
Wittering 6 AIR - Telt DOMETIC - Gratis bruksanvisning og manual
Finn enhetens veiledning gratis Wittering 6 AIR DOMETIC i PDF-format.


Brukerspørsmål om Wittering 6 AIR DOMETIC
0 spørsmål om dette apparatet. Svar på dem du kjenner, eller still ditt eget.
Still et nytt spørsmål om dette apparatet
Last ned instruksjonene for din Telt i PDF-format gratis! Finn veiledningen din Wittering 6 AIR - DOMETIC og ta den elektroniske enheten tilbake i hendene. På denne siden er alle dokumenter som er nødvendige for bruken av enheten din publisert. Wittering 6 AIR av merket DOMETIC.
BRUKSANVISNING Wittering 6 AIR DOMETIC
Kampa | ↗ DOMETIC
TENTS
WITTERING AIR
natural_image
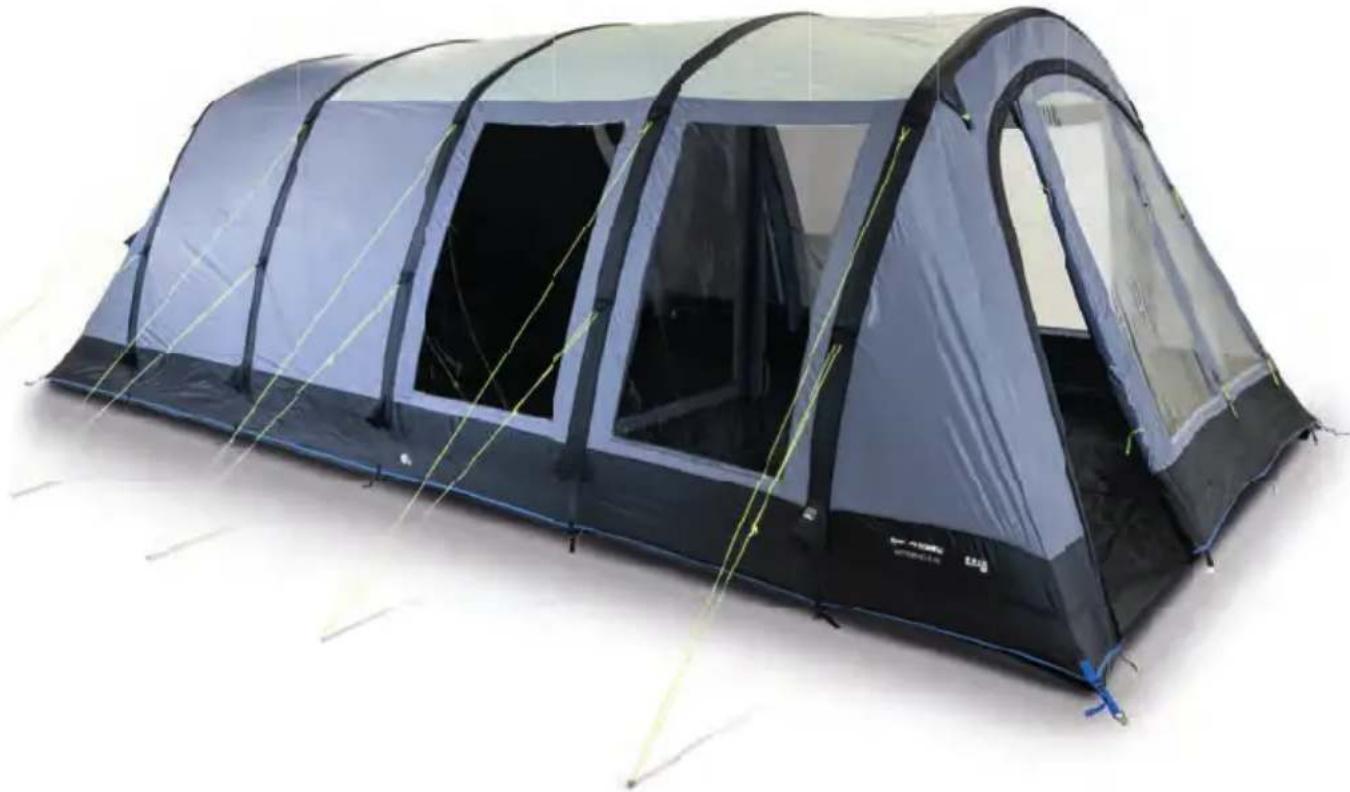
Exterior view of a black camping tent with arched windows and blue covers (no signage or text visible)SUITABLE FOR:
WITTERING AIR
4 & 6


Welcome
Thank you for purchasing your Kampa Dometic AirFrame tent. Please read these instructions carefully before attempting to set up your tent and retain for future reference. If used properly, your tent should give you years of trouble free use. We recommend that your tent is insured against accidental and storm damage as this is not covered by the warranty.
IMPORTANT - PLEASE READ:
Under certain conditions all tents will suffer from internal condensation. Depending upon the atmospheric conditions, the weather and the amount of moisture in the ground, the condensation could be quite severe and is commonly mistaken for leaking, especially as it can run down the inside of the roof and drips off ties tapes and other internal fittings. If you suspect your tent is leaking it is almost certainly condensation.

The tent material has a waterproof PU coating over its entire surface and the main seams of your tent have been factory taped to help prevent leakage. Depending upon your expectations, it may be necessary to treat the remaining seams with a seam sealant. Seams treated with seam sealant cannot leak. Seam sealant should also be applied to areas where the taping is damaged or has peeled away through wear and tear. It can also be applied to areas where a leak may have developed. Seam sealant is available from your dealer.
This tent is designed for use in light to moderate weather. During very strong winds we recommend that you take your tent down. The tent is designed for touring use; it is not designed for static or commercial use. We recommend a trial run before using your tent for the first time. This will allow you to familiarise yourself with the tent, its set up and any limitations the tent may have for your particular use.

BEFORE USING FOR THE FIRST TIME PLEASE CHECK THE CONTENTS OF YOUR TENT
Tent
Inner tent
Canopy groundsheet
Hand Pump
Peg Bag
Footprint
Carpet
Carry Bag
The inner tent may already be attached to the tent and can be left attached for take down and setup.
If you are missing any parts please contact your supplying dealer.
Siting
Choose a site that is flat and, if possible, protected from the wind. Try to clear the site of sharp stones to avoid damaging the groundsheet. Try to set up your tent with the doors facing away from the wind. Avoid pitching under trees as falling branches, sap, etc could damage your tent.
Set-Up
To protect your tent from dirt and damage, lay the footprint down before unpacking.
Unpack the tent and separate and identify the different parts.
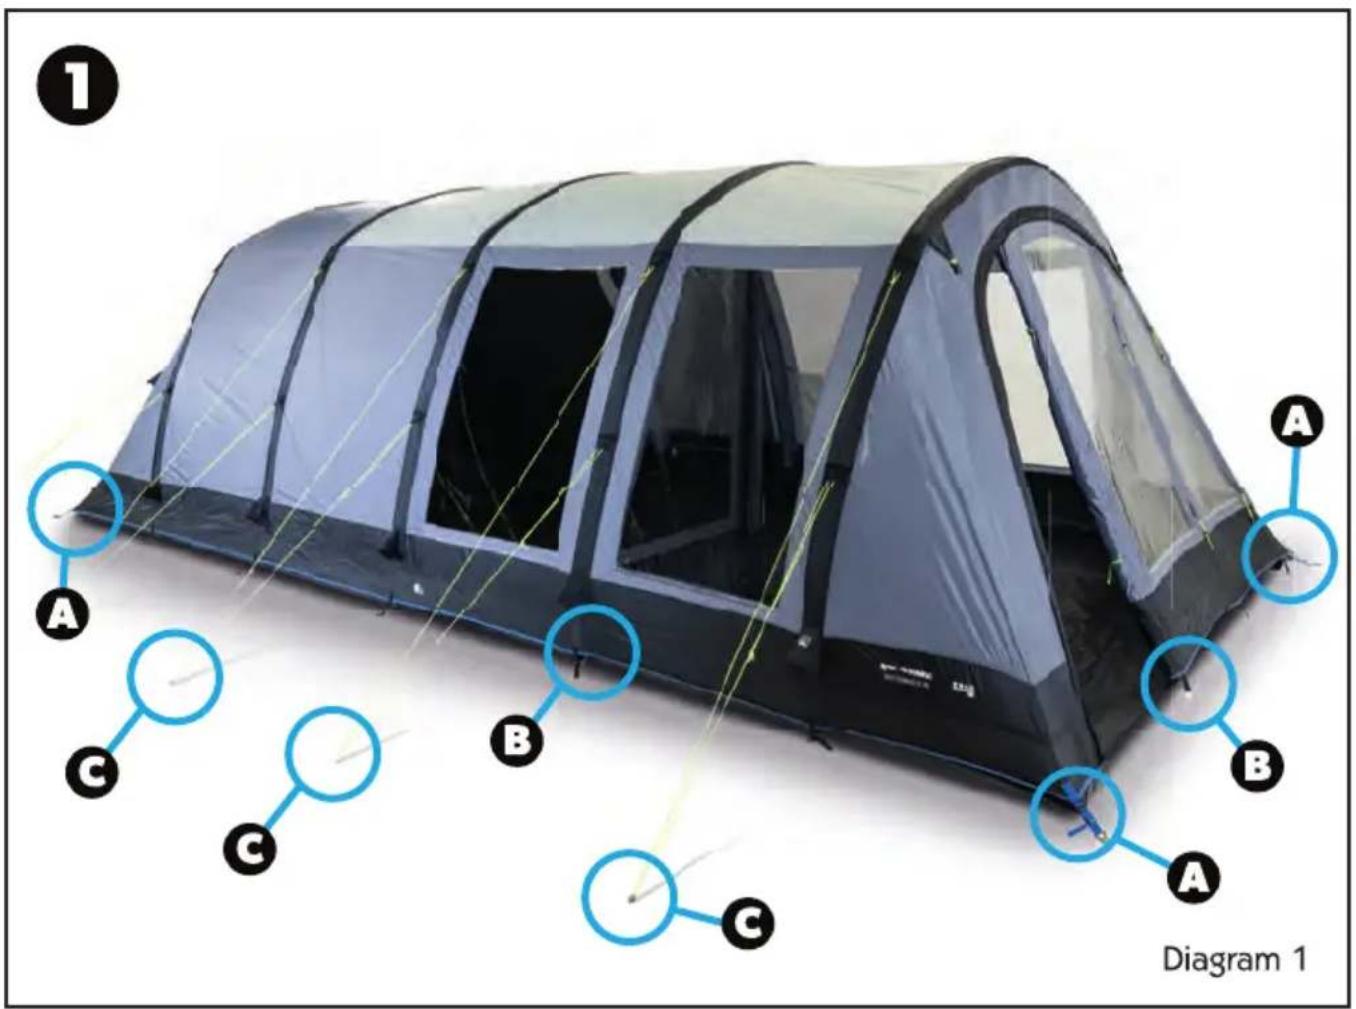
Unroll and lay the tent out in the required position. Peg each corner of the tent (see Diagram 1A) ensuring that you tension the tent between the pegs and making sure that the tent keeps its rectangular shape. You will probably need to re-peg later.
IMPORTANT:
It is important that whilst unscrewing/replacing the inflation/deflation valve that the valve does not spin in the AirPole. You can prevent this from happening by holding the valve in place where it meets the AirPole. If the valve spins it will twist the inflation tube in the pole and may lead to premature failure. If you suspect this has happened do not inflate your tent before untwisting the tube. Unscrew the valve from the AirPole and check that the inflation tube is not replacing the valve ensure that the black sealing washer is in place.


WARNING:
NEVER OPEN THE ZIP ON THE INNER TUBES WHILST THE POLES ARE INFLATED. THIS WILL RESULT IN THE POLE BURSTING.
Starting from one end of the tent, unscrew the top cap, of the inflation valve, and attach the pump nozzle (2). Pump up each AirPole (3). The pump has a pressure gauge and each AirPole should be inflated to 7-8 PSI (0.48-0.55 BAR). As each AirPole is inflated the tent will lift. It is normally necessary to go inside the tent and to push the poles upwards so that the AirPoles can assume their correct shape.
Once all the AirPoles have sprung outwards, assuming their correct shape, detach the pump from the tent and tighten the outer valve cap on each inflation point. It is important that these are tight to prevent the seepage of air.
You may need to use a guy rope to keep the tent upright in place whilst pegging.
Close all doors and entrances and check the positioning of the corner pegs again. If necessary re-peg to ensure that the groundsheet is taut inside the tent.
Peg all the intermediate pegging points (see Diagram 1B) ensuring that each side is straight.
If the inner tent is not already installed, take the inner tent inside and suspend from the colour coded buckles (4). Attach the remaining suspension points.
Attach the base of the inners to the corresponding buckles on the groundsheet. It will be easier to attach the rear points before fully suspending the inner tent.
The inner tent can remain permanently installed whilst the tent is deflated and inflated.
Install the canopy groundsheet by pegging into position.
The tent comes with guy lines pre-attached (Diagram 1C). Storm Tie Down straps (available as an optional extra) can be attached at each corner of the tent using the buckles already attached to the tent (5) for added stability. We recommend that the guy lines are used at all times. Peg them so that the tent is under tension without distorting the shape. The guy lines can be adjusted using the runners. They should be
secured using suitable pegs and the guy line should generally be pegged in line with the seam of the tent it starts from. Check the guy lines from time to time to ensure that they are still adequately tensioned.
Pegs
The tent comes complete with general purpose pegs. These will be suitable for many sites but there will be some instances where different pegs will be necessary. Your dealer will stock a range of pegs suitable for different types of ground. For maximum effectiveness, pegs should be driven into the ground at a 45° angle away from the pegging point.
Rain
We make our tents as resistant to the weather as possible. Occasionally you may find slight leakage. This is not a fault with the manufacturing process or materials and can normally be rectified by spot treating the seam with seam sealant (see below).
Seams
The main seams of this tent have been factory taped to help prevent leakage. Depending upon your expectations, it may be necessary to treat the remaining seams with a seam sealant. Seam sealant should also be applied to areas where the taping is damaged or has peeled away through wear and tear. It can also be applied to areas where a leak may have developed. Seam sealant is available through your dealer.
Suitability
This tent is designed for use in light to moderate weather. During very strong winds or snowfall we recommend that you take your tent down. The tent is designed for occasional use; it is not designed for static or commercial use.
UV Degradation
Tent fabrics can be weakened by prolonged exposure to sunlight. Under normal holiday use your tent will give long service but use for extended periods in strong sunlight will soon cause deterioration. In those cases it would be wise to use a site as shaded as possible. UV degradation is not covered under the warranty. The warranty does not cover tents used on permanent sites, displays or for commercial purposes.
Condensation
Under certain conditions tents will be affected by condensation inside. See page 3 for more information about condensation. Condensation and its effects are not covered under the warranty.

SAFETY
DO NOT COOK IN THE TENT OR USE NAKED FLAMES. READ AND UNDERSTAND THE FIRE PRECAUTIONS LABEL SEWN INTO THE INSIDE OF THE TENT.
Deflation
To pack away the tent
- Close all doors and openings, including those on the inner tent/s.
- Close all window blinds.
- Un-peg the guy lines and tie them neatly to avoid future tangling.
- Un-peg the intermediate pegging points but keep the four corners in place.
-
Un-peg the four corners.
-
Open the valves on each pole. The tent will start to deflate. Wait until most of the air has been expelled.
-
Fold/roll the tent towards the deflation valves to expel more air and then roll to fit in the carry bag.
-
Ensure that the tent is totally dry before storing in a cool, dry, dark space: if possible opened out.
Care
Tents are best stored opened out. Air fully and ensure it is totally dry before packing away. Store in a well ventilated dry place. A wet/damp tent will develop mildew surprisingly quickly.
Dirty tents can be washed using clean water and a soft brush. Do not scrub and never use detergents.
The AirPoles do not need any maintenance but should be protected from damage during storage. Damage due to improper use, wind damage or neglect is not covered under the warranty. Have any damage repaired at the first opportunity.
Zips should be treated with care, use two hands to close and open and never tread on them. Never force a zip. We strongly recommend that you carry a comprehensive spares kit including silicone waterproof spray, seam sealer and tape for repairing the AirPoles.
Repairs to the tent should be made by a company recommended by Kampa Dometic or your supplying dealer. Repairs and alterations made by an unauthorised company may invalidate your warranty.
In the event of a puncture
- Undo the inflation/deflation valve from the pole and re-attach ensuring that the valve is firmly connected.
- Re-inflate the AirPole.
- If tightening the hose fittings does not solve the problem then the AirPole may be punctured.
To remove an Airpole
- Unzip the outer sleeve holding the AirPole.
- Remove the AirPole.
- Unzip the protection sleeve of the AirPole, whilst deflated, to expose the inflatable bladder.
- Locate the puncture. This is made easier if you inflate the bladder. For small holes it may be necessary to submerge the bladder in water.
- Once located, the bladder can be repaired using repair tape. We recommend Kampa Dometic Awning Repair Tape - available from your retailer.
The repair can be enhanced by using a combination of the tape with Kampa Dometic Repair Solution. Follow the manufacturers instructions to repair.
Another alternative is to replace the tube. Spares are available from your retailer or direct from Kampa Dometic. Once a repair or replacement has been made, the AirPole can simply be zipped back into the outer sleeve.
Troubleshooting
| Problem | Solutions |
| Difficulty in pumping up the awning | 1. The inflation valve is not fully screwed into the AirPole.2. The AirPole is twisted at the valve. This may also be indicated by a noise.DO NOT continue to inflate until the AirPole has been untwisted (see page 4). |
| If you suspect an air leak | 1. Check that the inflation valve is properly screwed in and that the black 'O' ring seal is in place.2. Check that the top cap on the inflation valve is done up tightly. |
| If you think your awning has a water leak | Most suspected leakage is actually condensation (see condensation section of this manual). This forms on the inside of the awning fabric. Try to increase the ventilation by opening doors and ventilation ports. Do not cook in your awning. |
| If your awning has a water leak at specific points/areas | The main seams of this awning have been factory taped to help prevent leakage. Depending upon your expectations, it may be necessary to treat the remaining seams with a seam sealant. Seam sealant should also be applied to areas where the taping is damaged or has peeled away through wear and tear. It can also be applied to areas where a leak may have developed. Seam sealant is available through your retailer. |
dometic.com
YOUR LOCAL DEALER
YOUR LOCAL SUPPORT
YOUR LOCAL SALES OFFICE
dometic.com/contact
dometic.com/sales-officedome

Merke : DOMETIC
Modell : Wittering 6 AIR
Kategori : Telt