VT-44205 - Belysning V-TAC - Gratis bruksanvisning og manual
Finn enhetens veiledning gratis VT-44205 V-TAC i PDF-format.

Brukerspørsmål om VT-44205 V-TAC
0 spørsmål om dette apparatet. Svar på dem du kjenner, eller still ditt eget.
Still et nytt spørsmål om dette apparatet
Last ned instruksjonene for din Belysning i PDF-format gratis! Finn veiledningen din VT-44205 - V-TAC og ta den elektroniske enheten tilbake i hendene. På denne siden er alle dokumenter som er nødvendige for bruken av enheten din publisert. VT-44205 av merket V-TAC.
BRUKSANVISNING VT-44205 V-TAC
V-TAC
Meaningful Innovation.
WEEE Number: 80133970
INSTRUCTION MANUAL
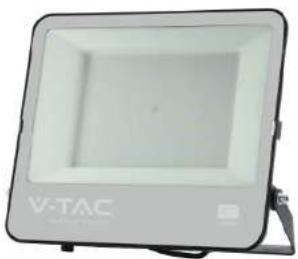
LED FLOOD LIGHT
natural_image
Exterior view of a modern LED light fixture (no text or symbols visible on body)
SPHERE
360°
STAYS BRIGHT
IP65
RATING
02 YEAR
WARRANTY*
TECHNICAL DATA
| Model | SKU | Watts | Lumens | Beam Angle | Long Life | DF | CRI | Input Power | Operation Temperature | Dimension | N.W. (KGS) | VWX KOUNTRIC-HUSHT | PROJECTED AREA(mm2) |
| VT-4135 | 000550 | SPHIRE 367 | 25000H | >0.9 | >70 | AC220-240V 50Hz | -20 to +45°C | 164.5x153x34mm | 0.41 | <5M201K | 0.5 | ||
| VT-4456 | 0822 583 | 50W | 9250 | SPHIRE 367 | 25000H | >0.9 | >70 | AC220-240V 50Hz | -20 to +45°C | 183.5x168x34mm | 0.58 | <5M | 31311.5 |
| VT-44106 | 0844 584 | 100W | 16500 | SPHIRE 367 | 25000H | >0.9 | >70 | AC220-240V 50Hz | -20 to +45°C | 253.5x242.5x40mm | 1.1 | <5M | 61473.75 |
| VT-44206 | 0848 587 | 200W | 37000 | SPHIRE 367 | 25000H | >0.9 | >70 | AC220-240V 50Hz | -20 to +45°C | 402.5x349.5x44mm | 2.5 | <5M | 142673.75 |
*This product contains a light source of energy efficiency class, where shall be replaced by the energy class of the contained light source.
INTRODUCTION & WARRANTY
Thank you for selecting and buying V-TAC product. V-TAC will serve you the best. Please read these instructions carefully before starting the installing and keep this manual handy for future reference. If you have any another query, please contact our dealer or local vendor from whom you have purchased the product. They are trained and ready to serve you at the best. The warranty is valid for 5 years from the date of purchase. The warranty does not apply to damage caused by incorrect installation or abnormal wear and tear. The company gives no warranty against damage to any surface due to incorrect removal and installation of the product. The products are suitable for 10-12 Hours Daily operation. Usage of product for 24 Hours a day would void the warranty. This product is warranted for manufacturing defects only.
WARNING
- Please make sure to turn off the power before starting the installation.
• Installation must be performed by a qualified electrician.
• The light source of this luminaire is not replaceable, when the light source reaches its end of life the whole luminaire should be replaced. - If the external flexible cable or cord of this luminaire is damaged, it shall be exclusively replaced by the manufacturer or his service agent or a similar qualified person in order to avoid a hazard.
- Replace any cracked protective shield.
• Terminal block not included. - Proper grounding should be ensured throughout the installation.
- Minimum distance from lighted objects 1m.
• Limitation of use indoors and outdoor.
NOTE: To reduce the risk of strangulation the flexible wiring connected to this luminaire shall be effectively fixed to the wall if the wiring is within arm's reach.

This marking indicates that this
This marking indicates that this product should not be disposed of
with other household wastes.

Caution, risk of electric shock.

MULTI-LANGUAGE
MANUAL QR CODE
Please scan the QR code
to access the manual in
multiple languages.
INSTALLATION DIAGRAM
natural_image
Simple line drawing of a rectangular object with directional arrows, no text or symbols present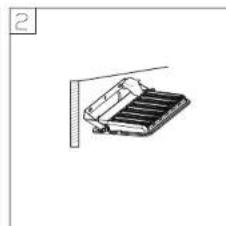
natural_image
Simple line drawing of a mechanical device with a bracket and handle (no text or symbols)
natural_image
Simple line drawing of a vertical structure with a horizontal line and a double-headed arrow, no text or symbols present.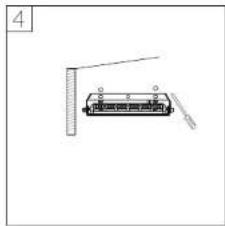
natural_image
Simple line drawing of a mechanical device with no text or symbols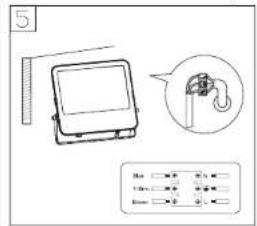
text_image
Diagram showing a device with labeled buttons and an inset diagram of a hook mechanism, likely illustrating a control or monitoring system.INSTALLATION INSTRUCTION
- DO NOT USE IN AREAS WITH LIMITED VENTILATION OR OUTSIDE THE RATED AMBIENT TEMPERATURE RANGE. *CON- NECT WITH WATERPROOF CABLE HOUSE ONLY. *ENSURE ELECTRICITY IS SWITCH OFF BEFORE INSTALLATION.
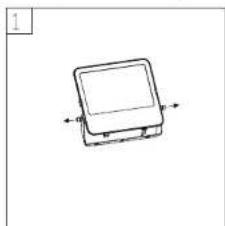
- Please do not mount to a surface that is prone to vibrations.* Remove the screw and the bracket afterward. (Figure 1) Before drilling, mark the hole position for fixing the bracket onto the wall (Screw not supplied). (Figure 2)
- Screw the retaining bracket to the wall with a suitable quantity of screws. (Figure 4)
- Mount the bracket back to the fixture. Adjust the floodlight according to the desired position. Tighten the screw. (Figure 5) Connect your main cable (HOSRN-F3G1.0mm2 Recommended) with the input lead of our product through the waterproof junction box. Note, the line (-) of the lead. (Need to use the junction box of IP65 or above, ensure to tighten the waterproof screw) Switch on the power to make sure if the product is working.
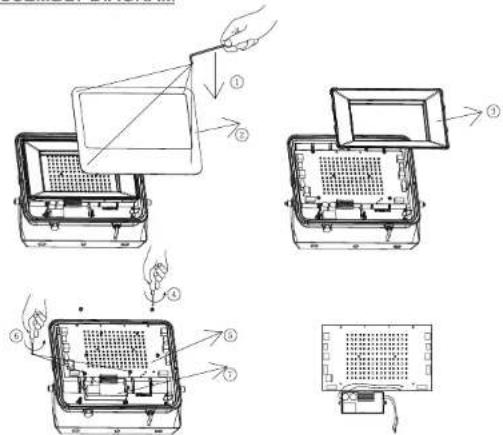
DISASSEMBLY DIAGRAM
text_image
Technical diagram showing four steps of device installation or assembly, with numbered instructions for each step.


IN CASE OF ANY QUERY/ISSUE WITH THE PRODUCT, PLEASE REACH OUT TO US AT: SUPPORT@V-TAC.EU FOR MORE PRODUCTS RANGE, INQUIRY PLEASE CONTACT OUR DISTRIBUTOR OR NEAREST DEALERS. V-TAC EUROPE LTD. BULGARIA, PLOVDIV 4000, BUL.L.KARAVELOW 9B