La Bella 8815-65 - Belysning Livex Lighting - Gratis bruksanvisning og manual
Finn enhetens veiledning gratis La Bella 8815-65 Livex Lighting i PDF-format.

Brukerspørsmål om La Bella 8815-65 Livex Lighting
0 spørsmål om dette apparatet. Svar på dem du kjenner, eller still ditt eget.
Still et nytt spørsmål om dette apparatet
Last ned instruksjonene for din Belysning i PDF-format gratis! Finn veiledningen din La Bella 8815-65 - Livex Lighting og ta den elektroniske enheten tilbake i hendene. På denne siden er alle dokumenter som er nødvendige for bruken av enheten din publisert. La Bella 8815-65 av merket Livex Lighting.
BRUKSANVISNING La Bella 8815-65 Livex Lighting
Carefully unpack your new fixture and lay out all the parts on a clear area. Make sure not to misplace any small necessary for installation.
ASSEMBLING THE FIXTURE (Fig.2)
- Return the ten arms to suitable position.
-
Attach the fixture assembly (B) to the fixture body (J), and attach the loop (A) to the fixture assembly (B) by turning it clockwise until tight.
-
Hook the end of chain (C) to the loop on the column of the fixture assembly (B) and the arms of the fixture body (J).
-
Attach the finial (L) to bottom of the fixture body (J).
-
Place the socket sleeve (I) and the harp(G) over the socket of the fixture body(J), then lock it securely with the check ring (H). Install the light bulb and put the glass shade(F) on to the harp(G), then screw the finial(E) onto the glass shade(F). NOTE: DO NOT EXCEED THE SPECIFIED WATTAGE!
-
Adsorb the magnet of crystal (D) to the center of the finial (E).
-
Attach the crystal (K) to the fixture assembly (B), the fixture body (J) and the finial (L).
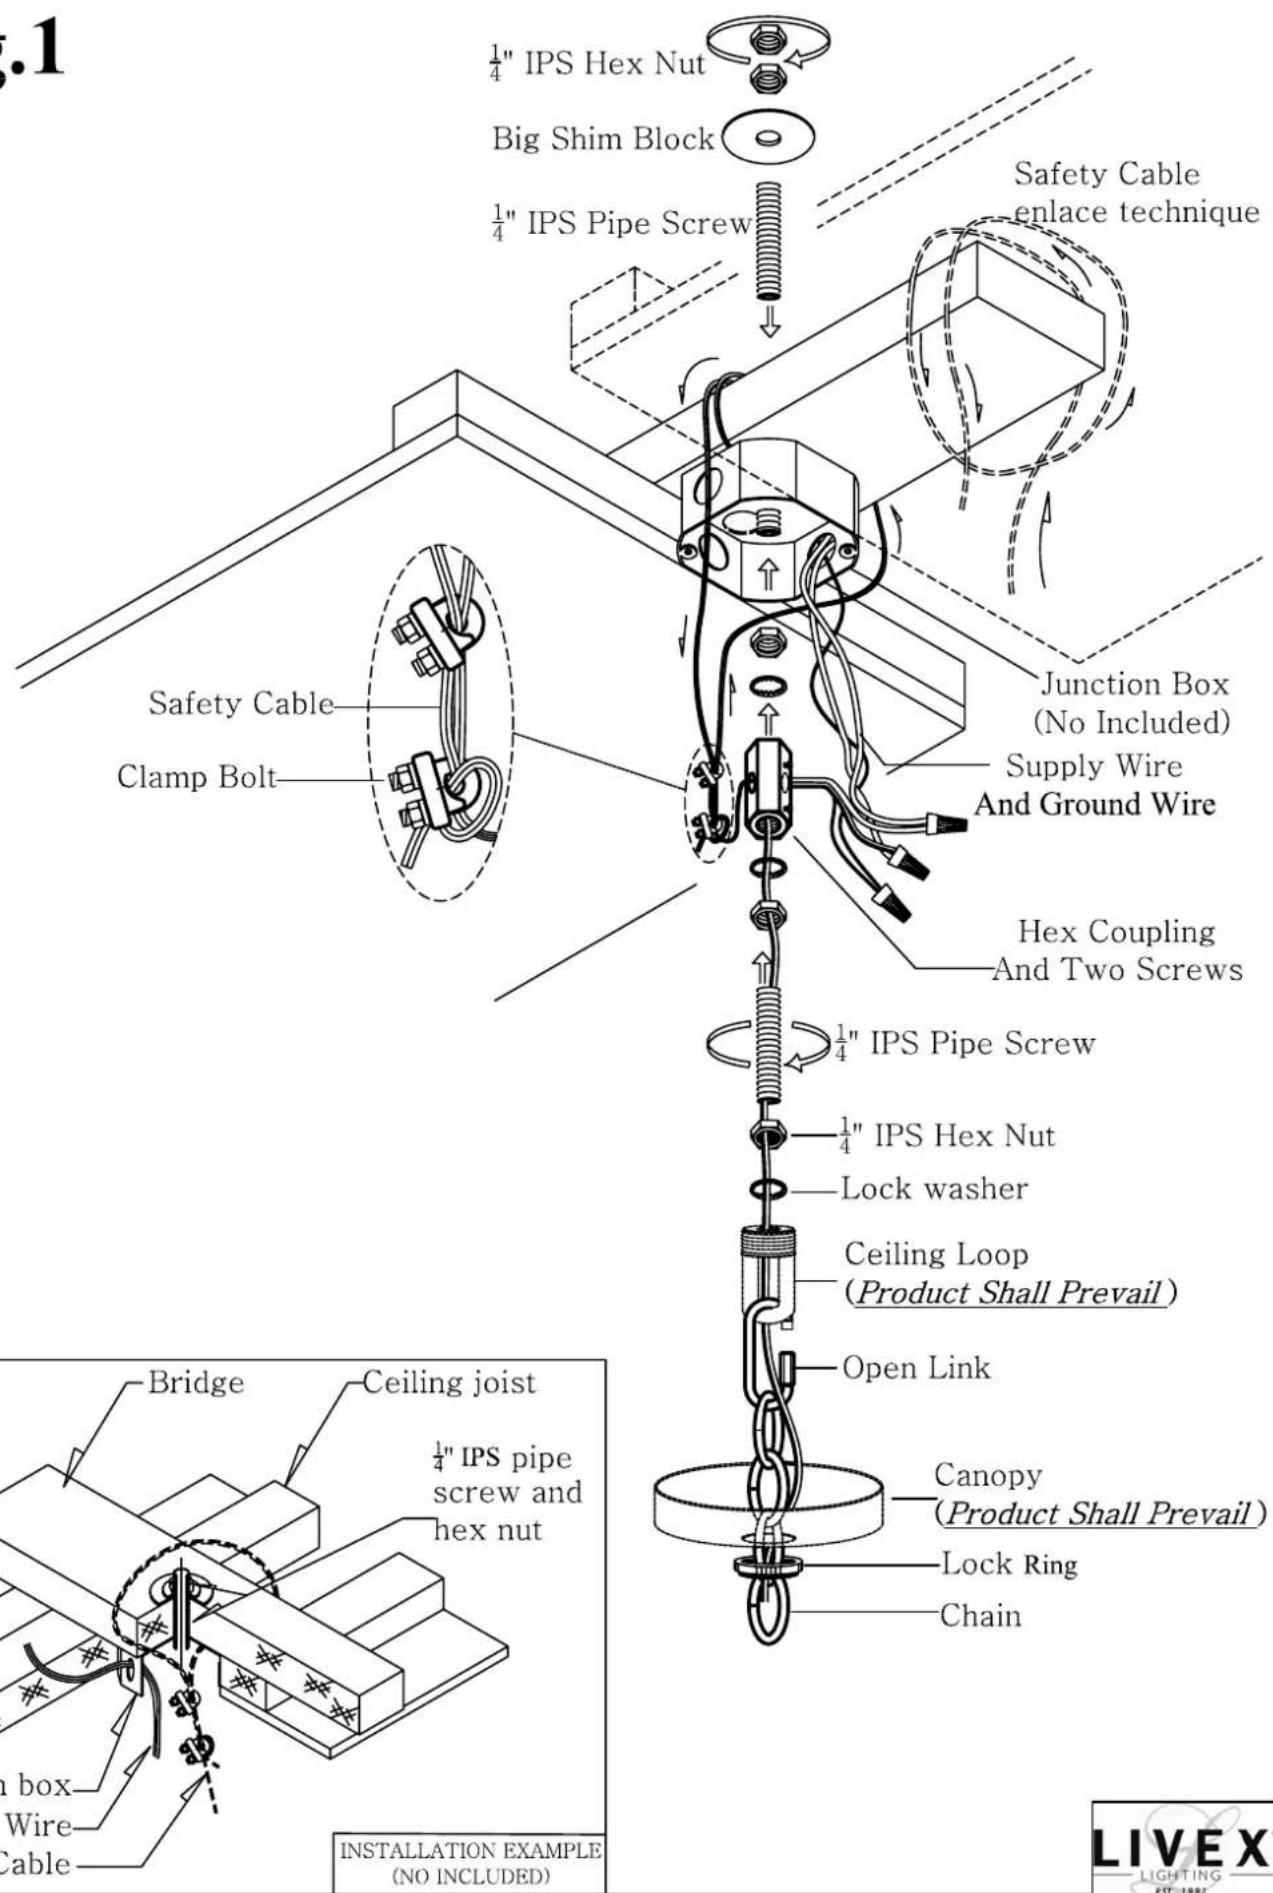
HANGING THE FIXTURE (Fig.1 Please see the Page.2)
IMPORTANT: For a safe and secure installation, this fixture must be installed by means of support that is independent of the junction box.
- Shut off the power at the circuit breaker and remove old fixture from ceiling, including the old crossbar.
-
Provide a 1/4" IPS pipe screw with one end securely mounted to a beam or a structural member. The other end should protrude through the center of the junction box as shown. The junction box is not included.
-
Assemble the hex nuts, lock washer, hex coupling, pipe screw and ceiling loop(product shall prevail) to center 1/4"IPS support pipe and adjust overall length to allow the lock ring to hold the canopy flush to the ceiling. When the adjustments have been completed, secure the three (3) hex nuts, as shown.
-
Attach the chain to the fixture loop. Slip the lock ring and canopy over the upper end of the chain. Open the open link of the chain and lift the fixture to attach to the ceiling loop and close the open link.
-
Lace the fixture wires, ground wire and safety cable through the chain and loop, exiting through the side of the hex coupling.
-
IMPORTANT: you must, run the safety cable through the two clamp bolts, then through the top of the junction box and secure to structural member. NOW, fasten the end of safety cable through the two clamp bolts(see fig.1), lock them securely with the four small hex nuts until tight.
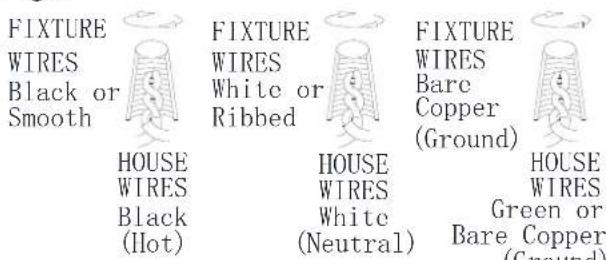
CONNECTING THE WIRES (Fig.3)
-
Take the black wire from the ceiling junction box and the smooth wire leg from the fixture and twist bare ends together. Twist wire connector onto end of wire until snug.
-
Repeat same process with white junction box wire and ribbed wire leg of fixture wire. NOTE: Twist wires together in the same direction you twist the wire connector onto wires.
-
If your junction box has a grounding wire (green or bare copper), attach this wire and the bare copper wire from the fixture together as step 1.
-
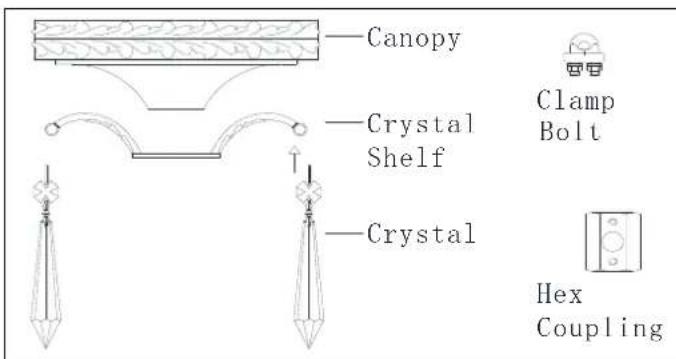
Tuck these wire connections neatly into the ceiling junction box, then raise the canopy and crystal shelf all the way to the ceiling. Raise the lock ring to the bottom of canopy, screw it with until tight.
Your installation is now complete. Return power to the junction box and test the fixture.
Fig.2 parts
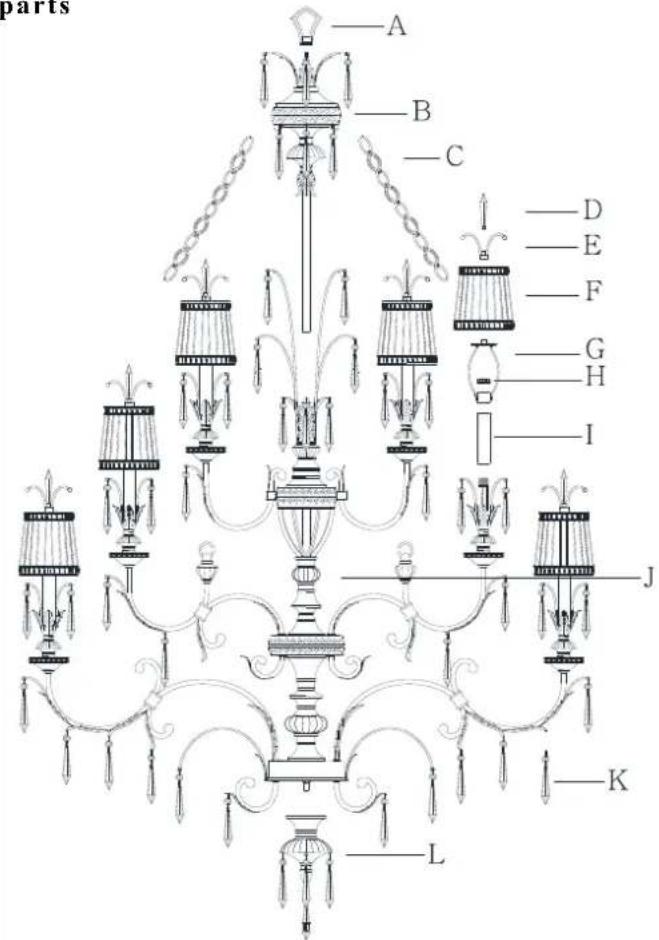
Fig.3
ASSEMBLING & INSTALLATION INSTRUCTIONS
FOR HEAVY MOUNTING FIXTURE
Fig.1