935-PM71 - Grenuttak Kondator - Gratis bruksanvisning og manual
Finn enhetens veiledning gratis 935-PM71 Kondator i PDF-format.

Brukerspørsmål om 935-PM71 Kondator
0 spørsmål om dette apparatet. Svar på dem du kjenner, eller still ditt eget.
Still et nytt spørsmål om dette apparatet
Last ned instruksjonene for din Grenuttak i PDF-format gratis! Finn veiledningen din 935-PM71 - Kondator og ta den elektroniske enheten tilbake i hendene. På denne siden er alle dokumenter som er nødvendige for bruken av enheten din publisert. 935-PM71 av merket Kondator.
BRUKSANVISNING 935-PM71 Kondator
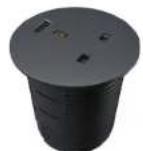
Powerdot MIDI
935-PM71

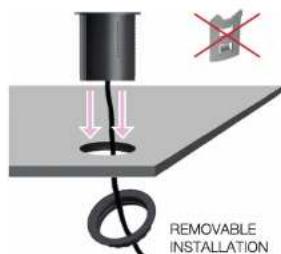
A - Removable installation
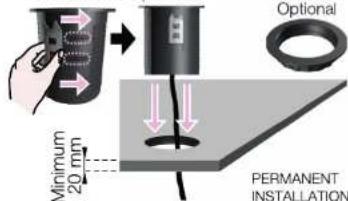
B - Permanent installation
CONTENT:
x1
x1

x2

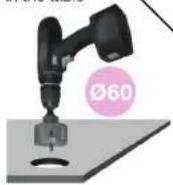
DRILL Drill a hole in the table
DBI
Drill a hole in the table

REMOVABLE INSTALLATION
PERMANENT INSTALLATION

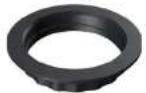
INSERT
Insert Powerdot into the hole and feed the power plug through the plastic fastening nut (without using the cable clips).

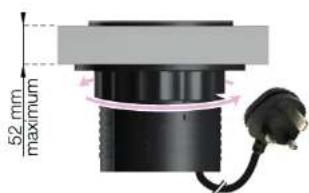
TURN CLOCKWISE & PLUG IN Turn the plastic fastening nut as far up the thread as possible. Make sure it has been thoroughly tightened. Lastly, plug it in to the wall socket.


ATTACH & INSERT (NON REMOVABLE)
Attach clips by guiding them into the side tracks. The clips will keep the product in place without the fastening nut. Push the Powerdot all the way down the hole. Lastly, plug it in to the wall socket.
NOTE! Once inserted, removing the product will prove to be very difficult without damaging the table and/or the product.

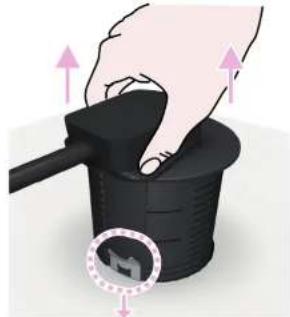
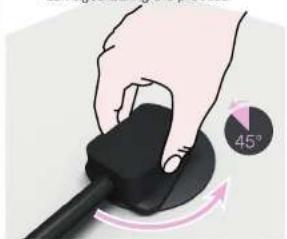
HOW TO REMOVE (WITH CLIPS)
To increase your chances of removing once installed with clips, turn the grommet clockwise. Until the clips re-position and loosen up.
NOTE! The table or product might get damaged during the process
natural_image
Hand holding a black mouse with a 45° angle indicator (no text or symbols on the mouse itself)
PULL UPWARDS
If you successfully loosened up the clips. Pull upwards until fully removed.