P226WU - Skjerm HYUNDAI - Gratis bruksanvisning og manual
Finn enhetens veiledning gratis P226WU HYUNDAI i PDF-format.

Brukerspørsmål om P226WU HYUNDAI
0 spørsmål om dette apparatet. Svar på dem du kjenner, eller still ditt eget.
Still et nytt spørsmål om dette apparatet
Last ned instruksjonene for din Skjerm i PDF-format gratis! Finn veiledningen din P226WU - HYUNDAI og ta den elektroniske enheten tilbake i hendene. På denne siden er alle dokumenter som er nødvendige for bruken av enheten din publisert. P226WU av merket HYUNDAI.
BRUKSANVISNING P226WU HYUNDAI
•HYUNDAI
HYUNDAI IT CORP
22" Wide LCD Monitor
User Manual
Modelo : P220W, P220WU

Warning
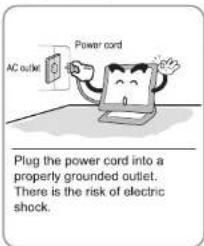
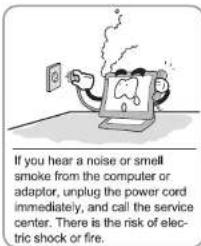
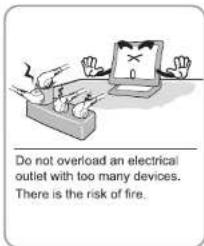
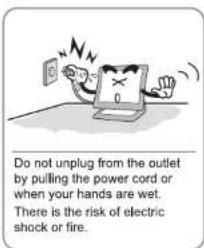
The following information will help you avoid the risk of electric shock, serious injury or death.
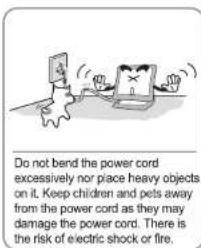
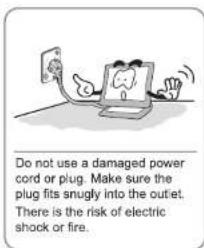
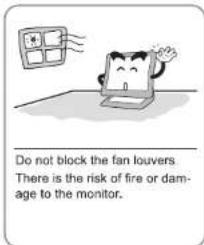
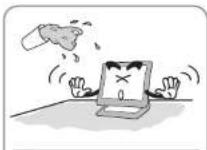
Do not allow any object or liquid to enter inside the monitor. There is the risk of electric shock, fire or damage to the monitor.

Do not attempt to disassemble, fix or modify the monitor. There is the risk of electric shock or fire.

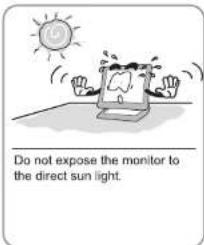
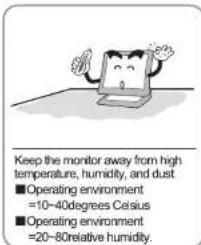
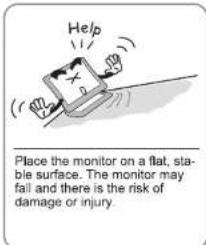
Caution
The following information will help you avoid the risk of minor or moderate injury or damage to the monitor.
natural_image
Illustration of a computer monitor with a smiling face, labeled 'LCD Monitor' below (no additional text or symbols)
natural_image
Simple line drawing of a circular object with a central hole, labeled 'Stand' below (no other text or symbols)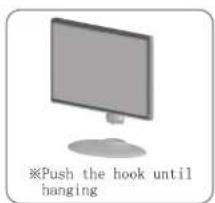
natural_image
Coiled cable with two connectors, labeled 'Power Cord' below (no other text or symbols)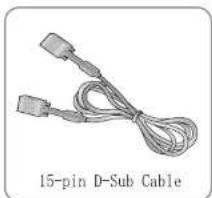
natural_image
Coiled 15-pin D-sub cable with two connectors (no text or symbols on the cable itself)
natural_image
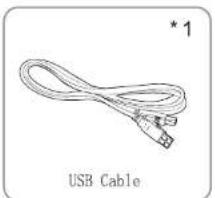
Illustration of a USB cable with two connectors and a label 'USB Cable' below (no other text or symbols)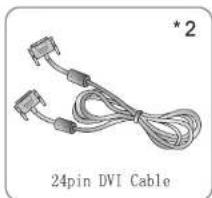
natural_image
Coiled 24-pin DVI cable with two connectors and a label (no text on cable itself)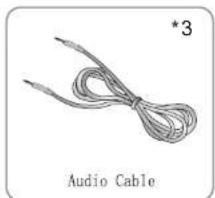
natural_image
Illustration of a cord with two leads, labeled 'Audio Cable' below (no other text or symbols)*1: For USB Model Only
*2 : For DVI Model Only.
*3 : For Audio Model Only.

Notice
Please make sure the following items are included with your monitor. If any items are missing, contact your dealer.
Also we'd like to ask you to use our 'D-Sub' cable all the time, otherwise we are not in a position to be responsible for all the matters caused by that.
Setting up the LCD monitor
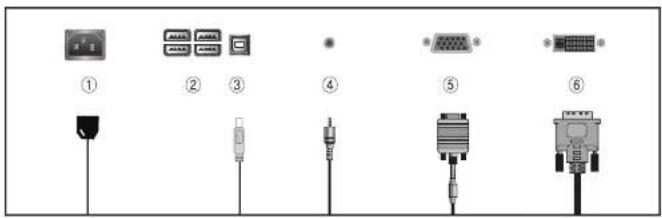
| No. | Name | Cable connections |
| 1 | Power | Power Cord |
| 2 | USB Downstream Port (4) (Option) | To connect another USB Device*1 |
| 3 | USB Upstream Port (Option) | USB to PC *1 |
| 4 | AUDIO IN | AUDIO Cable *3 |
| 5 | VGA | 15-pin D-Sub Signal Cable |
| 6 | DVI (Option) | DVI-D Cable *2 |
Plug & Play
The adoption of the new VESA Plug and Play solution eliminates complicated and time consuming setup. It allows you to install your monitor in a Plug and Play compatible system without the usual hassies and confusion. Your PC system can easily identify and configure itself for use with your display. This monitor automatically tells the PC system its Extended Display Identification Data (EDID) using Display Data Channel (DDC) protocols so the PC system can automatically configure itself to use the flat panel display.
Warm-up Time
All LCD monitors need time to become thermally stable whenever you turn on the monitor after letting the monitor be turned off for a couple of hours. Therefore, to achieve more accurate adjustments for parameters, allow the LCD monitor to be warmed up for at least 30 minutes before making any screen adjustments.

Notice
When the condition of the screen is not good, please press the button "AUTO". (This function may cause some noises on the screen according to VGA Cards)
Buttons & functions
| Button | Function description | Hot key setting |
| MENU | Opens OSD MENU window.Chooses icons. | |
| ▼/ [IMAGE] | Moves down icon choice bar.Decreases value of chosen icon. | Sound control *1 |
| ▼ | Moves down icon choice bar.Decreases value of chosen icon. | |
| ▲/INPUT | Moves up icon choice bar.Increases value of chosen icon. | SOURCE change |
| AUTO/EXIT | Cancels chosen OSD MENU step by step.Closes OSD MENU. | Automatic setting |
| POWER | turns on/off monitors. | |
| State Lamp | Indicates monitors' state.LED ON(green) in normal stateLED flicker(green off) in standby mode |
*1 : For Audio Model Only.
Functions
Hot key is a handy key to execute frequently used functions.
▼ Monitor & OSD screen settings
OSD screen selection and control procedures.
- Press the "MENU" button to bring up the OSD screen.
- Press the "▼/□(▼), ▲/INPUT" buttons to select the main option.
- Press the "MENU" button after selecting the main option
- Bring up the sub-menu. Use the "▼/□(▼), ▲/INPUT" buttons to select the desired option.
- Press the "MENU" button after selecting the desired sub-menu option
- Use the "▼/□(▼), ▲/INPUT" buttons to adjust the set value.
- Pressing the "AUTO/EXIT" button three times saves and exits the setting mode.
*Pressing the "AUTO/EXIT" button moves back to the previous menu.
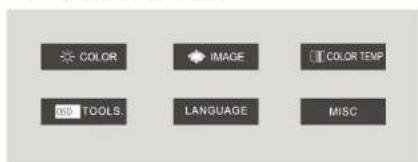
| MAIN MENU ICON | MAIN MENU | SUB MENU | FUNCTION |
| COLOR | BRIGHTNESSCONTRAST | Adjusts screen brightness.Adjusts screen light and darkness. | |
| HORIZONTAL POSITIONVERTICAL POSITION | Adjusts screen left or right. | ||
| IMAGE | PHASE | Adjusts screen upwards or downwards.Removes noise coming out horizontally on screen. | |
| CLOCK | Removes noise coming out vertically on screen. | ||
| WARM | Screen colors turn mild.(6500K) | ||
| COOL | Screen colors turn mild.(9300K) | ||
| COLOR TEMP | USER-DEFINED | Can adjust three colors(red, green and blue)individually, if USER-DEFINED is selected. | |
| OSD TOOLS | OSD H-POSITIONOSD V-POSITION | Adjusts OSD screen left or right.Adjusts OSD screen upwards or downwards | |
| LANGUAGE | LANGUAGE | Select OSD languages ( 6 languages ) | |
| AUTO ADJUST | Automatically sets optimum screen.(Not available in DVI) | ||
| AUTO GAIN | Automatically sets optimum color.(Not available in DVI) | ||
| FACTORY RESETVOLUME | User setting values return to factory setting values.Adjusts volume of sound level.*1 | ||
| SCALE | Adjusts screen ratio. (4:3, 16:10) |
*1: For Audio Model Only.
English

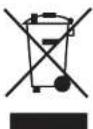
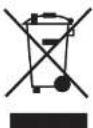
Disposal of Used Electrical & Electronic Equipment
The meaning of the symbol on the product, its accessory or packaging indicates that this product shall not be treated as household waste. Please, dispose of this equipment at your applicable collection point for the recycling of electrical & electronic equipments waste. In the European Union and Other European countries which there are separate collection systems for used electrical and electronic product. By ensuring the correct disposal of this product, which could otherwise be caused by unsuitable waste handling of this product. The recycling of materials will help conserve natural resources. Please do not therefore dispose of your old electrical and electronic equipment with your househol waste. For more detailed information about recycling of this product, please contact your local city office, your househol waste disposal service or the shop where you purchased the product.
• Dansk

Handtering af udtjente elektriske og elektroniske produkter (Gælder for den Europæiske Union og andre europæiske lande medseparate indsamlingssystemer) Dette symbol på produktet eller emballagen angiver, at produktet ikke ma benandles som husholdningsaffald. Det skal i stedet indieveres på en deponeringsplads specielt indretter til modtagelse of oparbejdning af elektriske og elektroniske produkter. Ved at sikre at produktet bortskaffes korrekt, forebygges de eventuelle negative miljo-og sundhedsskadelige pavirkninger, som en ukorrekt affaldshandtering af produktet kan forarsage. Genindvinding af materialer vil medvirke til at bevare naturens ressourcer. Ydertlige information om genindvindingen af dette produkt kan fas hos myndighederne, det lokale renovationss-skab eller butikken, hvor produktet blev kobt.
- Español
Eliminacion de equipamiento electrico y electronico usado
Este simbolo en el producto, sus accesorios o embalaje indica que el producto no debe tratarse como un residuo domestico. Deshagase de este equipamiento en su punto de recogida mas cercano para el reciclaje de residuos eléctricos y électronicos. En la Union Europea y otros países europeos existen diferentes sistemas de recogida de productos eléctricos y électronicos usados. Al asegurar la correcta eliminacion de este producto ayudara a evitar riesgos potenciales para el medio ambiente y al salud de las personas que podrían tener lugar si el producto no se eliminara de forma adecua. El reciclaje de materiales ayudara a conservar los recursos naturales. Por consiguiente, no elimine equipamiento eléctrico y electronico usado junto con residuos domesticos. Para información mas detallada acerca del reciclaje de este producto, pongase en contacto con su oficina municipat, el servicio de eliminacion de residuos domesticos o el establecimiento donde adquirio el producto.
- Português
Eliminação de Equipamento Electrico e Electrónico Usado
O símbolo no aparelho, nos seus acessórios ou na emba'agem indica que este aparelho não deve ser tratado como resíduos domésticos. Deixe deste aparelho no ponto de recolha de material eléctrico e electrónico para reciclagem mais perto de si. Na União Europeia e noutros países europeus existem sistemas de recolha separada para produtos eléctricos e électronicos usados. Garantindo uma eliminação correcta deste aparelho, ajudara a evitar possíveis danos ambientais a/ou pessoais, que um incorrecto tratamento do aparelho usado poderia provocar. A reciclagem de materiais ajuda a conservar os recursos naturais. Por isso, não deite fora os aparelhos eléctricos e électroniços junto com os seus resíduos domésticos. Para informacao detalhada sobre a reciclagem deste aparelho, contacte a sua Camare Municipal, o seu serviço de recolha de lixo ou a loja onde comprou o aparelho.
Display Modes and frequency
| Resolution | Horizontal Frequency (kHz) | Vertical Frequency(Hz) | |
| 640 x 480 | 31.47 kHz | 60 Hz | |
| 37.86 kHz | 72 Hz | ||
| 37.50 kHz | 75 Hz | ||
| 720 x 400 | 31.47 kHz | 70 Hz | |
| 800 x 600 | 37.88 kHz | 60 Hz | |
| 48.08 kHz | 72 Hz | ||
| 46.88 kHz | 75 Hz | ||
| 1024 x 768 | 48.36 kHz | 60 Hz | |
| 56.48 kHz | 70 Hz | ||
| 60.02 kHz | 75 Hz | ||
| 1280 x 1024 | 67.98 kHz | 60 Hz | |
| 79.98 kHz | 75 Hz | ||
| 1440 x 900 | 55.40 kHz | 60 Hz | |
| 1680 x 1050 | 64.68 kHz | 60 Hz | |
| 480p | 50/60 | DV/(HDCP) | |
| 576p | 50/60 | ||
| 720p | 50/60 | ||
| 1080p | 50/60 |
Power Save
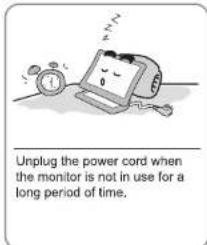
This monitor has a built-in power management system called PowerSave. This system saves energy by switching your monitor into a low-power mode when it has not been used for a certain period of time. The monitor automatically returns to normal operation when you press a key on the keyboard. For energy saving, turn your monitor OFF when it is not used, or when leaving it unattended for a long period.
| State | Power consumption | LED Color |
| ON | Under 55W | Green |
| OFF | Less than 1W | Flickering (Green) |
Troubleshooting
Specifications
| Problem | Solution |
| Abnormal colors appear. It is in black and white. | Reconnect the cable to PC. Insert the PC's video card correctly. Re-boot the PC. Set the video card again after referring to the video card manual. |
| The displayed screen position suddenly changes or tilts inward. | Use the screen control to adjust the displayed screen shape. Set the resolution and/or frequency on the video card (refer to the supported mode table). Differences in the signal period of the video card may cause changes in the displayed position from time to time. Use the screen control functions to correct the displayed screen position. |
| Displays 16 colors only. The color has changed after replacing the video card. | Windows ME/XP/VISTa Re-set the color from the Control Panel -> Display -> Setting.Re-install the video card driver. |
| Power indicator lamp blinks Green. | Monitor is in Sleep Mode |
| Cannot control the screen with the buttons on the front of the monitor. | Contact technical support. |
| There are colored spots on the screen. | There may be a few colored (red, green, white, black) pixel spots on the screen during use. This is a natural characteristic in LCD panels. It is not a malfunction and does not affect the monitor's performance. |
| The power indicator lamp is off. | Check if the power cable is intact. Reconnect the power cable correctly if necessary. |
| The "No Signal" message appears on the screen. | Check if the connection between the PC and monitor is intact. Reconnect the cable correctly if necessary. |
| The "Out of Range" message appears on the screen. | The output signal from the video card exceeds the monitor's maximum resolution or frequency limit. Set the maximum resolution and frequency to suit the product limits. |
| The screen appears to be sliding downward. | Check the connection between the PC and monitor. Re-connect if necessary. |
| The screen is unclear. | Run the auto-adjusting function. |
| The screen appears unstable or flickers. The screen leaves shadows. | Check if the computer or video card output resolution and frequency is set within the limits. Re-set the screen display by referring to the resolution information and standard supported mode table. |
| The screen is too bright or dark. | Use the brightness or contrast controls to adjust the display. |
| The color on the screen is not uniform. | Use the color density control to set the color. |
| Lines appear on the screen and the screen flickers. | Turn off any cordless phones, hair dryers, electrical drills etc. that are in use. |

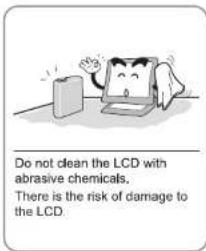
Caution
Use a soft dry cloth to clean the product.
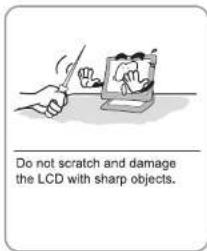
- Do not scratch the monitor panel with your fingernails or other sharp objects.
Use a clean cloth with a special screen cleanser.
- Do not use flammable substances such as benzene or paint thinner on the product. Do not use a wet cloth.
- Do not use acetone, benzene or paint thinner on the product.
| Specification | P200V, P200Hz | |
| LCD | Visible Screen Area | 473.76mm(H) x 296.1mm(V)(22inch) |
| Pacer Pitch | 0.282mm(H) x 0.282mm(W) | |
| Recommended Resolution | 1680 x 1050@60Hz | |
| Maximum Visible Angle | 160°/60°(HV) | |
| Displayed Color | 16.7M | |
| Brightness | 250 cd/m2 | |
| Contrast Ratio | 1000:1 | |
| Response Time | 5 msec | |
| Input Signal | Horizontal Frequency | 30KHz 80KHz |
| Vertical Frequency | 60KHz-75KHz | |
| Video Signal | Analog RGB, DVI2 | |
| Connector | 15pin D-SUB, USB1, DVI-D2, AUDIO3 | |
| Power | Power Consumption | <55W |
| Stand by Power | <1W | |
| Input Power | AC-100V-240V 5060Hz, 0.7A | |
| Multimedia Speakers | 2W x 2-1 | |
| Operating Environment | Operation: 10 to 40°C, humidity: 20-80%(non-condensing)Storage: -10 to 50°C, humidity: 10-90%(non-condensing) | |
The above specifications are subject to change without prior notice to improve performance.
*1: For USB Model Only.
*2: For DVI Model Only.
*3 : For Audio Model Only.