Stream 1510 - Bord BDI - Gratis bruksanvisning og manual
Finn enhetens veiledning gratis Stream 1510 BDI i PDF-format.

Brukerspørsmål om Stream 1510 BDI
0 spørsmål om dette apparatet. Svar på dem du kjenner, eller still ditt eget.
Still et nytt spørsmål om dette apparatet
Last ned instruksjonene for din Bord i PDF-format gratis! Finn veiledningen din Stream 1510 - BDI og ta den elektroniske enheten tilbake i hendene. På denne siden er alle dokumenter som er nødvendige for bruken av enheten din publisert. Stream 1510 av merket BDI.
BRUKSANVISNING Stream 1510 BDI
Component List

A - Allen Wrench x 1
natural_image
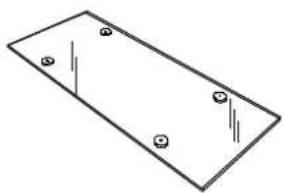
Simple line drawing of a rectangular plate with four circular holes and vertical lines (no text or symbols)B - Glass Top x 1
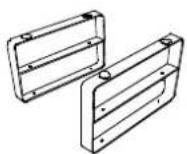
C - Metal Leg x 2

D - Socket Screw x 4
natural_image
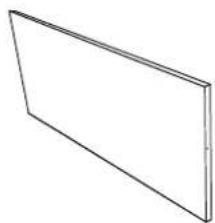
Simple line drawing of a blank rectangular panel (no text or symbols)E - Lower Wood Shelf x 1
F - Long Socket Screw x 4
F
Stream is engineered for easy assembly. Carefully follow this procedure to prevent any damage.
Placement and Maintenance
Stream is designed for indoor use on level floors. Use damp cloth to clean steel parts. Clean wood veneer with a moist cloth. Use mild soap on a damp rag to remove difficult stains. DO NOT use ammonia-based glass cleaner to clean glass parts, doing so may damage finish on legs.
Step 1
Unpack and Identify
Open boxes, but DO NOT REMOVE SHELVES.
Unpack and identify the components at left. The assembly workspace should be a non-marring surface such as carpet. For missing hardware pieces, please contact BDI Customer Service at customerservice@bdiusa.com. For all other concerns, please contact your BDI Retailer.
Step 2
Attach Legs to Glass Top
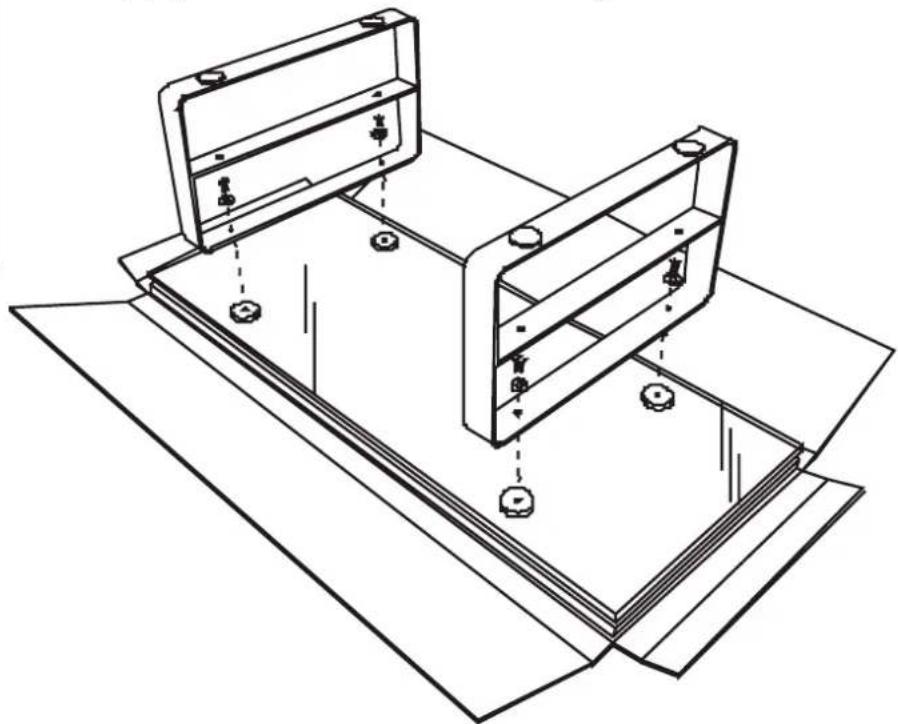
Using the illustration as a guide, attach the Metal Legs (C) to the Glass Top (B) as shown using the Socket Screw (D) and Allen Wrench (A). This should be done BEFORE removing top from the box so that Glass Top (B) is not scratched prior to assembly.
natural_image
Technical line drawing of a mechanical assembly with mounting brackets and mounting holes (no text or symbols)Step 3
Prepare to attach Wood Top
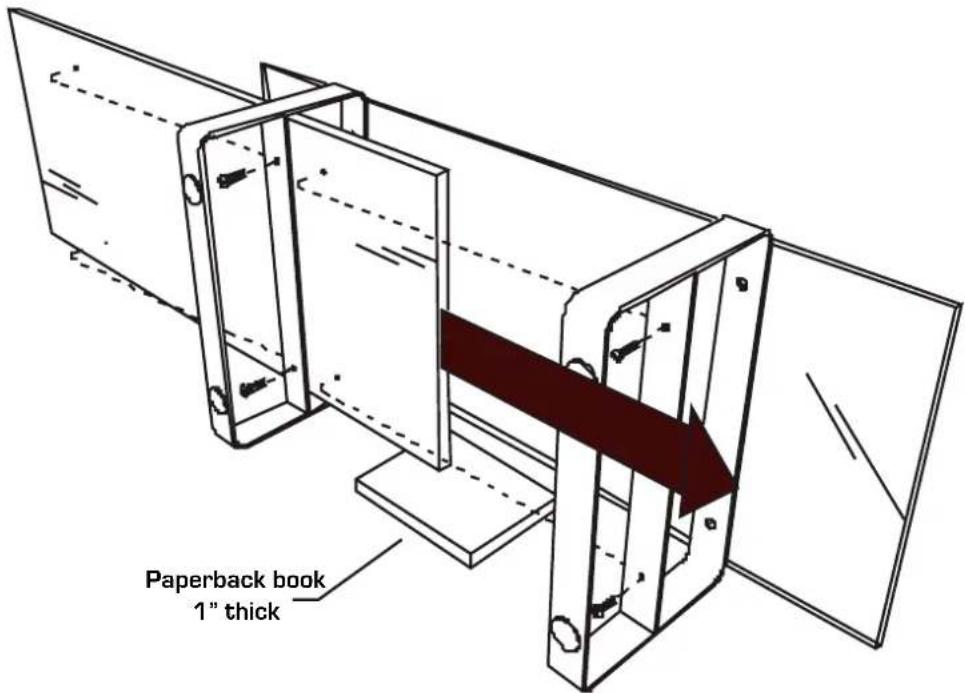
Carefully rotate 90 degrees so that the table is resting on its side on a non-marring surface. For easiest installation find a paperback book about 1" thick and place on floor between Metal Legs (C) as shown below, or find non-abrasive materials to temporarily cover inside edge of legs.
Step 4
Attach Wood Top
Carefully slide Lower Wood Shelf (E) into place being careful not to bump the Metal Legs (C). Rest the Lower Wood Shelf (E) on the book and attach using the Long Socket Screw (F) and Allen Wrench (A).