
AR18JC5TFURNMD - Oro kondicionierius SAMSUNG - Nemokama naudojimo instrukcija
Raskite įrenginio instrukciją nemokamai AR18JC5TFURNMD SAMSUNG PDF formatu.


Naudotojų klausimai apie AR18JC5TFURNMD SAMSUNG
0 klausimas apie šį prietaisą. Atsakykite į tas, kurias žinote, arba užduokite savo.
Užduokite naują klausimą apie šį prietaisą
Atsisiųskite instrukciją savo Oro kondicionierius PDF formatu nemokamai! Raskite savo instrukciją AR18JC5TFURNMD - SAMSUNG ir vėl perimkite savo elektroninį įrenginį. Šiame puslapyje skelbiami visi dokumentai, reikalingi jūsų įrenginio naudojimui. AR18JC5TFURNMD prekės ženklo SAMSUNG.
NAUDOJIMO INSTRUKCIJA AR18JC5TFURNMD SAMSUNG
| AR12JC3ESLW | AR18JC3HBWK |
| AR12JC5ESLZ | AR18JC5HATP |
| AR18JC3ESLW | AR18JC5HBWK |
| AR18JC5ESLZ | AR24JC3HATP |
| AR12JC2HATP | AR12JC3TFUR |
| AR12JC3HATP | AR12JC5TFUR |
| AR12JC3HBWK | AR18JC3TFUR |
| AR12JC5HATP | AR18JC5TFUR |
| AR18JC2HATP | AR24JC3TFUR |
| AR18JC3HATP | AR18JC5ECLZ |
AR18JC5HCTP
AR18JC5HCWK
AR18JC5TCUR
Air Conditioner
user & installation manual
(include Warranty Card)


imagine the possibilities
Thank you for purchasing this Samsung product.
To receive more complete service, please register your product at
www.samsung.com/register
Features of your new air conditioner
Cool Summer Offer
On those hot sweltering summer days and long restless nights, there is no better escape from the heat than the cool comforts of home. Your new air conditioner brings an end to exhausting hot summer days and lets you rest. Beat the heat with your own air conditioner this summer.
Cost Efficient System
Your new air conditioner not only provides maximum cooling power in the summer, efficient compare to the other electrical heating appliance, so you can further reduce its running cost. Now, meet year-round needs with one air conditioner.
Look for Everywhere
The elegant and harmonious design gives priority to the esthetics of your space and complements any of your existing interior décor. With its soft color and rounded-edge shape, the new air conditioner adds class to any room. Enjoy what your air conditioner offers both functionally and esthetically
good' sleep function
good' sleep function allows you to set a comfortable sleep temperature while saving energy and having sound sleep.
S- Plasma ion function
S-Plasma ion function generates hydrogen(H) and oxygen( O_2 ) to attack undesirable air contaminants such as bacteria, pollen, and odor. It makes you breathe better as if you are staying around waterfalls, ocean surf, rivers and mountains.
Contents
USING PARTS
Safety precautions 3
Checking before use 10
Checking the name of the parts 11
Checking the remote controller 12
Basic function 14
Adjusting the air flow direction 16
Using the Turbo function 16
good sleep mode 17
Setting the On/Off timer 18
Using the Smart Saver function 19
Using the S-Plasma ion function 20
Using the Auto Clean function 20
Cleaning the air conditioner 21
Maintaining the air conditioner 23
Troubleshooting 24
INSTALLATION PARTS
Safety precautions 27
Choosing the installation location 28
Accessories 31
Fixing the installation plate 32
Connecting the assembly cable 33
Installing and connecting the assembly
pipe of the indoor unit 35
Purging the indoor unit 36
Cutting or extending the pipe 36
Installing and connecting the
drain hose of the indoor unit 37
Changing direction of the drain hose 38
Purging the connected pipes 39
Performing the gas leak tests 40
Fixing the indoor unit in place 41
Fixing the outdoor unit in place 41
Final check and trial operation 42
Pump down procedure
(when removing the product) 42
How to connect your extended power cables 43
Safety precautions
Before using your new air conditioner, please read this manual thoroughly to ensure that you know how to safely and efficiently operate the extensive features and functions of your new appliance.
Because the following operating instructions cover various models, the characteristics of your air conditioner may differ slightly from those described in this manual. If you have any questions, call your nearest contact center or find help and information online at www.samsung.com.
Important safety symbols and precautions:
| WARNING | Hazards or unsafe practices that may result insevere personal injury or death. | |||
| CAUTION | Hazards or unsafe practices that may result inminor personal injury or property damage. | |||
| Follow directions. | Unplug the power plug from the wall socket. | |||
| Do NOT attempt. | Do NOT disassemble. | |||
| Make sure the machine is grounded to prevent electric shock. | ||||
FOR INSTALLATION | ⚠ WARNING
Plug the power cord into a wall socket with the power specifications of the product or higher and use the socket for this appliance only. In addition, do not use an extension cord.
Sharing a wall socket with other appliances using a power strip or extending the power cord may result in electric shock or fire.
Do not use an electric transformer. It may result in electric shock or fire.
If the voltage/frequency/rated current condition is different, it may cause fire.
The installation of this appliance must be performed by a qualified technician or service company.
Failing to do so may result in electric shock, fire, explosion, problems with the product, or injury.
Install a switch and circuit breaker dedicated to the air conditioner.
▶ Failing to do so may result in electric shock or fire.
Fix the outdoor unit firmly so that the electric part of the outdoor unit is not exposed.
▶ Failing to do so may result in electric shock or fire.
Safety precautions
Do not install this appliance near a heater, inflammable material. Do not install this appliance in a humid, oily or dusty location, in a location exposed to direct sunlight and water (rain drops). Do not install this appliance in a location where gas may leak.
This may result in electric shock or fire.
Never install the outdoor unit in a location such as on a high external wall where it could fall.
If the outdoor unit falls, it may result in injury, death or property damage.
If using a multi system, AJ***outdoor unit can only be connected to European products among AR09FSSY*/AR12FSSY*/AR18FSSY* series.
This appliance must be properly grounded. Do not ground the appliance to a gas pipe, plastic water pipe, or telephone line.
Failure to do so may result in electric shock, fire, an explosion, or other problems with the product.
▶ Never plug the power cord into a socket that is not grounded correctly and make sure that it is in accordance with local and national codes.
FOR INSTALLATION ⚠️ CAUTION
This appliance should be positioned in such a way that it is accessible to the power plug.
▶ Failing to do so may result in electric shock or fire due to electric leakage.
Install your appliance on a level and hard floor that can support its weight.
▶ Failing to do so may result in abnormal vibrations, noise, or problems with the product.
Install the draining hose properly so that water is drained correctly.
▶ Failing to do so may result in water overflowing and property damage.
When installing the outdoor unit, make sure to connect the draining hose so that draining is performed correctly.
The water generated during the heating operation by the outdoor unit may overflow and result in property damage.
In particular, in winter, if a block of ice falls, it may result in injury, death or property damage.
Remove all foreign substances such as dust or water from the power plug terminals and contact points using a dry cloth on a regular basis.
▶ Unplug the power plug and clean it with a dry cloth.
▶ Failing to do so may result in electric shock or fire.
Plug the power plug into the wall socket in the right direction so that the cord runs towards the floor.
If you plug the power plug into the socket in the opposite direction, the electric wires within the cable may be damaged and this may result in electric shock or fire.
When the appliance or power plug or power cord is damaged, contact your nearest service center.
Plug the power plug into the wall socket firmly. Do not use a damaged power plug, damaged power cord or loose wall socket.
This may result in electric shock or fire.
Do not pull the power cord, when unplugging the power plug.
▶ Unplug the power plug by holding the plug.
▶ Failing to do so may result in electric shock or fire.
Do not pull or excessively bend the power cord. Do not twist or tie the power cord. Do not hook the power cord over a metal object, place a heavy object on the power cord, insert the power cord between objects, or push the power cord into the space behind the appliance.
This may result in electric shock or fire.
FOR POWER SUPPLY
CAUTION
When not using the air conditioner for a long period of time or during a thunder/lightning storm, cut the power at the circuit breaker.
▶ Failing to do so may result in electric shock or fire.
FOR USING
WARNING
If the appliance is flooded, please contact your nearest service center.
▶ Failing to do so may result in electric shock or fire.
If the appliance generates a strange noise, a burning smell or smoke, unplug the power plug immediately and contact your nearest service center.
▶ Failing to do so may result in electric shock or fire.
Safety precautions
In the event of a gas leak (such as propane gas, LP gas, etc.), ventilate immediately without touching the power plug. Do not touch the appliance or power cord.
▶ Do not use a ventilating fan.
▶ A spark may result in an explosion or fire.
To reinstall the air conditioner, please contact your nearest service center.
▶ Failing to do so may result in problems with the product, water leakage, electric shock, or fire.
A delivery service for the product is not provided. If you reinstall the product in another location, additional construction expenses and an installation fee will be charged.
Especially, when you wish to install the product in an unusual location such as in an industrial area or near the seaside where it is exposed to the salt in the air, please contact your nearest service center.
Do not touch the power plug or the circuit breaker with wet hands.
This may result in electric shock.
Do not unplug the power plug or turn the air conditioner off with the circuit breaker while it is operating.
Plugging the power plug into the wall outlet or turning the air conditioner on from the circuit breaker may cause a spark and result in electric shock or fire.
After unpacking the air conditioner, keep all packaging materials well out of the reach of children, as packaging materials can be dangerous to children.
If a child places a bag over its head, it may result in suffocation.
Do not insert your fingers or foreign substances into the outlet when the air conditioner is operating.
Take special care that children do not injure themselves by inserting their fingers into the product.
Do not touch the air flow blade with your hands or fingers during the heating operation.
This may result in electric shock or burns.
Do not insert your fingers or foreign substances into the air inlet/outlet of the air conditioner.
Take special care that children do not injure themselves by inserting their fingers into the product.
Do not strike or pull the air conditioner with excessive force.
This may result in fire, injury, or problems with the product.
FOR USING
WARNING
Do not place an object near the outdoor unit that allows children to climb onto the machine.
This may result in children seriously injuring themselves.
Do not use this air conditioner for long periods of time in badly ventilated locations or near infirm people.
Since this may be dangerous due to a lack of oxygen, Open a window at least once an hour.
If any foreign substance such as water has entered the appliance, cut the power by unplugging the power plug and turning the circuit breaker off and then contact your nearest service center.
▶ Failing to do so may result in electric shock or fire.
Do not attempt to repair, disassemble, or modify the appliance yourself.
Do not use any fuse (such as cooper, steel wire, etc.) other than the standard fuse.
▶ Failing to do so may result in electric shock, fire, problems with the product, or injury.
FOR USING
CAUTION
Do not place objects or devices under the indoor unit.
Water dripping from the indoor unit may result in fire or property damage.
Check that the installation frame of the outdoor unit is not broken at least once a year.
▶ Failing to do so may result in injury, death or property damage.
Max current is measured according to IEC standard for safety and current is measured according to ISO standard for energy efficiency.
Safety precautions
Do not stand on top of the appliance or place objects (such as laundry, lighted candles, lighted cigarettes, dishes, chemicals, metal objects, etc.) on the appliance.
This may result in electric shock, fire, problems with the product, or injury.
Do not operate the appliance with wet hands.
This may result in electric shock.
Do not spray volatile material such as insecticide onto the surface of the appliance.
As well as being harmful to humans, it may also result in electric shock, fire or problems with the product.
Do not drink the water from the air conditioner.
The water may be harmful to humans.
Do not apply a strong impact to the remote controller and do not disassemble the remote controller.
Do not touch the pipes connected with the product.
This may result in burns or injury.
Do not use this air conditioner to preserve precision equipment, food, animals, plants or cosmetics, or for any other unusual purposes.
This may result in property damage.
Avoid directly exposing humans, animals or plants from the air flow from the air conditioner for long periods of time.
This may result in harm to humans, animals or plants.
This appliance is not intended for use by persons (including children) with reduced physical, sensory or mental capabilities, or lack of experience and knowledge, unless they have been given supervision or instruction concerning use of the appliance by a person responsible for their safety. Children should be supervised to ensure that they do not play with the appliance.
FOR CLEANING
WARNING
Do not clean the appliance by spraying water directly onto it. Do not use benzene, thinner or alcohol to clean the appliance.
This may result in discoloration, deformation, damage, electric shock or fire.
Before cleaning or performing maintenance, unplug the air conditioner from the wall socket and wait until the fan stops.
▶ Failing to do so may result in electric shock or fire.
FOR CLEANING
CAUTION
Take care when cleaning the surface of the heat exchanger of the outdoor unit since it has sharp edges.
To avoid cutting your fingers, wear thick cotton gloves when cleaning it.
Do not clean the inside of the air conditioner by yourself.
For cleaning inside the appliance, contact your nearest service center.
When cleaning the internal filter, refer to the descriptions in the 'Cleaning the air conditioner' section.
Failure to do may result in damage, electric shock or fire.
Checking before use
Operation ranges
The table below indicates the temperature and humidity ranges the air conditioner can be operated within. Refer to the table for efficient use.
| Mode | Indoor temperature | Outdoor temperature | Indoor humidity |
| Cooling | 16°C~30°C | 21°C~52°C | Relative humidity 80% or less |
| Dry | 18°C~30°C | 21°C~52°C | - |
▶ If the air conditioner operates in cooling mode for long period of time in high humidity area, dew may be formed.
Maintaining your air conditioner
Internal protections via the unit control system
▶ This internal protection operates if an internal fault occurs in the air conditioner.
| Type | Description |
| Anti-protection of internal knock | The compressor will be off to protect internal knock when the air conditioner operates in Cool mode. |
| Protect compressor | The air conditioner does not start operating immediately to protect the compressor of the outdoor unit after it has been started. |
Smart install
▶ Through Smart install function, installer can check if the installation was done properly.
▶ If the installation was not done properly, an error message will appear on the indoor unit display. Thus, the user will know whether the unit was installed properly or not, and what problems may have occurred during installation.
Checking the name of the parts
Your air conditioner may slightly look different from illustration shown above depending on your model.
Main parts
AR12JC2HATP AR18JC5HATP
AR12JC3HATP AR18JC5HBWK
AR12JC3HBWK AR24JC3HATP
AR12JC5HATP AR12JC3TFUR
AR18JC2HATP AR12JC5TFUR
AR18JC3HATP AR18JC3TFUR
AR18JC3HBWK AR18JC5TFUR
AR24JC3TFUR
AR18JC5HCTP
AR18JC5HCWK
AR12JC3ESLW
AR12JC5ESLZ
AR18JC3ESLW
AR18JC5ESLZ
AR18JC5ECLZ

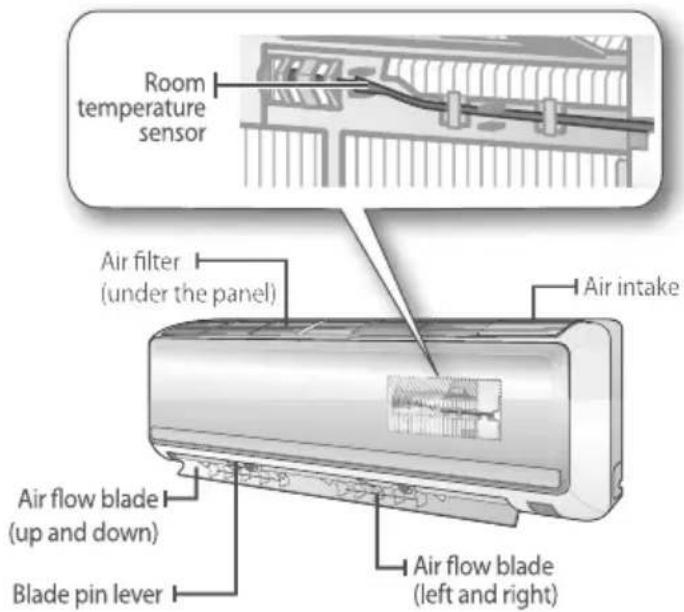
Display
AR12JC2HATP AR18JC5HATP
AR12JC3HATP AR18JC5HBWK
AR12JC3HBWK AR24JC3HATP
AR12JC5HATP AR12JC3TFUR
AR18JC2HATP AR12JC5TFUR
AR18JC3HATP AR18JC3TFUR
AR18JC3HBWK AR18JC5TFUR
AR24JC3TFUR

AR12JC3ESLW
AR12JC5ESLZ
AR18JC3ESLW
AR18JC5ESLZ
AR18JC5ECLZ
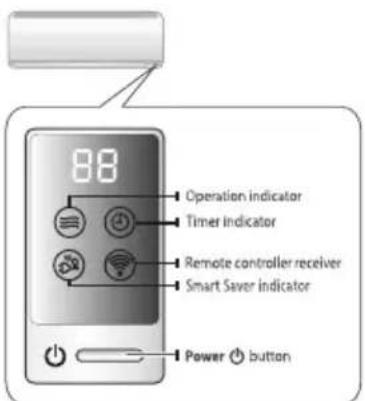
Checking the remote controller
- Point the remote controllertowards the remote controller receiver of the indoor unit.
- When you properly press the button on the remote controller, you will hear beep sound from the indoor unit and a transmit indicator(💡) appears on the remote controller display.


- When you press [2^ndF] button, the 2^ndF indicator will be displayed on the remote controller and you can change the functions on the remote controller as listed below.

If you select the function under the button while the function of the button is switched by 2^ndF button, the 2^ndF function is canceled.
- The Quiet function, SPI and D'light cool are not available in this model. If you press the Quiet button in the cooling mode, the fan speed will be operated as auto mode. If you press the d'light Cool button in the cooling mode, the fan speed will be operated as auto and the blade will be operated as swing mode.
Remote controller display

Battery changing time
When the battery is exhausted, (☑) will be displayed in the remote controller display. When the icon appears, change the batteries. The remote controller requires two 1.5V AAA type batteries.
Storing the remote controller
When you do not use the remote controller for long time, remove the batteries from the remote controller and store it.
Inserting the batteries

flowchart
graph LR
    A["Top-Down View"] --> B["Add Top-Down View"]
    B --> C["Add Bottom-Down View"]
-
Push the lever as arrow indicates on the rear side of the remote controller and pull up.
-
Insert two AAA batteries. Check and match the "+" and "-" signs accordingly. Make sure you have inserted the batteries in correct position.
-
Close the cover by place it back to its original position. You should hear click sound when the cover is locked properly.

- The signal may not be received well of electronic lighting style fluorescent lamps such as inverter fluorescent lamps are in the same space.
- If other electrical products operate by the remote controller, call your nearest contact center.
Basic function
Basic operation is an operation mode that can be selected by pressing the Mode button.
Auto
In Auto mode, the air conditioner will automatically set the temperature and fan speed depending on the room temperature detected by the room temperature.
Cool
In Cool mode, the air conditioner will cool your room. You can adjust the temperature and the fan speed to feel cooler in hot season.
- If current outside temperatures are much higher than the selected indoor temperature, it may take time to bring the inner temperature to the desired coolness.
Dry
The air conditioner in Dry mode acts like a dehumidifier by removing moisture from the indoor air. Dry mode makes the air feel refreshing in a humid climate.
To activate the Dry mode, remote set temperature must be lower than indoor room temperature.
Fan
Fan mode can be selected to ventilate your room. Fan mode will be helpful to refresh the stale air in your room.
Heat
Heat mode doesn't have any function.
Press the

button to turn on the air conditioner.

Mode
button to set the operating mode.
• Each time you press the Mode button, the mode will change in order of Auto, Cool, Dry, Fan and Heat.

flowchart
graph LR
    A["Auto"] --> B["Cool"]
    B --> C["Dry"]
    C --> D["Fan"]
    D --> E["Heat"]
    style A fill:#f9f,stroke:#333
    style B fill:#ccf,stroke:#333
    style C fill:#cfc,stroke:#333
    style D fill:#fcc,stroke:#333
    style E fill:#cff,stroke:#333
Press the button to set the desired fan speed.
| Auto | (Auto) |
| Cool | (Auto), (Low), (Med), (High) |
| Dry | (Auto) |
| Fan | (Low), (Med), (High) |
| Heat | Heat Mode doesn't have any function. |
Press the Temp button to adjust the temperature.
| Auto | You can adjust the desired temperature by 1°C within the range of 16°C~30°C. |
| Cool | You can adjust the desired temperature by 1°C within the range of 16°C~30°C. |
| Dry | You can adjust the desired temperature by 1°C within the range of 18°C~30°C. |
| Fan | Temperature adjustment is not possible. |
| Heat | Heat Mode doesn't have any function. |

Air flow can be adjusted manually.(see page 16 for instructions.)
Adjusting the air flow direction
Air flow can be directed to your desired position.
Vertical air flow
Air flow blades move up and down.
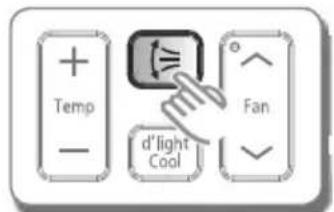

Press the Air swing [≥button on the remote controller.
▶ Air swing indicator will be on and air flow blades move up and down continuously to circulate the air.
▶ Press the Air swing (≡ button on the remote controller again, to keep the air flow direction in a constant position.
Horizontal air flow
Make sure one of the blade pin lever that stick out of the air flow blades are not broken.


- Be extremely careful with your fingers while adjusting the Horizontal air flow direction. There is a potential risk of personal injury when the unit is mishandled.
Using the Turbo function
Turbo function will be helpful to cool your room quickly and effectively.
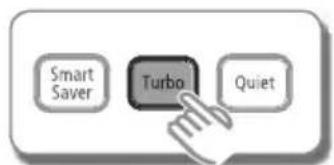
Press the Turbo button on the remote controller during Cool mode.
▶ Turbo indicator appears on the remote controller display and the air conditioner operates in Turbo function for 30 minutes.
Cancel
Press the Turbo button once again.

• Turbo function is only available in Cool mode.
- If you press the Mode button while the Turbo function is on, it will cancel the function.
• Temperature/Fan speed cannot be adjusted while using this function.
good' sleepmode
For a comfortable sleep, the air conditioner will operate it Fall asleep ▷ Sound sleep ▷ Wake up from good' sleep mode.


When the air conditioner is on and in cool mode
1. Press the good' sleep button on the remote controller.
good' sleep indicator appears and Off timer indicator starts blinking on the remote controller display.
2. Press the good' sleep button to set the time.
▶ You can set the time in half hourly unit from 30 minutes \~ 3 hours and hour unit from 3 hours \~ 12 hours.
▶ Operating hour can be set from minimum 30 minutes to maximum 12 hours.
▶ Default operation hour is set to 8 hours.
3. Press the Set/Cancel button to active it on.
▶ Off timer indicator stops blinking and reserved time will be displayed for 3 seconds. Then the air conditioner operates in good'sleep(Cool) mode.
If you don't press Set/Cancel button within 10 seconds after pressing the good' sleep the air conditioner will return to previous status. Check Off timer indicator and 📋 indicator on the indoor unit.
Cancel Press the Set/Cancel button once again.
| You can set the desired temperature by 1°C in the range of 16°C~30°C. | |
| Fan speed will be adjusted automatically according to the good' sleep mode. | |
| Air flow direction will be adjusted automatically according to the good' sleep mode. |
Temperature and fan speed changes in good' sleep mode
• Fall asleep: Eases you into sleep by dropping the temperature.
• Sound sleep: Relaxes your body and raises your temperature slightly.
- Wake up from good' sleep mode: Allows you to wake up from comfortable intermittent air and it makes you feel refreshed.

- Set Off timer in good' sleep mode over 5 hours. You fell disturbed sleep if the good' sleep is set too short or long because the default is set to 8-hour-operation.
- If the good' sleep mode is set less than 4 hours, the operation will stop at the same time. If the good' sleep mode is set over 5 hours, it will run as Wake up stage from the last one hour before it stops.
- Recommended set temperature is between 25^ 27^ for cooling.
Setting the On/Off timer
You can set the air conditioner to turn on/off automatically at desired time.
Setting On timer while the air conditioner is off / Off timer while the air conditioner is on
Setting On timer


Setting Off timer


- Press the On Timer/Off Timer button.
▶ On/Off timer indicator will blink on the remote controller display.
- Press the On Timer/Off Timer button to set the time.
▶ You can set the time in half hourly unit from 30 minutes \~ 3 hours and hour unit from 3 hours \~ 24 hours.
▶ Operating hour can be set from minimum 30 minutes to maximum 24 hours.
- Press the Set/Cancel button to active it on.
▶ On timer indicator stops blinking and reserved time will be displayed for 3 seconds.
If you don't press Set/Cancel button within 10 seconds after selecting the time the air conditioner will return to previous status. Check On timer or Off timer indicator and 📊 indicator on the indoor unit.
Cancel Press the Set/Cancel button.
| Additional options available in On timer mode | |
| Mode | You can select from Auto/Cool/Dry/Fan. |
| You can adjust the fan speed in Cool/Fan mode. | |
| You can adjust the temperature in Auto/Cool/Dry mode. | |

- Only the latest setting timer will be applied between the On Timer/Off Timer and good' sleep Off timer functions.
- After setting the timer, the set time will be displayed for 3 second before it disappears.
Combining On Timer and Off Timer
| If the air conditioner is on | If the air conditioner is off |
| Preset time on On timer is longer than Off timerEx) On timer: 3 hours, Off timer: 1 hour- The air conditioner will operate the Off timer after 1 hour from the moment you have set the timer.Your air conditioner will turn on after 2 hours. | Preset time on On timer is shorter than Off timerEx) On timer: 3 hours, Off timer: 5 hours- The air conditioner will operate On timer after 3 hours from the moment you have set the timer.Your air conditioner will remain on for 2 hours and then turn off automatically. |

- On timer and Off timer setting time should be different from each other.
- Press the Set/Cancel button on the remote controller while timer combination is on.
Both of the On and Off timer will be canceled and the indicator will disappear.
Using the Smart Saver function
This function will set the temperature range limit to help you save energy while the air conditioner is operating in Cool mode.
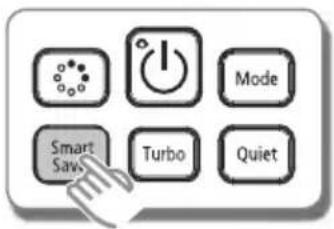
Press the Smart Saver button on the remote controller while the air conditioner is operating in Cool mode.
▶ Smart Saver indicator and air swing indicator appears automatically on the remote controller display.
The air flow blades move up and down.
▶ If the current set temperature is lower than 24^ C, it will automatically raise to 24^ C.
Cancel Press the Smart Saver button once again.


• Smart Saver function is only available in Cool mode.
- When Smart Saver function is activated, temperature range will be limited to 24°C\~30°C.
- If the desired temperature is lower than 24°C, turn off the Smart Saver function by pressing the Smart Saver button again.
• Temperature/Fan speed can also be adjusted (see page 15 for instructions).
• Air flow can be adjusted manually (see page 16 for instructions).
- If you press the Mode button while the Smart Saver function is on, it will cancel the function.
Using the SPi function < FOR SPi MODEL >
SPi, Super-Plasma Ion, generates hydrogen(H) and oxygen( O_2 ) to remove a polluted substance and decomposition of such harmful particles. It makes you breathe better as if you were staying around waterfalls, ocean surf, rivers and mountains.

- Press the SPi button on the remote control. SPi indicator will appear on the remote control display and the air conditioner generates SPi.
- SPi model : The SPi mode can be selected whether the air conditioner is on/off. - non SPi model : The air conditioner will be operated as fan mode.
To deactivate SPi mode
- Press the SPi button on the remote control. SPi mode you set will be canceled.
Using the Auto Clean function
Auto clean function will prevent from growing mold by eliminating the moisture inside of the indoor unit. Your indoor unit evaporates the moisture inside of the unit. Activate this function to provide you with more clean and healthier air.

flowchart
graph TD
    A["Auto Cle"] --> B["Filter"]
    C["Temp HumI"] --> D["Beep Off"]
    E["good' sleep"] --> F["Display Off"]
    G["On Timer"] --> H["Off Timer"]
    I["Set Cancel"] --> J["End"]
Press the Auto Clean button.
When the air conditioner is turned off,
The Auto clean indicator (C1) on the indoor unit display appears and the Auto cleaning function runs.
When the air conditioner is turned on,
The Auto clean indicator (C1) on the indoor unit display appears and the Auto cleaning function runs after stopping the air conditioner operation.
※ Auto Cleaning time can vary, depending on the previously used mode.
Auto, Cool, Dry mode: approximately 30 minutes.
Fan mode: approximately 15 minutes.
If Auto Clean function is turned on, "C1" displayed in the indoor unit.
After 3 second it will go to the previous setting temperature.
Cancel Press the Auto Clean button once again.

- When the air conditioner is turned on, the Auto clean function runs after stopping the air conditioner operation.
Cleaning the air conditioner
- Make sure the power is turned off and unplugged from the wall socket when cleaning the air conditioner.
Cleaning the indoor unit
▶ Wipe the surface of the unit with a slightly wet or dry cloth when needed.

- Contact the service center when you clean the indoor unit heat exchanger because it needs to be disassembled.

natural_image
Illustration of a hand cleaning a large air conditioner cover (no text or symbols)(Illustration may differ slightly depending on the models)

- Do not clean the display using alkaline detergent.
- Do not use sulfuric acid, hydrochloric acid, organic solvents (such as thinner, kerosene and acetone etc.) to clean the surface of the product or put any stickers on it. They may damage the surface of the air conditioner.
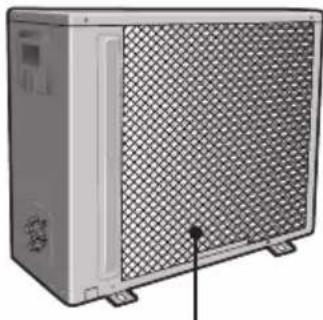
Cleaning the outdoor unit heat exchanger
When dust accumulates on the heat exchanger, it may decrease cooling performance. Therefore, clean it regularly.
▶ Spray water to clean the dust.

• If it is difficult to clean the outdoor unit heat exchanger on your own, contact service center.

- Be careful with the sharp edges on the outdoor unit heat exchanger.
natural_image
Exterior view of a server rack unit with mesh grille and mounting base (no visible text or symbols)Heat exchanger (Illustration may differ slightly depending on the models)
Opening the panel
Model: AR**J**H/T***
Tightly grab top of the front panel and pull it down to open.
Then slightly lift the panel up.
Model: AR**J**E***
Tightly grab top of the front panel and pull it down to open.
Then slightly lift the panel up.

- Procedure for each model is specified with model name. Not following the procedure may lead to breaking of locks.

natural_image
Diagram showing airflow or ventilation system between a car air conditioner unit and a wall-mounted air duct (no text or symbols)
natural_image
Diagram showing a mechanical component being processed with an arrow indicating motion (no text or symbols present)Removing the Air filter
Grab the handle and lift it up. Then, pull the Air filter towards you and slide it down.

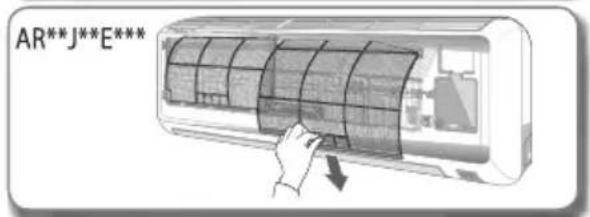
☒ Illustration may differ slightly depending on the models.
Cleaning the air filter
Washable foam based air filter captures large particles from the air. The filter is cleaned with a vacuum or by hand washing.

flowchart
graph TD
    A["Open the panel and put the Air filter out."] --> B["Clean the Air filter with a vacuum cleaner or soft brush. If dust is too heavy, rinse it with running water."]
    B --> C["Insert the Air filter back in its original position and close the front panel."]
    C --> D["Dry the Air filter in a ventilated area."]

- Clean the Air filter every 2 weeks. Cleaning term may differ depending on the usage and environmental conditions. In dusty area, clean it once a week.
- If the Air filter dries in a confined (or humid) area, odors may generate. If it occurs, re-clean and dry it in a well-ventilated area.
Maintaining the air conditioner
If the air conditioner will not be used for an extended period of time, dry the air conditioner to maintain it in best condition.
- Dry the air conditioner thoroughly by operating in Fan mode for 3 to 4 hours and disconnect the power plug.
There may be internal damage if moisture is left in components.
- Before using the air conditioner again, dry the inner components of the air conditioner again by running in Fan mode for 3 to 4 hours. This helps remove odors which may have generated from dampness.
Periodical checks
Refer to the following chart to maintain the air conditioner properly.
| Type | Description | Every 2 weeks | Every 3 months | Every 4 months | Once a year |
| Indoor unit | Clean the air filter (1) | ||||
| Clean the condensate drain pan (2) | |||||
| Thoroughly clean the heat exchanger (2) | |||||
| Clean the condensate drain pipe (2) | |||||
| Replace the remote controller batteries (1) | |||||
| Outdoor unit | Clean the heat exchanger on the outside of the unit (2) | ||||
| Clean the heat exchanger on the inside of the unit (2) | |||||
| Clean the electric components with jets of air (2) | |||||
| Verify that all the electric components are firmly tightened (2) | |||||
| Clean the fan (2) | |||||
| Verify that all the fan assembly is firmly tightened (2) |
- : This check mark requires checking the indoor/outdoor unit periodically, following to the description to maintain the air conditioner properly.

(1) The described operations should be performed more frequently if the area of installation is very dusty.
(2) These operations must always be performed by qualified personnel. For more detailed information, see the installation part in the manual.
Trouble shooting
Refer to the following chart if the air conditioner operates abnormally. This may save time and unnecessary expenses.
| PROBLEM | SOLUTION |
| The air conditioner does not work at all. | Check power status and then operate the air conditioner again.Plug in or switch on the circuit breaker and then operate the air conditioner again.Check if you have set the Off Timer. Operate the air conditioner again by pressing thePowerbutton. |
| The temperature adjustment is not working. | Check in you have selected Fan/Turbo mode. In these modes, desired temperature is set to auto and you cannot adjust the temperature. |
| Cool air does not come out of the air conditioner. | Check if the set temperature is higher (during cool mode) than the current temperature Press theTemp+ or - button on the remote controller to change the set temperature.Check if the Air filter is blocked by dirt. If there is a lot of dust on the Air filter, cooling performance may decrease. Clean them frequently.Check if the outdoor unit is covered or installed near the obstacle. Take the cover off and take the obstacle away.To protect the outdoor from direct sunlight cover the outdoor unit using shed, curtains etc.If the doors or windows are open, it may cause bad cooling performance.Close the doors and windowsCheck if the air conditioner has just been turned on after stopping cooling operation.In this case, just a fan will run to protect the outdoor unit compressor.Check if the pipe length is too long. When the pipe length exceeds maximum allowable pipe length, cooling performance may decrease. |
| Air flow adjustment is not working. | ·Check if you have selected Auto/Dry/Turbo/good sleep modes, and you cannot adjust the air flow direction |
| Fan speed adjustment is not working. | ·Check if you have selected Auto/Dry/Turbo/good sleep Cool mode. In these mode, fan speed is set to Auto and you cannot adjust the fan speed. |
| Remote controller is no t working. | ·Checkifyour batteries are depleted. ·Makesure nothing is blocking your remote controller sensor ·Check that there are strong lighting apparatus near the air conditioner. Strong light which comes from fluorescent bulbs or neon signs may interrupt the electric waves. |
| Timer function does not set. | ·Check if you press the Set/Cancel button on the remote controller after you have set the time. |
| The indicator is blinking continuously. | ·Press the Power button or disconnect the power plug/ switch off the auxiliary power switch. If the indicator is still blinking, contact the service center. |
| Odors perm eate in the room during operation. | ·Check if the appliance is running in a smoky area. Ventilate the room or operate the air conditioner in Fan mode for 1~2 hours. (We do not use smelly components in the air conditioner.) ·Clean the Full HD filter if they are dirty. |
Trouble shooting
| PROBLEM | SOLUTION |
| Error is indicated. | ·When an indoor unit indicator blinks, contact nearest service center. |
| Noise is generated. | ·Depending on the status of the air condition er usage, noise can be heard when refrigerant flow movement changes. It is normal. |
| Water is dropping from the ou tdoor unit piping connection. | ·Water may be generated because of the temperature difference. It is normal. |
Safety precautions
Carefully follow the precautions listed below because they are essential to guarantee the safety of the equipment.

WARNING
- Always disconnect the air conditioner from the power supply before servicing it or accessing its internal components.
- Verify that installation and testing operations are performed by qualified personnel.
- Verify that the air conditioner is not installed in an easily accessible area.
General information
Carefully read the content of this manual before installing the air conditioner and store the manual in a safe place in order to be able to use it as reference after installation.
For maximum safety, installers should always carefully read the following warnings.
▶ Store the operation and installation manual in a safe location and remember to hand it over to the new owner if the air conditioner is sold or transferred.
This manual explains how to install an indoor unit with a split system with two SAMSUNG units. The use of other types of units with different control systems may damage the units and invalidate the warranty. The manufacturer shall not be responsible for damages arising from the use of non compliant units.
The air conditioner is compliant with the requirements of the Low Voltage Directive (72/23/EEC), the EMC Directive (89/336/EEC) and the Directive on pressurized equipment (97/23/EEC).
The manufacturer shall not be responsible for damage originating from unauthorized changes or the improper connection of electric and requirements set forth in the "Operating limits" table, included in the manual, shall immediately invalidate the warranty.
The air conditioner should be used only for the applications for which it has been designed: the indoor unit is not suitable to be installed in areas used for laundry.
▶ Do not use the units if damaged. If problems occur, switch the unit off and disconnect it from the power supply.
In order to prevent electric shocks, fires or injuries, always stop the unit, disable the protection switch and contact SAMSUNG's technical support if the unit produces smoke, if the power cable is hot or damaged or if the unit is very noisy.
▶ Always remember to inspect the unit, electric connections, refrigerant tubes and protections regularly. These operations should be performed by qualified personnel only.
The unit contains moving parts, which should always be kept out of the reach of children.
Do not attempt to repair, move, alter or reinstall the unit. If performed by unauthorized personnel, these operations may cause electric shocks or fires.
▶ Do not place containers with liquids or other objects on the unit.
All the materials used for the manufacture and packaging of the air conditioner are recyclable.
The packing material and exhaust batteries of the remote controller(optional) must be disposed of in accordance with current laws.
The air conditioner contains a refrigerant that has to be disposed of as special waste. At the end of its life cycle, the air conditioner must be disposed of in authorized centers or returned to the retailer so that it can be disposed of correctly and safely.
Safety precautions
Installing the unit
IMPORTANT: When installing the unit, always remember to connect first the refrigerant tubes, then the electrical lines. Always disassemble the electric lines before the refrigerant tubes.
Upon receipt, inspect the product to verify that it has not been damaged during transport.
If the product appears damaged, DO NOT INSTALL it and immediately report the damage to the carrier or retailer (if the installer or the authorized technician has collected the material from the retailer.)
▶ After completing the installation, always carry out a functional test and provide the instructions on how to operate the air conditioner to the user.
Do not use the air conditioner in environments with hazardous substances or close to equipment that release free flames to avoid the occurrence of fires, explosions or injuries.
To prevent injury when accidentally touching the indoor unit fan, install the indoor unit at least 2.5m above the floor.
The air conditioner should be used only for the applications for which it has been designed: the indoor unit is not suitable to be installed in areas used for laundry.
Our units must be installed in compliance with the spaces indicated in the installation manual to ensure either accessibility from both sides or ability to perform routine maintenance and repairs. The units' components must be accessible and that can be disassembled in conditions of complete safety either for people or things.
For this reason, where it is not observed as indicated into the Installation Manual, the cost necessary to reach and repair the unit (in safety, as required by current regulations in force) with slings, trucks, scaffolding or any other means of elevation won't be considered in-warranty and charged to end user.
Power supply line, fuse or circuit breaker
▶ Always make sure that the power supply is compliant with current safety standards. Always install the air conditioner in compliance with current local safety standards.
▶ Always verify that a suitable grounding connection is available.
▶ Verify that the voltage and frequency of the power supply comply with the specifications and that the installed power is sufficient to ensure the operation of any other domestic appliance connected to the same electric lines.
▶ Always verify that the cut-off and protection switches are suitably dimensioned.
▶ Verify that the air conditioner is connected to the power supply in accordance with the instructions provided in the wiring diagram included in the manual.
▶ Always verify that electric connections (cable entry, section of leads, protections...) are compliant with the electric specifications and with the instructions provided in the wiring scheme.
Always verify that all connections comply with the standards applicable to the installation of air conditioners.
Choosing the installation location
Indoor unit
▶ Where airflow is not blocked
▶ Where cool air can be distributed throughout the room
▶ Install the refrigerant piping length and the height difference of both indoor and outdoor units as indicated in the installation diagram
▶ Wall that prevents vibration and is strong enough to hold the product weight
▶ Out of the direct sunlight
▶ 1m or more away from the TV or radio (to prevent the screen from being distorted or noise from being generated)
As far away as possible from the fluorescent and incandescent lights (so that the remote controller can be operated well)
▶ A place where the air filter can be replaced easily
Outdoor Unit
▶ Where it is not exposed to strong wind
▶ Well ventilated and dustless places
▶ Out of the direct sunlight and rain
▶ Where neighbors are not annoyed by operation sound or hot air
Solid wall or support that prevents vibration and is strong enough to hold the product weight
▶ Where there is no risk of flammable gas leakage
▶ When installing the unit at a high place be sure to fix the unit legs
▶ 3m or more away from the TV or radio (to prevent the screen from being distorted or noise from being generated)
▶ Install the unit horizontally
▶ Place where drained water does not become any problem.
Place with no plants (especially climbing plants) and where small animal can not access.

- Avoid the following places to prevent malfunction of the unit
- Where there is machine oil
- Salty environment such as seaside areas
- Where sulfide gas exists
- Other special atmosphere areas
Observe the clearances and maximum lengths as seen in the picture below when installing the air conditioner.

* The appearance of the unit may be different from the diagram depending on the model.
Choosing the installation location
Space Requirements for Outdoor Unit
When installing 1 outdoor unit
◆ Figure Description
| Top view | Side view | ||
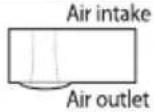 | Air outlet |  | Air intake |
• ↓, ← Air flow direction.
◆ When the air outlet is opposite the wall

◆ When the air outlet is towards the wall
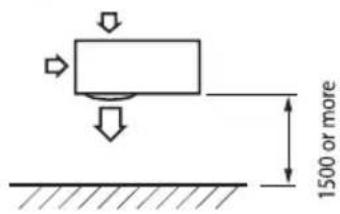
◆ The upper part of the outdoor unit and the air outlet is towards the wall

◆ The upper part of the outdoor unit and the air outlet is opposite the wall

(Unit : mm)
◆ When 3 sides of the outdoor unit are blocked by the wall
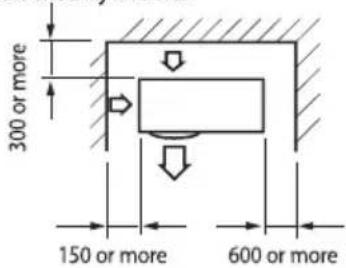
When the walls are blocking front and the rear side of the outdoor unit

When installing more than 1 outdoor unit
(Unit: mm)
◆ When the air outlet is towards the wall
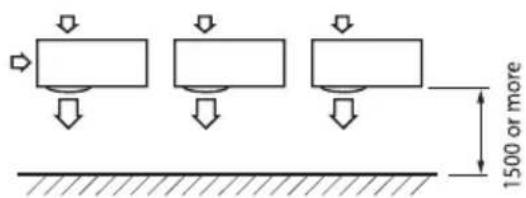
◆ When 3 sides of the outdoor unit are blocked by the wall

(Unit: mm)
When the walls are blocking front and the rear side of the outdoor units

☒ When front and rear side of the outdoor unit is towards the wall

When the upper part of the outdoor unit and the air outlet is opposite the wall


CAUTION
- If installation is done in inappropriate space, unit may generate sound and cause bad effect on the product.
• Installation must be done in level and in a place where vibration will not cause any effect.
Accessories
The following accessories are supplied with the air conditioner:

NOTE
• The number of each accessory is indicated in parentheses.
Accessories in the indoor unit case
Installation Plate (1) | Remote controller (1) | Batteries for Remote controller (2)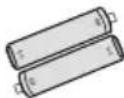 | Uses & Installation Manual (1) | ALLERGY FILTER (1)AR**JC*HA**AR**JC*ES** |
Accessories in the outdoor unit case
Assembly Pipe,∅6.35mm (1) | Assembly Pipe,∅12.7mm (1)AR12JC***** | Assembly Pipe,∅15.88mm (1)AR18JC*****AR24JC***** | Wire Assembly Cable (1)[IMAGE] | Rubber Leg (4) |

NOTE
- Use the Flare nuts to connect evaporator pipe and service port.
- The 3-wire assembly cable is optional. If it is not supplied, use standard cable.
- Assembly Pipe are optional, depending upon the models.
• Cable Tie and Drain Hose are optional.
• Illustration may differ slightly depending on the models.
Accessories
Tools required for installation
General Tools
• Vacuum Pump(Backward flowing prevention)
• Torque Wrench
• Pipe Cutter
• Reamer
• Manifold Gauge
• Stud Finder
• Pipe Bender
• Spirit Level
- Screw Driver
- Spanner
• Drill
• L Wrench
• Measuring Tape
Tools for test operations
- Thermometer
- Resistance Meter
• Electroscope
Fixing the installation plate
You can select the direction of the drain hose depending on where you want to install the indoor unit. Therefore before fixing the installation plate to a wall or a window frame, you must determine the position of the 65mm hole through which the cable, pipe and hose pass to connect the indoor unit to the outdoor unit.
When facing the wall, the pipe and cable can be connected from the:
• Right (A)
- Left (B)
- Underside_right (C)
- Rear_right or left (D)
Direction of pipe


• Make sure to drill only one hole after choosing the direction of the pipe.
- Determine the position of the pipe and drain hose hole as seen in the picture and drill the hole with an inner diameter of 65mm so that it slants slightly downwards.

(Unit : mm)
| Model | A | B | C | D |
| AR12JC**** | 27 | 120 | 68 | 27 |
| AR1BJC2*** | ||||
| AR1BJC3*** |
| Model | A | B | C | D |
| AR18JC5*** | 34 | 140 | 68 | 34 |
| AR24J**** |
- Fix the indoor unit.
If you fix the indoor unit on a wall
(1) Fix the installation plate to the wall giving attention to the weight of the indoor unit.

- If you mount the plate to a concrete wall using plastic anchors, make sure that gaps between the wall and the plate, created by projected anchor, is less than 20mm.

If you fix the indoor unit on a window frame
(1) Determine the positions of the wooden uprights to be attached to the window frame.
(2) Attach the wooden uprights to the window frame giving attention to the weight of the indoor unit.
(3) Attach the installation plate to the wooden upright using tapping screws.

- Search for other spots if there are less than two studs, or the distance between the studs are different from the plate hanger.
• Fix the installation plate without inclining to one side.

- Make sure that a wall can withstand the weight of the product. If you install the product in a place where it is not strong enough to withstand the product weight, the unit could fall and cause injury.
If you fix the indoor unit on a gypsum board
(1) Use stud finder to find out locations of the studs.
(2) Fix the plate hanger on two studs.
Connecting the assembly cable
Cable specification
| Model | Interconnection cable | Model | Interconnection cable |
| AR12JC***** | 3G, Not less than 1.5mm ^2 | AR24JC***** | 3G, Not less than 2.5mm ^2 |
| AR18JC***** | |||

- Connect the power cable to the auxiliary circuit breaker. If every pole fails to connect to the power supply, it must be incorporated in a wire with a contact opening of ≥ 3mm .
- For each model use specied cable only as written in below table. Failing to do that may result to damage of appliance,re,accident or even explosion.
Connecting the cable
When you install the unit, make first refrigerant connections and then electrical connections. Connect the air conditioner to grounding system before performing the electrical connection. If unit is uninstalled, first disconnect electrical cables, then refrigerant connections.
If the outdoor unit is more than 5 meters away from the indoor unit, you must extend the cable.
- Extend the assembly cable if necessary.

- Do not connect two or more different cables to extend the length. It may cause fire.
-
Open the front grille.
-
Remove the screw securing the connector cover.
-
Pass the assembly cable through the rear of the indoor unit and connect the assembly cable to terminals. (Refer to the picture below)

• Each wire is labeled with the corresponding terminal number.
- Pass the other end of the cable through the 65mm hole in the wall.
- Close the connector cover by tightening the screw carefully.
- Close the front grille.
- Remove the terminal board cover on the side of the outdoor unit.
Connecting the assembly cable
9. Connect the cables to the terminals as seen in the picture.

Each wire is labeled with the corresponding terminal number.

AR12JC
AR18JC

Outdoor unit
AR24JC*****
Indoor unit
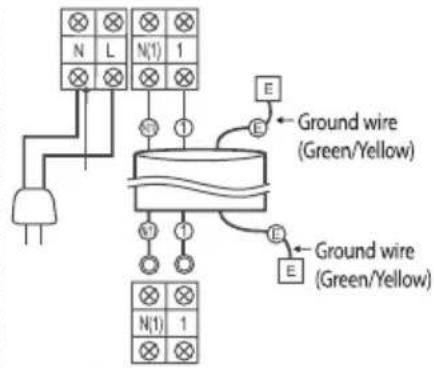
Outdoor unit

CAUTION
• End of the wire must be circular.
• After connecting the cables, make sure terminal numbers on the indoor/outdoor unit matches.
- Screws on terminal block must not be unscrewed with the torque less than 12kgf·cm.
10. Connect the grounding conductor to the grounding terminals.
11. Close the terminal board cover by tightening the screw carefully.

NOTE
- In Russia and Europe, consult with the supply authority to determine the supply system impedance before installation.

WARNING
- Connect the wires firmly so that wires can not be pulled out easily. (If they are loose, it could cause burn-out of the wires.)
- Connect the wires according to color codes, referring to the wiring diagram.
- The power cable and the interconnection cable should be selected according to the specification in page 33.
■ Wire connecting the indoor unit terminal blocks
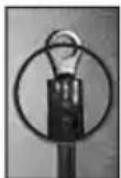
- Terminal press of Ring terminal shall be set facing up before connecting wire.

Is inverted

Terminal has been cut.
- There shall be no empty space between Ring terminal and Screw after Clamp. If not, there exists a possibility of fire which can be caused by electric heat in the connecting part.
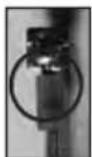
①
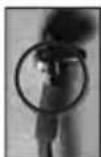
②

③
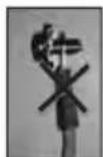
④

⑤
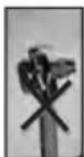
6
①.②: Good
③ Bad : Ring terminal is connected reversely
⑤ Bad : In the gap between Ring terminal & Screw
④ Bad : Not clamped Screw
⑥ Bad : Unused Ring Terminal
Installing and connecting the assembly pipe of the indoor unit
There are 2 refrigerant pipes of different diameters:
• The smaller one is for the liquid refrigerant
• The larger one is for the gas refrigerant
A short pipe is already fitted to the air conditioner. You may need to extend the pipe using the assembly pipe (optional).
The connection procedure for the refrigerant pipe varies according to the exit position of the pipe when facing the wall:
• Right(A)
• Left(B)
- Underside(C)
• Rear

natural_image
Cross-sectional diagram of a device casing with labeled components A, B, and C (no text or symbols beyond labels)- Cut out the appropriate knock-out piece (A, B, C) on the rear of the indoor unit unless you connect the pipe directly from the rear.
- Smooth the cut edges.
- Remove the protection caps of the pipes and connect the assembly pipe to each pipe. Tighten the nuts first with your hands, and then with a torque wrench, applying the following torque:
| Outer Diameter | Torque (kgf·cm) |
| ø6.35 mm | 140~170 |
| ø9.52 mm | 250~280 |
| ø12.70 mm | 380~420 |
| ø15.88 mm | 440~480 |
| ø19.05 mm | 990~1210 |
| ø22.23 mm | 990~1210 |

- If you want to shorten or extend the pipes, refer to page 36\~37.
- Cut off the remaining foam insulation.
- If necessary, bend the pipe to fit along the bottom of the indoor unit. Then pull it out through the appropriate hole.
▶ The pipe should not project from the rear of the indoor unit.
▶ The bending radius should be 100 mm or more.
- Pass the pipe through the hole in the wall.

• The pipe will be insulated and fixed permanently into position after finishing the installation and the gas leak test.

- Tighten the flare nut with torque wrench according to specified method.
If the flare nut is over-tightened, the flare may break and cause refrigerant gas leakage.
• DO NOT WALL UP THE PIPE CONNECTION!
All refrigerant pipe connection must be easy accessible and serviceable.
Purging the indoor unit
1. Remove the caps at the end of each pipe.

- To prevent dirt or foreign substances from getting into the pipes during installation, do NOT remove the caps completely until you are ready to connect the pipes.

- The remaining air in the Refrigeration cycle, which contains moisture, may cause malfunction on the compressor. - Always contact the service center or a professional installation agency for product installation.

Cutting or extending the pipe
A Connecting pipe is supplied with the air conditioner.
The length of the pipe can be:
• Extended up to : see table page 29
- Shorten up to: see page 29
| Model Names | Pipe Length (m) |
| AR12***** | 3.0 |
| AR18***** | 3.0 |
| AR24***** | 3.5 |

If you need a pipe longer than mentioned upside table :
- You must extend the assembly cable.
-
You must add refrigerant to the pipes; otherwise, the indoor unit may freeze.
-
Make sure that you have all the required tools (pipe cutter, reamer, flaring tool and pipe holder).
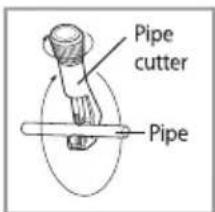
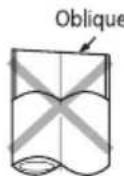
- If you want to shorten the pipe, cut it using a pipe cutter, ensuring that the cut edge remains at 90^ with the side of the pipe (see below examples of correct and incorrect cut edges).



- To prevent a gas leak, remove all burrs at the cut edge of the pipe using a reamer.

- Face the pipe down while removing the burrs to make sure that burrs do not get in to the pipe.
- Put a flare nut slightly into the pipe and modify the flare.
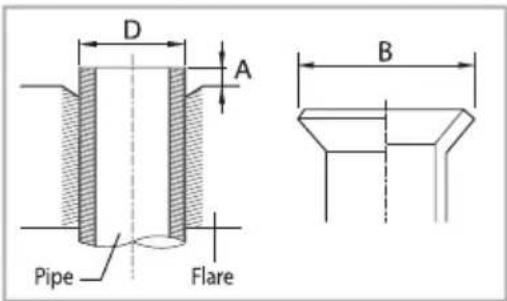
| Outer Diameter (D) | Depth (A) | Flaring Size (B) |
| ø6.35 mm | 1.3 mm | 9.0 mm |
| ø9.52 mm | 1.8 mm | 13.0 mm |
| ø12.70 mm | 2.0 mm | 16.2 mm |
| ø15.88 mm | 2.2 mm | 19.3 mm |
| ø19.05 mm | 2.2 mm | 22.5 mm |
| ø22.23 mm | 2.2 mm | 25.7 mm |
- Check if you flared the pipe correctly (see examples of incorrectly flared pipes below).

Correct

Inclined
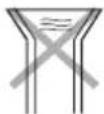
Damaged Surface
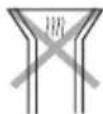
Cracked

Uneven Thickness
- Align the pipes to connect them easily. Tighten the flare nuts first with your hands, and then with a torque wrench, applying the following torque:

| Outer Diameter | Torque (kgf·cm) |
| ø6.35 mm | 140~170 |
| ø9.52 mm | 250~280 |
| ø12.70 mm | 380~420 |
| ø15.88 mm | 440~480 |
| ø19.05 mm | 990~1210 |
| ø22.23 mm | 990~1210 |

- Excessive torque can be cause of gas leakage. In case brazing the pipe, the nitrogen gas must be blown into the pipe (50 Pa). The joint must be accessible and serviceable.
- For further details on how to connect to the outdoor unit and purge the air, refer to page 39\~40.

- Tighten the flare nut with torque wrench according to specified method. If the flare nut is over-tightened, the flare may break and cause refrigerant gas leakage.
Installing and connecting the drain hose of the indoor unit
When installing the drain hose for the indoor unit, check if condensation draining is adequate. When passing the drain hose through the 65-mm hole drilled in the wall, check the followings:


natural_image
Pure mechanical cross-section diagram without any text, numbers, or symbolsThe drain hose must NOT slant upwards.

natural_image
Pure mechanical diagram showing a bracket and mounting structure without any text or symbolsThe end of the drain hose must NOT be placed under water.

natural_image
Technical diagram showing a mechanical assembly with no visible text or symbolsThe drain hose must not be bent.

Keep a clearance of at least 5cm between the end of the drain hose and the ground.

Do not place the end of the drain hose in a hollow.
Installing and connecting the drain hose of the indoor unit
Drain hose installation
- If necessary, connect the 2-meter extension drain hose to the drain hose.
-
If you use the extension drain hose, insulate the inside of the extension drain hose with a shield.
-
Fit the drain hose into 1 of 2 drain hose holes, then fix the end of the drain hose tightly with a clamp.

• If you do not use the other drain hose hole, block it with a rubber stopper.

-
Pass the drain hose under the refrigerant pipe, keeping the drain hose tight.
-
Pass the drain hose through the hole in the wall. Check if it slants downwards as seen in the picture.


- The hose will be fixed permanently into position after finishing the installation and the gas leak test; refer to page 40\~41 for further details.

- Make sure the installed direction of the drain hose is correct. Inadequate installation may cause condensate water leakage.
- If the drain hose is routed inside the room, insulate the hose so that dripping condensation does not damage the furniture or floors.
- DO NOT WALL UP THE DRAIN HOSE CONNECTION! Drain hose connection must be easy accessible and serviceable.
- Make sure the installed direction of the drain hose is correct. Inadequate installation may cause condensate water leakage. - If the drain hose is routed inside the room, insulate the hose so that dripping condensation does not damage the furniture or floors. - DO NOT WALL UP THE DRAIN HOSE CONNECTION! Drain hose connection must be easy accessible and serviceable.
Changing direction of the drain hose
Change the direction only when it is necessary.
- Detach the rubber cap with the plier.
- Detach the drain hose by pulling it and turning to the left.
- Insert the drain hose by fixing it with the screw into the groove of the drain hose and the outlet of the drain pan.
- Attach the rubber cap with a screwdriver by turning it to the right until it fixes to the end of the groove.
- Check for leakage on both side of the drain outlet.
Pour the water in direction of arrow.

natural_image
Technical illustration of a mechanical assembly with two circular insets showing close-ups of internal components (no text or symbols)* Direction of the drained water
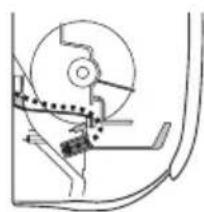
natural_image
Mechanical diagram showing a gear and linkage mechanism (no text or labels)
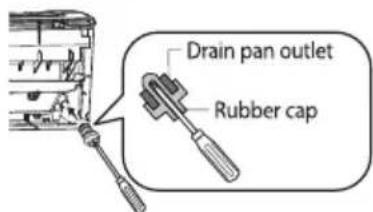

- Make sure the indoor unit is in upright position when you pour water to check for leakage. Make sure that the water does not overflow onto the electrical part.
Purging the connected pipes
The outdoor unit is loaded with sufficient R22 refrigerant. Do not vent R22 into atmosphere: it is a fluorinated greenhouse gas. You should purge the air in the indoor unit and in the pipe. If air remains in the refrigerant pipes, it affects the compressor. It may cause reduction of cooling capacity and malfunction. Refrigerant for air purging is not charged in the outdoor unit. Use Vacuum Pump as seen in the picture.

- When installing, make sure there is no leakage. When recovering the refrigerant, ground the compressor first before removing the connection pipe. If the refrigerant pipe is not properly connected and the compressor works with the service valve open, the pipe inhales the air and it makes the pressure inside of the refrigerant cycle abnormally high. It may cause explosion and injury.
-
Connect each assembly pipe to the appropriate valve on the outdoor unit and tighten the flare nut.
-
Tighten the flare nut first with your hands, and then with a torque wrench, applying the following torque:

• Excessive torque can be cause of gas leakage.

- Make the electrical connection and leave the system into "stand by mode". Do not turn on the system!

flowchart
graph LR
    A["Outdoor unit"] --> B["Gas pipe side"]
    A --> C["Liquid pipe side"]
    D["Indoor unit"] --> E["Gas pipe side"]
    D --> F["Liquid pipe side"]
| Outer Diameter | Torque (kgf·cm) |
| ø6.35 mm | 140~170 |
| ø9.52 mm | 250~280 |
| ø12.70 mm | 380~420 |
| ø15.88 mm | 440~480 |
| ø19.05 mm | 990~1210 |
| ø22.23 mm | 990~1210 |
- Connect the charging hose of the low-pressure side of manifold gauge to a gas service port as seen in the picture.
- Open the valve of the low pressure side of manifold gauge counterclockwise.
- Purge the air in the connected pipes using the vacuum pump for about 15 minutes.
▶ Make sure that pressure gauge shows -0.1MPa(-76cmHg) after about 10 minutes.
This procedure is very important to avoid a gas leak.
▶ Close the valve of the low pressure side of manifold gauge clockwise.
▶ Turn off the vacuum pump.
▶ Check for 2 minutes if there is any pressure change.
▶ Remove the hose of the low pressure side of manifold gauge.
- Set a valve cork of liquid and gas service port to the open position.
- Mount the valve stem nuts and the service port cap to the valve, and tighten them at the torque of 183kgf·cm with a torque wrench.
- Check for a gas leak paying particular attention to the 3-way valve's stem nuts and to the service port cap.

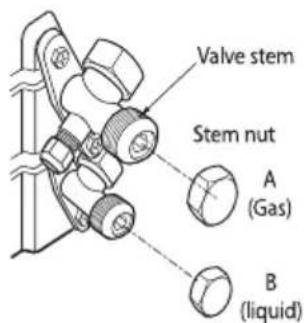
Purging the connected pipes
Adding Refrigerant
Add refrigerant charge according to table below:
If you use a pipe longer than the one given,
'A'g of refrigerant R22 must be added for each extra meter.
If you use a pipe shorter than the one given,
The purge time is normal.
| Model | A |
| AR12JC***** | 20 |
| AR18JC***** | |
| AR24JC***** | 25 |
Refer to the Service Manual for further details.

• The remaining air in the Refrigeration cycle, which contains moisture, may cause malfunction on the compressor.
• Always contact the service center or a professional installation agency for product installation.
Performing the gas leak tests
Make sure to check for gas leaks before completing the installation process (connecting the assembly pipe and hose between indoor unit and outdoor unit, insulating the cables, hose and pipe, and fixing the indoor unit to the installation plate).
To check for gas leaks on the outdoor unit,
Check the valve A and B using a leak detector.
To check for gas leaks on the indoor unit,
Check the flare nut C and D using a leak detector.

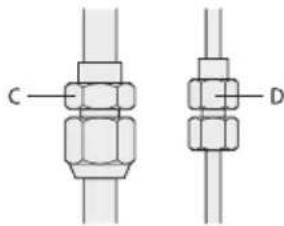
natural_image
Technical diagram of two mechanical fasteners labeled C and D, showing bolted joint configurations (no text or symbols beyond labels)Leak test with nitrogen (before opening valves)
In order to detect basic refrigerant leaks, before recreating the vacuum and recirculating the R22, it's responsible of installer to pressurize the whole system with nitrogen (using a cylinder with pressure reducer) at a pressure above 40 bar (gauge).
Leak test (after opening valves)
Before opening valves, discharge all the nitrogen from the system and create vacuum according to page 39.
After opening valves, check leaks using a leak detector for refrigerant.
Pump down (before disconnecting the refrigerant connections for unit repair, removal or disposal)
Pump-down is an operation intended to collect all the system refrigerant in the outdoor unit.
This operation must be carried out before disconnecting the refrigerant tubing in order to avoid refrigerant loss to the atmosphere.
▶ Shut off the liquid valve with the Allen wrench.
▶ Turn the system on in cooling with fan operating at high velocity.
(Compressor will immediately start, provided 3 minutes have elapsed since the last stop).
▶ After 2 minutes of operation, shut the suction valve with the same wrench.
▶ Turn the system off and switch mains supply off.
▶ Disconnect tubing. After disconnection, protect valves and tubing ends from dust.
▶ Compressor damage may occur if run at a negative suction pressure.
Fixing the indoor unit in place
Perform the following work on the area where gas leak test was done priorly.
After checking for gas leaks in the system, insulate the pipe, hose and cables.
Then place the indoor unit on the installation plate.
- To avoid condensation problems, wrap foam insulation (as shown in the figure) on a part without insulation on the end of the pipes.
- Wind the pipe, assembly cable and drain hose with vinyl tape.
- Place the bundle (the pipe, assembly cable and drain hose) in the lower part of the indoor unit carefully so it does not project from the rear of the indoor unit.
- Hook the indoor unit to the installation plate and move the unit to the right and left until it is securely in place.

- Make sure pipe does not move when you install the indoor unit on an installation plate.
- Wrap the rest of the pipe with vinyl tape.
- Attach the pipe to the wall using clamps (optional).


Fixing the outdoor unit in place
Install the outdoor unit in level on a stable base to avoid the generation of noise and vibration, especially when installing the unit close to a neighbor.
If you install the outdoor unit in a place exposed to strong winds or at a height, fix it to an appropriate support (wall or ground).

- Place the outdoor unit as indicated on the top of the unit to let the discharged air out properly.
- Fix the outdoor unit in level to an appropriate support using anchor bolts.
- If the outdoor unit is exposed to strong winds, install shield plates around the outdoor unit so that the fan can operate correctly.
| Model | X | Y |
| AR12J***** | 538 | 290 |
| AR18JC2**** | ||
| AR18JC3**** | 543 | 319 |
| AR18JC5**** | 660 | 340 |
| AR24J***** |

- Secure the rubber leg to prevent the generation of noise and vibration.
Outdoor unit installed on the wall by rack
- Ensure the wall will be able to suspend the weight of rack and outdoor unit;
• Install the rack close to the column as much as possible;
• Install proper grommet in order to reduce noise and residual vibration transferred by outdoor unit towards wall.

Smart Install mode
This model supports Smart Install mode which checks installation status to find out if there is any problem with any of the functions. Execute Smart Install mode after installation.
- Check the installation status of the air conditioner.
1) Check the power supply, service valve (if it's open), power cable of the indoor and outdoor unit and amount of additional refrigerant required for pipe extension.
2) Status of the indicator after supplying the power: Standby status
- When the air conditioner is in standby status, use the remote controller to start the Smart Install mode.
1) Press the [Set/Cancel or Cancel], [Mode], [Power] button simultaneously for 4 seconds.
▶ Smart Install mode can be operated only with the supplied remote controller.
▶ During the Smart install mode procedure, remote controller cannot be operated.


* Remote controller may be different (image/functions) depending on the model.
2) Smart Install mode in progress
• 88 Display: Progress will be displayed in 0\~99.
- LED Display : Indicator on the indoor unit display will blink in sequence and then all indicators will blink. (This will be repeated.)
| TYPE | 88 Display | LED Display |
| Indoor unit indicator | 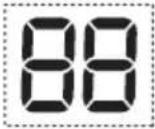 | 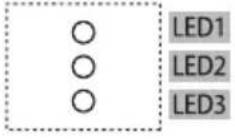 |
| ○ ○ |
* Display may be different depending on the model.
- Smart Install mode will end.
1) Smart Install mode will take approximately 7\~13 minutes. (Actual time may be different depending on the model.)
2) When Installation is successful: Smart Install mode will end with ringing sound and the air conditioner will be in standby status. (Error message will not be displayed on the indoor unit indicator and the remote controller and buttons on the indoor unit will work normally.)
3) When installation is not successful: Smart Install mode will end and error message will be displayed on the indoor unit display.

- Take necessary measures when error occurs.
- Refer to the service manual for necessary measures for each error that occurs.
- Use the product after taking care of the error that occurs.
| Error indicator | Error | Measures to take by an installer | |||
| 88Display | LED Display | ||||
| LED 1 | LED 2 | LED 3 | |||
| E 101 | ○ | ● | ● | Communication Error between Indoor and outdoor unit | 1. Check the connection wire between indoor and outdoor unit. (whether the power cable and communication cable is crossed or not) |
| E 121 | ○ | ● | ○ | Error on indoor temperature sensor | 1. Check the connection of the connector |
| E 122,E 123 | ● | ● | ○ | Error on indoor heat exchanger | 1. Check the connection of the connector |
| E 154 | ○ | ○ | ● | Error on indoor fan motor | 1. Check the connection of the connector2. Remove foreign substance (Check for the cause that restrains motor) |
| 88 display and all LED blinks | ● | ● | ● | EEPROM/Option error | 1. Re-set options |
| E 162,E 163 | |||||
| E422 | ● | ○ | ● | Refrigerant flow blocking Error | 1. Check if the service valve is completely open.2. Check if there's any blockage in the refrigerant pipe which connects indoor and outdoor unit.3. Check for refrigerant leak. |
| E554 | ● | ○ | ● | Lack of Refrigerant (For Inverter model only) | 1. Check if sufficient amount of additional refrigerant was charged for the pipe length that exceeds 7.5 m.2. Check for refrigerant leak between valve and pipe connection. |
| * Above LED pattern is displayed when there's error is occurred on outdoor unit. Check the LED display on outdoor unit for the details. | |||||
Final Check and Trial Operation
To complete the installation, perform the following checks and tests to ensure that the air conditioner operates correctly.
Check the followings:
• Strength of the installation site
• Tightness of pipe connection to detect gas leak
• Electric wiring connection
• Heat-resistant insulation of the pipe
- Drainage
• Grounding conductor connection
- Correct operation (follow the steps below)

1. Press the Power ⏻ button and check the following:
▶ The indicator on the indoor unit lights up.
▶ The airflow blade opens and the fan gears up for operation.
2. Press the Mode button to select Cool mode.
In Cool mode, use Temp + or - button and set the temperature at 16°C.

NOTE
- Approximately 3\~5 minutes later, outdoor unit will start to operate and the Cool air will blow out.
• After 12 minutes of stationary condition check the indoor unit air treatment:
Cooling mode (indoor unit check) → Inlet air temp. - Outlet air temp : From 10°K to 12°K (indicative delta T)
3. Press the Air swing (≡ button and check the following:
▶ The airflow blades work properly.
4. Press the Power ⏻ button to stop the operation.

NOTE
- When you complete the installation successfully, hand over this manual to the user for storage in a handy and safe place.
Pump down procedure (when removing the product)
- Turn on the air conditioner and select Cool mode to run the compressor for 3 minutes.
- Release the valve caps on High and Low pressure side.
- Use L wrench to close the valve on the high pressure side.
- Approximately 2 minutes after, close the valve on the low pressure side.
- Stop operation of the air conditioner.
- Disconnect the pipes.
How to connect your extended power cables
Items to prepare
(compressor and insulation tape should be prepared by an installation technician.)
| Tools | Crimping plier | Connection sleeve (mm) | Insulation tape | Contraction tube (mm) |
| Spec | MH-14 | 20x∅7.0(HxOD) | Width 18mm | 50x∅8.0(LxOD) |
| Shape |  |  |  |  |
- As shown in the figure, peel off the shields from the rubber/wire of the power cable.
- Peel off 20 mm of the wire shields of the tube installed already.

• After peeling off the tube wire, you must insert a contraction tube.
-
Insert both sides of core wire of the power cable into the connection sleeve.
-
Using a compressor, compress the two points and flip it over and compress another two points in the same location.
-
The compression dimension should be 8.0.
-
After compressing it, pull both sides of the wire to make sure it is firmly pressed.
-
Wrap it with the insulation tape twice and position your contraction tube in the middle of the insulation tape.
- Apply heat to the contraction tube to contract it.
- After tube contraction work is completed, wrap it with the insulation tape to finish.

WARNING
- In case of extending the electric wire, please DO NOT use a round-shaped pressing socket.
- Incomplete wire connections can cause electric shock or a fire.


This page is intentionally left blank.
This warranty is not applicable in any of the following cases :
- The warranty card is not filled and mailed back / submitted to the nearest Authorised Service Center of the company within 2 weeks of purchase.
- The completed warranty card is not presented to the service engineer at the time of repairs being undertaken / requested.
- The product is not purchased from an Authorised Samsung Sales Dealer.
- The product purchased is not used according to instructions given in the INSTRUCTION MANUAL, as determined by company personnel.
- Defects caused by improper use, as determined by the authorised service center / company personnel.
- Modifications or alterations of any nature made in the circuitry by the purchaser or unauthorized personnel, as determined by the company personnel.
- The product is being used for commercial purpose.
- Site (premises where the product is kept) conditions that do not confirm to the recommended operations of the machine/unit.
- The original serial number is removed, obliterated, or altered from the product.
- Defects due to causes beyond control like lightning, abnormal voltage, acts of God or while in transit to service center or to the purchaser's residence.
II. Defects caused by household pets, rats, cockroaches or any other animals or insects.
For any further information/assistance, please mail us on samsung.com/in/support
Samsung Service Network
Register for service at www.samsung.com/in Service helpline: samsung.com/in/support Or below Contact Centre Numbers
Customer Contact Center
1800 3000 8282
1800 266 8282
* For Demonstration / Installation / Service request kindly Contact Customer Care Center at : 1800 3000 8282, 1800 266 8282
* Please mail in queries to samsung.com/in/support
• For Demonstration / Installation / Service request kindly Contact Customer Care Center at :
1800 3000 8282
1800 266 8282
Warranty Card
CUSTOMER DETAILS CUM WARRANTY CARD
Customer copy (to be retained by customer)
Model Name
Product Serial No.
Date of purchase

Name
Address in full
Telephone No.
Dealer Name & Address
Dealer's signature with rubber stamp
Customer's signature & Date (I accept the terms & condition of warranty)
Warranty Conditions
*TERMS & CONDITIONS
- The warranty is confined to the first purchaser of the product only and is not transferable.
- Repairs under warranty period shall be carried out by the company authorized personnel only. The details of service centers / support required are available at the company website www.samsung.com/india or in the centralised helpline (1800 3000 8282, 1800 266 8282) from mobiles.
- For unit installed beyond municipal limits of the jurisdiction of the company's Authorised Service Center, it is the responsibility of the purchaser to contact the nearest authorized service center and bring the unit to the authorized service center at purchaser's cost and risk.
- Calls registered with the Centralised Helpline / Authorised Service Center, wherein only cleaning of the unit / parts in the unit due to dust gathering on portions of the unit, general explanations / returning, particular software not being read/installed, are not to be construed as defects. The company does not undertake responsibility on the quality of software being used by purchasers.
- In the event of repairs of any part/s of the unit, this warranty will thereafter continue and remain in force only for the unexpired period of the warranty.
The time taken for repair and in transit whether under the warranty or otherwise shall not be excluded from the warranty period. - Any change of address by the original purchaser shall be intimated to the concerned Authorised Service Center by the purchaser, and warranty will be applicable only after inspection of the unit and clearance of condition by Authorised Service Center personnel.
- In case of any damage to the product / misuse detected by the Authorised Service Center personnel, the warranty conditions are not applicable and repairs will be done subject to availability of parts and on a chargeable basis only.
- The company's obligation under this warranty shall be limited to repair or providing replacement of part/s only. The maximum claim/s if entertained by the company will be subject to the maximum retail price of the product purchased or the purchase price, whichever is lower.
- In the event of any unforeseen circumstance, and spares not being available the company's prevailing depreciation rules will be binding on the purchaser to accept as a commercial solution in lieu of repairs.
- In the event of the company offering EXTENDED WARRANTY period for any specific product / period, it is the RESPONSIBILITY OF THE PURCHASER to get the warranty card duly registered with the nearest Authorised Service Center of the company, within 2 weeks of purchasing under such an offer, at the purchaser's cost and risk only.
SAMSUNG INDIA ELECTRONICS PVT.LTD (hereinafter referred to as "the company") guarantees to the purchaser that this product carries a warranty for the period mentioned above, commencing from the date of purchase. The company will repair free of charge any part or parts of the product, if the defect is due to the faulty material or workmanship.
| Product | Warranty | |
| Period | Parts not covered | |
| Colour Television | 12 months | N/A |
| Refrigerator | Comprehensive: 12 monthsCompressor : 60 months | Plastic/Glassware,Gas Charging, ConsumableLight bulb/tube |
| Washing Machine | 24 months | Outer Steel Casing • Top Lid |
| Room Airconditioner | Comprehensive: 12 monthsCompressor : 60 months | Air Filter • Front Grill • Gas ChargingConsumable |
| Audio/DVD/VCD | 12 months | Connector & Antenna Wires |
| Microwave Oven | 12 months | Main Door, Door Plastic. |
| Colour Monitors/PC Monitors | 1 year PDP monitors3 year TFT monitors | DATA/VGA Cables |
| Laser Printers | 1 year | Consumables (Tone, Cartages) |
| Mobile Phones | 1 year (6Mths, Battery) | |
| Optical Disc Drives | 1 year | |
| Projector | 1 year | Lamp(180 Days after Purchasing and 600 Hours of Use Limited Warranty Period) |
| Digital Photo Frame | 1 year | |
This page is intentionally left blank.
This page is intentionally left blank.
This page is intentionally left blank.
SAMSUNG

Correct Disposal of This Product (Waste Electrical & Electronic Equipment)
This marking on the product & accessories literature indicates that the product and its electronic accessories (e.g. charger, headset, USB cable) should not be disposed of with other household waste at the end of their working life. To prevent possible harm to the environment or human health from uncontrolled waste disposal, please separate these items from other types of waste and recycle them responsibly to promote the sustainable reuse of material resources House hold users should contact either the retailer where the y purchased this product, or their local government office, for details of where and how they can take these items for environmentally safe recycling.
Business user should contact their supplier and check the terms and conditions of the purchase contract. This product and its electronic accessories should not be mixed other commercial wastes for disposal.
For more information on safe disposal and recycling visit our website www.samsung.com/in or contact our customer care numbers.
QUESTIONS OR COMMENTS?
| COUNTRY | CALL | OR VISIT US ONLINE AT |
| INDIA | 1800 3000 82821800 266 8282 | www.samsung.com |
- Air Conditioner
- user & installation manual
- Features of your new air conditioner
- Cool Summer Offer
- Cost Efficient System
- Look for Everywhere
- good' sleep function
- S- Plasma ion function
- Contents
- USING PARTS
- INSTALLATION PARTS
- Safety precautions
- FOR INSTALLATION | ⚠ WARNING
- FOR INSTALLATION ⚠️ CAUTION
- FOR POWER SUPPLY
- CAUTION
- FOR USING
- WARNING
- FOR CLEANING
- Checking before use
- Operation ranges
- Maintaining your air conditioner
- Smart install
- Checking the name of the parts
- Main parts
- Display
- Checking the remote controller
- Battery changing time
- Storing the remote controller
- Basic function
- Auto
- Cool
- Dry
- Fan
- Heat
- Adjusting the air flow direction
- Vertical air flow
- Horizontal air flow
- Using the Turbo function
- good' sleepmode
- When the air conditioner is on and in cool mode
- Press the good' sleep button on the remote controller.
- Press the good' sleep button to set the time.
- Press the Set/Cancel button to active it on.
- Temperature and fan speed changes in good' sleep mode
- Setting the On/Off timer
- Setting On timer while the air conditioner is off / Off timer while the air conditioner is on
- Setting On timer
- Setting Off timer
- Using the Smart Saver function
- Using the SPi function < FOR SPi MODEL >
- Using the Auto Clean function
- Press the Auto Clean button.
- When the air conditioner is turned off,
- When the air conditioner is turned on,
- Cancel Press the Auto Clean button once again.
- Cleaning the air conditioner
- Cleaning the indoor unit
- Cleaning the outdoor unit heat exchanger
- Opening the panel
- Removing the Air filter
- Cleaning the air filter
- Maintaining the air conditioner
- Trouble shooting
- General information
- Installing the unit
- Power supply line, fuse or circuit breaker
- Choosing the installation location
- Indoor unit
- Outdoor Unit
- Space Requirements for Outdoor Unit
- When installing 1 outdoor unit
- When installing more than 1 outdoor unit
- Accessories
- Tools required for installation
- General Tools
- Tools for test operations
- Fixing the installation plate
- If you fix the indoor unit on a window frame
- If you fix the indoor unit on a gypsum board
- Connecting the assembly cable
- Connecting the cable
- Connect the cables to the terminals as seen in the picture.
- Connect the grounding conductor to the grounding terminals.
- Close the terminal board cover by tightening the screw carefully.
- ■ Wire connecting the indoor unit terminal blocks
- Installing and connecting the assembly pipe of the indoor unit
- Purging the indoor unit
- Remove the caps at the end of each pipe.
- Cutting or extending the pipe
- Installing and connecting the drain hose of the indoor unit
- Drain hose installation
- Changing direction of the drain hose
- Purging the connected pipes
- Adding Refrigerant
- Performing the gas leak tests
- Leak test with nitrogen (before opening valves)
- Leak test (after opening valves)
- Pump down (before disconnecting the refrigerant connections for unit repair, removal or disposal)
- Fixing the indoor unit in place
- Fixing the outdoor unit in place
- Outdoor unit installed on the wall by rack
- Smart Install mode
- Final Check and Trial Operation
- Check the followings:
- Press the Power ⏻ button and check the following:
- Press the Mode button to select Cool mode.
- Press the Air swing (≡ button and check the following:
- Press the Power ⏻ button to stop the operation.
- Pump down procedure (when removing the product)
- How to connect your extended power cables
- This page is intentionally left blank.
- This warranty is not applicable in any of the following cases :
- Samsung Service Network
- Register for service at www.samsung.com/in Service helpline: samsung.com/in/support Or below Contact Centre Numbers
- CUSTOMER DETAILS CUM WARRANTY CARD
- Warranty Conditions
- SAMSUNG
- Correct Disposal of This Product (Waste Electrical & Electronic Equipment)
- QUESTIONS OR COMMENTS?
Prekės ženklas : SAMSUNG
Modelis : AR18JC5TFURNMD
Kategorija : Oro kondicionierius