MSH30T/ENC - Garsiakalbis Penton - Nemokama naudojimo instrukcija
Raskite įrenginio instrukciją nemokamai MSH30T/ENC Penton PDF formatu.

Naudotojų klausimai apie MSH30T/ENC Penton
0 klausimas apie šį prietaisą. Atsakykite į tas, kurias žinote, arba užduokite savo.
Užduokite naują klausimą apie šį prietaisą
Atsisiųskite instrukciją savo Garsiakalbis PDF formatu nemokamai! Raskite savo instrukciją MSH30T/ENC - Penton ir vėl perimkite savo elektroninį įrenginį. Šiame puslapyje skelbiami visi dokumentai, reikalingi jūsų įrenginio naudojimui. MSH30T/ENC prekės ženklo Penton.
NAUDOJIMO INSTRUKCIJA MSH30T/ENC Penton
MUSIC HORN LOUDSPEAKERS
MSH30T/EN MSH30TENC
INSTALLATION INSTRUCTIONS
EN54-24:2008
Certificate No: 0359-CPD-0166 TYPE B
- LOUDSPEAKER ENCLOSURE
- REFERENCE AXIS
- REFERENCE PLANE
- HORIZONTAL PLANE

Circuit Diagram
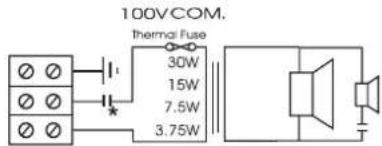
MSH30T/EN
MSH30T/ENC
* with capacitor
natural_image
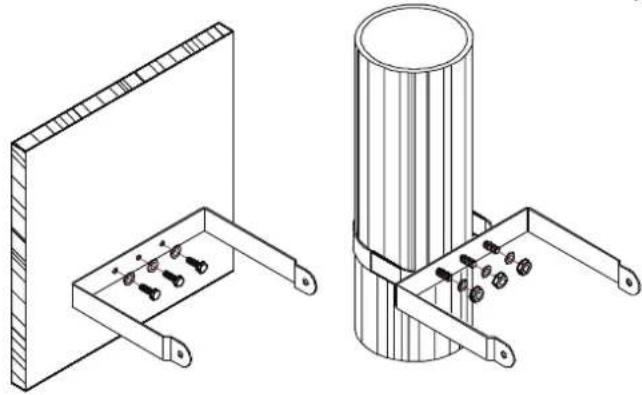
Technical line drawing of two mechanical components: a rectangular plate and a cylindrical rod with mounting brackets (no text or symbols)- Remove the "U" bracket from the speaker. Align the bracket and mark the fixing points. Fix the bracket using suitable fixings (Not supplied).
natural_image
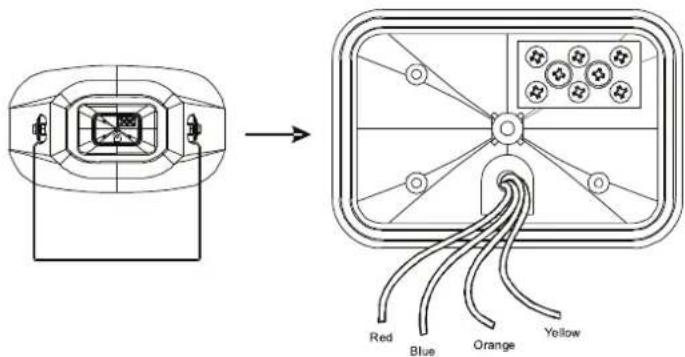
Technical line drawing of a mechanical assembly with mounting bracket and housing (no text or symbols)- Around the inner section of the chamber where the back lid was removed a rubber gasket is located; please make sure that it is in place when re-fitting the back lid to avoid water penetration.
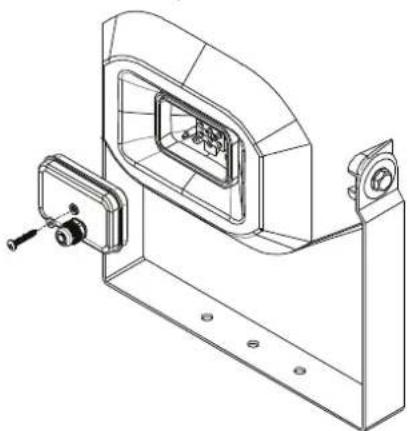
- Re-fit the speaker to the "U" bracket. Position the speaker to the desired angle then tighten the fixings to secure in place.
- On removing the back lid of the Horn you will observe a 3 way ceramic terminal block that is connected to the 100v line transformer via a multi core cable. To select the required tapping select the appropriately coloured core and terminate into the ceramic block. Please see instructions detailed on the back of the lid to match the colour with the tapping value which runs from 30 watts to 3.75 watts.
- On selecting the required tapping the installation cable can be fitted via a suitably rated gland into the single 20mm gland entry provided on the back lid.
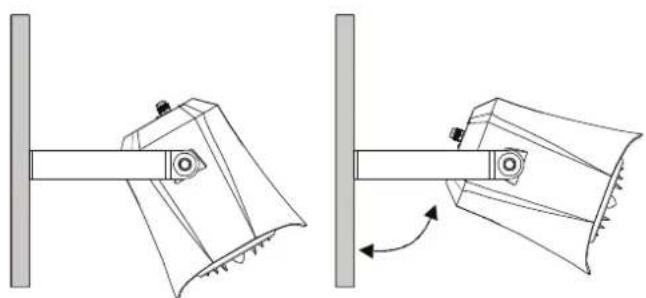
natural_image
Mechanical assembly diagram showing two configurations of a rotating mechanical component mounted on a vertical post (no text or symbols present)- Before connecting the speaker circuit to the power amplifier we strongly advise that the impedance of the circuit is checked to ensure it is fault free in order to prevent damage to the speaker and or amplification.