
G-Class (2025) - 112 Mercedes-Benz - Panduan pengguna gratis
Temukan panduan perangkat secara gratis G-Class (2025) Mercedes-Benz dalam format PDF.


Pertanyaan pengguna tentang G-Class (2025) Mercedes-Benz
0 pertanyaan tentang perangkat ini. Jawab yang Anda tahu atau ajukan milik Anda sendiri.
Ajukan pertanyaan baru tentang perangkat ini
Unduh instruksi untuk 112 dalam format PDF gratis! Temukan panduan Anda G-Class (2025) - Mercedes-Benz dan ambil kembali perangkat elektronik Anda. Di halaman ini diterbitkan semua dokumen yang diperlukan untuk penggunaan perangkat Anda. G-Class (2025) merek Mercedes-Benz.
PANDUAN PENGGUNA G-Class (2025) Mercedes-Benz
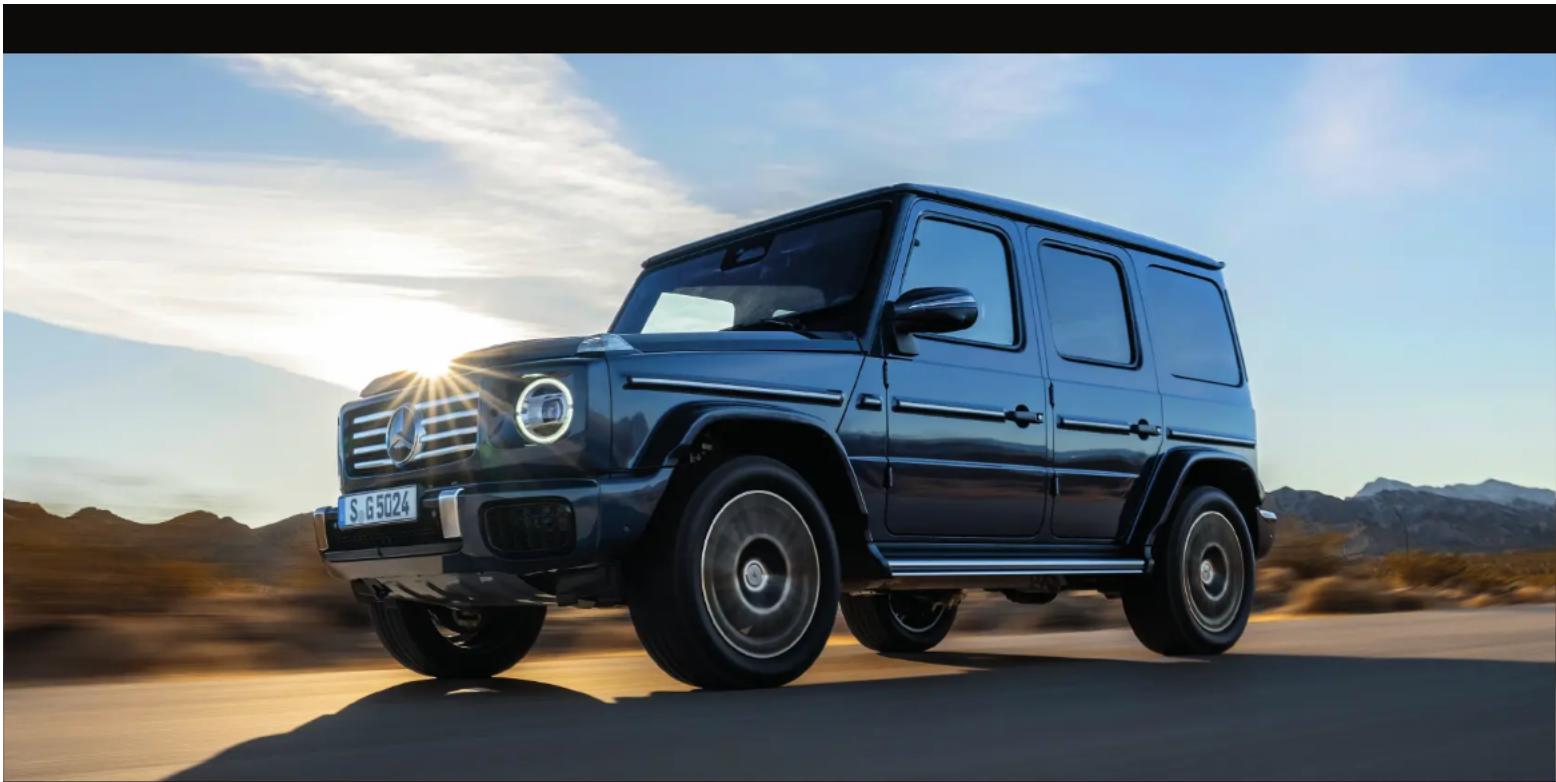
G-Class
Buku Panduan Pemilik +
Mercedes-Benz


Tahukah Anda?
Untuk memenuhi semua kebutuhan, buku panduan operator Anda tersedia dalam berbagai format. Selain PDF ini, opsi berikut terbuka untuk Anda:

Digital - di dalam kendaraan
Temukan Buku Panduan Pemilik di sistem multimedia di bawah Preferensi. Mulailah dengan Mulai Cepat dan temukan tips yang berguna.

Digital - di Internet
Anda dapat menemukan Buku Panduan Pemilik di beranda Mercedes-Benz https://mb4.me/CSS.

Cetak di dalam kendaraan
Di sini Anda akan menemukan informasi cetak tentang pengoperasian kendaraan Anda. Tergantung pada negara, informasi cetak tambahan mungkin disertakan.

Digital - sebagai Aplikasi
Buku Panduan Pemilik tersedia gratis dari toko aplikasi umum.
Apple iOS Android
14
Peringatan airbag penumpang depan

Perhatikan bab "Anak-anak di dalam kendaraan".

PERINGATAN
Risiko cedera atau cedera fatal jika airbag penumpang depan aktif. Jika airbag penumpang depan aktif, anak di kursi penumpang depan dapat terbentur oleh airbag penumpang depan saat kecelakaan.

JANGAN PERNAH menggunakan kursi pengaman anak yang menghadap ke belakang di kursi yang dilindungi oleh AIRBAG AKTIF di depannya, KEMATIAN atau CEDERA SERIUS pada ANAK dapat terjadi.


Selamat datang di dunia Mercedes-Benz
Sebelum berkendara pertama kali, harap baca Buku Panduan Pemilik ini dengan saksama dan kenali kendaraan Anda. Demi keselamatan Anda sendiri dan umur pakai kendaraan yang lebih lama, ikuti instruksi dan peringatan dalam Buku Panduan Pemilik ini. Kegagalan untuk melakukannya dapat menyebabkan cedera pribadi atau kerusakan pada kendaraan.
FITUR PERALATAN ATAU PENANDAAN PRODUK KENDARAAN ANDA MUNGKIN BERBEDA DARI ISI YANG DIJELASKAN DALAM BUKU PANDUAN PEMILIK. BUKU PANDUAN PEMILIK MENJELASKAN ISI BERIKUT:
- Model dan peralatan standar serta khusus yang tersedia pada saat Buku Panduan Pemilik ini diterbitkan.
- Model dan peralatan standar serta khusus yang hanya tersedia di negara tertentu.
- Model dan peralatan standar serta khusus yang baru akan tersedia di kemudian hari.
Harap diperhatikan bahwa kendaraan Anda mungkin tidak dilengkapi dengan semua fitur yang dijelaskan. Ini juga berlaku untuk sistem dan fungsi yang berkaitan dengan keselamatan. Dalam kasus tertentu, kendaraan Anda mungkin berbeda dari yang ditunjukkan dalam deskripsi dan ilustrasi.
MERCEDES-BENZ TERUS MENGEMBANGKAN KENDARAANNYA SECARA KONSTAN DAN OLEH KARENA ITU BERHAK UNTUK MEMPERKENALKAN PERUBAHAN DI BIDANG BERIKUT:
Desain Peralatan
• Fitur teknis
Informasi terkini dan lengkap tentang kendaraan Anda serta deskripsi fungsi-fungsi yang kemudian diunggah terdapat dalam Buku Panduan Pemilik Digital pada sistem multimedia.
Ilustrasi dalam Buku Panduan Pemilik ini menunjukkan kendaraan dengan setir kiri. Untuk kendaraan dengan setir kanan, tata letak bagian kendaraan dan elemen kontrol berbeda sesuai.
Perjanjian pembelian asli kendaraan Anda mencakup daftar fitur perlengkapan kendaraan Anda pada saat pengiriman.
DOKUMEN BERIKUT ADALAH KOMPONEN KENDARAAN:
Buku Panduan Pemilik Digital pada sistem multimedia, Buku Panduan Pemilik cetak, Buku servis, • Manual tambahan terkait perlengkapan tertentu, • Dokumen tambahan
Simpan dokumen-dokumen ini di dalam kendaraan setiap saat. Pastikan semua dokumen berada di dalam kendaraan atau diserahkan saat penjualan atau penyewaan.
Untuk pertanyaan mengenai perlengkapan dan pengoperasian, hubungi pusat layanan Mercedes-Benz.

Pernyataan Penyangkalan
Versi online Buku Panduan Pemilik berikut ini menjelaskan semua model serta semua perlengkapan standar dan khusus kendaraan Anda. Perbedaan khusus negara mungkin terjadi di antara berbagai bahasa. Perhatikan bahwa kendaraan Anda mungkin tidak dilengkapi dengan semua fitur yang dijelaskan. Ini juga berlaku untuk sistem dan fungsi yang berkaitan dengan keselamatan.
Silakan hubungi dealer resmi Mercedes-Benz Anda untuk menerima Buku Panduan Pemilik cetak untuk model kendaraan dan tahun model kendaraan lainnya. Buku Panduan Pemilik Online adalah versi terkini. Kemungkinan variasi pada kendaraan Anda mungkin tidak diperhitungkan karena Mercedes-Benz terus memperbarui kendaraan dan perlengkapannya ke teknologi terbaru dan memperkenalkan perubahan dalam desain dan perlengkapan.
Silakan juga baca Buku Panduan Pemilik cetak, dokumen tambahan, dan Buku Panduan Pemilik digital di dalam kendaraan.
HAK CIPTA
Semua Hak Dilindungi. Semua teks, gambar, dan grafik tunduk pada hukum hak cipta dan hukum lain yang melindungi kekayaan intelektual. Mereka tidak boleh disalin untuk tujuan komersial atau untuk transmisi, maupun diubah dan digunakan di situs web lain.
G-Class - Buku Panduan Pemilik


Daftar Isi
PDF interaktif ini berfungsi seperti situs web – ketuk atau klik tombol untuk langsung melompat ke tempat yang Anda inginkan. Anda dapat kembali ke sini kapan saja melalui bilah navigasi di kiri atas.
| Symbols 7 | > | Opening and closing 169 | > | MBUX multimedia system 448 | > |
| Quick start and Tips 9 | > | Seats and stowing 192 | > | Maintenance and care | 601 |
| At a glance 72 | > | Light and sight 238 | > | Breakdown assistance | 625 |
| Digital Owner's Manual 87 | > | Climate control 257 | > | Wheels and tyres | 648 |
| General notes 90 | > | Driving and parking 270 | > | Technical data | 669 |
| Occupant safety 119 | > | Driver display 418 | > | Display messages and warning/indicator lamps | 788 |
| Children in the vehicle 141 | > | MBUX Voice Assistant 437 | > | Index | 845 |
G-Class - Buku Panduan Pemilik
Simbol

This interactive PDF works like a website - tap or click a button to jump straight to where you want to go. You can return here at any time via the navigation bar at the top left.
G-Class - Owner's Manual
Symbols
In this Owner's Manual, you will find the following symbols:

PERINGATAN
Danger due to not observing the warning notices
Warning notices draw your attention to hazards that may endanger your health or life, or the health or life of others.
▶ Observe the warning notices.
ENVIRONMENTAL NOTE
Environmental damage due to failure to observe environmental notes
Environmental notes include information on environmentally responsible behaviour or environmentally responsible disposal.
▶ Observe environmental notes.

CATATAN
Damage to property due to failure to observe notes on material damage
Notes on material damage inform you of risks which may lead to your vehicle being damaged.
▶ Observe notes on material damage.
These symbols indicate useful instructions or further information that could be helpful to you.
Instruction
(→ page) Further information on a topic
Display Display in the central display
Highest menu level, which is to be selected in the multimedia system
Relevant submenus, which are to be selected in the multimedia system
* Indicates a cause


G-Class - Owner's Manual
> Quick start and Tips

< Panduan memulai cepat dan tips
This interactive PDF works like a website - tap or click a button to jump straight to where you want to go. You can return here at any time via the navigation bar at the top left.
Seats 10 > MBUX Voice Assistant 17 > Preparing for a holiday 41 > Children in the vehicle 11 > ENERGIZING Packages 18 > Luggage and loading 27 MULTIBEAM LED 12 > Driving Assistance package 19 > Ice and snow 58 Touch-sensitive controls 13 > Parking Package 20 > Help in the event of a breakdown 59 Radio 14 > Destination entry navigation 21 > Expert knowledge 65 Wi-Fi hotspot 15 > New multimedia system features 22 > Connecting a mobile phone 16 > At the filling station 30 >
G-Class - Owner's Manual
> Quick start and Tips Seats
< Kursi
Adjusting the seats

1 Head restraint height
2 Seat backrest inclination
3 Seat height
4 Seat cushion length
Seat cushion inclination
6 Seat fore-and-aft posi-
tion


Anak-anak di dalam kendaraan
Mengangkut anak-anak dengan aman di dalam kendaraan
When children are travelling in the vehicle, always observe the following ( → page 144)
▶ Important warning stickers ( → page 145)
▶ Recommended child restraint systems ( → page 152)
Suitable seats in the vehicle for fitting a child restraint system ( → page 142)
Approval categories for child restraint systems ( → page 151)
Suitability of seats for securing ISOFIX/LATCH child restraint systems ( → page 155)
\- Fitting the ISOFIX child restraint system on the rear seat ( → page 160)
Suitability of seats for securing i-Size child restraint systems ( → page 156).
- Fitting the i-Size child restraint system on the rear seat ( → page 160)
Securing a Top Tether belt ( → page 162)
Suitability of seats for securing belt-secured child restraint systems ( → page 156)
- Notes on vehicles without automatic front passenger airbag deactivation ( → page 150)
- Notes on rear-facing and front-facing child restraint systems on the front passenger seat ( → page 148)
- Securing the child restraint system with the seat belt ( → page 163)
▶ Automatic front passenger airbag deactivation ( → page 148)
▶ Child safety locks for the rear side windows ( → page 166)
▶ Child safety locks for the rear doors ( → page 164)
G-Class - Owner's Manual
> Quick start and Tips MULTIBEAM LED
MULTIBEAM LED
Fungsi adaptif, MULTIBEAM LED
The MULTIBEAM LED headlamps adapt to the weather and the situation on the road and provide advanced functions for improving the illumination of the road.
SISTEM INI TERDIRI DARI FUNGSI-FUNGSI BERIKUT:
• Active headlamps ( → page 242)
• Motorway mode ( → page 242)
• Bad weather light ( → page 243)
• City lighting ( → page 243)
• Enhanced fog light function ( → page 242)
Mengaktifkan atau menonaktifkan MULTIBEAM LED:
- Briefly press 📋 on the multimedia system display.
- Select Settings.
- Select Lights.
• Select MULTIBEAM LED.
• Activate or deactivate Dynamic low beam.


G-Class - Owner's Manual
> Quick start and Tips Touch-sensitive controls
Kontrol sensitif sentuhan
Overview of touch-sensitive controls

Control panel:
Driver display
Active Distance Assist DISTRONIC and variable limiter
2 Control panel for the MBUX multimedia system
MBUX multimedia system touchpad
Observe the notes on the touch-sensitive controls ( → page 95).


G-Class - Owner's Manual
> Quick start and Tips Radio
Radio
Mengoperasikan radio
Untuk beralih ke radio:
- Briefly press [icon] in the multimedia system display.
Tap on [↑].
Untuk mengatur pita frekuensi:
- Briefly press in the multimedia system display.
Tap on □.
• Select a frequency band or a favourite.
Untuk menyetel stasiun radio:
- Briefly press in the multimedia system display.
Tap on ↑.
- Swipe to the left or right on the control element or select a radio station.
Untuk memanggil daftar stasiun radio:
- Briefly press in the multimedia system display.
Tap on
Select :≡.
Untuk mencari stasiun radio menggunakan nama stasiun atau entri frekuensi:
- Briefly press in the multimedia system display.
Tap on [↑].
Select
• Enter a station name or frequency.
- Select a station.
Untuk menyimpan stasiun radio:
- Briefly press in the multimedia system display.
Tap on [↑].
- Select [ ☆ ].
Untuk mengatur peningkatan volume layanan informasi lalu lintas:
- Briefly press in the multimedia system display.
Tap on [icon].
- Select System.
- Select Audio.
• Select Navigation & traffic announcements.
• Set a value for Traffic announce. vol. increase.


G-Class - Owner's Manual
> Quick start and Tips Wi-Fi hotspot
Hotspot Wi-Fi
Menyiapkan hotspot Wi-Fi
UMUMNYA, DUA JENIS KONEKSI WI-FI TERSEDIA:
• Using the multimedia system as a Wi-Fi hotspot
The multimedia system serves as a Wi-Fi hotspot for mobile communication devices such as a smartphone or tablet PC.
The data volume of the vehicle or an already connected tethering device is used for the data connection.
Data volume must be purchased for a fee via the Mercedes-Benz Portal. The use of the vehicle data tariff by external devices is not available in all countries.
- Using a mobile communication device as a Wi-Fi hotspot (tethering)
An external Wi-Fi hotspot is accessed for the Internet connection of the multimedia system.
The data tariff of the mobile communication device via Data package is used for the data connection.
PILIHAN UNTUK MENYIAPKAN KONEKSI:
• QR code
The connection is set up by scanning the QR code shown on the multi-media system.
NFC
The connection is set up by placing the mobile communication device in the NFC interface of the vehicle.
\- Security key
The connection is established by entering the security key displayed on the multimedia system.

G-Class - Owner's Manual
> Quick start and Tips Connecting a mobile phone
Menghubungkan ponsel
Menghubungkan ponsel
Mengaktifkan Bluetooth*:
• Make sure that the mobile phone Bluetooth ® is switched on.
Tap on the central display or media display.
- Select Settings.
- Select System.
• Select Internet and Bluetooth.
• Activate Bluetooth*.
Mencari ponsel:
Tap on [he] the central display or media display.
- Select Phone.
Select
- Select Devices.
- Select Devices.
- Select Connect new device.
Mengotorisasi ponsel:
\- Select a mobile phone.
A code is displayed in the multimedia system and on the mobile phone.
If the codes match, confirm the code on the mobile phone.


G-Class - Owner's Manual
> Quick start and Tips MBUX Voice Assistant
Asisten Suara MBUX
Mengoperasikan Asisten Suara MBUX
ANDA DAPAT MENGGUNAKAN ASISTEN SUARA MBUX UNTUK MENGOPERASIKAN FUNGSI-FUNGSI BERIKUT TERGANTUNG PADA PERLENGKAPAN KENDARAAN:
- Telephone
• Text message and e-mail
Navigation
Radio and media
- Vehicle functions
• Online functions
CONTOH PERINTAH SUARA YANG MUNGKIN:
• To operate the phone: Call my father.
• To manage e-mails: Show me my new e-mails.
• To operate the navigation: Search for an Asian restaurant, but not Japanese, in South London.
• To operate the radio: Which station am I currently listening to?
• To operate media: Play a similar track.
• To operate climate control: My feet are cold.
• To call up the weather: Will it be sunny tomorrow?
- To ask a general knowledge question: Who painted the picture "The Scream"?


G-Class - Owner's Manual
> Quick start and Tips ENERGIZING Packages
Paket ENERGIZING
Mengoperasikan ENERGIZING COMFORT
Untuk memulai program ENERGIZING:
- Briefly press [icon] in the multimedia system display.
- Select Comfort.
• Select ENERGIZING COMFORT.
- Select a programme and start with ▶.
Untuk mengonfigurasi program ENERGIZING:
- Select a programme.
- Select Settings.
- Switch the functions included in the programme on or off.
Untuk memulai Power Nap:
- Select Power Nap.
- Select ▶ for the desired seat.
Untuk memulai program pelatihan:
- Select Training.
- Select a programme and start with ▶.
Untuk memulai Tips:
- Select Tips.
- Select an area of the body and start with ▶.


G-Class - Owner's Manual
> Quick start and Tips Driving Assistance package
Paket Bantuan Mengemudi
Fungsi Paket Bantuan Mengemudi
Depending on availability for the respective country of use, the vehicle may be equipped with various functions which are provided to assist the driver. The vehicle is thus fitted with cameras and sensors to monitor the vehicle surroundings.
Active Distance Assist DISTRONIC ( → page 354)
You can watch an animation on this topic via the following link:
▶ Active Speed Limit Assist ( → page 361)
You can watch an animation on this topic via the following link:
Route-based speed adaptation ( → page 362)
▶ Active Brake Assist ( → page 369)
You can watch an animation on this topic via the following link:
▶ Active Steering Assist ( → page 366)
You can watch an animation on this topic via the following link:
▶ Active Emergency Stop Assist ( → page 368)
▶ Active Stop-and-Go Assist ( → page 363)
Blind Spot Assist with exit warning ( → page 377)
You can watch an animation on this topic via the following link:
▶ Active Lane Keeping Assist ( → page 379)


G-Class - Owner's Manual
> Quick start and Tips Parking Package
Paket Parkir
Fungsi Paket Parkir
Depending on availability for the respective country of use, the vehicle may be equipped with various functions which are provided to assist the driver with parking and manoeuvring. The vehicle is thus fitted with cameras and sensors to monitor the vehicle surroundings.
Depending on the equipment version, the following systems and functions are part of your Parking Package:
▶ Reversing camera: monitors the area behind the vehicle and relays an image of this area on the driver display ( → page 389).
360° camera: a system comprising four cameras which record the immediate vehicle surroundings and relay an image to the driver display ( → page 391).
Parking Assist PARKTRONIC: an electronic parking assistance system which monitors the area surrounding your vehicle and the distance to obstacles in the vicinity using ultrasound ( → page 398).
Active Parking Assist: an electronic parking assistance system which assists you when parking or exiting a parking space by changing gear, accelerating, braking and steering the vehicle ( → page 401).
You can watch an animation on this topic via the following link:
Trailer Manoeuvring Assist: Trailer Manoeuvring Assist assists you when reversing with a trailer. The reversing camera monitors the artic-
ulation angle between the vehicle and the trailer and adjusts it to a specified value. Trailer Manoeuvring Assist also limits your speed ( → page 410).

G-Class - Owner's Manual
> Quick start and Tips Destination entry navigation
- Memasukkan tujuan navigasi
Memasukkan tujuan navigasi
Briefly press [icon] in the multimedia system display. The home screen is shown.
Select Navigation.
Select
PILIH OPSI BERIKUT UNTUK MEMASUKKAN TUJUAN:
- Enter a POI, an address or a three-word address in the input line. Online search results for POIs (if available) may contain additional information, for example opening times and prices. The information is provided by an online map service.
You can find further information about three-word addresses at: http://what3words.com
• Select a destination suggestion.
Requirements:
The Navigation option is switched on in the user settings for Suggestions. The multimedia system has gathered sufficient data in order to show destination suggestions.
• Select Previous destinations.
Select a previous destination.
You can save the destination as a favourite.
- Select POIs.
Select a POI category, e.g. P or enter a POI name or POI category in the input line.
If search results are displayed, limit them with Filter, for example by search position or the desired travel time.
\- Select Contacts.
Requirements:
A mobile phone is connected to the multimedia system and contacts have been downloaded.
The contact contains a navigable address.
\- Enter the geocoordinates as latitude and longitude in the input line.
Example 1: 47°58'11"N 7°57'25"E (degrees, minutes, seconds and compass direction)
Example 2: 47.969722 7.956944 (decimal degrees)
• Select a destination on the map.
\- Select Favourites.
Requirements:
The destinations have been saved as favourites.
• Select Received destinations.
Requirements:
There is an Internet connection for receiving external destinations.
The destinations have been sent to the vehicle.

G-Class - Owner's Manual
> Quick start and Tips New multimedia system features
< Fitur baru sistem multimedia
Information about the telephone menu

Bluetooth® device name of the currently connected mobile phone/of the mobile phone
Bluetooth ® device name of the currently connected mobile phone/of the mobile phone (two phone mode)
3 Signal strength of the mobile phone network
Battery status of the connected mobile phone
5 Options
6 Messages
7 Calls up my devices
8 Numerical pad
9 Starts contact search
IKHTISAR MENU TELEPON
Via the telephone menu you can use the functions in connection with your mobile phone.
FUNGSI BERIKUT DAPAT DIGUNAKAN:
Call lists
- Contacts
- Messages
• Device manager
MENGGUNAKAN DAFTAR PANGGILAN
If your mobile phone supports the PBAP Bluetooth ® profile, the call lists from the mobile phone are displayed in the multimedia system.
FUNGSI BERIKUT TERSEDIA:
• Making calls from the call list
• Opening contacts on the call list
PESAN
In the message menu you can receive text messages and create and send them with the help of the MBUX voice assistant. In addition, you can conveniently use the read-aloud function during the journey.
PENGELOLA PERANGKAT
In the device manager, you can connect your mobile phone with the multimedia system.

G-Class - Owner's Manual
> Quick start and Tips New multimedia system features
You have the option of using your mobile phone alone in single telephone mode or together with another mobile phone in two phone mode.
MENGGUNAKAN KONTAK
If you permit the multimedia system to access the contacts in your mobile phone, you can use these in the vehicle. You can store up to 8,000 contacts.
OPSI BERIKUT TERSEDIA UNTUK ANDA MELALUI MENU KONTAK:
• Making telephone calls (calling a contact)
Navigation
• Composing messages with the help of the MBUX voice assistant
• Additional options
The contacts from your mobile phone can be downloaded automatically or manually.
MELAKUKAN PANGGILAN
When conducting a call, additional functions are available apart from making, accepting or rejecting a call. For example, you can switch between calls, conduct a call with several participants or conference calls.
It is also possible to accept or reject waiting calls. If you receive a call while already in a call, a message is displayed.
SELAMA PANGGILAN, ANDA DAPAT MENGAKTIFKAN FUNGSI BERIKUT:
- Microphone off
• Fade in the numerical pad to send DTMF tones
- Add a call
- Hands-free mode to transfer the call to the front or rear passenger compartment

• Privacy mode to transfer the call to the telephone or headphones
Informasi tentang navigasi

Navigation module (reduced view)
Route guidance active:
The navigation module shows the information relevant to the route in the zoomed-out view, e.g. the destination or a traffic delay
☒ Ends the current route guidance
Tapping opens the navigation module and displays the route overview ( → page 496)
Sets map orientation and map type
Calls up the telephone menu
Current vehicle position (vehicle symbol or arrow)
Calls up entertainment applications
Elevation and map scale ( → page 514)


G-Class - Owner's Manual
> Quick start and Tips New multimedia system features
⑦ Navigation window shows the next manoeuvre (zoomed out view) or the route monitor (zoomed in view)
Route guidance active: route monitor shows, e.g. route sections, upcoming driving manoeuvres with lane recommendations, destination, traffic delays, 3D images at motorway exits, online content
When you switch on the multimedia system or after selecting 📂, the digital map is shown.
The navigation system offers many options for destination entry, route planning and route guidance. The traffic situation is taken into account during route guidance. When using route guidance with augmented reality, additional information can be shown in a camera image before a turning manoeuvre. Services and apps help you reach the destination quickly, safely and in comfort.
After tapping on navigation module ① start destination entry via Ⓞ in the route overview. You can enter the POI, address or contact as the destination on-board or search online using a map service. Or you select a previous destination. The destination can be stored here as a favourite or be saved as an address for home and work. When the Allow destination suggestions option is switched on, the vehicle makes suggestions based on your visited navigation destinations. If external destinations and routes are received from apps or services, these are also available.
OPSI BERIKUT TERSEDIA UNTUK PERENCANAAN RUTE, MISALNYA:
- Route options:
e.g. avoid or use toll roads, tunnels, unpaved roads or areas
• Intermediate destinations
• Alternative routes
- Commuter route
• Automatic filling station and service station search
You can record and save routes then select or share them with a USB device.
Lane recommendations are shown during route guidance on multi-lane roads. When driving on a motorway, service facilities on the route ahead can be shown and used for route guidance.
The Live Traffic Information service takes the current traffic situation into account. The map can show the current traffic flow, traffic incidents or warning messages, e.g. before the end of traffic jams that pose a risk.
Hazardous situations on public roads are detected automatically by the vehicle via Car-to-X-Communication or these can be reported by the driver. The early warning makes it possible to adapt your driving characteristics in good time. Accidents, broken-down vehicles, weather hazards or a vehicle with activated hazard warning lights are shown on the map.
For route guidance with augmented reality, information objects such as arrows indicating a turn, street names and house numbers are shown in a video image during the driving manoeuvre or at traffic lights.
The map shows map data from the database or from an online map service. In small map scales, buildings are shown as realistic images. The online map update service makes possible the updating of the map data.
Weather information and data from other services can be shown on the map. Multi-storey car parks with the corresponding equipment, deliver data about the current occupancy and about parking charges, for example.
The options offered vary depending on the country, vehicle equipment and available services.

G-Class - Owner's Manual
> Quick start and Tips New multimedia system features

MODUL NAVIGASI (TAMPILAN DIPERLUAS) DENGAN RINGKASAN RUTE

Example: route guidance is active
① Enters an address or POI
Destination and time of arrival
beneath that the current distance to the destination and the chequered flag
Alternative routes
Searches for parking
5 Switches traffic information display on or off
⑥ Makes settings for View, Messages & tones and Route
Informasi tentang radio

Active frequency band
Station name or set frequency
Settings
Additional options
5 Switches on traffic reports
6 Station list
7 Search
Using the radio menu you can play a multitude of radio stations and use the Internet Radio TuneIn. Search for your preferred stations and save these as favourites or in station lists.
The function of TuneIn Internet radio is country-dependent.
Radio text: this function shows you the station name, the track and the artist for the song currently playing, for example.

G-Class - Owner's Manual
> Quick start and Tips New multimedia system features
DAB: with the DAB function, graphically formatted additional information about a station can be shown, e.g. logos, album covers, music tracks, programmes, news or also service information.
Traffic announcements: Traffic messages can be displayed by pressing TA.
Information on media

Album cover
2 Active media source
Track and artist
Active data storage medium and current track number/track in playback list
Random playback
6 Repeat
7 Settings
a Additional options
9 Previous or next track and fast rewind or fast forward
10 Additional categories
⑪ Playlists and categories
12 Media search
Controls playback
14 Timeline
Using the Media application, you can set and use the audio and video functions of your multimedia system. You can listen to music or look at videos, for example.
USB: Using the USBmenu, you can play back your own audio or video data from a data storage medium connected by USB.
Bluetooth*: using the Bluetooth menu, you can connect a Bluetooth* audio device with the multimedia system and play back the available tracks on the audio device. Connecting the device can be conveniently handled in the device manager, so you can complete all settings with just a few clicks.
Online music: the Online music menu allows you to access music streaming services.
Catatan tentang kenyamanan
The Comfort menu makes all the functions available that contribute to your comfort when driving or taking a break.
KENYAMANAN KURSI
The Seat menu allows you to flexibly adjust the contours of the seats to your needs by adjusting the side bolsters and lumbar support independently. You can save these settings in your Mercedes me profile, so they can be called up each time you drive. With the Seat kinetics function, you can start a programme that causes slight modifications of the seat position when you are driving. These modifications promote a healthy back.


G-Class - Owner's Manual
> Quick start and Tips New multimedia system features
PIJAT
In the Massage menu you will find the massage programmes that are available for your vehicle. By selecting the desired programme you start it directly and it runs for a period of approximately ten minutes, depending on the programme selected. With the High intensity function you can increase the effect of the massage programme.
CAHAYA AMBIEN
In the Ambient light menu you can set the colour and brightness for your ambient lighting. Using the Link zones function, the ambience, accent and impression zones can be regulated separately so that you can set the lighting of your vehicle individually.
Informasi tentang integrasi ponsel pintar
Using the Smartphone Integration menu, various applications are available that can bring the functions of your mobile phone to the multimedia system display. Operation can by carried out via the touchscreen or voice control, for example.
Only one mobile phone at a time can be connected via Smartphone Integration to the multimedia system. Also for use with two phone mode with Smartphone Integration, only one additional mobile phone can be connected using Bluetooth ® with the multimedia system.
Use Android Auto for mobile phones with the Android operating system and use Apple CarPlay ® with your iPhone ® . The full functionality of Android Auto and Apple CarPlay ® is only possible with an Internet connection.
Informasi tentang AMG Performance
Using the AMG Performance menu, you can call up information about the performance of your vehicle.

TERGANTUNG PADA KENDARAAN, MENU BERIKUT TERSEDIA:
- Energy flow
Visualisation of the energy flow in the vehicle
Consumption
Display of the current and average consumption values of the vehicle
Vehicle
Display of vehicle data
Engine
Display of engine data such as current power and torque
Drive
Display of current data of various drive elements such as current, voltage and temperature
Informasi tentang info kendaraan
You can have important vehicle information displayed in the Info menu. At a glance you will have an overview of vehicle and engine data or current consumption values, for example. In addition, you can call up the Digital Owner's Manual via the Owner's Manual menu item.
DATA KENDARAAN
CONTOH DATA BERIKUT AKAN DITAMPILKAN:
• Activity of the acceleration and brake pedal
• Activity of the suspension strut
- wheel angle
• G-force display for the linear and lateral acceleration

G-Class - Owner's Manual
> Quick start and Tips New multimedia system features
DATA MESIN
DATA BERIKUT DITAMPILKAN:
• Transmission oil temperature
• Engine/coolant temperature
Performance
Torque
- Boost pressure
DATA KONSUMSI
Depending on your driving style, this display shows the current and average fuel consumption. Together with the displays of vehicle and engine data, you can adapt your driving style to be as efficient and economical as possible.
Informasi tentang In-Car Office
Using the In-Car Office menu you can connect your online services with the multimedia system.
ANDA KEMUDIAN MEMILIKI BEBERAPA OPSI YANG TERSEDIA:
• Organising your meetings and telephone conferences.
• Managing your e-mails and appointments.
• Receive route guidance to the location of a meeting.
Informasi tentang MB Apps (Ekstra Digital)
BERBAGAI LAYANAN DAN FUNGSI ONLINE TERSEDIA MELALUI MENU MB APPS:
• Managing Digital Extras
• Using the dashcam
• Using the web browser to surf the Internet
You require a Mercedes me ID user account, and have to connect your vehicle with the user account, in order to be able to use services.
If the Mercedes-Benz App is available on a mobile phone, the vehicle link can be made via the displayed QR code.
Please not that the available features are country-dependent.
Informasi tentang pengaturan
In the Settings you can set the basic configuration for your multimedia system and the vehicle. You have access to all functions in this menu, from switching the driver assistance systems on and off to display and language settings.
PENGATURAN TERSTRUKTUR DALAM MENU BERIKUT:
- Assistance
Vehicle
Lights
System
MENU BANTUAN
With the Assistance menu you have direct access to the driver assistance systems which are installed in your vehicle and can either switch these on or off, or configure according to your wishes.
MENU KENDARAAN
DI SINI ANDA DAPAT MENGAKTIFKAN FUNGSI BERIKUT, MISALNYA:
• Automatic folding in of the outside mirrors when parking the vehicle

G-Class - Owner's Manual
> Quick start and Tips New multimedia system features
• Automatic adjustment of the seat and steering wheel, for comfortable entry and exit from the vehicle
• Automatic activation of the 360° camera when selecting reverse gear
MENU LAMPU
All the light settings can be carried out in the Lights menu. You can activate or deactivate the Intelligent Light System here, set for how long your vehicle should remain lit after parking or unlocking or switch the function off.
MENU SISTEM
All important settings for the multimedia system can be carried out in the System menu.
ANDA DAPAT MELAKUKAN PENGATURAN BERIKUT, MISALNYA:
• Setting the system language
• The configuration of Wi-Fi and Bluetooth®
• Setting of time and date


G-Class - Owner's Manual
> Quick start and Tips At the filling station
Di pom bensin
Mengisi bahan bakar kendaraan

PERINGATAN
Risk of fire or explosion from fuel
Fuels are highly flammable.
▶ Fire, naked flames, smoking and creating sparks must be avoided.
Before refuelling, switch off the vehicle and, if fitted, the stationary heater and keep switched off during filling.

PERINGATAN
Risk of injury from fuels
Fuels are poisonous and hazardous to your health.
Do not swallow fuel or let it come into contact with skin, eyes or clothing.
▶ Do not inhale fuel vapour.
▶ Keep children away from fuel.
▶ Keep doors and windows closed during the refuelling process.
If you or other people come into contact with fuel, observe the following:
▶ Immediately rinse fuel off your skin with soap and water.
If fuel comes into contact with your eyes, immediately rinse them thoroughly with clean water. Seek medical attention immediately.
If you swallow fuel, seek medical attention immediately. Do not induce vomiting.
▶ Change immediately out of clothing that has come into contact with fuel.

G-Class - Owner's Manual
> Quick start and Tips At the filling station

PERINGATAN
Risk of fire and explosion due to electrostatic charge
Electrostatic charge can ignite fuel vapour.
Before you open the fuel filler cap or take hold of the pump nozzle, touch the metallic vehicle body.
To avoid creating another electrostatic charge, do not get into the vehicle again during the refuelling process.

PERINGATAN
Risk of fire from fuel mixture
Vehicles with a diesel engine:
If you mix diesel fuel with petrol, the flash point of the fuel mixture is lower than that of pure diesel fuel.
While the vehicle is running, component parts in the exhaust system may overheat without warning.
▶ Never refuel using petrol.
▶ Never mix petrol with diesel fuel.


CATATAN
Damage caused by the wrong fuel
Vehicles with a petrol engine:
Even small amounts of the wrong fuel could result in damage to the fuel system, the engine and the emission control system.
▶ Refuel only with unleaded, sulphur-free spark-ignition engine fuel.
Petrol can contain up to 25 Vol.-% ethanol by volume.
▶ See the information label in fuel filler flap for compatible fuels.
Further information about compatible fuels can be obtained at a qualified specialist workshop.
Throughout Europe you can also find the compatibility labels on the fuel pump or pump nozzle suitable for your vehicle.
JANGAN PERNAH MENGISI BAHAN BAKAR DENGAN BAHAN BAKAR BERIKUT:
- Diesel
• Regular petrol with an octane number lower than 91 RON
• Petrol with more than 3% methanol by volume, e.g. M15, M30
• Petrol with metallic additives
If you have accidentally refuelled with the wrong fuel:
▶ Do not switch on the vehicle.

G-Class - Owner's Manual
> Quick start and Tips At the filling station
Consult a qualified specialist workshop.

CATATAN
Damage caused by the wrong fuel
Vehicles with a diesel engine:
Even small amounts of the wrong fuel could result in damage to the fuel system, the engine and the emission control system.
▶ Refuel using only sulphur-free diesel fuel.
In countries without sulphur-free diesel fuel, refuel using only low-sulphur diesel fuel with a sulphur content of less than 50 ppm.
JANGAN PERNAH MENGISI BAHAN BAKAR DENGAN BAHAN BAKAR BERIKUT:
- Petrol
- Marine diesel
- Heating oil
• Pure fatty acid methyl ester or vegetable oil
• Paraffin or kerosene
If you have accidentally refuelled with the wrong fuel:
▶ Do not switch on the vehicle.
Consult a qualified specialist workshop.

CATATAN
Shorter maintenance intervals due to fuel with increased bio-contents
When fuels with increased bio-contents are used, fuel residues with increased separation volume may occur. If fuels with increased bio-contents (compatibility marks B10 and B20) are used on an ongoing basis, this may lead to shorter maintenance intervals for the fuel filter.
If the vehicle is not used for an extended period of time (several weeks):
Refuel the vehicle beforehand with diesel fuel with bio-contents < 10% to avoid possible deposits of bio-contents in the fuel tank.

CATATAN
Do not use diesel to refuel vehicles with a petrol engine
JIKA ANDA TIDAK SENGAJA MENGISI BAHAN BAKAR YANG SALAH:
\- Do not switch on the vehicle. Otherwise fuel can enter the engine. Even small amounts of the wrong fuel could result in damage to the fuel system and the engine. The repair costs are high.
Consult a qualified specialist workshop.
▶ Have the fuel tank and fuel lines drained completely.

G-Class - Owner's Manual
> Quick start and Tips At the filling station

CATATAN
Do not refuel diesel-engined vehicles with petrol
JIKA ANDA TIDAK SENGAJA MENGISI BAHAN BAKAR YANG SALAH:
- Do not switch on the vehicle. Otherwise fuel can enter the engine. Even small amounts of the wrong fuel could result in damage to the fuel system and the engine. The repair costs are high.
Consult a qualified specialist workshop.
▶ Have the fuel tank and fuel lines drained completely.

CATATAN
Damage to the fuel system due to overfilling the fuel tank
▶ Only fill the fuel tank until the pump nozzle switches off.
If too much fuel has been added due, for example, to a faulty filling pump:
Do not switch on the vehicle.
Consult a qualified specialist workshop.

CATATAN
Fuel may spray out when you remove the fuel pump nozzle
▶ Only fill the fuel tank until the pump nozzle switches off.
Persyaratan:
• The vehicle is unlocked.
Observe the notes on operating fluids and fuel.
The recommended octane number for your vehicle can be found on the information label on the inside of the fuel filler flap.

Fuel filler flap
② Fuel filler cap
3 Fuel type
QR code for rescue card
5 Tyre pressure table
Press on the centre rear of fuel filler flap ①.
▶ Turn the fuel filler cap counter-clockwise and remove it.
Completely insert the pump nozzle into the tank filler neck, hook in place and refuel.


G-Class - Owner's Manual
> Quick start and Tips At the filling station
▶ Only fill the fuel tank until the pump nozzle switches off.
① Vehicles with diesel engine: The tank filler neck is designed for refuelling at diesel filling pumps.
① Vehicles with diesel engine: Do not run the fuel tank empty. When the fuel tank is completely empty, top up with at least 5 l diesel before starting the vehicle.
① Vehicles with diesel engine: Use a filler neck with a large diameter for vehicles with a diesel engine when topping up fuel from a canister. Otherwise, the filler neck cannot slide into the tank filler neck.
Replace the fuel filler cap on the tank filler neck and turn clockwise until it engages audibly.
Close fuel filler flap ①.
Mengisi ulang AdBlue®
NOTE
Engine damage due to AdBlue® being in the fuel
AdBlue ® must not be used to fill the fuel tank.
Only use AdBlue ® to fill the AdBlue ® tank.
Do not overfill the AdBlue ® tank.
NOTE
Contamination of the vehicle interior due to AdBlue® leakage
After topping up, carefully close the AdBlue® refill container.
Avoid carrying AdBlue ® refill containers permanently in the vehicle.
Persyaratan:
• The vehicle is unlocked.
PESAN-PESAN BERIKUT MUNCUL SECARA BERURUTAN DI LAYAR PENGEMUDI KETIKA TANGKI ADBLUE® PERLU DIISI ULANG:
- Refill AdBlue See Owner's Manual. The AdBlue level has fallen below the reserve range. Add at least 5 l AdBlue .
- Top up AdBlue Emergency op. in XXX km See Owner's Manual. The low AdBlue ® level will lead to limited performance after the remaining distance displayed has been driven. Add at least 5 l AdBlue ® .


G-Class - Owner's Manual
> Quick start and Tips At the filling station
- Top up AdBlue XX,X I Emerg. op.: max. XXX km/h Start not poss. in XXX km. The low AdBlue® level will lead to limited performance from the speed displayed. After the remaining distance displayed has been driven, it will no longer be possible to start the vehicle. Add at least the indicated quantity of AdBlue®.
- Top up XX,X I AdBlue Switch vehicle on, wait 60 sec. or engine start not possThe AdBlue ® tank is empty. You can no longer start the vehicle. Add at least the indicated quantity of AdBlue ® . Switch on the vehicle and wait approx. 60 seconds. Start the vehicle.
You can display the AdBlue ® range and level on the driver display in the menu Service.
① The AdBlue ® range indicated is highly dependent upon driving style and operating conditions. The actual range can therefore deviate from the calculated range.
OPENING THE ADBLUE® FILLER CAP

Press on the centre rear of fuel filler flap ①.
Turn AdBlue ® filler cap 2 counter-clockwise and remove it.
You can also place the AdBlue® filler cap in the filler cap holder in the hinge arm of the fuel filler flap.
MENGISI ULANG ADBLUE®
Mercedes-Benz recommends that you top up AdBlue ® at a pump system. If there is no AdBlue ® pump system available you can also top up AdBlue ® with a canister.

Unscrew the cap of AdBlue * refill canister 4.
Screw disposable hose Ⓐ onto the opening of AdBlue® refill canister ⚙ until hand-tight.
Screw disposable hose Ⓐ onto the filler neck of the vehicle until hand-tight.
Lift up and tip AdBlue ® refill canister
The filling process stops when the AdBlue ® tank is completely full.
AdBlue® refill canister ④ can be removed when it has been only partially emptied.


G-Class - Owner's Manual
> Quick start and Tips At the filling station
Unscrew disposable hose ③ and close AdBlue® refill canister ④ in reverse order.
Replace AdBlue ® filler cap ② and turn it clockwise until it audibly engages.
Close fuel filler flap ①.
▶ Switch on the vehicle for at least 60 seconds.
If it was no longer possible to start the vehicle due to the empty AdBlue ® tank, it takes up to 60 seconds for topping up to be detected.
Start the vehicle.
Avoid storing AdBlue ® refill containers permanently in the vehicle.
Mengisi ulang sistem pencuci kaca depan
PERINGATAN
Risk of burns when opening the bonnet
JIKA ANDA MEMBUKA KAP MESIN SAAT MESIN OVERHEAT ATAU TERJADI KEBAKARAN DI RUANG MESIN, SITUASI BERIKUT DAPAT TERJADI:
• You may come into contact with hot gases.
- You may come into contact with other escaping hot operating fluids.
Before opening the bonnet, allow the engine to cool down.
In the event of a fire in the engine compartment, keep the bonnet closed and call the fire service.
PERINGATAN
Risk of burns from hot component parts in the engine compartment
Certain component parts in the engine compartment can be very hot, e.g. the engine, the cooler and parts of the exhaust system.
▶ Allow the engine to cool down and only touch component parts described in the following.
G-Class - Owner's Manual
> Quick start and Tips At the filling station


PERINGATAN
Risk of injury due to moving parts
Components in the engine compartment can continue to run or start unexpectedly even when the ignition is switched off.
Observe the following before performing tasks in the engine compartment:
▶ Switch off the ignition.
▶ Never touch the danger zone surrounding moving components, e.g. the rotation area of the fan.
Remove jewellery and watches.
▶ Keep items of clothing and hair away from moving parts.

PERINGATAN
\- Risk of fire and injury due to windscreen washer concentrate
Windscreen washer concentrate is highly flammable. It could ignite if it comes into contact with hot engine component parts or the exhaust system.
▶ Make sure that no windscreen washer concentrate spills out next to the filler opening.

▶ Turn cap ⓘ anti-clockwise and remove it.
Top up the washer fluid.
Replace cap ⓘ and turn it clockwise until it engages.
Mengganti bilah penghapus kaca depan

PERINGATAN
Risk of becoming trapped if the windscreen wipers are switched on while wiper blades are being replaced
If the windscreen wipers begin to move while you are changing the wiper blades, you can be trapped by the wiper arm.
▶ Always switch off the windscreen wipers and vehicle before changing the wiper blades.
Check the condition of the wiper blades regularly and replace them in the event of visible damage or ongoing smearing.


G-Class - Owner's Manual
> Quick start and Tips At the filling station
Observe the information about the service indicator.
SERVICE INDICATOR

Remove protective film ① from the service indicators on the tips of the newly fitted wiper blades.
When the colour of the service indicator changes from black to yellow, replace the wiper blades.
The time it takes for the colour to change will vary depending on the usage conditions.
Memeriksa level oli mesin menggunakan layar pengemudi
Persyaratan:
• The engine has been warmed up.
• The vehicle is parked on a level surface.
• The engine is running at idle speed.
The bonnet is closed.
Determining the engine oil level can take up to 30 minutes with a normal driving style and even longer with an active driving style.
Before every off-road drive, fill the engine oil level up to the maximum.
Wait at least five minutes after the initial check using the on-board computer. After this, make a second request and top up the engine oil according to the specifications.
Driver display:
Service
The engine oil level is shown.
SALAH SATU PESAN BERIKUT AKAN MUNCUL DI LAYAR PENGEMUDI:
• Engine oil level Measuring now....: the engine oil level cannot be determined yet.
Repeat the request after a maximum of 30 minutes' driving.
- Engine oil level OK and the bar display for indicating the engine oil level on the driver's display is green and is between "min" and "max": the engine oil level is correct.
If the bar is at "min": Add around 1 l of engine oil.
If the bar is in the middle: Add approximately 0.5 l of engine oil.

G-Class - Owner's Manual
> Quick start and Tips At the filling station
- Engine oil level Top up 1,0 l and the bar display for indicating the engine oil level on the driver's display is yellow and is below "min":
▶ Add 1 l of engine oil.
- Engine oil level Reduce and the bar display for indicating the engine oil level on the driver's display is yellow and is above "max":
Drain off any excess engine oil that has been added. To do so, consult a qualified specialist workshop.
• For engine oil level, switch on vehicle
▶ Switch on the vehicle to check the engine oil level.
- Engine oil level System inoperative: The oil level sensor is defective or not connected.
Consult a qualified specialist workshop.
• Engine oil level System currently inoperative
Close the bonnet.

Informasi tentang mencuci kendaraan di tempat cuci mobil

PERINGATAN
Risk of an accident due to reduced braking power after washing the vehicle
Braking efficiency is reduced after washing the vehicle.
▶ After the vehicle has been washed, brake carefully while paying attention to the traffic conditions until braking power has been fully restored.

CATATAN
Damage from automatic braking
KENDARAAN AKAN MENGEREM SECARA OTONOM DALAM SITUASI TERTENTU JIKA FUNGSI-FUNGSI BERIKUT AKTIF:
• Active Brake Assist
• Active Distance Assist DISTRONIC
- HOLD function
• Active Parking Assist
To avoid damage to the vehicle, switch these systems off e.g. before towing it or in a car wash.

G-Class - Owner's Manual
> Quick start and Tips At the filling station


CATATAN
Damage due to unsuitable car wash
Before driving into a car wash make sure that the car wash is suitable for the vehicle dimensions.
▶ Ensure there is sufficient ground clearance between the underbody and the guide rails of the car wash.
▶ Ensure that the clearance width of the car wash, in particular the width of the guide rails, is sufficient.
UNTUK MENGHINDARI KERUSAKAN PADA KENDARAAN ANDA SAAT MENGGUNAKAN TEMPAT CUCI MOBIL, PASTIKAN HAL BERIKUT SEBELUMNYA:
• Active Distance Assist DISTRONIC is switched off.
• The HOLD function is switched off.
• The 360° camera or the reversing camera is switched off.
• The side windows and sliding sunroof are completely closed.
• The outside mirrors are retracted.
• The blower for the ventilation and heating is switched off.
• The windscreen wiper switch is in position 0.
- Vehicles with KEYLESS-GO: The key is a minimum distance of 3 m away from the vehicle. Otherwise a door may lock and unlock unintentionally.
• For car washes with conveyor systems:
- Neutral gear N is engaged.
- If you leave the vehicle while it is being washed, ensure the key is located in the vehicle. The park position [P] is otherwise automatically engaged.
Removing the wax from the windscreen and the wiper rubber after washing the vehicle will help to avoid smearing and reduce wiper noise.

G-Class - Owner's Manual
> Quick start and Tips Preparing for a holiday
Persiapan untuk liburan
Catatan tentang penyesuaian lampu saat berkendara di luar negeri
Vehicles with static LED headlamps: it is not necessary to convert the headlamps. The legal requirements are also met in countries in which traffic drives on the other side of the road.
Vehicles with MULTIBEAM LED: the headlamps will automatically be adjusted when you cross the border into countries in which traffic drives on the other side of the road.
DALAM KASUS BERIKUT, PERIKSA PENGATURAN LAMPU UTAMA DAN UBAH SECARA MANUAL JIKA PERLU:
- If the Dipped-beam setting (left/right-side traffic) Manual adjustment only display message is shown.
- If the Check dipped-beam setting (left/right-side traffic) display message is shown.
SETELAH LAMPU UTAMA DIUBAH:
• Oncoming traffic will not be dazzled.
• The edge of the road will not be illuminated as far or as high.
- The "motorway mode" and "enhanced fog light" functions will not be available.
Catatan tentang pemeriksaan rutin ban dan roda
PERINGATAN
Risk of injury due to damaged tyres
Damaged tyres can cause tyre pressure loss.
▶ Check the tyres regularly for signs of damage and replace any damaged tyres immediately.

G-Class - Owner's Manual
> Quick start and Tips Preparing for a holiday


PERINGATAN
Risk of aquaplaning due to insufficient tyre tread
Insufficient tyre tread will result in reduced tyre grip. There is a risk of an accident.
On a wet road surface the risk of aquaplaning is increased, in particular where speed is not adapted to suit the conditions.
▶ Check the tread depth and the condition of the tyre contact surface across the entire width of all tyres on a regular basis.
KEDALAMAN TAPAK MINIMUM UNTUK
• Summer tyres: 3 mm
• M+S tyres: 4 mm
For safety reasons, replace the tyres before the legally-prescribed limit for the minimum tread depth is reached.
Replace the tyres immediately if the legally-prescribed limit for the minimum tread depth is reached.
LAKUKAN PEMERIKSAAN BERIKUT PADA SEMUA RODA SECARA TERATUR, SETIDAKNYA SEKALI SEBULAN ATAU SESUAI KEBUTUHAN, MISALNYA SEBELUM PERJALANAN JAUH ATAU BERKENDARA DI JALAN OFF-ROAD:
• Check the tyre pressure ( → page 653).
• Visually inspect wheels and tyres for damage.
- Check the valve caps.
- Visual check of the tyre tread depth and the tyre contact surface across the entire width.
The minimum tread depth for summer tyres is 3 mm and for winter tyres 4 mm.
Melepas rompi keselamatan
The safety vests are located in the driver's door and front passenger door stowage compartments.
▶ Pull out the safety vest bag using the loop.
Open the safety vest bag and take out the safety vest.

1 Maximum number of washes
2 Maximum wash temperature
Do not bleach
Do not iron
Do not tumble dry
Do not dry clean
7 Class 2 safety vest
The requirements defined by the legal standard are only fulfilled if the safety vest is the correct size and is fully closed.
GANTI ROMPI KESELAMATAN DALAM KASUS BERIKUT:
• The reflective strips are damaged or dirty.
• The maximum permissible number of washes is exceeded.


G-Class - Owner's Manual
> Quick start and Tips Preparing for a holiday
\- The fluorescence property decreases, e.g. due to permanent exposure to sunlight.
BUANG ROMPI KESELAMATAN DENGAN CARA YANG RAMAH LINGKUNGAN:
• Please contact your local waste disposal company.
Removing the warning triangle

Open the tabs 2.
Remove the warning triangle ①.
First-aid kit overview

The first-aid kit is located in the door stowage compartment of the front passenger door.
Ringkasan pembaruan data peta
As the content of a digital road map has a short life, outdated data may have a negative effect on all navigation functions. For the best MBUX navigation experience, you should install all of the map updates offered by Mercedes-Benz.
PILIHAN BERIKUT TERSEDIA UNTUK PEMBARUAN DATA PETA:
• Online map update
• Updates via the Mercedes-Benz Portal
- Update at a Mercedes-Benz service centre
Additional costs can be incurred in this process.

G-Class - Owner's Manual
> Quick start and Tips Preparing for a holiday
PEMBARUAN PETA ONLINE
PERSYARATAN:
• Digital Extras are available.
• You have a Mercedes me ID.
• The Digital Extra Online Map Update is available for your region.
• Online Map Update has been activated.
① Online Map Update is only available in certain countries.
Installation takes place in the background as an automatic map update.
The MBUX multimedia system installs all of the available map updates for the European regions in which the vehicle is located or is moved.
The online map update is activated at the latest after the next time the vehicle is switched on.
PEMBARUAN MELALUI PORTAL MERCEDES-BENZ
The map data for several regions can also be updated manually. Log in with your Mercedes-Benz user account at: https://www.mercedes-benz.de/
Click on your account at the top right and follow the menu path My dashboard > Manage vehicle > Manage Digital Extras > Online Map Update. Select the regions to be downloaded to a storage medium.
After the map data has been copied, connect the storage medium with your vehicle. Select the notification with information about a new version of the map data and start the installation. After the MBUX multimedia system has been restarted, the updated map data is used.

Memasukkan POI atau alamat
Persyaratan:
• Untuk pencarian online:
- There is an Internet connection.
Digital Extras are available.
- You have created a Mercedes me ID,
The vehicle is linked to the Mercedes me ID and you have accepted the terms of use.
- Further information can be found at: https://www.mercedes.me
- The Digital Extra is available and has been activated.
If Online Search is not available, the search is performed using the data of the digital map.

G-Class - Owner's Manual
> Quick start and Tips Preparing for a holiday
Multimedia system:


Example: entering a POI or address
① Input line with current entry
2 Deletes an entry
3 Selects previous destinations
Displays and selects additional destination searches
Adopts the search result in the input line and continues the search
6 Search result
7 Deletes the last character entered
Hides the keypad
9 Activates voice entry.
Sets the written language
⑪ Switches to digits and special characters
12 Switches to upper-case or lower-case letters
If available, selecting the ⚡ symbol starts the MBUX Voice Assistant.
Enter a destination. The entries can be made in any order.
The search results are displayed in a list.
Online search results for POIs may contain additional information, for example opening times and ratings. The information is provided by an online map service.
This online function is not available in all countries.
ENTRI BERIKUT DAPAT DIBUAT, MISALNYA DI ①:
• Town, street, house number or street, town
Postcode
• POI name or POI category, e.g. Restaurants
Town, POI name
\- Contact name
• Geo-coordinates ( → page 490)
▶ Hide the keyboard with OK.
▶ Select the destination in the list.
The following menu shows the selected destination with the address information and a corresponding map section.
The menu enables the route to be calculated.

G-Class - Owner's Manual
> Quick start and Tips Preparing for a holiday

Mencari stasiun radio menggunakan nama stasiun atau entri frekuensi
Multimedia system:

Select ⭕.
Enter a station name or frequency.
Select a station.


G-Class - Owner's Manual
> Quick start and Tips Luggage and loading
Bagasi dan pemuatan
Memasang rak atap

PERINGATAN
Risk of accident due to exceeding the maximum roof load
The vehicle centre of gravity and the usual driving characteristics as well as the steering and braking characteristics alter.
If you exceed the maximum roof load, the driving characteristics, as well as steering and braking, will be greatly impaired.
▶ Never exceed the maximum roof load and adjust your driving style.

PERINGATAN
Risk of injury if unsuitable climbing aids are used
JIKA ANDA MENGGUNAKAN BUKAAN PADA BODI ATAU PENGIKAT SEBAGAI PIJAKAN, ANDA DAPAT:
- Slip and/or fall.
• Damage the vehicle and thus slip and fall.
▶ Always use non-slip, stable climbing aids, e.g. a suitable ladder.

CATATAN
Damage to the wheel arch flares and bumpers if used as a step
The wheel arch flares and bumpers can be damaged or become detached from the vehicle if you use them as a step.
▶ Only use the two steps indicated on the rear bumper.

CATATAN
Vehicle damage due to non-approved roof racks
The vehicle could be damaged by roof racks that have not been tested and approved by Mercedes-Benz.
▶ Only use roof racks approved for Mercedes-Benz.
▶ Depending on the vehicle equipment, ensure that the sliding sunroof can be fully raised when the roof rack is fitted.
▶ Position the load on the roof rack in such a way that the vehicle will not sustain damage even when it is in motion.

G-Class - Owner's Manual
> Quick start and Tips Luggage and loading

CATATAN
Maximum permissible roof load
The weight of the roof luggage, including the roof rack, must not exceed the maximum permissible roof load.
The maximum roof load is 150 kg with at least three pairs of supporting feet.
This information applies if the load is distributed evenly across the entire roof area. The maximum load per pair of supporting roof rack feet is 50 kg.
If the vehicle is at a standstill and at least three pairs of supporting feet are being used, you may exceed the maximum permissible roof load of 150 kg by a maximum of 150 kg. You can use this if you are using a roof tent, for example. It is absolutely essential to comply with the installation instructions of the roof rack manufacturer.


CATATAN
Damage to the covers
The covers may be damaged and scratched when being opened.
▶ Use the attached disassembly tool in the vehicle tool bag.
▶ Do not use metallic or hard objects.
Do not install the covers until the roof rack has been removed.
Bear in mind the following related topic:
• Vehicle tool kit overview ( → page 661)
An incorrectly attached roof rack or an incorrect roof load can become detached from the vehicle. It is absolutely essential to comply with the installation instructions of the roof rack manufacturer.
Carefully remove covers Ⓞ in the direction of the arrow with the disassembly tool.
Attach the roof rack at securing points ②.
Comply with the installation instructions of the roof rack manufacturer.
▶ Secure the load on the roof luggage rack.

G-Class - Owner's Manual
> Quick start and Tips Luggage and loading

Melipat kursi belakang ke depan

PERINGATAN
Risk of accident if the rear bench seat, rear seat and seat backrest are not engaged
The rear bench seat, rear seat and seat backrest may fold forwards, even while the vehicle is in motion.
- As a result, the vehicle occupant will be pressed into the seat belt with increased force. The seat belt will not be able to protect as intended and could cause additional injury.
- Objects or loads in the boot or load compartment cannot be restrained by the seat backrest.
Make sure that the rear bench seat, the rear seat and the seat backrest are engaged before every trip.

CATATAN
Damage to the seat backrests
The seat backrests may be damaged when the rear bench seat is folded forwards.
▶ Fold the rear bench seat's cushion upwards before the rear seat backrest is folded forwards.
You can fold the left and right seat backrests forwards separately.

▶ Fully insert the seat backrest head restraints ( → page 198).
Fold the seat cushion upwards using the loop ①.

Pull the release handle ② upwards until the seat backrest is completely unlocked.
▶ Fold the seat backrest forwards.


G-Class - Owner's Manual
> Quick start and Tips Luggage and loading

Melipat kembali kursi belakang

PERINGATAN
Risk of accident if the rear bench seat, rear seat and seat backrest are not engaged
The rear bench seat, rear seat and seat backrest may fold forwards, even while the vehicle is in motion.
- As a result, the vehicle occupant will be pressed into the seat belt with increased force. The seat belt will not be able to protect as intended and could cause additional injury.
- Objects or loads in the boot or load compartment cannot be restrained by the seat backrest.
Make sure that the rear bench seat, the rear seat and the seat backrest are engaged before every trip.

CATATAN
Damage caused by trapping the seat belt when folding back the seat backrest
The seat belt could become trapped and thus be damaged when the seat backrest is folded back.
Make sure that the seat belt is not trapped when folding back the seat backrest.

Swivel seat backrest ① back until it engages.
Swivel the seat cushion ② back.
Ikhtisar mata pengikat
Observe the notes on loading the vehicle ( → page 210).

① Load securing tie-down eye

G-Class - Owner's Manual
> Quick start and Tips Luggage and loading
Gambaran umum kompartemen penyimpanan depan

PERINGATAN
Risk of injury due to objects being stowed incorrectly
If objects in the vehicle interior are stowed incorrectly, they can slide or be thrown around and hit vehicle occupants. In addition, cup holders, open stowage spaces and mobile phone brackets cannot always retain all objects they contain.
There is a risk of injury, particularly in the event of braking manoeuvres or abrupt changes in direction.
▶ Always stow objects so that they cannot be thrown around in such situations.
▶ Always make sure that objects do not protrude from stowage spaces, luggage nets or stowage nets.
▶ Close the lockable stowage spaces before starting a journey.
▶ Stow and secure objects that are heavy, hard, pointed, sharpedged, fragile or too large in the load compartment.
Observe the notes on loading the vehicle.

PERINGATAN
Risk of accident due to objects in the driver's footwell
Objects in the driver's footwell may impede pedal travel or block a depressed pedal.
This will jeopardise the operating and road safety of the vehicle.
Stow all objects in the vehicle securely so that they cannot get into the driver's footwell.
▶ Make sure that there is always sufficient clearance for the pedals.
▶ Always fit the floor mats securely and as prescribed.
Do not use loose floor mats and do not place floor mats on top of one another.

① Stowage spaces in the doors
Storage and telephone compartment in the armrest with USB port (USB-C)
3 Storage compartment with cup holder and for wireless charging of a mobile phone in the front centre console
Glove compartment


G-Class - Owner's Manual
> Quick start and Tips Luggage and loading

Mengunci/membuka kunci kotak sarung tangan

PERINGATAN
Risk of injury due to objects being stowed incorrectly
If objects in the vehicle interior are stowed incorrectly, they can slide or be thrown around and hit vehicle occupants. In addition, cup holders, open stowage spaces and mobile phone brackets cannot always retain all objects they contain.
There is a risk of injury, particularly in the event of braking manoeuvres or abrupt changes in direction.
▶ Always stow objects so that they cannot be thrown around in such situations.
▶ Always make sure that objects do not protrude from stowage spaces, luggage nets or stowage nets.
▶ Close the lockable stowage spaces before starting a journey.
▶ Stow and secure objects that are heavy, hard, pointed, sharpedged, fragile or too large in the load compartment.

▶ Turn the emergency key a quarter turn clockwise 2 (to lock) or anticlockwise 1 (to unlock).
Observe the notes on loading the vehicle.

G-Class - Owner's Manual
> Quick start and Tips Ice and snow
< Es dan salju
Catatan tentang memeriksa roda dan ban secara teratur

PERINGATAN
Risk of injury due to damaged tyres
Damaged tyres can cause tyre pressure loss.
▶ Check the tyres regularly for signs of damage and replace any damaged tyres immediately.

PERINGATAN
Risk of aquaplaning due to insufficient tyre tread
Insufficient tyre tread will result in reduced tyre grip. There is a risk of an accident.
On a wet road surface the risk of aquaplaning is increased, in particular where speed is not adapted to suit the conditions.
▶ Check the tread depth and the condition of the tyre contact surface across the entire width of all tyres on a regular basis.
KEDALAMAN TAPAK MINIMUM UNTUK
• Summer tyres: 3 mm
• M+S tyres: 4 mm
For safety reasons, replace the tyres before the legally-prescribed limit for the minimum tread depth is reached.
Replace the tyres immediately if the legally-prescribed limit for the minimum tread depth is reached.
LAKUKAN PEMERIKSAAN BERIKUT PADA SEMUA RODA SECARA TERATUR, SETIDAKNYA SEKALI SEBULAN ATAU SESUAI KEBUTUHAN, MISALNYA SEBELUM PERJALANAN JAUH ATAU BERKENDARA DI JALAN OFF-ROAD:
• Check the tyre pressure ( → page 653).

G-Class - Owner's Manual
> Quick start and Tips Ice and snow
• Visually inspect wheels and tyres for damage.
- Check the valve caps.
- Visual check of the tyre tread depth and the tyre contact surface across the entire width.
The minimum tread depth for summer tyres is 3 mm and for winter tyres 4 mm.
Mengatur batas kecepatan untuk ban musim dingin
Multimedia system:
Settings Vehicle Driving Winter tyre limit
▶ Activate or deactivate Winter tyre limit.
MENGATUR KECEPATAN
▶ Select Winter tyre limit.
Select a speed.
Catatan tentang rantai salju
Mercedes-AMG vehicles: the notes on using snow chain-compatible AMG winter tyres apply to AMG tyres. Snow chains are permitted for use only with these.
PERHATIKAN CATATAN BERIKUT SAAT MENGGUNAKAN RANTAI SALJU:
- Snow chains are only permissible for certain wheel/tyre combinations. You can obtain information about this from a Mercedes-Benz Service Centre.
- For safety reasons, only use snow chains that have been specifically approved for your vehicle by Mercedes-Benz, or snow chains of the same quality standard.

• If snow chains are fitted, the maximum permissible speed is 50 km/h.
- Vehicles with Active Parking Assist: do not use Active Parking Assist when snow chains are fitted.
You can permanently limit the maximum vehicle speed for driving with winter tyres ( → page 353).
You can deactivate ESP to start off ( → page 345). Spinning the wheels results in a cutting action, which enhances traction.
Catatan tentang cairan pencuci kaca depan
Observe the notes on operating fluids ( → page 745).
PERINGATAN
\- Risk of fire and injury due to windscreen washer concentrate
Windscreen washer concentrate is highly flammable. It could ignite if it comes into contact with hot engine component parts or the exhaust system.
▶ Make sure that no windscreen washer concentrate spills out next to the filler opening.

G-Class - Owner's Manual
> Quick start and Tips Ice and snow

CATATAN
Damage to the exterior lighting due to unsuitable windscreen washer fluid
Unsuitable windscreen washer fluids may damage the plastic surface of the exterior lighting.
▶ Only use windscreen washer fluids which are also suitable for use on plastic surfaces, e.g. MB SummerFit or MB WinterFit.

CATATAN
Blocked spray nozzles caused by mixing windscreen washer fluids
Do not mix MB SummerFit and MB WinterFit with other wind-screen washer fluids.
Do not use distilled or de-ionised water. Otherwise, the fill level sensor may be triggered erroneously.
CAIRAN PENCUCI KACA DEPAN YANG DIREKOMENDASIKAN:
• above freezing point: e.g. MB SummerFit
• below freezing point: e.g. MB WinterFit
For the correct mixing ratio, refer to the information on the antifreeze container.
Mix washer fluid with windscreen washer fluid all year round.

Mengisi ulang sistem pencuci kaca depan

PERINGATAN
Risk of burns when opening the bonnet
JIKA ANDA MEMBUKA KAP MESIN SAAT MESIN MENGALAMI PANAS BERLEBIH ATAU TERJADI KEBAKARAN DI RUANG MESIN, SITUASI BERIKUT DAPAT TERJADI:
• You may come into contact with hot gases.
- You may come into contact with other escaping hot operating fluids.
Before opening the bonnet, allow the engine to cool down.
In the event of a fire in the engine compartment, keep the bonnet closed and call the fire service.

PERINGATAN
Risk of burns from hot component parts in the engine compartment
Certain component parts in the engine compartment can be very hot, e.g. the engine, the cooler and parts of the exhaust system.
▶ Allow the engine to cool down and only touch component parts described in the following.
G-Class - Owner's Manual
> Quick start and Tips Ice and snow


PERINGATAN
Risk of injury due to moving parts
Components in the engine compartment can continue to run or start unexpectedly even when the ignition is switched off.
Observe the following before performing tasks in the engine compartment:
▶ Switch off the ignition.
▶ Never touch the danger zone surrounding moving components, e.g. the rotation area of the fan.
Remove jewellery and watches.
▶ Keep items of clothing and hair away from moving parts.

PERINGATAN
\- Risk of fire and injury due to windscreen washer concentrate
Windscreen washer concentrate is highly flammable. It could ignite if it comes into contact with hot engine component parts or the exhaust system.
▶ Make sure that no windscreen washer concentrate spills out next to the filler opening.

▶ Turn cap ⓘ anti-clockwise and remove it.
Top up the washer fluid.
Replace cap ⓘ and turn it clockwise until it engages.
Mengganti bilah penghapus kaca depan

PERINGATAN
Risk of becoming trapped if the windscreen wipers are switched on while wiper blades are being replaced
If the windscreen wipers begin to move while you are changing the wiper blades, you can be trapped by the wiper arm.
▶ Always switch off the windscreen wipers and vehicle before changing the wiper blades.
Check the condition of the wiper blades regularly and replace them in the event of visible damage or ongoing smearing.


G-Class - Owner's Manual
> Quick start and Tips Ice and snow
Observe the information about the service indicator.
SERVICE INDICATOR

Remove protective film ① from the service indicators on the tips of the newly fitted wiper blades.
When the colour of the service indicator changes from black to yellow, replace the wiper blades.
The time it takes for the colour to change will vary depending on the usage conditions.

Menghidupkan/mematikan pemanas/ventilasi stasioner melalui panel kontrol AC

BAHAYA
Risk of fatal injury due to poisonous exhaust gases
If the tailpipe is blocked or sufficient ventilation is not possible, poisonous exhaust gases such as carbon monoxide may enter the vehicle. This is the case in enclosed spaces or if the vehicle gets stuck in snow, for example.
Always switch the stationary heater off in enclosed spaces without an air extraction system, e.g. in garages.
Keep the tailpipe and the area around the vehicle free from snow when the engine or the stationary heater is running.
Open a window on the side of the vehicle facing away from the wind to ensure an adequate supply of fresh air.

G-Class - Owner's Manual
> Quick start and Tips Ice and snow
A
PERINGATAN
Risk of fire due to hot stationary heater components and exhaust gases
Flammable materials such as leaves, grass or twigs may ignite.
When the stationary heater is switched on, make sure that:
- hot vehicle parts do not come into contact with flammable materials.
- the exhaust gas can flow out of the stationary heater exhaust pipe unhindered.
- the exhaust gas does not come into contact with flammable materials.
!
CATATAN
Battery discharge caused by stationary heater or stationary ventilation operation
Operating the stationary heater or stationary ventilation drains the battery.
▶ After heating or ventilating the vehicle twice, drive for a longer period of time.
Persyaratan:
• The fuel tank is filled to at least the reserve level.
- Adequate state of charge for the starter battery.

Set the desired temperature using the button
Press the button ①.
The red or blue indicator lamp on the button ① will light up or go out.
WARNA LAMPU INDIKATOR MEMILIKI ARTI BERIKUT:
• Blue: stationary ventilation is switched on.
• Red: the stationary heater is switched on.
• Yellow: the departure time is preselected.
The stationary heater/ventilation will switch off automatically after 50 minutes.
G-Class - Owner's Manual
> Quick start and Tips Help in the event of a breakdown
< Bantuan jika terjadi kerusakan
Activating/deactivating the hazard warning lights

Press button 1.
IN THE FOLLOWING SITUATIONS, THE HAZARD WARNING LIGHTS WILL SWITCH ON AUTOMATICALLY:
• The airbag has been deployed
- the vehicle brakes are applied heavily from a speed of more than 70 km/h to a standstill.
• An emergency stop has been initiated ( → page 368)
When you pull away again, the hazard warning light system will switch off automatically at approximately 10 km/h. You can also switch off the hazard warning light system using button ☐.
Melepas alat pemadam kebakaran
A PERINGATAN
Risk of accident due to an incorrectly secured fire extinguisher in the driver's footwell
A fire extinguisher may impede pedal travel or block a depressed pedal.
This jeopardises the operating and road safety of the vehicle.
The fire extinguisher can be flung around and injure the driver or other vehicle occupants.
▶ Always store and secure the fire extinguisher in the bracket.
Do not remove the fire extinguisher while driving.

Left-hand drive vehicle: pull the tab 1 upwards.
Right-hand drive vehicle: pull the tab ① downwards.


G-Class - Owner's Manual
> Quick start and Tips Help in the event of a breakdown
Remove the fire extinguisher ②.
Melepas rompi keselamatan
The safety vests are located in the driver's door and front passenger door stowage compartments.
▶ Pull out the safety vest bag using the loop.
▶ Open the safety vest bag and take out the safety vest.


1 Maximum number of washes
2 Maximum wash temperature
Do not bleach
Do not iron
Do not tumble dry
Do not dry clean
Class 2 safety vest
The requirements defined by the legal standard are only fulfilled if the safety vest is the correct size and is fully closed.
GANTI ROMBI KESELAMATAN DALAM KASUS BERIKUT:
• The reflective strips are damaged or dirty.
• The maximum permissible number of washes is exceeded.

\- The fluorescence property decreases, e.g. due to permanent exposure to sunlight.
BUANG ROMBI KESELAMATAN DENGAN CARA YANG RAMAH LINGKUNGAN:
• Please contact your local waste disposal company.
Melepas segitiga pengaman

Open the tabs 2.
Remove the warning triangle

G-Class - Owner's Manual
> Quick start and Tips Help in the event of a breakdown
First-aid kit overview

The first-aid kit ⓘ is located in the door stowage compartment of the front passenger door.
Kode QR untuk kartu penyelamatan
QR codes are attached in the fuel filler flap and on the opposite side on the B-pillar. In the event of an accident, rescue services can use the QR code to quickly find the appropriate rescue card for your vehicle. The current rescue card contains the most important information about your vehicle (e.g. the routing of the electric lines) in compact form.
Additional information can be obtained at: https://rk.mb-qr.com/de/

Starting assistance and charging the 12 V battery
PERSIAPKAN BANTUAN STARTER/PROSES PENGISIAN DAYA
▶ Secure the vehicle against rolling away.
▶ Switch off the vehicle and all electrical consumers.
▶ Open the bonnet ( → page 606).

Slide cover ① of positive terminal ② on the jump-starting connection point in the direction of the arrow.
BANTUAN SAAT MULAI
Connect the positive terminal of your own vehicle to the jump lead.
Connect the positive terminal of the booster battery to the jump lead.
On the assisting vehicle, let the engine run at idling speed.
Connect the negative terminal of the booster battery to the jump lead.

G-Class - Owner's Manual
> Quick start and Tips Help in the event of a breakdown
Connect the jump lead to your vehicle's earth point ③.
▶ Start the engine of your own vehicle.
Let the engines run for several minutes.
Before disconnecting the jump lead, switch on an electrical consumer in your own vehicle, e.g. the rear window heater or the lighting.
When the starting assistance process is complete:
Disconnect the jump lead from your vehicle's earth point ③.
Remove the jump lead from the negative terminal of the booster battery.
Remove the jump lead from the positive contact of your vehicle.
Remove the jump lead from the positive terminal of the booster battery.
After removing the jump lead, close cover ① of the positive terminal ②.
Further information can be obtained at a qualified specialist workshop.
MENGISI DAYA BATERAI 12 V
Connect the positive terminal of your own vehicle to the charging cable.
Connect the positive terminal of the charger to the charging cable.
Connect the negative terminal of the charger to the charging cable.
Connect the charging cable to your vehicle's earth point ③.
▶ Start the charging process.
When the charging process is complete:
Disconnect the charging cable from your vehicle's earth point ③.
Remove the charging cable from the negative terminal of the charger.
Remove the charging cable from the positive terminal of your own vehicle.
Remove the charging cable from the positive terminal of the charger.
After removing the charging cable, close cover ① of the positive terminal ②.
Catatan tentang sekring listrik

PERINGATAN
Risk of accident and injury due to overloaded lines
If you manipulate or bridge a faulty fuse or if you replace it with a fuse with a higher amperage, the electric line could be overloaded.
This could result in a fire.
▶ Always replace faulty fuses with specified new fuses containing the correct amperage.

CATATAN
Damage due to incorrect fuses
Using incorrect fuses can result in damage to electrical components or systems or their functions being considerably restricted.
▶ Use only fuses approved for Mercedes-Benz with the respective specified fuse rating.
G-Class - Owner's Manual
> Quick start and Tips Help in the event of a breakdown
Replace blown fuses with equivalent fuses, identifiable by their colour and label. The fuse ratings and further information to be observed can be found in the fuse assignment diagram.
Fuse assignment diagram: on the fuse box in the rear passenger compartment ( → page 647).

CATATAN
Damage or malfunctions caused by moisture
Moisture may cause damage to the electrical system or cause it to malfunction.
When the fuse box is open, make sure that no moisture can enter the fuse box.
When closing the fuse box, make sure that the seal of the lid is positioned correctly on the fuse box.
If the newly inserted fuse also blows, have the cause determined and rectified at a qualified specialist workshop.
PASTIKAN HAL BERIKUT SEBELUM MENGGANTI SEKERING:
• The vehicle is secured against rolling away.
• All electrical consumers are switched off.
• The vehicle is switched off.
SEKRING LISTRIK TERLETAK DI BERBAGAI KOTAK SEKERING:
- Fuse box in the engine compartment on the left-hand side (→ page 646)
• Fuse box in the front passenger footwell ( → page 646)
• Fuse box in the rear passenger compartment ( → page 647)
Catatan tentang ban kempes

PERINGATAN
Risk of accident due to a flat tyre
A flat tyre strongly impairs the vehicle's driving characteristics, as well as its steering and braking characteristics.
▶ Do not drive with a flat tyre.
Replace the flat tyre with the spare wheel. Alternatively, consult a qualified specialist workshop.
JIKA TERJADI BAN KEMPES, PILIHAN BERIKUT TERSEDIA TERGANTUNG PADA PERLENGKAPAN KENDARAAN ANDA:
- Vehicles with Mercedes-Benz Support: in the event of a breakdown, you can make a breakdown call via the overhead control panel ( → page 549).
• All vehicles: change the wheel ( → page 661).
The emergency spare wheel is only available in certain countries.
Menderek jika terjadi kerusakan pada poros belakang
Remove the propeller shaft between the front axle and the transfer case.
Tow the vehicle with a raised rear axle and with wheel rollers under the front axle.

G-Class - Owner's Manual
> Quick start and Tips Help in the event of a breakdown
Menderek jika terjadi kerusakan pada poros depan
Remove the propeller shaft between the rear axle and the transfer case.
▶ Towing the vehicle with a raised front axle.
Menderek kendaraan jika terjadi kerusakan
MENDEREK JIKA TERJADI KERUSAKAN PADA MESIN, TRANSMISI, ATAU KELISTRIKAN
Shift the transmission to position N.
Release the parking brake.
The transmission may be locked in position in the event of damage to the electrics. To shift to , provide the on-board electrical system with power (→ page 61).
PENARIKAN KENDARAAN APABILA TERJADI KERUSAKAN PADA TRANSFER CASE
Remove the propeller shafts between the axles and the transfer case.
Menarik kendaraan dengan kedua poros roda menyentuh tanah
Observe the notes on the permitted towing methods ( → page 639).
Make sure that the battery is connected and charged.
KETIKA AKI MENGALAMI KELUARAN DAYA (DISCHARGE):
• The vehicle cannot be started.
• The electric parking brake cannot be released or applied.
• The transmission cannot be shifted to position N or P.
If the transmission cannot be shifted to position N, transport the vehicle ( → page 642). A tow truck with lifting equipment is required for vehicle transport.
CATATAN
Damage due to towing away at excessively high speeds or over long distances
The drivetrain could be damaged when towing at excessively high speeds or over long distances.
A towing speed of 50 km/h must not be exceeded.
▶ A towing distance of 50 km must not be exceeded.
PERINGATAN
Risk of accident when towing a vehicle with too much weight
JIKA KENDARAAN YANG AKAN DITARIK LEBIH BERAT DARI BEBAN KOTOR YANG DIIZINKAN DARI KENDARAAN ANDA, MAKA SITUASI BERIKUT DAPAT TERJADI:
• The towing eye breaks off.
• The combination oscillates and can capsize.
Before towing, check whether the vehicle to be towed exceeds the permissible gross mass.


G-Class - Owner's Manual
> Quick start and Tips Help in the event of a breakdown
If a vehicle is to be towed away, its permissible gross mass must not exceed the permissible gross mass of the towing vehicle.
Information on the permissible gross mass of the vehicle can be found on the vehicle identification plate ( → page 743).
▶ Attach the towing device to the towing eyes ( → page 644).

CATATAN
Damage due to incorrect connection of the tow bar
▶ Only connect the tow rope or tow bar to the towing eyes.
▶ Deactivate the automatic locking mechanism ( → page 177).
Do not activate the HOLD function ( → page 347).
▶ Deactivate tow-away protection ( → page 190).
▶ Deactivate Active Brake Assist ( → page 372).
▶ Deactivate Active Parking Assist ( → page 401).
▶ Deactivate Active Distance Assist DISTRONIC ( → page 354).
Shift the transmission to position N.
Do not open the driver's door or front passenger door. Otherwise the transmission automatically shifts to position P.
Release the electric parking brake.


PERINGATAN
Risk of accidents due to restricted safety-related functions during towing
FUNGSI-FUNGSI YANG BERKAITAN DENGAN KESELAMATAN MENJADI TERBATAS ATAU TIDAK LAGI TERSEDIA DALAM SITUASI-SITUASI BERIKUT:
• The vehicle is switched off.
• The brake system or the power steering is malfunctioning.
• The power supply or the on-board electrical system is defective.
If your vehicle is being towed, considerably more force may be required for steering and braking.
In addition, important vehicle display messages cannot be seen if the driver display is faulty.
▶ Use a tow bar.
Before towing, ensure that the driver's display is operational and the steering can move freely.

CATATAN
Damage due to excessive tractive power
If you pull away sharply, the tractive power may be too high and the vehicles could be damaged.
▶ Pull away slowly and smoothly.

G-Class - Owner's Manual
> Quick start and Tips Expert knowledge
Pengetahuan ahli
Fungsi tambahan dari tombol-tombol
MEMBUKA DAN MENUTUP JENDELA MENGGUNAKAN TOMBOL SIRKULASI UDARA (PENUTUPAN/PEMBUKAAN KENYAMANAN)
When air-recirculation mode is activated, the side windows close automatically, for example, before entering a tunnel. When the air-recirculation mode is deactivated, the side windows move back to their original position.

PERINGATAN
Risk of entrapment due to not paying attention during convenience closing
When the convenience closing feature is operating, parts of the body could become trapped in the closing area of the side window and the sliding sunroof.
When the convenience closing feature is operating, monitor the entire closing process and make sure that no body parts are in the closing area.


PERINGATAN
Risk of entrapment due to not paying attention during convenience closing
When the convenience closing feature is operating, parts of the body could become trapped in the closing area of the side windows.
When the convenience closing feature is operating, monitor the entire closing process and make sure that no body parts are in the closing area.
To close the windows: press and hold the 📄 button until the windows start to move.
The windows close and air-recirculation mode switches on.

G-Class - Owner's Manual
> Quick start and Tips Expert knowledge


PERINGATAN
Risk of entrapment from the convenience opening feature
During convenience opening parts of the body could be drawn in or become trapped between the side window and window frame.
When opening, make sure that nobody is touching the side windows.
If someone becomes trapped, immediately press the button in the door to open the side windows.
The side windows stop.
To continue closing the side windows, pull on the ☑ button.
To reopen closed windows: press and hold the 📄 button until the windows start to move.
The windows move back to their original position and air-recirculation mode switches off.
Vehicles with a sliding sunroof: the sliding sunroof closes or opens simultaneously.
JIKA BAGIAN TUBUH TERJEBAK DI ATAP SURYA GESER:
To stop: press the button.
To open: pull the button back.
MENGATUR ULANG PENGATURAN KONTROL IKLIM
Press and hold the MENU button on the front control panel for at least four seconds.
The climate control settings will be reset to the basic settings.
MENGAKTIFKAN/MENONAKTIFKAN PENGUMUMAN LALU LINTAS
Multimedia system:

▶ Select Radio announcements.
The traffic information service is switched on or off.
Fungsi kendaraan yang berguna
CATATAN TENTANG WIPER KACA BELAKANG YANG AKTIF SECARA OTOMATIS WIPER KACA BELAKANG AKAN AKTIF SECARA OTOMATIS JIKA KONDISI BERIKUT TERPENUHI PADA SAAT YANG SAMA:
• The front windscreen wiper is switched on
• Reverse gear is engaged.
MENYIMPAN POSISI PARKIR KACA SPION LUAR PENUMPANG DEPAN MENGGUNAKAN TOMBOL MEMORI
Persyaratan
• Reverse gear has not been engaged.


G-Class - Owner's Manual
> Quick start and Tips Expert knowledge
Select the front-passenger outside mirror using button ①.
Move the front-passenger outside mirror into the desired parking position using button ②.
Press the M button.
Confirm immediately using button ② to store the setting.
No more than three seconds may pass between the M button and button ② being pressed. The mirror adjustment will be cancelled after three seconds.
Tips saat berkendara
KONDISI KENDARAAN UNTUK MESIN BERHENTI ATAU HIDUP OTOMATIS KONDISI UNTUK MESIN BERHENTI OTOMATIS:
• The ECO start/stop function is switched on.
• The brake system does not require a running engine.
- The atmospheric air pressure is within the range that is suitable for the system.
• The engine is at normal operating temperature.
• Engine diagnostics are not active.
- The transmission oil temperature is within the range that is suitable for the system.
• The temperature in the vehicle interior is within the set range.
• The fuel tank is sufficiently full.
- The system detects that there is no moisture on the windscreen when the air conditioning system is switched on.
• The system does not detect a steep gradient.
• The bonnet is closed.
KONDISI UNTUK MESIN HIDUP OTOMATIS:
• The brake system requires a running engine.
- The atmospheric air pressure has exceeded the range that is suitable for the system.
• Engine diagnostics require a running engine.
- The transmission oil temperature has exceeded the range that is suitable for the system.
• The temperature in the vehicle interior deviates from the set range.
- The system detects moisture on the windscreen when the air conditioning system is switched on.
Menonaktifkan fungsi kunci
Vehicles with KEYLESS-GO: if you deactivate the key function, the KEYLESS-GO functions are also deactivated. Access or drive authorisation via KEYLESS-GO is then no longer possible with that key. Activate the function of the key so that all functions using the key are available once again.
You can also deactivate the key's function to reduce the key's energy consumption if you do not use the vehicle or a key for an extended period of time.
Press and hold the key button ⏻.
With the button ⚫ pressed, immediately press the key button ⚠ twice in quick succession.
The indicator lamp of the key lights up once briefly, and then again for longer.

G-Class - Owner's Manual
> Quick start and Tips Expert knowledge

ANDA MEMILIKI OPSI BERIKUT UNTUK MENGAKTIFKAN KEMBALI KUNCI:
• Press any button on the key.
- Start the vehicle with the key in the centre console storage compartment ( → page 273).
Ikhtisar sistem panggilan darurat
Both the Mercedes-Benz emergency call system as well as the 112 emergency call system (EU eCall) can help to reduce the time between an accident and the arrival of emergency services at the site of the accident. They help locate an accident site in places that are difficult to access.
Both emergency call systems can initiate an emergency call automatically ( → page 559) or manually ( → page 560).
Only make emergency calls if you or others are in need of rescue. Do not make an emergency call in the event of a breakdown or a similar situation.
INDIKATOR DI LAYAR
Pesan-pesan berikut muncul di layar tengah atau layar media dari kedua sistem panggilan darurat:
\- SOS NOT READY: the vehicle is not switched on or the emergency call system is malfunctioning. This does not necessarily indicate complete failure of the emergency call system. Emergency calls can still be transmitted.
The display only refers to the vehicle and does not take account of the availability of mobile phone networks and the Mercedes-Benz emergency call centre.
The functional readiness of the emergency call system on the vehicle can be seen when the SOS NOT READY display disappears once the vehicle is switched on.
\- SOS: the icon appears in the display during an active emergency call.
In case of a malfunction of the emergency call system, the loudspeakers, microphone, airbag or the SOS button, for example, are faulty.
Anda dapat mengenali kerusakan pada sistem panggilan darurat melalui tampilan berikut:
\- A corresponding message appears on the driver and media display.
Panduan darurat
In the event of an accident or breakdown, the emergency guide shows safety notes on the central display.
Ini termasuk, misalnya:
• Recommended actions when leaving the vehicle
• Procedure for safely removing seat belts in the event of an accident whereby the vehicle comes to rest on its roof
Panduan darurat diaktifkan dalam situasi berikut:
• Occupant protection system has been triggered
• An emergency call is made
• Certain breakdown situations


G-Class - Owner's Manual
> Quick start and Tips Expert knowledge
The availability as well as the scope of the emergency guide can vary depending in the country and vehicle equipment.


G-Class - Owner's Manual
At a glance

< Sekilas
This interactive PDF works like a website - tap or click a button to jump straight to where you want to go. You can return here at any time via the navigation bar at the top left.
Cockpit 73
Indicator lamps and warning lamps 76
Overhead control panel 79
Door operating unit and seat adjustment 81 >
Emergencies and breakdowns 84
G-Class - Owner's Manual
> At a glance Cockpit

Kokpit

Left-hand-drive vehicles

G-Class - Owner's Manual
At a glance Cockpit


G-Class - Owner's Manual
At a glance > Cockpit
1 Combination switch 241 > 2 Steering wheel gearshift paddles 308 > 3 Driver display 419 > 4 DIRECT SELECT lever 303 > 5 Climate control systems 260 > 6 Central display 451 > 7 OFF-ROAD COCKPIT 477 > [ ] Activates/deactivates the differential locks 3>5 [ ] Shifts the transfer case 3>2 [ ] Manual gearshifting 3>8 [ ] PASSENGER AIR BAG indicator lamps 1>6 [ ] Hazard warning light system 59 [ ] Glove compartment 51 >
Stowage compartment 51 > Controller for volume and switching sound on/off 4>1 Switches the MBUX multime-dia system on/off 4>1 Calls up navigation 4>1 Calls up radio or media 4>1 Calls up the telephone 4>5 Touchpad 455 > Calls up favourites 4>1 Calls up vehicle functions 4>1 Active Parking Assist 4>3 DYNAMIC SELECT 298 > Start/stop button 272 > ECO start/stop function 2>8
Control panel for the MBUX multi-media system 424 Adjusts the steering wheel electrically 293 Switches the steering wheel heater on/off 293 Control panel: Driver display 421 > Cruise control or variable limiter 351 Active Distance Assist DISTRONIC 357 Diagnostics connection 105 > Opens the bonnet 606 > Instrument lighting Light switch 239 > Electric parking brake 393

G-Class - Owner's Manual
At a glance Indicator lamps and warning lamps

Lampu indikator dan lampu peringatan

Driver display

G-Class - Owner's Manual
At a glance Indicator lamps and warning lamps


G-Class - Owner's Manual
At a glance Indicator lamps and warning lamps

1 Turn signal light 21 2 Trailer hitch 82 3 Adaptive damping system 88 4 Electrical fault 83 5 Power steering (red) 82 Power steering (yellow) 82 6 Restraint system 81 7 Seat belt 81 8 Distance warning 88 9 ABS 88 10 Tyre pressure monitoring sys-tem 8$3
1 Engine diagnosis 8×3 2 ESP ° OFF 8×8 ESP ° 8×8 3 Diesel engine: preglow 4 Drive system: reduced power 8×2 5 Petrol engine: engine operating temperature 8×3 6 Coolant temperature 8×3 7 Coolant temperature display 425 > 8 Electric parking brake (yellow) 8×6 9 Electric parking brake (red) 8×6 10 Brakes (red) 8×6
Brakes (yellow) 896 Fuel reserve with fuel filler flap location indicator 893 Fuel level 425 > Adaptive Highbeam Assist Plus 294 High beam 291 Low beam 289 Standing lights 289 Rear fog light 210 Mercedes-Benz emergency call system 893 Rear window wiper 219
G-Class - Owner's Manual
At a glance Overhead control panel
Panel kontrol di atas kepala


G-Class - Owner's Manual
At a glance Overhead control panel

Sun visors
Switches the left-hand reading lamp on/off 297
Switches automatic interior lighting control on/off 297
4 SOS SOS button 59
Switches the front interior lighting on/off 297
6 me button 549
Switches the rear interior lighting on/off 2917
Switches the right-hand reading lamp on/off 247
9 Spectacles compartment
10 Opens/closes the sliding sunroof 124
Inside rear-view mirror 253

G-Class - Owner's Manual
At a glance Door operating unit and seat adjustment

Unit pengoperasian pintu dan penyesuaian kursi


G-Class - Owner's Manual
At a glance Door operating unit and seat adjustment


G-Class - Owner's Manual
At a glance Door operating unit and seat adjustment
1 Child safety lock for the rear side windows 156 2 Opens/closes the rear left side window 180 3 Opens/closes the rear right side window 180 4 Opens/closes the left side window 180 5 Opens/closes the right side window 180
Operates the outside mirrors 252 Locks/unlocks the vehicle 175 Switches the seat ventilation on/off 292 Switches the seat heating on/off 291 Adjusts the seats electrically 195 >
10M Operates the memory function 298 12Opens the door 175 > 13Seat adjustment using the multi-media system 199 14Adjusts the luxury head restraints 197 >

G-Class - Owner's Manual
At a glance Emergencies and breakdowns
Keadaan darurat dan kerusakan


G-Class - Owner's Manual
At a glance Emergencies and breakdowns


G-Class - Owner's Manual
At a glance Emergencies and breakdowns

Jack 661
② Warning triangle 43
QR codes for accessing the rescue card
Safety vests 42
⑤ Fire extinguisher 59
6 me button 59
SOS SOS button 59
7 Checks and tops up operating fluids 745
Starting assistance 61
Tow-starting and towing 639
10 Flat tyre 63
First-aid kit (soft sided) 43
12 Stowage compartment for customer literature
Hazard warning light system 59
14 Vehicle tool kit 661
Fuel filler flap with information labels for tyre pressure, fuel type and QR codes for accessing the rescue card
Tow-starting and towing 639
⑰ Spare wheel 628

G-Class - Owner's Manual
Digital Owner's Manual

< Buku Pedoman Pemilik Digital
This interactive PDF works like a website - tap or click a button to jump straight to where you want to go. You can return here at any time via the navigation bar at the top left.
Calling up the Digital Operator's Manual 88
G-Class - Owner's Manual
Digital Owner's Manual Calling up the Digital Operator's Manual

< Memanggil Buku Pedoman Operator Digital
Multimedia system:
Info Owner's Manual Open Digital Owner's Manual
The Digital Operator's Manual describes the functions and operation of the vehicle and the multimedia system.
Select one of the following menu items in the Digital Operator's Manual:
- Quick start: find the first steps towards adjusting your seat (driver's side).
- Tips: find information that prepares you for certain everyday situations with your vehicle.
• Animations: watch animations of the vehicle functions.
- Messages: receive additional information about the messages on the driver display.
• Language: select the language for the Digital Operator's Manual.
You can search for keywords using the search field Search in order to find quick answers to questions regarding operation of the vehicle.

① Back
② Contents section
Menu
4 Search
Some sections in the Digital Operator's Manual, such as warning notes, can be expanded and collapsed.
Opsi tambahan untuk memanggil Buku Pedoman Operator Digital:
Driver display: call up brief information regarding display messages on the driver display. Pressing ⓚ will show brief information on the central display.
MBUX Voice Assistant: call-up via the voice control system
Global search: call up search results for contents of the Digital Operator's Manual in the home screen

G-Class - Owner's Manual
Digital Owner's Manual Calling up the Digital Operator's Manual
For safety reasons, the Digital Operator's Manual is deactivated while driving.


Back to Contents
G-Class - Owner's Manual
> General notes

< Catatan umum
This interactive PDF works like a website - tap or click a button to jump straight to where you want to go. You can return here at any time via the navigation bar at the top left.
Protection of the environment 91
Declarations of conformity and country-specific information 191
Liability for material defects 112
Take-back of end-of-life vehicles 92
Diagnostics connection 105
QR codes for the rescue card 113
Mercedes-Benz GenuineParts 93
Qualified specialist workshop 107
Data storage 114
Touch-sensitive control elements 95
Vehicle registration 108
Copyright 118
Mercedes-Benz app 96
Correct use of the vehicle 109
Operating safety 97
REACH regulation 110
Mounting the licence plate onto the front licence plate bracket 100
Notes for persons with electronic medical aids 1>1
G-Class - Owner's Manual
> General notes Protection of the environment
Perlindungan lingkungan

CATATAN LINGKUNGAN
Environmental damage due to operating conditions and personal driving style
The pollutant emission of the vehicle is directly related to the way you operate the vehicle.
Operate your vehicle in an environmentally responsible manner to help protect the environment. Please observe the following recommendations on operating conditions and personal driving style.
Kondisi pengoperasian:
▶ Make sure that the tyre pressure is correct.
Do not carry any unnecessary weight (e.g. roof luggage rack once no longer needed).
▶ Adhere to the service intervals.
A regularly serviced vehicle will contribute to environmental protection.
▶ Always have maintenance work carried out at a qualified specialist workshop.
Gaya mengemudi pribadi:
Do not depress the accelerator pedal when starting the engine.
▶ Do not warm up the vehicle while stationary.
▶ Drive carefully and maintain a suitable distance from the vehicle in front.
▶ Avoid frequent, sudden acceleration and braking.
▶ Switch off the vehicle during traffic stops, e.g. by using the ECO start/stop function.
▶ Drive in a fuel-efficient manner. Observe the ECO display for an economical driving style.


G-Class - Owner's Manual
> General notes Take-back of end-of-life vehicles
Pengambilan kembali kendaraan akhir masa pakai
HANYA NEGARA UE:
Mercedes-Benz will take back your end-of-life vehicle for environment-friendly disposal in accordance with the European Union (EU) End-Of-Life Vehicles Directive.
A network of vehicle take-back points and dismantlers has been established for you to return your vehicle. You can leave it at any of these points free of charge. This makes an important contribution to closing the recycling circle and conserving resources.
For further information about the recycling and disposal of end-of-life vehicles, and the take-back conditions, please visit the national Mercedes-Benz website for your country.


G-Class - Owner's Manual
> General notes Mercedes-Benz GenuineParts
Suku Cadang Asli Mercedes-Benz

CATATAN LINGKUNGAN
Environmental damage caused by not using recycled reconditioned components
Mercedes-Benz AG offers recycled reconditioned components and parts with the same quality as new parts. The same entitlement from the implied warranty is valid as for new parts.
▶ Recycled reconditioned components and parts from Mercedes-Benz AG.

CATATAN
Impairment of the operating efficiency of restraint systems due to the installation of accessory parts or repairs or welding
KANTUNG UDARA DAN PENGENCANG SABUK PENGAMAN, SERTA UNIT KONTROL DAN SENSOR DAPAT DIPASANG DI AREA BERIKUT KENDARAAN UNTUK SISTEM PENAHAN:
- Doors
- Door pillars
- Door sill
- Seats
- Cockpit
- Driver display
- Centre console
• Lateral roof frames
Do not install accessory parts such as audio systems in these areas.
▶ Do not carry out repairs or welding.
▶ Have accessory parts retrofitted at a qualified specialist workshop.
You could jeopardise operating safety of your vehicle if you use parts, tyres and wheels, or accessories relevant to safety that have not been approved by

G-Class - Owner's Manual
> General notes Mercedes-Benz GenuineParts
Mercedes-Benz. Safety-critical systems (e.g. the brake system) may malfunction. Use only Mercedes-Benz GenuineParts or parts of equal quality. Use only tyres, wheels and accessory parts that have been specifically approved for your vehicle model.
Mercedes-Benz tests original parts, as well as conversion parts and accessory parts that have been specifically approved for your vehicle model for their reliability, safety and suitability. Despite ongoing market research, Mercedes-Benz is unable to assess alternative parts. Mercedes-Benz therefore accepts no responsibility for the use of such parts in Mercedes-Benz vehicles, even if they have been officially approved or independently approved by a testing centre.
Certain parts are only officially approved for installation or modification if they comply with legal specifications. All Mercedes-Benz GenuineParts meet approval requirements. The use of non-approved parts may invalidate the vehicle's operating permit.
INI AKAN BERLAKU DALAM SITUASI BERIKUT:
- The vehicle type is different from that for which the vehicle's operating permit was granted.
• Other road users could be at risk.
• The exhaust gas levels or noise levels worsen.
Always specify the vehicle identification number (VIN) ( → page 743) when ordering Mercedes-Benz GenuineParts.


G-Class - Owner's Manual
> General notes Touch-sensitive control elements

Elemen kontrol sensitif sentuhan
In addition to conventional switches and buttons, your vehicle is equipped with touch-sensitive control elements.
INI TERLETAK DI AREA BERIKUT KENDARAAN ANDA:
Steering wheel
• MBUX multimedia system
The control elements feature touch-sensitive user interface surfaces. The surfaces are controlled by pressing or swiping to adjust settings or trigger functions, forexample.
In the touchscreen area, haptic acknowledgement is relayed through the touch-sensitive surface, forexample in the form of a pulse or a vibration, or a change in user interface surface structure.
PENGAKUAN HAPTIK DISAMPAIKAN DALAM SITUASI BERIKUT, CONTOHNYA:
- When pressing a button on the user interface surface
- When scrolling in a list or table
- When reaching a new area on the user interface surface, e.g. a pop-up window
SAAT MENGGUNAKAN PERMUKAAN ANTAR MUKA PENGGUNA SENSITIF SENTUHAN, PERHATIKAN HAL-HAL BERIKUT UNTUK MENGHINDARI MASALAH OPERASIONAL:
• Do not affix stickers or similar objects onto the surfaces
- Do not attach a smartphone- or other holders to the surface of the central display.
- Protect the surfaces against moisture and wet conditions.
- Keep the surfaces free of dust and dirt ( → page 621).
In addition to a symbol, some touch-sensitive control elements also feature integrated indicator lamps. Ensure that the symbol of the control element is pressed during use.

G-Class - Owner's Manual
> General notes Mercedes-Benz app
Aplikasi Mercedes-Benz
Catatan tentang Digital Extras
You can also activate various functions (Digital Extras) retroactively via Mercedes-Benz after purchasing your vehicle.
Information is available at any Mercedes-Benz Service Centre.
Memesan dan mengaktifkan Digital Extras
Persyaratan:
• The vehicle has a wireless connection.
• The vehicle is linked to the user's Mercedes-Benz account.
MEMESAN DAN MENGAKTIFKAN DIGITAL EXTRAS
Place the Digital Extra that you would like to purchase for your vehicle in your shopping basket in the Mercedes-Benz Store.
Complete the order.
The Digital Extra will be activated while you are using the vehicle.
MEMPERCEPAT AKTIVASI
▶ Switch off and lock the vehicle.
Unlock the vehicle after about two minutes and switch on the vehicle. The Digital Extra will be activated. For some features, a notification will also appear in the vehicle's multimedia system.
If the activation was not successful, repeat the process.


G-Class - Owner's Manual
> General notes Operating safety
Keselamatan pengoperasian

PERINGATAN
Risk of accident due to malfunctions or system failures
If you do not have the prescribed service/maintenance work or any required repairs carried out, this could result in malfunctions or system failures.
▶ Always have the prescribed service- and maintenance work or any required repairs carried out in a qualified workshop.

PERINGATAN
Risk of accident or injury due to improper modifications to electronic components
Modifications to electronic components, their software or wiring can impair their functionality and/or the functionality of other networked components or safety-relevant systems.
This can endanger the vehicle's operating safety.
You must not tamper with wiring, electronic components, or their software.
▶ Always have work on electrical and electronic devices carried out at a qualified specialist workshop.
If you modify the on-board electronics, the general operating permit is rendered invalid.
Observe the "On-board electronics" section in "Technical data".

PERINGATAN
Risk of fire due to flammable material coming into contact with hot parts of the exhaust system
If combustible materials, e.g. leaves, grass or twigs, come into contact with hot parts of the exhaust system, they may ignite.
When driving off-road or on unpaved surfaces, check the underside of the vehicle at regular intervals.
In particular, remove any trapped parts of plants or other flammable material.
If damage should occur, immediately inform a qualified specialist workshop.

G-Class - Owner's Manual
> General notes Operating safety


CATATAN
Damage to the vehicle due to driving too fast and due to impacts to the vehicle underbody or suspension components
TERUTAMA DALAM SITUASI BERIKUT, ADA RISIKO KERUSAKAN PADA KENDARAAN:
• the vehicle becomes grounded, e.g. on a high kerb or an unpaved road
- the vehicle is driven too fast over an obstacle, e.g. a kerb, speed bump or pothole
• a heavy object strikes the underbody or suspension components
In situations such as these, damage to the body, underbody, suspension components, wheels or tyres may not be visible. Components damaged in this way can unexpectedly fail or, in the case of an accident, may no longer absorb the resulting force as intended.
If the underbody panelling is damaged, flammable materials such as leaves, grass or twigs can collect between the underbody and the underbody panelling. These materials may ignite if they come into contact with hot parts of the exhaust system.
▶ Have the vehicle checked and repaired immediately at a qualified specialist workshop.
or
If driving safety is impaired while continuing your journey, pull over and stop the vehicle immediately, while paying attention to road and traffic conditions, and contact a qualified specialist workshop.
KENDARAAN DENGAN SISTEM KELISTRIKAN 48 V

BAHAYA
Risk of fatal injury by touching damaged high-voltage components
Vehicles with a 48 V on-board electrical system contain individual high-voltage components. These high-voltage components are under high voltage.
If you modify component parts of these high-voltage components or touch damaged component parts, you may be electrocuted.
High voltage components may be damaged in an accident, although the damage may not be visible.
▶ Never perform modifications to component parts of high-voltage components.
▶ Never touch damaged component parts of high-voltage components.
▶ Never touch component parts of high-voltage components after an accident.
Vehicles with a 48 V on-board electrical system contain high voltage components. These components are marked with a high-voltage label:

G-Class - Owner's Manual
> General notes Operating safety


Example
All work on high voltage components must be carried out at a qualified specialist workshop.

G-Class - Owner's Manual
> General notes Mounting the licence plate onto the front licence plate bracket

Memasang plat nomor pada braket plat nomor depan

The information label can be found on the licence plate bracket, either embossed or in sticker form.
CATATAN
Malfunctions and system failures due to incorrect mounting of the licence plate on the front licence plate bracket
If the licence plate is incorrectly mounted on the front licence plate bracket, sensors, cameras or driving and safety systems may malfunction or fail.
Observe the following points when mounting the licence plate on the front licence plate bracket:
Mount the licence plate directly on the licence plate bracket without advertising media or other holders.
▶ Ensure when mounting the licence plate that it does not protrude over the licence plate bracket at the top.
▶ Fit the licence plate centrally on the licence plate holder, ensuring that any protrusion of the licence plate is the same on both sides.


G-Class - Owner's Manual
> General notes Declarations of conformity and country-specific information

< Deklarasi kesesuaian dan informasi khusus negara
Kompatibilitas elektromagnetik
The electromagnetic compatibility of the vehicle components has been checked and certified according to the currently valid version of Regulation UN-R 10.
Informasi khusus negara untuk komponen radio regulasi
INFORMASI MENGENAI MODIFIKASI KOMPONEN RADIO
Modifications to radio components may invalidate the general operating permit for the radio component in question. The radio component manufacturer shall accept no responsibility for such modifications.
INFORMASI MENGENAI MELINTASI BATAS NEGARA
You must observe the radio regulatory provisions for the country in which you are currently driving when operating the vehicle.
KOMPONEN KENDARAAN NIRKABEL
Only for EU and EFTA countries and countries that recognise the EU manufacturer's declaration of conformity:
C€
The following information applies to all wireless components of the vehicle and of the information systems and communication devices integrated in the vehicle:
The manufacturers of the wireless components ensure that all wireless components installed in the vehicle comply with Directive 2014/53/EU. The full texts of the EU declarations of conformity are available at the following web address:
https://certificates-of-conformity.corpinter.net/en

You can obtain further information from a Mercedes-Benz Service Centre.
KHUSUS UNTUK ISRAEL:
It is prohibited to make any change to a vehicle-installed radio component that could affect the wireless specifications of the device, including software changes, replacement of the original antenna, or adding the option to connect the device to an external antenna, without first obtaining approval from the Communica-tions Ministry, because of concern about wireless interference.
FOR THE UNITED KINGDOM ONLY:


G-Class - Owner's Manual
> General notes Declarations of conformity and country-specific information

The following information applies to all wireless components of the vehicle and of the information systems and communication devices integrated in the vehicle:
The manufacturers of the radio components declare that all radio equipment installed in the vehicle is in compliance with the relevant statutory requirements. The full texts of the declarations of conformity are available at the following web address:
https://certificates-of-conformity.corpinter.net/en

FOR BRAZIL ONLY:
ANATEL
Note on two-way radio systems in the vehicle:
These systems are not protected against harmful interference and must not cause interference in properly approved systems.
More information is available on the ANATEL website. www.anatel.gov.br
KHUSUS UNTUK JAMAICA:
All wireless vehicle components have received a type-approval certificate from the SMA.
KHUSUS UNTUK NIGERIA:
Connection and use of this communications equipment is permitted by the Nigerian Communications Commission
Connection and use of the radio communications equipment in this vehicle is permitted by the Nigerian Communications Commission
KHUSUS UNTUK NEGARA-NEGARA UNI EKONOMI EURASIA:

The manufacturers of the wireless components installed in the vehicle hereby declare that all wireless components installed in the vehicle comply with the technical specifications for two-way radios. You can obtain further information from a Mercedes-Benz Service Centre.
KHUSUS UNTUK UKRAINA:

The manufacturers of the wireless components installed in the vehicle hereby declare that the wireless components installed in the vehicle comply with the


G-Class - Owner's Manual
> General notes Declarations of conformity and country-specific information
technical regulations for two-way radios. You can obtain further information from a Mercedes-Benz service centre.
Baterai
UNTUK NEGARA-NEGARA UE DAN NEGARA-NEGARA YANG MENGAKUI DEKLARASI KESESUAIAN MANUFAKTUR UE:
CE
For all 48 V and high-voltage batteries in the vehicle, once the applicable requirements under regulation (EU) 2023/1542 come into effect, the required information will be available at the following web address:
https://certificates-of-conformity.corpinter.net/en

Jack
Only for EU and EFTA countries and countries that recognise the EU Manufacturer's Declaration of Conformity:
DEKLARASI KESESUAIAN CE
Copy and translation of the original Declaration of Conformity:
Deklarasi Kesesuaian EC
2006/42/EC
Kami WEBER-HYDRAULIK GMBH
Heilbronner Straße 30 – 74363 Güglingen
declare that the product "Weber hydraulic bottle jack", types:
A AD ADX AH AHX AL AT ATD ATDX ATG ATN ATGX ATPX ATQ AX
Capacity: 2,000 to 100,000 kg
Serial no.: from year of manufacture 01/2010
complies with the relevant essential health and safety requirements of the EC Machinery Directive.
DEKLARASI KESESUAIAN EC INI TIDAK BERLAKU LAGI:
- in the event of modifications or repairs performed by an unqualified person
- if the products are not used correctly and in accordance with the Owner's Manual
• if the required regular checks are not performed.
Relevant EU Directives: EC Machinery Directive 2006/42/EC
Applicable standards: ISO 11530
Quality assurance: DIN EN ISO 9001:2000
Güglingen, 01/07/2013
[Signature] [Signature]
Manager Representative of Technical
WEBER-HYDRAULIK GMBH Documentation


G-Class - Owner's Manual
> General notes Declarations of conformity and country-specific information

WEBER-HYDRAULIK GMBH
Heilbronner Strasse 30 — 74363 Güglingen
DEKLARASI KESESUAIAN UKCA
Copy and translation of the original Declaration of Conformity:
UKCA Declaration of Conformity
We, WEBER-HYDRAULIK GMBH
Heilbronner Straße 30 - 74363 Güglingen
hereby declare that the product "WEBER-HYDRAULIK - bottle jack",
of the types:
A AD ADX AH AHX
AL AT ATD ATDX ATG
ATN ATGX ATPX ATQ AX
Load: 2,000 to 100,000 kg
Serial no.: as of year of construction 01/2022
complies with the relevant essential health and safety requirements. Supply of Machinery (Safety) Regulation 2008.
Relevant UK Directives: Supply of Machinery/Regulations 2008
Standards applied:
ISO 11530:1993
BS EN ISO 12100:2010-12-31
Safety of machinery.
General principles for design.
Risk assessment and risk reduction.
Güglingen, 01/06/2022
[Signature]
Christine Grotz Tokley Doug
Managing Director
WEBER-HYDRAULIK GmbH
WEBER-HYDRAULIKA Sp.z.o.o.
WEBER-HYDRAULIK GMBH
Heilbronner Straße 30 - 74363 Güglingen
G-Class - Owner's Manual
> General notes Diagnostics connection
Koneksi diagnostik
The diagnostics connection is a technical interface in the vehicle. It is used, forexample, within the scope of repair and servicing work or for reading out vehicle data in a specialist workshop. Diagnostic devices should therefore only be connected at a qualified specialist workshop.

PERINGATAN
Risk of accident as a result of connecting devices to the diagnostics connection
If you connect devices to the vehicle's diagnostics connection, functioning of vehicle systems and operational safety can become impaired.
It is recommended for safety reasons that only products which have been approved by a Mercedes-Benz service centre be used and connected.


PERINGATAN
Risk of accident due to objects in the driver's footwell
Objects in the driver's footwell may impede pedal travel or block a depressed pedal.
This will jeopardise the operating and road safety of the vehicle.
Stow all objects in the vehicle securely so that they cannot get into the driver's footwell.
▶ Make sure that there is always sufficient clearance for the pedals.
▶ Always fit the floor mats securely and as prescribed.
Do not use loose floor mats and do not place floor mats on top of one another.
G-Class - Owner's Manual
> General notes Diagnostics connection


CATATAN
Battery discharging from using devices connected to the diagnostics connection
Using devices at the diagnostics connection drains the battery.
▶ Check the charge level of the battery.
If the charge level is low, charge the battery, e.g. by driving a considerable distance.
Please also note the information about the 12 V battery and short-distance trips in the "Driving and Parking" section ( → page 279).

MENGHUBUNGKAN DAN MENGGUNAKAN PERANGKAT LAIN DENGAN KONEKSI DIAGNOSTIK DAPAT MENYEBABKAN KONSEKUENSI BERIKUT:
• Malfunctions in the vehicle system
• Permanent damage to vehicle components
Please refer to the warranty terms and conditions in this regard.
Moreover, connecting equipment to the diagnostics connection can lead to emissions monitoring information being reset, forexample. This may lead to the vehicle failing to meet the requirements of the next emissions inspection during the main inspection.

G-Class - Owner's Manual
> General notes Qualified specialist workshop
< Bengkel spesialis yang berkualifikasi
A qualified specialist workshop has the necessary special skills, tools and qualifications to correctly carry out any necessary work on your vehicle. This particularly applies to safety-critical work.
SELALU LAKUKAN PEKERJAAN BERIKUT PADA KENDARAAN ANDA DI BENGKEL SPESIALIS YANG BERKUALIFIKASI:
Safety-critical work
• Service and maintenance work
Repair work
• Modifications as well as installations and conversions
• Work on electronic components
- Vehicles with 48 V on-board electrical system: work on the high-voltage component of the 48 V on-board electrical system
Mercedes-Benz recommends a Mercedes-Benz service centre.


G-Class - Owner's Manual
> General notes Vehicle registration
Registrasi Kendaraan
Mercedes-Benz may ask its service centres to carry out technical inspections on certain vehicles. The quality or safety of the vehicle will be improved as a result of the inspection.
Mercedes-Benz can only inform you about vehicle inspections if Mercedes-Benz has your registration data.
MUNGKIN KENDARAAN ANDA BELUM DIDAFTARKAN ATAS NAMA ANDA DALAM KASUS BERIKUT:
• if your vehicle was not purchased from an authorised specialist dealer.
- if your vehicle has not yet been inspected at a Mercedes-Benz service centre.
It is advisable to register your vehicle with a Mercedes-Benz service centre.
Notify Mercedes-Benz as soon as possible of any change of address and/or change of vehicle ownership. You can do this at a Mercedes-Benz service centre, forexample.


G-Class - Owner's Manual
> General notes Correct use of the vehicle
Penggunaan kendaraan yang benar
If you remove any warning stickers, you or others could fail to recognise potential dangers. Leave all warning stickers in their designated positions.
PERHATIKAN INFORMASI BERIKUT TERUTAMA SAAT MENGEMUDIKAN KENDARAAN ANDA:
- The safety notes in this Owner's Manual, vehicle-specific supplements and further supplementary documents
• Technical data for the vehicle
• Traffic rules and -regulations of the country you are currently in
- Motor vehicle laws and safety standards of the country you are currently in
• Radio regulatory requirements of the country you are currently in


G-Class - Owner's Manual
> General notes REACH regulation
Peraturan REACH
Khusus untuk negara-negara UE dan EFTA:
The REACH Regulation (Regulation (EC) No. 1907/2006, Article 33) stipulates a duty to supply information about substances of very high concern (SVHCs).
Mercedes-Benz AG acts to the best of its knowledge to prevent these SVHCs from being used and to enable customers to safely handle these substances. According to supplier information and internal product information, there are SVHCs known to Mercedes-Benz AG that are found in individual components of this vehicle in quantities of over 0.1 percent by weight.
INFORMASI LEBIH LANJUT DAPAT DIPEROLEH DI ALAMAT BERIKUT:
- https://reach.mercedes-benz.com/de/home/
- https://reach.mercedes-benz.com/en/home/


G-Class - Owner's Manual
> General notes Notes for persons with electronic medical aids

Catatan untuk orang dengan alat bantu medis elektronik
Despite meticulous development of their vehicle systems, Mercedes-Benz AG cannot completely rule out the interaction of vehicle systems with electronic medical aids, such as cardiac pacemakers.
In addition, there are components installed in the vehicle that can generate magnetic fields on a par with permanent magnets, regardless of the operating status of the vehicle. These fields may occur in the area around the multimedia system and sound system, forexample, or in the area around the seats, depending on the respective vehicle equipment.
DALAM BEBERAPA KASUS, HAL INI DAPAT MENGAKIBATKAN HAL BERIKUT, TERGANTUNG PADA ALAT BANTU YANG DIGUNAKAN:
• Medical aids malfunctioning
• Adverse health effects
Note the information and warnings from the manufacturer of the auxiliary equipment, and in case of uncertainty, please consult the manufacturer of the auxiliary equipment and/or your doctor. If there is continuing uncertainty concerning the possibility of medical aids malfunctioning, Mercedes-Benz AG recommends using fewer electrical vehicle systems and/or maintaining a distance from the components.
SELALU LAKUKAN PERBAIKAN DAN PERAWATAN PADA AREA KOMPONEN BERIKUT DI BENGKEL SPESIALIS YANG KOMPETEN:
• vehicle components carrying live voltage
• transmission aerials
• multimedia system and sound system
If you have any queries or suggestions, consult a qualified specialist workshop.

G-Class - Owner's Manual
> General notes Liability for material defects
Tanggung jawab atas cacat material

CATATAN
Damage to the vehicle due to failure to follow instructions in this Owner's Manual.
Damage to the vehicle can arise due to failure to follow instructions in this Owner's Manual.
This damage is not covered either by the Mercedes-Benz liability for material defects or by the New- or Used-Vehicle Warranty.
Observe the notes on correct operation of the vehicle as well as possible vehicle damage in this Owner's Manual.


G-Class - Owner's Manual
> General notes QR codes for the rescue card
Kode QR untuk kartu penyelamat
QR codes are attached in the fuel filler flap and on the opposite side on the B-pillar. In the event of an accident, rescue services can use the QR code to quickly find the appropriate rescue card for your vehicle. The current rescue card contains the most important information about your vehicle (e.g. the routing of the electric lines) in compact form.
Additional information can be obtained at: https://rk.mb-qr.com/de/


G-Class - Owner's Manual
> General notes Data storage
Penyimpanan data
Pemrosesan data di dalam kendaraan
UNIT KONTROL ELEKTRONIK
Electronic control units are fitted in your vehicle. Control units process data they receive, generate themselves or exchange with each other, forexample from vehicle sensors. Some control units are required for the safe operation of your vehicle. Some assist you when driving, such as driver assistance systems, while others enable convenience or infotainment functions.
The following section provides general information about data processing in the vehicle. Additional information regarding which vehicle data is collected, saved and transmitted to third parties and for what purpose can be found in the information directly related to the relevant functional characteristics in the respective Owner's Manual. This information is available online and digitally, depending on the vehicle's equipment.
DATA PRIBADI
A unique vehicle identification number identifies every vehicle. Depending on the country, this vehicle identification number can also be used to determine the identity of the vehicle keeper, forexample by the authorities. There are also other ways of tracing data collected from the vehicle back to the keeper or driver, such as the licence plate number.
The data generated or processed by control units may therefore be attributable to a person or, in certain circumstances, become attributable to a person. Depending on which vehicle data is available, it may be possible to make inferences about, forexample, your driving behaviour, location, route or use patterns.

PERSYARATAN HUKUM TERKAIT PENGUNGKAPAN DATA
If legally required to do so, manufacturers are generally obliged to provide the authorities with data stored by the manufacturer upon request and to the extent required. Forexample, this may be the case during the investigation of a criminal offence.
State authorities are themselves authorised to read out data from the vehicle in individual cases and within the applicable legal framework. In the case of an accident, information that can help with an investigation can be taken from the airbag control unit, forexample.
DATA OPERASIONAL DI DALAM KENDARAAN
To operate the vehicle, control units process data.
INI TERMASUK DATA BERIKUT, CONTOHNYA:
- Vehicle status information such as the speed, longitudinal acceleration, lateral acceleration, number of wheel revolutions or the fastened seat belts display
• Ambient conditions, such as temperature, rain sensor or distance sensor
Generally, this data is volatile and will not be stored beyond the period of operation and will only be processed within the vehicle itself. Control units, forexample, vehicle keys, often contain data memories. Their use permits the temporary or permanent documentation of technical information about the vehicle's operating state, component loads, maintenance requirements and technical events or faults.


G-Class - Owner's Manual
> General notes Data storage

TERGANTUNG PADA PERALATAN TEKNIS, DATA BERIKUT DISIMPAN:
- Operating status of system components, such as fill levels, tyre pressure or battery status
- Malfunctions or faults in important system components, such as lights or brakes
- System reactions in special driving situations, such as an airbag deployment or the intervention of stability control systems
• Information on events leading to vehicle damage
In certain cases, storing data that would have otherwise been temporary may be required. This may be the case if the vehicle has detected a malfunction, forexample.
If you make use of services, e.g. repair services or maintenance work, - the stored operating data can be read out and used together with the vehicle identification number - if necessary.
Service network employees such as workshops and manufacturers, and third parties such as breakdown services can read out the data. The same is true in the event of warranty claims and quality assurance measures.
In general, the readout is performed via the legally prescribed port for the diagnostics connection in the vehicle. The selected operating data document the vehicle's or individual components' technical conditions, help with fault diagnosis, compliance with warranty obligations and quality improvement.
To that end, these data, particularly information about component loads, technical events, malfunctions and other faults, may be transmitted to the manufacturer along with the vehicle identification number. Furthermore, the manufacturer is subject to product liability. For this reason, the manufacturer also uses operational data from the vehicle, e.g. for recalls. This data can also be used to review the customer's warranty and guarantee claims.
Fault memories in the vehicle can be reset by a service outlet or at your request as part of repair or maintenance work.
FUNGSI KENYAMANAN DAN INFOTAINMENT
You can store the vehicle's convenience and individual settings and change or reset them at any time.
TERGANTUNG PADA PERLENGKAPAN KENDARAAN, INI TERMASUK PENGATURAN BERIKUT, CONTOHNYA:
- Seat and steering wheel positions
• Suspension tuning and climate control settings
• Individual settings, such as interior lighting
Depending on the selected equipment, you can import data into vehicle infotainment functions yourself.
TERGANTUNG PADA PERLENGKAPAN KENDARAAN, INI TERMASUK DATA BERIKUT, CONTOHNYA:
- Multimedia data, such as music, films or photos for playback in an integrated multimedia system
- Address book data for use in connection with an integrated hands-free system or an integrated navigation system
• Entered navigation destinations
• Data about the use of Internet services
This data for convenience and infotainment functions may be saved locally in the vehicle or on a device connected to the vehicle, such as a smartphone, USB flash drive or MP3 player. If you have entered this data yourself, you can delete it at any time.

G-Class - Owner's Manual
> General notes Data storage
This data is transmitted only from the vehicle to third parties at your request. This applies in particular for the use of online services based on the settings you have selected yourself.
INTEGRASI SMARTPHONE (MISALNYA ANDROID AUTO ATAU APPLE CARPLAY)
If your vehicle is equipped accordingly, you can connect your smartphone or another mobile end device to the vehicle. You can then control them using the control elements integrated into the vehicle. Images and audio from the smartphone can be output via the multimedia system. Certain information is simultaneously transferred to your smartphone. Depending on the type of integration, this includes position data, day/night mode and other general vehicle states. For more information, please consult the vehicle Owner's Manual/infotainment system.
This integration allows the use of selected smartphone apps, such as navigation or music player apps. There is no further interaction between the smartphone and the vehicle; in particular, vehicle data is not directly accessible. The type of additional data processing is determined by the provider of the app being used. The settings you can make, if any, depend on the specific app and your smartphone's operating system.
Layanan online
KONEKSI JARINGAN NIRKABEL
If your vehicle has a wireless network connection, it enables data to be exchanged between your vehicle and additional systems. The wireless network connection is made possible by the vehicle's own transmitter and receiver or by a mobile end device that you have brought into the vehicle, forexample, a smartphone. Online functions can be used via the wireless network connection. This includes online services and applications/apps provided to you by the manufacturer or by other providers.

LAYANAN DARI PABRIKAN
Regarding the manufacturer's online services, the individual functions are described by the manufacturer in a suitable place, forexample, in the Owner's Manual or on the manufacturer's website, where the relevant data protection information is also given. Personal data may be used for the provision of online services. Data are exchanged via a secure connection, such as the manufacturer's designated IT systems. Any personal data which are collected, processed and used, other than for the provision of services, is done so exclusively on the basis of legal permission. This is the case, forexample, for a legally prescribed emergency call system, a contractual agreement or when consent has been given.
You can have services and functions, some of which are subject to a fee, activated or deactivated. This excludes legally prescribed functions and services, such as an emergency call system.
LAYANAN PIHAK KETIGA
If you use online services from other providers (third parties), these services are the responsibility of the provider in question and subject to that provider's data protection conditions and terms of use. As a general rule, the manufacturer has no influence on the content exchanged.
For this reason, when services are provided by third parties, please ask the service provider in question for information about the type, extent and purpose of the collection and use of personal data.
HAK PERLINDUNGAN DATA
Depending on your country or the equipment and range of functions of your vehicle as well as the services you use and the services on offer, you are entitled to different data protection rights. Further information on data protection and your data protection rights can either be found on the manufacturer's website or you will receive this information as part of the various services


G-Class - Owner's Manual
> General notes Data storage
and service offers. There you will also find the contact information for the manufacturer and its data protection officers.
At a workshop, forexample, with the support of a specialist and possibly for a fee, you can have data read out which is stored only locally in the vehicle.


G-Class - Owner's Manual
> General notes Copyright
INFORMASI TENTANG LISENSI UNTUK PERANGKAT LUNAK GRATIS DAN SUMBER TERBUKA YANG BERLAKU UNTUK KENDARAAN ANDA DAPAT DIPEROLEH SEBAGAI BERIKUT:
• on the data storage medium in your vehicle document wallet
- by performing an update online at: https://www.mercedes-benz.com/opensource


Back to Contents
G-Class - Owner's Manual
Occupant safety

Keselamatan penumpang
This interactive PDF works like a website - tap or click a button to jump straight to where you want to go. You can return here at any time via the navigation bar at the top left.
Brief overview of most important points 120
Information on the automatic functions of the restraint system

Purpose and function of the restraint system

Seat belts 139
Airbags 140
G-Class - Owner's Manual
Occupant safety Brief overview of most important points

Ringkasan singkat poin-poin terpenting
Informasi dasar
KHUSUSNYA PASTIKAN KONDISI BERIKUT UNTUK MEMUNGKINKAN KOMPONEN SISTEM PENAHAN MENGEMBANGKAN POTENSI PERLINDUNGANNYA:
• Sit correctly ( → page 121).
• Fasten the seat belt correctly ( → page 122).
Function of the 4 seat belt warning lamp ( → page 125).
Function of the rear seat belt status display ( → page 125).
- The restraint system warning lamp has gone out after the self-test ( → page 124).
- The PASSENGER AIR BAG indicator lamps display the correct status of the front passenger airbag ( → page 126).
UNTUK PEMAHAMAN YANG JELAS
The chapter "Occupant safety" includes information on equipment, functions and behaviours that contribute directly to safety of vehicle occupants.
INFORMASI DISUSUN SEBAGAI BERIKUT:
- The most important information in brief: in this chapter, you are provided with an overview of the relationship between the restraint system and the correct behaviour of all vehicle occupants.
- Specific information: in further sections of the chapter "Occupant safety", you can find specific information on the equipment and functions of the restraint system.
\- Keyword search: You can also find specific topics using the search field in the Digital Owner's Manual.
INFORMASI TENTANG SUBJEK BERIKUT, ANTARA LAIN, TIDAK DISEDIAKAN DALAM BAB "KESELAMATAN PENUMPANG":
• Children in the vehicle ( → page 142)
• Driving and driving safety systems ( → page 338)
• Stowage areas ( → page 210)
MENDEFINISIKAN ISTILAH UMUM DENGAN JELAS
DALAM BUKU PANDUAN PEMILIK INI, ISTILAH UMUM BERIKUT DIGUNAKAN:
- Occupant safety: comprises the components and system functions which help to minimise, as much as possible, the stresses on and consequences for vehicle occupants during an accident.
- Restraint system: comprises those components which, along with the vehicle structure, help prevent vehicle occupants from potentially coming into contact with parts of the vehicle interior. The seat belts and airbags, for example, are components of the restraint system.
- Child restraint system: you can find all information on this subject in the chapter "Children in the vehicle" ( → page 142).
BERHATI-HATILAH
For the components of the restraint system to provide the intended level of protection, it is essential that your posture is correct and that the seat belt is correctly fastened.
G-Class - Owner's Manual
Occupant safety Brief overview of most important points
Please bear in mind that carelessness regarding the seating position and putting on the seat belt may have serious consequences. Be diligent and make sure that all vehicle occupants are sitting correctly and have fastened their seat belts properly before starting every journey ( → page 121).
Informasi tentang posisi duduk yang benar
The seat position must be correct in order for the components of the restraint system to provide the intended level of protection.
The seat position influences both the protection provided by the seat belt and the additional protection provided by the airbag.
A correct seat position in which the seat is nearly perfectly upright and a correctly fastened seat belt reduce the risks posed by the airbag when it is deployed.
Keep in mind space considerations when choosing a seat. With the seat in the correct, nearly upright position, your head should not touch the roof.

PERINGATAN
Risk of injury- or death due to an incorrect seat position
If you deviate from the correct seat position, the airbag cannot provide its intended protective function.
Each vehicle occupant must make sure of the following.
▶ Put the seat in the correct position.
▶ Fasten seat belts correctly.
▶ Observe the following information.
AGAR SISTEM PENAHAN MEMBERIKAN TINGKAT PERLINDUNGAN YANG DIMAKSUDKAN, PERHATIKAN INFORMASI BERIKUT:
• Before starting your journey, adjust your seat correctly ( → page 193).
When doing so, make sure you are able to fasten your seat belt correctly. The shoulder belt strap must be routed forward from the seat belt outlet over the centre of your shoulder.
- Keep your distance from the airbags, especially the front airbags. Set the driver's seat and front passenger seat as far back as possible while making sure the seat belt is fastened correctly.
- If persons are sitting on the rear seats, vehicle occupants should maintain an sufficient distance to the parts of the vehicle interior in front of them.
- Make sure there are no people, animals or objects between the vehicle occupants and an airbag.
- If you are the driver, observe the following information on the correct position of the driver's seat ( → page 193).
Only hold the steering wheel by the steering wheel rim. This allows the driver's airbag to fully deploy.
During pregnancy in particular, it is important to ensure the greatest possible distance from the steering wheel due to the change in stature and the unborn child.
- Assume a nearly upright sitting posture, with your buttocks positioned as far back as possible in the gap between the seat cushion and the seat backrest.
Your back must lie as flatly and as firmly as possible against the seat backrest.
- While driving, do not lean forward and do not lean against the door or side window. You may otherwise be in the deployment area of the airbags.


G-Class - Owner's Manual
Occupant safety Brief overview of most important points
\- Sit with their feet resting on the floor, if possible. Your thighs are supported slightly by the seat cushion.
Do not put your feet on the cockpit, for example. Your feet may otherwise be in the deployment area of the airbag.
• Fasten seat belts correctly ( → page 122).
Catatan tentang penggunaan sabuk pengaman yang benar
Always fasten your seat belt correctly before starting a journey. A seat belt can only provide the best level of protection if it is worn correctly.

PERINGATAN
Risk of injury or death due to incorrectly fastened seat belt
If the seat belt is not worn correctly, it cannot perform its intended protective function.
In addition, an incorrectly fastened seat belt can also cause injuries, for example, in the event of an accident or when braking or changing direction suddenly.
▶ Always ensure that all vehicle occupants have their seat belts fastened correctly and are sitting properly.


PERINGATAN
Risk of injury or death when additional restraint systems are not used for persons with a smaller stature
Persons under 1.50 m tall cannot wear the seat belt correctly without a suitable additional restraint system.

Always secure persons under 1.50 m tall in a suitable restraint system.
Observe the following information on the correct seat position and posture ( → page 121).
SETIAP PENUMPANG KENDARAAN WAJIB MEMPERHATIKAN CATATAN BERIKUT:
• The seat belt must not be twisted.
- The shoulder belt strap must be routed forward from the seat belt outlet over the centre of your shoulder.
- The shoulder belt strap should neither touch your neck nor be routed under your arm or behind your back.
- The lap belt must be routed as low down across the hips as possible. In addition, push the lap belt down as far as possible across your hips and pull tight with the shoulder belt strap. Never route the lap belt across your abdomen.
- After being tightened, the shoulder belt strap and lap belt must fit snugly against the body.
- Particularly during pregnancy, the instructions for wearing the seat belt correctly must be followed consistently due to the change in stature and the unborn child ( → page 123).
- Avoid wearing bulky clothing, e.g. a winter coat.


G-Class - Owner's Manual
Occupant safety Brief overview of most important points
- Never route the seat belt across sharp, pointed, abrasive or fragile objects.
• Only one person should use each seat belt at any one time.
- Never secure objects with a seat belt if the seat belt is also being used by one of the vehicle's occupants.
Also ensure that no objects, e.g. a cushion, are ever placed between a person and the seat.
If you are driving with a child in the vehicle, observe the information in the chapter "Children in the vehicle" ( → page 142).
Observe the instructions for loading the vehicle when securing objects, luggage or loads ( → page 210).
Menggunakan sabuk pengaman selama kehamilan
BERHATI-HATILAH
PERHATIKAN KHUSUS PETUNJUK BERIKUT SELAMA KEHAMILAN KARENA PERUBAHAN POSTUR TUBUH DAN JANIN:
• Correct sitting position and posture
• Wearing the seat belt correctly
The correct sitting position with a nearly upright sitting posture and a correctly fastened seat belt reduce the risks for the mother and unborn child in the event of an accident.
Particularly during pregnancy, due to the change in stature and the unborn child, maintain as much distance as possible between your abdomen (baby bump) and the steering wheel.

If it is not possible to maintain a sufficient distance to the steering wheel whilst simultaneously ensuring safe operation of the vehicle, another person should drive the vehicle.
Mercedes-Benz recommends that you seek professional advice, e.g. from a doctor, about the possible risks involved in driving in a vehicle when pregnant.
PENGGUNAAN SABUK PENGAMAN

TERUTAMA SELAMA KEHAMILAN, PERHATIKAN CATATAN BERIKUT:
- Push the lap belt down as far as possible across your hips and pull tight with the shoulder belt strap. Never route the lap belt across your abdomen (baby bump).
- The shoulder strap should run along the side of the abdomen (baby bump).
- Never position any objects between the person and the seat belt, not even cushions for example.
Mengencangkan dan menyesuaikan sabuk pengaman
If the seat belt is pulled quickly or sharply, the seat belt retractor locks. The seat belt strap cannot be pulled out any further.

G-Class - Owner's Manual
Occupant safety Brief overview of most important points

Always engage seat belt tongue ① of the seat belt into seat belt buckle ② of the corresponding seat.
To adjust the seat belt height: press button ③ on the seat belt outlet and slide the seat belt outlet to the desired position.
To engage the seat belt outlet: release button ③ and ensure that the seat belt outlet engages.

CATATAN
Deployment of components of the restraint system when the front passenger seat is unoccupied and a seat belt is buckled
When the front passenger seat is unoccupied and the seat belt tongue of the seat belt is engaged in the seat belt buckle, components of the restraint system may deploy unnecessarily on the front passenger side, e.g. the seat belt tensioner.
▶ Only buckle the seat belts as intended.
Left and right rear seat:


CATATAN
Deployment of the seat belt tensioner due to a seatbelt that is buckled when a rear seat is unoccupied
If the seat belt tongue is engaged in the seat belt buckle of the unoccupied rear seat, the seat belt tensioner may also deploy in the event of an accident along with other systems.
▶ Only buckle the seat belts as intended.
Fungsi lampu peringatan sistem penahan
When the vehicle is switched on, a self-test is performed, during which the restraint system warning lamp lights up. It goes out no later than a few seconds after the vehicle is started. The components of the restraint system are then functional.
TERJADI KERUSAKAN PADA SISTEM PENAHAN JIKA:
- the restraint system warning lamp ☐ does not light up or is lit continuously when the vehicle is switched on
- the restraint system warning lamp lights up continuously or repeatedly during a journey
If components of the restraint system have been deployed, the 🎨 restraint system warning lamp lights up continuously.

G-Class - Owner's Manual
Occupant safety Brief overview of most important points

PERINGATAN
Risk of injury due to malfunctions in the restraint system
Components in the restraint system may be activated unintentionally or not deploy as intended in an accident.
▶ Have the restraint system checked and repaired immediately at a qualified specialist workshop.
Mercedes-Benz recommends that you have the vehicle towed to a qualified specialist workshop.
Fungsi lampu peringatan sabuk pengaman
The 4 seat belt warning lamp on the driver display is a reminder that the driver and/or front passenger are not wearing their seat belts.
All vehicle occupants must fasten their seat belts correctly ( → page 122).
In addition, a warning tone may sound.
When the driver and the front passenger fasten their seat belts, the seat belt warning goes out.
Fungsi tampilan status sabuk pengaman belakang
The rear seat belt status display is only available for certain countries.


The colour of the symbol is intended to help you quickly identify the status of the rear seat belt.
The rear seat belt status display in the driver display is a reminder that all vehicle occupants must wear their seat belts correctly.
Every time the vehicle is switched on, the rear seat belt status display informs you for a certain amount of time which rear seat belt is not fastened.
KEMUNGKINAN WARNA SIMBOL:
• Grey: the rear seat belt is not fastened.
- Green: the seat belt tongue of a rear seat belt is engaged in the seat belt buckle of the displayed seat.
• Red: the person in the rear seat has unfastened their seatbelt.
If a vehicle occupant unfastens a seat belt in the rear while the vehicle is motion, the rear seat belt status display reappears.
In addition, a warning tone may sound.

G-Class - Owner's Manual
Occupant safety Brief overview of most important points
Fungsi lampu indikator AIRBAG PENUMPANG (airbag penumpang depan)

Vehicles without automatic front passenger airbag shutoff have a special sticker affixed to the side of the cockpit on the front passenger side ( → page 147). Indicator lamps PASSENGER AIR BAG ON and OFF have no function in this case and are not an indication of automatic front passenger airbag deactivation.
On vehicles with automatic front passenger airbag deactivation, the PASSENGER AIR BAG indicator lamps display the status of the front passenger airbag.
If the front passenger seat is occupied or a child restraint system is installed on it, make sure both before and during the journey that the status of the front passenger airbag is correct for the situation.

WARNING
Risk of potentially fatal injuries due to objects trapped under the front passenger seat
Objects trapped under the front passenger seat may interfere with the function of the automatic front passenger airbag shutoff or damage the system.
Do not stow any objects under the front passenger seat.
When the front passenger seat is occupied, ensure that no objects have become trapped beneath the front passenger seat.
Self-test: when the vehicle is switched on, both the PASSENGER AIR BAG ON and OFF indicator lamps light up simultaneously for several seconds.
SETELAH UJI MANDIRI, ANDA DAPAT MENENTUKAN STATUS AIRBAG PENUMPANG DEPAN SEBAGAI BERIKUT:
- Front passenger airbag disabled: PASSENGER AIR BAG OFF lights up continuously.
The front passenger airbag will not be deployed in the event of an accident. If PASSENGER AIR BAG OFF is lit, no one may use the front passenger seat.
If a rearward-facing child restraint system is fitted on the front passenger seat, PASSENGER AIR BAG OFF must be lit continuously.
- Front passenger airbag enabled: PASSENGER AIR BAG ON lights up for up to 60 seconds or until both the PASSENGER AIR BAG ON and OFF indicator lamps go out.

G-Class - Owner's Manual
Occupant safety Brief overview of most important points
The front passenger airbag may be deployed during an accident. If the front passenger airbag is in this status, no rearward-facing child restraint system may be fitted on the front passenger seat.
If you are driving with a child in the vehicle, observe the information in the chapter "Children in the vehicle" (→ page 142).

PERINGATAN
Risk of injury or death due to a disabled front passenger airbag
The front passenger airbag is disabled when the PASSENGER AIR BAG OFF indicator lamp is lit.
A person in the front passenger seat could then, for example, come into contact with the vehicle interior, especially if the person is sitting too close to the cockpit.
JIKA KURSI PENUMPANG DEPAN TERISI, SELALU PASTIKAN BAHWA:
- the classification of the person in the front passenger seat is correct and the front passenger airbag is enabled or disabled in accordance with the person in the front passenger seat.
• the front passenger seat has been moved as far back as possible.
• the person is seated correctly.
Both before and during the journey, ensure that the status of the front passenger airbag is correct.
KERUSAKAN PADA PENONAKTIFAN OTOMATIS AIRBAG PENUMPANG DEPAN
The PASSENGER AIR BAG OFF indicator lamp and the restraint system warning lamp light up simultaneously.
In this case, no one may use the front passenger seat and no child restraint system may be fitted on the front passenger seat.
Have the automatic front passenger airbag shutoff checked and repaired immediately at a qualified specialist workshop.
Menonaktifkan atau mengaktifkan airbag penumpang depan
The automatic front passenger airbag shutoff can disable or enable the front passenger airbag and front passenger knee airbag according to the situation.
This happens automatically as a result of the classification of the person or child restraint system on the front passenger seat.
You cannot manually disable or enable the front passenger airbag.
Informasi tentang sistem pengaman anak
When fitting a child restraint system, observe the notes in "Children in the vehicle" ( → page 142).

G-Class - Owner's Manual
Occupant safety Brief overview of most important points
CATATAN TENTANG SISTEM PENGAMAN ANAK DI KURSI PENUMPANG DEPAN

PERINGATAN
Risk of injury or fatal injuries if the front passenger airbag is enabled
If the front passenger airbag is enabled, a child on the front passenger seat may be struck by the front passenger airbag during an accident.

NEVER use a rearward facing child restraint system on a seat protected by an ACTIVE AIRBAG in front of it, DEATH or SERIOUS INJURY to the CHILD can occur.
Also pay particular attention to the notes on rearward-facing or forward-facing child restraint systems on the front passenger seat ( → page 148).


G-Class - Owner's Manual
Occupant safety Information on the automatic functions of the restraint system

Informasi tentang fungsi otomatis sistem pengaman
Fungsi penonaktifan otomatis airbag penumpang depan
SESEORANG DI KURSI PENUMPANG DEPAN HARUS MEMATUHI PETUNJUK BERIKUT:
- Sit correctly (→ page 121).
• Fasten seat belts correctly ( → page 122).
The automatic front passenger airbag shutoff can disable or enable the front passenger airbag and front passenger knee airbag according to the situation.
PADA SITUASI BERIKUT, AIRBAG SAMPING DAN PENGENCANG SABUK KESELAMATAN DINONAKTIFKAN:
- The automatic front passenger airbag deactivation has not categorised the person in the front passenger seat as an adult or a person of corresponding stature and
- The seat belt tongue is not inserted into the seat belt buckle on the front passenger seat
PASTIKAN ANDA MEMPERHATIKAN INFORMASI BERIKUT:
\- The status of the front passenger airbag, see "Function of the PASSENGER AIR BAG indicator lamps" (→ page 126).
\- When fitting a child restraint system to the front passenger seat, observe the vehicle-specific information ( → page 148).

STATUS AIRBAG PENUMPANG DEPAN TERKAIT DENGAN POSTUR TUBUH ORANG:
\- Front passenger airbag disabled: PASSENGER AIR BAG OFF lights up continuously.
The front passenger airbag will not be deployed in the event of an accident. If PASSENGER AIR BAG OFF is lit, no one may use the front passenger seat.
\- Front passenger airbag enabled: PASSENGER AIR BAG ON lights up for up to 60 seconds or until both the PASSENGER AIR BAG ON and OFF indicator lamps go out.
The front passenger airbag may be deployed during an accident. Observe the following information on the correct seat position ( → page 121).


G-Class - Owner's Manual
Occupant safety Information on the automatic functions of the restraint system
Vehicles with rear seats: a person of smaller stature should use a rear seat.
BATASAN SISTEM
AIRBAG PENUMPANG DEPAN MUNGKIN DINONAKTIFKAN SECARA KELIRU, MIS. PADA SITUASI BERIKUT:
- The front passenger transfers their weight by supporting themselves on a vehicle armrest.
• The front passenger sits in such a way that they unload the seat surface.

CATATAN
Deployment of components of the restraint system when the front passenger seat is unoccupied
DALAM KECELAKAAN, KOMPONEN SISTEM PENAHAN MUNGKIN MENGEMBANG TANPA PERLU DI SISI PENUMPANG DEPAN JIKA:
• There are heavy objects on the front passenger seat.
- The seat belt tongue is engaged in the seat belt buckle of the front passenger seat and the front passenger seat is unoccupied.
▶ Stow objects in a suitable place.
▶ Only one person should use each seat belt at any one time.
Depending on the detected accident situation, the window airbag on the front passenger side may deploy. The airbag is deployed regardless of whether the front passenger seat is occupied.
Fungsi PRE-SAFE ® (perlindungan penumpang antisipatif)
PRE-SAFE ® is able to detect certain critical driving situations and implement pre-emptive measures to protect the vehicle occupants.
PRE-SAFE® DAPAT MENERAPKAN LANGKAH-LANGKAH BERIKUT SECARA INDEPENDEN SATU SAMA LAIN:
- tightening the seat belts on the driver's seat and front passenger seat.
• closing the side windows.
• Vehicles with sliding sunroof: closing the sliding sunroof.
- Vehicles with memory function: moving the front passenger seat to a more favourable seat position.
- Vehicles with multicontour seat: increasing the lateral support by inflating the seat side bolsters of the seat backrest.
PRE-SAFE® Sound: provided that the multimedia system is switched on, generating a brief noise signal to stimulate the innate protective mechanism of a person's hearing.

CATATAN
Damage caused by objects in the footwell or behind the seat
The automatic adjustment of the seat position may result in damage to the seat and/or the object.
▶ Stow objects in a suitable place.
You can watch an animation on this topic via the following link:

G-Class - Owner's Manual
Occupant safety Information on the automatic functions of the restraint system

Membalikkan langkah-langkah sistem PRE-SAFE ®
If an accident did not occur, the pre-emptive measures that were taken are reversed.
You will need to perform certain settings yourself.
If the seat belt pre-tensioning is not reduced, move the seat backrest slightly backwards.
The seat belt pre-tensioning releases.
Fungsi penyesuaian sabuk keselamatan
Vehicles with PRE-SAFE: After you have fastened the seat belt of the front seat, it may adjust itself against your body by pulling at the shoulder until somewhat tight. Do not hold the seat belt tightly while it is adjusting.
You can activate and deactivate the seat belt adjustment function using the multimedia system ( → page 131).
Mengaktifkan/menonaktifkan penyesuaian sabuk keselamatan melalui sistem multimedia
Multimedia system:

▶ Activate or deactivate Belt adjustment.
Ikhtisar langkah-langkah otomatis setelah kecelakaan
TERGANTUNG PADA JENIS DAN TINGKAT KEPARAHAN KECELAKAAN, DAN TERGANTUNG PADA PERLENGKAPAN KENDARAAN, LANGKAH-LANGKAH BERIKUT DAPAT DITERAPKAN, MISALNYA:
• automatic braking (post-collision brake) (→ page 131)
• activating the hazard warning lights
• triggering an automatic emergency call ( → page 69)
• switching off the engine
To start the vehicle again, switch the vehicle off and back on ( → page 272). Depending on the type and severity of the accident, the vehicle might no longer start.
• Shutting off the fuel supply system
- unlocking the vehicle doors
• lowering the side windows
• displaying the emergency guide on the central display ( → page 550)
• switching on the interior lighting
Fungsi rem pasca-tabrakan setelah kecelakaan
Depending on the accident situation, the post-collision brake can minimise the severity of a further collision or even avoid it.
If an accident is detected, the post-collision brake can initiate automatic braking. When the vehicle has come to a standstill, the electric parking brake is automatically applied.

G-Class - Owner's Manual
Occupant safety Information on the automatic functions of the restraint system

PENGEMUDI DAPAT MEMBATALKAN PENGEREMAN OTOMATIS DENGAN MELAKUKAN TINDAKAN BERIKUT:
• braking more strongly than automatic braking
• fully depressing the accelerator pedal with force

Tujuan dan fungsi sistem penahan
Ikhtisar situasi pengaktifan (sistem penahan)
TERUTAMA PASTIKAN KONDISI BERIKUT UNTUK MEMUNGKINKAN KOMPONEN SISTEM PENAHAN MENGEMBANGKAN POTENSI PERLINDUNGANNYA:
- Sit correctly (→ page 121).
• Fasten seat belts correctly ( → page 122).
Function of the seat belt warning lamp ( → page 125).
Function of the rear seat belt status display ( → page 125).
- The ☐ restraint system warning lamp does not light up after the self-check (→ page 124).
- The PASSENGER AIR BAG indicator lamps display the correct status of the front passenger airbag ( → page 126).
TERGANTUNG PADA SITUASI PENGaktifAN YANG TERDETEKSI, KOMPONEN SISTEM PENAHAN DAPAT DIAKTIFKAN ATAU DIKEMBANGKAN SECARA INDEPENDEN SATU SAMA LAIN:
- Seat belt tensioner: frontal impact, rear impact, side impact, rollover
• Driver's airbag, front passenger airbag: frontal impact
• Knee airbag: frontal impact
• Side airbag: side impact
• Window airbag: side impact, rollover, frontal impact
The installation location of an airbag is identified by the AIRBAG ( → page 140) symbol.
Observe the information on how the restraint system works ( → page 133).
Informasi tentang cara kerja sistem penahan
The function of the restraint system depends on the severity of the impact detected and the apparent type of accident.
For more information about types of accidents, see "Overview of deployment situations" ( → page 133).
The activation thresholds for the components of the restraint system are determined based on the evaluation of the sensor values measured at various points in the vehicle. This process is pre-emptive in nature. The triggering of the components of the restraint system must take place in good time at the start of the impact.
Factors which can only be seen and measured after a collision has occurred cannot play a decisive role in airbag deployment. They also do not provide an indication of airbag deployment.
The vehicle may be deformed significantly without an airbag being deployed. This is the case if only parts which are relatively easily deformed are affected
G-Class - Owner's Manual
Occupant safety Purpose and function of the restraint system
and the rate of vehicle deceleration is not high. Conversely, an airbag may be deployed even though the vehicle suffers only minor deformation. If, e.g. very rigid vehicle parts such as longitudinal members are hit, this may result in sufficiently high levels of vehicle deceleration.
Depending on the apparent type of accident and the detected deployment situation, seat belt tensioners and/or airbags supplement the protection offered by a correctly worn seat belt.
When enabled, an airbag can provide additional protection for the respective vehicle occupant.
PERLINDUNGAN POTENSIAL YANG DIBERIKAN OLEH SETIAP AIRBAG:
• Knee airbag: thighs, knees and lower legs
• Driver's airbag, front passenger airbag: head and ribcage
• Window airbag: head
• Side airbag: ribcage, also pelvis for front seat occupants
However, no system available today can completely eliminate injuries and fatalities in every accident situation. In particular, the seat belt and airbag generally do not protect against objects penetrating the vehicle from the outside. It is also not possible to completely rule out the risk of injury caused by the airbag deploying.
Mercedes-Benz recommends that you have the vehicle towed to a qualified specialist workshop after an accident. Take this into account, particularly if a seat belt tensioner has been triggered or an airbag deployed.
IF THE SEAT BELT TENSIONERS ARE TRIGGERED OR AN AIRBAG IS DEPLOYED, YOU WILL HEAR A BANG, AND A SMALL AMOUNT OF FINE POWDER MAY ALSO BE RELEASED:
• The bang will not generally affect your hearing.
\- In general, the fine powder released is not hazardous to health but may cause short-term breathing difficulties to persons suffering from asthma or other respiratory problems.
Provided it is safe to do so, leave the vehicle immediately or open the window in order to prevent breathing difficulties.
Informasi tentang perlindungan terbatas yang diberikan oleh sistem penahan
RISK DUE TO THE INCORRECT BEHAVIOUR OF VEHICLE OCCUPANTS EVERY VEHICLE OCCUPANT MUST MAKE SURE OF THE FOLLOWING IN PARTICULAR:
• They observe the information on the correct seat position ( → page 121).
- Do not stow any heavy, pointed, sharp or fragile objects in the pockets of clothing items. Stow such objects in a suitable place.
WARNING
Risk of injury or death due to incorrect seat position
The seat belt will not offer the intended level of protection if you have not moved the seat backrest to an almost vertical position.
In particular, you may slip under the seatbelt and injure yourself.
Adjust the seat properly before beginning your journey.
▶ Always ensure that the seat backrest is in an almost vertical position and that the shoulder section of your seat belt is routed across the centre of your shoulder.
G-Class - Owner's Manual
Occupant safety Purpose and function of the restraint system
RISIKO AKIBAT BENDA DI DALAM KABIN KENDARAAN
SETIAP PENUMPANG KENDARAAN HARUS MEMASTIKAN HAL BERIKUT TERUTAMA:
• They observe the information on the correct seat position ( → page 121).
• There are no objects between the seat, door and door pillar (B-pillar).
- There are no hard objects, e.g. clothes hangers, hanging on the grab handles or coat hooks.
- Do not stow any heavy, pointed, sharp or fragile objects in the pockets of clothing items. Stow such objects in a suitable place.
To secure objects, luggage or cargo, observe the instructions for loading the vehicle ( → page 210).

PERINGATAN
Risk of injury or death due to blocked seat belt buckle or seat belt anchorage
Objects next to the front seat that block the seat belt buckle or the moving seat belt anchorage on the front seat impair the function of the seat belt tensioners.
Before starting the journey, make sure that there are no objects around the seat belt buckle or between the front seat and door.


PERINGATAN
Risk of injury from objects in the deployment area of an airbag
Objects in the deployment area of an airbag can hinder or prevent the correct deployment of the airbag.
The airbag may then deploy in an uncontrolled manner and may even cause additional injuries to the vehicle occupants by deploying. This may be the case in particular if the airbag is integrated into the seat.
▶ Always stow and secure objects correctly.
Before commencing your journey, make sure that no objects are stowed in the deployment area of an airbag.
The installation location of an airbag is identified by the symbol AIRBAG ( → page 140).
RISIKO AKIBAT MEMASANG AKSESORIS
Do not attach accessories such as mobile navigation devices, mobile phones or cup holders, within the deployment area of an airbag, e.g. on the cockpit, on the door, on the side window or on the side trim.
In addition, no connecting cables, tensioning straps or retaining straps must be routed or attached to the vehicle within the deployment area of an airbag. Always comply with the accessory manufacturer's installation instructions and, in particular, the notes on suitable places for installation.

G-Class - Owner's Manual
Occupant safety Purpose and function of the restraint system

PERINGATAN
Risk of injury or death due to unsuitable protective covers
Due to unsuitable protective covers, the airbags cannot protect vehicle occupants as they are designed to do.
You should only use protective covers that have been approved for the corresponding seat by Mercedes-Benz.
In addition, the function of the automatic front passenger airbag deactivation could be restricted due to an unsuitable protective cover. If the front passenger seat is occupied, ensure that the PASSENGER AIR BAG indicator lamps display the correct status of the front passenger airbag ( → page 126).

RISIKO AKIBAT HEWAN PELIHARAAN DI DALAM RUANG KABIN KENDARAAN

PERINGATAN
Risk of accident and injury due to animals left unsecured or unattended in the vehicle
If you leave animals in the vehicle unattended or unsecured, they could press buttons or switches, for instance.
HEWAN DAPAT:
• activate vehicle equipment and become trapped, for example
• switch systems on or off and endanger other road users
Unsecured animals may be thrown about the vehicle in the event of an accident, or sudden steering and braking manoeuvres, and injure vehicle occupants.
▶ Never leave animals unattended in the vehicle.
▶ Always correctly secure animals while driving, e.g. using a suitable animal carrier.

G-Class - Owner's Manual
Occupant safety Purpose and function of the restraint system
RISIKO AKIBAT MODIFIKASI, KERUSAKAN, ATAU KEAUSAN PADA KOMPONEN SISTEM PENGAMAN

PERINGATAN
Risk of injury or death due to modifications to the restraint system
Vehicle occupants may no longer be protected as intended if alterations are made to the restraint system.
▶ Never alter the parts of the restraint system.
▶ Never tamper with the wiring or any electronic component parts or their software.
If it is necessary to modify the vehicle to accommodate a person with disabilities, contact a qualified specialist workshop.
Mercedes-Benz recommends that you use driving aids which have been approved for your vehicle by Mercedes-Benz.


PERINGATAN
Risk of injury or death due to damaged or modified seat belts
SABUK PENGAMAN TIDAK DAPAT MEMBERIKAN PERLINDUNGAN DALAM SITUASI BERIKUT:
- the seat belt is damaged, has been modified, is extremely dirty, bleached or dyed
• the seat belt buckle is damaged or extremely dirty
- modifications have been made to the seat belt tensioner, seat belt anchorage or seat belt retractor
Seat belts may sustain non-visible damage in an accident, e.g. due to glass splinters.
Modified or damaged seat belts could tear or fail in the event of an accident, for example.
Modified seat belt tensioners could accidentally trigger or fail to function as intended.
▶ Never modify the seat belt system, for example the seat belt, seat belt buckle, seat belt tensioner, seat belt anchorage and seat belt retractor.
▶ Make sure that the seat belts are undamaged, not worn and clean.
▶ Always have the seat belts checked immediately after an accident at a qualified specialist workshop.
Mercedes-Benz recommends that you use seat belts which have been approved for your vehicle by Mercedes-Benz.


G-Class - Owner's Manual
Occupant safety Purpose and function of the restraint system

PERINGATAN
Risk of injury due to modifications to the cover of an airbag
If you modify the cover of an airbag or affix objects such as stickers to it, the airbag can no longer function as intended.
▶ Never modify the cover of an airbag.
Do not attach any objects to the cover.
The installation location of an airbag is identified by the AIRBAG symbol ( → page 140).

PERINGATAN
Risk of injury due to malfunctioning sensors in the door
The function of the airbags can be impaired due to modifications or incorrect work performed on the doors or door trim, or if the doors are damaged.
▶ Never modify the doors or parts of the doors.
▶ Always have work on the doors or door trim carried out at a qualified specialist workshop.
RISIKO AKIBAT KOMPONEN SISTEM PENGAMAN YANG TELAH BEKERJA
Mercedes-Benz recommends that you have the vehicle towed to a qualified specialist workshop after an accident.


PERINGATAN
Risk of burns from hot airbag components
The airbag parts are hot after an airbag has been deployed.
▶ Do not touch the airbag parts.
▶ Have a deployed airbag replaced at a qualified specialist workshop as soon as possible.

PERINGATAN
Risk of injury due to deployed airbag
A deployed airbag no longer offers any protection.
▶ Have the vehicle towed to a qualified specialist workshop in order to have the deployed airbag replaced.
Have deployed airbags replaced immediately.

PERINGATAN
Risk of injury or death from deployed pyrotechnic seat belt tensioners
Pyrotechnic seat belt tensioners that have been deployed are no longer operational and are unable to perform their intended protective function.
Therefore, have deployed pyrotechnic seat belt tensioners immediately replaced at a qualified specialist workshop.

G-Class - Owner's Manual
Occupant safety Seat belts
< Sabuk pengaman
Melepas sabuk pengaman
Press the release button in the seat belt buckle and guide the seat belt back with the seat belt tongue.

CATATAN
Damage caused by trapping the seat belt
If an unused seat belt is not fully retracted, it may become trapped in the door or in the seat mechanism.
▶ Always ensure that an unused seat belt is fully retracted.


G-Class - Owner's Manual
Occupant safety Airbags
Airbag
Ikhtisar airbag

Driver's knee airbag
2 Driver's airbag
Front passenger airbag
Front passenger knee airbag
5 Window airbag
6 Side airbag
The installation location of an airbag is identified by the AIRBAG symbol.
Observe the information in "Overview of deployment situations"
(→ page 133).


Back to Contents
G-Class - Owner's Manual
Children in the vehicle

< Anak-anak di dalam kendaraan
This interactive PDF works like a website - tap or click a button to jump straight to where you want to go. You can return here at any time via the navigation bar at the top left.
Key facts in brief 142
Important safety notes 144
Suitable child restraint systems for the transport of children 1>1
Suitable seats for attaching child restraint systems 125
Securing the child restraint system 159
Child safety locks 164
Passive occupant presence reminder 168
G-Class - Owner's Manual
Children in the vehicle Key facts in brief
Fakta penting secara singkat
Safely transporting children in the vehicle

SELALU PERHATIKAN HAL BERIKUT SAAT MENGANGKUT ANAK-ANAK:
• Never leave children unattended in the vehicle ( → page 145).
- Secure children younger than twelve or of a height up to 1.50 m on the seat (see illustration above) properly with a suitable and approved child restraint system ( → page 151) and secure small children in a rearward-facing child restraint system.
- Observe the child restraint system manufacturer's installation instructions.

KURSI BELAKANG KIRI/KANAN (KURSI YANG DIUTAMAKAN)
SISTEM PENGIKAT YANG DIUTAMAKAN:
ISOFIX mounting brackets ( → page 155)
or i-Size mounting brackets ( → page 156)
and additionally fasten Top Tether if available ( → page 162).
SISTEM PENGIKAT ALTERNATIF:
名 Vehicle seat belt ( → page 163)
Additionally fasten Top Tether if recommended by the manufacturer of the child restraint system ( → page 162).
The following child restraint systems of the Universal category are approved: U, UF, i-U, IUF. Please see the other alternatives for use ( → page 155).
KURSI PENUMPANG DEPAN
SISTEM PENGIKAT:
Vehicle seat belt ( → page 163)

G-Class - Owner's Manual
Children in the vehicle Key facts in brief
PASTIKAN UNTUK MEMPERHATIKAN:
\- If the front passenger seat is occupied, ensure that the status of the front passenger airbag is correct for the current situation ( → page 126).
The following child restraint systems of the Universal category are approved: U(*) , UF. Please see the other alternatives for use ( → page 156).
(*) rearward-facing child restraint systems only in conjunction with automatic airbag shutoff
KURSI BELAKANG TENGAH
SISTEM PENGIKAT:
Vehicle seat belt ( → page 163)
The following belt-secured child restraint systems of the Universal category are approved: U, UF. Please see the other alternatives for use ( → page 156).


Peringatan keselamatan penting
Informasi dasar
BERHATI-HATILAH
Bear in mind that negligence when securing a child in the child restraint system may have serious consequences. Always be diligent in securing a child carefully before every journey.
Never allow babies and children to travel sitting on the lap of another vehicle occupant.
UNTUK MENINGKATKAN PERLINDUNGAN BAGI ANAK-ANAK YANG BERUSIA KURANG DARI DUA BELAS TAHUN ATAU TINGGINYA KURANG DARI 1,50 M, MERCEDES-BENZ SANGAT MEREKOMENDASIKAN AGAR ANDA MEMPERHATIKAN HAL-HAL BERIKUT:
- Always secure the child in a child restraint system suitable for this Mercedes-Benz vehicle.
- The child restraint system must be appropriate to the age, weight and size of the child.
- The vehicle seat must be suitable for the child restraint system to be fitted:
\- ISOFIX mounting bracket: (→ page 155)
\- i-Size mounting bracket: (→ page 156)
Securing with the vehicle seat belt: (→ page 156)
Accident statistics show that children secured on the rear seats are generally safer than children secured on the front seats. For this reason, Mercedes-Benz strongly advises that you fit a child restraint system to a rear seat.
ISTILAH UMUM SISTEM PENGAMAN ANAK
ISTILAH UMUM SISTEM PENGAMAN ANAK DIGUNAKAN DALAM BUKU PANDUAN PEMILIK INI. SISTEM PENGAMAN ANAK, CONTOHNYA:
a baby car seat
• a rearward-facing child seat
• a forward-facing child seat
- a child booster seat – Mercedes-Benz recommends using a child booster seat with a seat backrest and seat belt guide.
PATUHI HUKUM DAN PERSYARATAN HUKUM
Always observe the legal requirements when using a child restraint system in the vehicle.
Make sure that the child restraint system is approved in accordance with the valid test specifications and guidelines. Further information can be obtained at a qualified specialist workshop. Mercedes-Benz recommends that you use a Mercedes-Benz Service Centre for this purpose.
SISTEM PENGAMAN UNTUK SISTEM PENGAMAN ANAK DI DALAM KENDARAAN HANYA GUNAKAN SISTEM PENGAMAN BERIKUT UNTUK SISTEM PENGAMAN ANAK:
• the ISOFIX or i-Size mounting brackets
• the vehicle's seat belt system
• the Top Tether anchorages
G-Class - Owner's Manual
Children in the vehicle Important safety notes
Simply attaching to the ISOFIX mounting brackets or i-Size mounting brackets on the vehicle can reduce the risk of fitting the child restraint system incorrectly.
When securing a child with the integrated seat belt of the ISOFIX or i-Size child restraint system, always comply with the permissible gross mass for the child and child restraint system ( → page 160).
Stiker peringatan penting
SELALU AMANKAN SISTEM PENGAMAN ANAK DENGAN BENAR

PERINGATAN
Risk of injury or death due to incorrect installation of the child restraint system
The child can then not be protected or restrained as intended.
Be sure to comply with the manufacturer's installation instructions for the child restraint system and its correct use.
▶ Make sure that the entire base of the child restraint system always rests on the sitting surface of the seat.
▶ Never place objects (e.g. cushions) under or behind the child restraint system.
▶ Use child restraint systems only with the original cover designed for them.
▶ Always replace damaged covers with genuine covers.
Vehicles with a through-loading feature in the rear seat backrest: do not fit a rearward-facing child restraint system on the rear centre seat.
• Always observe the vehicle-specific information.
- Fitting an ISOFIX or i-Size child restraint system on the rear seat ( → page 160).
Securing the child restraint system with the seat belt ( → page 163).
\- Observe the warning labels in the vehicle interior and on the child restraint system.

PERINGATAN
Risk of injury or death due to unsecured child restraint systems in the vehicle
If the child restraint system is incorrectly fitted or not secured, it can become detached.
The child cannot then be protected or restrained as intended.
The unused child restraint system can be become detached and strike vehicle occupants.
▶ Always comply with the manufacturer's installation instructions for the child restraint system and its correct use.
▶ Always fit child restraint systems correctly, even if they are transported unused in the vehicle.
G-Class - Owner's Manual
Children in the vehicle Important safety notes
JANGAN MEMODIFIKASI SISTEM PENGAMAN ANAK

PERINGATAN
Risk of injury due to modifications to the child restraint system
The child restraint system can no longer function properly. This poses an increased risk of injury.
▶ Never modify a child restraint system.
Only affix accessories which have been specially approved for this child restraint system by the child restraint system's manufacturer.
HANYA GUNAKAN SISTEM PENGAMAN ANAK YANG DALAM KONDISI LAYAK PAKAI

PERINGATAN
Risk of injury or death caused by the use of damaged child restraint systems
Child restraint systems or their retaining systems that have been subjected to stress in an accident may not be able to perform their intended protective function.
It may be the case that the child cannot be properly restrained.
▶ Always immediately replace child restraint systems that have been damaged or involved in an accident.
Have the securing systems for the child restraint systems checked at a qualified specialist workshop before installing a child restraint system again.
HINDARI SINAR MATAHARI LANGSUNG

PERINGATAN
Risk of burns when the child seat is exposed to direct sunlight
If the child restraint system is exposed to direct sunlight or heat, parts could heat up.
Children could suffer burns from these parts, particularly on metallic parts of the child restraint system.
▶ Always make sure that the child restraint system is not exposed to direct sunlight.
Protect the child restraint system with a blanket, for example.
If the child restraint system has been exposed to direct sunlight, allow it to cool before securing a child into it.
▶ Never leave children unattended in the vehicle.
PERHATIKAN SAAT BERHENTI ATAU PARKIR

PERINGATAN
Risk of fatal injury due to exposure to extreme heat or cold in the vehicle
If persons, particularly children, are subjected to prolonged exposure to intense heat or cold, there is a risk of severe injury or even death.
▶ Never leave persons, particularly children, unattended in the vehicle.
G-Class - Owner's Manual
Children in the vehicle Important safety notes


PERINGATAN
Risk of accident- and injury due to children left unattended in the vehicle
KETIKA ANAK-ANAK DITINGGALKAN TANPA PENGAWASAN DI DALAM KENDARAAN, MEREKA DAPAT DIHARAPKAN TERUTAMA UNTUK
• open doors, thereby endangering other persons or road users.
• get out and be struck by oncoming traffic.
• operate vehicle equipment and become trapped, for example.
SELAIN ITU, ANAK-ANAK JUGA DAPAT MENGGERAKKAN KENDARAAN, MISALNYA DENGAN:
• releasing the parking brake.
• changing the drive range.
• starting the vehicle.
▶ Never leave children unattended in the vehicle.
When leaving the vehicle, always take the key with you and lock the vehicle.
▶ Keep the key out of reach of children.
Ikhtisar stiker peringatan di dalam kendaraan

Front passenger airbag warning (on the front passenger sun visor) (→ page 148)
2 Vehicles without automatic front passenger airbag deactivation warning (visible when the front passenger door is open) ( → page 150)

Catatan tentang sistem pengaman anak menghadap belakang dan menghadap depan di kursi penumpang depan

PERINGATAN
Risk of injury or death from using a rearward-facing child restraint system when the front passenger airbag is enabled
If you secure a child in a rearward-facing child restraint system on the co-driver seat and the PASSENGER AIR BAG OFF indicator lamp is off, the front passenger airbag can deploy in the event of an accident.
The airbag could hit the child.
▶ Always make sure the front passenger airbag is disabled. The PASSENGER AIR BAG OFF indicator lamp must be lit.
▶ NEVER use a rearward-facing child restraint system on a seat with an ENABLED FRONT AIRBAG. This can result in the DEATH or SERIOUS INJURY of the CHILD.
Observe the specific instructions for the rearward-facing and forward-facing child restraint systems ( → page 159).

Warning notice on the front passenger sun visor
JIKA SANGAT PERLU MEMASANG SISTEM PENGAMAN ANAK DI KURSI PENUMPANG DEPAN, SELALU PERHATIKAN INFORMASI BERIKUT:
- The notes on automatic front passenger airbag deactivation ( → page 127).
- When using a rearward-facing child restraint system on the front passenger seat, the front passenger airbag must always be disabled. This is only the case if the PASSENGER AIR BAG OFF indicator lamp is lit continuously ( → page 126).
- The front passenger airbag is enabled when the PASSENGER AIR BAG OFF indicator lamp is not lit. The front passenger airbag may be deployed during an accident. In that case, do not use rearward-facing child restraint systems.
Informasi tentang penonaktifan otomatis airbag penumpang depan
If the front passenger seat is occupied, ensure, both before and during the journey, that the status of the front passenger airbag is correct for the current situation.
G-Class - Owner's Manual
Children in the vehicle Important safety notes
A
PERINGATAN
Risk of injury or death due to objects between the seat surface and the child restraint system
Objects between the seat surface and the child restraint system could affect the function of the automatic co-driver airbag shutoff.
Do not place any objects between the seat surface and the child restraint system.
▶ Make sure that the entire base of the child restraint system is always resting on the seat surface of the co-driver seat.
The backrest of the forward-facing child restraint system must, as far as possible, be resting on the seat backrest of the co-driver seat.
It is essential to comply with the child restraint system manufacturer's installation instructions.
When fitting a child restraint system to the front passenger seat, observe the vehicle-specific information ( → page 148).
SISTEM PENGAMAN ANAK MENGHADAP BELAKANG DI KURSI PENUMPANG DEPAN
If a rearward-facing child restraint system is fitted on the front passenger seat, the front passenger airbag must be deactivated. The PASSENGER AIR BAG OFF indicator lamp must light up continuously ( → page 126).

A
PERINGATAN
Risk of injury or death from using a rearward-facing child restraint system when the front passenger airbag is enabled
If you secure a child in a rearward-facing child restraint system on the co-driver seat and the PASSENGER AIR BAG OFF indicator lamp is off, the front passenger airbag can deploy in the event of an accident.
The airbag could hit the child.
▶ Always make sure the front passenger airbag is disabled. The PASSENGER AIR BAG OFF indicator lamp must be lit.
▶ NEVER use a rearward-facing child restraint system on a seat with an ENABLED FRONT AIRBAG. This can result in the DEATH or SERIOUS INJURY of the CHILD.
i
The front passenger airbag is enabled depending on the child restraint system and the stature of the child. The PASSENGER AIR BAG OFF indicator lamp does not light up.
The front passenger airbag may be deployed during an accident. If the front passenger airbag is in this status, no rearward-facing child restraint system may be fitted on the front passenger seat. Instead, fit the rearward-facing child restraint system on a suitable rear seat.
SISTEM PENGAMAN ANAK MENGHADAP KE DEPAN DI KURSI PENUMPANG DEPAN
If a forward-facing child restraint system is fitted on the front passenger seat, the front passenger airbag may be automatically enabled or disabled. The status of the front passenger airbag depends on the child restraint system and the stature of the child.


G-Class - Owner's Manual
Children in the vehicle Important safety notes
The PASSENGER AIR BAG OFF indicator lamp is either lit continuously, or it is not lit ( → page 126). Always observe the following information.

PERINGATAN
Risk of injury or death due to incorrect positioning of the child restraint system
JIKA ANDA MENGAMANKAN ANAK DALAM SISTEM PENGAMAN ANAK MENGHADAP KE DEPAN DI KURSI PENUMPANG DEPAN DAN ANDA MEMPOSISIKAN KURSI PENUMPANG DEPAN TERLALU DEKAT DENGAN DASHBOARD, PADA SAAT TERJADI KECELAKAAN, ANAK TERSEBUT DAPAT:
- come into contact with the vehicle's interior if the PASSENGER AIR BAG OFF indicator lamp is lit, for example
- be struck by the airbag if the PASSENGER AIR BAG OFF indicator lamp is off
▶ Always move the co-driver seat as far back as possible. In doing so, always make sure that the shoulder belt strap is correctly routed from the seat belt outlet of the vehicle to the shoulder belt guide on the child restraint system. The shoulder belt strap must be routed forwards and downwards from the seat belt outlet. If necessary, adjust the seat belt outlet and the co-driver seat accordingly.
Always comply with the child restraint system manufacturer's installation instructions.

Catatan untuk kendaraan tanpa penonaktifan otomatis airbag penumpang depan
(→ page 147) Vehicles without automatic front passenger airbag deactivation have a special sticker which is visible when the front passenger door is opened.
PASTIKAN ANDA MEMPERHATIKAN INFORMASI BERIKUT:
- Never fit a rearward-facing child restraint system to the front passenger seat.
• Always fit a rearward-facing child restraint system to a suitable rear seat
- Notes on rear-facing and front-facing child restraint systems on the front passenger seat ( → page 148)

G-Class - Owner's Manual
Children in the vehicle Suitable child restraint systems for the transport of children

Sistem pengaman anak yang cocok untuk transportasi anak
Informasi tentang keuntungan sistem pengaman anak menghadap ke belakang
Transport a baby in a suitable rearward-facing child restraint system only. It is also preferable to transport a small child in a suitable rearward-facing child restraint system. In this case, the child sits in the opposite direction to the direction of travel and faces backwards.
Babies and small children have comparatively weak neck muscles in relation to the size and weight of their head. The risk of injury to the cervical spine during an accident can be reduced in a rearward-facing child restraint system.
Kategori persetujuan untuk sistem pengaman anak
HANYA SISTEM PENGAMAN ANAK YANG MEMENUHI STANDAR UNECE BERIKUT YANG DISETUJUI UNTUK DIGUNAKAN DI KENDARAAN:
UN-R44
UN-R129
IDENTIFIKASI SISTEM PENGAMAN ANAK
INFORMASI BERIKUT, MISALNYA, TERSEDIA PADA LABEL PERSETUJUAN DI SISTEM PENGAMAN ANAK:
• Approval category
Child weight group
• Authorisation number
• Child restraint system size class
Kategori persetujuan di bawah UN-R44

Example of an approval label
\- Universal: child restraint systems in the "Universal" category are approved for installation in vehicles. Following overviews of the suitability of seats for securing child restraint systems, they can be used on seats labelled U, UF or IUF.
The identification IUF refers to ISOFIX/LATCH child restraint systems in the "Universal" category. These child restraint systems must be additionally secured using Top Tether or support points.
\- Semi-Universal: child restraint systems in the "Semi-Universal" category may only be used if the vehicle and vehicle seat are listed in the child restraint system manufacturer's vehicle model list.

G-Class - Owner's Manual
Children in the vehicle Suitable child restraint systems for the transport of children
\- Vehicle-specific: child restraint systems in the "Vehicle-specific" category may only be used if the vehicle and vehicle seat are listed in the child restraint system manufacturer's vehicle model list.
Kategori persetujuan di bawah UN-R129

Example of an approval label
- i-Size child restraint systems and booster seats with seat backrest: suitable for attachment to i-Size mounting brackets. They can be used on seats marked i-U.
Child restraint systems in this category can also be attached to ISOFIX bars if approved by the child restraint system manufacturer. I-Size booster seats with backrest can be used on seats marked U if the seat is approved for category B2/B3.
- Belted child restraint systems and belted booster seats without seat backrest in the Universal category: suitable for attachment to seats marked U.
- Vehicle-specific child restraint systems (ISOFIX or belted attachment as well as child booster seats with and without seat backrest): suitable for attachment to seats marked I-U or U if approved by the child restraint system manufacturer.
HARAP PERHATIKAN KESESUAIAN KURSI KENDARAAN
- Suitability of seats for attaching ISOFIX/LATCH child restraint systems (→ page 155)
- Suitability of seats for securing i-Size child restraint systems (→ page 156).
- Suitability of seats for fastening belt-secured child restraint systems ( → page 156)
Ikhtisar sistem pengaman anak yang direkomendasikan
Further information on the correct child restraint system can be obtained at a qualified specialist workshop. Mercedes-Benz recommends that you use a Mercedes-Benz Service Centre for this purpose.
PENGIKATAN DENGAN ISOFIX
WEIGHT CATEGORY 0+ (UP TO 13 KG AND UP TO APPROX. 15 MONTHS)
Type1 Baby Safe 3 i-Size Size category R2 Approval E1*129R03/04*0060*02 Order number A 000 970 68 02 Order number A 000 970 73 02 FlexBase iSense 1 Manufacturer: Britax Römer

G-Class - Owner's Manual
Children in the vehicle Suitable child restraint systems for the transport of children
WEIGHT CATEGORY I (9 TO 18 KG AND FROM APPROX. 9 MONTHS TO 4 YEARS), DUALFIX 3 I-SIZE
Type1 Dualflx 3 I-Size Size category F2X/R2 Approval E1*129R03/04*0060*02 Order number A 000 970 93 02 Order number FlexBase ISense A 000 970 73 02 1 Manufacturer: Britax Rämer
WEIGHT CATEGORY I (9 TO 18 KG AND FROM APPROX. 9 MONTHS TO 4 YEARS), DUALFIX 5Z
Type1 Dualfix 5Z Size category F2X/R2 Approval E1 030060 Order number A 000 970 93 02 1 Manufacturer: Britax Röner
WEIGHT CATEGORY II (15 TO 25 KG AND UP TO 7 YEARS)
Type1 KIDFIX M i-Size Size category B2 Approval E1*129R03/04*0061*02 Order number A 000 970 89 02 1 Manufacturer: Britax Rümer

PENGIKATAN DENGAN I-SIZE (SISTEM PENGAMAN ANAK R129)
WEIGHT UP TO 13 KG, SIZE 40 TO 83 CM AND AGE FROM BIRTH TO APPROX. 15 MONTHS
Type1 Baby Safe 3 i-Size Size category R2 Approval E1*129R03/04*0060*02 Order number A 000 970 68 02 Order number FlexBase ISense A 000 970 73 02 1 Manufacturer: Britax Römer
WEIGHT TO 18 KG, SIZE 61 TO 105 CM AND AGE FROM APPROX.
3 MONTHS TO 4 YEARS (DUALFIX 3 I-SIZE)
Type1 Dualfix 3 i-Size Size category F2X/R2 Approval E1*129R03/04*0060*02 Order number A 000 970 93 02 Order number FlexBase iSense A 000 970 73 02 1 Manufacturer: Britav Rämer
G-Class - Owner's Manual
Children in the vehicle Suitable child restraint systems for the transport of children
WEIGHT TO 18 KG, SIZE 61 TO 105 CM AND AGE FROM APPROX.
3 MONTHS TO 4 YEARS (DUALFIX 5Z)
Type1 Dualflx 5Z Size category F2X/R2 Approval E1 030060 Order number A 000 970 93 02 1 Manufacturer: Britax Römer
WEIGHT 15 TO 36 KG, SIZE 100 TO 150 CM AND AGE FROM APPROX. 3.5 TO 12 YEARS (KIDFIX M I-SIZE)
Type1 KIDFIX M i-Size Size category B2 Approval E1*129R03/04*0061*02 Order number A 000 970 89 02 1 Manufacturer: Britax Römer
ATTACHMENT WITH THE SEAT BELT OF THE VEHICLE SEAT
WEIGHT CATEGORY 0 (UP TO 10 KG AND APPROX. 6 MONTHS) AND
WEIGHT CATEGORY 0+ (UP TO 13 KG AND APPROX. 15 MONTHS)
Type1 Baby Safe 3 I-Size Size category R2 Approval E1*129R03/04*0060*02 Order number A 000 970 68 02 1 Manufacturer: Britax Römer
WEIGHT CATEGORY I (9 TO 18 KG AND FROM APPROX. 9 MONTHS TO 4 YEARS), DUALFIX 3 I-SIZE
Type1 Dualflx 3 I-Size Size category F2X/R2 Approval E1*129R03/04*0060*02 Order number A 000 970 93 02 Order number FlexBase ISense A 000 970 73 02 1 Manufacturer: Britax Remor
WEIGHT CATEGORY I (9 TO 18 KG AND FROM APPROX. 9 MONTHS TO 4 YEARS), DUALFIX 5Z
Type1 Dualfix 5Z Size category F2X/R2 Approval E1 030060 Order number A 000 970 93 02 1 Manufacturer: Britax Rümer
WEIGHT CATEGORY III (22 TO 36 KG AND FROM APPROX. 6 TO 12 YEARS)
Type1 Junior1 Approval E8*129R03/06*13662*00 Order number EAN: 4016428012606 1 Manufacturer: Team Tex
G-Class - Owner's Manual
Children in the vehicle Suitable seats for attaching child restraint systems

Kursi yang cocok untuk memasang sistem pengaman anak
Overview of suitability of the seats for attaching ISOFIX/LATCH child restraint systems
ISOFIX ADALAH SISTEM PENGAMAN STANDAR UNTUK SISTEM PENGAMAN ANAK YANG DIRANCANG KHUSUS.

The symbol indicates seats suitable for attaching an ISOFIX child restraint system in accordance with UN R44 ( → page 151).

ISOFIX child restraint systems can also be installed on seats with i-Size markings ( → page 156).
Attach only ISOFIX child restraint systems that are approved in accordance with UN R44 as per the following ISOFIX tables.
CARRY COT
Size class - Equipment Left/right rear seat F - ISO/L1 X G - ISO/L2 X X Not suitable for an ISOF2K child restraint system in this weight group and/or size class.
WEIGHT GROUP 0 (UP TO 10 KG AND UP TO APPROXIMATELY 6 MONTHS)
Size class - Equipment Left/right rear seat E - ISO/R1 IL II. Suitable for ISOFIX chile restraint systems according to the table in "Overview of the recommended child restraint systems".or if the vehicle and the seat are listed on the child restraint system manufacturer's vehicle model list.
WEIGHT GROUP 0+ (UP TO 13 KG AND UP TO APPROXIMATELY 15 MONTHS)
Size class - Equipment Left/right rear seat E - ISO/R1 IL D - ISO/R2 IL C - ISO/R3 IL (1) IL Suitable for ISO/FIX child restraint systems according to the table in "Overview of the recommended child restraint systems", or if the vehicle and the seat are listed on the child restraint system manufacturer's vehicle model list.(1) When using a child restraint system of size class (ISO/R3), move the front seat into the highest position. Make sure that the seat backrest of the front seat does not rest against the child restraint system.

G-Class - Owner's Manual
Children in the vehicle Suitable seats for attaching child restraint systems

WEIGHT GROUP 1 (9-18 KG AND APPROXIMATELY 9 MONTHS TO 4 YEARS)
Size class - Equipment Left/right rear seat D - ISO/R2 IL C - ISO/R3 IL (1) B - ISO/F2 IUF B1 - ISO/F2X IUF A - ISO/F3 IUF II. Suitable for ISOFIX child restraint systems according to the table in "Overview of the recommended child restraint systems", or if the vehicle and the seat are listed on the child restraint system manufacturer's vehicle model list. IUF Suitable for forward-facing ISOFIX child restraint systems of the "Universal" category in this weight group. (1) When using a child restraint system of size class (ISO/II3), move the front seat into the highest position. Make sure that the seat backrest of the front seat does not rest against the child restraint system.
Ikhtisar kesesuaian kursi untuk memasang sistem pengaman anak i-Size
I-SIZE ADALAH SISTEM PENGAMAN STANDAR UNTUK SISTEM PENGAMAN ANAK YANG DIRANCANG KHUSUS.

i-Size child restraint systems can be attached to a seat with the i-Size marking ( → page 151).
Child restraint systems that are approved in accordance with the following i-Size table may be attached.
LEFT AND RIGHT REAR SEAT
i-Size child restraint systems (ISO/R1, ISO/R2, ISO/R2X, ISO/R3, ISO/F2, ISO/ F2X, ISO/F3, ISO/B2, ISO/B3) i-U
I-U Suitable for forward-facing and rearward-facing I-Size child restraint systems in the "Universal" category.
FRONT PASSENGER SEAT
I-Size child restraint systems (ISO/R1, ISO/R2, ISO/R2X, ISO/R3, ISO/F2, ISO/ F2X, ISO/F3, ISO/B2, ISO/B3) X
X Not suitable for an i-Size child restraint system in the "Universal" category.
Ikhtisar kesesuaian kursi untuk mengencangkan sistem pengaman anak yang diikat dengan sabuk
Suitability of seats for fastening belt-secured child restraint systems
REAR SEATS
Weight category 0: to 10 kg Left/right rear seat U, L Rear centre seat 1 U, L Weight category 0+: to 13 kg Left/right rear seat U, L Rear centre seat 2 U, L Weight category I: 9 to 18 kg Left/right rear seat U, L Rear centre seat 4 U, L

G-Class - Owner's Manual
Children in the vehicle Suitable seats for attaching child restraint systems
Weight category II: 15 to 25 kg
Left/right rear seat U, L
Rear centre seat1 U, L
Weight category III: 22 to 36 kg
Left/right rear seat U, L
Rear centre seat 1 U, L
1 Child restraint systems with a support log are not suitable for this seal.
U Suitable for child restraint systems of the "Universal" category in this weight category.
L. Suitable for semi-universal child restraint systems according to the table in "Recommended child restraint systems", or if the vehicle and the seat are listed in the child restraint system manufacturer's vehicle model list.
CATATAN TENTANG SISTEM PENGAMAN ANAK DI KURSI PENUMPANG DEPAN
- If it is absolutely necessary for you to fit a child restraint system to the front passenger seat, be sure to observe the information on child restraint systems on the front passenger seat ( → page 148).
- Observe the specific instructions for the rearward-facing and forward-facing child restraint systems. If the front passenger seat is occupied, ensure, both before and during the journey, that the status of the front passenger airbag is correct for the current situation (→ page 126).
FRONT PASSENGER SEAT
Weight category 0: to 10 kg
Front passenger airbag enabled1 X
Front passenger airbag disabled1,2 U, L
Weight category 0+: to 13 kg
Front passenger airbag enabled1 X Front passenger airbag disabled1, 2 U, L
Weight category I: 9 to 18 kg
Front passenger airbag enabled1 UF, L Front passenger airbag disabled1,2 U, L
Weight category II: 15 to 25 kg
Front passenger airbag enabled1 UF, L Front passenger airbag disabled1,2 U, L
Weight category III: 22 to 36 kg
Front passenger airbag enabled1 UF, L Front passenger airbag disabled1,2 U, L
1. Adjust the seat cushion inclination so that the front edge of the seat cushion is in the highest position and the rear edge of the seat cushion is in the lowest position.
2. The vehicle is equipped with automatic front passenger airbag deactivation. The PASSENGER AIRBAG OFF indicator lamp must be on.
X Not suitable for children in this weight category.
U Suitable for child restraint systems of the "Universal" category in this weight category.


G-Class - Owner's Manual
Children in the vehicle Suitable seats for attaching child restraint systems
1. Suitable for semi-universal child restraint systems according to the table in "Recommended child restraint systems", or if the vehicle and the seat are listed in the child restraint system manufacturer's vehicle model list.
UF Suitable for forward-facing child restraint systems of the "Universal" category in this weight category.

Mengencangkan sistem pengaman anak
Menyetel kursi dengan benar
SAAT MEMASANG SISTEM PENGAMAN ANAK DI KURSI BELAKANG KIRI ATAU KANAN, SELALU PERHATIKAN HAL BERIKUT:
Make sure that the child's feet do not touch the front seat. If necessary, move the front seat slightly forwards.
If the head restraint of the child restraint system cannot be fully extended when it is installed in the vehicle, this will result in restrictions on the maximum size setting for certain child restraint systems. Observe the child restraint system manufacturer's installation instructions.
Contact with the roof when the head restraint is fully extended and locked in place will not result in any restrictions on use.
PERHATIKAN JUGA HAL BERIKUT SAAT MEMASANG SISTEM PENGAMAN ANAK ISOFIX ATAU I-SIZE:
When using a rearward-facing child restraint system on a rear seat: adjust the front seat so that it does not touch the child restraint system.
When using a forward-facing child restraint system with integrated child seat belt: adjust the head restraint of the respective seat so that it does not push the child restraint system forwards. If necessary, the respective head restraint can be removed. In addition, the seat backrest of the child restraint system must lie as flat as possible against the backrest of the vehicle seat. After the child restraint system has been
removed, replace the vehicle head restraint immediately and adjust it correctly.
The child restraint system must not be put under strain between the roof and the seat cushion and/or be fitted facing the wrong direction. Where possible, adjust the seat cushion inclination accordingly.
Adjust the vehicle head restraints so that the child restraint system is not put under strain by the head restraint.
SAAT MEMASANG SISTEM PENGAMAN ANAK YANG DIKUNCI DENGAN SABUK PENGAMAN, PERHATIKAN JUGA HAL-HAL BERIKUT:
When using a rearward-facing child restraint system on a rear seat: adjust the front seat so that it does not touch the child restraint system.
When using a forward-facing child restraint system with integrated child seat belt: adjust the head restraint of the respective seat so that it does not push the child restraint system forwards. If necessary, the respective head restraint can be removed. In addition, the seat backrest of the child restraint system must lie as flat as possible against the backrest of the vehicle seat. After the child restraint system has been removed, replace the vehicle head restraint immediately and adjust it correctly.
The backrest of the forward-facing child restraint system must, as far as possible, be resting on the seat backrest of the rear seat.

G-Class - Owner's Manual
Children in the vehicle Securing the child restraint system
The child restraint system must not be put under strain between the roof and the seat cushion and/or be fitted facing the wrong direction. Where possible, adjust the seat cushion inclination accordingly.
Adjust the vehicle head restraints so that the child restraint system is not put under strain by the head restraint.
Make sure that the child's feet do not touch the front seat. If necessary, move the front seat slightly forwards.
☑ TERGANTUNG PADA PERLENGKAPAN KENDARAAN, SELALU PERHATIKAN HAL-HAL BERIKUT SAAT MEMASANG SISTEM PENGAMAN ANAK YANG DIKUNCI DENGAN SABUK PENGAMAN DI KURSI PENUMPANG DEPAN:
Observe the notes on rearward-facing and forward-facing child restraint systems on the front passenger seat ( → page 148).
When using a forward-facing child restraint system integrated child seat belt: remove the head restraint from the front passenger seat, if possible. After the child restraint system has been removed, immediately replace the head restraint and adjust it correctly.
The backrest of the forward-facing child restraint system must, as far as possible, be resting against the seat backrest of the front passenger seat.
The child restraint system must not be put under strain between the roof and the seat cushion and/or be fitted facing the wrong direction.
Adjust the vehicle head restraints so that the child restraint system is not put under strain by the head restraint.
▶ Never place objects (e.g. cushions) under or behind the child restraint system.
Set the front passenger seat as far back as possible and move the seat into the highest position if possible. Always make sure that the shoulder

belt strap is correctly routed from the seat belt outlet of the vehicle to the shoulder belt guide on the child restraint system. The shoulder belt strap must be routed forwards from the seat belt outlet and, where possible, downwards to the child restraint system.
▶ Fully retract the seat cushion length adjustment.
Adjust the seat cushion inclination so that the front edge of the seat cushion is in the highest position and the rear edge of the seat cushion is in the lowest position.
Set the seat backrest to the most vertical position possible.
Memasang sistem pengaman anak ISOFIX/LATCH atau i-Size
PERINGATAN
Risk of accident if the rear bench seat, rear seat and seat backrest are not engaged
The rear bench seat, rear seat and seat backrest may fold forwards, even while the vehicle is in motion.
- As a result, the vehicle occupant will be pressed into the seat belt with increased force. The seat belt will not be able to protect as intended and could cause additional injury.
- Objects or loads in the boot or load compartment cannot be restrained by the seat backrest.
▶ Make sure that the rear bench seat, the rear seat and the seat backrest are engaged before every trip.

G-Class - Owner's Manual
Children in the vehicle Securing the child restraint system
Ensure that the rear seat backrest is engaged. To do so, pull forcefully on the seat backrest.
A
PERINGATAN
Risk of injury or death if the permissible gross mass of the child and child restraint system together is exceeded.
Too much load may be placed on the ISOFIX or i-Size child restraint systems and the child may not be restrained correctly in the event of an accident, for example.
If the child is secured in an ISOFIX or i-Size child restraint system with integrated seat belts, the total mass of the child and child restraint system must not exceed 33 kg.
SELALU PERHATIKAN INFORMASI TENTANG MASSA SISTEM PENGAMAN ANAK:
- in the installation instructions and Owner's Manual provided by the manufacturer of the child restraint system used
• on a label on the child restraint system, if present
Regularly check that the permissible gross mass of the child and child restraint system is still being adhered to,
SAAT MEMASANG SISTEM PENGAMAN ANAK, PERHATIKAN JUGA HAL-HAL BERIKUT:
√ Always observe the area of use and the suitability of the seats for attaching a child restraint system.
ISOFIX mounting brackets ( → page 155)
or

i-Size mounting brackets ( → page 156)

ISOFIX mounting bracket
i-Size mounting brackets
Before every journey always ensure that the ISOFIX/LATCH child restraint system or the i-Size child restraint system is engaged in both mounting brackets on the vehicle.
CATATAN
Damage to the seat belt for the centre seat during installation of the child restraint system
▶ Make sure that the seat belt is not trapped.
Attach the ISOFIX/LATCH or i-Size child restraint system to both mounting brackets in the vehicle.


G-Class - Owner's Manual
Children in the vehicle Securing the child restraint system
Mengencangkan Top Tether

PERINGATAN
Risk of injury or death if the rear seat backrests are not locked after Top Tether belts are fitted
The rear seat backrests may fold forwards.
As a result, child restraint systems will no longer be able to perform their intended protective function. This may also cause additional injuries.
▶ Always lock rear seat backrests after fitting Top Tether belts.
Adjust the rear seat backrests so that they are in an upright position.
Ensure that the rear seat backrest is engaged. To do so, pull forcefully on the seat backrest.
If the child restraint system is equipped with a Top Tether belt:
The risk of injury may be reduced by Top Tether. The Top Tether belt enables an additional connection between the child restraint system attached with ISOFIX or i-Size and the vehicle.


Remove the load compartment cover and the partitioning net ( → page 219).
If necessary, slide head restraint ① upwards (→ page 198).
Fit the ISOFIX/LATCH or i-Size child restraint system with Top Tether. Comply with the child restraint system manufacturer's installation instructions.

Guide Top Tether belt ④ under head restraint ① between the two head restraint bars.
Hook Top Tether hook Ⓢ into Top Tether anchorage Ⓩ without twisting.


G-Class - Owner's Manual
Children in the vehicle Securing the child restraint system
Tension Top Tether belt ④. Comply with the child restraint system manufacturer's installation instructions.
If necessary, slide head restraint ① downwards (→ page 198). Make sure that you do not interfere with the correct routing of Top Tether belt ④.
Mengencangkan sistem pengaman anak dengan sabuk pengaman

PERINGATAN
Risk of accident if the rear bench seat, rear seat and seat backrest are not engaged
The rear bench seat, rear seat and seat backrest may fold forwards, even while the vehicle is in motion.
- As a result, the vehicle occupant will be pressed into the seat belt with increased force. The seat belt will not be able to protect as intended and could cause additional injury.
- Objects or loads in the boot or load compartment cannot be restrained by the seat backrest.
▶ Make sure that the rear bench seat, the rear seat and the seat backrest are engaged before every trip.
Ensure that the rear seat backrest is engaged. To do so, pull forcefully on the seat backrest.
For a child restraint system of the category "Universal" or "Semi-Universal" ensure that this is approved for the vehicle seat.
▶ Fit the child restraint system.
The entire base of the child restraint system must always rest on the sitting surface of the seat.
Always make sure that the shoulder belt strap is correctly routed from the seat belt outlet of the vehicle to the shoulder belt guide on the child restraint system.
The shoulder belt strap must be routed forwards from the seat belt outlet and, where possible, downwards to the child restraint system.
When fitting on the rear seat: also secure Top Tether, if present ( → page 162).
When fitting on the front passenger seat: if necessary, adjust the seat belt outlet and the front passenger seat appropriately.

G-Class - Owner's Manual
Children in the vehicle Child safety locks
< Kunci pengaman anak
Activating/deactivating the child safety lock for the rear doors

PERINGATAN
Risk of accident- and injury due to children left unattended in the vehicle
KETIKA ANAK-ANAK DITINGGALKAN TANPA PENGAWASAN DI DALAM KENDARAAN, MEREKA DAPAT DIPERKIRAKAN TERUTAMA AKAN
• open doors, thereby endangering other persons or road users.
• get out and be struck by oncoming traffic.
• operate vehicle equipment and become trapped, for example.
SELAIN ITU, ANAK-ANAK JUGA DAPAT MENGGERAKKAN KENDARAAN, MISALNYA DENGAN:
• releasing the parking brake.
• changing the drive range.
• starting the vehicle.
▶ Never leave children unattended in the vehicle.
When leaving the vehicle, always take the key with you and lock the vehicle.
▶ Keep the key out of reach of children.

PERINGATAN
Risk of fatal injury due to exposure to extreme heat or cold in the vehicle
If persons, particularly children, are subjected to prolonged exposure to intense heat or cold, there is a risk of severe injury or even death.
▶ Never leave persons, particularly children, unattended in the vehicle.
G-Class - Owner's Manual
Children in the vehicle Child safety locks

A
PERINGATAN
Risk of accident and injury due to children left unattended in the vehicle
JIKA ANAK-ANAK BERPERGIAN DENGAN KENDARAAN, MEREKA DAPAT, TERUTAMA:
• open doors, thereby endangering other persons or road users.
• get out and be struck by oncoming traffic.
• operate vehicle equipment and become trapped, for example.
▶ Always activate the installed child safety locks if children are travelling in the vehicle.
▶ Never leave children unattended in the vehicle.
When leaving the vehicle, always take the key with you and lock the vehicle.
There are child safety locks for the rear doors and the rear side windows. The child safety locks on the rear doors secure each door separately. The doors can no longer be opened from the inside.

Press the lever in the direction indicated by the arrow ② (activate) or ① (deactivate).
▶ Check functionality of the child safety lock.

G-Class - Owner's Manual
Children in the vehicle Child safety locks
Mengaktifkan/menonaktifkan kunci pengaman anak untuk jendela samping belakang

PERINGATAN
Risk of accident- and injury due to children left unattended in the vehicle
KETIKA ANAK-ANAK DITINGGALKAN TANPA PENGAWASAN DI DALAM KENDARAAN, MEREKA DAPAT DIPERKIRAKAN TERUTAMA AKAN
• open doors, thereby endangering other persons or road users.
• get out and be struck by oncoming traffic.
• operate vehicle equipment and become trapped, for example.
SELAIN ITU, ANAK-ANAK JUGA DAPAT MENGGERAKKAN KENDARAAN, MISALNYA DENGAN:
• releasing the parking brake.
• changing the drive range.
• starting the vehicle.
▶ Never leave children unattended in the vehicle.
When leaving the vehicle, always take the key with you and lock the vehicle.
▶ Keep the key out of reach of children.


PERINGATAN
Risk of fatal injury due to exposure to extreme heat or cold in the vehicle
If persons, particularly children, are subjected to prolonged exposure to intense heat or cold, there is a risk of severe injury or even death.
▶ Never leave persons, particularly children, unattended in the vehicle.

PERINGATAN
Risk of accident and injury due to children left unattended in the vehicle
JIKA ANAK-ANAK BERPERGIAN DENGAN KENDARAAN, MEREKA DAPAT, TERUTAMA:
• open doors, thereby endangering other persons or road users.
• get out and be struck by oncoming traffic.
• operate vehicle equipment and become trapped, for example.
▶ Always activate the installed child safety locks if children are travelling in the vehicle.
▶ Never leave children unattended in the vehicle.
When leaving the vehicle, always take the key with you and lock the vehicle.
There are child safety locks for the rear doors and the rear side windows.

G-Class - Owner's Manual
Children in the vehicle Child safety locks

To activate/deactivate: press the button ②.
THE REAR SIDE WINDOW CAN BE OPENED OR CLOSED AS FOLLOWS:
- Indicator lamp ① is lit: via the switch on the driver's door
- Indicator lamp ① is off: via the switch on the corresponding rear door or driver's door


G-Class - Owner's Manual
Children in the vehicle Passive occupant presence reminder

< Pengingat keberadaan penumpang pasif
Fungsi pengingat keberadaan penumpang pasif
The passive occupant presence reminder can help to remind you about a child who may have been forgotten in the rear compartment of the vehicle. It activates and deactivates automatically when the rear door is open for an extended period of time and a child which the system presumes to be present could enter or exit the vehicle.
When the vehicle is switched off, the Do not leave persons or animals in the vehicle message appears on the driver display if the system was already automatically activated.
You can permanently deactivate the function in the multimedia system ( → page 168). When the system is deactivated, the indicator lamp in the driver display lights up.
Mengaktifkan atau menonaktifkan pengingat keberadaan penumpang pasif di sistem multimedia
Multimedia system:

The function is permanently switched on or off.

Back to Contents
G-Class - Owner's Manual
Opening and closing

< Membuka dan menutup
This interactive PDF works like a website - tap or click a button to jump straight to where you want to go. You can return here at any time via the navigation bar at the top left.
Key 170
Doors 175
Rear-end door 178
Side windows 180
Sliding sunroof 184
Anti-theft protection 188
G-Class - Owner's Manual
Opening and closing Key
< Kunci
Ikhtisar fungsi kunci

PERINGATAN
Accident- and risk of injury with unsupervised children in the vehicle
JIKA ANDA MENINGGALKAN ANAK-ANAK TANPA PENGAWASAN DI DALAM KENDARAAN, MEREKA DAPAT TERUTAMA
- Open doors and thereby endanger other persons or road users.
• get out of the car and are hit by traffic.
• Operate vehicle equipment and become trapped, forexample.
SELAIN ITU, ANAK-ANAK JUGA DAPAT MENGGERAKKAN KENDARAAN, MISALNYA DENGAN:
• releasing the parking brake.
• change the gearbox setting.
- start the vehicle.
▶ Never leave children unattended in the vehicle.
When leaving the vehicle, always take the SmartKey with you and lock the vehicle.
▶ Keep the key out of reach of children.

CATATAN
Damage to the key caused by magnetic fields
▶ Keep the key away from strong magnetic fields.

Kunci kendaraan
Locking
2 Indicator lamp
3 Unlocking
If indicator lamp ☑ does not light up after pressing the ⏰ or Ⓤ button, the battery is weak or possibly discharged. Replace the battery as soon as possible.
Replace the key battery ( → page 173).

G-Class - Owner's Manual
Opening and closing Key

KUNCI MENGUNCI DAN MEMBUKA KUNCI KOMPONEN BERIKUT:
Doors
Fuel filler flap
Rear-end door
If the vehicle is not opened within approximately 40 seconds after unlocking, the vehicle is locked again. Anti-theft protection is primed again.
Do not keep the key together with electronic devices or metal objects. This can affect the key's functionality.
Do not keep the key in the temperature-controlled cup holder. Otherwise, the key will not be reliably detected.
Mengaktifkan/menonaktifkan sinyal verifikasi penguncian akustik
Multimedia system:

▶ Switch the Acoustic lock on or off.
i Harap diperhatikan:
The selected setting for the acoustic locking verification signal must comply with the relevant national road traffic rules. In some countries, including Germany, using the acoustic locking verification signal is prohibited by traffic laws (in accordance with §16 Para. 1 and §30 Para. 1 of the German national road traffic regulations). The driver of the vehicle must comply with these regulations. In countries where the use of this function is
prohibited, this function is not activated in the vehicle and must not be activated.
Mengubah pengaturan pembukaan kunci
FUNGSI PEMBUKAAN KUNCI YANG MUNGKIN:
Central unlocking
- Unlocking the driver's door and fuel filler flap
To switch between settings: press the buttons ☐ and ☑ simultaneously for approximately six seconds until the indicator lamp flashes twice.
PILIHAN JIKA FUNGSI PEMBUKAAN KUNCI UNTUK PINTU PENGEMUDI DAN TUTUP TANGKI BAHAN BAKAR TELAH DIPILIH:
• To unlock the vehicle centrally: press the button twice.
- Vehicles with KEYLESS-GO: if you touch the inner surface of the door handle on the driver's door, only the driver's door and the fuel filler flap are unlocked.
Menonaktifkan fungsi kunci
Vehicles with KEYLESS-GO: if you deactivate the key function, the KEYLESS-GO functions are also deactivated. Access or drive authorisation via KEYLESS-GO is then no longer possible with that key. Activate the function of the key so that all functions using the key are available once again.
You can also deactivate the key's function to reduce the key's energy consumption if you do not use the vehicle or a key for an extended period of time.


G-Class - Owner's Manual
Opening and closing Key
Press and hold the key button ☑.
With the button Ⓞ pressed, immediately press the key button Ⓝ twice in quick succession.
The indicator lamp of the key lights up once briefly, and then again for longer.
ANDA MEMILIKI OPSI BERIKUT UNTUK MENGAKTIFKAN KEMBALI KUNCI:
• Press any button on the key.
- Start the vehicle with the key in the centre console storage compartment ( → page 273).
Melepas/memasukkan kunci darurat MELEPAS KUNCI DARURAT

Press the release knob ①.
The emergency key ② is pushed out slightly.
Pull out the emergency key ② until it engages in the intermediate position.

Depending on the vehicle's equipment, the intermediate position may not be available.
Press the release knob ① again and fully remove the emergency key ②.
MEMASUKKAN KUNCI DARURAT

Press the release knob ①.
Insert the emergency key ② to the intermediate position, or fully until it engages.
① You can use the emergency key ② to attach the key to a key ring.
Depending on the respective configuration, it is possible to engage the emergency key ③ in the intermediate position.

G-Class - Owner's Manual
Opening and closing Key

Mengganti baterai kunci

BAHAYA
Risk of fatal injury due to swallowing batteries
Batteries contain toxic and corrosive substances. If batteries are swallowed or otherwise enter the body, severe internal burns can occur within two hours.
There is a risk of fatal injury!
▶ Keep the batteries out of the reach of children.
If the lid and/or the battery compartment do not close securely, stop using the key and keep it away from children.
If batteries are swallowed or otherwise enter the body, seek immediate medical attention.

CATATAN LINGKUNGAN
Environmental damage due to improper disposal of batteries
☒ Batteries contain pollutants. It is illegal to dispose of them with the household rubbish.
Dispose of batteries in an environmentally responsible manner. Take discharged batteries to a qualified specialist workshop or to a collection point for used batteries.
Persyaratan:
• You need a CR 2032 lithium cell battery (3 V).
Mercedes-Benz recommends that you have the battery replaced at a qualified specialist workshop.
Remove the emergency key ( → page 172).

Press the release knob ② down fully and slide the cover ① in the direction of the arrow.
Fold out the cover ① in the direction of the arrow and remove.
Remove the battery compartment ③ and take out the discharged battery.
Insert the new battery into the battery compartment ③. Observe the positive terminal marking in the battery compartment and on the battery.
▶ Push in the battery compartment ③.
Re-attach the cover ① and push in until it engages.


G-Class - Owner's Manual
Opening and closing Key

Mengatasi masalah pada kunci
ANDA TIDAK DAPAT LAGI MENGUNCI ATAU MEMBUKA KUNCI KENDARAAN. KEMUNGKINAN PENYEBAB:
• The key battery is at low capacity or is flat.
▶ Check the battery via the indicator lamp ( → page 170).
Replace the key battery as necessary ( → page 173).
▶ Use the replacement key.
▶ Use the emergency key to lock or unlock ( → page 177).
Have the key checked at a qualified specialist workshop.
ADA GANGGUAN DARI SUMBER SINYAL RADIO YANG KUAT. KEMUNGKINAN PENYEBAB JIKA FUNGSI KUNCI TERGANGGU:
• high-voltage power lines
mobile phones
• electronic devices (notebooks, tablets)
• shielding due to metallic objects or induction loops for electrical gate systems or automatic barriers
▶ Ensure that there is sufficient distance between the key and the potential source of interference.
ANDA KEHILANGAN KUNCI
Have the key deactivated at a qualified specialist workshop.
If necessary, have the mechanical lock replaced as well.

G-Class - Owner's Manual
Opening and closing Doors
< Pintu
Unlocking/opening the doors from the inside

Pull the door handle.
The safety pin Ⓞ pops up when the door is unlocked.
Centrally locking and unlocking the vehicle from the inside

To unlock: press the button ①.
To lock: press the button 2.
This does not lock or unlock the fuel filler flap.
KENDARAAN TIDAK TERBUKA SAAT TOMBOL Ⓛ DITEKAN:
• If you have locked the vehicle using the key
• If you have locked the vehicle using KEYLESS-GO
Mengunci/membuka kunci kendaraan dengan KEYLESS-GO
Persyaratan:
• The key is outside the vehicle.
• The distance between the key and the vehicle does not exceed 1 m.
- The driver's door and the door on which the door handle is actuated are closed.
G-Class - Owner's Manual
Opening and closing Doors
!
CATATAN
Damage to the vehicle resulting from unintentional locking or unlocking of the vehicle doors
• when using a car wash
• when using a high-pressure cleaner
▶ Deactivate functioning of the key in these situations.
or
▶ Ensure that the key is at least 3 m away from the vehicle.
PERHATIKAN INFORMASI:
• on washing the vehicle in a car wash ( → page 39)
• on using a high-pressure cleaner ( → page 617)

To unlock the vehicle: touch the inside surface of the door handle.
To lock the vehicle: touch the sensor surface ①.
▶ Convenience opening/closing: touch the recessed sensor surface until the closing process is completed.
(i) More information on convenience opening ( → page 182) or convenience closing ( → page 182).
Mengatasi masalah dengan KEYLESS-GO
ANDA TIDAK DAPAT LAGI MENGUNCI ATAU MEMBUKA KUNCI KENDARAAN MENGGUNAKAN KEYLESS-GO.
KEMUNGKINAN PENYEBAB:
• The function of the key has been deactivated.
• The key battery is at low capacity or is flat.
▶ Activate the function of the key ( → page 68).
▶ Check the battery via the indicator lamp ( → page 170).
Replace the key battery as necessary ( → page 173).
▶ Use the replacement key.
Use the emergency key to lock or unlock ( → page 177).
Have the vehicle and key checked at a qualified specialist workshop.
ADA GANGGUAN DARI SUMBER SINYAL RADIO YANG KUAT. KEMUNGKINAN PENYEBAB JIKA FUNGSI KEYLESS-GO TERGANGGU:
• high-voltage power lines
mobile phones


G-Class - Owner's Manual
Opening and closing Doors
• electronic devices (notebooks, tablets)
• shielding due to metallic objects or induction loops for electrical gate systems or automatic barriers
Ensure that there is sufficient distance between the key and the potential source of interference.
Mengaktifkan/menonaktifkan penguncian otomatis di sistem multimedia MBUX
Multimedia system:

The vehicle is locked automatically when the vehicle is switched on and the wheels are turning faster than walking pace.
▶ Activate or deactivate Automatic locking.
DALAM SITUASI BERIKUT, ADA BAHAYA TERKUNCI DI LUAR SAAT FUNGSI TERSEBUT DIAKTIFKAN:
• The vehicle is pushed.
• If the vehicle is being tested on a roller dynamometer.
Mengunci/membuka kunci pintu pengemudi dengan kunci darurat
If you unlock and open the driver's door with the emergency key, the anti-theft alarm system is triggered.

i Information on starting the vehicle in emergency operation mode ( → page 273).

Remove the emergency key ( → page 172).
Insert the emergency key into the lock of the driver's door as far as it will go.
To unlock: turn the emergency key anti-clockwise as far as it will go to position 1.
Then turn the emergency key back into the starting position again.
To lock: turn the emergency key clockwise as far as it will go to position 2.
Then turn the emergency key back into the starting position again.
Vehicles with "G-MANUFAKTUR Logo package" special equipment: the lock cylinder for emergency unlocking is located in the door handle on the rear-end door.

G-Class - Owner's Manual
Opening and closing Rear-end door
Pintu belakang
Membuka dan menutup pintu belakang

BAHAYA
Risk of exhaust gas poisoning
Combustion engines emit poisonous exhaust gases such as carbon monoxide. If the rear doors or the rear-end door are open with the engine running, and in particular during a journey, exhaust gases could be directed into the vehicle interior.
▶ Always switch off the engine before opening the rear door.
▶ Never drive the vehicle with the rear door or rear-end door open.

PERINGATAN
Risk of injury from unsecured items in the vehicle
If objects, luggage or loads are not secured or not secured sufficiently, they could slip, tip over or be thrown around and thereby hit vehicle occupants.
There is a risk of injury, particularly in the event of sudden braking or a sudden change in direction.
▶ Always stow objects in such a way that they cannot be thrown around.
Before the journey, secure objects, luggage or loads against slipping or tipping over.
Observe the "Notes on loading the vehicle".

CATATAN
Damage when opening the rear-end door
The rear-end door swings out to the side when it is opened.
▶ Ensure that there is sufficient clearance.

G-Class - Owner's Manual
Opening and closing Rear-end door

To open: press the button ☐ on the key.
① The "Central unlocking" unlocking setting must be selected ( → page 171).
Press the release knob ① and pull the door handle ②.
Open the rear-end door.
To close: push the rear-end door closed.
Press the button 🔒 on the key.
The rear-end door is locked.
KENDARAAN DENGAN KEYLESS-GO
PERSYARATAN:
• The key is outside the vehicle.
• The distance between the key and the vehicle does not exceed 1 m.
To unlock the rear-end door: press the release knob ① once.
To open the rear-end door: press the release knob ① again and pull on the door handle ②.
To close and lock the rear-end door: push the rear-end door closed.

G-Class - Owner's Manual
Opening and closing Side windows
Kaca samping
Membuka dan menutup kaca samping

PERINGATAN
Risk of becoming trapped when opening a side window
When you open a side window, parts of the body could be drawn in or become trapped between the side window and window frame.
When opening, make sure that nobody is touching the side window.
If someone is trapped, release the button immediately or pull it in order to close the side window again.

PERINGATAN
Risk of becoming trapped when closing a side window
When closing a side window, body parts could be trapped in the closing area in the process.
When closing, make sure that no body parts are in the closing area.
If someone is trapped, release the button immediately or press the button in order to reopen the side window.


PERINGATAN
Risk of becoming trapped when children operate the side windows
Children could become trapped if they operate the side windows, particularly when unattended.
▶ Activate the child safety lock for the rear side windows.
When leaving the vehicle, always take the key with you and lock the vehicle.
▶ Never leave children unattended in the vehicle.
Persyaratan:
• The power supply or the vehicle has been switched on.

G-Class - Owner's Manual
Opening and closing Side windows

Closing
To open
The buttons on the driver's door take precedence.
To start automatic operation: press the button beyond the point of resistance or pull and release it.
To interrupt automatic operation: press or pull the [ ] button again.
When the vehicle is switched off, you can continue to operate the side windows.
This function will be available for around four minutes or until a front door is opened.
FUNGSI PEMBALIKAN OTOMATIS PADA KACA SAMPING
If an obstacle impedes a side window during the closing process, the side window will open again automatically. The automatic reversing function serves solely as an aid and is not a substitute for your attentiveness.
During the closing process, ensure that no body parts remain within the closing area.

▲ WARNING
Risk of becoming trapped despite there being reversing protection on the side window
FUNGSI PEMBALIKAN TIDAK BERFUNGSI:
• to soft, light and thin objects, e.g. fingers.
• during resetting.
The reversing function cannot prevent someone from becoming trapped in these situations.
During the closing process, make sure that no body parts are in the closing area.
If someone becomes trapped, press the ☐ button to open the side window again.


Pembukaan kenyamanan (ventilasi kendaraan sebelum memulai perjalanan)

PERINGATAN
Risk of entrapment when opening a side window
When opening a side window, parts of the body could be drawn in or become trapped between the side window and window frame.
When opening, make sure that nobody is touching the side window.
▶ Release the button immediately if somebody becomes trapped.
Persyaratan:
• The key is in immediate proximity to the vehicle.
Press and hold the ⏻ button on the key.
FUNGSI-FUNGSI BERIKUT DILAKUKAN:
• The vehicle is unlocked.
• The side windows open.
• The sliding sunroof opens.
• The driver's seat ventilation is switched on.
Interrupt convenience opening: Release the 📄 button.
Continue convenience opening: Press and hold the 📄 button again.
i Convenience opening also functions with KEYLESS-GO ( → page 175).
Penutupan kenyamanan (menutup kendaraan dari luar)

PERINGATAN
Risk of entrapment due to not paying attention during convenience closing
When the convenience closing feature is operating, parts of the body could become trapped in the closing area of the side window and the sliding sunroof.
When the convenience closing feature is operating, monitor the entire closing process and make sure that no body parts are in the closing area.
Persyaratan:
• The key is in immediate proximity to the vehicle.
Press and hold the Ⓤ button on the key.
FUNGSI-FUNGSI BERIKUT DILAKUKAN:
• The vehicle is locked.
• The side windows are closed.
• The sliding sunroof is closed.

G-Class - Owner's Manual
Opening and closing Side windows
To interrupt convenience closing: release the Ⓗ button.
To continue convenience closing: press and hold the ☐ button again.
(i) Convenience closing also functions with KEYLESS-GO ( → page 175).
Mengatasi masalah pada kaca samping

PERINGATAN
Risk of becoming trapped or fatally injured if reversing protection is not activated
If you close a side window again immediately after it has been blocked, the side window will close with increased or maximum force. The reversing function is then not active and body parts may become trapped.
▶ Make sure that no parts of the body are in the closing area.
To stop the closing process, release the button or press the button again to reopen the side window.
KACA SAMPING TIDAK DAPAT DITUTUP DAN ANDA TIDAK DAPAT MELIHAT PENYEBABNYA.
▶ Check to see whether any objects are in the window guide.
Adjust the side windows.
Adjusting the side windows
If a side window is obstructed during closing and reopens again immediately:
Immediately after this, pull and hold the corresponding button again until the side window has closed and hold the button for at least one more second (re-adjustment).
The side window will be closed without the automatic reversing function.
If the side window is obstructed again and reopens again immediately:
Immediately after this, pull and hold the corresponding button again until the side window has closed and hold the button for at least one more second (follow-up adjustment).
The side window will be closed without the automatic reversing function.
If a side window is obstructed again during closing and reopens again slightly, consult a qualified specialist workshop.
KACA SAMPING TIDAK DAPAT DIBUKA ATAU DITUTUP MENGGUNAKAN FITUR PEMBUKAAN KENYAMANAN.
KEMUNGKINAN PENYEBAB:
• The key is not in the immediate vicinity of the vehicle.
• The key battery is at low capacity or is flat.
▶ Check the battery using the indicator lamp ( → page 170).
Replace the key battery, if necessary ( → page 173).

G-Class - Owner's Manual
Opening and closing Sliding sunroof
Sunroof geser
Membuka dan menutup sunroof geser

PERINGATAN
Risk of becoming trapped when the sliding sunroof is being opened and closed
Body parts may become trapped in the range of movement.
During opening and closing, make sure that no body parts are in the range of movement.
▶ Release the button immediately if somebody becomes trapped.
or
▶ Briefly press the button in any direction during automatic operation.
The opening or closing process will be stopped.


PERINGATAN
Risk of entrapment if the sliding sunroof is operated by children
Children operating the sliding sunroof could get caught in the moving parts, particularly if unattended.
▶ Never leave children unattended in the vehicle.
When leaving the vehicle, always take the key with you and lock the vehicle.

CATATAN
Malfunction due to snow and ice
Snow and ice may cause the sliding sunroof to malfunction.
▶ Open the sliding sunroof only if it is free of snow and ice.

CATATAN
Damage caused by moisture ingress
Do not open the sliding sunroof if it has just rained.
Do not open the sliding sunroof immediately after washing the vehicle in a car wash.


G-Class - Owner's Manual
Opening and closing Sliding sunroof

CATATAN
Damage caused by protruding objects
Objects that protrude from the sliding sunroof may damage the seals.
Do not allow anything to protrude from the sliding sunroof.

CATATAN
Damage to the sliding sunroof due to insufficient headroom
When the sliding sunroof is raised, the vehicle will be higher than 2 m.
▶ Ensure that sufficient headroom is available before you open the sliding sunroof in garages or multi-storey car parks, for example.

CATATAN
Damage to the sliding sunroof when a roof luggage rack is fitted
When a roof luggage rack is fitted, raising or opening the sliding sunroof may be restricted.
▶ Check whether the sliding sunroof can be raised or opened when a roof luggage rack is fitted.
If in doubt, do not raise or open the sliding sunroof.

To raise
To open
To close/lower
To start automatic operation: press the button beyond the point of resistance or pull and release it.
To interrupt automatic operation: briefly press the ☐ button in any direction.
The opening/closing process will be stopped.
FUNGSI PEMBALIKAN OTOMATIS PADA ATAP MOBIL GESER
If an obstacle obstructs the sliding sunroof during the closing process, the sliding sunroof will open again automatically. The automatic reversing function serves solely as an aid and is not a substitute for your attentiveness.
Keep the opening area and the guide rails free of debris, e.g. ice, snow or leaves.
When closing the sliding sunroof, make sure that no body parts or objects are in the closing area.


G-Class - Owner's Manual
Opening and closing Sliding sunroof

A
PERINGATAN
Risk of becoming trapped despite the reversing function being active
KHUSUSNYA, FUNGSI PEMBALIKAN TIDAK BERREAKSI:
• to soft, light and thin objects, e.g. fingers.
• towards the end of the closing procedure.
• during resetting.
During the closing process, make sure that no body parts are in the closing area.
▶ Release the button immediately if somebody becomes trapped.
or
▶ Briefly press the button in any direction during automatic operation.
The closing process will be stopped.
Fungsi otomatis atap mobil geser
ATAP MOBIL GESER AKAN DITUTUP OTOMATIS KETIKA KENDARAAN TELAH DIMATIKAN DALAM SITUASI BERIKUT:
- if it starts to rain
Rain will be detected by a rain sensor on the windscreen.
• in extreme temperatures
- after a certain time (depending on the on-board electrical system voltage)
• if there is a malfunction in the power supply
The sliding sunroof will rise at the rear in order to continue ventilating the vehicle interior.
If the sliding sunroof is obstructed during an automatic closing procedure, it will be opened again slightly. The automatic function for the sliding sunroof and the side windows will then be deactivated.
Memperbaiki masalah pada atap mobil geser
A
PERINGATAN
Risk of becoming trapped or fatal injuries when the sliding sunroof is closed again
If the sliding sunroof is closed again immediately after it has been blocked or reset, it will close with increased force.
▶ Make sure that no parts of the body are in the closing area.
▶ Release the button immediately if somebody becomes trapped.
or
▶ Briefly press the button in any direction during the automatic closing process.
The closing process will be stopped.
ATAP MOBIL GESER TIDAK DAPAT DITUTUP DAN ANDA TIDAK DAPAT MELIHAT PENYEBABNYA.
If the sliding sunroof is obstructed during closing and reopens again slightly:


G-Class - Owner's Manual
Opening and closing Sliding sunroof
Immediately after automatic reversing, pull and hold the [☐] button down again to the point of resistance until the sliding sunroof is closed. The sliding sunroof will be closed with increased force.
If the sliding sunroof is obstructed again and opens again slightly:
▶ Repeat the previous step.
The sliding sunroof will be closed again with increased force.
Vehicles without a panorama sliding sunroof: the sliding sunroof is not operating smoothly.
Reset the sliding sunroof.
Mengatur ulang atap mobil geser
▶ Push the ☐ button up to the point of resistance repeatedly until the sliding sunroof is fully open.
Press the button for another second.
▶ Close the sliding sunroof.


G-Class - Owner's Manual
Opening and closing Anti-theft protection

Perlindungan anti-pencurian
Fungsi immobiliser
The immobiliser prevents your vehicle from being started without the correct key.
The immobiliser is automatically activated when the vehicle is switched off, and deactivated when the vehicle is switched on.
ATA (Sistem Alarm Anti-Pencurian)
FUNGSI SISTEM ATA
JIKA SISTEM ATA DIAKTIFKAN, ALARM VISUAL DAN SUARA AKAN BERBUNYI DALAM SITUASI BERIKUT:
• when a door is opened
• when the rear-end door is opened
• when the bonnet is opened
• when the interior protection is triggered ( → page 190)
• when the tow-away protection is triggered (→ page 189)
SISTEM ATA DIAKTIFKAN SECARA OTOMATIS SETELAH KIRA-KIRA SEPULUH DETIK DALAM SITUASI BERIKUT:
• After locking the vehicle with the key
• After locking the vehicle using KEYLESS-GO

The indicator lamp ● flashes when the ATA system is primed.
SISTEM ATA DINONAKTIFKAN SECARA OTOMATIS DALAM SITUASI BERIKUT:
• After unlocking the vehicle with the key
• After unlocking the vehicle using KEYLESS-GO
• After pressing the Start/Stop button with the key in the storage compartment ( → page 273)
MENONAKTIFKAN ALARM SISTEM ATA
Press the button ☑ or ⏰ on the key.
or
Press the Start/Stop button with the key in the storage compartment ( → page 273)


G-Class - Owner's Manual
Opening and closing Anti-theft protection
MENONAKTIFKAN ALARM MENGGUNAKAN KEYLESS-GO:
▶ Cover the outside door handle with the key outside the vehicle. The distance between key and vehicle here should not be greater than 1 m.
Penonaktifan Kunci Darurat
PERSYARATAN:
- Your smartphone and your vehicle have an active data connection.
• The vehicle battery is sufficiently charged.
• To deactivate all keys: there is no other key in the vehicle.
• There are no persons or animals in the vehicle.
• The vehicle is parked in a safe place.
① Only use the Emergency Key Deactivation function in an emergency.
If you deactivate all keys, they can only be reactivated within 30 days. After 30 days or if the battery state of charge is low, the vehicle must be unlocked and opened using the emergency key.
Where is the vehicle key? Misplaced, lost or stolen?
Emergency Key Deactivation provides you with the option to deactivate specific keys or all vehicle keys in the event of loss or theft, and to reactivate them when the keys have been found again.
Berikut cara kerjanya:
Open ☐ in the Mercedes-Benz App and select the vehicle. The My garage menu appears.
Select Service management.
▶ Activate Emergency Key Deactivation.
NONAKTIFKAN KUNCI TERTENTU ATAU SEMUA KUNCI
Select in the Mercedes-Benz App.
▶ Select Emergency Key Deactivation.
▶ Deactivate specific keys or Deactivate all keys.
Select Confirm.
Enter the four-digit PIN and select Send.
The request will be sent. If deactivation is successful, you will receive a message that a specific key or all keys have been deactivated.
AKTIFKAN SEMUA KUNCI
▶ Select Emergency Key Deactivation.
Select Activate all keys.
Enter the four-digit PIN and select Send.
The request will be sent. If activation is successful, you will receive a message that all keys have been activated.
Fungsi perlindungan penarik
A visual and audible alarm is triggered if an alteration to your vehicle's angle of inclination is detected while tow-away protection is primed.

G-Class - Owner's Manual
Opening and closing Anti-theft protection
PERLINDUNGAN PENARIK DIAKTIFKAN SECARA OTOMATIS SETELAH SEKITAR 60 DETIK:
• After locking the vehicle with the key
• After locking the vehicle using KEYLESS-GO
Perlindungan derek hanya aktif ketika komponen berikut ditutup:
- Doors
- Rear-end door
Perlindungan derek otomatis nonaktif:
• After pressing the button ☑ on the key
- After pressing the start/stop button with the key in the storage compartment ( → page 273)
• After unlocking the vehicle using KEYLESS-GO
Information on collision detection on a parked vehicle ( → page 336).
Mengaktifkan/menonaktifkan perlindungan derek
Multimedia system:
Settings Vehicle Open/close Vehicle protection
▶ Activate or deactivate Tow-away protection.
Perlindungan derek aktif kembali dalam kasus berikut:
• The vehicle is unlocked again.
• A door is opened.
• The vehicle is locked again.
Fungsi perlindungan interior
When interior protection is primed, a visual and audible alarm is triggered if movement is detected in the vehicle interior.
Perlindungan interior aktif otomatis setelah sekitar sepuluh detik:
• After locking the vehicle with the key
• After locking the vehicle using KEYLESS-GO
Perlindungan interior hanya aktif ketika komponen berikut ditutup:
- Doors
• Rear-end door
Perlindungan interior otomatis nonaktif:
• After pressing the button 🔒 on the key
• After pressing the start/stop button with the key in the storage compartment ( → page 273)
• After unlocking the vehicle using KEYLESS-GO
Situasi berikut dapat menyebabkan alarm palsu:
- When there are moving objects such as mascots in the vehicle interior
• If a side window is open
• If the sliding sunroof is open


G-Class - Owner's Manual
Opening and closing Anti-theft protection

Mengaktifkan/menonaktifkan perlindungan interior
Multimedia system:
Settings Vehicle Open/close Vehicle protection
▶ Activate or deactivate Interior protection.
INTERIOR PROTECTION IS PRIMED AGAIN IN THE FOLLOWING CASES:
• The vehicle is unlocked again.
• A door is opened.
• The vehicle is locked again.

Back to Contents
G-Class - Owner's Manual
Seats and stowing

< Kursi dan penyimpanan
This interactive PDF works like a website - tap or click a button to jump straight to where you want to go. You can return here at any time via the navigation bar at the top left.
Notes on the correct driver's seat position 193
Cup holders 227
Notes on grab handles 194
Ashtray and cigarette lighter 231
Seats 195
Sockets 233
Steering wheel 203
Wireless charging of a mobile phone in the cockpit 204
Easy entry and exit feature 205
Fitting/removing the floor mats 237
Memory function 207
Stowage areas 210
G-Class - Owner's Manual
> Seats and stowing Notes on the correct driver's seat position

Catatan tentang posisi kursi pengemudi yang benar

PERINGATAN
Risk of accident due to adjusting the vehicle settings while the vehicle is in motion
ANDA BISA KEHILANGAN KENDALI KENDARAAN TERUTAMA DALAM SITUASI BERIKUT:
- if you adjust the driver's seat, the head restraint, the steering wheel or the mirror while the vehicle is in motion
• if you fasten your seat belt while the vehicle is in motion
Before starting the vehicle: in particular, adjust the driver's seat, head restraint, steering wheel and mirror, and fasten your seat belt.

PASTIKAN HAL BERIKUT SAAT MENYESUAIKAN RODA KEMUDI ①, SABUK KESELAMATAN ②, DAN KURSI PENGEMUDI ③:
- You are sitting as far away from the driver's airbag as possible, taking the following points into consideration:
• You are sitting in an upright position
- Your thighs are slightly supported by the seat cushion
- Your legs are not fully extended and you can depress the pedals properly
- The back of your head is supported at eye level by the centre of the head restraint
• You can hold the steering wheel with your arms slightly bent
• You can move your legs freely
• You can see all the indicators on the driver's display clearly
• You have a good overview of the traffic conditions
- Observe the notes on correctly fastening the seat belt (→ page 122).
G-Class - Owner's Manual
Seats and stowing Notes on grab handles
Catatan tentang pegangan pegangan

PERINGATAN
Risk of injury due to excessive load on the grab handles
If you apply your full body weight to the grab handle or pull it abruptly, the grab handle may be damaged or come loose from its anchorage. This may result in injuries.
▶ Use the grab handles only to stabilise the seating position or to assist in getting in and out of the seat.


G-Class - Owner's Manual
Seats and stowing Seats
< Kursi
Menyetel kursi depan secara elektrik

PERINGATAN
Risk of becoming trapped if the seats are adjusted by children. Children could become trapped if they adjust the seats, particularly when unattended.
When leaving the vehicle, always take the key with you and lock the vehicle.
▶ Never leave children unattended in the vehicle.
You can adjust the seats when the vehicle is switched off.

PERINGATAN
Risk of becoming trapped if the seats are adjusted
When adjusting a seat, you may trap yourself or a vehicle occupant, e.g. on the seat guide rail.
Make sure that no part of the body is within the seat's range of motion when adjusting a seat.
Observe the safety notes on "Airbags" and "Children in the vehicle".


PERINGATAN
Risk of accident due to adjusting the vehicle settings while the vehicle is in motion
ANDA BISA KEHILANGAN KENDALI ATAS KENDARAAN TERUTAMA DALAM SITUASI BERIKUT:
- if you adjust the driver's seat, the head restraint, the steering wheel or the mirror while the vehicle is in motion
• if you fasten your seat belt while the vehicle is in motion
Before starting the vehicle: in particular, adjust the driver's seat, head restraint, steering wheel and mirror, and fasten your seat belt.

PERINGATAN
Risk of becoming trapped if the seat height is adjusted carelessly
If you adjust the seat height carelessly, you or other vehicle occupants could be trapped and thereby injured.
Children in particular could accidentally press the electrical seat adjustment buttons and become trapped.
While moving the seats, make sure that hands or other body parts do not get under the lever assembly of the seat adjustment system.

G-Class - Owner's Manual
Seats and stowing Seats
A
PERINGATAN
Risk of injury due to head restraints not being fitted or being adjusted incorrectly
If head restraints have not been installed or have not been adjusted correctly, there is an increased risk of injury in the head and neck area, e.g. in the event of an accident or when braking.
▶ Always drive with the head restraints fitted.
Before driving off, make sure for every vehicle occupant that the centre of the head restraint supports the back of the head at about eye level.
Do not interchange the head restraints of the front and rear seats. Otherwise, you will not be able to adjust the height and angle of the head restraints correctly.
Adjust the head restraint fore-and-aft position so that it is as close as possible to the back of your head.
A
PERINGATAN
Risk of injury or death due to incorrect seat position
The seat belt will not offer the intended level of protection if you have not moved the seat backrest to an almost vertical position.
In particular, you may slip under the seatbelt and injure yourself.
Adjust the seat properly before beginning your journey.
▶ Always ensure that the seat backrest is in an almost vertical position and that the shoulder section of your seat belt is routed across the centre of your shoulder.

A
PERINGATAN
Risk of potentially fatal injuries due to objects trapped under the front passenger seat
Objects trapped under the front passenger seat may interfere with the function of the automatic front passenger airbag shutoff or damage the system.
Do not stow any objects under the front passenger seat.
When the front passenger seat is occupied, ensure that no objects have become trapped beneath the front passenger seat.
CATATAN
Damage to the seats when adjusting
The seats may be damaged by objects when adjusting the seats.
When adjusting the seats, make sure that there are no objects in the footwell, under or behind the seats.
G-Class - Owner's Manual
Seats and stowing Seats

① Head restraint height
② Seat backrest inclination
3 Seat height
Seat cushion length
Seat cushion inclination
6 Seat fore-and-aft position
Save the settings with the memory function ( → page 208).
Sandaran kepala
MENYESUAIKAN SANDARAN KEPALA MEWAH KURSI DEPAN SECARA MANUAL
PERINGATAN
Risk of accident due to adjusting the vehicle settings while the vehicle is in motion
ANDA DAPAT KEHILANGAN KENDALI KENDARAAN TERUTAMA DALAM SITUASI BERIKUT:
- if you adjust the driver's seat, the head restraint, the steering wheel or the mirror while the vehicle is in motion
• if you fasten your seat belt while the vehicle is in motion
Before starting the vehicle: in particular, adjust the driver's seat, head restraint, steering wheel and mirror, and fasten your seat belt.
PERINGATAN
Risk of injury due to incorrectly adjusted head restraints
If head restraints have not been adjusted correctly, there is an increased risk of injury in the head and neck area, e.g. in the event of an accident or sudden braking.
Before driving off, make sure for every vehicle occupant that the centre of the head restraint supports the back of the head at about eye level.
G-Class - Owner's Manual
Seats and stowing Seats

To adjust the side bolsters of the head restraint (equipment-dependent): pull or push right or left side bolster ②.
To move forwards: pull the head restraint forwards.
To move backwards: press release knob and push the head restraint backwards.
MENYESUAIKAN SANDARAN KEPALA KURSI BELAKANG SECARA MANUAL

PERINGATAN
Risk of injury due to head restraints not being fitted or being adjusted incorrectly
If head restraints have not been installed or have not been adjusted correctly, there is an increased risk of injury in the head and neck area, e.g. in the event of an accident or when braking.
▶ Always drive with the head restraints fitted.
Before driving off, make sure for every vehicle occupant that the centre of the head restraint supports the back of the head at about eye level.

To raise: pull the head restraint up.
To lower: press release button Ⓤ and push the head restraint down.
If the centre rear seat is not occupied: move the head restraint all the way down.
MENYESUAIKAN SUDUT SANDARAN KEPALA BELAKANG
You can adjust only the two outer head restraints.
▶ Pull or push the bottom edge of the head restraint forwards or backwards until the desired position has been reached.
G-Class - Owner's Manual
Seats and stowing Seats

MEMASANG/MELEPAS SANDARAN KEPALA KURSI BELAKANG

PERINGATAN
Risk of injury due to head restraints not being fitted or being adjusted incorrectly
If head restraints have not been installed or have not been adjusted correctly, there is an increased risk of injury in the head and neck area, e.g. in the event of an accident or when braking.
▶ Always drive with the head restraints fitted.
Before driving off, make sure for every vehicle occupant that the centre of the head restraint supports the back of the head at about eye level.
REMOVING

▶ Pull the head restraint upwards as far as it will go.
▶ Push release knob ① in the direction of the arrow and pull out the head restraint.
FITTING

Insert the head restraint such that the notches on the bar are on the left when viewed in the direction of travel.
▶ Push the head restraint down until it engages.
Mengonfigurasi penyesuaian kursi
Multimedia system:


MENYESUAIKAN BANTALAN UDARA
On the corresponding menu, adjust the air cushions for Lumbar or Side bolsters.
MENGATUR KESEIMBANGAN PEMANAS KURSI
Select Heating settings.
▶ Select Seat heating balance.
Adjust the heat distribution for the desired seat.


G-Class - Owner's Manual
Seats and stowing Seats
Ikhtisar program pijat
The availability of the massage function for the various seats is dependent on the vehicle equipment.
- Hot Relaxing back Combination of heat and massage. It starts by massaging the back. In addition, you will start to notice warm pressure points, beginning in the pelvic area.
- Activating Massage Activating massage with upward-moving massage waves.
• Classic Massage Relaxing back massage.
- Wave Massage Regenerating massage programme via massage waves across the back and in the seat cushion.
- Mobilizing Massage Mobilising massage with upward-moving massage waves. Can promote deeper respiration and hence improve circulation and blood pressure.
- Active Workout backrest and Active Workout cushion These programmes require your cooperation. Alternating between tensing and releasing helps to improve blood flow to your muscles. Press against a pressure point as soon as you feel it.
Memilih program pijat untuk kursi depan
Multimedia system:

Select Massage.
Select a massage programme ( → page 200).
Start the programme for the desired seat ▶.
To set the massage intensity: switch High intensity on or off.
To stop the massage: select ■.
i Availability of this function depends on the respective equipment.
Mengatur ulang penyesuaian kursi
Multimedia system:

Select Reset.
Select 📄 for the desired seat.
The settings for the selected seat will be reset.
G-Class - Owner's Manual
Seats and stowing Seats
Menghidupkan/mematikan pemanas kursi

PERINGATAN
Risk of burns due to repeatedly switching on the seat heating
Repeatedly switching on the seat heating can cause the seat cushion and seat backrest padding to become very hot.
In particular, the health of persons with limited temperature sensitivity or a limited ability to react to high temperatures may be affected or they may even suffer burn-like injuries.
▶ Do not repeatedly switch on the seat heating.
Front seat heating
To protect against overheating, the seat heating may be temporarily deactivated after it has been switched on repeatedly.

CATATAN
Damage to the seats caused by objects or documents when the seat heater is switched on
When the seat heater is switched on, overheating may occur due to objects or documents placed on the seats e.g. seat cushions or child seats. This could cause damage to the seat surface.
▶ Make sure that no objects or documents are on the seats when the seat heater is switched on.
Persyaratan:
• The power supply is switched on.
Rear seat heating
Press button ① repeatedly until the desired heating level is set. Depending on the heating level, up to three indicator lamps will light up. If all indicator lamps are off, the seat heating is switched off.
G-Class - Owner's Manual
Seats and stowing Seats
The seat heating will automatically switch down from the three heating levels after 8, 18 and 35 minutes until the seat heating is switched off.
Menghidupkan/mematikan ventilasi kursi
Persyaratan
• The power supply is switched on.

Press button ① repeatedly until the desired blower setting has been reached.
Depending on the blower setting, up to three indicator lamps will light up. If all indicator lamps are off, the seat ventilation is switched off.


G-Class - Owner's Manual
Seats and stowing Steering wheel
< Roda kemudi
Menyesuaikan roda kemudi secara elektrik

PERINGATAN
Risk of accident due to adjusting the vehicle settings while the vehicle is in motion
ANDA BISA KEHILANGAN KENDALI KENDARAAN TERUTAMA DALAM SITUASI BERIKUT:
- if you adjust the driver's seat, the head restraint, the steering wheel or the mirror while the vehicle is in motion
• if you fasten your seat belt while the vehicle is in motion
Before starting the vehicle: in particular, adjust the driver's seat, head restraint, steering wheel and mirror, and fasten your seat belt.

PERINGATAN
Risk of entrapment for children when adjusting the steering wheel
Children could injure themselves if they adjust the steering wheel.
▶ Never leave children unattended in the vehicle.
When leaving the vehicle, always take the key with you and lock the vehicle.
The steering wheel can be adjusted when the vehicle is switched off.

To adjust the distance to the steering wheel
To adjust the height
Save the settings with the memory function ( → page 208).
If the driver's door is open, the steering wheel can be adjusted for up to 30 minutes after the vehicle has been switched off.
Menghidupkan/mematikan pemanas roda kemudi
Persyaratan
• The vehicle is switched on.


G-Class - Owner's Manual
> Seats and stowing Steering wheel

Turn the lever in the direction of arrow ① or ②.
If indicator lamp lights up, the steering wheel heater is switched on.
When you switch the vehicle off, the steering wheel heater will switch off.


G-Class - Owner's Manual
Seats and stowing Easy entry and exit feature
Fitur masuk dan keluar yang mudah
Menggunakan fitur masuk dan keluar yang mudah

PERINGATAN
Risk of accident when pulling away during the adjustment process of the easy entry and exit feature
You could lose control of the vehicle.
▶ Always wait until the adjustment process is complete before driving off.


PERINGATAN
Risk of becoming trapped during adjustment of the easy entry and exit feature
You and other vehicle occupants could become trapped.
▶ Ensure that no one has a body part in the sweep of the seat or steering wheel.
▶ If somebody becomes trapped, press a memory function position button.
or
▶ Press the memory function memory button.
or
Move the steering column adjustment switch in the opposite direction to the steering wheel's direction of movement. The adjustment process is stopped.


G-Class - Owner's Manual
Seats and stowing Easy entry and exit feature

A
PERINGATAN
Risk of becoming trapped if children activate the easy entry and exit feature
Children could become trapped if they activate the easy entry and exit feature, particularly when unattended.
▶ Never leave children unattended in the vehicle.
When leaving the vehicle, always take the key with you and lock the vehicle.
JIKA FITUR MASUK DAN KELUAR YANG MUDAH AKTIF, RODA KEMUDI AKAN BERGERAK KE ATAS ATAU MENUJU DASHBOARD SAAT:
• you switch off the vehicle
• you open the driver's door when the vehicle is switched on
When the steering wheel is at the limit of its range of movement, it will not move upwards.
RODA KEMUDI AKAN KEMBALI KE POSISI BERKENDARA TERAKHIR JIKA:
• you switch the vehicle on when the driver's door is closed
• you close the driver's door when the vehicle is switched on
POSISI BERKENDARA TERAKHIR AKAN DISIMPAN SAAT:
• you switch off the vehicle
• you save the steering column adjustment with the memory function
If you press one of the memory function position switches, the adjustment process will be stopped.
Mengatur fitur masuk dan keluar yang mudah
Persyaratan:
• The power supply or the vehicle has been switched on.
Multimedia system:
Settings Vehicle Comfort
Easy entry and exit feature
MENGATUR FITUR MASUK DAN KELUAR YANG MUDAH
Select Steering wheel and seat, Steering wheel only or Off.
If you are using a custom user profile, this information will be used for the easy entry and exit feature. This will cause the driver's seat and steering wheel to move into the correct position automatically ( → page 458).
G-Class - Owner's Manual
Seats and stowing Memory function
< Fungsi memori
Fungsi dari fungsi memori

PERINGATAN
Risk of an accident if the memory function is used while driving. If you use the memory function on the driver's side while driving, you could lose control of the vehicle as a result of the adjustments being made.
▶ Only use the memory function on the driver's side when the vehicle is stationary.

PERINGATAN
Risk of entrapment when adjusting the seat with the memory function
When the memory function adjusts the seat or steering wheel, you and other vehicle occupants - particularly children - could become trapped.
During the adjusting process of the memory function, ensure that no body parts are in the sweep of the seat or the steering wheel.
If somebody becomes trapped, immediately release the memory function position button.
The adjustment process is stopped.


PERINGATAN
Danger of entrapment when memory function is activated by children
When children activate the memory function, they can get trapped, especially if they are unsupervised.
▶ Never leave children unattended in the vehicle.
When leaving the vehicle, always take the key with you and lock the vehicle.
You can use the memory function when the vehicle is switched off.
Seat adjustments for up to three people can be stored and called up using the memory function.
ANDA DAPAT MENYIMPAN PENGATURAN UNTUK SISTEM BERIKUT:
- Seat, backrest and head restraint
- Steering wheel
- Outside mirrors

G-Class - Owner's Manual
> Seats and stowing Memory function
Mengoperasikan fungsi memori

PERINGATAN
Risk of an accident if the memory function is used while driving
If you use the memory function on the driver's side while driving, you could lose control of the vehicle as a result of the adjustments being made.
▶ Only use the memory function on the driver's side when the vehicle is stationary.

PERINGATAN
Risk of entrapment when adjusting the seat with the memory function
When the memory function adjusts the seat or steering wheel, you and other vehicle occupants - particularly children - could become trapped.
During the adjusting process of the memory function, ensure that no body parts are in the sweep of the seat or the steering wheel.
If somebody becomes trapped, immediately release the memory function position button.
The adjustment process is stopped.


PERINGATAN
Danger of entrapment when memory function is activated by children
When children activate the memory function, they can get trapped, especially if they are unsupervised.
▶ Never leave children unattended in the vehicle.
When leaving the vehicle, always take the key with you and lock the vehicle.
You can use the memory function when the vehicle is switched off.

To store: Set the desired position for all systems.
Press the M memory button and then press the memory position button 1, 2 or 3 within three seconds.
An acoustic signal sounds. The settings are stored.
To call up: Press and hold preset position button 1, 2 or 3 until all the systems are in the stored position.


G-Class - Owner's Manual
Seats and stowing Memory function
You can watch an animation on this topic via the following link:


G-Class - Owner's Manual
Seats and stowing Stowage areas
Area penyimpanan
Catatan tentang memuat kendaraan

BAHAYA
Risk of exhaust gas poisoning
Combustion engines emit poisonous exhaust gases such as carbon monoxide. If the rear doors or the rear-end door are open with the engine running, and in particular during a journey, exhaust gases could be directed into the vehicle interior.
▶ Always switch off the engine before opening the rear door.
▶ Never drive the vehicle with the rear door or rear-end door open.
Objects in the deployment area of an airbag may prevent the airbag from functioning correctly. Observe the notes on airbags ( → page 140).

PERINGATAN
Risk of injury from unsecured items in the vehicle
If objects, luggage or loads are not secured or not secured sufficiently, they could slip, tip over or be thrown around and thereby hit vehicle occupants.
There is a risk of injury, particularly in the event of sudden braking or a sudden change in direction.
▶ Always stow objects in such a way that they cannot be thrown around.
Before the journey, secure objects, luggage or loads against slipping or tipping over.


G-Class - Owner's Manual
Seats and stowing Stowage areas

PERINGATAN
Risk of injury due to unsuitable stowage of objects
If objects in the vehicle interior are stowed incorrectly, they may slide or be thrown around and hit vehicle occupants. In addition, cup holders, open stowage spaces and mobile phone receptacles may not, in the event of an accident, retain all the objects they contain.
There is a risk of injury, particularly in the event of braking manoeuvres or abrupt changes in direction.
▶ Always stow objects in such a way that they cannot be thrown around in these or similar situations.
▶ Always ensure that objects do not protrude from stowage compartments, luggage nets or stowage nets.
▶ Close the lockable stowage spaces before starting a journey.
▶ Stow and secure objects that are heavy, hard, pointed, sharpedged, fragile or too large in the load compartment.

PERINGATAN
Risk of accident due to objects in the driver's footwell
Objects in the driver's footwell may impede pedal travel or block a depressed pedal.
This will jeopardise the operating and road safety of the vehicle.
Stow all objects in the vehicle securely so that they cannot get into the driver's footwell.
▶ Make sure that there is always sufficient clearance for the pedals.
▶ Always fit the floor mats securely and as prescribed.
Do not use loose floor mats and do not place floor mats on top of one another.
Vehicles with automatic front passenger airbag shut-off: objects trapped under the front passenger seat may interfere with the function of the automatic front passenger airbag shut-off or damage the system. Therefore please observe the notes on the function of automatic front passenger airbag shut-off ( → page 127).


G-Class - Owner's Manual
Seats and stowing Stowage areas

CATATAN
Damage to the vehicle caused by spilled liquids
If liquids are spilled in the vehicle, parts of the vehicle may be damaged.
▶ Always securely close containers containing liquids that you have brought with you.
▶ Clean the vehicle as soon as possible if liquids are spilled.
▶ If larger quantities of liquids are spilled, have the vehicle checked in a qualified specialist workshop.

PERINGATAN
Risk of burns from the tailpipe and tailpipe trims
The exhaust tailpipe and tailpipe trims can become very hot. If you come into contact with these parts of the vehicle, you could burn yourself.
▶ Always be particularly careful around the tailpipe and the tailpipe trims and supervise children especially closely in this area.
▶ Allow vehicle parts to cool down before touching them.
KARAKTERISTIK PENANGANAN KENDARAAN ANDA BERGANTUNG PADA DISTRIBUSI BEBAN DI DALAM KENDARAAN. ANDA HARUS MEMPERHATIKAN HAL-HAL BERIKUT SAAT MEMUAT KENDARAAN:
\- Never allow the payload including occupants to exceed the maximum permissible gross mass or the permissible axle loads for the vehicle.
These are shown on the vehicle identification plate ( → page 743).
• The load must not protrude above the upper edge of the seat backrests.
• Always install the load compartment cover when carrying objects in the load compartment.
• Always use the partitioning net when carrying objects in the load compartment.
• Always place the load behind unoccupied seats if possible.
- Secure the load using the tie-down eyes and distribute the tension evenly.
CATATAN TENTANG MEMBAWA BEBAN DI ATAP:
- Distribute the roof load and vehicle load evenly, and place heavy objects at the bottom. Also observe the notes on loading the vehicle.
- Drive with care. Avoid sudden starting, braking and steering manoeuvres or fast cornering.
- When carrying a roof load or when the vehicle is fully loaded or occupied, select drive program [F] or [C]. These are configured for good stability (→ page 294).

G-Class - Owner's Manual
Seats and stowing Stowage areas
Ruang penyimpanan di dalam kabin kendaraan
IKHTISAR KOMPARTEMEN PENYIMPANAN DEPAN

PERINGATAN
Risk of injury due to objects being stowed incorrectly
If objects in the vehicle interior are stowed incorrectly, they can slide or be thrown around and hit vehicle occupants. In addition, cup holders, open stowage spaces and mobile phone brackets cannot always retain all objects they contain.
There is a risk of injury, particularly in the event of braking manoeuvres or abrupt changes in direction.
▶ Always stow objects so that they cannot be thrown around in such situations.
▶ Always make sure that objects do not protrude from stowage spaces, luggage nets or stowage nets.
▶ Close the lockable stowage spaces before starting a journey.
▶ Stow and secure objects that are heavy, hard, pointed, sharpedged, fragile or too large in the load compartment.
Observe the notes on loading the vehicle.


PERINGATAN
Risk of accident due to objects in the driver's footwell
Objects in the driver's footwell may impede pedal travel or block a depressed pedal.
This will jeopardise the operating and road safety of the vehicle.
Stow all objects in the vehicle securely so that they cannot get into the driver's footwell.
▶ Make sure that there is always sufficient clearance for the pedals.
▶ Always fit the floor mats securely and as prescribed.
Do not use loose floor mats and do not place floor mats on top of one another.

① Stowage spaces in the doors
Storage and telephone compartment in the armrest with USB port (USB-C)
3 Storage compartment with cup holder and for wireless charging of a mobile phone in the front centre console
Glove compartment


G-Class - Owner's Manual
Seats and stowing Stowage areas
MENGUNCI/MEMBUKA KUNCI GLOVE BOX

PERINGATAN
Risk of injury due to objects being stowed incorrectly
If objects in the vehicle interior are stowed incorrectly, they can slide or be thrown around and hit vehicle occupants. In addition, cup holders, open stowage spaces and mobile phone brackets cannot always retain all objects they contain.
There is a risk of injury, particularly in the event of braking manoeuvres or abrupt changes in direction.
▶ Always stow objects so that they cannot be thrown around in such situations.
▶ Always make sure that objects do not protrude from stowage spaces, luggage nets or stowage nets.
▶ Close the lockable stowage spaces before starting a journey.
▶ Stow and secure objects that are heavy, hard, pointed, sharpedged, fragile or too large in the load compartment.
Observe the notes on loading the vehicle.


▶ Turn the emergency key a quarter turn clockwise 2 (to lock) or anticlockwise 1 (to unlock).

G-Class - Owner's Manual
Seats and stowing Stowage areas
Membuka fitur muatan tembus di kompartemen belakang

PERINGATAN
Risk of injury due to objects being stowed incorrectly
If objects in the vehicle interior are stowed incorrectly, they can slide or be thrown around and hit vehicle occupants. In addition, cup holders, open stowage spaces and mobile phone brackets cannot always retain all objects they contain.
There is a risk of injury, particularly in the event of braking manoeuvres or abrupt changes in direction.
▶ Always stow objects so that they cannot be thrown around in such situations.
▶ Always make sure that objects do not protrude from stowage spaces, luggage nets or stowage nets.
▶ Close the lockable stowage spaces before starting a journey.
▶ Stow and secure objects that are heavy, hard, pointed, sharpedged, fragile or too large in the load compartment.
Observe the notes on loading the vehicle.
FITUR MUATAN TEMBUS TANPA PENUTUP KOMPARTEMEN MUATAN

▶ Fold down the rear armrest.
▶ Pull the centre head restraint of the rear bench seat fully upwards.
▶ Slide release catch ⓘ to the left.

Swivel flap ② to the left until it comes to rest on the rear side of the rear bench seat.
Push cover 3 forwards until it comes to rest on the rear armrest.
FITUR MUATAN TEMBUS DENGAN PENUTUP KOMPARTEMEN MUATAN
▶ Fold the seat backrest forwards ( → page 218).

G-Class - Owner's Manual
Seats and stowing Stowage areas

Slide release catch ① to the left.
Swivel flap ② to the left until it comes to rest on the rear side of the rear bench seat.
Fold the seat backrest backwards and fold the rear armrest down.

Fold cover ③ forwards until it comes to rest on the rear armrest.
▶ Pull the centre head restraint of the rear bench seat fully upwards.
Melipat kursi belakang ke depan
PERINGATAN
Risk of accident if the rear bench seat, rear seat and seat backrest are not engaged
The rear bench seat, rear seat and seat backrest may fold forwards, even while the vehicle is in motion.
- As a result, the vehicle occupant will be pressed into the seat belt with increased force. The seat belt will not be able to protect as intended and could cause additional injury.
- Objects or loads in the boot or load compartment cannot be restrained by the seat backrest.
Make sure that the rear bench seat, the rear seat and the seat backrest are engaged before every trip.
CATATAN
Damage to the seat backrests
The seat backrests may be damaged when the rear bench seat is folded forwards.
▶ Fold the rear bench seat's cushion upwards before the rear seat backrest is folded forwards.
You can fold the left and right seat backrests forwards separately.

G-Class - Owner's Manual
Seats and stowing Stowage areas

▶ Fully insert the seat backrest head restraints ( → page 198).
Fold the seat cushion upwards using the loop ①.

Pull the release handle ② upwards until the seat backrest is completely unlocked.
▶ Fold the seat backrest forwards.
Melipat kembali kursi baris belakang
PERINGATAN
Risk of accident if the rear bench seat, rear seat and seat backrest are not engaged
The rear bench seat, rear seat and seat backrest may fold forwards, even while the vehicle is in motion.
- As a result, the vehicle occupant will be pressed into the seat belt with increased force. The seat belt will not be able to protect as intended and could cause additional injury.
- Objects or loads in the boot or load compartment cannot be restrained by the seat backrest.
Make sure that the rear bench seat, the rear seat and the seat backrest are engaged before every trip.
CATATAN
Damage caused by trapping the seat belt when folding back the seat backrest
The seat belt could become trapped and thus be damaged when the seat backrest is folded back.
Make sure that the seat belt is not trapped when folding back the seat backrest.
G-Class - Owner's Manual
> Seats and stowing Stowage areas

Swivel seat backrest ① back until it engages.
Swivel the seat cushion ② back.
Sandaran kursi belakang
MENYESUAIKAN KEMIRINGAN SANDARAN KURSI DI BAGIAN BELAKANG

PERINGATAN
Risk of accident if the rear bench seat, rear seat and seat backrest are not engaged
The rear bench seat, rear seat and seat backrest may fold forwards, even while the vehicle is in motion.
- As a result, the vehicle occupant will be pressed into the seat belt with increased force. The seat belt will not be able to protect as intended and could cause additional injury.
- Objects or loads in the boot or load compartment cannot be restrained by the seat backrest.
Make sure that the rear bench seat, the rear seat and the seat backrest are engaged before every trip.
You can adjust the angle of the rear seat backrests. There are several possible detent positions.


Pull left or right release lever ① in the direction of the arrow and hold it in position.
Move seat backrest ② to the desired angle.
Let go of release lever ①.
▶ Ensure that the seat backrest is engaged.


G-Class - Owner's Manual
Seats and stowing Stowage areas
Penutup ruang bagasi
MENGGULUNGKAN PENUTUP RUANG BAGASI MASUK/KELUAR

PERINGATAN
Risk of injury or death due to poorly secured objects
The load compartment cover alone cannot secure or restrain heavy objects, items of luggage or heavy loads.
You could be hit by an unsecured load, particularly in the event of abrupt changes in direction, sudden braking or an accident.
▶ Always stow objects in such a way that they cannot be thrown around.
▶ Secure objects, luggage or loads against slipping or tipping over, e.g. by using lashing material, even if you are using the load compartment cover.

CATATAN
Damage to the load compartment cover when loading the vehicle
The load compartment cover may be damaged when loading the vehicle.
Do not place any objects on the load compartment cover.
The load compartment cover is attached behind the seat backrest of the rear bench seat.

To extend: pull load compartment cover ① back by grab handle ② until it engages.
To retract: push the rear edge of load compartment cover ① downwards.
Load compartment cover ① will automatically move forwards.
MEMASANG DAN MELEPAS PENUTUP RUANG BAGASI
Persyaratan:
• The load compartment cover is rolled up.
MELEPAS PENUTUP RUANG BAGASI

Press in the end cap of load compartment cover Ⓞ on the right- or left-hand side.
▶ Push load compartment cover ① into recess ② on the opposite side.


G-Class - Owner's Manual
> Seats and stowing Stowage areas
Take load compartment cover ① out by pulling it upwards.
MEMASANG PENUTUP RUANG BAGASI

Place load compartment cover ① in recess ② on the left-hand or right-hand side.
Press in the end cap of load compartment cover ① on the opposite side and insert load compartment cover ① into other recess ②.
Slide the end cap outwards.
Memasang/membuka jaring pemisah
WARNING
Risk of injury or death due to poorly secured objects
The partitioning net alone cannot secure or restrain heavy objects, items of luggage or heavy loads.
You could be hit by an unsecured load, particularly in the event of abrupt changes in direction, sudden braking or an accident.
▶ Always stow objects in such a way that they cannot be thrown around.
- Secure objects, luggage or loads against slipping or tipping over, e.g. by using lashing material, even if you are using the partitioning net.
For safety reasons, always use a partitioning net when transporting a load.
Damaged partitioning nets can no longer fulfil their protective functions. Replace damaged partitioning nets. Visit a qualified specialist workshop.

G-Class - Owner's Manual
> Seats and stowing Stowage areas
ATTACHING

Partitioning net without load compartment enlargement

Partitioning net with load compartment enlargement
▶ Extend and unfold the partitioning net.
The joints on the top and bottom guide rods will audibly engage.
Attach guide rod ① to holders ② on the roof lining.
Engage hooks ③ in tie-down eyes ④ on the left and right.
Pull on the loose ends of the lashing straps until the partitioning net is tight.
After driving a short distance, check the tension of the partitioning net and re-tension it if necessary.
REMOVING

Pull belt clamp ⑤ upwards until the lashing straps are loose.
Remove hooks ③ from tie-down eyes ④ on the left and right.
Remove guide rod ① from holders ②.
PENYIMPANAN
Press the red button on the top and bottom guide rods.
▶ Collapse and roll up the partition net.
Ikhtisar mata pengikat
Observe the notes on loading the vehicle ( → page 210).

G-Class - Owner's Manual
Seats and stowing Stowage areas

Load securing tie-down eye
Ikhtisar pengait tas

PERINGATAN
Risk of injury when using bag hooks with heavy objects
The bag hooks cannot restrain heavy objects or items of luggage.
Objects or items of luggage may be flung around and hit vehicle occupants.
▶ Only hang light objects on the bag hooks.
▶ Never hang hard, sharp-edged or fragile objects on the bag hooks.
Observe the notes on loading the vehicle ( → page 210).
The bag hook can bear a maximum load of 3 kg. Do not use it to secure a load.


1 Bag hook
Memasang rak atap

PERINGATAN
Risk of accident due to exceeding the maximum roof load
The vehicle centre of gravity and the usual driving characteristics as well as the steering and braking characteristics alter.
If you exceed the maximum roof load, the driving characteristics, as well as steering and braking, will be greatly impaired.
▶ Never exceed the maximum roof load and adjust your driving style.

G-Class - Owner's Manual
Seats and stowing Stowage areas

PERINGATAN
Risk of injury if unsuitable climbing aids are used
JIKA ANDA MENGGUNAKAN BUKAAN PADA BODI ATAU AKSESORIS SEBAGAI PIJAKAN, ANDA DAPAT:
- Slip and/or fall.
• Damage the vehicle and thus slip and fall.
▶ Always use non-slip, stable climbing aids, e.g. a suitable ladder.

CATATAN
Damage to the wheel arch flares and bumpers if used as a step
The wheel arch flares and bumpers can be damaged or become detached from the vehicle if you use them as a step.
▶ Only use the two steps indicated on the rear bumper.

CATATAN
Vehicle damage due to non-approved roof racks
The vehicle could be damaged by roof racks that have not been tested and approved by Mercedes-Benz.
▶ Only use roof racks approved for Mercedes-Benz.
Depending on the vehicle equipment, ensure that the sliding sunroof can be fully raised when the roof rack is fitted.
▶ Position the load on the roof rack in such a way that the vehicle will not sustain damage even when it is in motion.

CATATAN
Maximum permissible roof load
The weight of the roof luggage, including the roof rack, must not exceed the maximum permissible roof load.
The maximum roof load is 150 kg with at least three pairs of supporting feet.
This information applies if the load is distributed evenly across the entire roof area. The maximum load per pair of supporting roof rack feet is 50 kg.
If the vehicle is at a standstill and at least three pairs of supporting feet are being used, you may exceed the maximum permissible roof load of 150 kg by a maximum of 150 kg. You can use this if you are using a roof tent, for example. It is absolutely essential to comply with the installation instructions of the roof rack manufacturer.

G-Class - Owner's Manual
Seats and stowing Stowage areas


CATATAN
Damage to the covers
The covers may be damaged and scratched when being opened.
▶ Use the attached disassembly tool in the vehicle tool bag.
▶ Do not use metallic or hard objects.
Do not install the covers until the roof rack has been removed.
Bear in mind the following related topic:
• Vehicle tool kit overview ( → page 661)
An incorrectly attached roof rack or an incorrect roof load can become detached from the vehicle. It is absolutely essential to comply with the installation instructions of the roof rack manufacturer.
Carefully remove covers Ⓐ in the direction of the arrow with the disassembly tool.

Attach the roof rack at securing points ②.
Comply with the installation instructions of the roof rack manufacturer.
▶ Secure the load on the roof luggage rack.
Rak atap dengan tangga
Have all maintenance work as well as the installation and removal of the roof luggage rack with ladder carried out only at a qualified specialist workshop.

PERINGATAN
Risk of accident due to exceeding the maximum roof load
The vehicle centre of gravity and the usual driving characteristics as well as the steering and braking characteristics alter.
If you exceed the maximum roof load, the driving characteristics, as well as steering and braking, will be greatly impaired.
▶ Never exceed the maximum roof load and adjust your driving style.

PERINGATAN
Risk of accident and injury due to children left unattended in the vehicle
If you leave children unattended near the vehicle, they may climb the ladder and fall.
Never leave children unattended by the vehicle.

G-Class - Owner's Manual
Seats and stowing Stowage areas

PERINGATAN
Risk of falling and injury when loading and unloading the roof luggage rack
The ladder at the rear of the vehicle does not have a climbing aid and the roof luggage rack does not have any protection against falling.
In particular, dirt, rain, ice or snow can reduce the safety of your footing.
There is a risk of falling and injury.
Always climb ladders and roof luggage racks carefully and only when wearing sturdy footwear.

CATATAN
Maximum permissible load of the ladder
The maximum permissible load of the ladder is 100 kg.
Do not exceed this load capacity.

CATATAN
Maximum permissible roof load
The weight of luggage on the roof including the roof luggage rack must not exceed the maximum permissible roof load.
The maximum roof load is 150 kg.
The roof luggage rack weighs 60 kg.
This information applies if the load is distributed evenly across the entire roof area.
When the vehicle is stationary, the permissible roof load of 150 kg may be exceeded by a maximum of 150 kg. You can make use of this if you are using a roof tent, for example. Observe the maximum load capacity of the ladder.

1 Roof luggage rack
Ladder
When loading and unloading the roof luggage rack, you can use ladder ② and walk on roof luggage rack ①.


G-Class - Owner's Manual
Seats and stowing Stowage areas

Maximum load on the roof area
3 120 kg per frame point
50 kg per plate
Ensure that the load has been distributed evenly and that it has been properly secured, e.g. with tension belts. Be careful not to exceed the maximum load for each plate.


G-Class - Owner's Manual
Seats and stowing Cup holders
< Tempat cangkir
Menggunakan tempat cangkir di konsol tengah

PERINGATAN
\- Risk of accident or injury when using the cup holder while the vehicle is in motion
The cup holder cannot hold a container secure while the vehicle is in motion.
If you use a cup holder while the vehicle is in motion, the container may be flung around and liquids could be spilled. The vehicle occupants may come into contact with the liquid and if it is hot, they could be scalded. You could be distracted from traffic conditions and you may lose control of the vehicle.
▶ Only use the cup holder when the vehicle is stationary.
▶ Only use the cup holder for containers of the right size.
▶ Always close the container, particularly if the liquid is hot.

Vehicles without a temperature-controlled cup holder: the bracket arms of the front cup holder can be folded in or out.
To fold the bracket arm in: push bracket arm Ⓞ outwards to the side until it engages.
When the bracket arm is folded in, the cup holder cannot fulfil its holding function.
To fold the bracket arm out: press release button ②.

G-Class - Owner's Manual
Seats and stowing Cup holders
Menggunakan tempat cangkir di sandaran tangan belakang

PERINGATAN
\- Risk of accident or injury when using the cup holder while the vehicle is in motion
The cup holder cannot hold a container secure while the vehicle is in motion.
If you use a cup holder while the vehicle is in motion, the container may be flung around and liquids could be spilled. The vehicle occupants may come into contact with the liquid and if it is hot, they could be scalded. You could be distracted from traffic conditions and you may lose control of the vehicle.
▶ Only use the cup holder when the vehicle is stationary.
▶ Only use the cup holder for containers of the right size.
▶ Always close the container, particularly if the liquid is hot.

CATATAN
Damage to the rear armrest due to body weight
When folded out, the rear armrest can be damaged by body weight.
Do not sit or support yourself on the rear seat armrest.


CATATAN
Damage to the cup holder
The cup holder could be damaged when you fold back the rear seat armrest. The cup holder could be damaged by body weight.
Do not sit or support yourself on the cup holder.

▶ Fold down the rear armrest.
Place the container into cup holder ① or remove it.

G-Class - Owner's Manual
Seats and stowing Cup holders
Mengaktifkan atau menonaktifkan fungsi pendinginan atau pemanasan untuk tempat cangkir dengan pengatur suhu

PERINGATAN
Risk of injury by touching the heating elements
The cup holder's heating elements may be very hot.
You can burn yourself on them.
Do not touch the cup holder's hot heating elements.
▶ Ensure that no children can access the cup holder's hot heating elements.
▶ Never leave children unattended in the vehicle.

PERINGATAN
\- Risk of accident or injury when using the cup holder while the vehicle is in motion
The cup holder cannot hold a container secure while the vehicle is in motion.
If you use a cup holder while the vehicle is in motion, the container may be flung around and liquids could be spilled. The vehicle occupants may come into contact with the liquid and if it is hot, they could be scalded. You could be distracted from traffic conditions and you may lose control of the vehicle.
▶ Only use the cup holder when the vehicle is stationary.
▶ Only use the cup holder for containers of the right size.
▶ Always close the container, particularly if the liquid is hot.

CATATAN
Damage to objects in the temperature-controlled cupholder
If you place objects into the temperature-controlled cup holder, they may become damaged.
Do not place objects into the temperature-controlled cup holder.


G-Class - Owner's Manual
Seats and stowing Cup holders

To switch on: on cup holder ①, press button ② repeatedly until the blue (keep cool) or red (keep warm) indicator lamp on the button lights up.
To switch off: press button ⑦ repeatedly until the indicator lamp on the button goes out.
Clean the removable rubber mat only with clean, lukewarm water and the cup holder only with a soft cloth.


G-Class - Owner's Manual
Seats and stowing Ashtray and cigarette lighter
Asbak dan pemantik rokok
Menggunakan asbak

CATATAN
Damage to the stowage compartment under the ashtray due to heat
The stowage compartment under the ashtray is not heat resistant and could be damaged if you rest lit cigarettes on it.
Place lit cigarettes only in the ashtray.
▶ Ensure that the ashtray is fully engaged.

Place the closed ashtray in the cup holder in the front centre console.
▶ Check that it is seated firmly.
Comply with the notes on loading the vehicle ( → page 210).
To open: fold lid ① upwards.
① Twist the top part of the ashtray to remove it for cleaning, e.g. with clean, lukewarm water, or for emptying.
Menggunakan pemantik rokok

PERINGATAN
Risk of fire and injury from hot cigarette lighter
You can suffer burns if you touch the hot heating element or the hot socket of the cigarette lighter.
SELAIN ITU, BAHAN YANG MUDAH TERBAKAR DAPAT TERBAKAR JIKA:
• you drop the hot cigarette lighter.
• children e.g. hold the hot cigarette lighter to objects.
▶ Always hold the cigarette lighter by the knob.
▶ Always make sure that the cigarette lighter is out of the reach of children.
▶ Never leave children unattended in the vehicle.

G-Class - Owner's Manual
> Seats and stowing Ashtray and cigarette lighter
Persyaratan
• The vehicle is switched on.

Press in cigarette lighter ①.
The cigarette lighter will pop out automatically when the heating element is red-hot.


G-Class - Owner's Manual
Seats and stowing Sockets
< Soket
Menggunakan soket 12 V
Persyaratan:
• Only devices up to the maximum power output are connected.
Depending on the vehicle equipment, the vehicle has the following 12 V sockets:

12 V socket in front centre console (maximum 240 W/20 A)
12 V socket in rear centre console (maximum 180 W/15 A)
12 V socket in load compartment (maximum 180 W/15 A)
Open the socket flap and insert the plug of the device.
If a device is connected to the 12 V socket in the front centre console, leave the cover of the stowage compartment open.

Ikhtisar port USB
Depending on the vehicle equipment, the vehicle has the following USB ports (USB-C):

USB ports front centre console
USB ports rear centre console
USB ports stowage compartment in the armrest(→ page 51)
When the vehicle is switched on, you can charge USB devices at the USB ports, e.g. a mobile phone. Depending on the vehicle equipment, the charging power is up to 120 W.


G-Class - Owner's Manual
> Seats and stowing Wireless charging of a mobile phone in the cockpit

< Pengisian daya nirkabel ponsel di kokpit

PERINGATAN
Risk of injury due to unsuitable stowage of objects
If objects in the vehicle interior are stowed incorrectly, they may slide or be thrown around and hit vehicle occupants. In addition, cup holders, open stowage spaces and mobile phone receptacles may not, in the event of an accident, retain all the objects they contain.
There is a risk of injury, particularly in the event of braking manoeuvres or abrupt changes in direction.
▶ Always stow objects in such a way that they cannot be thrown around in these or similar situations.
▶ Always ensure that objects do not protrude from stowage compartments, luggage nets or stowage nets.
▶ Close the lockable stowage spaces before starting a journey.
▶ Stow and secure objects that are heavy, hard, pointed, sharpedged, fragile or too large in the load compartment.

PERINGATAN
Risk of injury due to objects being stowed incorrectly
If objects in the vehicle interior are stowed incorrectly, they may slide or be thrown around and hit vehicle occupants. In addition, cup holders, open stowage spaces and mobile phone receptacles will not always be able to retain all objects that they contain in the event of an accident.
There is a risk of injury, particularly in the event of sudden braking or a sudden change in direction.
▶ Always stow objects such that they cannot be thrown around in such situations.
▶ Always make sure that objects do not protrude from stowage spaces, luggage nets or stowage nets.
▶ Close the lockable stowage spaces before starting a journey.
▶ Always stow and secure heavy, hard, pointed, sharp-edged, fragile or bulky objects in the boot/load compartment.
Observe the information on loading the vehicle.

G-Class - Owner's Manual
> Seats and stowing Wireless charging of a mobile phone in the cockpit

A
PERINGATAN
Risk of fire if objects are placed in the mobile phone tray while charging
There is a risk of fire if you place additional objects in the mobile phone tray while charging. This is particularly the case when metallic objects are involved.
Do not place any objects, especially metal objects such as coins, in the mobile phone tray while charging.
Observe the information on loading the vehicle.
Persyaratan:
• The mobile phone is suitable for wireless charging.
A list of compatible mobile phones can be found at: https://www.mercedes-benz-mobile.com/
!
CATATAN
Damage to objects caused by placing them in the mobile phone stowage compartment
If objects are placed in the mobile phone stowage compartment, these may be damaged by electromagnetic fields.
Do not place credit cards, storage media, ski passes or other objects sensitive to electromagnetic fields in the mobile phone stowage compartment.
!
CATATAN
Damage to the mobile phone stowage compartment caused by liquids
If liquids enter the mobile phone stowage compartment, the compartment may be damaged.
▶ Ensure that no liquids enter the mobile phone stowage compartment.
Always observe the notes for persons with electronic medical aids.
- Depending on the vehicle equipment, the mobile phone is connected to the vehicle's exterior aerial via the charging module.
- The charging function and wireless connection of the mobile phone to the vehicle's exterior aerial are only available if the vehicle is switched on.
- Small mobile phones may not be able to be charged in every position of the mobile phone tray.
• Large mobile phones which do not rest flat in the mobile phone tray may not be able to be charged or connected with the vehicle's exterior aerial.
- The mobile phone may heat up during the charging process. This may also depend on the applications (apps) currently open in the background.
- To ensure more efficient charging and connection with the vehicle's exterior aerial, remove the protective cover from the mobile phone. This does not apply to protective covers which are required for wireless charging.
G-Class - Owner's Manual
> Seats and stowing Wireless charging of a mobile phone in the cockpit

Place the mobile phone as close to the centre of mat ① as possible with the display facing up.
When a message is shown in the multimedia system, the mobile phone is being charged.
Malfunctions detected during the charging process are shown on the multimedia system display.
The mat can be removed for cleaning, e.g. using clean, lukewarm water.
NOMOR PERSETUJUAN PERALATAN RADIO UNTUK BRASIL
This device operates in secondary mode, which means it has no protection against harmful interference, not even from stations of the same type, and must not cause interference with systems operating on a primary basis.
This product is approved in accordance with the procedures defined in Directive 242/2000 by Brazilian telecommunications agency ANATEL and complies with the applicable technical requirements.
More information is available on the ANATEL website. www.anatel.gov.br
▶ Further information on the declaration of conformity for vehicle components which receive and/or transmit radio waves ( → page 101).


G-Class - Owner's Manual
Seats and stowing Fitting/removing the floor mats

Memasang/melepas karpet lantai

PERINGATAN
Risk of accident due to objects in the driver's footwell
Objects in the driver's footwell may impede pedal travel or block a depressed pedal.
This will jeopardise the operating and road safety of the vehicle.
▶ Stow all objects in the vehicle securely so that they cannot get into the driver's footwell.
▶ Make sure that there is always sufficient clearance for the pedals.
▶ Always fit the floor mats securely and as prescribed.
Do not use loose floor mats and do not place floor mats on top of one another.
FITTING FLOOR MATS

Move the corresponding seat backwards and lay the floor mat in the footwell.
Press studs ① onto holders ②.
Adjust the corresponding seat.
MELEPAS KARPET LANTAI
▶ Pull the floor mat off holders ②
Remove the floor mat.

Back to Contents
G-Class - Owner's Manual
> Light and sight

< Cahaya dan pandangan
This interactive PDF works like a website - tap or click a button to jump straight to where you want to go. You can return here at any time via the navigation bar at the top left.
Exterior lighting 239
Interior lighting 247
Windscreen wipers and windscreen washer system 229
Mirrors 252
Area permeable to radio waves on the windscreen 2-5
G-Class - Owner's Manual
Light and sight Exterior lighting
Pencahayaan eksterior
Catatan tentang penyesuaian lampu saat berkendara di luar negeri
Vehicles with static LED headlamps: it is not necessary to convert the headlamps. The legal requirements are also met in countries in which traffic drives on the other side of the road.
Vehicles with MULTIBEAM LED: the headlamps will automatically be adjusted when you cross the border into countries in which traffic drives on the other side of the road.
DALAM KASUS BERIKUT, PERIKSA PENGATURAN LAMPU DEPAN DAN UBAH SECARA MANUAL JIKA PERLU:
- If the Dipped-beam setting (left/right-side traffic) Manual adjustment only display message is shown.
- If the Check dipped-beam setting (left/right-side traffic) display message is shown.
SETELAH LAMPU DEPAN DIKONVERSI:
• Oncoming traffic will not be dazzled.
• The edge of the road will not be illuminated as far or as high.
- The "motorway mode" and "enhanced fog light" functions will not be available.
Informasi tentang sistem pencahayaan dan tanggung jawab Anda
The various lighting systems of the vehicle are only aids. The driver of the vehicle is responsible for correct vehicle illumination in accordance with the prevailing light and visibility conditions, legal requirements and traffic situation.
Sakelar lampu
OPERATING THE LIGHT SWITCH

1 ←P ∈ Left-hand parking lights
2 P← Right-hand parking lights
3 Standing lights and licence plate lighting


G-Class - Owner's Manual
Light and sight Exterior lighting
4 AUTO Automatic driving lights (preferred light switch position)
5 SD Low beam/high beam
6 Activates or deactivates the rear fog light.
When low beam is activated, the 3005 indicator lamp for the standing lights will be deactivated and replaced by the low-beam indicator lamp.
Always park your vehicle safely using sufficient lighting, in accordance with the relevant legal stipulations.

CATATAN
Battery discharging by operating the standing lights
Do not have the standing lights switched on over a period of several hours.
For vehicles that are wider than 2 m or longer than 6 m, single-sided parking lighting is not permitted in some countries. In this case, the standing lights are also switched on in the parking lights position.
If the battery is insufficiently charged, the standing lights or parking lights will be switched off automatically to facilitate the next engine start.
LAMPU EKSTERIOR (KECUALI LAMPU POSISI DAN LAMPU PARKIR) AKAN MATI SECARA OTOMATIS SAAT PINTU PENGEMUDI DIBUKA.
• Observe the notes on locator lighting ( → page 246).
FUNGSI LAMPU MENYALA OTOMATIS SAAT BERKENDARA
When the vehicle is switched on, the standing lights, low beam and daytime running lights will be switched on automatically depending on the light conditions.


PERINGATAN
Risk of accident when the dipped beam is switched off in poor visibility
When the light switch is set to AUTO, the dipped beam may not be switched on automatically if there is fog, snow or other causes of poor visibility such as spray.
In such cases, turn the light switch to .
The automatic driving lights are only an aid. You are responsible for the vehicle lighting.
MENGHIDUPKAN/MEMATIKAN LAMPU KABUT BELAKANG
Persyaratan
• The light switch is in the \$D or AUTO position.
Press button 0#.
Please observe the country-specific laws on the use of rear fog lamps.

G-Class - Owner's Manual
Light and sight Exterior lighting

Mengoperasikan sakelar kombinasi untuk lampu

1 Main beam
2 Turn signal light, right
3 Headlamp flashing
Turn signal light, left
▶ Use the combination switch to select the desired function.
MENYALAKAN LAMPU JAUH
Turn the light switch to the ☑D or AUTO position.
▶ Push the combination switch beyond pressure point in the direction of the arrow ①.
When the main beam is activated, the indicator lamp for the low beam will be deactivated and replaced by the indicator lamp for the main beam.
MEMATIKAN LAMPU JAUH
Move the combination switch back to its starting position.
KEDIP LAMPU UTAMA
▶ Pull the combination switch in the direction indicated by the arrow ⚙.
LAMPU SEIN
To indicate briefly: push the combination switch briefly to the pressure point in the direction of arrow ☐ or ☐.
The corresponding turn signal light flashes three times.
To indicate for a duration: push the combination switch beyond the pressure point in the direction of arrow ⑦ or ④.
Mengaktifkan/menonaktifkan lampu hazard

Press button ①.
DALAM SITUASI BERIKUT, LAMPU HAZARD AKAN MENYALA OTOMATIS:
• The airbag has been deployed
• the vehicle brakes are applied heavily from a speed of more than 70 km/h to a standstill.
• An emergency stop has been initiated ( → page 368)


G-Class - Owner's Manual
Light and sight Exterior lighting
When you pull away again, the hazard warning light system will switch off automatically at approximately 10 km/h. You can also switch off the hazard warning light system using button 🔒.
Fungsi adaptif, LED MULTIBEAM
FUNGSI LAMPU JAUH DINAMIS
The MULTIBEAM LED headlamps adapt to the weather and the situation on the road and provide advanced functions for improving the illumination of the road.
SISTEM INI TERDIRI ATAS FUNGSI-FUNGSI BERIKUT:
• Active headlamps ( → page 242)
• Motorway mode ( → page 242)
• Enhanced fog light function (→ page 242)
• Bad weather light ( → page 243)
• City lighting ( → page 243)
BATASAN SISTEM
• The system will be active only when it is dark.
ACTIVE HEADLAMPS FUNCTION

• The headlamps follow the steering movements.

• Relevant areas are better illuminated during a journey.
The functions are active when the low beam is switched on.
Depending on the vehicle's equipment, the course of the lane in which you are driving will also be evaluated and the active headlamps function will adjust the light in advance.
FUNGSI MODE JALAN TOL
Motorway mode increases the range and brightness of the cone of light, enabling better visibility.

FUNGSI INI AKTIF JIKA PERJALANAN DI JALAN TOL TERDETEKSI MELALUI:
• the vehicle's speed
• the multifunction camera
• or the navigation system
FUNGSI INI TIDAK AKTIF DALAM KASUS-KASUS BERIKUT:
• At speeds below 80 km/h
FUNGSI LAMPU KABUT PENINGKAT
The enhanced fog light function reduces self-dazzling and improves the illumination of the edge of the carriageway.

G-Class - Owner's Manual
> Light and sight Exterior lighting

FUNGSI INI AKTIF SECARA OTOMATIS DALAM KONDISI-KONDISI BERIKUT:
• At speeds below 70 km/h and when the rear fog light is switched on.
FUNGSI INI NONAKTIF SECARA OTOMATIS DALAM KONDISI-KONDISI BERIKUT:
- When speeds greater than 100 km/h are reached.
- When the rear fog light is switched off.
You can activate the enhanced fog light function up to a speed of 100 km/h by switching on the rear fog light.
FUNGSI LAMPU CUACA BURUK
The bad weather light reduces reflections in rainy conditions by dimming individual LEDs in the headlamps. This reduces glare for the driver and other road users.
FUNGSI PENERANGAN KOTA
City lighting improves the illumination of roadsides in urban areas using a broad distribution of light.

FUNGSI INI AKTIF DALAM KASUS-KASUS BERIKUT:
- At low speeds
• In illuminated parts of urban areas
MENGAKTIFKAN/MENONAKTIFKAN LAMPU JAUH DINAMIS
Persyaratan:
• The vehicle is switched on.
Multimedia system:
Settings Lights MULTIBEAM LED
▶ Activate or deactivate Dynamic low beam.
G-Class - Owner's Manual
Light and sight Exterior lighting
Adaptive Highbeam Assist Plus
FUNGSI ADAPTIVE HIGHBEAM ASSIST PLUS

PERINGATAN
Risk of accident despite Adaptive Highbeam Assist Plus
ADAPTIVE HIGHBEAM ASSIST PLUS TIDAK BERREAKSI TERHADAP:
• road users without lights, e.g. pedestrians
• road users with poor lighting, e.g. cyclists
• road users whose lighting is obstructed, e.g. by a barrier
On very rare occasions, Adaptive Highbeam Assist Plus may fail to recognise other road users with their own lighting, or may recognise them too late.
In these, or in similar situations, the automatic high beam will not be deactivated or will be activated despite the presence of other road users.
▶ Always observe the road and traffic conditions carefully and switch off the high beam in good time.
Adaptive Highbeam Assist Plus cannot take into account road, weather or traffic conditions.
DETEKSI MUNGKIN TERBATAS DALAM KASUS BERIKUT:
• In poor visibility (e.g. fog, heavy rain or snow)
• if there is dirt on the sensors or the sensors are obscured
Adaptive Highbeam Assist Plus is only an aid. You are responsible for adjusting the vehicle's lighting to the prevailing light, visibility and traffic conditions.

ADAPTIVE HIGHBEAM ASSIST PLUS BERALIH SECARA OTOMATIS ANTARA JENIS LAMPU BERIKUT:
Low beam
- Partial high beam
High beam
Partial high beam uses the high beam to shine past other road users rather than dazzling them. The low beam illumination area covers the vehicle in front.
PADA KECEPATAN DI ATAS 30 KM/JAM:
- If no other road users are detected, high beam will switch on automatically.
- If other road users are detected, partial high beam will be switched on automatically.

G-Class - Owner's Manual
Light and sight Exterior lighting
PADA KECEPATAN DI BAWAH 25 KM/JAM ATAU SAAT PENERANGAN JALAN CUKUP:
• High beam will switch off automatically.
• Partial high beam will switch off automatically.
PADA KECEPATAN DI ATAS KIRA-KIRA 50 KM/JAM:
\- The headlamp range of the low beam will be regulated automatically based on the distance to other road users.
The system's optical sensor is located behind the windscreen near the overhead control panel.
MENGAKTIFKAN/MENONAKTIFKAN ADAPTIVE HIGHBEAM ASSIST PLUS
PERINGATAN
Risk of accident despite Adaptive Highbeam Assist Plus
ADAPTIVE HIGHBEAM ASSIST PLUS TIDAK BERREAKSI TERHADAP:
• road users without lights, e.g. pedestrians
• road users with poor lighting, e.g. cyclists
• road users whose lighting is obstructed, e.g. by a barrier
On very rare occasions, Adaptive Highbeam Assist Plus may fail to recognise other road users with their own lighting, or may recognise them too late.
In these, or in similar situations, the automatic high beam will not be deactivated or will be activated despite the presence of other road users.
▶ Always observe the road and traffic conditions carefully and switch off the high beam in good time.
MENGAKTIFKAN
▶ Turn the light switch to the AUTO position.
▶ Switch on high beam using the combination switch.
When the high beam is switched on automatically in the dark, the indicator lamp will light up on the driver's display.
MENONAKTIFKAN
▶ Switch off high beam using the combination switch.

G-Class - Owner's Manual
Light and sight Exterior lighting
Mengatur lampu sorot rendah
Multimedia system:
Settings Lights MULTIBEAM LED Low beam
Select Right-side traffic, Left-side traffic or Automatic.
Mengatur waktu tunda mematikan lampu eksterior
Multimedia system:
Settings Lights Interior/exterior lighting
Exterior lighting switch-off delay
▶ Set a switch-off delay time.
After parking and locking the vehicle, the exterior lighting will be activated for the set time.
Mengaktifkan/menonaktifkan lampu pencari
Multimedia system:
Settings Lights Interior/exterior lighting
▶ Activate or deactivate Locator lighting.
The exterior lighting will light up for 40 seconds after the vehicle is unlocked or the driver's door is opened when the vehicle is not locked. When you start the vehicle, the locator lighting will be deactivated and the automatic driving lights activated.


G-Class - Owner's Manual
Light and sight Interior lighting
< Lampu interior
Menyesuaikan lampu interior
FRONT OVERHEAD CONTROL PANEL

1 Front left reading lamp
2 Automatic interior lighting control
3 Front interior lighting
4 Rear interior lighting
5 Front right reading lamp
To switch on or off: press button ① - ⑤ accordingly.
OPERATING UNIT INSIDE THE GRAB HANDLE (REAR)

1 Rear reading lamp
To switch on or off: press the ① button.
Menyesuaikan lampu suasana
Multimedia system:
Comfort Ambient light
MENGATUR WARNA
Select Colour.
▶ Select Monochrome or Multi-colour.
▶ Set the desired colour or colour scheme.
MENYESUAIKAN KECERAHAN
Select Brightness.
Adjust the brightness.


G-Class - Owner's Manual
Light and sight Interior lighting

Depending on the ambient light conditions, the ambient lighting will automatically switch between day and night modes.
MENGAKTIFKAN EFEK
Select Effects.
▶ Activate the desired effect.
① Different effects will be available depending on the vehicle equipment.
ANIMASI MULTI-WARNA
• The chosen colour combination will change at predefined intervals.
IKLIM
\- If changes are made to the temperature setting in the vehicle, the colour of the ambient lighting will change briefly.
SAPAN
\- When you get into the vehicle, a special colour animation will play.
Mengaktifkan/menonaktifkan waktu tunda mematikan lampu interior
Multimedia system:
Settings Lights Interior/exterior lighting Interior lighting switch-off delay
Activate or deactivate Interior lighting switch-off delay. If this function is active, the interior lighting will be switched on for a short time after the end of the journey.

G-Class - Owner's Manual
> Light and sight Windscreen wipers and windscreen washer system

Wiper kaca depan dan sistem pencuci kaca depan
Switching the windscreen wipers on/off

1 0 Windscreen wipers off
2 ⋯ Automatic wiping, normal
3 .... Automatic wiping, frequent
4 — Continuous wiping, slow
5 = Continuous wiping, fast
Turn the combination switch to the corresponding position 1 - 5.
Single wipe: press button ① as far as the point of resistance.
Wiping with washer fluid: press button ① beyond the point of resistance.
① Observe the notes on washing the vehicle in a car wash ( → page 39).
Switching the rear window wiper on/off

1 Wipes with washer fluid
2 — Switches on intermittent wipe
3 0 Switches off intermittent wipe
4 Wipes with washer fluid
Turn switch ① to the correct position 1 - 4.
The symbol will appear on the driver's display when the rear window wiper is switched on.


G-Class - Owner's Manual
Light and sight Windscreen wipers and windscreen washer system

Mengganti bilah wiper kaca depan

PERINGATAN
Risk of becoming trapped if the windscreen wipers are switched on while wiper blades are being replaced
If the windscreen wipers begin to move while you are changing the wiper blades, you can be trapped by the wiper arm.
▶ Always switch off the windscreen wipers and vehicle before changing the wiper blades.
Check the condition of the wiper blades regularly and replace them in the event of visible damage or ongoing smearing.
Observe the information about the service indicator.
SERVICE INDICATOR

Remove protective film ① from the service indicators on the tips of the newly fitted wiper blades.
When the colour of the service indicator changes from black to yellow, replace the wiper blades.
The time it takes for the colour to change will vary depending on the usage conditions.
Mengganti bilah penghapus kaca belakang

PERINGATAN
Risk of becoming trapped if the windscreen wipers are switched on while wiper blades are being replaced
If the windscreen wipers begin to move while you are changing the wiper blades, you can be trapped by the wiper arm.
▶ Always switch off the windscreen wipers and vehicle before changing the wiper blades.

CATATAN
Damage to the rear window
If the wiper arm without a wiper blade falls onto the rear window, the rear window may be damaged.
Hold the wiper arm firmly in place when changing the wiper blade, or place it carefully on the rear window.
MELEPAS BILAH PENGHAPUS
▶ Switch off the vehicle ( → page 271).


G-Class - Owner's Manual
> Light and sight Windscreen wipers and windscreen washer system
Within approximately 15 seconds, turn the combination switch to position 1 ( → page 249).
The wiper arm will move into the replacement position.

Fold wiper arm ④ away from the rear window and hold it tightly.
Press both release tabs 2.
Fold wiper blade ① away from wiper arm ④ in the direction of arrow ③.
Remove wiper blade ① in the direction of arrow ⑤.
FITTING THE WIPER BLADE

Position wiper blade ① with recess ⑥ on lug ⑤.
Fold wiper blade ① onto the wiper arm in the direction of arrow ③ until retaining clips ② engage in bracket ④.
Make sure that wiper blade Ⓞ is seated correctly.
Fold the wiper arm back onto the rear window.

G-Class - Owner's Manual
Light and sight Mirrors
< Kaca spion
Mengoperasikan kaca spion luar

PERINGATAN
Risk of accident due to adjusting the vehicle settings while the vehicle is in motion
ANDA DAPAT KEHILANGAN KENDALI ATAS KENDARAAN TERUTAMA DALAM SITUASI BERIKUT:
• if you adjust the driver's seat, the head restraint, the steering wheel or the mirror while the vehicle is in motion
• if you fasten your seat belt while the vehicle is in motion
Before starting the vehicle: in particular, adjust the driver's seat, head restraint, steering wheel and mirror, and fasten your seat belt.

PERINGATAN
Risk of accident due to misjudgement of distance when using the outside mirror
The outside mirrors reflect objects on a smaller scale. The objects in view are in fact closer than they appear.
Therefore, always look over your shoulder in order to ensure that you are aware of the actual distance between you and the road users driving behind you.

To fold in or out: briefly press button ②.
To adjust: use button ① or ③ to select the outside mirror to be adjusted.


G-Class - Owner's Manual
Light and sight Mirrors
Use button Ⓐ to adjust the position of the mirror glass.
If the battery has been disconnected or completely discharged, you will have to reset the outside mirrors. Only then will the automatic mirror folding function work properly.
To reset: briefly press button ②.
An outside mirror that has been pushed out of position can be engaged in position again as follows:
Press and hold button 2.
You will hear a click and the mirror will audibly click into place. The outside mirror will now be set to the correct position.
Fungsi kaca spion anti-silau otomatis
PERINGATAN
Risk of acid burns and poisoning due to the anti-dazzle mirror electrolyte
Electrolyte may escape if the glass in an automatic anti-dazzle mirror breaks.
The electrolyte is hazardous to health and causes irritation. It must not come into contact with your skin, eyes, respiratory organs or clothing or be swallowed.
If you come into contact with electrolyte, observe the following:
- Immediately rinse the electrolyte from your skin with water and seek medical attention.
- If electrolyte comes into contact with your eyes, immediately rinse them thoroughly with clean water and seek medical attention.
- If the electrolyte is swallowed, immediately rinse your mouth out thoroughly. Do not induce vomiting. Seek medical attention immediately.
- Immediately change out of clothing which has been contaminated with electrolyte.
• If an allergic reaction occurs, seek medical attention immediately.
Depending on the vehicle equipment, the inside mirror and the outside mirror on the driver's side will automatically go into anti-dazzle mode if light from a headlamp hits the sensor on the inside mirror.

G-Class - Owner's Manual
Light and sight Mirrors

BATASAN SISTEM
SISTEM TIDAK AKAN MASUK KE MODE ANTI-SILAU JIKA:
• The vehicle is switched off.
• Reverse gear is engaged.
• The interior lighting is switched on.
Front-passenger outside mirror parking position function
The parking position makes parking easier.
KACA SPION LUAR PENUMPANG DEPAN AKAN BERPUTAR KE BAWAH MENUJU ARAH RODA BELAKANG DI SISI PENUMPANG DEPAN KETIKA:
• the parking position is stored ( → page 254).
• the front-passenger mirror is selected.
• reverse gear is engaged.
KACA SPION LUAR PENUMPANG DEPAN AKAN KEMBALI KE POSISI SEMULA KETIKA:
• you shift the transmission to another transmission position.
• you are travelling at a speed greater than 15 km/h.
• you press the button for the outside mirror on the driver's side.
Storing the parking position of the front-passenger outside mirror using reverse gear
STORING

Press button Ⓞ to select the front-passenger outside mirror.
Engage reverse gear.
Move the front-passenger outside mirror into the desired parking position using button ②.


G-Class - Owner's Manual
Light and sight Mirrors

CALLING UP

1 Selects the front-passenger outside mirror
② Adjusts the mirrors
Press button Ⓤ to select the front-passenger outside mirror.
Engage reverse gear.
The front-passenger outside mirror will move into the stored parking position.


G-Class - Owner's Manual
Light and sight Area permeable to radio waves on the windscreen

Area permeable to radio waves on the windscreen

Vehicles with windscreen heaters: Radio-controlled equipment, such as toll systems, can be mounted only on areas of the windscreen ① that are permeable to radio waves.
The area that is permeable to radio waves is always located on the front-passenger side.
The area permeable to radio waves ① is best visible from outside the vehicle when the windscreen is illuminated with an additional light source.

Back to Contents
G-Class - Owner's Manual
Climate control

< Climate control
This interactive PDF works like a website - tap or click a button to jump straight to where you want to go. You can return here at any time via the navigation bar at the top left.
Overview of climate control systems 258
Operating the climate control system 260
G-Class - Owner's Manual
Climate control Overview of climate control systems

Overview of climate control systems
Notes on climate control
An interior filter in combination with the prefilter in the engine compartment must always be used so that the air conditioning system, pollution level monitoring and the air filtration work correctly. Use filters recommended and approved by Mercedes-Benz. Always have maintenance work carried out at a qualified specialist workshop.
Overview of the air conditioning control panel
The indicator lamps on the buttons indicate that the corresponding function is activated.

Vehicles with THERMOTRONIC air conditioning control panel (with stationary heater)
Sets the temperature on the driver's side, left
2 | μ vmm Calls up the air conditioning menu, left (→ page 260)
Sets the airflow or switches off climate control
AUTO Sets climate control to automatic mode (→ page 261)
5 Defrosts the windscreen
6 Switches the rear window heater on/off
7 Switches air-recirculation mode on/off (→ page 263)
8 A/C Switches the A/C function on/off (→ page 260) or Switches residual heat on/off (→ page 263)
9 [1] Switches the stationary heater on/off (→ page 57)
10 Sets the temperature on the front passenger side

Vehicles with THERMOTRONIC air conditioning control panel (without stationary heater)
Sets the temperature on the driver's side
Calls up/exits the air conditioning menu (→ page 260)
Sets the airflow or switches off climate control
AUTO Sets climate control to automatic mode (→ page 261)
5 Defrosts the windscreen
6 Switches the rear window heater on/off
7 Switches air-recirculation mode on/off (→ page 263)
a [A/C] Switches the A/C function on/off (→ page 260) or


G-Class - Owner's Manual
Climate control Overview of climate control systems
Switches residual heat on/off ( → page 263)
SYNC Switches synchronisation on/off ( → page 262)
Sets the temperature on the front passenger side
REAR OPERATING UNIT

Sets the temperature in the rear passenger compartment
2 Display
3 Sets the airflow in the rear passenger compartment
After four hours of non-operational time (ignition switched off), the specified climate values for temperature setting and manual blower in the rear passenger compartment will be synchronised with the driver's climate zone.


G-Class - Owner's Manual
Climate control Operating the climate control system
Operating the climate control system
Switching climate control on/off
To switch on: set the airflow to level 1 or higher using the 🎨 button.
To switch off: set the airflow to level 0 using the 📋 button.
If climate control is switched off, the windows may mist up more quickly. Switch climate control off only briefly.
Rear climate control cannot be switched off separately.
Switching the A/C function on/off via the operating unit
The A/C function heats, cools and dehumidifies the vehicle's interior air.
Press the button A/C.
Switch off the A/C function only briefly. Otherwise, the windows could mist up more quickly.
Condensation may drip from the underside of the vehicle when cooling mode is active. This is not indicative of a fault.
THE A/C FUNCTION WILL BE DEACTIVATED IN THE FOLLOWING CASES:
- When you are driving on an uphill or downhill gradient of more than 35%
- When you are driving at an angle across an incline of more than 15°
\- When the engine is subjected to extreme loads at high outside temperatures
Moderate driving will help to restore the cooling output.
Calling up the air conditioning menu via multimedia system or the air conditioning control panel
The air conditioning menu can be called up via the temperature display or via the air conditioning control panel. The temperature display is always shown on the lower edge of the media display.
Press on the temperature display on the lower edge of the media display.
or
Press the button in the air conditioning control panel.
G-Class - Owner's Manual
Climate control Operating the climate control system
Activating/deactivating the A/C function via the air conditioning menu
Multimedia system:
Climate menu First row of seats
Depending on the external conditions, support for improved cooling and dehumidification of the interior air will be provided when the A/C function is activated. If it is not possible to operate the A/C function on the climate bar on the central display, switch the function on or off on the air conditioning control panel.
Select A/C (A/C).
THE A/C FUNCTION WILL BE DEACTIVATED IN THE FOLLOWING CASES:
- When you are driving on an uphill or downhill gradient of more than 35%
- When you are driving at an angle across an incline of more than 15°
Switch off the A/C function only briefly; otherwise the windows may mist up more quickly.
Condensation may drip from the underside of the vehicle when cooling mode is active. This is not indicative of a fault.
Setting climate control to automatic mode
In automatic mode, the set temperature is controlled and maintained at a constant level by the air supply.
Press the AUTO button.
To switch to manual mode: press the AUTO button again.
Overview of the air distribution settings
SIMBOL-SIMBOL PADA LAYAR MENUNJUKKAN VENTILASI MANA YANG DILALUI ALIRAN UDARA:
Demister vents
Centre and side air vents
Footwell vents
Mengatur distribusi udara menggunakan menu AC
Multimedia system:
Climate menu
▶ Select First row of seats.
To set air distribution: select 📞, 🖼 or 🛏️.
Set the airflow.
When the air conditioning system is switched on, at least one zone is always active. However, several air distribution options can be selected at the same time, for example to set the climate control for the vehicle interior and the footwells simultaneously. In doing so, the [ˈɑː] climate control for the windscreen can only be selected for the first seat row. When automatic mode is active, the buttons for setting the air distribution are automatically deactivated. When the air conditioning system is switched off, the buttons remain operable and the last setting is saved.


G-Class - Owner's Manual
Climate control Operating the climate control system
Mengatur kontrol iklim belakang menggunakan menu AC
Multimedia system:
Climate menu
MENGATUR SUHU
▶ Select Second row of seats.
Set the temperature with ▲ or ▼.
MENGATUR ALIRAN UDARA
▶ Select Second row of seats.
Set the air flow with ▶ or ▶.
MENGONTROL KONTROL IKLIM BELAKANG SECARA OTOMATIS
Select AUTO.
When the defrost function is activated, some functions (e.g. the temperature setting) will automatically be deactivated. To deactivate the defrost function, press either Hmax, or A set the air flow to level 0 ( → page 262).
Mengaktifkan/menonaktifkan fungsi sinkronisasi melalui panel kontrol AC
Persyaratan:
• The vehicle is not equipped with a stationary heater.
Climate control can be set centrally using the synchronisation function. The temperature and air distribution setting for the driver's side will be adopted automatically for all climate control zones.
Press the SYNC button.
The synchronisation function will switch off if the settings for any of the other climate zones are changed.
Mengaktifkan/menonaktifkan fungsi sinkronisasi melalui menu AC
Multimedia system:
Climate menu First row of seats
The synchronisation function controls the climate control centrally. The driver's settings for temperature, airflow and air distribution are automatically adopted for each climate zone.
Select SYNC (SYNC).
Mengembunkan/menghilangkan embun pada kaca
KACA DEPAN BEKU ATAU BERKABUT
Press the button on the air-conditioning control panel (→ page 258).
The windscreen is heated by warm air from the air-conditioning system and by the electric windscreen heater.
KACA BERKABUT DI BAGIAN DALAM
Press the AUTO button on the air-conditioning control panel.

G-Class - Owner's Manual
Climate control Operating the climate control system
If the windows remain misted up: press the 📄 button.
The windscreen is heated by warm air from the air-conditioning system and by the electric windscreen heater.
The windscreen heater can also be switched on and off separately on the Climate menu via 📁.
KACA BERKABUT DI BAGIAN LUAR
▶ Switch on the windscreen wipers.
Press the AUTO button.
Mengaktifkan/menonaktifkan mode resirkulasi udara
Press the button 📄.
The interior air is recirculated.
Air-recirculation mode will automatically switch to fresh air mode after a while.
The windows may mist up more quickly with air-recirculation mode switched on. Do not have air-recirculation mode switched on for long periods.
Mengaktifkan/menonaktifkan panas sisa
Persyaratan:
• The vehicle is parked.
It is possible to make use of the residual heat from the engine to continue heating or ventilating the front compartment of the vehicle for approximately 30 minutes, depending on the temperature set.
To switch on: press the A/C button.
Residual heat will be switched off automatically.
Mengaktifkan/menonaktifkan ionisasi
Multimedia system:
Climate menu Air quality
When ionisation is activated, the air in the vehicle interior is enriched with negatively charged oxygen ions. These can promote the well-being of the vehicle occupants.
Select Ionisation.
The function can only be performed if the AUTO mode is activated or the air distribution is set to the side air vent. The function is restricted if the side air vents on the driver's side are closed.
Informasi tentang pemanas kaca depan

PERINGATAN
Risk of burns from touching the windscreen when the windscreen heater is switched on
The windscreen can become very hot when the windscreen heater is switched on.
The health of persons with limited temperature sensitivity or a limited ability to react to high temperatures may be affected or they may even suffer burn-like injuries.
Do not touch the windscreen while the windscreen heater is switched on.
▶ Allow the windscreen to cool down before touching it.
PERSYARATAN:
• The engine is running.
- The relevant environmental conditions are prevailing, e.g. an outside temperature of less than 5°C.
When max is switched on, the windscreen heater will be switched on automatically as needed.
The windscreen heater can also be switched on and off separately on the Climate menu via 📂.

Pemanas/ventilasi stasioner
FUNGSI PEMANAS/VENTILASI STASIONER
- The air inside the vehicle will be heated or ventilated to the set temperature.
- The air inside the vehicle cannot be cooled down to temperatures below the outside temperature.
- If the outside temperature changes, ventilation mode will automatically switch to heating mode or heating mode will automatically switch to ventilation mode.
The stationary heater and the exhaust gas outlet are situated at the left front wheel.
MENGHIDUPKAN/MEMATIKAN PEMANAS/VENTILASI STASIONER MELALUI PANEL KONTROL AC

BAHAYA
Risk of fatal injury due to poisonous exhaust gases
If the tailpipe is blocked or sufficient ventilation is not possible, poisonous exhaust gases such as carbon monoxide may enter the vehicle. This is the case in enclosed spaces or if the vehicle gets stuck in snow, for example.
▶ Always switch the stationary heater off in enclosed spaces without an air extraction system, e.g. in garages.
▶ Keep the tailpipe and the area around the vehicle free from snow when the engine or the stationary heater is running.
▶ Open a window on the side of the vehicle facing away from the wind to ensure an adequate supply of fresh air.

G-Class - Owner's Manual
Climate control Operating the climate control system

PERINGATAN
Risk of fire due to hot stationary heater components and exhaust gases
Flammable materials such as leaves, grass or twigs may ignite.
When the stationary heater is switched on, make sure that:
- hot vehicle parts do not come into contact with flammable materials.
- the exhaust gas can flow out of the stationary heater exhaust pipe unhindered.
- the exhaust gas does not come into contact with flammable materials.

CATATAN
Battery discharge caused by stationary heater or stationary ventilation operation
Operating the stationary heater or stationary ventilation drains the battery.
▶ After heating or ventilating the vehicle twice, drive for a longer period of time.
Persyaratan:
• The fuel tank is filled to at least the reserve level.
• Adequate state of charge for the starter battery.

Set the desired temperature using the button
Press the button ①.
The red or blue indicator lamp on the button ① will light up or go out.
WARNA LAMPU INDIKATOR MEMILIKI ARTI BERIKUT:
• Blue: stationary ventilation is switched on.
• Red: the stationary heater is switched on.
• Yellow: the departure time is preselected.
The stationary heater/ventilation will switch off automatically after 50 minutes.
MENGATUR PEMANAS/VENTILASI STASIONER MELALUI SISTEM MULTIMEDIA
Persyaratan
• The vehicle has a stationary heater.

G-Class - Owner's Manual
Climate control Operating the climate control system
Multimedia system:
Climate menu Stationary heater
MEMILIH WAKTU KEBERANGKATAN
▶ Select Time A, Time B or Time C.
MENGATUR WAKTU KEBERANGKATAN
▶ Select Time A, Time B or Time C.
▶ Select the pen beside the time.
Set a time.
MENGATUR PEMANAS STASIONER/VENTILASI MELALUI KENDALI JARAK JAUH

BAHAYA
Risk of fatal injury due to poisonous exhaust gases
If the tailpipe is blocked or sufficient ventilation is not possible, poisonous exhaust gases such as carbon monoxide may enter the vehicle. This is the case in enclosed spaces or if the vehicle gets stuck in snow, for example.
▶ Always switch the stationary heater off in enclosed spaces without an air extraction system, e.g. in garages.
▶ Keep the tailpipe and the area around the vehicle free from snow when the engine or the stationary heater is running.
▶ Open a window on the side of the vehicle facing away from the wind to ensure an adequate supply of fresh air.


PERINGATAN
Risk of fire due to hot stationary heater components and exhaust gases
Flammable materials such as leaves, grass or twigs may ignite.
When the stationary heater is switched on, make sure that:
- hot vehicle parts do not come into contact with flammable materials.
- the exhaust gas can flow out of the stationary heater exhaust pipe unhindered.
- the exhaust gas does not come into contact with flammable materials.

CATATAN
Battery discharge caused by stationary heater or stationary ventilation operation
Operating the stationary heater or stationary ventilation drains the battery.
▶ After heating or ventilating the vehicle twice, drive for a longer period of time.
Persyaratan
• The fuel tank is filled to at least the reserve level.

G-Class - Owner's Manual
Climate control Operating the climate control system
SWITCHING ON IMMEDIATELY

Press and hold the ON button.
SETTING THE DEPARTURE TIME

Briefly press the ON button.
Press the ◀ or ▶ button repeatedly until the time to be changed appears on the display.
Press the ON and OFF buttons simultaneously.
The ⏻ symbol on the remote control display will flash.
Use the ◀ and ▶ buttons to set the desired departure time.
Press the ON and OFF buttons simultaneously.
The new departure time will be stored.
Up to three departure times can be stored.
To activate the departure time: select the desired departure time and press and hold the ON button.
The symbol, the departure time and, depending on the selected departure time, the letter A, B or C will appear on the display.
To deactivate the departure time: select the desired departure time and press and hold the OFF button.
OFF will appear on the display.
To check the status of the active stationary heater: briefly press the ON button.


G-Class - Owner's Manual
Climate control Operating the climate control system
SWITCHING OFF IMMEDIATELY

Press and hold the OFF button.
OVERVIEW OF THE REMOTE CONTROL DISPLAYS (STATIONARY HEATER/VENTILATION)

Stationary ventilation switched on
Stationary heater switched on
3 Selected departure time
4 Remaining time for the stationary heater/ventilation (in minutes)
Stationary heater/ventilation active
6 Departure time activated
7 Signal strength
TAMPILAN LAIN YANG MUNGKIN:
• Time: the activated departure time.
- Zero minutes: the running time for the stationary heater is extended because the engine has not yet reached operating temperature when it is started.
• OFF: the stationary heater/ventilation is switched off.
Lubang ventilasi udara
MENYESUAIKAN LUBANG VENTILASI UDARA DEPAN
WARNING
Risk of burns or frostbite due to being too close to the air vents
Very hot or very cold air can flow from the air vents.
Make sure that all vehicle occupants always maintain a sufficient distance from the air vents.
If necessary, direct the airflow to another area of the vehicle interior.
UNTUK MENJAMIN ALIRAN UDARA SEGAR MELALUI LUBANG VENTILASI KE DALAM KABIN KENDARAAN, PERHATIKAN HAL BERIKUT:
• Always keep the vents and ventilation grilles in the vehicle interior clear.
- Keep the air inlet free of residue build-up (→ page 614).

G-Class - Owner's Manual
Climate control Operating the climate control system

To open or close: hold the centre of air vent and turn it to the left or right as far as it will go.
To set the airflow direction: hold the centre of air vent Ⓞ and move it up or down or to the left or right.
MENYESUAIKAN LUBANG VENTILASI UDARA BELAKANG

PERINGATAN
Risk of burns or frostbite due to being too close to the air vents. Very hot or very cold air can flow from the air vents.
▶ Make sure that all vehicle occupants always maintain a sufficient distance from the air vents.
If necessary, direct the airflow to another area of the vehicle interior.

To open or close: hold the centre of air vent ① and turn it to the left or right as far as it will go.
To set the airflow direction: hold the centre of air vent ① and move it up or down or to the left or right.
① Only cold air will flow from the rear air vents on the centre console.

G-Class - Owner's Manual
Driving and parking

< Mengemudi dan parkir
This interactive PDF works like a website - tap or click a button to jump straight to where you want to go. You can return here at any time via the navigation bar at the top left.
Driving 271 > Parking 326 >
DYNAMIC SELECT 294 > Driving and driving safety systems 338 >
Automatic transmission 303 > Trailer hitch 413 >
Transfer case 312 > Vehicle towing instructions 417 >
Differential locks 315
All-wheel drive 318
Refuelling 319
G-Class - Owner's Manual
Driving and parking Driving
< Mengemudi
Menyalakan catu daya atau kendaraan

PERINGATAN
Accident- and risk of injury with unsupervised children in the vehicle
JIKA ANDA MENINGGALKAN ANAK-ANAK TANPA PENGAWASAN DI DALAM KENDARAAN, MEREKA TERUTAMA DAPAT
- Open doors and thereby endanger other persons or road users.
• get out of the car and are hit by traffic.
• Operate vehicle equipment and become trapped, forexample.
SELAIN ITU, ANAK-ANAK JUGA DAPAT MENGGERAKKAN KENDARAAN, MISALNYA DENGAN:
• releasing the parking brake.
• change the gearbox setting.
- start the vehicle.
▶ Never leave children unattended in the vehicle.
When leaving the vehicle, always take the SmartKey with you and lock the vehicle.
▶ Keep the key out of reach of children.
Persyaratan:
• The key is in the vehicle and is recognised.
• The brake pedal is not depressed.

To switch on the power supply: press button ① once.
You can, for example, switch on the windscreen wipers.
CATU DAYA AKAN DIMATIKAN LAGI JIKA KONDISI BERIKUT TERPENUHI:
• You open the driver's door.
• You press button ① twice more.


G-Class - Owner's Manual
Driving and parking Driving
To switch on the vehicle: press button ① twice.
Indicator and warning lamps will light up on the driver display.
KENDARAAN AKAN DIMATIKAN LAGI JIKA SALAH SATU KONDISI BERIKUT TERPENUHI:
- You do not start the vehicle within 15 minutes and the transmission is in position or the electric parking brake is applied.
• You press button ① once.
Menyalakan kendaraan dengan tombol start/stop

BAHAYA
Danger to life from toxic exhaust gas in enclosed spaces
Combustion engines emit toxic exhaust gases such as carbon monoxide. Inhaling these exhaust gases is hazardous to health and leads to poisoning.
▶ Never leave the engine or, if present, the stationary heater running in an enclosed space without sufficient ventilation.

PERINGATAN
Risk of fire due to flammable materials in the engine compartment or on the exhaust system
Flammable materials may ignite.
Therefore, regularly check that there are no flammable foreign materials in the engine compartment or on the exhaust system.


PERINGATAN
Accident- and risk of injury with unsupervised children in the vehicle
JIKA ANDA MENINGGALKAN ANAK-ANAK TANPA PENGAWASAN DI DALAM KENDARAAN, MEREKA TERUTAMA DAPAT
- Open doors and thereby endanger other persons or road users.
• get out of the car and are hit by traffic.
• Operate vehicle equipment and become trapped, forexample.
SELAIN ITU, ANAK-ANAK JUGA DAPAT MENGGERAKKAN KENDARAAN, MISALNYA DENGAN:
• releasing the parking brake.
• change the gearbox setting.
- start the vehicle.
▶ Never leave children unattended in the vehicle.
When leaving the vehicle, always take the SmartKey with you and lock the vehicle.
▶ Keep the key out of reach of children.
Persyaratan:
• The key is in the vehicle and is recognised.

G-Class - Owner's Manual
Driving and parking Driving

Shift the transmission to position P or N.
Depress the brake pedal and press the button once.
If the vehicle does not start, switch off unnecessary consumers and press the button once.
If the vehicle still does not start and the Place the key in the marked space See Owner's Manual display message appears on the driver display, start the vehicle with the key in the storage compartment (emergency operation mode) (→ page 273).
You can switch off the vehicle while driving. You switch off the vehicle by pressing and holding the button ① for about three seconds or pressing the button ② three times within three seconds. Be sure to observe the safety notes concerning this under "Driving tips" (→ page 279).
Observe any information regarding display messages that may be shown on the driver display.

Menyalakan kendaraan dalam mode operasi darurat

BAHAYA
Danger to life from toxic exhaust gas in enclosed spaces
Combustion engines emit toxic exhaust gases such as carbon monoxide. Inhaling these exhaust gases is hazardous to health and leads to poisoning.
▶ Never leave the engine or, if present, the stationary heater running in an enclosed space without sufficient ventilation.

PERINGATAN
Risk of fire due to flammable materials in the engine compartment or on the exhaust system
Flammable materials may ignite.
Therefore, regularly check that there are no flammable foreign materials in the engine compartment or on the exhaust system.

G-Class - Owner's Manual
Driving and parking Driving


PERINGATAN
Accident- and risk of injury with unsupervised children in the vehicle
JIKA ANDA MENINGGALKAN ANAK-ANAK TANPA PENGAWASAN DI DALAM KENDARAAN, MEREKA DAPAT TERUTAMA
- Open doors and thereby endanger other persons or road users.
• get out of the car and are hit by traffic.
• Operate vehicle equipment and become trapped, forexample.
SELAIN ITU, ANAK-ANAK JUGA DAPAT MENGGERAKKAN KENDARAAN, MISALNYA DENGAN:
• releasing the parking brake.
• change the gearbox setting.
- start the vehicle.
▶ Never leave children unattended in the vehicle.
When leaving the vehicle, always take the SmartKey with you and lock the vehicle.
▶ Keep the key out of reach of children.
If the vehicle does not start and the Place the key in the marked space See Owner's Manual message appears on the driver display, you can start the vehicle in emergency operation mode.

▶ Ensure that the storage compartment ② is empty.
Remove the key ① from the key ring.
Place the key ① next to the symbol ③ in the storage compartment ②. The vehicle will start after a short delay.
If you remove the key ① from the storage compartment ②, it the vehicle will still be ready to drive. For further vehicle starts, however, the key
① must be located next to the symbol ③ in the storage compartment
② during the entire journey.
Have the key ① checked at a qualified specialist workshop.
JIKA KENDARAAN TIDAK MENYALA:
Place the key ① in the storage compartment ② and leave it there.
▶ Depress the brake pedal and start the vehicle using the start/stop button.
You can also switch on the power supply or the vehicle independently with the start/stop button ( → page 271).


G-Class - Owner's Manual
Driving and parking Driving
Observe any information regarding display messages that may be shown on the driver display.
Menyalakan kendaraan melalui Layanan Online Jarak Jauh
MENDINGINKAN ATAU MEMANASKAN INTERIOR KENDARAAN SEBELUM MEMULAI PERJALANAN
You can cool or heat the vehicle interior before starting a journey.
PASTIKAN HAL BERIKUT SEBELUM MENYALAKAN MESIN:
- The legal stipulations in the area where your vehicle is parked allow engine starting via smartphone.
It is safe to start and run the engine where your vehicle is parked.
• The fuel tank is sufficiently full.
• The starter battery is sufficiently charged.
i Further information can be found in the Mercedes-Benz App.
MENGISI DAYA BATERAI AWAL SEBELUM MEMULAI PERJALANAN
You can receive a message on your smartphone when the state of charge of the starter battery is low. You can then start the vehicle with the smartphone to charge the battery. The vehicle will automatically be switched off after ten minutes.
PASTIKAN HAL BERIKUT SEBELUM MENYALAKAN MESIN:
- The legal stipulations in the area where your vehicle is parked allow engine starting via smartphone.
It is safe to start and run the engine where your vehicle is parked.
• The fuel tank is sufficiently full.
MENYALAKAN KENDARAAN (ONLINE JARAK JAUH)

BAHAYA
Danger to life from toxic exhaust gas in enclosed spaces
Combustion engines emit toxic exhaust gases such as carbon monoxide. Inhaling these exhaust gases is hazardous to health and leads to poisoning.
▶ Never leave the engine or, if present, the stationary heater running in an enclosed space without sufficient ventilation.

PERINGATAN
Risk of fire due to flammable materials in the engine compartment or on the exhaust system
Flammable materials may ignite.
Therefore, regularly check that there are no flammable foreign materials in the engine compartment or on the exhaust system.


G-Class - Owner's Manual
Driving and parking Driving

PERINGATAN
Risk of crushing or entrapment due to unintentional starting of the engine
Limbs could be crushed or trapped if the engine is started unintentionally during service or maintenance work.
▶ Always secure the engine against unintentional starting before carrying out maintenance or repair work.


PERINGATAN
Accident- and risk of injury with unsupervised children in the vehicle
JIKA ANDA MENINGGALKAN ANAK-ANAK TANPA PENGAWASAN DI DALAM KENDARAAN, MEREKA DAPAT TERUTAMA
- Open doors and thereby endanger other persons or road users.
• get out of the car and are hit by traffic.
• Operate vehicle equipment and become trapped, forexample.
SELAIN ITU, ANAK-ANAK JUGA DAPAT MENGGERAKKAN KENDARAAN, MISALNYA DENGAN:
• releasing the parking brake.
• change the gearbox setting.
- start the vehicle.
▶ Never leave children unattended in the vehicle.
When leaving the vehicle, always take the SmartKey with you and lock the vehicle.
▶ Keep the key out of reach of children.
Persyaratan:
• Park position P is selected.
• The anti-theft alarm system is not activated.
• The hazard warning light system is switched off.
• The bonnet is closed.
• The doors are closed and locked.

G-Class - Owner's Manual
Driving and parking Driving
• The windows and sliding sunroof are closed.
▶ Start the vehicle using your smartphone.
After every vehicle start, the engine will run for ten minutes.
You can carry out a maximum of two consecutive starting attempts. You must start the vehicle with the key before trying to start the vehicle with your smartphone again.
ANDA DAPAT MEMATIKAN KENDARAAN KAPAN SAJA DENGAN CARA BERIKUT:
• Via the Mercedes-Benz app
- By pressing buttons 📐 or 🏠 on the key
Additional information can be found in the Mercedes-Benz app.
MENGAMANKAN KENDARAAN TERHADAP PENYALAAN SEBELUM MELAKUKAN PERAWATAN ATAU PERBAIKAN:
Switch on the hazard warning light system or unlock the doors.
Open a side window or the sliding sunroof.
Catatan pengoperasian awal
UNTUK MENJAGA MESIN SELAMA 1500 KM PERTAMA:
• Drive at varying road speeds and engine speeds.
• Do not drive faster than 140 km/h.
- Only briefly allow the engine to reach a maximum engine speed of 4500 rpm.
• Drive the vehicle in drive program C or E.
- Then shift to the next higher gear at the very latest when the needle reaches the last third before the red area in the rev counter.
• Do not shift down manually in order to brake.
- Avoid overstraining the vehicle, e.g. by driving at full throttle.
• Do not depress the accelerator pedal past the pressure point (kickdown).
- Only increase the engine speed gradually and accelerate the vehicle to full speed after 1500 km.
- In trailer operation: do not drive on a gradient greater than 7 % and more than 7 km long.
This also applies when the engine or parts of the drivetrain have been replaced.
HARAP JUGA PERHATIKAN CATATAN PENGOPERASIAN AWAL BERIKUT:
- In certain handling and driving safety systems, the sensors adjust automatically while a certain distance is being driven after the vehicle has been delivered or after repairs. Full system effectiveness is only reached when this teaching-in process has concluded.
- Brake pads, brake discs and tyres that are either new or have been replaced only achieve optimum braking effect and grip after driving several hundred kilometres. Compensate for the reduced braking effect by applying greater force to the brake pedal.
G-Class - Owner's Manual
Driving and parking Driving
Daya mesin dan torsi mesin (kendaraan Mercedes-AMG)
The actual (maximum) values that can be achieved for engine output and engine torque may deviate from the certified values within the country-specific guidelines for permissible tolerances (basis: UN-ECE No. 85 or country-specific guidelines).
VARIABEL YANG MEMPENGARUHI TERMASUK:
• Location above sea level
Fuel quality
• Outside temperature
• Engine and gearbox operating temperature
The engine operating temperature warning lamp will remain lit until the engine and the gearbox have reached their operating temperature. The temperature indicators on the driver display will also be blue.
Engine output and engine torque will be reduced. Factor this into your driving style.
When the engine operating temperature warning lamp goes out and the temperature indicators are white, full engine output and engine torque will be available.
If the temperature indicators on the driver display are red, the temperatures are too high. Engine output and engine torque will be reduced again. Factor this into your driving style and observe the warning lamps and display messages that are shown on the driver display.
Catatan tentang akselerasi yang dioptimalkan
If all necessary requirements and activation conditions are fulfilled, the best possible acceleration can be achieved from a standstill.
Do not use optimised acceleration on public roads. Individual wheels could spin and you could lose control of the vehicle. There is an increased risk of skidding and/or accident.
Be sure to observe the safety notes and information on ESP ® (→ page 341).
Melaju dengan akselerasi yang dioptimalkan

PERINGATAN
Risk of skidding and accidents due to wheelspin
If you pull away with optimised acceleration, individual wheels could spin and you could lose control of the vehicle.
There is a higher risk of skidding and accidents when ESP * is deactivated in particular.

Make sure that there are no persons or obstacles in the vicinity of the vehicle.
Persyaratan
• The vehicle is run in (→ page 277).
• The vehicle and tyres are in good condition.
• The road surface is high-grip.
• The engine and transmission are at normal operating temperature.


G-Class - Owner's Manual
Driving and parking Driving

CATATAN
Increased wear due to optimised acceleration
When pulling away with optimised acceleration, all components of the drivetrain are subjected to a very high load.
This can lead to increased component wear.
▶ Do not always pull away with optimised acceleration.
Engage the D drive position ( → page 308).
Move the steering wheel to the straight-ahead position.
Select drive program S (→ page 298, 297).
Deactivating ESP ® (→ page 345).
▶ Depress and hold the brake pedal firmly with your left foot.
▶ Fully depress the accelerator pedal with your right foot.
After no more than five seconds, quickly take your left foot off the brake, but keep the accelerator pedal depressed.
The vehicle will pull away at maximum acceleration.
Switch on ESP ® once the acceleration procedure is complete.
AKSELERASI OPTIMAL DI AKHIR
Remove your foot from the accelerator pedal.
Reactivate ESP ® .
After you pull away with optimised acceleration, components of the drivetrain may become very hot, which means that optimised acceleration values may be reached again only after a few minutes.
Catatan mengemudi

PERINGATAN
Risk of accident due to objects in the driver's footwell
Objects in the driver's footwell may impede pedal travel or block a depressed pedal.
This will jeopardise the operating and road safety of the vehicle.
Stow all objects in the vehicle securely so that they cannot get into the driver's footwell.
▶ Make sure that there is always sufficient clearance for the pedals.
▶ Always fit the floor mats securely and as prescribed.
Do not use loose floor mats and do not place floor mats on top of one another.


G-Class - Owner's Manual
Driving and parking Driving


PERINGATAN
Risk of accident due to incorrect footwear
ALAS KAKI YANG TIDAK TEPAT TERMASUK, CONTOHNYA:
• shoes with platform soles
• shoes with high heels
- slippers
There is a risk of an accident.
▶ Always wear suitable footwear so that you can operate the pedals safely.

PERINGATAN
Risk of accident if the vehicle is switched off while driving
If you switch off the vehicle while driving, safety functions are restricted or no longer available.
This may affect the power steering system and the brake force boosting, for example.
You will need to use considerably more force to steer and brake, for example.
▶ Do not switch off the vehicle while driving.

BAHAYA
Danger to life from toxic exhaust gas in enclosed spaces
Combustion engines emit toxic exhaust gases such as carbon monoxide. Inhaling these exhaust gases is hazardous to health and leads to poisoning.
▶ Never leave the engine or, if present, the stationary heater running in an enclosed space without sufficient ventilation.

PERINGATAN
Risk of skidding and of an accident due to shifting down on slippery road surfaces
If you shift down on slippery road surfaces to increase the engine braking effect, the drive wheels may lose traction.
Do not shift down on slippery road surfaces to increase the engine braking effect.

G-Class - Owner's Manual
Driving and parking Driving
A
BAHAYA
Risk of fatal injury from toxic exhaust gases if the tailpipe is blocked
Combustion engines emit toxic exhaust gases such as carbon monoxide. Inhaling these exhaust gases is harmful to health and leads to poisoning. If the tailpipe is blocked or sufficient ventilation is not possible, exhaust gases can enter the vehicle. This is the case, for example, if the vehicle gets stuck in the snow.
When the engine or stationary heater is running, keep the tailpipe and the area around the vehicle free of snow.
To ensure a sufficient supply of fresh air, open a window on the side of the vehicle facing away from the wind.
A
PERINGATAN
Risk of accident due to the brake system overheating
If you leave your foot on the brake pedal when driving, the brake system may overheat.
This increases the braking distance and the brake system can even fail.
▶ Never use the brake pedal as a footrest.
Do not depress the brake pedal and the accelerator pedal at the same time while driving.
!
CATATAN
Engine damage due to excessive engine speed
You will damage the engine if you drive at excessive engine speeds.
Do not drive at engine speeds in the red area of the rev counter, or shown in red in the driver display.
CATATAN
Causing wear to the brake linings by permanently depressing the brake pedal
Do not permanently depress the brake pedal while driving.
To use braking effect of the engine, shift to a lower gear in good time.
CATATAN
Damage to the drivetrain and engine when pulling away
Do not warm up the engine while the vehicle is stationary. Pull away immediately.
Avoid high engine speeds and driving at full throttle until the engine has reached its operating temperature.


G-Class - Owner's Manual
Driving and parking Driving

CATATAN
Damage to the catalytic converter due to non-combusted fuel. The engine is not running smoothly and is misfiring.
Non-combusted fuel may get into the catalytic converter.
▶ Only depress the accelerator pedal slightly.
▶ Have the cause rectified immediately at a qualified specialist workshop.

CATATAN
Reduced battery life due to frequent short-distance trips
The 12 V battery may not be sufficiently charged when the vehicle is used only for short-distance trips. This reduces the life of the battery.
▶ Drive longer distances regularly to charge the battery.

CATATAN
Vehicle damage due to failure to observe the maximum permissible clearance height
If the vehicle height exceeds the maximum permissible clearance height, the roof and other vehicle parts may be damaged.
Please observe the indicated maximum clearance height.
If the vehicle exceeds the permissible clearance height, do not drive in.
▶ Take the modified vehicle height in the case of roof superstructures or other carrier systems into account.

Please bear in mind that all speed values stated in this Owner's Manual are approximate values and are subject to a certain tolerance.
CATATAN MENGENAI MENGEMUDI DENGAN BEBAN DI ATAP, TRAILER, ATAU KENDARAAN BERMUATAN PENUH
Driving with a loaded roof luggage rack or trailer, or with the vehicle fully laden or occupied, changes the handling and steering characteristics of your vehicle.
OLEH KARENA ITU, HARAP PERHATIKAN CATATAN BERIKUT:
- Do not exceed the permissible roof load and trailer load. Also observe the information in the technical data in this respect.
- Distribute the roof load and vehicle load evenly, and place heavy objects at the bottom. Also observe the notes on loading the vehicle ( → page 210).

G-Class - Owner's Manual
Driving and parking Driving
- Drive with care. Avoid sudden starting, braking and steering manoeuvres or fast cornering.
- If trailer operation is permitted, observe the notes on trailer operation ( → page 413).
CATATAN MENGENAI MENGEMUDI DI JALAN YANG DITABURI GARAM PENGURAI ES
The braking effect is limited on road surfaces treated with de-icing salt.
OLEH KARENA ITU, HARAP INGAT CATATAN BERIKUT:
- Due to salt build-up on the brake discs and brake linings, the braking distance can increase considerably or braking may be one-sided.
- Maintain a much greater safety distance to the vehicle travelling ahead.
HILANGKAN PENUMPUKAN GARAM DENGAN CARA BERIKUT:
\- Brake occasionally, paying attention to the traffic conditions.
\- Carefully depress the brake pedal at the end of the journey and when starting the next journey.
CATATAN MENGENAI AQUAPLANING
Aquaplaning can take place if a certain depth of water has built up on the road surface.
PERHATIKAN CATATAN BERIKUT SAAT HUJAN DERAS ATAU DALAM KONDISI YANG DAPAT MENYEBABKAN AQUAPLANING:
- Reduce speed.
- Avoid tyre ruts.
- Avoid sudden steering movements.
- Brake carefully.
Also observe the notes on regularly checking wheels and tyres ( → page 41).
CATATAN MENGENAI MENGEMUDI MELALUI GENANGAN AIR DI JALAN
Water ingress can damage the engine, electrics and transmission.
Water can also enter the air intake fittings of the engine and cause engine damage.
PERHATIKAN HAL BERIKUT JIKA ANDA PERLU MENGEMUDI MELINTASI AIR:
- Observe the maximum permissible fording depth (→ page 760).
• Drive no faster than 10 km/h.
- Vehicles travelling ahead, or oncoming vehicles, can create waves which may exceed the maximum permissible depth of water.
The braking effect of the brakes is reduced after fording. Brake carefully, paying attention to the traffic conditions, until the braking effect has been fully restored.
Catatan tentang mengemudi off-road
WARNING
Risk of accident if you do not keep to line of fall on inclines
If you drive at an angle or turn on an incline, the vehicle could slip sideways, tip and rollover.
▶ Always drive on inclines in the line of fall (straight up or down) and do not turn.

G-Class - Owner's Manual
Driving and parking Driving
A
PERINGATAN
Risk of fire due to flammable material coming into contact with hot parts of the exhaust system
If combustible materials, e.g. leaves, grass or twigs, come into contact with hot parts of the exhaust system, they may ignite.
When driving off-road or on unpaved surfaces, check the underside of the vehicle at regular intervals.
In particular, remove any trapped parts of plants or other flammable material.
If damage should occur, immediately inform a qualified specialist workshop.
When driving off-road, it is possible for example that sand, mud and water, possibly mixed with oil, may get into the service brakes. This may lead to a reduction in braking effect or service brake failure, also as a result of increased wear. The braking characteristics will vary depending on the material that has entered the system. Clean the brakes after driving off-road. If you then notice reduced braking effect or hear scraping noises, have the brake system checked at a qualified specialist workshop. Adapt your driving style to the modified braking characteristics.

!
CATATAN
Damage caused by driving over obstacles
KENDARAAN DAPAT RUSAK OLEH:
• bottoming out on high kerbs or on unpaved trails
- driving at speed over obstacles such as kerbs, speed bumps or potholes
- heavy objects impacting the underbody or suspension components
▶ Do not drive over obstacles that might damage the vehicle.
When driving off-road, regularly check the vehicle for damage.
▶ Adjust your speed to the road conditions.
In the event of damage, immediately consult a qualified specialist workshop.
CATATAN LINGKUNGAN
Environmental damage due to non-observance of prohibition signs
Environmental protection has priority. Treat nature with respect.
Be sure to observe prohibition signs.
DAFTAR PERIKSA SEBELUM MENGEMUDI OFF-ROAD
PERIKSA HAL-HAL BERIKUT SEBELUM MENGEMUDI OFF-ROAD:
Fuel level
- Engine oil level: fill engine oil to the maximum level to ensure full gradeability ( → page 38).


G-Class - Owner's Manual
Driving and parking Driving
AdBlue® level of at least 10 l
• Tyre-change tool kit and spare wheel if provided
- Tyres and wheels
Further information about special all-terrain tyres for retrofitting can be obtained from a qualified specialist workshop.
The off-road cockpit in the multimedia system can assist you when driving off-road. Before driving off-road, familiarise yourself with its displays and equipment-dependent settings ( → page 477).
MENGEMUDI OFF-ROAD
Read this section before driving your vehicle off-road. Practise by driving in less challenging terrain first.
- Observe the notes on off-road ABS (→ page 340).
- Select the relevant drive program before driving off-road - 📄 Trail or 📋 Rock (→ page 298, 297).
- If appropriate, shift the transfer case to the LOW RANGE off-road gear before driving off-road (→ page 313).
• Engage the differential locks if necessary ( → page 316).
The LOW RANGE off-road gear is only available in the 📄 Trail and 🐃 Rock drive programs.
When the differential locks are engaged, the vehicle switches automatically to the drive program 📄 Rock.
At speeds of 3 km/h and more, and in LOW RANGE off-road gear, you can shift from D to R and from N to R without depressing the brake pedal. This can help you to "rock" your vehicle out of a ground depression, for example.

At speeds below 3 km/h, the brake pedal must be depressed when shifting from N to D or R.
- Always keep the engine running and in gear when driving on downhill gradients and slopes. Observe the notes on driving in mountainous terrain.
- Do not drive in unknown terrain that is not easy to see and stay on marked routes.
• Always keep the doors and windows closed while the vehicle is in motion.
- Deactivate the variable limiter and Active Distance Assist DISTRONIC or cruise control.
• Adapt your driving style to the terrain.
- Do not use the HOLD function in the 📄 Trail drive program on steep downhill or uphill gradients with slippery or loose surfaces.
Mengemudi di atas pasir
SAAT MENGEMUDI DI ATAS PASIR, PERHATIKAN JUGA PETUNJUK BERIKUT:
- Select the 📄 Sand drive program.
• Shift to a lower gear ( → page 308).
• Mercedes-AMG vehicles: shift to a lower gear ( → page 309).
- Drive briskly to overcome the rolling resistance. The vehicle may otherwise dig itself in.
- Drive in the tracks of other vehicles if possible. Make sure that the following prerequisites are met:
- the tyre ruts are not too deep.
the sand is firm enough.


G-Class - Owner's Manual
Driving and parking Driving
the ground clearance is sufficient.
\- Reduce the tyre pressure in all four wheels.
Contrary to the information in the tyre pressure table (fuel filler flap), you can reduce the tyre pressure to 130 kPa (1.3 bar, 18.9 psi).
When you are no longer driving on sand, immediately increase the tyre pressure again.
Information on the recommended tyre pressure for the vehicle's factory-fitted tyres can be found on the tyre pressure table on the inside of the fuel filler flap ( → page 654).
Mengarungi
PERHATIKAN JUGA INFORMASI BERIKUT SAAT MENGARUNG AIR:
• Drive no faster than 10 km/h.
- Observe the maximum permissible fording depth (→ page 762, 760).
- Select the LOW RANGE off-road gear before driving through water ( → page 313).
• Switch off automatic climate control ( → page 261).
- Vehicles with stationary heater/stationary ventilation: Switch off the stationary heater/stationary ventilation (→ page 57).
• Ensure that a bow wave does not form as you drive.
• Do not stop in the water and do not switch off the engine.
Mengemudi di medan pegunungan
PERHATIKAN JUGA INFORMASI BERIKUT SAAT MENGEMUDI DI MEDAN PEGUNUNGAN:
- Observe the figures for the angle of approach/departure and of the maximum gradeability ( → page 762, 760).
• Engage the differential locks if necessary ( → page 316).
- Avoid high engine speeds.
• Use the braking power of the engine when driving downhill.
- Shift to a lower gear on uphill gradients and on long, steep downhill gradients (→ page 308).
- Mercedes-AMG vehicles: shift to a lower gear on uphill gradients and on long, steep downhill gradients (→ page 309).
• If necessary, activate DSR before driving downhill (→ page 364).
DAFTAR PERIKSA SETELAH MENGEMUDI DI JALAN OFF-ROAD
Driving off-road places greater demands on your vehicle than driving on normal roads. Check the entire vehicle underbody for damage and foreign bodies every time after driving off-road. Foreign bodies in the wheels or drivetrain can lead to imbalances and therefore vibrations.
• Disengage the differential locks.
• Shift the transfer case to the on-road position HIGH RANGE.
- If an off-road drive program has been selected, select an on-road drive program.
In the off-road drive programs, the driving safety systems are switched off or subject to functional restrictions. The vehicle's tendency to overturn or skid would be increased in public traffic.
• Deactivate DSR.
• Apply the brakes to dry them after fording.
- Check that the service brake is working normally after a long downhill stretch.

G-Class - Owner's Manual
Driving and parking Driving
• Clean the following component parts every time after driving off-road:
- licence plate number
- headlamps and tail lamps
- tyres, wheels and wheel arches
- underbody
• After driving through sand, mud, water or gravel, have the following component parts checked and cleaned:
brake discs and brake linings
- tyres and wheels
- supporting joints
- radiators
- alternator
- belt drive
Informasi tentang sistem rem performa tinggi AMG
The AMG high-performance brake system is designed for high loads. This may lead to noise when braking. This effect can also occur after washing the vehicle.
KEBISINGAN TERGANTUNG PADA FAKTOR-FAKTOR BERIKUT:
speed
- brake force
• ambient conditions, e.g. temperature and air humidity
i Have the brake system checked at a qualified specialist workshop after it has been subjected to extreme loads.
Fungsi ECO start/stop
FUNGSI ECO START/STOP
Depending on the engine, the ECO start/stop function is not available in all drive programs. Observe the status display on the driver display concerning this.
MESIN AKAN MATI SECARA OTOMATIS DALAM SITUASI BERIKUT JIKA SEMUA KONDISI KENDARAAN UNTUK PENGHENTIAN MESIN OTOMATIS TERPENUHI:
- You brake the vehicle until it comes to a standstill in transmission position D or N.
• You depress the brake pedal when travelling at a low speed.
JIKA SISTEM MENDETEKSI SALAH SATU SITUASI BERIKUT, MESIN TIDAK AKAN MATI:
• You stop at a stop sign and there is no vehicle in front of you.
• The vehicle that stopped in front of you pulls away again.
• You manoeuvre, turn the steering wheel sharply or engage reverse gear.
This prevents the engine from stopping briefly.

G-Class - Owner's Manual
Driving and parking Driving

If the system detects a stop inhibitor to prevent a short stop (e.g. a stop sign), the engine will not stop.
If you activate the HOLD function or engage park position P, the engine can be switched off in spite of such a stop inhibitor.
MESIN AKAN MENYALA KEMBALI SECARA OTOMATIS DALAM KASUS BERIKUT:
• You engage transmission position D (depending on engine) or R.
• You depress the accelerator pedal.
• The vehicle requires an automatic engine start.
• You release the brake pedal.
- You release the brake pedal on a downhill gradient and the vehicle does not roll.
- The vehicle rolls on a downhill gradient and does not automatically enter gliding mode at 20 km/h.
SIMBOL FUNGSI ECO START/STOP PADA LAYAR PENGEMUDI:
- The Ⓐ symbol (green) appears when the vehicle is at a standstill: the engine was switched off by the ECO start/stop function.
- The symbol (yellow) appears when the vehicle is at a standstill: not all vehicle conditions for an engine stop have been met.
- Neither the Ⓐ nor Ⓠ symbol appears when the vehicle is at a standstill: a stop inhibitor to prevent a short stop has been detected (e.g. a stop sign).
- The symbol appears: the ECO start/stop function is deactivated or there is a malfunction.
If the engine was switched off by the ECO start/stop function and you leave the vehicle, a warning tone will sound and the engine will not be restarted. In addition, the following display message will appear on the driver display:
Vehicle is operational Switch off vehicle before exiting
If you do not switch off the vehicle, it will automatically be switched off after three minutes.
SWITCHING THE ECO START/STOP FUNCTION ON/OFF

Press button ①.
An indicator will appear on the driver display when you switch the ECO start/stop function on/off.
① will be shown permanently on the driver display while the ECO start/stop function is deactivated.
MENGAKTIFKAN/MENONAKTIFKAN FUNGSI ECO START/STOP (KENDARAAN MERCEDES-AMG)
Observe the notes on the ECO start/stop function in the vehicle Owner's Manual.

G-Class - Owner's Manual
Driving and parking Driving

You can also switch the ECO start/stop function on or off via the start/stop button or via the multimedia system.

Press upper or lower display button ① repeatedly, until it displays the symbol.
① If the display button does not show the symbol, then it is hidden. How functions are displayed and the order in which they are displayed can be set in the multimedia system ( → page 292).
Press corresponding button ②.
THE SYMBOL INDICATES THE CURRENT STATUS OF THE ECO START/STOP FUNCTION:
(A) (red): switched off
(A) (green): activated
(yellow): inactive
Fungsi tampilan ECO

The ECO display shows an evaluation of your driving style on the driver's display depending on the situation. This enables you to check the efficiency of your driving style and adjust it if necessary. The ECO display menu shows a ball that will roll forwards or backwards in the direction of travel on a stylised road according to the driving characteristics.
Above and below the road, lines mark the area for an efficient driving style ③. Ball ② will light up in green if it is rolling within these lines. Outside the lines, the ball will light up in orange.
TAMPILAN ECO MENILAI KRITERIA BERIKUT UNTUK GAYA MENGEMUDI YANG HEMAT:
• Coasting at the right times
• consistent speed
• moderate acceleration
The overall assessment of your driving style "from start" is indicated using stars Ⓞ. It starts with five empty stars, which you can fill one after the other if you drive efficiently. When all five stars are filled, a glow will appear in the background.

G-Class - Owner's Manual
Driving and parking Driving
① You can call up the ECO display function via the Classic menu ( → page 423).
Fungsi ECO Assist (kendaraan dengan sistem kelistrikan 48 V)
i ECO Assist is active only in drive programs E and C.
ECO Assist analyses data for the vehicle's expected route. This allows the system to optimally adjust the driving style for the route ahead, save fuel and recuperate. If the system detects an event ahead and the vehicle nears the event, ECO Assist will calculate the optimum speed for maximum fuel economy and recuperative energy based on the distance, speed and downhill gradient.
If the deceleration provided by ECO Assist is not sufficient, you will also need to brake with the service brake. This will be the case particularly if, for example, you start driving again in slow-moving traffic and the distance to the vehicle in front is very short.

① "Foot off the accelerator" recommendation
Route event ahead

If you release the accelerator pedal, the symbol will turn green and recuperation in overrun mode will be initiated. If the deceleration is not sufficient, also apply the service brake. If ECO Assist intervenes for a route event ahead (not for a vehicle in front) and you then press the accelerator pedal again, you will end control by ECO Assist.
TAMPILAN ECO ASSIST AKAN DISEMBUNYIKAN LAGI DALAM KASUS BERIKUT:
• You do not react to the ECO Assist recommendation for a long time.
- You depress the accelerator pedal while ECO Assist is intervening for a route event ahead (not for a vehicle in front).
• ECO Assist cannot identify any further recommendations from the route ahead.
SELAIN KENDARAAN DI DEPAN ☐, ECO ASSIST DAPAT MENDETEKSI PERISTIWA RUTE BERIKUT ② TERGANTUNG PADA PERLENGKAPAN KENDARAAN:
Roundabout
Sharp bend
Junction
T-junction
Downhill gradient
Speed limit

G-Class - Owner's Manual
Driving and parking Driving

In drive program C, ECO Assist will react only to the "vehicle in front" route event without displaying the route event or recommendation.
BATASAN SISTEM
If the calculated route is adhered to when route guidance is active, ECO Assist will operate with greater accuracy. The basic function is also available when route guidance is not active. Not all information and traffic situations can be foreseen. The quality depends on the map data.
ECO Assist is only an aid. The driver is responsible for keeping a safe distance from the vehicle in front, for vehicle speed and for braking in good time.
SISTEM MUNGKIN TERGANGGU ATAU TIDAK BERFUNGSI DALAM SITUASI BERIKUT:
- if there is poor visibility, e.g. owing to insufficient illumination of the road, highly variable shade conditions, rain, snow, fog or heavy spray
• if there is glare, e.g. from oncoming traffic, direct sunlight or reflections
• if the windscreen is dirty in the vicinity of the multifunction camera
• if the multifunction camera is misted up, damaged or obscured
- if road signs are hard to detect, e.g. due to dirt, snow or insufficient lighting, or because they are obscured
- if the digital road map of the navigation system has incorrect or outdated information
• if signs are ambiguous, e.g. road signs in roadworks or in adjacent lanes
• if the radar sensors are dirty or obscured
• when you drive on roads with steep gradients
• if there are narrow vehicles in front, such as bicycles or motorcycles
AMG Real Performance Sound
MEMILIH KARAKTERISTIK SUARA DENGAN TOMBOL SETIR AMG
You can select a comfortable (Balanced) or a sporty (Powerful) sound characteristic using the steering-wheel button or the multimedia system ( → page 301).

Press the upper or lower display button ① repeatedly until it displays the symbol.
① If the display button does not show the symbol, then it is hidden. How functions are displayed and the order in which they are displayed can be set in the multimedia system ( → page 292).
Press corresponding button ②.
WARNA SIMBOL TOMBOL MENUNJUKKAN KARAKTERISTIK SUARA YANG SAAT INI DIPILIH:
• Blue: Balanced - comfortable
Red: Powerful - sporty


G-Class - Owner's Manual
Driving and parking Driving
Fungsi tombol setir AMG

The AMG steering wheel buttons are an additional control element with two buttons on the steering wheel.
You can assign two vehicle functions of your choice to the control element. You can change between the available functions for corresponding button by pressing the upper or lower part of display buttons repeatedly. Display buttons show each function selected.
FUNGSI BERIKUT TERSEDIA TERGANTUNG PADA PERLENGKAPAN:
ESP * (→ page 342)
AMG RIDE CONTROL (→ page 382)
AMG ACTIVE RIDE CONTROL ( → page 383)
AMG Active Balance Control ( → page 384)
AMG Traction PRO ( → page 385)
Manual gearshifting ( → page 309)
ECO start/stop function ( → page 288)
AMG Real Performance Sound ( → page 291)
AMG DYNAMICS (→ page 295)
In addition, all the functions you have saved as favourites in the multimedia system are available for selection. Information on favourites ( → page 461).
i Individual functions may be hidden. How functions are displayed and the order in which they are displayed can be set in the multimedia system ( → page 292).
If you have assigned a specific function to one of display buttons ①, you can operate this function with corresponding button ②.
The assignment of display buttons Ⓤ remains stored even after a vehicle restart. But the operating status of the respective function is reset to the basic setting.
Mengatur tombol setir AMG
Multimedia system:
Settings ▶ System ▶ Control elements
AMG steering-wheel buttons
IKHTISAR MENU PILIHAN PENGATURAN AMG
The left display buttons on the steering wheel can be set in the SETTINGS SELECT menu.

G-Class - Owner's Manual
Driving and parking Driving

(Example of representation) Representation and arrangement of content equipment-dependent.
Selection area for the available functions
Adjustable steering wheel buttons
Calls up setting mode.
Select the appropriate steering wheel button.
MENGATUR TOMBOL SETIR
The SETTINGS SELECT menu can also be called up using the DYNAMIC SELECT button or by a long press on the respective display button.
Select the upper or lower display button in the media display.
Press Ⓢ and select the desired function for assignment from Ⓐ.
The setting mode can also be called up by pressing and holding the current assignment in selection area.
MENAMBAHKAN FUNGSI BARU UNTUK DIPILIH
Select the upper or lower display button in the media display.

Press ☐ in selection area ① and select the desired function from the list.
The selected function is assigned to selection area ① and can be selected from there for the steering wheel buttons.
MENGHAPUS PENUGASAN TOMBOL
Select the upper or lower display button in the media display.
Press 3.
Press ☒ for the respective function in selection area ① to delete the selected assignment of the display button.


G-Class - Owner's Manual
Driving and parking DYNAMIC SELECT
DYNAMIC SELECT
Fungsi DYNAMIC SELECT
DYNAMIC SELECT allows an on-road or off-road drive program to be selected quickly according to the current driving conditions or the desired vehicle characteristics.
TAMPILAN DAN PROGRAM BERKENDARA YANG TERSEDIA UNTUK DIPILIH TERGANTUNG PADA STATUS KETERLIBATAN BERIKUT:
• Transfer case – HIGH RANGE or LOW RANGE ( → page 312)
• Differential lock for the transfer case ( → page 315)
The C drive program will always be active automatically after the vehicle is restarted with the transfer case in the HIGH RANGE on-road position. If the transfer case was previously set to the LOW RANGE off-road gear, the Trail drive program will remain active after the vehicle is restarted. If the differential lock for the transfer case was also engaged before the vehicle was restarted, the Rock drive program will remain selected.
You will be able to select the following drive programs. The drive program selected will appear on the driver display.
INDIVIDUAL
• Custom settings ( → page 300)
SPORT
- Sporty driving
• Emphasis on stability, but with a sporty, dynamic setup
• Enables a sporty driver to adopt a more active driving style
- Suitable only for good road conditions, a dry surface and a clear stretch of road
COMFORT
• Comfortable and economical driving
• Balance between traction and stability
• Recommended for all road conditions
E ECO
• Economical setting of vehicle functions
• Balance between traction and stability
• Recommended for all road conditions
TRAIL
- Optimised handling for driving on undemanding off-road terrain with a loose surface, e.g. on dirt roads or gravel
• Improved traction when you brake on loose surfaces


G-Class - Owner's Manual
Driving and parking DYNAMIC SELECT
\- LOW RANGE off-road gear for the transfer case available

ROCK
• May be used only off road, not on public roads
- Optimised handling for driving on moderate or difficult, uneven terrain and hard, rocky ground
• A firm suspension and specially adapted steering set-up
- ESP® vehicle stabilisation degraded with active torque vectoring
- Driving and driving safety systems switched off or subject to functional restrictions
- LOW RANGE off-road gear for the transfer case available and differential locks switchable

SAND
• Optimised handling for driving on sand
- Improved traction thanks to late intervention in the event of understeer or oversteer
• Vehicle stabilisation deactivated
- Driving and driving safety systems switched off or subject to functional restrictions
• Not suitable for use on public roads
• Transfer case in HIGH RANGE on-road position
The ESP® settings in the drive programs [F] and [C] are configured for stability. Therefore, choose one of these drive programs in particular when transporting roof loads, in trailer operation and when the vehicle is fully laden or fully occupied.
KARAKTERISTIK SISTEM BERIKUT AKAN BERUBAH SESUAI DENGAN PROGRAM BERKENDARA YANG BERLAKU:
Drive
- Engine and transmission management
- Availability of gliding mode
ECO start/stop function
ESP 3
Suspension
Steering
You can watch an animation on this topic via the following link:
Fungsi DYNAMIC SELECT (kendaraan Mercedes-AMG)
DYNAMIC SELECT allows an on-road or off-road program to be selected quickly according to the current driving conditions or the desired vehicle characteristics.
The display and the available options for the drive programs depend on the engagement status of the differential lock for the transfer case ( → page 315). The display and the available options do not depend on the engagement status of the transfer case.
The drive program will always be active automatically after the engine is restarted.

FUNGSI PROGRAM BERKENDARA DI JALAN RAYA
JIKA KUNCI DIFERENSIAL UNTUK KOTAK TRANSFER DILEPASKAN, ANDA DAPAT MEMILIH DI ANTARA PROGRAM BERKENDARA DI JALAN RAYA BERIKUT
Slippery
\- Optimised pulling-away and driving characteristics in wintry and slippery road conditions
Comfort
\- Comfortable and economical driving
- Balance between traction and stability
\- Individual
\- Custom settings for drive system, suspension, gearbox, AMG DYNAMICS and AMG Real Performance Sound
S Sport
\- Sporty driving
- Balance between stability and sportiness
- Suitable only for good road conditions, a dry surface and a clear stretch of road
\- Sport+
\- Particularly sporty driving
- Emphasises the vehicle's own oversteer and understeer characteristics
- Suitable only for good road conditions, a dry surface and a clear stretch of road
Mercedes-AMG recommends selecting the C drive program when in city traffic or stop-and-go traffic.
FUNGSI PROGRAM OFF-ROAD
The driving and driving safety systems, particularly the Electronic Stability Program (ESP ® ) and ETS/4ETS traction control, will be switched off or subject to functional restrictions in the off-road programs.
If the differential locks for the transfer case are engaged, the vehicle will switch automatically to the 📄 Trail(Trail) drive program.
Anda kemudian akan dapat memilih antara program off-road berikut:
•
Sand
- Optimised handling for driving on sand
- Agility settings, adjustable in increments, with adapted all-wheel torque distribution
- Not suitable for use on public roads
•
Trail
- Traction control, adjustable in increments, with adapted all-wheel torque distribution
- Optimised handling for driving on undemanding off-road terrain with a loose surface, e.g. on dirt roads, gravel or sand
- Not suitable for use on public roads
Rock
- Improved traction, optimised suspension tuning and comfortable steering settings
- Optimised handling for driving on difficult terrain and hard, rocky ground
- Increased locking torque in the LOW RANGE off-road gear


G-Class - Owner's Manual
Driving and parking DYNAMIC SELECT
- Traction control with degree of lock adjustable in increments
- Not suitable for use on public roads
You can switch between the off-road programs only in the order given above. You cannot switch directly between Sand and Rock.
Opsi berikut tersedia untuk beralih ke program on-road:
• Disengage the differential lock for the transfer case ( → page 315).
- Select the on-road setting on the DYNAMIC SELECT menu in the multimedia system (→ page 301).
Tergantung pada program on-road atau off-road yang dipilih, karakteristik kendaraan berikut akan berubah:
Drive
- Transmission
• AMG DYNAMICS
The three agility functions, Basic, Advanced and Pro, as well as the two agility functions for the off-road programs, Slide and Traction, will be selected automatically depending on the drive program.
The steering, shift timing point, all-wheel drive and stabilisation functions will be adapted to the selected drive program.
• Real Performance Sound
- Suspension
Steering
All-wheel drive
You can set the drive program characteristics using the DYNAMIC SELECT menu of the multimedia system ( → page 301).
You can adjust certain agility functions of AMG DYNAMICS using the AMG steering-wheel buttons.
Memilih program berkendara

Push DYNAMIC SELECT switch ① forwards or backwards repeatedly until the selected drive program appears on the driver display.
or
▶ Push DYNAMIC SELECT switch Ⓤ forwards or backwards and select the drive program on the DYNAMIC SELECT menu on the central display.
Pay attention to any messages on the driver display and the central display.


G-Class - Owner's Manual
Driving and parking DYNAMIC SELECT
In the 📄 Rock and 📄 Sand off-road programs, some driving and driving safety systems will be subject to functional restrictions or will be unavailable. When you select one of these drive programs, a confirmation prompt will therefore appear on the central display before the drive program is activated.
Memilih program berkendara (kendaraan Mercedes-AMG)
Persyaratan:
- To be able to select the 📄 on-road drive programs, the differential lock for the transfer case must be switched off.
- To be able to select the off-road drive programs, the differential lock for the transfer case must be switched on.
Function of the differential lock ( → page 315).
MEMILIH PROGRAM BERKENDARA DENGAN TOMbol AMG DI SETIR KANAN

To select the drive programs, switch the differential lock for the transfer case off or on.
After the shift operation, the on-road or off-road drive programs can be selected
or
Press display button ⑪ and switch between the off-road and on-road drive programs on the DYNAMIC SELECT menu.
The differential locks will be disengaged. After the shift operation, the on-road drive programs can be selected.
Turn rotary switch ②.
The selected drive program will appear on display button Ⓞ and on the driver display.
① Individual drive programs may not be shown. How drive programs are displayed and the order in which they are displayed can be set in the multimedia system (→ page 301).
MEMILIH PROGRAM OFF-ROAD
When the differential locks for the front and rear axles are disengaged, you can set traction control or the degree of lock in the off-road programs. That allows to you select a balance between stability and agility in increments.


G-Class - Owner's Manual
Driving and parking DYNAMIC SELECT
When display button ① is showing the off-road program, press the display button.

In the Sand drive program, display button will show symbol and a seven-segment display. You can set the agility of the vehicle in increments. Adjusted all-wheel torque distribution allows you to deliberately induce oversteer on sandy ground.
In the Trail drive program, display button will show symbol and a seven-segment display. You can set traction control assistance in increments in conjunction with variable all-wheel distribution.
In the 📄 Rock drive program, display button Ⓓ will show symbol ⏚ and a seven-segment display. You can set the degree of lock of the electronically controlled inter-wheel differential lock in increments to suit the situation.
Once you have selected a drive program, the drive program characteristics will appear in the centre position and four segments will light up.
To increase (+) or reduce (-) the level of assistance from traction control or the degree of lock, turn control knob ② clockwise or anti-clockwise.
If you press display button ① again, you will then be able to select a drive program using control knob ②.

MEMILIH PROGRAM BERKENDARA DENGAN SAKLAR DYNAMIC SELECT

To select the drive programs, switch the differential lock for the transfer case off or on.
After the shift operation, the on-road or off-road drive programs can be selected.
or
Switch between the off-road and on-road drive programs on the DYNAMIC SELECT MENU.
The differential locks will be disengaged. After the shift operation, the on-road drive programs can be selected.
Push DYNAMIC SELECT switch forwards or backwards.
The selected drive program will appear on display button Ⓞ and on the driver display.
If an off-road program has been selected, you can set its program-specific characteristics in increments as outlined above using the steering-wheel button.

G-Class - Owner's Manual
Driving and parking DYNAMIC SELECT
Mengonfigurasi DYNAMIC SELECT di sistem multimedia
Multimedia system:

MENGATUR PROGRAM I DRIVE
Select Individual.
Select
Select a category from the list and set it.
In the Offroad drive program, some driving systems will be subject to functional restrictions or unavailable. That is why, when the Offroad drive programs are selected, a confirmation prompt appears in the media display prior to activation of the driving program.
MENGAKTIFKAN/MENONAKTIFKAN TAMPILAN RESET
Activate or deactivate Ask when starting.
This function must be activated for each user profile separately. Only when this function is activated will the drive program and ECO start/stop setting for the previous journey be saved for the respective user profile.
Function on: the next time the vehicle is started a prompt appears asking whether the last active drive program should be restored. If the ECO start/stop function was deactivated, an additional prompt appears asking if the function should remain deactivated.

The prompt appears only if the previously active settings deviate from the standard settings.
i Restoration of the ECO start/stop function setting is dependent on the ECO start/stop function behaviour ( → page 68).
Function off: the next time the vehicle is started the C drive program is set automatically. The ECO start/stop function is activated automatically.
Menampilkan data kendaraan
Multimedia system:

Select Vehicle.
The vehicle data is displayed.
Menampilkan data mesin
Multimedia system:

▶ Select Engine.
The engine data is displayed.
The actual maximum values that can be achieved for engine output and engine torque may deviate from the certified values within the country-specific guidelines for permissible tolerances (basis: UN-ECE No. 85 or country-specific guidelines).


G-Class - Owner's Manual
Driving and parking DYNAMIC SELECT

VARIABEL YANG MEMPENGARUHI TERMASUK:
Sea level
Fuel quality
• Outside temperature
• Operating temperature of the engine
Adjust your driving style accordingly.
The warning lamp in the driver display is on until the engine has reached operating temperature.
The values displayed serve only as guidance. The values for engine output and engine torque shown in the media display may deviate from the actual values.
The warning lamp to show the power output limitation after starting the vehicle is not available in all vehicle models.
Memanggil indikator konsumsi bahan bakar
Multimedia system:

Select Consumption.
The current and average fuel consumption will be displayed.
Mengatur AMG DYNAMIC SELECT di sistem multimedia MBUX
Multimedia system:

OVERVIEW OF THE AMG DYNAMIC SELECT MENU

(Example of representation) Representation and arrangement of content equipment-dependent.
① Switches between the Onroad and Offroad drive programs.
2 Drive programs
3 AMG drive program settings
ESP ® and quick-access buttons ( → page 342)
5 Edits settings
The AMG DYNAMIC SELECT menu can also be called up using the DYNAMIC SELECT button.

G-Class - Owner's Manual
Driving and parking DYNAMIC SELECT
In the Offroad drive program, some driving systems will be subject to functional restrictions or unavailable. That is why, when the Offroad drive programs are selected, a confirmation prompt appears in the media display prior to activation of the driving program.
To be able to select the Onroad drive programs, the differential lock for the transfer case must be switched off. To be able to select the Offroad drive programs, the differential lock for the transfer case must be switched on. Further information on the differential lock (→ page 385).
Select the appropriate drive program.
The settings of the drive programs can be adjusted individually. The setting mode for the drive programs can also be called up by pressing and holding the current configuration in selection area ②.
Select the desired tab on the left and make the relevant setting.
PENGATURAN OPSI UNTUK PROGRAM BERKENDARA (TERGANTUNG PERLENGKAPAN):
• AMG DYNAMICS:
Basic/Advanced/Pro
Sound:
Balanced/Powerful
- Transmission:
Manual/automatic
• Drive (can only be set in the 📋 Individual drive program):
Reduced/Moderate/Sport/Dynamic
\- Suspension:
Comfort/Sport/Sport+
MENGATUR PROGRAM BERKENDARA I
Select Individual.
Select and set a category.
① A sporty ESP mode can be set in conjunction with a sporty suspension mode.


G-Class - Owner's Manual
Driving and parking Automatic transmission
Transmisi otomatis
Tuas DIRECT SELECT
FUNGSI TUAS DIRECT SELECT

PERINGATAN
Risk of accident due to incorrect gearshifting
If the engine speed is higher than the idle speed and you engage the transmission position D or R, the vehicle may accelerate sharply.
If you engage the transmission position D or R when the vehicle is at a standstill, always depress the brake pedal firmly and do not accelerate at the same time.

PERINGATAN
Accident- and risk of injury with unsupervised children in the vehicle
JIKA ANDA MENINGGALKAN ANAK-ANAK TANPA PENGAWASAN DI DALAM KENDARAAN, MEREKA TERUTAMA DAPAT
- Open doors and thereby endanger other persons or road users.
• get out of the car and are hit by traffic.
• Operate vehicle equipment and become trapped, forexample.
SELAIN ITU, ANAK-ANAK JUGA DAPAT MENGGERAKKAN KENDARAAN, MISALNYA DENGAN:
• releasing the parking brake.
• change the gearbox setting.
- start the vehicle.
▶ Never leave children unattended in the vehicle.
When leaving the vehicle, always take the SmartKey with you and lock the vehicle.
▶ Keep the key out of reach of children.

G-Class - Owner's Manual
Driving and parking Automatic transmission

A
PERINGATAN
Risk of accident and injury when the transmission position is not engaged
The current transmission position will be highlighted on the driver's display.
If the selected transmission position is not highlighted, the vehicle may pull away in the wrong direction or roll away.
▶ After changing the transmission position, always check the transmission position display on the driver's display.
If the transmission position is not highlighted on the driver's display even after a short time:
▶ Pay attention to the display messages.
▶ Pull away carefully and check the engaged transmission position.
When parking, engage the parking brake and secure the vehicle against rolling away.
▶ Have the transmission checked immediately at a qualified specialist workshop.
Use the DIRECT SELECT lever to switch the transmission position. The current transmission position will be highlighted on the driver display.

P Park position
R Reverse gear
N Neutral
D Drive position
MEMASUKKAN GIGI MUNDUR R
A
PERINGATAN
Risk of accident due to incorrect gearshifting
If the engine speed is higher than the idle speed and you engage the transmission position or , the vehicle may accelerate sharply.
If you engage the transmission position D or R when the vehicle is at a standstill, always depress the brake pedal firmly and do not accelerate at the same time.

G-Class - Owner's Manual
Driving and parking Automatic transmission


▶ Depress the brake pedal and push the DIRECT SELECT lever upwards past the first point of resistance.
MENGGUNAKAN POSISI NETRAL N

PERINGATAN
Risk of accident due to incorrect gearshifting
If the engine speed is higher than the idle speed and you engage the transmission position D or R, the vehicle may accelerate sharply.
If you engage the transmission position [D] or [R] when the vehicle is at a standstill, always depress the brake pedal firmly and do not accelerate at the same time.

▶ Depress the brake pedal and push the DIRECT SELECT lever up or down to the first point of resistance.
To shift into neutral N with the vehicle switched on, push the selector lever up or down for several seconds to the first point of resistance.
Subsequently releasing the brake pedal will allow you to move the vehicle freely, e.g. to push it or tow it away.
LAKUKAN LANGKAH BERIKUT JIKA ANDA INGIN TRANSMISI OTOMATIS TETAP DALAM POSISI NETRAL [N], MESKIPUN KENDARAAN DIMATIKAN ATAU PINTU PENGEMUDI DIBUKA:
Depress the brake pedal and engage neutral N when the vehicle is at a standstill.
Release the brake pedal.
Switch off the vehicle.
The Risk of vehicle rolling away N activated manually No automatic switch to P message will appear on the driver display.


G-Class - Owner's Manual
Driving and parking Automatic transmission
If you then exit the vehicle leaving the key in the vehicle, the automatic transmission will remain in neutral N.
POSISI PARKIR Ⓟ AKAN OTOMATIS DIKUNCI KEMBALI SEGERA SETELAH SALAH SATU KONDISI BERIKUT TERPENUHI:
• You switch to transmission position D or R.
• You press the button P.
MENGGUNAKAN POSISI PARKIR P
PERINGATAN
Accident- and risk of injury with unsupervised children in the vehicle
JIKA ANDA MENINGGALKAN ANAK-ANAK TANPA PENGAWASAN DI DALAM KENDARAAN, MEREKA DAPAT TERUTAMA
- Open doors and thereby endanger other persons or road users.
• get out of the car and are hit by traffic.
• Operate vehicle equipment and become trapped, forexample.
SELAIN ITU, ANAK-ANAK JUGA DAPAT MENGGERAKKAN KENDARAAN, MISALNYA DENGAN:
• releasing the parking brake.
• change the gearbox setting.
- start the vehicle.
▶ Never leave children unattended in the vehicle.
When leaving the vehicle, always take the SmartKey with you and lock the vehicle.
Keep the key out of reach of children.

G-Class - Owner's Manual
Driving and parking Automatic transmission

CATATAN
Damage due to engaging park position P while the vehicle is rolling
If you shift the transmission into park position P while the vehicle is rolling, the transmission may be damaged.
If the vehicle is rolling, do not open a door.
▶ Only engage the park position P when the vehicle is stationary.

Observe the notes on parking the vehicle ( → page 326).
Depress the brake pedal until the vehicle comes to a standstill.
When the vehicle is stationary, press the button ①.
When the transmission position display P is shown, park position is engaged. If the transmission position display P is not shown, apply the parking brake and secure the vehicle to prevent it from rolling away.

Depending on the respective situation, it may take a short while before P engages. Therefore, always pay attention to the transmission position display.
POSISI PARKIR Ⓟ AKAN DIKUNCI OTOMATIS JIKA SALAH SATU KONDISI BERIKUT TERPENUHI:
• You switch the stationary vehicle off in transmission position [D] or [R].
- You open the driver's door when the vehicle is stationary in transmission position D or R.
- When the vehicle is rolling, you switch it off in transmission position D or R and slow it to a standstill.
- When the vehicle is rolling, you shift to transmission position [N], slow the vehicle to a standstill and open the driver's door when the vehicle is stationary.
• Automatic engagement of park position P is required for the vehicle.
To manoeuvre with the driver's door open, open the driver's door while the vehicle is stationary and engage transmission position [D] or [R] again.
G-Class - Owner's Manual
Driving and parking Automatic transmission

MENGGUNAKAN POSISI BERJALAN D

PERINGATAN
Risk of accident due to incorrect gearshifting
If the engine speed is higher than the idle speed and you engage the transmission position D or R, the vehicle may accelerate sharply.
If you engage the transmission position D or R when the vehicle is at a standstill, always depress the brake pedal firmly and do not accelerate at the same time.

Depress the brake pedal and push the DIRECT SELECT lever down past the first point of resistance.
KETIKA TRANSMISI OTOMATIS DALAM POSISI TRANSMISI [D], TRANSMISI AKAN MENGGANTI GIGI SECARA OTOMATIS. INI TERGANTUNG, ANTARA LAIN, PADA FAKTOR-FAKTOR BERIKUT:
• The selected drive program
• The position of the accelerator pedal
The vehicle speed
Menggoyangkan kendaraan agar bebas (kendaraan Mercedes-AMG)
Rocking the vehicle free may help to free the vehicle if it has become stuck in slush or snow.
To rock the vehicle free, move the DIRECT SELECT lever upwards and downwards past the pressure point to switch between transmission positions [D] and R.
The maximum speed for rocking the vehicle free is approximately 9 km/h.
Perpindahan gigi manual
PERMANENT SETTING

To activate/deactivate: press the button ①.
Manual shifting is activated: transmission position M and the current gear will appear on the driver display.


G-Class - Owner's Manual
Driving and parking Automatic transmission
Manual shifting is deactivated: transmission position D will appear on the driver display.
TEMPORARY SETTING

To activate: pull steering wheel gearshift paddle ① or ②.
Manual shifting will be activated for a short time. Transmission position M and the current gear will appear on the driver display.
To deactivate: pull and hold the steering wheel gearshift paddle 2.
Transmission position D will appear on the driver display.
To permanently shift the gears manually in drive program using the steering wheel gearshift paddles, select the M setting for the transmission.
SHIFTING

To shift up: pull the steering wheel gearshift paddle ②.
To shift down: pull the steering wheel gearshift paddle ①.
Perpindahan gigi manual (kendaraan Mercedes-AMG)
You can also permanently activate and deactivate manual gear-shifting via the M button on the Offroad switch panel or, as described below, via a steering wheel button. Activate/deactivate manual shifting via the M button ( → page 308).

Press upper or lower display button ① repeatedly until it displays the ⚙ or ⚙ symbol.
① If the display button does not show the symbol, then it is hidden. How functions are displayed and the order in which they are displayed can be set in the multimedia system ( → page 292).
G-Class - Owner's Manual
Driving and parking Automatic transmission

To activate/deactivate: press the corresponding button
SIMBOL MENUNJUKKAN POSISI TRANSMISI YANG SAAT INI DIPILIH:
• (red): manual shifting
• (blue): automatic transmission
PERPINDAHAN GIGI KE ATAS DAN KE BAWAH

CATATAN
Damage to the engine due to shifting up too late
The automatic transmission does not shift up in manual mode even when the engine's limiting speed is reached.
The fuel supply is interrupted in order to prevent the engine from overrevving.
Shift up before the engine speed reaches the red area in the rev counter.

To shift up: pull steering wheel gearshift paddle ②.
To shift down: pull steering wheel gearshift paddle

If the engine speed is too high or too low, you will not be able to change gear using the steering wheel gearshift paddles. In this case, segments ⚙ will light up red on the driver's display.
Rekomendasi perpindahan gigi
When manual gearshifting is activated, gearshift recommendation will assist you in adopting an economical driving style.

When gearshift recommendation ① appears on the driver's display, shift to the recommended gear.
Menggunakan kickdown
▶ Maximum acceleration: depress the accelerator pedal beyond the point of resistance.

G-Class - Owner's Manual
Driving and parking Automatic transmission
To protect against engine overrev, the automatic transmission will shift up to the next gear when maximum engine speed has been reached.
Fungsi mode meluncur
Gliding mode helps you to reduce fuel consumption when you employ an anticipatory driving style.
MODE MELUNCUR DITANDAI DENGAN HAL-HAL BERIKUT:
- The combustion engine is switched off depending on the driving situation. All the vehicle functions will remain active.
• The transmission position display is shown in green.
MODE MELUNCUR AKAN AKTIF JIKA KONDISI BERIKUT TERPENUHI:
• The ECO start/stop function is switched on.
• Drive program [E] is selected.
• The speed is within a suitable range.
The road's course is suitable, e.g. no steep inclines or tight bends.
• There is no trailer coupled to the trailer hitch and no bicycle rack fitted.
• The state of charge of the battery is sufficient.
- You do not depress the accelerator or brake pedal (except for light brake applications).
Gliding mode can also be activated if you have selected the "Eco" setting for the drive in drive program.

Gliding mode will be deactivated again if one of the conditions is no longer met.
MODE MELUNCUR JUGA DAPAT DICEGAH OLEH PARAMETER BERIKUT:
Incline
- Downhill gradient
- Temperature
Height
Speed
• Operating status of the engine
- Traffic situation
You can end gliding mode by operating a steering wheel gearshift paddle ( → page 308).

G-Class - Owner's Manual
Driving and parking Transfer case
Transfer case
Fungsi transfer case

PERINGATAN
Risk of skidding and accident on slippery road surfaces in LOW RANGE
PADA PERMUKAAN JALAN YANG LICIN, RODA DAPAT KEHILANGAN CAKRAAM PADA SITUASI BERIKUT KHUSUSNYA:
• If you take your foot off the accelerator pedal while driving.
• When you accelerate the vehicle quickly.
• If off-road ABS intervenes during braking.
▶ Never activate LOW RANGE off-road gear on slippery road surfaces.
Shift the transfer case to the HIGH RANGE on-road position or into the LOW RANGE off-road gear.
RENTANG PERPINDAHAN GIGI
- HIGH RANGE: on-road position for all normal driving conditions in all drive programs
- LOW RANGE: off-road gear for driving off road, fording and driving on steep inclines in the Trail or Rock drive program

In Mercedes-AMG vehicles, LOW RANGE off-road gear can be engaged in all drive programs.
KARAKTERISTIK GIGI RENDAH UNTUK MEDAN OFF-ROAD:
• reduced maximum permissible speed and increased tractive power
• altered transmission ratio by a factor of about three
• increased drive torque and braking torque
JANGAN GUNAKAN GIGI RENDAH DALAM SITUASI BERIKUT:
• when driving on paved public roads

G-Class - Owner's Manual
Driving and parking Transfer case
Memindahkan transfer case
PERPINDAHAN KE GIGI RENDAH UNTUK MEDAN OFF-ROAD

PERSYARATAN:
• You are not driving on a paved or public road.
- The vehicle has been started and you are not driving at a speed above 40 km/h.
Press the LOW RANGE button.
The shift request will stay active for a maximum of 30 seconds. If all requirements have not been fulfilled within this time, shift operation must be started again.
Shift the transmission to position N.
When the shift operation is complete, the LOW RANGE on message will appear on the driver display and an audible signal will sound. Depending on the on-road or off-road drive program that has previously been selected, the vehicle will automatically switch to drive program 📄 Trail or 🏠 Rock.

In Mercedes-AMG vehicles, the LOW RANGE off-road gear can be engaged in all drive programs. The drive program will not be changed automatically.
Shift the transmission to position D.
At speeds below 3 km/h, the brakes must be applied when you shift from N to D. At 3 km/h or higher, the brakes no longer have to be applied to shift to D.
If you switch off the vehicle in the LOW RANGE off-road gear, it will remain in LOW RANGE the next time you start the vehicle. The Trail or Rock drive program will remain activated.
PERPINDAHAN KE GIGI TINGGI UNTUK JALAN RAYA


G-Class - Owner's Manual
Driving and parking Transfer case
PERSYARATAN:
- The vehicle has been started and you are not driving at a speed above 70 km/h.
Press the LOW RANGE button.
The shift request will stay active for a maximum of 30 seconds. If all requirements have not been fulfilled within this time, shift operation must be started again.
Shift the transmission to position N.
When the shift operation is complete, the LOW RANGE off message will appear on the driver display and an audible signal will sound.
Shift the transmission to position D.
At speeds below 3 km/h, the brakes must be applied when you shift from N to D. At 3 km/h or higher, the brakes no longer have to be applied to shift to D.


G-Class - Owner's Manual
Driving and parking Differential locks

Kunci diferensial
Fungsi kunci diferensial

PERINGATAN
Risk of accident when differential lock is engaged on a firm surface
If you engage differential locks on a firm and non-slip surface, you may lose control of the vehicle.
▶ Always disengage the differential locks immediately on a firm, high-traction surface.

PERINGATAN
Risk of accident due to deactivated driving safety systems
When the differential locks are engaged, ABS, 4ETS, ESP ® and BAS are deactivated. Because of this, the wheels can lock while braking and the braking distance is increased.
▶ Always disengage the differential locks immediately on a firm, high-traction surface.
The differential locks improve vehicle traction during off-road driving and fording.

KENDARAAN INI MEMILIKI TIGA KUNCI DIFERENSIAL:
- The differential lock for the transfer case ① disables rotational speed compensation between the front and rear axles.
- The differential lock for the rear axle ② disables rotational speed compensation between the wheels of the rear axle.
- The differential lock for the front axle ③ disables rotational speed compensation between the wheels of the front axle.
BATASAN SISTEM
SAAT KUNCI DIFERENSIAL TERAKTIF, SISTEM BERIKUT AKAN DINONAKTIFKAN:
ABS ( → page 340)
• Active Distance Assist DISTRONIC (→ page 354)
• Active Brake Assist (→ page 369)


G-Class - Owner's Manual
Driving and parking Differential locks
• Active Parking Assist ( → page 401)
• Active Lane Keeping Assist ( → page 379)
• BAS ( → page 340)
• Hill Start Assist ( → page 348)
• ECO start/stop function (→ page 287)
- ESP 2 (→ page 341)
• HOLD function ( → page 347)
- Limiter (→ page 350)
• Cruise control ( → page 350)
• DSR ( → page 364)
• Blind Spot Assist (→ page 377)
Mengaktifkan/menonaktifkan pengunci diferensial
MENGUNCI DIFERENSIAL

PERSYARATAN:
• You are not driving on a paved or public road.
• You are driving at walking pace.
• The driven wheels are not spinning.
You can engage the differential locks in the following order: ①, ②, ③. Then press the respective buttons. Engage differential locks and ④ for the front and rear axles only if required.
If all conditions have been fulfilled, activation indicator lamps ⑤ will light up and the vehicle will automatically switch to the 📄 Rock drive program. As soon as the differential locks are active, function indicator lamps ④ will light up.
A message reading Differential lock active ABS and ESP unavailable See Owner's Manual will appear on the driver display and indicator and warning lamps and @ will light up.
If at least one requirement has not been fulfilled, a message reading Differential lock switch-on conditions not fulfilled will appear. Activation indicator lamps will flash three times and then go out.
The gear change must be restarted.
G-Class - Owner's Manual
Driving and parking Differential locks

DISENGAGE THE DIFFERENTIAL LOCKS

Press the buttons in the following order: ③, ②, ①.
or
To simultaneously disengage all differential locks: press button ①.
or
To disengage the differential locks for the rear and front axles: press button ②.
The differential locks will be disengaged only when function indicator lamps have gone out again.
If you switch off the vehicle with the differential locks engaged in the LOW RANGE off-road gear, the differential locks will remain engaged when the vehicle is next started and the Rock drive program will remain engaged.
If the transfer case was previously in the HIGH RANGE on-road position, the differential locks will be automatically disengaged when the vehicle is next started and the C drive program will be activated. In some cases, you will need to drive a few metres before the differential locks are properly
disengaged. Therefore, check whether function indicator lamps Ⓞ are lit up or off when you restart the vehicle.
PERHATIKAN SEMUA INFORMASI YANG DITAMPILKAN DI LAYAR PENGEMUDI:
• Indicator and warning lamps
• Display messages


G-Class - Owner's Manual
Driving and parking All-wheel drive
Penggerak semua roda
Drive is ideally distributed between all wheels on both axles on a continuous basis.
The all-wheel drive system improves vehicle traction together with ESP and 4ETS if a drive wheel spins due to insufficient grip.
If you fail to adapt your driving style, the all-wheel drive system can neither reduce the risk of an accident nor override the laws of physics. It cannot take into account road, weather or traffic conditions. The all-wheel drive system is only an aid. You are responsible in particular for maintaining a safe distance from the vehicle in front, for vehicle speed, for braking in good time and for staying in lane.
In wintry road conditions, the maximum effect of the all-wheel drive system can be achieved only if you use winter tyres (M+S tyres), with snow chains if necessary.


G-Class - Owner's Manual
Driving and parking Refuelling
Pengisian bahan bakar
Mengisi bahan bakar kendaraan

PERINGATAN
Risk of fire or explosion from fuel
Fuels are highly flammable.
▶ Fire, naked flames, smoking and creating sparks must be avoided.
Before refuelling, switch off the vehicle and, if fitted, the stationary heater and keep switched off during filling.

PERINGATAN
Risk of injury from fuels
Fuels are poisonous and hazardous to your health.
Do not swallow fuel or let it come into contact with skin, eyes or clothing.
Do not inhale fuel vapour.
▶ Keep children away from fuel.
▶ Keep doors and windows closed during the refuelling process.
If you or other people come into contact with fuel, observe the following:
▶ Immediately rinse fuel off your skin with soap and water.
If fuel comes into contact with your eyes, immediately rinse them thoroughly with clean water. Seek medical attention immediately.
If you swallow fuel, seek medical attention immediately. Do not induce vomiting.
▶ Change immediately out of clothing that has come into contact with fuel.

G-Class - Owner's Manual
Driving and parking Refuelling

PERINGATAN
Risk of fire and explosion due to electrostatic charge
Electrostatic charge can ignite fuel vapour.
Before you open the fuel filler cap or take hold of the pump nozzle, touch the metallic vehicle body.
To avoid creating another electrostatic charge, do not get into the vehicle again during the refuelling process.

PERINGATAN
Risk of fire from fuel mixture
Vehicles with a diesel engine:
If you mix diesel fuel with petrol, the flash point of the fuel mixture is lower than that of pure diesel fuel.
While the vehicle is running, component parts in the exhaust system may overheat without warning.
▶ Never refuel using petrol.
▶ Never mix petrol with diesel fuel.


CATATAN
Damage caused by the wrong fuel
Vehicles with a petrol engine:
Even small amounts of the wrong fuel could result in damage to the fuel system, the engine and the emission control system.
▶ Refuel only with unleaded, sulphur-free spark-ignition engine fuel.
Petrol can contain up to 25 Vol.-% ethanol by volume.
▶ See the information label in fuel filler flap for compatible fuels.
Further information about compatible fuels can be obtained at a qualified specialist workshop.
Throughout Europe you can also find the compatibility labels on the fuel pump or pump nozzle suitable for your vehicle.
JANGAN PERNAH MENGISI BAHAN BAKAR DENGAN SALAH SATU BAHAN BAKAR BERIKUT:
- Diesel
• Regular petrol with an octane number lower than 91 RON
• Petrol with more than 3% methanol by volume, e.g. M15, M30
• Petrol with metallic additives
If you have accidentally refuelled with the wrong fuel:
▶ Do not switch on the vehicle.

G-Class - Owner's Manual
Driving and parking Refuelling
Consult a qualified specialist workshop.

CATATAN
Damage caused by the wrong fuel
Vehicles with a diesel engine:
Even small amounts of the wrong fuel could result in damage to the fuel system, the engine and the emission control system.
▶ Refuel using only sulphur-free diesel fuel.
In countries without sulphur-free diesel fuel, refuel using only low-sulphur diesel fuel with a sulphur content of less than 50 ppm.
JANGAN PERNAH MENGISI BAHAN BAKAR DENGAN SALAH SATU BAHAN BAKAR BERIKUT:
Petrol
- Marine diesel
- Heating oil
• Pure fatty acid methyl ester or vegetable oil
• Paraffin or kerosene
If you have accidentally refuelled with the wrong fuel:
Do not switch on the vehicle.
Consult a qualified specialist workshop.

CATATAN
Shorter maintenance intervals due to fuel with increased bio-contents
When fuels with increased bio-contents are used, fuel residues with increased separation volume may occur. If fuels with increased bio-contents (compatibility marks B10 and B20) are used on an ongoing basis, this may lead to shorter maintenance intervals for the fuel filter.
If the vehicle is not used for an extended period of time (several weeks):
Refuel the vehicle beforehand with diesel fuel with bio-contents < 10% to avoid possible deposits of bio-contents in the fuel tank.

CATATAN
Do not use diesel to refuel vehicles with a petrol engine
JIKA ANDA SECARA TIDAK SENGAJA MENGISI BAHAN BAKAR YANG SALAH:
\- Do not switch on the vehicle. Otherwise fuel can enter the engine. Even small amounts of the wrong fuel could result in damage to the fuel system and the engine. The repair costs are high.
Consult a qualified specialist workshop.
▶ Have the fuel tank and fuel lines drained completely.

G-Class - Owner's Manual
Driving and parking Refuelling


CATATAN
Do not refuel diesel-engined vehicles with petrol
JIKA ANDA SECARA TIDAK SENGAJA MENGISI BAHAN BAKAR YANG SALAH:
- Do not switch on the vehicle. Otherwise fuel can enter the engine. Even small amounts of the wrong fuel could result in damage to the fuel system and the engine. The repair costs are high.
Consult a qualified specialist workshop.
▶ Have the fuel tank and fuel lines drained completely.

CATATAN
Damage to the fuel system due to overfilling the fuel tank
▶ Only fill the fuel tank until the pump nozzle switches off.
If too much fuel has been added due, for example, to a faulty filling pump:
▶ Do not switch on the vehicle.
Consult a qualified specialist workshop.

CATATAN
Fuel may spray out when you remove the fuel pump nozzle
▶ Only fill the fuel tank until the pump nozzle switches off.
Persyaratan:
• The vehicle is unlocked.
Observe the notes on operating fluids and fuel.
The recommended octane number for your vehicle can be found on the information label on the inside of the fuel filler flap.

Fuel filler flap
② Fuel filler cap
3 Fuel type
QR code for rescue card
5 Tyre pressure table
Press on the centre rear of fuel filler flap ①.
▶ Turn the fuel filler cap counter-clockwise and remove it.
Completely insert the pump nozzle into the tank filler neck, hook in place and refuel.


G-Class - Owner's Manual
Driving and parking Refuelling
▶ Only fill the fuel tank until the pump nozzle switches off.
① Vehicles with diesel engine: The tank filler neck is designed for refuelling at diesel filling pumps.
① Vehicles with diesel engine: Do not run the fuel tank empty. When the fuel tank is completely empty, top up with at least 5 l diesel before starting the vehicle.
① Vehicles with diesel engine: Use a filler neck with a large diameter for vehicles with a diesel engine when topping up fuel from a canister. Otherwise, the filler neck cannot slide into the tank filler neck.
Replace the fuel filler cap on the tank filler neck and turn clockwise until it engages audibly.
Close fuel filler flap ①.
AdBlue ® (kendaraan dengan mesin diesel saja)
CATATAN TENTANG PENGISIAN ADBLUE
AdBlue ® is a water-soluble fluid for the NOx exhaust gas aftertreatment of diesel engines. In order for the exhaust gas aftertreatment to function properly, only use AdBlue ® in accordance with ISO 22241.
ADBLUE 2 DICIRIKAN OLEH HAL BERIKUT:
non-toxic
• colourless and odourless
• non-flammable
If you open the AdBlue ® tank, small amounts of ammonia vapour may be released. Only fill the AdBlue ® tank in well-ventilated areas.
Do not let AdBlue ® come into contact with skin, eyes or clothes. Keep AdBlue ® away from children.
Do not ingest AdBlue ® . If AdBlue ® is swallowed, immediately rinse your mouth out thoroughly. Drink plenty of water. Seek medical attention at once.
Observe the notes on operating fluids ( → page 745).
ADBLUE ® TERSEDIA DI SINI:
- AdBlue can be topped up by fast service at a qualified specialist workshop, e.g. a Mercedes-Benz Service Centre.
- AdBlue is available at many filling stations from AdBlue filling pumps.
Alternatively, AdBlue is available at qualified specialist workshops, e.g. Mercedes-Benz Service Centres, and at many filling stations in AdBlue refill canisters or AdBlue refill bottles.
① Ensure the connection between the refill container and vehicle filler neck does not drip.


G-Class - Owner's Manual
Driving and parking Refuelling
PENGISIAN ADBLUE®

CATATAN
Engine damage due to AdBlue ® being in the fuel
AdBlue ® must not be used to fill the fuel tank.
▶ Only use AdBlue ® to fill the AdBlue ® tank.
Do not overfill the AdBlue ® tank.

CATATAN
Contamination of the vehicle interior due to AdBlue ® leakage
After topping up, carefully close the AdBlue® refill container.
- Avoid carrying AdBlue ® refill containers permanently in the vehicle.
Persyaratan:
• The vehicle is unlocked.
PESAN-PESAN BERIKUT MUNCUL SECARA BERURUTAN DI LAYAR PENGEMUDI KETIKA TANGKI ADBLUE® PERLU DIISI ULANG:
- Refill AdBlue See Owner's Manual. The AdBlue® level has fallen below the reserve range. Add at least 5 l AdBlue®.
- Top up AdBlue Emergency op. in XXX km See Owner's Manual. The low AdBlue ® level will lead to limited performance after the remaining distance displayed has been driven. Add at least 5 l AdBlue ® .

- Top up AdBlue XX,X I Emerg. op.: max. XXX km/h Start not poss. in XXX km. The low AdBlue * level will lead to limited performance from the speed displayed. After the remaining distance displayed has been driven, it will no longer be possible to start the vehicle. Add at least the indicated quantity of AdBlue * .
- Top up XX,X I AdBlue Switch vehicle on, wait 60 sec. or engine start not possThe AdBlue ® tank is empty. You can no longer start the vehicle. Add at least the indicated quantity of AdBlue ® . Switch on the vehicle and wait approx. 60 seconds. Start the vehicle.
You can display the AdBlue * range and level on the driver display in the menu Service.
The AdBlue ® range indicated is highly dependent upon driving style and operating conditions. The actual range can therefore deviate from the calculated range.
MEMBUKA TUTUP PENGISI ADBLUE®


G-Class - Owner's Manual
Driving and parking Refuelling
Press on the centre rear of fuel filler flap ①.
Turn AdBlue ® filler cap 2 counter-clockwise and remove it.
① You can also place the AdBlue ® filler cap in the filler cap holder in the hinge arm of the fuel filler flap.
MENGISI ULANG ADBLUE 1
Mercedes-Benz recommends that you top up AdBlue ® at a pump system. If there is no AdBlue ® pump system available you can also top up AdBlue ® with a canister.

Unscrew the cap of AdBlue® refill canister 4.
Screw disposable hose Ⓔ onto the opening of AdBlue® refill canister Ⓔ until hand-tight.
Screw disposable hose Ⓞ onto the filler neck of the vehicle until hand-tight.
Lift up and tip AdBlue® refill canister
The filling process stops when the AdBlue ® tank is completely full.
AdBlue ® refill canister 📷 can be removed when it has been only partially emptied.
Unscrew disposable hose ③ and close AdBlue® refill canister ④ in reverse order.
Replace AdBlue ® filler cap ② and turn it clockwise until it audibly engages.
Close fuel filler flap 1.
▶ Switch on the vehicle for at least 60 seconds.
If it was no longer possible to start the vehicle due to the empty AdBlue ® tank, it takes up to 60 seconds for topping up to be detected.
Start the vehicle.
① Avoid storing AdBlue ® refill containers permanently in the vehicle.


G-Class - Owner's Manual
Driving and parking Parking
Parkir
Memparkir kendaraan

PERINGATAN
Risk of accident and injury caused by an insufficiently secured vehicle rolling away
If the vehicle is not securely parked sufficiently, it can roll away in an uncontrolled way even at a slight downhill gradient.
On uphill or downhill gradients, turn the front wheels so that the vehicle rolls towards the kerb if it starts moving.
▶ apply the parking brake.
▶ Switch the transmission to position P.

PERINGATAN
Risk of fire caused by hot exhaust system parts
Flammable materials such as leaves, grass or twigs may ignite.
Park the vehicle so that no flammable material can come into contact with hot vehicle components.
In particular, do not park on dry grassland or harvested grain fields.


PERINGATAN
Accident- and risk of injury with unsupervised children in the vehicle
JIKA ANDA MENINGGALKAN ANAK-ANAK TANPA PENGAWASAN DI DALAM KENDARAAN, MEREKA TERUTAMA DAPAT
- Open doors and thereby endanger other persons or road users.
• get out of the car and are hit by traffic.
• Operate vehicle equipment and become trapped, forexample.
SELAIN ITU, ANAK-ANAK JUGA DAPAT MENGGERAKKAN KENDARAAN, MISALNYA DENGAN:
• releasing the parking brake.
• change the gearbox setting.
- start the vehicle.
▶ Never leave children unattended in the vehicle.
When leaving the vehicle, always take the SmartKey with you and lock the vehicle.
▶ Keep the key out of reach of children.
G-Class - Owner's Manual
Driving and parking Parking


CATATAN
Damage to the vehicle due to it rolling away
▶ Always secure the vehicle against rolling away.

Bring the vehicle to a standstill by depressing the brake pedal.
On uphill or downhill gradients, turn the front wheels so that the vehicle will roll towards the kerb if it starts moving.
Apply the electric parking brake.
Engage transmission position P with the vehicle stationary and the brake pedal depressed ( → page 306).
Switch off the vehicle by pressing the button ①.
Release the service brake slowly.
Exit and then lock the vehicle.
When you park the vehicle, you can still operate the side windows and the sliding sunroof for approximately four minutes as long as the driver's door is closed.
Pembuka pintu garasi (HomeLink ® )
MEMPROGRAM TOMBOL HOMELINK®

BAHAYA
Danger to life from toxic exhaust gas in enclosed spaces
Combustion engines emit toxic exhaust gases such as carbon monoxide. Inhaling these exhaust gases is hazardous to health and leads to poisoning.
▶ Never leave the engine or, if present, the stationary heater running in an enclosed space without sufficient ventilation.

PERINGATAN
Risk of injury by becoming trapped when opening and closing a garage door
When you operate or program a garage door with an integrated garage door opener, persons can become trapped or struck by the garage door if they stand within its range of movement.
Always make sure that nobody is within the range of the garage door's movement.
G-Class - Owner's Manual
Driving and parking Parking
HANYA OPERASIKAN PINTU BERIKUT MENGGUNAKAN PEMBUKA PINTU GARASI:
• Doors with a safety stop and reversing feature
• Doors that comply with the applicable safety standards
Before programming the garage door opener, park the vehicle outside the garage. Ensure that the vehicle is switched on but not started.
Persyaratan:
- The vehicle has been parked outside the garage or outside the range of movement of the door.
• The vehicle is switched on.
• The vehicle has not been started.
• The original remote control for the garage door is used.
The garage door opener function is always available when the vehicle is switched on.

Programming procedure: press the button to be programmed (①, ② or ③) and then release it.
If the selected button is not programmed, the indicator lamp ● flashes orange slowly.
To reprogram a button that has already been programmed, press the corresponding button until the indicator lamp Ⓞ starts to flash orange slowly. This may take up to 20 seconds.
Point the remote control ⑤ from a distance of between 5 cm and 30 cm underneath the mirror towards button ①, ② or ③.
Press and hold the button ⑥ on the remote control ⑤ until one of the following signals appears:
\- The indicator lamp ④ lights up green continuously. Programming is complete.
• The indicator lamp ④ flashes green. Programming was successful.
Tombol HomeLink* yang dipilih sekarang telah diprogram.
Test the programming: press and hold the HomeLink button for two seconds.
Release the HomeLink ® button and, after three seconds, press and hold it again for two seconds.
Repeat this process once more (three times in total).
If you have a garage door system with fixed code or QuickTrain technology, pressing the programmed HomeLink® button opens or closes the garage door.

G-Class - Owner's Manual
Driving and parking Parking
If the garage door is not working and the indicator lamp 🔒 is flashing quickly, you must perform rolling code synchronisation (→ page 329).
MELAKUKAN SINKRONISASI KODE BERJALAN (JIKA DIPERLUKAN)

BAHAYA
Danger to life from toxic exhaust gas in enclosed spaces
Combustion engines emit toxic exhaust gases such as carbon monoxide. Inhaling these exhaust gases is hazardous to health and leads to poisoning.
▶ Never leave the engine or, if present, the stationary heater running in an enclosed space without sufficient ventilation.

PERINGATAN
Risk of injury by becoming trapped when opening and closing a garage door
When you operate or program a garage door with an integrated garage door opener, persons can become trapped or struck by the garage door if they stand within its range of movement.
Always make sure that nobody is within the range of the garage door's movement.
HANYA OPERASIKAN PINTU BERIKUT MENGGUNAKAN PEMBUKA PINTU GARASI:
• Doors with a safety stop and reversing feature
• Doors that comply with the applicable safety standards
Before programming the garage door opener, park the vehicle outside the garage. Ensure that the vehicle is switched on but not started.
The garage door opener function is always available when the vehicle is switched on.
If the garage door is not working and the indicator lamp in the inside mirror is flashing quickly, your garage door system operates with rolling code. In this case, you must perform rolling code synchronisation.
Information on rolling code synchronisation: In the following steps, you must press the "Learn" "Program" or "Smart" button on the garage door opener in your garage. Please note that the names of the buttons may vary depending on the manufacturer. For more information, refer to the owner's manual for the garage door opener.
• Have someone help you so that the steps can be carried out faster and more easily.
- You may need a ladder or something of similar stability to help you reach the buttons. Do not stand on your vehicle to carry out these steps!
- Certain timings must be observed for the following steps. It may be necessary to try carrying out the steps several times.

G-Class - Owner's Manual
Driving and parking Parking


Find the "Learn", "Program" or "Smart" button on the garage door opener in the garage.
The shape and colour of the buttons vary depending on the manufacturer.
Press the "Learn", "Program" or "Smart" button.
Depending on the manufacturer of the garage door opener, an indicator lamp may start to flash.
Within 30 seconds, press and hold the HomeLink® button in the vehicle for three seconds.
Press the HomeLink ® button again and hold it for three seconds.
Repeat this process once more (three times in total).
Rolling code synchronisation is now complete. HomeLink ® should now activate your garage door equipped with a rolling code.
① Please note that some garage door openers may require the HomeLink® button to be pressed for different lengths of time during the synchronisation process. Observe the owner's manual for the garage door manufacturer.

More information can be found on the https://www.homelink.com
MENGATASI MASALAH SAAT MEMPROGRAM HOMELINK*
BAHAYA
Danger to life from toxic exhaust gas in enclosed spaces
Combustion engines emit toxic exhaust gases such as carbon monoxide. Inhaling these exhaust gases is hazardous to health and leads to poisoning.
▶ Never leave the engine or, if present, the stationary heater running in an enclosed space without sufficient ventilation.
PERINGATAN
Risk of injury by becoming trapped when opening and closing a garage door
When you operate or program a garage door with an integrated garage door opener, persons can become trapped or struck by the garage door if they stand within its range of movement.
▶ Always make sure that nobody is within the range of the garage door's movement.
HANYA OPERASIKAN PINTU BERIKUT MENGGUNAKAN PEMBUKA PINTU GARASI:
• Doors with a safety stop and reversing feature
• Doors that comply with the applicable safety standards


G-Class - Owner's Manual
Driving and parking Parking
Before programming the garage door opener, park the vehicle outside the garage. Ensure that the vehicle is switched on but not started.
The garage door opener function is always available when the vehicle is switched on.
Ensure that the remote control used for programming is approved by the manufacturer of the garage door opener and activates the door.

Replace the batteries in the remote control ⑤.
Hold the remote control ⑤ at various angles in front of the inside mirror from a distance of between 5 cm and 30 cm.
Hold each position for at least 25 seconds before trying another position.
Hold the remote control ⑥ at the same angles at various distances in front of the inside mirror. You should test every position for at least 25 seconds before trying another position.
On remote controls that only transmit for a limited period, press the button ⑥ on the remote control ⑤ again before transmission ends.
i INFORMASI DUKUNGAN DAN PEMROGRAMAN TAMBAHAN:
• European Union (EU): call the HomeLink® hotline on (0) 0800 046 635 465 (free of charge) or +49 (0) 7132 3455 733 (charges apply)
Please note that the free number may not be available depending on your mobile phone provider.
• Visit the https://www.homelink.com
MENGHAPUS TOMBOL HOMELINK®
BAHAYA
Danger to life from toxic exhaust gas in enclosed spaces
Combustion engines emit toxic exhaust gases such as carbon monoxide. Inhaling these exhaust gases is hazardous to health and leads to poisoning.
▶ Never leave the engine or, if present, the stationary heater running in an enclosed space without sufficient ventilation.
PERINGATAN
Risk of injury by becoming trapped when opening and closing a garage door
When you operate or program a garage door with an integrated garage door opener, persons can become trapped or struck by the garage door if they stand within its range of movement.
Always make sure that nobody is within the range of the garage door's movement.
G-Class - Owner's Manual
Driving and parking Parking
HANYA OPERASIKAN PINTU BERIKUT DENGAN MENGGUNAKAN PEMBUKA PINTU GARASI:
• Doors with a safety stop and reversing feature
• Doors that comply with the applicable safety standards
Before programming the garage door opener, park the vehicle outside the garage. Ensure that the vehicle is switched on but not started.
The garage door opener function is always available when the vehicle is switched on.


Press and hold buttons ① and ③.
The indicator lamp 4 lights up orange.
If the indicator lamp ● flashes green, release buttons ① and ②.
This may take up to 10 seconds.
The entire memory has been deleted.
MODE PEMROGRAMAN KHUSUS (JIKA DIPERLUKAN)

BAHAYA
Danger to life from toxic exhaust gas in enclosed spaces
Combustion engines emit toxic exhaust gases such as carbon monoxide. Inhaling these exhaust gases is hazardous to health and leads to poisoning.
▶ Never leave the engine or, if present, the stationary heater running in an enclosed space without sufficient ventilation.

PERINGATAN
Risk of injury by becoming trapped when opening and closing a garage door
When you operate or program a garage door with an integrated garage door opener, persons can become trapped or struck by the garage door if they stand within its range of movement.
Always make sure that nobody is within the range of the garage door's movement.
Before programming the garage door opener, park the vehicle outside the garage. Ensure that the vehicle is switched on but not started.
① The garage door opener function is always available when the vehicle is switched on.
D-mode: A special programming mode is required for some devices available on the market. Only use this if this is expressly stated in the program-


G-Class - Owner's Manual
Driving and parking Parking
ming instructions in the owner's manual for the device or on the https://www.homelink.com.
UR-mode: UR-mode is a special programming mode that is only required for use with the HomeLink ® universal receiver. The HomeLink ® universal receiver must be purchased separately. It is required to connect incompatible garage door openers or garage doors with HomeLink ® .

Rem parkir elektrik
FUNGSI REM PARKIR ELEKTRIK (PENGEREMAN OTOMATIS)

PERINGATAN
Accident- and risk of injury with unsupervised children in the vehicle
JIKA ANDA MENINGGALKAN ANAK-ANAK TANPA PENGAWASAN DI DALAM KENDARAAN, MEREKA TERUTAMA DAPAT
- Open doors and thereby endanger other persons or road users.
• get out of the car and are hit by traffic.
• Operate vehicle equipment and become trapped, forexample.
SELAIN ITU, ANAK-ANAK JUGA DAPAT MENGGERAKKAN KENDARAAN, MISALNYA DENGAN:
• releasing the parking brake.
• change the gearbox setting.
- start the vehicle.
▶ Never leave children unattended in the vehicle.
When leaving the vehicle, always take the SmartKey with you and lock the vehicle.
▶ Keep the key out of reach of children.

G-Class - Owner's Manual
Driving and parking Parking
REM PARKIR ELEKTRIK BEKERJA JIKA TRANSMISI BERADA DI POSISI P DAN SALAH SATU KONDISI BERIKUT TERPENUHI:
• The vehicle is switched off.
The driver's seat belt is not fastened and the driver's door is opened.
To prevent application: pull the handle of the electric parking brake ( → page 334).
When the electric parking brake is applied, the red [P] indicator lamp lights up on the driver display.
The electric parking brake is not automatically applied if the vehicle is switched off by the ECO start/stop function.
FUNGSI REM PARKIR ELEKTRIK (PELEPASAN OTOMATIS) REM PARKIR ELEKTRIK LEPAS KETIKA KONDISI BERIKUT TERPENUHI:
• The driver's door is closed.
• The vehicle has been started.
- The transmission is in position D or R and you depress the accelerator pedal, or you shift from transmission position P to D or R on level ground.
• If the transmission is in position R, the rear door must be closed.
- The driver's seat belt is not properly fastened.
If the driver's seat belt is not fastened, the following condition must be met:
\- You shift from transmission position P.
When the electric parking brake is released, the red Ⓓ indicator lamp in the driver display goes out.
MENGEREMKAN/MELEPASKAN REM PARKIR ELEKTRIK SECARA MANUAL
PERINGATAN
Accident- and risk of injury with unsupervised children in the vehicle
JIKA ANDA MENINGGALKAN ANAK-ANAK TANPA PENGAWASAN DI DALAM KENDARAAN, MEREKA TERUTAMA DAPAT
- Open doors and thereby endanger other persons or road users.
• get out of the car and are hit by traffic.
• Operate vehicle equipment and become trapped, forexample.
SELAIN ITU, ANAK-ANAK JUGA DAPAT MENGGERAKKAN KENDARAAN, CONTOHNYA DENGAN:
• releasing the parking brake.
• change the gearbox setting.
- start the vehicle.
▶ Never leave children unattended in the vehicle.
When leaving the vehicle, always take the SmartKey with you and lock the vehicle.
▶ Keep the key out of reach of children.

G-Class - Owner's Manual
Driving and parking Parking
APPLY

When the vehicle is stationary, push handle ⓚ.
The red Ⓔ indicator lamp on the driver display lights up.
The electric parking brake is only securely applied if the red indicator lamp is lit continuously.
RELEASE

\- Switch on the vehicle.
- Pull handle (1).
The red (2) indicator lamp on the driver display goes out.
EMERGENCY BRAKING

Press and hold handle ①.
As long as the vehicle is in motion, the Release parking brake message is displayed and the red Ⓓ indicator lamp flashes.
When the vehicle has been braked to a standstill, the electric parking brake is applied. The red Ⓓ indicator lamp on the driver display lights up.
i Have the electric parking brake checked at a qualified specialist workshop after emergency braking.

G-Class - Owner's Manual
Driving and parking Parking

Informasi tentang deteksi tabrakan untuk kendaraan yang diparkir
If an impact is detected with tow-away protection switched on in the vehicle, and collision detection is active, a message is displayed in the multimedia system when the vehicle is switched on.
ANDA AKAN MENERIMA INFORMASI MENGENAI HAL BERIKUT:
• The area of the vehicle that may have been damaged.
• The force of the impact.
SITUASI BERIKUT DAPAT MENYEBABKAN AKTIVASI TIDAK SENGAJA:
• The parked vehicle is moved, forexample in a double-decker garage.
• The locked vehicle is parked in a car wash.
Deactivate tow-away protection to prevent inadvertent activation. If you deactivate tow-away protection, collision detection will also be deactivated.
You can permanently deactivate collision detection via the multimedia system ( → page 336).
BATASAN SISTEM
DETEKSI MUNGKIN TERBATAS DALAM SITUASI BERIKUT:
- if damage is caused to the vehicle without impact, for example, if an outside mirror is torn off or the paint is damaged by a key
• in the event of an impact involving the collision partner at low speed
• if the electric parking brake is not applied
① You are responsible for your vehicle. You should therefore always ensure that your vehicle is free of damage and is roadworthy.
Mengatur deteksi tabrakan untuk kendaraan yang diparkir
Multimedia system:
Settings Vehicle Open/close Vehicle protection
Select Tow-away protec..
▶ Activate or deactivate the Collision notification function.
Catatan tentang memarkir kendaraan
If you leave the vehicle parked up for longer than six weeks, it may suffer damage through disuse.
The 12 V battery may also be impaired or damaged by heavy discharging.
① Further information can be obtained at a qualified specialist workshop.
G-Class - Owner's Manual
Driving and parking Parking

Mode siaga (perpanjangan periode penggunaan baterai starter)
FUNGSI MODE SIAGA
① This function is not available for all models.
If standby mode is activated, energy loss will be minimised during extended idle times.
MODE SIAGA DITANDAI DENGAN HAL BERIKUT:
• The starter battery is preserved.
• The maximum idle time appears on the driver display.
• The connection to online services is interrupted.
• The ATA (anti-theft alarm system) is not available.
- The interior protection and tow-away protection functions are not available.
- The function for detecting collisions when the vehicle is parked is not available.
JIKA KONDISI BERIKUT TERPENUHI, MODE SIAGA DAPAT DIAKTIFKAN ATAU DINONAKTIFKAN MENGGUNAKAN SISTEM MULTIMEDIA:
• The vehicle is switched on.
• The vehicle has not been started.
Exceeding the vehicle's displayed idle time may cause inconvenience; i.e. it cannot be guaranteed that the starter battery will reliably start the vehicle.
ISI ULANG BATERAI STARTER DALAM SITUASI BERIKUT:
• If the vehicle's idle time needs to be extended.
• If the starter battery state of charge is insufficient for standby mode.
Standby mode is automatically deactivated when the vehicle is switched on.
MENGAKTIFKAN/MENONAKTIFKAN MODE SIAGA (MEMARKIR KENDARAAN) Persyaratan
• The vehicle is switched on.
• The vehicle has not been started.
Multimedia system:
Settings Vehicle Other functions
▶ Activate or deactivate Standby mode.

G-Class - Owner's Manual
Driving and parking Driving and driving safety systems

Mengemudi dan sistem keselamatan berkendara
Sistem kemudi dan tanggung jawab Anda
Your vehicle is equipped with driving systems which assist you in driving, parking and manoeuvring the vehicle. The driving systems are only aids. They are not a substitute for you paying attention to your surroundings and do not relieve you of your responsibility pertaining to road traffic law. The driver is always responsible for maintaining a safe distance to the vehicle in front, for vehicle speed, for braking in good time and for staying in lane. Pay attention to the traffic conditions at all times and intervene when necessary. Be aware of the limitations regarding the safe use of these systems.
Driving systems can neither reduce the risk of accident if you fail to adapt your driving style nor override the laws of physics. They cannot always take into account road, weather or traffic conditions.
Some driving systems can regulate or limit the speed to a previously set value. Draw attention to the stored speed when changing drivers.
Informasi tentang sensor dan kamera kendaraan
PERINGATAN
Risk of accident if the detection capability of the vehicle sensors or cameras is impaired
If the areas of the vehicle sensors or cameras are obscured, damaged or dirty, some driving and driving safety systems may no longer function correctly. There is a risk of an accident.
▶ Always keep the areas of the vehicle sensors and cameras clear of obstructions and clean.
Have damage to the bumpers, radiator grille or stone chipping in the area of the cameras in the windscreen repaired at a qualified specialist workshop.
Some driving and driving safety systems use cameras as well as radar or ultrasonic sensors to monitor the area in front of, behind or next to the vehicle.


G-Class - Owner's Manual
Driving and parking Driving and driving safety systems

① Multifunction camera
② Cameras in the exterior mirrors
3 Front radar
Front camera
Corner radars
6 Ultrasonic sensors
7 Reversing camera
In particular, keep the sensor and camera areas free of dirt, ice or slush. (→ page 620). The sensors and cameras must not be covered and the detection ranges around them must be kept free. Do not attach additional number plate brackets, advertisements, stickers, car foils or rock chip protection films in the detection range of the sensors and cameras. Make sure there are no overhanging loads protruding into the detection range.
If there is damage to a bumper or the radiator shell, or after an impact, have the function of the sensors checked at a qualified specialist workshop. Have damage or stone chipping in the area of the cameras in the windscreen repaired at a qualified specialist workshop.

Ikhtisar sistem kemudi dan sistem keselamatan berkendara
SISTEM KEMUDI DAN SISTEM KESELAMATAN BERKENDARA
• ABS ( → page 340)
• Off-road ABS ( → page 340)
BAS ( → page 340)
- ESP 2 (→ page 341)
- ESP (Mercedes-AMG vehicles) (→ page 342)
- ESP ® trailer stabilisation (→ page 344)
EBD ( → page 346)
• HOLD function ( → page 347)
• Hill Start Assist ( → page 348)
• Adaptive Brake Lights ( → page 348)
• ATTENTION ASSIST (→ page 348)
• Cruise control ( → page 350)
• Traffic Sign Assist (→ page 373)
• Traffic light view ( → page 377)
• Suspension with adaptive damping adjustment (→ page 382)
• AMG RIDE CONTROL ( → page 382)
• AMG ACTIVE RIDE CONTROL (→ page 383)
PAKET BANTUAN MENGEMUDI
• Active Distance Assist DISTRONIC ( → page 354)
• Active Speed Limit Assist ( → page 361)
• Route-based speed adaptation ( → page 362)
• DSR ( → page 364)

G-Class - Owner's Manual
Driving and parking Driving and driving safety systems
• Active Brake Assist ( → page 369)
• Active Steering Assist ( → page 366)
• Active Emergency Stop Assist ( → page 368)
• Blind Spot Assist with exit warning ( → page 377)
• Active Lane Keeping Assist ( → page 379)
SISTEM PARKIR
• Reversing camera ( → page 389)
• 360° camera ( → page 391)
• Parking Assist PARKTRONIC ( → page 398)
• Active Parking Assist ( → page 401)
• Trailer Manoeuvring Assist ( → page 410)
Availability of individual functions depends on the respective equipment and country of use.
Fungsi ABS
SISTEM REM ANTI TERKUNCI (ABS) MENGATUR TEKANAN REM DALAM SITUASI BERKENDARA KRITIS:
- During braking, for instance, at maximum full-stop braking or if there is insufficient tyre traction, the wheels are prevented from locking.
• Vehicle steerability while braking is ensured.
If ABS intervenes when braking, you will feel a pulsing in the brake pedal. The pulsating brake pedal can be an indication of hazardous road conditions and can serve as a reminder to take extra care while driving.

BATASAN SISTEM
• ABS is active from speeds of approximately 5 km/h.
- ABS may be impaired or may not function if a malfunction has occurred and the yellow ☑ ABS warning lamp lights up continuously after the vehicle is started.
Fungsi ABS off-road
FUNGSI KONTROL ABS DIMODIFIKASI SAAT BERALIH KE PROGRAM BERKENDARA OFF-ROAD:
• The front wheels lock cyclically during braking.
• The braking distance is shortened due to the digging-in effect.
BATASAN SISTEM
• If Off-road ABS intervenes, the ability to steer may be restricted.
Fungsi BAS
⚠ WARNING
Risk of an accident caused by a malfunction in BAS (Brake Assist System)
If BAS is malfunctioning, the braking distance in an emergency braking situation is increased.
▶ Depress the brake pedal with full force in emergency braking situations. ABS prevents the wheels from locking.
The Brake Assist System (BAS) supports your emergency braking situation with additional brake force.

G-Class - Owner's Manual
Driving and parking Driving and driving safety systems
JIKA ANDA MENEKAN PEDAL REM DENGAN CEPAT, BAS AKTIF:
• BAS automatically boosts the brake pressure.
• BAS can shorten the braking distance.
• ABS prevents the wheels from locking.
The brakes will function as usual once you release the brake pedal. BAS is deactivated.
ESP® (Electronic Stability Program)
FUNGSI ESP®
KARAKTERISTIK SAAT ESP® AKTIF
i ESP e is not available in the 📄 Rock and 📄 Sand drive programs.
PROGRAM STABILITAS ELEKTRONIK (ESP®) DAPAT MEMANTAU DAN MENINGKATKAN STABILITAS BERKENDARA DAN TRAKSI DALAM SITUASI BERIKUT DALAM BATAS FISIK:
• when starting off on wet or slippery roads
- when braking
JIKA KENDARAAN MENYIMPANG DARI ARAH YANG DIINGINKAN PENGEMUDI, ESP® DAPAT MENSTABILKAN KENDARAAN DENGAN CARA INTERVENSI BERIKUT:
• One or more wheels are individually braked.
• The engine output is adapted according to the situation.

SAAT ESP® DINONAKTIFKAN, LAMPU PERINGATAN ⚡️ MENYALA TERUS-MENERUS:
• Driving stability will no longer be improved.
• The drive wheels could spin.
ETS/4ETS traction control remains active depending on the selected drive programme.
SAAT LAMPU PERINGATAN BERKEDIP, SATU ATAU BEBERAPA RODA TELAH MENCAPAI BATAS GRIP:
• Adapt your driving style to suit the current road and weather conditions.
• Do not deactivate ESP*.
- Only depress the accelerator pedal as far as is necessary when starting off.
KARAKTERISTIK SAAT ESP® DINONAKTIFKAN
WARNING
Risk of skidding if ESP ® is deactivated
If you deactivate ESP ® , ESP ® cannot carry out vehicle stabilisation.
▶ ESP ® should only be deactivated in the following situations.
UNTUK MENINGKATKAN TRAKSI, ESP® DAPAT DIMATIKAN DALAM SITUASI BERIKUT:
• when using snow chains
- in deep snow
• on sand or gravel

G-Class - Owner's Manual
Driving and parking Driving and driving safety systems
① Spinning the wheels results in a cutting action, which enhances traction.
If the warning lamp lights up continuously, ESP ® is not available due to a malfunction.
PERHATIKAN INFORMASI BERIKUT:
• Indicator and warning lamps (→ page 829)
• Display messages (→ page 769)
ETS/4ETS
ETS/4ETS traction control (Electronic Traction System) is part of ESP and makes it possible to pull away and accelerate on a slippery road.
ETS/4ETS DAPAT MENINGKATKAN TRAKSI KENDARAAN DENGAN CARA INTERVENSI BERIKUT:
• The drive wheels are braked individually if they spin.
- Either more torque is transferred to the wheel or wheels with more traction, or the drive torque in general is reduced.
PENGARUH PROGRAM BERKENDARA TERHADAP ESP®
The drive programs enable ESP ® to adapt to different weather and road conditions as well as the driver's preferred driving style. Depending on the selected drive program, the appropriate ESP ® mode will be activated ( → page 294).
FUNGSI ESP® (KENDARAAN MERCEDES-AMG)
YOU CAN SELECT BETWEEN THE FOLLOWING MODES OF THE ELECTRONIC STABILITY PROGRAM (ESP®):
- ESP 2 ON
- ESP ® SPORT
\- ESP ® OFF
KARAKTERISTIK SAAT ESP® AKTIF
ESP 6 MEMANTAU DAN MENINGKATKAN STABILITAS DAN TRAKSI BERKENDARA, TERUTAMA DALAM SITUASI BERIKUT:
• When starting off on wet or slippery roads.
- When braking.
- Vehicles with trailer hitch: in trailer operation from speeds of 65 km/h, if the vehicle/trailer combination begins to sway from side to side.
- When there is a strong crosswind and a driving speed of approximately 80 km/h to 200 km/h.
ESP ® DAPAT MENSTABILKAN KENDARAAN DENGAN CARA INTERVENSI BERIKUT:
• One or more wheels are braked.
• The engine output is adapted according to the situation.
ESP ® is activated every time the vehicle is started regardless of whether ESP ® SPORT or ESP ® OFF was selected before the engine was switched off.
KETIKA LAMPU PERINGATAN Ⓞ BERKEDIP, SATU ATAU BEBERAPA RODA TELAH MENCAPAI BATAS GRIPNYA:
- Adapt the driving style to suit the prevailing road and weather conditions.
• Do not deactivate ESP * under any circumstances.
• Only depress the accelerator pedal as far as necessary when starting off.

G-Class - Owner's Manual
Driving and parking Driving and driving safety systems
KARAKTERISTIK ESP® SPORT

PERINGATAN
Risk of skidding if ESP® SPORT is used incorrectly
When you activate ESP® SPORT, there is an increased risk of skidding and having an accident.
▶ Activate ESP ® SPORT only in the circumstances described below.
When ESP® SPORT is selected, the warning lamps OFF and ***** light up continuously.
Select ESP ® SPORT when the vehicle's own oversteering and understeering characteristics are desired, e.g. on cordoned-off roads.
Driving with ESP ® SPORT or with ESP ® deactivated requires an extremely qualified and experienced driver.
If ESP SPORT is activated and one or more wheels start to spin, the warning lamp flashes. ESP then only stabilises the vehicle to a limited degree.
ESP ® SPORT JUGA MEMILIKI KARAKTERISTIK BERIKUT:
- ESP only improves driving stability to a limited degree.
• ETS/4ETS traction control is still active.
- The engine's torque is only restricted to a limited degree and the drive wheels can spin.
The spinning of the wheels results in a cutting action for better traction on loose surfaces.
- ESP ® continues to provide assistance when the brakes are firmly applied.
- Vehicles with trailer hitch: stabilisation of the vehicle/trailer combination is no longer active.
• Crosswind Assist is no longer active.
KARAKTERISTIK SAAT ESP 9 DINONAKTIFKAN

PERINGATAN
Risk of skidding if ESP * is deactivated
If you deactivate ESP ® , ESP ® cannot carry out vehicle stabilisation.
▶ ESP ® should only be deactivated in the following situations.
When ESP ® is switched off, the warning lamps ☐ and ESP OFF light up continuously.
MENONAKTIFKAN ESP ® MEMILIKI EFEK BERIKUT:
• Driving stability will no longer be improved.
• The drive wheels could spin.
• ETS/4ETS traction control is still active.
- Vehicles with trailer hitch: stabilisation of the vehicle/trailer combination is no longer active.
• Crosswind Assist is no longer active.
Even when ESP is deactivated, you are still assisted by ESP when braking hard.

G-Class - Owner's Manual
Driving and parking Driving and driving safety systems
MUNGKIN TERBAIK UNTUK MENGAKTIFKAN ESP® SPORT ATAU MENONAKTIFKAN ESP® DALAM SITUASI BERIKUT:
- When using snow chains.
In deep snow.
- On sand or gravel.
① Spinning the wheels results in a cutting action, which enhances traction.
① Activate ESP * as soon as the situations described above no longer apply. ESP * will otherwise not be able to stabilise the vehicle if the vehicle starts to skid or a wheel starts to spin.
If the warning lamp lights up continuously, ESP is not available due to a malfunction.
PERHATIKAN PESAN TAMPILAN DAN LAMPU INDIKATOR SERTA PERINGATAN YANG DITAMPILKAN:
• Indicator and warning lamps (→ page 829)
• Display messages ( → page 769)
ETS/4ETS (SISTEM TRAKSI ELEKTRONIK)
ETS/4ETS traction control is part of ESP ® .
ETS/4ETS DAPAT MENINGKATKAN TRAKSI KENDARAAN DENGAN CARA INTERVENSI BERIKUT:
• The drive wheels are braked individually if they spin.
• More drive torque is transferred to the wheel or wheels with traction.

FUNGSI STABILISASI TRAILER ESP®
WARNING
Risk of accident in poor road and weather conditions
In poor road and weather conditions, the trailer stabilisation cannot prevent lurching of the vehicle/trailer combination. Trailers with a high centre of gravity may tip over before ESP ® detects this.
▶ Always adapt your driving style to suit the current road and weather conditions.
SAAT BERKENDARA DENGAN TRAILER, STABILISASI TRAILER ESP® DAPAT MENSTABILKAN KENDARAAN ANDA JIKA TRAILER MULAI BERGOYANG DARI SISI KE SISI:
- ESP ® trailer stabilisation is active above speeds of 65 km/h
- Slight swerving is reduced by means of a targeted, individual brake application on one side.
- In the event of severe swerving, the drive system output is also reduced and all wheels are braked.
STABILISASI TRAILER ESP® MUNGKIN TERGANGGU ATAU TIDAK BERFUNGSI JIKA:
\- The trailer is not connected correctly or is not detected properly by the vehicle.

G-Class - Owner's Manual
Driving and parking Driving and driving safety systems
MENGAKTIFKAN ATAU MENONAKTIFKAN ESP® DI SISTEM MULTIMEDIA MBUX
Multimedia system:

① ESP ® can only be activated/deactivated using quick-access when at least one other function is available in quick-access. Otherwise, you will find ESP ® in either the Assistance or the Offroad menu.
Select ESP.
Select On or Off.
ESP 3 is deactivated if the ESP 4 OFF warning lamp lights up continuously on the driver display.
Observe the information on the warning lamps and the display messages which may be shown on the driver display.
MENGATUR ESP® DENGAN TOMBOL RODA KEMUDI AMG
You can also adjust ESP * via the multimedia system ( → page 346).

To adjust ESP*: press upper or lower display button ① repeatedly, until it displays the symbol.
If the display button does not show the symbol, then it is hidden. How functions are displayed and the order in which they are displayed can be set in the multimedia system ( → page 292).
WARNA JALAN PADA SIMBOL TOMBOL 📁 MENUNJUKKAN PENGATURAN SAAT INI:
( blue ): ESP ® ON
(yellow): ESP SPORT
• (red): ESP* OFF
To set ESP SPORT: briefly press button Ⓞ when ESP is activated. The road in the 📁 button symbol lights up yellow. The 📁 and 📁 warning lamps appear in the driver display.
If you switch ESP® to SPORT ESP® in the off-road drive programs, or, AMG Dynamics automatically switches to the Slide or Traction level.
To deactivate ESP: set ESP® SPORT then press and hold the button ②. The road in the button symbol lights up red. The and SPORI warning lamps appear in the driver display.


G-Class - Owner's Manual
Driving and parking Driving and driving safety systems
In the off-road drive programs 📄, 📌 or 🏠 if you deactivate ESPOFF ESP®, AMG Dynamics automatically shifts to the Slide or Traction level.
To activate ESP: briefly press button ② when ESP SPORT is selected or ESP is deactivated.
The road in the button symbol lights up blue.
The ☐ and ☐ or ☐ ESPOFF warning lamps go out.
When the symbol is shown with a red 1 on the display button, ESP is malfunctioning. Observe the information on warning lamps and display messages which are shown in the driver display.
MENYESUAIKAN ESP ® DI SISTEM MULTIMEDIA (KENDARAAN MERCEDES-AMG)
Multimedia system:

The AMG DYNAMIC SELECT menu can also be accessed via the DYNAMIC SELECT button.
ESP is always activate when the engine is started. The road in the button symbol lights up blue.
To engage ESP SPORT: when ESP is activated, briefly press to change to the Sport programme.
The road in the button symbol lights up yellow.

Switch off ESP ® : engage the programme ESP ® SPORT and press and hold to switch off ESP ® .
The road in the button symbol lights up red. The and ESP OFF warning lamps appear on the driver display.
If you switch off ESP OFF ESP® in the off-road drive programmes or, AMG Dynamic Select automatically switches to the Slide or Traction level.
Switch on ESP ® : in ESP ® SPORT or when ESP ® is switched off, briefly press 📄.
The road in the button symbol lights up blue.
The and ESP OFF or ESP OFF warning lamps go out.
If you switch ESP* to SPORT in the off-road drive programmes or AMG Dynamic Select automatically switches to the Slide or Traction level.
(i) You can also set ESP via the steering-wheel buttons (→ page 345).
Fungsi EBD
DISTRIBUSI GAYA REM ELEKTRONIK (EBD) DITANDAI DENGAN HAL-HAL BERIKUT:
• Monitoring and regulating the brake pressure on the rear wheels.


G-Class - Owner's Manual
Driving and parking Driving and driving safety systems
• Improved driving stability when braking, especially on bends.
Fungsi HOLD
FUNGSI HOLD
The HOLD function holds the vehicle at a standstill without requiring you to depress the brake pedal, e.g. while waiting in traffic.
The HOLD function is only an aid. The responsibility for the vehicle safely standing still remains with the driver.
BATASAN SISTEM
The HOLD function is only intended to provide assistance when driving and is not a sufficient means of safeguarding the vehicle against rolling away when stationary.
• The gradient must not be greater than 30 %.
MENGAKTIFKAN/MENONAKTIFKAN FUNGSI HOLD

PERINGATAN
Risk of an accident due to the HOLD function being active when you leave the vehicle
JIKA KENDARAAN HANYA DIREM DENGAN FUNGSI HOLD, KENDARAAN DAPAT MELUNCUR DALAM SITUASI BERIKUT:
• If there is a malfunction in the system or in the power supply.
- If the HOLD function is deactivated by depressing the accelerator pedal or brake pedal, e.g. by a vehicle occupant.
▶ Always secure the vehicle against rolling away before you leave it.
Persyaratan:
• The vehicle is stationary.
• The driver's door is closed or the driver is correctly belted.
- The vehicle has been started or has been automatically switched off by the ECO start/stop function.
• The electric parking brake has been released.
• The transmission position D, R or N is engaged.
MENGAKTIFKAN FUNGSI HOLD
Depress the brake pedal, and after a short time quickly depress further until the HOLD display appears on the driver display.
Release the brake pedal.
MENONAKTIFKAN FUNGSI HOLD
▶ Depress the accelerator pedal to start off.
or
▶ Depress the brake pedal until HOLD disappears from the driver display.
FUNGSI HOLD JUGA DINONAKTIFKAN DALAM SITUASI BERIKUT:
• The parking position P is engaged.
• The vehicle is secured with the electric parking brake.
DALAM SITUASI BERIKUT, KENDARAAN DITAHAN OLEH POSISI PARKIR P DAN/ATAU REM PARKIR ELEKTRIK:
• The seat belt is unfastened and the driver's door is opened.
• The vehicle is switched off.

G-Class - Owner's Manual
Driving and parking Driving and driving safety systems
• There is a system malfunction.
• The power supply is insufficient.
Fungsi Hill Start Assist

PERINGATAN
Risk of accident and injury due to the vehicle rolling away
After a short time, Hill Start Assist no longer holds the vehicle.
Swiftly move your foot from the brake pedal to the accelerator pedal. Do not leave the vehicle when it is being held by Hill Start Assist.
HILL START ASSIST MENAHAN KENDARAAN UNTUK WAKTU SINGKAT SAAT MULAI BERJALAN DI TANJAKAN DENGAN KONDISI BERIKUT:
• The transmission position D or R for starting off uphill is selected.
• The electric parking brake has been released.
This gives you enough time to move your foot from the brake pedal to the accelerator pedal and depress it without the vehicle rolling away immediately.
Fungsi Lampu Rem Adaptif
LAMPU REM ADAPTIF MEMPERINGATKAN LALU LINTAS DI BELAKANG DALAM SITUASI PENGEREMAN DARURAT DENGAN TINDAKAN BERIKUT:
- flashing the brake lights
• activating the hazard warning lights ( → page 59)
If the vehicle is braked sharply from speeds above 70 km/h, the brake lights flash rapidly. This provides following traffic with an even more noticeable warning.
ATTENTION ASSIST
FUNGSI ATTENTION ASSIST

ATTENTION ASSIST is not available in the drive programs

Rock and 📄 Sand or is switched to passive mode.
ATTENTION ASSIST assists you on long, monotonous journeys, e.g. on motorways and trunk roads. If indicators of fatigue or increasing lapses in concentration on the part of the driver are detected, the system suggests taking a break.
ATTENTION ASSIST serves solely as an aid. It cannot always promptly detect fatigue or lapses in concentration. The system is not a substitute for a well-rested and attentive driver. On long journeys, take regular, timely breaks to allow for adequate recovery.
ANDA DAPAT MEMILIH ANTARA DUA PENGATURAN:
• Standard: normal system sensitivity.
- Sensitive: higher system sensitivity. The driver is warned earlier and the attention level detected by ATTENTION ASSIST is adapted accordingly.
If fatigue or increasing lapses in concentration are detected, the driver display shows the warning: ATTENTION ASSIST: Take a break!. You can acknowledge the message and take a break if necessary. If you do not take a break and ATTENTION ASSIST continues to detect increasing lapses in concentration, you will be warned again after a minimum of 15 minutes.


G-Class - Owner's Manual
Driving and parking Driving and driving safety systems


INFORMASI BERIKUT DITAMPILKAN PADA LAYAR PENGEMUDI:
• Journey time since the last break
• The attention level determined by ATTENTION ASSIST
The more segments ① of the circle that are displayed, the higher the detected attention level. Fewer segments ② are displayed in the circle as the attention level decreases.
If ATTENTION ASSIST is unable to calculate the attention level and cannot issue a warning, the System suspended message appears.
If the driver display shows a warning, the MBUX multimedia system offers to search for a rest area. You can select a rest area and start navigation to this rest area.
When you restart the vehicle, ATTENTION ASSIST is automatically switched on. The last selected sensitivity level remains stored.
BATASAN SISTEM
ATTENTION ASSIST is active in the 60 km/h to 200 km/h speed range.
If the system is unavailable due to a fault, the ATTENTION ASSIST warning lamp [icon] lights up continuously on the driver display.
FUNGSIONALITAS ATTENTION ASSIST DIBATASI, DAN PERINGATAN MUNGKIN TERTUNDA ATAU TIDAK DIBERIKAN SAMA SEKALI DALAM SITUASI BERIKUT:
• If you have been driving for less than approximately 30 minutes
• If the road condition is poor (uneven road surface or potholes)
• If there is a strong side wind
- If you adopt a sporty driving style (high cornering speeds or high rates of acceleration)
- If the Active Steering Assist function of Active Distance Assist DISTRONIC is active
• If the clock is set to the incorrect time
• If you change lanes and vary your speed frequently in active driving situations
Observe also any information regarding display messages that can be displayed on the driver display.
PENILAIAN KANTUK DAN KEWASPADAAN ATTENTION ASSIST DIATUR ULANG DAN DIMULAI KEMBALI SAAT MELANJUTKAN PERJALANAN DALAM SITUASI BERIKUT:
• If you switch off the vehicle.
- If you unfasten your seat belt and open the driver's door (e.g. to change drivers or take a break).
PENGATURAN BANTUAN PERHATIAN
Multimedia system:

Activate or deactivate ATTENTION ASSIST.

G-Class - Owner's Manual
Driving and parking Driving and driving safety systems
MENGATUR SENSITIVITAS
Select ☐ next to ATTENTION ASSIST.
▶ Select Standard or Sensitive.
Kontrol jelajah dan pembatas
FUNGSI KONTROL JELAJAH
Cruise control is not available in the drive programs Rock and Sand.
Cruise control regulates the speed to the value selected by the driver.
Forexample, the stored speed is not deleted if you accelerate to overtake. If you remove your foot from the accelerator pedal after overtaking, cruise control will resume speed regulation back to the stored speed.
You can set any speed above 20 km/h up to the maximum design speed or up to the stored winter tyre limit.
Observe the notes on driving systems and your responsibility; otherwise you may fail to recognise potential dangers ( → page 338).
Mercedes-AMG vehicles: cruise control is available up to a maximum speed of 240 km/h.
NOTIFIKASI DI LAYAR PENGEMUDI
Grey: cruise control is selected but not yet activated or temporarily in passive mode.
Green: cruise control is activated.
A stored speed is shown below the display ⚙ and is indicated in the speedometer.
BATASAN SISTEM
Cruise control may be unable to maintain the stored speed on uphill gradients. The stored speed is resumed when the gradient evens out.
On long and steep downhill gradients, you must change down to a lower gear in good time. This is particularly important when driving a laden vehicle. You are thus making full use of the engine's braking effect. This will take some of the strain off the brake system and prevent the brakes from overheating and wearing too quickly.
JANGAN GUNAKAN KONTROL JELAJAH DALAM SITUASI BERIKUT:
- In traffic situations which require frequent changes of speed, e.g. in heavy traffic, on winding roads.
- On slippery roads. Accelerating can cause the drive wheels to lose traction and the vehicle could then begin skidding.
- When visibility is poor.
FUNGSI PEMBATAS
The limiter is not available in the drive programs [icon] Rock and Sand.
The limiter restricts the speed of the vehicle. To reduce the speed to the stored speed, the limiter applies the brakes automatically.
ANDA DAPAT MEMBATASI KECEPATAN SEBAGAI BERIKUT:
• Variable: for short-term limitation of the travel speed, e.g. in built-up areas

G-Class - Owner's Manual
Driving and parking Driving and driving safety systems
• Permanent: for a longer-term speed restriction, e.g. in winter tyre mode
You can set any speed above 20 km/h up to the maximum design speed or up to the set winter tyre limit. You can also perform settings while the vehicle is stationary if the vehicle has been started.
Observe the notes on driving systems and your responsibility; you may otherwise fail to recognise potential dangers ( → page 338).
Mercedes-AMG vehicles: The limiter is available up to a maximum speed of 240 km/h.
NOTIFIKASI DI LAYAR PENGEMUDI
Grey: variable limiter is selected but not yet activated.
Flashing grey: variable limiter is temporarily in passive mode.
Green: variable limiter is activated.
A stored speed is shown below the display and is indicated in the speedometer.
If you depress the accelerator pedal beyond the pressure point (kickdown), the variable limiter switches to passive mode. The passive message appears on the driver display and the indicator starts flashing.
PEMBATAS VARIABEL DIAKTIFKAN KEMBALI DALAM SITUASI BERIKUT:
• If the vehicle speed drops below the stored speed.
• If the stored speed is called up.
• If you store a new speed.
MENGOPERASIKAN KONTROL JELAJAH ATAU PEMBATAS VARIABEL
PERINGATAN
Risk of accident due to stored speed
If you call up the stored speed and this is lower than your current speed, the vehicle decelerates.
▶ Take into account the traffic situation before calling up the stored speed.
Persyaratan:
KONTROL JELAJAH
- Neither drive program 📄 Rock nor 🐘 Sand is selected (→ page 294).
• The transmission is in position D.
• The vehicle speed is at least 20 km/h.
- ESP ® must be activated, but not intervening.
• Cruise control is selected.
PEMBATAS VARIABEL
- Neither drive program 📄 Rock nor 🐵 Sand is selected (→ page 294).
• The variable limiter is selected.

G-Class - Owner's Manual
Driving and parking Driving and driving safety systems

Steering wheel control panel for cruise control and variable limiter
RES/
Adopts the stored/detected speed
CANCEL
Deactivates cruise control/the variable limiter
1 SET+
Control panel to increase/decrease speed
©
Selects cruise control
UM
Selects the variable limiter
Mengoperasikan kontrol jelajah dan pembatas variabel:
Press the corresponding button with only one finger or swipe across the control panel.
Beralih antara kontrol jelajah dan pembatas variabel:
To select cruise control: press 📞.
To select the variable limiter: press LIM.
① Vehicles with Active Distance Assist DISTRONIC: the variable limiter is selected using a different button (→ page 357).
Mengaktifkan kontrol jelajah atau pembatas variabel:
Press SE+ or SET- on the control panel ①.
The current vehicle speed is stored and maintained by the vehicle via cruise control, or is restricted by the variable limiter.
or
Press RES 10 .
The last stored speed is called up and maintained by the vehicle via cruise control, or is restricted by the variable limiter.
If the last stored speed has previously been deleted, the current vehicle speed is stored.
When you switch off the vehicle, the last speed stored is deleted. When you activate cruise control or Active Distance Assist DISTRONIC, the last speed stored for the variable limiter is deleted.
Menambah/mengurangi kecepatan yang tersimpan:
To increase the stored speed: swipe upwards from the bottom of the control panel ①.
• The stored speed is increased by 1 km/h.
To decrease the stored speed: swipe downwards from the top of the control panel ①.
• The stored speed is decreased by 1 km/h.
or


G-Class - Owner's Manual
Driving and parking Driving and driving safety systems
Briefly press SET+ or SET on the control panel ①.
The stored speed is increased or decreased to the next increment of ten (e.g. to 50 km/h or 60 km/h).
or
Press and hold SFT+ or SFT- on the control panel ①.
The stored speed is increased or decreased to the next increment of ten, and afterwards by increments of 10 km/h.
or
▶ Accelerate the vehicle to the desired speed.
Press set-on the control panel 1.
When the variable limiter is switched to passive mode, you cannot increase or decrease its stored speed in increments of 1 km/h.
Mengadopsi kecepatan yang terdeteksi:
If cruise control/the variable limiter is activated and Traffic Sign Assist has detected a traffic sign with a maximum permissible speed and this is displayed on the driver display:
Press RES/1
The maximum permissible speed shown by the traffic sign is stored and the vehicle maintains, or does not exceed this speed.
Menonaktifkan kontrol jelajah atau pembatas variabel:
Press CANCE.

If you brake, deactivate ESP* or if ESP* intervenes, cruise control is deactivated. The variable limiter is not deactivated.
When you switch off the vehicle, the last speed stored is deleted. When you activate cruise control or Active Distance Assist DISTRONIC, the last speed stored for the variable limiter is deleted.
INFORMASI TENTANG PEMBATAS PERMANEN
If the vehicle should never exceed a specific speed (e.g. for driving in winter tyre mode), you can set this speed with the permanent limiter.
You do this by limiting the speed between 160 km/h and 210 km/h in the multimedia system ( → page 54).
The set speed is shown on the driver display immediately before it is reached. Confirming this message will cancel all other notifications until the vehicle is switched off again. Notifications are resumed when the vehicle is restarted or if the set speed is changed.
The permanent limiter can not be switched to passive mode even during kickdown, and the travel speed remains below the set speed.
MENGATUR BATAS KECEPATAN UNTUK BAN MUSIM DINGIN
Multimedia system:
Settings Vehicle Driving Winter tyre limit
▶ Activate or deactivate Winter tyre limit.
MENGATUR KECEPATAN
▶ Select Winter tyre limit.
Select a speed.


G-Class - Owner's Manual
Driving and parking Driving and driving safety systems
Active Distance Assist DISTRONIC
FUNGSI ACTIVE DISTANCE ASSIST DISTRONIC

PERINGATAN
Risk of accident from acceleration or braking by Active Distance Assist DISTRONIC
ACTIVE DISTANCE ASSIST DISTRONIC DAPAT MEMPERCEPAT ATAU MENGEREM DALAM KASUS BERIKUT, CONTOHNYA:
• If the vehicle pulls away using Active Distance Assist DISTRONIC.
- If the stored speed is called up and is considerably faster or slower than the currently driven speed.
- If Active Distance Assist DISTRONIC no longer detects a vehicle in front or does not react to relevant objects.
▶ Always carefully observe the traffic conditions and be ready to brake at all times.
▶ Take into account the traffic situation before calling up the stored speed.


PERINGATAN
Risk of accident due to insufficient deceleration by Active Distance Assist DISTRONIC
Active Distance Assist DISTRONIC brakes your vehicle with up to 50% of the possible deceleration. If this deceleration is not sufficient, Active Distance Assist DISTRONIC alerts you with a visual and acoustic warning.
Adjust your speed and maintain a suitable distance from the vehicle in front.
▶ Brake the vehicle yourself and/or take evasive action.

G-Class - Owner's Manual
Driving and parking Driving and driving safety systems
PERINGATAN
Risk of accident if detection function of Active Distance Assist DISTRONIC is impaired
ACTIVE DISTANCE ASSIST DISTRONIC TIDAK BERREAKSI ATAU MEMILIKI REAKSI TERBATAS:
• when driving on a different lane or when changing lanes
• to pedestrians, animals, bicycles or stationary vehicles, or unexpected obstacles
• to complex traffic conditions
• to oncoming vehicles and crossing traffic
As a result, Active Distance Assist DISTRONIC may neither give warnings nor intervene in such situations.
▶ Always observe the traffic conditions carefully and react accordingly.

Active Distance Assist DISTRONIC is not available in the Rock and Sand drive programs.
Active Distance Assist DISTRONIC maintains the set speed on free-flowing roads. If vehicles are detected ahead the set distance is maintained, if necessary until the vehicle comes to a standstill. The vehicle accelerates or brakes depending on the distance to the vehicle in front and the set speed.
The speed and distance to the vehicle in front are set and saved using the steering wheel.
Available speed range: 20 km/h - 160 km/h
The adjustable set speed may differ if a speed limit (e.g. winter tyre limit) is stored.
FITUR LAIN DARI ACTIVE DISTANCE ASSIST DISTRONIC:
• Adjusts the driving style depending on the selected drive program
- Initiates acceleration to the stored speed if the turn signal indicator is switched on to change to the overtaking lane
• Vehicles with Driving Assistance Package:
- Reacts to stationary vehicles detected in urban speed ranges (except bicycles and motorcycles)
- Takes one-sided overtaking restrictions into account on motorways or multi-lane roads with separate carriageways (country-dependent)
In the Active Distance Assist menu, it is possible to set the driving mode of Active Distance Assist DISTRONIC. Depending on the selected drive program, the driving behaviour is energy-saving, comfortable or dynamic ( → page 363).
Vehicles with Driving Assistance Package and Parking Package: If the vehicle has been braked to a standstill on multi-lane, separate carriageways by Active Distance Assist DISTRONIC, it can automatically follow the vehicle in front when driving off again within 30 seconds. If a critical situation is detected when driving off, a visual and audible warning is issued indicating that the driver must now take control of the vehicle. The vehicle is not accelerated any further.
Observe the notes on driving systems and your responsibility; otherwise you may fail to recognise potential dangers ( → page 338).


G-Class - Owner's Manual
Driving and parking Driving and driving safety systems

Notification on the driver display in the Assistance menu
Vehicle in front
2 Distance indicator
Set specified distance
The vehicle detected in front ① is highlighted in green. It may also be in the lane to the right of your vehicle in situations where it is not permitted to overtake on the left, for example, on UK motorways.
TAMPILAN STATUS PERMANEN
Grey: Active Distance Assist DISTRONIC selected but not yet active.
Green speedometer, grey vehicle: Active Distance Assist DISTRONIC active, speed set.
Green: Active Distance Assist DISTRONIC active and vehicle detected.
The stored speed is shown under the permanent status display and highlighted on the speedometer. Active Distance Assist DISTRONIC's status display is greyed out when in passive mode.
If the speed of the vehicle in front or the ascertained target speed due to the route event ahead is less than the stored speed, the segments on the speedometer light up.

If you increase or decrease the set specified distance ③, the | display appears briefly.
The green vehicle symbol 📄 is displayed cyclically when the vehicle is ready to pull away.
If the accelerator pedal is depressed while Active Distance Assist DISTRONIC is operational, the system can be switched to passive mode. The suspended message appears briefly on the driver display.
BATASAN SISTEM
SISTEM MUNGKIN TERGANGGU ATAU TIDAK BERFUNGSI DALAM KASUS BERIKUT, MISALNYA:
- In snow, rain, fog, heavy spray, if there is glare, in direct sunlight or in greatly varying light conditions.
• If there is swirling dust, e.g. when driving off-road or on sandy surfaces.
- If the windscreen in the area of the camera is dirty, misted up, damaged or covered.
• If the radar sensors are dirty or covered.
- In multi-storey car parks or on roads with steep uphill or downhill gradients.
• If there are narrow vehicles in front, such as bicycles or motorcycles.
In addition, one or more wheels may lose grip due to braking or acceleration on smooth or slippery roads, and the vehicle may begin skidding. If ESP ® intervenes, Active Distance Assist DISTRONIC is deactivated.
Do not use Active Distance Assist DISTRONIC in these situations.


G-Class - Owner's Manual
Driving and parking Driving and driving safety systems
You can watch an animation on this topic via the following link:
MENGOPERASIKAN ACTIVE DISTANCE ASSIST DISTRONIC DAN PEMBATAS VARIABEL

PERINGATAN
Risk of accident if detection function of Active Distance Assist DISTRONIC is impaired
ACTIVE DISTANCE ASSIST DISTRONIC TIDAK BERREAKSI ATAU MEMILIKI REAKSI TERBATAS:
• when driving on a different lane or when changing lanes
• to pedestrians, animals, bicycles or stationary vehicles, or unexpected obstacles
• to complex traffic conditions
• to oncoming vehicles and crossing traffic
As a result, Active Distance Assist DISTRONIC may neither give warnings nor intervene in such situations.
▶ Always observe the traffic conditions carefully and react accordingly.


PERINGATAN
Risk of accident from acceleration or braking by Active Distance Assist DISTRONIC
ACTIVE DISTANCE ASSIST DISTRONIC MUNGKIN MEMPERCEPAT ATAU MENGEREM DALAM KASUS BERIKUT, MISALNYA:
• If the vehicle pulls away using Active Distance Assist DISTRONIC.
- If the stored speed is called up and is considerably faster or slower than the currently driven speed.
- If Active Distance Assist DISTRONIC no longer detects a vehicle in front or does not react to relevant objects.
▶ Always carefully observe the traffic conditions and be ready to brake at all times.
▶ Take into account the traffic situation before calling up the stored speed.

G-Class - Owner's Manual
Driving and parking Driving and driving safety systems
PERINGATAN
Risk of accident due to insufficient deceleration by Active Distance Assist DISTRONIC
Active Distance Assist DISTRONIC brakes your vehicle with up to 50% of the possible deceleration. If this deceleration is not sufficient, Active Distance Assist DISTRONIC alerts you with a visual and acoustic warning.
Adjust your speed and maintain a suitable distance from the vehicle in front.
▶ Brake the vehicle yourself and/or take evasive action.
PERINGATAN
Risk of accident due to speed adaptation via Active Speed Limit Assist
The speed limit adopted by Active Speed Limit Assist may be too high or otherwise erroneous in certain circumstances:
• with speed limits below 20 km/h
• due to weather, e.g. in wet or foggy conditions
▶ Ensure that the speed driven always complies with the traffic regulations.
Adjust the speed driven to the current traffic and weather conditions.
Persyaratan:
BANTUAN JARAK AKTIF DISTRONIC:
• The electric parking brake has been released.
- ESP ® is switched on and is not intervening.
• Transmission position D is engaged.
• All the doors are closed.
- Check of the radar sensor system has been successfully completed.
- Neither drive program 📄 Rock nor 🐘 Sand is selected (→ page 294).
PEMBATAS VARIABEL:
• The variable limiter is selected.


Adopts the stored/detected speed
Deactivates Active Distance Assist DISTRONIC/variable limiter
Control panel to increase/decrease speed


G-Class - Owner's Manual
Driving and parking Driving and driving safety systems

Increases/decreases the specified distance

Switches between the variable limiter and Active Distance Assist DISTRONIC
To operate Active Distance Assist DISTRONIC or the variable limiter: press the respective button with only one finger or swipe across the control panel.
BERALIH ANTARA PEMBATAS VARIABEL DAN BANTUAN JARAK AKTIF DISTRONIC
Press
MENGAKTIFKAN BANTUAN JARAK AKTIF DISTRONIC/PEMBATAS VARIABEL
To activate without a stored speed: press SET+, SET- or RES/P. Active Distance Assist DISTRONIC: remove your foot from the accelerator pedal.
The current vehicle speed is stored and maintained by the vehicle via Active Distance Assist DISTRONIC or is restricted by the variable limiter.
or
To activate with a stored speed: press RES/1. Active Distance Assist DISTRONIC: remove your foot from the accelerator pedal.
The last stored speed is called up and maintained by the vehicle via Active Distance Assist DISTRONIC or is restricted by the variable limiter. If the stored speed has been deleted, the current vehicle speed is stored.
When you switch off the vehicle, the stored speed is deleted. When you activate Active Distance Assist DISTRONIC, the speed stored for the variable limiter is deleted.
MENAMBAH/MENGURANGI KECEPATAN
To increase the stored speed: swipe upwards from the bottom of the control panel ①.
• The stored speed is increased by 1 km/h.
To decrease the stored speed: swipe downwards from the top of the control panel ①.
• The stored speed is decreased by 1 km/h.
or
Briefly press the top SET- or bottom SET- of the control panel ①. The stored speed is increased or decreased by 10 km/h.
or
Press the top SET+ or bottom SET- of the control panel and hold pressed.
The stored speed is increased or decreased in 10 km/h increments.
or
▶ Accelerate the vehicle to the desired speed.
Press the top SET- of the control panel 1.
MENGADOPSI BATAS KECEPATAN YANG DITAMPILKAN DI LAYAR PENGEMUDI
To activate Active Distance Assist DISTRONIC or the variable limiter: press SET, SET- or RES 10 .
To adopt the displayed speed restriction: press RES/1.
The speed restriction shown on the driver display is adopted as the stored speed. The vehicle adapts its speed to that of the vehicle in front, but only up to the stored speed, or restricts its speed accordingly.


G-Class - Owner's Manual
Driving and parking Driving and driving safety systems
A speed restriction shown on the driver display is only adopted while driving, not when stationary.
MELAJU DENGAN BANTUAN JARAK AKTIF DISTRONIC
▶ Activate Active Distance Assist DISTRONIC and remove your foot from the brake pedal.
Press RES/ ® .
or
▶ Depress the accelerator pedal briefly and firmly.
The functions of Active Distance Assist DISTRONIC remain active.
MENAMBAH/MENGURANGI JARAK YANG DITENTUKAN KE KENDARAAN DI DEPAN
Press
The 📄 display appears. The specified distance is reduced by one level.
If the lowest level is already selected, the selection jumps to the highest level.
MENONAKTIFKAN BANTUAN JARAK AKTIF DISTRONIC/PEMBATAS VARIABEL
WARNING
Risk of an accident due to Active Distance Assist DISTRONIC being active when you leave the driver's seat
If you leave the driver's seat while the vehicle is being braked by Active Distance Assist DISTRONIC only, the vehicle can roll away.
▶ Always deactivate Active Distance Assist DISTRONIC and secure the vehicle to prevent it from rolling away before you leave the driver's seat.
Press CANCEL.
If you brake, deactivate ESP or if ESP intervenes, Active Distance Assist DISTRONIC is deactivated. The variable limiter is not deactivated.

G-Class - Owner's Manual
Driving and parking Driving and driving safety systems

FUNGSI BANTUAN BATAS KECEPATAN AKTIF

PERINGATAN
Risk of accident due to speed adaptation via Active Speed Limit Assist
The speed limit adopted by Active Speed Limit Assist may be too high or otherwise erroneous in certain circumstances:
• with speed limits below 20 km/h
• due to weather, e.g. in wet or foggy conditions
▶ Ensure that the speed driven always complies with the traffic regulations.
Adjust the speed driven to the current traffic and weather conditions.
If a changed speed limit is detected and the automatic adoption of speed limits is switched on, this is automatically adopted as the stored speed ( → page 363). Speed limits below 20 km/h are not accepted.
Adjustment of travel speed is initiated no later than when the vehicle is level with the traffic sign. For signs indicating entry into an urban zone, the speed is adapted according to that permitted within the built-up area. The speed restriction indicator on the driver display is always refreshed when the vehicle is level with the traffic sign.
If you are driving on German motorways with no speed limit, the system uses the speed stored for a stretch of road with no speed limit as the set speed. If you do not alter the stored speed on a stretch of road with no speed limit, the recommended speed of 130 km/h is adopted.
If Active Distance Assist DISTRONIC has been switched to passive mode by pressing the accelerator pedal, only speed limits which are higher than the stored speed are adopted.
The maximum permissible speed does not take the road condition and current weather and traffic conditions into consideration. Adjust your speed accordingly when necessary.
Observe the notes on driving systems and your responsibility; you may otherwise fail to recognise potential dangers ( → page 338).
BATAS SISTEM
The system limits of Traffic Sign Assist apply to the detection of traffic signs ( → page 373).
Speed limits below 20 km/h are not automatically adopted by the system as the stored speed. Temporary speed restrictions (e.g. for a specific time or due to weather conditions) cannot be unequivocally detected by the system.
Adjust your speed in these situations.
You can watch an animation on this topic via the following link:

FUNGSI ADAPTASI KECEPATAN BERDASARKAN RUTE

PERINGATAN
Risk of accident in spite of route-based speed adaptation
Route-based speed adaptation can malfunction or be temporarily unavailable in the following situations:
• If the driver does not follow the calculated route
• If map data is not up-to-date or available
• In the event of roadworks
• In bad weather or road conditions
• If the accelerator pedal is depressed
• In the event of electronically displayed speed limitations
▶ Adapt the speed to the traffic situation.
When Active Distance Assist DISTRONIC is activated, the vehicle speed will be adapted to the route events ahead. Depending on the drive program selected, the vehicle negotiates a route event ahead in an energy-saving, comfortable or dynamic manner. When the route event has been passed, the vehicle accelerates again to the stored speed. The set distance to the vehicle in front, vehicles detected ahead and speed restrictions ahead are taken into account.
Route-based speed adaptation can be activated in the multimedia system ( → page 363).
KEJADIAN RUTE BERIKUT DIPERHITUNGKAN:
Bends
Roundabouts
T-junctions
\- Turns and exits
SELAIN ITU, KECEPATAN DIKURANGI JIKA INDIKATOR SEIN DIHIDUPKAN DAN SALAH SATU SITUASI BERIKUT TERDETEKSI:
• Turning off at junctions
• Driving on slowing-down lanes
- Driving on lanes adjacent to slowing-down lanes
The driver is responsible for choosing the right speed and observing other road users. This applies in particular to junctions, roundabouts and traffic lights, as route-based speed adaptation does not brake the vehicle to a standstill.
When route guidance is active, the first speed adjustment is carried out automatically. If the turn signal indicator is switched on, the selected route is confirmed and further speed adjustment is activated.
PENYESUAIAN KECEPATAN DIBATALKAN DALAM KASUS BERIKUT:
- If the turn signal indicator is switched off before the route event and it is presumed that the route event is not deemed relevant for the driver.
• If the driver depresses the accelerator or brake pedal during the process.
BATASAN SISTEM
Route-based speed adaptation does not take right of way regulations into account. The driver is responsible for complying with road traffic regulations and driving at a suitable speed.
DALAM KONDISI SULIT, PEMILIHAN KECEPATAN YANG DILAKUKAN OLEH SISTEM MUNGKIN TIDAK SELALU SESUAI. INI BERLAKU UNTUK SITUASI BERIKUT, MISALNYA:
• The road's course is not clearly visible

G-Class - Owner's Manual
Driving and parking Driving and driving safety systems
Road narrowing
• Varying maximum permissible speeds in individual lanes, forexample, at toll stations
• Wet road surfaces, snow or ice
- If transport equipment, e.g. a trailer or bicycle rack, is attached to the trailer hitch and the electrical connection has been correctly established.
In these situations the driver must intervene accordingly.
MENGATUR GAYA BERKENDARA UNTUK ASSISTEN JARAK AKTIF DISTRONIC
Persyaratan:
• Active Distance Assist DISTRONIC is activated.
Multimedia system:

MENGATUR PENYESUAIAN KECEPATAN
Select Adopt speed limit or Route-based speed adjustment.
When these functions are active, the travel speed is adjusted depending on the route events ahead or in accordance with a speed restriction.
① JIKA SALAH SATU SISTEM BERIKUT DIAKTIFKAN, KECEPATAN YANG TERDETEKSI DAPAT DIADOPSI SECARA MANUAL SEBAGAI KECEPATAN MAKSIMUM YANG DIIZINKAN:
• Active Distance Assist DISTRONIC
• Variable limiter

i Additional information on speed adjustment ( → page 362).
FUNGSI ASSISTEN STOP-AND-GO AKTIF
Active Stop-and-Go Assist helps you in traffic jams on multi-lane roads with separate carriageways by automatically pulling away within 30 seconds and moderate steering manoeuvres. It orients itself using the vehicle in front and lane markings. Active Stop-and-Go Assist automatically maintains a safe distance from the vehicle in front and vehicles cutting in.
Active Stop-and-Go Assist requires you, as the driver, to keep your hands on the steering wheel at all times so that you can intervene at any time to correct the course of the vehicle and keep it in the lane.
Observe the notes on driving systems and your responsibility; you may otherwise fail to recognise potential dangers ( → page 338).
JIKA SEMUA KONDISI BERIKUT TERPENUHI, ASSISTEN STOP-AND-GO AKTIF AKTIF SECARA OTOMATIS:
• You are in a traffic jam on a motorway or major high-speed road.
• Active Distance Assist DISTRONIC is switched on and active ( → page 357).
• Active Brake Assist is available ( → page 369).
• Active Steering Assist is switched on and active ( → page 368).
• You are travelling no faster than 60 km/h.
When Active Stop-and-Go Assist is active, a message regarding formation of an emergency corridor to allow thoroughfare for emergency vehicles appears on the driver display and central display, in addition to the Active Steering Assist status display.

G-Class - Owner's Manual
Driving and parking Driving and driving safety systems
BATASAN SISTEM
The system limits of Active Distance Assist DISTRONIC and Active Steering Assist apply to Active Stop-and-Go Assist.
DSR (Pengaturan Kecepatan Menurun)
FUNGSI SISTEM DSR
DSR is a downhill driving assist function. It keeps the speed of travel at the selected target speed. The steeper the downhill gradient, the greater the DSR braking effect on the vehicle. On flat stretches of road and uphill gradients, the DSR brakes the vehicle minimally or not at all.
When DSR is activated and the transmission is in position D, R or N, DSR controls the driving speed. The target speed can be set to a value between 4 km/h and 18 km/h. By braking or accelerating, you can drive at a higher or lower speed than the target speed at any time.
DSR AKAN MATI SECARA OTOMATIS
• If you are driving at a speed greater than 45 km/h
• If you change the drive program
The off message will appear on the driver display. The status display in the driver display goes out. You also hear a warning tone.
i DSR remains active in the Trail drive program
INFORMASI TENTANG DSR
Observe the notes on driving systems and your responsibility; you may otherwise fail to recognise potential dangers ( → page 338).

You are always responsible for keeping control of the vehicle and for assessing whether the downhill gradient can be negotiated. Depending on road surface conditions and tyres, DSR may not always be able to maintain the target speed. Select a target speed suitable for the environmental conditions and also apply the brakes yourself if required.
MENGAKTIFKAN ATAU MENONAKTIFKAN DSR (REGULASI KECEPATAN SAAT MENURUN)
Persyaratan
• You are driving at 40 km/h or slower.
If the vehicle speed is too high, the Max. speed 40 - 45 km/h message appears in the driver display.
Multimedia system:
Settings Assistance
Select
A status display appears when the function is activated in the driver display.
Alternatively, DSR can also be activated or deactivated via DSR in the off-road menu ( → page 478).
The function is automatically deactivated when changing to the drive program.
G-Class - Owner's Manual
Driving and parking Driving and driving safety systems
MENGUBAH KECEPATAN TARGET
MENGUBAH KECEPATAN TARGET DENGAN PEDAL REM ATAU PEDAL GAS
Brake or accelerate the vehicle to the desired speed between 4 km/h and 18 km/h.
Release the brake or accelerator pedal.
The current speed is stored. When stationary, 4 km/h or the minimum possible speed for each gear range is stored. DSR maintains the stored speed on the downhill gradient and brakes automatically.
The set target speed is indicated under the green status display 📄 on the driver display.
MENGUBAH KECEPATAN TARGET MENGGUNAKAN TOMBOL DI RODA KEMUDI
When DSR is activated, you can change the target speed to a value between 4 km/h and 18 km/h.

To increase the target speed: swipe upwards from the bottom of the control panel.
• The target speed is increased by 1 km/h.
or

At the top of the control panel ①, press SET-
The target speed is increased in 1 km/h increments.
To decrease the target speed: swipe downwards from the top of the control panel.
• The target speed is decreased by 1 km/h.
or
At the bottom of the control panel ①, press □.
The target speed is reduced in 1 km/h increments.
The set target speed is indicated under the green status display ☐ on the driver display.
① This may then only be increased or decreased upon reaching the set target speed.

G-Class - Owner's Manual
Driving and parking Driving and driving safety systems
Active Steering Assist
FUNGSI ACTIVE STEERING ASSIST

PERINGATAN
Risk of accident if Active Steering Assist unexpectedly stops functioning
If the system limits of Active Steering Assist are reached there is no guarantee that the system will remain active or will keep the vehicle in lane.
▶ Always keep your hands on the steering wheel and observe the traffic carefully.
▶ Always steer the vehicle paying attention to traffic conditions.

PERINGATAN
Risk of accident if Active Steering Assist unexpectedly intervenes
The detection of lane markings and objects may malfunction and cause unexpected steering interventions.
▶ Steer according to traffic conditions.
Active Steering Assist is not available in the drive programs Rock and Sand.
Active Steering Assist is available up to a speed of 160 km/h.

The system helps you to stay in the centre of the lane by means of moderate steering interventions. Depending on the vehicle speed, Active Steering Assist uses the vehicles ahead and lane markings as a reference.
Depending on the respective country of use, Active Steering Assist can use the surrounding traffic as a reference in the lower speed range. If necessary, Active Steering Assist can also assist when driving outside the centre of the lane, forexample, to form an emergency corridor.
If the detection of lane markings and vehicles ahead is impaired, Active Steering Assist switches to passive mode. The system provides no support in this case.
TAMPILAN STATUS ACTIVE STEERING ASSIST

Grey: activated and in passive mode

Green: activated and active

Red, flashing: prompt to the driver to actively confirm or transition from active to passive mode, system limits detected

White, red hands: "hands on the steering wheel" prompt
During the transition from active mode to passive mode, the symbol is shown as enlarged and flashing. Once the system is in passive mode, the symbol is shown as grey on the driver display.

G-Class - Owner's Manual
Driving and parking Driving and driving safety systems

Depending on the selected vehicle settings, Active Steering Assist may be unavailable.
DETEKSI KEMUDI DAN SENTUHAN
The driver is required to keep their hands on the steering wheel at all times to ensure that they can intervene at any time to correct the course of the vehicle and keep it in lane. The driver must anticipate a change from active mode to passive mode or vice versa at any time.

If the system detects that the driver has not steered the vehicle for a considerable period of time or has removed their hands from the steering wheel, an initial visual warning is issued. The notification 🟢 appears on the driver display. If the driver still does not steer the vehicle, or gives no confirmation to the system, a repetitive warning tone sounds in addition to the visual warning message.
If the driver does not react to this warning for a considerable period, an emergency stop may be initiated ( → page 368).
The warning is not issued or stops as soon as the system detects the driver touching or steering the steering wheel.
The touch detection may be limited or inoperative if there is no direct contact between the hand and the steering wheel, e.g. when wearing gloves or if there is a steering wheel cover on the steering wheel.
If Active Steering Assist detects that a system limit has been reached, a visual warning is issued and a warning tone sounds.
Observe the notes on driving systems and your responsibility; otherwise you may fail to recognise potential dangers ( → page 338).
BATASAN SISTEM
Active Steering Assist has a limited steering torque for lateral guidance. In some cases, the steering intervention is not sufficient to keep the vehicle in the lane or to drive through exits.
SISTEM MUNGKIN TERGANGGU ATAU TIDAK BERFUNGSI DALAM SITUASI BERIKUT:
- There is poor visibility, e.g. due to snow, rain, fog, heavy spray, greatly varying light conditions or dense shadows on the carriageway.
• There is glare, e.g. from oncoming traffic, direct sunlight or reflections.
• If there is insufficient road illumination.
- The windscreen is dirty, misted up, damaged or covered in the vicinity of the camera, e.g. by a sticker.
- If there are no lane markings in a given lane, or the markings are not easily discernible or change quickly, forexample, in a construction area or at junctions.
- If the lane markings are worn away, dark or covered up, e.g. by dirt or snow.
- If the distance to the vehicle in front is too short and the lane markings can therefore not be detected.
• If the roadway is narrow and winding.
- If there are obstacles on the lane or projecting out into the lane, such as object markers.
- If transport equipment, e.g. a trailer or bicycle rack, is attached to the trailer hitch and the electrical connection has been correctly established.


G-Class - Owner's Manual
Driving and parking Driving and driving safety systems

SISTEM TIDAK MEMBERIKAN BANTUAN DALAM KONDISI BERIKUT:
• in very tight bends and when turning
- when crossing junctions
• at roundabouts or toll stations
- when actively changing lane without switching on the turn signal indicator
• when the tyre pressure is too low
You can watch an animation on this topic via the following link:
MENGAKTIFKAN/MENONAKTIFKAN ACTIVE STEERING ASSIST
Persyaratan:
- ESP ® is activated, but is not intervening.
• Active Distance Assist DISTRONIC is activated.
Multimedia system:

▶ Activate or deactivate Active Steering Assist.
Fungsi Active Emergency Stop Assist
The following function is only available in combination with the Driving Assistance Package.
Active Emergency Stop Assist monitors the steering wheel, as well as the accelerator and brake pedals. If the system detects a lack of driver activity or
the vehicle is in danger of leaving the lane, a warning may be issued and an emergency stop initiated.
If Active Steering Assist is switched off, the system is available from a speed of approx. 60 km/h.
JIKA KENDARAAN DALAM BAHAYA MENINGGALKAN JALUR, PERINGATAN DIBERIKAN DALAM KEADAAN BERIKUT.
- The driver has not touched the steering wheel for a while, or no steering movement is detected for a while (depending on the respective vehicle equipment).
• Neither the accelerator pedal nor the brake pedal is depressed.
If Active Steering Assist is switched on and active, the system only monitors the steering wheel. If the driver has not touched the steering wheel for a certain period of time, a warning may be issued despite pedal actuation.
Also observe the notes on touch detection of Active Steering Assist ( → page 366).

ACTIVE EMERGENCY STOP ASSIST MENGELUARKAN PERINGATAN BERIKUT SECARA BERURUTAN:
• The notification ① appears on the driver display.


G-Class - Owner's Manual
Driving and parking Driving and driving safety systems
• In addition to the notification ①, a warning tone sounds.
- The Beginning emergency stop message appears on the driver display, a continuous warning tone sounds and the vehicle will no longer accelerate.
- The vehicle speed is reduced in increments until the vehicle comes to a standstill. This generates jerky braking impulses.
Upon implementation of automatic braking, or if the vehicle comes to a standstill in certain countries, Active Distance Assist DISTRONIC is deactivated. Depending on the respective country of use, the hazard warning light system is also switched on.
KETIKA KENDARAAN TELAH MELAMBAT HINGGA BERHENTI:
• the vehicle is secured with the electric parking brake.
• the vehicle is unlocked.
- if possible, an emergency call is made to the Mercedes-Benz emergency call centre.
Before the Beginning emergency stop message is displayed, you can cancel Active Emergency Stop Assist by turning the steering wheel.
SETELAH PESAN PERINGATAN DARURAT MULAI DITAMPILKAN, ANDA DAPAT MEMBATALKAN ACTIVE EMERGENCY STOP ASSIST SEBAGAI BERIKUT:
- Accelerating or braking: braking is cancelled, but the warning message, warning tone and electric power steering remain active.
• Steering: electric power steering is cancelled, the warning message and warning tone remain active and the vehicle continues to be braked.
- Steering and accelerating or braking: The emergency stop and electric power steering are cancelled. The warning message and the warning tone are cancelled.

Active Emergency Stop Assist can initiate an emergency stop a maximum of three times within a driving cycle. After that, Active Steering Assist and Active Emergency Stop Assist are disabled until the vehicle has been restarted.
BATASAN SISTEM
UNTUK MENDETEKSI KENDARAAN DAN HALANGAN LAIN, PERHATIKAN BATASAN SISTEM DARI FUNGSI BERIKUT:
• Active Distance Assist DISTRONIC ( → page 354)
• Active Steering Assist ( → page 366)
• Active Lane Keeping Assist ( → page 379)
• Active Brake Assist ( → page 369)
ACTIVE EMERGENCY STOP ASSIST TIDAK AKTIF DALAM KASUS BERIKUT:
• Active Lane Keeping Assist and Active Steering Assist are switched off.
Active Brake Assist
FUNGSI ACTIVE BRAKE ASSIST
Active Brake Assist is not available in drive program Rock and Sand.
ACTIVE BRAKE ASSIST TERDIRI DARI FUNGSI BERIKUT:
• Distance warning function
- Collision warning

G-Class - Owner's Manual
Driving and parking Driving and driving safety systems
• Autonomous braking function
• Situation-based brake force boosting
Active Brake Assist can help you to minimise the risk of a collision with vehicles, cyclists or pedestrians, or to reduce the effects of such a collision.
If Active Brake Assist has detected a risk of collision, a warning tone sounds and the ▲ Active Brake Assist warning lamp lights up.

Notification on the driver display in the menu Assistance
① Distance insufficient
2 Red radar waves
In the Assistance menu, an insufficient distance to the vehicle in front ① is displayed in red. If you further reduce the distance, the vehicle in front is also highlighted in red. When the system detects a risk of collision, red radar waves ② appear ahead of the vehicle.
If you do not react to the warning, autonomous braking can be initiated in critical situations.
In particularly critical situations, Active Brake Assist can also initiate autonomous braking directly. In this case, the warning tone and the distance warning lamp are simultaneous with the braking action.

If you apply the brakes yourself in a critical situation or apply the brakes during autonomous braking, situation-based braking assistance is given. The brake pressure increases up to maximum emergency braking if necessary.

If autonomous braking, situation-related based assistance or evasive action has occurred, pop-up ① appears on the driver display. It automatically disappears after a short time.
If the autonomous braking function or the situation-based braking assistance is triggered, additional preventive measures for occupant protection by PRE-SAFE ® may also be initiated.

G-Class - Owner's Manual
Driving and parking Driving and driving safety systems


PERINGATAN
Risk of an accident caused by limited detection performance of Active Brake Assist
Active Brake Assist cannot always clearly identify objects and complex traffic situations.
DALAM KASUS SEPERTI INI, ACTIVE BRAKE ASSIST MUNGKIN:
• Give a warning or brake without reason
• Not give a warning or not brake
Active Brake Assist is only an aid. The driver is responsible for maintaining a sufficiently safe distance to the vehicle in front, vehicle speed and for braking in good time.
▶ Always pay careful attention to the traffic situation; do not rely on Active Brake Assist alone.
▶ Be prepared to brake or swerve if necessary.
If Active Brake Assist is deactivated or the functions are restricted, e.g. owing to activation of another driving system, the Active Brake Assist warning lamp appears in the driver display.
If the system is unavailable due to soiled or damaged sensors or a fault, or if the functions are restricted, the ▶Active Brake Assist warning lamp appears on the driver display.
Also observe the system limits of Active Brake Assist.
FUNGSI PERINGATAN JARAK
From approximately 30 km/h, you are warned by the distance warning function if the safety distance to the vehicle travelling ahead is insufficient at the cur-
rent speed for several seconds. In this case, the distance warning lamp in the driver display lights up. If the distance to the vehicle in front continues to decrease at higher speeds, the distance warning lamp begins to flash.
PERINGATAN TABRAKAN
PERINGATAN TABRAKAN DAPAT MEMBANTU ANDA DALAM SITUASI BERIKUT DENGAN NADA PERINGATAN TERPUTUS-PUTUS DAN LAMPU PERINGATAN △:
- at speeds up to approximately 210 km/h when approaching moving vehicles ahead.
- at speeds up to approximately 80 km/h when approaching stationary vehicles, pedestrians walking along the road and moving cyclists ahead.
- at speeds up to approximately 70 km/h when approaching crossing pedestrians and cyclists.
- at speeds up to approximately 60 km/h when approaching stationary pedestrians and cyclists.
FUNGSI PENGEREMAN OTONOM
PADA KECEPATAN DI ATAS KURANG LEBIH 7 KM/JAM, FUNGSI PENGEREMAN OTONOM DAPAT BERINTERVENSI DALAM SITUASI BERIKUT:
- at speeds up to approximately 210 km/h when approaching moving vehicles ahead.
- at speeds up to approximately 80 km/h when approaching moving cyclists ahead, pedestrians walking along the road and stationary vehicles.
- at speeds up to approximately 70 km/h when approaching crossing pedestrians and cyclists.

G-Class - Owner's Manual
Driving and parking Driving and driving safety systems
PENINGKATAN GAYA REM BERDASARKAN SITUASI
PADA KECEPATAN DI ATAS KURANG LEBIH 7 KM/JAM, PENINGKATAN GAYA REM TERKAIT SITUASI DAPAT BERINTERVENSI DALAM SITUASI BERIKUT.
- at speeds up to approximately 210 km/h when approaching moving vehicles ahead.
- at speeds up to approximately 80 km/h when approaching moving cyclists ahead, pedestrians walking along the road and stationary vehicles.
- at speeds up to approximately 70 km/h when approaching crossing pedestrians and cyclists.
- at speeds up to approximately 60 km/h when approaching stationary pedestrians and cyclists.
MEMBATALKAN INTERVENSI PENGEREMAN OLEH ACTIVE BRAKE ASSIST ANDA DAPAT MEMBATALKAN PENGEREMAN ACTIVE BRAKE ASSIST KAPAN SAJA DENGAN:
• firmly depressing the accelerator pedal or by kickdown
• releasing the brake pedal.
ACTIVE BRAKE ASSIST DAPAT MEMBATALKAN INTERVENSI PENGEREMAN KETIKA SALAH SATU KONDISI BERIKUT TERPENUHI:
• You steer to avoid an obstacle.
• there is no longer a risk of collision
• An obstacle is no longer detected in front of your vehicle.
FUNGSI MANUVER BELOK (KENDARAAN DENGAN PAKET BANTUAN MENGEMUDI):
If the system detects a risk of a collision with an oncoming vehicle when turning across an oncoming lane, autonomous braking can be initiated at speeds below 15 km/h before you have left your own lane.
You can watch an animation on this topic via the following link:
MENGATUR ACTIVE BRAKE ASSIST
Persyaratan:
• The vehicle is switched on.
Multimedia system:

▶ Activate or deactivate the function.
① It is recommended that you always leave Active Brake Assist activated.
When switching off the Active Brake Assist, the distance warning function, the collision warning and the autonomous braking function are switched off.
If Active Brake Assist is deactivated, the symbol appears in the status bar of the driver display and when the vehicle is next started the system is activated again.
The setting after starting the vehicle depends on the country.

G-Class - Owner's Manual
Driving and parking Driving and driving safety systems

MENGATUR WAKTU PERINGATAN
Select □ alongside Active Brake Assist.
▶ Select Early, Medium or Late.
If the ATTENTION ASSIST has detected signs of fatigue, depending on the country, the system can issue a warning earlier than set. Further information about ATTENTION ASSIST ( → page 349).
Bantuan Rambu Lalu Lintas
FUNGSI TRAFFIC SIGN ASSIST
Traffic Sign Assist detects the traffic signs with the multifunction camera and compares them with the information from the digital road map of the navigation system. It supports you by showing detected speed limits and no-overtaking zones on the driver display.
The system can issue a warning when you exceed the maximum permissible speed.
In some countries, the system can provide you with additional functions and can warn you when you are approaching pedestrian crossings. If the system detects that you are driving onto a section of road in the wrong direction of travel, it issues a warning.
The camera also detects and evaluates traffic signs with a restriction indicated by an additional sign (e.g. in wet conditions).
Traffic Sign Assist only shows selected signs on the driver display. Actual traffic signs and speed limits are always prioritised over traffic signs and speed limits shown on the driver display.
HAL-HAL BERIKUT JUGA HARUS DIPERHATIKAN SAAT MENGGUNAKAN TRAFFIC SIGN ASSIST:
- Select a speed suitable for the traffic, surroundings and weather conditions.
- Observe actual traffic signs.
- Observe applicable traffic rules and regulations.
Observe the notes on driving systems and your responsibility; otherwise you may fail to recognise potential dangers ( → page 338).
PEMBERITAHUAN PADA LAYAR PENGEMUDI

Example
1 Permissible speed
2 Permissible speed when there is a restriction
3 Additional sign with restriction
4 Speed limits up ahead
Speed limits are always shown as a priority over other traffic signs, such as no-overtaking zones, forexample.
Important information from other systems can cause traffic signs to be hidden for a short time.


G-Class - Owner's Manual
Driving and parking Driving and driving safety systems

TERGANTUNG PADA NEGARA PENGGUNAAN, TRAFFIC SIGN ASSIST DAPAT MENDETEKSI DAN MENAMPILKAN RAMBU LALU LINTAS BERIKUT, MISALNYA:
speed limits
• end of the speed limit
• overtaking restrictions
• residential streets
• signs showing the start or end of motorways and dual carriageways

Detected traffic signs (examples)
TRAFFIC SIGN ASSIST JUGA DAPAT MENDETEKSI RAMBU TAMBAHAN BERIKUT ③, MISALNYA, DAN MENGEVALUASI RELEVANSI PEMBATASAN JIKA PERLU MENGGUNAKAN SENSOR KENDARAAN PENDUKUNG:
• in wet conditions
• slippery road surfaces
in fog
• temporary restrictions
• exits
• restrictions for vehicle/trailer combinations
Traffic Sign Assist also uses data from the digital road map of the navigation system. When you leave or enter a municipality or change roads, on a motorway exit or slip road forexample, or after you turn at a junction, the display on the driver display can thus be updated without a traffic sign having been detected.
Regularly update the digital road map of the navigation system to ensure optimum functioning of Traffic Sign Assist ( → page 43).
Depending on the respective vehicle equipment and country of use, the system may also show upcoming speed limits on the driver display. The driver display may also show the distance to an upcoming lower speed limit. Information from the digital road map of the navigation system is used for this purpose. The Assistance menu can also display a dynamic visualisation of the speed limits ahead.
If Traffic Sign Assist cannot determine the current maximum permissible speed, e.g. due to a lack of signage, the following symbol appears on the driver display:

Traffic Sign Assist is not available in all countries. This symbol is shown permanently in the vehicle when travelling in countries which do not support Traffic Sign Assist.
If the system is temporarily or permanently unavailable due to a technical fault or because the windscreen is dirty, a corresponding display message appears on the driver display. The Traffic Sign Assist warning lamp ☑ for also lights up on the driver display in certain countries.

G-Class - Owner's Manual
Driving and parking Driving and driving safety systems

① Please also note the information on the display messages from Traffic Sign Assist ( → page 769).
PERINGATAN SAAT KECEPATAN MAKSIMUM YANG DIIZINKAN DILAMPAUI
The system can warn you if you are about to exceed the maximum permissible speed. Depending on the respective country of use, you can set the extent to which the maximum permissible speed may be exceeded in the multimedia system before a warning is issued. You can switch off the warning, or in the settings, select whether the warning should be issued visually, with the traffic sign flashing on the driver display, or as a combination of a visual and audible warning. Selection of the type of warning is confirmed via a notification on the driver display, depending on the respective country of use.


Contoh
① Visual warning only
2 Warning off
The type, duration and deployment stages of the speed warning, as well as the option to set the timing of the deployment stages upon which the warning is issued, are subject to legislation valid for the respective country in which the vehicle is delivered.
FUNGSI PERINGATAN TAMBAHAN
Warning for no-entry signs: Traffic Sign Assist can warn you if you drive down a section of road in the wrong direction of travel, forexample, on motor-way slip roads or one-way streets.
Warning at pedestrian crossings: if you approach pedestrian crossings, provided that pedestrians are in the danger zone or are moving towards it, Traffic Sign Assist can warn you up to a speed of approximately 70 km/h.
PENGGUNAAN TRAILER
① Refer to the chapter on the trailer hitch ( → page 413).
If a trailer or bicycle rack is connected correctly, the central display shows the query regarding the type of trailer and its maximum permissible speed ( → page 416).
The driver is solely responsible for ensuring that the maximum permissible speed is adapted manually in the Trailer type category.
TERUTAMA, HUKUM KHUSUS NEGARA HARUS DIPERHATIKAN, MISALNYA TENTANG:
• maximum design speed or maximum permissible speed
• permissible gross mass with or without towing vehicle
• required number of years with a corresponding driving licence
• type and condition of the road used
• the weather conditions
The maximum permissible speed adapted to the vehicle/trailer combination can be transferred to the manual or automatic speed control during the journey (depending on the respective equipment).

G-Class - Owner's Manual
Driving and parking Driving and driving safety systems
The system can take into account additional signs for the vehicle combination regarding speed limits and clear road traffic rules (country-dependent).
No maximum permissible speed can be selected for a bicycle rack in the multimedia system. When using a bicycle rack, observe the specifications for the maximum permissible speed in the Owner's Manual.
BATASAN SISTEM
SISTEM MUNGKIN TERGANGGU ATAU TIDAK BERFUNGSI DALAM SITUASI BERIKUT, TERUTAMA:
- If visibility is poor, e.g. due to insufficient illumination of the road, highly variable shade conditions, rain, snow, fog, swirling dust or heavy spray.
• If there is glare, e.g. from oncoming traffic, direct sunlight or reflections.
- If the windscreen in the area of the multifunction camera is dirty, or if the camera is misted up, damaged or obscured.
- If the traffic signs are difficult to see because, forexample, they are dirty, obscured, faded, iced over, damaged, inconveniently positioned, insufficiently illuminated or askew.
• Active traffic signs with LED displays may not be detected correctly, or even at all due to technical factors, such as transmission frequency.
- If the information on the navigation system's digital road map is incorrect, incomplete or out of date.
- If the signs, road markings or road layout are ambiguous, e.g. traffic signs at roadworks, at exits and slip roads, adjacent lanes or parallel roads, and pedestrian crossing markings at traffic lights.
• If the signage or road markings do not comply with the standard.
- If the signage, road markings or road layout are country-specific and deviate from the navigation system's route guidance, e.g. at or after roadworks.
• After sharp turns and in tight bends, if traffic signs are outside the camera's field of vision.
• If you overtake vehicles with traffic signs affixed or attached to them.
PENGATURAN TRAFFIC SIGN ASSIST
Multimedia system:

MENGAKTIFKAN ATAU MENONAKTIFKAN PERINGATAN BATAS KECEPATAN
The speed limit warning is switched on by default (depending on the respective country).
▶ Switch off Speed limit warning.
Following country-specific legislation, the speed limit warning remains deactivated until the next time the vehicle is switched on or off.
The audible speed limit warning can also be switched off and on via quick-access, by pressing and holding the mute button on the steering wheel, by pressing the speed icon in the status line of the media display or via a voice control command (availability of these functions is country-dependent).
MENGUBAH JENIS PERINGATAN BATAS KECEPATAN
Change the warning to Visual or Visual & audible.
MENGATUR AMBANG BATAS PERINGATAN
This value determines the speed at which a warning is issued when exceeded.
▶ Set the desired speed under Warning Threshold.
i Availability of the function is subject to country-specific legislation.
G-Class - Owner's Manual
Driving and parking Driving and driving safety systems
MENGAKTIFKAN ATAU MENONAKTIFKAN SINYAL AKUSTIK UNTUK BATAS KECEPATAN MAKSIMUM BARU
The acoustic signal for a new maximum permissible speed is switched off at the factory.
The function determines whether a subtle, non-intrusive sound supports each change of the displayed speed in the driver display.
▶ Activate or deactivate the function.
i Availability of the function is dependent on the respective country.
Tampilan lampu lalu lintas
INFORMASI TENTANG TAMPILAN LAMPU LALU LINTAS
The traffic light view supports the driver when waiting in front of a red light by displaying the camera image on the central display. The camera image is displayed when the driver is the first vehicle in front of the red light and faded out when the vehicle drives off.
MENAMPILKAN TAMPILAN LAMPU LALU LINTAS
Persyaratan:
• The Traffic light view option is switched on.
• A traffic light view is available.
Multimedia system:

① This function is not available in all countries.
If the vehicle is in first position at a traffic light, the camera image with traffic light view is shown on the central display.
When the vehicle pulls away, the camera image is faded out.
Activate or deactivate Traffic light view.
MENGGUNAKAN FUNGSI LAIN YANG TERSEDIA
Select
▶ Select On request or Automatic.
If On request is set and a traffic light view is available, the Please tap here for traffic light view. message is displayed. The camera image is shown after confirmation of the message.
When Automatic is set, the camera image is automatically displayed when the traffic light view is available.
Blind Spot Assist
FUNGSI BLIND SPOT ASSIST DENGAN PERINGATAN KELUAR
Blind Spot Assist uses two lateral, rear-facing radar sensors to monitor the area up to 40 m behind and 3 m next to your vehicle.
If at speeds above approximately 12 km/h a vehicle is detected and this vehicle subsequently enters the monitoring range directly next to your vehicle, the warning lamp in the outside mirror lights up red.


G-Class - Owner's Manual
Driving and parking Driving and driving safety systems
TAMPILAN STATUS PADA LAYAR PENGEMUDI
Grey: the system is activated but inoperative.
Green: the system is activated and operational.
If a vehicle is detected close to your vehicle and you actuate the turn signal indicator in its direction, a double warning tone sounds and the red warning lamp in the outside mirror flashes. If the turn signal indicator remains switched on, all other detected vehicles are indicated only by the flashing of the red warning lamp.
If you overtake a vehicle quickly, no warning is given.

PERINGATAN
Risk of accident despite Blind Spot Assist
Blind Spot Assist does not react to vehicles approaching and overtaking you at a greatly different speed.
Blind Spot Assist cannot warn drivers in this situation.
▶ Always pay careful attention to the traffic situation and maintain a safe distance at the side of the vehicle.
Blind Spot Assist is only an aid. It may fail to detect some vehicles and is not a substitute for attentive driving. Observe the notes on driving systems and your responsibility; you may otherwise fail to recognise potential dangers ( → page 338).
PERINGATAN KELUAR
The exit warning is an additional function of Blind Spot Assist and can warn vehicle occupants about approaching vehicles when leaving the vehicle when stationary.


PERINGATAN
Risk of accident despite exit warning
The exit warning neither reacts to stationary objects nor to persons or road users approaching you at a greatly differing speed.
The exit warning cannot warn drivers in these situations.
▶ Always pay particular attention to the traffic situation when opening the doors and make sure there is sufficient clearance.
If there is a vehicle in the monitoring range, this is indicated in the outside mirror. If a vehicle occupant opens the door on the side with the warning, a warning tone sounds and the warning lamp in the outside mirror starts to flash.
This additional function is only available when Blind Spot Assist is active. When the exit warning is activated, it can warn vehicle occupants for up to three minutes after switching the vehicle off. The exit warning is no longer available once the warning lamp in the outside mirror flashes three times.
The exit warning is only an aid and not a substitute for the attention of vehicle occupants. The responsibility for opening the doors and exiting the vehicle remains with the vehicle occupants at all times.
BATASAN SISTEM
BLIND SPOT ASSIST MUNGKIN TERBATAS DALAM SITUASI BERIKUT, TERUTAMA:
• if there is dirt on the sensors or the sensors are obscured
• in poor visibility, e.g. owing to fog, heavy rain or snow
• if there are narrow vehicles, e.g. bicycles or motorcycles
• if the road has very wide or narrow lanes


G-Class - Owner's Manual
Driving and parking Driving and driving safety systems
• if vehicles are not driving in the middle of their lane
Warnings may be issued in error when driving close to crash barriers or similar continuous lane borders. Always make sure that there is sufficient distance to the side for other traffic or obstacles.
Warnings may be interrupted when driving alongside long vehicles, e.g. trucks, for a prolonged period.
Blind Spot Assist is not operational when reverse gear is engaged.
Blind Spot Assist and the exit warning are not operational when a trailer is coupled to the vehicle and the electrical connection has been correctly established.
PERINGATAN KELUAR MUNGKIN TERBATAS DALAM SITUASI BERIKUT:
- when the sensors are covered by adjacent vehicles in narrow parking spaces
• when people approach the vehicle
• in the event of stationary or slowly moving objects
You can watch an animation on this topic via the following link:
MENGAKTIFKAN ATAU MENONAKTIFKAN BLIND SPOT ASSIST ATAU ACTIVE BLIND SPOT ASSIST
Multimedia system:
Settings Assistance Collision avoidance
▶ Activate or deactivate Active Blind Spot Assist.
Active Lane Keeping Assist
FUNGSI ACTIVE LANE KEEPING ASSIST

Active Lane Keeping Assist monitors the area in front of your vehicle using the multifunction camera ( → page 338).
It can protect you against unintentionally departing your lane. The system can guide you back into your lane with a course-correcting steering intervention, and warn you with tangible steering wheel feedback.
Active Lane Keeping Assist is available in the speed range between 60 km/h and 200 km/h.
SISTEM DAPAT BERINTERVENSI JIKA KONDISI BERIKUT TERPENUHI:
• Active Lane Keeping Assist detects a lane marking.
• You touch this lane marking with one of your front wheels.
If you activate the turn signal indicators, there is no steering intervention on that side.
There is no steering intervention if you leave your lane without activating the turn signal indicators, but there is a risk of collision with a moving obstacle in your own lane.
Vehicles with Blind Spot Assist or Driving Assistance Package: If the system detects an obstacle, e.g. another vehicle, in the adjacent lane, there is steering intervention despite the direction indicators.

G-Class - Owner's Manual
Driving and parking Driving and driving safety systems


DALAM KASUS BERIKUT, PERINGATAN ① MUNCUL DI LAYAR PENGEMUDI DAN TERDENGAR SUARA PERINGATAN:
- A steering intervention by Active Lane Keeping Assist lasts more than approximately ten seconds.
- There are two or more steering interventions by the systems within approximately three minutes, without steering intervention by the driver.
You can set the sensitivity of the system in the Active Lane Keeping Assist settings in order to determine the level of assistance. You can also determine whether the system is to react to broken lane markings, or only to continuous lane markings ( → page 381).
TAMPILAN STATUS ACTIVE LANE KEEPING ASSIST
White: Active Lane Keeping Assist is switched off.
If ESP ® is switched off or a tyre pressure loss warning is indicated, Active Lane Keeping Assist is automatically switched off.
Yellow: There is a malfunction. Also note any display messages.
Grey: Active Lane Keeping Assist is switched on but not ready.
Green: Active Lane Keeping Assist is switched on and ready.
Red: Active Lane Keeping Assist has guided you back into your lane by a course-correcting steering intervention. If a tangible warning is
also given in the steering wheel, the status display flashes. The lane marking of the affected side is shown in red.

Notification on the driver display in the Assistance menu
If one of your front wheels moves onto a detected lane marking, this is highlighted in red in the Assistance menu on the driver display.
BATASAN SISTEM
DALAM SITUASI BERIKUT, MUNGKIN TIDAK ADA INTERVENSI KEMUDI YANG MENGOREKSI ARAH, TETAPI PERINGATAN MUNGKIN DIBERIKAN DI RODA KEMUDI TERGANTUNG PADA SITUASI:
• if you clearly and actively steer, brake or accelerate.
- if a driving safety system is intervening, e.g. ESP ® or Active Brake Assist.
- if you have adopted a sporty driving style with high cornering speeds or high rates of acceleration.
- If transport equipment, e.g. a trailer or bicycle rack, is attached to the trailer hitch and the electrical connection has been correctly established
SISTEM MUNGKIN TERGANGGU ATAU TIDAK BERFUNGSI DALAM SITUASI BERIKUT:
\- if there is poor visibility, e.g. owing to insufficient illumination of the road, highly variable shade conditions, rain, snow, fog or heavy spray


G-Class - Owner's Manual
Driving and parking Driving and driving safety systems
• if there is glare, e.g. from oncoming traffic, direct sunlight or reflections.
- If there is soiling on the windscreen in the vicinity of the multifunction camera, or if the camera is misted up, damaged or obscured.
- if the bumper is soiled in the area of the radar sensors, or if these are damaged or obscured
- If there are no lane markings or several unclear lane markings for one lane, e.g. around roadworks
• If the lane markings are worn, dark or covered
- If the distance to the vehicle in front is too short and therefore the lane markings cannot be detected
- If the lane markings change quickly, e.g. lanes branch off, cross one another or merge
• If the lanes are very narrow and winding
Observe the notes on driving systems and your responsibility; otherwise you may fail to recognise potential dangers ( → page 338).
MENGAKTIFKAN/MENONAKTIFKAN ACTIVE LANE KEEPING ASSIST
Multimedia system:
Settings Assistance Collision avoidance
Active Lane Keeping Assist
▶ Activate or deactivate the function.
Alternatively, Active Lane Keeping Assist can be activated and deactivated via vehicle quick-access [☐].
① The setting after starting the vehicle depends on the country.
MENGATUR ACTIVE LANE KEEPING ASSIST
Multimedia system:
Settings Assistance Collision avoidance
Active Lane Keeping Assist
MENGATUR SENSITIVITAS
Select
Select Early, Med. or Late.
The last setting selected will be applied the next time the vehicle is started.
The standard setting of this function is country-dependent.
The function may not be available on vehicles with Driving Assistance Package, depending on the country.
MENGAKTIFKAN/MENONAKTIFKAN BANTUAN SAAT MARKA JALAN TERPUTUS
Select Advanced support.
The last setting selected will be applied the next time the vehicle is started.
① The standard setting of this function is country-dependent.
Depending on the country, this function must be activated in order for the full scope of Emergency Stop Assist to be available. Further information on Emergency Stop Assist ( → page 368).

G-Class - Owner's Manual
Driving and parking Driving and driving safety systems
Fungsi Sistem Damping Adaptif
The Adaptive Damping System improves driving comfort and ensures the best possible suspension tuning even when the vehicle is fully loaded. The damping is adjusted depending on the driving mode selected, or when using the off-road systems.
SISTEM PEREDAM ADAPTIF TERDIRI ATAS:
- Steel suspension
• Adaptive Damping System with continuous damper adjustment
• Five damper stages:
- Comfort
- Sport
- Trail
- Rock
Sand
• DYNAMIC SELECT ( → page 294)
① Damper stage is active in drive programmes C and E.
AMG RIDE CONTROL
FUNGSI AMG RIDE CONTROL
AMG RIDE CONTROL is an electronically controlled damping system for improved driving comfort and increased driving safety.
PEREDAMAN DISESUAIKAN SECARA INDIVIDU UNTUK SETIAP RODA DAN TERGANTUNG PADA FAKTOR-FAKTOR BERIKUT:
• driving style, e.g. sporty
• road condition, e.g. undulations
• individual selection of SPORT, SPORT + or COMFORT
The suspension tuning depends on the selected drive program.
In the on-road drive programs, the suspension and steering settings are optimised to be either comfortable or firm for sporty driving.
In each on-road drive program, you can also select the tuning individually using the AMG steering wheel button ( → page 383). After every change of drive program, automatic suspension tuning is active again.
With the exception of the AMG Offroad Package PRO, the suspension and steering settings cannot be selected in the Offroad drive programs. The suspension and steering settings are optimised for driving either on sand, on unpaved roads or on hard, rocky ground.
Vehicles with the AMG Offroad Package PRO are equipped with AMG ACTIVE RIDE CONTROL and AMG Active Balance Control. With AMG Active Balance Control, the roll resistance of the vehicle can be set in three stages to suit the driving situation in all Offroad drive programs ( → page 384).
When the vehicle is started again, the COMFORT setting is activated automatically.
G-Class - Owner's Manual
Driving and parking Driving and driving safety systems
MEMILIH PENYESUAIAN SUSPENSI DENGAN TOMBOL RODA KEMUDI AMG
You can also adjust the suspension setting via the multimedia system ( → page 301).
In offroad drive programs 📄, 📄 and 📄, the suspension setting is permanently assigned and cannot be selected.
ANDA DAPAT MEMILIH DARI TIGA PENGATURAN SUSPENSI YANG BERBEDA:
• COMFORT ensures a comfortable suspension setting. Select this suspension setting if you prefer a comfortable driving style.
- SPORT ensures a firmer suspension setting. Select this suspension setting when employing a sporty driving style, e.g. on winding country roads.
• SPORT + ensures a very firm suspension setting.

Press the upper or lower Ⓤ display button repeatedly, until it displays the ⏻ symbol.

If the display button does not show the symbol, then it is hidden. How functions are displayed and the order in which they are displayed can be set in the multimedia system ( → page 292).
Press the corresponding button ②.
The selected suspension setting is shown on the driver display as a message.
SIMBOL MENUNJUKKAN MODE YANG SAAT INI DIPILIH:
( blue ): COMFORT
(yellow): SPORT
( red ): SPORT +
AMG ACTIVE RIDE CONTROL
FUNGSI AMG ACTIVE RIDE CONTROL
AMG ACTIVE RIDE CONTROL additionally supplements the functions of AMG RIDE CONTROL with an active roll stabilisation system. Depending on the selected drive program, the suspension setting is adapted to the driving situation by means of continuous roll resistance adjustment, thus influencing the vehicle's roll behaviour. As a result, the driving comfort and safety of the vehicle are noticeably improved. In the Off-road drive programs, this allows the maximum axle articulation to maintain both ground contact and traction. As a result, the vehicle's off-road performance and a horizontal attitude when off-road are greatly improved.
Vehicles with the AMG Offroad Package PRO are equipped with AMG Active Balance Control. With AMG Active Balance Control, the roll resistance of the vehicle can be additionally set in three stages to suit the driving situation in all Offroad drive programmes ( → page 384).

G-Class - Owner's Manual
Driving and parking Driving and driving safety systems

PENGATURAN SUSPENSI PER PROGRAM BERKENDARA
PROGRAM BERKENDARA
• Roll resistance is reduced, allowing more axle articulation.
Vehicles with AMG Offroad Package PRO: roll resistance is adjustable via AMG Active Balance Control.
• Traction is improved for driving on sand.
PROGRAM BERKENDARA OFF-ROAD
• Roll resistance is increased, allowing more axle articulation.
• The suspension setting is configured for improved off-road performance.
Vehicles with AMG Offroad Package PRO: roll resistance is adjustable via AMG Active Balance Control.
• Traction is improved for driving off-road and on loose surfaces.
PROGRAM BERKENDARA OFF-ROAD
• Roll resistance is greatly reduced, allowing maximum axle articulation.
• The suspension setting is configured for optimum off-road performance.
Vehicles with AMG Offroad Package PRO: roll resistance is adjustable via AMG Active Balance Control.
• Traction is improved in difficult terrain and on hard, rocky surfaces.
PROGRAM BERKENDARA C:
• Body roll is reduced during cornering.
• Rolling movements caused by uneven road surfaces are reduced.
PROGRAM BERKENDARA S DAN S+ :
• Body roll is significantly reduced when cornering.
- [S + ]: the driving characteristics become even more agile owing to increased roll resistance.
PROGRAM PENGEMUDIAN
• Individual settings of the suspension setting via AMG DYNAMICS
AMG Active Balance Control
FUNGSI AMG ACTIVE BALANCE CONTROL
i AMG Active Balance Control is only available for vehicles with the AMG Offroad Package PRO.
AMG Active Balance Control supplements the functions of AMG ACTIVE RIDE CONTROL for all Offroad driving modes. You can adjust the roll resistance of the vehicle in three stages to suit the substrate, from LOW to HIGH. This allows you to achieve a balance between a comfortable and precise suspension set-up. Body stabilisation and the ground contact of the vehicle, as well as traction when off-road, can be greatly improved as a result.
When the vehicle is restarted, the LOW setting is activated automatically.
You can watch an animation on this topic via the following link:
MENGATUR RESISTENSI GULING
Persyaratan:
• AMG Offroad Package PRO

G-Class - Owner's Manual
Driving and parking Driving and driving safety systems
• An Offroad driving mode has been selected.
Depending on the equipment level, you can adjust the vehicle's roll resistance in Offroad driving modes 📄, 🙏 and 🗑.
ANDA DAPAT MEMILIH DI ANTARA TIGA SETELAN:
- LOW provides a comfortable suspension set-up (standard setting).
• MID has a stiffer suspension set-up.
• HIGH has a very taut and stiff suspension set-up.
① After restarting the vehicle, LOW is set automatically.

Press the upper or lower ① display button repeatedly, until it displays the [W] symbol.
If the display button does not show the symbol, then it is hidden. How functions are displayed and the order in which they are displayed can be set in the multimedia system ( → page 292).

If the display is greyed out, the requirements are not met and setting is not possible.
When the [图标] symbol is shown with a red ! on the display button, AMG Active Balance Control has a malfunction. Observe the information on warning lamps and display messages which are shown in the driver display.
Press the corresponding button ②.
THE SYMBOL INDICATES THE CURRENTLY SELECTED MODE:
- LOW (blue)
MID (yellow)
HIGH (sand brown)
AMG Traction PRO
FUNGSI AMG TRACTION PRO
i AMG Traction PRO is only available for vehicles with AMG Off-road Package PRO.
AMG Traction PRO uses wheel-selective braking and drive torque control to generate the maximum traction depending on the road surface. In addition the locking effect of the electronically controlled interwheel differential lock can be incrementally adjusted to suit the situation.
Deactivating ESP and using adjustable traction control requires a highly qualified and experienced driver.

G-Class - Owner's Manual
Driving and parking Driving and driving safety systems
AMG Traction PRO must not be used in normal road operation. AMG Traction PRO must only be activated off-road, away from the public roads.
Be sure to observe the safety notes and information on ESP ® (→ page 342).
You can watch an animation on this topic via the following link:
MENGAKTIFKAN AMG TRACTION PRO
Persyaratan:
• AMG Offroad Package PRO
• The vehicle is stationary.
- Drive programme 📄 Sand or 🌐 Rock has been selected.
- The transmission is in manual mode - manual gearshifting is activated ( → page 309).
- (→ page 312)The LOW RANGE off-road gear is engaged.
In Mercedes-AMG vehicles, the off-road gear can be engaged in both drive programmes.
MENGAKTIFKAN ATAU MENONAKTIFKAN
① AMG Traction PRO is deactivated when the vehicle is restarted.

Press the upper or lower ① display button repeatedly, until it displays the symbol.
① If the display button does not show the symbol, then it is hidden. How functions are displayed and the order in which they are displayed can be set in the multimedia system ( → page 292).
If the display is greyed out, the requirements are not met and setting is not possible.
When the symbol is shown with a red! on the display button, AMG Traction PRO has a malfunction. Observe the information on warning lamps and display messages which are shown in the driver display.
Press the corresponding button 2.
SIMBOL MENUNJUKKAN STATUS AMG TRACTION PRO:
blue: deactivated
red: activated
When AMG Traction PRO is active, the driver display shows the status traction.

G-Class - Owner's Manual
Driving and parking Driving and driving safety systems
If you change the direction of travel and therefore the transmission position in drive programme Rock, AMG Traction PRO is deactivated.
MENGATUR EFEK PENGUNCIAN
When AMG Traction PRO is activated, the locking effect of the electronically controlled inter-wheel differential lock can be incrementally adjusted to suit the situation.

When display button is showing the Offroad mode, press the display button.

The display key ⚫ shows the symbol ☐ with a seven-section segment display.
When the segment display shows only one segment lit up, the locking effect is minimal (-). When all seven segments light up, the locking effect is at its

maximum (+). When the vehicle is restarted, the medium setting is active and four segments light up.
▶ Turn the rotary control Ⓐ to the right or left to increase or reduce the locking effect.
When you press the display button ③ again, the display button shows the current drive programme.
RACE START
INFORMASI TENTANG RACE START
i RACE START is available only for Mercedes-AMG vehicles.
i RACE START is available only for vehicles with the AMG Performance package.
RACE START enables optimum vehicle acceleration from a standstill. This will necessitate a suitably high-grip road surface, and the tyres and vehicle must also be in good condition.
You can use RACE START only after the vehicle has been run in for approximately 1,500 km.
RACE START must not be used in normal road operation. RACE START may be activated and used only on dedicated race circuits, not on public roads.
Read the safety notes and information on ESP * (→ page 342).


G-Class - Owner's Manual
Driving and parking Driving and driving safety systems

PERINGATAN
Risk of skidding and having an accident from wheels spinning
If you use RACE START, depending on the ESP ® mode selected, there is an increased risk of skidding and having an accident.
▶ Make sure that no persons or obstacles are in the close vicinity of your vehicle.
MENGaktifKAN START BALAP

PERINGATAN
Risk of skidding and having an accident from wheels spinning
If you use RACE START, depending on the ESP mode selected, there is an increased risk of skidding and having an accident.
▶ Make sure that no persons or obstacles are in the close vicinity of your vehicle.
Persyaratan:
- The vehicle is switched on and the transmission and the engine are at normal operating temperature. The temperature indicators on the driver display are white instead of blue.
• The driver's door is closed.
- All vehicle occupants have their seat belts fastened properly and are seated correctly.
• The front wheels are in the straight-ahead position.
• The vehicle is on level ground.
- The vehicle is stationary, the brake pedal is depressed (left foot) and the parking brake is released.
• The transmission is in position D.
• One of the S or S+ drive programs is selected ( → page 295).
RACE START must not be used in normal road operation. RACE START may be activated and used only on dedicated race circuits, not on public roads.
Read the safety notes and information on ESP ® (→ page 342).
Rapidly depress the accelerator pedal fully.
The engine speed will increase.
If the activation conditions are not fulfilled, RACE START cannot be used. The RACE START not possible See Owner's Manual message will appear on the driver display.
The RACE START Release brake to start message will appear on the driver display.
If the brake pedal is not released after a short while, RACE START will be cancelled. The RACE START cancelled message will appear on the driver display.
Take your foot off the brake, but keep the accelerator pedal depressed. The vehicle will pull away at maximum acceleration. The RACE START active message will appear on the driver display.


G-Class - Owner's Manual


Driving and parking Driving and driving safety systems

RACE START will be deactivated immediately if you release the accelerator pedal during RACE START or if any of the activation conditions is no longer fulfilled. The RACE START cancelled message will appear on the driver display.
① After being used several times in short succession, RACE START will be unavailable until a certain distance has been driven.
Kamera mundur
FUNGSI KAMERA MUNDUR
The reversing camera serves solely as an aid. It is not a substitute for you having to pay attention to your surroundings. The responsibility for safe manoeuvring and parking remains with you. Ensure that there are no persons, animals or objects etc. in the manoeuvring area while manoeuvring and parking.
The area behind the vehicle is displayed as a mirror image, as it would appear in the inside mirror.
PERSPEKTIF KAMERA PADA LAYAR TENGAH

Example
Guide lines at a distance of approximately 0.5 m, 1.0 m, 1.5 m and 3.0 m from the rear area
Path indicating the route the wheels will take at the current steering angle (dynamic)
Driven surface depending on the current steering angle (dynamic)
Guide line at a distance of approximately 0.3 m from the rear area
Warning display of Parking Assist PARKTRONIC (→ page 398)
6 Trailer view or reversing camera (depending on the respective vehicle version)
⑦ Activate/deactivate Parking Assist PARKTRONIC (→ page 400)
Menu Parking Assistance
9 Wide-angle view
When Active Parking Assist is active, the paths are displayed in green ( → page 401).

G-Class - Owner's Manual
Driving and parking Driving and driving safety systems
TAMPILAN SUDUT LEBAR

Example
Switch on the standard view
Warning display of Parking Assist PARKTRONIC ( → page 398)
3 Activate/deactivate Parking Assist PARKTRONIC
(→ page 400)
TAMPILAN TRAILER

Example
① Warning display of Parking Assist PARKTRONIC (→ page 398)
2 Yellow guide line, locating aid
Red guide line at a distance of approximately 0.3 m from the ball head of the trailer hitch
Ball head of the trailer hitch
BATASAN SISTEM
If the system is not ready for operation, the message System inoperative appears on the driver display and/or on the central display.
If a camera perspective is selected and the central display is temporarily black or does not show a camera image, the camera system is also faulty or is not ready for operation.

PERINGATAN
Risk of accident due to functional limitations of the reversing camera
Functional limitations of the reversing camera could lead to a risk of collision with persons or objects.
Do not use the reversing camera if its functions are limited.
▶ Ensure that there are no persons, animals or objects etc., in the manoeuvring area while manoeuvring and parking.
KAMERA MUNDUR TIDAK AKAN BERFUNGSI, ATAU HANYA BERFUNGSI SEBAGIAN DALAM SITUASI BERIKUT:
• You are driving forwards at a speed greater than approximately 16 km/h.
• The rear-end door is open.
- The weather conditions are poor, e.g. heavy rain, snow, fog, storm or spray.
- The light conditions are poor, e.g. at night or if a light is shining into the camera.
- The camera lens is obstructed, dirty or misted up. Observe the notes on cleaning the reversing camera ( → page 620).


G-Class - Owner's Manual
Driving and parking Driving and driving safety systems
\- The camera or rear of your vehicle is damaged. In this case, have the camera, its position and setting checked at a qualified specialist workshop.
The field of vision and other functions of the camera system may be restricted due to additional vehicle attachments (e.g. licence plate bracket or bicycle rack).
The contrast of the display can be impaired by incidental light or other light sources, e.g. when driving out of a garage. Particular attention must be afforded in this case.
i Have the display repaired or replaced if, forexample, its use is considerably restricted due to pixel errors.
Observe also the information on vehicle sensors and cameras ( → page 338).
Kamera 360°
FUNGSI KAMERA 360°
KAMERA 360° ADALAH SISTEM YANG TERDIRI DARI EMPAT KAMERA:
- Front camera
- Reversing camera
• Two outside mirror cameras
The cameras record the immediate surroundings of the vehicle and provide assistance, e.g. during parking or at exits which are difficult to see.

The cameras serve solely as aids and may show a distorted view of obstacles, show them incorrectly or even omit them altogether. They are not a substitute for you having to pay attention to your surroundings. The responsibility for safe manoeuvring and parking remains with you. Ensure that there are no persons, animals or objects etc. in the manoeuvring area while manoeuvring and parking.
PERSPEKTIF KAMERA PADA LAYAR TENGAH

Example
Switching between standard view and wide-angle view
2 Image from the front camera
3D auto view
3D view right-hand side of the vehicle
3D view left-hand side of the vehicle
Trailer view (depending on the respective equipment) or reversing camera
Set the GPS activation point ( → page 397)
Activate/deactivate Parking Assist PARKTRONIC (→ page 400)
Menu Parking Assistance

G-Class - Owner's Manual
Driving and parking Driving and driving safety systems

The warning display of Parking Assist PARKTRONIC is shown in all views ( → page 398).
Availability of the 3D-Auto-View and 3D-View functions is dependent upon the respective equipment.
FUNCTION OF THE GUIDE LINES

Example
① Guide lines at a distance of approximately 0.5 m, 1.0 m, 1.5 m and 3.0 m from the rear area
2 Path indicating the route the wheels will take at the current steering angle (dynamic)
3 Driven surface depending on the current steering angle (dynamic)
Guide line at a distance of approximately 0.3 m from the rear area
When Active Parking Assist is active, paths and guide lines are displayed in green instead of yellow ( → page 401).
TOP VIEW WITH THE IMAGE FROM THE FRONT OR REVERSING CAMERA

Example
Warning display of Parking Assist PARKTRONIC (→ page 398)
Path indicating the current steering angle
3D VIEW, LEFT/RIGHT-HAND SIDE OF THE VEHICLE
PERINGATAN
Risk of accidents due to objects not being displayed or being displayed as heavily distorted
Due to the projection of the cameras, objects in the 3D views may be heavily distorted or not displayed at all.
▶ Ensure that there are no persons, animals or objects in the manoeuvring area while manoeuvring and parking.
G-Class - Owner's Manual
Driving and parking Driving and driving safety systems


Example
Top view with warning display of Parking Assist PARKTRONIC
2 Side view of the outside mirror cameras
In the 3D view, left/right-hand side of the vehicle, the virtual camera moves to the respective side of the vehicle. When you change the transmission position, the view is automatically adapted. In addition, the top view is displayed with the Parking Assist PARKTRONIC warning display.
i Display of the area beneath the vehicle may deviate from the actual circumstances.
TAMPILAN 3D OTOMATIS
The area behind the vehicle is not displayed as a conventional mirror image in the 3D views.

Example
Warning display of Parking Assist PARKTRONIC ( → page 398)
2 Guide lines
In the 3D auto view, the virtual camera moves to the standard view, facing forward from the rear above the roof. The view changes automatically when approaching obstacles.
If you touch the touchscreen, the view changes to a 3D view with free rotation. You can turn, tilt and zoom the views by touch.
TAMPILAN SUDUT LEBAR

Example
Switching between standard view and wide-angle view
2 Display of Parking Assist PARKTRONIC ( → page 398)
③ Activating/deactivating Parking Assist PARKTRONIC ( → page 400)


G-Class - Owner's Manual
Driving and parking Driving and driving safety systems
TAMPILAN TRAILER
If you select the trailer view and no trailer is coupled to the vehicle, the following display appears:

Contoh
1 Switching between standard view and trailer view
2 Yellow guide line, locating aid
Ball head of the trailer hitch
Red guide line at a distance of approximately 0.3 m from the ball head of the trailer hitch
In trailer mode, the guide lines are shown at the level of the trailer hitch.
When the electrical connection is established between the vehicle and the trailer, the display changes to the side camera view.

TAMPILAN SAMPING KAMERA KACA SPION LUAR PADA TAMPILAN TRAILER

Example
Switching to the reversing camera or trailer view
BATASAN SISTEM
If the system is not ready for operation, the message System inoperative appears on the driver display and/or on the central display.
If a camera perspective is selected and the central display is temporarily black or does not show a camera image, the camera system is also faulty or is not ready for operation.
▲ WARNING
Risk of accident due to functional limitations of the 360° camera
If the function of the 360° camera is restricted, there is a risk of collision with persons or objects.
Do not use the 360° camera in case of functional limitations.
▶ Ensure that there are no persons, animals or objects etc., in the manoeuvring area while manoeuvring and parking.

G-Class - Owner's Manual
Driving and parking Driving and driving safety systems
KAMERA 360° TIDAK AKAN BERFUNGSI, ATAU HANYA BERFUNGSI SEBAGIAN DALAM SITUASI BERIKUT, MISALNYA:
• You are driving forwards at a speed greater than approximately 16 km/h.
• The doors are open.
• An outside mirror is not completely extended.
• The rear-end door is open.
- The weather conditions are poor, e.g. heavy rain, snow, fog, storm or spray.
- The light conditions are poor, e.g. at night or if a light is shining into the camera.
- The camera lens is obstructed, dirty or misted up. Refer to the notes on cleaning the 360° camera (→ page 620).
- If cameras or vehicle components in which the cameras are fitted are damaged. In this event, have the cameras, their positions and their setting checked at a qualified specialist workshop.
For technical reasons, the standard height of the vehicle may be altered if the vehicle is carrying a heavy load and this can result in inaccuracies in the guide lines and in the display of generated images.
The field of vision and other functions of the camera system may be restricted due to additional vehicle attachments (e.g. licence plate bracket or bicycle rack).
(i) Contrast of the display may be impaired by abrupt direct sunlight or other light sources, e.g. when driving out of a garage. Particular attention must be afforded in this case.

i Have the display repaired or replaced if, forexample, its use is considerably restricted due to pixel errors.
Observe also the information on vehicle sensors and cameras ( → page 338).
FUNGSI KAMERA OFF-ROAD
The off-road camera provides support with various views when driving over rough terrain.
TAMPILAN BERIKUT TERSEDIA:
• Transparent bonnet
- Front view
Rear view
Active Parking Assist is not available in the drive programs Trail, Rock and Sand. Parking Assist PARKTRONIC is permanently deactivated in the drive programs Rock and Sand (depending on the respective country of use). Observe the system limits of the respective functions.
Call up the off-road camera in the off-road menu of the multimedia system ( → page 477).

G-Class - Owner's Manual
Driving and parking Driving and driving safety systems

BONNET TRANSPARAN

View of the transparent bonnet (example)
Activating/deactivating Parking Assist PARKTRONIC ( → page 398)
Switching the off-road camera on or off
3 Cardinal point
Position of the wheels
Area under the bonnet
6 Path indicating the current steering angle
7 Altitude above sea level
Activating/deactivating automatic, speed-dependent switching between the transparent bonnet view and the front view
If the Offroad menu is open in the central display and the button Ⓞ is switched on, the transparent bonnet view is automatically displayed in the transmission position [D]. This shows a virtual image of the area directly in front of the bumper, in front of the wheels and under the bonnet at speeds below approx. 6 km/h to 8 km/h. In addition, the current lane is displayed. The transparent bonnet view provides support when driving over difficult terrain, e.g. on rocky or uneven ground.
The front camera captures and records the shaded area under the bonnet. This area is then shown as soon as it has been traversed by the vehicle. If the vehicle has not been moved for some time, the recorded area is displayed in greyscale and faded out.
NOTE
Damage caused by obstacles which were not indicated
The transparent bonnet view is generated from images recorded previously by the 360° camera.
These recorded images may therefore possibly deviate from the actual conditions. In the meantime, moving objects may have found their way underneath the vehicle which are not showing up in the current display.
▶ Avoid any obstacles or navigate them with extreme caution.
Adapt the travel speed to the respective conditions.
TAMPILAN DEPAN DAN BELAKANG

Image of front and rear view (example)
1 Downhill gradient indicator
2 Path indicating the current steering angle
3 Uphill gradient indicator
(i) Note that the area between the vehicle and up to approximately 1 m in front of the vehicle is not displayed.


G-Class - Owner's Manual
Driving and parking Driving and driving safety systems
The downhill gradient and uphill gradient displays are only shown in the front view.
If the vehicle is travelling faster than approximately 8 km/h the view automatically changes from transparent bonnet to front view. The camera image is closed if the vehicle is travelling faster than approximately 20 km/h - 30 km/h (depending on the drive program).
If reverse gear is engaged, the rear view is automatically shown with the image of the reversing camera.
BATASAN SISTEM
AREA DI BAWAH BONNET TIDAK DITAMPILKAN DENGAN BENAR DALAM SITUASI BERIKUT:
in the rain
• when driving in the dark
• when shadows fall on the area recorded by the camera
Observe the instructions on the 360° camera's function and its system limits. You may otherwise fail to recognise potential dangers (→ page 391).
MEMANGGIL TAMPILAN KAMERA 360° MENGGUNAKAN TOMBOL

Press button 1
▶ Select the menu Camera views.
Select the desired view in the multimedia system ( → page 391).
MEMILIH TAMPILAN UNTUK KAMERA 360° (GIGI MUNDUR)
Engage reverse gear.
Select the desired view in the multimedia system ( → page 391).
MENGELOLA KAMERA 360° DENGAN POSISI AKTIVASI GPS
Multimedia system:

MENGUBAH NAMA POSISI AKTIVASI
(i) You can determine activation positions in the Camera views menu ( → page 391).
Select □□□ for the desired activation position.


G-Class - Owner's Manual
Driving and parking Driving and driving safety systems
Select Edit.
Enter a name and confirm.
The activation position is stored under the new name.
MENGHAPUS POSISI AKTIVASI
Select □□ for the desired activation position.
Select Delete entry.
Confirm the prompt.
The activation position is deleted.
PARKIR ASSIST PARKTRONIC
FUNGSI PARKIR ASSIST PARKTRONIC
Parking Assist PARKTRONIC is not available in the drive programs Rock and Sand (country-dependent).
Parking Assist PARKTRONIC is an electronic parking assistance system which monitors the area surrounding your vehicle. The distance between your vehicle and a detected obstacle is displayed visually and acoustically.
The passive side impact protection also warns you of obstacles to the side. These must be detected beforehand by the sensors in the front or rear bumper while driving by them. If you steer in the direction of a detected obstacle and there is a risk of a lateral collision, a warning is issued.
Passive side impact protection can be activated and deactivated via the multi-media system ( → page 401).

In order that front or rear obstacles to the side can be displayed, the vehicle must first travel a distance of at least half a vehicle length. Once the vehicle has travelled a distance of one vehicle length, obstacles on all sides can be shown.
Parking Assist PARKTRONIC serves solely as an aid. It is not a substitute for you having to pay attention to your surroundings. The responsibility for safe manoeuvring, parking and exiting parking spaces remains with you. Ensure that there are no persons, animals or objects etc. in the manoeuvring area while manoeuvring and parking in/exiting parking spaces.
TAMPILAN PADA LAYAR TENGAH

Example: vehicles with 360° camera
Ready for display at the front and rear
2 Ready for display all around
3 Ready for display all around and obstacles detected

G-Class - Owner's Manual
Driving and parking Driving and driving safety systems


Example: vehicles with reversing camera
Ready for display at the front and rear
2 Ready for display all around
3 Ready for display all around and obstacles detected
As soon as Parking Assist PARKTRONIC is ready for display, the respective areas ① to ③ of the display are shown in blue.
WARNA TAMPILAN BERUBAH TERGANTUNG PADA JARAK KE OBSTAKEL YANG TERDETEKSI:
• Blue: > 1 m (no obstacles detected)
• Yellow: approximately 1 m - 0.7 m
• Orange: approx. 0.7 m - 0.4 m
Red: < 0.4 m
Vehicles with 360° camera: the boundary line shifts dynamically depending on the position and distance of the obstacles detected.
An intermittent warning tone also sounds depending on the distance to the obstacle detected. You can set the timing of the warnings in the multimedia system. In the Warn early setting, the system warns you from a distance of 1 m. In the standard setting, from a shorter distance of 0.4 m.

Example: vehicles with 360° camera

Example: vehicles with reversing camera
JIKA ANDA TIDAK BERADA DI MENU KAMERA & PARKIR DAN OBSTAKEL DI JALUR KENDARAAN TERDETEKSI, JENDELA POP-UP ① MUNCUL DI LAYAR TENGAH JIKA PERSYARATAN BERIKUT TERPENUHI:
• Vehicles without Active Parking Assist: when driving no faster than 12 km/h.
• Vehicles with Active Parking Assist: when driving no faster than 18 km/h.
BATASAN SISTEM
PARKIR ASSIST PARKTRONIC TIDAK SELALU MEMPERHITUNGKAN OBSTAKEL BERIKUT:
• Obstacles below the detection range, e.g. persons, animals or objects
- Obstacles above the detection range, e.g. protruding loads, overhangs or loading ramps of lorries


G-Class - Owner's Manual
Driving and parking Driving and driving safety systems
• Pedestrians or animals approaching the vehicle from the side
- Objects placed next to the vehicle
OBSTAKEL DI SISI TIDAK DITAMPILKAN DALAM SITUASI BERIKUT, MISALNYA:
• You park the vehicle and switch it off.
• You open the doors.
After the vehicle is restarted, obstacles must be detected again by driving past them before a new warning can be issued.
PERHATIKAN JUGA BATASAN SISTEM DARI SISTEM BERIKUT:
• Reversing camera ( → page 389)
• 360° camera ( → page 391)
Observe the information on vehicle sensors and cameras; otherwise the system cannot function properly ( → page 338).
Vehicles with trailer hitch: If a transport device, e.g. trailer or bicycle rack is attached to the trailer hitch and the electrical connection is correctly established, Parking Assist PARKTRONIC is deactivated for the rear zone.
MASALAH DENGAN PARKIR ASSIST PARKTRONIC
If the Parking Assist PARKTRONIC display lights up red for approximately three seconds and then goes out, and the P98 symbol appears on the driver display, the system may have been deactivated due to signal interference. Start the vehicle again and check whether Parking Assist PARKTRONIC works in a different location.
Jika nada peringatan juga berbunyi, penyebabnya mungkin sebagai berikut:
• The sensors are dirty: clean the sensors ( → page 620).
- Parking Assist PARKTRONIC has been deactivated due to a malfunction: restart the vehicle. If the problem persists, consult a qualified specialist workshop.
MENGAKTIFKAN/MENONAKTIFKAN PARKIR ASSIST PARKTRONIC
CATATAN
Vehicle damage when parking or manoeuvring due to nearby objects
Parking Assist PARKTRONIC may not detect certain objects in the close-up range.
When parking or manoeuvring, pay particular attention to objects that are under or above the sensors, e.g. flower pots or drawbars. The vehicle or other objects may otherwise be damaged.
Persyaratan:
- Neither drive program 📁 Rock nor 🐵 Sand is selected (→ page 294).
• The camera menu is open.
• Or: the Parking Assist PARKTRONIC pop-up window is displayed.
Tap Pw on the central display.
If the indicator lamp is lit, Parking Assist PARKTRONIC is active. If the indicator lamp does not light up or the symbol P0CH is displayed, Parking Assist PARKTRONIC is not active.
G-Class - Owner's Manual
Driving and parking Driving and driving safety systems
Parking Assist PARKTRONIC is automatically activated when the vehicle is started.
Alternatively, Parking Assist PARKTRONIC can be activated or deactivated in the quick-access menu.
MENGATUR NADA PERINGATAN PARKIR ASSIST PARKTRONIC
Multimedia system:

MENGATUR NADA PERINGATAN
▶ Select Set warning tones.
▶ Set the desired level under Volume or Tone pitch.
MENGAKTIFKAN/MENONAKTIFKAN REDAMAN AUDIO
▶ Select Audio fadeout and activate or deactivate Audio fade for warnings. The volume of the media source currently playing is reduced when a warning tone sounds in Parking Assist PARKTRONIC.
or
▶ Select Audio fadeout and activate or deactivate Audio fadeout in trans. position R.
The volume of the media source currently playing is reduced when reverse gear is engaged.
MENGATUR WAKTU PERINGATAN
▶ Select Time of warning.
Set the desired warning time for Front or Rear.
▶ Activate or deactivate Side warning.
Parkir Assist Aktif
FUNGSI PARKIR ASSIST AKTIF

PERINGATAN
Risk of accident due to objects located above or below the detection range of Active Parking Assist
JIKA ADA OBJEK DI ATAS ATAU DI BAWAH JANGKAUAN DETEKSI, SITUASI BERIKUT MUNGKIN TERJADI:
• Active Parking Assist may steer too early.
• The vehicle may not stop in front of these objects.
There is a danger of collision!
In these situations, do not use Active Parking Assist.
Active Parking Assist is not available in the drive programs Trail, Rock and Sand.
Active Parking Assist is an electronic parking assistance system which uses ultrasound with the assistance of the reversing camera or 360° camera. When you are driving forwards up to approximately 35 km/h, the system automatically measures parking spaces on both sides of the vehicle.
Active Parking Assist serves solely as an aid. It is not a substitute for you having to pay attention to your surroundings. The responsibility for safe manoeuvring, parking and unparking remains with you at all times. Ensure that no persons, animals or objects etc. are in the vehicle's path.
Active Parking Assist offers the following functions:


G-Class - Owner's Manual
Driving and parking Driving and driving safety systems
KENDARAAN DENGAN KAMERA MUNDUR
• Parking in parking spaces parallel to the roadway
• Reversing into parking spaces perpendicular to the roadway
The parking space is freely selectable. The parking procedure is executed with the vehicle reversing.
KENDARAAN DENGAN KAMERA 360°
• Parking in parking spaces parallel to the roadway
- Parking in parking spaces perpendicular to the roadway (either forwards or reversing as desired)
- Parking in parking spaces that can only be detected as such from markings (forexample at the roadside)
- Exiting parking spaces if you have parked using Active Parking Assist
The parking space is freely selectable. The parking direction (forwards or reversing) can also be freely selected, depending on the orientation of the parking space.
If Active Parking Assist is available, the notification [P] appears on the driver display. When the system detects parking spaces, the notification [IP] appears. The arrows show the side of the roadway on which free parking spaces are detected. These are then shown on the central display.
When Active Parking Assist is activated, the turn signal indicator is activated based on the calculated path of your vehicle. The parking and unparking procedures are assisted by acceleration, braking, steering and gear changes.
To start the parking procedure, press the button [P] (→ page 403).
PARKIR ASSIST AKTIF AKAN DIBATALKAN DALAM SITUASI BERIKUT:
• You press the button P again.
• You begin steering.
• You select the park position P.
• You engage the electric parking brake.
- ESP ® intervenes.
• You open the driver's door.
BATASAN SISTEM
If the exterior lighting is malfunctioning, Active Parking Assist is not available.
PERHATIKAN JUGA BATASAN SISTEM DARI SISTEM BERIKUT:
• Reversing camera ( → page 389)
• 360° camera (→ page 391)
Objects above or below the detection range of Active Parking Assist, e.g. protruding loads, overhangs or loading ramps of trucks or parking space boundaries are not detected when measuring the parking space. These are also not subsequently taken into account when calculating the parking procedure. In some circumstances, Active Parking Assist may therefore prematurely guide you into the parking space or brake too late.
Certain environmental conditions, such as snowfall or heavy rain, may lead to a parking space being mismeasured. Parking spaces that are partially occupied by trailer drawbars might not be identified as such or may be measured incorrectly. Only use Active Parking Assist on level road surfaces with adequate grip.
Active Parking Assist can also display unsuitable parking spaces, e.g. parking spaces in which parking is not permitted or on unsuitable surfaces.

G-Class - Owner's Manual
Driving and parking Driving and driving safety systems

JANGAN GUNAKAN ACTIVE PARKING ASSIST DALAM SITUASI BERIKUT, MISALNYA:
• in extreme weather conditions, such as ice, packed snow or in heavy rain.
• when transporting a load that protrudes beyond the vehicle
• if the parking space is on a steep downhill or uphill gradient
• when snow chains are fitted
• when a trailer or bicycle rack is attached
• directly after a tyre change or when spare tyres are fitted
• if the tyre pressure is too low or too high
• on steep downhill gradients of more than approximately 15%
- if the vehicle level has been offset, e.g. mounting the kerb on one side (vehicles with level control)
You can watch an animation on this topic via the following link:
PARKIR DENGAN ACTIVE PARKING ASSIST

PERINGATAN
Risk of accident due to objects located above or below the detection range of Active Parking Assist
JIKA ADA OBJEK DI ATAS ATAU DI BAWAH JANGKAUAN DETEKSI, SITUASI BERIKUT DAPAT TERJADI:
• Active Parking Assist may steer too early.
• The vehicle may not stop in front of these objects.
There is a danger of collision!
In these situations, do not use Active Parking Assist.
Persyaratan:
\- None of the drive programs 📄 Trail, 📋 Rock or 📄 Sand is selected (→ page 294).

Press the button ⓘ.

Parking Assist menu (example for left-hand side of the screen)
Select the menu Parking Assistance ②.
Parking spaces ③ detected by the system are shown on the central display.

G-Class - Owner's Manual
Driving and parking Driving and driving safety systems
At speeds greater than approximately 16 km/h, the camera perspective on the right-hand side of the screen switches off.

Parking Assist menu (example)
When the vehicle is at a standstill, the indicated vehicle path ⑤ into the currently selected parking space ⑥ also appears.
If a parking space is displayed: stop the vehicle.
If necessary, select another parking space.
▶ Vehicles with 360° camera: to change the parking direction, tap the selected parking space again.
To start the parking procedure: press the button ① again.
Of
Depress the brake pedal and select Start parking procedure
Take your hands off the steering wheel and release the brake pedal. The vehicle drives into the selected parking space.
The duration of the parking procedure is indicated by a progress bar. The turn signal indicator is switched on automatically when the parking procedure begins. You are responsible for selecting the turn signal indicator in accordance with the traffic conditions. If necessary, select the turn signal indicator accordingly.

WARNING
Risk of accident due to vehicle swinging out while parking or pulling out of a parking space
While parking or exiting a parking space, the vehicle swings out and can drive onto areas of the oncoming lane.
This could cause you to collide with objects or other road users.
Pay attention to objects and other road users.
Where necessary, stop the vehicle or cancel the parking procedure with Active Parking Assist.
Following completion of the parking procedure, the message Active Parking Assist finished appears.
Secure the vehicle against rolling away. When necessitated by legal requirements or local conditions; turn the wheels towards the kerb.
You can stop the vehicle and change the transmission position during the parking procedure. The system then calculates a new vehicle path. If no new vehicle path is available, the transmission position can be changed again, or the process can be cancelled.

Immediate parking via the Camera views menu

G-Class - Owner's Manual
Driving and parking Driving and driving safety systems
▶ Select the Camera views menu.
When the vehicle is stationary and in transmission position R, and the symbol ⑦ appears in the camera image: press the button ① again.
or
Depress the brake pedal and select Start parking procedure. The parking procedure is initiated for the detected parking space.
The parking space and parking direction cannot be changed in immediate parking.
KELUAR DARI TEMPAT PARKIR DENGAN ACTIVE PARKING ASSIST

PERINGATAN
Risk of accident due to objects located above or below the detection range of Active Parking Assist
JIKA ADA OBJEK DI ATAS ATAU DI BAWAH JANGKAUAN DETEKSI, SITUASI BERIKUT DAPAT TERJADI:
• Active Parking Assist may steer too early.
• The vehicle may not stop in front of these objects.
There is a danger of collision!
In these situations, do not use Active Parking Assist.
Persyaratan:
• The vehicle is equipped with a 360° camera.
• The vehicle has been parked with Active Parking Assist.
Start the vehicle.

Press the button 1.

Parking Assist menu (example for left-hand side of the screen)
Select the menu Parking Assistance ②.
If necessary, change the direction of exit
To initiate the unparking procedure: press the button 📄 again.
or


G-Class - Owner's Manual
Driving and parking Driving and driving safety systems
Depress the brake pedal and select Start unparking procedure ③
(depending on the respective vehicle equipment).
If necessary, change the transmission position. Observe any messages displayed on the driver display and central display.
The vehicle moves out of the parking space.
The duration of the unparking procedure is indicated by a progress bar.
The turn signal indicator is automatically switched on when the unparking procedure is initiated, and automatically switched off again when it is completed. You are responsible for selecting the turn signal indicator in accordance with the traffic conditions. If necessary, select the turn signal indicator accordingly.

PERINGATAN
Risk of accident due to vehicle swinging out while parking or pulling out of a parking space
While parking or exiting a parking space, the vehicle swings out and can drive onto areas of the oncoming lane.
This could cause you to collide with objects or other road users.
Pay attention to objects and other road users.
▶ Where necessary, stop the vehicle or cancel the parking procedure with Active Parking Assist.
After the parking space has been exited, a warning tone and the Active Parking Assist finished, take control of vehicle message prompt you to take control of the vehicle. You have to accelerate, brake, steer and change gear yourself again.
If you do not react to the prompt to reassume control of the vehicle, the system will brake the vehicle to a standstill.
MENJEDA ACTIVE PARKING ASSIST

PERINGATAN
Risk of accident due to objects located above or below the detection range of Active Parking Assist
JIKA ADA OBJEK DI ATAS ATAU DI BAWAH JANGKAUAN DETEKSI, SITUASI BERIKUT DAPAT TERJADI:
• Active Parking Assist may steer too early.
• The vehicle may not stop in front of these objects.
There is a danger of collision!
In these situations, do not use Active Parking Assist.
ANDA DAPAT MENGGANGGU PROSEDUR PARKIR ATAU KELUAR PARKIR DARI ACTIVE PARKING ASSIST DENGAN MELAKUKAN SALAH SATU TINDAKAN BERIKUT, CONTOHNYA:
▶ Depress the brake pedal.
Open the front passenger door, a rear door, the rear-end door or the bonnet.
▶ Apply the electric parking brake or activate the HOLD function.
MEMULAI ULANG PROSEDUR PARKIR ATAU KELUAR PARKIR:
▶ Check the vehicle surroundings.
Ensure once again that there are no persons, animals or objects in the vehicle's path.
Gently depress the accelerator pedal.
Observe the messages shown on the driver display and central display.


G-Class - Owner's Manual
Driving and parking Driving and driving safety systems
Observe the system limits of Active Parking Assist ( → page 401).
FUNGSI PENGEREMAN OTOMATIS DARI ACTIVE PARKING ASSIST

PERINGATAN
Risk of accident due to objects located above or below the detection range of Active Parking Assist
JIKA ADA OBJEK DI ATAS ATAU DI BAWAH JANGKAUAN DETEKSI, SITUASI BERIKUT DAPAT TERJADI:
• Active Parking Assist may steer too early.
• The vehicle may not stop in front of these objects.
There is a danger of collision!
In these situations, do not use Active Parking Assist.
Persons or objects detected in the vehicle's path may trigger a sudden braking action, which will in turn halt the parking or unparking procedure. The vehicle will then remain at a standstill. The parking or unparking procedure is resumed if you depress the accelerator pedal.
Check the area around your vehicle again before resuming the parking or unparking procedure. Ensure once again that no persons, animals or objects are in the vehicle's path. Observe also the system limits of Active Parking Assist.

Asisten manuver
FUNGSI DRIVE AWAY ASSIST

Drive Away Assist can reduce the severity of an impact when pulling away. If the system detects an obstacle in the direction of travel, the vehicle's speed is briefly restricted to approximately 2 km/h. When a critical situation is detected, the symbol △ appears on the central display.
Drive Away Assist can be switched off or on in the Manoeuvring assistance menu.
You can cancel an intervention by Drive Away Assist at any time by deactivating Parking Assist PARKTRONIC.
PERINGATAN
Risk of accident caused by limited detection performance of Drive Away Assist
Drive Away Assist cannot always clearly identify objects and traffic situations.
▶ Always pay careful attention to the traffic situation; do not rely on Drive Away Assist alone.
Be prepared to brake or swerve as necessary, provided the traffic situation permits and that it is safe to take evasive action.

G-Class - Owner's Manual
Driving and parking Driving and driving safety systems
Drive Away Assist serves solely as an aid. It is not a substitute for you having to pay attention to your surroundings. The responsibility for safe manoeuvring, parking and exiting parking spaces remains with you. Ensure that no persons, animals or objects etc. are in the vehicle's path.
RISIKO TABRAKAN DAPAT TERJADI DALAM SITUASI BERIKUT, CONTOHNYA:
• If the driver mixes up the accelerator and brake pedals.
• If an incorrect transmission position is engaged.
FUNGSI DRIVE AWAY ASSIST AKTIF DALAM KONDISI BERIKUT:
- Neither drive program 📁 Rock or 🐘 Sand is selected (→ page 294).
• If Parking Assist PARKTRONIC is activated.
- If you shift the transmission position to R or D when the vehicle is at a standstill.
• If the detected obstacle is less than approx. 1.0 m away.
• Manoeuvring assistant is activated ( → page 410).
BATASAN SISTEM
The performance of Drive Away Assist is limited on uphill gradients.
If a transport device, e.g. trailer or bicycle rack, is attached to the trailer hitch and the electrical connection is correctly established, Drive Away Assist is not available.
① Observe also the system limits of Parking Assist PARKTRONIC ( → page 398).
FUNGSI CROSS TRAFFIC ALERT
The Cross Traffic Alert function is only available for vehicles with Blind Spot Assist.
The Cross Traffic Alert function is not available in the drive programs Rock and Sand.
The Cross Traffic Alert function can warn drivers of any crossing traffic when reversing and manoeuvring out of a parking space. The radar sensors in the bumper also monitor the area adjacent to the vehicle. If a critical situation is detected, the symbol 🙏 appears on the central display, and the vehicle can be braked automatically.
If the radar sensors are obstructed by vehicles or other objects, detection is not possible.
Depending on the respective country, Cross Traffic Alert can be switched off or on in the menu Manoeuvring assistance ( → page 410).
FUNGSI CROSS TRAFFIC ALERT AKTIF DALAM KONDISI BERIKUT:
- Neither drive program 📄 Rock or 🐃 Sand is selected (→ page 294).
• If the vehicle is reversing at walking pace.
• Manoeuvring assistant is activated ( → page 410).
① Observe also the instructions on Blind Spot Assist ( → page 377).
BATASAN SISTEM
The Cross Traffic Alert function is not available on uphill gradients.
G-Class - Owner's Manual
Driving and parking Driving and driving safety systems
If a transport device, e.g. trailer or bicycle rack is attached to the trailer hitch, and the electrical connection is correctly established, the Cross Traffic Alert function is not available.
FUNGSI PENGEREMAN JARAK DEKAT

PERINGATAN
Risk of accident caused by limited detection by the manoeuvring brake function
The manoeuvring brake function cannot always clearly detect people. Other obstacles are not detected by the function.
In these cases, the function may brake unnecessarily or not brake at all.
▶ Always pay careful attention to the traffic situation; do not rely on the manoeuvring brake function alone.
Be ready to brake.
i Close-range braking is not available in the drive programs Rock and Sand.
Close-range braking can prevent collisions with pedestrians when the vehicle is reversing at slow speeds. If the reversing camera detects a person in the vehicle's path, the vehicle can be braked to a standstill.
PENGEREMAN JARAK DEKAT DAPAT BEKERJA DALAM KONDISI BERIKUT:
• The vehicle is reversing at a speed slower than 10 km/h.
• The camera image is shown on the central display ( → page 397).

Depending on the respective country, close-range braking can be deactivated or activated in the Manoeuvring assistance menu ( → page 410).
When close-range braking is triggered, the symbol 🔒 appears in red in the selected view in the menu Camera & parking.
If close-range braking is not available, the symbol 🚗 appears in grey.
Close-range braking serves solely as an aid. It is not a substitute for you having to pay attention to your surroundings. The responsibility for safe manoeuvring, parking and unparking remains with you at all times. Ensure that no persons, animals or objects etc. are in the vehicle's path.
BATASAN SISTEM
PERHATIKAN BATASAN SISTEM DARI FUNGSI-FUNGSI BERIKUT:
• Active Parking Assist ( → page 401)
• 360° camera (→ page 391)
• Reversing camera (→ page 389)
FUNGSI PENGEREMAN JARAK DEKAT TIDAK TERSEDIA DALAM SITUASI BERIKUT:
• in the drive programs 📄 Rock and 🐵 Sand (→ page 294).
• on uphill gradients
- if transport equipment, e.g. a trailer or bicycle rack, is attached to the trailer hitch and the electrical connection has been correctly established.

G-Class - Owner's Manual
Driving and parking Driving and driving safety systems
MENGAKTIFKAN/MENONAKTIFKAN ASISTEN MANUVER
Multimedia system:

① This function is a Digital Extra ( → page 96).
The 'activating/deactivating manoeuvring assistant' function is not available in all countries.
Select Manoeuvring assistance.
Activate or deactivate the desired manoeuvring assistant.
Asisten Manuver Trailer
FUNGSI ASISTEN MANUVER TRAILER
Trailer Manoeuvring Assist is not available in the drive programs Trail, Rock and Sand.
PERINGATAN
Risk of accident due to unsuitable trailers
Trailers with a steered axle or a fifth wheel cannot be used with Trailer Manoeuvring Assist.
Due to this, the trailer cannot be manoeuvred in the desired direction and you can cause a collision or the trailer can overturn.
Only use Trailer Manoeuvring Assist with trailers with fixed drawbars and axles.
CATATAN
Damage due to overhanging loads in front or drawbar installations
The vehicle and the trailer may be damaged during manoeuvring due to overhanging loads at the front of the trailer or drawbar installations.
Pay attention to overhanging loads or drawbar installations while manoeuvring.
Trailer Manoeuvring Assist assists you when reversing with a trailer. The reversing camera monitors the articulation angle between the vehicle and the trailer and adjusts it to a specified value. Trailer Manoeuvring Assist also limits your speed.
Trailer Manoeuvring Assist serves solely as an aid. It is not a substitute for you having to pay attention to your surroundings. The responsibility for safe manoeuvring, parking and exiting parking spaces remains with you. Ensure that there are no persons, animals or objects etc. in the manoeuvring area while manoeuvring and parking in/exiting parking spaces.


G-Class - Owner's Manual


Driving and parking Driving and driving safety systems
You can enter the articulation angle value directly via the multimedia system, or use a straightening or 90° manoeuvre. When carrying out a straightening manoeuvre, the system calculates the articulation angle automatically and straightens the vehicle/trailer combination to the trailer's current direction.
Observe the notes on trailer operation ( → page 413).
BATASAN SISTEM
PERHATIKAN BATASAN SISTEM DARI FUNGSI-FUNGSI BERIKUT:
• Active Parking Assist ( → page 401)
360° camera (→ page 391)
• Reversing camera ( → page 389)
SISTEM MUNGKIN TERGANGGU ATAU TIDAK BERFUNGSI DALAM SITUASI BERIKUT:
• The uphill gradient is greater than approximately 15%.
For a heavy trailer with inertia-activated brake, functional restrictions may occur on uphill gradients less than approx. 15%. In these situations the driver must intervene accordingly.
MENGGUNAKAN ASISTEN MANUVER TRAILER
Persyaratan:
• The vehicle has been started and is stationary.
- Neither drive program 📄 Trail, 📄 Rock or 📄 Sand is selected (→ page 294).
• A trailer is selected in the Vehicle menu ( → page 416).
• A trailer has been detected.
• The uphill gradient is less than approximately 15 %.
• The rear-end door is closed.
• The electric parking brake is not applied.
• The driver's seat belt is fastened.

Engage reverse gear R.
Press the button ①.
The camera image is shown on the central display.
Take your hands off the steering wheel.


G-Class - Owner's Manual
Driving and parking Driving and driving safety systems
① This image is shown as an example and is without trailer.
You can select various manoeuvres in the Trailer Manoeuvring Assist menu. The manoeuvres available depend on the trailer's current articulation angle and length.
To adjust the articulation angle: select Ⓐ. To change the articulation angle, swipe to the left or to the right across the entire range of the camera image in the central display.
or
To activate the straightening manoeuvre: select ②.
The system calculates the articulation angle in such a way that the direction of the trailer at the time of activation is maintained. There is a short countersteering movement of the trailer while the vehicle is reversing, which then guides it back to the desired line. This allows the vehicle to align with the trailer, while at the same time maintaining the trailer's direction.
or
To activate the 90° manoeuvre:
- Align the vehicle in the same direction (line) as the trailer.
- Select Ⓤ (left or right).
The system calculates the articulation angle so that a trailer can be manoeuvred into a driveway at the most acute angle possible when it is perpendicular to its own vehicle. After the manoeuvre, the vehicle is aligned again in the trailer's direction.
▶ Accelerate and brake as required.

The maximum articulation angle depends on the length of the trailer. The system calculates this by driving the vehicle forwards, including cornering. Before the trailer length has been calculated, the maximum articulation angle is approximately 23° . The longer the trailer, the greater the maximum articulation angle (max. approximately 60° ).
① Be aware of all surroundings and always remain ready to brake.


G-Class - Owner's Manual
Driving and parking Trailer hitch
< Penarik trailer
Catatan tentang pengoperasian trailer

CATATAN
The operating permit may be invalidated due to the illegal installation of trailer hitches
The installation – including retrofitting – of a non-folding or non-removable trailer hitch that even partially conceals the license plate or the lighting system is prohibited.
▶ Observe the applicable legal regulations for the installation of trailer hitches.


PERINGATAN
Risk of accident due to car/trailer combination swerving
If you drive too fast in trailer operation, the car/trailer combination may start to swerve.
This could cause you to lose control of the car/trailer combination. The car/trailer combination may even overturn.
▶ Under no circumstances should you try to straighten the car/trailer combination by increasing your speed.
▶ Reduce the speed and do not countersteer.
Brake if necessary.

CATATAN
Damage to the engine due to overheating
If you have a trailer hitch retrofitted, modifications to the engine cooling system may be necessary depending on the vehicle type.
If you have a trailer tow hitch retrofitted, observe the fastening points on the vehicle frame.

G-Class - Owner's Manual
Driving and parking Trailer hitch
Retrofitting a trailer hitch is permissible only if a trailer load is specified in your vehicle documents. If this is not the case, the vehicle is not approved for trailer operation.
Further information can be obtained at a qualified specialist workshop.
PERHATIKAN CATATAN BERIKUT TENTANG BEBAN LIDAH:
• do not use a tongue weight that exceeds or falls below the permissible tongue weight
• use a tongue weight as close as possible to the maximum tongue weight
JANGAN MELEBIHI NILAI BERIKUT:
• permissible trailer load
• permissible rear axle load of the towing vehicle
• gross vehicle weight rating of the towing vehicle
• permissible gross mass of the trailer
• maximum permissible speed of the trailer
PASTIKAN HAL BERIKUT SEBELUM MEMULAI PERJALANAN:
- the tyre pressure on the rear axle of the towing vehicle is set for a maximum load
• the lighting of the connected trailer is operational
In the event of increased rear axle load, the car/trailer combination may not exceed a maximum speed of 100 km/h for reasons concerning the operating permit. This also applies in countries in which the permissible maximum speed for car/trailer combinations is above 100 km/h.

When you are reversing with a trailer, remember to use the Trailer Manoeuvring Assist function ( → page 410).
Menghubungkan/memutuskan trailer
TRAILER AKAN TERDETEKSI DENGAN BENAR OLEH KENDARAAN HANYA JIKA KONDISI BERIKUT TERPENUHI:
• the trailer is connected correctly
• the trailer lighting system is in working order
TRAILER YANG TERHUBUNG DENGAN BENAR MEMPENGARUHI FUNGSI SISTEM BERIKUT, CONTOHNYA:
- ESP ® trailer stabilisation
• Trailer Manoeuvring Assist
• Active Lane Keeping Assist
• Parking Assist PARKTRONIC
• Active Parking Assist
- Blind Spot Assist
Cross Traffic Alert
- Close-range braking
- Reversing camera
360° camera

G-Class - Owner's Manual
Driving and parking Trailer hitch
MENGHUBUNGKAN TRAILER

CATATAN
Damage to the starter battery due to full discharge
Charging the trailer battery using the power supply of the trailer can damage the starter battery.
Do not use the vehicle's power supply to charge the trailer battery.
i TRAILER DENGAN STECKER 7-PIN DAPAT DIHUBUNGKAN KE KENDARAAN DENGAN ADAPTOR BERIKUT:
- adapter plug
- adapter cable

Ball head with cover cap
Eyelet for breakaway cable
▶ Secure the vehicle against rolling away.
Remove the cover cap ① from the ball head and store it in a safe place.
Position the trailer on a level surface behind the vehicle and couple it with the vehicle.

Open the socket cap.
Insert the plug with the lug ① in the groove ③ on the socket.
Turn the bayonet coupling ② in a clockwise direction as far as it will go.
Allow the cap to engage.
- Secure the cable to the trailer with cable ties (when using an adapter cable only).
Ensure that the cable exhibits ample freedom of movement for cornering manoeuvres.
DALAM KEADAAN BERIKUT, PESAN MUNGKIN MUNCUL DI LAYAR PENGEMUDI, MESKIPUN TRAILER TELAH TERHUBUNG DENGAN BENAR:
• LEDs have been installed in the trailer lighting system.
- The current level has fallen below the trailer lighting system's minimum current level (50 mA).


G-Class - Owner's Manual
Driving and parking Trailer hitch

Accessories can be connected to the permanent power supply up to 180 W and to the power supply that is switched on via the ignition lock.
Melepas trailer

PERINGATAN
Risk of being crushed and becoming trapped when uncoupling a trailer
When uncoupling a trailer with an engaged inertia-activated brake, your hand may become trapped between the vehicle and the trailer drawbar.
Do not uncouple trailers with an engaged overrun brake.

CATATAN
Damage during uncoupling with an engaged overrun brake
The vehicle may be damaged if you uncouple with an engaged overrun brake.
Do not uncouple trailers with an engaged overrun brake.
▶ Secure the vehicle against rolling away.
▶ Disconnect the electrical connection between the vehicle and the trailer.
▶ Uncouple the trailer.
Fit the cover cap on the ball head.
Trailers with LED lighting: after uncoupling the trailer, switch the vehicle on and then off again.
Memilih tipe trailer
Multimedia system:
Settings Vehicle Driving Trailer type
MENGATUR PENGATURAN UNTUK TRAILER
The settings on this menu make it possible to calculate a route suitable for the selected trailer and optimise the calculated arrival time.
Select the desired trailer type.
Select the maximum permissible speed for the selected trailer.
To save changes: select Confirm.
When contact with the trailer socket is established (trailer/rear bicycle rack), a menu will automatically appear on the display.
THE FOLLOWING OPTIONS ARE AVAILABLE:
- Small trailer
• Large trailer

G-Class - Owner's Manual
Driving and parking Vehicle towing instructions
Instruksi penarik kendaraan
The vehicle is not suitable for the use of tow bar systems that are used for flat towing or dinghy towing, forexample. Attaching and using tow bar systems may result in damage to the vehicle. When you are towing a vehicle with tow bar systems, safe driving characteristics cannot be guaranteed for the towing vehicle or the towed vehicle. The vehicle-trailer combination may swerve from side to side.
PERHATIKAN INFORMASI BERIKUT:
• Permitted towing methods ( → page 639)
- The notes on towing the vehicle with both axles on the ground ( → page 64)


Back to Contents
G-Class - Owner's Manual
Driver display

< Tampilan pengemudi
This interactive PDF works like a website - tap or click a button to jump straight to where you want to go. You can return here at any time via the navigation bar at the top left.
Notes on the driver display 419
Driver display malfunction 420
Operating the driver display 421
Driver display menus 423
Vehicles with a 48 V on-board electrical system
Overview of status indicators on the driver display 4.5
G-Class - Owner's Manual
Driver display Notes on the driver display
Catatan tentang tampilan pengemudi

PERINGATAN
Risk of accident if the driver's display fails
If the driver's display fails or malfunctions, you may not be aware of any functional limitations to safety-critical systems. This may affect the operating safety of the vehicle.
Park the vehicle safely as soon as possible and notify a qualified specialist workshop.
TAMPILAN PENGEMUDI MENAMPILKAN INFORMASI DASAR SEPERTI:
• Indicator and warning lamps
Speed
• Transmission position
Fuel level
FUNGSI TAMBAHAN YANG TERSEDIA MELIPUTI:
• Various menus, such as Navigation and Assistance
• Status displays for the driving systems
• Display messages
• Information on Consumption and range
The content on the menus can be changed and customised ( → page 424).

Kerusakan tampilan pengemudi

PERINGATAN
Risk of accident if the driver display malfunctions
If the driver display is inoperative or its functions are restricted, you will not receive information about such issues as other function restrictions, speed, current drive range and the status of the electric parking brake.
This will impair operating safety.
▶ Stop the vehicle immediately in accordance with the traffic conditions and switch it off. Do not continue driving.
Consult a qualified specialist workshop.
▶ Have the vehicle transported rather than towed.
Mengidentifikasi kerusakan tampilan pengemudi
Gangguan pada tampilan pengemudi dapat diidentifikasi melalui karakteristik seperti berikut:
- When the vehicle is switched on, the driver display continues to show nothing but a black screen.
• The driver display restarts.
• The content freezes.
- The display stops showing data such as speed. Various indicator and warning lamps are also displayed.
Yang harus dilakukan jika terjadi gangguan pada tampilan pengemudi
If the driver display is inoperative or its functions are restricted, stop the vehicle immediately in accordance with the traffic conditions and switch it off. The following procedure is recommended in this eventuality:
▶ Stop the vehicle in accordance with the traffic conditions.
While the vehicle is stationary, continue to hold the brake pedal down.
Press the P button on the DIRECT SELECT lever.
Apply the parking brake.
▶ Slowly release the brake pedal and make sure that the vehicle is secured against rolling away.
Press and hold the start/stop button ( → page 326) once for roughly three seconds to switch off the drive system.
Contact a qualified specialist workshop immediately.
▶ Have the vehicle transported rather than towed.
In addition, note the additional information about switching off the vehicle ( → page 326) and the notes on transporting the vehicle ( → page 642).
G-Class - Owner's Manual
Driver display Operating the driver display
Mengoperasikan tampilan pengemudi

PERINGATAN
Risk of distraction from information systems and communications equipment
If you operate information systems and communication devices integrated in the vehicle when driving, you could be distracted from the traffic situation. This could also cause you to lose control of the vehicle.
▶ Only operate this equipment when the traffic situation permits.
If you cannot be sure of this, stop the vehicle whilst paying attention to road and traffic conditions and operate the equipment with the vehicle stationary.
Observe the legal requirements for the country in which you are currently driving when operating the driver display.
SCROLLING ON THE MENU BAR

1 Back button
2 Main menu
3 Touch Control


G-Class - Owner's Manual
Driver display Operating the driver display

Mercedes-AMG vehicles
① Back button
2 Main menu
3 Touch Control
You can manage the content of the driver display with the controls on the left of the steering wheel. You can navigate the content by swiping vertically and horizontally with one finger on Touch Control Ⓞ. Press the Touch Control to confirm your selection.
To operate Touch Control in the most effective way, use the tip of your thumb if possible. You can also set the sensitivity of the Touch Control on the central display ( → page 454).
Briefly press main menu button 2.
Select a menu by swiping to the left or right on Touch Control
To confirm: press Touch Control 3.

G-Class - Owner's Manual
Driver display Driver display menus
Menu tampilan pengemudi
Catatan tentang menu pada tampilan pengemudi

PERINGATAN
Risk of distraction from information systems and communications equipment
If you operate information systems and communication devices integrated in the vehicle when driving, you could be distracted from the traffic situation. This could also cause you to lose control of the vehicle.
▶ Only operate this equipment when the traffic situation permits.
If you cannot be sure of this, stop the vehicle whilst paying attention to road and traffic conditions and operate the equipment with the vehicle stationary.
Observe the legal requirements for the country in which you are currently driving when operating the driver display.
Menu berikut dapat dipanggil melalui bilah menu pada tampilan pengemudi:
- Understated
- Sport
Classic
Navigation
- Assistance
Offroad
Service
• Mercedes-AMG vehicles: Supersport
• Mercedes-AMG vehicles: TRACK PACE
On some of these menus, you can choose from a range of information for the centre display content.
On most of the menus, you can use Options to configure further settings for the menu-specific display content.
G-Class - Owner's Manual
Driver display Driver display menus

Calling up and operating menus on the driver display
CALLING UP A MENU ON THE DRIVER DISPLAY

1 Back button
Main menu
3 Touch Control

Mercedes-AMG vehicles
① Back button
② Main menu
3 Touch Control
Press the ② main menu button on the steering wheel.
The menu bar will be shown in the lower area of the driver display.

Swipe to the left or right on Touch Control ③ and select a menu (e.g. the Classic menu) on the menu bar.
To confirm: press Touch Control 3.


G-Class - Owner's Manual
Driver display Driver display menus

MEMANGGIL ATAU MENUTUP SUBMENU OPSI
To call up: press Touch Control 3.
To exit: press back button 1.
MENJELAJAHI ISI TAMPILAN ATAU DAFTAR
Swipe upwards/downwards or to the left/right on Touch Control ③.
MENGATUR TAMPILAN
You can preset individually configured information of a menu and thus determine the standard display.
Press Touch Control ③ until the bar is completely filled. Answer the Set direct entry? query as follows.
Swipe to the left on Touch Control ③ and select Yes.
To confirm: press Touch Control
To call up presettings: press the back button Ⓞ on the upper level of a menu.
i Pressing back button Ⓞ on the standard display will open the previous menu.
MENGATUR ULANG NILAI
To call up the Options submenu: press Touch Control
Select Yes.
To confirm: press Touch Control ③.
Menu Klasik atau Sederhana
Driver display:

MEMILIH ISI TAMPILAN TENGAH
The Classic menu shows the driver display separated into speedometer and rev counter. The area in between can be filled with various types of information.

Speedometer
2 Rev counter
3 Transmission position
Coolant temperature display
Outside temperature
6 Centre display content (example: trip distance)
7 Time
Fuel level and fuel filler flap location indicator


G-Class - Owner's Manual
Driver display Driver display menus

Mercedes-AMG vehicles
① Speedometer
2 Rev counter
Gear display
Coolant temperature display
Outside temperature
6 Centre display content (example: temperature)
7 Time
Fuel level and fuel filler flap location indicator
▶ Call up the Classic menu via the driver display menu bar.
To select display content: Swipe upwards or downwards on the Touch Control and select the display content.
Informasi berikut dapat ditampilkan dalam isi tampilan tengah ⑥:
- Trip and total distance
- Trip computer From start and From reset
ECO display
Consumption
• ATTENTION ASSIST
Audio
Navigation
• Mercedes-AMG vehicles:
- Engine oil
Transmission oil
coolant
• Mercedes-AMG vehicles: Setup
• Mercedes-AMG vehicles: Engine data
Depending on the vehicle equipment, AMG-specific content regarding temperature, set-up and engine data will be displayed. The settings for the setup display content can be configured either via the buttons on the multifunction steering wheel or via the MBUX multimedia system ( → page 301).
MEMILIH STASIUN RADIO ATAU LAGU PADA DAFTAR STASIUN ATAU LAGU
You can change radio stations or tracks on the station or track list in the centre display content with audio information.
HAL-HAL BERIKUT AKAN DISESUAIKAN DALAM SISTEM MULTIMEDIA MBUX:
- Configuring the station or track list
• Switching between media sources
• Setting the frequency band


G-Class - Owner's Manual
Driver display Driver display menus

Track list in the centre display content (example)
To change radio stations or tracks: swipe left or right on the Touch Control and select a radio station or track on the station or track list.
If you do not select something immediately after opening the station or track list, the view will return to the radio station or track selected.
The radio station or track displayed when the vehicle is restarted depends on the user profile used for the previous trip.
MEMANGGIL ATAU MENUTUP SUBMENU OPSI
Depending on the information in the centre display content, you can configure various settings on the Options submenu.
To call up the submenu: press the Touch Control.
To exit the submenu: press the ← back button.
FUNGSI-FUNGSI BERIKUT MUNGKIN TERSEDIA PADA SUBMENU OPSI, MISALNYA:
- Navigation: selecting and adjusting zoom, route guidance and map settings
- Resetting the trip odometer
• Resetting the trip computer From start
• Resetting the trip computer From reset
• Resetting the ECO display values
MENGUBAH PENGATURAN WARNA PADA MENU YANG SEDERHANA
▶ Call up the Understated menu via the driver display menu bar.
To call up the colour list: press the Touch Control. The colour list on the Understated menu will be displayed.
To select colour settings: swipe upwards or downwards on the left-hand Touch Control and select the desired colour setting.
If you do not select anything within a limited time after opening the colour list, the view will switch back to the default view of the Understated menu.
To exit the colour list: press the back button ↩.
Depending on the equipment, the selected colour setting will also be adopted for the MBUX multimedia system. If you select the Understated menu on the driver display, the content in the MBUX multimedia system will also be made smaller.


G-Class - Owner's Manual
Driver display Driver display menus

Menu layanan
Driver display:

The current status of the vehicle is shown on the Service menu.
To call up the menu: press the Touch Control.
KONTEN TAMPILAN BERIKUT TERSEDIA DI MENU LAYANAN (TERGANTUNG PERLENGKAPAN):
• Information about how many messages are in the message memory
• AdBlue: AdBlue ® range and fill level
- Tyre pressure:
\- Checking the tyre pressure with the tyre pressure monitoring system ( → page 655)
\- Restarting the tyre pressure monitoring system ( → page 655)
• ASSYST PLUS: calling up the service due date ( → page 602)
• Engine oil level: checking the engine oil level ( → page 38)
• Mercedes-AMG vehicles: temperature
- Engine oil
- Transmission oil
- coolant
Coolant indicator
FUNGSI-FUNGSI BERIKUT TERSEDIA PADA SUBMENU OPSI:
• Tyre pressure ( → page 655)
• Message memory ( → page 769)
Menu bantuan
Driver display:

The Assistance menu displays various driver assistance systems and navigation instructions.
To call up the display: select Assistance on the driver display.
Press the Touch Control.

Active Distance Assist DISTRONIC indicator on the assistant display (example)
TAMPILAN BERIKUT DAPAT BERBEDA TERGANTUNG PADA SITUASI BERKENDARA:
• The navigation instructions in the left-hand display section
• The traffic light view in the right-hand display section
• The display of the driver assistance systems
• The level of detail on the assistant display
TAMPILAN STATUS BERIKUT TERSEDIA PADA TAMPILAN ASISTEN:
\- Green radar waves next to vehicle: Blind Spot Assist is enabled and ready for operation


G-Class - Owner's Manual
Driver display Driver display menus
\- Grey radar waves next to vehicle: Blind Spot Assist is enabled but not ready for operation
KONTEN PADA TAMPILAN ASISTEN AKAN BERADAPTASI DENGAN SITUASI BERIKUT:
- Driving manoeuvre
• Current road conditions
Road users detected
The assistant display will not show other detected obstacles with the exception of road users.
FUNGSI-FUNGSI BERIKUT TERSEDIA PADA SUBMENU OPSI:
• Starting route guidance
• With active route guidance: end route guidance
• Call up previous destinations and favourites
• Start new route guidance to a recent destination
• Start new route guidance to a favourite
Menu olahraga
Driver display:

The Sport menu provides information about the engine data of the vehicle.

When you call up the Sport menu on the menu bar of the driver display, the menu colour setting will automatically be applied to the MBUX multimedia system.
To call up the menu: press the Touch Control.

Current torque
2 G-meter
3 Current power output
Boost pressure
5 Engine oil temperature
6 Engine speed
Menu supersport
Persyaratan:
• For Mercedes-AMG vehicles only.
Driver display:

To call up the menu: press the Touch Control.


G-Class - Owner's Manual
Driver display Driver display menus
To select: Swipe upwards or downwards on the Touch Control and select the display content.

Current torque
2 Centre display content (example: setup)
Current power output
The displays for current torque ① and current power ③ vary depending on the display content in the centre display area.
KONTEN LAYAR TENGAH AKAN MENAMPILKAN HAL BERIKUT:
Gear display
• Temperature display
- Engine oil
- Transmission oil
coolant
Setup
G-force
- Trip and total distance
• Distance From start and From reset
Consumption
Audio
Navigation
The AMG-specific content for temperature, set-up and engine data depends on the vehicle equipment. You can configure the set-up information either using the buttons on the multifunction steering wheel or via the MBUX multimedia system (→ page 301).
Menu Track Pace
Persyaratan
• For Mercedes-AMG vehicles only.
Driver display:
TRACK PACE
The Track Pace function is intended only for closed race tracks. Do not use this function on public roads, and adapt your driving style to your personal capabilities and the ambient conditions.
PILIHAN BERIKUT AKAN DITAMPILKAN PADA MENU TRACK PACE:
G-meter
• Race track selected
• Braking and acceleration procedure
• Gear currently selected

G-Class - Owner's Manual
Driver display Driver display menus


Indicators on the Track Pace menu (example)
G-meter
2 Centre display content (example: gear display)
Telemetry display (example: selected race track)
To call up the menu: press the Touch Control.
KONTEN MENU TRACK PACE AKAN MENYESUAIKAN DIRI DENGAN PENGATURAN YANG DIPILIH PADA LAYAR TENGAH:
Gear display
- Braking points
Acceleration
• Quarter-miles
• Race track selected on the central display
- Current race
- Record route
While the vehicle is in motion, the G-meter will show the forces that are exerted on the vehicle occupants both laterally and in the direction of travel. The maximum values will appear in red in the coordinate system.
Menu Off-road
Driver display:

To call up the menu: press the Touch Control.

ANTARA LAIN, MENU TERSEBUT BERISI INFORMASI BERIKUT:
- Steering angle
• Elevation above sea level
Coordinates
• Compass with direction of travel
- Record route
Incline
Angle
- LOW RANGE
When route recording is active, the compass view will be replaced by a display showing the course of the route.

G-Class - Owner's Manual
Driver display Driver display menus
Menu Navigasi
Driver display:
4 Navigation
The Navigation menu shows the relevant map with navigation instructions.
To call up the menu: press the Touch Control.
CHANGING THE SCALE OF THE SELECTED MAP VIEW
1 Distance to the change of direction
2 Road to which the change of direction leads
3 Traffic incident indicator
4 Currently selected route
5 Indicator showing vehicle's current position
6 Change-of-direction symbol
7 Recommended lane (white)
8 Lane not recommended (grey)
9 Current lane
% The level of detail in the navigation instructions in the left-hand display section may vary.
To zoom in and out on the map directly: swipe upwards or downwards on the Touch Control.
% If you do not operate anything in Autozoom, the system will reset the scale of the map view already selected after a short time. You can set the map scale permanently in the MBUX multimedia system (/ page 514).
THE FOLLOWING FUNCTIONS ARE AVAILABLE ON THE OPTIONS SUBMENU:
R With active route guidance: end route guidance
R Select route guidance
R Map settings
% If the current route guidance is ended on the Navigation menu of the driver display, it will also be ended in the MBUX multimedia system.
On the Options submenu, you can use other functions in the Destinations and Map settings categories.
YOU CAN USE THE FOLLOWING FUNCTIONS IN THE DESTINATIONS CATEGORY:
R Call up previous destinations and favourites
R Start new route guidance to a favourite
% The two options Work and Home will be displayed in Favourites even if no address is stored.
G-Class - Owner's Manual
Driver display Driver display menus
ANDA DAPAT MENGGUNAKAN FUNGSI BERIKUT DALAM KATEGORI PENGATURAN PETA:
• Activate auto zoom
• Set the map view, satellite view and route overview.
TAMPILAN PETA BERIKUT TERSEDIA PADA MENU NAVIGASI:
Entire route
• 2D direction of travel
2D north-up
3D map


G-Class - Owner's Manual
Driver display Vehicles with a 48 V on-board electrical system

Kendaraan dengan sistem kelistrikan 48 V

Electric drive support
Recuperation behaviour of the electric motor
Due to various system limits, the values displayed may temporarily differ slightly from the actual value.


G-Class - Owner's Manual
Driver display Overview of status indicators on the driver display

Ikhtisar indikator status pada layar pengemudi
The status indicators for the driving and driving safety systems can be found in the highlighted display sections.


Mercedes-AMG vehicles
The number, position and presentation of the status indicators on the driver display depend on which systems are activated or deactivated.
LOW RANGE off-road gear ( → page 312)
(A) ECO start/stop function ( → page 287)
HOLD HOLD function (→ page 347)
Cruise control ( → page 350)
Limiter ( → page 350)
Active Distance Assist DISTRONIC ( → page 354)
Specified distance for Active Distance Assist DISTRONIC ( → page 354)
Active Steering Assist ( → page 366)
Active Stop-and-Go Assist ( → page 363)
Active Brake Assist switched off (→ page 372)
Active Brake Assist impaired or not functioning (→ page 372)
Active Lane Keeping Assist (→ page 379)
Adaptive Highbeam Assist Plus ( → page 244)
Active Parking Assist is available ( → page 403)
Active Parking Assist has detected a parking space ( → page 403)
Parking Assist PARKTRONIC deactivated (→ page 400)
Maximum permissible speed exceeded (for certain countries only)


G-Class - Owner's Manual
Driver display Overview of status indicators on the driver display
* Slippery road surface warning
KENDARAAN MERCEDES-AMG
TRACT ON AMG Traction PRO (→ page 385)
Engine operating temperature warning lamp ( → page 278)
OFF ESP SPORT ESP® SPORT (→ page 342)
AMG RIDE CONTROL ( → page 382)
AMG ACTIVE RIDE CONTROL (→ page 383)
Vehicles with Traffic Sign Assist: detected instructions and traffic signs ( → page 373)
Important information from other driving systems may briefly appear in front of the displayed traffic signs.


Back to Contents
G-Class - Owner's Manual
MBUX Voice Assistant

< Asisten Suara MBUX
This interactive PDF works like a website - tap or click a button to jump straight to where you want to go. You can return here at any time via the navigation bar at the top left.
Notes on operating safety 438
Operation 439
Using MBUX Voice Assistant effectively 442
Essential voice commands 444
G-Class - Owner's Manual
MBUX Voice Assistant Notes on operating safety
Catatan tentang keselamatan pengoperasian
DEMI KESELAMATAN ANDA, SELALU PERHATIKAN HAL-HAL BERIKUT SAAT MENGOPERASIKAN PERALATAN KOMUNIKASI SELULER DAN TERUTAMA SISTEM KONTROL SUARA ANDA:
- Observe the legal requirements for the country in which you are driving.
- If voice control is used in an emergency situation, commands may be less easily recognised due to a change in voice.
- Familiarise yourself with the voice control system functions before starting the journey.
Sistem kontrol suara tidak menggantikan Buku Petunjuk Pemilik.
The answers from the voice control system do not provide the complete scope of information contained in the Owner's Manual. The voice control system also does not give detailed warning or damage information. Therefore read the Owner's Manual so that you are fully informed about the functions and the safe operation of the vehicle.

G-Class - Owner's Manual
MBUX Voice Assistant Operation
Pengoperasian
Fungsi Asisten Suara MBUX
You can watch an animation on this topic via the following link:
Using the MBUX Voice Assistant, vehicle functions and various areas of the MBUX multimedia system can be operated by voice input, e.g. Navigation or Telephone. The MBUX Voice Assistant is operational about half a minute after switching on the vehicle and can be operated from all seats (depending on the special equipment).
Melakukan dialog
Persyaratan:
• Voice activation is activated in the multimedia system ( → page 440).
MEMULAI DIALOG
Say Hey Mercedes to activate the MBUX Voice Assistant.
or
Press the □ button on the multifunction steering wheel.
A wave appears in the MBUX multimedia system. The dialogue can be started.
For the dialogue with the MBUX Voice Assistant, you can use complete sentences of colloquial language as voice commands. Voice activation can also be
combined directly with a voice command, e.g. Hey Mercedes, how warm is it outside?
MENGGANGGU DIALOG
During the dialogue say Pause. The dialogue is interrupted.
Say Hey Mercedes to continue the dialogue.
MENGUBAH TINGKAT DIALOG
During the dialogue, say Back.
The MBUX Voice Assistant jumps back to the previous dialogue step.
BERNAVIGASI DALAM DAFTAR PILIHAN
If a voice command does not achieve a clear result, a selection list is shown.
Say the line number or the content to select an entry or to have further details shown.
Say Next page or Previous page to browse the selection list.
MEMANGGIL BANTUAN
Information on the MBUX Voice Assistant: call up the following app in the multimedia system: Hey Mercedes Info.
Current application: say Help.
You will receive suggestions and information about operation of MBUX Voice Assistant for the current application.


G-Class - Owner's Manual
MBUX Voice Assistant Operation
▶ Specific function: call up the voice command for the required function, for example with Hey Mercedes, I need help with the radio.
Digital Owner's Manual: say Show me the Owner's Manual. The full extent of the Digital Owner's Manual is available on the media display when the vehicle is stationary.
Ikhtisar fungsi yang dapat dioperasikan dari Asisten Suara MBUX
ANDA DAPAT MENGGUNAKAN ASISTEN SUARA MBUX UNTUK MENGOPERASIKAN FUNGSI-FUNGSI BERIKUT TERGANTUNG PADA PERLENGKAPAN KENDARAAN:
Telephone
• Text message and e-mail
Navigation
Radio and media
- Vehicle functions
• Online functions
Full functionality of the voice control system is only available for you with activation of online voice control ( → page 440).
Informasi tentang pengaturan bahasa
You can change the language of the MBUX Voice Assistant via the system language settings ( → page 471). If the set system language is not supported by the MBUX Voice Assistant, English will be selected.
Mengatur fungsi MBUX Voice Assistant menggunakan sistem multimedia
Multimedia system:
Settings ▶ System ▶ Voice assistant
MENGAKTIFKAN ATAU MENONAKTIFKAN AKTIVASI SUARA MBUX VOICE ASSISTANT
Select Hey Mercedes.
When the function is active, the Hey Mercedes voice command can activate the dialogue.
MENGAKTIFKAN ATAU MENONAKTIFKAN PERINTAH LANGSUNG
Select ☐.
▶ Activate or deactivate the function.
If the function is active, some commands can be used without saying Hey Mercedes, for example Next track.
MENGAKTIFKAN ATAU MENONAKTIFKAN AKTIVASI SUARA UNTUK KURSI INDIVIDU
Select
▶ Switch the function for the desired seats on or off.
MENGAKTIFKAN ATAU MENONAKTIFKAN PROAKTIVITAS
Select Proactivity.
Select the desired situation, e.g. Activate your profile or Don't forget your phone.
When the function is active, the voice assistant proactively provides information in specific situations.


G-Class - Owner's Manual
MBUX Voice Assistant Operation
MENGAKTIFKAN ATAU MENONAKTIFKAN KONTROL SUARA ONLINE
① Online voice control is activated at the factory.
▶ Select Online recognition.
▶ Activate or deactivate the function.
If the function is switched on and a Mercedes-Benz user account is linked to the vehicle, additional results are available through external information, e.g. information on points of interest. By clicking the symbol in the wave, more information about the online voice control can be displayed.
MENGAKTIFKAN ATAU MENONAKTIFKAN KONTAK UNTUK PENGGUNAAN ONLINE
▶ Select Contact upload for online recognition.
When the function is active, contacts will be found more easily and accurately using voice input.


Menggunakan MBUX Voice Assistant secara efektif
Catatan tentang penggunaan optimal MBUX Voice Assistant
- The MBUX Voice Assistant is operational half a minute after switching on the vehicle and can be operated from all seats, depending on the equipment installed. The system recognises from which seat the command was spoken and performs actions according to the seat position.
- When a dialogue is ended, the MBUX Voice Assistant continues to be active for as long as the wave is displayed in the multimedia system. You can say another voice command without saying Hey Mercedes.
- Using the direct command Change language to English, the system language can be changed to English without Hey Mercedes. Direct commands must be activated for this.
- If a user profile has been stored and is active, the MBUX Voice Assistant can make suggestions based on the habits of the user.
Say Hey Mercedes, load my personal profile, to activate the profile. The user's voice must first be taught in by the system and assigned to a profile.
Further information on user profiles ( → page 458).
- With the MBUX Voice Assistant, incoming calls can be accepted or rejected without the keyword Hey Mercedes.
Informasi tentang asisten suara online MBUX
The online voice control facilitates recognition and thanks to external information makes additional results available.
Therefore, Mercedes-Benz recommends that you activate online voice control ( → page 440).
You will need a Mercedes-Benz user account for this. If you do not yet have a user account you must create one and connect it with your vehicle ( → page 555).
Then call up your Mercedes-Benz user account. The Mercedes-Benz Digital Extras are displayed and can be activated ( → page 555).
By clicking on the symbols displayed in the wave, further information on the online status is displayed.
KETIKA KONTROL SUARA ONLINE AKTIF, FUNGSI TAMBAHAN TERSEDIA SEPERTI:
Weather
General knowledge
• Public holidays and school holidays
Smart home
- Messages
• Time, date and time zones

G-Class - Owner's Manual
MBUX Voice Assistant Using MBUX Voice Assistant effectively
- Pocket and currency calculator
• Football results and fixture lists
Share prices
- Calendar
ChitChat
Horoscope
Geo Quiz
Giving feedback
The availability of these functions is country and equipment-dependent.
① Text content is taken from Wikipedia in accordance with the CC BY-SA 3.0 licence.


Perintah suara penting
Catatan tentang perintah suara
You can watch an animation on this topic via the following link:
It is not necessary to use exact voice commands to call up a specific function. The MBUX Voice Assistant also understands you when you use your colloquial speech. Some examples are listed below. For some languages however these examples are only available to a limited extent.
CONTOH PERINTAH SUARA:
• Navigation ( → page 444)
• Telephone ( → page 444)
• Radio and TV ( → page 445)
• Media player ( → page 445)
- Messages (→ page 445)
• Vehicle functions ( → page 445)
• Online functions ( → page 446)
Contoh perintah suara navigasi
You can operate the navigation system using the MBUX Voice Assistant. The following list offers just a small selection of the possible navigation commands. You will receive additional suggestions if you say Help for navigation.
\- Drive me home.
• Where is the nearest service station?
• Is there a service area along the route?
• Set Covent Garden as intermediate destination.
- Cancel the route guidance.
• Show my last destination.
• I want to buy juice.
• Search for an Asian restaurant, but not Japanese, in South London.
Contoh perintah suara telepon
You can operate phones connected with the MBUX multimedia system using the MBUX Voice Assistant. The following list offers just a small selection of the possible telephone commands. You will receive additional suggestions if you say Help for phone.
• Call Peter Miller on the mobile phone.
Dial 0711 17 0.
Call my father.
- Accept call
Reject call
• Search for the contact Peter Miller.
- Switch to address book
• Show me the incoming calls.
- Switch phone

Contoh perintah suara radio dan TV
Depending on the vehicle equipment, you can operate the radio and TV using the MBUX Voice Assistant. The following list offers just a small selection of the possible radio or TV voice commands. You will receive additional suggestions if you say Help for radio or Help for TV.
• Play the radio station Heart FM.
Next station.
Previous station.
• Show me the list of radio stations
- Save the station
• What am I listening to?
Contoh perintah suara media
You can operate connected media sources and online music using the MBUX Voice Assistant. The following list offers just a small selection of the possible media voice commands. You will receive additional suggestions if you say Help for media or Help for player.
• Play Michael Jackson.
• Play "Yellow Submarine" by the Beatles.
- Next track.
Previous track.
- Repeat this track.
- Switch on random playback.
- Mute the music.
- Switch to USB.
Contoh perintah suara pesan
Messages can be created, edited and listened to using the MBUX Voice Assistant. The following list offers just a small selection of the possible message voice commands. You will receive additional suggestions if you say Help for messaging.
• Write a text message to Jane Doe: When will the next meeting take place?
• Show me my new e-mails.
• Write an e-mail to Jane Doe.
• Read me my new text messages.
• Show all new text messages.
• Write an e-mail to John Doe in English
Contoh perintah suara kendaraan
You can operate vehicle settings and vehicle functions using the MBUX Voice Assistant. The following list offers only a small selection of possible vehicle-specific voice commands and depends on the vehicle equipment and the language set.
If no seat is mentioned for commands, the action is carried out automatically for the seat from which the command was spoken or for the function which is closest to that seat.
• Switch the seat heating to level 2.
• My feet are cold.
• Start the Refresh programme.
• Switch the relaxation programme on.
• I would like to set the ambient light to blue

G-Class - Owner's Manual
MBUX Voice Assistant Essential voice commands
• Switch on the reading lamp.
• Turn off the rear light.
• How fast can I drive here?
• Tell me my next service appointment
• How warm is it outside?
INFORMASI TENTANG KENDARAAN JUGA DAPAT DIMINTA:
• Information about individual items of the vehicle equipment
- Hey Mercedes, which relaxation programmes do you have?
- Hey Mercedes, do I have Blind Spot Assist?
- Hey Mercedes, where is the warning triangle?
• Information about functioning of the systems and components installed in the vehicle
- Hey Mercedes, what is DISTRONIC?
Hey Mercedes, what do I need ESP for?
- Hey Mercedes, what is MBUX?
• Information about operating the systems and components installed in the vehicle
Hey Mercedes, how do I connect my smartphone?
- Hey Mercedes, how can I turn on the main beam headlamps?
- Hey Mercedes, how do I stop the ionization function?
Contoh fungsi online
Depending on the country, language and vehicle equipment, additional functions are available when online voice control is active. The system accesses external information and can, as a result, answer general knowledge questions and make calculations, for example.
• Is the sun shining in Manchester?
• Is it raining at my destination?
• What are the skiing conditions on the Zugspitze?
• What's the time in Sydney now?
• In which country do you pay with dollars?
• How many Swiss franks make 25 euros?
• How long now until the holidays?
• What day is it tomorrow?
• What is 20 % of 29?
• What does my horoscope say?
• What is the price of Mercedes-Benz Group shares?
Let's play Geo Quiz.
I'm bored.
• Who is the current prime minister?
• What do you know about the Globe Theatre in London?
• Who painted the picture "The Scream"?
• What's the status in the Premier League?
• Create a calendar entry tomorrow at 9 am.
• What's my next task?
Tell me a joke.
• How many languages do you speak?
• What is your favourite animal?
Are there any updates?
• Is the light still on in the kitchen?
• Switch off all the devices in my house.
• Please set the temperature in the living room to 24 degrees.
• I'd like to give you feedback.


G-Class - Owner's Manual
MBUX Voice Assistant Essential voice commands

Contoh perintah langsung
With direct commands, some functions can be operated without first saying the voice command Hey Mercedes. To use direct commands, the function must be activated in the multimedia system ( → page 440).
Next TV channel
• Previous TV channel
• Next radio station
• Previous radio station
Next station
Previous station
Next track
Previous track
• Start dashcam recording
- Stop dashcam recording
• Show the map
3D map
2D map
- Align map to north
• Align map in direction of travel
• Show all routes
• Show traffic
- Navigate to work
- Navigate home
• Repeat driving instruction
- Cancel route guidance
• Change language to English

Back to Contents
G-Class - Owner's Manual
MBUX multimedia system

< Sistem multimedia MBUX
This interactive PDF works like a website - tap or click a button to jump straight to where you want to go. You can return here at any time via the navigation bar at the top left.
Overview and operation 449 > Media 573 >
System settings 467 > Radio 582 >
Off-road menu 477 > Sound 586 >
Fit & Healthy 480
> MBOX high-end rear seat entertainment system
598
Navigation and traffic 485
Telephone 526
Online and Internet functions 564
G-Class - Owner's Manual
MBUX multimedia system Overview and operation
Ikhtisar dan pengoperasian
Ikhtisar sistem multimedia MBUX

PERINGATAN
Risk of distraction from information systems and communications equipment
If you operate information systems and communication devices integrated in the vehicle when driving, you could be distracted from the traffic situation. This could also cause you to lose control of the vehicle.
▶ Only operate this equipment when the traffic situation permits.
If you cannot be sure of this, stop the vehicle whilst paying attention to road and traffic conditions and operate the equipment with the vehicle stationary.
You must observe the legal requirements for the country in which you are currently driving when operating the multimedia system.


CATATAN
Increased surface temperature due to direct sunlight on the central display
The surface of the central display is very dark.
If the display is exposed to direct sunlight, the surface can become very hot.
If the central display has been exposed to direct sunlight, allow it to cool down before touching it for a long time.

FUNGSI SISTEM MULTIMEDIA MBUX ANDA MUNGKIN BERBEDA DAN TERGANTUNG PADA FAKTOR-FAKTOR BERIKUT:
Market
• National version
• Technical conditions
Functions and Digital Extras provided by Mercedes-Benz and/or third-party providers may no longer be available when the contractual period expires. This may also be due to technical prerequisites. There is therefore no entitlement to the continuous provision of functions and Digital Extras.
The described functions may be modified, optimised and adapted after the time of going to press.
G-Class - Owner's Manual
MBUX multimedia system Overview and operation
Mercedes-Benz therefore reserves the right to introduce changes to functions and Digital Extras.
For these reasons, descriptions and depictions relating to the MBUX multimedia system may, in some cases, differ for your vehicle.

Touch Control and control panel for the MBUX multimedia system MBUX stands for Mercedes-Benz User Experience.
\- Operating Touch Control (→ page 453)
2 Media display with touch functionality
• Home screen overview (→ page 452)
\- Operating the touchscreen (→ page 454)
3 Touchpad
Operating the touchpad ( → page 455)
Controller
Turn: adjusts the volume
Press briefly: switches the mute function on/off
Press and hold: switches the MBUX multimedia system or media display on or off
5 Buttons for navigation [NAV/NAV], radio/media RADIO MEDUS and telephone TEL
Button for vehicle functions and favourites button ★
Alternatively, the MBUX Voice Assistant allows voice dialogue. Operation with natural speech starts after the wake-up call "Hey Mercedes" (→ page 439). You can start a voice navigation, for example.
If the vehicle is fitted with the MBUX Interior Assistant, selected functions of the multimedia system can be operated contact-free. In addition, the reading light or search light can be switched on or off contact-free.
Numerous apps and Digital Extras are available to you. These can be called up via the home screen.
You can conveniently call up your favourites using the ★ button on the steering wheel. Quick-access in the home screen and in the applications serve to select functions more quickly.
If you use the learning function of the multimedia system, you will receive suggestions during operation of the most probable navigation destinations, media sources, radio stations and contacts. The configuration of the suggestions is completed in the system settings. You can compile your user profile from various vehicle settings and settings of the multimedia system. Some functions and Digital Extras are protected by a PIN. You can teach in biometric procedures to identify yourself with these instead of the four-digit Mercedes me ID PIN.
The Notifications Centre collects incoming notifications, e.g. about an available software update. Depending on the type of notification it offers various actions. The call is made via the Control Centre.


G-Class - Owner's Manual
MBUX multimedia system Overview and operation
With the global search, you can search on the home screen via categories, e.g. in the navigation, and on the Internet.
PERLINDUNGAN ANTI-PENCURIAN
This device is equipped with technical provisions to protect it against theft. More detailed information about anti-theft protection can be obtained at a qualified specialist workshop.
Ikhtisar sistem multimedia MBUX (kendaraan Mercedes-AMG)

PERINGATAN
Risk of distraction from information systems and communications equipment
If you operate information systems and communication devices integrated in the vehicle when driving, you could be distracted from the traffic situation. This could also cause you to lose control of the vehicle.
▶ Only operate this equipment when the traffic situation permits.
If you cannot be sure of this, stop the vehicle whilst paying attention to road and traffic conditions and operate the equipment with the vehicle stationary.
You must observe the legal requirements for the country in which you are currently driving when operating the multimedia system.


CATATAN
Increased surface temperature due to direct sunlight on the central display
The surface of the central display is very dark.
If the display is exposed to direct sunlight, the surface can become very hot.
If the central display has been exposed to direct sunlight, allow it to cool down before touching it for a long time.

① Touch Control and control panel for the MBUX multimedia system MBUX stands for Mercedes-Benz User Experience.
\- Operating Touch Control (→ page 453)
2 Media display with touch functionality
• Home screen overview (→ page 452)
- Operating the touchscreen (→ page 454)

Touchpad
Operating the touchpad ( → page 455)


G-Class - Owner's Manual
MBUX multimedia system Overview and operation

Controller
Turn: adjusts the volume
Press briefly: switches the mute function on/off
Press and hold: switches the MBUX multimedia system or media display on or off
Buttons for navigation 📄, radio/media 📄 and telephone 📄
Calls up applications (→ page 456, 455, 456)
Button for vehicle functions 📁 and favourites button ★
Alternatively, the MBUX Voice Assistant allows voice dialogue. Operation with natural speech starts after the wake-up call "Hey Mercedes" (→ page 439). You can start a voice navigation, for example.
If the vehicle is equipped with the MBUX Interior Assistant, vehicle and infotainment functions can be used. The interaction then follows intelligently, reactively or with hand or head movements.
Numerous application, online services, services and apps are available for you. These can be called up via the home screen.
You can conveniently call up your favourites using the ★ button on the steering wheel. Quick-access in the home screen and in the applications serve to select functions more quickly.
If you use the learning function of the multimedia system, you will receive suggestions during operation of the most probable navigation destinations, media sources, radio stations and contacts. The configuration of the suggestions is completed in the system settings. You can compile your user profile from various vehicle settings and settings of the multimedia system. Some functions and services are protected by a PIN. You can teach in biometric
procedures to identify yourself with these instead of the four-digit Mercedes me PIN.
The Notifications Centre collects incoming notifications, e.g. about an available software update. Depending on the type of notification it offers various actions. The call is made in the home screen via the Control Centre.
With the global search, you can search on the home screen via categories, e.g. in the navigation, and on the internet.
PERLINDUNGAN ANTI-PENCURIAN
This device is equipped with technical provisions to protect it against theft. More detailed information about anti-theft protection can be obtained at a qualified specialist workshop.
Ikhtisar layar utama

① On the home screen: displays the first three applications. In other displays: calls up the home screen
2 Calls up user profile settings and switches user
3 Using the global search
Calls up the Control Centre: pull the bar down


G-Class - Owner's Manual
MBUX multimedia system Overview and operation
5 Calls up favourites
6 Displays in the status line
7 Calls up applications
Quick-access to application
9 Index points for selected display area
10 Calling up the air-conditioning menu
FUNGSI-FUNGSI BERIKUT DIPANGGIL DI PUSAT KENDALI:
- Notifications Centre
Favourites
• Vehicle quick-access
In the image, the applications are arranged as a carousel. Pressing and holding on 📄 arranges the applications in a grid. This view is also used by a smartphone, for example.
Kontrol Sentuh
MENGOPERASIKAN KONTROL SENTUH (SISTEM MULTIMEDIA MBUX)

1 Shows the home screen
② Touch Control
◀ ▲ ▶ ▼ swipe in the direction of the arrow (navigate)
OK Press (confirm)
Returns to the previous display
Makes or accepts a call
5 Rejects or ends a call
To increase volume: swipe upwards
To reduce volume: swipe down
To switch off the sound: press
7 ★ Calls up favourites
Starts the MBUX Voice Assistant

Mercedes-AMG vehicles
1 Shows zero layer/home screen
1 Shows the home screen
2 Touch Control
◀ ▲ ▶ ▼ swipe in the direction of the arrow (navigate)
OK Press (confirm)
Returns to the previous display
Makes or accepts a call
5 Rejects or ends a call
To increase volume: swipe upwards
To reduce volume: swipe down
To switch off the sound: press


G-Class - Owner's Manual
MBUX multimedia system Overview and operation
7 Calls up favourites
8 Starts the MBUX Voice Assistant
To operate Touch Control in the most effective way, use the tip of your thumb if possible.
You can navigate through menus and lists via the touch-sensitive surface of Touch Control using a single-finger swipe, e.g.:
To enter a character: select a character using the keyboard and press on Touch Control ②.
To select a menu option: scroll in a list and press Touch Control 2.
To move the digital map: swipe in any direction.
MENGATUR SENSITIVITAS KONTROL SENTUH
Multimedia system:
Settings ▶ System ▶ Control elements
▶ Touch Control sensitivity
▶ Select Fast, Medium or Slow.
MENGATUR UMPAN BALIK AKUSTIK OPERASIONAL UNTUK SEMUA ELEMEN KONTROL
Multimedia system:
Settings ▶ System ▶ Control elements
Acoustic feedback
The function is supported by the selection in a list.
▶ Set Off, Unleaded or Loud.
If the function is activated you will hear a clicking sound when selecting control elements or when scrolling in a list. When the beginning or end of the list is reached you will hear another clicking sound.

Layar Sentuh
MENGOPERASIKAN LAYAR SENTUH
MENYENTUH
To select a menu item or entry: tap on a symbol or an entry.
To increase the map scale: tap twice quickly with one finger.
To reduce the map scale: tap with two fingers.
To enter characters with the keypad: tap on a button.
GESER SATU JARI
To navigate in menus: swipe up, down, left or right.
To move the digital map: swipe in any direction.
To use handwriting to enter characters: write the character with one finger on the touchscreen.
GESER DUA JARI
To zoom in and out of the map: move two fingers together or apart.
To enlarge or reduce the size of a section of a website: move two fingers together or apart.
To turn the map: turn anti-clockwise or clockwise using two fingers.
GESERAN TIGA JARI
To call up the home screen: swipe up with three fingers in an application.
MENYENTUH, MENAHAN, DAN MENGGERAKKAN
To move the map: touch the touchscreen and move your finger in any direction.

G-Class - Owner's Manual
MBUX multimedia system Overview and operation
To set the volume on a scale: touch the touchscreen and move your finger to the left or right.
MENYENTUH DAN MENAHAN
To save the destination in the map: touch the touchscreen and hold until a message is shown.
To call up a global menu in the applications: touch the touchscreen and hold until the Options menu appears.
Touchpad
OPERATING THE TOUCHPAD

① button
Returns to the previous display
button
Calls up the control menu of the last active audio source
3 button
Shows the home screen and calls up applications
4 Turn: adjusts the volume
Press briefly: switches the mute function on/off
Press and hold: switches the MBUX multimedia system or media display on or off
5 Calls up navigation or the map
6 Calls up radio or media
7 Calls up the telephone
8 Calls up favourites
9 Calls up vehicle functions
To enter a character: enter a character using the keyboard.
or
Write a character on the touch-sensitive surface of the touch-pad.
MEMILIH ITEM MENU ATAU ENTRI DENGAN GESERAN SATU JARI
Swipe up, down, left or right.
Press the touchpad.
MENGGERAKKAN PETA DIGITAL
Swipe in any direction.
GUNAKAN FUNGSI-FUNGSI BERIKUT DENGAN GESERAN DUA JARI:
To call up the Notifications Centre: swipe down with two fingers.
To close the Notifications Centre: swipe up with two fingers.
To call up the control menu of the last active audio source: swipe up with two fingers.
To zoom in and out of the map: move two fingers together or apart.
To enlarge or reduce the size of a section of a website: move two fingers together or apart.


G-Class - Owner's Manual
MBUX multimedia system Overview and operation
MENGATUR SENSITIVITAS TOUCHPAD
Multimedia system:
Settings ▶ System ▶ Control elements
Select Sensitivity.
▶ Select Fast, Medium or Slow.
To set the pressure sensitivity: switch Touchpad tap on or off.
If the function is switched on, a tap on the touchpad is enough to select a menu item.
MENGAKTIFKAN ATAU MENONAKTIFKAN UMPAN BALIK OPERASI HAPTIK UNTUK TOUCHPAD
Multimedia system:
Settings ▶ System ▶ Control elements
The function supports you when making entries on the touchpad and when selecting menus.
▶ Switch Haptic feedback on or off.
When the function is activated, a tactile feedback in the form of a vibration is effected when the touchpad is operated.
MEMILIH STASIUN DAN LAGU MENGGUNAKAN TOUCHPAD
Press the ◀◀▶ button on the touchpad.
The control menu appears for the audio source that was last selected.
Swipe left or right using one finger.
Radio: the previous or next station is set.
Media source: the previous or next track is selected.
To hide the control menu: press the ◀▶ button on the touchpad.
Profil pengguna
CATATAN TENTANG PROFIL PENGGUNA

PERINGATAN
Risk of becoming trapped during adjustment of the driver's seat after calling up a driver profile
Selecting a user profile may trigger an adjustment of the driver's seat to the position saved under the user profile. You or other vehicle occupants could be injured in the process.
Make sure that when the position of driver's seat is being adjusted using the multimedia system, no people or body parts are in the seat's range of movement.
If there is a risk of someone becoming trapped, immediately stop the adjustment process by:
a) Tapping the warning message on the central display.
or
b) Pressing a position button of the memory function or a seat adjustment switch in the driver's door.
The adjustment process is stopped.
The electrically adjustable driver's seat is equipped with an automatic reversing function.
If the driver's door is open, the driver's seat will not be set after calling up the driver's profile.


G-Class - Owner's Manual
MBUX multimedia system Overview and operation
IKHTISAR PROFIL PENGGUNA
PERSYARATAN PENGGUNAAN
- You have registered with a Mercedes me ID and confirmed the terms of use.
• Your Mercedes me ID is linked to the vehicle.
• You have a Mercedes me ID PIN.
If one of the pre-requisites listed is missing or if no user profile has been selected, the data described in the following section will be saved in the vehicle as the standard setting. Standard settings can be changed by all vehicle users.
User profiles save personal settings. If the vehicle is used by several people, a person can change their profile settings without changing the settings of other users.
You can individualise a user profile in the vehicle using the set-up assistant or using the settings in your user profile. Some settings, e.g. the Mercedes me ID PIN and a profile photo, are made in the Mercedes-Benz App or on the Mercedes-Benz website.
If the user profile is downloaded while travelling, user profiles are not set up using the set-up assistant.
User-specific content and applications with personal data are protected by different levels of security ( → page 458).
To access protected content, the Mercedes me ID PIN and, depending on the vehicle equipment, biometric sensors are used.
The security level is set by the multimedia system and calculated from the combination of all sensor inputs. Some security levels cannot be turned off.
WHEN A USER PROFILE IS ACTIVATED, THE FOLLOWING PERSONALISED COMFORT SYSTEMS, FOR EXAMPLE, CAN BE ADJUSTED OR THEIR SETTINGS LOADED:
Seat
\- Ambient light
\- Outside mirrors
• Air-conditioning settings
If the user profile is activated when driving then the driver's seat position will not be adjusted.
KONTEN KHUSUS PENGGUNA
TERGANTUNG PADA PERLENGKAPAN KENDARAAN, ANDA SEBAGAI PENGGUNA DAPAT MENYIMPAN PENGATURAN BERIKUT, MISALNYA:
• Driver's seat, steering wheel and mirror settings
• Climate control
- Ambient light
• Radio (including station list)
• Suggestions and favourites
You can watch an animation on this topic via the following link:

G-Class - Owner's Manual
MBUX multimedia system Overview and operation

MENAMBAH PENGGUNA
Persyaratan:
• The vehicle is stationary.
Multimedia system:

Select + Add user.
A QR code is loaded.
▶ Scan the displayed QR code with the Mercedes-Benz App or any QR code scanner on a mobile device. If the Mercedes-Benz App is not yet installed on your mobile device, you will be directed to the store on your mobile device.
Follow the steps in the Mercedes-Benz App.
The vehicle is linked to your Mercedes me ID. This automatically creates your user profile in the vehicle.
You will be informed when your user profile is available.
When the vehicle is stationary, the set-up assistant starts automatically after user selection.
When the user has been added, they can be selected ( → page 460).
MEMILIH OPSI PENGGUNA
Multimedia system:

MELINDUNGI KONTEN DAN APLIKASI KHUSUS PENGGUNA
If you add a new user, access protection is already activated for the user profile. The Mercedes me ID PIN and, depending on the vehicle equipment, biometric sensors are available for access. Biometric sensors in the vehicle must be taught in. The authentication process then takes all taught-in and available sensors into account.
KONTEN DAN APLIKASI KHUSUS PENGGUNA BERIKUT DILINDUNGI, MISALNYA:
• User selection and user profile settings
• ENERGIZING COACH
The recorded health data and its evaluation.
• In-Car Office
The calendar, the tasks and the e-mails.
- Parking service
The payment transactions.
• Mercedes-Benz Store
The purchase of Digital Extras
• System activations of paid vehicle functions
\- Biometric sensors
The teaching-in of biometric sensors
For teaching in and editing biometric recognition see the following section.
\- Suggestions
The data and determination of the most probable navigation destinations, media sources, radio stations, contacts and messages.


G-Class - Owner's Manual
MBUX multimedia system Overview and operation
DALAM KASUS BERIKUT, ANDA AKAN DIMINTA UNTUK MELAKUKAN OTENTIKASI ATAU OTENTIKASI ULANG MENGGUNAKAN SENSOR ATAU PIN MERCEDES ME ID:
• When selecting a protected user profile
- When calling up a function requiring special protection
• If biometric sensors provide insufficient or contradictory information
• If the multimedia system no longer trusts a sensor
- If the seat belt buckle and the door are opened at the same seat and a function requiring special protection is called up
- When the vehicle is locked from outside
Select Protect content.
▶ Switch Access protection on or off.
When access protection is switched off, your user profile can be viewed from any seat and changes can be made.
Access protection is switched on or off on a vehicle-specific basis.
① Please note that authentication is necessary for several functions such as In-Car Office and cannot therefore be completely switched off.
MENYETEL DAN MENGEDIT PENGENALAN BIOMETRIK
The biometric data models are saved in the sensors in the vehicle. If recognition has been set up, this sensor serves as a contributory factor for authentication on the multimedia system.
Select Protect content.
Select Voice recognition.
① If necessary, authenticate yourself on the multimedia system.
MENYETEL PENGENALAN SUARA
Speak the sentence shown on the media display and follow the voice assistant's instructions.
If voice recognition was successful, a message appears on the media display. You can unlock your user profile.
① Avoid background or disturbing noises during voice recognition.
MENGHAPUS DATA BIOMETRIK
Tap on □ behind Voice recognition.
Select Yes.
MEMANGGIL ASISTEN PENYETELAN
Select Profile.
Select Set-up assistant.
▶ Follow the directions from the set-up assistant.

G-Class - Owner's Manual
MBUX multimedia system Overview and operation

MENGUBAH NAMA PENGGUNA ATAU FOTO PROFIL
Select Profile.
Select Change user name.
or
Select Profile picture.
Enter the user name or select a user image.
Select Finished.
You can use the Mercedes me ID to store your photo in the Mercedes-Benz App or in the Mercedes-Benz Portal. The photo will then be shown in the vehicle. In the vehicle itself, you can select other sample images instead of the photo.
MENGHAPUS PROFIL PENGGUNA
Select Profile.
Select Remove.
▶ Select Remove user profile.
Your Mercedes me ID and your personal data are retained in the Mercedes-Benz ecosystem.
MERESET PROFIL PENGGUNA KE PENGATURAN PABRIK
Select Profile.
Select Reset.
Select Yes.
This resets the contents of the user profile to factory settings, but not the vehicle.
You can watch an animation on this topic via the following link:
MEMILIH PENGGUNA
Multimedia system:

When you call up your driver profile, the driver's seat and the steering wheel can be set.
YOU CAN CANCEL THE SETTING PROCESS WITH THE FOLLOWING ACTIONS:
\- Press one of the seat operating buttons in the driver's door.
Select Select user.
Select a user.
When requested to do so, authenticate with the Mercedes me PIN or a taught-in biometric characteristic. The user profile is loaded and activated.
If you select Continue without selecting user, no specific settings for the user profile are loaded.
MENYINKRONKAN PROFIL PENGGUNA
Persyaratan:
• You have a Mercedes me ID.


G-Class - Owner's Manual
MBUX multimedia system Overview and operation
• The vehicle is linked to your Mercedes me ID.
Multimedia system:

▶ Synchronise automatically.
When the vehicle is switched on or off, the data stored in the vehicle is automatically synchronised with the Mercedes me IDs. This synchronisation is done for all user profiles and is not profile-specific.
or
Select Synchronise now.
The data stored in the vehicle is synchronised with the personal profiles after selecting this option.
Not all user profile functions are available during synchronisation. During synchronisation, the most recently changed data is applied.
IF THE PERSONALISATION SERVICE IN THE VEHICLE IS DEACTIVATED, ONLY THE FOLLOWING USER PROFILE MASTER DATA IS SYNCHRONISED:
Profile name
Profile image
• Mercedes me ID PIN
Favorit
IKHTISAR FAVORIT
Favourites offer you quick access to frequently used applications. 100 favourites are available in total.
You can select favourites from categories or you add favourites directly from an application.
① You can add and edit navigation favourites within the application.
MEMANGGIL FAVORIT
Multimedia system:

Alternatively, in the home screen pull down bar in the centre of the status line ( → page 452).
Select | ★ | in the Control Center.
MENAMBAH FAVORIT
Multimedia system:

MEMILIH FAVORIT DARI KATEGORI
Select ▷.
Select + Create new favourite.
Select the category.
Select a favourite.
The favourite is stored at the next available position.

G-Class - Owner's Manual
MBUX multimedia system Overview and operation
All positions in the favourites are taken: confirm the message shown.
A list shows all the favourites.
▶ Select a favourite to be overwritten.
MENAMBAH FAVORIT DARI APLIKASI
You can, for example, save a contact (example), or add an ENERGIZING COMFORT programme.
To save a contact as a global favourite: select a contact ( → page 534).
Press on a telephone number until a menu is shown.
▶ Select Save as favourite.
The contact is added as a favourite.
MENGUBAH NAMA FAVORIT
Multimedia system:

Press on a favourite until a menu is shown.
Select Rename.
Enter the name.
Save the names.
MEMINDAHKAN FAVORIT
Multimedia system:

Press on a favourite until a menu is shown.
Select Move.
Move the favourite to the new position.
Tap on ▼.
MENGHAPUS FAVORIT
Multimedia system:

Press on a favourite until a menu is shown.
Select Delete.
Select Yes.
MENGATUR ULANG FAVORIT
In the menu, select Reset all favourites.
Select Yes.
Pusat Notifikasi
IKHTISAR PUSAT NOTIFIKASI
KOMUNIKASI BERIKUT DIKUMPULKAN DI PUSAT NOTIFIKASI:
- Communications which are generated by the vehicle or from the multimedia system.
- Messages that arrive through the use of Digital Extras.
Jenis notifikasi berikut tersedia untuk Anda:
• Navigable destinations and routes
- Messages (text messages)
- Calendar entries and reminders, e.g. from In-Car Office This function is not available in all countries.


G-Class - Owner's Manual
MBUX multimedia system Overview and operation
- System information, e.g. Important software update available. Confirm to start the update.
- Other notifications, e.g. from additional Digital Extras that can be booked or from emergency reports (e.g. tornado)
The Notifications Centre is in the Control Centre.
Depending on the style set, newly received notifications are shown using a coloured dot.
Notifications are normally briefly shown as they are received. If you take no action, these are stored for future access in the Notifications Centre.
The notifications are sorted chronologically. The most recent notifications are at the top.

Example of a message
① Calls up the Notifications Centre
Time message received
Calls up the settings
4 Display for available actions
Description of the notification and the issuing service
6 Symbol for notifications
Date of the received notifications
Depending on the type of notification, up to four different actions are available.
Contoh tindakan meliputi:
- Reading aloud
- Placing a call
- Replying
- Calling up a web page
Navigation
Some notifications, e.g. a navigation destination, are stored longer. Therefore, it is not necessary to carry out available actions directly upon receipt of the notifications. A route guidance can be started at a later time.
You can pin a notification so that it is not deleted automatically after a certain time has elapsed ( → page 464).
Memanggil notifikasi
Membuka pusat notifikasi
Select [icon] in the Control Center.
Memilih notifikasi
If several messages are available swipe up or down.
Select an action.
Menutup pusat notifikasi
Select
Memilih tindakan untuk notifikasi. Opsi berikut tersedia:
\- Select the action directly after a notification is received and shown.

G-Class - Owner's Manual
MBUX multimedia system Overview and operation
• Select the action later after calling up in the Notifications Centre.
Up to two actions available: select the action.
▶ More than two actions available: select ◀.
▶ Select the action.
The notification is still available.
▶ Close the actions with ▶.
Mengedit notifikasi
▶ Call up the Notifications Centre ( → page 463).
Mengonfigurasi pengaturan
Select Settings.
Select the service.
▶ Switch the options on or off.
Opsi berikut tersedia tergantung pada layanan:
- Allow notifications
• Display in notification centre
• Show notifications
• Switching Acoustic signals on or off
- External access
The option allows an external service access to specific data, e.g. the current vehicle position. The detailed, approved information is shown with ①.

If Allow notifications is switched off, the options cannot be selected with the exception of External access.
Menyemat notifikasi
Drag a notification to the right on the touchscreen.
A pin appears.
Tap on the pin.
The notification is marked with a pin.
Menghapus notifikasi
Drag a notification to the left on the touchscreen.
or
Select □.
Select Yes.
All messages are deleted.
Pencarian global
IKHTISAR PENCARIAN GLOBAL
You can call up the global search on the home screen. You can input characters using the keyboard or the handwriting recognition. Alternatively, the MBUX voice assistant allows voice input.
PENCARIAN GLOBAL MENYEDIAKAN HASIL PENCARIAN UNTUK KATEGORI BERIKUT:
Navigation
Entertainment
• Phone, In-Car Office
In-Car Office is not available in all countries.


G-Class - Owner's Manual
MBUX multimedia system Overview and operation
• Digital Owner's Manual
Website
The global search enables you to search for towns, roads and tourist attractions in the navigation category, for example.
If the search field is empty, you will first see smart suggestions in the Suggestions category.
If a letter is entered, the best hits are displayed in the All category. You will find further search results in the individual categories. Next to the category is the number of results.
After selecting a category you can select the search results within the category. When you select a search result, a detailed view is opened depending on the category.
MENGGUNAKAN PENCARIAN GLOBAL
Multimedia system:

In the Suggestions category up to six smart suggestions are displayed, even if no search entry has been entered yet.
Enter the search term into the search field.
As soon as a character is entered the All category is marked. Up to ten search results per category are displayed there.
In the other categories suitable search results for the entered search item are displayed.

Alternatively, the MBUX Voice Assistant allows voice input using 📄 or you switch to the handwriting recognition 📋 (→ page 465).
To end the search: select OK.
To show search results for a category: select a category.
To accept the search result: select the search result.
An action starts, e.g. a radio station is set or a detailed view is displayed, e.g. for a contact.
Memasukkan karakter
MENGGUNAKAN FUNGSI INPUT KARAKTER
Enter the characters on the Touch Control or on the touchscreen. Character input can be started with a control element and resumed with another.
When the keypad is shown, enter the characters by swiping and pressing on the Touch Control or by tapping on the touchscreen.
Examples for character input include the global search, entering a navigation destination or the renaming of a favourite, for example.
MEMASUKKAN KARAKTER PADA LAYAR SENTUH
Persyaratan:
• An online connection is required for some functions.

G-Class - Owner's Manual
MBUX multimedia system Overview and operation

Character input with the keypad (destination entry)
① Input line with current entry
2 Deletes an entry
3 Selects previous destinations
Displays and selects additional destination searches
5 Adopts the search result in the input line and continues the search
6 Search result
⑦ Deletes the last character entered
Hides the keypad
9 Activates voice entry.
10 Sets the written language
Switches to digits and special characters
12 Switches to upper-case or lower-case letters
Example: call up the navigation and enter a destination address ( → page 44).
▶ Briefly press on a character.
The character is entered in input line ①.
Resume character input.
The available editing functions depend on the editing task, the language set and the character level.
MEMASUKKAN KARAKTER ALTERNATIF
Press and hold on a character.
Select the character.
MENGAKHIRI INPUT KARAKTER
Hide keypad
MENGATUR KEYBOARD UNTUK MEMASUKKAN KARAKTER
Multimedia system:
Settings ▶ System ▶ Keyboards and handwriting
MENGATUR BAHASA KEYBOARD
Select Keyboard languages.
Select one or more keyboard languages.
MENGHAPUS KAMUS PENGGUNA
The user dictionary learns from your inputs and offers suggestions during character input. You can reset the user dictionary.
Select Reset my dictionary.
Select Yes.
G-Class - Owner's Manual
MBUX multimedia system System settings
Pengaturan sistem
Tampilan
MENGONFIGURASI PENGATURAN TAMPILAN
Multimedia system:

MENYESUAIKAN KECERAHAN
Select Display brightness.
▶ Vehicles with a driver display and media display: adjust the display brightness of the driver display or media display.
Waktu dan tanggal
MENGATUR ZONA WAKTU
Multimedia system:

Select Time zone.
The list of countries is displayed.
If there are several time zones available in a country, these will be shown after the country is selected.
Select a country and, if required, a time zone. The time zone set is displayed after Time zone.
or
Select the Automatic time zone entry from the country list.
The time zone will be set automatically according to the vehicle location.
The Automatic time zone option is available for vehicles with satellite reception.
MENGATUR FORMAT WAKTU DAN TANGGAL
Multimedia system:

MENGATUR WAKTU DAN TANGGAL SECARA MANUAL
Persyaratan:
• The vehicle does not have satellite reception.
Multimedia system:

MENGATUR WAKTU
Select Set time.
Set a time.
Press OK to confirm.


G-Class - Owner's Manual
MBUX multimedia system System settings

MENGATUR TANGGAL
Select Set date.
Select a date.
Press OK to confirm.
On vehicles with satellite reception, the time and date settings are determined automatically based on the vehicle location and cannot be set manually.
MENYESUAIKAN WAKTU
Select Adjust time.
Set a value.
Press OK to confirm.
① The function is only available in vehicles with satellite reception.
Posisi kendaraan
MENGAKTIFKAN/MENONAKTIFKAN TRANSMISI POSISI KENDARAAN
Persyaratan:
• The vehicle is linked to a Mercedes-Benz ID.
- At least one Digital Extra is activated for the vehicle, which can be used to display the vehicle position to customers and/or co-users via the respective user accesses.
With this setting, you decide whether the vehicle position will be transmitted in order to show it to users who have access to the digital Mercedes-Benz services for this vehicle.
The function is country-dependent. For more information, consult a Mercedes-Benz Service Centre.
Multimedia system:
Settings ▶ System ▶ Data protection
▶ Activate or deactivate the Transmit veh. position function.
Alternatively, you can also switch the function on or off in the status line via ☐.
Mengatur izin
Multimedia system:
Settings ▶ System ▶ Data protection ▶ Permissions
In the Permissions menu, you can set access authorisations for various data points (such as microphone, camera) used in an application. You can change permissions that have already been granted here. You can set permissions either for individual data points or for certain applications or websites.
Select Requests or Apps/websites.
Make the required settings for the permissions.


G-Class - Owner's Manual
MBUX multimedia system System settings

Bluetooth®
INFORMASI TENTANG BLUETOOTH*
Bluetooth ® technology is a standard for short-range wireless data transfer up to approximately 10 m.
ANDA DAPAT MENGGUNAKAN BLUETOOTH® UNTUK MENGHUBUNGKAN PONSEL ANDA KE SISTEM MULTIMEDIA DAN MENGGUNAKAN FUNGSI-FUNGSI BERIKUT, MISALNYA:
\- Hands-free system with access to the following options:
Contacts ( → page 534)
\- Call lists ( → page 536)
\- Text messages (→ page 537)
• Internet connection ( → page 564)
Bluetooth ® is a registered trademark of Bluetooth Special Interest Group (SIG) Inc.
① Internet connection via Bluetooth * is not available in all countries.
MENGAKTIFKAN/MENONAKTIFKAN BLUETOOTH®
Multimedia system:

▶ Activate or deactivate Bluetooth.
Near Field Communication (NFC)
INFORMASI TENTANG NEAR FIELD COMMUNICATION (NFC)
NFC enables short-range wireless data transfer or connection of a mobile phone with the multimedia system.
Further information can be found at: https://www.mercedes-benz-mobile.com/
MENGAKTIFKAN ATAU MENONAKTIFKAN NEAR-FIELD COMMUNICATION
Multimedia system:

▶ Activate or deactivate NFC.
Wi-Fi
IKHTISAR KONEKSI WI-FI
You can use Wi-Fi to set up a connection to the Internet or to external network devices.
The availability of the function is dependent on the country.
SECARA UMUM, TERSEDIA DUA JENIS KONEKSI WI-FI:
• Using the multimedia system as a Wi-Fi hotspot ( → page 470)
The vehicle's multimedia system serves as a Wi-Fi hotspot for mobile communication devices, such as smartphones or tablet PCs, for example.
• Using a mobile communication device as a Wi-Fi hotspot (tethering) ( → page 566)
An external Wi-Fi hotspot is accessed for the Internet connection of the vehicle's multimedia system.


G-Class - Owner's Manual
MBUX multimedia system System settings
MENGAKTIFKAN ATAU MENONAKTIFKAN WI-FI
Multimedia system:
Settings ▶ System ▶ Internet and Bluetooth
Select Wi-Fi.
The controller is to the right: Wi-Fi is switched on.
When Wi-Fi is switched on, you can connect the multimedia system with external hotspots or make it available as a hotspot for external devices.
When Wi-Fi is switched off, it is not possible to establish a hotspot connection.
i Availability of the function is dependent on the respective country.
MENGGUNAKAN SISTEM MULTIMEDIA SEBAGAI HOTSPOT WI-FI
Persyaratan:
\- The device to be connected supports at least one of the types of connection described.
The connection types shown depend on the device to be connected. The function must be supported by the multimedia system and by the device to be connected. The type of connection must be selected on the multimedia system and on the device to be connected.
The data volume of the vehicle or an already connected tethering device is used for the data connection.
Vehicle data volume: depending on the vehicle equipment, you can purchase an Entertainment Package via the Mercedes-Benz Store. In order to use the data package included, you must conclude your own contract with a mobile phone network provider

via the Mercedes-Benz App. This can be terminated at any time and incurs no costs. Without this contract it is not possible to use the services included in the previously acquired Entertainment Package. The availability of this option is dependent on the country.
If the data package option is not available or can be upgraded, you can purchase data volume directly from the mobile phone network provider for a fee. The availability of this option is dependent on the country.
Some functions may first need to be activated on the device being connected. More detailed information can be found in the manufacturer's operating instructions.
The use of the vehicle data tariff by external devices is not available in all countries.
Multimedia system:
Settings ▶ System ▶ Internet and Bluetooth
Select MBUX hotspot.
Select one of the following connection options.
MENGHUBUNGKAN MENGGUNAKAN KODE QR
Requirement: an app for scanning the QR code is installed on the device being connected.
Alternatively: the device being connected has an integrated QR code scanner (see the manufacturer's operating instructions).


G-Class - Owner's Manual
MBUX multimedia system System settings
▶ Scan the QR code shown.
The WLAN connection is established.
MENGHUBUNGKAN MENGGUNAKAN NFC
▶ Activate NFC on the device to be connected.
When the NFC symbol is displayed in the MBUX hotspot menu, hold the device to be connected to the NFC interface.
Follow the instructions on the device. The WLAN connection is established.
MENGHUBUNGKAN MENGGUNAKAN KUNCI KEAMANAN
Select the vehicle from the device to be connected. The vehicle is displayed with the MBUX XXXXX network name.
Enter the security key which is shown in the media display on the device to be connected.
Confirm the entry.
MEMBUAT KUNCI KEAMANAN BARU
Select the Generate new security key option in the MBUX hotspot menu.
Confirm the prompt with Yes.
A new security key is generated.
A connection will be established with the newly created security key.
When a new security key is generated, all existing WLAN connections are then disconnected. If the WLAN connections are re-established, the new security key must be entered.
Bahasa sistem
CATATAN TENTANG BAHASA SISTEM
This function allows you to determine the language for the menus and navigation announcements. The selected language affects the characters available for entry. The navigation announcements are not available in all languages. If a language is not available, the navigation announcements will be in English.
MENGATUR BAHASA
Multimedia system:

MENGATUR BAHASA SISTEM
A list of the available system languages is shown.
Select a language.
The system language is switched to the selected language.
Mengatur satuan jarak
Multimedia system:

① This function is not available in all countries.
Select a unit for the distance.
▶ Activate Additional speedometer for an additional display in the driver display.

G-Class - Owner's Manual
MBUX multimedia system System settings
Mengaktifkan/menonaktifkan proteksi PIN sistem
Multimedia system:
Settings ▶ System ▶ Data protection ▶ PIN protection
MENGATUR PIN SISTEM
Select Set PIN.
Enter a four-digit system PIN.
Enter the four-digit system PIN again.
If both system PINs match, then the system PIN protection is active.
MENGUBAH PIN SISTEM
▶ Select Change settings.
Enter the current system PIN.
Select Change PIN.
Set a new system PIN.
MENGAKTIFKAN PROTEKSI PIN SISTEM UNTUK PEMBARUAN PERANGKAT LUNAK
▶ Select Protect software updates.
▶ Activate or deactivate the function.
Mengonfigurasi saran
Multimedia system:
Settings ▶ System ▶ Suggestions
Select [O].
▶ Switch the options on or off individually.
If an option is switched on and sufficient data has been gathered, personalised suggestions based on your user behaviour will be offered to you. These are, for example, navigation destinations visited, phone numbers dialled as well as suggestions based on your music preferences.
Navigasi
When Allow destination suggestions is switched on, the vehicle makes suggestions based on your visited navigation destinations.
If Commuter route is switched on, the navigation automatically detects that the vehicle is on a commuter route.
Panggilan & pesan
Suggestions are offered for numbers dialled and messages sent.
Kenyamanan
The vehicle makes suggestions based on the use of your comfort functions, e.g. which massage programme should be started at what time.
Hiburan
Suggestions are offered for the currently played media source. Suggestions are also made for Digital Extras such as Spotify, TuneIn Radio and other streaming providers as well as for categories, for example, genre, artist and mood.
Kendaraan
The suggestions for vehicle functions are displayed, e.g. for Parking Assist PARKTRONIC.
Layanan suara daring
The suggestions are made available online based on your voice input and are offered on the zero layer.
The zero layer is your own personalised user interface with the digital map in the foreground and the applications that you use the most. You can switch between the zero layer and the home screen with a classic menu.


G-Class - Owner's Manual
MBUX multimedia system System settings

The suggestions offered depend on the equipment.
Menghapus saran yang terkumpul
Multimedia system:
Settings ▶ System ▶ Suggestions
Select
Select Yes.
The suggestions are reset.
Pembaruan perangkat lunak
INFORMASI TENTANG PEMBARUAN PERANGKAT LUNAK
Software updates keep your vehicle and the related systems up-to-date and prevent security flaws.
Software updates are available online for vehicle components such as control units, convenience systems, locking and safety systems, driver assistance systems, suspension and drive systems as well as for the MBUX multimedia system. Software updates are available via the communication module or a Wi-Fi connection to an external hotspot.
The navigation maps are also updated via updates from external storage media (e.g. USB flash drive).
Install available software updates regularly. Otherwise the security of your MBUX multimedia system and individual vehicle components cannot be ensured.
① Software updates can be protected with a system PIN. Further information about the system PIN ( → page 472).
Further information about software updates can be found at https://me.secure.mercedes-benz.com.
MELAKUKAN PEMBARUAN PERANGKAT LUNAK
Persyaratan:
UNTUK PEMBARUAN PERANGKAT LUNAK MELALUI MODUL KOMUNIKASI DAN WI-FI:
- Your vehicle is linked to a Mercedes me user account (→ page 555).
- Software updates without Mercedes me user account: The Allow software updates option is activated in the Software update menu.
- For software updates via the communication module: an Internet connection exists via the communication module ( → page 565).
- For software updates via Wi-Fi: a connection to an external Wi-Fi hotspot exists (→ page 566).
Depending on the software update, this is started via the communication module, Wi-Fi or an external storage medium.
① Online software updates cannot be performed via external Wi-Fi hotspots that are encrypted via TKIP.
G-Class - Owner's Manual
MBUX multimedia system System settings
If the Wi-Fi hotspot requires logging in via the browser, once the connection is successfully established the browser will open in order to start the update. To start the download follow the instructions in the browser.
Multimedia system:
Settings ▶ System ▶ Software update ▶
MEMULAI PEMBARUAN PETA DARI MEDIA PENYIMPANAN EKSTERNAL
Connect the storage medium with the vehicle via a media interface.
A message about an available map update appears on the media display.
Select the message.
Select Start.
The map update is started.
MEMULAI PEMBARUAN PERANGKAT LUNAK MELALUI MODUL KOMUNIKASI
If the Automatic online update option is active, available software updates are downloaded and installed automatically. Activate the option in order to always keep your vehicle up-to-date and avoid security flaws.
▶ Select Automatic online update.
The software update is downloaded and installed automatically.
If the option is deactivated, you will be informed of new software updates once. The updates are available for downloading for a limited period of time.
Select an update from the list of available updates.
Start the update.
The software update is downloaded and installed automatically.
MEMULAI PEMBARUAN PERANGKAT LUNAK MELALUI WI-FI
Some software updates require an additional connection to a Wi-Fi hotspot. The connection to an external hotspot can be established when the software update is started.
Select an update from the list of available updates.
Start the update.
Establish the connection to a Wi-Fi hotspot.
The update is downloaded and installed automatically.
For software updates requiring a safe vehicle status: when the last installation step is reached, a message appears on the media display after the vehicle is switched off. Follow the step-by-step instructions on the media display to complete the installation.
There are software updates that can only be installed when the vehicle is safely parked, there are no more people in the vehicle and the vehicle is locked.
MEMASANG PEMBARUAN PERANGKAT LUNAK
Software updates are installed automatically after they are downloaded. As soon as the software update has been completed, a message appears in the media display. It may be necessary to restart the MBUX multimedia system.
Some software updates require a safe vehicle status for the installation to be completed. They can only be carried out in a safely parked vehicle with the vehicle switched off. If this is necessary, a message appears on the media display after the vehicle is switched off.
▶ Follow the instructions on the media display.
For some software updates, you can set a time for installation. The installation is carried out automatically at the scheduled time. You do not need to be in


G-Class - Owner's Manual
MBUX multimedia system System settings
the vehicle during installation. Note that the planned installation is cancelled as soon as the vehicle door is opened.
If an installation is available where you can set the time, a message appears on the media display after the vehicle is switched off.
▶ Follow the instructions on the media display.
The vehicle cannot be used while these software updates are being installed. Make sure that no persons or animals are in the path of your vehicle. Events stored in the vehicle's control units can be overwritten.
KETERSEDIAAN LAYAR PENGEMUDI DAN LAYAR MEDIA
During the installation of software updates, it is not possible to use the vehicle, driver display and media display. You may receive the following display message when an installation is running:

The display message does not appear every time a software update is installed.
In rare cases, an error can occur during the installation. The multimedia system automatically attempts to restore the previous version.
If it is not possible to restore the previous version, the display message shown above appears every time the vehicle is started.

KEGAGALAN LAYAR PENGEMUDI:
If the driver display fails or there is a malfunction, you may not recognise limitations in the functions of systems relevant to safety or the speed display, for example. This may impair the operating safety of the vehicle. Park the vehicle safely as soon as possible and notify a qualified specialist workshop ( → page 784).
Further information about software updates can be found at https://me.secure.mercedes-benz.com
KEGAGALAN LAYAR MEDIA:
If the media display fails or the display message shown above is shown continuously, several systems such as the reversing camera, Parking Assist PARKTRONIC or climate control are no longer available. Drive on carefully and consult a specialist workshop as soon as possible.
Mengatur ulang sistem multimedia (fungsi reset)
WARNING
Risk of accident due to failure of central display functions
While the multimedia system is reset, its functions, such as the reversing camera, are not available.
▶ Only reset the multimedia system when the vehicle is stationary.
Persyaratan:
• The vehicle is switched on.
• The vehicle is stationary.


G-Class - Owner's Manual
MBUX multimedia system System settings
Multimedia system:
Settings System Reset
SAAT MENGATUR ULANG SISTEM, DATA PRIBADI DAN PENGATURAN AKAN DIHAPUS, CONTOHNYA:
• Connected devices
• Individual user profiles
• Biometric data
The data used and saved in the multimedia system by the driver assistance systems is deleted.
Select Reset.
A query appears asking if the system should really be reset.
Select Yes.
The multimedia system is reset to the factory settings. The multimedia system is restarted after the system reset.
Due to data protection, as well as the function of individual driving systems and driving safety systems, it is a requirement to carry out a complete system reset before selling the vehicle or transferring it to a third party, or after use as a hire car.


Menu Off-road
Ikhtisar menu Off-road pada sistem multimedia MBUX
You can watch an animation on this topic via the following link:
MENU OFF-ROAD MENAMPILKAN INFORMASI TENTANG TOPIK-TOPIK BERIKUT:
• Overview of the most important data relevant to off-road driving.
• Functions to assist driving off-road.
- Recording of routes for subsequent re-use or for sharing with other drivers.
KOKPIT
This tab provides an overview of the most important data. Content is displayed in different tiles that can be changed using the directional arrows. In addition, this menu contains buttons for quick-access to certain vehicle functions relevant to off-road operation.
CONTOH DATA YANG DITAMPILKAN:
• Artificial horizon
- Compass
Altitude
• Steering angle of the front wheels
- Torque and power
• Tyre pressure and temperature
• Transparent bonnet
Further information on the Cockpit tab ( → page 478).
RUTE
In the Tracks tab, off-road tracks can be recorded and retraced. Depending on the equipment, dashcam videos with graphic overlays can also be generated. In conjunction with the Mercedes-Benz Stories app, video recording and route management can also be offered on a third-party device. The function helps you to drive your own routes in off-road terrain and to record these. At the start of the journey, you can set a destination and be navigated in that direction. These routes can then also be retraced. Furthermore, the Mercedes-Benz Stories App enables photos to be taken and videos to be recorded during the journey, which are then linked directly to the corresponding vehicle data. The recorded routes can be shared with other members of the community from the vehicle.
Further information on the Tracks ( → page 478) tab.
JELAJAHI
The Explore tab is used to download nearby tracks from the community.
Further information on the Explore ( → page 479) tab.

G-Class - Owner's Manual
MBUX multimedia system Off-road menu
Mengatur menu off-road pada sistem multimedia
Multimedia system:

MENGATUR TAMPILAN PADA LAYAR TENGAH
Press ◀, ▶ or on the display itself to jump to the next display.
AKSES CEPAT: MENGAKTIFKAN ATAU MENONAKTIFKAN PARKTRONIC (BANTUAN PARKIR)
Press P### to switch the function on or off.
i Further information on Parking Assist PARKTRONIC ( → page 398).
AKSES CEPAT: MENGAKTIFKAN ATAU MENONAKTIFKAN DSR (PENGATUR KECEPATAN SAAT MENURUN)
Press ☐ to switch the function on or off.
① Further information on DSR ( → page 364).
AKSES CEPAT: MENGATUR KETINGGIAN KENDARAAN
Press 📄 to raise or lower the vehicle.
Additional information about vehicle level ( → page 382).

The availability of individual functions depends on country and equipment.
AKSES CEPAT: MENGHIDUPKAN ATAU MEMATIKAN KAMERA OFF-ROAD
Press ☐ to switch the function on or off.
(i) Further information on the off-road camera ( → page 395).
The off-road camera can also be switched on or off using the button in the off-road control panel.
The availability of individual functions depends on country and equipment.
Menggunakan Trek Off-road
Multimedia system:

MEMBUAT TREK BARU SENDIRI
Select REC.
The recording is started and the Cockpit tab is displayed while driving.
When the track is completed, select STOP.
Enter a track name and select the weather during the journey and the level of difficulty.

G-Class - Owner's Manual
MBUX multimedia system Off-road menu
Press OK to confirm.
The route is saved.
MEMANGGIL LAGU LOKAL ATAU LAGU YANG DIUNDUH
Select a track from the carousel.
Select Drive track.
The Offroad Track tile is opened. The fact that the journey is being recorded on the route is displayed below the tile. Depending on the settings and equipment, a dashcam video can be created when a USB flash drive is inserted.
If the vehicle is too far away from the starting point of the route, it is automatically navigated to the start of the track. The route must be restarted at the starting point. Further information on navigation: (→ page 485).
MENGEDIT/MENGHAPUS RUTE
▶ Select a track in the carousel.
▶ Call up the context menu by pressing and holding the tile.
▶ Select Rename or Delete.
You can watch an animation on this topic via the following link:

Menjalankan Offroad Explore
Multimedia system:
Offroad Explore
MEMANGGIL DAN MENGUNDUH RUTE
The Explore tab displays routes close to the current position. If the tab has been open for some time, select Update.
Select a route from the carousel.
Select Download track.
The selected route is downloaded and opened. It can also be accessed via the Tracks tab.

G-Class - Owner's Manual
MBUX multimedia system Fit & Healthy
< Fit & Healthy
Mengatur seat kinetics ENERGIZING
Persyaratan:
These functions are available only for fully electric seats with a memory function.
Sistem multimedia:
Comfort Seat
▶ Select Seat kinetics.
ENERGIZING seat kinetics can support back health by changing the seat position during a journey. This involves repeatedly stressing and relieving the muscles and joints by means of minor movements of the cushion and backrest.
MEMULAI SEAT KINETICS
Select ▶ for the desired seat.
The programme will run for the set duration.
MENGONFIGURASI SEAT KINETICS
Select 📄 for the desired seat.
Select Backrest, Backrest & seat surface or Seat surface.
Select the desired duration for the selected seat.
ENERGIZING COMFORT
IKHTISAR PROGRAM ENERGIZING COMFORT
Note that the available programmes and the associated functions depend on your vehicle equipment. Depending on your equipment, fewer functions may be available.
IKHTISAR PROGRAM
- Refresh: Can have a refreshing effect with short, cool puffs of air. The seat is ventilated, the vehicle interior is illuminated with cool colours and the programme is completed with appropriate sound.
- Warmth: Can increase the comfort level of the vehicle occupants. Seat, surface and steering wheel heater provide soothing warmth. The programme is completed with unobtrusive sound and warm colours.
- Vitality: Can counteract diminishing attentiveness in monotonous driving situations. The activating stimulation of the vehicle occupants is carried out with invigorating sound, activating light and a vitalising massage.
- Joy: Can promote a positive mood in the vehicle occupants as well as mental regeneration. This results from the activation of a massage programme, friendly sound and illumination with suitable colours.
• Well-being: Can help relax the vehicle occupants. This is achieved through a relaxing massage programme, friendly light and calming sound.

G-Class - Owner's Manual
MBUX multimedia system Fit & Healthy
- Forest Glade: Can have a calming and soothing effect on the vehicle occupants thanks to the acoustics of the forest. The ambience is supported by a suitable animation, colours and sound.
- Sounds of the Sea: Can contribute to calming the vehicle occupants. The acoustics of wave sounds and seagulls in combination with other vehicle functions create a relaxing seashore atmosphere.
- Summer Rain: Can help relax the vehicle occupants. The relaxing effect of a rain shower can be experienced via acoustics and other vehicle functions inside the vehicle.
• Power Nap: The programme consists of three phases.
Falling asleep phase: here relaxing music is played and the air is purified by ionisation.
- Sleeping phase: the active functions are deactivated or restricted as much as possible.
- Waking phase: slightly stimulating music is played and the air is purified by ionisation. Additionally, functions such as fragrancing, seat ventilation and a massage programme are activated.
\- Training: Can counteract the onset of muscle tension, limbs falling asleep or stress with targeted relaxation or stimulation exercises. The exercises are demonstrated in short videos.
The training consists of audio content and a brief animation. The audio content is conceived so that it can also be played back when you are driving. Animations are only shown when the vehicle is stationary. Always observe the traffic conditions if you are training when driving.
\- Tips: The system gives auditory tips for possible exercises or measures for improving the comfort level of the vehicle occupants. By selecting the desired area of the body you can receive targeted tips for the comfort level of this area.
Most programmes that have been started for one seat can also be transferred simultaneously to another seat.

MEMULAI PROGRAM ENERGIZING COMFORT
PERINGATAN
Increased risk of accident when using the ENERGIZING COMFORT programmes Tips and Training
The ENERGIZING COMFORT programmes Tips and Training can distract you while driving.
▶ Only carry out exercises when the traffic situation permits.
When listening to the tips, make sure that you are aware of the traffic situation around you at all times.
PERINGATAN
Risk of becoming trapped when using the ENERGIZING COMFORT programme Power Nap
The following systems may be automatically moved when using the ENERGIZING COMFORT programme Power Nap:
- Side windows
- Sliding sunroof
- Roller sunblinds
As a result you or other vehicle occupants may become entrapped.
▶ Make sure that there is sufficient space behind the front seats.
▶ Make sure that no body parts are in the area of movement.


G-Class - Owner's Manual
MBUX multimedia system Fit & Healthy
Persyaratan:
• The vehicle is switched on.
UNTUK MULAI POWER NAP:
• Only the power supply is on.
• The doors are closed.
• The vehicle is secured against rolling away.
- The state of charge of the high-voltage battery is sufficient for the use of the auxiliary climate control.
Multimedia system:

MEMULAI DAN MENGHENTIKAN PROGRAM
Select a programme.
Select ▶ for the desired seat.
Select □ to stop the programme.
If, during an active programme, a function requirement is no longer met, a corresponding message appears. The active programme is cancelled.
MENGONFIGURASI PROGRAM
Select a programme.
Select Settings.
▶ Switch the functions included in the programme on or off.
MENGATUR DURASI
Select a programme.
Select Settings.
▶ Select the desired duration.
MEMULAI POWER NAP
Select Power Nap.
Select ▶ for the desired seat.
SAAT KENDARAAN DIAM, TINDAKAN BERIKUT DILAKUKAN SAAT POWER NAP DIMULAI:
• The roller sunblinds are extended.
• The doors are locked.
• The windows and sliding sunroof are closed.
• The parking brake is applied.
Select ■ to stop the programme.
MEMULAI PROGRAM LATIHAN
Select Training.
Select ▶ a programme.
Select ■ to stop the training programme.
The animations demonstrating the exercises are faded out when the vehicle is in motion and you only hear the instructions.

G-Class - Owner's Manual
MBUX multimedia system Fit & Healthy
TIPS MEMULAI
Select Tips.
Select ▶ an area of the body.
Select ■ to stop playback of the tip.
ENERGIZING COACH
FUNGSI ENERGIZING COACH
PERSYARATAN:
- The ENERGIZING COACH Digital Extra is activated in the Mercedes-Benz Portal or the Mercedes-Benz App.
- The Mercedes-Benz ENERGIZING app is installed on the mobile phone to use the Digital Extra.
With ENERGIZING COACH you can evaluate the driving and driver situation. Depending on the situation, it offers recommendations for the start of an appropriate ENERGIZING COMFORT programme.
PROGRAM BERIKUT MUNGKIN DISARANKAN:
Vitality
As an activating programme in monotonous driving situations or for long journey times, for example
Information on the vitality program see ( → page 480).
- Joy
As a balancing programme in demanding driving situations Information on the Joy programme see ( → page 480).
- Refresh
As a refreshing programme when temperatures rise Information on the Refresh programme; see ( → page 480).
\- Warmth
As a warming programme when temperatures drop Information on the Warmth programme; see ( → page 480).
By connecting a Garmin fitness tracker, for example the Garmin vivoactive ® 3, additional information can be entered into the evaluation for the recommendation of an ENERGIZING COMFORT programme. The additional information includes the stress level, that is calculated by the fitness tracker. The stress level is based primarily on the pulse rate.
PERSYARATAN UNTUK INTEGRASI INFORMASI TAMBAHAN MELALUI PELACAK KEBUGARAN GARMIN:
- Your fitness tracker is connected with your Garmin account.
- Your Garmin account is linked to your Mercedes-Benz user account.
If you wear your Garmin fitness tracker at night also, the sleep data is included in the evaluation of the ENERGIZING COACH.
PERSYARATAN INTEGRASI DATA TIDUR:
\- The Garmin fitness tracker is synchronised with the Garmin account before the beginning of the journey.
MEMANGGIL TAMPILAN COACH ENERGI
Persyaratan:
• The fitness tracker is connected with your Garmin account.
- Your Garmin account is connected with your Mercedes-Benz user account in the Mercedes-Benz ENERGIZING app.


G-Class - Owner's Manual
MBUX multimedia system Fit & Healthy
• The mobile phone is connected to the multimedia system ( → page 528).
- You are logged in with your Mercedes-Benz profile both in the vehicle and in the Mercedes-Benz ENERGIZING app.
Multimedia system:
Apps ENERGIZING COACH
Your current pulse as well as an evaluation of your pulse for the last 30 minutes driving time are shown. A corresponding fault message is shown if there is no mobile phone connected or no pulse can be sent to the system for an extended period.
Only pulse values which fall into the range from 30 - 140 (possibly also 150) bpm will be shown on the media display. The pulse values have no medical validity but are only informative in nature and are therefore also not required to be accurate.


G-Class - Owner's Manual
MBUX multimedia system Navigation and traffic
Navigasi dan lalu lintas
Mengaktifkan navigasi
Multimedia system:

Alternatively, switch on the MBUX voice assistant ( → page 439).
Switch to navigation.
The map appears.
Ikhtisar navigasi
DIGITAL MAP

① Navigation module (reduced view)
Route guidance active:
The navigation module shows the information relevant to the route in the zoomed-out view, e.g. the destination or a traffic delay
☒ Ends the current route guidance
Tapping opens the navigation module and displays the route overview ( → page 496)
Sets map orientation and map type
3 Calls up the telephone menu
Current vehicle position (vehicle symbol or arrow)
5 Calls up entertainment applications
Elevation and map scale ( → page 514)
7 Navigation window shows the next manoeuvre (zoomed out view) or the route monitor (zoomed in view)
Route guidance active: route monitor shows, e.g. route sections, upcoming driving manoeuvres with lane recommendations, destination, traffic delays, 3D images at motorway exits, online content
MENekan Ⓞ BEBERAPA KALI MENGUBAH ORIENTASI PETA DALAM URUTAN INI:
2D and to the north
• 2D and in the direction of travel
• 3D and in the direction of travel
• Map with complete route


G-Class - Owner's Manual
MBUX multimedia system Navigation and traffic
If the map is moved, the map switches between 3D direction of travel and 2D north orientation.
JENIS PETA BERIKUT ② TERSEDIA:
Daytime display
• Night-time display
Satellite map
If you notice a problem with the digital map, you can report it at https://mapfeedback.here.com/#/report.
You can watch an animation on this topic via the following link:
You can watch an animation on this topic via the following link:
You can watch an animation on this topic via the following link:
Memasukkan tujuan
CATATAN TENTANG MEMASUKKAN TUJUAN
⚠ WARNING
Risk of distraction from operating integrated communication equipment while the vehicle is in motion
If you operate communication equipment integrated in the vehicle when driving, you could be distracted from the traffic situation. This could also cause you to lose control of the vehicle.
▶ Only operate this equipment when the traffic situation permits.
If you cannot be sure of this, stop the vehicle whilst paying attention to road and traffic conditions and operate the equipment with the vehicle stationary.
You must observe the legal requirements for the country in which you are currently driving when operating the multimedia system.
MEMASUKKAN POI ATAU ALAMAT
Persyaratan:
• For the online search:
- There is an Internet connection.
- Digital Extras are available.
- You have created a Mercedes me ID.
- The vehicle is linked to the Mercedes me ID and you have accepted the terms of use.
- Further information can be found at: https://www.mercedes.me


G-Class - Owner's Manual
MBUX multimedia system Navigation and traffic
The Digital Extra is available and has been activated.
① If Online Search is not available, the search is performed using the data of the digital map.
Multimedia system:


Example: entering a POI or address
① Input line with current entry
2 Deletes an entry
3 Selects previous destinations
Displays and selects additional destination searches
Adopts the search result in the input line and continues the search
6 Search result
7 Deletes the last character entered
Hides the keypad
9 Activates voice entry.
Sets the written language
11 Switches to digits and special characters
12 Switches to upper-case or lower-case letters
If available, selecting the 3 symbol starts the MBUX Voice Assistant.
Enter a destination. The entries can be made in any order. The search results are displayed in a list.
① Online search results for POIs may contain additional information, for example opening times and ratings. The information is provided by an online map service.
This online function is not available in all countries.
ENTRI BERIKUT DAPAT DIBUAT, MISALNYA DI ①:
• Town, street, house number or street, town
Postcode
• POI name or POI category, e.g. Restaurants
Town, POI name
- Contact name
• Geo-coordinates ( → page 490)
Hide the keyboard with OK.
▶ Select the destination in the list.
The following menu shows the selected destination with the address information and a corresponding map section.
The menu enables the route to be calculated.


G-Class - Owner's Manual
MBUX multimedia system Navigation and traffic
MEMILIH SARAN TUJUAN
Persyaratan:
• The Allow destination suggestions option is switched on ( → page 472).
- The multimedia system has gathered sufficient data in order to show destination suggestions.
Multimedia system:

Select Suggestions.
The route is calculated in the following menu.
① If Suggestions has been selected, a menu is available via ⋯. The menu offers settings for the suggestions and memory functions.
i Managing destination suggestions ( → page 506).
MEMILIH DESTINASI SEBELUMNYA
Multimedia system:

▶ Select Previous destinations.
Select the destination.
The following menu enables the route to be calculated.
(i) You can save a destination as a favourite ( → page 505).
MEMILIH POI
Persyaratan:
- For use of personal POIs: a USB device is connected with the multimedia system.
- Personal POIs with the GPS Exchange format (.gpx) have been saved in the PersonalPOI folder on the USB device.
Multimedia system:

Select POIs.
Select one of the displayed quick-access categories, e.g. P.
Select the POI.
The following menu enables the route to be calculated.
or
Select All categories or Personal POIs (see requirements).
Select the category.
Select the POI.
The following menu enables the route to be calculated.
MENGATUR FILTER PENCARIAN SETELAH MEMILIH KATEGORI POI
POSISI PENCARIAN DEFAULT TERGANTUNG PADA STATUS PANDUAN RUTE:
• If route guidance is not active, In the vicinity is searched.
• If route guidance is active, Along the route is searched.


G-Class - Owner's Manual
MBUX multimedia system Navigation and traffic
When the search results are displayed, select Filter.
Select the search position, e.g. In the vicinity.
If a route with intermediate destinations already exists and Near destination has been selected in the search filters, the destination is selected for the search.
or
Select the desired travelling time to the point of interest.
Select Search results.
MENGONFIGURASI KATEGORI UNTUK AKSES CEPAT
KATEGORI DITAMPILKAN:
• As symbols after calling up the destination entry via 📞
• As a list after calling up All categories
In the POI menu, select All categories.
Select ☆ or ★ for a category.
Tapping on ☆ adds the category.
Tapping on ★ removes the category.
Use → to change back.
The new categories are shown after the destination entry is called up the next time.
If all available quick-access positions are full, select the category to be replaced.
MENGUBAH URUTAN KATEGORI AKSES CEPAT
In the POI menu, press and hold a category for quick access.
Tap on the arrows next to the selected category. The arrows for the other categories are greyed out.
Drag the category up or down.
Select
MENGHAPUS KATEGORI AKSES CEPAT
In the POI menu, press and hold a category for quick access.
Select ★ for the chosen category.
Select Delete.
Select ▼.
MENGUBAH KATEGORI UNTUK POI PRIBADI
Select Personal POIs.
Press on a category as long as is necessary until a menu appears.
▶ Select Change name and enter a name.
▶ Select Change icon and select a symbol.
▶ Select Delete and confirm the prompt with Yes.
MEMILIH KONTAK UNTUK MEMASUKKAN DESTINASI
Persyaratan:
• A mobile phone is connected to the multimedia system ( → page 528).
• The contacts from the mobile phone have been downloaded.
• The contact has a navigable address.


G-Class - Owner's Manual
MBUX multimedia system Navigation and traffic
• The address data can be located on the digital map.
Sistem multimedia:

Enter a contact in the entry line.
Select the address.
The following menu enables the route to be calculated.
Alternatively, after calling up the destination entry, you can enter the name of a contact in the search field.
MEMASUKKAN KOORDINAT GEO
Multimedia system:

Enter the geo-coordinates as latitude and longitude.
CONTOH FORMAT INPUT:
• 47°58'11"N 7°57'25"E (degrees, minutes and seconds)
• 47.969722 7.956944 (decimal degrees)
Confirm the entry.
The following menu enables the route to be calculated.
MEMILIH TUJUAN DI PETA
Multimedia system:

If necessary, move the map ( → page 513).

Press and hold on the map.
Available destinations are displayed.
or
▶ Briefly press on a POI symbol.
The POI is selected. If there are several POIs at this map position, a list
appears.
Select the destination in the Selected objects list.
The following menu enables the route to be calculated.
MEMILIH TUJUAN DARI FAVORIT
Persyaratan:
• Destinations are saved as favourites.
Save a previous destination or a destination suggestion as a favourite
(→ page 505).
Multimedia system:

Select Favourites.
Select a favourite.
The route is calculated in the following menu.
ALAMAT RUMAH DAN KANTOR SUDAH DIATUR
Select Home or Work.
The following menu enables the route to be calculated.

G-Class - Owner's Manual
MBUX multimedia system Navigation and traffic
ALAMAT RUMAH DAN KANTOR BELUM DIATUR
▶ Select Home or Work.
The prompt No "Home" address available. Set address now? appears, for example.
Select Yes.
▶ Search for or select the address.
Select Save.
MENGHAPUS FAVORIT
Select ⋯ for a favourite.
Select Delete.
or
▶ Select Delete all.
Confirm the prompt.
When all the favourites have been deleted, Add favourite is available, for example.
MEMILIH TUJUAN YANG DITERIMA
Persyaratan:
• There is an Internet connection for receiving external destinations.
• A destination has been sent to the vehicle.
• Destinations have been shared from another seat in the vehicle.
Multimedia system:

The vehicle can receive destinations from Digital Extras. You will be informed when a destination is received.
▶ Select Received destinations.
▶ Select a destination.
The route is calculated in the following menu.

MENGHAPUS TUJUAN YANG DITERIMA
Delete a destination with □.
or
Select Delete all.

G-Class - Owner's Manual
MBUX multimedia system Navigation and traffic
Rute
MENGHITUNG RUTE

Example: detailed display
① Calls up alternative routes
② Calculates the route and starts route guidance
3 Selects a point of interest in the vicinity of the destination
4 Destination address
The detailed display can contain additional entries such as online content
After selection of a destination the route is be calculated.
▶ Select one of the options.
MEMANGGIL RUTE ALTERNATIF
Select Routes.
▶ Select an alternative route ( → page 497).
MEMULAI PANDUAN RUTE
Select Let's go!.
MEMANGGIL TAMPILAN RINCI DENGAN ALAMAT TUJUAN
▶ Pull the bar above ② upwards.
Depending on the destination selection and availability, online content, for example ratings and weather information, is shown.

If the destination is in a different time zone, a message is displayed.
To share a destination: select Share.
This option allows you to scan the displayed QR code.
To save a destination as a favourite: select ★ Favourite and then an option.
To call up an Internet address: if a web address is available, select www.
To call the destination: if a telephone number is available, select Call.
MENCARI POI DI SEKITAR TUJUAN YANG DITAMPILKAN
▶ Select In the vicinity.
Search using categories, enter a search entry or search for a personal POI ( → page 488).
MENAMBAHKAN TUJUAN ANTARA PADA RUTE YANG ADA ATAU MEMULAI PANDUAN RUTE BARU
Select Add.
The selected destination address is set as the next intermediate destination. Route guidance begins.
There are already four intermediate destinations: confirm the prompt with Yes and select an intermediate destinations in the route overview ( → page 496), that should be overwritten with the new intermediate destination.
or
Select Replace.
The selected destination address is set as a new destination. Route guidance begins.


G-Class - Owner's Manual
MBUX multimedia system Navigation and traffic

JIKA ANDA MEMANGGIL MENU SELAMA PANDUAN RUTE, LEBIH BANYAK PILIHAN YANG TERSEDIA:
• To change the order of destinations, select Move ( → page 496).
• To delete the destination, select Delete ( → page 496).
• To cancel route guidance, select Cancel route guidance.
MENGAKTIFKAN ATAU MENONAKTIFKAN ZONA EMISI RENDAH UNTUK RUTE
Persyaratan:
• Digital Extras are available.
• You have created a Mercedes me ID.
- The vehicle is linked to the Mercedes me ID and you have accepted the terms of use.
- The Digital Extra Traffic restriction is available and activated in the Mercedes-Benz Portal. The Digital Extra is free of charge for three years after registration.
Multimedia system:

▶ Switch on Traffic restrictions.
The low emission zones along the route are shown on the digital map and in the route overview.
Before you enter a low emission zone, you will be shown a notification in the central display.
i FUNGSI PEMBATASAN LALU LINTAS DINONAKTIFKAN:
• No low emission zones are shown on the map.
MEMILIH JENIS RUTE
Multimedia system:

MENGGUNAKAN RUTE ONLINE
The route is calculated as a fast route with a short journey time.
▶ Switch on the option.
MEMPERHITUNGKAN INFORMASI LALU LINTAS UNTUK RUTE
Select Dynamic route guidance ▶.
Select one of the options.
PENJELASAN PILIHAN:
• Automatic
Traffic reports via Live Traffic Information are taken into account ( → page 506).
Live Traffic Information and FM home screen are not available in all countries.
After asking
A prompt appears when a new route is detected with a shorter journey time based on traffic reports. You can continue to use the current route or use the dynamic route instead ( → page 494).
Off
No traffic reports are taken into account for the route.

G-Class - Owner's Manual
MBUX multimedia system Navigation and traffic
MENGHITUNG RUTE ALTERNATIF
Multimedia system:
Navigation View
▶ Activate Overview of route after start.
Alternative routes are calculated for every route.
MENERIMA REKOMENDASI JALAN MEMUTAR SETELAH PERMINTAAN
Persyaratan:
- After asking is switched on (→ page 493) in the Dynamic route guidance menu.
• Route guidance is active.
• There are traffic reports for the current route.
If a new route with a shorter driving time is determined, the current and new routes will be shown.
If another application is active, a notification is hidden.
▶ Confirm the notification.
To accept the new route: select Accept.
To maintain the current route: select Keep to current route.
MEMILIH OPSI RUTE
Multimedia system:
Navigation Route Avoid options
MENGHINDARI ATAU MENGGUNAKAN BAGIAN RUTE, MIS. JALAN TOL ATAU FERI
▶ Activate or deactivate the avoid option.
Avoid: the option is activated. The route avoids motorways, for example.

Use: the option is deactivated. The route takes motorways into consideration, for example.
The selected route options cannot always be taken into account. Therefore, a route may include a ferry, for instance, even though the Avoid ferries avoid option is enabled. A message then appears and you will hear a corresponding message.
MENGHINDARI ATAU MENGGUNAKAN JALAN BERBAYAR
The use of toll roads requires a usage fee (toll).
Select Toll roads ▶.
▶ Activate or deactivate Avoid all.
If the option is activated, the route avoids toll roads.
If the option is deactivated, the route takes toll roads into account.
or
Select an option for Payment by cash or card or Electronic billing.
Avoid: the route avoids toll roads with the selected method of payment.
Use: the route takes into account roads that require a toll corresponding with the payment type selected.
MENGHINDARI ATAU MENGGUNAKAN JALAN YANG MEMERLUKAN STIKER TOLL KHUSUS
A vignette allows for the use of a route network for a limited time period.
Select Avoid vignette roads ▶.
▶ Activate or deactivate Avoid all.
or

G-Class - Owner's Manual
MBUX multimedia system Navigation and traffic
▶ Switch individual countries on or off in the list.
Avoid: the option is activated. The route avoids roads requiring a special toll sticker in the selected countries.
Use: the option is deactivated. The route takes into account roads in the selected country which require you to pay a time-based fee (vignette).
① These route options are not available in every country.
MENGHINDARI ATAU MENGGUNAKAN AREA DENGAN PERSYARATAN ZONA EMISI RENDAH:
- An active Internet connection is indicated in the status line on the media display with the ➕ symbol.
• The Traffic restrictions option is switched on.
▶ Activate or deactivate Area with low emission zones.
Avoid: the option is activated. The route avoids all low emission zones restricted for the vehicle. These are displayed in red on the map.
Use: the option is deactivated. The restricted low emission zones for the vehicle are passed through on the route. A warning is displayed before you drive into a low emission zone.
MENGHINDARI AREA
Select Avoid areas ≥ ( → page 514).
MEMILIH NOTIFIKASI UNTUK RUTE
Persyaratan:
- For an audible indication when approaching a personal POI: the USB device contains personal POIs.
• The USB device is connected with the multimedia system.

• The category in which the personal POI belongs is activated.
Multimedia system:
Navigation Messages & tones
MENGAKTIFKAN ATAU MENONAKTIFKAN PENGUMUMAN NAVIGASI
▶ Activate Reduced messages.
If a driving instruction is available for a simple change in direction, you hear a brief announcement, e.g. "turn right in 200 m". The number of driving instructions along the route is minimised.
▶ Activate Detailed messages.
If a driving instruction is available and there is a complex driving situation, you hear supplementary information, e.g. "In 200 m turn right and continue to follow the major road". Additional driving instructions are issued for the route, for example on turning major roads.
▶ Activate Announce street names.
The name of the street into which the vehicle should turn is announced.
① This option is not available in all countries and languages.
MENGAKTIFKAN ATAU MENONAKTIFKAN PENGUMUMAN LALU LINTAS
▶ Activate or deactivate Announce traffic warnings.
If available, traffic warnings are announced, e.g. before the end of traffic jams that pose a risk.
INDIKASI AUDIBLE SAAT MENDEKATI POI PRIBADI
Select Personal POIs.
Activate a category.
When approaching a personal POI in the selected category an audible indication will be issued.


G-Class - Owner's Manual
MBUX multimedia system Navigation and traffic
MENAMPILKAN RINGKASAN RUTE
Persyaratan:
• A destination is entered.
Multimedia system:


Example: route guidance is active
① Enters an address or POI
2 Destination and time of arrival
beneath that the current distance to the destination and the chequered flag
Alternative routes
Searches for parking
5 Switches traffic information display on or off
⑥ Makes settings for View, Messages & tones and Route
When route guidance is active, the destination and entered intermediate destinations are shown.
TERGANTUNG PADA RUTE, SITUASI LALU LINTAS, DAN DATA YANG TERSEDIA, INFORMASI LEBIH LANJUT DITAMPILKAN:
• Name, destination address
Symbols for intermediate destination and destination
• Phone number (if available)
• Web address (if available)
- Traffic information
The route can include up to four intermediate destinations.
▶ Select one of the options.
MERENCANAKAN RUTE
Multimedia system:

Enter the intermediate destination ( → page 44).
After entering the destination and new calculation of the route, the route overview is shown again. The route contains a new intermediate destination.
If there are already four intermediate destinations, delete an intermediate destination ( → page 496).
MENGEDIT RUTE DENGAN TUJUAN ANTARA
Persyaratan:
\- The destination and at least one intermediate destination have been entered.


G-Class - Owner's Manual
MBUX multimedia system Navigation and traffic
Multimedia system:

MENGUBAH URUTAN TUJUAN
In the route overview, press and hold on a destination.
Move the destination with ◀ or ▶.
Tap on [♥].
The editing mode is ended.
MENGHAPUS TUJUAN
In the route overview, press and hold on a destination.
Tap on □.
The editing mode is ended.
MENAMPILKAN DAFTAR RUTE
Multimedia system:

Tap on navigation window ⑦ on the digital map (→ page 485).

Example: route list
Upcoming manoeuvre with turning arrow, distance to manoeuvre, street number, street name
Switches on navigation announcements
Switches off navigation announcements
Including the following route sections on the route to the destination
2 Current vehicle position
The route sections are displayed in the navigation window. The route list is updated during the journey.
Motorway information shows the available service facilities. After selecting symbols, e.g. for car parks, service areas or motorway exits, the POI is adopted as an intermediate destination or destination.
Press the arrow at the bottom of the navigation window briefly.
Swipe up or down.
Select a route section.
The map section is displayed.
To return to vehicle position: select Current position.
MEMILIH RUTE ALTERNATIF
Persyaratan:
• A route has already been created.
• The Overview of route after start option is switched on (→ page 494).


G-Class - Owner's Manual
MBUX multimedia system Navigation and traffic
Multimedia system:


Example: alternative routes
Original route is highlighted
Alternative routes with indication of the difference in driving time
In ② a faster route may also be shown that is considerably longer.
INFORMASI RUTE BERIKUT DITAMPILKAN:
- Driving time
• Time of arrival
• Distance to the destination
- Avoid options based on the set route options
- Driving time saved or lost compared with the original route
When the alternative routes have been calculated, display the route in the navigation window by swiping to the right or left.
MENGUBAH JENIS RUTE
Select Filter.
▶ Switching the route type on or off.
MENGHINDARI ATAU MENGGUNAKAN OPSI RUTE
Select Filter.
▶ Switch the route options on or off (→ page 494).
▶ Confirm the settings with Finished.
To start route guidance to the alternative route: select Start.
To select an alternative route on the map: touch any point on the alternative route.
The alternative route is highlighted.
MENGAKTIFKAN RUTE KOMUTER
Persyaratan:
• You have created a profile ( → page 458).
• The Allow destination suggestions option is switched on (→ page 472).
• The Commuter route option is switched on.
• The multimedia system has gathered sufficient data in order to show destination suggestions.
• Routes have been learned for these destination suggestions.
• Route guidance is active.
① This commuter route is not available in all countries.
G-Class - Owner's Manual
MBUX multimedia system Navigation and traffic

Multimedia system:

▶ Activate Commuter route.
The navigation system automatically detects that the vehicle is on a commuter route.
For the daily commuter route, traffic incidents on the route are also reported when driving without active route guidance.
To select commuter route: select Start.
Route guidance begins without spoken driving instructions.
i A commuter route is suggested even with delays on the route.

SWITCHING THE AUTOMATIC FILLING STATION SEARCH ON OR OFF Multimedia system:

Select Driving.
▶ Activate or deactivate Automatic filling station search.
If Automatic filling station search is switched on, a notification appears in which the search for filling stations is started.
MEMULAI PENCARIAN SPBU OTOMATIS
Requirements:
• The automatic filling station search is activated ( → page 499).
SITUASI BERKENDARA
The fuel level in the fuel tank reaches the reserve fuel level.
The following notification is shown on the central display: Fuel reserve Tap here to search for filling stations..
▶ Confirm the notification.
The automatic filling station search begins. The available filling stations along the route or in the vicinity of the vehicle's current position are displayed.
▶ Select a filling station.
Calculate the route with the filling station as an intermediate destination or as a destination ( → page 492).
If there are already four intermediate destinations: select Yes in the prompt.
The selected filling station is entered in the route overview at position 1. Intermediate destination 4 is deleted. Route guidance begins.
MEMULAI PENCARIAN SPBU OTOMATIS
Persyaratan
• ATTENTION ASSIST is activated ( → page 349).
• You are driving on a motorway.
• There are service stations along the route section ahead.
SITUASI BERKENDARA
▶ Confirm the notification.
The service station search starts. The available service stations along the route or in the vicinity of the vehicle's current position are displayed.
Select a service station.


G-Class - Owner's Manual
MBUX multimedia system Navigation and traffic
Calculate the route with the service station as an intermediate destination or as a destination ( → page 492).
If there are already four intermediate destinations: select Yes in the prompt.
The selected service station is entered in the route overview at position 1. Intermediate destination 4 is deleted. Route guidance begins.
MEMULAI DAN MENGEDIT RUTE TERSIMPAN
Persyaratan:
- A USB device with stored routes is connected with the multimedia system ( → page 575).
- The route is stored in the "Routes" folder with the GPS Exchange data format (.gpx).
Sistem multimedia:
Navigation
Press the double arrow in the destination input line until Stored routes is displayed.
▶ Select Stored routes.
MEMULAI RUTE TERSIMPAN
Select a route.
Select Start: route guidance at start or Start: current location.
Route guidance begins.
MENGUBAH NAMA RUTE
▶ Press on a route until a menu is shown.
Select Rename.
Enter the name.
Select OK.
MEREKAM DAN MENYIMPAN RUTE
Persyaratan:
• A USB device is connected with the multimedia system ( → page 575).
Sistem multimedia:
Navigation
Press the double arrow in the destination input line until Stored routes is displayed.
▶ Select Stored routes.
MEMULAI PEREKAMAN
▶ Select Start recording.
A white rectangle is displayed.
The route is stored on the USB device.
MENGHENTIKAN PEREKAMAN
▶ Press the white rectangle.
▶ Select End recording.


G-Class - Owner's Manual
MBUX multimedia system Navigation and traffic
Panduan rute
CATATAN TENTANG PANDUAN RUTE

PERINGATAN
Risk of distraction from operating integrated communication equipment while the vehicle is in motion
If you operate communication equipment integrated in the vehicle when driving, you could be distracted from the traffic situation. This could also cause you to lose control of the vehicle.
▶ Only operate this equipment when the traffic situation permits.
If you cannot be sure of this, stop the vehicle whilst paying attention to road and traffic conditions and operate the equipment with the vehicle stationary.
You must observe the legal requirements for the country in which you are currently driving when operating the multimedia system.
Route guidance begins once a route has been calculated. The road and traffic rules and regulations always have priority over multimedia system driving instructions. Driving instructions are, for example navigation announcements, changes in direction and lane recommendations.
Changes in direction and lane recommendations are shown in the navigation window.
TAMPILAN DAN FUNGSI BERIKUT JUGA TERSEDIA DI JENDELA NAVIGASI, MISALNYA:
- Route list
• Destination information
• Traffic information, e.g. length of traffic jam, delay
• Motorway facilities
- Car park search
Emergency corridors
If you do not follow the driving instructions or if you leave the calculated route, a new route is calculated automatically.
If, for example, the route is diverted or the direction of a one-way road has been reversed, driving instructions may deviate from the actual traffic situation.
Alternatives may be offered during route guidance, e.g. before passing a motorway exit road. The additional driving time for the journey along the motorway exit is shown.
For this reason, you must always observe road and traffic rules and regulations during your journey as well as the prevailing traffic conditions.
The route can differ from the ideal route, for example in the event of roadworks or incomplete digital map data.
CATATAN TENTANG PENERIMAAN SATELIT
The correct function of the navigation system depends amongst other things on reception of the satellite system used. In certain situations satellite reception can be impaired, malfunction or even not be possible, e.g. in tunnels or in multi-storey car parks.
IKHTISAR PERUBAHAN ARAH
PERUBAHAN ARAH DITAMPILKAN PADA TAMPILAN BERIKUT:
• Detailed image of the junction
The display appears when you drive into a junction.
3D image


G-Class - Owner's Manual
MBUX multimedia system Navigation and traffic
The display appears when driving on junction-free, multi-lane roads, for example at motorway exits and motorway interchanges.

Example: detailed image of the crossing with upcoming changes of direction
1 Name of the street to turn into
Change of direction arrow (also on the map)
3 Current vehicle position
Current distance to the change of direction

Example: 3D image of the upcoming change of direction
Manoeuvre point
Change of direction arrow (also on the map)
Larger map scales show change of direction points instead of change of direction arrows.
3 Current distance to the change of direction
Current vehicle position

ADA TIGA FASE SAAT BERUBAH ARAH:
• Preparation phase
If there is enough time between the changes of direction, the multimedia system prepares you for the upcoming change of direction. A navigation announcement is issued, e.g. "Prepare to turn right".
The navigation window shows: the direction information or the name of the road which is to be turned into as well as the distance to the change of direction.
- Announcement phase
The multimedia system announces the upcoming change of direction, e.g. by announcing "Turn right in 300 m".
When the Auto zoom map orientation is switched off ( → page 517), a detailed representation of the junction or a 3D image of the upcoming change in direction appears in the navigation window.
• Change-of-direction phase
The multimedia system announces the imminent change of direction, e.g. by announcing "Now turn right".
Example of 3D image: when the distance to manoeuvre point ① is shown with 0 m and the symbol for current vehicle position ④ has reached manoeuvre point ① the change in direction is carried out.
① Changes of direction are also shown in the driver display.
G-Class - Owner's Manual
MBUX multimedia system Navigation and traffic
IKHTISAR REKOMENDASI JALUR

Example: lane recommendations
① Non-recommended lane (grey arrow)
② Possible lane (white arrow)
Recommended lane (white arrow, blue background)
This display appears for multi-lane roads.
If the digital map contains the relevant data, lane recommendations are displayed in the navigation window.
PENJELASAN JALUR YANG DITAMPILKAN:
• Recommended lane
In this lane, you will be able to complete both the next change of direction and the one after that.
Possible lane
In this lane, you will only be able to complete the next change of direction.
• Non-recommended lane
In this lane, you will not be able to complete the next change of direction without changing lane.
During the change of direction, new lanes may be added. Bus lanes are also shown.

① Lane recommendations are also shown in the driver display.
MENGGUNAKAN INFORMASI JALAN TOL
When driving on the motorway, upcoming motorway facilities and available service facilities are shown in the route list. These include car parks, service stations or motorway exits with service POIs, for example.
The entries are sorted according to increasing distance from the current vehicle position.
Select an entry.
If several service facilities are available, select a service facility from the list.
The destination address and the map position are shown.
Calculate the route ( → page 492).
or
▶ Search for a POI in the vicinity.
or
Use other functions, e.g. store the destination address of the service facility.
TUJUAN TERCAPAI
Once the destination is reached, you will see the ☐ chequered flag. Route guidance will now be complete. The navigation menu is shown.
When an intermediate destination has been reached, you will see the intermediate destination flag with the number of your intermediate destination. Route guidance is continued.


G-Class - Owner's Manual
MBUX multimedia system Navigation and traffic
MENGAKTIFKAN ATAU MENONAKTIFKAN PENGUMUMAN NAVIGASI
MENONAKTIFKAN
During a navigation announcement, press the button on the steering wheel or controller in the centre console.
The Spoken driving recommendations have been deactivated. message appears.
or
In the route list for a driving manoeuvre select 📄 (→ page 497). The symbol changes to 📄.
MENGAKTIFKAN
Press the button on the steering wheel or on the controller in the centre console again.
or
In the navigation window, select 📄 for an upcoming driving manoeuvre.
The current navigation announcement is played.
The symbol changes to 📄.
MENGAKTIFKAN ATAU MENONAKTIFKAN PENGUMUMAN NAVIGASI SELAMA PANGGILAN TELEPON
Press the button on the steering wheel on the right.
or
Tap on in the media display.
Select Settings.
Select System.
Select Audio.
▶ Select Navigation & traffic announcements.
▶ Activate or deactivate Driving recommendations during call.
To leave the menu: select ↩.
MENYESUAIKAN VOLUME PENGUMUMAN NAVIGASI
Multimedia system:
Settings ▶ System ▶ Audio
Navigation & traffic announcements
▶ Select Driving recommendation vol..
Set the volume.
To leave the menu: select
PANDUAN RUTE AKTIF
MENGAKTIFKAN ATAU MENONAKTIFKAN PEMADAMAN AUDIO SELAMA PENGUMUMAN NAVIGASI
Press the button on the steering wheel on the right.
or
Tap on in the media display.
Select Settings.
Select System.
Select Audio.
▶ Select Navigation & traffic announcements.
▶ Activate or deactivate Audio fadeout during navigation announcements.


G-Class - Owner's Manual
MBUX multimedia system Navigation and traffic

To leave the menu: select ↗.
MENGULANG PENGUMUMAN NAVIGASI
Persyaratan:
• A route has already been created.
• Route guidance is active.
Multimedia system:
Navigation
In the navigation window, select 📄 for an upcoming driving manoeuvre.
Select
The current navigation announcement is repeated.
MEMBATALKAN PANDUAN RUTE
Persyaratan:
• A route has already been created.
• Route guidance is active.
Show the navigation menu.
Select ☐ in the navigation menu (→ page 485).
TINJAUAN STATUS DI LUAR JALAN SELAMA PANDUAN RUTE
Due to roadworks, for example, there may be differences between the data on the digital map and the actual course of the road. In such cases, the multimedia system will temporarily be unable to locate the vehicle's current position on the digital map. The vehicle is off-road. Road not mapped will be shown. Route guidance may be restricted.
When the vehicle is back on a road known to the multimedia system, route guidance continues as normal.
Tujuan
MENYIMPAN POSISI KENDARAAN SAAT INI
Multimedia system:
Navigation
When the map is shown, tap on the current vehicle position.
Select Store position.
To save as a favourite: select Save as favourite.
To save as "Home" address: select Home.
To save as "Work" address: select Work.
MENGELOLA TUJUAN SEBELUMNYA
Multimedia system:
Navigation
▶ Select Previous destinations.
Select ⋯ for the last destination.
MENYIMPAN TUJUAN TERAKHIR SEBAGAI FAVORIT
Press and hold on one of the previous destinations. A menu appears.
To save as a favourite: select Save as favourite.
To save as "Home" address: select Home.
To save as "Work" address: select Work.


G-Class - Owner's Manual
MBUX multimedia system Navigation and traffic
MENGHAPUS TUJUAN SEBELUMNYA
▶ Select Previous destinations.
Select ⋯ for the last destination.
Select Delete.
or
▶ Select Delete all.
Confirm the prompt.
When all the favourites have been deleted, Add favourite is available, for example.
MENGEDIT SARAN TUJUAN
Persyaratan:
• The Allow destination suggestions option is switched on ( → page 472).
- For the display of destination suggestions: the multimedia system has gathered sufficient data.
Multimedia system:
Navigation
Select Suggestions.
▶ Press and hold on a destination suggestion.
A menu appears.
To cancel a destination suggestion: select Do not suggest now or No longer suggest.
To save a destination suggestion: select Save as favourite, Home or Work.
i Delete a destination suggestion from the favourites ( → page 490).
Panduan rute dengan laporan lalu lintas terkini
TINJAUAN INFORMASI LALU LINTAS
Current traffic reports are received with the Live Traffic Information subscription service.
If the subscription has expired, then FM RDS-TMC is available in selected countries.
i Live Traffic Information is not available in all countries.
The Digital Extra must be registered ( → page 507). This secures the free-of-charge period of three years.
The Digital Extra updates the traffic situation at short, regular intervals via the internet connection.
Information on the vehicle's position is regularly sent to Mercedes-Benz AG. The data is immediately rendered anonymous by Mercedes-Benz AG and forwarded to the traffic data provider. Using this data, traffic reports relevant to the vehicle's position are sent to the vehicle. The vehicle acts as a sensor for the flow of traffic and helps to improve the quality of the traffic reports.
There may be differences between the traffic reports received and the actual road and traffic conditions.


G-Class - Owner's Manual
MBUX multimedia system Navigation and traffic
JIKA ANDA TIDAK INGIN MENGIRIMKAN POSISI KENDARAAN, ANDA MEMILIKI OPSI BERIKUT:
• You can deactivate the Digital Extra in your Mercedes me ID.
- You can have the Digital Extra deactivated at a Mercedes-Benz service centre.
Further hazard warnings are received via the Car-to-X Digital Extra ( → page 510).
MENAMPILKAN INFORMASI DARI PENYEDIA LAYANAN UNTUK INFORMASI LALU LINTAS LANGSUNG
Persyaratan:
• The vehicle is equipped with Live Traffic Information.
Multimedia system:
→ Apps ➤ Mercedes me ➤ My services
▶ Select Live Traffic.
When the subscription for Live Traffic Information has expired then in selected countries FM RDS-TMC is available.
MENDAFTARKAN INFORMASI LALU LINTAS LANGSUNG
Persyaratan:
• The vehicle is equipped with Live Traffic Information.
• You have a Mercedes me ID.
Create a Mercedes me ID at: https://www.mercedes.me. A valid email address is required for this.
Register the vehicle using the vehicle identification number (VIN).
Link the vehicle to your Mercedes me ID. A code is sent to the multimedia system.
Enter the code into the multimedia system.
Accept the general and specific terms of use.
Alternatively, you can have the connection completed at a Mercedes-Benz service centre.
MEMPERPANJANG LANGGANAN INFORMASI LALU LINTAS LANGSUNG
Persyaratan:
• The vehicle is equipped with Live Traffic Information.
• You have a Mercedes me ID.
Visit the Mercedes-Benz website.
Log in with the Mercedes me ID.
Switch to the Mercedes-Benz Store via the linked vehicle.
▶ Select Live Traffic Information.
▶ Select the renewal period.
▶ Add the product to the shopping basket.


G-Class - Owner's Manual
MBUX multimedia system Navigation and traffic
Accept the general and specific terms of use.
Live Traffic Information remains activated for the selected extension period. Activation begins on the date of extension.
MENAMPILKAN INFORMASI LALU LINTAS DI PETA
Persyaratan:
• Traffic incidents and Free-flowing traffic are switched on ( → page 509).
Multimedia system:

If necessary, move the map ( → page 513).
PETA MENAMPILKAN INFORMASI LALU LINTAS BERIKUT TERGANTUNG PADA PENGATURAN YANG DIAKTIFKAN:
- Traffic incidents
These are roadworks, road blocks and warning messages, for example. When route guidance is active, the symbols for traffic incidents will be shown in colour on the route. Off the route they are grey.
- Warning messages
Warning messages are shown as the △ symbol.
Traffic safety information can be shown, e.g. if there are people on the carriageway.
If the vehicle approaches a danger area, for example the end of a traffic jam in a dangerous position, the △ symbol is shown on the map. If Announce traffic warnings is switched on and a message has been issued, an additional announcement is made.
• Traffic flow information:
- Traffic jam (red line)
- Slow-moving traffic (orange line)
- Heavy traffic (yellow line)
- Free-flowing traffic (green line)
• Display for traffic delays on the current route
The smallest value for the display for traffic delays is a minute.
MENAMPILKAN INSIDEN LALU LINTAS DI RUTE
Persyaratan:
• The Traffic incidents display is switched on ( → page 509).
Multimedia system:

If there are traffic incidents on the route, these are shown on the map and in the route overview.
With the MBUX Voice Assistant you can inform yourself about traffic incidents on your route. Ask, for example How is the traffic on my route? or How is the traffic at home?. A voice output is issued.

Example: traffic incidents on the route
Total delay or message that there are no delays along the route


G-Class - Owner's Manual
MBUX multimedia system Navigation and traffic
2 Switches traffic information display on or off
Calls up settings for View, Messages & tones and Route
JIKA ADA KETERLAMBATAN DI SEPANJANG RUTE, INI DITAMPILKAN DI TAMPILAN RUTE BERSAMA DENGAN INFORMASI BERIKUT:
• Traffic jam section: red bars
• Slow-moving traffic: orange bar
• Heavy traffic: yellow bar
For each section:
The delay
The length
- The street name or the street number
SELAMA PANDUAN RUTE AKTIF, TOTAL KETERLAMBATAN DI RUTE JUGA DITAMPILKAN DI SINI:
• in the navigation system in the navigation module
• in other applications in the status line at the top
Traffic incident symbols are shown in the route overview and in the map. A traffic incident symbol is, for example [△] for roadworks.
In the map several traffic incidents may be shown on top of each other. The traffic incident symbol shows a plus sign.
If available, the street number can be replaced by a street name or both the name and number.
① If a message about forming an emergency corridor has been issued, Emergency corridor is shown in the navigation window.
To see all of the traffic incidents on the route, swipe to the right or left. The route section is highlighted on the map.
To show detailed information in the route overview: tap on a display in the route overview.
The detailed information is shown, for example the road section and the direction.
MEMANGGIL INFORMASI RINCI DI PETA
Tap on traffic flow information on the map, e.g. a red line for a traffic jam section.
The detail information is displayed.
If several lines are shown on top of the other, then select an item of traffic flow information from the list.
MENAMPILKAN INSIDEN LALU LINTAS DI PETA
Tap on a traffic incident symbol.
The detail information is displayed.
Several traffic incidents are in the immediate vicinity: tap on the top traffic incident symbol and select from the list of traffic incidents.
MENGAKTIFKAN TAMPILAN INFORMASI LALU LINTAS
Multimedia system:

Select View.
Traffic.

G-Class - Owner's Manual
MBUX multimedia system Navigation and traffic
▶ Activate Traffic incidents and Free-flowing traffic.
Traffic incidents, for example roadworks, local area reports (e.g. fog) and warning messages, are shown on the route.
Komunikasi Car-to-X
IKHTISAR KOMUNIKASI CAR-TO-X
PERSYARATAN BERIKUT BERLAKU UNTUK KOMUNIKASI CAR-TO-X DIGITAL EKSTRA:
- The vehicle is equipped with an MBUX multimedia system with navigation function.
• There is a subscription for the Live Traffic Information service.
• Car-to-X-Communication is activated in your Mercedes-Benz user account.
Car-to-X-Communication is available in selected countries.
The communication module automatically establishes an Internet connection once the vehicle is switched on. If there are any hazard warnings, they will be provided shortly thereafter. Depending on the mobile phone connection, provision takes place from within a second up to about a minute.
MANFAAT KOMUNIKASI CAR-TO-X:
- Dangers are automatically detected by the vehicle or can be reported by the driver. These are then sent to vehicles with Car-to-X-Communication in the immediate vicinity.
- If available, current details relating to hazard spots near the vehicle's current position are received.

This gives you sufficient time to adapt your driving style to the traffic conditions.
The use of Car-to-X-Communication requires the regular transmission of vehicle data to Mercedes-Benz AG. The data is then immediately pseudonymised by Mercedes-Benz AG. The vehicle data is deleted after an appropriate amount of time has elapsed (several weeks) and is not stored permanently.
Data which serves as identification is replaced during the pseudonymisation process. In this way, your identity is protected against access by unauthorised third parties.
MENAMPILKAN PERINGATAN BAHAYA
Multimedia system:
Navigation
If hazard warnings are available these can be shown as symbols on the map. The display depends on the settings for the Traffic incidents option.
Set the option via ⏱ (→ page 509).
If the option is activated, all of the symbols are shown.
If the option is deactivated, the symbols are only shown when there is a hazard warning.
BAHAYA BERIKUT DAPAT DITAMPILKAN DI PETA:
• Accidents and breakdowns
• Slippery roads, fog, crosswinds and heavy rain
• Hazards reported manually
• Vehicle with active hazard warning light
Roadworks
• Additional hazards (if available)


G-Class - Owner's Manual
MBUX multimedia system Navigation and traffic

If Announce traffic warnings is switched off ( → page 495), voice output can indicate a danger area.
MENGIRIM PERINGATAN BAHAYA
MELAPORKAN BAHAYA SECARA MANUAL
① Automatically detected hazard warnings are sent by the vehicle.
When the map is shown, tap on the current vehicle position. The Position menu is shown.
Select Report traffic incident.
A prompt is shown.
Select Yes.
The Thank you for supporting accident prevention! message appears.
Panduan rute dengan realitas tertambah
IKHTISAR PANDUAN RUTE DENGAN REALITAS TERTAMBAH

PERINGATAN
Risk of accident and injury as a result of distraction, Incorrect depiction or wrong interpretation of the display
The camera image of the augmented reality display is not suitable as a guide for driving.
▶ Always keep an eye on the actual traffic situation.
▶ Avoid extended observation of the camera image.
During route guidance with augmented reality a camera image with the real traffic scene is shown in the media display before a turning manoeuvre. The camera image includes additional information, for example arrows indicating a change of direction.
If the options are switched on and this additional information is available, road names and house numbers are displayed ( → page 512).

① Street name
2 Change of direction arrow


G-Class - Owner's Manual
MBUX multimedia system Navigation and traffic
Route guidance with augmented reality will not be available in some situations, e.g. in the event of poor satellite reception or roads that have not been digitised.
Route guidance with augmented reality is not available in all countries.
You can watch an animation on this topic via the following link:
MENGAKTIFKAN PANDUAN RUTE DENGAN REALITAS TERTAMBAH

PERINGATAN
Risk of accident and injury due to imprecise positioning of additional information
The additional information from the augmented reality display may be inaccurate and is not a substitute for observing and assessing the actual driving situation.
▶ Always keep an eye on the actual traffic situation when carrying out all driving manoeuvres.
Multimedia system:

Select View.
▶ Select Augmented reality video.
▶ Activate or deactivate Augmented reality video.
MENAMPILKAN INFORMASI PROPERTI UNTUK PANDUAN RUTE DENGAN REALITAS TERTAMBAH
Requirements:
• Augmented reality is activated ( → page 512).
Multimedia system:


Navigation


Select View.
▶ Select Augmented reality video.
▶ Activate Street names and House numbers.
During route guidance, the activated options are shown as additional information in the camera image.
Peta
MENGATUR SKALA PETA
Multimedia system:


Navigation
MEMPERBESAR TAMPILAN
When the map is shown, tap twice quickly with one finger on the media display.
or
▶ Move two fingers apart on the media display.
MEMPERKECIL TAMPILAN
Tap with two fingers on the media display.
or
Move two fingers together on the media display.
① You can set the unit of measurement of the map scale ( → page 471).


G-Class - Owner's Manual
MBUX multimedia system Navigation and traffic
MENGGERAKKAN PETA
Multimedia system:
Navigation
When the map is displayed, swipe in any direction with one finger on the media display.
FUNGSI-FUNGSI BERIKUT TERSEDIA:
• Selecting a destination on the map ( → page 490).
• Selecting a POI ( → page 488).
• Showing traffic incidents on the map ( → page 508).
To reset the map to the current vehicle position: select Centre.
MENGAKTIFKAN ATAU MENONAKTIFKAN TAMPILAN RINGKASAN RUTE SETELAH MULAI
Multimedia system:
Navigation
Select View.
Activate [O] or deactivate [O] Overview of route after start.
If the option is enabled, the map shows the full route after route guidance is started and, if available, all alternative routes.
MEMILIH SIMBOL POI UNTUK TAMPILAN PETA
Multimedia system:
Navigation
POIs include restaurants and hotels, for example. These are displayed as symbols on the map. Not all POIs are available in all countries.
Personal POIs are destinations which you have saved on a USB device, for example.

The display of POI symbols on the map can be activated or deactivated as a favourite.
Select View.
Select POI symbols on map
▶ Activate Hide all points of interest.
If the option is switched off, POI symbols are displayed on the map which correspond to the settings in the POI categories.
If the conditions are fulfilled, the POI symbols are shown with current online information ( → page 518).
MENGAKTIFKAN ATAU MENONAKTIFKAN TAMPILAN KATEGORI UNTUK AKSES CEPAT
▶ Switch a category on or off in the menu.
MEMILIH KATEGORI
In the menu, select Other categories ▷.
▶ Activate or deactivate Show all.
When the option is switched on, the POI symbols for all categories are shown on the map.
or
Select ▶ the categories.
▶ Activate or deactivate the categories.
The POI symbols for the selected categories are shown on the map.

G-Class - Owner's Manual
MBUX multimedia system Navigation and traffic
MEMILIH KATEGORI POI PRIBADI
In the menu, select Personal POIs ▶.
Select ▶ a category.
▶ Activate or deactivate Display on the map.
To issue a signal when approaching: activate Visual warning and Acoustic notification.
MENGATUR ULANG TAMPILAN SIMBOL POI
In the menu, select Reset POIs.
The settings are reset to the standard settings.
MEMILIH TAMPILAN INFORMASI TAMBAHAN DI PETA
Multimedia system:

Select View.
▶ Select Show additional information.
▶ Switch the options on or off.
PILIHAN-PILIHAN BERIKUT TERSEDIA:
- Current street
If the option is enabled, it will be displayed in the navigation window.
- Scale
If the option is switched off, the map scale is only displayed on the map when zooming.
If the option is enabled, the map scale is permanently displayed on the map.
The option also influences the display on the driver display.
\- Altitude
\- Next junction
If the option is switched on and the journey continues without route guidance, the name of the next intersecting street will be displayed in the navigation window.
MENAMPILKAN VERSI PETA
Multimedia system:

▶ Select View.
▶ Select Map data version.
The detail information is displayed.
You can update the map data with the Online Map Update Digital Extra ( → page 43).
Information about new versions of the digital map can be obtained from a Mercedes-Benz service centre.
RINGKASAN PENGHINDARAN AREA DI RUTE
You can define areas along a route that you would like to avoid.
Motorways or multi-lane expressways that pass through an area to be avoided may be included in the route despite being blocked.
MENGHINDARI AREA BARU UNTUK RUTE
Multimedia system:

▶ Select Avoid new area.


G-Class - Owner's Manual
MBUX multimedia system Navigation and traffic
MEMULAI PENGGUNAAN PETA
Select Using map.
A red rectangle appears. This designates the area that should be avoided.
Move the map ( → page 513).
▶ Set the map scale ( → page 512).
Select OK.
The area is entered into the list.
MEMULAI PENGGUNAAN PENCARIAN TUJUAN
▶ Select Via address entry.
Enter the address ( → page 44).
▶ Select the destination in the list.
The map appears. The area is saved.
MENGUBAH AREA YANG HARUS DIHINDARI
Multimedia system:
Navigation Route Avoid areas
▶ Select an area in the list.
Select Edit.
To move an area on the map: swipe in any direction on the media display.
MENGUBAH UKURAN AREA
Move two fingers apart or together on the media display.
Select OK.
The area is entered into the list.
MEMPERHITUNGKAN AREA UNTUK RUTE
▶ Select the area in the list.
Activate Avoid area.
If route guidance is active, a new route is calculated.
If there is no route yet, the setting is carried over to the next route guidance.
RUTE DAPAT MENCANTUMKAN AREA YANG HARUS DIHINDARI DALAM KASUS BERIKUT:
• The destination is located in an area that is to be avoided.
- The route includes motorways or multi-lane expressways which pass through an area to be avoided.
• There is no practical alternative route.
MENGHAPUS AREA YANG HARUS DIHINDARI
Multimedia system:
Navigation Route Avoid areas
MENGHAPUS AREA YANG HARUS DIHINDARI
▶ Select an area in the list.
Select Delete.
▶ Confirm the prompt with Yes.
MENGHAPUS SEMUA AREA YANG HARUS DIHINDARI
If at least two areas to be avoided are set, select Delete all.
▶ Confirm the prompt with Yes.
IKHTISAR PEMBARUAN DATA PETA
As the content of a digital road map has a short life, outdated data may have a negative effect on all navigation functions. For the best MBUX navigation

G-Class - Owner's Manual
MBUX multimedia system Navigation and traffic
experience, you should install all of the map updates offered by Mercedes-Benz.
PILIHAN BERIKUT TERSEDIA UNTUK PEMBARUAN DATA PETA:
• Online map update
• Updates via the Mercedes-Benz Portal
• Update at a Mercedes-Benz service centre
Additional costs can be incurred in this process.
PEMBARUAN PETA ONLINE
PERSYARATAN:
• Digital Extras are available.
• You have a Mercedes me ID.
• The Digital Extra Online Map Update is available for your region.
• Online Map Update has been activated.
i Online Map Update is only available in certain countries.
Installation takes place in the background as an automatic map update.
The MBUX multimedia system installs all of the available map updates for the European regions in which the vehicle is located or is moved.
The online map update is activated at the latest after the next time the vehicle is switched on.
PEMBARUAN MELALUI PORTAL MERCEDES-BENZ
The map data for several regions can also be updated manually. Log in with your Mercedes-Benz user account at: https://www.mercedes-benz.de/
Click on your account at the top right and follow the menu path My dashboard > Manage vehicle > Manage Digital Extras > Online Map Update. Select the regions to be downloaded to a storage medium.
After the map data has been copied, connect the storage medium with your vehicle. Select the notification with information about a new version of the map data and start the installation. After the MBUX multimedia system has been restarted, the updated map data is used.
IKHTISAR DATA PETA
If map data is reinstalled in a vehicle, no activation code needs to be entered.
For map data purchased as data media, the enclosed activation code must be entered after starting the installation.
Activation codes are only ever valid for one vehicle.
JIKA TERJADI MASALAH BERIKUT, HUBUNGI PUSAT LAYANAN MERCEDES-BENZ:
• The multimedia system does not accept the activation code.
• You have lost the activation code.
MENAMPILKAN KOMPAS
Multimedia system:
Navigation
When the map is shown, tap on the current vehicle position until the Position menu is shown.
Select Compass.
TAMPILAN KOMPAS MENUNJUKKAN INFORMASI BERIKUT:
\- The current direction of travel with bearing (360° format) and compass direction

G-Class - Owner's Manual
MBUX multimedia system Navigation and traffic
• Longitude and latitude coordinates in degrees, minutes and seconds
• Number of satellites from which a signal can be received
The information is not available in every country.
MENAMPILKAN KIBLAT
Multimedia system:
Navigation
When the map is shown, tap on the current vehicle position until the Position menu is shown.
Select Alerts.
The arrow on the compass shows the direction to Mecca in relation to the current direction of travel.
The number of satellites received is shown.
This function is not available in all countries.
MENGATUR SKALA PETA SECARA OTOMATIS
Multimedia system:
Navigation
Select View.
Activate Auto zoom.
When the option is switched on, the map scale is set automatically depending on your driving speed and the type of road.
The automatically selected map scale can be changed manually. After a few seconds, this is automatically reset.

When the option is activated, no detailed display of the junction or a 3D image is shown in the navigation window during an upcoming driving manoeuvre.
MENAMPILKAN PETA SATELIT
Multimedia system:
Navigation
Select View.
▶ Activate or deactivate Satellite map.
WHEN SATELLITE MAP IS SELECTED, THEY ARE DISPLAYED AT THE FOLLOWING MAP SCALES:
- On-board maps
The satellite maps are displayed in map scales from 2 km.
• Online maps
The satellite maps are displayed in high-resolution map scales from 10 m.
When Satellite map is not selected, no satellite maps are displayed.
The satellite maps for these map scales are not available in all countries.
MENAMPILKAN JANGKAUAN
Requirements:
• There is an Internet connection.
• Mercedes me connect is available.
• You have a Mercedes me user account.


G-Class - Owner's Manual
MBUX multimedia system Navigation and traffic
- The vehicle is connected with the user account and you have accepted the Mercedes me connect terms of use.
Further information can be found at: https://www.mercedes.me
• The service is available and has been activated.
Multimedia system:

Select View.
Range.
JANGKAUAN DITAMPILKAN PADA PETA DENGAN TAMPILAN BERIKUT:
• For petrol and diesel vehicles: green display
When the lower reserve capacity is reached then the range display on the map is switched off.
① The range display on the map is not available in all countries.
MENAMPILKAN KONTEN PETA ONLINE
Persyaratan:
• There is an Internet connection.
• Digital Extras are available.
• You have a Mercedes me ID.
- The vehicle is linked to the Mercedes me ID and you have accepted the Mercedes-Benz terms of use.
Further information can be found at: https://www.mercedes.me
• The Digital Extra is available and has been activated.
Multimedia system:

Select View.
Switch on a Digital Extra, e.g. Weather.
Current weather information is displayed on the navigation map, e.g. temperature or cloud cover.
The information provided by the Digital Extras is not displayed in all map scales, e.g. weather symbols.
The display of online map content is not available in all countries.
Layanan parkir
CATATAN TENTANG LAYANAN PARKIR
CATATAN
Vehicle damage due to failure to observe the maximum permissible clearance height
If the vehicle height exceeds the maximum permissible clearance height, the roof and other vehicle parts may be damaged.
Please observe the indicated maximum clearance height.
If the vehicle exceeds the permissible clearance height, do not drive in.
Take the modified vehicle height in the case of roof superstructures or other carrier systems into account.


G-Class - Owner's Manual
MBUX multimedia system Navigation and traffic
① This service is not available in all countries.
MENAMPILKAN OPSI PARKIR DI PETA
Persyaratan:
- The Navigation Services service is activated in your Mercedes-Benz user account.
• The parking service is part of the scope of the Navigation Services.
Multimedia system:

Switch on Parking.
The parking options within the vicinity of the current vehicle position are shown.
MEMILIH OPSI PARKIR

CATATAN
Vehicle damage due to failure to observe local information and parking conditions
The data is based on the information provided by the respective service providers.
Mercedes-Benz does not guarantee the accuracy of the information provided in relation to the car park or parking area.
▶ Always observe the local information and conditions.
Persyaratan:
• The Navigation Services service is activated in your Mercedes-Benz user account.
• The parking service is part of the scope of the Navigation Services.
• Parking is activated ( → page 519).
Multimedia system:

Tap on P the map.
or
In the route overview, select P Parking spaces (→ page 496).
Select the search position and search filter, e.g. Near destination and Multi-storey car parks.
The map shows car parks suited to the selected settings.
Select a parking option.
INFORMASI BERIKUT DITAMPILKAN (JIKA TERSEDIA):
- Destination address, distance from current vehicle position and arrival time
• Information on the car park, e.g.
- Opening times
- Parking charges
- Current occupancy
- Maximum parking time
- Maximum access height

G-Class - Owner's Manual
MBUX multimedia system Navigation and traffic
The maximum access height shown by the parking service does not replace the need for observation of the actual circumstances.
• Available payment options (Mercedes pay, coins, bank notes, cards)
• Details on parking tariffs
• Number of available parking spaces
• Payment method (e.g. at parking meters)
• Services/facilities at the parking option
- Telephone number
▶ Calculate the route ( → page 492).
FUNGSI BERIKUT DAPAT DIGUNAKAN (JIKA TERSEDIA):
• Searching for POIs in the vicinity.
• Saving the destination.
- Placing a call at the destination.
• Sharing the destination via the QR code.
- Calling up the web address.
• Showing the destination on the map.
PEMESANAN AWAL TEMPAT PARKIR
Persyaratan:
- The Navigation Services service is activated in your Mercedes-Benz user account.
• The parking service is part of the scope of the Navigation Services.
- You have registered in the Mercedes-Benz Portal with Mercedes pay and the respective contract partners with your payment details for paying for parking.
• Parking is activated ( → page 519).
This option is not available in all countries.
Sistem multimedia:
Navigation
▶ Select a parking option on the map.
If a parking space available to book has been selected, select Book parking space.
Select the desired booking period. Take note of the cancellation conditions. If the parking space is available for the selected period, the price will be shown.
Press OK to confirm.
In the booking overview, confirm with Book.
If required, enter the Mercedes me ID PIN.
The parking space will be booked in the background.
A booking confirmation including a car park ticket will be sent to your registered email address.
MENGGUNAKAN ATAU MEMBATALKAN PEMESANAN
Start the Mercedes-Benz App on your smartphone.
Open Menu.
▶ Select My transactions.


G-Class - Owner's Manual
MBUX multimedia system Navigation and traffic
Select Parking transactions.
▶ Select the desired booking.
To make use of the booking: select Show car park ticket.
or
To cancel the booking: select Cancel booking.
If possible, a parking space booking can be cancelled up to the stated time. If a booking cannot be cancelled, this will already be shown to you during the booking procedure.
MEMBAYAR BIAYA PARKIR
Persyaratan:
- The Navigation Services service is activated in your Mercedes-Benz user account.
• The parking service is part of the scope of the Navigation Services.
- You have registered in the Mercedes-Benz Portal with Mercedes pay and the respective contract partners with your payment details for paying for parking.
• Parking is activated ( → page 519).
① This option is not available in all countries.
Multimedia system:

▶ Select a parking option on the map.
If a car park that can be paid for has been selected, scroll down in the parking details.
Select Payment.
Once the vehicle has reached a parking position with payment function and the vehicle is switched off, a message appears. Using this message you can pay from the vehicle and start the payment process.
MEMULAI PROSEDUR PEMBAYARAN
▶ Acknowledge the message.
Please note the maximum parking period displayed and any existing additional limitations. If required, a message will inform you about the necessity of displaying information confirming the online payment for the parking space.
① You will receive the receipt as a printout from the parking machine after successfully completing the payment process.
▶ Select Start the payment process.
If required, enter the Mercedes me PIN.
Press OK to confirm.
The successful start of your parking transaction is shown.
▶ Complete the booking with OK.
To cancel a parking transaction: after receiving the confirmation request, select Cancel.
Minimum charges may be incurred.


G-Class - Owner's Manual
MBUX multimedia system Navigation and traffic
MENGAKHIRI TRANSAKSI PARKIR
▶ Stop the active transaction via the Mercedes-Benz App.
You receive a summary of the procedure and the costs.
If an uncompleted parking transaction is detected for your vehicle as you continue your journey, a message will appear asking whether you would like to end it.
▶ Acknowledge the message.
When the parking transaction is stopped successfully, another message appears with the details about your completed parking.
Dashcam
CATATAN TENTANG DASHCAM

CATATAN
Risk of legal consequences due to violation of legal regulations and data protection provisions
You are legally responsible for operation and use of the dashcam functions.
The legal requirements relating to operation and use of the dashcam can vary depending on the country in which the dashcam is operated.
This function is not permitted in all countries.
Before using the dashcam, read up on the content of the legal regulations, in particular the data protection requirements in the respective country of use.
▶ Observe the legal regulations, in particular the data protection requirements.
SAYA MENGIKUTI PETUNJUK BERIKUT UNTUK PENGOPERASIAN YANG AMAN:
• Only use FAT32 or exFAT formatted USB storage devices.
- Use USB-IF certified USB storage devices.
USB-IF is a non-profit corporation and stands for USB Implementers Forum. Based on the USB specification, USB-IF certifies, for example, USB versions, corresponding cables and plugs as well as energy supply processes via the USB interface.
- USB storage devices may be damaged if often or permanently overwritten at high speed. Mercedes-Benz recommends a high-quality external SSD drive.
The abbreviation SSD stands for Solid State Drive.
The file size and therefore the duration of single recording is limited by the limitations of the USB flash drive format. So FAT32 formatted USB flash drives do not allow files larger than 4 GB, for example.
When the file size is reached, the recording stops and you receive a notification.
FUNGSI-FUNGSI BERIKUT TERSEDIA DI APLIKASI GALERI:
• Switching write protection on or off
- Deleting video files
Additional information about the Gallery app ( → page 556).


G-Class - Owner's Manual
MBUX multimedia system Navigation and traffic
MEMILIH PERANGKAT USB UNTUK REKAMAN VIDEO DENGAN DASHCAM
Persyaratan:
\- At least one USB device is connected with the multimedia system ( → page 575).
Multimedia system:

Select the USB symbol.
Select the USB device.
When USB devices contain multiple partitions, recorded video files are not always displayed in the recording list. Mercedes-Benz recommends that you use USB devices with one partition.
MEMULAI ATAU MENGHENTIKAN REKAMAN LOOP DENGAN DASHCAM
Persyaratan:
- For recording and saving a video file: a USB device is connected with the multimedia system ( → page 575).
• The vehicle is switched on.
Multimedia system:

If several USB devices are connected with the multimedia system, select a USB device ( → page 523).
If no USB device is selected, a selection is made automatically when recording starts.
To select recording mode: select Loop recording.
Loop recording continuously records short video files. When the memory is full, recording is continued automatically. In doing so, the oldest video file is written over.
To start: select Start recording.
The length of the recording is shown. The Do not remove the storage medium during recording. Before removing the storage medium, eject it first. message appears. The video file is stored on the USB device.
To end: select End recording.
In some countries, geo-coordinates (longitude and latitude) are shown in the video image.
For technical reasons, the geo-coordinates may show greater inaccuracies.
PESAN MUNGKIN MUNCUL DALAM KASUS BERIKUT:
- The camera is not functional, the Camera unavailable message appears. Have the camera checked in a Mercedes-Benz service centre.
• If the country border indication has been switched on (→ page 524).
- If an outdoor recording is started with the camera app during a dashcam recording, the dashcam recording pauses and resumes automatically


G-Class - Owner's Manual
MBUX multimedia system Navigation and traffic
after the camera recording is finished. A notification to this effect is displayed.
MEMULAI ATAU MENGHENTIKAN REKAMAN INDIVIDU DENGAN DASHCAM
Persyaratan:
- For recording and saving a video file: a USB device is connected with the multimedia system ( → page 575).
• The vehicle is switched on.
Multimedia system:
→ | ➤ Apps ➤ Dashcam
If several USB devices are connected with the multimedia system, select a USB device ( → page 523).
If no USB device is selected, a selection is made automatically when recording starts.
To select recording mode: select Individual recording.
Individual recording stops recording when the memory limit is reached. An individual recording is automatically protected against being overwritten.
To start: select Start recording.
The length of the recording is shown. The Do not remove the storage medium during recording. Before removing the storage medium, eject it first. message appears. The video file is stored on the USB device.
To end: select End recording.
① In some countries, geo-coordinates (longitude and latitude) are shown in the video image.

For technical reasons, the geo-coordinates may show greater inaccuracies.
PESAN MUNGKIN MUNCUL DALAM KASUS BERIKUT:
- Individual recording: the memory is full or there are only a few minutes recording time available. The video recording stops or will be stopped imminently.
Change the USB device or delete a video file.
- The camera is not functional, the Camera unavailable message appears. Have the camera checked in a Mercedes-Benz service centre.
• If the country border indication has been switched on (→ page 524).
- If an outdoor recording is started with the camera app during a dashcam recording, the dashcam recording pauses and resumes automatically after the camera recording is finished. A notification to this effect is displayed.
MENGONFIGURASI PENGATURAN DASHCAM
Persyaratan:
• A USB device is connected with the multimedia system ( → page 575).
Multimedia system:
→ Apps >> Dashcam
Select
MENERIMA NOTIFIKASI SETELAH MELEWATI PERBATASAN
▶ Activate National border alert.
A message is shown if video is being recorded and the vehicle passes a border.


G-Class - Owner's Manual
MBUX multimedia system Navigation and traffic
This function is not available in all countries.
MEMULAI REKAMAN VIDEO OTOMATIS
▶ Select Automatic loop recording.
▶ Activate Automatic loop recording.
When the vehicle is started, video recording starts automatically.
① This function is not available in all countries.


G-Class - Owner's Manual
MBUX multimedia system Telephone
Telepon
Telepon
CATATAN TENTANG TELEPON

PERINGATAN
Risk of distraction from operating integrated communication equipment while the vehicle is in motion
If you operate communication equipment integrated in the vehicle when driving, you could be distracted from the traffic situation. This could also cause you to lose control of the vehicle.
▶ Only operate this equipment when the traffic situation permits.
If you cannot be sure of this, stop the vehicle whilst paying attention to road and traffic conditions and operate the equipment with the vehicle stationary.

PERINGATAN
Risk of accident from operating mobile communication equipment while the vehicle is in motion
Mobile communication devices distract the driver from the traffic situation. This can also cause the driver to lose control of the vehicle.
As a driver, only operate mobile communication devices when the vehicle is stationary.
As a vehicle occupant, use mobile communication devices only in the designated area, e.g. in the rear passenger compartment.
When operating the multimedia system and mobile communication devices in the vehicle, observe the legal regulations of the country in which you are currently travelling.

G-Class - Owner's Manual
MBUX multimedia system Telephone

PERINGATAN
Risk of injury due to objects being stowed incorrectly
If objects in the vehicle interior are stowed incorrectly, they may slide or be thrown around and hit vehicle occupants. In addition, cup holders, open stowage spaces and mobile phone receptacles will not always be able to retain all objects that they contain in the event of an accident.
There is a risk of injury, particularly in the event of sudden braking or a sudden change in direction.
▶ Always stow objects such that they cannot be thrown around in such situations.
▶ Always make sure that objects do not protrude from stowage spaces, luggage nets or stowage nets.
▶ Close the lockable stowage spaces before starting a journey.
▶ Always stow and secure heavy, hard, pointed, sharp-edged, fragile or bulky objects in the boot/load compartment.
PERHATIKAN INFORMASI TAMBAHAN TENTANG CARA MENYIMPAN PERANGKAT KOMUNIKASI SELULER DENGAN BENAR:
\- Loading the vehicle ( → page 210)
Further information can be obtained from a Mercedes-Benz service centre or at: https://www.mercedes-benz-mobile.com/

IKHTISAR MENU TELEPON

Bluetooth ® device name of the currently connected mobile phone/of the mobile phone
② Bluetooth * device name of the other currently connected mobile phone/of the mobile phone
3 Signal strength of the mobile phone network
Battery status of the connected mobile phone
5 Options
6 Messages
7 Calls up devices
Numerical pad
9 Starts contact search
BLUETOOTH® PROFILE OVERVIEW
Bluetooth® profile of the mobile phone Function PBAP (Phone Book Access Profile) Contacts are automatically displayed in the multimedia system MAP (Message Access Profile) Message functions can be used HFP (Hands Free Profile) Wireless telephony is available

G-Class - Owner's Manual
MBUX multimedia system Telephone

IKHTISAR MODE OPERASI TELEPON
TERGANTUNG PADA PERALATAN ANDA, MODE OPERASI TELEPON BERIKUT TERSEDIA:
- A mobile phone is connected to the multimedia system via Bluetooth (→ page 528).
- Two mobile phones are connected with the multimedia system via Bluetooth 6 (two phone mode) (→ page 529).
- You can use all the functions of the multimedia system with both mobile phones.
Irrespective of this, Bluetooth ® audio functionality can be used with any mobile phone ( → page 576).
INFORMASI TENTANG TELEPON
SITUASI BERIKUT DAPAT MENYEBABKAN PANGGILAN TERPUTUS SAAT KENDARAAN BERGERAK:
• There is insufficient network coverage in the area
- You move from one transmission/reception station to another and no communication channels are free
• The SIM card used is not compatible with the network available
- A mobile phone with "Twincard" is logged into the network with the second SIM card at the same time
The multimedia system supports calls in HD Voice ® for improved speech quality. A requirement for this is that the mobile phone and the mobile phone network provider of the person you are calling support HD Voice ® .
Depending on the quality of the connection, the voice quality may fluctuate.
MENGHUBUNGKAN PONSEL
Persyaratan:
- Bluetooth is activated on the mobile phone (see the manufacturer's operating instructions).
- Bluetooth* is activated on the multimedia system (→ page 469).
Multimedia system:

MENCARI PONSEL
▶ Select Connect new device.
MENGIZINKAN TELEPON GENGGAM
Select a mobile phone.
A code is displayed in the multimedia system and on the mobile phone.
If the codes match: confirm the code on the mobile phone.
For older mobile phone models, enter a 1 to 16-digit number code on the mobile phone and on the multimedia system for authorisation.
(i) Up to 15 mobile phones can be authorised on the multimedia system.
Authorised mobile phones are reconnected automatically.
The connected mobile phone can also be used as a Bluetooth * audio device ( → page 576).

G-Class - Owner's Manual
MBUX multimedia system Telephone
You can watch an animation on this topic via the following link:
MENGHUBUNGKAN TELEPON GENGGAM KEDUA (MODE DUA TELEPON)
Persyaratan:
\- At least one mobile phone is already connected to the multimedia system via Bluetooth®.
Multimedia system:
Phone Devices
▶ Select Connect new device.
▶ Select the mobile phone.
In some cases, if the query appears, confirm the selection of the mobile phone pair with the Device name 1 + Device name 2 option.
The selected mobile phone is connected to the multimedia system.
MEMERTUKARKAN TELEPON GENGGAM (MODE DUA TELEPON)
Multimedia system:
Phone
Both mobile phones are shown individually in separate tabs.
▶ Select the tab with the desired mobile phone.
Selecting the tab of a specific mobile phone displays the associated telephone contents.
Selecting the other tab switches the view to the other telephone.
The submenus in the telephone menu (e.g. contacts, call lists, messages) relate to the currently selected mobile phone with the exception of the telephone settings. In the telephone settings, settings can be made for both mobile phones.
MENGGANTI FUNGSI TELEPON GENGGAM
Multimedia system:
Phone Devices
MENGAKTIFKAN FUNGSI
Select a grey symbol in the line of a mobile phone. The corresponding function is activated.
MENONAKTIFKAN FUNGSI
One function is active: select the coloured symbol in the line of a mobile phone.
The mobile phone is disconnected from the multimedia system.
Several functions are active: de-select an active function in the line of one of the mobile phones.
The corresponding function is deactivated.
MENGGANTI TELEPON GENGGAM
Multimedia system:
Phone Devices
TIDAK ADA TELEPON GENGGAM TEROTORISASI TERSEDIA:
▶ Select Connect new device.
Select a mobile phone.
Newly authorised mobile phone: confirm the numerical code on the mobile phone.
PENGGUNAAN DALAM MODE TELEPON TUNGGAL
▶ Select Device name.
A newly authorised mobile phone is connected in single telephone mode.
If the mobile phone has already been authorised and connected in single telephone mode, it is connected again in single telephone mode.


G-Class - Owner's Manual
MBUX multimedia system Telephone
If a mobile phone is already authorised and has been connected in two phone mode with another mobile phone, a query may come, whether the mobile phone should in future be operated in single telephone mode or connected with another mobile phone in two phone mode.
If required, confirm the query about operating mode (single telephone or two phone mode) by confirming the Device name option.
PENGGUNAAN DALAM MODE DUA TELEPON
▶ Select Device name 1 + Device name 2.
A newly authorised mobile phone is connected with the selected mobile phone in two phone mode.
If the mobile phone has already been authorised and connected in single telephone mode, it will be connected in future with the selected mobile phone in two phone mode.
If the mobile phone was previously connected with another mobile phone, this connection is cancelled.
MEMUTUSKAN ATAU MENGHAPUS TELEPON GENGGAM
Multimedia system:

MEMUTUSKAN TELEPON GENGGAM
▶ Select Disconnect.
If applicable, the mobile phone will be automatically reconnected when the vehicle is next started.
MENGHAPUS TELEPON GENGGAM
Select Devices.
Select ⋯ in the line of the mobile phone.
▶ Select Delete device.
The mobile phone is deleted from the system.
MENGGUNAKAN TELEPON GENGGAM DENGAN KOMUNIKASI MEDAN DEKAT (NFC)
Persyaratan:
- NFC is activated on the mobile phone (see the manufacturer's operating instructions).
- The mobile phone's screen is switched on and unlocked (see the manufacturer's operating instructions).
MENGHUBUNGKAN PONSEL

Hold the NFC interface of the mobile phone (see manufacturer's operating instructions) on mat ① or place the mobile phone on mat ① with the display facing upwards.
▶ Follow the additional prompts on the media display to connect the mobile phone. Connect the mobile phone in single telephone mode ( → page 528). Connect the mobile phone in two phone mode ( → page 529).
MENGGANTI PONSEL
Hold the NFC interface of the mobile phone (see the manufacturer's operating instructions) against NFC interface ⓘ in the front storage compartment.
▶ Follow the additional prompts on the media display to replace the mobile phone in single or two phone mode ( → page 529).


G-Class - Owner's Manual
MBUX multimedia system Telephone
If required, confirm the prompts on your mobile phone (see the manufacturer's operating instructions).
If your mobile phone supports wireless charging, it can be charged on the mat ( → page 234).
If the mobile phone is not charging, switch off NFC on the mobile phone (see the manufacturer's operating instructions).
Further information can be found at: https://www.mercedes-benz-mobile.com/
MENGATUR VOLUME PENERIMAAN DAN TRANSMISI
Persyaratan:
• A mobile phone is connected ( → page 528).
Multimedia system:

This function ensures optimal language quality.
Please note that the respective mobile phone must be selected for adjustment of the reception and transmission volume.
Select ⋯ in the line of the mobile phone.
Select Volume.
Set the reception and transmission volume using Reception volume and Transmission volume.
Further information on the recommended reception and transmission volume: https://www.mercedes-benz-mobile.com/
MENGATUR NADA DERING
Multimedia system:

Set the ringtone.
If the mobile phone supports the transfer of the ringtone, you will hear the ringtone of the mobile phone instead of that of the vehicle audio system.
MEMULAI ATAU MENGHENTIKAN PENGENALAN SUARA PONSEL
Persyaratan
- At least one mobile phone is connected to the multimedia system ( → page 528).
- The tab with the mobile phone for which voice recognition should be started is selected (→ page 529).
MEMULAI PENGENALAN SUARA PONSEL
Press and hold the button on the multifunction steering wheel for more than one second.
Voice recognition is started for the currently selected mobile phone.
MENGHENTIKAN PENGENALAN SUARA PONSEL
Press the 🔔 or 📞 button on the multifunction steering wheel.

G-Class - Owner's Manual
MBUX multimedia system Telephone
If a mobile phone is connected via Smartphone Integration, the voice recognition of this mobile phone is always started or stopped.
CATATAN TENTANG SARAN KONTAK
The multimedia system can show contact suggestions based on frequently used contacts, outgoing calls and text messages. For this, the Allow contact suggestions option must be switched on (→ page 472).
When you open the call list or the message menu, contacts which you can call or write to will be suggested to you. Suggestions will be shown in the Suggestionstab.
The multimedia system does not use the content of messages for suggestions.
MEMILIH OPSI UNTUK SARAN KONTAK
Persyaratan:
• The Allow contact suggestions option is switched on (→ page 472).
- The multimedia system has gathered sufficient data in order to show contact suggestions.
Multimedia system:

▶ Select Call list or Contacts.
Select Suggestions.
Select ⋯ in the line of the suggested contact.
THE FOLLOWING OPTION IS AVAILABLE FOR SELECTION:
• Do not suggest now
Panggilan
OPERASI TELEPON
Multimedia system:

MELAKUKAN PANGGILAN DENGAN MEMASUKKAN NOMOR
Select □.
Enter a number.
Select □.
The call is made.
MENERIMA PANGGILAN
Select Accept.
MENOLAK PANGGILAN
Select Reject.
MENJAWAB PANGGILAN DENGAN PESAN
Select Message.
MENGAKHIRI PANGGILAN
Select
MENEMPATKAN PANGGILAN KE DAFTAR TUGAS KANTOR DALAM MOBIL
Select ☐ Put call on In-Car Office's to-do list.


G-Class - Owner's Manual
MBUX multimedia system Telephone
MENGAKTIFKAN FUNGSI SELAMA PANGGILAN
FUNGSI BERIKUT TERSEDIA SELAMA PANGGILAN:


End call

Micro. off

Keypad (show to send DTMF tones)

Add call
\- Hands-free
Transfer the call, e.g. to Front, Rear or All seats.
\- Private mode
Transfer the call to the telephone or headphones, for example.

Select a function.
① Observe that the functions and symbols can vary depending on the vehicle equipment.
MELAKUKAN PANGGILAN DENGAN BEBERAPA PESERTA
Persyaratan:
• There is an active call ( → page 532).
• Another call is being made.
BERALIH ANTAR PANGGILAN
▶ Select the contact.
The selected call is active. The other call is on hold.
MENGAKTIFKAN PANGGILAN YANG DITAHAN
▶ Select the contact of the call on hold.
MELAKUKAN PANGGILAN KONFERENSI

Select Conference.
The new participant is included in the conference call.
MENGAKHIRI PANGGILAN AKTIF

Select End call.
On some mobile phones, the call on hold is activated as soon as the active call is ended.
MENERIMA ATAU MENOLAK PANGGILAN YANG MENUNGGU
Persyaratan:
• There is an active call ( → page 532).
If you receive a call while already in a call, a message is displayed.
Depending on the mobile phone and mobile phone network provider you will hear a call waiting signal.
Alternatively, in two phone mode you will hear an acoustic signal when the call goes through to the other (not yet active) mobile phone.

Select Accept.
The incoming call is active.
If only one mobile phone is connected with the multimedia system, the previous call will be put on hold.
If during a call you accept a call with the other mobile phone when in two phone mode then the existing call is ended.
or
G-Class - Owner's Manual
MBUX multimedia system Telephone
Select Message.
The incoming call is not accepted.
You answer with a message.
or
Select Reject.
The function and the behaviour depend on your mobile phone network provider as well as on the mobile phone (see the manufacturer's operating instructions).
MENGGUNAKAN KODE PANGGILAN INTERNASIONAL
Multimedia system:

Press and "0" until a "+" appears in the selection field.
Enter the numbers of the country code, regional code and the telephone number.
Select □.
The call is made.
Kontak
INFORMASI TENTANG MENU KONTAK
The contacts menu contains all contacts from existing data sources, e.g. mobile phone or data storage medium.
TERGANTUNG PADA SUMBER DATA, MUNGKIN UNTUK MENYIMPAN/MEMUAT JUMLAH KONTAK BERIKUT:
• Permanently saved contacts: 3,000 entries
- Contacts loaded from the mobile phone: 5,000 entries per mobile phone
DARI MENU KONTAK, ANDA DAPAT MELAKUKAN TINDAKAN BERIKUT:
• Make a call, for example call a contact ( → page 535)
• Navigation ( → page 489)
• Compose messages ( → page 537)
• Additional options (→ page 536)
Mobile phone contacts are automatically displayed when a mobile phone is connected to the multimedia system ( → page 528).
MENGUNDUH KONTAK FAVORIT PONSEL
If the mobile phone supports the function, the favourites of the mobile phone are automatically loaded and appear in the overview of the phone menu.
MEMANGGIL KONTAK
Multimedia system:

PILIHAN BERIKUT DAPAT DIGUNAKAN UNTUK MENCARI KONTAK:
• Searching by initials
- Searching by name
• Searching by phone number
Enter characters into the search field.


G-Class - Owner's Manual
MBUX multimedia system Telephone
Select the contact.
SUATU KONTAK DAPAT BERISI RINCIAN BERIKUT:
- Phone numbers
• Navigation addresses
- Internet address
- Email addresses
- Relationship (if set)
MENGELOLA FORMAT NAMA KONTAK
Multimedia system:

Select Contacts.
▶ Select Name format.
Select an option.
IKHTISAR IMPOR KONTAK
MENGIMPOR KONTAK KE MENU KONTAK
Persyaratan Sumber
USB device The USB device is connected with the USB port.
Mobile phone A mobile phone is connected to the multime-
dia system via Bluetooth ® .
Contacts are available.
Note that the imported contacts remain in the vehicle and can be accessed at any time regardless of the connected mobile phones.
MENGIMPOR KONTAK KE MENU KONTAK
Multimedia system:
Phone Contacts Import contacts
Select a mobile phone , from which the contacts should be imported.
Select an option.
MENYIMPAN KONTAK PONSel
Multimedia system:
Phone Contacts
Select ➞ in the line of the mobile phone contact.
Select ...
Select Save.
Select Yes.
The contact saved in the multimedia system is identified by the MBUX symbol.
MEMANGGIL KONTAK
Multimedia system:
Phone Contacts
Select Search contacts.
Enter characters into the search field.
Select the contact.
Select the telephone number.
The number is dialled.

G-Class - Owner's Manual
MBUX multimedia system Telephone
MEMILIH OPSI TAMBAHAN DI MENU KONTAK
Multimedia system:
Phone Contacts
Select ▶ in the line of the contact.
Select ⋯.
Select an option.
MENGHAPUS KONTAK
Persyaratan:
• The contacts are saved in the vehicle.
- To delete an individual contact, this has been imported manually into the vehicle.
Multimedia system:
Phone
MENGHAPUS SEMUA KONTAK
Select
Select Contacts.
▶ Select Delete all MBUX contacts.
Select an option.
MENGHAPUS SATU KONTAK
Select Contacts.
Select ▶ in the line of the contact.
Select ⋯.
▶ Select Delete contact.
Select Yes.
Daftar panggilan
IKHTISAR DAFTAR PANGGILAN
Depending on whether your mobile phone supports the PBAP Bluetooth ® profile or not, this can have different effects on the presentation and functions of the call list.
JIKA PROFIL PBAP BLUETOOTH* DIDUKUNG, EFEKNYA ADALAH SEBAGAI BERIKUT:
- The call lists from the mobile phone are displayed in the multimedia system.
- When connecting the mobile phone, you may have to confirm the connection for the PBAP Bluetooth® profile.
JIKA PROFIL PBAP BLUETOOTH® TIDAK DIDUKUNG, EFEKNYA ADALAH SEBAGAI BERIKUT:
- The multimedia system generates a call list independently as soon as calls are made in the vehicle.
• The call list is not synchronised with the call lists in the mobile phone.
MELAKUKAN PANGGILAN DARI DAFTAR PANGGILAN
Multimedia system:
Phone
Select Call list.

G-Class - Owner's Manual
MBUX multimedia system Telephone
Select an entry.
The call is made.
MEMILIH OPSI TAMBAHAN DI DAFTAR PANGGILAN
Multimedia system:
Phone
Select Call list.
For contacts that are in the address book: select options. The contact details are called up.
For contacts where only one number is shown (not in the address book): select 🔒.
MENGHAPUS DAFTAR PANGGILAN
Multimedia system:
Phone Devices
Select Delete call list.
Select Yes.
This function is only available if your mobile does not support the PBAP Bluetooth ® profile.
Pesan teks
IKHTISAR FUNGSI PESAN
In the message menu you can receive text messages and create and send them with the help of the MBUX voice assistant.
If the connected mobile phone supports the Bluetooth ® MAP profile, the message functions can be used on the multimedia system.

You can obtain further information about settings and supported functions of Bluetooth ® -capable mobile phones at a Mercedes-Benz service centre or at: https://www.mercedes-benz-mobile.com/
Some mobile phones require further settings after being connected to the multimedia system to activate the messaging functionality (see manufacturer's operating instructions).
MENGATUR TAMPILAN PESAN
Multimedia system:
Phone Devices
▶ Select Message display.
Select On or Off.
MEMBACA PESAN
Multimedia system:
Phone
MENGGUNAKAN FUNGSI BACA DENGAN SUARA
A message list is shown.
To read aloud, select the symbol at a conversation.
The message is read aloud.
MEMBUAT DAN MENGIRIM PESAN BARU
Persyaratan
• There is an Internet connection.
• At least one mobile phone with reception is connected.
- If applicable, the message function must be activated on the mobile phone.

G-Class - Owner's Manual
MBUX multimedia system Telephone
Multimedia system:

Using the MBUX voice assistant, speak the voice command Send a message to, and name the desired contact ( → page 439).
MENDIKTEKAN TEKS
Say the message.
You are guided by the voice dialogue.
MEMBALAS PESAN DALAM RIWAYAT PESAN
Multimedia system:

A message list is shown.
Select ➤ next to a contact.
The messaging history with this contact is shown. You will be guided through the steps with the help of a voice dialogue.
Say the message.
MENERUSKAN PESAN
Multimedia system:

A message list is shown.
Speak the voice command Forward message. You are guided by the voice dialogue.
MENGHUBUNGI PENGIRIM PESAN
Multimedia system:

A message list is shown.
Select ➤ next to a contact.
The messaging history with this contact is shown.
Select ⋯.
Select Call.
MENGGUNAKAN NOMOR TELEPON, URL, ATAU ALAMAT EMAIL DARI PESAN TEKS
Persyaratan
• An Internet connection is available to call up a URL.
Multimedia system:

A message list is shown.
Select ▶ next to a contact.
The messaging history with this contact is shown.
Select a telephone number or a URL in the message. If a URL is selected the web browser opens.
JIKA NOMOR TELEPON DIPILIH, OPSI BERIKUT TERSEDIA:
Call
- New message
or
If In-Car Office and the email function are available: select an email address.
In-Car Office opens.


G-Class - Owner's Manual
MBUX multimedia system Telephone

The availability of In-Car Office is country-dependent.
Select an option.
MENGHAPUS PESAN
Multimedia system:

A message list is shown.
Select a contact.
Press and hold on a message.
To delete the message: select Delete.
Kantor Dalam Mobil
FUNGSI IN-CAR OFFICE
Using In-Car Office, you can connect your online services to the multimedia system.
FUNGSI-FUNGSI BERIKUT TERSEDIA:
- Calendar
Showing appointments and triggering actions, e.g. reading aloud, placing a call, navigating
E-mail
Reading, reading aloud, creating, answering and forwarding e-mails
- Tasks and calls
Managing tasks and pre-booked calls
• Voice input
Creating appointments/reminders and tasks
① Alternatively, you can record text contents via the MBUX Voice Assistant or via the dictation function.
Further information on the MBUX Voice Assistant ( → page 440).
(i) Please note that certain functions are only available when the vehicle is stationary.
MEMANGGIL IN-CAR OFFICE
Persyaratan:
• You have a Mercedes me ID.
• The Digital Extra In-Car Office is activated in your Mercedes me ID.
- You have a user account with an online service, for example Office 365. In this way, appointments, e-mails and tasks can be synchronised and facilitated.
Sistem multimedia:

Select In-Car Office.
Individual functions from In-Car Office can be called up.
MENGHUBUNGKAN AKUN PENGGUNA
▶ Select the desired online service.
Scan the QR code.
▶ Follow the instructions on the device.


G-Class - Owner's Manual
MBUX multimedia system Telephone
MEMILIH FUNGSI KALENDER DI IN-CAR OFFICE
Multimedia system:

FUNGSI-FUNGSI BERIKUT TERSEDIA:

Select a function.
i Functions are available if corresponding appointment information is saved.
CONTOH-CONTOHNYA ADALAH:
- If a telephone number has been saved for the appointment, Call is available.
• If a navigable address has been saved in the Online Account for the appointment, Navigate is available.
MEMILIH FUNGSI TUGAS & PANGGILAN DI "IN-CAR OFFICE"
Multimedia system:

▶ Select a function for an entry.
FUNGSI-FUNGSI BERIKUT TERSEDIA:
\- Reading aloud

- Placing a call
This task function requires a telephone number.
- Marking as completed ☑
In the current edit, an entry that has been marked as completed can be marked as open again by removing the tick.
- Deleting
- Displaying details
MENANDAI ENTRI SEBAGAI SELESAI DI TUGAS & PANGGILAN
Multimedia system:

Select Tasks & calls.
An overview appears.
Select √.
MEMBACA DAN MENGELOLA E-MAIL
Multimedia system:

Select an e-mail.
The e-mail is opened.
FUNGSI TAMBAHAN TERSEDIA:
- Reading e-mails
• Answering e-mails (→ page 541)
- Forwarding e-mails to (→ page 541)
• Delete e-mails

G-Class - Owner's Manual
MBUX multimedia system Telephone
MEMBUAT E-MAIL BARU
Multimedia system:
→ Apps In-Car Office E-mail
Select + Create e-mail.
Select +.
Enter an e-mail address directly via the keyboard.
or
Select an e-mail address from the contacts.
Contacts can be used from the contacts menu or from linked online services such as Office 365 or Gmail. Further information about the contacts menu ( → page 534).
(i) Please note that e-mails can only be written when the vehicle is stationary.
Enter the subject and text of the e-mail in the corresponding fields with the keypad.
Select Send.
MENJAWAB EMAIL
Multimedia system:
Apps In-Car Office E-mail
Select an e-mail.
Select Reply.
Enter the e-mail text in the corresponding field using the keypad.
Select Send.
① Please note that e-mails can only be written when the vehicle is stationary.
MENERUSKAN EMAIL
Multimedia system:
→ Apps In-Car Office E-mail
Select an e-mail.
Select Forward.
To forward with attachment: select Forward with attachment.
Contacts can be used from the contacts menu or from linked online services such as Office 365 or Gmail. Further information about the contacts menu (→ page 534).
Forwarding with an attachment is only possible if an attachment is available.
To forward without attachment: select Forward without attachment.
Enter the e-mail text in the corresponding field using the keypad.
Select Send.


G-Class - Owner's Manual
MBUX multimedia system Telephone
MENGGUNAKAN KANTOR DALAM MOBIL DENGAN ASISTEN SUARA MBUX DAN FUNGSI DIKTE
Multimedia system:
→ Apps In-Car Office E-mail
MENGGUNAKAN KANTOR DALAM MOBIL DENGAN FUNGSI DIKTE
The dictation function allows you to dictate text content, such as the subject or text of an e-mail, instead of typing the content using the keyboard.
The dictation function is not available everywhere with the full range of functions. To activate the function for the first time, it may be necessary to accept the Mercedes-Benz Connect terms of use in your Mercedes me ID.
The following is an example of how you can dictate the subject and text of an e-mail.
Select + Create e-mail.
▶ Add recipients using ⊕.
Select □.
The dictation function is started.
▶ Dictate the subject and text of the e-mail.
After the voice input has been processed, it is shown as text.
Select Send.
MENGGUNAKAN KANTOR DALAM MOBIL DENGAN ASISTEN SUARA MBUX
With the voice control of the MBUX Voice Assistant you can operate various functions of In-Car Office and speak in text contents.
Further information on operating the MBUX Voice Assistant ( → page 439).
The following are examples of some voice commands that you can use to operate In-Car Office.
To write new e-mail: say the voice command I want to send an e-mail to John Doe.
You are guided by the dialogue.
To reply to an e-mail: say the voice command Reply to e-mail.
You are guided by the dialogue.
To forward an e-mail: say the voice command Forward e-mail.
Dictate the text of the e-mail.
To show tasks: say the voice command Show my tasks.
The tasks are shown.
To create a calendar entry: say the voice command Create a calendar entry tomorrow at 9 a.m..
You are guided by the dialogue.

G-Class - Owner's Manual
MBUX multimedia system Telephone
Apple CarPlay®
IKHTISAR APPLE CARPLAY*

PERINGATAN
Risk of distraction from information systems and communications equipment
If you operate information systems and communication devices integrated in the vehicle when driving, you could be distracted from the traffic situation. This could also cause you to lose control of the vehicle.
▶ Only operate this equipment when the traffic situation permits.
If you cannot be sure of this, stop the vehicle whilst paying attention to road and traffic conditions and operate the equipment with the vehicle stationary.
You must observe the legal requirements for the country in which you are currently driving when operating the multimedia system.
iPhone * functions can be used via the multimedia system using Apple CarPlay * . They are operated using the touchscreen, Touch Control or Sir voice control. You can activate voice control by pressing and holding the button on the multifunction steering wheel.
By briefly pressing the □ button on the multifunction steering wheel you can continue to operate the multimedia system using the MBUX Voice Assistant (→ page 439).
Only one iPhone ® at a time can be connected via Apple CarPlay ® with the multimedia system.
Also for use of Apple CarPlay ® with two phone mode, only one additional mobile phone can be connected using Bluetooth ® with the multimedia system.
As access to the iPhone ® is restricted by MBUX when an Apple CarPlay ® session is active, not all MBUX functions (e.g. dialling from the address book) can be fully provided for the connected device. In this case use Apple CarPlay ® .
The full range of functions for Apple CarPlay ® is only available with an Internet connection.
The availability of Apple CarPlay ® may vary according to the country.
The service provider is responsible for this application and the services and content connected to it.
Apple CarPlay ® is a registered trademark of Apple Inc.
You can watch an animation on this topic via the following link:
INFORMASI TENTANG APPLE CARPLAY®
The Apple CarPlay ® symbol in the status line switches within Apple CarPlay ® to the last active display.
If route guidance is active on the multimedia system, it is closed when route guidance is started on the mobile phone.
MENGHUBUNGKAN IPHONE* MELALUI APPLE CARPLAY* (BERKABEL)
Persyaratan:
\- The current version of your device's operating system is being used (see the manufacturer's operating instructions).

G-Class - Owner's Manual
MBUX multimedia system Telephone

For safety reasons, the first activation of Apple CarPlay ® on the multimedia system must be carried out when the vehicle is stationary and the parking brake applied.
Connect the iPhone ® to a USB port on the multimedia system using a suitable cable ( → page 575).
When the application is connected for the first time, a message about data protection regulations appears.
Select Accept & start if the application should be started.
or
▶ Open the device manager ( → page 529).
Start Apple CarPlay ® using the relevant symbol next to the device name.
If applicable, a message about data protection regulations appears.
If required confirm the use of Apple CarPlay® on your iPhone®.
KELUAR DARI APPLE CARPLAY ®
Select
or
Press the button on the multifunction steering wheel (MBUX multimedia system).
If Apple CarPlay ® was not displayed in the foreground before disconnecting, the application starts in the background when
reconnected. You can call up Apple CarPlay ® using the Apple CarPlay ® symbol in the status line.
MENGHUBUNGKAN IPHONE* MELALUI APPLE CARPLAY* (NIRKABEL)
Persyaratan:
- The current version of your device's operating system is being used (see the manufacturer's operating instructions).
- Bluetooth ® is activated on the device (see the manufacturer's operating instructions).
• The device is "visible" for other devices.
For safety reasons, the first activation of Apple CarPlay® on the multimedia system must be carried out when the vehicle is stationary and the parking brake applied.
Sistem multimedia:
Phone Devices
Connect the mobile phone using Bluetooth ® (→ page 528).
When the application is connected for the first time, a message about data protection regulations appears.
Select OK, start Apple CarPlay if the application should be started.
If required confirm the use of Apple CarPlay ® on your iPhone ® .
It is possible at any time to switch between a connection via Bluetooth a or Apple CarPlay b (wireless) in the device list.


G-Class - Owner's Manual
MBUX multimedia system Telephone

If you have already connected a mobile phone via Bluetooth, you can connect another iPhone * via Bluetooth * to use Apple CarPlay * via the device manager.
KELUAR DARI APPLE CARPLAY 1
Select [ ]
or
Press the button on the Touch Control (MBUX multimedia system).
If Apple CarPlay ® was not displayed in the foreground before disconnecting, the application starts in the background when reconnected. You can call up Apple CarPlay ® using the Apple CarPlay ® symbol in the status line.
MEMANGGIL PENGATURAN SUARA APPLE CARPLAY®
Multimedia system:

Select the sound settings.
MENGAKHIRI APPLE CARPLAY*
Select the Apple CarPlay ® symbol in the device manager (telephone, media) that is next to the device name of the iPhone ® .
① Select the Apple CarPlay® symbol in the device manager in the telephone or media applications if Apple CarPlay® should be restarted.
If Apple CarPlay * was not displayed in the foreground before disconnecting, the application starts in the background the next time it is started automatically. You can call up Apple CarPlay * using the relevant symbol in the status line.
Android Auto
TINJAUAN ANDROID AUTO

PERINGATAN
Risk of distraction from information systems and communications equipment
If you operate information systems and communication devices integrated in the vehicle when driving, you could be distracted from the traffic situation. This could also cause you to lose control of the vehicle.
▶ Only operate this equipment when the traffic situation permits.
If you cannot be sure of this, stop the vehicle whilst paying attention to road and traffic conditions and operate the equipment with the vehicle stationary.
You must observe the legal requirements for the country in which you are currently driving when operating the multimedia system. Mobile phone functions can be used with Android Auto using the Android operating system on the multimedia system. They are operated using the touchscreen, Touch Control or voice control. You can activate the voice control system by pressing and holding the ☐ button on the multifunction steering wheel.

G-Class - Owner's Manual
MBUX multimedia system Telephone
By briefly pressing the button on the multifunction steering wheel you can continue to operate the multimedia system using the MBUX Voice Assistant (→ page 439).
Only one mobile phone at a time can be connected via Android Auto with the multimedia system.
Also for use of Android Auto with two phone mode, only one additional mobile phone can be connected using Bluetooth ® with the multimedia system.
The full range of functions for Android Auto is only possible with an Internet connection.
The availability of Android Auto and Android Auto apps may vary according to the country.
The service provider is responsible for this application and the services and content connected to it.
You can watch an animation on this topic via the following link:
INFORMASI TENTANG ANDROID AUTO
The Android Auto symbol in the status line switches within Android Auto to the last active display.
If route guidance is active on the multimedia system, it is closed when route guidance is started on the mobile phone.
MENGHUBUNGKAN PONSEL MELALUI ANDROID AUTO (BERKABEL)
Persyaratan:
• The mobile phone supports Android Auto from Android 5.0.
- The current version of the Android Auto app is installed on the mobile phone.
\- In order to use the telephone functions, the mobile phone must be connected to the multimedia system via Bluetooth (→ page 528). If there was no prior Internet connection, this is established with the use of the mobile phone with Android Auto.
For safety reasons, the first activation of Android Auto on the multimedia system must be carried out when the vehicle is stationary with the parking brake.
Connect the mobile phone to a USB port on the multimedia system using a suitable cable ( → page 575).
When the application is connected for the first time, a message about data protection regulations appears.
Select Accept & start if the application should be started.
or
\- Open the device manager ( → page 529).
- Start Android Auto using the relevant symbol next to the device name.
KELUAR DARI ANDROID AUTO
Select [ ]
or
Press the button on the Touch Control (MBUX multimedia system).
G-Class - Owner's Manual
MBUX multimedia system Telephone
If Android Auto was not displayed in the foreground before disconnecting, the application starts in the background when reconnected. You can call up Android Auto using the Android Auto symbol in the status line.
MENGHUBUNGKAN PONSEL MELALUI ANDROID AUTO (NIRKABEL)
Persyaratan:
- The current version of your device's operating system is being used (see the manufacturer's operating instructions).
• The device supports the Android Auto function (wireless).
- Bluetooth ® is activated on the device (see the manufacturer's operating instructions).
• The device is "visible" for other devices.
- Bluetooth 5 is activated on the multimedia system (→ page 469)
For safety reasons, the first activation of Android Auto on the multimedia system must be carried out when the vehicle is stationary and the parking brake applied.
The Android Auto function (wireless) is not available in all countries.
Multimedia system:

Connect the mobile phone using Bluetooth ® (→ page 528).

Depending on the device configuration, the query whether Android Auto should be started may appear after connecting the mobile phone via Bluetooth. In this case, the query must be answered with Yes.
Select Start Android Auto.
When the application is connected for the first time, a message about data protection regulations appears.
Select Accept & start.
It is possible at any time to switch between a connection via Bluetooth® or Android Auto (wireless) in the device list.
If you have already connected a mobile phone via Bluetooth ® , you can connect another mobile phone via Bluetooth ® to use Android Auto via the device manager.
KELUAR DARI ANDROID AUTO
Select
or
Press the button on the Touch Control (MBUX multimedia system).
If Android Auto was not displayed in the foreground before disconnecting, the application starts in the background when reconnected. You can call up Android Auto using the Android Auto symbol in the status line.

G-Class - Owner's Manual
MBUX multimedia system Telephone

MEMANGGIL PENGATURAN SUARA ANDROID AUTO
Multimedia system:
Settings ▶ System ▶ Audio
Select the sound settings.
MENGAKHIRI ANDROID AUTO
Select the Android Auto symbol in the device manager (telephone, media) that is next to the device name of the mobile phone.
i Select the Android Auto symbol in the device manager if Android Auto should be restarted.
If Android Auto was not displayed in the foreground before disconnecting, the application starts in the background the next time it is started automatically. You can call up Android Auto using the Android Auto symbol in the status line.
Data kendaraan yang ditransfer dengan Android Auto dan Apple CarPlay®
IKHTISAR DATA KENDARAAN YANG DITRANSFER
When using Smartphone Integration, certain vehicle data is transferred to the mobile phone. This enables you to get the best out of selected mobile phone services. Vehicle data is not directly accessible.
INFORMASI SISTEM BERIKUT INI DITRANSMISIKAN:
• Software release of the multimedia system
• System ID (anonymised)
The transfer of this data is used to optimise communication between the vehicle and the mobile phone.
To do this, and to assign several vehicles to the mobile phone, a vehicle identifier is randomly generated.
This has no connection to the vehicle identification number (VIN) and is deleted when the multimedia system is reset ( → page 475).
DATA STATUS BERKENDARA BERIKUT INI DITRANSMISIKAN:
• Transmission position engaged
• Distinction between parked, standstill, rolling and driving
• Day/night mode of the driver display
Drive type
The transfer of this data is used to alter how content is displayed to correspond to the driving situation.
DATA POSISI BERIKUT INI DITRANSMISIKAN:
Coordinates
Speed
- Compass direction
• Acceleration direction
This data is used by the mobile phone to improve the accuracy of the navigation (e.g. for continuity in a tunnel).

G-Class - Owner's Manual
MBUX multimedia system Telephone
Panggilan Dukungan Mercedes-Benz
MELAKUKAN PANGGILAN MELALUI PANEL KONTROL ATAS
Mercedes-Benz Connect calls are not possible in every country. Find out at a Mercedes-Benz service centre if these functions are available in your country.

me button for a Mercedes-Benz Connect call
② SOS button cover
SOS button (emergency call system)
Melakukan panggilan Mercedes-Benz Connect
Press me button ①.
MELAKUKAN PANGGILAN DARURAT
To open the cover of SOS button Ⓞ, press it briefly.
Press and hold SOS button ③ for at least one second.
If a Mercedes-Benz Connect call is active, an emergency call can still be triggered. This has priority over all other active calls.
INFORMASI TENTANG PANGGILAN DUKUNGAN MERCEDES-BENZ MELALUI TOMBOL ME
A call was made via the me button to Mercedes-Benz Support via the overhead control panel or the multimedia system ( → page 549).
DENGAN MENGGUNAKAN SISTEM DIALOG SUARA, ANDA MENGAKSES LAYANAN YANG DIINGINKAN:
• Accident and Breakdown Management
• Mercedes-Benz Support for general information about the vehicle
ANDA DAPAT MENEMUKAN INFORMASI TENTANG TOPIK BERIKUT:
• Activation of Digital Extras
• Operating the vehicle
• Nearest Mercedes-Benz service centre
• Further products from Mercedes-Benz
Data is transferred during the connection to Mercedes-Benz Support ( → page 551).
MEMANGGIL DUKUNGAN MERCEDES-BENZ MENGGUNAKAN SISTEM MULTIMEDIA
Persyaratan:
• Access to a mobile phone network is available.
- Sufficient network coverage is provided by the mobile phone network providers in the respective region.
• For automatic transmission of vehicle data: the vehicle is switched on.


Sistem multimedia:

▶ Call Mercedes me connect.
• After confirmation, the multimedia system sends the required vehicle data. The data transfer is shown in the display.
Select a service via the voice dialogue system.
You will be put in touch with a contact person at Mercedes-Benz Support.
Pilihan berikut mungkin tersedia:
• Accident and Breakdown Management
• Workshop service
• Mercedes-Benz Support for general information about the vehicle
The availability of the individual selection options is country-dependent.
MENGHUBUNGI DUKUNGAN MERCEDES-BENZ SETELAH DETEKSI KECELAKAAN/KERUSAKAN OTOMATIS
Persyaratan:
The vehicle can detect accident or breakdown situations under certain circumstances.
Accident: no requirements.
Kerusakan:
• The vehicle is stationary.
• The hazard warning lights are switched on.
Additional requirements may apply for collision detection with a parked vehicle ( → page 336).
① This function is not available in all countries.
PROSEDUR DETEKSI KECELAKAAN/KERUSAKAN
- The vehicle has detected an accident or breakdown situation ( → page 336).
- In the event an accident or breakdown is detected, the emergency guide shows safety notes in the multimedia system display. This may take a few seconds.
Depending on the severity of the accident, an automatic emergency call can be initiated. This has priority over all other active calls ( → page 559).
Exit the emergency guide display.
A prompt appears asking whether you would like to receive support from Mercedes-Benz Support.
▶ Assistance from Mercedes-Benz Support immediately after the breakdown or accident has been recognised: select Call.
- The vehicle data is transferred automatically after your consent or if the "Breakdown Management" Digital Extra is activated (→ page 554).
• Mercedes-Benz Support will take your call and organise accident/breakdown assistance.


G-Class - Owner's Manual
MBUX multimedia system Telephone
You may be charged for these services.
▶ Support from Mercedes-Benz Support at a later time: select Call later.
The message will disappear and reappear at a later time.
Additional prompt when the "Guard 360" Digital Extra is active: If the "Guard 360" Digital Extra is active, a message may appear in the multimedia system when the vehicle is switched on after a collision is detected, indicating the affected area and the severity of the impact.
▶ Support from Mercedes-Benz Support directly after collision detection: select Call.
No support from Mercedes-Benz Support required: reject the prompt.
MENGATUR JANJI TEMU SERVIS MELALUI PANGGILAN DUKUNGAN MERCEDES-BENZ
If you have activated the Digital Extra Maintenance Management, relevant vehicle data is automatically transferred to Mercedes-Benz Support. You will then receive individual recommendations regarding the maintenance of your vehicle.
Regardless of whether you have consented to the maintenance management service, the multimedia system reminds you after a certain amount of time that a service is due. A prompt appears asking if you would like to make an appointment.
To arrange a service appointment: select Call.
The vehicle data will be transferred after your approval and Mercedes-Benz Support will accept your appointment request. The information is then sent to your desired service outlet.
This will contact you to confirm the appointment and if necessary consult about the details.

If you select Call later after the service message appears, the message is hidden and reappears at a later time.
MENYETUJUI TRANSFER DATA UNTUK PANGGILAN DUKUNGAN MERCEDES-BENZ Persyaratan:
\- There is an active Mercedes-Benz Support call via the multimedia system or the me button in the overhead control panel ( → page 549).
The prompt to confirm data transfer does not appear in all countries.
If the Accident/Breakdown Management Digital Extras are not activated, a prompt appears to confirm the data transfer.
Select Yes.
• The relevant vehicle data is sent automatically ( → page 551).
or
▶ Select No and confirm.
• Only call control data is transmitted ( → page 551).
More information on Digital Extras: https://www.mercedes.me
DATA YANG DIKIRIMKAN SELAMA PANGGILAN DUKUNGAN MERCEDES-BENZ
If you initiate a Mercedes-Benz Support call, data is transferred to enable targeted advice and an efficient service.

G-Class - Owner's Manual
MBUX multimedia system Telephone
PERSYARATAN BERIKUT HARUS DIPENUHI UNTUK TRANSFER DATA:
• The vehicle is switched on.
- The required data transfer technology is supported by the mobile phone network provider.
• The quality of the mobile connection is sufficient.
TRANSFER BERTAHAP TERGANTUNG PADA FAKTOR-FAKTOR BERIKUT:
• Reason for the initiation of the call
• The available mobile phone transmission technology
• Activated Digital Extras
• The service selected in the voice control system
A prompt for consent to data transmission is only made if the corresponding Digital Extra has not been activated.
The scope of the data transmitted depends on the vehicle model and vehicle equipment. For technical reasons, not all data is available at all times.
TRANSMISI DATA SAAT EKSTRA DIGITAL TIDAK DIAKTIFKAN JIKA EKSTRA DIGITAL TIDAK DIAKTIFKAN DAN PERMINTAAN PERLINDUNGAN DATA TELAH DIKONFIRMASI, DATA BERIKUT DIKIRIMKAN:
• Vehicle identification number
• Time of the call
• Reason for the initiation of the call
• Confirmation of the data protection prompt
• Country indicator of the vehicle
• Set language for the multimedia system
- Telephone number of the communication platform installed in the vehicle
JIKA PANGGILAN DILAKUKAN UNTUK JANJI TEMU SERVIS MELALUI PENGINGAT SERVIS, DATA BERIKUT JUGA DIKIRIMKAN:
• Current mileage and maintenance data
JIKA PANGGILAN DILAKUKAN SETELAH DETEKSI KECELAKAAN ATAU KERUSAKAN OTOMATIS MENGGUNAKAN SISTEM MULTIMEDIA, DATA BERIKUT JUGA DIKIRIMKAN:
• Current mileage and maintenance data
• Current vehicle location
JIKA PILIHAN MANAJEMEN KECELAKAAN DAN KERUSAKAN TELAH DIBUAT MELALUI SISTEM DIALOG SUARA DAN TIDAK ADA EKSTRA DIGITAL YANG DIAKTIFKAN, TETAPI PERMINTAAN PERLINDUNGAN DATA TELAH DIKONFIRMASI, DATA BERIKUT DAPAT DIMINTA TAMBAHAN DARI KENDARAAN OLEH DUKUNGAN MERCEDES-BENZ:
• Current vehicle location
JIKA PERMINTAAN PERLINDUNGAN DATA TELAH DITOLAK, DATA BERIKUT DIKIRIMKAN UNTUK MEMUNGKINKAN SARAN YANG TERTARGET DAN LAYANAN YANG EFISIEN:
• Time of the call

G-Class - Owner's Manual
MBUX multimedia system Telephone
• Reason for the initiation of the call
• Rejection of the data protection prompt
• Country indicator of the vehicle
• Set language for the multimedia system
- Telephone number of the communication platform installed in the vehicle
TRANSMISI DATA SAAT EKSTRA DIGITAL DIAKTIFKAN
Only in the second step and only for the respective activated Digital Extras, further case-specific data is transmitted in order to enable an optimal service.
An overview of the data transferred is contained in the data protection notes for the Digital Extras. You can find these in your Mercedes me ID.
PEMROSESAN DATA
The data transmitted as part of the call will be deleted from the transmitting systems once the call has been completed, provided they are not used for other activated Digital Extras.
The incident-specific data is processed and stored by Mercedes-Benz Support and, if required to process the incident, forwarded to the service partner authorised by Mercedes-Benz Support. Please observe the data protection note on the Mercedes-Benz website at https://me.secure.mercedes-benz.com or in the announcement immediately after a call to Mercedes-Benz Support is connected.
① The recorded message is not available in every country.
Mercedes-Benz Connect
INFORMASI TENTANG MERCEDES-BENZ CONNECT
① Individual Digital Extras or certain packages are not available in every country. Find out at a Mercedes-Benz service centre if these functions are available in your country.
ANDA DAPAT MENGGUNAKAN EKSTRA DIGITAL BERIKUT MELALUI SISTEM MULTIMEDIA DAN PANEL KONTROL ATAS, MISALNYA:
- Accident Recovery (me button or the situation-dependent display in the multimedia system)
Breakdown Management (me button or the situation-dependent display in the multimedia system)
• Mercedes-Benz Emergency Call System (automatic emergency call and SOS button)
The Digital Extras Accident and Breakdown Management and the Mercedes-Benz emergency call system are available to you around the clock.
The me button and the SOS button can be found on the vehicle's overhead control panel ( → page 549).
You can also call Mercedes-Benz Support via the multimedia system ( → page 549).
Please note that Mercedes-Benz Connect is a Mercedes-Benz service. In an emergency, use the emergency call system in the vehicle ( → page 69) or contact the standard national emergency numbers.
Please note the terms of use and the data protection notes for Digital Extras. You can find these in your Mercedes-Benz user account.

EKSTRA DIGITAL MANAJEMEN KECELAKAAN DAN BREAKDOWN
The Accident and Breakdown Management Digital Extras are not available in every country. Contact a Mercedes-Benz service centre to find out whether this function is available in your country.
MANAJEMEN KECELAKAAN DAN BREAKDOWN DAPAT MENCakup FUNGSI-FUNGSI BERIKUT:
- Supplement to the Mercedes-Benz emergency call system (→ page 69) If necessary, the contact person at the Mercedes-Benz emergency call centre forwards the call to Accident and Breakdown Management. Forwarding the call is however not possible in all countries.
Breakdown assistance by a technician on location and/or the towing away of the vehicle to the nearest Mercedes-Benz service centre. You may be charged for these services.
- Addition to the emergency guide after automatic accident or breakdown detection ( → page 550)
In the event of a breakdown or accident, further vehicle data is sent which enables optimal support by Mercedes-Benz Support and the authorised service partner or breakdown assistance.
• Supplement to the Digital Extra Telediagnosis
With the Telediagnosis function, specific wear and failure reports are recorded by the service provider, in so far as these can be clearly interpreted and are available through the monitoring of components that are subject to diagnostics.
If your vehicle detects a breakdown or threat of a breakdown, you may be prompted via the multimedia system to contact Mercedes-Benz Sup-
port for further help. This prompt in the multimedia system only appears when the vehicle is stationary.
These Digital Extras are subject to technical restrictions such as the mobile phone coverage, mobile network quality and the ability of the processing systems to interpret the transferred data. In some circumstances, this can result in delays or the failure of the information to appear in the multimedia system.
Please note that the Mercedes-Benz Support Call is a Mercedes-Benz service. In emergencies, be sure to contact the usual national emergency number first or use the Mercedes-Benz emergency call system ( → page 557).
You can find more information on Digital Extras on the Mercedes-Benz Portal: https://me.secure.mercedes-benz.com
DATA YANG DIKIRIM DENGAN MERCEDES-BENZ CONNECT
DATA YANG DITRANSFER SELAMA PANGGILAN DUKUNGAN MERCEDES-BENZ TERGANTUNG PADA:
• The reason for initiation of the call
• The service that is selected in the voice control system
• The activated Digital Extras ( → page 551)
Which data is transferred for the Digital Extras can be taken from the currently valid terms of use and the data protection notes for Digital Extras. You can find these in your Mercedes me ID.

G-Class - Owner's Manual
MBUX multimedia system Telephone
MB Apps (Ekstra Digital)
INFORMASI TENTANG MB APPS DAN EKSTRA DIGITAL
With a Mercedes me ID, you have access to services and offers from Mercedes-Benz.
Availability is dependent both on the country and equipment.
You can obtain further information at a Mercedes-Benz service centre or in the Mercedes-Benz Portal: https://www.mercedes.me
MENGAKSES AKUN PENGGUNA MERCEDES ME ID
Multimedia system:

ANDA MEMILIKI MERCEDES ME ID DAN KENDARAAN TERKAIT DENGAN MERCEDES ME ID
Select Mercedes me ID.
Information regarding the linked Mercedes me ID user account appears.
ANDA BELUM MEMILIKI MERCEDES ME ID DAN KENDARAAN BELUM TERKAIT DENGAN MERCEDES ME ID
If you do not yet have a Mercedes me ID, you can create a Mercedes me ID at: https://www.mercedes.me or in the Mercedes-Benz App. A valid email address or phone number is required for this.
Select
Select MB Apps.
Select Mercedes me.
To link your Mercedes me ID to the vehicle, follow the instructions on the display.
If the Mercedes-Benz App is available on a mobile phone, the vehicle link can be made via the displayed QR code.
MENGAKSES EKSTRA DIGITAL
Persyaratan:
• The vehicle is linked to your Mercedes me ID.
Multimedia system:

Select My services.
The Digital Extras for which you have a valid licence are displayed in alphabetical order.
MEMESAN ATAU MEMPERBARUI EKSTRA DIGITAL
To order or extend Digital Extras, use the Mercedes-Benz Store.
Select
Select Store.
MENGHAPUS TAUTAN ANTARA ID MERCEDES ME ANDA DAN KENDARAAN
Persyaratan:
• The Mercedes me ID that was first linked to the vehicle is registered.
• The user profile is synchronised ( → page 460).
• A Mercedes me PIN has been set.


G-Class - Owner's Manual
MBUX multimedia system Telephone
Multimedia system:
MB Apps > Mercedes me
Select Mercedes me ID.
▶ Select Delete vehicle connection.
Only the user whose Mercedes me ID was first linked to the vehicle can delete the link between all users and the vehicle.
MEMILIH APLIKASI
Persyaratan:
• Depending on the app, the general terms and conditions are confirmed.
Multimedia system:
Apps
Select an app.
APLIKASI BERIKUT TERSAJIA, MISALNYA:
- Weather
- Browser
• Additional apps, which are purchased or installed subsequently
You can also access both of the first two apps via the quick access at Apps.
The available features are country-dependent. Licence fees may be applicable.
FUNGSI BERIKUT TERSAJIA UNTUK APLIKASI, MISALNYA:
- Search function
- Filter function, for displaying search results at the current vehicle position or at the destination
• Display of detailed information
Read-aloud function
- Setting functions
MENGGUNAKAN APLIKASI GALERI
Multimedia system:
Apps
Select Gallery.
IMAGES AND VIDEO RECORDINGS ARE DISPLAYED FROM THE FOLLOWING SOURCES, FOR EXAMPLE:
• Dashcam video recordings
• Video recordings and images from other available sources
• Video recordings from AMG TRACK PACE
Favourites
Select a tab.
MENYARING TAMPILAN
Select ☐.
Select an option.
All files, all images or all video recordings are displayed.
MEMUTAR REKAMAN VIDEO
Select ▶.
Playback starts.


G-Class - Owner's Manual
MBUX multimedia system Telephone
To continue playback in full screen mode: tap on the display.
To pause playback: select 📄.
To continue playback from the desired position: move the ⏻ position on the timeline by sliding it.
To select the previous or next video recording: swipe to the right or left.
MENGGULIR DAN MEMPERBESAR GAMBAR
To scroll: swipe on the image in one direction.
To zoom: tap twice in quick succession on an image.
To select the previous or next image: swipe to the right or left.
MENAMBAH ATAU MENGHAPUS BERKAS DARI FAVORIT
▶ Press and hold on a file.
▶ Select Add to favourites/Remove from favourites.
A corresponding message appears.
MENGAKTIFKAN ATAU MENONAKTIFKAN PERLINDUNGAN TULIS
Active write protection is not supported by every app.
▶ Press and hold on a file.
Activate or deactivate Write protection.
MENGHAPUS BERKAS
Select
To delete a single file: tap on a file.
will appear.
To delete all files: tap on 📄.
To delete: select ☐.
A prompt appears.
Select Yes.
A single file can be deleted even after a long press on the file.
Sistem panggilan darurat
INFORMASI TENTANG SISTEM PANGGILAN DARURAT YANG TERSEDIA
DUA JENIS SISTEM PANGGILAN DARURAT TERSEDIA UNTUK ANDA DI DALAM KENDARAAN:
• Mercedes-Benz emergency call system
• 112 emergency call system (EU eCall)
The Mercedes-Benz emergency call system is generally available for your vehicle for 10 years ex works.
The Mercedes-Benz Emergency Call System is not available in all countries. You can find out about the regional availability of the Mercedes-Benz emergency call system at: https://www.mercedes-benz-mobile.com/extra/ecall/


BERIKUT INI BERLAKU UNTUK KEDUA SISTEM PANGGILAN DARURAT:
- The transfer of specific data is required for the intended function of both emergency call systems. This will be explained in the "Data transfer" section ( → page 560).
- Both emergency call systems are included as standard equipment in your vehicle and are activated at the factory.
• The use of both emergency call systems is exempt from charges.
- Both emergency call systems only function in areas in which the mobile phone network providers offer mobile phone coverage.
For both systems, insufficient network coverage from the mobile phone network providers can result in an emergency call not being transmitted.
PERBEDAAN ANTARA SISTEM PANGGILAN DARURAT MERCEDES-BENZ DAN SISTEM PANGGILAN DARURAT 112 (EU ECALL)
Sistem panggilan darurat Mercedes-Benz Sistem panggilan darurat 112 (EU eCall)
The Mercedes-Benz emergency call system is permanently logged in to the mobile phone network.
• Automatic and manual Mercedes-Benz emergency calls are transmitted to a Mercedes-Benz emergency call centre.
In the event that the emergency call centre of the Mercedes-Benz emergency call system cannot be reached (e.g. due to a lack of network coverage), the 112 emergency call is carried out automatically.
If you decide on the 112 emergency call system (EU eCall) only, then the system only logs in to the mobile phone network after the triggering of a manual or automatic emergency call.
The 112 emergency call system (EU eCall) transmits automatic and manual emergency calls directly to public coordination centres.
The 112 emergency call system (EU eCall) in your vehicle meets the delegated regulation EU 2017/79. Proper and full functionality of the 112 emergency call system (EU eCall) depends on circumstances beyond the influence of Mercedes-Benz AG. This includes mobile network coverage and the technical infrastructure of the public reception centres in the respective countries.
Please observe that in the event of a repair genuine Mercedes-Benz batteries must be used which have been certified pursuant to the delegated regulation EU 2017/79 (Appendix I). Other manufacturers are also permitted provided their batteries are certified according to the delegated regulation EU 2017/79.
There is the option of deactivating the Mercedes-Benz emergency call system and using only the 112 emergency call system (EU eCall). Contact address for carrying out deactivation of the Mercedes-Benz emergency call system are the local dealers.
MERCEDES-BENZ MEREKOMENDASIKAN AKTIVASI SISTEM PANGGILAN DARURAT MERCEDES-BENZ DENGAN ALASAN BERIKUT:
- In emergency situations when abroad, you can also get support in a language you speak.
• Several transmission technologies are used to accelerate the transfer of the accident data and improve reliability of the transmission.
- The Mercedes-Benz emergency call system is permanently logged in to the mobile phone network, which ensures faster placement of the emergency call and faster transfer of the accident data.
G-Class - Owner's Manual
MBUX multimedia system Telephone
Measures for rescue, recovery or towing away can then be initiated in quickly.
- With a Mercedes-Benz emergency call, the accident data is only transferred to the public coordination centre with the approval of the customer. In the event of an automatically triggered emergency call in which there is no voice contact, the accident data is transmitted immediately to the public emergency call centre.
- If the Mercedes-Benz emergency call centre is not available, the 112 emergency call is carried out automatically.
IKHTISAR SISTEM PANGGILAN DARURAT
Both the Mercedes-Benz emergency call system as well as the 112 emergency call system (EU eCall) can help to reduce the time between an accident and the arrival of emergency services at the site of the accident. They help locate an accident site in places that are difficult to access.
Both emergency call systems can initiate an emergency call automatically ( → page 559) or manually ( → page 560).
Only make emergency calls if you or others are in need of rescue. Do not make an emergency call in the event of a breakdown or a similar situation.
INDIKATOR DI LAYAR
PESAN BERIKUT MUNCUL DI LAYAR TENGAH ATAU LAYAR MEDIA DARI KEDUA SISTEM PANGGILAN DARURAT:
\- SOS NOT READY: the vehicle is not switched on or the emergency call system is malfunctioning. This does not necessarily indicate complete failure of the emergency call system. Emergency calls can still be transmitted.
The display only refers to the vehicle and does not take account of the availability of mobile phone networks and the Mercedes-Benz emergency call centre.

The functional readiness of the emergency call system on the vehicle can be seen when the SOS NOT READY display disappears once the vehicle is switched on.
\- SOS: the icon appears in the display during an active emergency call.
In case of a malfunction of the emergency call system, the loudspeakers, microphone, airbag or the SOS button, for example, are faulty.
ANDA DAPAT MENGENALI KERUSAKAN PADA SISTEM PANGGILAN DARURAT DENGAN TAMPILAN BERIKUT:
\- A corresponding message appears on the driver and media display.
MEMICU PANGGILAN DARURAT OTOMATIS
Persyaratan:
• The vehicle is switched on.
• The starter battery is sufficiently charged.
PANGGILAN DARURAT DIPICU SECARA OTOMATIS:
• After activation of the restraint systems such as airbags or seat belt tensioners after an accident
• After an automatically initiated emergency stop by Active Emergency Stop Assist
PANGGILAN DARURAT TELAH DILAKUKAN:
• A voice connection is established with the emergency call centre.


G-Class - Owner's Manual
MBUX multimedia system Telephone
\- A message with accident data is transmitted to the emergency call centre.
If no connection can be made to the public emergency services, a corresponding message appears in the display.
▶ Dial the emergency number 112 or the appropriate local emergency call number on your mobile phone.
JIKA PANGGILAN DARURAT TELAH DIMULAI:
- If the traffic conditions and safety permit, remain in the vehicle until a voice connection is established with the emergency call centre.
- On the basis of the call, the emergency call centre decides whether it is necessary to call rescue teams and/or the police to the accident site.
- If no vehicle occupant answers, an ambulance is sent to the vehicle immediately.
MEMICU PANGGILAN DARURAT MANUAL
To use the SOS button in the overhead control panel: press the SOS button for at least one second ( → page 549).
or
To use voice control: use the voice commands of the MBUX Voice Assistant ( → page 444).
PANGGILAN DARURAT TELAH DILAKUKAN:
• A voice connection is established with an emergency call centre.
- If the traffic conditions and safety permit, remain in the vehicle until a voice connection is established with the emergency call centre.
- On the basis of the call, the emergency call centre decides whether it is necessary to call rescue teams and the police to the accident site.
- A message with accident data is transmitted to the emergency call centre.
If no connection can be made to the public emergency services, a corresponding message appears in the display.
▶ Dial the emergency number 112 or the appropriate local emergency call number on your mobile phone.
TRANSFER DATA SISTEM PANGGILAN DARURAT
For both the Mercedes-Benz emergency call system as well as the 112 emergency call system (EU eCall) data is transferred to the Mercedes-Benz emergency call centre or the public emergency services call centre.
Depending on the emergency call system ( → page 557) activated different data is transmitted to the appropriate emergency call centre.
DATA YANG DIKIRIMKAN SESUAI DENGAN SISTEM PANGGILAN DARURAT YANG DIAKTIFKAN:
Panggilan darurat Mercedes-Benz 112 panggilan darurat
• Position data of the vehicle
• Position data on the route (a few 100 m before the incident)
Direction of travel
• Vehicle Identification number
Drive type of the vehicle (e.g. petrol, diesel, CNG, LPG, electric or hydrogen)
• Number of people detected in the vehicle
Whether the emergency call was initiated manually or automatically
• Time of the accident
• Language setting on the multimedia system
Digital Extras available or not
This determines whether the call can be forwarded to Mercedes-Benz Support if required.
• Position data of the vehicle
• Position data on the route (a few 100 m before the incident)
Direction of travel
• Vehicle identification number
Drive type of the vehicle (e.g. petrol, diesel, CNG, LPG, electric or hydrogen)
• Number of people detected in the vehicle
Whether the emergency call was initiated manually or automatically
• Time of the accident
If only the 112 emergency call system (EU eCall) is activated in the vehicle, the accident data is transmitted directly to the public emergency call centre.
UNTUK KEPERLUAN KLARIFIKASI KECELAKAAN, LANGKAH-LANGKAH BERIKUT DAPAT DIAMBIL HINGGA SATU JAM SETELAH PANGGILAN DARURAT DIMULAI:
• The current vehicle position can be determined.
• A voice connection to the vehicle occupants can be established.
• Emergency call data can be called up.
For Russia: various functions, e.g. receiving traffic information, cannot be performed for up to two hours after sending an emergency call.
FUNGSI DIAGNOSIS MANDIRI SISTEM PANGGILAN DARURAT
Your vehicle checks the functionality of the emergency call system every time the vehicle is switched on. During this time, the SOS button lights up red continuously for five seconds. In the event of a system failure, you will be informed via a text message on the driver's display and the red SOS NOT READY indicator on the central display or media display.
Please, make sure, that during 30 seconds after switching vehicle ON the red indicator SOS NOT READY in the upper right corner of display is switched OFF, this means the emergency call system passed diagnostics successfully.

G-Class - Owner's Manual
MBUX multimedia system Telephone

MEMULAI/MENGAKHIRI MODE UJI ERA-GLONASS
Persyaratan
• The starter battery is sufficiently charged.
• The vehicle is switched on.
• The vehicle has been stationary for at least one minute.
MODE UJI SAAT INI TERSEDIA DI NEGARA-NEGARA BERIKUT, MISALNYA:
Russia
- Belarus
Kazakhstan
Armenia
Kyrgyzstan
To start the test mode: press and hold the 📞 button on the multifunction steering wheel for at least five seconds.
The test mode is started and automatically ends after the language test has been performed.
To stop manual test mode: switch off the vehicle.
The test mode is ended.
INFORMASI TENTANG PEMROSESAN DATA
PEMROSESAN DATA PRIBADI MELALUI SISTEM PANGGILAN DARURAT MERCEDES-BENZ
All processing of personal data via the Mercedes-Benz emergency call system corresponds with the specifications in the EU Regulation 2016/679 "on the protection of natural entities with regard to the processing of personal data (GDPR)".
The data is solely used by the Mercedes-Benz emergency call system for rescue and recovery in the event of an accident.
The owner of a vehicle, that is equipped with a Mercedes-Benz emergency call system in addition to the 112 emergency call system (EU eCall), has the right to use the 112 emergency call system instead of the Mercedes-Benz emergency call system.
Contact address for carrying out deactivation of the Mercedes-Benz emergency call system are the local dealers.
PEMROSESAN DATA PRIBADI MELALUI SISTEM PANGGILAN DARURAT 112 (EU ECALL)
All processing of personal data via the 112 emergency call system (EU eCall) corresponds with the specifications in the EU Regulation 2016/679 "on the protection of natural entities with regard to the processing of personal data (GDPR)" and is based particularly on the necessity of upholding the vital interests of the affected person in accordance with article 6, paragraph 1, letter d of the GDPR.
The processing of this type of data is strictly limited to the purpose of operating the emergency calls to the standard European emergency call number 112.
PENERIMA DATA
The recipients of data that is processed by the 112 emergency call system (EU eCall) are the relevant emergency call inquiry terminals. These are configured by the appropriate authorities of the respective country in which they are located to first accept and subsequently process emergency calls to the standard European emergency call number 112.

G-Class - Owner's Manual
MBUX multimedia system Telephone

PENGATURAN UNTUK PEMROSESAN DATA
KEDUA SISTEM PANGGILAN DARURAT DIRANCANG SEHINGGA PERSYARATAN BERIKUT TERPENUHI:
- The data contained in the system memory is not accessible outside the system prior to the initiation of an emergency call.
- Both emergency call systems cannot be traced and there is no continuous tracking in normal operation.
- The data in the system's internal memory is automatically and continuously deleted.
- The location data of the vehicle is continuously overwritten in the system's internal memory, so that no more than the last three current locations required for the normal function of the system are available.
- The record of the activity data of both emergency call systems is only kept for as long as is required to fulfil the purpose of handling the emergency call, and under no circumstances for more than 13 hours after the time that an emergency call is initiated.
HAK-HAK ORANG YANG TERPENGARUH OLEH PEMROSESAN DATA
The person affected by the data processing (the vehicle owner) has the right to access the data and if applicable can demand the correction, deletion or barring of data that affects him or her and that the processing of which does not correspond with the GDPR regulations. Each correction, deletion or barring carried out according to this regulation must be shared with the third party to which the data has been transmitted, provided this does not prove to be infeasible and does not incur disproportionate expenditure.
The person affected by the data processing has the right to complain to the appropriate data protection authority should they be of the opinion that their rights have been infringed by the processing of their personal data.
Responsible contact point for the processing of access rights: Konzernbeauftragter für den Datenschutz, Mercedes-Benz Group AG, HPC E600, D-70546 Stuttgart, Germany

Fungsi daring dan internet
Koneksi internet
INFORMASI TENTANG MENGHUBUNGKAN KE INTERNET

PERINGATAN
Risk of distraction from information systems and communications equipment
If you operate information systems and communication devices integrated in the vehicle when driving, you could be distracted from the traffic situation. This could also cause you to lose control of the vehicle.
▶ Only operate this equipment when the traffic situation permits.
If you cannot be sure of this, stop the vehicle whilst paying attention to road and traffic conditions and operate the equipment with the vehicle stationary.
You must observe the legal requirements for the country in which you are currently driving when operating the multimedia system.

PERINGATAN
Risk of accident from operating mobile communication equipment while the vehicle is in motion
Mobile communication devices distract the driver from the traffic situation. This can also cause the driver to lose control of the vehicle.
As a driver, only operate mobile communication devices when the vehicle is stationary.
As a vehicle occupant, use mobile communication devices only in the designated area, e.g. in the rear passenger compartment.
You must observe the legal requirements for the country in which you are currently driving when operating mobile communication equipment in the vehicle.
TERGANTUNG PADA PERLENGKAPAN KENDARAAN DAN KETERSEDIAAN DI NEGARA, ANDA DAPAT MEMBUAT KONEKSI INTERNET DENGAN CARA BERIKUT:
• Vehicles with a communication module:
- Using the communication module including data roaming ( → page 565)
- Using Bluetooth ® or Wi-Fi with a data-enabled mobile phone
• Vehicles without a communication module:
Using Bluetooth ® or Wi-Fi with a data-enabled mobile phone


G-Class - Owner's Manual
MBUX multimedia system Online and Internet functions
The Internet functions can only be used to a limited degree whilst driving.
MENYIAPKAN KONEKSI INTERNET MENGGUNAKAN MODUL KOMUNIKASI
Persyaratan:
- The vehicle is equipped with a permanently installed communication module.
• A Mercedes me ID is available.
• The vehicle is linked to a Mercedes me ID.
• The Entertainment Package is active.
• The Comfort Data Volume Digital Extra is activated.
Multimedia system:


For most Digital Extras, data volume can be obtained when procuring the Digital Extras.
Additional data volume is required to use some functions, e.g. web browser or Wi-Fi hotspot.
If the data volume is reached, availability of the Digital Extras is limited.
Depending on the vehicle equipment, you can obtain an Entertainment Package via the Mercedes-Benz Store. In order to use the data package included, you must conclude your own contract with a mobile phone network provider via the Mercedes-Benz App. This can be terminated at any time and incurs no costs. Without this contract it is not possible to use the Digital Extras included in the previously acquired Entertainment Package. The availability of this option is dependent on the country.
If the data package option is not available or can be upgraded, you can purchase data volume directly from the mobile phone network provider for a fee. The availability of this option is dependent on the country.
Visit a Mercedes-Benz service centre to find out whether it is possible to purchase data volume in your country directly from a mobile phone network provider.
Alternatively, and if available, you can utilise the tethering function of a mobile phone via Wi-Fi or Bluetooth® to use the web browser or Wi-Fi hotspot.
With external Wi-Fi hotspots, which are encrypted via TKIP, online software updates cannot be carried out via the external Wi-Fi hotspot.
MEMUTUSKAN KONEKSI INTERNET OTOMATIS MELALUI MODUL KOMUNIKASI
Persyaratan:
• Wi-Fi or Bluetooth ® tethering are available in the vehicle.
Sistem multimedia:


Select the ⋯ settings in the line of Data package.
To disconnect the automatic connection: select the Delete entry option.

G-Class - Owner's Manual
MBUX multimedia system Online and Internet functions
The communication module is removed from the list of known hotspots, but can be reconnected manually at any time ( → page 565).
The Delete entry option permits the use of purchased data volume to be limited. The system is prevented from automatically establishing a connection to the communication module after this option has been activated.
MENYIAPKAN KONEKSI INTERNET MELALUI WLAN
Persyaratan:
• The Wi-Fi function is activated on the multimedia system ( → page 470).
- The Wi-Fi hotspot function is activated on the mobile phone (see the manufacturer's operating instructions).
- Internet access via Wi-Fi is activated (see the manufacturer's operating instructions).
Multimedia system:

① This function is country-dependent.
Telepon seluler terdaftar di pengelola perangkat Internet
Select the mobile phone with the Wi-Fi symbol.
The mobile phone is not listed in the Internet device manager
▶ Select Search for access.
Select the mobile phone with the Wi-Fi symbol. It may take a few seconds until the device is found by the Wi-Fi search.
Log in to the Wi-Fi network ( → page 470).
KONEKSI INTERNET MELALUI WI-FI DIBATASI ATAU TIDAK BERFUNGSI DALAM KASUS BERIKUT:
• The mobile phone is switched off.
• Mobile data use is deactivated on the mobile phone.
• The Wi-Fi function is deactivated on the multimedia system.
• The Wi-Fi function is deactivated on the mobile phone.
• Internet access via Wi-Fi is deactivated on the mobile phone.
MENYIAPKAN KONEKSI INTERNET MELALUI BLUETOOTH*
Persyaratan:
- The mobile phone supports the Bluetooth® profile PAN (Personal Area Network).
- The mobile phone is connected to the multimedia system via Bluetooth ® (→ page 528).
- Internet access via Bluetooth ® is activated (see the manufacturer's operating instructions).
Multimedia system:

① This function is country-dependent.
The mobile phone is listed in the Internet device manager

G-Class - Owner's Manual
MBUX multimedia system Online and Internet functions
Select the mobile phone with the Bluetooth® symbol.
Telepon seluler tidak terdaftar di pengelola perangkat Internet
▶ Select Search for access.
In the list displayed, all mobile phones already known to the multimedia system are shown. New devices can be set up using the phone application.
Connect the mobile phone using Bluetooth * ( → page 528).
If a new mobile phone is connected using Bluetooth * , this is also used for the telephone application.
KONEKSI INTERNET MELALUI BLUETOOTH ® DIBATASI ATAU TIDAK BERFUNGSI DALAM KASUS BERIKUT:
• The mobile phone is switched off.
• The mobile phone network coverage is insufficient.
• Mobile data use is deactivated on the mobile phone.
- The Bluetooth function on the multimedia system is switched off and the mobile phone is to be connected via Bluetooth .
- The Bluetooth function is switched off on the mobile phone and the mobile phone is to be connected via Bluetooth .
- Neither the mobile phone network nor the mobile phone allow simultaneous use of a telephone and an Internet connection.
- The mobile phone has not been enabled for Internet access via Bluetooth 4 .
MEMBATALKAN IZIN AKSES INTERNET UNTUK TELEPON SELULER
Multimedia system:
Settings ▶ System ▶ Internet and Bluetooth
Manage Internet access
Select options ⋯ next to the name of the mobile phone.
▶ Select Delete configuration.
Select Yes.
MEMBUAT KONEKSI INTERNET
Multimedia system:
→ Apps
For example, select Browser.
If you select a function that requires an Internet connection and the system is currently offline, a menu opens with a selection of possible Internet accesses as well as all tethering devices that are within range.
▶ Select an Internet access from the list. The Internet connection is established.
The list of possible Internet connections can also be displayed using the extended status line.
Depending on the vehicle equipment and country availability, you can establish an Internet connection via the communication module or connected mobile phones.

G-Class - Owner's Manual
MBUX multimedia system Online and Internet functions
The availability of the web browser depends on the country.
Status koneksi
IKHTISAR STATUS KONEKSI
TERGANTUNG PADA STATUS KONEKSI, SIMBOL BERIKUT DAPAT MUNCUL DI LAYAR MEDIA PADA GARIS STATUS:
• Wi-Fi device is selected as Internet access.
• ⚙: a Bluetooth * device is selected as Internet access.
- Mobile communications standard (e.g. 4G + double arrow symbol): the communication module is selected as the hotspot.
MENAMPILKAN STATUS KONEKSI
Multimedia system:

▶ Briefly press the status line.
The extended status line is displayed.
Briefly press the Internet symbol in the symbol overview. The current connection status is displayed.
CATATAN TENTANG MENAMPILKAN STATUS KONEKSI
- When connecting via Wi-Fi, the connection status and device name are displayed.
- When connecting via a Bluetooth device, the connection status, device name, and network type are displayed.
- In the case of a connection via the communication module the following status information can be shown:
Type of network

Status (online, offline, data volumes available or used, limited service)
\- For vehicles with a communication module, the connection data of Digital Extras for which the user does not have to pay can be displayed under Digital Extras.
Peramban web
MEMBUKA HALAMAN WEB
PERINGATAN
Risk of distraction from information systems and communications equipment
If you operate information systems and communication devices integrated in the vehicle when driving, you could be distracted from the traffic situation. This could also cause you to lose control of the vehicle.
▶ Only operate this equipment when the traffic situation permits.
If you cannot be sure of this, stop the vehicle whilst paying attention to road and traffic conditions and operate the equipment with the vehicle stationary.
You must observe the legal requirements for the country in which you are currently driving when operating the multimedia system.
Multimedia system:

MEMBUKA HALAMAN WEB BARU
Select Search.

G-Class - Owner's Manual
MBUX multimedia system Online and Internet functions
Entering a web address.
Select OK.
The function is country-dependent.
No web pages can be displayed on the multimedia system while driving.
MEMBUKA SITUS WEB DARI RIWAYAT PERAMBAN
To call up the previous page from the history: select
IKHTISAR PERAMBAN WEB

① Previous website
2 Next website
3 Update
4 URL
5 Adds/removes bookmarks
6 Options
7 Settings
i UNDER ⋯ ANDA MEMILIKI OPSI BERIKUT:
- Tabs
- Bookmarks & history
- Reading mode
Share link
- Share content
- Request mobile website
MEMBUKA OPSI PERAMBAN WEB
Multimedia system:

FUNGSI BERIKUT TERSEDIA:
Bookmarks
- Browsing history
Entered URLs
Select an option.
Change the settings.
MEMBUKA PENGATURAN PERAMBAN WEB
Multimedia system:

FUNGSI BERIKUT TERSEDIA:
- Block popups
- Enable cookies
- Enable Javascript


G-Class - Owner's Manual
MBUX multimedia system Online and Internet functions
▶ Switch a function on ☐ or off ☐.
MENGHAPUS DATA PERAMBAN
Multimedia system:

THE FOLLOWING SPECIFIC BROWSER DATA CAN BE DELETED:
- Cache
- Cookies
Form data
▶ Select one of the options shown.
MENGELOLA MARKAH
Multimedia system:

▶ Select Bookmarks & history.
Select ▪ after the bookmark.
A menu with options opens.
OPSI BERIKUT TERSEDIA:
- Delete entry
- Delete all
Edit
Share
▶ Select one of the options shown.
MENGELOLA TAB
Multimedia system:

MEMBUKA TAB BARU
▶ Select New tab.
MENGUBAH TAB
▶ Select the icon for the desired tab.
MENUTUP TAB
Press and hold the icon of the tab to be closed until a menu appears.
Select Close.
The tab is closed.
MODE PRIBADI
Switch private mode on ☐ or off ☐.
If the private mode is switched on, an icon appears in the input line of the web browser.
In private mode, neither the history nor cookies are saved. Bookmarks can also be created in private mode.
BERBAGI URL DARI PERAMBA WEB
Persyaratan:
\- To share via QR code: an app for scanning the QR code is installed on the mobile device.

G-Class - Owner's Manual
MBUX multimedia system Online and Internet functions
Multimedia system:

BERBAGI URL MELALUI KODE QR
Select Share link.
A QR code appears.
▶ Scan the displayed QR code with a mobile device.
BERBAGI URL DENGAN LAYAR LAIN
Select Share content.
In the menu drag and drop a display to another display.
The displayed web page opens on the other display.
MENGATUR PERAMBA WEB DI LATAR BELAKANG
Multimedia system:

Press.
Audio playback continues.
TuneIn Radio
MEMANGGIL TUNEIN RADIO
Persyaratan:
• There is a user account at https://www.mercedes.me.
• The vehicle is linked to the Mercedes me user account.
• The TuneIn radio service is activated.
• The data volume is available.
Depending on the country, data volume may need to be purchased.

• A fast Internet connection for data transmission free of interference.
The functions and services are country-dependent. For more information, consult a Mercedes-Benz service centre.
Multimedia system:

Select TuneIn Radio.
The TuneIn Radio menu appears. The last station set starts playing.
The connection quality depends on the local mobile phone reception.
TINJAUAN TUNEIN RADIO

Internet Radio provider
Additional information on the currently selected station
3 Previous or next station


G-Class - Owner's Manual
MBUX multimedia system Online and Internet functions
4 Settings
Additional options
6 Favourites
7 Controls playback
Station list
Search
MEMILIH DAN MENGHUBUNGKAN KE STASIUN TUNEIN RADIO
Multimedia system:
Radio ▶▶▶ Tuneln Radio
Select □
Select a category.
Select a station.
The connection is established automatically.
or
▶ Select the search field.
Enter a station name.
A relatively large volume of data can be transmitted when using Internet Radio.
MENYIMPAN/MENGHAPUS STASIUN TUNEIN RADIO SEBAGAI FAVORIT
Multimedia system:
Radio ▶ Tuneln Radio
MENYIMPAN FAVORIT
Select a station.
Press the symbol next to the station name.

MENGHAPUS FAVORIT
Select a station.
Press the symbol next to the station name.
MENGATUR OPSI RADIO INTERNET
Multimedia system:
Radio Tuneln Radio
OPSI BERIKUT TERSEDIA:
• Select Stream: select the stream quality
- Login to TuneIn Account: log in to your TuneIn user account
• Log Out of Account: log out of your TuneIn user account
Select an option.


G-Class - Owner's Manual
MBUX multimedia system Media
Media
Informasi tentang mode media
INFORMASI TENTANG FORMAT YANG DIDUKUNG DAN MEDIA PENYIMPANAN DATA

PERINGATAN
Risk of distraction when handling data storage media
If you handle a data storage medium while driving, your attention is diverted from the traffic conditions. This could also cause you to lose control of the vehicle.
▶ Only handle a data storage medium when the vehicle is stationary.
i PERHATIKAN CATATAN BERIKUT:
- The multimedia system supports a total of up to 50,000 files.
• Data storage media up to 2 TB are supported (32-bit address space).
- Due to the large variety of available music and video files regarding encoders, sampling frequency and data transfer rates, playback cannot be guaranteed.
• Due to the wide range of USB devices available on the market, playback cannot be guaranteed for all USB devices.
• Videos up to FullHD (1920x1080) are supported.
• Copy-protected music and video files or DRM (Digital Rights Management) encrypted files cannot be played back.
• MP3 players must support Media Transfer Protocol (MTP).
- Files with the corresponding format can be played back from the USB device in Dolby Atmos.
INFORMASI TENTANG PERLINDUNGAN HAK CIPTA DAN MEREK DAGANG
Audio files which you create yourself (e.g. copies of data storage media you make yourself) are generally subject to copyright protection. In many countries, reproductions are not permitted without the prior consent of the copyright holder, even for private use. Make sure that you know about the applicable copyright regulations and that you comply with these.
Dolby
ATMOS
Manufactured under licence from Dolby Laboratories. Dolby and the double-D symbol are registered trademarks of Dolby Laboratories Licensing Corporation. Confidential unpublished works. Copyright 2020-2022 Dolby Laboratories. All Rights Reserved.


G-Class - Owner's Manual
MBUX multimedia system Media

Manufactured under licence from Dolby Laboratories. Dolby, Dolby Audio and the double-D symbol are trademarks of Dolby Laboratories.


LISTEN
For DTS Patents, see https://patents.dts.com. Manufactured under licence from DTS Licensing Limited. DTS, the Symbol, & DTS and the Symbol together are registered trademarks, and DTS TruVolume is a trademark of DTS, Inc 8 . DTS, Inc. All Rights Reserved.


DTS ® Connected Radio ™
For DTS Patents, see http://patents.dts.com. Manufactured under licence from DTS Licensing Limited. DTS, DTS Connected Radio, and the DTS logo are registered trademarks or trademarks of DTS, Inc. in the United States and other countries. ® 2020 DTS, Inc. ALL RIGHTS RESERVED. Lyrics licensed and provided by Lyric Find ™ . Content licensed and sourced from Radioplayer ™ .

gracenote.
A NIELSEN COMPANY
Gracenote, the Gracenote logo and logotype, "Powered by Gracenote", MusicID and Playlist Plus are either registered trademarks or trademarks of Gracenote, Inc. in the United States and/or other countries.
This product incorporates Spotify software which is subject to 3rd party licences found here: https://www.spotify.com/connect/third-party-licenses

G-Class - Owner's Manual
MBUX multimedia system Media


TIDAL
TIDAL and TIDAL logo are registered trademark of Aspiro AB in the European Union and other countries.
Overview of the media menu

① Album cover
Active media source
Track and artist
Active data storage medium and current track number/track in playback list
5 Repeat
6 Random playback
7 Settings
8 Additional options
Additional categories
10 Playlists and categories
Timeline
Media search
13 Next track or fast forward
Controls playback
15 Previous track or fast rewind
Menghubungkan media penyimpanan data ke sistem multimedia
MENGHUBUNGKAN PERANGKAT USB

CATATAN
Damage caused by high temperatures
High temperatures can damage USB devices.
Remove the USB device after use and take it out of the vehicle.


G-Class - Owner's Manual
MBUX multimedia system Media

The multimedia connection unit is found in the centre console storage compartment and has two type C USB ports. Depending on the vehicle equipment, there are further USB ports in the stowage compartment under the armrest.
The charging power of the USB ports is at least 5 V (3 A) and, depending on the vehicle equipment, a maximum of 20 V (5 A).
Connect the USB device to the USB port.
MENCARI DAN MENGIZINKAN PERANGKAT AUDIO BLUETOOTH
Persyaratan:
- Bluetooth® is activated on the multimedia system and audio device.
- The audio device supports the Bluetooth* audio profiles A2DP and AVRCP.
• The audio device is "visible" for other devices.
Multimedia system:

MENGIZINKAN PERANGKAT AUDIO BLUETOOTH® BARU
▶ Select Connect device.
Detected equipment is displayed in the device list.
▶ Select an audio device.
Authorisation starts. A code is displayed on the multimedia system and on the mobile phone.
If the codes are identical, confirm on the audio device.
Select No, only music.
The Bluetooth ® audio device is connected with the multimedia system.
MENGHUBUNGKAN PERANGKAT AUDIO BLUETOOTH YANG SEBELUMNYA TELAH DIIZINKAN
Select a Bluetooth ® audio device from the list.
The connection is being established.
Memulai pemutaran media
Persyaratan:
• A data storage medium is connected to the multimedia system.
Multimedia system:

Select a media source.

G-Class - Owner's Manual
MBUX multimedia system Media
Mengontrol pemutaran media
Multimedia system:

To pause playback: select 📄.
To continue playback: select ▶.
To repeat a track: select □.
FOR THE REPEAT FUNCTION THERE ARE THE FOLLOWING SETTINGS:
• Select once: the active playlist is repeated.
- Select twice: the current track is repeated.
- Select three times: the repeat function is deactivated.
To play back tracks in random order: select ✗.
To rewind or fast-forward a track: tap on the desired point on the timeline.
To select the next track: select ▶.
To select the previous track: select ◀.
To scroll through tracks quickly: press and hold ▶ or ▷.
To show the current track list: select ≡.
Opsi tambahan untuk mengatur pemutaran media
Multimedia system:

MEMANGGIL OPSI TAMBAHAN
Select
The additional options are shown.
Select an option.
Pencarian media
CATATAN TENTANG FUNGSI PENCARIAN DALAM KATEGORI
Under [≡] you can search through all available media files. There are several categories available for selection. The categories shown depend on the connected device and data format.
The categories are available as soon as the entire media content has been read in and analysed.
Availability of the media search with Android devices may be limited.
MEMULAI PENCARIAN DALAM KATEGORI
Multimedia system:

Select a category.

G-Class - Owner's Manual
MBUX multimedia system Media
MENGGUNAKAN PENCARIAN KATA KUNCI
Multimedia system:

You can look for content using the keyword search with free text input.
Select
A keyboard for character entry appears.
Enter the term searched for.
The search begins with the first character entered. The more characters entered the more concrete the search results become.
Select the desired entry from the result list.
If a list with several tracks is selected, then this is opened in the search. To playback all of the tracks in the list, select ⋯ and then Play now.
Musik online
PERSYARATAN
• There is an account for the music streaming service.
• A subscription for the music streaming service has been obtained.
• The data volume is available.
Depending on the country, data volume may need to be purchased.
• A fast Internet connection for data transmission free of interference.
The functions and services are country-dependent. For more information, consult a Mercedes-Benz Service Centre.
Multimedia system:

MENAMBAHKAN PENYEDIA STREAMING PERTAMA KALI ANDA MEMULAI APLIKASI
Select Online music.
The overview of all supported streaming providers appears.
▶ Select a streaming provider.
A QR code is shown on the display.
▶ Scan the QR code with the mobile phone.
▶ Confirm the connection request on the mobile phone.
MENAMBAHKAN LEBIH BANYAK PENYEDIA STREAMING
Select Online music.
The last active streaming provider is active.
Select
Select Music services.
The overview of all supported streaming providers appears.
Select a streaming provider.
A QR code is shown on the display.
▶ Scan the QR code with the mobile phone.
▶ Confirm the connection request on the mobile phone.
KELUAR DARI PENYEDIA STREAMING
Select Online music.
The last active streaming provider is active.


G-Class - Owner's Manual
MBUX multimedia system Media
Select ☐.
▶ Select Music services.
The overview of all supported streaming providers appears.
Tap on Log out.
MEMANGGIL MUSIK SECARA ONLINE
Multimedia system:

Select Online music.
Music playback can be controlled with the Touch Control or by using the media application.
MENCARI MUSIK DI MUSIK ONLINE
Multimedia system:

MENCARI KATEGORI DI MUSIK ONLINE
The media content of the streaming provider can be scanned through in the category search. The available categories and the symbol for the category search depend on the streaming provider.
▶ Start the category search.
The list of available categories appears.
Select a category.
PENCARIAN KATA KUNCI DI MUSIK ONLINE
You can look for content using the keyword search with free text input.
Select □.
A keyboard for character entry appears.
Enter the term searched for.
The more characters entered when using the keyword search, the more concrete the search results are.
▶ Select the desired entry from the result list.
Depending on the selected hit, playback is started or a lower level in the search is opened.
MEMANGGIL PENGATURAN MUSIK ONLINE
Multimedia system:

Select ☐.
Select Music services.
Select ☐ next to a streaming provider.
Select a setting.
INFORMASI TENTANG DOLBY ATMOS*
The MBUX multimedia system enables playback of Dolby Atmos ® content via the Burmester ® sound system, thereby providing an even more immersive three-dimensional sound experience.
The function is available with Amazon Music ® or Apple Music ® or by using a USB device with the corresponding file formats.
Availability of this function depends on the respective equipment.


G-Class - Owner's Manual
MBUX multimedia system Media
MENGAKTIFKAN ATAU MENONAKTIFKAN DOLBY ATMOS*
Persyaratan:
- An account for the Amazon Music ® or Apple Music ® music streaming service is available.
- A subscription to the Amazon Music ® or Apple Music ® music streaming service has been obtained.
• Sufficient data volume is available.
Depending on the country, data volume may need to be purchased.
• A fast Internet connection for data transmission free of interference.
The functions and services are country-dependent. For more information, consult a Mercedes-Benz Service Centre.
Multimedia system:
Media
▶ Select Online music.
The overview of all supported streaming providers appears.
Select Amazon Music ® or Apple Music ® .
Select ☐.
Tap to switch on Dolby Atmos ® .
or
Tap to switch off Dolby Atmos ® .
Tracks which are present or available in Dolby Atmos ® will be played accordingly in this format by the sound system.

MBUX SOUND DRIVE
INFORMASI TENTANG MBUX SOUND DRIVE
MBUX SOUND DRIVE allows you to experience your favourite song in a new interactive way. You can use various driving conditions to influence elements, e.g. instruments or voices in real time, and recreate them while driving. Different elements of your favourite song are thus built up and broken down again through the experience of different driving situations.
KONDISI BERKENDARA BERIKUT MEMUNGKINKAN ANDA MENJADI BAGIAN DARI MUSIK (CONTOH):
- Accelerate
- Brake
Steer
LAGU FAVORIT ANDA DAPAT DIPERLUAS DENGAN LAPISAN BERIKUT (CONTOH):
Bass
Melody
• Certain instruments
i Availability of this function depends on the respective equipment.
MENGOPERASIKAN MBUX SOUND DRIVE
Persyaratan:
• You have a Mercedes me ID.
• The vehicle is linked to the Mercedes me ID.


G-Class - Owner's Manual
MBUX multimedia system Media
• The Digital Extra is available and has been activated.
• There is an Internet connection.
• The track is available.
Multimedia system:
Media Sound Drive
MENGONTROL PEMUTARAN
Tap on ▶ to start playback.
Playback starts.
or
Tap on ■ to stop playback.
Playback stops.
MENGAKTIFKAN ATAU MENONAKTIFKAN PEMUTARAN ACAK
Tap on [✗] to switch on random playback.
Random playback starts.
or
Tap again on ✗ to switch off random playback.
Random playback stops.
MEMBUKA PENGATURAN
Tap on 📞 to access the settings.
Select a setting.
MEMBUKA DAFTAR PUTAR
Tap on 📊 to search the available content.
Select a track.
MENCARI LAGU
Tap on 🔒 to search for a track.
G-Class - Owner's Manual
MBUX multimedia system Radio

Radio
Menyalakan radio
Multimedia system:

Start the application on the multimedia system home screen.
The radio menu appears. You will hear the last station played on the last frequency band selected.
Ikhtisar radio

1 Preview image
2 Active frequency band
3 Station name, set frequency and additional information on the station
Previous or next station
5 Settings
Sound settings
7 Switches on traffic reports
8 Station list
Search
Mengatur pita frekuensi
Multimedia system:

Select a frequency band or a favourite in the selection above the preview image.
Memilih stasiun radio
Multimedia system:

Swipe to the left or right on the control element or select a radio station.


G-Class - Owner's Manual
MBUX multimedia system Radio
Membuka daftar stasiun radio
Multimedia system:

Select :≡.
The station list appears.
Swipe the station list up or down.
▶ Select a station.
Mencari stasiun radio menggunakan nama stasiun atau entri frekuensi
Multimedia system:

Select ⭕.
Enter a station name or frequency.
Select a station.
Memilih stasiun radio yang direkomendasikan
Persyaratan:
\- The multimedia system has gathered sufficient data in order to show station suggestions.
Multimedia system:

Select ☐.
The recommended stations are shown.
▶ Select a suggested station.
The selected station is played.
Menyimpan stasiun radio
Multimedia system:

▶ Select a radio station.
Select ☆.
Mengelola favorit
Multimedia system:

MEMINDAHKAN STASIUN
Press :≡★.
The list of favourites appears.
Press ⋯ to the far right of the station name.
Select Move.
▶ Move the station to the new position.
- Press [≡★].
The list of favourites appears.
- Press ⋯ to the far right of the station name.
- Select Move.
- Move the station to the new position.


G-Class - Owner's Manual
MBUX multimedia system Radio
Mengatur pelacakan stasiun melalui radio internet
Persyaratan:
• A fast Internet connection for data transmission free of interference.
Multimedia system:

Select Internet radio.
▶ Activate or deactivate the Service Following function.
When the function is on, the station is searched for via Internet Radio. If you are driving out of the station's coverage area and the station is available via Internet radio, the Poor reception. Tap here to switch to Internet radio. message appears on the central display.
Memanggil tayangan slide (mode radio FM/DAB)
Multimedia system:

The slide show displays additional information provided by the station as an image. This can include logos, album covers, music tracks, programmes, news or service information, for example.
The slide show is available for DAB+ channels that broadcast additional information.
Press the station picture on the central display. The image is enlarged.
Mengaktifkan/menonaktifkan tayangan slide (mode radio FM/DAB)
Multimedia system:

Switch DAB Slideshow or Expanded Radio Slideshow on ☐ or off ☐. When both slideshows are switched on, the contents of both slideshows alternate.
Mengaktifkan/menonaktifkan fungsi fiksasi frekuensi
Multimedia system:

▶ Activate or deactivate Frequency fix.
If the function is activated, the set frequency is kept even if the reception is poor.

G-Class - Owner's Manual
MBUX multimedia system Radio

Mengaktifkan/menonaktifkan pengumuman lalu lintas
Multimedia system:

▶ Select Radio announcements.
The traffic information service is switched on or off.
Mengaktifkan/menonaktifkan pengumuman radio
Multimedia system:

▶ Switch on Radio announcements.
The selected radio announcements are played.
When Radio announcements are first switched on, Traffic information service (TA), Travel and Warning are preset.
or
▶ Switch off Radio announcements.
No radio announcements are played.
Memilih pengumuman radio
Multimedia system:

▶ Switch an announcement on or off.
For example, Traffic information service (TA), Travel or Warning can be selected.
The radio announcements are not station-dependent.
Mengatur peningkatan volume informasi lalu lintas
Multimedia system:

▶ Select Navigation & traffic announcements.
▶ Set a value for Traffic announce. vol. increase.
Increasing the volume of the traffic information service increases the volume of traffic announcements.
Menampilkan teks radio
Multimedia system:

▶ Activate or deactivate Radio text information.

G-Class - Owner's Manual
MBUX multimedia system Sound

Suara
Sistem suara surround Burmester®
INFORMASI TENTANG SISTEM SUARA SURROUND 3D BURMESTER®
The Burmester® 3D surround sound system is equipped with 18 loudspeakers. It is available for all functions in the radio and media modes.
The call can also be made from other audio sources. Replace Media with, for example, Radio in the menu path.
MEMANGGIL MENU SUARA PADA SISTEM SUARA SURROUND BURMESTER®
Multimedia system:

Select one of the functions shown to make settings.
MENYESUAIKAN PENGATURAN TREBLE, MID, DAN BASS PADA SISTEM SUARA SURROUND BURMESTER
Multimedia system:

Set Treble, Mid or Bass.
MENGAKTIFKAN ATAU MENONAKTIFKAN NORMALISASI KEKERASAN SUARA PADA SISTEM SUARA SURROUND BURMESTER®
Multimedia system:

The function compensates for differing loudness when changing between audio sources and within an audio source. Several levels are available for this purpose. The currently set level is displayed.
Loudness normalisation can also be switched off.
Switch on one level.
or
▶ Switch off loudness normalisation.
MENYESUAIKAN BALANCE DAN FADER PADA SISTEM SUARA SURROUND BURMESTER®
Multimedia system:

MENGATUR BALANCE DAN FADER
Move the volume distribution between the right and left side of the vehicle and the front and rear of the vehicle in the grid shown. The volume is distributed between the left and right and front and rear loudspeakers in the vehicle.

G-Class - Owner's Manual
MBUX multimedia system Sound
MEMILIH PROFIL SUARA PADA SISTEM SUARA SURROUND BURMESTER®
Multimedia system:

MENGATUR PROFIL SUARA YANG SUDAH ADA
▶ Select a sound profile.
MEMBUAT PROFIL SUARA PRIBADI
Select Personal sound profile and 📄.
Select Reconfigure.
▶ Restart the set-up assistant.
MEMBUAT PROFIL SUARA PRIBADI UNTUK PERTAMA KALI:
▶ Select Personal sound profile.
▶ Open the set-up assistant with Start.
Observe the messages on the display and select the preferred settings. The personal sound profile is created with the selected settings and can be selected in the Sound profiles menu.
MENGUBAH PENGATURAN INDIVIDU PROFIL SUARA PRIBADI DI KEMUDIAN HARI:
Select Personal sound profile and [icon].
Adjust the desired settings.
The availability of a Personal sound profile is dependent on the equipment.
The set-up assistant is available when the vehicle is stationary.

MENYESUAIKAN FOKUS SUARA PADA SISTEM SUARA SURROUND BURMESTER®
Multimedia system:

Select a seat row for sound focus. Sound focus is activated.
or
▶ Select the row of seats again. Sound focus is deactivated.


G-Class - Owner's Manual
MBUX multimedia system MBUX high-end rear seat entertainment system

Sistem hiburan kursi belakang MBUX high-end
Keselamatan pengoperasian

PERINGATAN
Risk of injury from unsecured items in the vehicle
If objects such as headphones/headsets or external audio/video sources are not secured in the vehicle interior, they can be flung around and hit vehicle occupants.
Always stow these items or similar objects carefully so that they cannot be flung around, for example in a lockable vehicle stowage compartment.
Observe the notes on loading the vehicle.
① Ventilation must not be impeded by covering the ventilation openings with items (such as newspaper, table-cloths, clothes, curtains, etc).
① No naked flame sources (such as lighted candles), shall be placed on apparatus.
Ikhtisar Sistem Hiburan Kursi Belakang Kelas Atas

SISTEM HIBURAN KURSI BELAKANG KELAS ATAS TERDIRI ATAS:
• Two rear displays ① behind the head restraints of the front seats
• A connection jack each for wired headphones
• Two USB ports for charging USB devices ( → page 233)
• Two ports for HDMI mini
TERGANTUNG PADA PERLENGKAPAN, ANDA DAPAT MENGOPERASIKAN SISTEM HIBURAN KURSI BELAKANG KELAS ATAS:
- On the rear displays
• Via the MBUX Voice Assistant


G-Class - Owner's Manual
MBUX multimedia system MBUX high-end rear seat entertainment system
Layar belakang
IKHTISAR LAYAR BELAKANG

Port for corded headphones with 4 pin stereo jack (headset with microphone) or 3 pin stereo jack, 3.5 mm stereo
The rear displays are located behind the head restraints of the front seats.
The rear displays are equipped with capacitive touchscreens.
Further information on operating touchscreens ( → page 454).
When the rear door is closed, the welcome screen appears.
Nearly all MBUX multimedia system functions are also supported on the Rear Seat Entertainment System. Settings for the driver or for driver assistance systems as well as some system settings are however not possible. External user interfaces, e.g. Apple CarPlay ® and Android Auto cannot be used on the rear displays. Contents of the Digital Owner's Manual can only be called up on the MBUX multimedia system.
MENGHIDUPKAN ATAU MEMATIKAN LAYAR BELAKANG
▶ Touch the Ⓞ button on the rear display.
The rear display is switched on or off.
MEMILIH ATAU MENAMBAH PENGGUNA
If the vehicle is linked with your Mercedes me user account, select a user.
A set-up assistant guides you through the most important settings during first use.
or
▶ Add a user (→ page 458).
If you select Continue without selecting user, no specific settings for the user profile are loaded.
The use of user profiles is seat-specific.
INFORMASI LEBIH LANJUT TENTANG PROFIL PENGGUNA
• Overview of user profiles ( → page 457)
• Selecting user options ( → page 458)
• Synchronising user profiles ( → page 460)
① No biometric data can be stored at the rear seats.

G-Class - Owner's Manual
MBUX multimedia system MBUX high-end rear seat entertainment system

HOME SCREEN OVERVIEW (REAR DISPLAY)

Example: home screen on the right rear display
① Calls up user profile settings and switches user
2 Uses the global search
3 Calls up the Control Centre (pull down)
- Calls up Favourites
- Shares display content
- Calls up the Notifications Centre
4 Calls up favourites
⑤ Displays for status line, e.g. connection status, time, □ poor radio or TV reception
6 Adjusts climate control, for example on the right-hand rear display
7 Automatic air cleaning and fine particle status display (PM2.5 sensor)
Starts the MBUX Voice Assistant
9 Calls up the home screen
10 Calls up application, including quick-access
Calls up the device manager
Display connection status for headphones, e.g. 📄 for connected Bluetooth® headphones
12 Selects playback via vehicle speakers
13 Press briefly: adjusts volume for headphones (if connected) or for vehicle speakers
Press and hold: switches off sound for headphones (if connected) or for vehicle speakers
The arrangement of buttons ⑥, ⑦ and ⑧ as well as ⑪, ⑫ and ⑬ in the lower menu bar depends on the seat.
Headphone
IKHTISAR HEADPHONE (SISTEM HIBURAN KURSI BELAKANG)
WARNING Health hazard due to excessive volume on headphones
Excessive volume can damage your hearing.
Avoid wearing headphones for long periods of time and at too high a volume (85 decibels).
▶ Ensure that the volume is set to a comfortable level.
HEADPHONE EKSTERNAL BERIKUT DAPAT DIHUBUNGKAN KE SETIAP LAYAR BELAKANG:
- Bluetooth ® headphones
• A headset with microphone via a 4-pin stereo jack
• Corded headphones via a 3-pin stereo jack, 3.5 mm

G-Class - Owner's Manual
MBUX multimedia system MBUX high-end rear seat entertainment system
The headphones are special equipment for the Rear Seat Entertainment System.
You can also obtain the headphones from Mercedes-Benz Customer Solutions or in a specialist shop (see the manufacturer's operating instructions).
The function of wireless headphones can be impaired by other radio-based electronic devices, such as mobile phones, for example.
MENGHUBUNGKAN HEADPHONE BLUETOOTH* DENGAN SISTEM HIBURAN KURSI BELAKANG
Persyaratan:
\- Bluetooth ® is switched on in the multimedia system (→ page 469).
On the headphones: press and hold the ⏻ button on the MB headphones.
The headphones are switched on and the battery charge level is announced.
Pairing mode is activated.
If different headphones are used, the power button may be displayed differently.
If the Bluetooth® headphones are connected to several vehicles or devices, reconnecting may take a longer time. In this case,
you can reset the headphones and then reconnect them (see the manufacturer's Owner's Manual).
On the rear display: select the 📊 headphones symbol in the lower menu bar.
▶ Select Connect new device.
▶ Select MB Headphones in the device list.
The connection is established. When the connection is established, the headphones will announce "Bluetooth" connected" and "MBUX rear seat".
In the lower menu bar, the * headphone symbol is shown on the left or right rear display.
When connecting headphones, corded headphones have priority over Bluetooth® headphones.
Kursi belakang
MENYESUAIKAN KURSI BELAKANG PADA SISTEM HIBURAN KURSI BELAKANG
Rear Seat Entertainment System:

MENGATUR PEMANAS KURSI
Select Seat climate control.
Select Seat heating.


G-Class - Owner's Manual
MBUX multimedia system MBUX high-end rear seat entertainment system
Press the seat symbol repeatedly until the desired heating level is set. Depending on the heating level, up to three indicator lamps will light up. If all indicator lamps are off, the seat heating is switched off.
MENGATUR KESEIMBANGAN PEMANAS KURSI
▶ Select Seat climate control.
▶ Select Seat heating balance.
Adjust the heat distribution for the desired seat.
Menyesuaikan kontrol iklim belakang pada Sistem Hiburan Kursi Belakang
MENGATUR ALIRAN UDARA
▶ Select the temperature indicator at the lower edge of the rear display.
Set the airflow with 📄 or ⚙ on the left or right seat.
MENGATUR SUHU
Select the temperature indicator at the lower edge of the rear display.
Set the temperature with ▲ or ▼ on the left or right seat.
MENONAKTIFKAN KONTROL IKLIM BELAKANG
Set 0 on the left or right seat using Blower down.
Rear climate control is deactivated.
JIKA TERSEDIA, FUNGSI KONTROL IKLIM LAINNYA DAPAT DIAKSES:
Air quality
• Stationary heater
MEMBUKA MENU KUALITAS UDARA
The fine particle status display informs you about the current particulate values inside and outside the vehicle. The measurement values are shown with the µg/m3 units (microgrammes per cubic metre).
Select the fine particle status display.
An animation of the automatic air cleaning taking place is shown.
To improve the quality of the air inside the vehicle: switch on Ionisation.
To switch on air-recirculation mode: select the vehicle symbol.
Menyesuaikan pencahayaan ambient di kompartemen penumpang belakang
Rear Seat Entertainment System:
Comfort Ambient light
MENGATUR WARNA
Select Colour.
▶ Select Monochrome or Multi-colour.
▶ Set the desired colour or colour scheme.
MENYESUAIKAN KECERAHAN
Select Brightness.
Adjust the brightness.
Depending on the ambient light conditions, the ambient lighting will automatically switch between day and night modes.

G-Class - Owner's Manual
MBUX multimedia system MBUX high-end rear seat entertainment system
MENGAKTIFKAN KECERAHAN UNTUK ZONA
Select Brightness.
▶ Switch off Link zones.
The Direct, Indirect and Accents zones can be set separately.
MENGAKTIFKAN EFEK

PERINGATAN
Risk of accident if ambient lighting and active ambient lighting effects are not switched on
The warning support effects are fully active only if the respective driving or driving safety systems are switched on on the driving assistance menu.
▶ Ensure that the respective driving or driving safety systems are switched on.
Select Effects.
▶ Activate the desired effect.
i Further information on effects ( → page 247)
Memilih pengaturan sistem di kompartemen penumpang belakang
Rear Seat Entertainment System:


MENYESUAIKAN KECERAHAN
Select Display.
▶ Select Display brightness.
Adjust the brightness.
MENGATUR DESAIN
Select Display.
Select Designs.
Set the design.
or
▶ Adopt the design from the media display.
MENGAKTIFKAN ATAU MENONAKTIFKAN LAYAR BERANDA
Select Display.
▶ Activate or deactivate Intelligent Homescreen.
MENGATUR PAPAN KETIK DAN TULISAN TANGAN
Select Display.
▶ Select Keyboards and handwriting.
FUNGSI-FUNGSI BERIKUT TERSEDIA:
• Selecting Keyboard languages


G-Class - Owner's Manual
MBUX multimedia system MBUX high-end rear seat entertainment system
• Activating Read out handwriting recognition
• Activating Handwriting recognition
• Selecting Writing speed
• Selecting Reset my dictionary
Further information on setting the keyboard and handwriting recognition for character entry ( → page 466)
MENYESUAIKAN VOLUME AUDIO
To use quick-access: select the loudspeaker symbol in the lower menu bar.
Adjust the volume for the headphones (if connected) or the volume of the vehicle speakers.
In the System menu: select Audio.
▶ Select a setting, for example Navigation & traffic announcements ( → page 504).
MENGHUBUNGKAN PERANGKAT DI PENGELOLA PERANGKAT
To use quick-access: select the 📄 headphones symbol in the lower menu bar.
or
In the System menu: select My devices.
▶ Select Search devices.
▶ Select a device that is to be connected.
Headphones or headsets are connected with the rear display.
Mobile phones or other devices are connected with the multimedia system.
MENGATUR SENSITIVITAS LAYAR BELAKANG
▶ Select Touch Sensitivity.
Select an option.
MENAMPILKAN INFORMASI SISTEM
▶ Select System information.
Menyiapkan Internet dan Bluetooth®
Rear Seat Entertainment System:

PENGATURAN BLUETOOTH®
▶ Activate or deactivate Bluetooth.
i Further information on Bluetooth ® ( → page 469).
MENGGUNAKAN SISTEM MULTIMEDIA SEBAGAI WI-FI HOTSPOT
The multimedia system serves as a Wi-Fi hotspot for mobile communication devices such as a smartphone or tablet PC. With the connected devices, you can use apps which interact with the multimedia system. The data volume of the vehicle or an already connected tethering device is used for the data connection.
▶ Activate Wi-Fi ( → page 470).
Select MBUX hotspot.
Select Continue.


G-Class - Owner's Manual
MBUX multimedia system MBUX high-end rear seat entertainment system
MENGHUBUNGKAN KE MBUX HOTSPOT
▶ Scan the QR code shown.
i Further information on Wi-Fi connections ( → page 469).
Further information on requirements and use of the multimedia system as a Wi-Fi hotspot ( → page 470).
MENGGUNAKAN PERANGKAT KOMUNIKASI SELULER SEBAGAI WI-FI HOTSPOT (TETHERING)
An external Wi-Fi hotspot is accessed for the Internet connection of the multimedia system. The data tariff of the mobile communication device is used for the data connection.
① This function is country-dependent.
Activate Wi-Fi.
Select Manage Internet access.
To select an Internet source: select Central display. In this way, the Internet access is used for the entire vehicle.
or
Select Rear.
This enables Internet access via a Wi-Fi hotspot.
① Acquired package can only be selected on the media display.
Select Continue.
▶ Select Search for access.
Select the network.
Log in at the Wi-Fi hotspot ( → page 470).
Select Continue.
Further information on requirements and use of a mobile communication device as a Wi-Fi hotspot ( → page 566).
Navigasi
MENGAKTIFKAN NAVIGASI DI KOMPARTEMEN PENUMPANG BELAKANG Sistem Hiburan Kursi Belakang:
Navigation
The map appears and shows the current vehicle position.
Select an option in the navigation menu ( → page 485).
In principle, you can use the multimedia system functions on the Rear Seat Entertainment System also.
PILIHAN BERIKUT TERSEDIA DI LAYAR BELAKANG, CONTOHNYA:
- Enter the destination as a POI or address, for example (→ page 44).
- Adopt the destination from the multimedia system or share with another seat.
• Set the map scale ( → page 512).


G-Class - Owner's Manual
MBUX multimedia system MBUX high-end rear seat entertainment system
• Calculate the route ( → page 492).
Route settings and route options, e.g. toll roads, are available for the route.
You can add and manage intermediate destinations for the route planning ( → page 496).
Alternative routes are available.
• Route and destination information is shown during route guidance.
\- The Live Traffic Information service shows traffic incidents, traffic flow information and warning message symbols.
This option is not available in all countries.
When starting the navigation in the rear passenger compartment for the first time, the map material of the multimedia system may still synchronise. A corresponding message appears in the navigation on the displays in the rear passenger compartment. After successful synchronisation, the navigation in the rear passenger compartment is restarted and can be used.
Menggunakan ponsel di kompartemen penumpang belakang
Persyaratan:
• A mobile phone is connected to the multimedia system ( → page 528).
Rear Seat Entertainment System:

Select Phone 1 or Phone 2.
Access to phone content is made possible on the multimedia system.
On the rear display: select Send access request.
On the media display: confirm the access request with Yes.
You can access the contacts on the mobile phone in the rear passenger compartment, for example.
Layanan dan peramban web
IKHTISAR PERAMBAN WEB (SISTEM HIBURAN KURSI BELAKANG)
Depending on the country and the vehicle equipment, a web browser can be called up on the rear display.
The Internet connection can be established using the communication module, Bluetooth ® or Wi-Fi.
UNTUK INFORMASI LEBIH LANJUT TENTANG MENYIAPKAN KONEKSI INTERNET:
• Via communication module ( → page 565)
Via Wi-Fi (→ page 566)
Via Bluetooth * (→ page 566)
MEMBUKA PERAMBAN WEB (SISTEM HIBURAN KURSI BELAKANG)
Persyaratan:
\- The vehicle is equipped with a permanently installed communication module.


G-Class - Owner's Manual
MBUX multimedia system MBUX high-end rear seat entertainment system
\- Alternatively, the Internet connection can be set up and established using Wi-Fi ( → page 566) or Bluetooth * ( → page 566).
Rear Seat Entertainment System:

▶ Call up a page.
To stop the web browser: select
FUNGSI BERIKUT TERSEDIA:
- Calling up the web browser settings (→ page 569)
• Deleting browser data ( → page 570)
• Managing bookmarks ( → page 570)
Media
INFORMASI TENTANG MODE MEDIA DI KOMPARTEMEN PENUMPANG BELAKANG
The Rear Seat Entertainment System has two HDMI mini connections for use on both rear displays. Additional information on the connections ( → page 588).
The Rear Seat Entertainment System has two USB ports for charging USB devices ( → page 233), for example Bluetooth ® headphones.
Data storage media for playing back content on the Rear Seat Entertainment System are connected via the USB ports for the multimedia system in the storage compartment in the centre console ( → page 575).
SISTEM HIBURAN KURSI BELAKANG MENDUKUNG MEDIA PENYIMPANAN DATA BERIKUT:
USB devices
- iPhone or iPod
Apple CarPlay ® is not supported in the rear.
• Devices which support the Media Transfer Protocol
• Android devices that are used as MTP devices Android Auto is not supported in the rear.
\- Bluetooth ® audio devices
Authorisation of a Bluetooth ® audio device is carried out on the multimedia system ( → page 576) or on the Rear Seat Entertainment System.
The Rear Seat Entertainment System can access the files on the multimedia system.
Further information about media mode ( → page 573).

HIGH-DEFINITION MULTIMEDIA INTERFACE
The terms HDMI and HDMI High-Definition Multimedia Interface, and the HDMI Logo are trademarks or registered trademarks of HDMI Licensing LLC in the United States and other countries.

G-Class - Owner's Manual
MBUX multimedia system MBUX high-end rear seat entertainment system
MENGAKTIFKAN MODE MEDIA DI KOMPARTEMEN PENUMPANG BELAKANG
Persyaratan:
• A data storage medium is connected to the multimedia system.
A Bluetooth® audio device is connected with the multimedia system.
Rear Seat Entertainment System:

▶ Close the media source.
Select Bluetooth, USB, HDMI 1 or HDMI 2.
A possible audio source is Online music. Further information on availability and perquisites ( → page 579).
FUNGSI-FUNGSI BERIKUT TERSEDIA:
• Controlling media playback ( → page 598)
• Using media search ( → page 578)
- Searching for media files using categories (→ page 577)
• □□ Calling up options (→ page 577)
- Calling up settings (video and sound settings)
BERBAGI SUMBER MEDIA DI DALAM KENDARAAN:
Select
Select Share.
MENGONTROL PEMUTARAN MEDIA DI SISTEM HIBURAN KURSI BELAKANG
Rear Seat Entertainment System:

To pause or continue playback: select □ or ▶.
To select the next or previous track: select ▶ or ◀.
To scroll through tracks quickly: press and hold ▶ or ▶.
To rewind or fast-forward a track: tap on the desired point on the timeline.
To play back tracks in random order: select ✗.
To repeat a track: select
FOR THE REPEAT FUNCTION THERE ARE THE FOLLOWING OPTIONS:
Tap once: the active playlist is repeated.
Tap twice: the current track is repeated.
• Tap three times: the repeat function is deactivated.
To display a full screen: select the cover.
BERALIH KE VIDEO HDMI DI SISTEM HIBURAN KURSI BELAKANG
Rear Seat Entertainment System:

Connect an HDMI device using one of the two connections for HDMI mini. When the HDMI signal is connected to the rear seat entertainment system, the media of the connected HDMI device can be played back on the rear display. An HDMI device is, for example, a notebook or a smartphone.

G-Class - Owner's Manual
MBUX multimedia system MBUX high-end rear seat entertainment system
For further information about the HDMI connections; see ( → page 597).
HDMI content cannot be controlled by touchscreen due to the technology.
Radio
BERALIH KE RADIO DI RUANG PENUMPANG BELAKANG
Rear Seat Entertainment System:
Radio
Swipe left or right on the rear display.
or
Select a channel with ◀ or ▶.
If the channel is changed on the multimedia system it changes also on the rear display. This is also done in reverse when setting the station or selecting a radio favourite on the rear displays.
BERBAGI STASIUN RADIO DI DALAM KENDARAAN:
Select ⋯.
Select Share.
FUNGSI-FUNGSI BERIKUT TERSEDIA:
- Searching for radio stations (→ page 46)
• Selecting from the station list ( → page 583)
• Storing radio stations ( → page 583)
• Setting the frequency band ( → page 582)
• Calling up a slide show (→ page 584)
- Switching settings on or off using 📄:
Frequency fix
Radio text information
Adjusting sound settings
Suara
IKHTISAR PENGATURAN SUARA DI RUANG PENUMPANG BELAKANG
The sound settings depend on which sound system is available.
TERGANTUNG PADA PERALATAN YANG TERPASANG, SALAH SATU SISTEM SUARA BERIKUT DIDUKUNG:
Sound system
- Burmester ® surround sound system (→ page 586)
• Burmester ® high-end 3D surround sound system
MEMILIH PENGATURAN SUARA DI RUANG PENUMPANG BELAKANG
Rear Seat Entertainment System:
Settings System
Select Sound.
Select the sound settings.
MENGAKTIFKAN ATAU MENONAKTIFKAN SPEAKER KENDARAAN DAN MENYESUAIKAN TINGKAT VOLUME
The audio playback can be moved from the headphones into the vehicle interior.


G-Class - Owner's Manual
MBUX multimedia system MBUX high-end rear seat entertainment system
Select
▶ Select the symbol for the vehicle loudspeaker in the lower menu bar. Playback via the vehicle loudspeakers is switched on or off.
To set the volumes: move the control knob to the left or right on one of the scales and hold it until the desired volume is set.
Menggunakan Asisten Suara MBUX
Persyaratan:
- The Voice Assistant wake-up call "Hey Mercedes" is switched on in the MBUX multimedia system settings ( → page 440).
• Online functionality offers the full range of functions.
Using the MBUX Voice Assistant you can operate the MBUX Rear Seat Entertainment System using voice input. You can use vernacular sentences for this. The voice assistant recognises different voices, learns and can thereby offer suitable suggestions.
To activate the voice assistant: say the wake-up call "Hey Mercedes".
or
Select [0] in the lower menu bar.
Say a voice command, e.g. set station.
To deactivate the Voice Assistant: select in the lower menu bar.
or
Say the voice command "Close".

You can activate and deactivate the voice assistant from different seats.
INFORMASI LEBIH LANJUT TENTANG ASISTEN SUARA:
• Conducting a dialogue ( → page 439)
- Activating online voice control on the multimedia system (→ page 440)
- Activating or deactivating the Contact upload for online recognition setting on the multimedia system ( → page 440)
• Using audible help functions ( → page 445)
• Notes on online voice control ( → page 442)

Back to Contents
G-Class - Owner's Manual
> Maintenance and care

< Perawatan dan perawatan
This interactive PDF works like a website - tap or click a button to jump straight to where you want to go. You can return here at any time via the navigation bar at the top left.
ASSYST PLUS service interval display 602
Maintenance Management 604
Telediagnostics 605
Engine compartment 606
Cleaning and care 615
G-Class - Owner's Manual
> Maintenance and care ASSYST PLUS service interval display

Tampilan interval servis ASSYST PLUS
Fungsi tampilan interval servis ASSYST PLUS
The ASSYST PLUS service interval display on the driver's display provides information on the remaining time or distance before the next service due date.
You can hide this service display using the back button ↩ on the steering wheel.
TERGANTUNG PADA CARA KENDARAAN DIGUNAKAN, TAMPILAN INTERVAL SERVIS ASSYST PLUS DAPAT MEMPERPENDEK INTERVAL SERVIS, MIS. DALAM KASUS BERIKUT:
• Mainly short-distance driving
- When the engine is often left idling for long periods
• In the event of frequent cold start phases
• Vehicles with diesel particulate filters: in the event of frequently interrupted regeneration of the diesel particulate filter
Mercedes-Benz recommends avoiding such operating conditions.
You can obtain information concerning the servicing of your vehicle from a qualified specialist workshop, e.g. a Mercedes-Benz Service Centre.
Menampilkan tanggal jatuh tempo servis
Driver display:

The next service due date is displayed.
To exit the display: press the back button ↩ on the steering wheel.
Informasi tentang pekerjaan servis rutin
CATATAN
Premature wear through failure to observe service due dates
Service work which is not carried out at the right time or incompletely can lead to increased wear and damage to the vehicle.
Observe the specified service intervals. If there are any uncertainties regarding the service due date, forexample if the battery is disconnected, operating conditions are difficult, etc., contact a qualified specialist workshop.
▶ Have the prescribed service work carried out at a qualified specialist workshop.
G-Class - Owner's Manual
> Maintenance and care ASSYST PLUS service interval display
Catatan tentang persyaratan servis khusus
The prescribed service interval is based on normal operation of the vehicle. Have the maintenance work carried out more often than prescribed if operating conditions are difficult or the vehicle is subject to increased stress.
The ASSYST PLUS service interval display is only an aid. It is the responsibility of the driver of the vehicle to have maintenance work carried out more often than prescribed due to actual operating conditions and/or stresses.
CONTOH KONDISI OPERASI YANG BERAT:
• Regular city driving with frequent intermediate stops
• Mainly short-distance driving
• Frequent operation in mountainous terrain or on poor road surfaces
- When the engine is often left idling for long periods
• Operation in particularly dusty conditions and/or if air-recirculation mode is frequently used
In these or similar operating conditions, have the interior air filter, air filter, engine oil and oil filter, for example, changed more frequently. Check the tyres more frequently if the vehicle is operated under increased stress. Further information can be obtained at a qualified specialist workshop.
Periode pemutusan baterai
The ASSYST PLUS service interval display can calculate the service due date only when the battery is connected.
▶ Display and note down the service due date on the driver display before disconnecting the battery ( → page 602).
The period with disconnected battery is not taken into account by ASSYST PLUS. Deduct the period with disconnected battery from the time indicated on the driver display.
• The calculated date serves as a new service due date.
- The service interval for distance before service due date (km) is not affected in this regard.


G-Class - Owner's Manual
> Maintenance and care Maintenance Management

Manajemen Perawatan
Catatan tentang Manajemen Perawatan
If the Maintenance Management service is activated, relevant data is automatically transferred to the Mercedes-Benz customer centre.
The customer centre transmits the data to the service partner that you have entered on the Mercedes-Benz website at: https://www.mercedes.me. You will then receive individual recommendations regarding the maintenance of your vehicle.
The calculation of the optimal transmission time of the maintenance request to the service partner is subject to technical limitations that may cause the maintenance recommendation to be perceived as too early or too late or not to be made at all. In this case, you can conveniently arrange a maintenance appointment with the customer centre via the maintenance reminder in the multimedia system.
Maintenance Management and the maintenance reminder in the multimedia system are not available in every country. Contact a Mercedes-Benz service centre to find out whether this function is available in your country.
Data yang ditransfer saat menggunakan Manajemen Perawatan
When the service is activated, relevant data is automatically transferred to determine the required scope of maintenance as well as fault detection and fault rectification.
Details on data transmission can be found in the data protection notes for Mercedes-Benz Support. These can be found at: https://www.mercedes.me under "My Account", "Privacy & Legal".
(i) Maintenance Management and the maintenance reminder in the multimedia system are not available in every country.

G-Class - Owner's Manual
> Maintenance and care Telediagnostics
Telediagnostik
Catatan tentang Telediagnosis
① This service is not available in all countries.
The vehicle can detect if certain wear parts need to be replaced or if malfunctions have occurred in vehicle systems. If the Telediagnosis service is activated, relevant data is automatically transmitted to the manufacturer. If fault conditions are detected by the vehicle system self-diagnosis, the system transmits recommendations for action to the Mercedes-Benz customer centre depending on the fault detected. The customer centre transmits the data to the service partner that you have entered on the Mercedes-Benz website at: https://www.mercedes.me.
For selected faults, the notification that a malfunction has been detected may appear in the multimedia system with a request to contact the Mercedes-Benz Customer Centre. From this message, a call can be made directly to the customer centre for assistance.
The transmission of a notification to the multimedia system depends on the country, vehicle model and equipment and requires a fast data connection, over which the service provider has no influence.
① Reliable fault detection is subject to technical limitations. Therefore, only a limited selection of faults can be detected and rec-
ommendations for action transmitted to the customer centre and the service partners. Mercedes-Benz AG is continuously working on the expansion of this service. The fault detection depends on the country, vehicle model and equipment.
Data yang dikirim saat menggunakan Telediagnosis
When the service is activated, relevant data is automatically transferred to determine the required scope of maintenance as well as fault detection and fault rectification.
Details on data transmission can be found in the data protection notes for Mercedes-Benz Support. These can be found at: https://www.mercedes.me under "My Account", "Privacy & Legal".
The scope of the transmitted data depends on the vehicle model and its equipment. For technical reasons, not all data is available at all times.
G-Class - Owner's Manual
> Maintenance and care Engine compartment
Ruang mesin
Membuka dan menutup kap mesin

PERINGATAN
Risk of accident due to driving with the bonnet unlocked
The bonnet may open and block your view.
▶ Never release the bonnet when driving.
Before every trip, ensure that the engine bonnet is locked.

PERINGATAN
Risk of accident and injury when opening and closing the bonnet
The bonnet may suddenly drop into the end position.
There is a risk of injury for anyone in the engine bonnet's range of movement.
Do not open or close the bonnet if there is a person in the bonnet's range of movement.

PERINGATAN
Risk of burns when opening the bonnet
JIKA ANDA MEMBUKA KAP MESIN SAAT MESIN MENGALAMI PANAS BERLEBIH ATAU TERJADI KEBAKARAN DI RUANG MESIN, SITUASI BERIKUT DAPAT TERJADI:
• You may come into contact with hot gases.
- You may come into contact with other escaping hot operating fluids.
Before opening the bonnet, allow the engine to cool down.
In the event of a fire in the engine compartment, keep the bonnet closed and call the fire service.


G-Class - Owner's Manual
> Maintenance and care Engine compartment

A
PERINGATAN
Risk of injury due to moving parts
Components in the engine compartment can continue to run or start unexpectedly even when the ignition is switched off.
Observe the following before performing tasks in the engine compartment:
▶ Switch off the ignition.
▶ Never touch the danger zone surrounding moving components, e.g. the rotation area of the fan.
Remove jewellery and watches.
▶ Keep items of clothing and hair away from moving parts.
A
PERINGATAN
Risk of injury from touching components under voltage
The ignition system and the fuel injection system operate at high voltage. You could receive an electric shock.
▶ Never touch ignition system or fuel injection system components when the vehicle is switched on.
KOMPONEN BERALIRAN LISTRIK MELIPUTI CONTOH BERIKUT:
Ignition coils
- Fuel injectors
• Electric lines to the ignition coils and the fuel injectors
A
PERINGATAN
Risk of burns from hot component parts in the engine compartment
Certain component parts in the engine compartment can be very hot, e.g. the engine, the cooler and parts of the exhaust system.
Allow the engine to cool down and only touch component parts described in the following.
A
PERINGATAN
Risk of injury from using the windscreen wipers when the bonnet is open
If the windscreen wipers start moving when the bonnet is open, you could be trapped by the wiper linkage.
▶ Always switch off the windscreen wipers and vehicle before opening the engine bonnet.
MEMBUKA KAP MESIN


G-Class - Owner's Manual
> Maintenance and care Engine compartment
To release the bonnet, pull on handle ①.

Push handle of the bonnet catch upwards and lift the bonnet by approximately 40 cm.
The bonnet will be opened and held open automatically by the pneumatic spring.
MENUTUP KAP MESIN
▶ Lower the bonnet until the bonnet catch engages.
Then, press the bonnet firmly into the lock with both hands until it is completely closed.
If the bonnet can still be lifted slightly, open the bonnet again and repeat the previous step until it engages correctly.
Oli mesin
MEMERIKSA LEVEL OLI MESIN MENGGUNAKAN TAMPILAN PENGEMUDI
Persyaratan
• The engine has been warmed up.
• The vehicle is parked on a level surface.
• The engine is running at idle speed.
• The bonnet is closed.
Determining the engine oil level can take up to 30 minutes with a normal driving style and even longer with an active driving style.
Before every off-road drive, fill the engine oil level up to the maximum.
Wait at least five minutes after the initial check using the on-board computer. After this, make a second request and top up the engine oil according to the specifications.
Driver display:
Service
The engine oil level is shown.
SALAH SATU PESAN BERIKUT AKAN MUNCUL DI TAMPILAN PENGEMUDI:
- Engine oil level Measuring now...: the engine oil level cannot be determined yet.
Repeat the request after a maximum of 30 minutes' driving.
- Engine oil level OK and the bar display for indicating the engine oil level on the driver's display is green and is between "min" and "max": the engine oil level is correct.
If the bar is at "min": Add around 1 l of engine oil.


G-Class - Owner's Manual
> Maintenance and care Engine compartment
If the bar is in the middle: Add approximately 0.5 l of engine oil.
- Engine oil level Top up 1,0 l and the bar display for indicating the engine oil level on the driver's display is yellow and is below "min":
▶ Add 1 l of engine oil.
- Engine oil level Reduce and the bar display for indicating the engine oil level on the driver's display is yellow and is above "max":
Drain off any excess engine oil that has been added. To do so, consult a qualified specialist workshop.
• For engine oil level, switch on vehicle
Switch on the vehicle to check the engine oil level.
- Engine oil level System inoperative: The oil level sensor is defective or not connected.
Consult a qualified specialist workshop.
• Engine oil level System currently inoperative
▶ Close the bonnet.

MENAMBAH OLI MESIN
PERINGATAN
Risk of burns when opening the bonnet
JIKA ANDA MEMBUKA KAP MESIN SAAT MESIN TERLALU PANAS ATAU TERJADI KEBAKARAN DI RUANG MESIN, SITUASI BERIKUT DAPAT TERJADI:
• You may come into contact with hot gases.
- You may come into contact with other escaping hot operating fluids.
Before opening the bonnet, allow the engine to cool down.
In the event of a fire in the engine compartment, keep the bonnet closed and call the fire service.
PERINGATAN
Risk of injury due to moving parts
Components in the engine compartment may continue to run or start unexpectedly even when the drive system is switched off.
Observe the following if you must open the bonnet:
▶ Switch off the vehicle.
▶ Never touch the danger zones surrounding moving components, e.g. the rotation area of the fan.
Remove jewellery and watches.
▶ Keep items of clothing and hair away from moving parts.
G-Class - Owner's Manual
> Maintenance and care Engine compartment
A
PERINGATAN
Risk of burns from hot component parts in the engine compartment
Certain component parts in the engine compartment can be very hot, e.g. the engine, the cooler and parts of the exhaust system.
▶ Allow the engine to cool down and only touch component parts described in the following.
A
PERINGATAN
Risk of fire and injury from engine oil
If engine oil comes into contact with hot component parts in the engine compartment, it may ignite.
▶ Make sure that no engine oil is spilled next to the filler opening.
Allow the engine to cool off and thoroughly clean the engine oil from component parts before starting the vehicle.
!
CATATAN
Engine damage caused by an incorrect oil filter, incorrect oil or additives
Do not use engine oils or oil filters which do not correspond to the specifications explicitly prescribed for the service intervals.
▶ Follow the instructions on the service interval display for changing the engine oil and observe the prescribed change intervals.
Do not use additives.
!
CATATAN
Damage caused by topping up too much engine oil
Excess engine oil can damage the engine or catalytic converter.
▶ Have excess engine oil removed at a qualified specialist workshop.
i
Depending on driving style, the vehicle will consume up to 0.8 litres of oil per 1000 km. The oil consumption may also be higher than this when the vehicle is new or if you frequently drive at high engine speeds.


G-Class - Owner's Manual
> Maintenance and care Engine compartment

▶ Turn cap ⓘ anti-clockwise and remove it.
Top up the engine oil.
Replace cap ① and turn it clockwise until it engages.
▶ Check the oil level again ( → page 38).

Memeriksa level cairan pendingin
PERINGATAN
Risk of burns when opening the bonnet
JIKA ANDA MEMBUKA KAP MESIN SAAT MESIN TERLALU PANAS ATAU TERJADI KEBAKARAN DI RUANG MESIN, SITUASI BERIKUT DAPAT TERJADI:
• You may come into contact with hot gases.
- You may come into contact with other escaping hot operating fluids.
Before opening the bonnet, allow the engine to cool down.
In the event of a fire in the engine compartment, keep the bonnet closed and call the fire service.

G-Class - Owner's Manual
> Maintenance and care Engine compartment

A
PERINGATAN
Risk of injury due to moving parts
Components in the engine compartment can continue to run or start unexpectedly even when the ignition is switched off.
Observe the following before performing tasks in the engine compartment:
▶ Switch off the ignition.
▶ Never touch the danger zone surrounding moving components, e.g. the rotation area of the fan.
Remove jewellery and watches.
▶ Keep items of clothing and hair away from moving parts.
A
PERINGATAN
Risk of burns from hot component parts in the engine compartment
Certain component parts in the engine compartment can be very hot, e.g. the engine, the cooler and parts of the exhaust system.
▶ Allow the engine to cool down and only touch component parts described in the following.
A
PERINGATAN
Risk of scalding from hot coolant
If you open the cap, you could scald yourself.
▶ Allow the engine to cool down before opening the cap.
When opening the cap, wear protective gloves and safety glasses.
▶ Open the cap slowly to release pressure.


Park the vehicle on a level surface.
Check the coolant temperature display on the driver display. The coolant temperature must be below 70°C.
Slowly turn cap ⓘ anti-clockwise to release overpressure.
Continue turning cap ① anti-clockwise and remove it.

G-Class - Owner's Manual
> Maintenance and care Engine compartment
KADAR CAIRAN PENDINGIN BENAR DALAM KASUS BERIKUT:
• If the engine is cold, the coolant is up to marker bar 2.
- If the engine is warm, the coolant is up to 1.5 cm above marker bar 2 .
If necessary, top up with coolant that has been approved for Mercedes-Benz.
(i) Further information on coolant ( → page 754).
Mengisi ulang sistem pencuci kaca depan

PERINGATAN
Risk of burns when opening the bonnet
JIKA ANDA MEMBUKA KAP MESIN SAAT MESIN TERLALU PANAS ATAU TERJADI KEBAKARAN DI RUANG MESIN, SITUASI BERIKUT DAPAT TERJADI:
• You may come into contact with hot gases.
- You may come into contact with other escaping hot operating fluids.
Before opening the bonnet, allow the engine to cool down.
In the event of a fire in the engine compartment, keep the bonnet closed and call the fire service.


PERINGATAN
Risk of burns from hot component parts in the engine compartment
Certain component parts in the engine compartment can be very hot, e.g. the engine, the cooler and parts of the exhaust system.
Allow the engine to cool down and only touch component parts described in the following.

PERINGATAN
Risk of injury due to moving parts
Components in the engine compartment can continue to run or start unexpectedly even when the ignition is switched off.
Observe the following before performing tasks in the engine compartment:
▶ Switch off the ignition.
▶ Never touch the danger zone surrounding moving components, e.g. the rotation area of the fan.
Remove jewellery and watches.
▶ Keep items of clothing and hair away from moving parts.

G-Class - Owner's Manual
> Maintenance and care Engine compartment

PERINGATAN
Risk of fire and injury due to windscreen washer concentrate
Windscreen washer concentrate is highly flammable. It could ignite if it comes into contact with hot engine component parts or the exhaust system.
Make sure that no windscreen washer concentrate spills out next to the filler opening.

▶ Turn cap 🔒 anti-clockwise and remove it.
Top up the washer fluid.
Replace cap ① and turn it clockwise until it engages.
Menjaga saluran udara/air tetap bersih
Keep the area between the bonnet and the windscreen free of deposits, e.g. ice, snow or leaves.


G-Class - Owner's Manual
> Maintenance and care Cleaning and care
< Pembersihan dan perawatan
Information on washing the vehicle in a car wash

PERINGATAN
Risk of an accident due to reduced braking power after washing the vehicle
Braking efficiency is reduced after washing the vehicle.
After the vehicle has been washed, brake carefully while paying attention to the traffic conditions until braking power has been fully restored.


CATATAN
Damage from automatic braking
KENDARAAN AKAN MENGEREM SECARA OTONOM DALAM SITUASI TERTENTU JIKA FUNGSI BERIKUT AKTIF:
• Active Brake Assist
• Active Distance Assist DISTRONIC
• HOLD function
• Active Parking Assist
To avoid damage to the vehicle, switch these systems off e.g. before towing it or in a car wash.

CATATAN
Damage due to unsuitable car wash
Before driving into a car wash make sure that the car wash is suitable for the vehicle dimensions.
▶ Ensure there is sufficient ground clearance between the underbody and the guide rails of the car wash.
▶ Ensure that the clearance width of the car wash, in particular the width of the guide rails, is sufficient.


UNTUK MENGHINDARI KERUSAKAN PADA KENDARAAN ANDA SAAT MENGGUNAKAN CUCIAN MOBIL, PASTIKAN HAL BERIKUT SEBELUMNYA:
• Active Distance Assist DISTRONIC is switched off.
• The HOLD function is switched off.
• The 360° camera or the reversing camera is switched off.
• The side windows and sliding sunroof are completely closed.
• The outside mirrors are retracted.
• The blower for the ventilation and heating is switched off.
• The windscreen wiper switch is in position 0.
- Vehicles with KEYLESS-GO: The key is a minimum distance of 3 m away from the vehicle. Otherwise a door may lock and unlock unintentionally.
• For car washes with conveyor systems:
Neutral gear N is engaged.
\- If you leave the vehicle while it is being washed, ensure the key is located in the vehicle. The park position P is otherwise automatically engaged.
Removing the wax from the windscreen and the wiper rubber after washing the vehicle will help to avoid smearing and reduce wiper noise.
Mode pencucian mobil
In car wash mode, the vehicle is prepared for driving into an automatic car wash. Car wash mode can be activated up to a speed of 20 km/h ( → page 617).
KETIKA MODE CUCI MOBIL DIAKTIFKAN, PESAN MODE CUCI MOBIL AKTIF AKAN MUNCUL DI LAYAR PENGEMUDI. PENYESUAIAN BERIKUT AKAN DILAKUKAN:
• The outside mirrors will be folded in.
- To prevent the windscreen washer system from starting up automatically, the rain sensor will be deactivated.
• Air-recirculation mode will be activated.
• The rear window wiper will be deactivated.
• The windows and the sliding sunroof will be closed.
• Parking Assist PARKTRONIC will be deactivated.
- Vehicles with 360° camera: the front image will be activated after approximately eight seconds.
If one of the settings cannot be selected, this is displayed by a behind the respective setting.
Pressing Switch off will cancel car wash mode. Car wash mode will automatically be deactivated above a speed of 20 km/h.
You can also switch off car wash mode via the MBUX multimedia system ( → page 617).
PENGATURAN BERIKUT AKAN DIATUR ULANG KETIKA MODE CUCI MOBIL DINONAKTIFKAN:
• The outside mirrors will be folded out.
• The rain sensor will be activated.
• Air-recirculation mode will be deactivated.
• The windows and the sliding sunroof will remain closed.
• The rear window wiper will be activated.

G-Class - Owner's Manual
> Maintenance and care Cleaning and care
- Parking Assist PARKTRONIC will be reset to the previously selected setting.
- Vehicles with 360° camera: the front image will be deactivated at speeds above 18 km/h.
Mengaktifkan/menonaktifkan mode cuci mobil
Persyaratan:
• The vehicle is stationary.
• The vehicle is switched on.
Multimedia system:

MENGAKTIFKAN MODE CUCI MOBIL
Select Car wash mode.
Select Activate.
If one of the settings cannot be selected, this will be shown by a X next to the respective setting.
For an overview of the settings configured when you activate car wash mode (→ page 616).
MENONAKTIFKAN MODE CUCI MOBIL
Select Switch off.
The settings of car wash mode will be reset.

Car wash mode will be automatically deactivated as soon as your speed exceeds 20 km/h.
Informasi penggunaan pembersih bertekanan tinggi
⚠ WARNING
Risk of an accident when using high-pressure cleaners with round-spray nozzles
The water jet can cause externally invisible damage.
Components damaged in this way may unexpectedly fail.
Do not use a high-pressure cleaner with round-spray nozzles.
▶ Have damaged tyres or chassis parts replaced immediately.
UNTUK MENGHINDARI KERUSAKAN PADA KENDARAAN ANDA, PERHATIKAN HAL BERIKUT SAAT MENGGUNAKAN PEMBERSIH BERTEKANAN TINGGI:
- Vehicles with KEYLESS-GO: The key is at a minimum distance of 3 m away from the vehicle. Otherwise the doors could lock and unlock unintentionally.
- Maintain a distance of at least 30 cm to the vehicle.
- Vehicles with decorative foil: Parts of your vehicle are covered with a decorative foil. Maintain a distance of at least 70 cm between the foil-covered parts of the vehicle and the nozzle of the high-pressure cleaner. Move the nozzle of the high-pressure cleaner around while cleaning. The water temperature of the high-pressure cleaner must not exceed 60°C.

G-Class - Owner's Manual
> Maintenance and care Cleaning and care
- Observe the information on the correct distance in the equipment manufacturer's operating instructions.
- Do not direct the nozzle of the high-pressure cleaner directly at sensitive parts, e.g. tyres, gaps, electrical components, batteries, illuminants or louvres.
Mencuci kendaraan dengan tangan

CATATAN
Damage to the wheel arch flares and bumpers if used as a step
The wheel arch flares and bumpers can be damaged or become detached from the vehicle if you use them as a step.
▶ Only use the two steps indicated on the rear bumper.

CATATAN
Engine damage due to water ingress
Take care not to point the water jet directly towards the air inlet grille below the bonnet.
Observe the relevant legal requirements (for example in some countries, washing by hand is permitted only in specially designated wash bays).
Use a mild cleaning agent, e.g. car shampoo.
Do not use acidic cleaning agents.
Wash the vehicle with lukewarm water using a soft car sponge. When doing so, do not expose the vehicle to direct sunlight.
Carefully hose the vehicle off with water and dry using a chamois.
i Observe the notes on the care of car parts ( → page 620).
Catatan perawatan cat/finishing doff
To avoid damaging the paintwork and interfering with the driving assistance systems, please observe the following notes:
CAT
- Insect remains: soak with insect remover and rinse off the treated areas afterwards.
• Bird droppings: soak with water and rinse off afterwards.
- Tree resin, oils, fuels and greases: remove by rubbing gently with a cloth soaked in petroleum ether or lighter fluid.
• Coolant and brake fluid: remove with a damp cloth and clean water.
• Tar stains: use tar remover.
• Wax: use silicone remover.
- Do not attach stickers, foil or similar materials. Only have foil attached to the bumper at a qualified specialist workshop.
- Remove dirt immediately, where possible. Do not use acid solutions and acidic cleaners.
FINISHING DOFF
• Only use care products approved for Mercedes-Benz.
- Do not attach stickers, foils or similar materials. Only have foil attached to the bumper at a qualified specialist workshop.
• Do not polish the vehicle and light-alloy wheels.
• Only use car washes that correspond to the latest engineering standards.


G-Class - Owner's Manual
> Maintenance and care Cleaning and care
• Do not use car wash programmes with a final hot wax treatment.
- Do not use paint cleaners, buffing or polishing products, gloss preservers, e.g.wax.
JIKA TERJADI KERUSAKAN CAT:
- Always have paintwork repairs carried out at a qualified specialist workshop.
• Make sure the radar sensors are working ( → page 338).
Catatan tentang membersihkan film dekoratif
Observe the "Notes on paintwork / matt finish paintwork care" ( → page 618). They also apply to matt decorative films.
Observe the notes on cleaning decorative films to avoid damage.
PEMBERSIHAN
- When cleaning with the high-pressure cleaner, maintain a distance of at least 70 cm between the foil-covered parts of the vehicle and the nozzle of the high-pressure cleaner.
- For cleaning, use plenty of water and a mild cleaning agent without additives or abrasive substances (e.g. a car shampoo approved for Mercedes-Benz).
• Do not use acidic cleaning agents.
- Remove dirt as soon as possible. Avoid rubbing too hard in order not to damage the decorative film irreparably.
- If there is dirt on the finish or if the decorative film is dull: use the paint cleaner recommended and approved for Mercedes-Benz.
- Insect remains: Soak with insect remover and rinse off the treated areas afterwards.
• Bird droppings: Soak with water and rinse off afterwards.
\- To prevent water stains, dry a film-wrapped vehicle with a soft, absorbent cloth after every car wash.
MENGHINDARI KERUSAKAN PADA FILM DEKORATIF
• The service life and colouring of decorative films are impaired by:
- Sunlight
- Temperature (e.g. hot air blower)
- Weather conditions
- Stone chippings and dirt
Chemical cleaning agents
Oily products
- Do not use polish on matt decorative film. Polishing will have the effect of shining the film-wrapped surface.
- Do not treat matt or structured decorative films with wax. Permanent stains may occur.
Scratches, corrosive deposits, areas affected by corrosion and damage caused by incorrect care cannot always be completely repaired. In this case, contact a qualified specialist workshop.
You can obtain more information on care and cleaning agents from the manufacturer.
In the case of film-wrapped surfaces, visual differences may occur between the surfaces that were not protected by a decorative film after a decorative film has been removed.
i Have work or repairs to decorative films carried out at a qualified specialist workshop (e.g. at a Mercedes-Benz Service Centre).

G-Class - Owner's Manual
> Maintenance and care Cleaning and care
Informasi tentang film kaca

CATATAN
Damage to electronic components due to excess fluids
When window films have been retrofitted, fluids such as cleaning agents or water may run down and get behind trim parts of the vehicle interior and cause damage to electronic components.
▶ Use cleaning agents as sparingly as possible.
▶ Immediately absorb any excess fluids.
Catatan tentang pembersihan dan perawatan suku cadang mobil

PERINGATAN
Risk of entrapment if the windscreen wipers are switched on while the windscreen is being cleaned
If the windscreen wipers are set in motion while you are cleaning the windscreen or wiper blades, you can be trapped by the wiper arm.
▶ Always switch off the windscreen wipers and the vehicle before cleaning the windscreen or wiper blades.

CATATAN
Damage due to use of acidic cleaning agents
Do not use acidic cleaning agents. Otherwise, the surfaces could be damaged.
To avoid damage to the vehicle, observe the notes on cleaning and care of the following car parts:
KACA

CATATAN
Damage to electronic components due to excess fluids
When cleaning the windows from the inside, fluids such as cleaning agents or water may run down and get behind trim parts of the vehicle interior and cause damage to electronic components.
▶ Use cleaning agents as sparingly as possible.
▶ Immediately absorb any excess fluids.
- Clean the windows on the inside and outside with a damp cloth and with a cleaning agent recommended for Mercedes-Benz.
- Do not use dry cloths or abrasive or solvent-based cleaning agents to clean the insides of windows.
After changing the wiper blades or treating the vehicle with wax, clean the windscreen thoroughly with cleaning agents recommended for Mercedes-Benz. Failure to observe the application instructions may result in damage, smear marks or dazzling spots.
Remove external misting or dirt on the windscreen in front of the multifunction camera. Otherwise, driving systems and driving safety systems may be impaired or unavailable ( → page 338).


G-Class - Owner's Manual
> Maintenance and care Cleaning and care
RODA DAN VELG
• Use water and acid-free wheel cleaners.
- Do not use acidic wheel cleaners to remove brake dust. This could damage wheel bolts and brake components.
- To avoid corrosion of the brake discs and pads, drive the vehicle for a few minutes after cleaning before parking it. The brake discs and brake linings will warm up and dry out.
LAMPU EKSTERIOR
- Clean the lenses with a wet sponge and mild cleaning agent (e.g. car shampoo).
- Use only cleaning agents or cleaning cloths that are suitable for plastic lenses.
SENSOR
- Clean the sensors in the front and rear part of the vehicle with car shampoo, plenty of water and a soft cloth ( → page 338).
- When using a high-pressure cleaner, maintain a minimum distance of 30 cm.
PENARIK TRAILER
- Observe the notes on care in the trailer hitch manufacturer's owner's manual.
• Do not clean the ball neck with a high-pressure cleaner or solvent.
- Remove traces of rust on the ball (e.g. with a wire brush).
- Remove dirt with a lint-free cloth.
• After cleaning, lightly oil or grease the ball head.
Before using trailers with anti-swerve coupling, note the manufacturer's owner's manual.

Catatan tentang perawatan interior
⚠ WARNING
Risk of injury from plastic parts breaking off after the use of solvent-based care products
Care and cleaning products containing solvents can cause surfaces in the cockpit to become porous. When the airbags are deployed, plastic parts may break away.
Do not use any care or cleaning products containing solvents to clean the cockpit.
⚠ WARNING
Risk of injury or fatal injuries from bleached seat belts
Bleaching or dyeing seat belts can severely weaken them.
This can, for example, cause seat belts to tear or fail in an accident.
▶ Never bleach or dye seat belts.


CATATAN
Property damage due to disinfectants
The interior includes a number of sensitive surfaces such as displays, plastics and leather.
Disinfectants can contain alcohol and other substances that penetrate and damage surfaces. Technology behind buttons and displays can also be damaged.
▶ Do not use disinfectant on interior surfaces.
To avoid damage to the vehicle, observe the following notes on cleaning and care:
SABUK PENGAMAN
• Clean with lukewarm, soapy water.
• Do not use chemical cleaning agents.
• Do not dry by heating to more than 80 °C or exposing to direct sunlight.
LAYAR
• Switch off the display and allow it to cool.
- Clean the surface carefully with a microfibre cloth and a suitable display care product (TFT LCD).
• Do not use any other agents.
TRIM PLASTIK
• Clean with a damp microfibre cloth.
• If it is very dirty, use a cleaning agent recommended for Mercedes-Benz.
• Do not attach stickers, plastic film or similar materials.
- Do not allow cosmetics, insect repellent or sun cream to come into contact with the plastic trim.
KAYU ASLI DAN ELEMEN TRIM
• Clean with a microfibre cloth.
- Black piano-lacquer look: clean with a damp cloth and soapy water.
• If it is very dirty, use a cleaning agent recommended for Mercedes-Benz.
• Do not use solvent-based cleaning agents, polishes or waxes.
HEADLINER
• Clean with a brush or dry shampoo.
KARPET
\- Use a carpets and textiles cleaning agent recommended for Mercedes-Benz.
RODA KEMUDI DARI KULIT IMITASI
- Clean the entire steering wheel with a damp cotton cloth and a 1% soap solution. Do not spot clean.
• Use cleaning and care products recommended for Mercedes-Benz.
• Do not use a microfibre cloth.
• Do not use oil-based cleaning and care products.
RODA KEMUDI DARI KULIT ASLI ATAU DINAMICA

CATATAN
Damage caused by wrong cleaners
Do not use solvent-based cleaning agents such as tar remover or wheel cleaner; neither should you use polishes or waxes. Otherwise you may damage the finish.
- Clean with a damp cloth and a 1% soap solution and then wipe with a dry cloth.
• If it is very dirty, use a cleaning agent recommended for Mercedes-Benz.
• Leather care: use a leather care agent recommended for Mercedes-Benz.


G-Class - Owner's Manual
> Maintenance and care Cleaning and care
• Do not allow the leather to become too damp.
• Do not use a microfibre cloth.
Leather is a natural product. It has natural surface characteristics, such as differences in structure, marks caused by growth and injury or subtle colour differences. These surface characteristics are particular to leather, and are not material defects. Leather is also subject to a natural ageing process, which changes the surface characteristics.
SARUNG KURSI KULIT ASLI
- Vacuum up dirt such as crumbs or dust and then clean the seat covers with a damp cotton cloth and wipe down with a dry cloth. Regularly clean the seat covers.
- If they are very dirty, use an aftercare leather care agent recommended for Mercedes-Benz.
• Leather care: use a leather care agent recommended for Mercedes-Benz.
• Do not use a microfibre cloth.
• Do not allow the leather to become too damp.
• Do not use oil-based cleaning and care products.
Leather is a natural product. It has natural surface characteristics, such as differences in structure, marks caused by growth and injury or subtle colour differences. These surface characteristics are particular to leather, and are not material defects. Leather is also subject to a natural ageing process, which changes the surface characteristics.
Waves or wrinkling in the seat cover may occur due to the stress on the seat; this is caused by the natural leather material.

Regular cleaning and care of the leather will reduce dirt build-up, wear marks and ageing damage and thus significantly extend its life span. Clothing that can leave stains (e.g. jeans) may discolour the leather.
SARUNG KURSI KULIT IMITASI
• Vacuum up dirt such as crumbs or dust and then use a damp cotton cloth and a 1% soap solution to clean the entire seat cover. Do not spot clean.
• Use cleaning and care products recommended for Mercedes-Benz.
• Do not use a microfibre cloth.
• Do not use oil-based cleaning and care products.
LANTAI BAGASI KAYU
CATATAN
Damage caused to the wood luggage compartment floor by wrong cleaners
Do not use microfibre cloths.
Do not use commercially available furniture polishes and sprays.
Do not use steam cleaners.
Do not apply self-adhesive films or adhesive strips to the wooden luggage-compartment floor; the solvent residue and plasticisers contained in them may destroy the paintwork.
MEMBERSIHKAN LANTAI BAGASI KAYU
• Use a cotton cloth to remove dust, dirt and fingerprints.
• If necessary, moisten the cotton cloth with clean water.


G-Class - Owner's Manual
> Maintenance and care Cleaning and care
Use care oil recommended and approved by Mercedes-Benz to care for and protect the wooden luggage-compartment floor. This revitalises the wooden surface and increases the resilience of the wood.
MERAWAT LANTAI BAGASI KAYU
- Sand the wooden surface along the grain with the sanding pad.
• Clean off the sanding dust.
• Using a cotton cloth, distribute a thin layer of care oil evenly along the grain on the wooden surface.
• Using a second cotton cloth, rub in the remaining care oil.
- Allow to soak in for approx. four hours before loading.
• For heavily worn surfaces, repeat the treatment if necessary.


Back to Contents
G-Class - Owner's Manual
Breakdown assistance

< Bantuan gangguan
This interactive PDF works like a website - tap or click a button to jump straight to where you want to go. You can return here at any time via the navigation bar at the top left.
Emergency 626
Flat tyre 628
Battery (vehicle) 632
Tow-starting or towing away 639
Electrical fuses 645
G-Class - Owner's Manual
Breakdown assistance Emergency

Darurat
Melepas rompi keselamatan
The safety vests are located in the driver's door and front passenger door stowage compartments.
▶ Pull out the safety vest bag using the loop.
Open the safety vest bag and take out the safety vest.

1 Maximum number of washes
2 Maximum wash temperature
Do not bleach
Do not iron
Do not tumble dry
Do not dry clean
Class 2 safety vest
The requirements defined by the legal standard are only fulfilled if the safety vest is the correct size and is fully closed.
GANTI ROMPI KESELAMATAN DALAM KASUS BERIKUT:
• The reflective strips are damaged or dirty.
• The maximum permissible number of washes is exceeded.
- The fluorescence property decreases, e.g. due to permanent exposure to sunlight.
BUANG ROMPI KESELAMATAN DENGAN CARA YANG RAMAH LINGKUNGAN:
• Please contact your local waste disposal company.
Segitiga pengaman
REMOVING THE WARNING TRIANGLE

G-Class - Owner's Manual
Breakdown assistance Emergency
Open the tabs 2.
Remove the warning triangle
MEMASANG SEGITIGA PENGAMAN
Fold the side reflectors upwards to form a triangle and attach using the upper snap fastener.
▶ Fold the legs down and out to the side.
First-aid kit overview

The first-aid kit Ⓞ is located in the door stowage compartment of the front passenger door.
Melepas alat pemadam kebakaran
WARNING
Risk of accident due to an incorrectly secured fire extinguisher in the driver's footwell
A fire extinguisher may impede pedal travel or block a depressed pedal.
This jeopardises the operating and road safety of the vehicle.
The fire extinguisher can be flung around and injure the driver or other vehicle occupants.
▶ Always store and secure the fire extinguisher in the bracket.
Do not remove the fire extinguisher while driving.

Left-hand drive vehicle: pull the tab 1 upwards.
Right-hand drive vehicle: pull the tab ① downwards.
Remove the fire extinguisher ②.


G-Class - Owner's Manual
> Breakdown assistance Flat tyre
Ban kempes
Catatan tentang ban kempes

PERINGATAN
Risk of accident due to a flat tyre
A flat tyre strongly impairs the vehicle's driving characteristics, as well as its steering and braking characteristics.
Do not drive with a flat tyre.
Replace the flat tyre with the spare wheel. Alternatively, consult a qualified specialist workshop.
JIKA BAN KEMPES, PILIHAN BERIKUT TERSEDIA TERGANTUNG PADA PERALATAN KENDARAAN ANDA:
- Vehicles with Mercedes-Benz Support: in the event of a breakdown, you can make a breakdown call via the overhead control panel (→ page 549).
• All vehicles: change the wheel ( → page 661).
① The emergency spare wheel is only available in certain countries.
Ikhtisar dudukan ban cadangan di pintu belakang
Pembawa roda cadangan dari baja tahan karat

PERINGATAN
Risk of injury when changing a wheel
The wheels are very heavy. When being removed, a wheel can tip over or roll away uncontrollably. As a result, you or other persons could be hit by the wheel.
▶ Have a second person assist you in removing the wheel.

Removing the stainless-steel spare wheel cover


G-Class - Owner's Manual
> Breakdown assistance Flat tyre
Remove screwdriver ④ from the vehicle tool kit (→ page 661).
Open the lock on cover ring ① with screwdriver ④.
Fold tab a down.
▶ Pull cover ring ① apart and remove it.
Remove cover panel ②.

Melepas roda cadangan
Remove wheel nuts 5.
Remove spare wheel

Memasang roda pada pembawa roda cadangan
Use the wheel nuts to attach the defective wheel Ⓔ to the spare wheel carrier. Specified tightening torque: 20 Nm
Position cover panel ② again. Make sure that retainer ⑥ of cover panel ② engages in recess ⑦.
Attach cover ring ① again and close the lock.
Make sure that the lock does not cover the reversing camera. If necessary, turn cover ring slightly.
(i) (→ page 667) Vehicles with an emergency spare wheel: observe the notes on the emergency spare wheel.
PEMBAWA RODA CADANGAN DENGAN PENUTUP BAN PELINDUNG

Melepas penutup ban pelindung
▶ Pull protective tyre cover Ⓞ on the rear side apart and remove it.


G-Class - Owner's Manual
> Breakdown assistance Flat tyre
Melepas roda dari pembawa roda cadangan dan memasang roda yang rusak
Remove wheel nuts 2.
Remove spare wheel
Use the wheel nuts to attach the defective wheel Ⓞ to the spare wheel carrier. Specified tightening torque: 20 Nm

Kendaraan dengan roda cadangan darurat: melepas setengah cangkang
Remove half shell 3.

Remove wheel nuts 2.
Remove the emergency spare wheel.
Remove the rear half shell.
Use the wheel nuts to attach the defective wheel Ⓞ to the spare wheel carrier. Specified tightening torque: 20 Nm
Stow the half shells in the luggage compartment.
(i) (→ page 667) Vehicles with an emergency spare wheel: observe the notes on the emergency spare wheel.
PEMBAWA RODA CADANGAN PROFESIONAL
PERINGATAN
Risk of injury when changing a wheel
The wheels are very heavy. When being removed, a wheel can tip over or roll away uncontrollably. As a result, you or other persons could be hit by the wheel.
Have a second person assist you in removing the wheel.
CATATAN
Damage to the vehicle when opening the rear door with the spare wheel carrier open
If you open the rear door with the spare wheel carrier open, the carrier can strike the vehicle and cause damage.
Before opening the rear door, fully close the spare wheel carrier.
G-Class - Owner's Manual
Breakdown assistance Flat tyre


(→ page 661)Open cover Ⓞ with the triangular socket wrench from the vehicle tool kit and fold it open.

(→ page 661)Unscrew central nut Ⓐ of the retaining bracket with the socket wrench (SW 18) from the vehicle tool kit.
Open the spare wheel carrier by 90°.

Remove wheel nuts (SW 19)
Remove ④ spare wheel
▶ Secure the spare wheel in reverse order.


G-Class - Owner's Manual
Breakdown assistance Battery (vehicle)
Baterai (kendaraan)
Catatan tentang baterai 12 V

PERINGATAN
Risk of explosion due to electrostatic charge
Electrostatic charge can ignite the highly explosive gas mixture in the battery.
To discharge any electrostatic charge that may have built up, touch the metal vehicle body before handling the battery.
The highly flammable gas mixture is created while the battery is charging and during starting assistance.
For safety reasons, Mercedes-Benz recommends that you only use batteries which have been tested and approved for your vehicle by Mercedes-Benz.

PERINGATAN
Danger of chemical burns from the battery acid
Battery acid is caustic.
▶ Avoid contact with the skin, eyes or clothing.
Do not lean over the battery.
▶ Do not inhale battery gases.
▶ Keep children away from the battery.
▶ Immediately rinse battery acid off thoroughly with plenty of clean water and seek medical attention immediately.

CATATAN LINGKUNGAN
Environmental damage due to improper disposal of batteries
☒ Batteries contain pollutants. It is illegal to dispose of them with the household rubbish.

Dispose of batteries in an environmentally responsible manner. Take discharged batteries to a qualified specialist workshop or to a collection point for used batteries.
Consult a qualified specialist workshop to disconnect the 12 V battery.


G-Class - Owner's Manual
> Breakdown assistance Battery (vehicle)

Comply with safety notes and take protective measures when handling batteries.
Risk of explosion.
Fire, open flame and smoking are prohibited when handling the battery. Avoid creating sparks.
Electrolyte or battery acid is corrosive. Avoid contact with your skin, eyes or clothing. Wear suitable protective clothing, in particular gloves, apron and face mask. Immediately rinse electrolyte or acid splashes off with clean water. Consult a doctor.
Wear safety glasses.
Keep children away.
Observe this Owner's Manual.
JIKA ANDA TIDAK BERMAKSUD MENGGUNAKAN KENDARAAN UNTUK JANGKA WAKTU YANG LAMA:
• Activate standby mode ( → page 337).
- Connect the battery to a battery charger approved by Mercedes-Benz.
- Consult a qualified specialist workshop to disconnect the battery.
Catatan tentang baterai 48 V
WARNING
Risk of an accident due to work carried out incorrectly on the battery
Work carried out incorrectly on the battery can, for example, lead to a short circuit. This can restrict functions relevant for safety systems and impair the operating safety of your vehicle.
ANDA BISA KEHILANGAN KENDALI ATAS KENDARAAN TERUTAMA DALAM SITUASI BERIKUT:
- when braking
- in the event of abrupt steering manoeuvres and/or when the vehicle's speed is not adapted to the road conditions
In the event of a short circuit or a similar incident, contact a qualified specialist workshop immediately.
Do not drive on.
▶ Always have work on the battery carried out at a qualified specialist workshop.
• Further information on ABS ( → page 340)
• Further information on ESP ® ( → page 341)
• Further information on ESP ® (Mercedes-AMG vehicles) (→ page 341, 344, 342)

G-Class - Owner's Manual
Breakdown assistance Battery (vehicle)

CATATAN LINGKUNGAN
Environmental damage due to improper disposal of batteries
Batteries contain pollutants. It is illegal to dispose of them with the household rubbish.

Disposition of batteries in an environmentally responsible manner. Take discharged batteries to a qualified specialist workshop or to a collection point for used batteries.
Only have work on the 48 V battery carried out at a qualified specialist workshop.
Comply with safety notes and take protective measures when handling batteries.

Risk of explosion if the 48 V battery is used improperly.

The surface of the 48 V battery may be hot.

Fire, open flame and smoking are prohibited when handling the battery. Avoid creating sparks.

Electrolyte or battery acid is corrosive. Avoid contact with your skin, eyes or clothing. Wear suitable protective clothing, in particular gloves, apron and face mask. Immediately rinse off splashes of electrolyte or acid with plenty of clean water. Consult a doctor.

Do not place heavy objects on the surface of the battery or use the battery to support a person in any way.

Do not perform any work on the battery. Always have any work on the battery carried out at a qualified specialist workshop. Do not

disconnect the battery yourself. Do not remove the battery yourself. Do not attempt to open the battery.

Keep children away.

Wear safety glasses.

Observe this Owner's Manual.
JIKA ANDA TIDAK BERMAKSUD MENGGUNAKAN KENDARAAN UNTUK JANGKA WAKTU YANG LAMA, PERHATIKAN HAL BERIKUT:
• If available: activate standby mode (→ page 337).
Catatan tentang bantuan start dan pengisian baterai 12 V
Always use the jump-start connection point in the engine compartment for charging the battery and jump starting.

CATATAN
Damage to the battery due to overvoltage
When charging using a battery charger without a maximum charging voltage, the battery or the on-board electronics may be damaged.

Only use battery chargers with a maximum charging voltage of 14.8 V.


G-Class - Owner's Manual
> Breakdown assistance Battery (vehicle)

PERINGATAN
Risk of explosion due to the ignition of hydrogen gas
If there is a short circuit or sparks are created, there is a danger of hydrogen gas igniting when you charge the battery.
▶ Take care that the positive terminal of a connected battery does not come into contact with vehicle parts.
▶ Never place metal objects or tools on a battery.
When connecting and disconnecting the battery, always observe the sequence of battery terminals described.
During starting assistance, always take care to connect only battery terminals of identical polarity.
During starting assistance, observe the sequence described for connecting and disconnecting the jump leads.
Do not connect or disconnect the battery terminals with the engine running.


PERINGATAN
Risk of explosion due to explosive mixture of gases
An explosive mixture of gases can escape from the battery during charging and starting assistance.
▶ Fire, naked flames, smoking and creating sparks must be avoided.
▶ Make sure there is adequate ventilation.
▶ Do not stand over the battery.

PERINGATAN
Risk of explosion from a frozen battery
A discharged battery may freeze at temperatures slightly above or below freezing point.
During starting assistance or battery charging, battery gas can be released.
▶ Always allow a battery to thaw before charging it or performing starting assistance.
If the indicator/warning lamps in the driver display do not light up at low temperatures, the discharged battery is very likely frozen. In this case you must neither charge the battery nor give the vehicle starting assistance.
The service life of a defrosted battery may be drastically shortened. The starting behaviour may deteriorate, in particular at low temperatures.
It is recommended to have a defrosted battery checked at a qualified specialist workshop.


G-Class - Owner's Manual
Breakdown assistance Battery (vehicle)


CATATAN
Damage caused by numerous or extended attempts to start the engine
Numerous or extended attempts to start the engine may damage the catalytic converter due to non-combusted fuel.
Avoid numerous and extended attempts to start the engine.
PERHATIKAN HAL-HAL BERIKUT SELAMA BANTUAN START DAN SAAT MENGISI BATERAI:
- Only use undamaged jump leads/charging cables with a sufficient cross-section and insulated terminal clamps.
- Uninsulated parts of the terminal clamps must not come into contact with other metal parts as long as the jump leads/charging cables are connected to the battery/the jump-start connection point.
- The jump leads/charging cables must not touch any parts which may move when the engine is running.
• Always ensure that neither you nor the battery are electrostatically charged.
- Avoid fire and open flames at all times.
• Do not bend over a battery.
SAAT MENGISI BATERAI, PERHATIKAN JUGA HAL-HAL BERIKUT:
• Only use chargers tested and approved for Mercedes-Benz.
- Read the charger's operating instructions before you charge the battery.
PERHATIKAN JUGA HAL-HAL BERIKUT SELAMA BANTUAN START:
• Only use batteries with a rated voltage of 12 V for starting assistance.
• The vehicles must not touch each other.
- Petrol engine: Only give starting assistance when the engine is cold and the exhaust system has cooled down.
Bantuan start dan pengisian baterai 12 V
PERSIAPAN PROSES BANTUAN START/PENGISIAN
▶ Secure the vehicle against rolling away.
▶ Switch off the vehicle and all electrical consumers.
▶ Open the bonnet ( → page 606).

Slide cover ① of positive terminal ② on the jump-starting connection point in the direction of the arrow.


G-Class - Owner's Manual
> Breakdown assistance Battery (vehicle)
BANTUAN START
Connect the positive terminal of your own vehicle to the jump lead.
Connect the positive terminal of the booster battery to the jump lead.
On the assisting vehicle, let the engine run at idling speed.
Connect the negative terminal of the booster battery to the jump lead.
Connect the jump lead to your vehicle's earth point ③.
▶ Start the engine of your own vehicle.
Let the engines run for several minutes.
Before disconnecting the jump lead, switch on an electrical consumer in your own vehicle, e.g. the rear window heater or the lighting.
When the starting assistance process is complete:
Disconnect the jump lead from your vehicle's earth point ③.
Remove the jump lead from the negative terminal of the booster battery.
Remove the jump lead from the positive contact of your vehicle.
Remove the jump lead from the positive terminal of the booster battery.
After removing the jump lead, close cover ① of the positive terminal ②.
Further information can be obtained at a qualified specialist workshop.
PENGISIAN BATERAI 12 V
Connect the positive terminal of your own vehicle to the charging cable.
Connect the positive terminal of the charger to the charging cable.
Connect the negative terminal of the charger to the charging cable.
Connect the charging cable to your vehicle's earth point ③
▶ Start the charging process.
When the charging process is complete:
Disconnect the charging cable from your vehicle's earth point ③
Remove the charging cable from the negative terminal of the charger.
Remove the charging cable from the positive terminal of your own vehicle.
Remove the charging cable from the positive terminal of the charger.
After removing the charging cable, close cover ① of the positive terminal ②.
Penggantian baterai 12 V
Observe the notes on the 12-V-battery ( → page 632).
Mercedes-Benz recommends that you have the 12-V-battery replaced at a qualified specialist workshop, e.g. at a Mercedes-Benz Service Centre.
PERHATIKAN CATATAN BERIKUT JIKA ANDA INGIN MENGGANTI BATERAI SENDIRI:
• Always replace a faulty battery with a battery which meets the specific vehicle requirements.
The vehicle is equipped with a fleece battery. Full vehicle functionality is only guaranteed with a fleece battery. For safety reasons, Mercedes-


G-Class - Owner's Manual
> Breakdown assistance Battery (vehicle)
Benz recommends that you only use batteries which have been tested and approved for your vehicle by Mercedes-Benz.
- Use the detachable parts such as vent hose, elbow fittings or terminal covers from the battery to be replaced.
- Make sure that the vent hose is always connected to the original opening on the side of the battery.
Fit any existing or supplied stop plugs.
Otherwise, gases or battery acid could escape.
• Make sure that detachable parts are reconnected in the same way.


G-Class - Owner's Manual
Breakdown assistance Tow-starting or towing away
< Penarik awal atau penarik kendaraan
Ikhtisar metode penarik yang diizinkan

CATATAN
Damage from automatic braking
KENDARAAN AKAN MENGEREM SECARA OTONOM DALAM SITUASI TERTENTU JIKA FUNGSI-FUNGSI BERIKUT AKTIF:
• Active Brake Assist
• Active Distance Assist DISTRONIC
- HOLD function
• Active Parking Assist
To avoid damage to the vehicle, switch these systems off e.g. before towing it or in a car wash.
Mercedes-Benz recommends transporting your vehicle in case of a breakdown, rather than towing it.
For towing with both axles on the ground, use a tow rope or tow bar. Do not use tow bar systems.

CATATAN
Damage to the vehicle due to towing away incorrectly

Observe the instructions and notes on towing away.

If you tow the vehicle with raised front or rear axle, you must remove the propeller shaft between the transfer case and the rolling axle.
METODE PENARIK YANG DIIZINKAN

Both axles on the ground Front axle raised Rear axle raised


Yes, for a maximum of 50 km at 50 km/h Yes Yes


G-Class - Owner's Manual
Breakdown assistance Tow-starting or towing away
Menarik kendaraan dengan kedua poros di tanah
Observe the notes on the permitted towing methods ( → page 639).
Make sure that the battery is connected and charged.
KETIKA BATERAI HABIS:
• The vehicle cannot be started.
• The electric parking brake cannot be released or applied.
• The transmission cannot be shifted to position N or P.
If the transmission cannot be shifted to position N, transport the vehicle ( → page 642). A tow truck with lifting equipment is required for vehicle transport.

CATATAN
Damage due to towing away at excessively high speeds or over long distances
The drivetrain could be damaged when towing at excessively high speeds or over long distances.
▶ A towing speed of 50 km/h must not be exceeded.
▶ A towing distance of 50 km must not be exceeded.


PERINGATAN
Risk of accident when towing a vehicle with too much weight
JIKA KENDARAAN YANG AKAN DIDEREK LEBIH BERAT DARI MASSA KOTOR YANG DIIZINKAN DARI KENDARAAN ANDA, SITUASI BERIKUT DAPAT TERJADI:
• The towing eye breaks off.
• The combination oscillates and can capsize.
Before towing, check whether the vehicle to be towed exceeds the permissible gross mass.
If a vehicle is to be towed away, its permissible gross mass must not exceed the permissible gross mass of the towing vehicle.
Information on the permissible gross mass of the vehicle can be found on the vehicle identification plate ( → page 743).
Attach the towing device to the towing eyes ( → page 644).

CATATAN
Damage due to incorrect connection of the tow bar
▶ Only connect the tow rope or tow bar to the towing eyes.
▶ Deactivate the automatic locking mechanism ( → page 177).
Do not activate the HOLD function ( → page 347).
Deactivate tow-away protection ( → page 190).


G-Class - Owner's Manual
Breakdown assistance Tow-starting or towing away
▶ Deactivate Active Brake Assist ( → page 372).
▶ Deactivate Active Parking Assist ( → page 401).
▶ Deactivate Active Distance Assist DISTRONIC ( → page 354).
Shift the transmission to position N.
Do not open the driver's door or front passenger door. Otherwise the transmission automatically shifts to position P.
Release the electric parking brake.

PERINGATAN
Risk of accidents due to restricted safety-related functions during towing
FUNGSI-FUNGSI YANG RELEVAN TERHADAP KESELAMATAN DIBATASI ATAU TIDAK LAGI TERSEDIA DALAM SITUASI BERIKUT:
• The vehicle is switched off.
• The brake system or the power steering is malfunctioning.
• The power supply or the on-board electrical system is defective.
If your vehicle is being towed, considerably more force may be required for steering and braking.
In addition, important vehicle display messages cannot be seen if the driver display is faulty.
▶ Use a tow bar.
Before towing, ensure that the driver's display is operational and the steering can move freely.


CATATAN
Damage due to excessive tractive power
If you pull away sharply, the tractive power may be too high and the vehicles could be damaged.
▶ Pull away slowly and smoothly.
Catatan tentang pemulihan kendaraan yang macet

CATATAN
Damage as a result of recovering a vehicle that is stuck
If the tractive power is too high, the vehicles could be damaged.
▶ Pull out the vehicle that is stuck as straight and evenly as possible during recovery.
PERHATIKAN HAL BERIKUT SELAMA PEMULIHAN UNTUK MENGHINDARI KERUSAKAN PADA KENDARAAN ANDA:
- if the driven wheels get stuck in loose or muddy ground, recover the vehicle with the utmost care,
especially so if the vehicle is laden.
• Never attempt to recover a stuck vehicle with a trailer attached.
- Pull out the stuck vehicle backwards, if possible, using the tracks it made before.


G-Class - Owner's Manual
Breakdown assistance Tow-starting or towing away
Menderek kendaraan jika terjadi kerusakan
CATATAN TENTANG PENDEREKAN JIKA TERJADI KERUSAKAN

CATATAN
Damage due to incorrect attachment and use of old nuts
The vehicle and components of the vehicle can be damaged due to incorrect attachment and use of old nuts.
If you remove the propeller shaft, place the M10 nuts on the M8 bolts as spacers and secure them with M8 nuts.
▶ Always use new self-locking nuts when installing the propeller shafts.
Observe the notes on towing ( → page 639).
① For further information, consult a Mercedes-Benz Service Centre.
PENDEREKAN JIKA TERJADI KERUSAKAN
PENDEREKAN JIKA TERJADI KERUSAKAN PADA MESIN, TRANSMISI, ATAU KELISTRIKAN
Shift the transmission to position N.
Release the parking brake.
The transmission may be locked in position in the event of damage to the electrics. To shift to , provide the on-board electrical system with power (→ page 61).
PENDEREKAN JIKA TERJADI KERUSAKAN PADA KOTAK TRANSFER
Remove the propeller shafts between the axles and the transfer case.
PENARIKAN JIKA TERJADI KERUSAKAN PADA AS RODA DEPAN
Remove the propeller shaft between the rear axle and the transfer case.
▶ Towing the vehicle with a raised front axle.
PENARIKAN JIKA TERJADI KERUSAKAN PADA AS RODA BELAKANG
Remove the propeller shaft between the front axle and the transfer case.
Tow the vehicle with a raised rear axle and with wheel rollers under the front axle.
Memuat kendaraan untuk transportasi
Observe the notes on towing away ( → page 64, 63).
Connect the towing device to the towing eye in order to load up the vehicle.
① If the vehicle cannot be loaded with the help of the towing device, use a crane.
Shift the transmission to position N.
The transmission may be locked in position P in the event of damage to the electrics. To shift to N, supply power to the on-board electrical system ( → page 61).
Load the vehicle correctly onto the transporter.

G-Class - Owner's Manual
Breakdown assistance Tow-starting or towing away
• Ensure that all wheels are on the transportation surface.
- Ensure that the vehicle is positioned parallel with the direction of travel.
Put the selector lever into position P.
Use the electric parking brake to secure the vehicle against rolling away.
▶ Stop the vehicle and switch off the power supply.
▶ Only secure the vehicle by the wheels.
KENDARAAN DENGAN SISTEM PEREDAM ADAPTIF

PERINGATAN
Risk of an accident when transporting vehicles with adaptive damping adjustment
When transporting vehicles with adaptive damping adjustment, the vehicle/trailer combination may begin to rock and start to skid.
▶ Load the vehicle correctly onto the transporter.
- Secure the vehicle on all four wheels with suitable tensioning straps.

CATATAN
Damage to the vehicle from securing it incorrectly
- Secure the vehicle at all four wheels after loading it up. Otherwise, the vehicle could be damaged.
Maintain a minimum vertical distance of 20 cm from the transport platform.
▶ Load the vehicle correctly onto the transporter.
• Ensure that all wheels are on the transportation surface.
- Ensure that the vehicle is positioned parallel with the direction of travel.
Put the selector lever into position P.
▶ Use the electric parking brake to secure the vehicle against rolling away.
▶ Stop the vehicle and switch off the power supply.
▶ Secure the vehicle at all four wheels.

Make sure that the front and rear axles come to rest on the same transport vehicle.

CATATAN
Damage to the drive train due to incorrect positioning of the vehicle
Do not position the vehicle above the connection point of the transport vehicle.
G-Class - Owner's Manual
Breakdown assistance Tow-starting or towing away
Position of towing eyes


Towing eyes ① are attached to the front and rear of the vehicle.
Menyalakan kendaraan dengan cara diderek (start darurat kendaraan)

CATATAN
Damage to the automatic transmission due to tow-starting
The automatic transmission may be damaged in the process of tow-starting vehicles with automatic transmission.
▶ Vehicles with automatic transmission must not be tow-started.
Do not tow-start the vehicle.


G-Class - Owner's Manual
Breakdown assistance Electrical fuses
Sekring listrik
Catatan tentang sekring listrik

PERINGATAN
Risk of accident and injury due to overloaded lines
If you manipulate or bridge a faulty fuse or if you replace it with a fuse with a higher amperage, the electric line could be overloaded.
This could result in a fire.
▶ Always replace faulty fuses with specified new fuses containing the correct amperage.

CATATAN
Damage due to incorrect fuses
Using incorrect fuses can result in damage to electrical components or systems or their functions being considerably restricted.
▶ Use only fuses approved for Mercedes-Benz with the respective specified fuse rating.
Replace blown fuses with equivalent fuses, identifiable by their colour and label. The fuse ratings and further information to be observed can be found in the fuse assignment diagram.

Fuse assignment diagram: on the fuse box in the rear passenger compartment ( → page 647).

CATATAN
Damage or malfunctions caused by moisture
Moisture may cause damage to the electrical system or cause it to malfunction.
When the fuse box is open, make sure that no moisture can enter the fuse box.
When closing the fuse box, make sure that the seal of the lid is positioned correctly on the fuse box.
If the newly inserted fuse also blows, have the cause determined and rectified at a qualified specialist workshop.
PASTIKAN HAL BERIKUT SEBELUM MENGGANTI SEKERING:
• The vehicle is secured against rolling away.
• All electrical consumers are switched off.
• The vehicle is switched off.
Sekring listrik terletak di berbagai kotak sekring:
\- Fuse box in the engine compartment on the left-hand side (→ page 646)


G-Class - Owner's Manual
> Breakdown assistance Electrical fuses
• Fuse box in the front passenger footwell ( → page 646)
• Fuse box in the rear passenger compartment ( → page 647)
Membuka dan menutup kotak sekring di kompartemen mesin
Persyaratan:
• A dry cloth and a screwdriver are available.
Observe the notes on electrical fuses ( → page 62).
MEMBUKA
▶ Open the bonnet ( → page 606).

Remove any existing moisture from the fuse box using a dry cloth.
Loosen screws
Fold out cover ② in the direction of the arrow and remove it.

MENUTUP
▶ Check whether the seal is positioned correctly in the cover.

Place tabs ③ of cover ② in the fuse box.
Ensure that cover ② is seated on the fuse box.
Tighten screws ①.
Close the bonnet.
Membuka dan menutup kotak sekring di area kaki penumpang depan
Persyaratan:
• Observe the notes on electrical fuses ( → page 62).
Right-hand drive vehicles: the fuse box is on the left side.


G-Class - Owner's Manual
> Breakdown assistance Electrical fuses


Example: left-hand drive vehicle
To open the fuse box: remove cover ①.
To close the fuse box: reinsert cover ①.

▶ Fold the right-hand seat cushion forward ( → page 49).
Flip open and remove cover ①.
Membuka dan menutup kotak sekring di bagian belakang
Persyaratan
• Observe the notes on electrical fuses.

Back to Contents
G-Class - Owner's Manual
Wheels and tyres

< Roda dan ban
This interactive PDF works like a website - tap or click a button to jump straight to where you want to go. You can return here at any time via the navigation bar at the top left.
Notes on noise or unusual handling characteristics
Notes on regularly inspecting wheels and tyres
Notes on snow chains 652
Tyre pressure 653
Wheel change 657
Emergency spare wheel 667
G-Class - Owner's Manual
Wheels and tyres Notes on noise or unusual handling characteristics

Catatan tentang kebisingan atau karakteristik penanganan yang tidak biasa
Make sure there are no vibrations, noises or unusual handling characteristics when the vehicle is in motion. This may indicate that the wheels or tyres are damaged. Hidden tyre damage could also be causing the unusual handling characteristics.
If you suspect that a tyre is defective, reduce your speed immediately and have the tyres and wheels checked at a qualified specialist workshop.
G-Class - Owner's Manual
Wheels and tyres Notes on regularly inspecting wheels and tyres

Catatan tentang memeriksa roda dan ban secara teratur

PERINGATAN
Risk of injury due to damaged tyres
Damaged tyres can cause tyre pressure loss.
▶ Check the tyres regularly for signs of damage and replace any damaged tyres immediately.

PERINGATAN
Risk of aquaplaning due to insufficient tyre tread
Insufficient tyre tread will result in reduced tyre grip. There is a risk of an accident.
On a wet road surface the risk of aquaplaning is increased, in particular where speed is not adapted to suit the conditions.
▶ Check the tread depth and the condition of the tyre contact surface across the entire width of all tyres on a regular basis.
KEDALAMAN TAPAK MINIMUM UNTUK
• Summer tyres: 3 mm
• M+S tyres: 4 mm
For safety reasons, replace the tyres before the legally-prescribed limit for the minimum tread depth is reached.
Replace the tyres immediately if the legally-prescribed limit for the minimum tread depth is reached.
LAKUKAN PEMERIKSAAN BERIKUT PADA SEMUA RODA SECARA TERATUR, SETIDAKNYA SEKALI SEBULAN ATAU SESUAI KEBUTUHAN, MISALNYA, SEBELUM PERJALANAN JAUH ATAU MENGEMUDI DI JALAN OFF-ROAD:
• Check the tyre pressure ( → page 653).


G-Class - Owner's Manual
Wheels and tyres Notes on regularly inspecting wheels and tyres
• Visually inspect wheels and tyres for damage.
- Check the valve caps.
- Visual check of the tyre tread depth and the tyre contact surface across the entire width.
The minimum tread depth for summer tyres is 3 mm and for winter tyres 4 mm.


G-Class - Owner's Manual
Wheels and tyres Notes on snow chains
Catatan tentang rantai salju
Mercedes-AMG vehicles: the notes on using snow chain-compatible AMG winter tyres apply to AMG tyres. Snow chains are permitted for use only with these.
PERHATIKAN CATATAN BERIKUT SAAT MENGGUNAKAN RANTAI SALJU:
- Snow chains are only permissible for certain wheel/tyre combinations. You can obtain information about this from a Mercedes-Benz Service Centre.
- For safety reasons, only use snow chains that have been specifically approved for your vehicle by Mercedes-Benz, or snow chains of the same quality standard.
• If snow chains are fitted, the maximum permissible speed is 50 km/h.
• Vehicles with Active Parking Assist: do not use Active Parking Assist when snow chains are fitted.
You can permanently limit the maximum vehicle speed for driving with winter tyres ( → page 353).
You can deactivate ESP ® to start off ( → page 345). Spinning the wheels results in a cutting action, which enhances traction.


G-Class - Owner's Manual
Wheels and tyres Type pressure
< Tekanan ban
Catatan tentang tekanan ban

PERINGATAN
Risk of an accident due to tyre pressure that is insufficient or too high
BAN DENGAN TEKANAN YANG TIDAK CUKUP ATAU TERLALU TINGGI MENIMBULKAN BAHAYA BERIKUT:
• The tyres can burst.
• The tyres can wear excessively and/or unevenly.
- The driving characteristics as well as the steering- and braking may be greatly impaired.
▶ Observe the recommended tyre pressures and check the tyre pressure of all tyres including the spare wheel:
• monthly
• when the load changes
• before embarking on a longer journey
• when the operating conditions change, e.g. off-road driving
• when driving at over 250 km/h
Adjust the tyre pressure, if necessary.
TEKANAN BAN TINGGI ATAU RENDAH DAPAT:
• shorten the service life of the tyres.
• cause increased tyre damage.
- adversely affect driving characteristics and thus driving safety, e.g. due to aquaplaning.

PERINGATAN
Risk of accident due to repeated pressure drop in the tyres
The wheels, valves or tyres could be damaged.
Too low a tyre pressure can lead to the tyres bursting.
▶ Examine the tyres for foreign objects.
▶ Check whether the tyre has a puncture or the valve has a leak.
If you are unable to rectify the damage, contact a qualified specialist workshop.
Information on the recommended tyre pressure for the vehicle's factory-fitted tyres can be found on the tyre pressure table on the inside of the fuel filler flap ( → page 654).
Use a suitable pressure gauge to check the tyre pressure. The outer appearance of a tyre does not permit any reliable conclusion about the tyre pressure.


G-Class - Owner's Manual
Wheels and tyres Type pressure
You can also check the tyre pressure using the on-board computer ( → page 654).
HANYA KOREKSI TEKANAN BAN SAAT BAN DALAM KEADAAN DINGIN. KONDISI BAN DINGIN:
- The vehicle has been parked with the tyres out of direct sunlight for at least three hours.
• The vehicle has travelled less than 1.6 km.
A rise in the tyre temperature by 10 °C increases the tyre pressure by approx. 10 kPa (0.1 bar/1.5 psi). Take this into account when checking the tyre pressure of warm tyres.
CATATAN TENTANG OPERASI TRAILER
Always inflate the rear axle tyres to the recommended tyre pressures on the tyre pressure table for increased load.
CATATAN TENTANG MENGEMUDI DI PASIR
When driving on sand, you can lower the tyre pressure ( → page 283).
Tabel tekanan ban
The tyre pressure table is on the inside of the fuel filler flap.

The tyre pressure table shows the recommended tyre pressure for all tyres approved for this vehicle. The recommended tyre pressures apply for cold tyres under various operating conditions, i.e. load and/or speed of the vehicle.
If one or more tyre sizes precede a tyre pressure, the tyre pressure information following is only valid for those tyre sizes.
The load conditions "partially laden" and "fully laden" are defined in the table for different numbers of passengers and amounts of luggage. The actual number of seats may differ from this.
PASTIKAN JUGA UNTUK MEMPERHATIKAN TOPIK TERKAIT BERIKUT:
• Notes on tyre pressure ( → page 653)
Sistem pemantauan tekanan ban
FUNGSI SISTEM PEMANTAUAN TEKANAN BAN
The system checks the tyre pressure and the temperature of the tyres fitted to the vehicle by means of a tyre pressure sensor.
The tyre pressure and the tyre temperature are displayed on the driver display.
In the event of significant pressure loss or excessive temperature of the tyres, you will be warned by display messages ( → page 822) or the warning light ☐ on the driver display ( → page 843).
The tyre pressure monitoring system serves solely as an aid. It is the driver's responsibility to set the tyre pressure to the recommended cold tyre pressure suitable for the operating situation.
In most cases, the tyre pressure monitoring system will automatically update the new reference values after you have changed the tyre pressure. You can, however, also update the reference values by restarting the tyre pressure monitoring system manually ( → page 655).

G-Class - Owner's Manual
Wheels and tyres Type pressure

BATASAN SISTEM
SISTEM MUNGKIN TERGANGGU ATAU TIDAK BERFUNGSI DALAM SITUASI BERIKUT:
• Incorrect reference values were taught in.
- Sudden pressure loss caused, e.g. by a foreign object penetrating the tyre.
• There is a malfunction caused by another radio signal source.
After a maximum of ten minutes of driving through water, the message Tyre press. monitor currently unavailable appears on the driver display. The tyre pressure monitoring system is then temporarily unavailable due to fording. This message disappears approximately one minute after fording.
MEMERIKSA TEKANAN BAN DENGAN SISTEM PEMANTAUAN TEKANAN BAN
Persyaratan:
• The vehicle is switched on.
Driver display:

Press OK to confirm.
SALAH SATU PESAN BERIKUT MUNCUL:
• Current tyre pressure of each wheel:

- Tyre pressures will be displayed after a few minutes of driving: Current values are not yet known to the system. The pressure/temperature values of each tyre are displayed as soon as they are known to the system.
- Tyre pressure monitor active: the break-in process of the system is not yet complete. The tyre pressures are already being monitored.
Compare the current tyre pressure with the recommended tyre pressure for the current operating status ( → page 654). Additionally, observe the notes on cold tyres ( → page 653).
The values displayed on the driver display may deviate from those of the tyre pressure gauge as they relate to sea level. At high elevations, the tyre pressure values indicated by a pressure gauge are higher than those shown on the driver display.
MEMULAI ULANG SISTEM PEMANTAUAN TEKANAN BAN
Persyaratan:
\- The recommended tyre pressure is correctly set for the respective operating condition in each of the four wheels ( → page 653).

G-Class - Owner's Manual
Wheels and tyres Type pressure

MULAI ULANG SISTEM PEMANTAUAN TEKANAN BAN DALAM SITUASI BERIKUT:
• The tyre pressure has changed.
• The wheels or tyres have been changed or newly fitted.
Driver display:

▶ Select Tyre pressure and confirm with OK.
Swipe down on the Touch Control on the steering wheel.
The driver display shows the message Use current tyre pressures as new reference values?
Select Yes and confirm the restart with OK.
The driver display shows the message Tyre pressure monitor restarted.
Current warning messages are deleted and the ⏻ yellow warning lamp goes out.
After you have driven for a few minutes, the system checks whether the current tyre pressures are within the specified range. The current tyre pressures are then accepted as reference values and monitored.
If the tyre pressure values are not within the specified range, the message Please correct tyre pressure appears.

G-Class - Owner's Manual
Wheels and tyres Wheel change
Penggantian roda
Catatan tentang memilih, merakit, dan mengganti ban
You can ask for information regarding permitted wheel/tyre combinations at a Mercedes-Benz Service Centre.

PERINGATAN
Risk of accident due to incorrect wheel and tyre dimensions
If wheels and tyres of the wrong size are fitted, the service brakes or components in the brake system and in the wheel suspension may be damaged.
▶ Always replace wheels and tyres with those that fulfil the specifications of the original part.
UNTUK RODA, PERHATIKAN HAL BERIKUT:
- Designation
Type
UNTUK BAN, PERHATIKAN HAL BERIKUT:
- Designation
Manufacturer
- Type

PERINGATAN
Risk of injury through exceeding the specified tyre load-bearing capacity or the permissible speed rating
Exceeding the load-bearing capacity of the tyres can lead to tyre damage and could cause the tyres to explode.
Therefore, only use tyre types and sizes approved for your vehicle model.
▶ Observe the tyre load-bearing capacity rating and speed rating required for your vehicle.


G-Class - Owner's Manual
Wheels and tyres Wheel change

CATATAN
Vehicle and tyre damage caused by non-approved tyre types and sizes
For safety reasons, only use tyres, wheels and accessories which have been specially approved by Mercedes-Benz for your vehicle.
BAN INI DIKONFIGURASI KHUSUS UNTUK SISTEM KESELAMATAN AKTIF SEPERTI ABS, ESP 2 DAN 4MATIC, DAN DITANDAI SEBAGAI BERIKUT:
• MO = Mercedes-Benz Original
• MOE = Mercedes-Benz Original Extended (tyres with run-flat characteristics, only for certain wheels)
• MO1/MO1A = Mercedes-Benz Original (only certain AMG tyres)
Otherwise certain properties such as driving characteristics, noise emissions, consumption, etc. could be adversely affected. Furthermore, other tyre sizes could result in the tyres rubbing against the body and axle components when loaded. This could result in damage to the tyre or the vehicle.
Only use tyres, wheels and accessories that have been checked and recommended by Mercedes-Benz.


CATATAN
Risk to driving safety from retreaded tyres
Retreaded tyres are neither tested nor recommended by Mercedes-Benz, since previous damage cannot always be detected on retreaded tyres.
For this reason driving safety cannot be guaranteed.
Do not use used tyres if you have no information about their previous usage.

CATATAN
Possible wheel and tyre damage when driving over obstacles
Large wheels have a smaller section width. As the section width decreases, the risk of wheels and tyres being damaged when driving over obstacles increases.
▶ Avoid obstacles or drive especially carefully.
▶ Reduce your speed when driving over kerbs, speed bumps, manhole covers and potholes.
▶ Avoid particularly high kerbs.
G-Class - Owner's Manual
Wheels and tyres Wheel change

CATATAN
Possible wheel and tyre damage when parking on kerbs or in potholes
Parking on kerbs or in potholes can damage the wheels and tyres.
▶ Only park on level surfaces if possible.
▶ Avoid kerbs and potholes when parking.

CATATAN
Damage to electronic component parts due to the use of tyre-fitting tools
Vehicles with tyre pressure monitoring system: there are electronic components in the wheel.
Positioning tyre-fitting tools in the area of the valve may damage the electronic components.
▶ Tyre-fitting tools should not be applied in the area of the valve.
▶ Always have tyres changed at a qualified specialist workshop.

CATATAN
Damage to summer tyres at low ambient temperatures
At low ambient temperatures, tears could form when driving with summer tyres, causing permanent damage to the tyre.
At temperatures below 7 °C use M+5 tyres.
Accessory parts which are not approved for your vehicle by Mercedes-Benz, or which are not used correctly, can impair driving safety.
SEBELUM MEMBELI DAN MENGGUNAKAN AKSESORIS YANG TIDAK DISETUJUI, KUNJUNGI BENGKEL SPESIALIS YANG KOMPETEN DAN TANYAKAN TENTANG HAL-HAL BERIKUT:
Suitability
- Legal provisions
• Factory recommendations

PERINGATAN
Risk of accident with sport tyres
The special tyre tread in combination with the optimised tyre compound means that the risk of skidding or aquaplaning on wet roads is increased.
In addition, the tyre grip is greatly reduced at a low outside temperature and tyre running temperature.
Switch on the ESP ® and adapt your driving style accordingly.
▶ Use ⚠️ M+S tyres at outside temperatures of less than 7 °C.
▶ Only use tyres suitable for the intended use.
PERHATIKAN HAL-HAL BERIKUT SAAT MEMILIH, MEMASANG, DAN MENGGANTI BAN:
\- Country-specific requirements for tyre approval that define a specific tyre type for your vehicle.

Furthermore, the use of certain tyre types in certain regions and areas of operation can be highly beneficial.
- Only use tyres and wheels of the same type (summer tyres, winter tyres) and the same manufacture.
• Only fit wheels of the same size on one axle (left and right).
It is only permissible to fit a different wheel size in the event of a flat tyre in order to drive to the specialist workshop.
• Only fit tyres of the correct size onto the wheels.
- Do not make any modifications to the brake system, the wheels or the tyres.
The use of shims or brake dust shields is not permitted and may invalidate the vehicle's general operating permit.
- Vehicles with a tyre pressure monitoring system: All fitted wheels must be equipped with functioning sensors for the tyre pressure monitoring system.
- At temperatures below 7 °C, use winter tyres or all-season tyres marked M+S on all wheels.
Winter tyres bearing the snowflake symbol in addition to the M+S marking provide the best possible grip in wintry road conditions.
• For M+S tyres, only use tyres with the same tread.
- Observe the maximum permissible speed for the M+S tyres fitted. If this is below the vehicle's maximum speed, this must be indicated in an appropriate label in the driver's field of vision.
• Drive the vehicle with new tyres at moderate speeds for the first 100 km.
- Replace the tyres after six years at the latest, regardless of wear.
You can permanently limit the maximum speed for winter tyre mode ( → page 353).
For more information on wheels and tyres, contact a qualified specialist workshop.
PASTIKAN JUGA UNTUK MEMPERHATIKAN TOPIK TERKAIT BERIKUT INI:
• Notes on tyre pressure ( → page 653)
• Tyre pressure table ( → page 654)
• Notes on the emergency spare wheel ( → page 667)
Catatan tentang penggantian roda
PERINGATAN
Risk of injury through different wheel sizes
Interchanging the front and rear wheels can severely impair the driving characteristics.
The disk brakes or wheel suspension components may also be damaged.
▶ Only interchange the front and rear wheels if the wheels and tyres have the same dimensions.
Interchanging the front and rear wheels if the wheels or tyres have different dimensions can render the general operating permit invalid.
Observe the instructions and safety notes on "Changing a wheel" ( → page 657).
POLA KEAUSAN PADA RODA DEPAN DAN BELAKANG BERBEDA:
• front wheels wear more on the tyre shoulder


G-Class - Owner's Manual
Wheels and tyres Wheel change
• rear wheels wear more in the centre of the tyre
Do not drive with tyres that have too little tread depth. This significantly reduces traction on wet roads (aquaplaning).
On vehicles with the same front and rear wheel size, you can interchange the wheels every 5000 to 10,000 km, depending on the wear. Ensure the direction of rotation is maintained for the wheels.
Catatan tentang penyimpanan roda
SAAT MENYIMPAN RODA, PERHATIKAN CATATAN BERIKUT:
• After removing wheels, store them in a cool, dry and preferably dark place.
- Protect the tyres from contact with oil, grease or fuel.
Ikhtisar peralatan kendaraan
PERALATAN KENDARAAN BERISI:
- vehicle tool bag with:
- pump lever for jack
- wheel wrench with T-piece
- screwdriver (inserted in a pump lever)
- dismantling tool for roof luggage rack (inserted in a pump lever)
\- jack with adapter
The vehicle tool kit is located under the rear bench seat ( → page 50).

1 Vehicle tool bag
Jack
The jack weighs approximately 4.4 kg.
The maximum load capacity of the jack can be found on the sticker affixed to the jack.
The jack is maintenance-free. In the event of a malfunction, please contact a qualified specialist workshop.
Mempersiapkan kendaraan untuk penggantian roda
Persyaratan
- The required tyre-change tool kit is available. If your vehicle is not equipped with the tyre-change tool kit, consult a qualified specialist workshop to find out about suitable tools.
• The vehicle is not on a slope.
• The vehicle is on solid, non-slippery and level ground.


G-Class - Owner's Manual
Wheels and tyres Wheel change
Apply the electric parking brake.
Move the front wheels to the straight-ahead position.
Shift the transmission to position P.
▶ Switch off the vehicle.
Make sure that the vehicle cannot be started.
Place chocks or other suitable items under the front and rear of the wheel that is diagonally opposite the wheel you wish to change.
▶ Raise the vehicle ( → page 662).
Menaikkan kendaraan untuk penggantian roda
Persyaratan:
• There are no persons in the vehicle.
• The vehicle has been prepared for a wheel change ( → page 661).

ASSEMBLING THE JACK

Assemble pump lever ①.
Place pump lever ① with the recess on drain screw ② on the jack.
Turn pump lever ① clockwise as far as it will go.
Drain screw ② is closed.

3 Adapter
To raise the vehicle at the front: adapter Ⓐ must be secured on the jack.
To raise the vehicle at the rear: remove adapter 3 from the jack.

G-Class - Owner's Manual
Wheels and tyres Wheel change
CATATAN PENTING TENTANG PENGGUNAAN DONGKRAK:
- Use only the vehicle-specific jack that has been tested and approved by Mercedes-Benz to raise the vehicle.
- The jack is only designed for raising and holding the vehicle for a short time while a wheel is being changed and not for maintenance work under the vehicle.
- The jack must be placed on a firm, level and non-slip surface. If necessary, use a large, flat, load-bearing, non-slip underlay.
• Position the jack only at the vehicle lift support point.
ATURAN PERILAKU SAAT KENDARAAN DIANGKAT:
• Never place your hands or feet under the vehicle.
• Never lie under the vehicle.
• Do not start the vehicle and do not release the electric parking brake.
• Do not open or close any doors or the rear-end door.

Using the wheel spanner, loosen the wheel bolts on the wheel you wish to change by about one full turn. Do not unscrew the screws completely.

WARNING
Risk of injury from incorrect positioning of the jack
If you do not position the jack correctly at the appropriate jacking point of the vehicle, the jack could tip with the vehicle raised.
Only position the jack at the appropriate jacking point of the vehicle. The base of the jack must be positioned vertically under the jacking point of the vehicle.
NOTE
Damage to the vehicle due to the jack
If the jack has not been positioned at the prescribed jack support points, the vehicle may suffer damage.
▶ Only position the jack at the jack support points provided for this purpose.
RAISING THE VEHICLE AT THE FRONT


G-Class - Owner's Manual
Wheels and tyres Wheel change
Make sure that the adapter is secured on the jack.
Position jack ⚠ on the comfort bushing on transverse control arm ⚡.
Raise the vehicle by pumping until the tyre is no more than 3 cm off the ground.
Loosen and remove the wheel ( → page 664).
RAISING THE VEHICLE AT THE REAR

▶ Pull out the adapter from the jack.
Position jack ④ at the vehicle lift support point of axle tube ⑥.
Keep pumping until axle tube is seated securely in the vehicle lift support point and the base of the jack lies evenly on the ground.
Raise the vehicle by pumping until the tyre is no more than 3 cm off the ground.
Loosen and remove the wheel ( → page 664).

Melepas roda
Persyaratan:
• The vehicle is raised ( → page 662).
When changing a wheel, avoid applying any force to the brake discs, as this could impair the level of comfort when braking.
CATATAN
Damage to threading from dirt on wheel bolts
Do not place wheel bolts in sand or on a dirty surface.
Unscrew the wheel bolts.
Remove the wheel.
Fit the new wheel ( → page 664).
Memasang roda baru
Persyaratan:
• The wheel has been removed ( → page 664).

G-Class - Owner's Manual
Wheels and tyres Wheel change

PERINGATAN
Risk of accident from losing a wheel
Oiled or greased wheel bolts can cause the wheel bolts to come loose, as too can damaged wheel bolts or wheel hub threads.
▶ Never oil or grease the threads.
In the event of damage to the threads, contact a qualified specialist workshop immediately.
▶ Have the damaged wheel bolts or damaged hub threads replaced.
▶ Do not continue driving.
Observe the information on the choice of tyres ( → page 657).
For tyres with a specified running direction, an arrow on the side wall of the tyre indicates the correct running direction. Observe the direction of rotation when assembling.

PERINGATAN
Risk of injury from tightening wheel bolts and nuts
If you tighten the wheel bolts or wheel nuts when the vehicle is raised, the jack could tip.
▶ Only tighten wheel bolts or wheel nuts when the vehicle is on the ground.
Place the wheel to be fitted on the wheel hub and push it on.

For safety reasons, only use wheel bolts which have been approved for Mercedes-Benz and for the wheel in question.

▶ Tighten the wheel bolts evenly in a diagonal pattern in the order indicated ① to ⑤ until they are hand-tight.
Lower the vehicle and tighten wheel bolts to the prescribed tightening torque ( → page 665).
Menurunkan kendaraan setelah penggantian roda
Persyaratan:
• The new wheel has been fitted ( → page 664).
Lowering the vehicle: Use the pump lever to open the pressure release screw on the jack, turning it ( → page 662) approximately one quarter turn.
Place the jack to one side.

G-Class - Owner's Manual
Wheels and tyres Wheel change

▶ Tighten the wheel bolts evenly in a diagonal pattern in the indicated order ① to ⑤ with an initial maximum force of 80 Nm.
Tighten the wheel bolts evenly in a diagonal pattern in the indicated order ① to ⑤ with the specified tightening torque of 180 Nm.

PERINGATAN
Risk of accident due to incorrect tightening torque
The wheels could come loose if the wheel bolts or wheel nuts are not tightened to the prescribed torque.
▶ Ensure that the wheel bolts or wheel nuts are tightened to the prescribed tightening torque.
If you are not sure, do not move the vehicle. Contact a qualified specialist workshop and have the tightening torque checked immediately.
▶ Push the jack piston back in and close the pressure release screw.
Stow the jack and tool kit in the vehicle.
Check the tyre pressure of the newly fitted wheel and adjust it if necessary.

The following does not apply if the new wheel is an emergency spare wheel.
▶ Vehicles with a tyre pressure monitoring system: restart the tyre pressure monitoring system ( → page 655).

G-Class - Owner's Manual
Wheels and tyres Emergency spare wheel
Roda cadangan darurat
Catatan tentang roda cadangan darurat

PERINGATAN
Risk of accident caused by incorrect wheel and tyre dimensions
The wheel or tyre size and the tyre type of the emergency spare wheel or spare wheel and the wheel to be replaced may differ. The emergency spare wheel or spare wheel can significantly impair driving characteristics of the vehicle.
To prevent hazardous situations:
Drive carefully.
▶ Never fit more than one emergency spare wheel or spare wheel that differs in size.
▶ Only use an emergency spare wheel or spare wheel briefly.
Do not deactivate ESP*.
▶ Have the emergency spare wheel or spare wheel of a different size replaced at the nearest qualified specialist workshop. The new wheel must have the correct dimensions.
The emergency spare wheel is attached to the carrier on the rear door.

PERHATIKAN CATATAN BERIKUT TENTANG PEMASANGAN RODA CADANGAN DARURAT:
- The maximum permissible speed with an emergency spare wheel fitted is 80 km/h.
• Do not fit the emergency spare wheel with snow chains.
- Replace the emergency spare wheel after six years at the latest, regardless of wear.
- Check the tyre pressure of the emergency spare wheel when fitted. Correct the pressure as necessary.
The specified tyre pressure is stated on the label of the emergency spare wheel.
① Vehicles with a tyre pressure monitoring system: if an emergency spare wheel is fitted, the tyre pressure monitoring system cannot function reliably. For a few minutes after an emergency spare wheel is fitted, the system may still display the tyre pressure of the removed wheel. Only restart the system when the emergency spare wheel has been replaced with a new wheel.
PASTIKAN JUGA MEMPERHATIKAN TOPIK TERKAIT BERIKUT INI:
• Notes on tyre pressure ( → page 653)
• Tyre pressure table ( → page 654)


G-Class - Owner's Manual
Wheels and tyres Emergency spare wheel
• Notes on fitting tyres ( → page 657)
• Fitting an emergency spare wheel ( → page 661)


Back to Contents
G-Class - Owner's Manual
> Technical data

< Data teknis
This interactive PDF works like a website - tap or click a button to jump straight to where you want to go. You can return here at any time via the navigation bar at the top left.
Notes on technical data 670
On-board electronics 671
Regulatory radio information 673
Vehicle identification plate, VIN and engine number 723
Operating fluids 745
Vehicle data 757
Trailer hitch 764
G-Class - Owner's Manual
> Technical data Notes on technical data
Catatan tentang data teknis
The technical data was determined in accordance with EU Directives. The data stated only applies to vehicles with standard equipment. You can obtain further information from a Mercedes-Benz Service Centre.
Only for certain countries: you can find vehicle-specific vehicle data in the COC documents (CERTIFICATE OF CONFORMITY). These documents are supplied upon delivery of the vehicle.

670
G-Class - Owner's Manual
> Technical data On-board electronics
Elektronik kendaraan
Notes on tampering with the engine electronics

CATATAN
Premature wear through improper maintenance
Improper maintenance may cause vehicle components to wear more quickly and the vehicle's operating permit may be invalidated.
▶ Always have work on the engine electronics and related components carried out at a qualified specialist workshop.
Radio dua arah
NOTES ON INSTALLING TWO-WAY RADIOS

PERINGATAN
Risk of accident due to improper work on two-way radios
If two-way radios are manipulated or retrofitted incorrectly, the electromagnetic radiation from the two-way radios can interfere with the vehicle electronics and jeopardise the operating safety of the vehicle.
You should have all work on electrical and electronic components carried out at a qualified specialist workshop.


PERINGATAN
Risk of accident due to improper operation of two-way radios
If you use two-way radios in the vehicle improperly, their electromagnetic radiation can disrupt the vehicle's electronics. This is the case in the following situations, in particular:
• The two-way radio is not connected to an exterior aerial.
- The exterior aerial is fitted incorrectly or is not a low-reflection aerial.
This could jeopardise the operating safety of the vehicle.
▶ Have the low-reflection exterior aerial fitted at a qualified specialist workshop.
When operating two-way radios in the vehicle, always connect them to the low-reflection exterior aerial.

G-Class - Owner's Manual
> Technical data On-board electronics

CATATAN
Invalidation of the operating permit due to failure to comply with the instructions for installation and use
The operating permit may be invalidated if the instructions for installation and use of two-way radios are not observed.
▶ Only use approved frequency bands.
▶ Observe the maximum permissible output power in these frequency bands.
▶ Only use approved aerial positions.

1 Front roof area
2 Rear roof area
Fitting a roof aerial to vehicles with a roof luggage rack is subject to restrictions, and cannot be generally permitted. Further information about these restrictions can be obtained at a qualified specialist workshop.
Use Technical Specification ISO/TS 21609 (Road Vehicles - "EMCs for installation of aftermarket radio frequency transmitting equipment") when retrofitting two-way radios. Comply with the legal requirements for detachable parts.
If your vehicle is equipped with the pre-installation for a two-way radio, use the power supply and aerial connectors provided in the pre-installation. Observe the manufacturer's supplements when fitting.
DAYA KELUARAN TRANSMISI TELEPON SELULER
The maximum transmission output (PEAK) at the base of the aerial must not exceed the values in the following table.
FREQUENCY BAND AND MAXIMUM TRANSMISSION OUTPUT
Frequency band Maximum transmission output 2-m- frequency band 50 W 144 - 174 MHz Terrestrial Trunked Radio (TETRA) 10 W 380 - 460 MHz Mobile phone 2 W 2G Mobile phone 0.5 W 3G/4G/5G
BERIKUT INI DAPAT DIGUNAKAN DI DALAM KENDARAAN TANPA BATASAN:
• two-way radios with a maximum transmission output of up to 100 mW
- two-way radios with transmitter frequencies in the 380 -410 MHz frequency band and a maximum transmission output of up to 2 W (TETRA)
• mobile phones (2G/3G/4G/5G)
TIDAK ADA BATASAN SAAT MENEMPATKAN ANTENA DI BAGIAN LUAR KENDARAAN UNTUK PITA FREKUENSI BERIKUT:
• Terrestrial Trunked Radio (TETRA)
2G/3G/4G/5G

G-Class - Owner's Manual
> Technical data > Regulatory radio information
< Informasi radio peraturan
Informasi khusus tentang aplikasi nirkabel sesuai dengan 2014/53/EU
Besides the typical frequencies for mobile communication cars by Mercedes-Benz make use of the following automotive radio applications.
TYPE OF WIRELESS APPLICATIONS AND SPECIFICATIONS IN ACCORDANCE WITH 2014/53/EU
Technology Frequency range Transmission output/magnetic field strength Remote Keyless Entry 20 kHz (9 - 90 kHz) ≤ 72 dBμA/m at 10m Wireless Power Transmission 105 kHz (90 - 119 kHz) ≤ 42 dBμA/m at 10m Remote Keyless Entry 120 kHz (119 - 135 kHz) ≤ 42 dBμA/m at 10m Wireless Power Transmission 127 kHz (119 - 135 kHz) ≤ 66 dBμA/m at 10m with the magnetic field strength level decreasing 3dB/octave above 119 kHz Near-field communication 13.553 - 13.567 MHz ≤ 42 dBμA/m at 10m Remote Keyless Entry, Garage Door Opener, Tire Pressure Monitoring 433 MHz (433.05 - 434.79 MHz) ≤ 10 mW ERP Block Heater Remote Control, Garage Door Opener 868 MHz (868.0 - 868.6 MHz) ≤ 25 mW ERP Block Heater Remote Control, Garage Door Opener 869 MHz (868.7 - 869.2 MHz) ≤ 25 mW ERP Bluetooth, Kleer, RLAN, wireless Headphones 2.4 GHz ISM band (2400 - 2483.5 MHz) ≤ 100 mW EIRP RLAN 5.1 GHz UNII-1 (5150 - 5250 MHz) ≤ 40 mW EIRP


G-Class - Owner's Manual
> Technical data > Regulatory radio information

Technology Frequency range Transmission output/magnetic field strength
Interior Monitoring Radar, RLAN 5.8 GHz UNII-3 (5725 - 5875 MHz) ≤ 40 mW EIRP
Remote Keyless Entry 7.25 GHz UWB (6.0–8.5 GHz) ≤ -41.3 dBm/MHz EIRP mean ≤ 0 dBm/MHz EIRP peak
24 GHz radar 24 GHz ISM band (24.15 - 24.25 GHz) ≤ 100 mW EIRP
76 GHz radar 76-77 GHz ≤ 55 dBm peak EIRP
79 GHz radar 77-79 GHz < 55 dBm peak FIRP
Compensator ECE DE003 and ECE DE004 GSM (E-GSM 900) < +33 dBm GSM (E-GSM 1800) < +30 dBm UMTS (I, III, VIII) < +23 dBm LTE (B1, B3, B7, B8, B20) < -23 dBm HERMES (Hardware for Enhanced Remote, Mobility & Emergency Services) WLAN (2400-2483.5 MHz) < 20 dBm WLAN (5736-5833 MHz) < 14 dBm GSM (E-GSM 900, Class 4) < +33 dBm ( ± 2 dB) GSM (E-GSM 1800, Class 1) < +30 dBm (+2 dB) GSM (E-GSM 900 8-PSK, Class E2) < +27 dBm (+3 dB) GSM (E-GSM 1800 8-PSK, Class E2) < +26 dBm ( ± 3 dB/-4 dB) UMTS (2100 WCDMA FDD B1, Class 3) < +24 dBm (+1 dB/-3 dB) LTE (FDD B I, B III, B38, B39, B40, B41, Class 3) < -23 dBm ( ± 2 dB) GPS (1575.42 MHz +/- 2 MHz) Receiving only RAMSES (Router And Mobile SServiceS) GSM (E-GSM 850 / L-GSM 900, Class 4) < +32.5 dBm ( ± 1 dB) GSM (E-GSM 1800 / E-GSM 1900, Class 4) < +29.5 dBm ( ± 1 dB) UMTS (WCDMA FDD I, II, III, IV, V, VIII, XIX, Class 3) < +23.5 dBm (+1 dB)

G-Class - Owner's Manual
> Technical data > Regulatory radio information

Teknologi Rentang frekuensi Daya keluaran/kekuatan medan magnet
LTE (FDD B1, B2, B3, B4, B5, B7, B8, B9, B18, B19, B21, B28, Class < +23 dBm (±1 dB) 3)
LTE (TDD B38, B40, B41, Class 3) < +23 dBm (±1 dB)
GNSS (1559 - 1610 MHz) Receiving only
Further information and updates are available at the following web address:
https://regulatoryradioinformation.corpinter.net/en

Pengidentifikasi radio peraturan/catatan khusus
The tables and sections contain the following regulatory radio information:
• Manufacturer information
• Required regulatory radio identifiers, listed by country/region:
- Manufacturer's specifications
- Model designations
- Radio equipment approval numbers
• Specific information on radio-based vehicle components
Further information and updates are available at the following website:
https://regulatoryradioinformation.corpinter.net/en

IKHTISAR PRODUSEN
Produsen Informasi produsen
Continental ADC Continental ADC Automotive Distance Con-
trol Systems GmbH, Peter-Dornier-Straße 10, 88131 Lindau, Germany
Bosch Robert Bosch GmbH, Daimlerstraße 6, 71229
Leonberg, Germany
Bury BURY SP. Z O.O., UL. WOJSKA POLSKIEGO 4,
39-300 Mielec, Poland
Continental Antenna Continental Advanced Antenna GmbH, Römer
ring 1, 31137 Hildesheim, Germany
Continental Automotive Continental Automotive GmbH, Siemensstraße
12, 93055 Regensburg, Germany
Continental Automotive France Continental Automotive France SAS, 1 Avenue
Paul Ourliac, 31100 Toulouse 1, France
Continental Automotive Hungary Continental Automotive Hungary Kft., H-1106
Budapest, Napmátka u. 6., Hungary


G-Class - Owner's Manual
> Technical data > Regulatory radio information
Manufacturer Manufacturer information
Continental Automotive Technologies Continental Automotive Technologies GmbH, VDO-Straße 1, 64832 Babenhausen, Germany Gentex Gentex Corporation, 600 North Centennial Street, Zeeland MI 49464, USA Harman Becker Harman Becker Automotive Systems GmbH, Becker-Goehring-Straße 18, 76307 Karlsbad, Germany HELLA HELLA KGaA Hueck & Co., Rixbecker Straße 75, 59552 Lippstadt, Germany Hirschmann Hirschmann Car Communication GmbH, Stuttgarter Straße 45-51, 72654 Neckartenzlingen, Germany Huf Baolong Huf Baolong Electronics Bretten GmbH, Gewerbestraße 40, 75015 Bretten, Germany HUF HUF Hülsbeck & Fürst GmbH & Co. KG, Steeger Straße 17, 42551 Velbert, Germany MARQUARDT MARQUARDT GmbH, Schloßstraße 16, 78604 Riethelm-Wellhelm, Germany Meta System Meta System S.P.A., Via T. Galimberti 5, 42124 Reggio Emilia, Italy Molex Molex CVS Dabendorf GmbH, Märkische Straße 72, 15806 Zossen, Germany Molex Technologies Molex Technologies GmbH, Mizarstraße 3, 12529 Schönefeld, Germany Panasonic Panasonic Automotive Systems Europe GmbH, Robert-Bosch-Straße 27, 63225 Langen, Germany
Manufacturer Manufacturer information
Schrader Schrader Electronics Ltd., 11 Technology Park, Belfast Road, Antrim BT41 1QS, Northern Ireland, United Kingdom Sennheiser Sennheiser electronic GmbH & Co. KG, Am Labor 1, 30900 Wedemark, Germany Valeo Valeo Telematik und Akustik GmbH, Max-Planck-Straße 28-32, 61381 Friedrichsdorf Germany Veoneer Veoneer Sweden AB, Wallentlinsvägen 22, 44737 Vårgårda, Sweden Vitesco Vitesco Technologies GmbH, Siemensstrasse 12, 93055 Regensburg Germany WITTE-Velbert WITTE-Velbert GmbH & Co. KG, Hoeferstr. 3-15, 42551 Velbert, Germany
ALJAZAIR
Disetujui oleh ANF
Referensi Sertifikat Kesesuaian

G-Class - Owner's Manual
> Technical data > Regulatory radio information
Disetujui oleh ARPCE Referensi Sertifikat Kesesuaian
REGULATORY RADIO IDENTIFIERS
Manufacturer Model designation Radio equipment approval number Continental Antenna RKE223GNS (locking system) 71/H/ANF/2021 Continental Automotive CMKG1 (locking system) 122/H/ANF/2021 Continental Automotive CMKG2 (locking system) 136/H/ANF/2023 Continental Automotive MARS Keyless (locking sys-tem) 168/H/ANF/2024 HELLA DM4 (locking system) 123/H/ANF/2021 Hirschmann 920287A (locking system) 106/H/ANF/2020 Hirschmann 920287B (locking system) 107/H/ANF/2020 Hirschmann 920702A (locking system) 133/H/ANF/2022 Huf Baolong TSSRE4A (tyre pressure sen-sor) 198/H/ANF/2021 HUF HUF13145 (locking system) 105/H/ANF/2022 MARQUARDT DC12A (locking system) 188/H/ANF/2021 MARQUARDT DC12B (locking system) 189/H/ANF/2021 MARQUARDT DC12K (locking system) 190/H/ANF/2021
Manufacturer Model designation Radio equipment approval number MARQUARDT MS5 (locking system) 195/H/ANF/2021 MARQUARDT MS7 (locking system) 146/H/ANF/2024 MARQUARDT MK1 (locking system) 193/H/ANF/2021 MARQUARDT MK2 (locking system) 194/H/ANF/2021 MARQUARDT MK3 (locking system) 300/H/ANF/2024 MARQUARDT 3350.38 (locking system) 186/H/ANF/2021 Schrader AG5SP4 (tyre pressure sensor) 3681/1-73.OA 1639/DT/DG/ARPT/15 Schrader AG3PF4 (tyre pressure sensor) 652/1/DT/DG/ARPCE/2020 Schrader BG3FP4 (tyre pressure sensor) 56/H/ANF/2021 Schrader GG4T (tyre pressure sensor) 3994/1.69-DA/2098/DT/DG/ARPT/17 Schrader DG6W2D4 (tyre pressure sensor) 2695/1-NO.431396/DT/DG/ARPT/17 WITTE-Velbert SDHTAG3NFC (locking system) 32/H/ANF/2021

G-Class - Owner's Manual
> Technical data > Regulatory radio information
ARGENTINA
REGULATORY RADIO IDENTIFIERS
Manufacturer Model designation Radio equipment approval number Continental ADC ARS4-A (radar sensor) C-18005 Continental ADC ARS6-A (radar sensor) H-28818 Continental ADC ARS441DP10 (radar sensor) C-2377 Continental Antenna RKE213E1 (aerial amplifier) H-26206 Continental Antenna RKE223E1 (aerial amplifier) H-24637 Continental Automotive CMKG1 (locking system) H-24376 Continental Automotive CMKG2 (locking system) H-28998 Continental Automotive MARS Keyless (locking sys-tem) H-17929 Continental Automotive D-WMI2020A (control unit) H-23974 Continental Automotive Tech-nologies NTG7Q MID LF2 (head unit) C-29127 Continental Automotive Tech-nologies NTG7Q HIGH LF2 (head unit) C-29126 Continental Automotive Tech-nologies NTG7Q PREMIUM LF2 (head unit) C-29128 Continental Automotive Tech-nologies NTG7Q PREMIUMPLUS LF2 (head unit) C-29930 HELLA DM4 (locking system) H-17845
Manufacturer Model designation Radio equipment approval number Hirschmann 920287A (locking system) H-15694 Hirschmann 920287B (locking system) H-15695 Hirschmann 920702A (locking system) H-28310 Huf Baolong TSSRE4A (tyre pressure sen-sor) H-27592 HUF HUF13482 (locking system) H-31125 HUF HUF13145 (locking system) H-28067 HUF HUF14632 (locking system) H-15541 HUF HUF4761 (locking system) H-11545 MARQUARDT DC12A (locking system) H-17689 MARQUARDT DC12B (locking system) H-21034 MARQUARDT DC12K (locking system) H-21035 MARQUARDT MS2 (locking system) H-17598 MARQUARDT MS4 (locking system) H-23101 MARQUARDT MS5 (locking system) H-24933 MARQUARDT MS6 (locking system) H-30441 MARQUARDT MS7 (locking system) H-29810 MARQUARDT MK1 (locking system) H-17213

G-Class - Owner's Manual
> Technical data > Regulatory radio information

Manufacturer Model designation Radio equipment approval
number
MARQUARDT MK2 (locking system) H-17212
MARQUARDT MK3 (locking system) H-30378
MARQUARDT 3350.38 (locking system) H-23166
MARQUARDT MU3 (locking system) H-30159
MARQUARDT MUB1 (locking system) H-30622
Schrader AG5SP4 (tyre pressure sen-
H-4788
sor)
Schrader AG3PF4 (tyre pressure sensor) H-23292
Schrader BG3FP4 (tyre pressure sensor) H-25586
Schrader GG4T (tyre pressure sensor) H-20495
Schrader DG6W2D4 (tyre pressure sensor) H-20959
Vitesco HFA30 (Handsfree-Access) H-30148
WITTE-Velbert SDHTAG3NFC (locking system) H-24664
AUSTRALIA
REGULATORY RADIO IDENTIFIERS
Manufacturer Model designation Continental ADC ARS4-A (radar sensor) Continental ADC ARS6-A (radar sensor) Continental ADC ARS4-C (radar sensor) Continental ADC ARS441DP10 (radar sensor) Bosch MRR1Rear (radar sensor) Bosch MRRe14FCR (radar sensor) Bosch F5CP12 (radar sensor) Continental Antenna RKE213E1 (aerial amplifier) Continental Antenna RKE223E1 (aerial amplifier) Continental Automotive CMKG1 (locking system) Continental Automotive CMKG2 (locking system) Continental Automotive MARS Keyless (locking system) Continental Automotive Technologies NTG7Q MID LF2 (head unit) Continental Automotive Technologies NTG7Q HIGH LF2 (head unit) Continental Automotive Technologies NTG7Q PREMIUM LF2 (head unit) Hirschmann 920287A (locking system) Hirschmann 920287B (locking system)


G-Class - Owner's Manual
> Technical data > Regulatory radio information


Manufacturer Model designation
Hirschmann 920702A (locking system) Huf Baolong TSSRE4A (tyre pressure sensor) HUF HUF13145 (locking system) MARQUARDT MS6 (locking system) MARQUARDT MS7 (locking system) MARQUARDT MK1 (locking system) MARQUARDT MK2 (locking system) MARQUARDT MK3 (locking system) MARQUARDT 3350.38 (locking system) MARQUARDT MU3 (locking system) MARQUARDT MUB1 (locking system) Schrader AG5SP4 (tyre pressure sensor) Schrader AG3PF4 (tyre pressure sensor) Schrader BG3FP4 (tyre pressure sensor) Schrader GG4T (tyre pressure sensor) Schrader DG6W2D4 (tyre pressure sensor) Veoneer 77V12BSM (radar sensor) Veoneer 77V12CRN (radar sensor)

Manufacturer Model designation
Veoneer 77V125CRN (radar sensor) Veoneer MMRV1 (radar sensor)
BAHAMAS
REGULATORY RADIO IDENTIFIERS
Manufacturer Model designation Radio equipment approval number Continental ADC ARS4-A (radar sensor) URCA_TA_2014_082 Continental ADC ARS6-A (radar sensor) URCA_TA_2023_211 Continental ADC ARS4-C (radar sensor) URCA_TA_2019_167 Bosch MRR1Rear (radar sensor) URCA_TA/2017_184 Bosch MRRe14FCR (radar sensor) URCA_TA/2017_157 Bosch FR5CPCCF (radar sensor) URCA_TA_2019_195 Bosch F5CP12 (radar sensor) URCA_TA_2022_077 Continental Automotive CMKG1 (locking system) URCA_TA/2020_068 Continental Automotive CMKG2 (locking system) URCA_TA/2023_028 Continental Automotive MARS Keyless (locking sys-tem) URCA_TA/2017_119 Continental Antenna RKE213E1 (aerial amplifier) UCRA_TA/2016_009 Continental Antenna RKE223E1GNS (aerial ampli-fer) UCRA_TA/2020_032


G-Class - Owner's Manual
> Technical data > Regulatory radio information
Manufacturer Model designation Radio equipment approval
number
HELLA DM4 (locking system) URCA_TA/2017_078 HELLA RS6 (locking system) URCA_TA_2023_174 Hirschmann 920287A (locking system) URCA_TA/2019_053 Hirschmann 920287B (locking system) URCA_TA/2019_052 Hirschmann 920702A (locking system) URCA_TA/2022_043 HUF HUF13145 (locking system) URCA_TA_2022_057 HUF HUF14632 (locking system) URCA_TA/2015_087 HUF HUF4761 (locking system) URCA_TA/2015_087 Huf Baolong TSSRE4A (tyre pressure sensor) URCA_TA/2017_094 MARQUARDT DC12A (locking system) URCA_TA_2017_042 MARQUARDT DC12B (locking system) URCA_TA_2019_128 MARQUARDT DC12K (locking system) URCA_TA_2019_129 MARQUARDT MS2 (locking system) URCA_TA/2017_021 MARQUARDT MS4 (locking system) URCA_TA_2019_141 MARQUARDT MS5 (locking system) URCA_TA_2020_141 MARQUARDT MS6 (locking system) URCA_TA_2024-035 MARQUARDT MS7 (locking system) URCA_TA_2024-066 MARQUARDT MK1 (locking system) URCA_TA/2015_031
MARQUARDT MK2 (locking system) URCA_TA/2015_033
Manufacturer Model designation Radio equipment approval
number
MARQUARDT MK3 (locking system) URCA_TA_2024_025 MARQUARDT 3350.38 (locking system) URCA_TA/2019_250 MARQUARDT MU3 (locking system) URCA_TA/2023_245 MARQUARDT MUB1 (locking system) URCA_TA/2024_060 Schrader AG5SP4 (tyre pressure sensor) URCA_TA_TA/2015_009 Schrader AG3PF4 (tyre pressure sensor) URCA_TA_2019_101 Schrader BG3FP4 (tyre pressure sensor) URCA_TA_2021_001 Schrader GG4T (tyre pressure sensor) URCA_TA_2020_046 Schrader DG6W2D4 (tyre pressure sensor) URCA_TA_2019_247 Valeo ARTEMIS-SUB-01 (locking system) URCA_TA_2024_056 Veoneer 77V12BSM (radar sensor) URCA_TA_2019_169 Veoneer 77V12CRN (radar sensor) URCA_TA_2019_168 Veoneer 77V125CRN (radar sensor) URCA_TA_2021_027 Veoneer MMRV1 (radar sensor) URCA_TA/2015_063 Vitesco Technologies HFA30 (Handsfree-Access) URCA_TA_2023_247 WITTE-Velbert SDHTAG3NFC (locking system) URCA_TA_2020_056

G-Class - Owner's Manual
> Technical data Regulatory radio information
BELARUS
REGULATORY RADIO IDENTIFIERS

Manufacturer Model designation
Continental ADC ARS4-A (radar sensor)
Continental ADC ARS4-C (radar sensor)
Bosch MRR1Rear (radar sensor)
Bosch MRRe14FCR (radar sensor)
Bosch FR5CPCCF (radar sensor)
Bosch F5CP12 (radar sensor)
Continental Antenna RKE213E1 (aerial amplifier)
Continental Antenna RKE223E1GNS (aerial amplifier)
Continental Automotive CMKG1 (locking system)
Continental Automotive CMKG2 (locking system)
Continental Automotive MARS Keyless (locking system)
Harman Becker HERMES 3.0 (communication module)
HELLA DM4 (locking system)
HUF HUF13145 (locking system)
MARQUARDT DC12A (locking system)
MARQUARDT DC12B (locking system)
MARQUARDT DC12K (locking system)

Manufacturer Model designation
MARQUARDT MS2 (locking system)
MARQUARDT MS4 (locking system)
MARQUARDT MS5 (locking system)
MARQUARDT MS7 (locking system)
MARQUARDT MK1 (locking system)
MARQUARDT MK2 (locking system)
MARQUARDT MK3 (locking system)
MARQUARDT 3350.38 (locking system)
MARQUARDT MU3 (locking system)
MARQUARDT MUB1 (locking system)
Veoneer 77V12BSM (radar sensor)
Veoneer 77V12CRN (radar sensor)
Veoneer 77V125CRN (radar sensor)
Veoneer MMRV1 (radar sensor)
WITTE-Velbert SDHTAG3NFC (locking system)


G-Class - Owner's Manual
> Technical data > Regulatory radio information
BOTSWANA
REGULATORY RADIO IDENTIFIERS
Manufacturer Model designation Radio equipment approval number Continental ADC ARS4-A (radar sensor) BOCRA/TA/2018/2026 Continental ADC ARS6-A (radar sensor) BOCRA/TA/2022/7599 Continental ADC ARS4-C (radar sensor) BOCRA/TA/2020/5186 Bosch MRRe14FCR (radar sensor) BOCRA/TA/2019/4674 Bosch FR5CPCCF (radar sensor) BOCRA/TA/2019/4975 Bosch MRR1Rear (radar sensor) BOCRA/TA/2017/3788 Bosch F5CP12 (radar sensor) BOCRA/TA/2022/7110 Continental Antenna RKE213E1 (aerial amplifier) BOCRA/TA/2019/4387 Continental Antenna RKE223E1GNS (aerial amplifier) BOCRA/TA/2019/5050 Continental Automotive CMKG1 (locking system) BOCRA/TA/2019/5075 Continental Automotive CMKG2 (locking system) BOCRA/TA/2023/8144 Continental Automotive MARS Keyless (locking system) BOCRA/TA/2019/4661 HELLA DM4 (locking system) BOCRA/TA/2019/4662 HELLA RS6 (locking system) BOCRA/TA/2023/8610 Hirschmann 920287A (locking system) BOCRA/TA/2019/4724 Hirschmann 920287B (locking system) BOCRA/TA/2019/4723
Manufacturer Model designation Radio equipment approval
Number Hirschmann 920702A (locking system) BOCRA/TA/2022/7099 HUF HUF13145 (locking system) HUF13145 HUF HUF4761 (locking system) BOCRA/TA/2019/4664 MARQUARDT DC12A (locking system) BOCRA/TA/2019/4389 MARQUARDT DC12B (locking system) BOCRA/TA/2019/4388 MARQUARDT DC12K (locking system) BOCRA/TA/2019/4390 MARQUARDT MS2 (locking system) BOCRA/TA/2019/5135 MARQUARDT MS4 (locking system) BOCRA/TA/2019/4758 MARQUARDT MS5 (locking system) BOCRA/TA/2020/5473 MARQUARDT MS6 (locking system) BOCRA/TA/2024/259 MARQUARDT MS7 (locking system) BOCRA/TA/2024/374 MARQUARDT MK1 (locking system) BOCRA/TA/2019/4359 MARQUARDT MK2 (locking system) BOCRA/TA/2019/4360 MARQUARDT MK3 (locking system) BOCRA/TA/2024/373 MARQUARDT 3350.38 (locking system) BOCRA/TA/2019/4687 MARQUARDT MU3 (locking system) BOCRA/TA/2023/8771 MARQUARDT MUB1 (locking system) BOCRA/TA/2024/386 Veoneer 77V12BSM (radar sensor) BOCRA/TA/2019/4975 Veoneer 77V12CRN (radar sensor) BOCRA/TA/2019/4980


G-Class - Owner's Manual
> Technical data > Regulatory radio information
Manufacturer Model designation Radio equipment approval
number
Veoneer 77V125CRN (radar sensor) BOCRA/TA/2021/6191
WITTE-Velbert SDHTAG3NFC (locking system) BOCRA/TA/2020/5342
BRAZIL
Informasi tentang sistem radio dua arah di dalam kendaraan:
These systems are not protected against harmful interference and must not cause interference in properly approved systems.
REGULATORY RADIO IDENTIFIERS

Manufacturer Model designation Radio equipment approval
number
Continental ADC ARS4-A (radar sensor) 02217-14-06068
Continental ADC ARS441DP10 (radar sensor) 06783-19-02496
Bury A167 820 19 03 /A247 820 84 20280-23-04457 02 (mobile phone charger)
Bury A247 820 86 02 (mobile phone charger) 20288-23-04457
Bury A174 820 42 00 (USB-C 07785-24-04457 charger)
Continental Antenna RKE223E1 (aerial amplifier) 03691-15-05298
Continental Antenna RKE213E1 (aerial amplifier) 07359-21-12817
Continental Antenna RKE213E1 (aerial amplifier) 3691-15-5298

Manufacturer Model designation Radio equipment approval
number
Continental Automotive CMKG1 (locking system) 00325-20-02149
Continental Automotive CMKG2 (locking system) 01334-23-02149
Continental Automotive MARS Keyless (locking system) 03189-17-02856
Continental Automotive Technologies NTG7Q MID LF2 (head unit) 12520-23-06353
Continental Automotive Technologies NTG7Q HIGH LF2 (head unit) 12525-23-06353
Continental Automotive Technologies NTG7Q PREMIUM LF2 (head unit) 12522-23-06353
Continental Automotive Technologies NTG7Q PREMIUMPLUS LF2(head unit) 17830-23-06353
HELLA DM4 (locking system) 04689-17-05364
Hirschmann 920287A (locking system) 1855-12-5762
Hirschmann 920287B (locking system) 1787-12-8058
Huf Baolong TSSRE4A (tyre pressure sensor) 08539-19-03616
HUF HUF13482 (locking system) 07889-24-06643
HUF HUF13145 (locking system) HUF13145
HUF HUF14632 (locking system) 03627-15-06643
HUF HUF4761 (locking system) 00053-13-06643


G-Class - Owner's Manual
> Technical data > Regulatory radio information


Manufacturer Model designation Radio equipment approval
number
MARQUARDT DC12A (locking system) 01333-17-02930
MARQUARDT DC12B (locking system) 01395-11-02930
MARQUARDT DC12K (locking system) 01392-11-02930
MARQUARDT MS2 (locking system) 00616-17-02930
MARQUARDT MS4 (locking system) 06218-19-02930
MARQUARDT MS5 (locking system) 11149-20-02930
MARQUARDT MS6 (locking system) 02565-24-02930
MARQUARDT MS7 (locking system) 05883-24-02930
MARQUARDT 3350.38 (locking system) 03149-19-02930
MARQUARDT MK1 (locking system) 03756-15-02930
MARQUARDT MK2 (locking system) 03757-15-02930
MARQUARDT MK3 (locking system) 06050-24-02930
MARQUARDT MU3 (locking system) 05884-24-02930
MARQUARDT MUB1 (locking system) 05886-24-02930
Molex Technologies HUB-8 (mobile phone charger) 19286-23-12116
Molex Technologies HUB-9d / HUB-9e (mobile
phone charger)
19287-23-12116

Manufacturer Model designation Radio equipment approval
number
Vitesco Technologies HFA30 (Handsfree-Access) 18924-23-15869
WITTE-Velbert SDHTAG3NFC (locking sys-
tem)
03034-20-07018
Informasi tambahan spesifik
Sistem Hiburan Kursi Belakang:
This system is not protected against harmful interference and must not cause interference in properly approved systems.
This product is approved by ANATEL in accordance with the procedures set out in Resolution 242/2000 and complies with the relevant technical requirements. You will find additional information on the https://www.anatel.gov.br
Unit pengisian daya untuk pengisian nirkabel perangkat komunikasi seluler (WMI):
This device operates in secondary mode, which means it has no protection against harmful interference, not even from stations of the same type, and must not cause interference with systems operating on a primary basis.
This product is approved in accordance with the procedures defined in Directive 242/2000 by the Brazilian telecommunications agency ANATEL and complies with the applicable technical requirements.
Additional information can be found on the www.anatel.gov.br website.
Produk telekomunikasi:


G-Class - Owner's Manual
> Technical data > Regulatory radio information
This product has been approved by Anatel in accordance with the procedures stipulated in Resolution No. 715/2020, and satisfies all applied technical requirements.
Additional information can be found on the www.anatel.gov.br website.
BRUNEI DARUSSALAM
REGULATORY RADIO IDENTIFIERS
Manufacturer Model designation Radio equipment approval number Continental ADC ARS4-C (radar sensor) DTA-004005 Continental ADC ARS6-A (radar sensor) DTA-020359 Bosch FR5CPCCF (radar sensor) DTA-004222 Bosch LRR3 (radar sensor) DTA-011039 Bosch MRR1Rear (radar sensor) DTA-006601 Bosch MRRe14FCR (radar sensor) DTA-006678 Bosch F5CP12 (radar sensor) DTA-018042 Continental Antenna RKE213E1 (aerial amplifier) DTA-006665 Continental Antenna RKE223E1GNS (aerial amplifier) DTA-004998 Continental Automotive CMKG1 (locking system) DTA-005043 Continental Automotive CMKG2 (locking system) DTA-023993 Continental Automotive MARS Keyless (locking system) DTA-017264
Manufacturer Model designation Radio equipment approval number HELLA DM4 (locking system) DTA-020187 HELLA RS6 (locking system) AA-000081 Hirschmann 920287A (locking system) DTA-001661 Hirschmann 920287B (locking system) DTA-000794 Hirschmann 920702A (locking system) DTA-018051 Huf Baolong TSSRE4A (tyre pressure sensor) DTA-011045 Huf Baolong TSSSG4G6b (tyre pressure monitoring system control unit) DTA-003757 HUF HUF13145 (locking system) DTA-017926 HUF HUF14632 (locking system) DTA-006138 HUF HUF4761 (locking system) DTA-000615 MARQUARDT DC12A (locking system) DTA-019403 MARQUARDT DC12B (locking system) DTA-000068 MARQUARDT DC12K (locking system) DTA-000066 MARQUARDT MS2 (locking system) LPD-38890 MARQUARDT MS4 (locking system) DTA-003525 MARQUARDT MS5 (locking system) DTA-005850


G-Class - Owner's Manual
> Technical data > Regulatory radio information

Manufacturer Model designation Radio equipment approval
number
MARQUARDT MS7 (locking system) DTA-032943
MARQUARDT MK1 (locking system) DTA-011312
MARQUARDT MK2 (locking system) DTA-011313
MARQUARDT MK3 (locking system) DTA-031059
MARQUARDT 3350.38 (locking system) DTA-032673
MARQUARDT MU3 (locking system) DTA-029861
MARQUARDT MUB1 (locking system) DTA-032674
Schrader AG5SP4 (tyre pressure sensor) DTA-005291
Schrader AG3PF4 (tyre pressure sensor) DTA-003581
Schrader BG3FP4 (tyre pressure sensor) DRQ-D-JATI-07-2000-109000
Schrader DG6W2D4 (tyre pressure sensor) DTA-025258
Schrader GG4T (tyre pressure sensor) DTA-025258
Schrader BG3FP4 (tyre pressure sensor) DTA-025258
Schrader MFR (tyre pressure monitor-
DTA-003893
ing system control unit)
Schrader MFR3 (tyre pressure monitor-
ing system control unit)
DRQ-D-
MAJU-02-2011-111083

Manufacturer Model designation Radio equipment approval
number
Valeo ARTEMIS-SUB-01 (locking system) DTA-031587
Veoneer 77V12BSM (radar sensor) DTA-004000
Veoneer 77V12CRN (radar sensor) DTA-003999
Veoneer 77V125CRN (radar sensor) DTA-010423
Veoneer 77GHz MMRV1 (radar sensor) DTA-006216
Vitesco Technologies HFA30 (Handstree-Access) DTA-030296
WITTE-Velbert SDHTAG3NFC (locking system) DTA-005628
UNI EKONOMI EURASIA
REGULATORY RADIO IDENTIFIERS
Manufacturer CAC Model designation Continental ADC ARS4-A (radar sensor) Continental ADC ARS4-C (radar sensor) Continental ADC ARS6-A (radar sensor) Continental ADC ARS441DP10 (radar sensor) Bosch FR5CPCCF (radar sensor) Bosch LRR3 (radar sensor)


G-Class - Owner's Manual
> Technical data Regulatory radio information

EAC
EAC
Manufacturer Model designation
Bosch MRR1Rear (radar sensor) Bosch MRRe14FCR (radar sensor) Bosch F5CP12 (radar sensor) Continental Antenna RKE213E1 (aerial amplifier) Continental Antenna RKE223E1GNS (aerial amplifier) Continental Automotive MARS Keyless (locking system) Continental Automotive CMKG1 (locking system) Continental Automotive CMKG2 (locking system) HELLA DM4 (locking system) Hirschmann 920287A (locking system) Hirschmann 920287B (locking system) Hirschmann 920702A (locking system) Huf Baolong TSSRE4A (tyre pressure sensor) HUF HUF13145 (locking system) HUF HUF4761 (locking system) HUF HUF14632 (locking system) HUF HUF13482 (locking system) MARQUARDT DC12A (locking system)
Manufacturer Model designation
MARQUARDT DC12B (locking system) MARQUARDT DC12K (locking system) MARQUARDT MS2 (locking system) MARQUARDT MS4 (locking system) MARQUARDT MS5 (locking system) MARQUARDT MS6 (locking system) MARQUARDT MS7 (locking system) MARQUARDT MK1 (locking system) MARQUARDT MK2 (locking system) MARQUARDT MK3 (locking system) MARQUARDT 3350.38 (locking system) MARQUARDT MU3 (locking system) MARQUARDT MUB1 (locking system) Schrader AG5SP4 (tyre pressure sensor) Schrader AG3PF4 (tyre pressure sensor) Schrader BG3FP4 (tyre pressure sensor) Schrader GG4T (tyre pressure sensor) Schrader DG6W2D4 (tyre pressure sensor)


G-Class - Owner's Manual
> Technical data > Regulatory radio information
Manufacturer Model designation
Valeo ARTEMIS-SUB-01 (locking system)
Veoneer 77GHz MMRV1 (radar sensor)
Veoneer 77V12BSM (radar sensor)
Veoneer 77V12CRN (radar sensor)
Veoneer 77V125CRN (radar sensor)
WITTE-Velbert SDHTAG3NFC (locking system)
GHANA
REGULATORY RADIO IDENTIFIERS
Manufacturer Model designation Radio equipment approval
number
NCA APPROVED Continental ADC ARS4-C (radar sensor) ZRO-1H-7E3-152 Continental ADC ARS6-A (radar sensor) 7E6-M1-16C-SRD Continental ADC AR5441DP10 (radar sensor) ZRO-1H-7E3-152 Bosch FR5CPCCF (radar sensor) ZRO-M8-7E3-230 Bosch F5CP12 (radar sensor) 7E6-M1-X9B-SRD Continental Antenna RKE213E1 (aerial amplifier) ZRO-M8-7E3-X53 Continental Antenna RKE223E1GNS (aerial amplifier) ZRO-M8-7E3-225
Manufacturer Model designation Radio equipment approval
number
Continental Automotive CMKG1 (locking system) ZRO-M8-7E3-277 Continental Automotive CMKG2 (locking system) 7M-7E7-X25-DSR Continental Automotive MARS Keyless (locking sys-tem) BR3-1M-GE2-16A Continental Automotive Tech-nologies NTG7Q MID LF2 (head unit) 7M-7E7-X09-DSR Continental Automotive Tech-nologies NTG7Q HIGH LF2 (head unit) 7M-7E7-X05-DSR Continental Automotive Tech-nologies NTG7Q PREMIUM LF2 (head unit) 7M-7E7-X03-DSR HELLA DM4 (locking system) BR3-1M-GE2-157 Hirschmann 920287A (locking system) ZRO-M8-7E3-X45 Hirschmann 920287B (locking system) ZRO-M8-7E3-X47 HUF HUF13145 (locking system) 7E6-M1-X14-SRD HUF HUF4761 (locking system) EX6-6M-GE2-16C MARQUARDT DC12A (locking system) ZRO-M8-7E3-X50 MARQUARDT DC12B (locking system) ZRO-M8-7E3-X51 MARQUARDT DC12K (locking system) ZRO-M8-7E3-X52 MARQUARDT MS2 (locking system) BR3-1M-GE-129 MARQUARDT MS4 (locking system) ZRO-1H-7E3-26E MARQUARDT MS5 (locking system) SRO-1M-7E4-11B


G-Class - Owner's Manual
> Technical data > Regulatory radio information
Manufacturer Model designation Radio equipment approval
number
MARQUARDT MS6 (locking system) M1-7E8-X42-SRH
MARQUARDT MS7 (locking system) M1-7E8-X9F-SRH
MARQUARDT MK1 (locking system) ZRO-M8-7E3-X4A
MARQUARDT MK2 (locking system) ZRO-M8-7E3-X4C
MARQUARDT MK3 (locking system) HS-7E7-262-DSR
MARQUARDT MU3 (locking system) HS-7E7-XE5-DSR
MARQUARDT MUB1 (locking system) M1-7E8-X9D-SRH
MARQUARDT 3350.38 (locking system) ZRO-M8-7E3-X3C
MARQUARDT MU3 (locking system) HS-7E7-XE5-DSR
Valeo ARTEMIS-SUB-01 (locking system) 7M-7E7-272-DSR
Veoneer 77V12BSM (radar sensor) ZRO-1H-7E3-142
Veoneer 77V12CRN (radar sensor) ZRO-M8-7E3-230
Veoneer 77V125CRN (radar sensor) 7E5-7M-X72-RDR
Vitesco Technologies HFA30 (Handsfree-Access) 7M-7E7-134-DSR
WITTE-Velbert SDHTAG3NFC (locking system) SRO-1M-7E4-X59
INDONESIA
REGULATORY RADIO IDENTIFIERS
Manufacturer Model designation Radio equipment approval number Bury MB-WMI2024 (control unit) 100200/SDPPI/20247163 Continental ADC ARS3-A (radar sensor) 97128/SDPPI/20247163 Continental ADC ARS3-B (radar sensor) 97129/SDPPI/20247163 Continental ADC ARS4-B (radar sensor) 97127/ SDPPI/ 20247163 Continental ADC ARS4-C (radar sensor) 68676/SDPPI/20207163 Continental ADC ARS4-A (radar sensor) 90362/SDPPI/20237163 Continental ADC ARS6-A (radar sensor) 84770/SDPPI/20227163


G-Class - Owner's Manual
> Technical data Regulatory radio information

Manufacturer Model designation Radio equipment approval number Continental ADC AR5441DP10 (radar sensor) 89748/SDPPI/2023 7163 Bosch LRR3 (radar sensor) 74264/SDPPI/2021 7163 Bosch MRR1Rear (radar sensor) 74267/SDPPI/2021 7163 Bosch MRRevo14F (radar sensor) 74265/SDPPI/2021 7163 Bosch MRRe14FCR (radar sensor) 74266/SDPPI/2021 7163 Bosch FR5CPCCF (radar sensor) 67882/SDPPI/2020 7163 Dilarang melakukan perubahan spesifikasi yang dapat menimbulkan gangguan fisik dan/atau elektromagnetik terhadap lingkungan sekitarnya
Manufacturer Model designation Radio equipment approval number Bosch F5CP12 (radar sensor) 86858/SDPPI/2022 84754⚠️Dilarang melakukan perubahan spesifikasi yang dapat menimbulkan gangguan fisik dan/atau elektromagnetik terhadap lingkungan sekitarnya[IMAGE] Continental Antenna RKE213E1 (aerlal amplifier) 103697/SDPPI/2024 7163⚠️Dilarang melakukan perubahan spesifikasi yang dapat menimbulkan gangguan fisik dan/atau elektromagnetik terhadap lingkungan sekitarnya[IMAGE] Continental Antenna RKE223E1GNS (aerlal amplifier) 86957/ SDPPI/ 202210325⚠️Dilarang melakukan perubahan spesifikasi yang dapat menimbulkan gangguan fisik dan/atau elektromagnetik terhadap lingkungan sekitarnya[IMAGE]

G-Class - Owner's Manual
> Technical data Regulatory radio information

Pabrikan Penunjukan model Persetujuan peralatan radio
nomor
Continental Automotive CMKG1 (locking system) 87836/SDPPI/2023
7163

Dilarang melakukan perubahan spesifikasi yang dapat menimbulkan gangguan fisik dan/atau elektromagnetik terhadap lingkungan sekitarnya

Continental Automotive CMKG2 (locking system) 88721/SDPPI/2023
7163

Dilarang melakukan perubahan spesifikasi yang dapat menimbulkan gangguan fisik dan/atau elektromagnetik terhadap lingkungan sekitarnya

Continental Automotive MARS Keyless (locking system)
69379/SDPPI/2020
7163

Dilarang melakukan perubahan spesifikasi yang dapat menimbulkan gangguan fisik dan/atau elektromagnetik terhadap lingkungan sekitarnya

Pabrikan Penunjukan model Persetujuan peralatan radio
nomor
Continental Automotive CORT1508 (tyre pressure monitoring system control unit)
97476//SDPPI/2024
7163

Dilarang melakukan perubahan spesifikasi yang dapat menimbulkan gangguan flisk dan/atau elektromagnetik terhadap lingkungan sekitarnya

Continental Automotive D-WMI2020A (control unit) 66678/SDPPI/2020 7163

Dilarang melakukan perubahan spesifikasi yang dapat menimbulkan gangguan fisik dan/atau elektromagnetik terhadap lingkungan sekitarnya

Continental Automotive NTG7 MID
(Headunit)
Production: Hungary
92192/SDPPI/2023 7163

Dilarang melakukan perubahan spesifikasi yang dapat menimbulkan gangguan fisik dan/atau elektromagnetik terhadap lingkungan sekitarnya


G-Class - Owner's Manual
> Technical data Regulatory radio information

Manufacturer Model designation Radio equipment approval
Number Continental Automotive NTG7 HIGH(Headunit)Production: Hungary 92190/SDPPI/2023 7163⚠️Dilarang melakukan perubahan spesifikasi yang dapat menimbulkan gangguan fisik dan/atau elektromagnetik terhadap lingkungan sekitarnya[IMAGE] Continental Automotive NTG7 PREMIUM(Headunit)Production: Hungary 92188/SDPPI/2023 7163⚠️Dilarang melakukan perubahan spesifikasi yang dapat menimbulkan gangguan fisik dan/atau elektromagnetik terhadap lingkungan sekitarnya[IMAGE] Continental Automotive NTG7 PREMIUM PLUS(Headunit)Production: Hungary 92195/SDPPI/2023 7163⚠️Dilarang melakukan perubahan spesifikasi yang dapat menimbulkan gangguan fisik dan/atau elektromagnetik terhadap lingkungan sekitarnya[IMAGE]
Manufacturer Model designation Radio equipment approval
Continental Automotive France CORTIS08 (tyre pressure monitoring system control unit) 97476/SDPPI/2024 7163 ⚠️Dilarang melakukan perubahan spesifikasi yang dapat menimbulkan gangguan fisik dan/atau elektromagnetik terhadap lingkungan sekitarnya Continental Automotive Technologies NTG7Q MID LF2 (head unit) 88477/SDPPI/2023 7163 ⚠️Dilarang melakukan perubahan spesifikasi yang dapat menimbulkan gangguan fisik dan/atau elektromagnetik terhadap lingkungan sekitarnya Continental Automotive Technologies NTG7Q HIGH LF2 (head unit) 88579/SDPPI/2023 7163 ⚠️Dilarang melakukan perubahan spesifikasi yang dapat menimbulkan gangguan fisik dan/atau elektromagnetik terhadap lingkungan sekitarnya

G-Class - Owner's Manual
> Technical data Regulatory radio information

Manufacturer Model designation Radio equipment approval
Continental Automotive Technologies NTG7Q PREMIUM LF2 (head unit)
number

Dilarang melakukan perubahan spesifikasi yang dapat menimbulkan gangguan flisik dan/atau elektromagnetik terhadap lingkungan sekitarnya

Harman Becker NTG6N ENTRY/MID
(Headunit) Production: Germany
64019/SDPPI/2019 7163

Dilarang melakukan perubahan spesifikasi yang dapat menimbulkan gangguan fisik dan/atau elektromagnetik terhadap lingkungan sekitarnya

Harman Becker NTG6N HIGH
(Headunit) Production: Germany
64018/SDPPI/2019 7163

Dilarang melakukan perubahan spesifikasi yang dapat menimbulkan gangguan fisik dan/atau elektromagnetik terhadap lingkungan sekitarnya

Manufacturer Model designation Radio equipment approval
Harman Becker NTG6N ENTRY/MID
(Headunit)
Production: Hungary
number
63775/SDPPI/2019 7163

Dilarang melakukan perubahan spesifikasi yang dapat menlmbulkan gangguan flisik dan/atau elektromagnetik terhadap lingkungan sekitarnya

Harman Becker NTG6N HIGH
(Headunit)
Production: Hungary
63774/SDPPI/2019 7163

Dilarang melakukan perubahan spesifikasi yang dapat menimbulkan gangguan fisik dan/atau elektromagnetik terhadap lingkungan sekitarnya

Harman Becker NTG7 MID
(Headunit)
65544/SDPPI/2020 7163

Dilarang melakukan perubahan spesifikasi yang dapat menimbulkan gangguan fisik dan/atau elektromagnetik terhadap lingkungan sekitarnya


G-Class - Owner's Manual
> Technical data Regulatory radio information

Manufacturer Model designation Radio equipment approval
Number Harman Becker NTG7 HIGH(Headunit) 70513/SDPPI/2020 7163 ⚠️Dilarang melakukan perubahan spesifikasi yang dapat menimbulkan gangguan fisik dan/atau elektromagnetik terhadap lingkungan sekitarnya Harman Becker NTG7 PREMIUM(Headunit) 65543/SDPPI/2020 7163 ⚠️Dilarang melakukan perubahan spesifikasi yang dapat menimbulkan gangguan fisik dan/atau elektromagnetik terhadap lingkungan sekitarnya Harman Becker NTG7 PREMIUM PLUS(Headunit) 70512/SDPPI/2020 7163 ⚠️Dilarang melakukan perubahan spesifikasi yang dapat menimbulkan gangguan fisik dan/atau elektromagnetik terhadap lingkungan sekitarnya
Manufacturer Model designation Radio equipment approval
Number Harman Becker NTG7 RSU (control unit) 66387/SDPPI/2020 7163 Dilarang melakukan perubahan spesifikasi yang dapat menimbulkan gangguan fisik dan/atau elektromagnetik terhadap lingkungan sekitarnya HELLA DM4 (locking system) 69378/SDPPI/2020 7163 Dilarang melakukan perubahan spesifikasi yang dapat menimbulkan gangguan fisik dan/atau elektromagnetik terhadap lingkungan sekitarnya Huf Baolong TSSRE4A (tyre pressure sensor) 72438/SDPPI/2021 7163 Hirschmann 920287A (locking system) 71369 /SDPPI/2020 7163


G-Class - Owner's Manual
> Technical data Regulatory radio information

Manufacturer Model designation Radio equipment approval
number
Hirschmann 920287B (locking system) 72974 /SDPPI/2021
7163

Dilarang melakukan perubahan spesifikasi yang dapat menimbulkan gangguan fisik dan/atau elektromagnetik terhadap lingkungan sekitarnya

Hirschmann 920702A (locking system) 82675/SDPPI/2022
7163

Dilarang melakukan perubahan spesifikasi yang dapat menimbulkan gangguan fisik dan/atau elektromagnetik terhadap lingkungan sekitarnya

HUF HUF13482 (locking system) 104103/SDPPI/2024
7163

Dilarang melakukan perubahan spesifikasi yang dapat menimbulkan gangguan fisik dan/atau elektromagnetik terhadap lingkungan sekitarnya

Manufacturer Model designation Radio equipment approval
number
HUF HUF14632 (locking system) 78368/SDPPI/2021
7163

Dilarang melakukan perubahan spesifikasi yang dapat menimbulkan gangguan flisk dan/atau elektromagnetik terhadap lingkungan sekitarnya

HUF HUF4761 (locking system) 26742/SDPPI/2015
3533

Dilarang melakukan perubahan spesifikasi yang dapat menimbulkan gangguan fisik dan/atau elektromagnetik terhadap lingkungan sekitarnya

HUF HUF13145 (NFC reader) 83988/SDPPI/2022

Dilarang melakukan perubahan spesifikasi yang dapat menimbulkan gangguan fisik dan/atau elektromagnetik terhadap lingkungan sekitarnya

G-Class - Owner's Manual
> Technical data Regulatory radio information

Manufacturer Model designation Radio equipment approval
number
MARQUARDT DC12A (locking system) 67373/SDPPI/2020
7163

Dilarang melakukan perubahan spesifikasi yang dapat menimbulkan gangguan fisik dan/atau elektromagnetik terhadap lingkungan sekitarnya

MARQUARDT DC12B (locking system) 80676/SDPPI/2022
7163

Dilarang melakukan perubahan spesifikasi yang dapat menimbulkan gangguan fisik dan/atau elektromagnetik terhadap lingkungan sekitarnya

MARQUARDT DC12K (locking system) 80621/SDPPI/2022
7163

Dilarang melakukan perubahan spesifikasi yang dapat menimbulkan gangguan fisik dan/atau elektromagnetik terhadap lingkungan sekitarnya

Manufacturer Model designation Radio equipment approval
number
MARQUARDT MS2 (locking system) 67372/SDPPI/2020
7163

Dilarang melakukan perubahan spesifikasi yang dapat menimbulkan gangguan flisk dan/atau elektromagnetik terhadap lingkungan sekitarnya

MARQUARDT MS4 (locking system) 64126/SDPPI/2019
7163

Dilarang melakukan perubahan spesifikasi yang dapat menimbulkan gangguan fisik dan/atau elektromagnetik terhadap lingkungan sekitarnya

MARQUARDT MS5 (locking system) 90695/SDPPI/2023 7163
7163

Dilarang melakukan perubahan spesifikasi yang dapat menimbulkan gangguan fisik dan/atau elektromagnetik terhadap lingkungan sekitarnya


G-Class - Owner's Manual
> Technical data Regulatory radio information

Manufacturer Model designation Radio equipment approval
number MARQUARDT MS6 (locking system) 102883/SDPPI/2024 7163 7163⚠️Dilarang melakukan peruba-han spesifikasi yang dapat menimbulkan gangguan fisik dan/atau elektromagnetik ter-hadap lingkungan sekitarnya[IMAGE] MARQUARDT MS7 (locking system) 102735/SDPPI/2024 7163 7163⚠️Dilarang melakukan peruba-han spesifikasi yang dapat menimbulkan gangguan fisik dan/atau elektromagnetik ter-hadap lingkungan sekitarnya[IMAGE] MARQUARDT MK1 (locking system) 100207/ SDPPI/ 2024 7163⚠️Dilarang melakukan peruba-han spesifikasi yang dapat menimbulkan gangguan fisik dan/atau elektromagnetik ter-hadap lingkungan sekitarnya[IMAGE]
Manufacturer Model designation Radio equipment approval
number MARQUARDT MK2 (locking system) 100209/ SDPPI/ 2024 7163⚠️Dilarang melakukan perubahan spesifikasi yang dapat menimbulkan gangguan fisik dan/atau elektromagnetik terhadap lingkungan sekitarnya MARQUARDT MK3 (locking system) 102736/ SDPPI/ 2024 7163⚠️Dilarang melakukan perubahan spesifikasi yang dapat menimbulkan gangguan fisik dan/atau elektromagnetik terhadap lingkungan sekitarnya MARQUARDT 3350.38 (locking system) 82980/SDPPI/2022 7163⚠️Dilarang melakukan perubahan spesifikasi yang dapat menimbulkan gangguan fisik dan/atau elektromagnetik terhadap lingkungan sekitarnya

G-Class - Owner's Manual
> Technical data Regulatory radio information

Pabrikan Penunjukan model Persetujuan peralatan radio
nomor
Molex WCH-302b (control unit) 71668/SDPPI/2020 7163

Dilarang melakukan perubahan spesifikasi yang dapat menimbulkan gangguan flisk dan/atau elektromagnetik terhadap lingkungan sekitarnya

Molex WCH-302d (control unit) 71220/SDPPI/2020 7163

Dilarang melakukan perubahan spesifikasi yang dapat menimbulkan gangguan fisik dan/atau elektromagnetik terhadap lingkungan sekitarnya

Molex WCH-302e (control unit) 71669/SDPPI/2020 7163

Dilarang melakukan perubahan spesifikasi yang dapat menimbulkan gangguan fisik dan/atau elektromagnetik terhadap lingkungan sekitarnya

Pabrikan Penunjukan model Persetujuan peralatan radio
nomor
Panasonic DAIRSE (control unit) 63550/SDPPI/2019

Dilarang melakukan perubahan spesifikasi yang dapat menlmbulkan gangguan fisik dan/atau elektromagnetik terhadap lingkungan sekitarnya

Schrader GG4T (tyre pressure sensor) 72023/SDPPI/2020
9338
Schrader AG5SP4 (tyre pressure sensor)
75465/SDPPI/2021
7163

Schrader BG3FP4 (tyre pressure sensor) 72765/SDPP/2021
7163

Schrader DG6W2D4 (tyre pressure sensor)
57058/SDPPI/2018
3612
Schrader MC34MA4 (tyre pressure
25626/SDPPI/2015
3612
Schrader AG3PF4 (tyre pressure sensor) 62396/SDPPI/2020
7163


G-Class - Owner's Manual
> Technical data > Regulatory radio information

Manufacturer Model designation Radio equipment approval number Schrader GG4T (tyre pressure sensor) 72023/SDPPI/2020 7163 Veoneer 77GHz MMRV1 (radar sensor) 74749/SDPPI/2021 7163 Veoneer 77V12CRN (radar sensor) 66830/SDPPI/2020 7163 Veoneer 77V125CRN (radar sensor) 78366/SDPPI/2021 7163 Veoneer 77V12BSM (radar sensor) 66792/SDPPI/2020 7163 WITTE-Velbert SDHTAG3NFC (locking sys-tem) 67233/SDPPI/202010325 Dilarang melakukan perubahan spesifikasi yang dapat menimbulkan gangguan fisik dan/atau elektromagnetik ter-hadap lingkungan sekitarnya
ISRAEL
REGULATORY RADIO IDENTIFIERS
Manufacturer Model designation Radio equipment approval number Approval number of the Min-istry of Communications: Continental ADC ARS4-A (radar sensor) 55-09697 Continental ADC ARS6-A (radar sensor) 55-14225 Continental ADC ARS4-C (radar sensor) 55-07525 Bosch FR5CPCCF (radar sensor) 55-08783 Bosch LRR3 (radar sensor) 55-08334 Bosch MRR1Rear (radar sensor) 55-08333 Bosch MRRe14FCR (radar sensor) 55-08395 Bosch F5CP12 (radar sensor) 55-12854 Bosch MBCI2LS3PR1 (head unit) 51-91228 Bosch MBCI2LS4PR1 (head unit) 51-91226 Continental Antenna RKE213E1 (aerial amplifier) 55-13929 Continental Antenna RKE223E1GNS (aerial amplifier) 51-97825 Continental Automotive D-WMI2017B (control unit) 51-75654 Continental Automotive D-WMI2017A (control unit) 51-75367 Continental Automotive D-WMI2016A (control unit) 55-08177

PERINGATAN
Danger due to not observing the warning notices Warning notices draw your attention to hazards that may endanger your health or life, or the health or life of others. ▶ Observe the warning notices. ENVIRONMENTAL NOTE Environmental damage due to failure to observe environmental notes Environmental notes include information on environmentally responsible behaviour or environmentally responsible disposal. ▶ Observe environmental notes. CATATAN
Damage to property due to failure to observe notes on material damage Notes on material damage inform you of risks which may lead to your vehicle being damaged. ▶ Observe notes on material damage. These symbols indicate useful instructions or further information that could be helpful to you. Instruction (→ page) Further information on a topic Display Display in the central display Highest menu level, which is to be selected in the multimedia system Relevant submenus, which are to be selected in the multimedia system * Indicates a cause   G-Class - Owner's Manual > Quick start and Tips < Panduan memulai cepat dan tips
This interactive PDF works like a website - tap or click a button to jump straight to where you want to go. You can return here at any time via the navigation bar at the top left.| Seats 10 | > | MBUX Voice Assistant 17 | > | Preparing for a holiday 41 | > |
| Children in the vehicle 11 | > | ENERGIZING Packages 18 | > | Luggage and loading | 27 |
| MULTIBEAM LED 12 | > | Driving Assistance package 19 | > | Ice and snow | 58 |
| Touch-sensitive controls 13 | > | Parking Package 20 | > | Help in the event of a breakdown | 59 |
| Radio 14 | > | Destination entry navigation 21 | > | Expert knowledge | 65 |
| Wi-Fi hotspot 15 | > | New multimedia system features 22 | > | ||
| Connecting a mobile phone 16 | > | At the filling station 30 | > |
< Kursi
Adjusting the seats  1 Head restraint height 2 Seat backrest inclination 3 Seat height 4 Seat cushion length Seat cushion inclination 6 Seat fore-and-aft posi- tion  Anak-anak di dalam kendaraan
Mengangkut anak-anak dengan aman di dalam kendaraan
When children are travelling in the vehicle, always observe the following ( → page 144) ▶ Important warning stickers ( → page 145) ▶ Recommended child restraint systems ( → page 152) Suitable seats in the vehicle for fitting a child restraint system ( → page 142) Approval categories for child restraint systems ( → page 151) Suitability of seats for securing ISOFIX/LATCH child restraint systems ( → page 155) \- Fitting the ISOFIX child restraint system on the rear seat ( → page 160) Suitability of seats for securing i-Size child restraint systems ( → page 156). - Fitting the i-Size child restraint system on the rear seat ( → page 160) Securing a Top Tether belt ( → page 162) Suitability of seats for securing belt-secured child restraint systems ( → page 156) - Notes on vehicles without automatic front passenger airbag deactivation ( → page 150) - Notes on rear-facing and front-facing child restraint systems on the front passenger seat ( → page 148) - Securing the child restraint system with the seat belt ( → page 163) ▶ Automatic front passenger airbag deactivation ( → page 148) ▶ Child safety locks for the rear side windows ( → page 166) ▶ Child safety locks for the rear doors ( → page 164) G-Class - Owner's Manual > Quick start and Tips MULTIBEAM LEDMULTIBEAM LED
Fungsi adaptif, MULTIBEAM LED
The MULTIBEAM LED headlamps adapt to the weather and the situation on the road and provide advanced functions for improving the illumination of the road.SISTEM INI TERDIRI DARI FUNGSI-FUNGSI BERIKUT:
• Active headlamps ( → page 242) • Motorway mode ( → page 242) • Bad weather light ( → page 243) • City lighting ( → page 243) • Enhanced fog light function ( → page 242)Mengaktifkan atau menonaktifkan MULTIBEAM LED:
- Briefly press 📋 on the multimedia system display. - Select Settings. - Select Lights. • Select MULTIBEAM LED. • Activate or deactivate Dynamic low beam.   G-Class - Owner's Manual > Quick start and Tips Touch-sensitive controlsKontrol sensitif sentuhan
Overview of touch-sensitive controls  Control panel: Driver display Active Distance Assist DISTRONIC and variable limiter 2 Control panel for the MBUX multimedia system MBUX multimedia system touchpad Observe the notes on the touch-sensitive controls ( → page 95).    G-Class - Owner's Manual > Quick start and Tips RadioRadio
Mengoperasikan radio
Untuk beralih ke radio:
- Briefly press [icon] in the multimedia system display. Tap on [↑].Untuk mengatur pita frekuensi:
- Briefly press in the multimedia system display. Tap on □. • Select a frequency band or a favourite.Untuk menyetel stasiun radio:
- Briefly press in the multimedia system display. Tap on ↑. - Swipe to the left or right on the control element or select a radio station.Untuk memanggil daftar stasiun radio:
- Briefly press in the multimedia system display. Tap on Select :≡.Untuk mencari stasiun radio menggunakan nama stasiun atau entri frekuensi:
- Briefly press in the multimedia system display. Tap on [↑]. Select • Enter a station name or frequency. - Select a station.Untuk menyimpan stasiun radio:
- Briefly press in the multimedia system display. Tap on [↑]. - Select [ ☆ ].Untuk mengatur peningkatan volume layanan informasi lalu lintas:
- Briefly press in the multimedia system display. Tap on [icon]. - Select System. - Select Audio. • Select Navigation & traffic announcements. • Set a value for Traffic announce. vol. increase.   G-Class - Owner's Manual > Quick start and Tips Wi-Fi hotspotHotspot Wi-Fi
Menyiapkan hotspot Wi-Fi
UMUMNYA, DUA JENIS KONEKSI WI-FI TERSEDIA:
• Using the multimedia system as a Wi-Fi hotspot The multimedia system serves as a Wi-Fi hotspot for mobile communication devices such as a smartphone or tablet PC. The data volume of the vehicle or an already connected tethering device is used for the data connection. Data volume must be purchased for a fee via the Mercedes-Benz Portal. The use of the vehicle data tariff by external devices is not available in all countries. - Using a mobile communication device as a Wi-Fi hotspot (tethering) An external Wi-Fi hotspot is accessed for the Internet connection of the multimedia system. The data tariff of the mobile communication device via Data package is used for the data connection.PILIHAN UNTUK MENYIAPKAN KONEKSI:
• QR code The connection is set up by scanning the QR code shown on the multi-media system. NFC The connection is set up by placing the mobile communication device in the NFC interface of the vehicle. \- Security key The connection is established by entering the security key displayed on the multimedia system.  G-Class - Owner's Manual > Quick start and Tips Connecting a mobile phoneMenghubungkan ponsel
Menghubungkan ponsel
Mengaktifkan Bluetooth*:
• Make sure that the mobile phone Bluetooth ® is switched on. Tap on the central display or media display. - Select Settings. - Select System. • Select Internet and Bluetooth. • Activate Bluetooth*.Mencari ponsel:
Tap on [he] the central display or media display. - Select Phone. Select - Select Devices. - Select Devices. - Select Connect new device.Mengotorisasi ponsel:
\- Select a mobile phone. A code is displayed in the multimedia system and on the mobile phone. If the codes match, confirm the code on the mobile phone.   G-Class - Owner's Manual > Quick start and Tips MBUX Voice AssistantAsisten Suara MBUX
Mengoperasikan Asisten Suara MBUX
ANDA DAPAT MENGGUNAKAN ASISTEN SUARA MBUX UNTUK MENGOPERASIKAN FUNGSI-FUNGSI BERIKUT TERGANTUNG PADA PERLENGKAPAN KENDARAAN:
- Telephone • Text message and e-mail Navigation Radio and media - Vehicle functions • Online functionsCONTOH PERINTAH SUARA YANG MUNGKIN:
• To operate the phone: Call my father. • To manage e-mails: Show me my new e-mails. • To operate the navigation: Search for an Asian restaurant, but not Japanese, in South London. • To operate the radio: Which station am I currently listening to? • To operate media: Play a similar track. • To operate climate control: My feet are cold. • To call up the weather: Will it be sunny tomorrow? - To ask a general knowledge question: Who painted the picture "The Scream"?   G-Class - Owner's Manual > Quick start and Tips ENERGIZING PackagesPaket ENERGIZING
Mengoperasikan ENERGIZING COMFORT
Untuk memulai program ENERGIZING:
- Briefly press [icon] in the multimedia system display. - Select Comfort. • Select ENERGIZING COMFORT. - Select a programme and start with ▶.Untuk mengonfigurasi program ENERGIZING:
- Select a programme. - Select Settings. - Switch the functions included in the programme on or off.Untuk memulai Power Nap:
- Select Power Nap. - Select ▶ for the desired seat.Untuk memulai program pelatihan:
- Select Training. - Select a programme and start with ▶.Untuk memulai Tips:
- Select Tips. - Select an area of the body and start with ▶.   G-Class - Owner's Manual > Quick start and Tips Driving Assistance packagePaket Bantuan Mengemudi
Fungsi Paket Bantuan Mengemudi
Depending on availability for the respective country of use, the vehicle may be equipped with various functions which are provided to assist the driver. The vehicle is thus fitted with cameras and sensors to monitor the vehicle surroundings. Active Distance Assist DISTRONIC ( → page 354) You can watch an animation on this topic via the following link: ▶ Active Speed Limit Assist ( → page 361) You can watch an animation on this topic via the following link: Route-based speed adaptation ( → page 362) ▶ Active Brake Assist ( → page 369) You can watch an animation on this topic via the following link: ▶ Active Steering Assist ( → page 366) You can watch an animation on this topic via the following link: ▶ Active Emergency Stop Assist ( → page 368) ▶ Active Stop-and-Go Assist ( → page 363) Blind Spot Assist with exit warning ( → page 377) You can watch an animation on this topic via the following link: ▶ Active Lane Keeping Assist ( → page 379)   G-Class - Owner's Manual > Quick start and Tips Parking PackagePaket Parkir
Fungsi Paket Parkir
Depending on availability for the respective country of use, the vehicle may be equipped with various functions which are provided to assist the driver with parking and manoeuvring. The vehicle is thus fitted with cameras and sensors to monitor the vehicle surroundings. Depending on the equipment version, the following systems and functions are part of your Parking Package: ▶ Reversing camera: monitors the area behind the vehicle and relays an image of this area on the driver display ( → page 389). 360° camera: a system comprising four cameras which record the immediate vehicle surroundings and relay an image to the driver display ( → page 391). Parking Assist PARKTRONIC: an electronic parking assistance system which monitors the area surrounding your vehicle and the distance to obstacles in the vicinity using ultrasound ( → page 398). Active Parking Assist: an electronic parking assistance system which assists you when parking or exiting a parking space by changing gear, accelerating, braking and steering the vehicle ( → page 401). You can watch an animation on this topic via the following link: Trailer Manoeuvring Assist: Trailer Manoeuvring Assist assists you when reversing with a trailer. The reversing camera monitors the artic- ulation angle between the vehicle and the trailer and adjusts it to a specified value. Trailer Manoeuvring Assist also limits your speed ( → page 410).  G-Class - Owner's Manual > Quick start and Tips Destination entry navigation- Memasukkan tujuan navigasi
Memasukkan tujuan navigasi
Briefly press [icon] in the multimedia system display. The home screen is shown. Select Navigation. SelectPILIH OPSI BERIKUT UNTUK MEMASUKKAN TUJUAN:
- Enter a POI, an address or a three-word address in the input line. Online search results for POIs (if available) may contain additional information, for example opening times and prices. The information is provided by an online map service. You can find further information about three-word addresses at: http://what3words.com • Select a destination suggestion. Requirements: The Navigation option is switched on in the user settings for Suggestions. The multimedia system has gathered sufficient data in order to show destination suggestions. • Select Previous destinations. Select a previous destination. You can save the destination as a favourite. - Select POIs. Select a POI category, e.g. P or enter a POI name or POI category in the input line. If search results are displayed, limit them with Filter, for example by search position or the desired travel time. \- Select Contacts. Requirements: A mobile phone is connected to the multimedia system and contacts have been downloaded. The contact contains a navigable address. \- Enter the geocoordinates as latitude and longitude in the input line. Example 1: 47°58'11"N 7°57'25"E (degrees, minutes, seconds and compass direction) Example 2: 47.969722 7.956944 (decimal degrees) • Select a destination on the map. \- Select Favourites. Requirements: The destinations have been saved as favourites. • Select Received destinations. Requirements: There is an Internet connection for receiving external destinations. The destinations have been sent to the vehicle.  G-Class - Owner's Manual > Quick start and Tips New multimedia system features< Fitur baru sistem multimedia
Information about the telephone menu  Bluetooth® device name of the currently connected mobile phone/of the mobile phone Bluetooth ® device name of the currently connected mobile phone/of the mobile phone (two phone mode) 3 Signal strength of the mobile phone network Battery status of the connected mobile phone 5 Options 6 Messages 7 Calls up my devices 8 Numerical pad 9 Starts contact searchIKHTISAR MENU TELEPON
Via the telephone menu you can use the functions in connection with your mobile phone.FUNGSI BERIKUT DAPAT DIGUNAKAN:
Call lists - Contacts - Messages • Device managerMENGGUNAKAN DAFTAR PANGGILAN
If your mobile phone supports the PBAP Bluetooth ® profile, the call lists from the mobile phone are displayed in the multimedia system.FUNGSI BERIKUT TERSEDIA:
• Making calls from the call list • Opening contacts on the call listPESAN
In the message menu you can receive text messages and create and send them with the help of the MBUX voice assistant. In addition, you can conveniently use the read-aloud function during the journey.PENGELOLA PERANGKAT
In the device manager, you can connect your mobile phone with the multimedia system.  G-Class - Owner's Manual > Quick start and Tips New multimedia system features You have the option of using your mobile phone alone in single telephone mode or together with another mobile phone in two phone mode.MENGGUNAKAN KONTAK
If you permit the multimedia system to access the contacts in your mobile phone, you can use these in the vehicle. You can store up to 8,000 contacts.OPSI BERIKUT TERSEDIA UNTUK ANDA MELALUI MENU KONTAK:
• Making telephone calls (calling a contact) Navigation • Composing messages with the help of the MBUX voice assistant • Additional options The contacts from your mobile phone can be downloaded automatically or manually.MELAKUKAN PANGGILAN
When conducting a call, additional functions are available apart from making, accepting or rejecting a call. For example, you can switch between calls, conduct a call with several participants or conference calls. It is also possible to accept or reject waiting calls. If you receive a call while already in a call, a message is displayed.SELAMA PANGGILAN, ANDA DAPAT MENGAKTIFKAN FUNGSI BERIKUT:
- Microphone off • Fade in the numerical pad to send DTMF tones - Add a call - Hands-free mode to transfer the call to the front or rear passenger compartment  • Privacy mode to transfer the call to the telephone or headphonesInformasi tentang navigasi
 Navigation module (reduced view) Route guidance active: The navigation module shows the information relevant to the route in the zoomed-out view, e.g. the destination or a traffic delay ☒ Ends the current route guidance Tapping opens the navigation module and displays the route overview ( → page 496) Sets map orientation and map type Calls up the telephone menu Current vehicle position (vehicle symbol or arrow) Calls up entertainment applications Elevation and map scale ( → page 514)   G-Class - Owner's Manual > Quick start and Tips New multimedia system features ⑦ Navigation window shows the next manoeuvre (zoomed out view) or the route monitor (zoomed in view) Route guidance active: route monitor shows, e.g. route sections, upcoming driving manoeuvres with lane recommendations, destination, traffic delays, 3D images at motorway exits, online content When you switch on the multimedia system or after selecting 📂, the digital map is shown. The navigation system offers many options for destination entry, route planning and route guidance. The traffic situation is taken into account during route guidance. When using route guidance with augmented reality, additional information can be shown in a camera image before a turning manoeuvre. Services and apps help you reach the destination quickly, safely and in comfort. After tapping on navigation module ① start destination entry via Ⓞ in the route overview. You can enter the POI, address or contact as the destination on-board or search online using a map service. Or you select a previous destination. The destination can be stored here as a favourite or be saved as an address for home and work. When the Allow destination suggestions option is switched on, the vehicle makes suggestions based on your visited navigation destinations. If external destinations and routes are received from apps or services, these are also available.OPSI BERIKUT TERSEDIA UNTUK PERENCANAAN RUTE, MISALNYA:
- Route options: e.g. avoid or use toll roads, tunnels, unpaved roads or areas • Intermediate destinations • Alternative routes - Commuter route • Automatic filling station and service station search You can record and save routes then select or share them with a USB device. Lane recommendations are shown during route guidance on multi-lane roads. When driving on a motorway, service facilities on the route ahead can be shown and used for route guidance. The Live Traffic Information service takes the current traffic situation into account. The map can show the current traffic flow, traffic incidents or warning messages, e.g. before the end of traffic jams that pose a risk. Hazardous situations on public roads are detected automatically by the vehicle via Car-to-X-Communication or these can be reported by the driver. The early warning makes it possible to adapt your driving characteristics in good time. Accidents, broken-down vehicles, weather hazards or a vehicle with activated hazard warning lights are shown on the map. For route guidance with augmented reality, information objects such as arrows indicating a turn, street names and house numbers are shown in a video image during the driving manoeuvre or at traffic lights. The map shows map data from the database or from an online map service. In small map scales, buildings are shown as realistic images. The online map update service makes possible the updating of the map data. Weather information and data from other services can be shown on the map. Multi-storey car parks with the corresponding equipment, deliver data about the current occupancy and about parking charges, for example. The options offered vary depending on the country, vehicle equipment and available services.  G-Class - Owner's Manual > Quick start and Tips New multimedia system features MODUL NAVIGASI (TAMPILAN DIPERLUAS) DENGAN RINGKASAN RUTE
 Example: route guidance is active ① Enters an address or POI Destination and time of arrival beneath that the current distance to the destination and the chequered flag Alternative routes Searches for parking 5 Switches traffic information display on or off ⑥ Makes settings for View, Messages & tones and RouteInformasi tentang radio
 Active frequency band Station name or set frequency Settings Additional options 5 Switches on traffic reports 6 Station list 7 Search Using the radio menu you can play a multitude of radio stations and use the Internet Radio TuneIn. Search for your preferred stations and save these as favourites or in station lists. The function of TuneIn Internet radio is country-dependent. Radio text: this function shows you the station name, the track and the artist for the song currently playing, for example.  G-Class - Owner's Manual > Quick start and Tips New multimedia system features DAB: with the DAB function, graphically formatted additional information about a station can be shown, e.g. logos, album covers, music tracks, programmes, news or also service information. Traffic announcements: Traffic messages can be displayed by pressing TA. Information on media  Album cover 2 Active media source Track and artist Active data storage medium and current track number/track in playback list Random playback 6 Repeat 7 Settings a Additional options 9 Previous or next track and fast rewind or fast forward 10 Additional categories ⑪ Playlists and categories 12 Media search Controls playback 14 Timeline Using the Media application, you can set and use the audio and video functions of your multimedia system. You can listen to music or look at videos, for example. USB: Using the USBmenu, you can play back your own audio or video data from a data storage medium connected by USB. Bluetooth*: using the Bluetooth menu, you can connect a Bluetooth* audio device with the multimedia system and play back the available tracks on the audio device. Connecting the device can be conveniently handled in the device manager, so you can complete all settings with just a few clicks. Online music: the Online music menu allows you to access music streaming services.Catatan tentang kenyamanan
The Comfort menu makes all the functions available that contribute to your comfort when driving or taking a break.KENYAMANAN KURSI
The Seat menu allows you to flexibly adjust the contours of the seats to your needs by adjusting the side bolsters and lumbar support independently. You can save these settings in your Mercedes me profile, so they can be called up each time you drive. With the Seat kinetics function, you can start a programme that causes slight modifications of the seat position when you are driving. These modifications promote a healthy back.   G-Class - Owner's Manual > Quick start and Tips New multimedia system featuresPIJAT
In the Massage menu you will find the massage programmes that are available for your vehicle. By selecting the desired programme you start it directly and it runs for a period of approximately ten minutes, depending on the programme selected. With the High intensity function you can increase the effect of the massage programme.CAHAYA AMBIEN
In the Ambient light menu you can set the colour and brightness for your ambient lighting. Using the Link zones function, the ambience, accent and impression zones can be regulated separately so that you can set the lighting of your vehicle individually.Informasi tentang integrasi ponsel pintar
Using the Smartphone Integration menu, various applications are available that can bring the functions of your mobile phone to the multimedia system display. Operation can by carried out via the touchscreen or voice control, for example. Only one mobile phone at a time can be connected via Smartphone Integration to the multimedia system. Also for use with two phone mode with Smartphone Integration, only one additional mobile phone can be connected using Bluetooth ® with the multimedia system. Use Android Auto for mobile phones with the Android operating system and use Apple CarPlay ® with your iPhone ® . The full functionality of Android Auto and Apple CarPlay ® is only possible with an Internet connection.Informasi tentang AMG Performance
Using the AMG Performance menu, you can call up information about the performance of your vehicle. TERGANTUNG PADA KENDARAAN, MENU BERIKUT TERSEDIA:
- Energy flow Visualisation of the energy flow in the vehicle Consumption Display of the current and average consumption values of the vehicle Vehicle Display of vehicle data Engine Display of engine data such as current power and torque Drive Display of current data of various drive elements such as current, voltage and temperatureInformasi tentang info kendaraan
You can have important vehicle information displayed in the Info menu. At a glance you will have an overview of vehicle and engine data or current consumption values, for example. In addition, you can call up the Digital Owner's Manual via the Owner's Manual menu item.DATA KENDARAAN
CONTOH DATA BERIKUT AKAN DITAMPILKAN:
• Activity of the acceleration and brake pedal • Activity of the suspension strut - wheel angle • G-force display for the linear and lateral acceleration  G-Class - Owner's Manual > Quick start and Tips New multimedia system featuresDATA MESIN
DATA BERIKUT DITAMPILKAN:
• Transmission oil temperature • Engine/coolant temperature Performance Torque - Boost pressureDATA KONSUMSI
Depending on your driving style, this display shows the current and average fuel consumption. Together with the displays of vehicle and engine data, you can adapt your driving style to be as efficient and economical as possible.Informasi tentang In-Car Office
Using the In-Car Office menu you can connect your online services with the multimedia system.ANDA KEMUDIAN MEMILIKI BEBERAPA OPSI YANG TERSEDIA:
• Organising your meetings and telephone conferences. • Managing your e-mails and appointments. • Receive route guidance to the location of a meeting.Informasi tentang MB Apps (Ekstra Digital)
BERBAGAI LAYANAN DAN FUNGSI ONLINE TERSEDIA MELALUI MENU MB APPS:
• Managing Digital Extras • Using the dashcam • Using the web browser to surf the Internet You require a Mercedes me ID user account, and have to connect your vehicle with the user account, in order to be able to use services. If the Mercedes-Benz App is available on a mobile phone, the vehicle link can be made via the displayed QR code. Please not that the available features are country-dependent.Informasi tentang pengaturan
In the Settings you can set the basic configuration for your multimedia system and the vehicle. You have access to all functions in this menu, from switching the driver assistance systems on and off to display and language settings.PENGATURAN TERSTRUKTUR DALAM MENU BERIKUT:
- Assistance Vehicle Lights SystemMENU BANTUAN
With the Assistance menu you have direct access to the driver assistance systems which are installed in your vehicle and can either switch these on or off, or configure according to your wishes.MENU KENDARAAN
DI SINI ANDA DAPAT MENGAKTIFKAN FUNGSI BERIKUT, MISALNYA:
• Automatic folding in of the outside mirrors when parking the vehicle  G-Class - Owner's Manual > Quick start and Tips New multimedia system features • Automatic adjustment of the seat and steering wheel, for comfortable entry and exit from the vehicle • Automatic activation of the 360° camera when selecting reverse gearMENU LAMPU
All the light settings can be carried out in the Lights menu. You can activate or deactivate the Intelligent Light System here, set for how long your vehicle should remain lit after parking or unlocking or switch the function off.MENU SISTEM
All important settings for the multimedia system can be carried out in the System menu.ANDA DAPAT MELAKUKAN PENGATURAN BERIKUT, MISALNYA:
• Setting the system language • The configuration of Wi-Fi and Bluetooth® • Setting of time and date   G-Class - Owner's Manual > Quick start and Tips At the filling stationDi pom bensin
Mengisi bahan bakar kendaraan
PERINGATAN
Risk of fire or explosion from fuel Fuels are highly flammable. ▶ Fire, naked flames, smoking and creating sparks must be avoided. Before refuelling, switch off the vehicle and, if fitted, the stationary heater and keep switched off during filling. PERINGATAN
Risk of injury from fuels Fuels are poisonous and hazardous to your health. Do not swallow fuel or let it come into contact with skin, eyes or clothing. ▶ Do not inhale fuel vapour. ▶ Keep children away from fuel. ▶ Keep doors and windows closed during the refuelling process. If you or other people come into contact with fuel, observe the following: ▶ Immediately rinse fuel off your skin with soap and water. If fuel comes into contact with your eyes, immediately rinse them thoroughly with clean water. Seek medical attention immediately. If you swallow fuel, seek medical attention immediately. Do not induce vomiting. ▶ Change immediately out of clothing that has come into contact with fuel.  G-Class - Owner's Manual > Quick start and Tips At the filling station PERINGATAN
Risk of fire and explosion due to electrostatic charge Electrostatic charge can ignite fuel vapour. Before you open the fuel filler cap or take hold of the pump nozzle, touch the metallic vehicle body. To avoid creating another electrostatic charge, do not get into the vehicle again during the refuelling process. PERINGATAN
Risk of fire from fuel mixture Vehicles with a diesel engine: If you mix diesel fuel with petrol, the flash point of the fuel mixture is lower than that of pure diesel fuel. While the vehicle is running, component parts in the exhaust system may overheat without warning. ▶ Never refuel using petrol. ▶ Never mix petrol with diesel fuel.  CATATAN
Damage caused by the wrong fuel Vehicles with a petrol engine: Even small amounts of the wrong fuel could result in damage to the fuel system, the engine and the emission control system. ▶ Refuel only with unleaded, sulphur-free spark-ignition engine fuel. Petrol can contain up to 25 Vol.-% ethanol by volume. ▶ See the information label in fuel filler flap for compatible fuels. Further information about compatible fuels can be obtained at a qualified specialist workshop. Throughout Europe you can also find the compatibility labels on the fuel pump or pump nozzle suitable for your vehicle.JANGAN PERNAH MENGISI BAHAN BAKAR DENGAN BAHAN BAKAR BERIKUT:
- Diesel • Regular petrol with an octane number lower than 91 RON • Petrol with more than 3% methanol by volume, e.g. M15, M30 • Petrol with metallic additives If you have accidentally refuelled with the wrong fuel: ▶ Do not switch on the vehicle.  G-Class - Owner's Manual > Quick start and Tips At the filling station Consult a qualified specialist workshop. CATATAN
Damage caused by the wrong fuel Vehicles with a diesel engine: Even small amounts of the wrong fuel could result in damage to the fuel system, the engine and the emission control system. ▶ Refuel using only sulphur-free diesel fuel. In countries without sulphur-free diesel fuel, refuel using only low-sulphur diesel fuel with a sulphur content of less than 50 ppm.JANGAN PERNAH MENGISI BAHAN BAKAR DENGAN BAHAN BAKAR BERIKUT:
- Petrol - Marine diesel - Heating oil • Pure fatty acid methyl ester or vegetable oil • Paraffin or kerosene If you have accidentally refuelled with the wrong fuel: ▶ Do not switch on the vehicle. Consult a qualified specialist workshop. CATATAN
Shorter maintenance intervals due to fuel with increased bio-contents When fuels with increased bio-contents are used, fuel residues with increased separation volume may occur. If fuels with increased bio-contents (compatibility marks B10 and B20) are used on an ongoing basis, this may lead to shorter maintenance intervals for the fuel filter. If the vehicle is not used for an extended period of time (several weeks): Refuel the vehicle beforehand with diesel fuel with bio-contents < 10% to avoid possible deposits of bio-contents in the fuel tank. CATATAN
Do not use diesel to refuel vehicles with a petrol engineJIKA ANDA TIDAK SENGAJA MENGISI BAHAN BAKAR YANG SALAH:
\- Do not switch on the vehicle. Otherwise fuel can enter the engine. Even small amounts of the wrong fuel could result in damage to the fuel system and the engine. The repair costs are high. Consult a qualified specialist workshop. ▶ Have the fuel tank and fuel lines drained completely.  G-Class - Owner's Manual > Quick start and Tips At the filling station CATATAN
Do not refuel diesel-engined vehicles with petrolJIKA ANDA TIDAK SENGAJA MENGISI BAHAN BAKAR YANG SALAH:
- Do not switch on the vehicle. Otherwise fuel can enter the engine. Even small amounts of the wrong fuel could result in damage to the fuel system and the engine. The repair costs are high. Consult a qualified specialist workshop. ▶ Have the fuel tank and fuel lines drained completely. CATATAN
Damage to the fuel system due to overfilling the fuel tank ▶ Only fill the fuel tank until the pump nozzle switches off. If too much fuel has been added due, for example, to a faulty filling pump: Do not switch on the vehicle. Consult a qualified specialist workshop. CATATAN
Fuel may spray out when you remove the fuel pump nozzle ▶ Only fill the fuel tank until the pump nozzle switches off.Persyaratan:
• The vehicle is unlocked. Observe the notes on operating fluids and fuel. The recommended octane number for your vehicle can be found on the information label on the inside of the fuel filler flap.  Fuel filler flap ② Fuel filler cap 3 Fuel type QR code for rescue card 5 Tyre pressure table Press on the centre rear of fuel filler flap ①. ▶ Turn the fuel filler cap counter-clockwise and remove it. Completely insert the pump nozzle into the tank filler neck, hook in place and refuel.   G-Class - Owner's Manual > Quick start and Tips At the filling station ▶ Only fill the fuel tank until the pump nozzle switches off. ① Vehicles with diesel engine: The tank filler neck is designed for refuelling at diesel filling pumps. ① Vehicles with diesel engine: Do not run the fuel tank empty. When the fuel tank is completely empty, top up with at least 5 l diesel before starting the vehicle. ① Vehicles with diesel engine: Use a filler neck with a large diameter for vehicles with a diesel engine when topping up fuel from a canister. Otherwise, the filler neck cannot slide into the tank filler neck. Replace the fuel filler cap on the tank filler neck and turn clockwise until it engages audibly. Close fuel filler flap ①.Mengisi ulang AdBlue®
NOTE Engine damage due to AdBlue® being in the fuel AdBlue ® must not be used to fill the fuel tank. Only use AdBlue ® to fill the AdBlue ® tank. Do not overfill the AdBlue ® tank. NOTE Contamination of the vehicle interior due to AdBlue® leakage After topping up, carefully close the AdBlue® refill container. Avoid carrying AdBlue ® refill containers permanently in the vehicle.Persyaratan:
• The vehicle is unlocked.PESAN-PESAN BERIKUT MUNCUL SECARA BERURUTAN DI LAYAR PENGEMUDI KETIKA TANGKI ADBLUE® PERLU DIISI ULANG:
- Refill AdBlue See Owner's Manual. The AdBlue level has fallen below the reserve range. Add at least 5 l AdBlue . - Top up AdBlue Emergency op. in XXX km See Owner's Manual. The low AdBlue ® level will lead to limited performance after the remaining distance displayed has been driven. Add at least 5 l AdBlue ® .   G-Class - Owner's Manual > Quick start and Tips At the filling station - Top up AdBlue XX,X I Emerg. op.: max. XXX km/h Start not poss. in XXX km. The low AdBlue® level will lead to limited performance from the speed displayed. After the remaining distance displayed has been driven, it will no longer be possible to start the vehicle. Add at least the indicated quantity of AdBlue®. - Top up XX,X I AdBlue Switch vehicle on, wait 60 sec. or engine start not possThe AdBlue ® tank is empty. You can no longer start the vehicle. Add at least the indicated quantity of AdBlue ® . Switch on the vehicle and wait approx. 60 seconds. Start the vehicle. You can display the AdBlue ® range and level on the driver display in the menu Service. ① The AdBlue ® range indicated is highly dependent upon driving style and operating conditions. The actual range can therefore deviate from the calculated range. OPENING THE ADBLUE® FILLER CAP  Press on the centre rear of fuel filler flap ①. Turn AdBlue ® filler cap 2 counter-clockwise and remove it. You can also place the AdBlue® filler cap in the filler cap holder in the hinge arm of the fuel filler flap.MENGISI ULANG ADBLUE®
Mercedes-Benz recommends that you top up AdBlue ® at a pump system. If there is no AdBlue ® pump system available you can also top up AdBlue ® with a canister.  Unscrew the cap of AdBlue * refill canister 4. Screw disposable hose Ⓐ onto the opening of AdBlue® refill canister ⚙ until hand-tight. Screw disposable hose Ⓐ onto the filler neck of the vehicle until hand-tight. Lift up and tip AdBlue ® refill canister The filling process stops when the AdBlue ® tank is completely full. AdBlue® refill canister ④ can be removed when it has been only partially emptied.   G-Class - Owner's Manual > Quick start and Tips At the filling station Unscrew disposable hose ③ and close AdBlue® refill canister ④ in reverse order. Replace AdBlue ® filler cap ② and turn it clockwise until it audibly engages. Close fuel filler flap ①. ▶ Switch on the vehicle for at least 60 seconds. If it was no longer possible to start the vehicle due to the empty AdBlue ® tank, it takes up to 60 seconds for topping up to be detected. Start the vehicle. Avoid storing AdBlue ® refill containers permanently in the vehicle.Mengisi ulang sistem pencuci kaca depan
PERINGATAN
Risk of burns when opening the bonnetJIKA ANDA MEMBUKA KAP MESIN SAAT MESIN OVERHEAT ATAU TERJADI KEBAKARAN DI RUANG MESIN, SITUASI BERIKUT DAPAT TERJADI:
• You may come into contact with hot gases. - You may come into contact with other escaping hot operating fluids. Before opening the bonnet, allow the engine to cool down. In the event of a fire in the engine compartment, keep the bonnet closed and call the fire service.PERINGATAN
Risk of burns from hot component parts in the engine compartment Certain component parts in the engine compartment can be very hot, e.g. the engine, the cooler and parts of the exhaust system. ▶ Allow the engine to cool down and only touch component parts described in the following. G-Class - Owner's Manual > Quick start and Tips At the filling station  PERINGATAN
Risk of injury due to moving parts Components in the engine compartment can continue to run or start unexpectedly even when the ignition is switched off. Observe the following before performing tasks in the engine compartment: ▶ Switch off the ignition. ▶ Never touch the danger zone surrounding moving components, e.g. the rotation area of the fan. Remove jewellery and watches. ▶ Keep items of clothing and hair away from moving parts. PERINGATAN
\- Risk of fire and injury due to windscreen washer concentrate Windscreen washer concentrate is highly flammable. It could ignite if it comes into contact with hot engine component parts or the exhaust system. ▶ Make sure that no windscreen washer concentrate spills out next to the filler opening.  ▶ Turn cap ⓘ anti-clockwise and remove it. Top up the washer fluid. Replace cap ⓘ and turn it clockwise until it engages.Mengganti bilah penghapus kaca depan
PERINGATAN
Risk of becoming trapped if the windscreen wipers are switched on while wiper blades are being replaced If the windscreen wipers begin to move while you are changing the wiper blades, you can be trapped by the wiper arm. ▶ Always switch off the windscreen wipers and vehicle before changing the wiper blades. Check the condition of the wiper blades regularly and replace them in the event of visible damage or ongoing smearing.   G-Class - Owner's Manual > Quick start and Tips At the filling station Observe the information about the service indicator. SERVICE INDICATOR  Remove protective film ① from the service indicators on the tips of the newly fitted wiper blades. When the colour of the service indicator changes from black to yellow, replace the wiper blades. The time it takes for the colour to change will vary depending on the usage conditions.Memeriksa level oli mesin menggunakan layar pengemudi
Persyaratan:
• The engine has been warmed up. • The vehicle is parked on a level surface. • The engine is running at idle speed. The bonnet is closed. Determining the engine oil level can take up to 30 minutes with a normal driving style and even longer with an active driving style. Before every off-road drive, fill the engine oil level up to the maximum. Wait at least five minutes after the initial check using the on-board computer. After this, make a second request and top up the engine oil according to the specifications. Driver display: Service The engine oil level is shown.SALAH SATU PESAN BERIKUT AKAN MUNCUL DI LAYAR PENGEMUDI:
• Engine oil level Measuring now....: the engine oil level cannot be determined yet. Repeat the request after a maximum of 30 minutes' driving. - Engine oil level OK and the bar display for indicating the engine oil level on the driver's display is green and is between "min" and "max": the engine oil level is correct. If the bar is at "min": Add around 1 l of engine oil. If the bar is in the middle: Add approximately 0.5 l of engine oil.  G-Class - Owner's Manual > Quick start and Tips At the filling station - Engine oil level Top up 1,0 l and the bar display for indicating the engine oil level on the driver's display is yellow and is below "min": ▶ Add 1 l of engine oil. - Engine oil level Reduce and the bar display for indicating the engine oil level on the driver's display is yellow and is above "max": Drain off any excess engine oil that has been added. To do so, consult a qualified specialist workshop. • For engine oil level, switch on vehicle ▶ Switch on the vehicle to check the engine oil level. - Engine oil level System inoperative: The oil level sensor is defective or not connected. Consult a qualified specialist workshop. • Engine oil level System currently inoperative Close the bonnet. Informasi tentang mencuci kendaraan di tempat cuci mobil
PERINGATAN
Risk of an accident due to reduced braking power after washing the vehicle Braking efficiency is reduced after washing the vehicle. ▶ After the vehicle has been washed, brake carefully while paying attention to the traffic conditions until braking power has been fully restored. CATATAN
Damage from automatic brakingKENDARAAN AKAN MENGEREM SECARA OTONOM DALAM SITUASI TERTENTU JIKA FUNGSI-FUNGSI BERIKUT AKTIF:
• Active Brake Assist • Active Distance Assist DISTRONIC - HOLD function • Active Parking Assist To avoid damage to the vehicle, switch these systems off e.g. before towing it or in a car wash.  G-Class - Owner's Manual > Quick start and Tips At the filling station  CATATAN
Damage due to unsuitable car wash Before driving into a car wash make sure that the car wash is suitable for the vehicle dimensions. ▶ Ensure there is sufficient ground clearance between the underbody and the guide rails of the car wash. ▶ Ensure that the clearance width of the car wash, in particular the width of the guide rails, is sufficient.UNTUK MENGHINDARI KERUSAKAN PADA KENDARAAN ANDA SAAT MENGGUNAKAN TEMPAT CUCI MOBIL, PASTIKAN HAL BERIKUT SEBELUMNYA:
• Active Distance Assist DISTRONIC is switched off. • The HOLD function is switched off. • The 360° camera or the reversing camera is switched off. • The side windows and sliding sunroof are completely closed. • The outside mirrors are retracted. • The blower for the ventilation and heating is switched off. • The windscreen wiper switch is in position 0. - Vehicles with KEYLESS-GO: The key is a minimum distance of 3 m away from the vehicle. Otherwise a door may lock and unlock unintentionally. • For car washes with conveyor systems: - Neutral gear N is engaged. - If you leave the vehicle while it is being washed, ensure the key is located in the vehicle. The park position [P] is otherwise automatically engaged. Removing the wax from the windscreen and the wiper rubber after washing the vehicle will help to avoid smearing and reduce wiper noise.  G-Class - Owner's Manual > Quick start and Tips Preparing for a holidayPersiapan untuk liburan
Catatan tentang penyesuaian lampu saat berkendara di luar negeri
Vehicles with static LED headlamps: it is not necessary to convert the headlamps. The legal requirements are also met in countries in which traffic drives on the other side of the road. Vehicles with MULTIBEAM LED: the headlamps will automatically be adjusted when you cross the border into countries in which traffic drives on the other side of the road.DALAM KASUS BERIKUT, PERIKSA PENGATURAN LAMPU UTAMA DAN UBAH SECARA MANUAL JIKA PERLU:
- If the Dipped-beam setting (left/right-side traffic) Manual adjustment only display message is shown. - If the Check dipped-beam setting (left/right-side traffic) display message is shown.SETELAH LAMPU UTAMA DIUBAH:
• Oncoming traffic will not be dazzled. • The edge of the road will not be illuminated as far or as high. - The "motorway mode" and "enhanced fog light" functions will not be available.Catatan tentang pemeriksaan rutin ban dan roda
PERINGATAN
Risk of injury due to damaged tyres Damaged tyres can cause tyre pressure loss. ▶ Check the tyres regularly for signs of damage and replace any damaged tyres immediately.  G-Class - Owner's Manual > Quick start and Tips Preparing for a holiday  PERINGATAN
Risk of aquaplaning due to insufficient tyre tread Insufficient tyre tread will result in reduced tyre grip. There is a risk of an accident. On a wet road surface the risk of aquaplaning is increased, in particular where speed is not adapted to suit the conditions. ▶ Check the tread depth and the condition of the tyre contact surface across the entire width of all tyres on a regular basis.KEDALAMAN TAPAK MINIMUM UNTUK
• Summer tyres: 3 mm • M+S tyres: 4 mm For safety reasons, replace the tyres before the legally-prescribed limit for the minimum tread depth is reached. Replace the tyres immediately if the legally-prescribed limit for the minimum tread depth is reached.LAKUKAN PEMERIKSAAN BERIKUT PADA SEMUA RODA SECARA TERATUR, SETIDAKNYA SEKALI SEBULAN ATAU SESUAI KEBUTUHAN, MISALNYA SEBELUM PERJALANAN JAUH ATAU BERKENDARA DI JALAN OFF-ROAD:
• Check the tyre pressure ( → page 653). • Visually inspect wheels and tyres for damage. - Check the valve caps. - Visual check of the tyre tread depth and the tyre contact surface across the entire width. The minimum tread depth for summer tyres is 3 mm and for winter tyres 4 mm.Melepas rompi keselamatan
The safety vests are located in the driver's door and front passenger door stowage compartments. ▶ Pull out the safety vest bag using the loop. Open the safety vest bag and take out the safety vest.  1 Maximum number of washes 2 Maximum wash temperature Do not bleach Do not iron Do not tumble dry Do not dry clean 7 Class 2 safety vest The requirements defined by the legal standard are only fulfilled if the safety vest is the correct size and is fully closed.GANTI ROMPI KESELAMATAN DALAM KASUS BERIKUT:
• The reflective strips are damaged or dirty. • The maximum permissible number of washes is exceeded.   G-Class - Owner's Manual > Quick start and Tips Preparing for a holiday \- The fluorescence property decreases, e.g. due to permanent exposure to sunlight.BUANG ROMPI KESELAMATAN DENGAN CARA YANG RAMAH LINGKUNGAN:
• Please contact your local waste disposal company. Removing the warning triangle  Open the tabs 2. Remove the warning triangle ①. First-aid kit overview  The first-aid kit is located in the door stowage compartment of the front passenger door.Ringkasan pembaruan data peta
As the content of a digital road map has a short life, outdated data may have a negative effect on all navigation functions. For the best MBUX navigation experience, you should install all of the map updates offered by Mercedes-Benz.PILIHAN BERIKUT TERSEDIA UNTUK PEMBARUAN DATA PETA:
• Online map update • Updates via the Mercedes-Benz Portal - Update at a Mercedes-Benz service centre Additional costs can be incurred in this process.  G-Class - Owner's Manual > Quick start and Tips Preparing for a holidayPEMBARUAN PETA ONLINE
PERSYARATAN:
• Digital Extras are available. • You have a Mercedes me ID. • The Digital Extra Online Map Update is available for your region. • Online Map Update has been activated. ① Online Map Update is only available in certain countries. Installation takes place in the background as an automatic map update. The MBUX multimedia system installs all of the available map updates for the European regions in which the vehicle is located or is moved. The online map update is activated at the latest after the next time the vehicle is switched on.PEMBARUAN MELALUI PORTAL MERCEDES-BENZ
The map data for several regions can also be updated manually. Log in with your Mercedes-Benz user account at: https://www.mercedes-benz.de/ Click on your account at the top right and follow the menu path My dashboard > Manage vehicle > Manage Digital Extras > Online Map Update. Select the regions to be downloaded to a storage medium. After the map data has been copied, connect the storage medium with your vehicle. Select the notification with information about a new version of the map data and start the installation. After the MBUX multimedia system has been restarted, the updated map data is used. Memasukkan POI atau alamat
Persyaratan:
• Untuk pencarian online:
- There is an Internet connection. Digital Extras are available. - You have created a Mercedes me ID, The vehicle is linked to the Mercedes me ID and you have accepted the terms of use. - Further information can be found at: https://www.mercedes.me - The Digital Extra is available and has been activated. If Online Search is not available, the search is performed using the data of the digital map.  G-Class - Owner's Manual > Quick start and Tips Preparing for a holiday Multimedia system:   Example: entering a POI or address ① Input line with current entry 2 Deletes an entry 3 Selects previous destinations Displays and selects additional destination searches Adopts the search result in the input line and continues the search 6 Search result 7 Deletes the last character entered Hides the keypad 9 Activates voice entry. Sets the written language ⑪ Switches to digits and special characters 12 Switches to upper-case or lower-case letters If available, selecting the ⚡ symbol starts the MBUX Voice Assistant. Enter a destination. The entries can be made in any order. The search results are displayed in a list. Online search results for POIs may contain additional information, for example opening times and ratings. The information is provided by an online map service. This online function is not available in all countries.ENTRI BERIKUT DAPAT DIBUAT, MISALNYA DI ①:
• Town, street, house number or street, town Postcode • POI name or POI category, e.g. Restaurants Town, POI name \- Contact name • Geo-coordinates ( → page 490) ▶ Hide the keyboard with OK. ▶ Select the destination in the list. The following menu shows the selected destination with the address information and a corresponding map section. The menu enables the route to be calculated.  G-Class - Owner's Manual > Quick start and Tips Preparing for a holiday Mencari stasiun radio menggunakan nama stasiun atau entri frekuensi
Multimedia system:  Select ⭕. Enter a station name or frequency. Select a station.   G-Class - Owner's Manual > Quick start and Tips Luggage and loadingBagasi dan pemuatan
Memasang rak atap
PERINGATAN
Risk of accident due to exceeding the maximum roof load The vehicle centre of gravity and the usual driving characteristics as well as the steering and braking characteristics alter. If you exceed the maximum roof load, the driving characteristics, as well as steering and braking, will be greatly impaired. ▶ Never exceed the maximum roof load and adjust your driving style. PERINGATAN
Risk of injury if unsuitable climbing aids are usedJIKA ANDA MENGGUNAKAN BUKAAN PADA BODI ATAU PENGIKAT SEBAGAI PIJAKAN, ANDA DAPAT:
- Slip and/or fall. • Damage the vehicle and thus slip and fall. ▶ Always use non-slip, stable climbing aids, e.g. a suitable ladder. CATATAN
Damage to the wheel arch flares and bumpers if used as a step The wheel arch flares and bumpers can be damaged or become detached from the vehicle if you use them as a step. ▶ Only use the two steps indicated on the rear bumper. CATATAN
Vehicle damage due to non-approved roof racks The vehicle could be damaged by roof racks that have not been tested and approved by Mercedes-Benz. ▶ Only use roof racks approved for Mercedes-Benz. ▶ Depending on the vehicle equipment, ensure that the sliding sunroof can be fully raised when the roof rack is fitted. ▶ Position the load on the roof rack in such a way that the vehicle will not sustain damage even when it is in motion.  G-Class - Owner's Manual > Quick start and Tips Luggage and loading CATATAN
Maximum permissible roof load The weight of the roof luggage, including the roof rack, must not exceed the maximum permissible roof load. The maximum roof load is 150 kg with at least three pairs of supporting feet. This information applies if the load is distributed evenly across the entire roof area. The maximum load per pair of supporting roof rack feet is 50 kg. If the vehicle is at a standstill and at least three pairs of supporting feet are being used, you may exceed the maximum permissible roof load of 150 kg by a maximum of 150 kg. You can use this if you are using a roof tent, for example. It is absolutely essential to comply with the installation instructions of the roof rack manufacturer.   CATATAN
Damage to the covers The covers may be damaged and scratched when being opened. ▶ Use the attached disassembly tool in the vehicle tool bag. ▶ Do not use metallic or hard objects. Do not install the covers until the roof rack has been removed. Bear in mind the following related topic: • Vehicle tool kit overview ( → page 661) An incorrectly attached roof rack or an incorrect roof load can become detached from the vehicle. It is absolutely essential to comply with the installation instructions of the roof rack manufacturer. Carefully remove covers Ⓞ in the direction of the arrow with the disassembly tool. Attach the roof rack at securing points ②. Comply with the installation instructions of the roof rack manufacturer. ▶ Secure the load on the roof luggage rack.  G-Class - Owner's Manual > Quick start and Tips Luggage and loading Melipat kursi belakang ke depan
PERINGATAN
Risk of accident if the rear bench seat, rear seat and seat backrest are not engaged The rear bench seat, rear seat and seat backrest may fold forwards, even while the vehicle is in motion. - As a result, the vehicle occupant will be pressed into the seat belt with increased force. The seat belt will not be able to protect as intended and could cause additional injury. - Objects or loads in the boot or load compartment cannot be restrained by the seat backrest. Make sure that the rear bench seat, the rear seat and the seat backrest are engaged before every trip. CATATAN
Damage to the seat backrests The seat backrests may be damaged when the rear bench seat is folded forwards. ▶ Fold the rear bench seat's cushion upwards before the rear seat backrest is folded forwards. You can fold the left and right seat backrests forwards separately.  ▶ Fully insert the seat backrest head restraints ( → page 198). Fold the seat cushion upwards using the loop ①.  Pull the release handle ② upwards until the seat backrest is completely unlocked. ▶ Fold the seat backrest forwards.   G-Class - Owner's Manual > Quick start and Tips Luggage and loading Melipat kembali kursi belakang
PERINGATAN
Risk of accident if the rear bench seat, rear seat and seat backrest are not engaged The rear bench seat, rear seat and seat backrest may fold forwards, even while the vehicle is in motion. - As a result, the vehicle occupant will be pressed into the seat belt with increased force. The seat belt will not be able to protect as intended and could cause additional injury. - Objects or loads in the boot or load compartment cannot be restrained by the seat backrest. Make sure that the rear bench seat, the rear seat and the seat backrest are engaged before every trip. CATATAN
Damage caused by trapping the seat belt when folding back the seat backrest The seat belt could become trapped and thus be damaged when the seat backrest is folded back. Make sure that the seat belt is not trapped when folding back the seat backrest.  Swivel seat backrest ① back until it engages. Swivel the seat cushion ② back.Ikhtisar mata pengikat
Observe the notes on loading the vehicle ( → page 210).  ① Load securing tie-down eye  G-Class - Owner's Manual > Quick start and Tips Luggage and loadingGambaran umum kompartemen penyimpanan depan
PERINGATAN
Risk of injury due to objects being stowed incorrectly If objects in the vehicle interior are stowed incorrectly, they can slide or be thrown around and hit vehicle occupants. In addition, cup holders, open stowage spaces and mobile phone brackets cannot always retain all objects they contain. There is a risk of injury, particularly in the event of braking manoeuvres or abrupt changes in direction. ▶ Always stow objects so that they cannot be thrown around in such situations. ▶ Always make sure that objects do not protrude from stowage spaces, luggage nets or stowage nets. ▶ Close the lockable stowage spaces before starting a journey. ▶ Stow and secure objects that are heavy, hard, pointed, sharpedged, fragile or too large in the load compartment. Observe the notes on loading the vehicle. PERINGATAN
Risk of accident due to objects in the driver's footwell Objects in the driver's footwell may impede pedal travel or block a depressed pedal. This will jeopardise the operating and road safety of the vehicle. Stow all objects in the vehicle securely so that they cannot get into the driver's footwell. ▶ Make sure that there is always sufficient clearance for the pedals. ▶ Always fit the floor mats securely and as prescribed. Do not use loose floor mats and do not place floor mats on top of one another.  ① Stowage spaces in the doors Storage and telephone compartment in the armrest with USB port (USB-C) 3 Storage compartment with cup holder and for wireless charging of a mobile phone in the front centre console Glove compartment   G-Class - Owner's Manual > Quick start and Tips Luggage and loading Mengunci/membuka kunci kotak sarung tangan
PERINGATAN
Risk of injury due to objects being stowed incorrectly If objects in the vehicle interior are stowed incorrectly, they can slide or be thrown around and hit vehicle occupants. In addition, cup holders, open stowage spaces and mobile phone brackets cannot always retain all objects they contain. There is a risk of injury, particularly in the event of braking manoeuvres or abrupt changes in direction. ▶ Always stow objects so that they cannot be thrown around in such situations. ▶ Always make sure that objects do not protrude from stowage spaces, luggage nets or stowage nets. ▶ Close the lockable stowage spaces before starting a journey. ▶ Stow and secure objects that are heavy, hard, pointed, sharpedged, fragile or too large in the load compartment.  ▶ Turn the emergency key a quarter turn clockwise 2 (to lock) or anticlockwise 1 (to unlock). Observe the notes on loading the vehicle.  G-Class - Owner's Manual > Quick start and Tips Ice and snow< Es dan salju
Catatan tentang memeriksa roda dan ban secara teratur
PERINGATAN
Risk of injury due to damaged tyres Damaged tyres can cause tyre pressure loss. ▶ Check the tyres regularly for signs of damage and replace any damaged tyres immediately. PERINGATAN
Risk of aquaplaning due to insufficient tyre tread Insufficient tyre tread will result in reduced tyre grip. There is a risk of an accident. On a wet road surface the risk of aquaplaning is increased, in particular where speed is not adapted to suit the conditions. ▶ Check the tread depth and the condition of the tyre contact surface across the entire width of all tyres on a regular basis.KEDALAMAN TAPAK MINIMUM UNTUK
• Summer tyres: 3 mm • M+S tyres: 4 mm For safety reasons, replace the tyres before the legally-prescribed limit for the minimum tread depth is reached. Replace the tyres immediately if the legally-prescribed limit for the minimum tread depth is reached.LAKUKAN PEMERIKSAAN BERIKUT PADA SEMUA RODA SECARA TERATUR, SETIDAKNYA SEKALI SEBULAN ATAU SESUAI KEBUTUHAN, MISALNYA SEBELUM PERJALANAN JAUH ATAU BERKENDARA DI JALAN OFF-ROAD:
• Check the tyre pressure ( → page 653).  G-Class - Owner's Manual > Quick start and Tips Ice and snow • Visually inspect wheels and tyres for damage. - Check the valve caps. - Visual check of the tyre tread depth and the tyre contact surface across the entire width. The minimum tread depth for summer tyres is 3 mm and for winter tyres 4 mm.Mengatur batas kecepatan untuk ban musim dingin
Multimedia system: Settings Vehicle Driving Winter tyre limit ▶ Activate or deactivate Winter tyre limit.MENGATUR KECEPATAN
▶ Select Winter tyre limit. Select a speed.Catatan tentang rantai salju
Mercedes-AMG vehicles: the notes on using snow chain-compatible AMG winter tyres apply to AMG tyres. Snow chains are permitted for use only with these.PERHATIKAN CATATAN BERIKUT SAAT MENGGUNAKAN RANTAI SALJU:
- Snow chains are only permissible for certain wheel/tyre combinations. You can obtain information about this from a Mercedes-Benz Service Centre. - For safety reasons, only use snow chains that have been specifically approved for your vehicle by Mercedes-Benz, or snow chains of the same quality standard.  • If snow chains are fitted, the maximum permissible speed is 50 km/h. - Vehicles with Active Parking Assist: do not use Active Parking Assist when snow chains are fitted. You can permanently limit the maximum vehicle speed for driving with winter tyres ( → page 353). You can deactivate ESP to start off ( → page 345). Spinning the wheels results in a cutting action, which enhances traction.Catatan tentang cairan pencuci kaca depan
Observe the notes on operating fluids ( → page 745).PERINGATAN
\- Risk of fire and injury due to windscreen washer concentrate Windscreen washer concentrate is highly flammable. It could ignite if it comes into contact with hot engine component parts or the exhaust system. ▶ Make sure that no windscreen washer concentrate spills out next to the filler opening.  G-Class - Owner's Manual > Quick start and Tips Ice and snow CATATAN
Damage to the exterior lighting due to unsuitable windscreen washer fluid Unsuitable windscreen washer fluids may damage the plastic surface of the exterior lighting. ▶ Only use windscreen washer fluids which are also suitable for use on plastic surfaces, e.g. MB SummerFit or MB WinterFit. CATATAN
Blocked spray nozzles caused by mixing windscreen washer fluids Do not mix MB SummerFit and MB WinterFit with other wind-screen washer fluids. Do not use distilled or de-ionised water. Otherwise, the fill level sensor may be triggered erroneously.CAIRAN PENCUCI KACA DEPAN YANG DIREKOMENDASIKAN:
• above freezing point: e.g. MB SummerFit • below freezing point: e.g. MB WinterFit For the correct mixing ratio, refer to the information on the antifreeze container. Mix washer fluid with windscreen washer fluid all year round. Mengisi ulang sistem pencuci kaca depan
PERINGATAN
Risk of burns when opening the bonnetJIKA ANDA MEMBUKA KAP MESIN SAAT MESIN MENGALAMI PANAS BERLEBIH ATAU TERJADI KEBAKARAN DI RUANG MESIN, SITUASI BERIKUT DAPAT TERJADI:
• You may come into contact with hot gases. - You may come into contact with other escaping hot operating fluids. Before opening the bonnet, allow the engine to cool down. In the event of a fire in the engine compartment, keep the bonnet closed and call the fire service. PERINGATAN
Risk of burns from hot component parts in the engine compartment Certain component parts in the engine compartment can be very hot, e.g. the engine, the cooler and parts of the exhaust system. ▶ Allow the engine to cool down and only touch component parts described in the following. G-Class - Owner's Manual > Quick start and Tips Ice and snow  PERINGATAN
Risk of injury due to moving parts Components in the engine compartment can continue to run or start unexpectedly even when the ignition is switched off. Observe the following before performing tasks in the engine compartment: ▶ Switch off the ignition. ▶ Never touch the danger zone surrounding moving components, e.g. the rotation area of the fan. Remove jewellery and watches. ▶ Keep items of clothing and hair away from moving parts. PERINGATAN
\- Risk of fire and injury due to windscreen washer concentrate Windscreen washer concentrate is highly flammable. It could ignite if it comes into contact with hot engine component parts or the exhaust system. ▶ Make sure that no windscreen washer concentrate spills out next to the filler opening.  ▶ Turn cap ⓘ anti-clockwise and remove it. Top up the washer fluid. Replace cap ⓘ and turn it clockwise until it engages.Mengganti bilah penghapus kaca depan
PERINGATAN
Risk of becoming trapped if the windscreen wipers are switched on while wiper blades are being replaced If the windscreen wipers begin to move while you are changing the wiper blades, you can be trapped by the wiper arm. ▶ Always switch off the windscreen wipers and vehicle before changing the wiper blades. Check the condition of the wiper blades regularly and replace them in the event of visible damage or ongoing smearing.   G-Class - Owner's Manual > Quick start and Tips Ice and snow Observe the information about the service indicator. SERVICE INDICATOR  Remove protective film ① from the service indicators on the tips of the newly fitted wiper blades. When the colour of the service indicator changes from black to yellow, replace the wiper blades. The time it takes for the colour to change will vary depending on the usage conditions. Menghidupkan/mematikan pemanas/ventilasi stasioner melalui panel kontrol AC
BAHAYA
Risk of fatal injury due to poisonous exhaust gases If the tailpipe is blocked or sufficient ventilation is not possible, poisonous exhaust gases such as carbon monoxide may enter the vehicle. This is the case in enclosed spaces or if the vehicle gets stuck in snow, for example. Always switch the stationary heater off in enclosed spaces without an air extraction system, e.g. in garages. Keep the tailpipe and the area around the vehicle free from snow when the engine or the stationary heater is running. Open a window on the side of the vehicle facing away from the wind to ensure an adequate supply of fresh air.  G-Class - Owner's Manual > Quick start and Tips Ice and snowA
PERINGATAN
Risk of fire due to hot stationary heater components and exhaust gases Flammable materials such as leaves, grass or twigs may ignite. When the stationary heater is switched on, make sure that: - hot vehicle parts do not come into contact with flammable materials. - the exhaust gas can flow out of the stationary heater exhaust pipe unhindered. - the exhaust gas does not come into contact with flammable materials.!
CATATAN
Battery discharge caused by stationary heater or stationary ventilation operation Operating the stationary heater or stationary ventilation drains the battery. ▶ After heating or ventilating the vehicle twice, drive for a longer period of time.Persyaratan:
• The fuel tank is filled to at least the reserve level. - Adequate state of charge for the starter battery.  Set the desired temperature using the button Press the button ①. The red or blue indicator lamp on the button ① will light up or go out.WARNA LAMPU INDIKATOR MEMILIKI ARTI BERIKUT:
• Blue: stationary ventilation is switched on. • Red: the stationary heater is switched on. • Yellow: the departure time is preselected. The stationary heater/ventilation will switch off automatically after 50 minutes. G-Class - Owner's Manual > Quick start and Tips Help in the event of a breakdown< Bantuan jika terjadi kerusakan
Activating/deactivating the hazard warning lights  Press button 1. IN THE FOLLOWING SITUATIONS, THE HAZARD WARNING LIGHTS WILL SWITCH ON AUTOMATICALLY: • The airbag has been deployed - the vehicle brakes are applied heavily from a speed of more than 70 km/h to a standstill. • An emergency stop has been initiated ( → page 368) When you pull away again, the hazard warning light system will switch off automatically at approximately 10 km/h. You can also switch off the hazard warning light system using button ☐.Melepas alat pemadam kebakaran
A PERINGATAN
Risk of accident due to an incorrectly secured fire extinguisher in the driver's footwell A fire extinguisher may impede pedal travel or block a depressed pedal. This jeopardises the operating and road safety of the vehicle. The fire extinguisher can be flung around and injure the driver or other vehicle occupants. ▶ Always store and secure the fire extinguisher in the bracket. Do not remove the fire extinguisher while driving.  Left-hand drive vehicle: pull the tab 1 upwards. Right-hand drive vehicle: pull the tab ① downwards.   G-Class - Owner's Manual > Quick start and Tips Help in the event of a breakdown Remove the fire extinguisher ②.Melepas rompi keselamatan
The safety vests are located in the driver's door and front passenger door stowage compartments. ▶ Pull out the safety vest bag using the loop. ▶ Open the safety vest bag and take out the safety vest.     1 Maximum number of washes 2 Maximum wash temperature Do not bleach Do not iron Do not tumble dry Do not dry clean Class 2 safety vest The requirements defined by the legal standard are only fulfilled if the safety vest is the correct size and is fully closed.GANTI ROMBI KESELAMATAN DALAM KASUS BERIKUT:
• The reflective strips are damaged or dirty. • The maximum permissible number of washes is exceeded.  \- The fluorescence property decreases, e.g. due to permanent exposure to sunlight.BUANG ROMBI KESELAMATAN DENGAN CARA YANG RAMAH LINGKUNGAN:
• Please contact your local waste disposal company.Melepas segitiga pengaman
 Open the tabs 2. Remove the warning triangle  G-Class - Owner's Manual > Quick start and Tips Help in the event of a breakdown First-aid kit overview  The first-aid kit ⓘ is located in the door stowage compartment of the front passenger door.Kode QR untuk kartu penyelamatan
QR codes are attached in the fuel filler flap and on the opposite side on the B-pillar. In the event of an accident, rescue services can use the QR code to quickly find the appropriate rescue card for your vehicle. The current rescue card contains the most important information about your vehicle (e.g. the routing of the electric lines) in compact form. Additional information can be obtained at: https://rk.mb-qr.com/de/  Starting assistance and charging the 12 V batteryPERSIAPKAN BANTUAN STARTER/PROSES PENGISIAN DAYA
▶ Secure the vehicle against rolling away. ▶ Switch off the vehicle and all electrical consumers. ▶ Open the bonnet ( → page 606).  Slide cover ① of positive terminal ② on the jump-starting connection point in the direction of the arrow.BANTUAN SAAT MULAI
Connect the positive terminal of your own vehicle to the jump lead. Connect the positive terminal of the booster battery to the jump lead. On the assisting vehicle, let the engine run at idling speed. Connect the negative terminal of the booster battery to the jump lead.  G-Class - Owner's Manual > Quick start and Tips Help in the event of a breakdown Connect the jump lead to your vehicle's earth point ③. ▶ Start the engine of your own vehicle. Let the engines run for several minutes. Before disconnecting the jump lead, switch on an electrical consumer in your own vehicle, e.g. the rear window heater or the lighting. When the starting assistance process is complete: Disconnect the jump lead from your vehicle's earth point ③. Remove the jump lead from the negative terminal of the booster battery. Remove the jump lead from the positive contact of your vehicle. Remove the jump lead from the positive terminal of the booster battery. After removing the jump lead, close cover ① of the positive terminal ②. Further information can be obtained at a qualified specialist workshop.MENGISI DAYA BATERAI 12 V
Connect the positive terminal of your own vehicle to the charging cable. Connect the positive terminal of the charger to the charging cable. Connect the negative terminal of the charger to the charging cable. Connect the charging cable to your vehicle's earth point ③. ▶ Start the charging process. When the charging process is complete: Disconnect the charging cable from your vehicle's earth point ③. Remove the charging cable from the negative terminal of the charger. Remove the charging cable from the positive terminal of your own vehicle. Remove the charging cable from the positive terminal of the charger. After removing the charging cable, close cover ① of the positive terminal ②.Catatan tentang sekring listrik
PERINGATAN
Risk of accident and injury due to overloaded lines If you manipulate or bridge a faulty fuse or if you replace it with a fuse with a higher amperage, the electric line could be overloaded. This could result in a fire. ▶ Always replace faulty fuses with specified new fuses containing the correct amperage. CATATAN
Damage due to incorrect fuses Using incorrect fuses can result in damage to electrical components or systems or their functions being considerably restricted. ▶ Use only fuses approved for Mercedes-Benz with the respective specified fuse rating. G-Class - Owner's Manual > Quick start and Tips Help in the event of a breakdown Replace blown fuses with equivalent fuses, identifiable by their colour and label. The fuse ratings and further information to be observed can be found in the fuse assignment diagram. Fuse assignment diagram: on the fuse box in the rear passenger compartment ( → page 647). CATATAN
Damage or malfunctions caused by moisture Moisture may cause damage to the electrical system or cause it to malfunction. When the fuse box is open, make sure that no moisture can enter the fuse box. When closing the fuse box, make sure that the seal of the lid is positioned correctly on the fuse box. If the newly inserted fuse also blows, have the cause determined and rectified at a qualified specialist workshop.PASTIKAN HAL BERIKUT SEBELUM MENGGANTI SEKERING:
• The vehicle is secured against rolling away. • All electrical consumers are switched off. • The vehicle is switched off.SEKRING LISTRIK TERLETAK DI BERBAGAI KOTAK SEKERING:
- Fuse box in the engine compartment on the left-hand side (→ page 646) • Fuse box in the front passenger footwell ( → page 646) • Fuse box in the rear passenger compartment ( → page 647)Catatan tentang ban kempes
PERINGATAN
Risk of accident due to a flat tyre A flat tyre strongly impairs the vehicle's driving characteristics, as well as its steering and braking characteristics. ▶ Do not drive with a flat tyre. Replace the flat tyre with the spare wheel. Alternatively, consult a qualified specialist workshop.JIKA TERJADI BAN KEMPES, PILIHAN BERIKUT TERSEDIA TERGANTUNG PADA PERLENGKAPAN KENDARAAN ANDA:
- Vehicles with Mercedes-Benz Support: in the event of a breakdown, you can make a breakdown call via the overhead control panel ( → page 549). • All vehicles: change the wheel ( → page 661). The emergency spare wheel is only available in certain countries.Menderek jika terjadi kerusakan pada poros belakang
Remove the propeller shaft between the front axle and the transfer case. Tow the vehicle with a raised rear axle and with wheel rollers under the front axle.  G-Class - Owner's Manual > Quick start and Tips Help in the event of a breakdownMenderek jika terjadi kerusakan pada poros depan
Remove the propeller shaft between the rear axle and the transfer case. ▶ Towing the vehicle with a raised front axle.Menderek kendaraan jika terjadi kerusakan
MENDEREK JIKA TERJADI KERUSAKAN PADA MESIN, TRANSMISI, ATAU KELISTRIKAN
Shift the transmission to position N. Release the parking brake. The transmission may be locked in position in the event of damage to the electrics. To shift to , provide the on-board electrical system with power (→ page 61).PENARIKAN KENDARAAN APABILA TERJADI KERUSAKAN PADA TRANSFER CASE
Remove the propeller shafts between the axles and the transfer case.Menarik kendaraan dengan kedua poros roda menyentuh tanah
Observe the notes on the permitted towing methods ( → page 639). Make sure that the battery is connected and charged.KETIKA AKI MENGALAMI KELUARAN DAYA (DISCHARGE):
• The vehicle cannot be started. • The electric parking brake cannot be released or applied. • The transmission cannot be shifted to position N or P. If the transmission cannot be shifted to position N, transport the vehicle ( → page 642). A tow truck with lifting equipment is required for vehicle transport.CATATAN
Damage due to towing away at excessively high speeds or over long distances The drivetrain could be damaged when towing at excessively high speeds or over long distances. A towing speed of 50 km/h must not be exceeded. ▶ A towing distance of 50 km must not be exceeded.PERINGATAN
Risk of accident when towing a vehicle with too much weightJIKA KENDARAAN YANG AKAN DITARIK LEBIH BERAT DARI BEBAN KOTOR YANG DIIZINKAN DARI KENDARAAN ANDA, MAKA SITUASI BERIKUT DAPAT TERJADI:
• The towing eye breaks off. • The combination oscillates and can capsize. Before towing, check whether the vehicle to be towed exceeds the permissible gross mass.   G-Class - Owner's Manual > Quick start and Tips Help in the event of a breakdown If a vehicle is to be towed away, its permissible gross mass must not exceed the permissible gross mass of the towing vehicle. Information on the permissible gross mass of the vehicle can be found on the vehicle identification plate ( → page 743). ▶ Attach the towing device to the towing eyes ( → page 644). CATATAN
Damage due to incorrect connection of the tow bar ▶ Only connect the tow rope or tow bar to the towing eyes. ▶ Deactivate the automatic locking mechanism ( → page 177). Do not activate the HOLD function ( → page 347). ▶ Deactivate tow-away protection ( → page 190). ▶ Deactivate Active Brake Assist ( → page 372). ▶ Deactivate Active Parking Assist ( → page 401). ▶ Deactivate Active Distance Assist DISTRONIC ( → page 354). Shift the transmission to position N. Do not open the driver's door or front passenger door. Otherwise the transmission automatically shifts to position P. Release the electric parking brake.  PERINGATAN
Risk of accidents due to restricted safety-related functions during towingFUNGSI-FUNGSI YANG BERKAITAN DENGAN KESELAMATAN MENJADI TERBATAS ATAU TIDAK LAGI TERSEDIA DALAM SITUASI-SITUASI BERIKUT:
• The vehicle is switched off. • The brake system or the power steering is malfunctioning. • The power supply or the on-board electrical system is defective. If your vehicle is being towed, considerably more force may be required for steering and braking. In addition, important vehicle display messages cannot be seen if the driver display is faulty. ▶ Use a tow bar. Before towing, ensure that the driver's display is operational and the steering can move freely. CATATAN
Damage due to excessive tractive power If you pull away sharply, the tractive power may be too high and the vehicles could be damaged. ▶ Pull away slowly and smoothly.  G-Class - Owner's Manual > Quick start and Tips Expert knowledgePengetahuan ahli
Fungsi tambahan dari tombol-tombol
MEMBUKA DAN MENUTUP JENDELA MENGGUNAKAN TOMBOL SIRKULASI UDARA (PENUTUPAN/PEMBUKAAN KENYAMANAN)
When air-recirculation mode is activated, the side windows close automatically, for example, before entering a tunnel. When the air-recirculation mode is deactivated, the side windows move back to their original position. PERINGATAN
Risk of entrapment due to not paying attention during convenience closing When the convenience closing feature is operating, parts of the body could become trapped in the closing area of the side window and the sliding sunroof. When the convenience closing feature is operating, monitor the entire closing process and make sure that no body parts are in the closing area.  PERINGATAN
Risk of entrapment due to not paying attention during convenience closing When the convenience closing feature is operating, parts of the body could become trapped in the closing area of the side windows. When the convenience closing feature is operating, monitor the entire closing process and make sure that no body parts are in the closing area. To close the windows: press and hold the 📄 button until the windows start to move. The windows close and air-recirculation mode switches on.  G-Class - Owner's Manual > Quick start and Tips Expert knowledge  PERINGATAN
Risk of entrapment from the convenience opening feature During convenience opening parts of the body could be drawn in or become trapped between the side window and window frame. When opening, make sure that nobody is touching the side windows. If someone becomes trapped, immediately press the button in the door to open the side windows. The side windows stop. To continue closing the side windows, pull on the ☑ button. To reopen closed windows: press and hold the 📄 button until the windows start to move. The windows move back to their original position and air-recirculation mode switches off. Vehicles with a sliding sunroof: the sliding sunroof closes or opens simultaneously.JIKA BAGIAN TUBUH TERJEBAK DI ATAP SURYA GESER:
To stop: press the button. To open: pull the button back.MENGATUR ULANG PENGATURAN KONTROL IKLIM
Press and hold the MENU button on the front control panel for at least four seconds. The climate control settings will be reset to the basic settings.MENGAKTIFKAN/MENONAKTIFKAN PENGUMUMAN LALU LINTAS
Multimedia system:  ▶ Select Radio announcements. The traffic information service is switched on or off.Fungsi kendaraan yang berguna
CATATAN TENTANG WIPER KACA BELAKANG YANG AKTIF SECARA OTOMATIS WIPER KACA BELAKANG AKAN AKTIF SECARA OTOMATIS JIKA KONDISI BERIKUT TERPENUHI PADA SAAT YANG SAMA:
• The front windscreen wiper is switched on • Reverse gear is engaged.MENYIMPAN POSISI PARKIR KACA SPION LUAR PENUMPANG DEPAN MENGGUNAKAN TOMBOL MEMORI
Persyaratan
• Reverse gear has not been engaged.   G-Class - Owner's Manual > Quick start and Tips Expert knowledge Select the front-passenger outside mirror using button ①. Move the front-passenger outside mirror into the desired parking position using button ②. Press the M button. Confirm immediately using button ② to store the setting. No more than three seconds may pass between the M button and button ② being pressed. The mirror adjustment will be cancelled after three seconds.Tips saat berkendara
KONDISI KENDARAAN UNTUK MESIN BERHENTI ATAU HIDUP OTOMATIS KONDISI UNTUK MESIN BERHENTI OTOMATIS:
• The ECO start/stop function is switched on. • The brake system does not require a running engine. - The atmospheric air pressure is within the range that is suitable for the system. • The engine is at normal operating temperature. • Engine diagnostics are not active. - The transmission oil temperature is within the range that is suitable for the system. • The temperature in the vehicle interior is within the set range. • The fuel tank is sufficiently full. - The system detects that there is no moisture on the windscreen when the air conditioning system is switched on. • The system does not detect a steep gradient. • The bonnet is closed.KONDISI UNTUK MESIN HIDUP OTOMATIS:
• The brake system requires a running engine. - The atmospheric air pressure has exceeded the range that is suitable for the system. • Engine diagnostics require a running engine. - The transmission oil temperature has exceeded the range that is suitable for the system. • The temperature in the vehicle interior deviates from the set range. - The system detects moisture on the windscreen when the air conditioning system is switched on.Menonaktifkan fungsi kunci
Vehicles with KEYLESS-GO: if you deactivate the key function, the KEYLESS-GO functions are also deactivated. Access or drive authorisation via KEYLESS-GO is then no longer possible with that key. Activate the function of the key so that all functions using the key are available once again. You can also deactivate the key's function to reduce the key's energy consumption if you do not use the vehicle or a key for an extended period of time. Press and hold the key button ⏻. With the button ⚫ pressed, immediately press the key button ⚠ twice in quick succession. The indicator lamp of the key lights up once briefly, and then again for longer.  G-Class - Owner's Manual > Quick start and Tips Expert knowledge ANDA MEMILIKI OPSI BERIKUT UNTUK MENGAKTIFKAN KEMBALI KUNCI:
• Press any button on the key. - Start the vehicle with the key in the centre console storage compartment ( → page 273).Ikhtisar sistem panggilan darurat
Both the Mercedes-Benz emergency call system as well as the 112 emergency call system (EU eCall) can help to reduce the time between an accident and the arrival of emergency services at the site of the accident. They help locate an accident site in places that are difficult to access. Both emergency call systems can initiate an emergency call automatically ( → page 559) or manually ( → page 560). Only make emergency calls if you or others are in need of rescue. Do not make an emergency call in the event of a breakdown or a similar situation.INDIKATOR DI LAYAR
Pesan-pesan berikut muncul di layar tengah atau layar media dari kedua sistem panggilan darurat:
\- SOS NOT READY: the vehicle is not switched on or the emergency call system is malfunctioning. This does not necessarily indicate complete failure of the emergency call system. Emergency calls can still be transmitted. The display only refers to the vehicle and does not take account of the availability of mobile phone networks and the Mercedes-Benz emergency call centre. The functional readiness of the emergency call system on the vehicle can be seen when the SOS NOT READY display disappears once the vehicle is switched on. \- SOS: the icon appears in the display during an active emergency call. In case of a malfunction of the emergency call system, the loudspeakers, microphone, airbag or the SOS button, for example, are faulty.Anda dapat mengenali kerusakan pada sistem panggilan darurat melalui tampilan berikut:
\- A corresponding message appears on the driver and media display.Panduan darurat
In the event of an accident or breakdown, the emergency guide shows safety notes on the central display.Ini termasuk, misalnya:
• Recommended actions when leaving the vehicle • Procedure for safely removing seat belts in the event of an accident whereby the vehicle comes to rest on its roofPanduan darurat diaktifkan dalam situasi berikut:
• Occupant protection system has been triggered • An emergency call is made • Certain breakdown situations   G-Class - Owner's Manual > Quick start and Tips Expert knowledge The availability as well as the scope of the emergency guide can vary depending in the country and vehicle equipment.   G-Class - Owner's Manual At a glance < Sekilas
This interactive PDF works like a website - tap or click a button to jump straight to where you want to go. You can return here at any time via the navigation bar at the top left. Cockpit 73 Indicator lamps and warning lamps 76 Overhead control panel 79 Door operating unit and seat adjustment 81 > Emergencies and breakdowns 84 G-Class - Owner's Manual > At a glance Cockpit Kokpit
 Left-hand-drive vehicles  G-Class - Owner's Manual At a glance Cockpit   G-Class - Owner's Manual At a glance > Cockpit| 1 Combination switch 241 | > |
| 2 Steering wheel gearshift paddles 308 | > |
| 3 Driver display 419 | > |
| 4 DIRECT SELECT lever 303 | > |
| 5 Climate control systems 260 | > |
| 6 Central display 451 | > |
| 7 OFF-ROAD COCKPIT 477 | > |
| [ ] Activates/deactivates the differential locks | 3>5 |
| [ ] Shifts the transfer case | 3>2 |
| [ ] Manual gearshifting | 3>8 |
| [ ] PASSENGER AIR BAG indicator lamps | 1>6 |
| [ ] Hazard warning light system | 59 |
| [ ] Glove compartment 51 | > |
| Stowage compartment 51 | > |
| Controller for volume and switching sound on/off | 4>1 |
| Switches the MBUX multime-dia system on/off | 4>1 |
| Calls up navigation | 4>1 |
| Calls up radio or media | 4>1 |
| Calls up the telephone | 4>5 |
| Touchpad 455 | > |
| Calls up favourites | 4>1 |
| Calls up vehicle functions | 4>1 |
| Active Parking Assist | 4>3 |
| DYNAMIC SELECT 298 | > |
| Start/stop button 272 | > |
| ECO start/stop function | 2>8 |
| Control panel for the MBUX multi-media system | 424 |
| Adjusts the steering wheel electrically | 293 |
| Switches the steering wheel heater on/off | 293 |
| Control panel: | |
| Driver display 421 | > |
| Cruise control or variable limiter | 351 |
| Active Distance Assist DISTRONIC | 357 |
| Diagnostics connection 105 | > |
| Opens the bonnet 606 | > |
| Instrument lighting | |
| Light switch 239 | > |
| Electric parking brake | 393 |
Lampu indikator dan lampu peringatan
 Driver display  G-Class - Owner's Manual At a glance Indicator lamps and warning lamps   G-Class - Owner's Manual At a glance Indicator lamps and warning lamps | 1 | Turn signal light | 21 |
| 2 | Trailer hitch | 82 |
| 3 | Adaptive damping system | 88 |
| 4 | Electrical fault | 83 |
| 5 | Power steering (red) | 82 |
| Power steering (yellow) | 82 | |
| 6 | Restraint system | 81 |
| 7 | Seat belt | 81 |
| 8 | Distance warning | 88 |
| 9 | ABS | 88 |
| 10 | Tyre pressure monitoring sys-tem | 8$3 |
| 1 | Engine diagnosis | 8×3 |
| 2 | ESP ° OFF | 8×8 |
| ESP ° | 8×8 | |
| 3 | Diesel engine: preglow | |
| 4 | Drive system: reduced power | 8×2 |
| 5 | Petrol engine: engine operating temperature | 8×3 |
| 6 | Coolant temperature | 8×3 |
| 7 | Coolant temperature display 425 | > |
| 8 | Electric parking brake (yellow) | 8×6 |
| 9 | Electric parking brake (red) | 8×6 |
| 10 | Brakes (red) | 8×6 |
| Brakes (yellow) | 896 |
| Fuel reserve with fuel filler flap location indicator | 893 |
| Fuel level 425 | > |
| Adaptive Highbeam Assist Plus | 294 |
| High beam | 291 |
| Low beam | 289 |
| Standing lights | 289 |
| Rear fog light | 210 |
| Mercedes-Benz emergency call system | 893 |
| Rear window wiper | 219 |
Panel kontrol di atas kepala
   G-Class - Owner's Manual At a glance Overhead control panel  Sun visors Switches the left-hand reading lamp on/off 297 Switches automatic interior lighting control on/off 297 4 SOS SOS button 59 Switches the front interior lighting on/off 297 6 me button 549 Switches the rear interior lighting on/off 2917 Switches the right-hand reading lamp on/off 247 9 Spectacles compartment 10 Opens/closes the sliding sunroof 124 Inside rear-view mirror 253  G-Class - Owner's Manual At a glance Door operating unit and seat adjustment Unit pengoperasian pintu dan penyesuaian kursi
  G-Class - Owner's Manual At a glance Door operating unit and seat adjustment   G-Class - Owner's Manual At a glance Door operating unit and seat adjustment| 1 Child safety lock for the rear side windows | 156 |
| 2 Opens/closes the rear left side window | 180 |
| 3 Opens/closes the rear right side window | 180 |
| 4 Opens/closes the left side window | 180 |
| 5 Opens/closes the right side window | 180 |
| Operates the outside mirrors | 252 |
| Locks/unlocks the vehicle | 175 |
| Switches the seat ventilation on/off | 292 |
| Switches the seat heating on/off | 291 |
| Adjusts the seats electrically 195 | > |
| 10M Operates the memory function | 298 |
| 12Opens the door 175 | > |
| 13Seat adjustment using the multi-media system | 199 |
| 14Adjusts the luxury head restraints 197 | > |
Keadaan darurat dan kerusakan
   G-Class - Owner's Manual At a glance Emergencies and breakdowns   G-Class - Owner's Manual At a glance Emergencies and breakdowns  Jack 661 ② Warning triangle 43 QR codes for accessing the rescue card Safety vests 42 ⑤ Fire extinguisher 59 6 me button 59 SOS SOS button 59 7 Checks and tops up operating fluids 745 Starting assistance 61 Tow-starting and towing 639 10 Flat tyre 63 First-aid kit (soft sided) 43 12 Stowage compartment for customer literature Hazard warning light system 59 14 Vehicle tool kit 661 Fuel filler flap with information labels for tyre pressure, fuel type and QR codes for accessing the rescue card Tow-starting and towing 639 ⑰ Spare wheel 628  G-Class - Owner's Manual Digital Owner's Manual < Buku Pedoman Pemilik Digital
This interactive PDF works like a website - tap or click a button to jump straight to where you want to go. You can return here at any time via the navigation bar at the top left. Calling up the Digital Operator's Manual 88 G-Class - Owner's Manual Digital Owner's Manual Calling up the Digital Operator's Manual < Memanggil Buku Pedoman Operator Digital
Multimedia system: Info Owner's Manual Open Digital Owner's Manual The Digital Operator's Manual describes the functions and operation of the vehicle and the multimedia system. Select one of the following menu items in the Digital Operator's Manual: - Quick start: find the first steps towards adjusting your seat (driver's side). - Tips: find information that prepares you for certain everyday situations with your vehicle. • Animations: watch animations of the vehicle functions. - Messages: receive additional information about the messages on the driver display. • Language: select the language for the Digital Operator's Manual. You can search for keywords using the search field Search in order to find quick answers to questions regarding operation of the vehicle.  ① Back ② Contents section Menu 4 Search Some sections in the Digital Operator's Manual, such as warning notes, can be expanded and collapsed.Opsi tambahan untuk memanggil Buku Pedoman Operator Digital:
Driver display: call up brief information regarding display messages on the driver display. Pressing ⓚ will show brief information on the central display. MBUX Voice Assistant: call-up via the voice control system Global search: call up search results for contents of the Digital Operator's Manual in the home screen  G-Class - Owner's Manual Digital Owner's Manual Calling up the Digital Operator's Manual For safety reasons, the Digital Operator's Manual is deactivated while driving.   Back to Contents G-Class - Owner's Manual > General notes < Catatan umum
This interactive PDF works like a website - tap or click a button to jump straight to where you want to go. You can return here at any time via the navigation bar at the top left. Protection of the environment 91 Declarations of conformity and country-specific information 191 Liability for material defects 112 Take-back of end-of-life vehicles 92 Diagnostics connection 105 QR codes for the rescue card 113 Mercedes-Benz GenuineParts 93 Qualified specialist workshop 107 Data storage 114 Touch-sensitive control elements 95 Vehicle registration 108 Copyright 118 Mercedes-Benz app 96 Correct use of the vehicle 109 Operating safety 97 REACH regulation 110 Mounting the licence plate onto the front licence plate bracket 100 Notes for persons with electronic medical aids 1>1 G-Class - Owner's Manual > General notes Protection of the environmentPerlindungan lingkungan
CATATAN LINGKUNGAN
Environmental damage due to operating conditions and personal driving style The pollutant emission of the vehicle is directly related to the way you operate the vehicle. Operate your vehicle in an environmentally responsible manner to help protect the environment. Please observe the following recommendations on operating conditions and personal driving style.Kondisi pengoperasian:
▶ Make sure that the tyre pressure is correct. Do not carry any unnecessary weight (e.g. roof luggage rack once no longer needed). ▶ Adhere to the service intervals. A regularly serviced vehicle will contribute to environmental protection. ▶ Always have maintenance work carried out at a qualified specialist workshop.Gaya mengemudi pribadi:
Do not depress the accelerator pedal when starting the engine. ▶ Do not warm up the vehicle while stationary. ▶ Drive carefully and maintain a suitable distance from the vehicle in front. ▶ Avoid frequent, sudden acceleration and braking. ▶ Switch off the vehicle during traffic stops, e.g. by using the ECO start/stop function. ▶ Drive in a fuel-efficient manner. Observe the ECO display for an economical driving style.   G-Class - Owner's Manual > General notes Take-back of end-of-life vehiclesPengambilan kembali kendaraan akhir masa pakai
HANYA NEGARA UE:
Mercedes-Benz will take back your end-of-life vehicle for environment-friendly disposal in accordance with the European Union (EU) End-Of-Life Vehicles Directive. A network of vehicle take-back points and dismantlers has been established for you to return your vehicle. You can leave it at any of these points free of charge. This makes an important contribution to closing the recycling circle and conserving resources. For further information about the recycling and disposal of end-of-life vehicles, and the take-back conditions, please visit the national Mercedes-Benz website for your country.   G-Class - Owner's Manual > General notes Mercedes-Benz GenuinePartsSuku Cadang Asli Mercedes-Benz
CATATAN LINGKUNGAN
Environmental damage caused by not using recycled reconditioned components Mercedes-Benz AG offers recycled reconditioned components and parts with the same quality as new parts. The same entitlement from the implied warranty is valid as for new parts. ▶ Recycled reconditioned components and parts from Mercedes-Benz AG. CATATAN
Impairment of the operating efficiency of restraint systems due to the installation of accessory parts or repairs or weldingKANTUNG UDARA DAN PENGENCANG SABUK PENGAMAN, SERTA UNIT KONTROL DAN SENSOR DAPAT DIPASANG DI AREA BERIKUT KENDARAAN UNTUK SISTEM PENAHAN:
- Doors - Door pillars - Door sill - Seats - Cockpit - Driver display - Centre console • Lateral roof frames Do not install accessory parts such as audio systems in these areas. ▶ Do not carry out repairs or welding. ▶ Have accessory parts retrofitted at a qualified specialist workshop. You could jeopardise operating safety of your vehicle if you use parts, tyres and wheels, or accessories relevant to safety that have not been approved by  G-Class - Owner's Manual > General notes Mercedes-Benz GenuineParts Mercedes-Benz. Safety-critical systems (e.g. the brake system) may malfunction. Use only Mercedes-Benz GenuineParts or parts of equal quality. Use only tyres, wheels and accessory parts that have been specifically approved for your vehicle model. Mercedes-Benz tests original parts, as well as conversion parts and accessory parts that have been specifically approved for your vehicle model for their reliability, safety and suitability. Despite ongoing market research, Mercedes-Benz is unable to assess alternative parts. Mercedes-Benz therefore accepts no responsibility for the use of such parts in Mercedes-Benz vehicles, even if they have been officially approved or independently approved by a testing centre. Certain parts are only officially approved for installation or modification if they comply with legal specifications. All Mercedes-Benz GenuineParts meet approval requirements. The use of non-approved parts may invalidate the vehicle's operating permit.INI AKAN BERLAKU DALAM SITUASI BERIKUT:
- The vehicle type is different from that for which the vehicle's operating permit was granted. • Other road users could be at risk. • The exhaust gas levels or noise levels worsen. Always specify the vehicle identification number (VIN) ( → page 743) when ordering Mercedes-Benz GenuineParts.   G-Class - Owner's Manual > General notes Touch-sensitive control elements Elemen kontrol sensitif sentuhan
In addition to conventional switches and buttons, your vehicle is equipped with touch-sensitive control elements.INI TERLETAK DI AREA BERIKUT KENDARAAN ANDA:
Steering wheel • MBUX multimedia system The control elements feature touch-sensitive user interface surfaces. The surfaces are controlled by pressing or swiping to adjust settings or trigger functions, forexample. In the touchscreen area, haptic acknowledgement is relayed through the touch-sensitive surface, forexample in the form of a pulse or a vibration, or a change in user interface surface structure.PENGAKUAN HAPTIK DISAMPAIKAN DALAM SITUASI BERIKUT, CONTOHNYA:
- When pressing a button on the user interface surface - When scrolling in a list or table - When reaching a new area on the user interface surface, e.g. a pop-up windowSAAT MENGGUNAKAN PERMUKAAN ANTAR MUKA PENGGUNA SENSITIF SENTUHAN, PERHATIKAN HAL-HAL BERIKUT UNTUK MENGHINDARI MASALAH OPERASIONAL:
• Do not affix stickers or similar objects onto the surfaces - Do not attach a smartphone- or other holders to the surface of the central display. - Protect the surfaces against moisture and wet conditions. - Keep the surfaces free of dust and dirt ( → page 621). In addition to a symbol, some touch-sensitive control elements also feature integrated indicator lamps. Ensure that the symbol of the control element is pressed during use.  G-Class - Owner's Manual > General notes Mercedes-Benz appAplikasi Mercedes-Benz
Catatan tentang Digital Extras
You can also activate various functions (Digital Extras) retroactively via Mercedes-Benz after purchasing your vehicle. Information is available at any Mercedes-Benz Service Centre.Memesan dan mengaktifkan Digital Extras
Persyaratan:
• The vehicle has a wireless connection. • The vehicle is linked to the user's Mercedes-Benz account.MEMESAN DAN MENGAKTIFKAN DIGITAL EXTRAS
Place the Digital Extra that you would like to purchase for your vehicle in your shopping basket in the Mercedes-Benz Store. Complete the order. The Digital Extra will be activated while you are using the vehicle.MEMPERCEPAT AKTIVASI
▶ Switch off and lock the vehicle. Unlock the vehicle after about two minutes and switch on the vehicle. The Digital Extra will be activated. For some features, a notification will also appear in the vehicle's multimedia system. If the activation was not successful, repeat the process.    G-Class - Owner's Manual > General notes Operating safetyKeselamatan pengoperasian
PERINGATAN
Risk of accident due to malfunctions or system failures If you do not have the prescribed service/maintenance work or any required repairs carried out, this could result in malfunctions or system failures. ▶ Always have the prescribed service- and maintenance work or any required repairs carried out in a qualified workshop. PERINGATAN
Risk of accident or injury due to improper modifications to electronic components Modifications to electronic components, their software or wiring can impair their functionality and/or the functionality of other networked components or safety-relevant systems. This can endanger the vehicle's operating safety. You must not tamper with wiring, electronic components, or their software. ▶ Always have work on electrical and electronic devices carried out at a qualified specialist workshop. If you modify the on-board electronics, the general operating permit is rendered invalid. Observe the "On-board electronics" section in "Technical data". PERINGATAN
Risk of fire due to flammable material coming into contact with hot parts of the exhaust system If combustible materials, e.g. leaves, grass or twigs, come into contact with hot parts of the exhaust system, they may ignite. When driving off-road or on unpaved surfaces, check the underside of the vehicle at regular intervals. In particular, remove any trapped parts of plants or other flammable material. If damage should occur, immediately inform a qualified specialist workshop.  G-Class - Owner's Manual > General notes Operating safety  CATATAN
Damage to the vehicle due to driving too fast and due to impacts to the vehicle underbody or suspension componentsTERUTAMA DALAM SITUASI BERIKUT, ADA RISIKO KERUSAKAN PADA KENDARAAN:
• the vehicle becomes grounded, e.g. on a high kerb or an unpaved road - the vehicle is driven too fast over an obstacle, e.g. a kerb, speed bump or pothole • a heavy object strikes the underbody or suspension components In situations such as these, damage to the body, underbody, suspension components, wheels or tyres may not be visible. Components damaged in this way can unexpectedly fail or, in the case of an accident, may no longer absorb the resulting force as intended. If the underbody panelling is damaged, flammable materials such as leaves, grass or twigs can collect between the underbody and the underbody panelling. These materials may ignite if they come into contact with hot parts of the exhaust system. ▶ Have the vehicle checked and repaired immediately at a qualified specialist workshop. or If driving safety is impaired while continuing your journey, pull over and stop the vehicle immediately, while paying attention to road and traffic conditions, and contact a qualified specialist workshop.KENDARAAN DENGAN SISTEM KELISTRIKAN 48 V
BAHAYA
Risk of fatal injury by touching damaged high-voltage components Vehicles with a 48 V on-board electrical system contain individual high-voltage components. These high-voltage components are under high voltage. If you modify component parts of these high-voltage components or touch damaged component parts, you may be electrocuted. High voltage components may be damaged in an accident, although the damage may not be visible. ▶ Never perform modifications to component parts of high-voltage components. ▶ Never touch damaged component parts of high-voltage components. ▶ Never touch component parts of high-voltage components after an accident. Vehicles with a 48 V on-board electrical system contain high voltage components. These components are marked with a high-voltage label:  G-Class - Owner's Manual > General notes Operating safety   Example All work on high voltage components must be carried out at a qualified specialist workshop.  G-Class - Owner's Manual > General notes Mounting the licence plate onto the front licence plate bracket Memasang plat nomor pada braket plat nomor depan
 The information label can be found on the licence plate bracket, either embossed or in sticker form.CATATAN
Malfunctions and system failures due to incorrect mounting of the licence plate on the front licence plate bracket If the licence plate is incorrectly mounted on the front licence plate bracket, sensors, cameras or driving and safety systems may malfunction or fail. Observe the following points when mounting the licence plate on the front licence plate bracket: Mount the licence plate directly on the licence plate bracket without advertising media or other holders. ▶ Ensure when mounting the licence plate that it does not protrude over the licence plate bracket at the top. ▶ Fit the licence plate centrally on the licence plate holder, ensuring that any protrusion of the licence plate is the same on both sides.   G-Class - Owner's Manual > General notes Declarations of conformity and country-specific information < Deklarasi kesesuaian dan informasi khusus negara
Kompatibilitas elektromagnetik
The electromagnetic compatibility of the vehicle components has been checked and certified according to the currently valid version of Regulation UN-R 10.Informasi khusus negara untuk komponen radio regulasi
INFORMASI MENGENAI MODIFIKASI KOMPONEN RADIO
Modifications to radio components may invalidate the general operating permit for the radio component in question. The radio component manufacturer shall accept no responsibility for such modifications.INFORMASI MENGENAI MELINTASI BATAS NEGARA
You must observe the radio regulatory provisions for the country in which you are currently driving when operating the vehicle.KOMPONEN KENDARAAN NIRKABEL
Only for EU and EFTA countries and countries that recognise the EU manufacturer's declaration of conformity: C€ The following information applies to all wireless components of the vehicle and of the information systems and communication devices integrated in the vehicle: The manufacturers of the wireless components ensure that all wireless components installed in the vehicle comply with Directive 2014/53/EU. The full texts of the EU declarations of conformity are available at the following web address: https://certificates-of-conformity.corpinter.net/en  You can obtain further information from a Mercedes-Benz Service Centre.KHUSUS UNTUK ISRAEL:
It is prohibited to make any change to a vehicle-installed radio component that could affect the wireless specifications of the device, including software changes, replacement of the original antenna, or adding the option to connect the device to an external antenna, without first obtaining approval from the Communica-tions Ministry, because of concern about wireless interference. FOR THE UNITED KINGDOM ONLY:   G-Class - Owner's Manual > General notes Declarations of conformity and country-specific information  The following information applies to all wireless components of the vehicle and of the information systems and communication devices integrated in the vehicle: The manufacturers of the radio components declare that all radio equipment installed in the vehicle is in compliance with the relevant statutory requirements. The full texts of the declarations of conformity are available at the following web address: https://certificates-of-conformity.corpinter.net/en  FOR BRAZIL ONLY: ANATEL Note on two-way radio systems in the vehicle: These systems are not protected against harmful interference and must not cause interference in properly approved systems. More information is available on the ANATEL website. www.anatel.gov.brKHUSUS UNTUK JAMAICA:
All wireless vehicle components have received a type-approval certificate from the SMA.KHUSUS UNTUK NIGERIA:
Connection and use of this communications equipment is permitted by the Nigerian Communications Commission Connection and use of the radio communications equipment in this vehicle is permitted by the Nigerian Communications CommissionKHUSUS UNTUK NEGARA-NEGARA UNI EKONOMI EURASIA:
 The manufacturers of the wireless components installed in the vehicle hereby declare that all wireless components installed in the vehicle comply with the technical specifications for two-way radios. You can obtain further information from a Mercedes-Benz Service Centre.KHUSUS UNTUK UKRAINA:
 The manufacturers of the wireless components installed in the vehicle hereby declare that the wireless components installed in the vehicle comply with the   G-Class - Owner's Manual > General notes Declarations of conformity and country-specific information technical regulations for two-way radios. You can obtain further information from a Mercedes-Benz service centre.Baterai
UNTUK NEGARA-NEGARA UE DAN NEGARA-NEGARA YANG MENGAKUI DEKLARASI KESESUAIAN MANUFAKTUR UE:
CE
For all 48 V and high-voltage batteries in the vehicle, once the applicable requirements under regulation (EU) 2023/1542 come into effect, the required information will be available at the following web address: https://certificates-of-conformity.corpinter.net/en Jack
Only for EU and EFTA countries and countries that recognise the EU Manufacturer's Declaration of Conformity:DEKLARASI KESESUAIAN CE
Copy and translation of the original Declaration of Conformity:Deklarasi Kesesuaian EC
2006/42/ECKami WEBER-HYDRAULIK GMBH
Heilbronner Straße 30 – 74363 Güglingen
declare that the product "Weber hydraulic bottle jack", types: A AD ADX AH AHX AL AT ATD ATDX ATG ATN ATGX ATPX ATQ AX Capacity: 2,000 to 100,000 kg Serial no.: from year of manufacture 01/2010 complies with the relevant essential health and safety requirements of the EC Machinery Directive.DEKLARASI KESESUAIAN EC INI TIDAK BERLAKU LAGI:
- in the event of modifications or repairs performed by an unqualified person - if the products are not used correctly and in accordance with the Owner's Manual • if the required regular checks are not performed. Relevant EU Directives: EC Machinery Directive 2006/42/EC Applicable standards: ISO 11530 Quality assurance: DIN EN ISO 9001:2000 Güglingen, 01/07/2013 [Signature] [Signature] Manager Representative of Technical WEBER-HYDRAULIK GMBH Documentation   G-Class - Owner's Manual > General notes Declarations of conformity and country-specific information WEBER-HYDRAULIK GMBH
Heilbronner Strasse 30 — 74363 GüglingenDEKLARASI KESESUAIAN UKCA
Copy and translation of the original Declaration of Conformity: UKCA Declaration of Conformity We, WEBER-HYDRAULIK GMBH Heilbronner Straße 30 - 74363 Güglingen hereby declare that the product "WEBER-HYDRAULIK - bottle jack", of the types: A AD ADX AH AHX AL AT ATD ATDX ATG ATN ATGX ATPX ATQ AX Load: 2,000 to 100,000 kg Serial no.: as of year of construction 01/2022 complies with the relevant essential health and safety requirements. Supply of Machinery (Safety) Regulation 2008. Relevant UK Directives: Supply of Machinery/Regulations 2008 Standards applied: ISO 11530:1993 BS EN ISO 12100:2010-12-31 Safety of machinery. General principles for design. Risk assessment and risk reduction. Güglingen, 01/06/2022 [Signature] Christine Grotz Tokley Doug Managing Director WEBER-HYDRAULIK GmbH WEBER-HYDRAULIKA Sp.z.o.o. WEBER-HYDRAULIK GMBH Heilbronner Straße 30 - 74363 Güglingen G-Class - Owner's Manual > General notes Diagnostics connectionKoneksi diagnostik
The diagnostics connection is a technical interface in the vehicle. It is used, forexample, within the scope of repair and servicing work or for reading out vehicle data in a specialist workshop. Diagnostic devices should therefore only be connected at a qualified specialist workshop. PERINGATAN
Risk of accident as a result of connecting devices to the diagnostics connection If you connect devices to the vehicle's diagnostics connection, functioning of vehicle systems and operational safety can become impaired. It is recommended for safety reasons that only products which have been approved by a Mercedes-Benz service centre be used and connected.  PERINGATAN
Risk of accident due to objects in the driver's footwell Objects in the driver's footwell may impede pedal travel or block a depressed pedal. This will jeopardise the operating and road safety of the vehicle. Stow all objects in the vehicle securely so that they cannot get into the driver's footwell. ▶ Make sure that there is always sufficient clearance for the pedals. ▶ Always fit the floor mats securely and as prescribed. Do not use loose floor mats and do not place floor mats on top of one another. G-Class - Owner's Manual > General notes Diagnostics connection  CATATAN
Battery discharging from using devices connected to the diagnostics connection Using devices at the diagnostics connection drains the battery. ▶ Check the charge level of the battery. If the charge level is low, charge the battery, e.g. by driving a considerable distance. Please also note the information about the 12 V battery and short-distance trips in the "Driving and Parking" section ( → page 279). MENGHUBUNGKAN DAN MENGGUNAKAN PERANGKAT LAIN DENGAN KONEKSI DIAGNOSTIK DAPAT MENYEBABKAN KONSEKUENSI BERIKUT:
• Malfunctions in the vehicle system • Permanent damage to vehicle components Please refer to the warranty terms and conditions in this regard. Moreover, connecting equipment to the diagnostics connection can lead to emissions monitoring information being reset, forexample. This may lead to the vehicle failing to meet the requirements of the next emissions inspection during the main inspection.  G-Class - Owner's Manual > General notes Qualified specialist workshop< Bengkel spesialis yang berkualifikasi
A qualified specialist workshop has the necessary special skills, tools and qualifications to correctly carry out any necessary work on your vehicle. This particularly applies to safety-critical work.SELALU LAKUKAN PEKERJAAN BERIKUT PADA KENDARAAN ANDA DI BENGKEL SPESIALIS YANG BERKUALIFIKASI:
Safety-critical work • Service and maintenance work Repair work • Modifications as well as installations and conversions • Work on electronic components - Vehicles with 48 V on-board electrical system: work on the high-voltage component of the 48 V on-board electrical system Mercedes-Benz recommends a Mercedes-Benz service centre.   G-Class - Owner's Manual > General notes Vehicle registrationRegistrasi Kendaraan
Mercedes-Benz may ask its service centres to carry out technical inspections on certain vehicles. The quality or safety of the vehicle will be improved as a result of the inspection. Mercedes-Benz can only inform you about vehicle inspections if Mercedes-Benz has your registration data.MUNGKIN KENDARAAN ANDA BELUM DIDAFTARKAN ATAS NAMA ANDA DALAM KASUS BERIKUT:
• if your vehicle was not purchased from an authorised specialist dealer. - if your vehicle has not yet been inspected at a Mercedes-Benz service centre. It is advisable to register your vehicle with a Mercedes-Benz service centre. Notify Mercedes-Benz as soon as possible of any change of address and/or change of vehicle ownership. You can do this at a Mercedes-Benz service centre, forexample.   G-Class - Owner's Manual > General notes Correct use of the vehiclePenggunaan kendaraan yang benar
If you remove any warning stickers, you or others could fail to recognise potential dangers. Leave all warning stickers in their designated positions.PERHATIKAN INFORMASI BERIKUT TERUTAMA SAAT MENGEMUDIKAN KENDARAAN ANDA:
- The safety notes in this Owner's Manual, vehicle-specific supplements and further supplementary documents • Technical data for the vehicle • Traffic rules and -regulations of the country you are currently in - Motor vehicle laws and safety standards of the country you are currently in • Radio regulatory requirements of the country you are currently in   G-Class - Owner's Manual > General notes REACH regulationPeraturan REACH
Khusus untuk negara-negara UE dan EFTA:
The REACH Regulation (Regulation (EC) No. 1907/2006, Article 33) stipulates a duty to supply information about substances of very high concern (SVHCs). Mercedes-Benz AG acts to the best of its knowledge to prevent these SVHCs from being used and to enable customers to safely handle these substances. According to supplier information and internal product information, there are SVHCs known to Mercedes-Benz AG that are found in individual components of this vehicle in quantities of over 0.1 percent by weight.INFORMASI LEBIH LANJUT DAPAT DIPEROLEH DI ALAMAT BERIKUT:
- https://reach.mercedes-benz.com/de/home/ - https://reach.mercedes-benz.com/en/home/   G-Class - Owner's Manual > General notes Notes for persons with electronic medical aids Catatan untuk orang dengan alat bantu medis elektronik
Despite meticulous development of their vehicle systems, Mercedes-Benz AG cannot completely rule out the interaction of vehicle systems with electronic medical aids, such as cardiac pacemakers. In addition, there are components installed in the vehicle that can generate magnetic fields on a par with permanent magnets, regardless of the operating status of the vehicle. These fields may occur in the area around the multimedia system and sound system, forexample, or in the area around the seats, depending on the respective vehicle equipment.DALAM BEBERAPA KASUS, HAL INI DAPAT MENGAKIBATKAN HAL BERIKUT, TERGANTUNG PADA ALAT BANTU YANG DIGUNAKAN:
• Medical aids malfunctioning • Adverse health effects Note the information and warnings from the manufacturer of the auxiliary equipment, and in case of uncertainty, please consult the manufacturer of the auxiliary equipment and/or your doctor. If there is continuing uncertainty concerning the possibility of medical aids malfunctioning, Mercedes-Benz AG recommends using fewer electrical vehicle systems and/or maintaining a distance from the components.SELALU LAKUKAN PERBAIKAN DAN PERAWATAN PADA AREA KOMPONEN BERIKUT DI BENGKEL SPESIALIS YANG KOMPETEN:
• vehicle components carrying live voltage • transmission aerials • multimedia system and sound system If you have any queries or suggestions, consult a qualified specialist workshop.  G-Class - Owner's Manual > General notes Liability for material defectsTanggung jawab atas cacat material
CATATAN
Damage to the vehicle due to failure to follow instructions in this Owner's Manual. Damage to the vehicle can arise due to failure to follow instructions in this Owner's Manual. This damage is not covered either by the Mercedes-Benz liability for material defects or by the New- or Used-Vehicle Warranty. Observe the notes on correct operation of the vehicle as well as possible vehicle damage in this Owner's Manual.   G-Class - Owner's Manual > General notes QR codes for the rescue cardKode QR untuk kartu penyelamat
QR codes are attached in the fuel filler flap and on the opposite side on the B-pillar. In the event of an accident, rescue services can use the QR code to quickly find the appropriate rescue card for your vehicle. The current rescue card contains the most important information about your vehicle (e.g. the routing of the electric lines) in compact form. Additional information can be obtained at: https://rk.mb-qr.com/de/   G-Class - Owner's Manual > General notes Data storagePenyimpanan data
Pemrosesan data di dalam kendaraan
UNIT KONTROL ELEKTRONIK
Electronic control units are fitted in your vehicle. Control units process data they receive, generate themselves or exchange with each other, forexample from vehicle sensors. Some control units are required for the safe operation of your vehicle. Some assist you when driving, such as driver assistance systems, while others enable convenience or infotainment functions. The following section provides general information about data processing in the vehicle. Additional information regarding which vehicle data is collected, saved and transmitted to third parties and for what purpose can be found in the information directly related to the relevant functional characteristics in the respective Owner's Manual. This information is available online and digitally, depending on the vehicle's equipment.DATA PRIBADI
A unique vehicle identification number identifies every vehicle. Depending on the country, this vehicle identification number can also be used to determine the identity of the vehicle keeper, forexample by the authorities. There are also other ways of tracing data collected from the vehicle back to the keeper or driver, such as the licence plate number. The data generated or processed by control units may therefore be attributable to a person or, in certain circumstances, become attributable to a person. Depending on which vehicle data is available, it may be possible to make inferences about, forexample, your driving behaviour, location, route or use patterns. PERSYARATAN HUKUM TERKAIT PENGUNGKAPAN DATA
If legally required to do so, manufacturers are generally obliged to provide the authorities with data stored by the manufacturer upon request and to the extent required. Forexample, this may be the case during the investigation of a criminal offence. State authorities are themselves authorised to read out data from the vehicle in individual cases and within the applicable legal framework. In the case of an accident, information that can help with an investigation can be taken from the airbag control unit, forexample.DATA OPERASIONAL DI DALAM KENDARAAN
To operate the vehicle, control units process data.INI TERMASUK DATA BERIKUT, CONTOHNYA:
- Vehicle status information such as the speed, longitudinal acceleration, lateral acceleration, number of wheel revolutions or the fastened seat belts display • Ambient conditions, such as temperature, rain sensor or distance sensor Generally, this data is volatile and will not be stored beyond the period of operation and will only be processed within the vehicle itself. Control units, forexample, vehicle keys, often contain data memories. Their use permits the temporary or permanent documentation of technical information about the vehicle's operating state, component loads, maintenance requirements and technical events or faults.   G-Class - Owner's Manual > General notes Data storage TERGANTUNG PADA PERALATAN TEKNIS, DATA BERIKUT DISIMPAN:
- Operating status of system components, such as fill levels, tyre pressure or battery status - Malfunctions or faults in important system components, such as lights or brakes - System reactions in special driving situations, such as an airbag deployment or the intervention of stability control systems • Information on events leading to vehicle damage In certain cases, storing data that would have otherwise been temporary may be required. This may be the case if the vehicle has detected a malfunction, forexample. If you make use of services, e.g. repair services or maintenance work, - the stored operating data can be read out and used together with the vehicle identification number - if necessary. Service network employees such as workshops and manufacturers, and third parties such as breakdown services can read out the data. The same is true in the event of warranty claims and quality assurance measures. In general, the readout is performed via the legally prescribed port for the diagnostics connection in the vehicle. The selected operating data document the vehicle's or individual components' technical conditions, help with fault diagnosis, compliance with warranty obligations and quality improvement. To that end, these data, particularly information about component loads, technical events, malfunctions and other faults, may be transmitted to the manufacturer along with the vehicle identification number. Furthermore, the manufacturer is subject to product liability. For this reason, the manufacturer also uses operational data from the vehicle, e.g. for recalls. This data can also be used to review the customer's warranty and guarantee claims. Fault memories in the vehicle can be reset by a service outlet or at your request as part of repair or maintenance work.FUNGSI KENYAMANAN DAN INFOTAINMENT
You can store the vehicle's convenience and individual settings and change or reset them at any time.TERGANTUNG PADA PERLENGKAPAN KENDARAAN, INI TERMASUK PENGATURAN BERIKUT, CONTOHNYA:
- Seat and steering wheel positions • Suspension tuning and climate control settings • Individual settings, such as interior lighting Depending on the selected equipment, you can import data into vehicle infotainment functions yourself.TERGANTUNG PADA PERLENGKAPAN KENDARAAN, INI TERMASUK DATA BERIKUT, CONTOHNYA:
- Multimedia data, such as music, films or photos for playback in an integrated multimedia system - Address book data for use in connection with an integrated hands-free system or an integrated navigation system • Entered navigation destinations • Data about the use of Internet services This data for convenience and infotainment functions may be saved locally in the vehicle or on a device connected to the vehicle, such as a smartphone, USB flash drive or MP3 player. If you have entered this data yourself, you can delete it at any time.  G-Class - Owner's Manual > General notes Data storage This data is transmitted only from the vehicle to third parties at your request. This applies in particular for the use of online services based on the settings you have selected yourself.INTEGRASI SMARTPHONE (MISALNYA ANDROID AUTO ATAU APPLE CARPLAY)
If your vehicle is equipped accordingly, you can connect your smartphone or another mobile end device to the vehicle. You can then control them using the control elements integrated into the vehicle. Images and audio from the smartphone can be output via the multimedia system. Certain information is simultaneously transferred to your smartphone. Depending on the type of integration, this includes position data, day/night mode and other general vehicle states. For more information, please consult the vehicle Owner's Manual/infotainment system. This integration allows the use of selected smartphone apps, such as navigation or music player apps. There is no further interaction between the smartphone and the vehicle; in particular, vehicle data is not directly accessible. The type of additional data processing is determined by the provider of the app being used. The settings you can make, if any, depend on the specific app and your smartphone's operating system.Layanan online
KONEKSI JARINGAN NIRKABEL
If your vehicle has a wireless network connection, it enables data to be exchanged between your vehicle and additional systems. The wireless network connection is made possible by the vehicle's own transmitter and receiver or by a mobile end device that you have brought into the vehicle, forexample, a smartphone. Online functions can be used via the wireless network connection. This includes online services and applications/apps provided to you by the manufacturer or by other providers. LAYANAN DARI PABRIKAN
Regarding the manufacturer's online services, the individual functions are described by the manufacturer in a suitable place, forexample, in the Owner's Manual or on the manufacturer's website, where the relevant data protection information is also given. Personal data may be used for the provision of online services. Data are exchanged via a secure connection, such as the manufacturer's designated IT systems. Any personal data which are collected, processed and used, other than for the provision of services, is done so exclusively on the basis of legal permission. This is the case, forexample, for a legally prescribed emergency call system, a contractual agreement or when consent has been given. You can have services and functions, some of which are subject to a fee, activated or deactivated. This excludes legally prescribed functions and services, such as an emergency call system.LAYANAN PIHAK KETIGA
If you use online services from other providers (third parties), these services are the responsibility of the provider in question and subject to that provider's data protection conditions and terms of use. As a general rule, the manufacturer has no influence on the content exchanged. For this reason, when services are provided by third parties, please ask the service provider in question for information about the type, extent and purpose of the collection and use of personal data.HAK PERLINDUNGAN DATA
Depending on your country or the equipment and range of functions of your vehicle as well as the services you use and the services on offer, you are entitled to different data protection rights. Further information on data protection and your data protection rights can either be found on the manufacturer's website or you will receive this information as part of the various services   G-Class - Owner's Manual > General notes Data storage and service offers. There you will also find the contact information for the manufacturer and its data protection officers. At a workshop, forexample, with the support of a specialist and possibly for a fee, you can have data read out which is stored only locally in the vehicle.   G-Class - Owner's Manual > General notes CopyrightINFORMASI TENTANG LISENSI UNTUK PERANGKAT LUNAK GRATIS DAN SUMBER TERBUKA YANG BERLAKU UNTUK KENDARAAN ANDA DAPAT DIPEROLEH SEBAGAI BERIKUT:
• on the data storage medium in your vehicle document wallet - by performing an update online at: https://www.mercedes-benz.com/opensource   Back to Contents G-Class - Owner's Manual Occupant safety Keselamatan penumpang
This interactive PDF works like a website - tap or click a button to jump straight to where you want to go. You can return here at any time via the navigation bar at the top left. Brief overview of most important points 120 Information on the automatic functions of the restraint system  Purpose and function of the restraint system  Seat belts 139 Airbags 140 G-Class - Owner's Manual Occupant safety Brief overview of most important points Ringkasan singkat poin-poin terpenting
Informasi dasar
KHUSUSNYA PASTIKAN KONDISI BERIKUT UNTUK MEMUNGKINKAN KOMPONEN SISTEM PENAHAN MENGEMBANGKAN POTENSI PERLINDUNGANNYA:
• Sit correctly ( → page 121). • Fasten the seat belt correctly ( → page 122). Function of the 4 seat belt warning lamp ( → page 125). Function of the rear seat belt status display ( → page 125). - The restraint system warning lamp has gone out after the self-test ( → page 124). - The PASSENGER AIR BAG indicator lamps display the correct status of the front passenger airbag ( → page 126).UNTUK PEMAHAMAN YANG JELAS
The chapter "Occupant safety" includes information on equipment, functions and behaviours that contribute directly to safety of vehicle occupants.INFORMASI DISUSUN SEBAGAI BERIKUT:
- The most important information in brief: in this chapter, you are provided with an overview of the relationship between the restraint system and the correct behaviour of all vehicle occupants. - Specific information: in further sections of the chapter "Occupant safety", you can find specific information on the equipment and functions of the restraint system. \- Keyword search: You can also find specific topics using the search field in the Digital Owner's Manual.INFORMASI TENTANG SUBJEK BERIKUT, ANTARA LAIN, TIDAK DISEDIAKAN DALAM BAB "KESELAMATAN PENUMPANG":
• Children in the vehicle ( → page 142) • Driving and driving safety systems ( → page 338) • Stowage areas ( → page 210)MENDEFINISIKAN ISTILAH UMUM DENGAN JELAS
DALAM BUKU PANDUAN PEMILIK INI, ISTILAH UMUM BERIKUT DIGUNAKAN:
- Occupant safety: comprises the components and system functions which help to minimise, as much as possible, the stresses on and consequences for vehicle occupants during an accident. - Restraint system: comprises those components which, along with the vehicle structure, help prevent vehicle occupants from potentially coming into contact with parts of the vehicle interior. The seat belts and airbags, for example, are components of the restraint system. - Child restraint system: you can find all information on this subject in the chapter "Children in the vehicle" ( → page 142).BERHATI-HATILAH
For the components of the restraint system to provide the intended level of protection, it is essential that your posture is correct and that the seat belt is correctly fastened. G-Class - Owner's Manual Occupant safety Brief overview of most important points Please bear in mind that carelessness regarding the seating position and putting on the seat belt may have serious consequences. Be diligent and make sure that all vehicle occupants are sitting correctly and have fastened their seat belts properly before starting every journey ( → page 121).Informasi tentang posisi duduk yang benar
The seat position must be correct in order for the components of the restraint system to provide the intended level of protection. The seat position influences both the protection provided by the seat belt and the additional protection provided by the airbag. A correct seat position in which the seat is nearly perfectly upright and a correctly fastened seat belt reduce the risks posed by the airbag when it is deployed. Keep in mind space considerations when choosing a seat. With the seat in the correct, nearly upright position, your head should not touch the roof. PERINGATAN
Risk of injury- or death due to an incorrect seat position If you deviate from the correct seat position, the airbag cannot provide its intended protective function. Each vehicle occupant must make sure of the following. ▶ Put the seat in the correct position. ▶ Fasten seat belts correctly. ▶ Observe the following information.AGAR SISTEM PENAHAN MEMBERIKAN TINGKAT PERLINDUNGAN YANG DIMAKSUDKAN, PERHATIKAN INFORMASI BERIKUT:
• Before starting your journey, adjust your seat correctly ( → page 193). When doing so, make sure you are able to fasten your seat belt correctly. The shoulder belt strap must be routed forward from the seat belt outlet over the centre of your shoulder. - Keep your distance from the airbags, especially the front airbags. Set the driver's seat and front passenger seat as far back as possible while making sure the seat belt is fastened correctly. - If persons are sitting on the rear seats, vehicle occupants should maintain an sufficient distance to the parts of the vehicle interior in front of them. - Make sure there are no people, animals or objects between the vehicle occupants and an airbag. - If you are the driver, observe the following information on the correct position of the driver's seat ( → page 193). Only hold the steering wheel by the steering wheel rim. This allows the driver's airbag to fully deploy. During pregnancy in particular, it is important to ensure the greatest possible distance from the steering wheel due to the change in stature and the unborn child. - Assume a nearly upright sitting posture, with your buttocks positioned as far back as possible in the gap between the seat cushion and the seat backrest. Your back must lie as flatly and as firmly as possible against the seat backrest. - While driving, do not lean forward and do not lean against the door or side window. You may otherwise be in the deployment area of the airbags.    G-Class - Owner's Manual Occupant safety Brief overview of most important points \- Sit with their feet resting on the floor, if possible. Your thighs are supported slightly by the seat cushion. Do not put your feet on the cockpit, for example. Your feet may otherwise be in the deployment area of the airbag. • Fasten seat belts correctly ( → page 122).Catatan tentang penggunaan sabuk pengaman yang benar
Always fasten your seat belt correctly before starting a journey. A seat belt can only provide the best level of protection if it is worn correctly. PERINGATAN
Risk of injury or death due to incorrectly fastened seat belt If the seat belt is not worn correctly, it cannot perform its intended protective function. In addition, an incorrectly fastened seat belt can also cause injuries, for example, in the event of an accident or when braking or changing direction suddenly. ▶ Always ensure that all vehicle occupants have their seat belts fastened correctly and are sitting properly.  PERINGATAN
Risk of injury or death when additional restraint systems are not used for persons with a smaller stature Persons under 1.50 m tall cannot wear the seat belt correctly without a suitable additional restraint system.  Always secure persons under 1.50 m tall in a suitable restraint system. Observe the following information on the correct seat position and posture ( → page 121).SETIAP PENUMPANG KENDARAAN WAJIB MEMPERHATIKAN CATATAN BERIKUT:
• The seat belt must not be twisted. - The shoulder belt strap must be routed forward from the seat belt outlet over the centre of your shoulder. - The shoulder belt strap should neither touch your neck nor be routed under your arm or behind your back. - The lap belt must be routed as low down across the hips as possible. In addition, push the lap belt down as far as possible across your hips and pull tight with the shoulder belt strap. Never route the lap belt across your abdomen. - After being tightened, the shoulder belt strap and lap belt must fit snugly against the body. - Particularly during pregnancy, the instructions for wearing the seat belt correctly must be followed consistently due to the change in stature and the unborn child ( → page 123). - Avoid wearing bulky clothing, e.g. a winter coat.   G-Class - Owner's Manual Occupant safety Brief overview of most important points - Never route the seat belt across sharp, pointed, abrasive or fragile objects. • Only one person should use each seat belt at any one time. - Never secure objects with a seat belt if the seat belt is also being used by one of the vehicle's occupants. Also ensure that no objects, e.g. a cushion, are ever placed between a person and the seat. If you are driving with a child in the vehicle, observe the information in the chapter "Children in the vehicle" ( → page 142). Observe the instructions for loading the vehicle when securing objects, luggage or loads ( → page 210).Menggunakan sabuk pengaman selama kehamilan
BERHATI-HATILAH
PERHATIKAN KHUSUS PETUNJUK BERIKUT SELAMA KEHAMILAN KARENA PERUBAHAN POSTUR TUBUH DAN JANIN:
• Correct sitting position and posture • Wearing the seat belt correctly The correct sitting position with a nearly upright sitting posture and a correctly fastened seat belt reduce the risks for the mother and unborn child in the event of an accident. Particularly during pregnancy, due to the change in stature and the unborn child, maintain as much distance as possible between your abdomen (baby bump) and the steering wheel.  If it is not possible to maintain a sufficient distance to the steering wheel whilst simultaneously ensuring safe operation of the vehicle, another person should drive the vehicle. Mercedes-Benz recommends that you seek professional advice, e.g. from a doctor, about the possible risks involved in driving in a vehicle when pregnant.PENGGUNAAN SABUK PENGAMAN
TERUTAMA SELAMA KEHAMILAN, PERHATIKAN CATATAN BERIKUT:
- Push the lap belt down as far as possible across your hips and pull tight with the shoulder belt strap. Never route the lap belt across your abdomen (baby bump). - The shoulder strap should run along the side of the abdomen (baby bump). - Never position any objects between the person and the seat belt, not even cushions for example.Mengencangkan dan menyesuaikan sabuk pengaman
If the seat belt is pulled quickly or sharply, the seat belt retractor locks. The seat belt strap cannot be pulled out any further.  G-Class - Owner's Manual Occupant safety Brief overview of most important points  Always engage seat belt tongue ① of the seat belt into seat belt buckle ② of the corresponding seat. To adjust the seat belt height: press button ③ on the seat belt outlet and slide the seat belt outlet to the desired position. To engage the seat belt outlet: release button ③ and ensure that the seat belt outlet engages. CATATAN
Deployment of components of the restraint system when the front passenger seat is unoccupied and a seat belt is buckled When the front passenger seat is unoccupied and the seat belt tongue of the seat belt is engaged in the seat belt buckle, components of the restraint system may deploy unnecessarily on the front passenger side, e.g. the seat belt tensioner. ▶ Only buckle the seat belts as intended. Left and right rear seat:  CATATAN
Deployment of the seat belt tensioner due to a seatbelt that is buckled when a rear seat is unoccupied If the seat belt tongue is engaged in the seat belt buckle of the unoccupied rear seat, the seat belt tensioner may also deploy in the event of an accident along with other systems. ▶ Only buckle the seat belts as intended.Fungsi lampu peringatan sistem penahan
When the vehicle is switched on, a self-test is performed, during which the restraint system warning lamp lights up. It goes out no later than a few seconds after the vehicle is started. The components of the restraint system are then functional.TERJADI KERUSAKAN PADA SISTEM PENAHAN JIKA:
- the restraint system warning lamp ☐ does not light up or is lit continuously when the vehicle is switched on - the restraint system warning lamp lights up continuously or repeatedly during a journey If components of the restraint system have been deployed, the 🎨 restraint system warning lamp lights up continuously.  G-Class - Owner's Manual Occupant safety Brief overview of most important points PERINGATAN
Risk of injury due to malfunctions in the restraint system Components in the restraint system may be activated unintentionally or not deploy as intended in an accident. ▶ Have the restraint system checked and repaired immediately at a qualified specialist workshop. Mercedes-Benz recommends that you have the vehicle towed to a qualified specialist workshop.Fungsi lampu peringatan sabuk pengaman
The 4 seat belt warning lamp on the driver display is a reminder that the driver and/or front passenger are not wearing their seat belts. All vehicle occupants must fasten their seat belts correctly ( → page 122). In addition, a warning tone may sound. When the driver and the front passenger fasten their seat belts, the seat belt warning goes out.Fungsi tampilan status sabuk pengaman belakang
The rear seat belt status display is only available for certain countries.      The colour of the symbol is intended to help you quickly identify the status of the rear seat belt. The rear seat belt status display in the driver display is a reminder that all vehicle occupants must wear their seat belts correctly. Every time the vehicle is switched on, the rear seat belt status display informs you for a certain amount of time which rear seat belt is not fastened.KEMUNGKINAN WARNA SIMBOL:
• Grey: the rear seat belt is not fastened. - Green: the seat belt tongue of a rear seat belt is engaged in the seat belt buckle of the displayed seat. • Red: the person in the rear seat has unfastened their seatbelt. If a vehicle occupant unfastens a seat belt in the rear while the vehicle is motion, the rear seat belt status display reappears. In addition, a warning tone may sound.  G-Class - Owner's Manual Occupant safety Brief overview of most important pointsFungsi lampu indikator AIRBAG PENUMPANG (airbag penumpang depan)
 Vehicles without automatic front passenger airbag shutoff have a special sticker affixed to the side of the cockpit on the front passenger side ( → page 147). Indicator lamps PASSENGER AIR BAG ON and OFF have no function in this case and are not an indication of automatic front passenger airbag deactivation. On vehicles with automatic front passenger airbag deactivation, the PASSENGER AIR BAG indicator lamps display the status of the front passenger airbag. If the front passenger seat is occupied or a child restraint system is installed on it, make sure both before and during the journey that the status of the front passenger airbag is correct for the situation.  WARNING Risk of potentially fatal injuries due to objects trapped under the front passenger seat Objects trapped under the front passenger seat may interfere with the function of the automatic front passenger airbag shutoff or damage the system. Do not stow any objects under the front passenger seat. When the front passenger seat is occupied, ensure that no objects have become trapped beneath the front passenger seat. Self-test: when the vehicle is switched on, both the PASSENGER AIR BAG ON and OFF indicator lamps light up simultaneously for several seconds.SETELAH UJI MANDIRI, ANDA DAPAT MENENTUKAN STATUS AIRBAG PENUMPANG DEPAN SEBAGAI BERIKUT:
- Front passenger airbag disabled: PASSENGER AIR BAG OFF lights up continuously. The front passenger airbag will not be deployed in the event of an accident. If PASSENGER AIR BAG OFF is lit, no one may use the front passenger seat. If a rearward-facing child restraint system is fitted on the front passenger seat, PASSENGER AIR BAG OFF must be lit continuously. - Front passenger airbag enabled: PASSENGER AIR BAG ON lights up for up to 60 seconds or until both the PASSENGER AIR BAG ON and OFF indicator lamps go out.  G-Class - Owner's Manual Occupant safety Brief overview of most important points The front passenger airbag may be deployed during an accident. If the front passenger airbag is in this status, no rearward-facing child restraint system may be fitted on the front passenger seat. If you are driving with a child in the vehicle, observe the information in the chapter "Children in the vehicle" (→ page 142). PERINGATAN
Risk of injury or death due to a disabled front passenger airbag The front passenger airbag is disabled when the PASSENGER AIR BAG OFF indicator lamp is lit. A person in the front passenger seat could then, for example, come into contact with the vehicle interior, especially if the person is sitting too close to the cockpit.JIKA KURSI PENUMPANG DEPAN TERISI, SELALU PASTIKAN BAHWA:
- the classification of the person in the front passenger seat is correct and the front passenger airbag is enabled or disabled in accordance with the person in the front passenger seat. • the front passenger seat has been moved as far back as possible. • the person is seated correctly. Both before and during the journey, ensure that the status of the front passenger airbag is correct.KERUSAKAN PADA PENONAKTIFAN OTOMATIS AIRBAG PENUMPANG DEPAN
The PASSENGER AIR BAG OFF indicator lamp and the restraint system warning lamp light up simultaneously. In this case, no one may use the front passenger seat and no child restraint system may be fitted on the front passenger seat. Have the automatic front passenger airbag shutoff checked and repaired immediately at a qualified specialist workshop.Menonaktifkan atau mengaktifkan airbag penumpang depan
The automatic front passenger airbag shutoff can disable or enable the front passenger airbag and front passenger knee airbag according to the situation. This happens automatically as a result of the classification of the person or child restraint system on the front passenger seat. You cannot manually disable or enable the front passenger airbag.Informasi tentang sistem pengaman anak
When fitting a child restraint system, observe the notes in "Children in the vehicle" ( → page 142).  G-Class - Owner's Manual Occupant safety Brief overview of most important pointsCATATAN TENTANG SISTEM PENGAMAN ANAK DI KURSI PENUMPANG DEPAN
PERINGATAN
Risk of injury or fatal injuries if the front passenger airbag is enabled If the front passenger airbag is enabled, a child on the front passenger seat may be struck by the front passenger airbag during an accident.  NEVER use a rearward facing child restraint system on a seat protected by an ACTIVE AIRBAG in front of it, DEATH or SERIOUS INJURY to the CHILD can occur. Also pay particular attention to the notes on rearward-facing or forward-facing child restraint systems on the front passenger seat ( → page 148).   G-Class - Owner's Manual Occupant safety Information on the automatic functions of the restraint system Informasi tentang fungsi otomatis sistem pengaman
Fungsi penonaktifan otomatis airbag penumpang depan
SESEORANG DI KURSI PENUMPANG DEPAN HARUS MEMATUHI PETUNJUK BERIKUT:
- Sit correctly (→ page 121). • Fasten seat belts correctly ( → page 122). The automatic front passenger airbag shutoff can disable or enable the front passenger airbag and front passenger knee airbag according to the situation.PADA SITUASI BERIKUT, AIRBAG SAMPING DAN PENGENCANG SABUK KESELAMATAN DINONAKTIFKAN:
- The automatic front passenger airbag deactivation has not categorised the person in the front passenger seat as an adult or a person of corresponding stature and - The seat belt tongue is not inserted into the seat belt buckle on the front passenger seatPASTIKAN ANDA MEMPERHATIKAN INFORMASI BERIKUT:
\- The status of the front passenger airbag, see "Function of the PASSENGER AIR BAG indicator lamps" (→ page 126). \- When fitting a child restraint system to the front passenger seat, observe the vehicle-specific information ( → page 148). STATUS AIRBAG PENUMPANG DEPAN TERKAIT DENGAN POSTUR TUBUH ORANG:
\- Front passenger airbag disabled: PASSENGER AIR BAG OFF lights up continuously. The front passenger airbag will not be deployed in the event of an accident. If PASSENGER AIR BAG OFF is lit, no one may use the front passenger seat. \- Front passenger airbag enabled: PASSENGER AIR BAG ON lights up for up to 60 seconds or until both the PASSENGER AIR BAG ON and OFF indicator lamps go out. The front passenger airbag may be deployed during an accident. Observe the following information on the correct seat position ( → page 121).   G-Class - Owner's Manual Occupant safety Information on the automatic functions of the restraint system Vehicles with rear seats: a person of smaller stature should use a rear seat.BATASAN SISTEM
AIRBAG PENUMPANG DEPAN MUNGKIN DINONAKTIFKAN SECARA KELIRU, MIS. PADA SITUASI BERIKUT:
- The front passenger transfers their weight by supporting themselves on a vehicle armrest. • The front passenger sits in such a way that they unload the seat surface. CATATAN
Deployment of components of the restraint system when the front passenger seat is unoccupiedDALAM KECELAKAAN, KOMPONEN SISTEM PENAHAN MUNGKIN MENGEMBANG TANPA PERLU DI SISI PENUMPANG DEPAN JIKA:
• There are heavy objects on the front passenger seat. - The seat belt tongue is engaged in the seat belt buckle of the front passenger seat and the front passenger seat is unoccupied. ▶ Stow objects in a suitable place. ▶ Only one person should use each seat belt at any one time. Depending on the detected accident situation, the window airbag on the front passenger side may deploy. The airbag is deployed regardless of whether the front passenger seat is occupied.Fungsi PRE-SAFE ® (perlindungan penumpang antisipatif)
PRE-SAFE ® is able to detect certain critical driving situations and implement pre-emptive measures to protect the vehicle occupants.PRE-SAFE® DAPAT MENERAPKAN LANGKAH-LANGKAH BERIKUT SECARA INDEPENDEN SATU SAMA LAIN:
- tightening the seat belts on the driver's seat and front passenger seat. • closing the side windows. • Vehicles with sliding sunroof: closing the sliding sunroof. - Vehicles with memory function: moving the front passenger seat to a more favourable seat position. - Vehicles with multicontour seat: increasing the lateral support by inflating the seat side bolsters of the seat backrest. PRE-SAFE® Sound: provided that the multimedia system is switched on, generating a brief noise signal to stimulate the innate protective mechanism of a person's hearing. CATATAN
Damage caused by objects in the footwell or behind the seat The automatic adjustment of the seat position may result in damage to the seat and/or the object. ▶ Stow objects in a suitable place. You can watch an animation on this topic via the following link:  G-Class - Owner's Manual Occupant safety Information on the automatic functions of the restraint system Membalikkan langkah-langkah sistem PRE-SAFE ®
If an accident did not occur, the pre-emptive measures that were taken are reversed. You will need to perform certain settings yourself. If the seat belt pre-tensioning is not reduced, move the seat backrest slightly backwards. The seat belt pre-tensioning releases.Fungsi penyesuaian sabuk keselamatan
Vehicles with PRE-SAFE: After you have fastened the seat belt of the front seat, it may adjust itself against your body by pulling at the shoulder until somewhat tight. Do not hold the seat belt tightly while it is adjusting. You can activate and deactivate the seat belt adjustment function using the multimedia system ( → page 131).Mengaktifkan/menonaktifkan penyesuaian sabuk keselamatan melalui sistem multimedia
Multimedia system:  ▶ Activate or deactivate Belt adjustment.Ikhtisar langkah-langkah otomatis setelah kecelakaan
TERGANTUNG PADA JENIS DAN TINGKAT KEPARAHAN KECELAKAAN, DAN TERGANTUNG PADA PERLENGKAPAN KENDARAAN, LANGKAH-LANGKAH BERIKUT DAPAT DITERAPKAN, MISALNYA:
• automatic braking (post-collision brake) (→ page 131) • activating the hazard warning lights • triggering an automatic emergency call ( → page 69) • switching off the engine To start the vehicle again, switch the vehicle off and back on ( → page 272). Depending on the type and severity of the accident, the vehicle might no longer start. • Shutting off the fuel supply system - unlocking the vehicle doors • lowering the side windows • displaying the emergency guide on the central display ( → page 550) • switching on the interior lightingFungsi rem pasca-tabrakan setelah kecelakaan
Depending on the accident situation, the post-collision brake can minimise the severity of a further collision or even avoid it. If an accident is detected, the post-collision brake can initiate automatic braking. When the vehicle has come to a standstill, the electric parking brake is automatically applied.  G-Class - Owner's Manual Occupant safety Information on the automatic functions of the restraint system PENGEMUDI DAPAT MEMBATALKAN PENGEREMAN OTOMATIS DENGAN MELAKUKAN TINDAKAN BERIKUT:
• braking more strongly than automatic braking • fully depressing the accelerator pedal with force Tujuan dan fungsi sistem penahan
Ikhtisar situasi pengaktifan (sistem penahan)
TERUTAMA PASTIKAN KONDISI BERIKUT UNTUK MEMUNGKINKAN KOMPONEN SISTEM PENAHAN MENGEMBANGKAN POTENSI PERLINDUNGANNYA:
- Sit correctly (→ page 121). • Fasten seat belts correctly ( → page 122). Function of the seat belt warning lamp ( → page 125). Function of the rear seat belt status display ( → page 125). - The ☐ restraint system warning lamp does not light up after the self-check (→ page 124). - The PASSENGER AIR BAG indicator lamps display the correct status of the front passenger airbag ( → page 126).TERGANTUNG PADA SITUASI PENGaktifAN YANG TERDETEKSI, KOMPONEN SISTEM PENAHAN DAPAT DIAKTIFKAN ATAU DIKEMBANGKAN SECARA INDEPENDEN SATU SAMA LAIN:
- Seat belt tensioner: frontal impact, rear impact, side impact, rollover • Driver's airbag, front passenger airbag: frontal impact • Knee airbag: frontal impact • Side airbag: side impact • Window airbag: side impact, rollover, frontal impact The installation location of an airbag is identified by the AIRBAG ( → page 140) symbol. Observe the information on how the restraint system works ( → page 133).Informasi tentang cara kerja sistem penahan
The function of the restraint system depends on the severity of the impact detected and the apparent type of accident. For more information about types of accidents, see "Overview of deployment situations" ( → page 133). The activation thresholds for the components of the restraint system are determined based on the evaluation of the sensor values measured at various points in the vehicle. This process is pre-emptive in nature. The triggering of the components of the restraint system must take place in good time at the start of the impact. Factors which can only be seen and measured after a collision has occurred cannot play a decisive role in airbag deployment. They also do not provide an indication of airbag deployment. The vehicle may be deformed significantly without an airbag being deployed. This is the case if only parts which are relatively easily deformed are affected G-Class - Owner's Manual Occupant safety Purpose and function of the restraint system and the rate of vehicle deceleration is not high. Conversely, an airbag may be deployed even though the vehicle suffers only minor deformation. If, e.g. very rigid vehicle parts such as longitudinal members are hit, this may result in sufficiently high levels of vehicle deceleration. Depending on the apparent type of accident and the detected deployment situation, seat belt tensioners and/or airbags supplement the protection offered by a correctly worn seat belt. When enabled, an airbag can provide additional protection for the respective vehicle occupant.PERLINDUNGAN POTENSIAL YANG DIBERIKAN OLEH SETIAP AIRBAG:
• Knee airbag: thighs, knees and lower legs • Driver's airbag, front passenger airbag: head and ribcage • Window airbag: head • Side airbag: ribcage, also pelvis for front seat occupants However, no system available today can completely eliminate injuries and fatalities in every accident situation. In particular, the seat belt and airbag generally do not protect against objects penetrating the vehicle from the outside. It is also not possible to completely rule out the risk of injury caused by the airbag deploying. Mercedes-Benz recommends that you have the vehicle towed to a qualified specialist workshop after an accident. Take this into account, particularly if a seat belt tensioner has been triggered or an airbag deployed. IF THE SEAT BELT TENSIONERS ARE TRIGGERED OR AN AIRBAG IS DEPLOYED, YOU WILL HEAR A BANG, AND A SMALL AMOUNT OF FINE POWDER MAY ALSO BE RELEASED: • The bang will not generally affect your hearing. \- In general, the fine powder released is not hazardous to health but may cause short-term breathing difficulties to persons suffering from asthma or other respiratory problems. Provided it is safe to do so, leave the vehicle immediately or open the window in order to prevent breathing difficulties.Informasi tentang perlindungan terbatas yang diberikan oleh sistem penahan
RISK DUE TO THE INCORRECT BEHAVIOUR OF VEHICLE OCCUPANTS EVERY VEHICLE OCCUPANT MUST MAKE SURE OF THE FOLLOWING IN PARTICULAR: • They observe the information on the correct seat position ( → page 121). - Do not stow any heavy, pointed, sharp or fragile objects in the pockets of clothing items. Stow such objects in a suitable place. WARNING Risk of injury or death due to incorrect seat position The seat belt will not offer the intended level of protection if you have not moved the seat backrest to an almost vertical position. In particular, you may slip under the seatbelt and injure yourself. Adjust the seat properly before beginning your journey. ▶ Always ensure that the seat backrest is in an almost vertical position and that the shoulder section of your seat belt is routed across the centre of your shoulder. G-Class - Owner's Manual Occupant safety Purpose and function of the restraint systemRISIKO AKIBAT BENDA DI DALAM KABIN KENDARAAN
SETIAP PENUMPANG KENDARAAN HARUS MEMASTIKAN HAL BERIKUT TERUTAMA:
• They observe the information on the correct seat position ( → page 121). • There are no objects between the seat, door and door pillar (B-pillar). - There are no hard objects, e.g. clothes hangers, hanging on the grab handles or coat hooks. - Do not stow any heavy, pointed, sharp or fragile objects in the pockets of clothing items. Stow such objects in a suitable place. To secure objects, luggage or cargo, observe the instructions for loading the vehicle ( → page 210). PERINGATAN
Risk of injury or death due to blocked seat belt buckle or seat belt anchorage Objects next to the front seat that block the seat belt buckle or the moving seat belt anchorage on the front seat impair the function of the seat belt tensioners. Before starting the journey, make sure that there are no objects around the seat belt buckle or between the front seat and door.  PERINGATAN
Risk of injury from objects in the deployment area of an airbag Objects in the deployment area of an airbag can hinder or prevent the correct deployment of the airbag. The airbag may then deploy in an uncontrolled manner and may even cause additional injuries to the vehicle occupants by deploying. This may be the case in particular if the airbag is integrated into the seat. ▶ Always stow and secure objects correctly. Before commencing your journey, make sure that no objects are stowed in the deployment area of an airbag. The installation location of an airbag is identified by the symbol AIRBAG ( → page 140).RISIKO AKIBAT MEMASANG AKSESORIS
Do not attach accessories such as mobile navigation devices, mobile phones or cup holders, within the deployment area of an airbag, e.g. on the cockpit, on the door, on the side window or on the side trim. In addition, no connecting cables, tensioning straps or retaining straps must be routed or attached to the vehicle within the deployment area of an airbag. Always comply with the accessory manufacturer's installation instructions and, in particular, the notes on suitable places for installation.  G-Class - Owner's Manual Occupant safety Purpose and function of the restraint system PERINGATAN
Risk of injury or death due to unsuitable protective covers Due to unsuitable protective covers, the airbags cannot protect vehicle occupants as they are designed to do. You should only use protective covers that have been approved for the corresponding seat by Mercedes-Benz. In addition, the function of the automatic front passenger airbag deactivation could be restricted due to an unsuitable protective cover. If the front passenger seat is occupied, ensure that the PASSENGER AIR BAG indicator lamps display the correct status of the front passenger airbag ( → page 126). RISIKO AKIBAT HEWAN PELIHARAAN DI DALAM RUANG KABIN KENDARAAN
PERINGATAN
Risk of accident and injury due to animals left unsecured or unattended in the vehicle If you leave animals in the vehicle unattended or unsecured, they could press buttons or switches, for instance.HEWAN DAPAT:
• activate vehicle equipment and become trapped, for example • switch systems on or off and endanger other road users Unsecured animals may be thrown about the vehicle in the event of an accident, or sudden steering and braking manoeuvres, and injure vehicle occupants. ▶ Never leave animals unattended in the vehicle. ▶ Always correctly secure animals while driving, e.g. using a suitable animal carrier.  G-Class - Owner's Manual Occupant safety Purpose and function of the restraint systemRISIKO AKIBAT MODIFIKASI, KERUSAKAN, ATAU KEAUSAN PADA KOMPONEN SISTEM PENGAMAN
PERINGATAN
Risk of injury or death due to modifications to the restraint system Vehicle occupants may no longer be protected as intended if alterations are made to the restraint system. ▶ Never alter the parts of the restraint system. ▶ Never tamper with the wiring or any electronic component parts or their software. If it is necessary to modify the vehicle to accommodate a person with disabilities, contact a qualified specialist workshop. Mercedes-Benz recommends that you use driving aids which have been approved for your vehicle by Mercedes-Benz.  PERINGATAN
Risk of injury or death due to damaged or modified seat beltsSABUK PENGAMAN TIDAK DAPAT MEMBERIKAN PERLINDUNGAN DALAM SITUASI BERIKUT:
- the seat belt is damaged, has been modified, is extremely dirty, bleached or dyed • the seat belt buckle is damaged or extremely dirty - modifications have been made to the seat belt tensioner, seat belt anchorage or seat belt retractor Seat belts may sustain non-visible damage in an accident, e.g. due to glass splinters. Modified or damaged seat belts could tear or fail in the event of an accident, for example. Modified seat belt tensioners could accidentally trigger or fail to function as intended. ▶ Never modify the seat belt system, for example the seat belt, seat belt buckle, seat belt tensioner, seat belt anchorage and seat belt retractor. ▶ Make sure that the seat belts are undamaged, not worn and clean. ▶ Always have the seat belts checked immediately after an accident at a qualified specialist workshop. Mercedes-Benz recommends that you use seat belts which have been approved for your vehicle by Mercedes-Benz.   G-Class - Owner's Manual Occupant safety Purpose and function of the restraint system PERINGATAN
Risk of injury due to modifications to the cover of an airbag If you modify the cover of an airbag or affix objects such as stickers to it, the airbag can no longer function as intended. ▶ Never modify the cover of an airbag. Do not attach any objects to the cover. The installation location of an airbag is identified by the AIRBAG symbol ( → page 140). PERINGATAN
Risk of injury due to malfunctioning sensors in the door The function of the airbags can be impaired due to modifications or incorrect work performed on the doors or door trim, or if the doors are damaged. ▶ Never modify the doors or parts of the doors. ▶ Always have work on the doors or door trim carried out at a qualified specialist workshop.RISIKO AKIBAT KOMPONEN SISTEM PENGAMAN YANG TELAH BEKERJA
Mercedes-Benz recommends that you have the vehicle towed to a qualified specialist workshop after an accident.  PERINGATAN
Risk of burns from hot airbag components The airbag parts are hot after an airbag has been deployed. ▶ Do not touch the airbag parts. ▶ Have a deployed airbag replaced at a qualified specialist workshop as soon as possible. PERINGATAN
Risk of injury due to deployed airbag A deployed airbag no longer offers any protection. ▶ Have the vehicle towed to a qualified specialist workshop in order to have the deployed airbag replaced. Have deployed airbags replaced immediately. PERINGATAN
Risk of injury or death from deployed pyrotechnic seat belt tensioners Pyrotechnic seat belt tensioners that have been deployed are no longer operational and are unable to perform their intended protective function. Therefore, have deployed pyrotechnic seat belt tensioners immediately replaced at a qualified specialist workshop.  G-Class - Owner's Manual Occupant safety Seat belts< Sabuk pengaman
Melepas sabuk pengaman
Press the release button in the seat belt buckle and guide the seat belt back with the seat belt tongue. CATATAN
Damage caused by trapping the seat belt If an unused seat belt is not fully retracted, it may become trapped in the door or in the seat mechanism. ▶ Always ensure that an unused seat belt is fully retracted.    G-Class - Owner's Manual Occupant safety AirbagsAirbag
Ikhtisar airbag
 Driver's knee airbag 2 Driver's airbag Front passenger airbag Front passenger knee airbag 5 Window airbag 6 Side airbag The installation location of an airbag is identified by the AIRBAG symbol. Observe the information in "Overview of deployment situations" (→ page 133).   Back to Contents G-Class - Owner's Manual Children in the vehicle < Anak-anak di dalam kendaraan
This interactive PDF works like a website - tap or click a button to jump straight to where you want to go. You can return here at any time via the navigation bar at the top left. Key facts in brief 142 Important safety notes 144 Suitable child restraint systems for the transport of children 1>1 Suitable seats for attaching child restraint systems 125 Securing the child restraint system 159 Child safety locks 164 Passive occupant presence reminder 168 G-Class - Owner's Manual Children in the vehicle Key facts in briefFakta penting secara singkat
Safely transporting children in the vehicle SELALU PERHATIKAN HAL BERIKUT SAAT MENGANGKUT ANAK-ANAK:
• Never leave children unattended in the vehicle ( → page 145). - Secure children younger than twelve or of a height up to 1.50 m on the seat (see illustration above) properly with a suitable and approved child restraint system ( → page 151) and secure small children in a rearward-facing child restraint system. - Observe the child restraint system manufacturer's installation instructions. KURSI BELAKANG KIRI/KANAN (KURSI YANG DIUTAMAKAN)
SISTEM PENGIKAT YANG DIUTAMAKAN:
ISOFIX mounting brackets ( → page 155) or i-Size mounting brackets ( → page 156) and additionally fasten Top Tether if available ( → page 162).SISTEM PENGIKAT ALTERNATIF:
名 Vehicle seat belt ( → page 163) Additionally fasten Top Tether if recommended by the manufacturer of the child restraint system ( → page 162). The following child restraint systems of the Universal category are approved: U, UF, i-U, IUF. Please see the other alternatives for use ( → page 155).KURSI PENUMPANG DEPAN
SISTEM PENGIKAT:
Vehicle seat belt ( → page 163)  G-Class - Owner's Manual Children in the vehicle Key facts in briefPASTIKAN UNTUK MEMPERHATIKAN:
\- If the front passenger seat is occupied, ensure that the status of the front passenger airbag is correct for the current situation ( → page 126). The following child restraint systems of the Universal category are approved: U(*) , UF. Please see the other alternatives for use ( → page 156). (*) rearward-facing child restraint systems only in conjunction with automatic airbag shutoffKURSI BELAKANG TENGAH
SISTEM PENGIKAT:
Vehicle seat belt ( → page 163) The following belt-secured child restraint systems of the Universal category are approved: U, UF. Please see the other alternatives for use ( → page 156).  Peringatan keselamatan penting
Informasi dasar
BERHATI-HATILAH
Bear in mind that negligence when securing a child in the child restraint system may have serious consequences. Always be diligent in securing a child carefully before every journey. Never allow babies and children to travel sitting on the lap of another vehicle occupant.UNTUK MENINGKATKAN PERLINDUNGAN BAGI ANAK-ANAK YANG BERUSIA KURANG DARI DUA BELAS TAHUN ATAU TINGGINYA KURANG DARI 1,50 M, MERCEDES-BENZ SANGAT MEREKOMENDASIKAN AGAR ANDA MEMPERHATIKAN HAL-HAL BERIKUT:
- Always secure the child in a child restraint system suitable for this Mercedes-Benz vehicle. - The child restraint system must be appropriate to the age, weight and size of the child. - The vehicle seat must be suitable for the child restraint system to be fitted: \- ISOFIX mounting bracket: (→ page 155) \- i-Size mounting bracket: (→ page 156) Securing with the vehicle seat belt: (→ page 156) Accident statistics show that children secured on the rear seats are generally safer than children secured on the front seats. For this reason, Mercedes-Benz strongly advises that you fit a child restraint system to a rear seat.ISTILAH UMUM SISTEM PENGAMAN ANAK
ISTILAH UMUM SISTEM PENGAMAN ANAK DIGUNAKAN DALAM BUKU PANDUAN PEMILIK INI. SISTEM PENGAMAN ANAK, CONTOHNYA:
a baby car seat • a rearward-facing child seat • a forward-facing child seat - a child booster seat – Mercedes-Benz recommends using a child booster seat with a seat backrest and seat belt guide.PATUHI HUKUM DAN PERSYARATAN HUKUM
Always observe the legal requirements when using a child restraint system in the vehicle. Make sure that the child restraint system is approved in accordance with the valid test specifications and guidelines. Further information can be obtained at a qualified specialist workshop. Mercedes-Benz recommends that you use a Mercedes-Benz Service Centre for this purpose.SISTEM PENGAMAN UNTUK SISTEM PENGAMAN ANAK DI DALAM KENDARAAN HANYA GUNAKAN SISTEM PENGAMAN BERIKUT UNTUK SISTEM PENGAMAN ANAK:
• the ISOFIX or i-Size mounting brackets • the vehicle's seat belt system • the Top Tether anchorages G-Class - Owner's Manual Children in the vehicle Important safety notes Simply attaching to the ISOFIX mounting brackets or i-Size mounting brackets on the vehicle can reduce the risk of fitting the child restraint system incorrectly. When securing a child with the integrated seat belt of the ISOFIX or i-Size child restraint system, always comply with the permissible gross mass for the child and child restraint system ( → page 160).Stiker peringatan penting
SELALU AMANKAN SISTEM PENGAMAN ANAK DENGAN BENAR
PERINGATAN
Risk of injury or death due to incorrect installation of the child restraint system The child can then not be protected or restrained as intended. Be sure to comply with the manufacturer's installation instructions for the child restraint system and its correct use. ▶ Make sure that the entire base of the child restraint system always rests on the sitting surface of the seat. ▶ Never place objects (e.g. cushions) under or behind the child restraint system. ▶ Use child restraint systems only with the original cover designed for them. ▶ Always replace damaged covers with genuine covers. Vehicles with a through-loading feature in the rear seat backrest: do not fit a rearward-facing child restraint system on the rear centre seat. • Always observe the vehicle-specific information. - Fitting an ISOFIX or i-Size child restraint system on the rear seat ( → page 160). Securing the child restraint system with the seat belt ( → page 163). \- Observe the warning labels in the vehicle interior and on the child restraint system. PERINGATAN
Risk of injury or death due to unsecured child restraint systems in the vehicle If the child restraint system is incorrectly fitted or not secured, it can become detached. The child cannot then be protected or restrained as intended. The unused child restraint system can be become detached and strike vehicle occupants. ▶ Always comply with the manufacturer's installation instructions for the child restraint system and its correct use. ▶ Always fit child restraint systems correctly, even if they are transported unused in the vehicle. G-Class - Owner's Manual Children in the vehicle Important safety notesJANGAN MEMODIFIKASI SISTEM PENGAMAN ANAK
PERINGATAN
Risk of injury due to modifications to the child restraint system The child restraint system can no longer function properly. This poses an increased risk of injury. ▶ Never modify a child restraint system. Only affix accessories which have been specially approved for this child restraint system by the child restraint system's manufacturer.HANYA GUNAKAN SISTEM PENGAMAN ANAK YANG DALAM KONDISI LAYAK PAKAI
PERINGATAN
Risk of injury or death caused by the use of damaged child restraint systems Child restraint systems or their retaining systems that have been subjected to stress in an accident may not be able to perform their intended protective function. It may be the case that the child cannot be properly restrained. ▶ Always immediately replace child restraint systems that have been damaged or involved in an accident. Have the securing systems for the child restraint systems checked at a qualified specialist workshop before installing a child restraint system again.HINDARI SINAR MATAHARI LANGSUNG
PERINGATAN
Risk of burns when the child seat is exposed to direct sunlight If the child restraint system is exposed to direct sunlight or heat, parts could heat up. Children could suffer burns from these parts, particularly on metallic parts of the child restraint system. ▶ Always make sure that the child restraint system is not exposed to direct sunlight. Protect the child restraint system with a blanket, for example. If the child restraint system has been exposed to direct sunlight, allow it to cool before securing a child into it. ▶ Never leave children unattended in the vehicle.PERHATIKAN SAAT BERHENTI ATAU PARKIR
PERINGATAN
Risk of fatal injury due to exposure to extreme heat or cold in the vehicle If persons, particularly children, are subjected to prolonged exposure to intense heat or cold, there is a risk of severe injury or even death. ▶ Never leave persons, particularly children, unattended in the vehicle. G-Class - Owner's Manual Children in the vehicle Important safety notes  PERINGATAN
Risk of accident- and injury due to children left unattended in the vehicleKETIKA ANAK-ANAK DITINGGALKAN TANPA PENGAWASAN DI DALAM KENDARAAN, MEREKA DAPAT DIHARAPKAN TERUTAMA UNTUK
• open doors, thereby endangering other persons or road users. • get out and be struck by oncoming traffic. • operate vehicle equipment and become trapped, for example.SELAIN ITU, ANAK-ANAK JUGA DAPAT MENGGERAKKAN KENDARAAN, MISALNYA DENGAN:
• releasing the parking brake. • changing the drive range. • starting the vehicle. ▶ Never leave children unattended in the vehicle. When leaving the vehicle, always take the key with you and lock the vehicle. ▶ Keep the key out of reach of children.Ikhtisar stiker peringatan di dalam kendaraan
 Front passenger airbag warning (on the front passenger sun visor) (→ page 148) 2 Vehicles without automatic front passenger airbag deactivation warning (visible when the front passenger door is open) ( → page 150) Catatan tentang sistem pengaman anak menghadap belakang dan menghadap depan di kursi penumpang depan
PERINGATAN
Risk of injury or death from using a rearward-facing child restraint system when the front passenger airbag is enabled If you secure a child in a rearward-facing child restraint system on the co-driver seat and the PASSENGER AIR BAG OFF indicator lamp is off, the front passenger airbag can deploy in the event of an accident. The airbag could hit the child. ▶ Always make sure the front passenger airbag is disabled. The PASSENGER AIR BAG OFF indicator lamp must be lit. ▶ NEVER use a rearward-facing child restraint system on a seat with an ENABLED FRONT AIRBAG. This can result in the DEATH or SERIOUS INJURY of the CHILD. Observe the specific instructions for the rearward-facing and forward-facing child restraint systems ( → page 159).  Warning notice on the front passenger sun visorJIKA SANGAT PERLU MEMASANG SISTEM PENGAMAN ANAK DI KURSI PENUMPANG DEPAN, SELALU PERHATIKAN INFORMASI BERIKUT:
- The notes on automatic front passenger airbag deactivation ( → page 127). - When using a rearward-facing child restraint system on the front passenger seat, the front passenger airbag must always be disabled. This is only the case if the PASSENGER AIR BAG OFF indicator lamp is lit continuously ( → page 126). - The front passenger airbag is enabled when the PASSENGER AIR BAG OFF indicator lamp is not lit. The front passenger airbag may be deployed during an accident. In that case, do not use rearward-facing child restraint systems.Informasi tentang penonaktifan otomatis airbag penumpang depan
If the front passenger seat is occupied, ensure, both before and during the journey, that the status of the front passenger airbag is correct for the current situation. G-Class - Owner's Manual Children in the vehicle Important safety notesA
PERINGATAN
Risk of injury or death due to objects between the seat surface and the child restraint system Objects between the seat surface and the child restraint system could affect the function of the automatic co-driver airbag shutoff. Do not place any objects between the seat surface and the child restraint system. ▶ Make sure that the entire base of the child restraint system is always resting on the seat surface of the co-driver seat. The backrest of the forward-facing child restraint system must, as far as possible, be resting on the seat backrest of the co-driver seat. It is essential to comply with the child restraint system manufacturer's installation instructions. When fitting a child restraint system to the front passenger seat, observe the vehicle-specific information ( → page 148).SISTEM PENGAMAN ANAK MENGHADAP BELAKANG DI KURSI PENUMPANG DEPAN
If a rearward-facing child restraint system is fitted on the front passenger seat, the front passenger airbag must be deactivated. The PASSENGER AIR BAG OFF indicator lamp must light up continuously ( → page 126). A
PERINGATAN
Risk of injury or death from using a rearward-facing child restraint system when the front passenger airbag is enabled If you secure a child in a rearward-facing child restraint system on the co-driver seat and the PASSENGER AIR BAG OFF indicator lamp is off, the front passenger airbag can deploy in the event of an accident. The airbag could hit the child. ▶ Always make sure the front passenger airbag is disabled. The PASSENGER AIR BAG OFF indicator lamp must be lit. ▶ NEVER use a rearward-facing child restraint system on a seat with an ENABLED FRONT AIRBAG. This can result in the DEATH or SERIOUS INJURY of the CHILD.i
The front passenger airbag is enabled depending on the child restraint system and the stature of the child. The PASSENGER AIR BAG OFF indicator lamp does not light up. The front passenger airbag may be deployed during an accident. If the front passenger airbag is in this status, no rearward-facing child restraint system may be fitted on the front passenger seat. Instead, fit the rearward-facing child restraint system on a suitable rear seat.SISTEM PENGAMAN ANAK MENGHADAP KE DEPAN DI KURSI PENUMPANG DEPAN
If a forward-facing child restraint system is fitted on the front passenger seat, the front passenger airbag may be automatically enabled or disabled. The status of the front passenger airbag depends on the child restraint system and the stature of the child.   G-Class - Owner's Manual Children in the vehicle Important safety notes The PASSENGER AIR BAG OFF indicator lamp is either lit continuously, or it is not lit ( → page 126). Always observe the following information. PERINGATAN
Risk of injury or death due to incorrect positioning of the child restraint systemJIKA ANDA MENGAMANKAN ANAK DALAM SISTEM PENGAMAN ANAK MENGHADAP KE DEPAN DI KURSI PENUMPANG DEPAN DAN ANDA MEMPOSISIKAN KURSI PENUMPANG DEPAN TERLALU DEKAT DENGAN DASHBOARD, PADA SAAT TERJADI KECELAKAAN, ANAK TERSEBUT DAPAT:
- come into contact with the vehicle's interior if the PASSENGER AIR BAG OFF indicator lamp is lit, for example - be struck by the airbag if the PASSENGER AIR BAG OFF indicator lamp is off ▶ Always move the co-driver seat as far back as possible. In doing so, always make sure that the shoulder belt strap is correctly routed from the seat belt outlet of the vehicle to the shoulder belt guide on the child restraint system. The shoulder belt strap must be routed forwards and downwards from the seat belt outlet. If necessary, adjust the seat belt outlet and the co-driver seat accordingly. Always comply with the child restraint system manufacturer's installation instructions. Catatan untuk kendaraan tanpa penonaktifan otomatis airbag penumpang depan
(→ page 147) Vehicles without automatic front passenger airbag deactivation have a special sticker which is visible when the front passenger door is opened.PASTIKAN ANDA MEMPERHATIKAN INFORMASI BERIKUT:
- Never fit a rearward-facing child restraint system to the front passenger seat. • Always fit a rearward-facing child restraint system to a suitable rear seat - Notes on rear-facing and front-facing child restraint systems on the front passenger seat ( → page 148)  G-Class - Owner's Manual Children in the vehicle Suitable child restraint systems for the transport of children Sistem pengaman anak yang cocok untuk transportasi anak
Informasi tentang keuntungan sistem pengaman anak menghadap ke belakang
Transport a baby in a suitable rearward-facing child restraint system only. It is also preferable to transport a small child in a suitable rearward-facing child restraint system. In this case, the child sits in the opposite direction to the direction of travel and faces backwards. Babies and small children have comparatively weak neck muscles in relation to the size and weight of their head. The risk of injury to the cervical spine during an accident can be reduced in a rearward-facing child restraint system.Kategori persetujuan untuk sistem pengaman anak
HANYA SISTEM PENGAMAN ANAK YANG MEMENUHI STANDAR UNECE BERIKUT YANG DISETUJUI UNTUK DIGUNAKAN DI KENDARAAN:
UN-R44 UN-R129IDENTIFIKASI SISTEM PENGAMAN ANAK
INFORMASI BERIKUT, MISALNYA, TERSEDIA PADA LABEL PERSETUJUAN DI SISTEM PENGAMAN ANAK:
• Approval category Child weight group • Authorisation number • Child restraint system size classKategori persetujuan di bawah UN-R44
 Example of an approval label \- Universal: child restraint systems in the "Universal" category are approved for installation in vehicles. Following overviews of the suitability of seats for securing child restraint systems, they can be used on seats labelled U, UF or IUF. The identification IUF refers to ISOFIX/LATCH child restraint systems in the "Universal" category. These child restraint systems must be additionally secured using Top Tether or support points. \- Semi-Universal: child restraint systems in the "Semi-Universal" category may only be used if the vehicle and vehicle seat are listed in the child restraint system manufacturer's vehicle model list.  G-Class - Owner's Manual Children in the vehicle Suitable child restraint systems for the transport of children \- Vehicle-specific: child restraint systems in the "Vehicle-specific" category may only be used if the vehicle and vehicle seat are listed in the child restraint system manufacturer's vehicle model list.Kategori persetujuan di bawah UN-R129
 Example of an approval label - i-Size child restraint systems and booster seats with seat backrest: suitable for attachment to i-Size mounting brackets. They can be used on seats marked i-U. Child restraint systems in this category can also be attached to ISOFIX bars if approved by the child restraint system manufacturer. I-Size booster seats with backrest can be used on seats marked U if the seat is approved for category B2/B3. - Belted child restraint systems and belted booster seats without seat backrest in the Universal category: suitable for attachment to seats marked U. - Vehicle-specific child restraint systems (ISOFIX or belted attachment as well as child booster seats with and without seat backrest): suitable for attachment to seats marked I-U or U if approved by the child restraint system manufacturer.HARAP PERHATIKAN KESESUAIAN KURSI KENDARAAN
- Suitability of seats for attaching ISOFIX/LATCH child restraint systems (→ page 155) - Suitability of seats for securing i-Size child restraint systems (→ page 156). - Suitability of seats for fastening belt-secured child restraint systems ( → page 156)Ikhtisar sistem pengaman anak yang direkomendasikan
Further information on the correct child restraint system can be obtained at a qualified specialist workshop. Mercedes-Benz recommends that you use a Mercedes-Benz Service Centre for this purpose.PENGIKATAN DENGAN ISOFIX
WEIGHT CATEGORY 0+ (UP TO 13 KG AND UP TO APPROX. 15 MONTHS)| Type1 | Baby Safe 3 i-Size |
| Size category R2 | |
| Approval E1*129R03/04*0060*02 | |
| Order number A 000 970 68 02 | |
| Order number | A 000 970 73 02 |
| FlexBase iSense | |
| 1 Manufacturer: Britax Römer | |
| Type1 | Dualflx 3 I-Size |
| Size category F2X/R2 | |
| Approval E1*129R03/04*0060*02 | |
| Order number A 000 970 93 02 | |
| Order number FlexBase ISense | A 000 970 73 02 |
| 1 Manufacturer: Britax Rämer | |
| Type1 | Dualfix 5Z |
| Size category F2X/R2 | |
| Approval E1 030060 | |
| Order number A 000 970 93 02 | |
| 1 Manufacturer: Britax Röner | |
| Type1 | KIDFIX M i-Size |
| Size category B2 | |
| Approval E1*129R03/04*0061*02 | |
| Order number A 000 970 89 02 | |
| 1 Manufacturer: Britax Rümer | |
PENGIKATAN DENGAN I-SIZE (SISTEM PENGAMAN ANAK R129)
WEIGHT UP TO 13 KG, SIZE 40 TO 83 CM AND AGE FROM BIRTH TO APPROX. 15 MONTHS| Type1 | Baby Safe 3 i-Size |
| Size category R2 | |
| Approval E1*129R03/04*0060*02 | |
| Order number A 000 970 68 02 | |
| Order number FlexBase ISense | A 000 970 73 02 |
| 1 Manufacturer: Britax Römer |
| Type1 | Dualfix 3 i-Size |
| Size category F2X/R2 | |
| Approval E1*129R03/04*0060*02 | |
| Order number A 000 970 93 02 | |
| Order number FlexBase iSense | A 000 970 73 02 |
| 1 Manufacturer: Britav Rämer | |
| Type1 | Dualflx 5Z |
| Size category F2X/R2 | |
| Approval E1 030060 | |
| Order number A 000 970 93 02 | |
| 1 Manufacturer: Britax Römer | |
| Type1 | KIDFIX M i-Size |
| Size category B2 | |
| Approval E1*129R03/04*0061*02 | |
| Order number A 000 970 89 02 | |
| 1 Manufacturer: Britax Römer | |
| Type1 | Baby Safe 3 I-Size |
| Size category R2 | |
| Approval E1*129R03/04*0060*02 | |
| Order number A 000 970 68 02 | |
| 1 Manufacturer: Britax Römer | |
| Type1 | Dualflx 3 I-Size |
| Size category F2X/R2 | |
| Approval E1*129R03/04*0060*02 | |
| Order number A 000 970 93 02 | |
| Order number FlexBase ISense | A 000 970 73 02 |
| 1 Manufacturer: Britax Remor | |
| Type1 | Dualfix 5Z |
| Size category F2X/R2 | |
| Approval E1 030060 | |
| Order number A 000 970 93 02 | |
| 1 Manufacturer: Britax Rümer | |
| Type1 | Junior1 |
| Approval E8*129R03/06*13662*00 | |
| Order number EAN: 4016428012606 | |
| 1 Manufacturer: Team Tex | |
Kursi yang cocok untuk memasang sistem pengaman anak
Overview of suitability of the seats for attaching ISOFIX/LATCH child restraint systemsISOFIX ADALAH SISTEM PENGAMAN STANDAR UNTUK SISTEM PENGAMAN ANAK YANG DIRANCANG KHUSUS.
 The symbol indicates seats suitable for attaching an ISOFIX child restraint system in accordance with UN R44 ( → page 151).  ISOFIX child restraint systems can also be installed on seats with i-Size markings ( → page 156). Attach only ISOFIX child restraint systems that are approved in accordance with UN R44 as per the following ISOFIX tables. CARRY COT| Size class - Equipment | Left/right rear seat |
| F - ISO/L1 X | |
| G - ISO/L2 X | |
| X Not suitable for an ISOF2K child restraint system in this weight group and/or size class. | |
| Size class - Equipment | Left/right rear seat |
| E - ISO/R1 IL | |
| II. Suitable for ISOFIX chile restraint systems according to the table in "Overview of the recommended child restraint systems".or if the vehicle and the seat are listed on the child restraint system manufacturer's vehicle model list. | |
| Size class - Equipment | Left/right rear seat |
| E - ISO/R1 IL | |
| D - ISO/R2 IL | |
| C - ISO/R3 IL (1) | |
| IL Suitable for ISO/FIX child restraint systems according to the table in "Overview of the recommended child restraint systems", or if the vehicle and the seat are listed on the child restraint system manufacturer's vehicle model list.(1) When using a child restraint system of size class (ISO/R3), move the front seat into the highest position. Make sure that the seat backrest of the front seat does not rest against the child restraint system. | |
| Size class - Equipment | Left/right rear seat |
| D - ISO/R2 IL | |
| C - ISO/R3 IL (1) | |
| B - ISO/F2 IUF | |
| B1 - ISO/F2X IUF | |
| A - ISO/F3 IUF | |
| II. Suitable for ISOFIX child restraint systems according to the table in "Overview of the recommended child restraint systems", or if the vehicle and the seat are listed on the child restraint system manufacturer's vehicle model list. | |
| IUF Suitable for forward-facing ISOFIX child restraint systems of the "Universal" category in this weight group. | |
| (1) When using a child restraint system of size class (ISO/II3), move the front seat into the highest position. Make sure that the seat backrest of the front seat does not rest against the child restraint system. | |
Ikhtisar kesesuaian kursi untuk memasang sistem pengaman anak i-Size
I-SIZE ADALAH SISTEM PENGAMAN STANDAR UNTUK SISTEM PENGAMAN ANAK YANG DIRANCANG KHUSUS.
 i-Size child restraint systems can be attached to a seat with the i-Size marking ( → page 151). Child restraint systems that are approved in accordance with the following i-Size table may be attached. LEFT AND RIGHT REAR SEAT| i-Size child restraint systems (ISO/R1, ISO/R2, ISO/R2X, ISO/R3, ISO/F2, ISO/ F2X, ISO/F3, ISO/B2, ISO/B3) | i-U |
| I-Size child restraint systems (ISO/R1, ISO/R2, ISO/R2X, ISO/R3, ISO/F2, ISO/ F2X, ISO/F3, ISO/B2, ISO/B3) | X |
Ikhtisar kesesuaian kursi untuk mengencangkan sistem pengaman anak yang diikat dengan sabuk
Suitability of seats for fastening belt-secured child restraint systems REAR SEATS| Weight category 0: to 10 kg | |
| Left/right rear seat U, L | |
| Rear centre seat 1 | U, L |
| Weight category 0+: to 13 kg | |
| Left/right rear seat U, L | |
| Rear centre seat 2 | U, L |
| Weight category I: 9 to 18 kg | |
| Left/right rear seat U, L | |
| Rear centre seat 4 | U, L |
| Rear centre seat1 | U, L |
| Rear centre seat 1 | U, L |
| 1 Child restraint systems with a support log are not suitable for this seal. |
| U Suitable for child restraint systems of the "Universal" category in this weight category. |
| L. Suitable for semi-universal child restraint systems according to the table in "Recommended child restraint systems", or if the vehicle and the seat are listed in the child restraint system manufacturer's vehicle model list. |
CATATAN TENTANG SISTEM PENGAMAN ANAK DI KURSI PENUMPANG DEPAN
- If it is absolutely necessary for you to fit a child restraint system to the front passenger seat, be sure to observe the information on child restraint systems on the front passenger seat ( → page 148). - Observe the specific instructions for the rearward-facing and forward-facing child restraint systems. If the front passenger seat is occupied, ensure, both before and during the journey, that the status of the front passenger airbag is correct for the current situation (→ page 126). FRONT PASSENGER SEAT Weight category 0: to 10 kg| Front passenger airbag enabled1 | X |
| Front passenger airbag disabled1,2 | U, L |
| Front passenger airbag enabled1 | X |
| Front passenger airbag disabled1, 2 | U, L |
| Front passenger airbag enabled1 | UF, L |
| Front passenger airbag disabled1,2 | U, L |
| Front passenger airbag enabled1 | UF, L |
| Front passenger airbag disabled1,2 | U, L |
| Front passenger airbag enabled1 | UF, L |
| Front passenger airbag disabled1,2 | U, L |
| 1. Adjust the seat cushion inclination so that the front edge of the seat cushion is in the highest position and the rear edge of the seat cushion is in the lowest position. |
| 2. The vehicle is equipped with automatic front passenger airbag deactivation. The PASSENGER AIRBAG OFF indicator lamp must be on. |
| X Not suitable for children in this weight category. |
| U Suitable for child restraint systems of the "Universal" category in this weight category. |
Mengencangkan sistem pengaman anak
Menyetel kursi dengan benar
SAAT MEMASANG SISTEM PENGAMAN ANAK DI KURSI BELAKANG KIRI ATAU KANAN, SELALU PERHATIKAN HAL BERIKUT:
Make sure that the child's feet do not touch the front seat. If necessary, move the front seat slightly forwards. If the head restraint of the child restraint system cannot be fully extended when it is installed in the vehicle, this will result in restrictions on the maximum size setting for certain child restraint systems. Observe the child restraint system manufacturer's installation instructions. Contact with the roof when the head restraint is fully extended and locked in place will not result in any restrictions on use.PERHATIKAN JUGA HAL BERIKUT SAAT MEMASANG SISTEM PENGAMAN ANAK ISOFIX ATAU I-SIZE:
When using a rearward-facing child restraint system on a rear seat: adjust the front seat so that it does not touch the child restraint system. When using a forward-facing child restraint system with integrated child seat belt: adjust the head restraint of the respective seat so that it does not push the child restraint system forwards. If necessary, the respective head restraint can be removed. In addition, the seat backrest of the child restraint system must lie as flat as possible against the backrest of the vehicle seat. After the child restraint system has been removed, replace the vehicle head restraint immediately and adjust it correctly. The child restraint system must not be put under strain between the roof and the seat cushion and/or be fitted facing the wrong direction. Where possible, adjust the seat cushion inclination accordingly. Adjust the vehicle head restraints so that the child restraint system is not put under strain by the head restraint.SAAT MEMASANG SISTEM PENGAMAN ANAK YANG DIKUNCI DENGAN SABUK PENGAMAN, PERHATIKAN JUGA HAL-HAL BERIKUT:
When using a rearward-facing child restraint system on a rear seat: adjust the front seat so that it does not touch the child restraint system. When using a forward-facing child restraint system with integrated child seat belt: adjust the head restraint of the respective seat so that it does not push the child restraint system forwards. If necessary, the respective head restraint can be removed. In addition, the seat backrest of the child restraint system must lie as flat as possible against the backrest of the vehicle seat. After the child restraint system has been removed, replace the vehicle head restraint immediately and adjust it correctly. The backrest of the forward-facing child restraint system must, as far as possible, be resting on the seat backrest of the rear seat.  G-Class - Owner's Manual Children in the vehicle Securing the child restraint system The child restraint system must not be put under strain between the roof and the seat cushion and/or be fitted facing the wrong direction. Where possible, adjust the seat cushion inclination accordingly. Adjust the vehicle head restraints so that the child restraint system is not put under strain by the head restraint. Make sure that the child's feet do not touch the front seat. If necessary, move the front seat slightly forwards.☑ TERGANTUNG PADA PERLENGKAPAN KENDARAAN, SELALU PERHATIKAN HAL-HAL BERIKUT SAAT MEMASANG SISTEM PENGAMAN ANAK YANG DIKUNCI DENGAN SABUK PENGAMAN DI KURSI PENUMPANG DEPAN:
Observe the notes on rearward-facing and forward-facing child restraint systems on the front passenger seat ( → page 148). When using a forward-facing child restraint system integrated child seat belt: remove the head restraint from the front passenger seat, if possible. After the child restraint system has been removed, immediately replace the head restraint and adjust it correctly. The backrest of the forward-facing child restraint system must, as far as possible, be resting against the seat backrest of the front passenger seat. The child restraint system must not be put under strain between the roof and the seat cushion and/or be fitted facing the wrong direction. Adjust the vehicle head restraints so that the child restraint system is not put under strain by the head restraint. ▶ Never place objects (e.g. cushions) under or behind the child restraint system. Set the front passenger seat as far back as possible and move the seat into the highest position if possible. Always make sure that the shoulder  belt strap is correctly routed from the seat belt outlet of the vehicle to the shoulder belt guide on the child restraint system. The shoulder belt strap must be routed forwards from the seat belt outlet and, where possible, downwards to the child restraint system. ▶ Fully retract the seat cushion length adjustment. Adjust the seat cushion inclination so that the front edge of the seat cushion is in the highest position and the rear edge of the seat cushion is in the lowest position. Set the seat backrest to the most vertical position possible.Memasang sistem pengaman anak ISOFIX/LATCH atau i-Size
PERINGATAN
Risk of accident if the rear bench seat, rear seat and seat backrest are not engaged The rear bench seat, rear seat and seat backrest may fold forwards, even while the vehicle is in motion. - As a result, the vehicle occupant will be pressed into the seat belt with increased force. The seat belt will not be able to protect as intended and could cause additional injury. - Objects or loads in the boot or load compartment cannot be restrained by the seat backrest. ▶ Make sure that the rear bench seat, the rear seat and the seat backrest are engaged before every trip.  G-Class - Owner's Manual Children in the vehicle Securing the child restraint system Ensure that the rear seat backrest is engaged. To do so, pull forcefully on the seat backrest.A
PERINGATAN
Risk of injury or death if the permissible gross mass of the child and child restraint system together is exceeded. Too much load may be placed on the ISOFIX or i-Size child restraint systems and the child may not be restrained correctly in the event of an accident, for example. If the child is secured in an ISOFIX or i-Size child restraint system with integrated seat belts, the total mass of the child and child restraint system must not exceed 33 kg.SELALU PERHATIKAN INFORMASI TENTANG MASSA SISTEM PENGAMAN ANAK:
- in the installation instructions and Owner's Manual provided by the manufacturer of the child restraint system used • on a label on the child restraint system, if present Regularly check that the permissible gross mass of the child and child restraint system is still being adhered to,SAAT MEMASANG SISTEM PENGAMAN ANAK, PERHATIKAN JUGA HAL-HAL BERIKUT:
√ Always observe the area of use and the suitability of the seats for attaching a child restraint system. ISOFIX mounting brackets ( → page 155) or  i-Size mounting brackets ( → page 156)  ISOFIX mounting bracket i-Size mounting brackets Before every journey always ensure that the ISOFIX/LATCH child restraint system or the i-Size child restraint system is engaged in both mounting brackets on the vehicle.CATATAN
Damage to the seat belt for the centre seat during installation of the child restraint system ▶ Make sure that the seat belt is not trapped. Attach the ISOFIX/LATCH or i-Size child restraint system to both mounting brackets in the vehicle.   G-Class - Owner's Manual Children in the vehicle Securing the child restraint systemMengencangkan Top Tether
PERINGATAN
Risk of injury or death if the rear seat backrests are not locked after Top Tether belts are fitted The rear seat backrests may fold forwards. As a result, child restraint systems will no longer be able to perform their intended protective function. This may also cause additional injuries. ▶ Always lock rear seat backrests after fitting Top Tether belts. Adjust the rear seat backrests so that they are in an upright position. Ensure that the rear seat backrest is engaged. To do so, pull forcefully on the seat backrest. If the child restraint system is equipped with a Top Tether belt: The risk of injury may be reduced by Top Tether. The Top Tether belt enables an additional connection between the child restraint system attached with ISOFIX or i-Size and the vehicle.   Remove the load compartment cover and the partitioning net ( → page 219). If necessary, slide head restraint ① upwards (→ page 198). Fit the ISOFIX/LATCH or i-Size child restraint system with Top Tether. Comply with the child restraint system manufacturer's installation instructions.  Guide Top Tether belt ④ under head restraint ① between the two head restraint bars. Hook Top Tether hook Ⓢ into Top Tether anchorage Ⓩ without twisting.   G-Class - Owner's Manual Children in the vehicle Securing the child restraint system Tension Top Tether belt ④. Comply with the child restraint system manufacturer's installation instructions. If necessary, slide head restraint ① downwards (→ page 198). Make sure that you do not interfere with the correct routing of Top Tether belt ④.Mengencangkan sistem pengaman anak dengan sabuk pengaman
PERINGATAN
Risk of accident if the rear bench seat, rear seat and seat backrest are not engaged The rear bench seat, rear seat and seat backrest may fold forwards, even while the vehicle is in motion. - As a result, the vehicle occupant will be pressed into the seat belt with increased force. The seat belt will not be able to protect as intended and could cause additional injury. - Objects or loads in the boot or load compartment cannot be restrained by the seat backrest. ▶ Make sure that the rear bench seat, the rear seat and the seat backrest are engaged before every trip. Ensure that the rear seat backrest is engaged. To do so, pull forcefully on the seat backrest. For a child restraint system of the category "Universal" or "Semi-Universal" ensure that this is approved for the vehicle seat. ▶ Fit the child restraint system. The entire base of the child restraint system must always rest on the sitting surface of the seat. Always make sure that the shoulder belt strap is correctly routed from the seat belt outlet of the vehicle to the shoulder belt guide on the child restraint system. The shoulder belt strap must be routed forwards from the seat belt outlet and, where possible, downwards to the child restraint system. When fitting on the rear seat: also secure Top Tether, if present ( → page 162). When fitting on the front passenger seat: if necessary, adjust the seat belt outlet and the front passenger seat appropriately.  G-Class - Owner's Manual Children in the vehicle Child safety locks< Kunci pengaman anak
Activating/deactivating the child safety lock for the rear doors PERINGATAN
Risk of accident- and injury due to children left unattended in the vehicleKETIKA ANAK-ANAK DITINGGALKAN TANPA PENGAWASAN DI DALAM KENDARAAN, MEREKA DAPAT DIPERKIRAKAN TERUTAMA AKAN
• open doors, thereby endangering other persons or road users. • get out and be struck by oncoming traffic. • operate vehicle equipment and become trapped, for example.SELAIN ITU, ANAK-ANAK JUGA DAPAT MENGGERAKKAN KENDARAAN, MISALNYA DENGAN:
• releasing the parking brake. • changing the drive range. • starting the vehicle. ▶ Never leave children unattended in the vehicle. When leaving the vehicle, always take the key with you and lock the vehicle. ▶ Keep the key out of reach of children. PERINGATAN
Risk of fatal injury due to exposure to extreme heat or cold in the vehicle If persons, particularly children, are subjected to prolonged exposure to intense heat or cold, there is a risk of severe injury or even death. ▶ Never leave persons, particularly children, unattended in the vehicle. G-Class - Owner's Manual Children in the vehicle Child safety locks A
PERINGATAN
Risk of accident and injury due to children left unattended in the vehicleJIKA ANAK-ANAK BERPERGIAN DENGAN KENDARAAN, MEREKA DAPAT, TERUTAMA:
• open doors, thereby endangering other persons or road users. • get out and be struck by oncoming traffic. • operate vehicle equipment and become trapped, for example. ▶ Always activate the installed child safety locks if children are travelling in the vehicle. ▶ Never leave children unattended in the vehicle. When leaving the vehicle, always take the key with you and lock the vehicle. There are child safety locks for the rear doors and the rear side windows. The child safety locks on the rear doors secure each door separately. The doors can no longer be opened from the inside.  Press the lever in the direction indicated by the arrow ② (activate) or ① (deactivate). ▶ Check functionality of the child safety lock.  G-Class - Owner's Manual Children in the vehicle Child safety locksMengaktifkan/menonaktifkan kunci pengaman anak untuk jendela samping belakang
PERINGATAN
Risk of accident- and injury due to children left unattended in the vehicleKETIKA ANAK-ANAK DITINGGALKAN TANPA PENGAWASAN DI DALAM KENDARAAN, MEREKA DAPAT DIPERKIRAKAN TERUTAMA AKAN
• open doors, thereby endangering other persons or road users. • get out and be struck by oncoming traffic. • operate vehicle equipment and become trapped, for example.SELAIN ITU, ANAK-ANAK JUGA DAPAT MENGGERAKKAN KENDARAAN, MISALNYA DENGAN:
• releasing the parking brake. • changing the drive range. • starting the vehicle. ▶ Never leave children unattended in the vehicle. When leaving the vehicle, always take the key with you and lock the vehicle. ▶ Keep the key out of reach of children.  PERINGATAN
Risk of fatal injury due to exposure to extreme heat or cold in the vehicle If persons, particularly children, are subjected to prolonged exposure to intense heat or cold, there is a risk of severe injury or even death. ▶ Never leave persons, particularly children, unattended in the vehicle. PERINGATAN
Risk of accident and injury due to children left unattended in the vehicleJIKA ANAK-ANAK BERPERGIAN DENGAN KENDARAAN, MEREKA DAPAT, TERUTAMA:
• open doors, thereby endangering other persons or road users. • get out and be struck by oncoming traffic. • operate vehicle equipment and become trapped, for example. ▶ Always activate the installed child safety locks if children are travelling in the vehicle. ▶ Never leave children unattended in the vehicle. When leaving the vehicle, always take the key with you and lock the vehicle. There are child safety locks for the rear doors and the rear side windows.  G-Class - Owner's Manual Children in the vehicle Child safety locks  To activate/deactivate: press the button ②. THE REAR SIDE WINDOW CAN BE OPENED OR CLOSED AS FOLLOWS: - Indicator lamp ① is lit: via the switch on the driver's door - Indicator lamp ① is off: via the switch on the corresponding rear door or driver's door   G-Class - Owner's Manual Children in the vehicle Passive occupant presence reminder < Pengingat keberadaan penumpang pasif
Fungsi pengingat keberadaan penumpang pasif
The passive occupant presence reminder can help to remind you about a child who may have been forgotten in the rear compartment of the vehicle. It activates and deactivates automatically when the rear door is open for an extended period of time and a child which the system presumes to be present could enter or exit the vehicle. When the vehicle is switched off, the Do not leave persons or animals in the vehicle message appears on the driver display if the system was already automatically activated. You can permanently deactivate the function in the multimedia system ( → page 168). When the system is deactivated, the indicator lamp in the driver display lights up.Mengaktifkan atau menonaktifkan pengingat keberadaan penumpang pasif di sistem multimedia
Multimedia system:  The function is permanently switched on or off.  Back to Contents G-Class - Owner's Manual Opening and closing < Membuka dan menutup
This interactive PDF works like a website - tap or click a button to jump straight to where you want to go. You can return here at any time via the navigation bar at the top left. Key 170 Doors 175 Rear-end door 178 Side windows 180 Sliding sunroof 184 Anti-theft protection 188 G-Class - Owner's Manual Opening and closing Key< Kunci
Ikhtisar fungsi kunci
PERINGATAN
Accident- and risk of injury with unsupervised children in the vehicleJIKA ANDA MENINGGALKAN ANAK-ANAK TANPA PENGAWASAN DI DALAM KENDARAAN, MEREKA DAPAT TERUTAMA
- Open doors and thereby endanger other persons or road users. • get out of the car and are hit by traffic. • Operate vehicle equipment and become trapped, forexample.SELAIN ITU, ANAK-ANAK JUGA DAPAT MENGGERAKKAN KENDARAAN, MISALNYA DENGAN:
• releasing the parking brake. • change the gearbox setting. - start the vehicle. ▶ Never leave children unattended in the vehicle. When leaving the vehicle, always take the SmartKey with you and lock the vehicle. ▶ Keep the key out of reach of children. CATATAN
Damage to the key caused by magnetic fields ▶ Keep the key away from strong magnetic fields. Kunci kendaraan
Locking 2 Indicator lamp 3 Unlocking If indicator lamp ☑ does not light up after pressing the ⏰ or Ⓤ button, the battery is weak or possibly discharged. Replace the battery as soon as possible. Replace the key battery ( → page 173).  G-Class - Owner's Manual Opening and closing Key KUNCI MENGUNCI DAN MEMBUKA KUNCI KOMPONEN BERIKUT:
Doors Fuel filler flap Rear-end door If the vehicle is not opened within approximately 40 seconds after unlocking, the vehicle is locked again. Anti-theft protection is primed again. Do not keep the key together with electronic devices or metal objects. This can affect the key's functionality. Do not keep the key in the temperature-controlled cup holder. Otherwise, the key will not be reliably detected.Mengaktifkan/menonaktifkan sinyal verifikasi penguncian akustik
Multimedia system:  ▶ Switch the Acoustic lock on or off.i Harap diperhatikan:
The selected setting for the acoustic locking verification signal must comply with the relevant national road traffic rules. In some countries, including Germany, using the acoustic locking verification signal is prohibited by traffic laws (in accordance with §16 Para. 1 and §30 Para. 1 of the German national road traffic regulations). The driver of the vehicle must comply with these regulations. In countries where the use of this function is prohibited, this function is not activated in the vehicle and must not be activated.Mengubah pengaturan pembukaan kunci
FUNGSI PEMBUKAAN KUNCI YANG MUNGKIN:
Central unlocking - Unlocking the driver's door and fuel filler flap To switch between settings: press the buttons ☐ and ☑ simultaneously for approximately six seconds until the indicator lamp flashes twice.PILIHAN JIKA FUNGSI PEMBUKAAN KUNCI UNTUK PINTU PENGEMUDI DAN TUTUP TANGKI BAHAN BAKAR TELAH DIPILIH:
• To unlock the vehicle centrally: press the button twice. - Vehicles with KEYLESS-GO: if you touch the inner surface of the door handle on the driver's door, only the driver's door and the fuel filler flap are unlocked.Menonaktifkan fungsi kunci
Vehicles with KEYLESS-GO: if you deactivate the key function, the KEYLESS-GO functions are also deactivated. Access or drive authorisation via KEYLESS-GO is then no longer possible with that key. Activate the function of the key so that all functions using the key are available once again. You can also deactivate the key's function to reduce the key's energy consumption if you do not use the vehicle or a key for an extended period of time.   G-Class - Owner's Manual Opening and closing Key Press and hold the key button ☑. With the button Ⓞ pressed, immediately press the key button Ⓝ twice in quick succession. The indicator lamp of the key lights up once briefly, and then again for longer.ANDA MEMILIKI OPSI BERIKUT UNTUK MENGAKTIFKAN KEMBALI KUNCI:
• Press any button on the key. - Start the vehicle with the key in the centre console storage compartment ( → page 273).Melepas/memasukkan kunci darurat MELEPAS KUNCI DARURAT
 Press the release knob ①. The emergency key ② is pushed out slightly. Pull out the emergency key ② until it engages in the intermediate position.  Depending on the vehicle's equipment, the intermediate position may not be available. Press the release knob ① again and fully remove the emergency key ②.MEMASUKKAN KUNCI DARURAT
 Press the release knob ①. Insert the emergency key ② to the intermediate position, or fully until it engages. ① You can use the emergency key ② to attach the key to a key ring. Depending on the respective configuration, it is possible to engage the emergency key ③ in the intermediate position.  G-Class - Owner's Manual Opening and closing Key Mengganti baterai kunci
BAHAYA
Risk of fatal injury due to swallowing batteries Batteries contain toxic and corrosive substances. If batteries are swallowed or otherwise enter the body, severe internal burns can occur within two hours. There is a risk of fatal injury! ▶ Keep the batteries out of the reach of children. If the lid and/or the battery compartment do not close securely, stop using the key and keep it away from children. If batteries are swallowed or otherwise enter the body, seek immediate medical attention. CATATAN LINGKUNGAN
Environmental damage due to improper disposal of batteries ☒ Batteries contain pollutants. It is illegal to dispose of them with the household rubbish. Dispose of batteries in an environmentally responsible manner. Take discharged batteries to a qualified specialist workshop or to a collection point for used batteries.Persyaratan:
• You need a CR 2032 lithium cell battery (3 V). Mercedes-Benz recommends that you have the battery replaced at a qualified specialist workshop. Remove the emergency key ( → page 172).  Press the release knob ② down fully and slide the cover ① in the direction of the arrow. Fold out the cover ① in the direction of the arrow and remove. Remove the battery compartment ③ and take out the discharged battery. Insert the new battery into the battery compartment ③. Observe the positive terminal marking in the battery compartment and on the battery. ▶ Push in the battery compartment ③. Re-attach the cover ① and push in until it engages.   G-Class - Owner's Manual Opening and closing Key Mengatasi masalah pada kunci
ANDA TIDAK DAPAT LAGI MENGUNCI ATAU MEMBUKA KUNCI KENDARAAN. KEMUNGKINAN PENYEBAB:
• The key battery is at low capacity or is flat. ▶ Check the battery via the indicator lamp ( → page 170). Replace the key battery as necessary ( → page 173). ▶ Use the replacement key. ▶ Use the emergency key to lock or unlock ( → page 177). Have the key checked at a qualified specialist workshop.ADA GANGGUAN DARI SUMBER SINYAL RADIO YANG KUAT. KEMUNGKINAN PENYEBAB JIKA FUNGSI KUNCI TERGANGGU:
• high-voltage power lines mobile phones • electronic devices (notebooks, tablets) • shielding due to metallic objects or induction loops for electrical gate systems or automatic barriers ▶ Ensure that there is sufficient distance between the key and the potential source of interference.ANDA KEHILANGAN KUNCI
Have the key deactivated at a qualified specialist workshop. If necessary, have the mechanical lock replaced as well.  G-Class - Owner's Manual Opening and closing Doors< Pintu
Unlocking/opening the doors from the inside  Pull the door handle. The safety pin Ⓞ pops up when the door is unlocked. Centrally locking and unlocking the vehicle from the inside  To unlock: press the button ①. To lock: press the button 2. This does not lock or unlock the fuel filler flap.KENDARAAN TIDAK TERBUKA SAAT TOMBOL Ⓛ DITEKAN:
• If you have locked the vehicle using the key • If you have locked the vehicle using KEYLESS-GOMengunci/membuka kunci kendaraan dengan KEYLESS-GO
Persyaratan:
• The key is outside the vehicle. • The distance between the key and the vehicle does not exceed 1 m. - The driver's door and the door on which the door handle is actuated are closed. G-Class - Owner's Manual Opening and closing Doors!
CATATAN
Damage to the vehicle resulting from unintentional locking or unlocking of the vehicle doors • when using a car wash • when using a high-pressure cleaner ▶ Deactivate functioning of the key in these situations. or ▶ Ensure that the key is at least 3 m away from the vehicle.PERHATIKAN INFORMASI:
• on washing the vehicle in a car wash ( → page 39) • on using a high-pressure cleaner ( → page 617)  To unlock the vehicle: touch the inside surface of the door handle. To lock the vehicle: touch the sensor surface ①. ▶ Convenience opening/closing: touch the recessed sensor surface until the closing process is completed. (i) More information on convenience opening ( → page 182) or convenience closing ( → page 182).Mengatasi masalah dengan KEYLESS-GO
ANDA TIDAK DAPAT LAGI MENGUNCI ATAU MEMBUKA KUNCI KENDARAAN MENGGUNAKAN KEYLESS-GO.
KEMUNGKINAN PENYEBAB:
• The function of the key has been deactivated. • The key battery is at low capacity or is flat. ▶ Activate the function of the key ( → page 68). ▶ Check the battery via the indicator lamp ( → page 170). Replace the key battery as necessary ( → page 173). ▶ Use the replacement key. Use the emergency key to lock or unlock ( → page 177). Have the vehicle and key checked at a qualified specialist workshop.ADA GANGGUAN DARI SUMBER SINYAL RADIO YANG KUAT. KEMUNGKINAN PENYEBAB JIKA FUNGSI KEYLESS-GO TERGANGGU:
• high-voltage power lines mobile phones    G-Class - Owner's Manual Opening and closing Doors • electronic devices (notebooks, tablets) • shielding due to metallic objects or induction loops for electrical gate systems or automatic barriers Ensure that there is sufficient distance between the key and the potential source of interference.Mengaktifkan/menonaktifkan penguncian otomatis di sistem multimedia MBUX
Multimedia system:  The vehicle is locked automatically when the vehicle is switched on and the wheels are turning faster than walking pace. ▶ Activate or deactivate Automatic locking.DALAM SITUASI BERIKUT, ADA BAHAYA TERKUNCI DI LUAR SAAT FUNGSI TERSEBUT DIAKTIFKAN:
• The vehicle is pushed. • If the vehicle is being tested on a roller dynamometer.Mengunci/membuka kunci pintu pengemudi dengan kunci darurat
If you unlock and open the driver's door with the emergency key, the anti-theft alarm system is triggered.  i Information on starting the vehicle in emergency operation mode ( → page 273).  Remove the emergency key ( → page 172). Insert the emergency key into the lock of the driver's door as far as it will go. To unlock: turn the emergency key anti-clockwise as far as it will go to position 1. Then turn the emergency key back into the starting position again. To lock: turn the emergency key clockwise as far as it will go to position 2. Then turn the emergency key back into the starting position again. Vehicles with "G-MANUFAKTUR Logo package" special equipment: the lock cylinder for emergency unlocking is located in the door handle on the rear-end door.  G-Class - Owner's Manual Opening and closing Rear-end doorPintu belakang
Membuka dan menutup pintu belakang
BAHAYA
Risk of exhaust gas poisoning Combustion engines emit poisonous exhaust gases such as carbon monoxide. If the rear doors or the rear-end door are open with the engine running, and in particular during a journey, exhaust gases could be directed into the vehicle interior. ▶ Always switch off the engine before opening the rear door. ▶ Never drive the vehicle with the rear door or rear-end door open. PERINGATAN
Risk of injury from unsecured items in the vehicle If objects, luggage or loads are not secured or not secured sufficiently, they could slip, tip over or be thrown around and thereby hit vehicle occupants. There is a risk of injury, particularly in the event of sudden braking or a sudden change in direction. ▶ Always stow objects in such a way that they cannot be thrown around. Before the journey, secure objects, luggage or loads against slipping or tipping over. Observe the "Notes on loading the vehicle". CATATAN
Damage when opening the rear-end door The rear-end door swings out to the side when it is opened. ▶ Ensure that there is sufficient clearance.  G-Class - Owner's Manual Opening and closing Rear-end door  To open: press the button ☐ on the key. ① The "Central unlocking" unlocking setting must be selected ( → page 171). Press the release knob ① and pull the door handle ②. Open the rear-end door. To close: push the rear-end door closed. Press the button 🔒 on the key. The rear-end door is locked.KENDARAAN DENGAN KEYLESS-GO
PERSYARATAN:
• The key is outside the vehicle. • The distance between the key and the vehicle does not exceed 1 m. To unlock the rear-end door: press the release knob ① once. To open the rear-end door: press the release knob ① again and pull on the door handle ②. To close and lock the rear-end door: push the rear-end door closed.  G-Class - Owner's Manual Opening and closing Side windowsKaca samping
Membuka dan menutup kaca samping
PERINGATAN
Risk of becoming trapped when opening a side window When you open a side window, parts of the body could be drawn in or become trapped between the side window and window frame. When opening, make sure that nobody is touching the side window. If someone is trapped, release the button immediately or pull it in order to close the side window again. PERINGATAN
Risk of becoming trapped when closing a side window When closing a side window, body parts could be trapped in the closing area in the process. When closing, make sure that no body parts are in the closing area. If someone is trapped, release the button immediately or press the button in order to reopen the side window.  PERINGATAN
Risk of becoming trapped when children operate the side windows Children could become trapped if they operate the side windows, particularly when unattended. ▶ Activate the child safety lock for the rear side windows. When leaving the vehicle, always take the key with you and lock the vehicle. ▶ Never leave children unattended in the vehicle.Persyaratan:
• The power supply or the vehicle has been switched on.  G-Class - Owner's Manual Opening and closing Side windows  Closing To open The buttons on the driver's door take precedence. To start automatic operation: press the button beyond the point of resistance or pull and release it. To interrupt automatic operation: press or pull the [ ] button again. When the vehicle is switched off, you can continue to operate the side windows. This function will be available for around four minutes or until a front door is opened.FUNGSI PEMBALIKAN OTOMATIS PADA KACA SAMPING
If an obstacle impedes a side window during the closing process, the side window will open again automatically. The automatic reversing function serves solely as an aid and is not a substitute for your attentiveness. During the closing process, ensure that no body parts remain within the closing area.  ▲ WARNING Risk of becoming trapped despite there being reversing protection on the side windowFUNGSI PEMBALIKAN TIDAK BERFUNGSI:
• to soft, light and thin objects, e.g. fingers. • during resetting. The reversing function cannot prevent someone from becoming trapped in these situations. During the closing process, make sure that no body parts are in the closing area. If someone becomes trapped, press the ☐ button to open the side window again.  Pembukaan kenyamanan (ventilasi kendaraan sebelum memulai perjalanan)
PERINGATAN
Risk of entrapment when opening a side window When opening a side window, parts of the body could be drawn in or become trapped between the side window and window frame. When opening, make sure that nobody is touching the side window. ▶ Release the button immediately if somebody becomes trapped.Persyaratan:
• The key is in immediate proximity to the vehicle. Press and hold the ⏻ button on the key.FUNGSI-FUNGSI BERIKUT DILAKUKAN:
• The vehicle is unlocked. • The side windows open. • The sliding sunroof opens. • The driver's seat ventilation is switched on. Interrupt convenience opening: Release the 📄 button. Continue convenience opening: Press and hold the 📄 button again. i Convenience opening also functions with KEYLESS-GO ( → page 175).Penutupan kenyamanan (menutup kendaraan dari luar)
PERINGATAN
Risk of entrapment due to not paying attention during convenience closing When the convenience closing feature is operating, parts of the body could become trapped in the closing area of the side window and the sliding sunroof. When the convenience closing feature is operating, monitor the entire closing process and make sure that no body parts are in the closing area.Persyaratan:
• The key is in immediate proximity to the vehicle. Press and hold the Ⓤ button on the key.FUNGSI-FUNGSI BERIKUT DILAKUKAN:
• The vehicle is locked. • The side windows are closed. • The sliding sunroof is closed.  G-Class - Owner's Manual Opening and closing Side windows To interrupt convenience closing: release the Ⓗ button. To continue convenience closing: press and hold the ☐ button again. (i) Convenience closing also functions with KEYLESS-GO ( → page 175).Mengatasi masalah pada kaca samping
PERINGATAN
Risk of becoming trapped or fatally injured if reversing protection is not activated If you close a side window again immediately after it has been blocked, the side window will close with increased or maximum force. The reversing function is then not active and body parts may become trapped. ▶ Make sure that no parts of the body are in the closing area. To stop the closing process, release the button or press the button again to reopen the side window.KACA SAMPING TIDAK DAPAT DITUTUP DAN ANDA TIDAK DAPAT MELIHAT PENYEBABNYA.
▶ Check to see whether any objects are in the window guide. Adjust the side windows. Adjusting the side windows If a side window is obstructed during closing and reopens again immediately: Immediately after this, pull and hold the corresponding button again until the side window has closed and hold the button for at least one more second (re-adjustment). The side window will be closed without the automatic reversing function. If the side window is obstructed again and reopens again immediately: Immediately after this, pull and hold the corresponding button again until the side window has closed and hold the button for at least one more second (follow-up adjustment). The side window will be closed without the automatic reversing function. If a side window is obstructed again during closing and reopens again slightly, consult a qualified specialist workshop.KACA SAMPING TIDAK DAPAT DIBUKA ATAU DITUTUP MENGGUNAKAN FITUR PEMBUKAAN KENYAMANAN.
KEMUNGKINAN PENYEBAB:
• The key is not in the immediate vicinity of the vehicle. • The key battery is at low capacity or is flat. ▶ Check the battery using the indicator lamp ( → page 170). Replace the key battery, if necessary ( → page 173).  G-Class - Owner's Manual Opening and closing Sliding sunroofSunroof geser
Membuka dan menutup sunroof geser
PERINGATAN
Risk of becoming trapped when the sliding sunroof is being opened and closed Body parts may become trapped in the range of movement. During opening and closing, make sure that no body parts are in the range of movement. ▶ Release the button immediately if somebody becomes trapped. or ▶ Briefly press the button in any direction during automatic operation. The opening or closing process will be stopped.  PERINGATAN
Risk of entrapment if the sliding sunroof is operated by children Children operating the sliding sunroof could get caught in the moving parts, particularly if unattended. ▶ Never leave children unattended in the vehicle. When leaving the vehicle, always take the key with you and lock the vehicle. CATATAN
Malfunction due to snow and ice Snow and ice may cause the sliding sunroof to malfunction. ▶ Open the sliding sunroof only if it is free of snow and ice. CATATAN
Damage caused by moisture ingress Do not open the sliding sunroof if it has just rained. Do not open the sliding sunroof immediately after washing the vehicle in a car wash.   G-Class - Owner's Manual Opening and closing Sliding sunroof CATATAN
Damage caused by protruding objects Objects that protrude from the sliding sunroof may damage the seals. Do not allow anything to protrude from the sliding sunroof. CATATAN
Damage to the sliding sunroof due to insufficient headroom When the sliding sunroof is raised, the vehicle will be higher than 2 m. ▶ Ensure that sufficient headroom is available before you open the sliding sunroof in garages or multi-storey car parks, for example. CATATAN
Damage to the sliding sunroof when a roof luggage rack is fitted When a roof luggage rack is fitted, raising or opening the sliding sunroof may be restricted. ▶ Check whether the sliding sunroof can be raised or opened when a roof luggage rack is fitted. If in doubt, do not raise or open the sliding sunroof.  To raise To open To close/lower To start automatic operation: press the button beyond the point of resistance or pull and release it. To interrupt automatic operation: briefly press the ☐ button in any direction. The opening/closing process will be stopped.FUNGSI PEMBALIKAN OTOMATIS PADA ATAP MOBIL GESER
If an obstacle obstructs the sliding sunroof during the closing process, the sliding sunroof will open again automatically. The automatic reversing function serves solely as an aid and is not a substitute for your attentiveness. Keep the opening area and the guide rails free of debris, e.g. ice, snow or leaves. When closing the sliding sunroof, make sure that no body parts or objects are in the closing area.   G-Class - Owner's Manual Opening and closing Sliding sunroof A
PERINGATAN
Risk of becoming trapped despite the reversing function being activeKHUSUSNYA, FUNGSI PEMBALIKAN TIDAK BERREAKSI:
• to soft, light and thin objects, e.g. fingers. • towards the end of the closing procedure. • during resetting. During the closing process, make sure that no body parts are in the closing area. ▶ Release the button immediately if somebody becomes trapped. or ▶ Briefly press the button in any direction during automatic operation. The closing process will be stopped.Fungsi otomatis atap mobil geser
ATAP MOBIL GESER AKAN DITUTUP OTOMATIS KETIKA KENDARAAN TELAH DIMATIKAN DALAM SITUASI BERIKUT:
- if it starts to rain Rain will be detected by a rain sensor on the windscreen. • in extreme temperatures - after a certain time (depending on the on-board electrical system voltage) • if there is a malfunction in the power supply The sliding sunroof will rise at the rear in order to continue ventilating the vehicle interior. If the sliding sunroof is obstructed during an automatic closing procedure, it will be opened again slightly. The automatic function for the sliding sunroof and the side windows will then be deactivated.Memperbaiki masalah pada atap mobil geser
A
PERINGATAN
Risk of becoming trapped or fatal injuries when the sliding sunroof is closed again If the sliding sunroof is closed again immediately after it has been blocked or reset, it will close with increased force. ▶ Make sure that no parts of the body are in the closing area. ▶ Release the button immediately if somebody becomes trapped. or ▶ Briefly press the button in any direction during the automatic closing process. The closing process will be stopped.ATAP MOBIL GESER TIDAK DAPAT DITUTUP DAN ANDA TIDAK DAPAT MELIHAT PENYEBABNYA.
If the sliding sunroof is obstructed during closing and reopens again slightly:   G-Class - Owner's Manual Opening and closing Sliding sunroof Immediately after automatic reversing, pull and hold the [☐] button down again to the point of resistance until the sliding sunroof is closed. The sliding sunroof will be closed with increased force. If the sliding sunroof is obstructed again and opens again slightly: ▶ Repeat the previous step. The sliding sunroof will be closed again with increased force. Vehicles without a panorama sliding sunroof: the sliding sunroof is not operating smoothly. Reset the sliding sunroof.Mengatur ulang atap mobil geser
▶ Push the ☐ button up to the point of resistance repeatedly until the sliding sunroof is fully open. Press the button for another second. ▶ Close the sliding sunroof.   G-Class - Owner's Manual Opening and closing Anti-theft protection Perlindungan anti-pencurian
Fungsi immobiliser
The immobiliser prevents your vehicle from being started without the correct key. The immobiliser is automatically activated when the vehicle is switched off, and deactivated when the vehicle is switched on.ATA (Sistem Alarm Anti-Pencurian)
FUNGSI SISTEM ATA
JIKA SISTEM ATA DIAKTIFKAN, ALARM VISUAL DAN SUARA AKAN BERBUNYI DALAM SITUASI BERIKUT:
• when a door is opened • when the rear-end door is opened • when the bonnet is opened • when the interior protection is triggered ( → page 190) • when the tow-away protection is triggered (→ page 189)SISTEM ATA DIAKTIFKAN SECARA OTOMATIS SETELAH KIRA-KIRA SEPULUH DETIK DALAM SITUASI BERIKUT:
• After locking the vehicle with the key • After locking the vehicle using KEYLESS-GO  The indicator lamp ● flashes when the ATA system is primed.SISTEM ATA DINONAKTIFKAN SECARA OTOMATIS DALAM SITUASI BERIKUT:
• After unlocking the vehicle with the key • After unlocking the vehicle using KEYLESS-GO • After pressing the Start/Stop button with the key in the storage compartment ( → page 273)MENONAKTIFKAN ALARM SISTEM ATA
Press the button ☑ or ⏰ on the key. or Press the Start/Stop button with the key in the storage compartment ( → page 273)   G-Class - Owner's Manual Opening and closing Anti-theft protectionMENONAKTIFKAN ALARM MENGGUNAKAN KEYLESS-GO:
▶ Cover the outside door handle with the key outside the vehicle. The distance between key and vehicle here should not be greater than 1 m.Penonaktifan Kunci Darurat
PERSYARATAN:
- Your smartphone and your vehicle have an active data connection. • The vehicle battery is sufficiently charged. • To deactivate all keys: there is no other key in the vehicle. • There are no persons or animals in the vehicle. • The vehicle is parked in a safe place. ① Only use the Emergency Key Deactivation function in an emergency. If you deactivate all keys, they can only be reactivated within 30 days. After 30 days or if the battery state of charge is low, the vehicle must be unlocked and opened using the emergency key. Where is the vehicle key? Misplaced, lost or stolen? Emergency Key Deactivation provides you with the option to deactivate specific keys or all vehicle keys in the event of loss or theft, and to reactivate them when the keys have been found again.Berikut cara kerjanya:
Open ☐ in the Mercedes-Benz App and select the vehicle. The My garage menu appears. Select Service management. ▶ Activate Emergency Key Deactivation.NONAKTIFKAN KUNCI TERTENTU ATAU SEMUA KUNCI
Select in the Mercedes-Benz App. ▶ Select Emergency Key Deactivation. ▶ Deactivate specific keys or Deactivate all keys. Select Confirm. Enter the four-digit PIN and select Send. The request will be sent. If deactivation is successful, you will receive a message that a specific key or all keys have been deactivated.AKTIFKAN SEMUA KUNCI
▶ Select Emergency Key Deactivation. Select Activate all keys. Enter the four-digit PIN and select Send. The request will be sent. If activation is successful, you will receive a message that all keys have been activated.Fungsi perlindungan penarik
A visual and audible alarm is triggered if an alteration to your vehicle's angle of inclination is detected while tow-away protection is primed.  G-Class - Owner's Manual Opening and closing Anti-theft protectionPERLINDUNGAN PENARIK DIAKTIFKAN SECARA OTOMATIS SETELAH SEKITAR 60 DETIK:
• After locking the vehicle with the key • After locking the vehicle using KEYLESS-GOPerlindungan derek hanya aktif ketika komponen berikut ditutup:
- Doors - Rear-end doorPerlindungan derek otomatis nonaktif:
• After pressing the button ☑ on the key - After pressing the start/stop button with the key in the storage compartment ( → page 273) • After unlocking the vehicle using KEYLESS-GO Information on collision detection on a parked vehicle ( → page 336).Mengaktifkan/menonaktifkan perlindungan derek
Multimedia system: Settings Vehicle Open/close Vehicle protection ▶ Activate or deactivate Tow-away protection.Perlindungan derek aktif kembali dalam kasus berikut:
• The vehicle is unlocked again. • A door is opened. • The vehicle is locked again.Fungsi perlindungan interior
When interior protection is primed, a visual and audible alarm is triggered if movement is detected in the vehicle interior.Perlindungan interior aktif otomatis setelah sekitar sepuluh detik:
• After locking the vehicle with the key • After locking the vehicle using KEYLESS-GOPerlindungan interior hanya aktif ketika komponen berikut ditutup:
- Doors • Rear-end doorPerlindungan interior otomatis nonaktif:
• After pressing the button 🔒 on the key • After pressing the start/stop button with the key in the storage compartment ( → page 273) • After unlocking the vehicle using KEYLESS-GOSituasi berikut dapat menyebabkan alarm palsu:
- When there are moving objects such as mascots in the vehicle interior • If a side window is open • If the sliding sunroof is open   G-Class - Owner's Manual Opening and closing Anti-theft protection Mengaktifkan/menonaktifkan perlindungan interior
Multimedia system: Settings Vehicle Open/close Vehicle protection ▶ Activate or deactivate Interior protection. INTERIOR PROTECTION IS PRIMED AGAIN IN THE FOLLOWING CASES: • The vehicle is unlocked again. • A door is opened. • The vehicle is locked again.  Back to Contents G-Class - Owner's Manual Seats and stowing < Kursi dan penyimpanan
This interactive PDF works like a website - tap or click a button to jump straight to where you want to go. You can return here at any time via the navigation bar at the top left. Notes on the correct driver's seat position 193 Cup holders 227 Notes on grab handles 194 Ashtray and cigarette lighter 231 Seats 195 Sockets 233 Steering wheel 203 Wireless charging of a mobile phone in the cockpit 204 Easy entry and exit feature 205 Fitting/removing the floor mats 237 Memory function 207 Stowage areas 210 G-Class - Owner's Manual > Seats and stowing Notes on the correct driver's seat position Catatan tentang posisi kursi pengemudi yang benar
PERINGATAN
Risk of accident due to adjusting the vehicle settings while the vehicle is in motionANDA BISA KEHILANGAN KENDALI KENDARAAN TERUTAMA DALAM SITUASI BERIKUT:
- if you adjust the driver's seat, the head restraint, the steering wheel or the mirror while the vehicle is in motion • if you fasten your seat belt while the vehicle is in motion Before starting the vehicle: in particular, adjust the driver's seat, head restraint, steering wheel and mirror, and fasten your seat belt. PASTIKAN HAL BERIKUT SAAT MENYESUAIKAN RODA KEMUDI ①, SABUK KESELAMATAN ②, DAN KURSI PENGEMUDI ③:
- You are sitting as far away from the driver's airbag as possible, taking the following points into consideration: • You are sitting in an upright position - Your thighs are slightly supported by the seat cushion - Your legs are not fully extended and you can depress the pedals properly - The back of your head is supported at eye level by the centre of the head restraint • You can hold the steering wheel with your arms slightly bent • You can move your legs freely • You can see all the indicators on the driver's display clearly • You have a good overview of the traffic conditions - Observe the notes on correctly fastening the seat belt (→ page 122). G-Class - Owner's Manual Seats and stowing Notes on grab handlesCatatan tentang pegangan pegangan
PERINGATAN
Risk of injury due to excessive load on the grab handles If you apply your full body weight to the grab handle or pull it abruptly, the grab handle may be damaged or come loose from its anchorage. This may result in injuries. ▶ Use the grab handles only to stabilise the seating position or to assist in getting in and out of the seat.   G-Class - Owner's Manual Seats and stowing Seats< Kursi
Menyetel kursi depan secara elektrik
PERINGATAN
Risk of becoming trapped if the seats are adjusted by children. Children could become trapped if they adjust the seats, particularly when unattended. When leaving the vehicle, always take the key with you and lock the vehicle. ▶ Never leave children unattended in the vehicle. You can adjust the seats when the vehicle is switched off. PERINGATAN
Risk of becoming trapped if the seats are adjusted When adjusting a seat, you may trap yourself or a vehicle occupant, e.g. on the seat guide rail. Make sure that no part of the body is within the seat's range of motion when adjusting a seat. Observe the safety notes on "Airbags" and "Children in the vehicle".  PERINGATAN
Risk of accident due to adjusting the vehicle settings while the vehicle is in motionANDA BISA KEHILANGAN KENDALI ATAS KENDARAAN TERUTAMA DALAM SITUASI BERIKUT:
- if you adjust the driver's seat, the head restraint, the steering wheel or the mirror while the vehicle is in motion • if you fasten your seat belt while the vehicle is in motion Before starting the vehicle: in particular, adjust the driver's seat, head restraint, steering wheel and mirror, and fasten your seat belt. PERINGATAN
Risk of becoming trapped if the seat height is adjusted carelessly If you adjust the seat height carelessly, you or other vehicle occupants could be trapped and thereby injured. Children in particular could accidentally press the electrical seat adjustment buttons and become trapped. While moving the seats, make sure that hands or other body parts do not get under the lever assembly of the seat adjustment system.  G-Class - Owner's Manual Seats and stowing SeatsA
PERINGATAN
Risk of injury due to head restraints not being fitted or being adjusted incorrectly If head restraints have not been installed or have not been adjusted correctly, there is an increased risk of injury in the head and neck area, e.g. in the event of an accident or when braking. ▶ Always drive with the head restraints fitted. Before driving off, make sure for every vehicle occupant that the centre of the head restraint supports the back of the head at about eye level. Do not interchange the head restraints of the front and rear seats. Otherwise, you will not be able to adjust the height and angle of the head restraints correctly. Adjust the head restraint fore-and-aft position so that it is as close as possible to the back of your head.A
PERINGATAN
Risk of injury or death due to incorrect seat position The seat belt will not offer the intended level of protection if you have not moved the seat backrest to an almost vertical position. In particular, you may slip under the seatbelt and injure yourself. Adjust the seat properly before beginning your journey. ▶ Always ensure that the seat backrest is in an almost vertical position and that the shoulder section of your seat belt is routed across the centre of your shoulder. A
PERINGATAN
Risk of potentially fatal injuries due to objects trapped under the front passenger seat Objects trapped under the front passenger seat may interfere with the function of the automatic front passenger airbag shutoff or damage the system. Do not stow any objects under the front passenger seat. When the front passenger seat is occupied, ensure that no objects have become trapped beneath the front passenger seat.CATATAN
Damage to the seats when adjusting The seats may be damaged by objects when adjusting the seats. When adjusting the seats, make sure that there are no objects in the footwell, under or behind the seats. G-Class - Owner's Manual Seats and stowing Seats  ① Head restraint height ② Seat backrest inclination 3 Seat height Seat cushion length Seat cushion inclination 6 Seat fore-and-aft position Save the settings with the memory function ( → page 208).Sandaran kepala
MENYESUAIKAN SANDARAN KEPALA MEWAH KURSI DEPAN SECARA MANUAL
PERINGATAN
Risk of accident due to adjusting the vehicle settings while the vehicle is in motionANDA DAPAT KEHILANGAN KENDALI KENDARAAN TERUTAMA DALAM SITUASI BERIKUT:
- if you adjust the driver's seat, the head restraint, the steering wheel or the mirror while the vehicle is in motion • if you fasten your seat belt while the vehicle is in motion Before starting the vehicle: in particular, adjust the driver's seat, head restraint, steering wheel and mirror, and fasten your seat belt.PERINGATAN
Risk of injury due to incorrectly adjusted head restraints If head restraints have not been adjusted correctly, there is an increased risk of injury in the head and neck area, e.g. in the event of an accident or sudden braking. Before driving off, make sure for every vehicle occupant that the centre of the head restraint supports the back of the head at about eye level. G-Class - Owner's Manual Seats and stowing Seats  To adjust the side bolsters of the head restraint (equipment-dependent): pull or push right or left side bolster ②. To move forwards: pull the head restraint forwards. To move backwards: press release knob and push the head restraint backwards.MENYESUAIKAN SANDARAN KEPALA KURSI BELAKANG SECARA MANUAL
PERINGATAN
Risk of injury due to head restraints not being fitted or being adjusted incorrectly If head restraints have not been installed or have not been adjusted correctly, there is an increased risk of injury in the head and neck area, e.g. in the event of an accident or when braking. ▶ Always drive with the head restraints fitted. Before driving off, make sure for every vehicle occupant that the centre of the head restraint supports the back of the head at about eye level.  To raise: pull the head restraint up. To lower: press release button Ⓤ and push the head restraint down. If the centre rear seat is not occupied: move the head restraint all the way down.MENYESUAIKAN SUDUT SANDARAN KEPALA BELAKANG
You can adjust only the two outer head restraints. ▶ Pull or push the bottom edge of the head restraint forwards or backwards until the desired position has been reached. G-Class - Owner's Manual Seats and stowing Seats MEMASANG/MELEPAS SANDARAN KEPALA KURSI BELAKANG
PERINGATAN
Risk of injury due to head restraints not being fitted or being adjusted incorrectly If head restraints have not been installed or have not been adjusted correctly, there is an increased risk of injury in the head and neck area, e.g. in the event of an accident or when braking. ▶ Always drive with the head restraints fitted. Before driving off, make sure for every vehicle occupant that the centre of the head restraint supports the back of the head at about eye level. REMOVING  ▶ Pull the head restraint upwards as far as it will go. ▶ Push release knob ① in the direction of the arrow and pull out the head restraint. FITTING  Insert the head restraint such that the notches on the bar are on the left when viewed in the direction of travel. ▶ Push the head restraint down until it engages.Mengonfigurasi penyesuaian kursi
Multimedia system:      MENYESUAIKAN BANTALAN UDARA
On the corresponding menu, adjust the air cushions for Lumbar or Side bolsters.MENGATUR KESEIMBANGAN PEMANAS KURSI
Select Heating settings. ▶ Select Seat heating balance. Adjust the heat distribution for the desired seat.   G-Class - Owner's Manual Seats and stowing SeatsIkhtisar program pijat
The availability of the massage function for the various seats is dependent on the vehicle equipment. - Hot Relaxing back Combination of heat and massage. It starts by massaging the back. In addition, you will start to notice warm pressure points, beginning in the pelvic area. - Activating Massage Activating massage with upward-moving massage waves. • Classic Massage Relaxing back massage. - Wave Massage Regenerating massage programme via massage waves across the back and in the seat cushion. - Mobilizing Massage Mobilising massage with upward-moving massage waves. Can promote deeper respiration and hence improve circulation and blood pressure. - Active Workout backrest and Active Workout cushion These programmes require your cooperation. Alternating between tensing and releasing helps to improve blood flow to your muscles. Press against a pressure point as soon as you feel it.Memilih program pijat untuk kursi depan
Multimedia system:  Select Massage. Select a massage programme ( → page 200). Start the programme for the desired seat ▶. To set the massage intensity: switch High intensity on or off. To stop the massage: select ■. i Availability of this function depends on the respective equipment.Mengatur ulang penyesuaian kursi
Multimedia system:  Select Reset. Select 📄 for the desired seat. The settings for the selected seat will be reset. G-Class - Owner's Manual Seats and stowing SeatsMenghidupkan/mematikan pemanas kursi
PERINGATAN
Risk of burns due to repeatedly switching on the seat heating Repeatedly switching on the seat heating can cause the seat cushion and seat backrest padding to become very hot. In particular, the health of persons with limited temperature sensitivity or a limited ability to react to high temperatures may be affected or they may even suffer burn-like injuries. ▶ Do not repeatedly switch on the seat heating. Front seat heating To protect against overheating, the seat heating may be temporarily deactivated after it has been switched on repeatedly. CATATAN
Damage to the seats caused by objects or documents when the seat heater is switched on When the seat heater is switched on, overheating may occur due to objects or documents placed on the seats e.g. seat cushions or child seats. This could cause damage to the seat surface. ▶ Make sure that no objects or documents are on the seats when the seat heater is switched on.Persyaratan:
• The power supply is switched on. Rear seat heating Press button ① repeatedly until the desired heating level is set. Depending on the heating level, up to three indicator lamps will light up. If all indicator lamps are off, the seat heating is switched off. G-Class - Owner's Manual Seats and stowing Seats The seat heating will automatically switch down from the three heating levels after 8, 18 and 35 minutes until the seat heating is switched off.Menghidupkan/mematikan ventilasi kursi
Persyaratan
• The power supply is switched on.  Press button ① repeatedly until the desired blower setting has been reached. Depending on the blower setting, up to three indicator lamps will light up. If all indicator lamps are off, the seat ventilation is switched off.   G-Class - Owner's Manual Seats and stowing Steering wheel< Roda kemudi
Menyesuaikan roda kemudi secara elektrik
PERINGATAN
Risk of accident due to adjusting the vehicle settings while the vehicle is in motionANDA BISA KEHILANGAN KENDALI KENDARAAN TERUTAMA DALAM SITUASI BERIKUT:
- if you adjust the driver's seat, the head restraint, the steering wheel or the mirror while the vehicle is in motion • if you fasten your seat belt while the vehicle is in motion Before starting the vehicle: in particular, adjust the driver's seat, head restraint, steering wheel and mirror, and fasten your seat belt. PERINGATAN
Risk of entrapment for children when adjusting the steering wheel Children could injure themselves if they adjust the steering wheel. ▶ Never leave children unattended in the vehicle. When leaving the vehicle, always take the key with you and lock the vehicle. The steering wheel can be adjusted when the vehicle is switched off.  To adjust the distance to the steering wheel To adjust the height Save the settings with the memory function ( → page 208). If the driver's door is open, the steering wheel can be adjusted for up to 30 minutes after the vehicle has been switched off.Menghidupkan/mematikan pemanas roda kemudi
Persyaratan
• The vehicle is switched on.   G-Class - Owner's Manual > Seats and stowing Steering wheel  Turn the lever in the direction of arrow ① or ②. If indicator lamp lights up, the steering wheel heater is switched on. When you switch the vehicle off, the steering wheel heater will switch off.   G-Class - Owner's Manual Seats and stowing Easy entry and exit featureFitur masuk dan keluar yang mudah
Menggunakan fitur masuk dan keluar yang mudah
PERINGATAN
Risk of accident when pulling away during the adjustment process of the easy entry and exit feature You could lose control of the vehicle. ▶ Always wait until the adjustment process is complete before driving off.  PERINGATAN
Risk of becoming trapped during adjustment of the easy entry and exit feature You and other vehicle occupants could become trapped. ▶ Ensure that no one has a body part in the sweep of the seat or steering wheel. ▶ If somebody becomes trapped, press a memory function position button. or ▶ Press the memory function memory button. or Move the steering column adjustment switch in the opposite direction to the steering wheel's direction of movement. The adjustment process is stopped.   G-Class - Owner's Manual Seats and stowing Easy entry and exit feature A
PERINGATAN
Risk of becoming trapped if children activate the easy entry and exit feature Children could become trapped if they activate the easy entry and exit feature, particularly when unattended. ▶ Never leave children unattended in the vehicle. When leaving the vehicle, always take the key with you and lock the vehicle.JIKA FITUR MASUK DAN KELUAR YANG MUDAH AKTIF, RODA KEMUDI AKAN BERGERAK KE ATAS ATAU MENUJU DASHBOARD SAAT:
• you switch off the vehicle • you open the driver's door when the vehicle is switched on When the steering wheel is at the limit of its range of movement, it will not move upwards.RODA KEMUDI AKAN KEMBALI KE POSISI BERKENDARA TERAKHIR JIKA:
• you switch the vehicle on when the driver's door is closed • you close the driver's door when the vehicle is switched onPOSISI BERKENDARA TERAKHIR AKAN DISIMPAN SAAT:
• you switch off the vehicle • you save the steering column adjustment with the memory function If you press one of the memory function position switches, the adjustment process will be stopped.Mengatur fitur masuk dan keluar yang mudah
Persyaratan:
• The power supply or the vehicle has been switched on. Multimedia system: Settings Vehicle Comfort Easy entry and exit featureMENGATUR FITUR MASUK DAN KELUAR YANG MUDAH
Select Steering wheel and seat, Steering wheel only or Off. If you are using a custom user profile, this information will be used for the easy entry and exit feature. This will cause the driver's seat and steering wheel to move into the correct position automatically ( → page 458). G-Class - Owner's Manual Seats and stowing Memory function< Fungsi memori
Fungsi dari fungsi memori
PERINGATAN
Risk of an accident if the memory function is used while driving. If you use the memory function on the driver's side while driving, you could lose control of the vehicle as a result of the adjustments being made. ▶ Only use the memory function on the driver's side when the vehicle is stationary. PERINGATAN
Risk of entrapment when adjusting the seat with the memory function When the memory function adjusts the seat or steering wheel, you and other vehicle occupants - particularly children - could become trapped. During the adjusting process of the memory function, ensure that no body parts are in the sweep of the seat or the steering wheel. If somebody becomes trapped, immediately release the memory function position button. The adjustment process is stopped.  PERINGATAN
Danger of entrapment when memory function is activated by children When children activate the memory function, they can get trapped, especially if they are unsupervised. ▶ Never leave children unattended in the vehicle. When leaving the vehicle, always take the key with you and lock the vehicle. You can use the memory function when the vehicle is switched off. Seat adjustments for up to three people can be stored and called up using the memory function.ANDA DAPAT MENYIMPAN PENGATURAN UNTUK SISTEM BERIKUT:
- Seat, backrest and head restraint - Steering wheel - Outside mirrors  G-Class - Owner's Manual > Seats and stowing Memory functionMengoperasikan fungsi memori
PERINGATAN
Risk of an accident if the memory function is used while driving If you use the memory function on the driver's side while driving, you could lose control of the vehicle as a result of the adjustments being made. ▶ Only use the memory function on the driver's side when the vehicle is stationary. PERINGATAN
Risk of entrapment when adjusting the seat with the memory function When the memory function adjusts the seat or steering wheel, you and other vehicle occupants - particularly children - could become trapped. During the adjusting process of the memory function, ensure that no body parts are in the sweep of the seat or the steering wheel. If somebody becomes trapped, immediately release the memory function position button. The adjustment process is stopped.  PERINGATAN
Danger of entrapment when memory function is activated by children When children activate the memory function, they can get trapped, especially if they are unsupervised. ▶ Never leave children unattended in the vehicle. When leaving the vehicle, always take the key with you and lock the vehicle. You can use the memory function when the vehicle is switched off.  To store: Set the desired position for all systems. Press the M memory button and then press the memory position button 1, 2 or 3 within three seconds. An acoustic signal sounds. The settings are stored. To call up: Press and hold preset position button 1, 2 or 3 until all the systems are in the stored position.   G-Class - Owner's Manual Seats and stowing Memory function You can watch an animation on this topic via the following link:   G-Class - Owner's Manual Seats and stowing Stowage areasArea penyimpanan
Catatan tentang memuat kendaraan
BAHAYA
Risk of exhaust gas poisoning Combustion engines emit poisonous exhaust gases such as carbon monoxide. If the rear doors or the rear-end door are open with the engine running, and in particular during a journey, exhaust gases could be directed into the vehicle interior. ▶ Always switch off the engine before opening the rear door. ▶ Never drive the vehicle with the rear door or rear-end door open. Objects in the deployment area of an airbag may prevent the airbag from functioning correctly. Observe the notes on airbags ( → page 140). PERINGATAN
Risk of injury from unsecured items in the vehicle If objects, luggage or loads are not secured or not secured sufficiently, they could slip, tip over or be thrown around and thereby hit vehicle occupants. There is a risk of injury, particularly in the event of sudden braking or a sudden change in direction. ▶ Always stow objects in such a way that they cannot be thrown around. Before the journey, secure objects, luggage or loads against slipping or tipping over.   G-Class - Owner's Manual Seats and stowing Stowage areas PERINGATAN
Risk of injury due to unsuitable stowage of objects If objects in the vehicle interior are stowed incorrectly, they may slide or be thrown around and hit vehicle occupants. In addition, cup holders, open stowage spaces and mobile phone receptacles may not, in the event of an accident, retain all the objects they contain. There is a risk of injury, particularly in the event of braking manoeuvres or abrupt changes in direction. ▶ Always stow objects in such a way that they cannot be thrown around in these or similar situations. ▶ Always ensure that objects do not protrude from stowage compartments, luggage nets or stowage nets. ▶ Close the lockable stowage spaces before starting a journey. ▶ Stow and secure objects that are heavy, hard, pointed, sharpedged, fragile or too large in the load compartment. PERINGATAN
Risk of accident due to objects in the driver's footwell Objects in the driver's footwell may impede pedal travel or block a depressed pedal. This will jeopardise the operating and road safety of the vehicle. Stow all objects in the vehicle securely so that they cannot get into the driver's footwell. ▶ Make sure that there is always sufficient clearance for the pedals. ▶ Always fit the floor mats securely and as prescribed. Do not use loose floor mats and do not place floor mats on top of one another. Vehicles with automatic front passenger airbag shut-off: objects trapped under the front passenger seat may interfere with the function of the automatic front passenger airbag shut-off or damage the system. Therefore please observe the notes on the function of automatic front passenger airbag shut-off ( → page 127).   G-Class - Owner's Manual Seats and stowing Stowage areas CATATAN
Damage to the vehicle caused by spilled liquids If liquids are spilled in the vehicle, parts of the vehicle may be damaged. ▶ Always securely close containers containing liquids that you have brought with you. ▶ Clean the vehicle as soon as possible if liquids are spilled. ▶ If larger quantities of liquids are spilled, have the vehicle checked in a qualified specialist workshop. PERINGATAN
Risk of burns from the tailpipe and tailpipe trims The exhaust tailpipe and tailpipe trims can become very hot. If you come into contact with these parts of the vehicle, you could burn yourself. ▶ Always be particularly careful around the tailpipe and the tailpipe trims and supervise children especially closely in this area. ▶ Allow vehicle parts to cool down before touching them.KARAKTERISTIK PENANGANAN KENDARAAN ANDA BERGANTUNG PADA DISTRIBUSI BEBAN DI DALAM KENDARAAN. ANDA HARUS MEMPERHATIKAN HAL-HAL BERIKUT SAAT MEMUAT KENDARAAN:
\- Never allow the payload including occupants to exceed the maximum permissible gross mass or the permissible axle loads for the vehicle. These are shown on the vehicle identification plate ( → page 743). • The load must not protrude above the upper edge of the seat backrests. • Always install the load compartment cover when carrying objects in the load compartment. • Always use the partitioning net when carrying objects in the load compartment. • Always place the load behind unoccupied seats if possible. - Secure the load using the tie-down eyes and distribute the tension evenly.CATATAN TENTANG MEMBAWA BEBAN DI ATAP:
- Distribute the roof load and vehicle load evenly, and place heavy objects at the bottom. Also observe the notes on loading the vehicle. - Drive with care. Avoid sudden starting, braking and steering manoeuvres or fast cornering. - When carrying a roof load or when the vehicle is fully loaded or occupied, select drive program [F] or [C]. These are configured for good stability (→ page 294).  G-Class - Owner's Manual Seats and stowing Stowage areasRuang penyimpanan di dalam kabin kendaraan
IKHTISAR KOMPARTEMEN PENYIMPANAN DEPAN
PERINGATAN
Risk of injury due to objects being stowed incorrectly If objects in the vehicle interior are stowed incorrectly, they can slide or be thrown around and hit vehicle occupants. In addition, cup holders, open stowage spaces and mobile phone brackets cannot always retain all objects they contain. There is a risk of injury, particularly in the event of braking manoeuvres or abrupt changes in direction. ▶ Always stow objects so that they cannot be thrown around in such situations. ▶ Always make sure that objects do not protrude from stowage spaces, luggage nets or stowage nets. ▶ Close the lockable stowage spaces before starting a journey. ▶ Stow and secure objects that are heavy, hard, pointed, sharpedged, fragile or too large in the load compartment. Observe the notes on loading the vehicle.  PERINGATAN
Risk of accident due to objects in the driver's footwell Objects in the driver's footwell may impede pedal travel or block a depressed pedal. This will jeopardise the operating and road safety of the vehicle. Stow all objects in the vehicle securely so that they cannot get into the driver's footwell. ▶ Make sure that there is always sufficient clearance for the pedals. ▶ Always fit the floor mats securely and as prescribed. Do not use loose floor mats and do not place floor mats on top of one another.  ① Stowage spaces in the doors Storage and telephone compartment in the armrest with USB port (USB-C) 3 Storage compartment with cup holder and for wireless charging of a mobile phone in the front centre console Glove compartment   G-Class - Owner's Manual Seats and stowing Stowage areasMENGUNCI/MEMBUKA KUNCI GLOVE BOX
PERINGATAN
Risk of injury due to objects being stowed incorrectly If objects in the vehicle interior are stowed incorrectly, they can slide or be thrown around and hit vehicle occupants. In addition, cup holders, open stowage spaces and mobile phone brackets cannot always retain all objects they contain. There is a risk of injury, particularly in the event of braking manoeuvres or abrupt changes in direction. ▶ Always stow objects so that they cannot be thrown around in such situations. ▶ Always make sure that objects do not protrude from stowage spaces, luggage nets or stowage nets. ▶ Close the lockable stowage spaces before starting a journey. ▶ Stow and secure objects that are heavy, hard, pointed, sharpedged, fragile or too large in the load compartment. Observe the notes on loading the vehicle.   ▶ Turn the emergency key a quarter turn clockwise 2 (to lock) or anticlockwise 1 (to unlock).  G-Class - Owner's Manual Seats and stowing Stowage areasMembuka fitur muatan tembus di kompartemen belakang
PERINGATAN
Risk of injury due to objects being stowed incorrectly If objects in the vehicle interior are stowed incorrectly, they can slide or be thrown around and hit vehicle occupants. In addition, cup holders, open stowage spaces and mobile phone brackets cannot always retain all objects they contain. There is a risk of injury, particularly in the event of braking manoeuvres or abrupt changes in direction. ▶ Always stow objects so that they cannot be thrown around in such situations. ▶ Always make sure that objects do not protrude from stowage spaces, luggage nets or stowage nets. ▶ Close the lockable stowage spaces before starting a journey. ▶ Stow and secure objects that are heavy, hard, pointed, sharpedged, fragile or too large in the load compartment. Observe the notes on loading the vehicle.FITUR MUATAN TEMBUS TANPA PENUTUP KOMPARTEMEN MUATAN
 ▶ Fold down the rear armrest. ▶ Pull the centre head restraint of the rear bench seat fully upwards. ▶ Slide release catch ⓘ to the left.  Swivel flap ② to the left until it comes to rest on the rear side of the rear bench seat. Push cover 3 forwards until it comes to rest on the rear armrest.FITUR MUATAN TEMBUS DENGAN PENUTUP KOMPARTEMEN MUATAN
▶ Fold the seat backrest forwards ( → page 218).  G-Class - Owner's Manual Seats and stowing Stowage areas  Slide release catch ① to the left. Swivel flap ② to the left until it comes to rest on the rear side of the rear bench seat. Fold the seat backrest backwards and fold the rear armrest down.  Fold cover ③ forwards until it comes to rest on the rear armrest. ▶ Pull the centre head restraint of the rear bench seat fully upwards.Melipat kursi belakang ke depan
PERINGATAN
Risk of accident if the rear bench seat, rear seat and seat backrest are not engaged The rear bench seat, rear seat and seat backrest may fold forwards, even while the vehicle is in motion. - As a result, the vehicle occupant will be pressed into the seat belt with increased force. The seat belt will not be able to protect as intended and could cause additional injury. - Objects or loads in the boot or load compartment cannot be restrained by the seat backrest. Make sure that the rear bench seat, the rear seat and the seat backrest are engaged before every trip.CATATAN
Damage to the seat backrests The seat backrests may be damaged when the rear bench seat is folded forwards. ▶ Fold the rear bench seat's cushion upwards before the rear seat backrest is folded forwards. You can fold the left and right seat backrests forwards separately.  G-Class - Owner's Manual Seats and stowing Stowage areas  ▶ Fully insert the seat backrest head restraints ( → page 198). Fold the seat cushion upwards using the loop ①.  Pull the release handle ② upwards until the seat backrest is completely unlocked. ▶ Fold the seat backrest forwards.Melipat kembali kursi baris belakang
PERINGATAN
Risk of accident if the rear bench seat, rear seat and seat backrest are not engaged The rear bench seat, rear seat and seat backrest may fold forwards, even while the vehicle is in motion. - As a result, the vehicle occupant will be pressed into the seat belt with increased force. The seat belt will not be able to protect as intended and could cause additional injury. - Objects or loads in the boot or load compartment cannot be restrained by the seat backrest. Make sure that the rear bench seat, the rear seat and the seat backrest are engaged before every trip.CATATAN
Damage caused by trapping the seat belt when folding back the seat backrest The seat belt could become trapped and thus be damaged when the seat backrest is folded back. Make sure that the seat belt is not trapped when folding back the seat backrest. G-Class - Owner's Manual > Seats and stowing Stowage areas  Swivel seat backrest ① back until it engages. Swivel the seat cushion ② back.Sandaran kursi belakang
MENYESUAIKAN KEMIRINGAN SANDARAN KURSI DI BAGIAN BELAKANG
PERINGATAN
Risk of accident if the rear bench seat, rear seat and seat backrest are not engaged The rear bench seat, rear seat and seat backrest may fold forwards, even while the vehicle is in motion. - As a result, the vehicle occupant will be pressed into the seat belt with increased force. The seat belt will not be able to protect as intended and could cause additional injury. - Objects or loads in the boot or load compartment cannot be restrained by the seat backrest. Make sure that the rear bench seat, the rear seat and the seat backrest are engaged before every trip. You can adjust the angle of the rear seat backrests. There are several possible detent positions.   Pull left or right release lever ① in the direction of the arrow and hold it in position. Move seat backrest ② to the desired angle. Let go of release lever ①. ▶ Ensure that the seat backrest is engaged.   G-Class - Owner's Manual Seats and stowing Stowage areasPenutup ruang bagasi
MENGGULUNGKAN PENUTUP RUANG BAGASI MASUK/KELUAR
PERINGATAN
Risk of injury or death due to poorly secured objects The load compartment cover alone cannot secure or restrain heavy objects, items of luggage or heavy loads. You could be hit by an unsecured load, particularly in the event of abrupt changes in direction, sudden braking or an accident. ▶ Always stow objects in such a way that they cannot be thrown around. ▶ Secure objects, luggage or loads against slipping or tipping over, e.g. by using lashing material, even if you are using the load compartment cover. CATATAN
Damage to the load compartment cover when loading the vehicle The load compartment cover may be damaged when loading the vehicle. Do not place any objects on the load compartment cover. The load compartment cover is attached behind the seat backrest of the rear bench seat.  To extend: pull load compartment cover ① back by grab handle ② until it engages. To retract: push the rear edge of load compartment cover ① downwards. Load compartment cover ① will automatically move forwards.MEMASANG DAN MELEPAS PENUTUP RUANG BAGASI
Persyaratan:
• The load compartment cover is rolled up.MELEPAS PENUTUP RUANG BAGASI
 Press in the end cap of load compartment cover Ⓞ on the right- or left-hand side. ▶ Push load compartment cover ① into recess ② on the opposite side.   G-Class - Owner's Manual > Seats and stowing Stowage areas Take load compartment cover ① out by pulling it upwards.MEMASANG PENUTUP RUANG BAGASI
 Place load compartment cover ① in recess ② on the left-hand or right-hand side. Press in the end cap of load compartment cover ① on the opposite side and insert load compartment cover ① into other recess ②. Slide the end cap outwards.Memasang/membuka jaring pemisah
WARNING Risk of injury or death due to poorly secured objects The partitioning net alone cannot secure or restrain heavy objects, items of luggage or heavy loads. You could be hit by an unsecured load, particularly in the event of abrupt changes in direction, sudden braking or an accident. ▶ Always stow objects in such a way that they cannot be thrown around. - Secure objects, luggage or loads against slipping or tipping over, e.g. by using lashing material, even if you are using the partitioning net. For safety reasons, always use a partitioning net when transporting a load. Damaged partitioning nets can no longer fulfil their protective functions. Replace damaged partitioning nets. Visit a qualified specialist workshop.  G-Class - Owner's Manual > Seats and stowing Stowage areas ATTACHING  Partitioning net without load compartment enlargement  Partitioning net with load compartment enlargement ▶ Extend and unfold the partitioning net. The joints on the top and bottom guide rods will audibly engage. Attach guide rod ① to holders ② on the roof lining. Engage hooks ③ in tie-down eyes ④ on the left and right. Pull on the loose ends of the lashing straps until the partitioning net is tight. After driving a short distance, check the tension of the partitioning net and re-tension it if necessary. REMOVING  Pull belt clamp ⑤ upwards until the lashing straps are loose. Remove hooks ③ from tie-down eyes ④ on the left and right. Remove guide rod ① from holders ②.PENYIMPANAN
Press the red button on the top and bottom guide rods. ▶ Collapse and roll up the partition net.Ikhtisar mata pengikat
Observe the notes on loading the vehicle ( → page 210).  G-Class - Owner's Manual Seats and stowing Stowage areas  Load securing tie-down eyeIkhtisar pengait tas
PERINGATAN
Risk of injury when using bag hooks with heavy objects The bag hooks cannot restrain heavy objects or items of luggage. Objects or items of luggage may be flung around and hit vehicle occupants. ▶ Only hang light objects on the bag hooks. ▶ Never hang hard, sharp-edged or fragile objects on the bag hooks. Observe the notes on loading the vehicle ( → page 210). The bag hook can bear a maximum load of 3 kg. Do not use it to secure a load.   1 Bag hookMemasang rak atap
PERINGATAN
Risk of accident due to exceeding the maximum roof load The vehicle centre of gravity and the usual driving characteristics as well as the steering and braking characteristics alter. If you exceed the maximum roof load, the driving characteristics, as well as steering and braking, will be greatly impaired. ▶ Never exceed the maximum roof load and adjust your driving style.  G-Class - Owner's Manual Seats and stowing Stowage areas PERINGATAN
Risk of injury if unsuitable climbing aids are usedJIKA ANDA MENGGUNAKAN BUKAAN PADA BODI ATAU AKSESORIS SEBAGAI PIJAKAN, ANDA DAPAT:
- Slip and/or fall. • Damage the vehicle and thus slip and fall. ▶ Always use non-slip, stable climbing aids, e.g. a suitable ladder. CATATAN
Damage to the wheel arch flares and bumpers if used as a step The wheel arch flares and bumpers can be damaged or become detached from the vehicle if you use them as a step. ▶ Only use the two steps indicated on the rear bumper. CATATAN
Vehicle damage due to non-approved roof racks The vehicle could be damaged by roof racks that have not been tested and approved by Mercedes-Benz. ▶ Only use roof racks approved for Mercedes-Benz. Depending on the vehicle equipment, ensure that the sliding sunroof can be fully raised when the roof rack is fitted. ▶ Position the load on the roof rack in such a way that the vehicle will not sustain damage even when it is in motion. CATATAN
Maximum permissible roof load The weight of the roof luggage, including the roof rack, must not exceed the maximum permissible roof load. The maximum roof load is 150 kg with at least three pairs of supporting feet. This information applies if the load is distributed evenly across the entire roof area. The maximum load per pair of supporting roof rack feet is 50 kg. If the vehicle is at a standstill and at least three pairs of supporting feet are being used, you may exceed the maximum permissible roof load of 150 kg by a maximum of 150 kg. You can use this if you are using a roof tent, for example. It is absolutely essential to comply with the installation instructions of the roof rack manufacturer.  G-Class - Owner's Manual Seats and stowing Stowage areas  CATATAN
Damage to the covers The covers may be damaged and scratched when being opened. ▶ Use the attached disassembly tool in the vehicle tool bag. ▶ Do not use metallic or hard objects. Do not install the covers until the roof rack has been removed. Bear in mind the following related topic: • Vehicle tool kit overview ( → page 661) An incorrectly attached roof rack or an incorrect roof load can become detached from the vehicle. It is absolutely essential to comply with the installation instructions of the roof rack manufacturer. Carefully remove covers Ⓐ in the direction of the arrow with the disassembly tool.  Attach the roof rack at securing points ②. Comply with the installation instructions of the roof rack manufacturer. ▶ Secure the load on the roof luggage rack.Rak atap dengan tangga
Have all maintenance work as well as the installation and removal of the roof luggage rack with ladder carried out only at a qualified specialist workshop. PERINGATAN
Risk of accident due to exceeding the maximum roof load The vehicle centre of gravity and the usual driving characteristics as well as the steering and braking characteristics alter. If you exceed the maximum roof load, the driving characteristics, as well as steering and braking, will be greatly impaired. ▶ Never exceed the maximum roof load and adjust your driving style. PERINGATAN
Risk of accident and injury due to children left unattended in the vehicle If you leave children unattended near the vehicle, they may climb the ladder and fall. Never leave children unattended by the vehicle.  G-Class - Owner's Manual Seats and stowing Stowage areas PERINGATAN
Risk of falling and injury when loading and unloading the roof luggage rack The ladder at the rear of the vehicle does not have a climbing aid and the roof luggage rack does not have any protection against falling. In particular, dirt, rain, ice or snow can reduce the safety of your footing. There is a risk of falling and injury. Always climb ladders and roof luggage racks carefully and only when wearing sturdy footwear. CATATAN
Maximum permissible load of the ladder The maximum permissible load of the ladder is 100 kg. Do not exceed this load capacity. CATATAN
Maximum permissible roof load The weight of luggage on the roof including the roof luggage rack must not exceed the maximum permissible roof load. The maximum roof load is 150 kg. The roof luggage rack weighs 60 kg. This information applies if the load is distributed evenly across the entire roof area. When the vehicle is stationary, the permissible roof load of 150 kg may be exceeded by a maximum of 150 kg. You can make use of this if you are using a roof tent, for example. Observe the maximum load capacity of the ladder.  1 Roof luggage rack Ladder When loading and unloading the roof luggage rack, you can use ladder ② and walk on roof luggage rack ①.    G-Class - Owner's Manual Seats and stowing Stowage areas  Maximum load on the roof area 3 120 kg per frame point 50 kg per plate Ensure that the load has been distributed evenly and that it has been properly secured, e.g. with tension belts. Be careful not to exceed the maximum load for each plate.    G-Class - Owner's Manual Seats and stowing Cup holders< Tempat cangkir
Menggunakan tempat cangkir di konsol tengah
PERINGATAN
\- Risk of accident or injury when using the cup holder while the vehicle is in motion The cup holder cannot hold a container secure while the vehicle is in motion. If you use a cup holder while the vehicle is in motion, the container may be flung around and liquids could be spilled. The vehicle occupants may come into contact with the liquid and if it is hot, they could be scalded. You could be distracted from traffic conditions and you may lose control of the vehicle. ▶ Only use the cup holder when the vehicle is stationary. ▶ Only use the cup holder for containers of the right size. ▶ Always close the container, particularly if the liquid is hot.  Vehicles without a temperature-controlled cup holder: the bracket arms of the front cup holder can be folded in or out. To fold the bracket arm in: push bracket arm Ⓞ outwards to the side until it engages. When the bracket arm is folded in, the cup holder cannot fulfil its holding function. To fold the bracket arm out: press release button ②.  G-Class - Owner's Manual Seats and stowing Cup holdersMenggunakan tempat cangkir di sandaran tangan belakang
PERINGATAN
\- Risk of accident or injury when using the cup holder while the vehicle is in motion The cup holder cannot hold a container secure while the vehicle is in motion. If you use a cup holder while the vehicle is in motion, the container may be flung around and liquids could be spilled. The vehicle occupants may come into contact with the liquid and if it is hot, they could be scalded. You could be distracted from traffic conditions and you may lose control of the vehicle. ▶ Only use the cup holder when the vehicle is stationary. ▶ Only use the cup holder for containers of the right size. ▶ Always close the container, particularly if the liquid is hot. CATATAN
Damage to the rear armrest due to body weight When folded out, the rear armrest can be damaged by body weight. Do not sit or support yourself on the rear seat armrest.  CATATAN
Damage to the cup holder The cup holder could be damaged when you fold back the rear seat armrest. The cup holder could be damaged by body weight. Do not sit or support yourself on the cup holder.  ▶ Fold down the rear armrest. Place the container into cup holder ① or remove it.  G-Class - Owner's Manual Seats and stowing Cup holdersMengaktifkan atau menonaktifkan fungsi pendinginan atau pemanasan untuk tempat cangkir dengan pengatur suhu
PERINGATAN
Risk of injury by touching the heating elements The cup holder's heating elements may be very hot. You can burn yourself on them. Do not touch the cup holder's hot heating elements. ▶ Ensure that no children can access the cup holder's hot heating elements. ▶ Never leave children unattended in the vehicle. PERINGATAN
\- Risk of accident or injury when using the cup holder while the vehicle is in motion The cup holder cannot hold a container secure while the vehicle is in motion. If you use a cup holder while the vehicle is in motion, the container may be flung around and liquids could be spilled. The vehicle occupants may come into contact with the liquid and if it is hot, they could be scalded. You could be distracted from traffic conditions and you may lose control of the vehicle. ▶ Only use the cup holder when the vehicle is stationary. ▶ Only use the cup holder for containers of the right size. ▶ Always close the container, particularly if the liquid is hot. CATATAN
Damage to objects in the temperature-controlled cupholder If you place objects into the temperature-controlled cup holder, they may become damaged. Do not place objects into the temperature-controlled cup holder.   G-Class - Owner's Manual Seats and stowing Cup holders  To switch on: on cup holder ①, press button ② repeatedly until the blue (keep cool) or red (keep warm) indicator lamp on the button lights up. To switch off: press button ⑦ repeatedly until the indicator lamp on the button goes out. Clean the removable rubber mat only with clean, lukewarm water and the cup holder only with a soft cloth.   G-Class - Owner's Manual Seats and stowing Ashtray and cigarette lighterAsbak dan pemantik rokok
Menggunakan asbak
CATATAN
Damage to the stowage compartment under the ashtray due to heat The stowage compartment under the ashtray is not heat resistant and could be damaged if you rest lit cigarettes on it. Place lit cigarettes only in the ashtray. ▶ Ensure that the ashtray is fully engaged.  Place the closed ashtray in the cup holder in the front centre console. ▶ Check that it is seated firmly. Comply with the notes on loading the vehicle ( → page 210). To open: fold lid ① upwards. ① Twist the top part of the ashtray to remove it for cleaning, e.g. with clean, lukewarm water, or for emptying.Menggunakan pemantik rokok
PERINGATAN
Risk of fire and injury from hot cigarette lighter You can suffer burns if you touch the hot heating element or the hot socket of the cigarette lighter.SELAIN ITU, BAHAN YANG MUDAH TERBAKAR DAPAT TERBAKAR JIKA:
• you drop the hot cigarette lighter. • children e.g. hold the hot cigarette lighter to objects. ▶ Always hold the cigarette lighter by the knob. ▶ Always make sure that the cigarette lighter is out of the reach of children. ▶ Never leave children unattended in the vehicle.  G-Class - Owner's Manual > Seats and stowing Ashtray and cigarette lighterPersyaratan
• The vehicle is switched on.  Press in cigarette lighter ①. The cigarette lighter will pop out automatically when the heating element is red-hot.   G-Class - Owner's Manual Seats and stowing Sockets< Soket
Menggunakan soket 12 V
Persyaratan:
• Only devices up to the maximum power output are connected. Depending on the vehicle equipment, the vehicle has the following 12 V sockets:  12 V socket in front centre console (maximum 240 W/20 A) 12 V socket in rear centre console (maximum 180 W/15 A) 12 V socket in load compartment (maximum 180 W/15 A) Open the socket flap and insert the plug of the device. If a device is connected to the 12 V socket in the front centre console, leave the cover of the stowage compartment open. Ikhtisar port USB
Depending on the vehicle equipment, the vehicle has the following USB ports (USB-C):  USB ports front centre console USB ports rear centre console USB ports stowage compartment in the armrest(→ page 51) When the vehicle is switched on, you can charge USB devices at the USB ports, e.g. a mobile phone. Depending on the vehicle equipment, the charging power is up to 120 W.   G-Class - Owner's Manual > Seats and stowing Wireless charging of a mobile phone in the cockpit < Pengisian daya nirkabel ponsel di kokpit
PERINGATAN
Risk of injury due to unsuitable stowage of objects If objects in the vehicle interior are stowed incorrectly, they may slide or be thrown around and hit vehicle occupants. In addition, cup holders, open stowage spaces and mobile phone receptacles may not, in the event of an accident, retain all the objects they contain. There is a risk of injury, particularly in the event of braking manoeuvres or abrupt changes in direction. ▶ Always stow objects in such a way that they cannot be thrown around in these or similar situations. ▶ Always ensure that objects do not protrude from stowage compartments, luggage nets or stowage nets. ▶ Close the lockable stowage spaces before starting a journey. ▶ Stow and secure objects that are heavy, hard, pointed, sharpedged, fragile or too large in the load compartment. PERINGATAN
Risk of injury due to objects being stowed incorrectly If objects in the vehicle interior are stowed incorrectly, they may slide or be thrown around and hit vehicle occupants. In addition, cup holders, open stowage spaces and mobile phone receptacles will not always be able to retain all objects that they contain in the event of an accident. There is a risk of injury, particularly in the event of sudden braking or a sudden change in direction. ▶ Always stow objects such that they cannot be thrown around in such situations. ▶ Always make sure that objects do not protrude from stowage spaces, luggage nets or stowage nets. ▶ Close the lockable stowage spaces before starting a journey. ▶ Always stow and secure heavy, hard, pointed, sharp-edged, fragile or bulky objects in the boot/load compartment. Observe the information on loading the vehicle.  G-Class - Owner's Manual > Seats and stowing Wireless charging of a mobile phone in the cockpit A
PERINGATAN
Risk of fire if objects are placed in the mobile phone tray while charging There is a risk of fire if you place additional objects in the mobile phone tray while charging. This is particularly the case when metallic objects are involved. Do not place any objects, especially metal objects such as coins, in the mobile phone tray while charging. Observe the information on loading the vehicle.Persyaratan:
• The mobile phone is suitable for wireless charging. A list of compatible mobile phones can be found at: https://www.mercedes-benz-mobile.com/!
CATATAN
Damage to objects caused by placing them in the mobile phone stowage compartment If objects are placed in the mobile phone stowage compartment, these may be damaged by electromagnetic fields. Do not place credit cards, storage media, ski passes or other objects sensitive to electromagnetic fields in the mobile phone stowage compartment.!
CATATAN
Damage to the mobile phone stowage compartment caused by liquids If liquids enter the mobile phone stowage compartment, the compartment may be damaged. ▶ Ensure that no liquids enter the mobile phone stowage compartment. Always observe the notes for persons with electronic medical aids. - Depending on the vehicle equipment, the mobile phone is connected to the vehicle's exterior aerial via the charging module. - The charging function and wireless connection of the mobile phone to the vehicle's exterior aerial are only available if the vehicle is switched on. - Small mobile phones may not be able to be charged in every position of the mobile phone tray. • Large mobile phones which do not rest flat in the mobile phone tray may not be able to be charged or connected with the vehicle's exterior aerial. - The mobile phone may heat up during the charging process. This may also depend on the applications (apps) currently open in the background. - To ensure more efficient charging and connection with the vehicle's exterior aerial, remove the protective cover from the mobile phone. This does not apply to protective covers which are required for wireless charging. G-Class - Owner's Manual > Seats and stowing Wireless charging of a mobile phone in the cockpit  Place the mobile phone as close to the centre of mat ① as possible with the display facing up. When a message is shown in the multimedia system, the mobile phone is being charged. Malfunctions detected during the charging process are shown on the multimedia system display. The mat can be removed for cleaning, e.g. using clean, lukewarm water.NOMOR PERSETUJUAN PERALATAN RADIO UNTUK BRASIL
This device operates in secondary mode, which means it has no protection against harmful interference, not even from stations of the same type, and must not cause interference with systems operating on a primary basis. This product is approved in accordance with the procedures defined in Directive 242/2000 by Brazilian telecommunications agency ANATEL and complies with the applicable technical requirements. More information is available on the ANATEL website. www.anatel.gov.br ▶ Further information on the declaration of conformity for vehicle components which receive and/or transmit radio waves ( → page 101).   G-Class - Owner's Manual Seats and stowing Fitting/removing the floor mats Memasang/melepas karpet lantai
PERINGATAN
Risk of accident due to objects in the driver's footwell Objects in the driver's footwell may impede pedal travel or block a depressed pedal. This will jeopardise the operating and road safety of the vehicle. ▶ Stow all objects in the vehicle securely so that they cannot get into the driver's footwell. ▶ Make sure that there is always sufficient clearance for the pedals. ▶ Always fit the floor mats securely and as prescribed. Do not use loose floor mats and do not place floor mats on top of one another. FITTING FLOOR MATS  Move the corresponding seat backwards and lay the floor mat in the footwell. Press studs ① onto holders ②. Adjust the corresponding seat.MELEPAS KARPET LANTAI
▶ Pull the floor mat off holders ② Remove the floor mat.  Back to Contents G-Class - Owner's Manual > Light and sight < Cahaya dan pandangan
This interactive PDF works like a website - tap or click a button to jump straight to where you want to go. You can return here at any time via the navigation bar at the top left. Exterior lighting 239 Interior lighting 247 Windscreen wipers and windscreen washer system 229 Mirrors 252 Area permeable to radio waves on the windscreen 2-5 G-Class - Owner's Manual Light and sight Exterior lightingPencahayaan eksterior
Catatan tentang penyesuaian lampu saat berkendara di luar negeri
Vehicles with static LED headlamps: it is not necessary to convert the headlamps. The legal requirements are also met in countries in which traffic drives on the other side of the road. Vehicles with MULTIBEAM LED: the headlamps will automatically be adjusted when you cross the border into countries in which traffic drives on the other side of the road.DALAM KASUS BERIKUT, PERIKSA PENGATURAN LAMPU DEPAN DAN UBAH SECARA MANUAL JIKA PERLU:
- If the Dipped-beam setting (left/right-side traffic) Manual adjustment only display message is shown. - If the Check dipped-beam setting (left/right-side traffic) display message is shown.SETELAH LAMPU DEPAN DIKONVERSI:
• Oncoming traffic will not be dazzled. • The edge of the road will not be illuminated as far or as high. - The "motorway mode" and "enhanced fog light" functions will not be available.Informasi tentang sistem pencahayaan dan tanggung jawab Anda
The various lighting systems of the vehicle are only aids. The driver of the vehicle is responsible for correct vehicle illumination in accordance with the prevailing light and visibility conditions, legal requirements and traffic situation.Sakelar lampu
OPERATING THE LIGHT SWITCH  1 ←P ∈ Left-hand parking lights 2 P← Right-hand parking lights 3 Standing lights and licence plate lighting   G-Class - Owner's Manual Light and sight Exterior lighting 4 AUTO Automatic driving lights (preferred light switch position) 5 SD Low beam/high beam 6 Activates or deactivates the rear fog light. When low beam is activated, the 3005 indicator lamp for the standing lights will be deactivated and replaced by the low-beam indicator lamp. Always park your vehicle safely using sufficient lighting, in accordance with the relevant legal stipulations. CATATAN
Battery discharging by operating the standing lights Do not have the standing lights switched on over a period of several hours. For vehicles that are wider than 2 m or longer than 6 m, single-sided parking lighting is not permitted in some countries. In this case, the standing lights are also switched on in the parking lights position. If the battery is insufficiently charged, the standing lights or parking lights will be switched off automatically to facilitate the next engine start.LAMPU EKSTERIOR (KECUALI LAMPU POSISI DAN LAMPU PARKIR) AKAN MATI SECARA OTOMATIS SAAT PINTU PENGEMUDI DIBUKA.
• Observe the notes on locator lighting ( → page 246).FUNGSI LAMPU MENYALA OTOMATIS SAAT BERKENDARA
When the vehicle is switched on, the standing lights, low beam and daytime running lights will be switched on automatically depending on the light conditions.  PERINGATAN
Risk of accident when the dipped beam is switched off in poor visibility When the light switch is set to AUTO, the dipped beam may not be switched on automatically if there is fog, snow or other causes of poor visibility such as spray. In such cases, turn the light switch to . The automatic driving lights are only an aid. You are responsible for the vehicle lighting.MENGHIDUPKAN/MEMATIKAN LAMPU KABUT BELAKANG
Persyaratan
• The light switch is in the \$D or AUTO position. Press button 0#. Please observe the country-specific laws on the use of rear fog lamps.  G-Class - Owner's Manual Light and sight Exterior lighting Mengoperasikan sakelar kombinasi untuk lampu
 1 Main beam 2 Turn signal light, right 3 Headlamp flashing Turn signal light, left ▶ Use the combination switch to select the desired function.MENYALAKAN LAMPU JAUH
Turn the light switch to the ☑D or AUTO position. ▶ Push the combination switch beyond pressure point in the direction of the arrow ①. When the main beam is activated, the indicator lamp for the low beam will be deactivated and replaced by the indicator lamp for the main beam.MEMATIKAN LAMPU JAUH
Move the combination switch back to its starting position.KEDIP LAMPU UTAMA
▶ Pull the combination switch in the direction indicated by the arrow ⚙.LAMPU SEIN
To indicate briefly: push the combination switch briefly to the pressure point in the direction of arrow ☐ or ☐. The corresponding turn signal light flashes three times. To indicate for a duration: push the combination switch beyond the pressure point in the direction of arrow ⑦ or ④.Mengaktifkan/menonaktifkan lampu hazard
 Press button ①.DALAM SITUASI BERIKUT, LAMPU HAZARD AKAN MENYALA OTOMATIS:
• The airbag has been deployed • the vehicle brakes are applied heavily from a speed of more than 70 km/h to a standstill. • An emergency stop has been initiated ( → page 368)   G-Class - Owner's Manual Light and sight Exterior lighting When you pull away again, the hazard warning light system will switch off automatically at approximately 10 km/h. You can also switch off the hazard warning light system using button 🔒.Fungsi adaptif, LED MULTIBEAM
FUNGSI LAMPU JAUH DINAMIS
The MULTIBEAM LED headlamps adapt to the weather and the situation on the road and provide advanced functions for improving the illumination of the road.SISTEM INI TERDIRI ATAS FUNGSI-FUNGSI BERIKUT:
• Active headlamps ( → page 242) • Motorway mode ( → page 242) • Enhanced fog light function (→ page 242) • Bad weather light ( → page 243) • City lighting ( → page 243)BATASAN SISTEM
• The system will be active only when it is dark. ACTIVE HEADLAMPS FUNCTION  • The headlamps follow the steering movements.  • Relevant areas are better illuminated during a journey. The functions are active when the low beam is switched on. Depending on the vehicle's equipment, the course of the lane in which you are driving will also be evaluated and the active headlamps function will adjust the light in advance.FUNGSI MODE JALAN TOL
Motorway mode increases the range and brightness of the cone of light, enabling better visibility. FUNGSI INI AKTIF JIKA PERJALANAN DI JALAN TOL TERDETEKSI MELALUI:
• the vehicle's speed • the multifunction camera • or the navigation systemFUNGSI INI TIDAK AKTIF DALAM KASUS-KASUS BERIKUT:
• At speeds below 80 km/hFUNGSI LAMPU KABUT PENINGKAT
The enhanced fog light function reduces self-dazzling and improves the illumination of the edge of the carriageway.  G-Class - Owner's Manual > Light and sight Exterior lighting FUNGSI INI AKTIF SECARA OTOMATIS DALAM KONDISI-KONDISI BERIKUT:
• At speeds below 70 km/h and when the rear fog light is switched on.FUNGSI INI NONAKTIF SECARA OTOMATIS DALAM KONDISI-KONDISI BERIKUT:
- When speeds greater than 100 km/h are reached. - When the rear fog light is switched off. You can activate the enhanced fog light function up to a speed of 100 km/h by switching on the rear fog light.FUNGSI LAMPU CUACA BURUK
The bad weather light reduces reflections in rainy conditions by dimming individual LEDs in the headlamps. This reduces glare for the driver and other road users.FUNGSI PENERANGAN KOTA
City lighting improves the illumination of roadsides in urban areas using a broad distribution of light. FUNGSI INI AKTIF DALAM KASUS-KASUS BERIKUT:
- At low speeds • In illuminated parts of urban areasMENGAKTIFKAN/MENONAKTIFKAN LAMPU JAUH DINAMIS
Persyaratan:
• The vehicle is switched on. Multimedia system: Settings Lights MULTIBEAM LED ▶ Activate or deactivate Dynamic low beam. G-Class - Owner's Manual Light and sight Exterior lightingAdaptive Highbeam Assist Plus
FUNGSI ADAPTIVE HIGHBEAM ASSIST PLUS
PERINGATAN
Risk of accident despite Adaptive Highbeam Assist PlusADAPTIVE HIGHBEAM ASSIST PLUS TIDAK BERREAKSI TERHADAP:
• road users without lights, e.g. pedestrians • road users with poor lighting, e.g. cyclists • road users whose lighting is obstructed, e.g. by a barrier On very rare occasions, Adaptive Highbeam Assist Plus may fail to recognise other road users with their own lighting, or may recognise them too late. In these, or in similar situations, the automatic high beam will not be deactivated or will be activated despite the presence of other road users. ▶ Always observe the road and traffic conditions carefully and switch off the high beam in good time. Adaptive Highbeam Assist Plus cannot take into account road, weather or traffic conditions.DETEKSI MUNGKIN TERBATAS DALAM KASUS BERIKUT:
• In poor visibility (e.g. fog, heavy rain or snow) • if there is dirt on the sensors or the sensors are obscured Adaptive Highbeam Assist Plus is only an aid. You are responsible for adjusting the vehicle's lighting to the prevailing light, visibility and traffic conditions. ADAPTIVE HIGHBEAM ASSIST PLUS BERALIH SECARA OTOMATIS ANTARA JENIS LAMPU BERIKUT:
Low beam - Partial high beam High beam Partial high beam uses the high beam to shine past other road users rather than dazzling them. The low beam illumination area covers the vehicle in front.PADA KECEPATAN DI ATAS 30 KM/JAM:
- If no other road users are detected, high beam will switch on automatically. - If other road users are detected, partial high beam will be switched on automatically.  G-Class - Owner's Manual Light and sight Exterior lightingPADA KECEPATAN DI BAWAH 25 KM/JAM ATAU SAAT PENERANGAN JALAN CUKUP:
• High beam will switch off automatically. • Partial high beam will switch off automatically.PADA KECEPATAN DI ATAS KIRA-KIRA 50 KM/JAM:
\- The headlamp range of the low beam will be regulated automatically based on the distance to other road users. The system's optical sensor is located behind the windscreen near the overhead control panel.MENGAKTIFKAN/MENONAKTIFKAN ADAPTIVE HIGHBEAM ASSIST PLUS
PERINGATAN
Risk of accident despite Adaptive Highbeam Assist PlusADAPTIVE HIGHBEAM ASSIST PLUS TIDAK BERREAKSI TERHADAP:
• road users without lights, e.g. pedestrians • road users with poor lighting, e.g. cyclists • road users whose lighting is obstructed, e.g. by a barrier On very rare occasions, Adaptive Highbeam Assist Plus may fail to recognise other road users with their own lighting, or may recognise them too late. In these, or in similar situations, the automatic high beam will not be deactivated or will be activated despite the presence of other road users. ▶ Always observe the road and traffic conditions carefully and switch off the high beam in good time.MENGAKTIFKAN
▶ Turn the light switch to the AUTO position. ▶ Switch on high beam using the combination switch. When the high beam is switched on automatically in the dark, the indicator lamp will light up on the driver's display.MENONAKTIFKAN
▶ Switch off high beam using the combination switch.  G-Class - Owner's Manual Light and sight Exterior lightingMengatur lampu sorot rendah
Multimedia system: Settings Lights MULTIBEAM LED Low beam Select Right-side traffic, Left-side traffic or Automatic.Mengatur waktu tunda mematikan lampu eksterior
Multimedia system: Settings Lights Interior/exterior lighting Exterior lighting switch-off delay ▶ Set a switch-off delay time. After parking and locking the vehicle, the exterior lighting will be activated for the set time.Mengaktifkan/menonaktifkan lampu pencari
Multimedia system: Settings Lights Interior/exterior lighting ▶ Activate or deactivate Locator lighting. The exterior lighting will light up for 40 seconds after the vehicle is unlocked or the driver's door is opened when the vehicle is not locked. When you start the vehicle, the locator lighting will be deactivated and the automatic driving lights activated.   G-Class - Owner's Manual Light and sight Interior lighting< Lampu interior
Menyesuaikan lampu interior
FRONT OVERHEAD CONTROL PANEL  1 Front left reading lamp 2 Automatic interior lighting control 3 Front interior lighting 4 Rear interior lighting 5 Front right reading lamp To switch on or off: press button ① - ⑤ accordingly. OPERATING UNIT INSIDE THE GRAB HANDLE (REAR)  1 Rear reading lamp To switch on or off: press the ① button.Menyesuaikan lampu suasana
Multimedia system: Comfort Ambient lightMENGATUR WARNA
Select Colour. ▶ Select Monochrome or Multi-colour. ▶ Set the desired colour or colour scheme.MENYESUAIKAN KECERAHAN
Select Brightness. Adjust the brightness.   G-Class - Owner's Manual Light and sight Interior lighting  Depending on the ambient light conditions, the ambient lighting will automatically switch between day and night modes.MENGAKTIFKAN EFEK
Select Effects. ▶ Activate the desired effect. ① Different effects will be available depending on the vehicle equipment.ANIMASI MULTI-WARNA
• The chosen colour combination will change at predefined intervals.IKLIM
\- If changes are made to the temperature setting in the vehicle, the colour of the ambient lighting will change briefly.SAPAN
\- When you get into the vehicle, a special colour animation will play.Mengaktifkan/menonaktifkan waktu tunda mematikan lampu interior
Multimedia system: Settings Lights Interior/exterior lighting Interior lighting switch-off delay Activate or deactivate Interior lighting switch-off delay. If this function is active, the interior lighting will be switched on for a short time after the end of the journey.  G-Class - Owner's Manual > Light and sight Windscreen wipers and windscreen washer system Wiper kaca depan dan sistem pencuci kaca depan
Switching the windscreen wipers on/off  1 0 Windscreen wipers off 2 ⋯ Automatic wiping, normal 3 .... Automatic wiping, frequent 4 — Continuous wiping, slow 5 = Continuous wiping, fast Turn the combination switch to the corresponding position 1 - 5. Single wipe: press button ① as far as the point of resistance. Wiping with washer fluid: press button ① beyond the point of resistance. ① Observe the notes on washing the vehicle in a car wash ( → page 39). Switching the rear window wiper on/off  1 Wipes with washer fluid 2 — Switches on intermittent wipe 3 0 Switches off intermittent wipe 4 Wipes with washer fluid Turn switch ① to the correct position 1 - 4. The symbol will appear on the driver's display when the rear window wiper is switched on.   G-Class - Owner's Manual Light and sight Windscreen wipers and windscreen washer system Mengganti bilah wiper kaca depan
PERINGATAN
Risk of becoming trapped if the windscreen wipers are switched on while wiper blades are being replaced If the windscreen wipers begin to move while you are changing the wiper blades, you can be trapped by the wiper arm. ▶ Always switch off the windscreen wipers and vehicle before changing the wiper blades. Check the condition of the wiper blades regularly and replace them in the event of visible damage or ongoing smearing. Observe the information about the service indicator. SERVICE INDICATOR  Remove protective film ① from the service indicators on the tips of the newly fitted wiper blades. When the colour of the service indicator changes from black to yellow, replace the wiper blades. The time it takes for the colour to change will vary depending on the usage conditions.Mengganti bilah penghapus kaca belakang
PERINGATAN
Risk of becoming trapped if the windscreen wipers are switched on while wiper blades are being replaced If the windscreen wipers begin to move while you are changing the wiper blades, you can be trapped by the wiper arm. ▶ Always switch off the windscreen wipers and vehicle before changing the wiper blades. CATATAN
Damage to the rear window If the wiper arm without a wiper blade falls onto the rear window, the rear window may be damaged. Hold the wiper arm firmly in place when changing the wiper blade, or place it carefully on the rear window.MELEPAS BILAH PENGHAPUS
▶ Switch off the vehicle ( → page 271).   G-Class - Owner's Manual > Light and sight Windscreen wipers and windscreen washer system Within approximately 15 seconds, turn the combination switch to position 1 ( → page 249). The wiper arm will move into the replacement position.  Fold wiper arm ④ away from the rear window and hold it tightly. Press both release tabs 2. Fold wiper blade ① away from wiper arm ④ in the direction of arrow ③. Remove wiper blade ① in the direction of arrow ⑤. FITTING THE WIPER BLADE  Position wiper blade ① with recess ⑥ on lug ⑤. Fold wiper blade ① onto the wiper arm in the direction of arrow ③ until retaining clips ② engage in bracket ④. Make sure that wiper blade Ⓞ is seated correctly. Fold the wiper arm back onto the rear window.  G-Class - Owner's Manual Light and sight Mirrors< Kaca spion
Mengoperasikan kaca spion luar
PERINGATAN
Risk of accident due to adjusting the vehicle settings while the vehicle is in motionANDA DAPAT KEHILANGAN KENDALI ATAS KENDARAAN TERUTAMA DALAM SITUASI BERIKUT:
• if you adjust the driver's seat, the head restraint, the steering wheel or the mirror while the vehicle is in motion • if you fasten your seat belt while the vehicle is in motion Before starting the vehicle: in particular, adjust the driver's seat, head restraint, steering wheel and mirror, and fasten your seat belt. PERINGATAN
Risk of accident due to misjudgement of distance when using the outside mirror The outside mirrors reflect objects on a smaller scale. The objects in view are in fact closer than they appear. Therefore, always look over your shoulder in order to ensure that you are aware of the actual distance between you and the road users driving behind you.  To fold in or out: briefly press button ②. To adjust: use button ① or ③ to select the outside mirror to be adjusted.   G-Class - Owner's Manual Light and sight Mirrors Use button Ⓐ to adjust the position of the mirror glass. If the battery has been disconnected or completely discharged, you will have to reset the outside mirrors. Only then will the automatic mirror folding function work properly. To reset: briefly press button ②. An outside mirror that has been pushed out of position can be engaged in position again as follows: Press and hold button 2. You will hear a click and the mirror will audibly click into place. The outside mirror will now be set to the correct position.Fungsi kaca spion anti-silau otomatis
PERINGATAN
Risk of acid burns and poisoning due to the anti-dazzle mirror electrolyte Electrolyte may escape if the glass in an automatic anti-dazzle mirror breaks. The electrolyte is hazardous to health and causes irritation. It must not come into contact with your skin, eyes, respiratory organs or clothing or be swallowed. If you come into contact with electrolyte, observe the following: - Immediately rinse the electrolyte from your skin with water and seek medical attention. - If electrolyte comes into contact with your eyes, immediately rinse them thoroughly with clean water and seek medical attention. - If the electrolyte is swallowed, immediately rinse your mouth out thoroughly. Do not induce vomiting. Seek medical attention immediately. - Immediately change out of clothing which has been contaminated with electrolyte. • If an allergic reaction occurs, seek medical attention immediately. Depending on the vehicle equipment, the inside mirror and the outside mirror on the driver's side will automatically go into anti-dazzle mode if light from a headlamp hits the sensor on the inside mirror.  G-Class - Owner's Manual Light and sight Mirrors BATASAN SISTEM
SISTEM TIDAK AKAN MASUK KE MODE ANTI-SILAU JIKA:
• The vehicle is switched off. • Reverse gear is engaged. • The interior lighting is switched on. Front-passenger outside mirror parking position function The parking position makes parking easier.KACA SPION LUAR PENUMPANG DEPAN AKAN BERPUTAR KE BAWAH MENUJU ARAH RODA BELAKANG DI SISI PENUMPANG DEPAN KETIKA:
• the parking position is stored ( → page 254). • the front-passenger mirror is selected. • reverse gear is engaged.KACA SPION LUAR PENUMPANG DEPAN AKAN KEMBALI KE POSISI SEMULA KETIKA:
• you shift the transmission to another transmission position. • you are travelling at a speed greater than 15 km/h. • you press the button for the outside mirror on the driver's side. Storing the parking position of the front-passenger outside mirror using reverse gear STORING  Press button Ⓞ to select the front-passenger outside mirror. Engage reverse gear. Move the front-passenger outside mirror into the desired parking position using button ②.   G-Class - Owner's Manual Light and sight Mirrors  CALLING UP  1 Selects the front-passenger outside mirror ② Adjusts the mirrors Press button Ⓤ to select the front-passenger outside mirror. Engage reverse gear. The front-passenger outside mirror will move into the stored parking position.   G-Class - Owner's Manual Light and sight Area permeable to radio waves on the windscreen Area permeable to radio waves on the windscreen
 Vehicles with windscreen heaters: Radio-controlled equipment, such as toll systems, can be mounted only on areas of the windscreen ① that are permeable to radio waves. The area that is permeable to radio waves is always located on the front-passenger side. The area permeable to radio waves ① is best visible from outside the vehicle when the windscreen is illuminated with an additional light source.  Back to Contents G-Class - Owner's Manual Climate control < Climate control
This interactive PDF works like a website - tap or click a button to jump straight to where you want to go. You can return here at any time via the navigation bar at the top left. Overview of climate control systems 258 Operating the climate control system 260 G-Class - Owner's Manual Climate control Overview of climate control systems Overview of climate control systems
Notes on climate control
An interior filter in combination with the prefilter in the engine compartment must always be used so that the air conditioning system, pollution level monitoring and the air filtration work correctly. Use filters recommended and approved by Mercedes-Benz. Always have maintenance work carried out at a qualified specialist workshop.Overview of the air conditioning control panel
The indicator lamps on the buttons indicate that the corresponding function is activated.  Vehicles with THERMOTRONIC air conditioning control panel (with stationary heater) Sets the temperature on the driver's side, left 2 | μ vmm Calls up the air conditioning menu, left (→ page 260) Sets the airflow or switches off climate control AUTO Sets climate control to automatic mode (→ page 261) 5 Defrosts the windscreen 6 Switches the rear window heater on/off 7 Switches air-recirculation mode on/off (→ page 263) 8 A/C Switches the A/C function on/off (→ page 260) or Switches residual heat on/off (→ page 263) 9 [1] Switches the stationary heater on/off (→ page 57) 10 Sets the temperature on the front passenger side  Vehicles with THERMOTRONIC air conditioning control panel (without stationary heater) Sets the temperature on the driver's side Calls up/exits the air conditioning menu (→ page 260) Sets the airflow or switches off climate control AUTO Sets climate control to automatic mode (→ page 261) 5 Defrosts the windscreen 6 Switches the rear window heater on/off 7 Switches air-recirculation mode on/off (→ page 263) a [A/C] Switches the A/C function on/off (→ page 260) or   G-Class - Owner's Manual Climate control Overview of climate control systems Switches residual heat on/off ( → page 263) SYNC Switches synchronisation on/off ( → page 262) Sets the temperature on the front passenger sideREAR OPERATING UNIT
 Sets the temperature in the rear passenger compartment 2 Display 3 Sets the airflow in the rear passenger compartment After four hours of non-operational time (ignition switched off), the specified climate values for temperature setting and manual blower in the rear passenger compartment will be synchronised with the driver's climate zone.   G-Class - Owner's Manual Climate control Operating the climate control systemOperating the climate control system
Switching climate control on/off
To switch on: set the airflow to level 1 or higher using the 🎨 button. To switch off: set the airflow to level 0 using the 📋 button. If climate control is switched off, the windows may mist up more quickly. Switch climate control off only briefly. Rear climate control cannot be switched off separately.Switching the A/C function on/off via the operating unit
The A/C function heats, cools and dehumidifies the vehicle's interior air. Press the button A/C. Switch off the A/C function only briefly. Otherwise, the windows could mist up more quickly. Condensation may drip from the underside of the vehicle when cooling mode is active. This is not indicative of a fault.THE A/C FUNCTION WILL BE DEACTIVATED IN THE FOLLOWING CASES:
- When you are driving on an uphill or downhill gradient of more than 35% - When you are driving at an angle across an incline of more than 15° \- When the engine is subjected to extreme loads at high outside temperatures Moderate driving will help to restore the cooling output.Calling up the air conditioning menu via multimedia system or the air conditioning control panel
The air conditioning menu can be called up via the temperature display or via the air conditioning control panel. The temperature display is always shown on the lower edge of the media display. Press on the temperature display on the lower edge of the media display. or Press the button in the air conditioning control panel. G-Class - Owner's Manual Climate control Operating the climate control systemActivating/deactivating the A/C function via the air conditioning menu
Multimedia system: Climate menu First row of seats Depending on the external conditions, support for improved cooling and dehumidification of the interior air will be provided when the A/C function is activated. If it is not possible to operate the A/C function on the climate bar on the central display, switch the function on or off on the air conditioning control panel. Select A/C (A/C).THE A/C FUNCTION WILL BE DEACTIVATED IN THE FOLLOWING CASES:
- When you are driving on an uphill or downhill gradient of more than 35% - When you are driving at an angle across an incline of more than 15° Switch off the A/C function only briefly; otherwise the windows may mist up more quickly. Condensation may drip from the underside of the vehicle when cooling mode is active. This is not indicative of a fault.Setting climate control to automatic mode
In automatic mode, the set temperature is controlled and maintained at a constant level by the air supply. Press the AUTO button. To switch to manual mode: press the AUTO button again.Overview of the air distribution settings
SIMBOL-SIMBOL PADA LAYAR MENUNJUKKAN VENTILASI MANA YANG DILALUI ALIRAN UDARA:
Demister vents Centre and side air vents Footwell ventsMengatur distribusi udara menggunakan menu AC
Multimedia system: Climate menu ▶ Select First row of seats. To set air distribution: select 📞, 🖼 or 🛏️. Set the airflow. When the air conditioning system is switched on, at least one zone is always active. However, several air distribution options can be selected at the same time, for example to set the climate control for the vehicle interior and the footwells simultaneously. In doing so, the [ˈɑː] climate control for the windscreen can only be selected for the first seat row. When automatic mode is active, the buttons for setting the air distribution are automatically deactivated. When the air conditioning system is switched off, the buttons remain operable and the last setting is saved.   G-Class - Owner's Manual Climate control Operating the climate control systemMengatur kontrol iklim belakang menggunakan menu AC
Multimedia system: Climate menuMENGATUR SUHU
▶ Select Second row of seats. Set the temperature with ▲ or ▼.MENGATUR ALIRAN UDARA
▶ Select Second row of seats. Set the air flow with ▶ or ▶.MENGONTROL KONTROL IKLIM BELAKANG SECARA OTOMATIS
Select AUTO. When the defrost function is activated, some functions (e.g. the temperature setting) will automatically be deactivated. To deactivate the defrost function, press either Hmax, or A set the air flow to level 0 ( → page 262).Mengaktifkan/menonaktifkan fungsi sinkronisasi melalui panel kontrol AC
Persyaratan:
• The vehicle is not equipped with a stationary heater. Climate control can be set centrally using the synchronisation function. The temperature and air distribution setting for the driver's side will be adopted automatically for all climate control zones. Press the SYNC button. The synchronisation function will switch off if the settings for any of the other climate zones are changed.Mengaktifkan/menonaktifkan fungsi sinkronisasi melalui menu AC
Multimedia system: Climate menu First row of seats The synchronisation function controls the climate control centrally. The driver's settings for temperature, airflow and air distribution are automatically adopted for each climate zone. Select SYNC (SYNC).Mengembunkan/menghilangkan embun pada kaca
KACA DEPAN BEKU ATAU BERKABUT
Press the button on the air-conditioning control panel (→ page 258). The windscreen is heated by warm air from the air-conditioning system and by the electric windscreen heater.KACA BERKABUT DI BAGIAN DALAM
Press the AUTO button on the air-conditioning control panel.  G-Class - Owner's Manual Climate control Operating the climate control system If the windows remain misted up: press the 📄 button. The windscreen is heated by warm air from the air-conditioning system and by the electric windscreen heater. The windscreen heater can also be switched on and off separately on the Climate menu via 📁.KACA BERKABUT DI BAGIAN LUAR
▶ Switch on the windscreen wipers. Press the AUTO button.Mengaktifkan/menonaktifkan mode resirkulasi udara
Press the button 📄. The interior air is recirculated. Air-recirculation mode will automatically switch to fresh air mode after a while. The windows may mist up more quickly with air-recirculation mode switched on. Do not have air-recirculation mode switched on for long periods.Mengaktifkan/menonaktifkan panas sisa
Persyaratan:
• The vehicle is parked. It is possible to make use of the residual heat from the engine to continue heating or ventilating the front compartment of the vehicle for approximately 30 minutes, depending on the temperature set. To switch on: press the A/C button. Residual heat will be switched off automatically.Mengaktifkan/menonaktifkan ionisasi
Multimedia system: Climate menu Air quality When ionisation is activated, the air in the vehicle interior is enriched with negatively charged oxygen ions. These can promote the well-being of the vehicle occupants. Select Ionisation. The function can only be performed if the AUTO mode is activated or the air distribution is set to the side air vent. The function is restricted if the side air vents on the driver's side are closed.Informasi tentang pemanas kaca depan
PERINGATAN
Risk of burns from touching the windscreen when the windscreen heater is switched on The windscreen can become very hot when the windscreen heater is switched on. The health of persons with limited temperature sensitivity or a limited ability to react to high temperatures may be affected or they may even suffer burn-like injuries. Do not touch the windscreen while the windscreen heater is switched on. ▶ Allow the windscreen to cool down before touching it.PERSYARATAN:
• The engine is running. - The relevant environmental conditions are prevailing, e.g. an outside temperature of less than 5°C. When max is switched on, the windscreen heater will be switched on automatically as needed. The windscreen heater can also be switched on and off separately on the Climate menu via 📂. Pemanas/ventilasi stasioner
FUNGSI PEMANAS/VENTILASI STASIONER
- The air inside the vehicle will be heated or ventilated to the set temperature. - The air inside the vehicle cannot be cooled down to temperatures below the outside temperature. - If the outside temperature changes, ventilation mode will automatically switch to heating mode or heating mode will automatically switch to ventilation mode. The stationary heater and the exhaust gas outlet are situated at the left front wheel.MENGHIDUPKAN/MEMATIKAN PEMANAS/VENTILASI STASIONER MELALUI PANEL KONTROL AC
BAHAYA
Risk of fatal injury due to poisonous exhaust gases If the tailpipe is blocked or sufficient ventilation is not possible, poisonous exhaust gases such as carbon monoxide may enter the vehicle. This is the case in enclosed spaces or if the vehicle gets stuck in snow, for example. ▶ Always switch the stationary heater off in enclosed spaces without an air extraction system, e.g. in garages. ▶ Keep the tailpipe and the area around the vehicle free from snow when the engine or the stationary heater is running. ▶ Open a window on the side of the vehicle facing away from the wind to ensure an adequate supply of fresh air.  G-Class - Owner's Manual Climate control Operating the climate control system PERINGATAN
Risk of fire due to hot stationary heater components and exhaust gases Flammable materials such as leaves, grass or twigs may ignite. When the stationary heater is switched on, make sure that: - hot vehicle parts do not come into contact with flammable materials. - the exhaust gas can flow out of the stationary heater exhaust pipe unhindered. - the exhaust gas does not come into contact with flammable materials. CATATAN
Battery discharge caused by stationary heater or stationary ventilation operation Operating the stationary heater or stationary ventilation drains the battery. ▶ After heating or ventilating the vehicle twice, drive for a longer period of time.Persyaratan:
• The fuel tank is filled to at least the reserve level. • Adequate state of charge for the starter battery.  Set the desired temperature using the button Press the button ①. The red or blue indicator lamp on the button ① will light up or go out.WARNA LAMPU INDIKATOR MEMILIKI ARTI BERIKUT:
• Blue: stationary ventilation is switched on. • Red: the stationary heater is switched on. • Yellow: the departure time is preselected. The stationary heater/ventilation will switch off automatically after 50 minutes.MENGATUR PEMANAS/VENTILASI STASIONER MELALUI SISTEM MULTIMEDIA
Persyaratan
• The vehicle has a stationary heater.  G-Class - Owner's Manual Climate control Operating the climate control system Multimedia system: Climate menu Stationary heaterMEMILIH WAKTU KEBERANGKATAN
▶ Select Time A, Time B or Time C.MENGATUR WAKTU KEBERANGKATAN
▶ Select Time A, Time B or Time C. ▶ Select the pen beside the time. Set a time.MENGATUR PEMANAS STASIONER/VENTILASI MELALUI KENDALI JARAK JAUH
BAHAYA
Risk of fatal injury due to poisonous exhaust gases If the tailpipe is blocked or sufficient ventilation is not possible, poisonous exhaust gases such as carbon monoxide may enter the vehicle. This is the case in enclosed spaces or if the vehicle gets stuck in snow, for example. ▶ Always switch the stationary heater off in enclosed spaces without an air extraction system, e.g. in garages. ▶ Keep the tailpipe and the area around the vehicle free from snow when the engine or the stationary heater is running. ▶ Open a window on the side of the vehicle facing away from the wind to ensure an adequate supply of fresh air.  PERINGATAN
Risk of fire due to hot stationary heater components and exhaust gases Flammable materials such as leaves, grass or twigs may ignite. When the stationary heater is switched on, make sure that: - hot vehicle parts do not come into contact with flammable materials. - the exhaust gas can flow out of the stationary heater exhaust pipe unhindered. - the exhaust gas does not come into contact with flammable materials. CATATAN
Battery discharge caused by stationary heater or stationary ventilation operation Operating the stationary heater or stationary ventilation drains the battery. ▶ After heating or ventilating the vehicle twice, drive for a longer period of time.Persyaratan
• The fuel tank is filled to at least the reserve level.  G-Class - Owner's Manual Climate control Operating the climate control system SWITCHING ON IMMEDIATELY  Press and hold the ON button. SETTING THE DEPARTURE TIME  Briefly press the ON button. Press the ◀ or ▶ button repeatedly until the time to be changed appears on the display. Press the ON and OFF buttons simultaneously. The ⏻ symbol on the remote control display will flash. Use the ◀ and ▶ buttons to set the desired departure time. Press the ON and OFF buttons simultaneously. The new departure time will be stored. Up to three departure times can be stored. To activate the departure time: select the desired departure time and press and hold the ON button. The symbol, the departure time and, depending on the selected departure time, the letter A, B or C will appear on the display. To deactivate the departure time: select the desired departure time and press and hold the OFF button. OFF will appear on the display. To check the status of the active stationary heater: briefly press the ON button.   G-Class - Owner's Manual Climate control Operating the climate control system SWITCHING OFF IMMEDIATELY  Press and hold the OFF button. OVERVIEW OF THE REMOTE CONTROL DISPLAYS (STATIONARY HEATER/VENTILATION)  Stationary ventilation switched on Stationary heater switched on 3 Selected departure time 4 Remaining time for the stationary heater/ventilation (in minutes) Stationary heater/ventilation active 6 Departure time activated 7 Signal strengthTAMPILAN LAIN YANG MUNGKIN:
• Time: the activated departure time. - Zero minutes: the running time for the stationary heater is extended because the engine has not yet reached operating temperature when it is started. • OFF: the stationary heater/ventilation is switched off.Lubang ventilasi udara
MENYESUAIKAN LUBANG VENTILASI UDARA DEPAN
WARNING Risk of burns or frostbite due to being too close to the air vents Very hot or very cold air can flow from the air vents. Make sure that all vehicle occupants always maintain a sufficient distance from the air vents. If necessary, direct the airflow to another area of the vehicle interior.UNTUK MENJAMIN ALIRAN UDARA SEGAR MELALUI LUBANG VENTILASI KE DALAM KABIN KENDARAAN, PERHATIKAN HAL BERIKUT:
• Always keep the vents and ventilation grilles in the vehicle interior clear. - Keep the air inlet free of residue build-up (→ page 614).  G-Class - Owner's Manual Climate control Operating the climate control system  To open or close: hold the centre of air vent and turn it to the left or right as far as it will go. To set the airflow direction: hold the centre of air vent Ⓞ and move it up or down or to the left or right.MENYESUAIKAN LUBANG VENTILASI UDARA BELAKANG
PERINGATAN
Risk of burns or frostbite due to being too close to the air vents. Very hot or very cold air can flow from the air vents. ▶ Make sure that all vehicle occupants always maintain a sufficient distance from the air vents. If necessary, direct the airflow to another area of the vehicle interior.  To open or close: hold the centre of air vent ① and turn it to the left or right as far as it will go. To set the airflow direction: hold the centre of air vent ① and move it up or down or to the left or right. ① Only cold air will flow from the rear air vents on the centre console.  G-Class - Owner's Manual Driving and parking < Mengemudi dan parkir
This interactive PDF works like a website - tap or click a button to jump straight to where you want to go. You can return here at any time via the navigation bar at the top left. Driving 271 > Parking 326 > DYNAMIC SELECT 294 > Driving and driving safety systems 338 > Automatic transmission 303 > Trailer hitch 413 > Transfer case 312 > Vehicle towing instructions 417 > Differential locks 315 All-wheel drive 318 Refuelling 319 G-Class - Owner's Manual Driving and parking Driving< Mengemudi
Menyalakan catu daya atau kendaraan
PERINGATAN
Accident- and risk of injury with unsupervised children in the vehicleJIKA ANDA MENINGGALKAN ANAK-ANAK TANPA PENGAWASAN DI DALAM KENDARAAN, MEREKA TERUTAMA DAPAT
- Open doors and thereby endanger other persons or road users. • get out of the car and are hit by traffic. • Operate vehicle equipment and become trapped, forexample.SELAIN ITU, ANAK-ANAK JUGA DAPAT MENGGERAKKAN KENDARAAN, MISALNYA DENGAN:
• releasing the parking brake. • change the gearbox setting. - start the vehicle. ▶ Never leave children unattended in the vehicle. When leaving the vehicle, always take the SmartKey with you and lock the vehicle. ▶ Keep the key out of reach of children.Persyaratan:
• The key is in the vehicle and is recognised. • The brake pedal is not depressed.  To switch on the power supply: press button ① once. You can, for example, switch on the windscreen wipers.CATU DAYA AKAN DIMATIKAN LAGI JIKA KONDISI BERIKUT TERPENUHI:
• You open the driver's door. • You press button ① twice more.   G-Class - Owner's Manual Driving and parking Driving To switch on the vehicle: press button ① twice. Indicator and warning lamps will light up on the driver display.KENDARAAN AKAN DIMATIKAN LAGI JIKA SALAH SATU KONDISI BERIKUT TERPENUHI:
- You do not start the vehicle within 15 minutes and the transmission is in position or the electric parking brake is applied. • You press button ① once.Menyalakan kendaraan dengan tombol start/stop
BAHAYA
Danger to life from toxic exhaust gas in enclosed spaces Combustion engines emit toxic exhaust gases such as carbon monoxide. Inhaling these exhaust gases is hazardous to health and leads to poisoning. ▶ Never leave the engine or, if present, the stationary heater running in an enclosed space without sufficient ventilation. PERINGATAN
Risk of fire due to flammable materials in the engine compartment or on the exhaust system Flammable materials may ignite. Therefore, regularly check that there are no flammable foreign materials in the engine compartment or on the exhaust system.  PERINGATAN
Accident- and risk of injury with unsupervised children in the vehicleJIKA ANDA MENINGGALKAN ANAK-ANAK TANPA PENGAWASAN DI DALAM KENDARAAN, MEREKA TERUTAMA DAPAT
- Open doors and thereby endanger other persons or road users. • get out of the car and are hit by traffic. • Operate vehicle equipment and become trapped, forexample.SELAIN ITU, ANAK-ANAK JUGA DAPAT MENGGERAKKAN KENDARAAN, MISALNYA DENGAN:
• releasing the parking brake. • change the gearbox setting. - start the vehicle. ▶ Never leave children unattended in the vehicle. When leaving the vehicle, always take the SmartKey with you and lock the vehicle. ▶ Keep the key out of reach of children.Persyaratan:
• The key is in the vehicle and is recognised.  G-Class - Owner's Manual Driving and parking Driving  Shift the transmission to position P or N. Depress the brake pedal and press the button once. If the vehicle does not start, switch off unnecessary consumers and press the button once. If the vehicle still does not start and the Place the key in the marked space See Owner's Manual display message appears on the driver display, start the vehicle with the key in the storage compartment (emergency operation mode) (→ page 273). You can switch off the vehicle while driving. You switch off the vehicle by pressing and holding the button ① for about three seconds or pressing the button ② three times within three seconds. Be sure to observe the safety notes concerning this under "Driving tips" (→ page 279). Observe any information regarding display messages that may be shown on the driver display. Menyalakan kendaraan dalam mode operasi darurat
BAHAYA
Danger to life from toxic exhaust gas in enclosed spaces Combustion engines emit toxic exhaust gases such as carbon monoxide. Inhaling these exhaust gases is hazardous to health and leads to poisoning. ▶ Never leave the engine or, if present, the stationary heater running in an enclosed space without sufficient ventilation. PERINGATAN
Risk of fire due to flammable materials in the engine compartment or on the exhaust system Flammable materials may ignite. Therefore, regularly check that there are no flammable foreign materials in the engine compartment or on the exhaust system.  G-Class - Owner's Manual Driving and parking Driving  PERINGATAN
Accident- and risk of injury with unsupervised children in the vehicleJIKA ANDA MENINGGALKAN ANAK-ANAK TANPA PENGAWASAN DI DALAM KENDARAAN, MEREKA DAPAT TERUTAMA
- Open doors and thereby endanger other persons or road users. • get out of the car and are hit by traffic. • Operate vehicle equipment and become trapped, forexample.SELAIN ITU, ANAK-ANAK JUGA DAPAT MENGGERAKKAN KENDARAAN, MISALNYA DENGAN:
• releasing the parking brake. • change the gearbox setting. - start the vehicle. ▶ Never leave children unattended in the vehicle. When leaving the vehicle, always take the SmartKey with you and lock the vehicle. ▶ Keep the key out of reach of children. If the vehicle does not start and the Place the key in the marked space See Owner's Manual message appears on the driver display, you can start the vehicle in emergency operation mode.  ▶ Ensure that the storage compartment ② is empty. Remove the key ① from the key ring. Place the key ① next to the symbol ③ in the storage compartment ②. The vehicle will start after a short delay. If you remove the key ① from the storage compartment ②, it the vehicle will still be ready to drive. For further vehicle starts, however, the key ① must be located next to the symbol ③ in the storage compartment ② during the entire journey. Have the key ① checked at a qualified specialist workshop.JIKA KENDARAAN TIDAK MENYALA:
Place the key ① in the storage compartment ② and leave it there. ▶ Depress the brake pedal and start the vehicle using the start/stop button. You can also switch on the power supply or the vehicle independently with the start/stop button ( → page 271).   G-Class - Owner's Manual Driving and parking Driving Observe any information regarding display messages that may be shown on the driver display.Menyalakan kendaraan melalui Layanan Online Jarak Jauh
MENDINGINKAN ATAU MEMANASKAN INTERIOR KENDARAAN SEBELUM MEMULAI PERJALANAN
You can cool or heat the vehicle interior before starting a journey.PASTIKAN HAL BERIKUT SEBELUM MENYALAKAN MESIN:
- The legal stipulations in the area where your vehicle is parked allow engine starting via smartphone. It is safe to start and run the engine where your vehicle is parked. • The fuel tank is sufficiently full. • The starter battery is sufficiently charged. i Further information can be found in the Mercedes-Benz App.MENGISI DAYA BATERAI AWAL SEBELUM MEMULAI PERJALANAN
You can receive a message on your smartphone when the state of charge of the starter battery is low. You can then start the vehicle with the smartphone to charge the battery. The vehicle will automatically be switched off after ten minutes.PASTIKAN HAL BERIKUT SEBELUM MENYALAKAN MESIN:
- The legal stipulations in the area where your vehicle is parked allow engine starting via smartphone. It is safe to start and run the engine where your vehicle is parked. • The fuel tank is sufficiently full.MENYALAKAN KENDARAAN (ONLINE JARAK JAUH)
BAHAYA
Danger to life from toxic exhaust gas in enclosed spaces Combustion engines emit toxic exhaust gases such as carbon monoxide. Inhaling these exhaust gases is hazardous to health and leads to poisoning. ▶ Never leave the engine or, if present, the stationary heater running in an enclosed space without sufficient ventilation. PERINGATAN
Risk of fire due to flammable materials in the engine compartment or on the exhaust system Flammable materials may ignite. Therefore, regularly check that there are no flammable foreign materials in the engine compartment or on the exhaust system.   G-Class - Owner's Manual Driving and parking Driving PERINGATAN
Risk of crushing or entrapment due to unintentional starting of the engine Limbs could be crushed or trapped if the engine is started unintentionally during service or maintenance work. ▶ Always secure the engine against unintentional starting before carrying out maintenance or repair work.  PERINGATAN
Accident- and risk of injury with unsupervised children in the vehicleJIKA ANDA MENINGGALKAN ANAK-ANAK TANPA PENGAWASAN DI DALAM KENDARAAN, MEREKA DAPAT TERUTAMA
- Open doors and thereby endanger other persons or road users. • get out of the car and are hit by traffic. • Operate vehicle equipment and become trapped, forexample.SELAIN ITU, ANAK-ANAK JUGA DAPAT MENGGERAKKAN KENDARAAN, MISALNYA DENGAN:
• releasing the parking brake. • change the gearbox setting. - start the vehicle. ▶ Never leave children unattended in the vehicle. When leaving the vehicle, always take the SmartKey with you and lock the vehicle. ▶ Keep the key out of reach of children.Persyaratan:
• Park position P is selected. • The anti-theft alarm system is not activated. • The hazard warning light system is switched off. • The bonnet is closed. • The doors are closed and locked.  G-Class - Owner's Manual Driving and parking Driving • The windows and sliding sunroof are closed. ▶ Start the vehicle using your smartphone. After every vehicle start, the engine will run for ten minutes. You can carry out a maximum of two consecutive starting attempts. You must start the vehicle with the key before trying to start the vehicle with your smartphone again.ANDA DAPAT MEMATIKAN KENDARAAN KAPAN SAJA DENGAN CARA BERIKUT:
• Via the Mercedes-Benz app - By pressing buttons 📐 or 🏠 on the key Additional information can be found in the Mercedes-Benz app.MENGAMANKAN KENDARAAN TERHADAP PENYALAAN SEBELUM MELAKUKAN PERAWATAN ATAU PERBAIKAN:
Switch on the hazard warning light system or unlock the doors. Open a side window or the sliding sunroof.Catatan pengoperasian awal
UNTUK MENJAGA MESIN SELAMA 1500 KM PERTAMA:
• Drive at varying road speeds and engine speeds. • Do not drive faster than 140 km/h. - Only briefly allow the engine to reach a maximum engine speed of 4500 rpm. • Drive the vehicle in drive program C or E. - Then shift to the next higher gear at the very latest when the needle reaches the last third before the red area in the rev counter. • Do not shift down manually in order to brake. - Avoid overstraining the vehicle, e.g. by driving at full throttle. • Do not depress the accelerator pedal past the pressure point (kickdown). - Only increase the engine speed gradually and accelerate the vehicle to full speed after 1500 km. - In trailer operation: do not drive on a gradient greater than 7 % and more than 7 km long. This also applies when the engine or parts of the drivetrain have been replaced.HARAP JUGA PERHATIKAN CATATAN PENGOPERASIAN AWAL BERIKUT:
- In certain handling and driving safety systems, the sensors adjust automatically while a certain distance is being driven after the vehicle has been delivered or after repairs. Full system effectiveness is only reached when this teaching-in process has concluded. - Brake pads, brake discs and tyres that are either new or have been replaced only achieve optimum braking effect and grip after driving several hundred kilometres. Compensate for the reduced braking effect by applying greater force to the brake pedal. G-Class - Owner's Manual Driving and parking DrivingDaya mesin dan torsi mesin (kendaraan Mercedes-AMG)
The actual (maximum) values that can be achieved for engine output and engine torque may deviate from the certified values within the country-specific guidelines for permissible tolerances (basis: UN-ECE No. 85 or country-specific guidelines).VARIABEL YANG MEMPENGARUHI TERMASUK:
• Location above sea level Fuel quality • Outside temperature • Engine and gearbox operating temperature The engine operating temperature warning lamp will remain lit until the engine and the gearbox have reached their operating temperature. The temperature indicators on the driver display will also be blue. Engine output and engine torque will be reduced. Factor this into your driving style. When the engine operating temperature warning lamp goes out and the temperature indicators are white, full engine output and engine torque will be available. If the temperature indicators on the driver display are red, the temperatures are too high. Engine output and engine torque will be reduced again. Factor this into your driving style and observe the warning lamps and display messages that are shown on the driver display.Catatan tentang akselerasi yang dioptimalkan
If all necessary requirements and activation conditions are fulfilled, the best possible acceleration can be achieved from a standstill. Do not use optimised acceleration on public roads. Individual wheels could spin and you could lose control of the vehicle. There is an increased risk of skidding and/or accident. Be sure to observe the safety notes and information on ESP ® (→ page 341).Melaju dengan akselerasi yang dioptimalkan
PERINGATAN
Risk of skidding and accidents due to wheelspin If you pull away with optimised acceleration, individual wheels could spin and you could lose control of the vehicle. There is a higher risk of skidding and accidents when ESP * is deactivated in particular.  Make sure that there are no persons or obstacles in the vicinity of the vehicle.Persyaratan
• The vehicle is run in (→ page 277). • The vehicle and tyres are in good condition. • The road surface is high-grip. • The engine and transmission are at normal operating temperature.   G-Class - Owner's Manual Driving and parking Driving CATATAN
Increased wear due to optimised acceleration When pulling away with optimised acceleration, all components of the drivetrain are subjected to a very high load. This can lead to increased component wear. ▶ Do not always pull away with optimised acceleration. Engage the D drive position ( → page 308). Move the steering wheel to the straight-ahead position. Select drive program S (→ page 298, 297). Deactivating ESP ® (→ page 345). ▶ Depress and hold the brake pedal firmly with your left foot. ▶ Fully depress the accelerator pedal with your right foot. After no more than five seconds, quickly take your left foot off the brake, but keep the accelerator pedal depressed. The vehicle will pull away at maximum acceleration. Switch on ESP ® once the acceleration procedure is complete.AKSELERASI OPTIMAL DI AKHIR
Remove your foot from the accelerator pedal. Reactivate ESP ® . After you pull away with optimised acceleration, components of the drivetrain may become very hot, which means that optimised acceleration values may be reached again only after a few minutes.Catatan mengemudi
PERINGATAN
Risk of accident due to objects in the driver's footwell Objects in the driver's footwell may impede pedal travel or block a depressed pedal. This will jeopardise the operating and road safety of the vehicle. Stow all objects in the vehicle securely so that they cannot get into the driver's footwell. ▶ Make sure that there is always sufficient clearance for the pedals. ▶ Always fit the floor mats securely and as prescribed. Do not use loose floor mats and do not place floor mats on top of one another.   G-Class - Owner's Manual Driving and parking Driving  PERINGATAN
Risk of accident due to incorrect footwearALAS KAKI YANG TIDAK TEPAT TERMASUK, CONTOHNYA:
• shoes with platform soles • shoes with high heels - slippers There is a risk of an accident. ▶ Always wear suitable footwear so that you can operate the pedals safely. PERINGATAN
Risk of accident if the vehicle is switched off while driving If you switch off the vehicle while driving, safety functions are restricted or no longer available. This may affect the power steering system and the brake force boosting, for example. You will need to use considerably more force to steer and brake, for example. ▶ Do not switch off the vehicle while driving. BAHAYA
Danger to life from toxic exhaust gas in enclosed spaces Combustion engines emit toxic exhaust gases such as carbon monoxide. Inhaling these exhaust gases is hazardous to health and leads to poisoning. ▶ Never leave the engine or, if present, the stationary heater running in an enclosed space without sufficient ventilation. PERINGATAN
Risk of skidding and of an accident due to shifting down on slippery road surfaces If you shift down on slippery road surfaces to increase the engine braking effect, the drive wheels may lose traction. Do not shift down on slippery road surfaces to increase the engine braking effect.  G-Class - Owner's Manual Driving and parking DrivingA
BAHAYA
Risk of fatal injury from toxic exhaust gases if the tailpipe is blocked Combustion engines emit toxic exhaust gases such as carbon monoxide. Inhaling these exhaust gases is harmful to health and leads to poisoning. If the tailpipe is blocked or sufficient ventilation is not possible, exhaust gases can enter the vehicle. This is the case, for example, if the vehicle gets stuck in the snow. When the engine or stationary heater is running, keep the tailpipe and the area around the vehicle free of snow. To ensure a sufficient supply of fresh air, open a window on the side of the vehicle facing away from the wind.A
PERINGATAN
Risk of accident due to the brake system overheating If you leave your foot on the brake pedal when driving, the brake system may overheat. This increases the braking distance and the brake system can even fail. ▶ Never use the brake pedal as a footrest. Do not depress the brake pedal and the accelerator pedal at the same time while driving.!
CATATAN
Engine damage due to excessive engine speed You will damage the engine if you drive at excessive engine speeds. Do not drive at engine speeds in the red area of the rev counter, or shown in red in the driver display.CATATAN
Causing wear to the brake linings by permanently depressing the brake pedal Do not permanently depress the brake pedal while driving. To use braking effect of the engine, shift to a lower gear in good time.CATATAN
Damage to the drivetrain and engine when pulling away Do not warm up the engine while the vehicle is stationary. Pull away immediately. Avoid high engine speeds and driving at full throttle until the engine has reached its operating temperature.   G-Class - Owner's Manual Driving and parking Driving CATATAN
Damage to the catalytic converter due to non-combusted fuel. The engine is not running smoothly and is misfiring. Non-combusted fuel may get into the catalytic converter. ▶ Only depress the accelerator pedal slightly. ▶ Have the cause rectified immediately at a qualified specialist workshop. CATATAN
Reduced battery life due to frequent short-distance trips The 12 V battery may not be sufficiently charged when the vehicle is used only for short-distance trips. This reduces the life of the battery. ▶ Drive longer distances regularly to charge the battery. CATATAN
Vehicle damage due to failure to observe the maximum permissible clearance height If the vehicle height exceeds the maximum permissible clearance height, the roof and other vehicle parts may be damaged. Please observe the indicated maximum clearance height. If the vehicle exceeds the permissible clearance height, do not drive in. ▶ Take the modified vehicle height in the case of roof superstructures or other carrier systems into account.  Please bear in mind that all speed values stated in this Owner's Manual are approximate values and are subject to a certain tolerance.CATATAN MENGENAI MENGEMUDI DENGAN BEBAN DI ATAP, TRAILER, ATAU KENDARAAN BERMUATAN PENUH
Driving with a loaded roof luggage rack or trailer, or with the vehicle fully laden or occupied, changes the handling and steering characteristics of your vehicle.OLEH KARENA ITU, HARAP PERHATIKAN CATATAN BERIKUT:
- Do not exceed the permissible roof load and trailer load. Also observe the information in the technical data in this respect. - Distribute the roof load and vehicle load evenly, and place heavy objects at the bottom. Also observe the notes on loading the vehicle ( → page 210).  G-Class - Owner's Manual Driving and parking Driving - Drive with care. Avoid sudden starting, braking and steering manoeuvres or fast cornering. - If trailer operation is permitted, observe the notes on trailer operation ( → page 413).CATATAN MENGENAI MENGEMUDI DI JALAN YANG DITABURI GARAM PENGURAI ES
The braking effect is limited on road surfaces treated with de-icing salt.OLEH KARENA ITU, HARAP INGAT CATATAN BERIKUT:
- Due to salt build-up on the brake discs and brake linings, the braking distance can increase considerably or braking may be one-sided. - Maintain a much greater safety distance to the vehicle travelling ahead.HILANGKAN PENUMPUKAN GARAM DENGAN CARA BERIKUT:
\- Brake occasionally, paying attention to the traffic conditions. \- Carefully depress the brake pedal at the end of the journey and when starting the next journey.CATATAN MENGENAI AQUAPLANING
Aquaplaning can take place if a certain depth of water has built up on the road surface.PERHATIKAN CATATAN BERIKUT SAAT HUJAN DERAS ATAU DALAM KONDISI YANG DAPAT MENYEBABKAN AQUAPLANING:
- Reduce speed. - Avoid tyre ruts. - Avoid sudden steering movements. - Brake carefully. Also observe the notes on regularly checking wheels and tyres ( → page 41).CATATAN MENGENAI MENGEMUDI MELALUI GENANGAN AIR DI JALAN
Water ingress can damage the engine, electrics and transmission. Water can also enter the air intake fittings of the engine and cause engine damage.PERHATIKAN HAL BERIKUT JIKA ANDA PERLU MENGEMUDI MELINTASI AIR:
- Observe the maximum permissible fording depth (→ page 760). • Drive no faster than 10 km/h. - Vehicles travelling ahead, or oncoming vehicles, can create waves which may exceed the maximum permissible depth of water. The braking effect of the brakes is reduced after fording. Brake carefully, paying attention to the traffic conditions, until the braking effect has been fully restored.Catatan tentang mengemudi off-road
WARNING Risk of accident if you do not keep to line of fall on inclines If you drive at an angle or turn on an incline, the vehicle could slip sideways, tip and rollover. ▶ Always drive on inclines in the line of fall (straight up or down) and do not turn.  G-Class - Owner's Manual Driving and parking DrivingA
PERINGATAN
Risk of fire due to flammable material coming into contact with hot parts of the exhaust system If combustible materials, e.g. leaves, grass or twigs, come into contact with hot parts of the exhaust system, they may ignite. When driving off-road or on unpaved surfaces, check the underside of the vehicle at regular intervals. In particular, remove any trapped parts of plants or other flammable material. If damage should occur, immediately inform a qualified specialist workshop. When driving off-road, it is possible for example that sand, mud and water, possibly mixed with oil, may get into the service brakes. This may lead to a reduction in braking effect or service brake failure, also as a result of increased wear. The braking characteristics will vary depending on the material that has entered the system. Clean the brakes after driving off-road. If you then notice reduced braking effect or hear scraping noises, have the brake system checked at a qualified specialist workshop. Adapt your driving style to the modified braking characteristics. !
CATATAN
Damage caused by driving over obstaclesKENDARAAN DAPAT RUSAK OLEH:
• bottoming out on high kerbs or on unpaved trails - driving at speed over obstacles such as kerbs, speed bumps or potholes - heavy objects impacting the underbody or suspension components ▶ Do not drive over obstacles that might damage the vehicle. When driving off-road, regularly check the vehicle for damage. ▶ Adjust your speed to the road conditions. In the event of damage, immediately consult a qualified specialist workshop.CATATAN LINGKUNGAN
Environmental damage due to non-observance of prohibition signs Environmental protection has priority. Treat nature with respect. Be sure to observe prohibition signs.DAFTAR PERIKSA SEBELUM MENGEMUDI OFF-ROAD
PERIKSA HAL-HAL BERIKUT SEBELUM MENGEMUDI OFF-ROAD:
Fuel level - Engine oil level: fill engine oil to the maximum level to ensure full gradeability ( → page 38).   G-Class - Owner's Manual Driving and parking Driving AdBlue® level of at least 10 l • Tyre-change tool kit and spare wheel if provided - Tyres and wheels Further information about special all-terrain tyres for retrofitting can be obtained from a qualified specialist workshop. The off-road cockpit in the multimedia system can assist you when driving off-road. Before driving off-road, familiarise yourself with its displays and equipment-dependent settings ( → page 477).MENGEMUDI OFF-ROAD
Read this section before driving your vehicle off-road. Practise by driving in less challenging terrain first. - Observe the notes on off-road ABS (→ page 340). - Select the relevant drive program before driving off-road - 📄 Trail or 📋 Rock (→ page 298, 297). - If appropriate, shift the transfer case to the LOW RANGE off-road gear before driving off-road (→ page 313). • Engage the differential locks if necessary ( → page 316). The LOW RANGE off-road gear is only available in the 📄 Trail and 🐃 Rock drive programs. When the differential locks are engaged, the vehicle switches automatically to the drive program 📄 Rock. At speeds of 3 km/h and more, and in LOW RANGE off-road gear, you can shift from D to R and from N to R without depressing the brake pedal. This can help you to "rock" your vehicle out of a ground depression, for example.  At speeds below 3 km/h, the brake pedal must be depressed when shifting from N to D or R. - Always keep the engine running and in gear when driving on downhill gradients and slopes. Observe the notes on driving in mountainous terrain. - Do not drive in unknown terrain that is not easy to see and stay on marked routes. • Always keep the doors and windows closed while the vehicle is in motion. - Deactivate the variable limiter and Active Distance Assist DISTRONIC or cruise control. • Adapt your driving style to the terrain. - Do not use the HOLD function in the 📄 Trail drive program on steep downhill or uphill gradients with slippery or loose surfaces.Mengemudi di atas pasir
SAAT MENGEMUDI DI ATAS PASIR, PERHATIKAN JUGA PETUNJUK BERIKUT:
- Select the 📄 Sand drive program. • Shift to a lower gear ( → page 308). • Mercedes-AMG vehicles: shift to a lower gear ( → page 309). - Drive briskly to overcome the rolling resistance. The vehicle may otherwise dig itself in. - Drive in the tracks of other vehicles if possible. Make sure that the following prerequisites are met: - the tyre ruts are not too deep. the sand is firm enough.   G-Class - Owner's Manual Driving and parking Driving the ground clearance is sufficient. \- Reduce the tyre pressure in all four wheels. Contrary to the information in the tyre pressure table (fuel filler flap), you can reduce the tyre pressure to 130 kPa (1.3 bar, 18.9 psi). When you are no longer driving on sand, immediately increase the tyre pressure again. Information on the recommended tyre pressure for the vehicle's factory-fitted tyres can be found on the tyre pressure table on the inside of the fuel filler flap ( → page 654).Mengarungi
PERHATIKAN JUGA INFORMASI BERIKUT SAAT MENGARUNG AIR:
• Drive no faster than 10 km/h. - Observe the maximum permissible fording depth (→ page 762, 760). - Select the LOW RANGE off-road gear before driving through water ( → page 313). • Switch off automatic climate control ( → page 261). - Vehicles with stationary heater/stationary ventilation: Switch off the stationary heater/stationary ventilation (→ page 57). • Ensure that a bow wave does not form as you drive. • Do not stop in the water and do not switch off the engine.Mengemudi di medan pegunungan
PERHATIKAN JUGA INFORMASI BERIKUT SAAT MENGEMUDI DI MEDAN PEGUNUNGAN:
- Observe the figures for the angle of approach/departure and of the maximum gradeability ( → page 762, 760). • Engage the differential locks if necessary ( → page 316). - Avoid high engine speeds. • Use the braking power of the engine when driving downhill. - Shift to a lower gear on uphill gradients and on long, steep downhill gradients (→ page 308). - Mercedes-AMG vehicles: shift to a lower gear on uphill gradients and on long, steep downhill gradients (→ page 309). • If necessary, activate DSR before driving downhill (→ page 364).DAFTAR PERIKSA SETELAH MENGEMUDI DI JALAN OFF-ROAD
Driving off-road places greater demands on your vehicle than driving on normal roads. Check the entire vehicle underbody for damage and foreign bodies every time after driving off-road. Foreign bodies in the wheels or drivetrain can lead to imbalances and therefore vibrations. • Disengage the differential locks. • Shift the transfer case to the on-road position HIGH RANGE. - If an off-road drive program has been selected, select an on-road drive program. In the off-road drive programs, the driving safety systems are switched off or subject to functional restrictions. The vehicle's tendency to overturn or skid would be increased in public traffic. • Deactivate DSR. • Apply the brakes to dry them after fording. - Check that the service brake is working normally after a long downhill stretch.  G-Class - Owner's Manual Driving and parking Driving • Clean the following component parts every time after driving off-road: - licence plate number - headlamps and tail lamps - tyres, wheels and wheel arches - underbody • After driving through sand, mud, water or gravel, have the following component parts checked and cleaned: brake discs and brake linings - tyres and wheels - supporting joints - radiators - alternator - belt driveInformasi tentang sistem rem performa tinggi AMG
The AMG high-performance brake system is designed for high loads. This may lead to noise when braking. This effect can also occur after washing the vehicle.KEBISINGAN TERGANTUNG PADA FAKTOR-FAKTOR BERIKUT:
speed - brake force • ambient conditions, e.g. temperature and air humidity i Have the brake system checked at a qualified specialist workshop after it has been subjected to extreme loads.Fungsi ECO start/stop
FUNGSI ECO START/STOP
Depending on the engine, the ECO start/stop function is not available in all drive programs. Observe the status display on the driver display concerning this.MESIN AKAN MATI SECARA OTOMATIS DALAM SITUASI BERIKUT JIKA SEMUA KONDISI KENDARAAN UNTUK PENGHENTIAN MESIN OTOMATIS TERPENUHI:
- You brake the vehicle until it comes to a standstill in transmission position D or N. • You depress the brake pedal when travelling at a low speed.JIKA SISTEM MENDETEKSI SALAH SATU SITUASI BERIKUT, MESIN TIDAK AKAN MATI:
• You stop at a stop sign and there is no vehicle in front of you. • The vehicle that stopped in front of you pulls away again. • You manoeuvre, turn the steering wheel sharply or engage reverse gear. This prevents the engine from stopping briefly.  G-Class - Owner's Manual Driving and parking Driving  If the system detects a stop inhibitor to prevent a short stop (e.g. a stop sign), the engine will not stop. If you activate the HOLD function or engage park position P, the engine can be switched off in spite of such a stop inhibitor.MESIN AKAN MENYALA KEMBALI SECARA OTOMATIS DALAM KASUS BERIKUT:
• You engage transmission position D (depending on engine) or R. • You depress the accelerator pedal. • The vehicle requires an automatic engine start. • You release the brake pedal. - You release the brake pedal on a downhill gradient and the vehicle does not roll. - The vehicle rolls on a downhill gradient and does not automatically enter gliding mode at 20 km/h.SIMBOL FUNGSI ECO START/STOP PADA LAYAR PENGEMUDI:
- The Ⓐ symbol (green) appears when the vehicle is at a standstill: the engine was switched off by the ECO start/stop function. - The symbol (yellow) appears when the vehicle is at a standstill: not all vehicle conditions for an engine stop have been met. - Neither the Ⓐ nor Ⓠ symbol appears when the vehicle is at a standstill: a stop inhibitor to prevent a short stop has been detected (e.g. a stop sign). - The symbol appears: the ECO start/stop function is deactivated or there is a malfunction. If the engine was switched off by the ECO start/stop function and you leave the vehicle, a warning tone will sound and the engine will not be restarted. In addition, the following display message will appear on the driver display: Vehicle is operational Switch off vehicle before exiting If you do not switch off the vehicle, it will automatically be switched off after three minutes. SWITCHING THE ECO START/STOP FUNCTION ON/OFF  Press button ①. An indicator will appear on the driver display when you switch the ECO start/stop function on/off. ① will be shown permanently on the driver display while the ECO start/stop function is deactivated.MENGAKTIFKAN/MENONAKTIFKAN FUNGSI ECO START/STOP (KENDARAAN MERCEDES-AMG)
Observe the notes on the ECO start/stop function in the vehicle Owner's Manual.  G-Class - Owner's Manual Driving and parking Driving  You can also switch the ECO start/stop function on or off via the start/stop button or via the multimedia system.  Press upper or lower display button ① repeatedly, until it displays the symbol. ① If the display button does not show the symbol, then it is hidden. How functions are displayed and the order in which they are displayed can be set in the multimedia system ( → page 292). Press corresponding button ②. THE SYMBOL INDICATES THE CURRENT STATUS OF THE ECO START/STOP FUNCTION: (A) (red): switched off (A) (green): activated (yellow): inactiveFungsi tampilan ECO
 The ECO display shows an evaluation of your driving style on the driver's display depending on the situation. This enables you to check the efficiency of your driving style and adjust it if necessary. The ECO display menu shows a ball that will roll forwards or backwards in the direction of travel on a stylised road according to the driving characteristics. Above and below the road, lines mark the area for an efficient driving style ③. Ball ② will light up in green if it is rolling within these lines. Outside the lines, the ball will light up in orange.TAMPILAN ECO MENILAI KRITERIA BERIKUT UNTUK GAYA MENGEMUDI YANG HEMAT:
• Coasting at the right times • consistent speed • moderate acceleration The overall assessment of your driving style "from start" is indicated using stars Ⓞ. It starts with five empty stars, which you can fill one after the other if you drive efficiently. When all five stars are filled, a glow will appear in the background.  G-Class - Owner's Manual Driving and parking Driving ① You can call up the ECO display function via the Classic menu ( → page 423).Fungsi ECO Assist (kendaraan dengan sistem kelistrikan 48 V)
i ECO Assist is active only in drive programs E and C. ECO Assist analyses data for the vehicle's expected route. This allows the system to optimally adjust the driving style for the route ahead, save fuel and recuperate. If the system detects an event ahead and the vehicle nears the event, ECO Assist will calculate the optimum speed for maximum fuel economy and recuperative energy based on the distance, speed and downhill gradient. If the deceleration provided by ECO Assist is not sufficient, you will also need to brake with the service brake. This will be the case particularly if, for example, you start driving again in slow-moving traffic and the distance to the vehicle in front is very short.  ① "Foot off the accelerator" recommendation Route event ahead  If you release the accelerator pedal, the symbol will turn green and recuperation in overrun mode will be initiated. If the deceleration is not sufficient, also apply the service brake. If ECO Assist intervenes for a route event ahead (not for a vehicle in front) and you then press the accelerator pedal again, you will end control by ECO Assist.TAMPILAN ECO ASSIST AKAN DISEMBUNYIKAN LAGI DALAM KASUS BERIKUT:
• You do not react to the ECO Assist recommendation for a long time. - You depress the accelerator pedal while ECO Assist is intervening for a route event ahead (not for a vehicle in front). • ECO Assist cannot identify any further recommendations from the route ahead.SELAIN KENDARAAN DI DEPAN ☐, ECO ASSIST DAPAT MENDETEKSI PERISTIWA RUTE BERIKUT ② TERGANTUNG PADA PERLENGKAPAN KENDARAAN:
Roundabout Sharp bend Junction T-junction Downhill gradient Speed limit  G-Class - Owner's Manual Driving and parking Driving  In drive program C, ECO Assist will react only to the "vehicle in front" route event without displaying the route event or recommendation.BATASAN SISTEM
If the calculated route is adhered to when route guidance is active, ECO Assist will operate with greater accuracy. The basic function is also available when route guidance is not active. Not all information and traffic situations can be foreseen. The quality depends on the map data. ECO Assist is only an aid. The driver is responsible for keeping a safe distance from the vehicle in front, for vehicle speed and for braking in good time.SISTEM MUNGKIN TERGANGGU ATAU TIDAK BERFUNGSI DALAM SITUASI BERIKUT:
- if there is poor visibility, e.g. owing to insufficient illumination of the road, highly variable shade conditions, rain, snow, fog or heavy spray • if there is glare, e.g. from oncoming traffic, direct sunlight or reflections • if the windscreen is dirty in the vicinity of the multifunction camera • if the multifunction camera is misted up, damaged or obscured - if road signs are hard to detect, e.g. due to dirt, snow or insufficient lighting, or because they are obscured - if the digital road map of the navigation system has incorrect or outdated information • if signs are ambiguous, e.g. road signs in roadworks or in adjacent lanes • if the radar sensors are dirty or obscured • when you drive on roads with steep gradients • if there are narrow vehicles in front, such as bicycles or motorcyclesAMG Real Performance Sound
MEMILIH KARAKTERISTIK SUARA DENGAN TOMBOL SETIR AMG
You can select a comfortable (Balanced) or a sporty (Powerful) sound characteristic using the steering-wheel button or the multimedia system ( → page 301).  Press the upper or lower display button ① repeatedly until it displays the symbol. ① If the display button does not show the symbol, then it is hidden. How functions are displayed and the order in which they are displayed can be set in the multimedia system ( → page 292). Press corresponding button ②.WARNA SIMBOL TOMBOL MENUNJUKKAN KARAKTERISTIK SUARA YANG SAAT INI DIPILIH:
• Blue: Balanced - comfortable Red: Powerful - sporty   G-Class - Owner's Manual Driving and parking DrivingFungsi tombol setir AMG
 The AMG steering wheel buttons are an additional control element with two buttons on the steering wheel. You can assign two vehicle functions of your choice to the control element. You can change between the available functions for corresponding button by pressing the upper or lower part of display buttons repeatedly. Display buttons show each function selected.FUNGSI BERIKUT TERSEDIA TERGANTUNG PADA PERLENGKAPAN:
ESP * (→ page 342) AMG RIDE CONTROL (→ page 382) AMG ACTIVE RIDE CONTROL ( → page 383) AMG Active Balance Control ( → page 384) AMG Traction PRO ( → page 385) Manual gearshifting ( → page 309) ECO start/stop function ( → page 288) AMG Real Performance Sound ( → page 291) AMG DYNAMICS (→ page 295) In addition, all the functions you have saved as favourites in the multimedia system are available for selection. Information on favourites ( → page 461). i Individual functions may be hidden. How functions are displayed and the order in which they are displayed can be set in the multimedia system ( → page 292). If you have assigned a specific function to one of display buttons ①, you can operate this function with corresponding button ②. The assignment of display buttons Ⓤ remains stored even after a vehicle restart. But the operating status of the respective function is reset to the basic setting.Mengatur tombol setir AMG
Multimedia system: Settings ▶ System ▶ Control elements AMG steering-wheel buttonsIKHTISAR MENU PILIHAN PENGATURAN AMG
The left display buttons on the steering wheel can be set in the SETTINGS SELECT menu.  G-Class - Owner's Manual Driving and parking Driving  (Example of representation) Representation and arrangement of content equipment-dependent. Selection area for the available functions Adjustable steering wheel buttons Calls up setting mode. Select the appropriate steering wheel button.MENGATUR TOMBOL SETIR
The SETTINGS SELECT menu can also be called up using the DYNAMIC SELECT button or by a long press on the respective display button. Select the upper or lower display button in the media display. Press Ⓢ and select the desired function for assignment from Ⓐ. The setting mode can also be called up by pressing and holding the current assignment in selection area.MENAMBAHKAN FUNGSI BARU UNTUK DIPILIH
Select the upper or lower display button in the media display.  Press ☐ in selection area ① and select the desired function from the list. The selected function is assigned to selection area ① and can be selected from there for the steering wheel buttons.MENGHAPUS PENUGASAN TOMBOL
Select the upper or lower display button in the media display. Press 3. Press ☒ for the respective function in selection area ① to delete the selected assignment of the display button.   G-Class - Owner's Manual Driving and parking DYNAMIC SELECTDYNAMIC SELECT
Fungsi DYNAMIC SELECT
DYNAMIC SELECT allows an on-road or off-road drive program to be selected quickly according to the current driving conditions or the desired vehicle characteristics.TAMPILAN DAN PROGRAM BERKENDARA YANG TERSEDIA UNTUK DIPILIH TERGANTUNG PADA STATUS KETERLIBATAN BERIKUT:
• Transfer case – HIGH RANGE or LOW RANGE ( → page 312) • Differential lock for the transfer case ( → page 315) The C drive program will always be active automatically after the vehicle is restarted with the transfer case in the HIGH RANGE on-road position. If the transfer case was previously set to the LOW RANGE off-road gear, the Trail drive program will remain active after the vehicle is restarted. If the differential lock for the transfer case was also engaged before the vehicle was restarted, the Rock drive program will remain selected. You will be able to select the following drive programs. The drive program selected will appear on the driver display.INDIVIDUAL
• Custom settings ( → page 300)SPORT
- Sporty driving • Emphasis on stability, but with a sporty, dynamic setup • Enables a sporty driver to adopt a more active driving style - Suitable only for good road conditions, a dry surface and a clear stretch of roadCOMFORT
• Comfortable and economical driving • Balance between traction and stability • Recommended for all road conditionsE ECO
• Economical setting of vehicle functions • Balance between traction and stability • Recommended for all road conditionsTRAIL
- Optimised handling for driving on undemanding off-road terrain with a loose surface, e.g. on dirt roads or gravel • Improved traction when you brake on loose surfaces   G-Class - Owner's Manual Driving and parking DYNAMIC SELECT \- LOW RANGE off-road gear for the transfer case available ROCK
• May be used only off road, not on public roads - Optimised handling for driving on moderate or difficult, uneven terrain and hard, rocky ground • A firm suspension and specially adapted steering set-up - ESP® vehicle stabilisation degraded with active torque vectoring - Driving and driving safety systems switched off or subject to functional restrictions - LOW RANGE off-road gear for the transfer case available and differential locks switchable SAND
• Optimised handling for driving on sand - Improved traction thanks to late intervention in the event of understeer or oversteer • Vehicle stabilisation deactivated - Driving and driving safety systems switched off or subject to functional restrictions • Not suitable for use on public roads • Transfer case in HIGH RANGE on-road position The ESP® settings in the drive programs [F] and [C] are configured for stability. Therefore, choose one of these drive programs in particular when transporting roof loads, in trailer operation and when the vehicle is fully laden or fully occupied.KARAKTERISTIK SISTEM BERIKUT AKAN BERUBAH SESUAI DENGAN PROGRAM BERKENDARA YANG BERLAKU:
Drive - Engine and transmission management - Availability of gliding mode ECO start/stop function ESP 3 Suspension Steering You can watch an animation on this topic via the following link:Fungsi DYNAMIC SELECT (kendaraan Mercedes-AMG)
DYNAMIC SELECT allows an on-road or off-road program to be selected quickly according to the current driving conditions or the desired vehicle characteristics. The display and the available options for the drive programs depend on the engagement status of the differential lock for the transfer case ( → page 315). The display and the available options do not depend on the engagement status of the transfer case. The drive program will always be active automatically after the engine is restarted. FUNGSI PROGRAM BERKENDARA DI JALAN RAYA
JIKA KUNCI DIFERENSIAL UNTUK KOTAK TRANSFER DILEPASKAN, ANDA DAPAT MEMILIH DI ANTARA PROGRAM BERKENDARA DI JALAN RAYA BERIKUT
Slippery \- Optimised pulling-away and driving characteristics in wintry and slippery road conditions Comfort \- Comfortable and economical driving - Balance between traction and stability \- Individual \- Custom settings for drive system, suspension, gearbox, AMG DYNAMICS and AMG Real Performance Sound S Sport \- Sporty driving - Balance between stability and sportiness - Suitable only for good road conditions, a dry surface and a clear stretch of road \- Sport+ \- Particularly sporty driving - Emphasises the vehicle's own oversteer and understeer characteristics - Suitable only for good road conditions, a dry surface and a clear stretch of road Mercedes-AMG recommends selecting the C drive program when in city traffic or stop-and-go traffic.FUNGSI PROGRAM OFF-ROAD
The driving and driving safety systems, particularly the Electronic Stability Program (ESP ® ) and ETS/4ETS traction control, will be switched off or subject to functional restrictions in the off-road programs. If the differential locks for the transfer case are engaged, the vehicle will switch automatically to the 📄 Trail(Trail) drive program.Anda kemudian akan dapat memilih antara program off-road berikut:
• Sand - Optimised handling for driving on sand - Agility settings, adjustable in increments, with adapted all-wheel torque distribution - Not suitable for use on public roads • Trail - Traction control, adjustable in increments, with adapted all-wheel torque distribution - Optimised handling for driving on undemanding off-road terrain with a loose surface, e.g. on dirt roads, gravel or sand - Not suitable for use on public roads Rock - Improved traction, optimised suspension tuning and comfortable steering settings - Optimised handling for driving on difficult terrain and hard, rocky ground - Increased locking torque in the LOW RANGE off-road gear   G-Class - Owner's Manual Driving and parking DYNAMIC SELECT - Traction control with degree of lock adjustable in increments - Not suitable for use on public roads You can switch between the off-road programs only in the order given above. You cannot switch directly between Sand and Rock.Opsi berikut tersedia untuk beralih ke program on-road:
• Disengage the differential lock for the transfer case ( → page 315). - Select the on-road setting on the DYNAMIC SELECT menu in the multimedia system (→ page 301).Tergantung pada program on-road atau off-road yang dipilih, karakteristik kendaraan berikut akan berubah:
Drive - Transmission • AMG DYNAMICS The three agility functions, Basic, Advanced and Pro, as well as the two agility functions for the off-road programs, Slide and Traction, will be selected automatically depending on the drive program. The steering, shift timing point, all-wheel drive and stabilisation functions will be adapted to the selected drive program. • Real Performance Sound - Suspension Steering All-wheel drive You can set the drive program characteristics using the DYNAMIC SELECT menu of the multimedia system ( → page 301). You can adjust certain agility functions of AMG DYNAMICS using the AMG steering-wheel buttons.Memilih program berkendara
 Push DYNAMIC SELECT switch ① forwards or backwards repeatedly until the selected drive program appears on the driver display. or ▶ Push DYNAMIC SELECT switch Ⓤ forwards or backwards and select the drive program on the DYNAMIC SELECT menu on the central display. Pay attention to any messages on the driver display and the central display.   G-Class - Owner's Manual Driving and parking DYNAMIC SELECT In the 📄 Rock and 📄 Sand off-road programs, some driving and driving safety systems will be subject to functional restrictions or will be unavailable. When you select one of these drive programs, a confirmation prompt will therefore appear on the central display before the drive program is activated.Memilih program berkendara (kendaraan Mercedes-AMG)
Persyaratan:
- To be able to select the 📄 on-road drive programs, the differential lock for the transfer case must be switched off. - To be able to select the off-road drive programs, the differential lock for the transfer case must be switched on. Function of the differential lock ( → page 315).MEMILIH PROGRAM BERKENDARA DENGAN TOMbol AMG DI SETIR KANAN
 To select the drive programs, switch the differential lock for the transfer case off or on. After the shift operation, the on-road or off-road drive programs can be selected or Press display button ⑪ and switch between the off-road and on-road drive programs on the DYNAMIC SELECT menu. The differential locks will be disengaged. After the shift operation, the on-road drive programs can be selected. Turn rotary switch ②. The selected drive program will appear on display button Ⓞ and on the driver display. ① Individual drive programs may not be shown. How drive programs are displayed and the order in which they are displayed can be set in the multimedia system (→ page 301).MEMILIH PROGRAM OFF-ROAD
When the differential locks for the front and rear axles are disengaged, you can set traction control or the degree of lock in the off-road programs. That allows to you select a balance between stability and agility in increments.   G-Class - Owner's Manual Driving and parking DYNAMIC SELECT When display button ① is showing the off-road program, press the display button.  In the Sand drive program, display button will show symbol and a seven-segment display. You can set the agility of the vehicle in increments. Adjusted all-wheel torque distribution allows you to deliberately induce oversteer on sandy ground. In the Trail drive program, display button will show symbol and a seven-segment display. You can set traction control assistance in increments in conjunction with variable all-wheel distribution. In the 📄 Rock drive program, display button Ⓓ will show symbol ⏚ and a seven-segment display. You can set the degree of lock of the electronically controlled inter-wheel differential lock in increments to suit the situation. Once you have selected a drive program, the drive program characteristics will appear in the centre position and four segments will light up. To increase (+) or reduce (-) the level of assistance from traction control or the degree of lock, turn control knob ② clockwise or anti-clockwise. If you press display button ① again, you will then be able to select a drive program using control knob ②. MEMILIH PROGRAM BERKENDARA DENGAN SAKLAR DYNAMIC SELECT
 To select the drive programs, switch the differential lock for the transfer case off or on. After the shift operation, the on-road or off-road drive programs can be selected. or Switch between the off-road and on-road drive programs on the DYNAMIC SELECT MENU. The differential locks will be disengaged. After the shift operation, the on-road drive programs can be selected. Push DYNAMIC SELECT switch forwards or backwards. The selected drive program will appear on display button Ⓞ and on the driver display. If an off-road program has been selected, you can set its program-specific characteristics in increments as outlined above using the steering-wheel button.  G-Class - Owner's Manual Driving and parking DYNAMIC SELECTMengonfigurasi DYNAMIC SELECT di sistem multimedia
Multimedia system: MENGATUR PROGRAM I DRIVE
Select Individual. Select Select a category from the list and set it. In the Offroad drive program, some driving systems will be subject to functional restrictions or unavailable. That is why, when the Offroad drive programs are selected, a confirmation prompt appears in the media display prior to activation of the driving program.MENGAKTIFKAN/MENONAKTIFKAN TAMPILAN RESET
Activate or deactivate Ask when starting. This function must be activated for each user profile separately. Only when this function is activated will the drive program and ECO start/stop setting for the previous journey be saved for the respective user profile. Function on: the next time the vehicle is started a prompt appears asking whether the last active drive program should be restored. If the ECO start/stop function was deactivated, an additional prompt appears asking if the function should remain deactivated.  The prompt appears only if the previously active settings deviate from the standard settings. i Restoration of the ECO start/stop function setting is dependent on the ECO start/stop function behaviour ( → page 68). Function off: the next time the vehicle is started the C drive program is set automatically. The ECO start/stop function is activated automatically.Menampilkan data kendaraan
Multimedia system:  Select Vehicle. The vehicle data is displayed.Menampilkan data mesin
Multimedia system:  ▶ Select Engine. The engine data is displayed. The actual maximum values that can be achieved for engine output and engine torque may deviate from the certified values within the country-specific guidelines for permissible tolerances (basis: UN-ECE No. 85 or country-specific guidelines).   G-Class - Owner's Manual Driving and parking DYNAMIC SELECT VARIABEL YANG MEMPENGARUHI TERMASUK:
Sea level Fuel quality • Outside temperature • Operating temperature of the engine Adjust your driving style accordingly. The warning lamp in the driver display is on until the engine has reached operating temperature. The values displayed serve only as guidance. The values for engine output and engine torque shown in the media display may deviate from the actual values. The warning lamp to show the power output limitation after starting the vehicle is not available in all vehicle models.Memanggil indikator konsumsi bahan bakar
Multimedia system:  Select Consumption. The current and average fuel consumption will be displayed.Mengatur AMG DYNAMIC SELECT di sistem multimedia MBUX
Multimedia system:  OVERVIEW OF THE AMG DYNAMIC SELECT MENU  (Example of representation) Representation and arrangement of content equipment-dependent. ① Switches between the Onroad and Offroad drive programs. 2 Drive programs 3 AMG drive program settings ESP ® and quick-access buttons ( → page 342) 5 Edits settings The AMG DYNAMIC SELECT menu can also be called up using the DYNAMIC SELECT button.  G-Class - Owner's Manual Driving and parking DYNAMIC SELECT In the Offroad drive program, some driving systems will be subject to functional restrictions or unavailable. That is why, when the Offroad drive programs are selected, a confirmation prompt appears in the media display prior to activation of the driving program. To be able to select the Onroad drive programs, the differential lock for the transfer case must be switched off. To be able to select the Offroad drive programs, the differential lock for the transfer case must be switched on. Further information on the differential lock (→ page 385). Select the appropriate drive program. The settings of the drive programs can be adjusted individually. The setting mode for the drive programs can also be called up by pressing and holding the current configuration in selection area ②. Select the desired tab on the left and make the relevant setting.PENGATURAN OPSI UNTUK PROGRAM BERKENDARA (TERGANTUNG PERLENGKAPAN):
• AMG DYNAMICS: Basic/Advanced/Pro Sound: Balanced/Powerful - Transmission: Manual/automatic • Drive (can only be set in the 📋 Individual drive program): Reduced/Moderate/Sport/Dynamic \- Suspension: Comfort/Sport/Sport+MENGATUR PROGRAM BERKENDARA I
Select Individual. Select and set a category. ① A sporty ESP mode can be set in conjunction with a sporty suspension mode.   G-Class - Owner's Manual Driving and parking Automatic transmissionTransmisi otomatis
Tuas DIRECT SELECT
FUNGSI TUAS DIRECT SELECT
PERINGATAN
Risk of accident due to incorrect gearshifting If the engine speed is higher than the idle speed and you engage the transmission position D or R, the vehicle may accelerate sharply. If you engage the transmission position D or R when the vehicle is at a standstill, always depress the brake pedal firmly and do not accelerate at the same time. PERINGATAN
Accident- and risk of injury with unsupervised children in the vehicleJIKA ANDA MENINGGALKAN ANAK-ANAK TANPA PENGAWASAN DI DALAM KENDARAAN, MEREKA TERUTAMA DAPAT
- Open doors and thereby endanger other persons or road users. • get out of the car and are hit by traffic. • Operate vehicle equipment and become trapped, forexample.SELAIN ITU, ANAK-ANAK JUGA DAPAT MENGGERAKKAN KENDARAAN, MISALNYA DENGAN:
• releasing the parking brake. • change the gearbox setting. - start the vehicle. ▶ Never leave children unattended in the vehicle. When leaving the vehicle, always take the SmartKey with you and lock the vehicle. ▶ Keep the key out of reach of children.  G-Class - Owner's Manual Driving and parking Automatic transmission A
PERINGATAN
Risk of accident and injury when the transmission position is not engaged The current transmission position will be highlighted on the driver's display. If the selected transmission position is not highlighted, the vehicle may pull away in the wrong direction or roll away. ▶ After changing the transmission position, always check the transmission position display on the driver's display. If the transmission position is not highlighted on the driver's display even after a short time: ▶ Pay attention to the display messages. ▶ Pull away carefully and check the engaged transmission position. When parking, engage the parking brake and secure the vehicle against rolling away. ▶ Have the transmission checked immediately at a qualified specialist workshop. Use the DIRECT SELECT lever to switch the transmission position. The current transmission position will be highlighted on the driver display.  P Park position R Reverse gear N Neutral D Drive positionMEMASUKKAN GIGI MUNDUR R
A
PERINGATAN
Risk of accident due to incorrect gearshifting If the engine speed is higher than the idle speed and you engage the transmission position or , the vehicle may accelerate sharply. If you engage the transmission position D or R when the vehicle is at a standstill, always depress the brake pedal firmly and do not accelerate at the same time.  G-Class - Owner's Manual Driving and parking Automatic transmission   ▶ Depress the brake pedal and push the DIRECT SELECT lever upwards past the first point of resistance.MENGGUNAKAN POSISI NETRAL N
PERINGATAN
Risk of accident due to incorrect gearshifting If the engine speed is higher than the idle speed and you engage the transmission position D or R, the vehicle may accelerate sharply. If you engage the transmission position [D] or [R] when the vehicle is at a standstill, always depress the brake pedal firmly and do not accelerate at the same time.  ▶ Depress the brake pedal and push the DIRECT SELECT lever up or down to the first point of resistance. To shift into neutral N with the vehicle switched on, push the selector lever up or down for several seconds to the first point of resistance. Subsequently releasing the brake pedal will allow you to move the vehicle freely, e.g. to push it or tow it away.LAKUKAN LANGKAH BERIKUT JIKA ANDA INGIN TRANSMISI OTOMATIS TETAP DALAM POSISI NETRAL [N], MESKIPUN KENDARAAN DIMATIKAN ATAU PINTU PENGEMUDI DIBUKA:
Depress the brake pedal and engage neutral N when the vehicle is at a standstill. Release the brake pedal. Switch off the vehicle. The Risk of vehicle rolling away N activated manually No automatic switch to P message will appear on the driver display.   G-Class - Owner's Manual Driving and parking Automatic transmission If you then exit the vehicle leaving the key in the vehicle, the automatic transmission will remain in neutral N.POSISI PARKIR Ⓟ AKAN OTOMATIS DIKUNCI KEMBALI SEGERA SETELAH SALAH SATU KONDISI BERIKUT TERPENUHI:
• You switch to transmission position D or R. • You press the button P.MENGGUNAKAN POSISI PARKIR P
PERINGATAN
Accident- and risk of injury with unsupervised children in the vehicleJIKA ANDA MENINGGALKAN ANAK-ANAK TANPA PENGAWASAN DI DALAM KENDARAAN, MEREKA DAPAT TERUTAMA
- Open doors and thereby endanger other persons or road users. • get out of the car and are hit by traffic. • Operate vehicle equipment and become trapped, forexample.SELAIN ITU, ANAK-ANAK JUGA DAPAT MENGGERAKKAN KENDARAAN, MISALNYA DENGAN:
• releasing the parking brake. • change the gearbox setting. - start the vehicle. ▶ Never leave children unattended in the vehicle. When leaving the vehicle, always take the SmartKey with you and lock the vehicle. Keep the key out of reach of children.  G-Class - Owner's Manual Driving and parking Automatic transmission CATATAN
Damage due to engaging park position P while the vehicle is rolling If you shift the transmission into park position P while the vehicle is rolling, the transmission may be damaged. If the vehicle is rolling, do not open a door. ▶ Only engage the park position P when the vehicle is stationary.  Observe the notes on parking the vehicle ( → page 326). Depress the brake pedal until the vehicle comes to a standstill. When the vehicle is stationary, press the button ①. When the transmission position display P is shown, park position is engaged. If the transmission position display P is not shown, apply the parking brake and secure the vehicle to prevent it from rolling away.  Depending on the respective situation, it may take a short while before P engages. Therefore, always pay attention to the transmission position display.POSISI PARKIR Ⓟ AKAN DIKUNCI OTOMATIS JIKA SALAH SATU KONDISI BERIKUT TERPENUHI:
• You switch the stationary vehicle off in transmission position [D] or [R]. - You open the driver's door when the vehicle is stationary in transmission position D or R. - When the vehicle is rolling, you switch it off in transmission position D or R and slow it to a standstill. - When the vehicle is rolling, you shift to transmission position [N], slow the vehicle to a standstill and open the driver's door when the vehicle is stationary. • Automatic engagement of park position P is required for the vehicle. To manoeuvre with the driver's door open, open the driver's door while the vehicle is stationary and engage transmission position [D] or [R] again. G-Class - Owner's Manual Driving and parking Automatic transmission MENGGUNAKAN POSISI BERJALAN D
PERINGATAN
Risk of accident due to incorrect gearshifting If the engine speed is higher than the idle speed and you engage the transmission position D or R, the vehicle may accelerate sharply. If you engage the transmission position D or R when the vehicle is at a standstill, always depress the brake pedal firmly and do not accelerate at the same time.  Depress the brake pedal and push the DIRECT SELECT lever down past the first point of resistance.KETIKA TRANSMISI OTOMATIS DALAM POSISI TRANSMISI [D], TRANSMISI AKAN MENGGANTI GIGI SECARA OTOMATIS. INI TERGANTUNG, ANTARA LAIN, PADA FAKTOR-FAKTOR BERIKUT:
• The selected drive program • The position of the accelerator pedal The vehicle speedMenggoyangkan kendaraan agar bebas (kendaraan Mercedes-AMG)
Rocking the vehicle free may help to free the vehicle if it has become stuck in slush or snow. To rock the vehicle free, move the DIRECT SELECT lever upwards and downwards past the pressure point to switch between transmission positions [D] and R. The maximum speed for rocking the vehicle free is approximately 9 km/h.Perpindahan gigi manual
PERMANENT SETTING  To activate/deactivate: press the button ①. Manual shifting is activated: transmission position M and the current gear will appear on the driver display.   G-Class - Owner's Manual Driving and parking Automatic transmission Manual shifting is deactivated: transmission position D will appear on the driver display. TEMPORARY SETTING  To activate: pull steering wheel gearshift paddle ① or ②. Manual shifting will be activated for a short time. Transmission position M and the current gear will appear on the driver display. To deactivate: pull and hold the steering wheel gearshift paddle 2. Transmission position D will appear on the driver display. To permanently shift the gears manually in drive program using the steering wheel gearshift paddles, select the M setting for the transmission. SHIFTING  To shift up: pull the steering wheel gearshift paddle ②. To shift down: pull the steering wheel gearshift paddle ①.Perpindahan gigi manual (kendaraan Mercedes-AMG)
You can also permanently activate and deactivate manual gear-shifting via the M button on the Offroad switch panel or, as described below, via a steering wheel button. Activate/deactivate manual shifting via the M button ( → page 308).  Press upper or lower display button ① repeatedly until it displays the ⚙ or ⚙ symbol. ① If the display button does not show the symbol, then it is hidden. How functions are displayed and the order in which they are displayed can be set in the multimedia system ( → page 292). G-Class - Owner's Manual Driving and parking Automatic transmission  To activate/deactivate: press the corresponding buttonSIMBOL MENUNJUKKAN POSISI TRANSMISI YANG SAAT INI DIPILIH:
• (red): manual shifting • (blue): automatic transmissionPERPINDAHAN GIGI KE ATAS DAN KE BAWAH
CATATAN
Damage to the engine due to shifting up too late The automatic transmission does not shift up in manual mode even when the engine's limiting speed is reached. The fuel supply is interrupted in order to prevent the engine from overrevving. Shift up before the engine speed reaches the red area in the rev counter.  To shift up: pull steering wheel gearshift paddle ②. To shift down: pull steering wheel gearshift paddle  If the engine speed is too high or too low, you will not be able to change gear using the steering wheel gearshift paddles. In this case, segments ⚙ will light up red on the driver's display.Rekomendasi perpindahan gigi
When manual gearshifting is activated, gearshift recommendation will assist you in adopting an economical driving style.  When gearshift recommendation ① appears on the driver's display, shift to the recommended gear.Menggunakan kickdown
▶ Maximum acceleration: depress the accelerator pedal beyond the point of resistance.  G-Class - Owner's Manual Driving and parking Automatic transmission To protect against engine overrev, the automatic transmission will shift up to the next gear when maximum engine speed has been reached.Fungsi mode meluncur
Gliding mode helps you to reduce fuel consumption when you employ an anticipatory driving style.MODE MELUNCUR DITANDAI DENGAN HAL-HAL BERIKUT:
- The combustion engine is switched off depending on the driving situation. All the vehicle functions will remain active. • The transmission position display is shown in green.MODE MELUNCUR AKAN AKTIF JIKA KONDISI BERIKUT TERPENUHI:
• The ECO start/stop function is switched on. • Drive program [E] is selected. • The speed is within a suitable range. The road's course is suitable, e.g. no steep inclines or tight bends. • There is no trailer coupled to the trailer hitch and no bicycle rack fitted. • The state of charge of the battery is sufficient. - You do not depress the accelerator or brake pedal (except for light brake applications). Gliding mode can also be activated if you have selected the "Eco" setting for the drive in drive program.  Gliding mode will be deactivated again if one of the conditions is no longer met.MODE MELUNCUR JUGA DAPAT DICEGAH OLEH PARAMETER BERIKUT:
Incline - Downhill gradient - Temperature Height Speed • Operating status of the engine - Traffic situation You can end gliding mode by operating a steering wheel gearshift paddle ( → page 308).  G-Class - Owner's Manual Driving and parking Transfer caseTransfer case
Fungsi transfer case
PERINGATAN
Risk of skidding and accident on slippery road surfaces in LOW RANGEPADA PERMUKAAN JALAN YANG LICIN, RODA DAPAT KEHILANGAN CAKRAAM PADA SITUASI BERIKUT KHUSUSNYA:
• If you take your foot off the accelerator pedal while driving. • When you accelerate the vehicle quickly. • If off-road ABS intervenes during braking. ▶ Never activate LOW RANGE off-road gear on slippery road surfaces. Shift the transfer case to the HIGH RANGE on-road position or into the LOW RANGE off-road gear.RENTANG PERPINDAHAN GIGI
- HIGH RANGE: on-road position for all normal driving conditions in all drive programs - LOW RANGE: off-road gear for driving off road, fording and driving on steep inclines in the Trail or Rock drive program  In Mercedes-AMG vehicles, LOW RANGE off-road gear can be engaged in all drive programs.KARAKTERISTIK GIGI RENDAH UNTUK MEDAN OFF-ROAD:
• reduced maximum permissible speed and increased tractive power • altered transmission ratio by a factor of about three • increased drive torque and braking torqueJANGAN GUNAKAN GIGI RENDAH DALAM SITUASI BERIKUT:
• when driving on paved public roads  G-Class - Owner's Manual Driving and parking Transfer caseMemindahkan transfer case
PERPINDAHAN KE GIGI RENDAH UNTUK MEDAN OFF-ROAD
PERSYARATAN:
• You are not driving on a paved or public road. - The vehicle has been started and you are not driving at a speed above 40 km/h. Press the LOW RANGE button. The shift request will stay active for a maximum of 30 seconds. If all requirements have not been fulfilled within this time, shift operation must be started again. Shift the transmission to position N. When the shift operation is complete, the LOW RANGE on message will appear on the driver display and an audible signal will sound. Depending on the on-road or off-road drive program that has previously been selected, the vehicle will automatically switch to drive program 📄 Trail or 🏠 Rock.  In Mercedes-AMG vehicles, the LOW RANGE off-road gear can be engaged in all drive programs. The drive program will not be changed automatically. Shift the transmission to position D. At speeds below 3 km/h, the brakes must be applied when you shift from N to D. At 3 km/h or higher, the brakes no longer have to be applied to shift to D. If you switch off the vehicle in the LOW RANGE off-road gear, it will remain in LOW RANGE the next time you start the vehicle. The Trail or Rock drive program will remain activated.PERPINDAHAN KE GIGI TINGGI UNTUK JALAN RAYA
  G-Class - Owner's Manual Driving and parking Transfer casePERSYARATAN:
- The vehicle has been started and you are not driving at a speed above 70 km/h. Press the LOW RANGE button. The shift request will stay active for a maximum of 30 seconds. If all requirements have not been fulfilled within this time, shift operation must be started again. Shift the transmission to position N. When the shift operation is complete, the LOW RANGE off message will appear on the driver display and an audible signal will sound. Shift the transmission to position D. At speeds below 3 km/h, the brakes must be applied when you shift from N to D. At 3 km/h or higher, the brakes no longer have to be applied to shift to D.   G-Class - Owner's Manual Driving and parking Differential locks Kunci diferensial
Fungsi kunci diferensial
PERINGATAN
Risk of accident when differential lock is engaged on a firm surface If you engage differential locks on a firm and non-slip surface, you may lose control of the vehicle. ▶ Always disengage the differential locks immediately on a firm, high-traction surface. PERINGATAN
Risk of accident due to deactivated driving safety systems When the differential locks are engaged, ABS, 4ETS, ESP ® and BAS are deactivated. Because of this, the wheels can lock while braking and the braking distance is increased. ▶ Always disengage the differential locks immediately on a firm, high-traction surface. The differential locks improve vehicle traction during off-road driving and fording. KENDARAAN INI MEMILIKI TIGA KUNCI DIFERENSIAL:
- The differential lock for the transfer case ① disables rotational speed compensation between the front and rear axles. - The differential lock for the rear axle ② disables rotational speed compensation between the wheels of the rear axle. - The differential lock for the front axle ③ disables rotational speed compensation between the wheels of the front axle.BATASAN SISTEM
SAAT KUNCI DIFERENSIAL TERAKTIF, SISTEM BERIKUT AKAN DINONAKTIFKAN:
ABS ( → page 340) • Active Distance Assist DISTRONIC (→ page 354) • Active Brake Assist (→ page 369)   G-Class - Owner's Manual Driving and parking Differential locks • Active Parking Assist ( → page 401) • Active Lane Keeping Assist ( → page 379) • BAS ( → page 340) • Hill Start Assist ( → page 348) • ECO start/stop function (→ page 287) - ESP 2 (→ page 341) • HOLD function ( → page 347) - Limiter (→ page 350) • Cruise control ( → page 350) • DSR ( → page 364) • Blind Spot Assist (→ page 377)Mengaktifkan/menonaktifkan pengunci diferensial
MENGUNCI DIFERENSIAL
PERSYARATAN:
• You are not driving on a paved or public road. • You are driving at walking pace. • The driven wheels are not spinning. You can engage the differential locks in the following order: ①, ②, ③. Then press the respective buttons. Engage differential locks and ④ for the front and rear axles only if required. If all conditions have been fulfilled, activation indicator lamps ⑤ will light up and the vehicle will automatically switch to the 📄 Rock drive program. As soon as the differential locks are active, function indicator lamps ④ will light up. A message reading Differential lock active ABS and ESP unavailable See Owner's Manual will appear on the driver display and indicator and warning lamps and @ will light up. If at least one requirement has not been fulfilled, a message reading Differential lock switch-on conditions not fulfilled will appear. Activation indicator lamps will flash three times and then go out. The gear change must be restarted. G-Class - Owner's Manual Driving and parking Differential locks  DISENGAGE THE DIFFERENTIAL LOCKS  Press the buttons in the following order: ③, ②, ①. or To simultaneously disengage all differential locks: press button ①. or To disengage the differential locks for the rear and front axles: press button ②. The differential locks will be disengaged only when function indicator lamps have gone out again. If you switch off the vehicle with the differential locks engaged in the LOW RANGE off-road gear, the differential locks will remain engaged when the vehicle is next started and the Rock drive program will remain engaged. If the transfer case was previously in the HIGH RANGE on-road position, the differential locks will be automatically disengaged when the vehicle is next started and the C drive program will be activated. In some cases, you will need to drive a few metres before the differential locks are properly disengaged. Therefore, check whether function indicator lamps Ⓞ are lit up or off when you restart the vehicle.PERHATIKAN SEMUA INFORMASI YANG DITAMPILKAN DI LAYAR PENGEMUDI:
• Indicator and warning lamps • Display messages   G-Class - Owner's Manual Driving and parking All-wheel drivePenggerak semua roda
Drive is ideally distributed between all wheels on both axles on a continuous basis. The all-wheel drive system improves vehicle traction together with ESP and 4ETS if a drive wheel spins due to insufficient grip. If you fail to adapt your driving style, the all-wheel drive system can neither reduce the risk of an accident nor override the laws of physics. It cannot take into account road, weather or traffic conditions. The all-wheel drive system is only an aid. You are responsible in particular for maintaining a safe distance from the vehicle in front, for vehicle speed, for braking in good time and for staying in lane. In wintry road conditions, the maximum effect of the all-wheel drive system can be achieved only if you use winter tyres (M+S tyres), with snow chains if necessary.   G-Class - Owner's Manual Driving and parking RefuellingPengisian bahan bakar
Mengisi bahan bakar kendaraan
PERINGATAN
Risk of fire or explosion from fuel Fuels are highly flammable. ▶ Fire, naked flames, smoking and creating sparks must be avoided. Before refuelling, switch off the vehicle and, if fitted, the stationary heater and keep switched off during filling. PERINGATAN
Risk of injury from fuels Fuels are poisonous and hazardous to your health. Do not swallow fuel or let it come into contact with skin, eyes or clothing. Do not inhale fuel vapour. ▶ Keep children away from fuel. ▶ Keep doors and windows closed during the refuelling process. If you or other people come into contact with fuel, observe the following: ▶ Immediately rinse fuel off your skin with soap and water. If fuel comes into contact with your eyes, immediately rinse them thoroughly with clean water. Seek medical attention immediately. If you swallow fuel, seek medical attention immediately. Do not induce vomiting. ▶ Change immediately out of clothing that has come into contact with fuel.  G-Class - Owner's Manual Driving and parking Refuelling PERINGATAN
Risk of fire and explosion due to electrostatic charge Electrostatic charge can ignite fuel vapour. Before you open the fuel filler cap or take hold of the pump nozzle, touch the metallic vehicle body. To avoid creating another electrostatic charge, do not get into the vehicle again during the refuelling process. PERINGATAN
Risk of fire from fuel mixture Vehicles with a diesel engine: If you mix diesel fuel with petrol, the flash point of the fuel mixture is lower than that of pure diesel fuel. While the vehicle is running, component parts in the exhaust system may overheat without warning. ▶ Never refuel using petrol. ▶ Never mix petrol with diesel fuel.  CATATAN
Damage caused by the wrong fuel Vehicles with a petrol engine: Even small amounts of the wrong fuel could result in damage to the fuel system, the engine and the emission control system. ▶ Refuel only with unleaded, sulphur-free spark-ignition engine fuel. Petrol can contain up to 25 Vol.-% ethanol by volume. ▶ See the information label in fuel filler flap for compatible fuels. Further information about compatible fuels can be obtained at a qualified specialist workshop. Throughout Europe you can also find the compatibility labels on the fuel pump or pump nozzle suitable for your vehicle.JANGAN PERNAH MENGISI BAHAN BAKAR DENGAN SALAH SATU BAHAN BAKAR BERIKUT:
- Diesel • Regular petrol with an octane number lower than 91 RON • Petrol with more than 3% methanol by volume, e.g. M15, M30 • Petrol with metallic additives If you have accidentally refuelled with the wrong fuel: ▶ Do not switch on the vehicle.  G-Class - Owner's Manual Driving and parking Refuelling Consult a qualified specialist workshop. CATATAN
Damage caused by the wrong fuel Vehicles with a diesel engine: Even small amounts of the wrong fuel could result in damage to the fuel system, the engine and the emission control system. ▶ Refuel using only sulphur-free diesel fuel. In countries without sulphur-free diesel fuel, refuel using only low-sulphur diesel fuel with a sulphur content of less than 50 ppm.JANGAN PERNAH MENGISI BAHAN BAKAR DENGAN SALAH SATU BAHAN BAKAR BERIKUT:
Petrol - Marine diesel - Heating oil • Pure fatty acid methyl ester or vegetable oil • Paraffin or kerosene If you have accidentally refuelled with the wrong fuel: Do not switch on the vehicle. Consult a qualified specialist workshop. CATATAN
Shorter maintenance intervals due to fuel with increased bio-contents When fuels with increased bio-contents are used, fuel residues with increased separation volume may occur. If fuels with increased bio-contents (compatibility marks B10 and B20) are used on an ongoing basis, this may lead to shorter maintenance intervals for the fuel filter. If the vehicle is not used for an extended period of time (several weeks): Refuel the vehicle beforehand with diesel fuel with bio-contents < 10% to avoid possible deposits of bio-contents in the fuel tank. CATATAN
Do not use diesel to refuel vehicles with a petrol engineJIKA ANDA SECARA TIDAK SENGAJA MENGISI BAHAN BAKAR YANG SALAH:
\- Do not switch on the vehicle. Otherwise fuel can enter the engine. Even small amounts of the wrong fuel could result in damage to the fuel system and the engine. The repair costs are high. Consult a qualified specialist workshop. ▶ Have the fuel tank and fuel lines drained completely.  G-Class - Owner's Manual Driving and parking Refuelling  CATATAN
Do not refuel diesel-engined vehicles with petrolJIKA ANDA SECARA TIDAK SENGAJA MENGISI BAHAN BAKAR YANG SALAH:
- Do not switch on the vehicle. Otherwise fuel can enter the engine. Even small amounts of the wrong fuel could result in damage to the fuel system and the engine. The repair costs are high. Consult a qualified specialist workshop. ▶ Have the fuel tank and fuel lines drained completely. CATATAN
Damage to the fuel system due to overfilling the fuel tank ▶ Only fill the fuel tank until the pump nozzle switches off. If too much fuel has been added due, for example, to a faulty filling pump: ▶ Do not switch on the vehicle. Consult a qualified specialist workshop. CATATAN
Fuel may spray out when you remove the fuel pump nozzle ▶ Only fill the fuel tank until the pump nozzle switches off.Persyaratan:
• The vehicle is unlocked. Observe the notes on operating fluids and fuel. The recommended octane number for your vehicle can be found on the information label on the inside of the fuel filler flap.  Fuel filler flap ② Fuel filler cap 3 Fuel type QR code for rescue card 5 Tyre pressure table Press on the centre rear of fuel filler flap ①. ▶ Turn the fuel filler cap counter-clockwise and remove it. Completely insert the pump nozzle into the tank filler neck, hook in place and refuel.   G-Class - Owner's Manual Driving and parking Refuelling ▶ Only fill the fuel tank until the pump nozzle switches off. ① Vehicles with diesel engine: The tank filler neck is designed for refuelling at diesel filling pumps. ① Vehicles with diesel engine: Do not run the fuel tank empty. When the fuel tank is completely empty, top up with at least 5 l diesel before starting the vehicle. ① Vehicles with diesel engine: Use a filler neck with a large diameter for vehicles with a diesel engine when topping up fuel from a canister. Otherwise, the filler neck cannot slide into the tank filler neck. Replace the fuel filler cap on the tank filler neck and turn clockwise until it engages audibly. Close fuel filler flap ①.AdBlue ® (kendaraan dengan mesin diesel saja)
CATATAN TENTANG PENGISIAN ADBLUE
AdBlue ® is a water-soluble fluid for the NOx exhaust gas aftertreatment of diesel engines. In order for the exhaust gas aftertreatment to function properly, only use AdBlue ® in accordance with ISO 22241.ADBLUE 2 DICIRIKAN OLEH HAL BERIKUT:
non-toxic • colourless and odourless • non-flammable If you open the AdBlue ® tank, small amounts of ammonia vapour may be released. Only fill the AdBlue ® tank in well-ventilated areas. Do not let AdBlue ® come into contact with skin, eyes or clothes. Keep AdBlue ® away from children. Do not ingest AdBlue ® . If AdBlue ® is swallowed, immediately rinse your mouth out thoroughly. Drink plenty of water. Seek medical attention at once. Observe the notes on operating fluids ( → page 745).ADBLUE ® TERSEDIA DI SINI:
- AdBlue can be topped up by fast service at a qualified specialist workshop, e.g. a Mercedes-Benz Service Centre. - AdBlue is available at many filling stations from AdBlue filling pumps. Alternatively, AdBlue is available at qualified specialist workshops, e.g. Mercedes-Benz Service Centres, and at many filling stations in AdBlue refill canisters or AdBlue refill bottles. ① Ensure the connection between the refill container and vehicle filler neck does not drip.   G-Class - Owner's Manual Driving and parking RefuellingPENGISIAN ADBLUE®
CATATAN
Engine damage due to AdBlue ® being in the fuel AdBlue ® must not be used to fill the fuel tank. ▶ Only use AdBlue ® to fill the AdBlue ® tank. Do not overfill the AdBlue ® tank. CATATAN
Contamination of the vehicle interior due to AdBlue ® leakage After topping up, carefully close the AdBlue® refill container. - Avoid carrying AdBlue ® refill containers permanently in the vehicle.Persyaratan:
• The vehicle is unlocked.PESAN-PESAN BERIKUT MUNCUL SECARA BERURUTAN DI LAYAR PENGEMUDI KETIKA TANGKI ADBLUE® PERLU DIISI ULANG:
- Refill AdBlue See Owner's Manual. The AdBlue® level has fallen below the reserve range. Add at least 5 l AdBlue®. - Top up AdBlue Emergency op. in XXX km See Owner's Manual. The low AdBlue ® level will lead to limited performance after the remaining distance displayed has been driven. Add at least 5 l AdBlue ® .  - Top up AdBlue XX,X I Emerg. op.: max. XXX km/h Start not poss. in XXX km. The low AdBlue * level will lead to limited performance from the speed displayed. After the remaining distance displayed has been driven, it will no longer be possible to start the vehicle. Add at least the indicated quantity of AdBlue * . - Top up XX,X I AdBlue Switch vehicle on, wait 60 sec. or engine start not possThe AdBlue ® tank is empty. You can no longer start the vehicle. Add at least the indicated quantity of AdBlue ® . Switch on the vehicle and wait approx. 60 seconds. Start the vehicle. You can display the AdBlue * range and level on the driver display in the menu Service. The AdBlue ® range indicated is highly dependent upon driving style and operating conditions. The actual range can therefore deviate from the calculated range.MEMBUKA TUTUP PENGISI ADBLUE®
  G-Class - Owner's Manual Driving and parking Refuelling Press on the centre rear of fuel filler flap ①. Turn AdBlue ® filler cap 2 counter-clockwise and remove it. ① You can also place the AdBlue ® filler cap in the filler cap holder in the hinge arm of the fuel filler flap.MENGISI ULANG ADBLUE 1
Mercedes-Benz recommends that you top up AdBlue ® at a pump system. If there is no AdBlue ® pump system available you can also top up AdBlue ® with a canister.  Unscrew the cap of AdBlue® refill canister 4. Screw disposable hose Ⓔ onto the opening of AdBlue® refill canister Ⓔ until hand-tight. Screw disposable hose Ⓞ onto the filler neck of the vehicle until hand-tight. Lift up and tip AdBlue® refill canister The filling process stops when the AdBlue ® tank is completely full. AdBlue ® refill canister 📷 can be removed when it has been only partially emptied. Unscrew disposable hose ③ and close AdBlue® refill canister ④ in reverse order. Replace AdBlue ® filler cap ② and turn it clockwise until it audibly engages. Close fuel filler flap 1. ▶ Switch on the vehicle for at least 60 seconds. If it was no longer possible to start the vehicle due to the empty AdBlue ® tank, it takes up to 60 seconds for topping up to be detected. Start the vehicle. ① Avoid storing AdBlue ® refill containers permanently in the vehicle.   G-Class - Owner's Manual Driving and parking ParkingParkir
Memparkir kendaraan
PERINGATAN
Risk of accident and injury caused by an insufficiently secured vehicle rolling away If the vehicle is not securely parked sufficiently, it can roll away in an uncontrolled way even at a slight downhill gradient. On uphill or downhill gradients, turn the front wheels so that the vehicle rolls towards the kerb if it starts moving. ▶ apply the parking brake. ▶ Switch the transmission to position P. PERINGATAN
Risk of fire caused by hot exhaust system parts Flammable materials such as leaves, grass or twigs may ignite. Park the vehicle so that no flammable material can come into contact with hot vehicle components. In particular, do not park on dry grassland or harvested grain fields.  PERINGATAN
Accident- and risk of injury with unsupervised children in the vehicleJIKA ANDA MENINGGALKAN ANAK-ANAK TANPA PENGAWASAN DI DALAM KENDARAAN, MEREKA TERUTAMA DAPAT
- Open doors and thereby endanger other persons or road users. • get out of the car and are hit by traffic. • Operate vehicle equipment and become trapped, forexample.SELAIN ITU, ANAK-ANAK JUGA DAPAT MENGGERAKKAN KENDARAAN, MISALNYA DENGAN:
• releasing the parking brake. • change the gearbox setting. - start the vehicle. ▶ Never leave children unattended in the vehicle. When leaving the vehicle, always take the SmartKey with you and lock the vehicle. ▶ Keep the key out of reach of children. G-Class - Owner's Manual Driving and parking Parking  CATATAN
Damage to the vehicle due to it rolling away ▶ Always secure the vehicle against rolling away.  Bring the vehicle to a standstill by depressing the brake pedal. On uphill or downhill gradients, turn the front wheels so that the vehicle will roll towards the kerb if it starts moving. Apply the electric parking brake. Engage transmission position P with the vehicle stationary and the brake pedal depressed ( → page 306). Switch off the vehicle by pressing the button ①. Release the service brake slowly. Exit and then lock the vehicle. When you park the vehicle, you can still operate the side windows and the sliding sunroof for approximately four minutes as long as the driver's door is closed.Pembuka pintu garasi (HomeLink ® )
MEMPROGRAM TOMBOL HOMELINK®
BAHAYA
Danger to life from toxic exhaust gas in enclosed spaces Combustion engines emit toxic exhaust gases such as carbon monoxide. Inhaling these exhaust gases is hazardous to health and leads to poisoning. ▶ Never leave the engine or, if present, the stationary heater running in an enclosed space without sufficient ventilation. PERINGATAN
Risk of injury by becoming trapped when opening and closing a garage door When you operate or program a garage door with an integrated garage door opener, persons can become trapped or struck by the garage door if they stand within its range of movement. Always make sure that nobody is within the range of the garage door's movement. G-Class - Owner's Manual Driving and parking ParkingHANYA OPERASIKAN PINTU BERIKUT MENGGUNAKAN PEMBUKA PINTU GARASI:
• Doors with a safety stop and reversing feature • Doors that comply with the applicable safety standards Before programming the garage door opener, park the vehicle outside the garage. Ensure that the vehicle is switched on but not started.Persyaratan:
- The vehicle has been parked outside the garage or outside the range of movement of the door. • The vehicle is switched on. • The vehicle has not been started. • The original remote control for the garage door is used. The garage door opener function is always available when the vehicle is switched on.  Programming procedure: press the button to be programmed (①, ② or ③) and then release it. If the selected button is not programmed, the indicator lamp ● flashes orange slowly. To reprogram a button that has already been programmed, press the corresponding button until the indicator lamp Ⓞ starts to flash orange slowly. This may take up to 20 seconds. Point the remote control ⑤ from a distance of between 5 cm and 30 cm underneath the mirror towards button ①, ② or ③. Press and hold the button ⑥ on the remote control ⑤ until one of the following signals appears: \- The indicator lamp ④ lights up green continuously. Programming is complete. • The indicator lamp ④ flashes green. Programming was successful.Tombol HomeLink* yang dipilih sekarang telah diprogram.
Test the programming: press and hold the HomeLink button for two seconds. Release the HomeLink ® button and, after three seconds, press and hold it again for two seconds. Repeat this process once more (three times in total). If you have a garage door system with fixed code or QuickTrain technology, pressing the programmed HomeLink® button opens or closes the garage door.  G-Class - Owner's Manual Driving and parking Parking If the garage door is not working and the indicator lamp 🔒 is flashing quickly, you must perform rolling code synchronisation (→ page 329).MELAKUKAN SINKRONISASI KODE BERJALAN (JIKA DIPERLUKAN)
BAHAYA
Danger to life from toxic exhaust gas in enclosed spaces Combustion engines emit toxic exhaust gases such as carbon monoxide. Inhaling these exhaust gases is hazardous to health and leads to poisoning. ▶ Never leave the engine or, if present, the stationary heater running in an enclosed space without sufficient ventilation. PERINGATAN
Risk of injury by becoming trapped when opening and closing a garage door When you operate or program a garage door with an integrated garage door opener, persons can become trapped or struck by the garage door if they stand within its range of movement. Always make sure that nobody is within the range of the garage door's movement.HANYA OPERASIKAN PINTU BERIKUT MENGGUNAKAN PEMBUKA PINTU GARASI:
• Doors with a safety stop and reversing feature • Doors that comply with the applicable safety standards Before programming the garage door opener, park the vehicle outside the garage. Ensure that the vehicle is switched on but not started. The garage door opener function is always available when the vehicle is switched on. If the garage door is not working and the indicator lamp in the inside mirror is flashing quickly, your garage door system operates with rolling code. In this case, you must perform rolling code synchronisation. Information on rolling code synchronisation: In the following steps, you must press the "Learn" "Program" or "Smart" button on the garage door opener in your garage. Please note that the names of the buttons may vary depending on the manufacturer. For more information, refer to the owner's manual for the garage door opener. • Have someone help you so that the steps can be carried out faster and more easily. - You may need a ladder or something of similar stability to help you reach the buttons. Do not stand on your vehicle to carry out these steps! - Certain timings must be observed for the following steps. It may be necessary to try carrying out the steps several times.  G-Class - Owner's Manual Driving and parking Parking   Find the "Learn", "Program" or "Smart" button on the garage door opener in the garage. The shape and colour of the buttons vary depending on the manufacturer. Press the "Learn", "Program" or "Smart" button. Depending on the manufacturer of the garage door opener, an indicator lamp may start to flash. Within 30 seconds, press and hold the HomeLink® button in the vehicle for three seconds. Press the HomeLink ® button again and hold it for three seconds. Repeat this process once more (three times in total). Rolling code synchronisation is now complete. HomeLink ® should now activate your garage door equipped with a rolling code. ① Please note that some garage door openers may require the HomeLink® button to be pressed for different lengths of time during the synchronisation process. Observe the owner's manual for the garage door manufacturer.  More information can be found on the https://www.homelink.comMENGATASI MASALAH SAAT MEMPROGRAM HOMELINK*
BAHAYA
Danger to life from toxic exhaust gas in enclosed spaces Combustion engines emit toxic exhaust gases such as carbon monoxide. Inhaling these exhaust gases is hazardous to health and leads to poisoning. ▶ Never leave the engine or, if present, the stationary heater running in an enclosed space without sufficient ventilation.PERINGATAN
Risk of injury by becoming trapped when opening and closing a garage door When you operate or program a garage door with an integrated garage door opener, persons can become trapped or struck by the garage door if they stand within its range of movement. ▶ Always make sure that nobody is within the range of the garage door's movement.HANYA OPERASIKAN PINTU BERIKUT MENGGUNAKAN PEMBUKA PINTU GARASI:
• Doors with a safety stop and reversing feature • Doors that comply with the applicable safety standards   G-Class - Owner's Manual Driving and parking Parking Before programming the garage door opener, park the vehicle outside the garage. Ensure that the vehicle is switched on but not started. The garage door opener function is always available when the vehicle is switched on. Ensure that the remote control used for programming is approved by the manufacturer of the garage door opener and activates the door.  Replace the batteries in the remote control ⑤. Hold the remote control ⑤ at various angles in front of the inside mirror from a distance of between 5 cm and 30 cm. Hold each position for at least 25 seconds before trying another position. Hold the remote control ⑥ at the same angles at various distances in front of the inside mirror. You should test every position for at least 25 seconds before trying another position. On remote controls that only transmit for a limited period, press the button ⑥ on the remote control ⑤ again before transmission ends.i INFORMASI DUKUNGAN DAN PEMROGRAMAN TAMBAHAN:
• European Union (EU): call the HomeLink® hotline on (0) 0800 046 635 465 (free of charge) or +49 (0) 7132 3455 733 (charges apply) Please note that the free number may not be available depending on your mobile phone provider. • Visit the https://www.homelink.comMENGHAPUS TOMBOL HOMELINK®
BAHAYA
Danger to life from toxic exhaust gas in enclosed spaces Combustion engines emit toxic exhaust gases such as carbon monoxide. Inhaling these exhaust gases is hazardous to health and leads to poisoning. ▶ Never leave the engine or, if present, the stationary heater running in an enclosed space without sufficient ventilation.PERINGATAN
Risk of injury by becoming trapped when opening and closing a garage door When you operate or program a garage door with an integrated garage door opener, persons can become trapped or struck by the garage door if they stand within its range of movement. Always make sure that nobody is within the range of the garage door's movement. G-Class - Owner's Manual Driving and parking ParkingHANYA OPERASIKAN PINTU BERIKUT DENGAN MENGGUNAKAN PEMBUKA PINTU GARASI:
• Doors with a safety stop and reversing feature • Doors that comply with the applicable safety standards Before programming the garage door opener, park the vehicle outside the garage. Ensure that the vehicle is switched on but not started. The garage door opener function is always available when the vehicle is switched on.   Press and hold buttons ① and ③. The indicator lamp 4 lights up orange. If the indicator lamp ● flashes green, release buttons ① and ②. This may take up to 10 seconds. The entire memory has been deleted.MODE PEMROGRAMAN KHUSUS (JIKA DIPERLUKAN)
BAHAYA
Danger to life from toxic exhaust gas in enclosed spaces Combustion engines emit toxic exhaust gases such as carbon monoxide. Inhaling these exhaust gases is hazardous to health and leads to poisoning. ▶ Never leave the engine or, if present, the stationary heater running in an enclosed space without sufficient ventilation. PERINGATAN
Risk of injury by becoming trapped when opening and closing a garage door When you operate or program a garage door with an integrated garage door opener, persons can become trapped or struck by the garage door if they stand within its range of movement. Always make sure that nobody is within the range of the garage door's movement. Before programming the garage door opener, park the vehicle outside the garage. Ensure that the vehicle is switched on but not started. ① The garage door opener function is always available when the vehicle is switched on. D-mode: A special programming mode is required for some devices available on the market. Only use this if this is expressly stated in the program-   G-Class - Owner's Manual Driving and parking Parking ming instructions in the owner's manual for the device or on the https://www.homelink.com. UR-mode: UR-mode is a special programming mode that is only required for use with the HomeLink ® universal receiver. The HomeLink ® universal receiver must be purchased separately. It is required to connect incompatible garage door openers or garage doors with HomeLink ® . Rem parkir elektrik
FUNGSI REM PARKIR ELEKTRIK (PENGEREMAN OTOMATIS)
PERINGATAN
Accident- and risk of injury with unsupervised children in the vehicleJIKA ANDA MENINGGALKAN ANAK-ANAK TANPA PENGAWASAN DI DALAM KENDARAAN, MEREKA TERUTAMA DAPAT
- Open doors and thereby endanger other persons or road users. • get out of the car and are hit by traffic. • Operate vehicle equipment and become trapped, forexample.SELAIN ITU, ANAK-ANAK JUGA DAPAT MENGGERAKKAN KENDARAAN, MISALNYA DENGAN:
• releasing the parking brake. • change the gearbox setting. - start the vehicle. ▶ Never leave children unattended in the vehicle. When leaving the vehicle, always take the SmartKey with you and lock the vehicle. ▶ Keep the key out of reach of children.  G-Class - Owner's Manual Driving and parking ParkingREM PARKIR ELEKTRIK BEKERJA JIKA TRANSMISI BERADA DI POSISI P DAN SALAH SATU KONDISI BERIKUT TERPENUHI:
• The vehicle is switched off. The driver's seat belt is not fastened and the driver's door is opened. To prevent application: pull the handle of the electric parking brake ( → page 334). When the electric parking brake is applied, the red [P] indicator lamp lights up on the driver display. The electric parking brake is not automatically applied if the vehicle is switched off by the ECO start/stop function.FUNGSI REM PARKIR ELEKTRIK (PELEPASAN OTOMATIS) REM PARKIR ELEKTRIK LEPAS KETIKA KONDISI BERIKUT TERPENUHI:
• The driver's door is closed. • The vehicle has been started. - The transmission is in position D or R and you depress the accelerator pedal, or you shift from transmission position P to D or R on level ground. • If the transmission is in position R, the rear door must be closed. - The driver's seat belt is not properly fastened. If the driver's seat belt is not fastened, the following condition must be met: \- You shift from transmission position P. When the electric parking brake is released, the red Ⓓ indicator lamp in the driver display goes out.MENGEREMKAN/MELEPASKAN REM PARKIR ELEKTRIK SECARA MANUAL
PERINGATAN
Accident- and risk of injury with unsupervised children in the vehicleJIKA ANDA MENINGGALKAN ANAK-ANAK TANPA PENGAWASAN DI DALAM KENDARAAN, MEREKA TERUTAMA DAPAT
- Open doors and thereby endanger other persons or road users. • get out of the car and are hit by traffic. • Operate vehicle equipment and become trapped, forexample.SELAIN ITU, ANAK-ANAK JUGA DAPAT MENGGERAKKAN KENDARAAN, CONTOHNYA DENGAN:
• releasing the parking brake. • change the gearbox setting. - start the vehicle. ▶ Never leave children unattended in the vehicle. When leaving the vehicle, always take the SmartKey with you and lock the vehicle. ▶ Keep the key out of reach of children.  G-Class - Owner's Manual Driving and parking Parking APPLY  When the vehicle is stationary, push handle ⓚ. The red Ⓔ indicator lamp on the driver display lights up. The electric parking brake is only securely applied if the red indicator lamp is lit continuously. RELEASE  \- Switch on the vehicle. - Pull handle (1). The red (2) indicator lamp on the driver display goes out. EMERGENCY BRAKING  Press and hold handle ①. As long as the vehicle is in motion, the Release parking brake message is displayed and the red Ⓓ indicator lamp flashes. When the vehicle has been braked to a standstill, the electric parking brake is applied. The red Ⓓ indicator lamp on the driver display lights up. i Have the electric parking brake checked at a qualified specialist workshop after emergency braking.  G-Class - Owner's Manual Driving and parking Parking Informasi tentang deteksi tabrakan untuk kendaraan yang diparkir
If an impact is detected with tow-away protection switched on in the vehicle, and collision detection is active, a message is displayed in the multimedia system when the vehicle is switched on.ANDA AKAN MENERIMA INFORMASI MENGENAI HAL BERIKUT:
• The area of the vehicle that may have been damaged. • The force of the impact.SITUASI BERIKUT DAPAT MENYEBABKAN AKTIVASI TIDAK SENGAJA:
• The parked vehicle is moved, forexample in a double-decker garage. • The locked vehicle is parked in a car wash. Deactivate tow-away protection to prevent inadvertent activation. If you deactivate tow-away protection, collision detection will also be deactivated. You can permanently deactivate collision detection via the multimedia system ( → page 336).BATASAN SISTEM
DETEKSI MUNGKIN TERBATAS DALAM SITUASI BERIKUT:
- if damage is caused to the vehicle without impact, for example, if an outside mirror is torn off or the paint is damaged by a key • in the event of an impact involving the collision partner at low speed • if the electric parking brake is not applied ① You are responsible for your vehicle. You should therefore always ensure that your vehicle is free of damage and is roadworthy.Mengatur deteksi tabrakan untuk kendaraan yang diparkir
Multimedia system: Settings Vehicle Open/close Vehicle protection Select Tow-away protec.. ▶ Activate or deactivate the Collision notification function.Catatan tentang memarkir kendaraan
If you leave the vehicle parked up for longer than six weeks, it may suffer damage through disuse. The 12 V battery may also be impaired or damaged by heavy discharging. ① Further information can be obtained at a qualified specialist workshop. G-Class - Owner's Manual Driving and parking Parking Mode siaga (perpanjangan periode penggunaan baterai starter)
FUNGSI MODE SIAGA
① This function is not available for all models. If standby mode is activated, energy loss will be minimised during extended idle times.MODE SIAGA DITANDAI DENGAN HAL BERIKUT:
• The starter battery is preserved. • The maximum idle time appears on the driver display. • The connection to online services is interrupted. • The ATA (anti-theft alarm system) is not available. - The interior protection and tow-away protection functions are not available. - The function for detecting collisions when the vehicle is parked is not available.JIKA KONDISI BERIKUT TERPENUHI, MODE SIAGA DAPAT DIAKTIFKAN ATAU DINONAKTIFKAN MENGGUNAKAN SISTEM MULTIMEDIA:
• The vehicle is switched on. • The vehicle has not been started. Exceeding the vehicle's displayed idle time may cause inconvenience; i.e. it cannot be guaranteed that the starter battery will reliably start the vehicle.ISI ULANG BATERAI STARTER DALAM SITUASI BERIKUT:
• If the vehicle's idle time needs to be extended. • If the starter battery state of charge is insufficient for standby mode. Standby mode is automatically deactivated when the vehicle is switched on.MENGAKTIFKAN/MENONAKTIFKAN MODE SIAGA (MEMARKIR KENDARAAN) Persyaratan
• The vehicle is switched on. • The vehicle has not been started. Multimedia system: Settings Vehicle Other functions ▶ Activate or deactivate Standby mode.  G-Class - Owner's Manual Driving and parking Driving and driving safety systems Mengemudi dan sistem keselamatan berkendara
Sistem kemudi dan tanggung jawab Anda
Your vehicle is equipped with driving systems which assist you in driving, parking and manoeuvring the vehicle. The driving systems are only aids. They are not a substitute for you paying attention to your surroundings and do not relieve you of your responsibility pertaining to road traffic law. The driver is always responsible for maintaining a safe distance to the vehicle in front, for vehicle speed, for braking in good time and for staying in lane. Pay attention to the traffic conditions at all times and intervene when necessary. Be aware of the limitations regarding the safe use of these systems. Driving systems can neither reduce the risk of accident if you fail to adapt your driving style nor override the laws of physics. They cannot always take into account road, weather or traffic conditions. Some driving systems can regulate or limit the speed to a previously set value. Draw attention to the stored speed when changing drivers.Informasi tentang sensor dan kamera kendaraan
PERINGATAN
Risk of accident if the detection capability of the vehicle sensors or cameras is impaired If the areas of the vehicle sensors or cameras are obscured, damaged or dirty, some driving and driving safety systems may no longer function correctly. There is a risk of an accident. ▶ Always keep the areas of the vehicle sensors and cameras clear of obstructions and clean. Have damage to the bumpers, radiator grille or stone chipping in the area of the cameras in the windscreen repaired at a qualified specialist workshop. Some driving and driving safety systems use cameras as well as radar or ultrasonic sensors to monitor the area in front of, behind or next to the vehicle.   G-Class - Owner's Manual Driving and parking Driving and driving safety systems  ① Multifunction camera ② Cameras in the exterior mirrors 3 Front radar Front camera Corner radars 6 Ultrasonic sensors 7 Reversing camera In particular, keep the sensor and camera areas free of dirt, ice or slush. (→ page 620). The sensors and cameras must not be covered and the detection ranges around them must be kept free. Do not attach additional number plate brackets, advertisements, stickers, car foils or rock chip protection films in the detection range of the sensors and cameras. Make sure there are no overhanging loads protruding into the detection range. If there is damage to a bumper or the radiator shell, or after an impact, have the function of the sensors checked at a qualified specialist workshop. Have damage or stone chipping in the area of the cameras in the windscreen repaired at a qualified specialist workshop. Ikhtisar sistem kemudi dan sistem keselamatan berkendara
SISTEM KEMUDI DAN SISTEM KESELAMATAN BERKENDARA
• ABS ( → page 340) • Off-road ABS ( → page 340) BAS ( → page 340) - ESP 2 (→ page 341) - ESP (Mercedes-AMG vehicles) (→ page 342) - ESP ® trailer stabilisation (→ page 344) EBD ( → page 346) • HOLD function ( → page 347) • Hill Start Assist ( → page 348) • Adaptive Brake Lights ( → page 348) • ATTENTION ASSIST (→ page 348) • Cruise control ( → page 350) • Traffic Sign Assist (→ page 373) • Traffic light view ( → page 377) • Suspension with adaptive damping adjustment (→ page 382) • AMG RIDE CONTROL ( → page 382) • AMG ACTIVE RIDE CONTROL (→ page 383)PAKET BANTUAN MENGEMUDI
• Active Distance Assist DISTRONIC ( → page 354) • Active Speed Limit Assist ( → page 361) • Route-based speed adaptation ( → page 362) • DSR ( → page 364)  G-Class - Owner's Manual Driving and parking Driving and driving safety systems • Active Brake Assist ( → page 369) • Active Steering Assist ( → page 366) • Active Emergency Stop Assist ( → page 368) • Blind Spot Assist with exit warning ( → page 377) • Active Lane Keeping Assist ( → page 379)SISTEM PARKIR
• Reversing camera ( → page 389) • 360° camera ( → page 391) • Parking Assist PARKTRONIC ( → page 398) • Active Parking Assist ( → page 401) • Trailer Manoeuvring Assist ( → page 410) Availability of individual functions depends on the respective equipment and country of use.Fungsi ABS
SISTEM REM ANTI TERKUNCI (ABS) MENGATUR TEKANAN REM DALAM SITUASI BERKENDARA KRITIS:
- During braking, for instance, at maximum full-stop braking or if there is insufficient tyre traction, the wheels are prevented from locking. • Vehicle steerability while braking is ensured. If ABS intervenes when braking, you will feel a pulsing in the brake pedal. The pulsating brake pedal can be an indication of hazardous road conditions and can serve as a reminder to take extra care while driving. BATASAN SISTEM
• ABS is active from speeds of approximately 5 km/h. - ABS may be impaired or may not function if a malfunction has occurred and the yellow ☑ ABS warning lamp lights up continuously after the vehicle is started.Fungsi ABS off-road
FUNGSI KONTROL ABS DIMODIFIKASI SAAT BERALIH KE PROGRAM BERKENDARA OFF-ROAD:
• The front wheels lock cyclically during braking. • The braking distance is shortened due to the digging-in effect.BATASAN SISTEM
• If Off-road ABS intervenes, the ability to steer may be restricted.Fungsi BAS
⚠ WARNING Risk of an accident caused by a malfunction in BAS (Brake Assist System) If BAS is malfunctioning, the braking distance in an emergency braking situation is increased. ▶ Depress the brake pedal with full force in emergency braking situations. ABS prevents the wheels from locking. The Brake Assist System (BAS) supports your emergency braking situation with additional brake force.  G-Class - Owner's Manual Driving and parking Driving and driving safety systemsJIKA ANDA MENEKAN PEDAL REM DENGAN CEPAT, BAS AKTIF:
• BAS automatically boosts the brake pressure. • BAS can shorten the braking distance. • ABS prevents the wheels from locking. The brakes will function as usual once you release the brake pedal. BAS is deactivated.ESP® (Electronic Stability Program)
FUNGSI ESP®
KARAKTERISTIK SAAT ESP® AKTIF
i ESP e is not available in the 📄 Rock and 📄 Sand drive programs.PROGRAM STABILITAS ELEKTRONIK (ESP®) DAPAT MEMANTAU DAN MENINGKATKAN STABILITAS BERKENDARA DAN TRAKSI DALAM SITUASI BERIKUT DALAM BATAS FISIK:
• when starting off on wet or slippery roads - when brakingJIKA KENDARAAN MENYIMPANG DARI ARAH YANG DIINGINKAN PENGEMUDI, ESP® DAPAT MENSTABILKAN KENDARAAN DENGAN CARA INTERVENSI BERIKUT:
• One or more wheels are individually braked. • The engine output is adapted according to the situation. SAAT ESP® DINONAKTIFKAN, LAMPU PERINGATAN ⚡️ MENYALA TERUS-MENERUS:
• Driving stability will no longer be improved. • The drive wheels could spin. ETS/4ETS traction control remains active depending on the selected drive programme.SAAT LAMPU PERINGATAN BERKEDIP, SATU ATAU BEBERAPA RODA TELAH MENCAPAI BATAS GRIP:
• Adapt your driving style to suit the current road and weather conditions. • Do not deactivate ESP*. - Only depress the accelerator pedal as far as is necessary when starting off.KARAKTERISTIK SAAT ESP® DINONAKTIFKAN
WARNING Risk of skidding if ESP ® is deactivated If you deactivate ESP ® , ESP ® cannot carry out vehicle stabilisation. ▶ ESP ® should only be deactivated in the following situations.UNTUK MENINGKATKAN TRAKSI, ESP® DAPAT DIMATIKAN DALAM SITUASI BERIKUT:
• when using snow chains - in deep snow • on sand or gravel  G-Class - Owner's Manual Driving and parking Driving and driving safety systems ① Spinning the wheels results in a cutting action, which enhances traction. If the warning lamp lights up continuously, ESP ® is not available due to a malfunction.PERHATIKAN INFORMASI BERIKUT:
• Indicator and warning lamps (→ page 829) • Display messages (→ page 769)ETS/4ETS
ETS/4ETS traction control (Electronic Traction System) is part of ESP and makes it possible to pull away and accelerate on a slippery road.ETS/4ETS DAPAT MENINGKATKAN TRAKSI KENDARAAN DENGAN CARA INTERVENSI BERIKUT:
• The drive wheels are braked individually if they spin. - Either more torque is transferred to the wheel or wheels with more traction, or the drive torque in general is reduced.PENGARUH PROGRAM BERKENDARA TERHADAP ESP®
The drive programs enable ESP ® to adapt to different weather and road conditions as well as the driver's preferred driving style. Depending on the selected drive program, the appropriate ESP ® mode will be activated ( → page 294).FUNGSI ESP® (KENDARAAN MERCEDES-AMG)
YOU CAN SELECT BETWEEN THE FOLLOWING MODES OF THE ELECTRONIC STABILITY PROGRAM (ESP®): - ESP 2 ON - ESP ® SPORT \- ESP ® OFFKARAKTERISTIK SAAT ESP® AKTIF
ESP 6 MEMANTAU DAN MENINGKATKAN STABILITAS DAN TRAKSI BERKENDARA, TERUTAMA DALAM SITUASI BERIKUT:
• When starting off on wet or slippery roads. - When braking. - Vehicles with trailer hitch: in trailer operation from speeds of 65 km/h, if the vehicle/trailer combination begins to sway from side to side. - When there is a strong crosswind and a driving speed of approximately 80 km/h to 200 km/h.ESP ® DAPAT MENSTABILKAN KENDARAAN DENGAN CARA INTERVENSI BERIKUT:
• One or more wheels are braked. • The engine output is adapted according to the situation. ESP ® is activated every time the vehicle is started regardless of whether ESP ® SPORT or ESP ® OFF was selected before the engine was switched off.KETIKA LAMPU PERINGATAN Ⓞ BERKEDIP, SATU ATAU BEBERAPA RODA TELAH MENCAPAI BATAS GRIPNYA:
- Adapt the driving style to suit the prevailing road and weather conditions. • Do not deactivate ESP * under any circumstances. • Only depress the accelerator pedal as far as necessary when starting off.  G-Class - Owner's Manual Driving and parking Driving and driving safety systemsKARAKTERISTIK ESP® SPORT
PERINGATAN
Risk of skidding if ESP® SPORT is used incorrectly When you activate ESP® SPORT, there is an increased risk of skidding and having an accident. ▶ Activate ESP ® SPORT only in the circumstances described below. When ESP® SPORT is selected, the warning lamps OFF and ***** light up continuously. Select ESP ® SPORT when the vehicle's own oversteering and understeering characteristics are desired, e.g. on cordoned-off roads. Driving with ESP ® SPORT or with ESP ® deactivated requires an extremely qualified and experienced driver. If ESP SPORT is activated and one or more wheels start to spin, the warning lamp flashes. ESP then only stabilises the vehicle to a limited degree.ESP ® SPORT JUGA MEMILIKI KARAKTERISTIK BERIKUT:
- ESP only improves driving stability to a limited degree. • ETS/4ETS traction control is still active. - The engine's torque is only restricted to a limited degree and the drive wheels can spin. The spinning of the wheels results in a cutting action for better traction on loose surfaces. - ESP ® continues to provide assistance when the brakes are firmly applied. - Vehicles with trailer hitch: stabilisation of the vehicle/trailer combination is no longer active. • Crosswind Assist is no longer active.KARAKTERISTIK SAAT ESP 9 DINONAKTIFKAN
PERINGATAN
Risk of skidding if ESP * is deactivated If you deactivate ESP ® , ESP ® cannot carry out vehicle stabilisation. ▶ ESP ® should only be deactivated in the following situations. When ESP ® is switched off, the warning lamps ☐ and ESP OFF light up continuously.MENONAKTIFKAN ESP ® MEMILIKI EFEK BERIKUT:
• Driving stability will no longer be improved. • The drive wheels could spin. • ETS/4ETS traction control is still active. - Vehicles with trailer hitch: stabilisation of the vehicle/trailer combination is no longer active. • Crosswind Assist is no longer active. Even when ESP is deactivated, you are still assisted by ESP when braking hard.  G-Class - Owner's Manual Driving and parking Driving and driving safety systemsMUNGKIN TERBAIK UNTUK MENGAKTIFKAN ESP® SPORT ATAU MENONAKTIFKAN ESP® DALAM SITUASI BERIKUT:
- When using snow chains. In deep snow. - On sand or gravel. ① Spinning the wheels results in a cutting action, which enhances traction. ① Activate ESP * as soon as the situations described above no longer apply. ESP * will otherwise not be able to stabilise the vehicle if the vehicle starts to skid or a wheel starts to spin. If the warning lamp lights up continuously, ESP is not available due to a malfunction.PERHATIKAN PESAN TAMPILAN DAN LAMPU INDIKATOR SERTA PERINGATAN YANG DITAMPILKAN:
• Indicator and warning lamps (→ page 829) • Display messages ( → page 769)ETS/4ETS (SISTEM TRAKSI ELEKTRONIK)
ETS/4ETS traction control is part of ESP ® .ETS/4ETS DAPAT MENINGKATKAN TRAKSI KENDARAAN DENGAN CARA INTERVENSI BERIKUT:
• The drive wheels are braked individually if they spin. • More drive torque is transferred to the wheel or wheels with traction. FUNGSI STABILISASI TRAILER ESP®
WARNING Risk of accident in poor road and weather conditions In poor road and weather conditions, the trailer stabilisation cannot prevent lurching of the vehicle/trailer combination. Trailers with a high centre of gravity may tip over before ESP ® detects this. ▶ Always adapt your driving style to suit the current road and weather conditions.SAAT BERKENDARA DENGAN TRAILER, STABILISASI TRAILER ESP® DAPAT MENSTABILKAN KENDARAAN ANDA JIKA TRAILER MULAI BERGOYANG DARI SISI KE SISI:
- ESP ® trailer stabilisation is active above speeds of 65 km/h - Slight swerving is reduced by means of a targeted, individual brake application on one side. - In the event of severe swerving, the drive system output is also reduced and all wheels are braked.STABILISASI TRAILER ESP® MUNGKIN TERGANGGU ATAU TIDAK BERFUNGSI JIKA:
\- The trailer is not connected correctly or is not detected properly by the vehicle.  G-Class - Owner's Manual Driving and parking Driving and driving safety systemsMENGAKTIFKAN ATAU MENONAKTIFKAN ESP® DI SISTEM MULTIMEDIA MBUX
Multimedia system:  ① ESP ® can only be activated/deactivated using quick-access when at least one other function is available in quick-access. Otherwise, you will find ESP ® in either the Assistance or the Offroad menu. Select ESP. Select On or Off. ESP 3 is deactivated if the ESP 4 OFF warning lamp lights up continuously on the driver display. Observe the information on the warning lamps and the display messages which may be shown on the driver display.MENGATUR ESP® DENGAN TOMBOL RODA KEMUDI AMG
You can also adjust ESP * via the multimedia system ( → page 346).  To adjust ESP*: press upper or lower display button ① repeatedly, until it displays the symbol. If the display button does not show the symbol, then it is hidden. How functions are displayed and the order in which they are displayed can be set in the multimedia system ( → page 292).WARNA JALAN PADA SIMBOL TOMBOL 📁 MENUNJUKKAN PENGATURAN SAAT INI:
( blue ): ESP ® ON (yellow): ESP SPORT • (red): ESP* OFF To set ESP SPORT: briefly press button Ⓞ when ESP is activated. The road in the 📁 button symbol lights up yellow. The 📁 and 📁 warning lamps appear in the driver display. If you switch ESP® to SPORT ESP® in the off-road drive programs, or, AMG Dynamics automatically switches to the Slide or Traction level. To deactivate ESP: set ESP® SPORT then press and hold the button ②. The road in the button symbol lights up red. The and SPORI warning lamps appear in the driver display.   G-Class - Owner's Manual Driving and parking Driving and driving safety systems In the off-road drive programs 📄, 📌 or 🏠 if you deactivate ESPOFF ESP®, AMG Dynamics automatically shifts to the Slide or Traction level. To activate ESP: briefly press button ② when ESP SPORT is selected or ESP is deactivated. The road in the button symbol lights up blue. The ☐ and ☐ or ☐ ESPOFF warning lamps go out. When the symbol is shown with a red 1 on the display button, ESP is malfunctioning. Observe the information on warning lamps and display messages which are shown in the driver display.MENYESUAIKAN ESP ® DI SISTEM MULTIMEDIA (KENDARAAN MERCEDES-AMG)
Multimedia system:  The AMG DYNAMIC SELECT menu can also be accessed via the DYNAMIC SELECT button. ESP is always activate when the engine is started. The road in the button symbol lights up blue. To engage ESP SPORT: when ESP is activated, briefly press to change to the Sport programme. The road in the button symbol lights up yellow.  Switch off ESP ® : engage the programme ESP ® SPORT and press and hold to switch off ESP ® . The road in the button symbol lights up red. The and ESP OFF warning lamps appear on the driver display. If you switch off ESP OFF ESP® in the off-road drive programmes or, AMG Dynamic Select automatically switches to the Slide or Traction level. Switch on ESP ® : in ESP ® SPORT or when ESP ® is switched off, briefly press 📄. The road in the button symbol lights up blue. The and ESP OFF or ESP OFF warning lamps go out. If you switch ESP* to SPORT in the off-road drive programmes or AMG Dynamic Select automatically switches to the Slide or Traction level. (i) You can also set ESP via the steering-wheel buttons (→ page 345).Fungsi EBD
DISTRIBUSI GAYA REM ELEKTRONIK (EBD) DITANDAI DENGAN HAL-HAL BERIKUT:
• Monitoring and regulating the brake pressure on the rear wheels.   G-Class - Owner's Manual Driving and parking Driving and driving safety systems • Improved driving stability when braking, especially on bends.Fungsi HOLD
FUNGSI HOLD
The HOLD function holds the vehicle at a standstill without requiring you to depress the brake pedal, e.g. while waiting in traffic. The HOLD function is only an aid. The responsibility for the vehicle safely standing still remains with the driver.BATASAN SISTEM
The HOLD function is only intended to provide assistance when driving and is not a sufficient means of safeguarding the vehicle against rolling away when stationary. • The gradient must not be greater than 30 %.MENGAKTIFKAN/MENONAKTIFKAN FUNGSI HOLD
PERINGATAN
Risk of an accident due to the HOLD function being active when you leave the vehicleJIKA KENDARAAN HANYA DIREM DENGAN FUNGSI HOLD, KENDARAAN DAPAT MELUNCUR DALAM SITUASI BERIKUT:
• If there is a malfunction in the system or in the power supply. - If the HOLD function is deactivated by depressing the accelerator pedal or brake pedal, e.g. by a vehicle occupant. ▶ Always secure the vehicle against rolling away before you leave it.Persyaratan:
• The vehicle is stationary. • The driver's door is closed or the driver is correctly belted. - The vehicle has been started or has been automatically switched off by the ECO start/stop function. • The electric parking brake has been released. • The transmission position D, R or N is engaged.MENGAKTIFKAN FUNGSI HOLD
Depress the brake pedal, and after a short time quickly depress further until the HOLD display appears on the driver display. Release the brake pedal.MENONAKTIFKAN FUNGSI HOLD
▶ Depress the accelerator pedal to start off. or ▶ Depress the brake pedal until HOLD disappears from the driver display.FUNGSI HOLD JUGA DINONAKTIFKAN DALAM SITUASI BERIKUT:
• The parking position P is engaged. • The vehicle is secured with the electric parking brake.DALAM SITUASI BERIKUT, KENDARAAN DITAHAN OLEH POSISI PARKIR P DAN/ATAU REM PARKIR ELEKTRIK:
• The seat belt is unfastened and the driver's door is opened. • The vehicle is switched off.  G-Class - Owner's Manual Driving and parking Driving and driving safety systems • There is a system malfunction. • The power supply is insufficient.Fungsi Hill Start Assist
PERINGATAN
Risk of accident and injury due to the vehicle rolling away After a short time, Hill Start Assist no longer holds the vehicle. Swiftly move your foot from the brake pedal to the accelerator pedal. Do not leave the vehicle when it is being held by Hill Start Assist.HILL START ASSIST MENAHAN KENDARAAN UNTUK WAKTU SINGKAT SAAT MULAI BERJALAN DI TANJAKAN DENGAN KONDISI BERIKUT:
• The transmission position D or R for starting off uphill is selected. • The electric parking brake has been released. This gives you enough time to move your foot from the brake pedal to the accelerator pedal and depress it without the vehicle rolling away immediately.Fungsi Lampu Rem Adaptif
LAMPU REM ADAPTIF MEMPERINGATKAN LALU LINTAS DI BELAKANG DALAM SITUASI PENGEREMAN DARURAT DENGAN TINDAKAN BERIKUT:
- flashing the brake lights • activating the hazard warning lights ( → page 59) If the vehicle is braked sharply from speeds above 70 km/h, the brake lights flash rapidly. This provides following traffic with an even more noticeable warning.ATTENTION ASSIST
FUNGSI ATTENTION ASSIST
 ATTENTION ASSIST is not available in the drive programs  Rock and 📄 Sand or is switched to passive mode. ATTENTION ASSIST assists you on long, monotonous journeys, e.g. on motorways and trunk roads. If indicators of fatigue or increasing lapses in concentration on the part of the driver are detected, the system suggests taking a break. ATTENTION ASSIST serves solely as an aid. It cannot always promptly detect fatigue or lapses in concentration. The system is not a substitute for a well-rested and attentive driver. On long journeys, take regular, timely breaks to allow for adequate recovery.ANDA DAPAT MEMILIH ANTARA DUA PENGATURAN:
• Standard: normal system sensitivity. - Sensitive: higher system sensitivity. The driver is warned earlier and the attention level detected by ATTENTION ASSIST is adapted accordingly. If fatigue or increasing lapses in concentration are detected, the driver display shows the warning: ATTENTION ASSIST: Take a break!. You can acknowledge the message and take a break if necessary. If you do not take a break and ATTENTION ASSIST continues to detect increasing lapses in concentration, you will be warned again after a minimum of 15 minutes.   G-Class - Owner's Manual Driving and parking Driving and driving safety systems  INFORMASI BERIKUT DITAMPILKAN PADA LAYAR PENGEMUDI:
• Journey time since the last break • The attention level determined by ATTENTION ASSIST The more segments ① of the circle that are displayed, the higher the detected attention level. Fewer segments ② are displayed in the circle as the attention level decreases. If ATTENTION ASSIST is unable to calculate the attention level and cannot issue a warning, the System suspended message appears. If the driver display shows a warning, the MBUX multimedia system offers to search for a rest area. You can select a rest area and start navigation to this rest area. When you restart the vehicle, ATTENTION ASSIST is automatically switched on. The last selected sensitivity level remains stored.BATASAN SISTEM
ATTENTION ASSIST is active in the 60 km/h to 200 km/h speed range. If the system is unavailable due to a fault, the ATTENTION ASSIST warning lamp [icon] lights up continuously on the driver display.FUNGSIONALITAS ATTENTION ASSIST DIBATASI, DAN PERINGATAN MUNGKIN TERTUNDA ATAU TIDAK DIBERIKAN SAMA SEKALI DALAM SITUASI BERIKUT:
• If you have been driving for less than approximately 30 minutes • If the road condition is poor (uneven road surface or potholes) • If there is a strong side wind - If you adopt a sporty driving style (high cornering speeds or high rates of acceleration) - If the Active Steering Assist function of Active Distance Assist DISTRONIC is active • If the clock is set to the incorrect time • If you change lanes and vary your speed frequently in active driving situations Observe also any information regarding display messages that can be displayed on the driver display.PENILAIAN KANTUK DAN KEWASPADAAN ATTENTION ASSIST DIATUR ULANG DAN DIMULAI KEMBALI SAAT MELANJUTKAN PERJALANAN DALAM SITUASI BERIKUT:
• If you switch off the vehicle. - If you unfasten your seat belt and open the driver's door (e.g. to change drivers or take a break).PENGATURAN BANTUAN PERHATIAN
Multimedia system:  Activate or deactivate ATTENTION ASSIST.  G-Class - Owner's Manual Driving and parking Driving and driving safety systemsMENGATUR SENSITIVITAS
Select ☐ next to ATTENTION ASSIST. ▶ Select Standard or Sensitive.Kontrol jelajah dan pembatas
FUNGSI KONTROL JELAJAH
Cruise control is not available in the drive programs Rock and Sand. Cruise control regulates the speed to the value selected by the driver. Forexample, the stored speed is not deleted if you accelerate to overtake. If you remove your foot from the accelerator pedal after overtaking, cruise control will resume speed regulation back to the stored speed. You can set any speed above 20 km/h up to the maximum design speed or up to the stored winter tyre limit. Observe the notes on driving systems and your responsibility; otherwise you may fail to recognise potential dangers ( → page 338). Mercedes-AMG vehicles: cruise control is available up to a maximum speed of 240 km/h.NOTIFIKASI DI LAYAR PENGEMUDI
Grey: cruise control is selected but not yet activated or temporarily in passive mode. Green: cruise control is activated. A stored speed is shown below the display ⚙ and is indicated in the speedometer.BATASAN SISTEM
Cruise control may be unable to maintain the stored speed on uphill gradients. The stored speed is resumed when the gradient evens out. On long and steep downhill gradients, you must change down to a lower gear in good time. This is particularly important when driving a laden vehicle. You are thus making full use of the engine's braking effect. This will take some of the strain off the brake system and prevent the brakes from overheating and wearing too quickly.JANGAN GUNAKAN KONTROL JELAJAH DALAM SITUASI BERIKUT:
- In traffic situations which require frequent changes of speed, e.g. in heavy traffic, on winding roads. - On slippery roads. Accelerating can cause the drive wheels to lose traction and the vehicle could then begin skidding. - When visibility is poor.FUNGSI PEMBATAS
The limiter is not available in the drive programs [icon] Rock and Sand. The limiter restricts the speed of the vehicle. To reduce the speed to the stored speed, the limiter applies the brakes automatically.ANDA DAPAT MEMBATASI KECEPATAN SEBAGAI BERIKUT:
• Variable: for short-term limitation of the travel speed, e.g. in built-up areas  G-Class - Owner's Manual Driving and parking Driving and driving safety systems • Permanent: for a longer-term speed restriction, e.g. in winter tyre mode You can set any speed above 20 km/h up to the maximum design speed or up to the set winter tyre limit. You can also perform settings while the vehicle is stationary if the vehicle has been started. Observe the notes on driving systems and your responsibility; you may otherwise fail to recognise potential dangers ( → page 338). Mercedes-AMG vehicles: The limiter is available up to a maximum speed of 240 km/h.NOTIFIKASI DI LAYAR PENGEMUDI
Grey: variable limiter is selected but not yet activated. Flashing grey: variable limiter is temporarily in passive mode. Green: variable limiter is activated. A stored speed is shown below the display and is indicated in the speedometer. If you depress the accelerator pedal beyond the pressure point (kickdown), the variable limiter switches to passive mode. The passive message appears on the driver display and the indicator starts flashing.PEMBATAS VARIABEL DIAKTIFKAN KEMBALI DALAM SITUASI BERIKUT:
• If the vehicle speed drops below the stored speed. • If the stored speed is called up. • If you store a new speed.MENGOPERASIKAN KONTROL JELAJAH ATAU PEMBATAS VARIABEL
PERINGATAN
Risk of accident due to stored speed If you call up the stored speed and this is lower than your current speed, the vehicle decelerates. ▶ Take into account the traffic situation before calling up the stored speed.Persyaratan:
KONTROL JELAJAH
- Neither drive program 📄 Rock nor 🐘 Sand is selected (→ page 294). • The transmission is in position D. • The vehicle speed is at least 20 km/h. - ESP ® must be activated, but not intervening. • Cruise control is selected.PEMBATAS VARIABEL
- Neither drive program 📄 Rock nor 🐵 Sand is selected (→ page 294). • The variable limiter is selected.  G-Class - Owner's Manual Driving and parking Driving and driving safety systems  Steering wheel control panel for cruise control and variable limiter RES/ Adopts the stored/detected speed CANCEL Deactivates cruise control/the variable limiter 1 SET+ Control panel to increase/decrease speed © Selects cruise control UM Selects the variable limiterMengoperasikan kontrol jelajah dan pembatas variabel:
Press the corresponding button with only one finger or swipe across the control panel.Beralih antara kontrol jelajah dan pembatas variabel:
To select cruise control: press 📞. To select the variable limiter: press LIM. ① Vehicles with Active Distance Assist DISTRONIC: the variable limiter is selected using a different button (→ page 357).Mengaktifkan kontrol jelajah atau pembatas variabel:
Press SE+ or SET- on the control panel ①. The current vehicle speed is stored and maintained by the vehicle via cruise control, or is restricted by the variable limiter. or Press RES 10 . The last stored speed is called up and maintained by the vehicle via cruise control, or is restricted by the variable limiter. If the last stored speed has previously been deleted, the current vehicle speed is stored. When you switch off the vehicle, the last speed stored is deleted. When you activate cruise control or Active Distance Assist DISTRONIC, the last speed stored for the variable limiter is deleted.Menambah/mengurangi kecepatan yang tersimpan:
To increase the stored speed: swipe upwards from the bottom of the control panel ①. • The stored speed is increased by 1 km/h. To decrease the stored speed: swipe downwards from the top of the control panel ①. • The stored speed is decreased by 1 km/h. or   G-Class - Owner's Manual Driving and parking Driving and driving safety systems Briefly press SET+ or SET on the control panel ①. The stored speed is increased or decreased to the next increment of ten (e.g. to 50 km/h or 60 km/h). or Press and hold SFT+ or SFT- on the control panel ①. The stored speed is increased or decreased to the next increment of ten, and afterwards by increments of 10 km/h. or ▶ Accelerate the vehicle to the desired speed. Press set-on the control panel 1. When the variable limiter is switched to passive mode, you cannot increase or decrease its stored speed in increments of 1 km/h.Mengadopsi kecepatan yang terdeteksi:
If cruise control/the variable limiter is activated and Traffic Sign Assist has detected a traffic sign with a maximum permissible speed and this is displayed on the driver display: Press RES/1 The maximum permissible speed shown by the traffic sign is stored and the vehicle maintains, or does not exceed this speed.Menonaktifkan kontrol jelajah atau pembatas variabel:
Press CANCE.  If you brake, deactivate ESP* or if ESP* intervenes, cruise control is deactivated. The variable limiter is not deactivated. When you switch off the vehicle, the last speed stored is deleted. When you activate cruise control or Active Distance Assist DISTRONIC, the last speed stored for the variable limiter is deleted.INFORMASI TENTANG PEMBATAS PERMANEN
If the vehicle should never exceed a specific speed (e.g. for driving in winter tyre mode), you can set this speed with the permanent limiter. You do this by limiting the speed between 160 km/h and 210 km/h in the multimedia system ( → page 54). The set speed is shown on the driver display immediately before it is reached. Confirming this message will cancel all other notifications until the vehicle is switched off again. Notifications are resumed when the vehicle is restarted or if the set speed is changed. The permanent limiter can not be switched to passive mode even during kickdown, and the travel speed remains below the set speed.MENGATUR BATAS KECEPATAN UNTUK BAN MUSIM DINGIN
Multimedia system: Settings Vehicle Driving Winter tyre limit ▶ Activate or deactivate Winter tyre limit.MENGATUR KECEPATAN
▶ Select Winter tyre limit. Select a speed.   G-Class - Owner's Manual Driving and parking Driving and driving safety systemsActive Distance Assist DISTRONIC
FUNGSI ACTIVE DISTANCE ASSIST DISTRONIC
PERINGATAN
Risk of accident from acceleration or braking by Active Distance Assist DISTRONICACTIVE DISTANCE ASSIST DISTRONIC DAPAT MEMPERCEPAT ATAU MENGEREM DALAM KASUS BERIKUT, CONTOHNYA:
• If the vehicle pulls away using Active Distance Assist DISTRONIC. - If the stored speed is called up and is considerably faster or slower than the currently driven speed. - If Active Distance Assist DISTRONIC no longer detects a vehicle in front or does not react to relevant objects. ▶ Always carefully observe the traffic conditions and be ready to brake at all times. ▶ Take into account the traffic situation before calling up the stored speed.  PERINGATAN
Risk of accident due to insufficient deceleration by Active Distance Assist DISTRONIC Active Distance Assist DISTRONIC brakes your vehicle with up to 50% of the possible deceleration. If this deceleration is not sufficient, Active Distance Assist DISTRONIC alerts you with a visual and acoustic warning. Adjust your speed and maintain a suitable distance from the vehicle in front. ▶ Brake the vehicle yourself and/or take evasive action.  G-Class - Owner's Manual Driving and parking Driving and driving safety systemsPERINGATAN
Risk of accident if detection function of Active Distance Assist DISTRONIC is impairedACTIVE DISTANCE ASSIST DISTRONIC TIDAK BERREAKSI ATAU MEMILIKI REAKSI TERBATAS:
• when driving on a different lane or when changing lanes • to pedestrians, animals, bicycles or stationary vehicles, or unexpected obstacles • to complex traffic conditions • to oncoming vehicles and crossing traffic As a result, Active Distance Assist DISTRONIC may neither give warnings nor intervene in such situations. ▶ Always observe the traffic conditions carefully and react accordingly.  Active Distance Assist DISTRONIC is not available in the Rock and Sand drive programs. Active Distance Assist DISTRONIC maintains the set speed on free-flowing roads. If vehicles are detected ahead the set distance is maintained, if necessary until the vehicle comes to a standstill. The vehicle accelerates or brakes depending on the distance to the vehicle in front and the set speed. The speed and distance to the vehicle in front are set and saved using the steering wheel. Available speed range: 20 km/h - 160 km/h The adjustable set speed may differ if a speed limit (e.g. winter tyre limit) is stored.FITUR LAIN DARI ACTIVE DISTANCE ASSIST DISTRONIC:
• Adjusts the driving style depending on the selected drive program - Initiates acceleration to the stored speed if the turn signal indicator is switched on to change to the overtaking lane • Vehicles with Driving Assistance Package: - Reacts to stationary vehicles detected in urban speed ranges (except bicycles and motorcycles) - Takes one-sided overtaking restrictions into account on motorways or multi-lane roads with separate carriageways (country-dependent) In the Active Distance Assist menu, it is possible to set the driving mode of Active Distance Assist DISTRONIC. Depending on the selected drive program, the driving behaviour is energy-saving, comfortable or dynamic ( → page 363). Vehicles with Driving Assistance Package and Parking Package: If the vehicle has been braked to a standstill on multi-lane, separate carriageways by Active Distance Assist DISTRONIC, it can automatically follow the vehicle in front when driving off again within 30 seconds. If a critical situation is detected when driving off, a visual and audible warning is issued indicating that the driver must now take control of the vehicle. The vehicle is not accelerated any further. Observe the notes on driving systems and your responsibility; otherwise you may fail to recognise potential dangers ( → page 338).   G-Class - Owner's Manual Driving and parking Driving and driving safety systems  Notification on the driver display in the Assistance menu Vehicle in front 2 Distance indicator Set specified distance The vehicle detected in front ① is highlighted in green. It may also be in the lane to the right of your vehicle in situations where it is not permitted to overtake on the left, for example, on UK motorways.TAMPILAN STATUS PERMANEN
Grey: Active Distance Assist DISTRONIC selected but not yet active. Green speedometer, grey vehicle: Active Distance Assist DISTRONIC active, speed set. Green: Active Distance Assist DISTRONIC active and vehicle detected. The stored speed is shown under the permanent status display and highlighted on the speedometer. Active Distance Assist DISTRONIC's status display is greyed out when in passive mode. If the speed of the vehicle in front or the ascertained target speed due to the route event ahead is less than the stored speed, the segments on the speedometer light up.  If you increase or decrease the set specified distance ③, the | display appears briefly. The green vehicle symbol 📄 is displayed cyclically when the vehicle is ready to pull away. If the accelerator pedal is depressed while Active Distance Assist DISTRONIC is operational, the system can be switched to passive mode. The suspended message appears briefly on the driver display.BATASAN SISTEM
SISTEM MUNGKIN TERGANGGU ATAU TIDAK BERFUNGSI DALAM KASUS BERIKUT, MISALNYA:
- In snow, rain, fog, heavy spray, if there is glare, in direct sunlight or in greatly varying light conditions. • If there is swirling dust, e.g. when driving off-road or on sandy surfaces. - If the windscreen in the area of the camera is dirty, misted up, damaged or covered. • If the radar sensors are dirty or covered. - In multi-storey car parks or on roads with steep uphill or downhill gradients. • If there are narrow vehicles in front, such as bicycles or motorcycles. In addition, one or more wheels may lose grip due to braking or acceleration on smooth or slippery roads, and the vehicle may begin skidding. If ESP ® intervenes, Active Distance Assist DISTRONIC is deactivated. Do not use Active Distance Assist DISTRONIC in these situations.   G-Class - Owner's Manual Driving and parking Driving and driving safety systems You can watch an animation on this topic via the following link:MENGOPERASIKAN ACTIVE DISTANCE ASSIST DISTRONIC DAN PEMBATAS VARIABEL
PERINGATAN
Risk of accident if detection function of Active Distance Assist DISTRONIC is impairedACTIVE DISTANCE ASSIST DISTRONIC TIDAK BERREAKSI ATAU MEMILIKI REAKSI TERBATAS:
• when driving on a different lane or when changing lanes • to pedestrians, animals, bicycles or stationary vehicles, or unexpected obstacles • to complex traffic conditions • to oncoming vehicles and crossing traffic As a result, Active Distance Assist DISTRONIC may neither give warnings nor intervene in such situations. ▶ Always observe the traffic conditions carefully and react accordingly.  PERINGATAN
Risk of accident from acceleration or braking by Active Distance Assist DISTRONICACTIVE DISTANCE ASSIST DISTRONIC MUNGKIN MEMPERCEPAT ATAU MENGEREM DALAM KASUS BERIKUT, MISALNYA:
• If the vehicle pulls away using Active Distance Assist DISTRONIC. - If the stored speed is called up and is considerably faster or slower than the currently driven speed. - If Active Distance Assist DISTRONIC no longer detects a vehicle in front or does not react to relevant objects. ▶ Always carefully observe the traffic conditions and be ready to brake at all times. ▶ Take into account the traffic situation before calling up the stored speed.  G-Class - Owner's Manual Driving and parking Driving and driving safety systemsPERINGATAN
Risk of accident due to insufficient deceleration by Active Distance Assist DISTRONIC Active Distance Assist DISTRONIC brakes your vehicle with up to 50% of the possible deceleration. If this deceleration is not sufficient, Active Distance Assist DISTRONIC alerts you with a visual and acoustic warning. Adjust your speed and maintain a suitable distance from the vehicle in front. ▶ Brake the vehicle yourself and/or take evasive action.PERINGATAN
Risk of accident due to speed adaptation via Active Speed Limit Assist The speed limit adopted by Active Speed Limit Assist may be too high or otherwise erroneous in certain circumstances: • with speed limits below 20 km/h • due to weather, e.g. in wet or foggy conditions ▶ Ensure that the speed driven always complies with the traffic regulations. Adjust the speed driven to the current traffic and weather conditions.Persyaratan:
BANTUAN JARAK AKTIF DISTRONIC:
• The electric parking brake has been released. - ESP ® is switched on and is not intervening. • Transmission position D is engaged. • All the doors are closed. - Check of the radar sensor system has been successfully completed. - Neither drive program 📄 Rock nor 🐘 Sand is selected (→ page 294).PEMBATAS VARIABEL:
• The variable limiter is selected.     Adopts the stored/detected speed Deactivates Active Distance Assist DISTRONIC/variable limiter Control panel to increase/decrease speed    G-Class - Owner's Manual Driving and parking Driving and driving safety systems  Increases/decreases the specified distance  Switches between the variable limiter and Active Distance Assist DISTRONIC To operate Active Distance Assist DISTRONIC or the variable limiter: press the respective button with only one finger or swipe across the control panel.BERALIH ANTARA PEMBATAS VARIABEL DAN BANTUAN JARAK AKTIF DISTRONIC
PressMENGAKTIFKAN BANTUAN JARAK AKTIF DISTRONIC/PEMBATAS VARIABEL
To activate without a stored speed: press SET+, SET- or RES/P. Active Distance Assist DISTRONIC: remove your foot from the accelerator pedal. The current vehicle speed is stored and maintained by the vehicle via Active Distance Assist DISTRONIC or is restricted by the variable limiter. or To activate with a stored speed: press RES/1. Active Distance Assist DISTRONIC: remove your foot from the accelerator pedal. The last stored speed is called up and maintained by the vehicle via Active Distance Assist DISTRONIC or is restricted by the variable limiter. If the stored speed has been deleted, the current vehicle speed is stored. When you switch off the vehicle, the stored speed is deleted. When you activate Active Distance Assist DISTRONIC, the speed stored for the variable limiter is deleted.MENAMBAH/MENGURANGI KECEPATAN
To increase the stored speed: swipe upwards from the bottom of the control panel ①. • The stored speed is increased by 1 km/h. To decrease the stored speed: swipe downwards from the top of the control panel ①. • The stored speed is decreased by 1 km/h. or Briefly press the top SET- or bottom SET- of the control panel ①. The stored speed is increased or decreased by 10 km/h. or Press the top SET+ or bottom SET- of the control panel and hold pressed. The stored speed is increased or decreased in 10 km/h increments. or ▶ Accelerate the vehicle to the desired speed. Press the top SET- of the control panel 1.MENGADOPSI BATAS KECEPATAN YANG DITAMPILKAN DI LAYAR PENGEMUDI
To activate Active Distance Assist DISTRONIC or the variable limiter: press SET, SET- or RES 10 . To adopt the displayed speed restriction: press RES/1. The speed restriction shown on the driver display is adopted as the stored speed. The vehicle adapts its speed to that of the vehicle in front, but only up to the stored speed, or restricts its speed accordingly.   G-Class - Owner's Manual Driving and parking Driving and driving safety systems A speed restriction shown on the driver display is only adopted while driving, not when stationary.MELAJU DENGAN BANTUAN JARAK AKTIF DISTRONIC
▶ Activate Active Distance Assist DISTRONIC and remove your foot from the brake pedal. Press RES/ ® . or ▶ Depress the accelerator pedal briefly and firmly. The functions of Active Distance Assist DISTRONIC remain active.MENAMBAH/MENGURANGI JARAK YANG DITENTUKAN KE KENDARAAN DI DEPAN
Press The 📄 display appears. The specified distance is reduced by one level. If the lowest level is already selected, the selection jumps to the highest level.MENONAKTIFKAN BANTUAN JARAK AKTIF DISTRONIC/PEMBATAS VARIABEL
WARNING Risk of an accident due to Active Distance Assist DISTRONIC being active when you leave the driver's seat If you leave the driver's seat while the vehicle is being braked by Active Distance Assist DISTRONIC only, the vehicle can roll away. ▶ Always deactivate Active Distance Assist DISTRONIC and secure the vehicle to prevent it from rolling away before you leave the driver's seat. Press CANCEL. If you brake, deactivate ESP or if ESP intervenes, Active Distance Assist DISTRONIC is deactivated. The variable limiter is not deactivated.  G-Class - Owner's Manual Driving and parking Driving and driving safety systems FUNGSI BANTUAN BATAS KECEPATAN AKTIF
PERINGATAN
Risk of accident due to speed adaptation via Active Speed Limit Assist The speed limit adopted by Active Speed Limit Assist may be too high or otherwise erroneous in certain circumstances: • with speed limits below 20 km/h • due to weather, e.g. in wet or foggy conditions ▶ Ensure that the speed driven always complies with the traffic regulations. Adjust the speed driven to the current traffic and weather conditions. If a changed speed limit is detected and the automatic adoption of speed limits is switched on, this is automatically adopted as the stored speed ( → page 363). Speed limits below 20 km/h are not accepted. Adjustment of travel speed is initiated no later than when the vehicle is level with the traffic sign. For signs indicating entry into an urban zone, the speed is adapted according to that permitted within the built-up area. The speed restriction indicator on the driver display is always refreshed when the vehicle is level with the traffic sign. If you are driving on German motorways with no speed limit, the system uses the speed stored for a stretch of road with no speed limit as the set speed. If you do not alter the stored speed on a stretch of road with no speed limit, the recommended speed of 130 km/h is adopted. If Active Distance Assist DISTRONIC has been switched to passive mode by pressing the accelerator pedal, only speed limits which are higher than the stored speed are adopted. The maximum permissible speed does not take the road condition and current weather and traffic conditions into consideration. Adjust your speed accordingly when necessary. Observe the notes on driving systems and your responsibility; you may otherwise fail to recognise potential dangers ( → page 338).BATAS SISTEM
The system limits of Traffic Sign Assist apply to the detection of traffic signs ( → page 373). Speed limits below 20 km/h are not automatically adopted by the system as the stored speed. Temporary speed restrictions (e.g. for a specific time or due to weather conditions) cannot be unequivocally detected by the system. Adjust your speed in these situations. You can watch an animation on this topic via the following link: FUNGSI ADAPTASI KECEPATAN BERDASARKAN RUTE
PERINGATAN
Risk of accident in spite of route-based speed adaptation Route-based speed adaptation can malfunction or be temporarily unavailable in the following situations: • If the driver does not follow the calculated route • If map data is not up-to-date or available • In the event of roadworks • In bad weather or road conditions • If the accelerator pedal is depressed • In the event of electronically displayed speed limitations ▶ Adapt the speed to the traffic situation. When Active Distance Assist DISTRONIC is activated, the vehicle speed will be adapted to the route events ahead. Depending on the drive program selected, the vehicle negotiates a route event ahead in an energy-saving, comfortable or dynamic manner. When the route event has been passed, the vehicle accelerates again to the stored speed. The set distance to the vehicle in front, vehicles detected ahead and speed restrictions ahead are taken into account. Route-based speed adaptation can be activated in the multimedia system ( → page 363).KEJADIAN RUTE BERIKUT DIPERHITUNGKAN:
Bends Roundabouts T-junctions \- Turns and exitsSELAIN ITU, KECEPATAN DIKURANGI JIKA INDIKATOR SEIN DIHIDUPKAN DAN SALAH SATU SITUASI BERIKUT TERDETEKSI:
• Turning off at junctions • Driving on slowing-down lanes - Driving on lanes adjacent to slowing-down lanes The driver is responsible for choosing the right speed and observing other road users. This applies in particular to junctions, roundabouts and traffic lights, as route-based speed adaptation does not brake the vehicle to a standstill. When route guidance is active, the first speed adjustment is carried out automatically. If the turn signal indicator is switched on, the selected route is confirmed and further speed adjustment is activated.PENYESUAIAN KECEPATAN DIBATALKAN DALAM KASUS BERIKUT:
- If the turn signal indicator is switched off before the route event and it is presumed that the route event is not deemed relevant for the driver. • If the driver depresses the accelerator or brake pedal during the process.BATASAN SISTEM
Route-based speed adaptation does not take right of way regulations into account. The driver is responsible for complying with road traffic regulations and driving at a suitable speed.DALAM KONDISI SULIT, PEMILIHAN KECEPATAN YANG DILAKUKAN OLEH SISTEM MUNGKIN TIDAK SELALU SESUAI. INI BERLAKU UNTUK SITUASI BERIKUT, MISALNYA:
• The road's course is not clearly visible  G-Class - Owner's Manual Driving and parking Driving and driving safety systems Road narrowing • Varying maximum permissible speeds in individual lanes, forexample, at toll stations • Wet road surfaces, snow or ice - If transport equipment, e.g. a trailer or bicycle rack, is attached to the trailer hitch and the electrical connection has been correctly established. In these situations the driver must intervene accordingly.MENGATUR GAYA BERKENDARA UNTUK ASSISTEN JARAK AKTIF DISTRONIC
Persyaratan:
• Active Distance Assist DISTRONIC is activated. Multimedia system: MENGATUR PENYESUAIAN KECEPATAN
Select Adopt speed limit or Route-based speed adjustment. When these functions are active, the travel speed is adjusted depending on the route events ahead or in accordance with a speed restriction.① JIKA SALAH SATU SISTEM BERIKUT DIAKTIFKAN, KECEPATAN YANG TERDETEKSI DAPAT DIADOPSI SECARA MANUAL SEBAGAI KECEPATAN MAKSIMUM YANG DIIZINKAN:
• Active Distance Assist DISTRONIC • Variable limiter  i Additional information on speed adjustment ( → page 362).FUNGSI ASSISTEN STOP-AND-GO AKTIF
Active Stop-and-Go Assist helps you in traffic jams on multi-lane roads with separate carriageways by automatically pulling away within 30 seconds and moderate steering manoeuvres. It orients itself using the vehicle in front and lane markings. Active Stop-and-Go Assist automatically maintains a safe distance from the vehicle in front and vehicles cutting in. Active Stop-and-Go Assist requires you, as the driver, to keep your hands on the steering wheel at all times so that you can intervene at any time to correct the course of the vehicle and keep it in the lane. Observe the notes on driving systems and your responsibility; you may otherwise fail to recognise potential dangers ( → page 338).JIKA SEMUA KONDISI BERIKUT TERPENUHI, ASSISTEN STOP-AND-GO AKTIF AKTIF SECARA OTOMATIS:
• You are in a traffic jam on a motorway or major high-speed road. • Active Distance Assist DISTRONIC is switched on and active ( → page 357). • Active Brake Assist is available ( → page 369). • Active Steering Assist is switched on and active ( → page 368). • You are travelling no faster than 60 km/h. When Active Stop-and-Go Assist is active, a message regarding formation of an emergency corridor to allow thoroughfare for emergency vehicles appears on the driver display and central display, in addition to the Active Steering Assist status display.  G-Class - Owner's Manual Driving and parking Driving and driving safety systemsBATASAN SISTEM
The system limits of Active Distance Assist DISTRONIC and Active Steering Assist apply to Active Stop-and-Go Assist.DSR (Pengaturan Kecepatan Menurun)
FUNGSI SISTEM DSR
DSR is a downhill driving assist function. It keeps the speed of travel at the selected target speed. The steeper the downhill gradient, the greater the DSR braking effect on the vehicle. On flat stretches of road and uphill gradients, the DSR brakes the vehicle minimally or not at all. When DSR is activated and the transmission is in position D, R or N, DSR controls the driving speed. The target speed can be set to a value between 4 km/h and 18 km/h. By braking or accelerating, you can drive at a higher or lower speed than the target speed at any time.DSR AKAN MATI SECARA OTOMATIS
• If you are driving at a speed greater than 45 km/h • If you change the drive program The off message will appear on the driver display. The status display in the driver display goes out. You also hear a warning tone. i DSR remains active in the Trail drive programINFORMASI TENTANG DSR
Observe the notes on driving systems and your responsibility; you may otherwise fail to recognise potential dangers ( → page 338).  You are always responsible for keeping control of the vehicle and for assessing whether the downhill gradient can be negotiated. Depending on road surface conditions and tyres, DSR may not always be able to maintain the target speed. Select a target speed suitable for the environmental conditions and also apply the brakes yourself if required.MENGAKTIFKAN ATAU MENONAKTIFKAN DSR (REGULASI KECEPATAN SAAT MENURUN)
Persyaratan
• You are driving at 40 km/h or slower. If the vehicle speed is too high, the Max. speed 40 - 45 km/h message appears in the driver display. Multimedia system: Settings Assistance Select A status display appears when the function is activated in the driver display. Alternatively, DSR can also be activated or deactivated via DSR in the off-road menu ( → page 478). The function is automatically deactivated when changing to the drive program. G-Class - Owner's Manual Driving and parking Driving and driving safety systemsMENGUBAH KECEPATAN TARGET
MENGUBAH KECEPATAN TARGET DENGAN PEDAL REM ATAU PEDAL GAS
Brake or accelerate the vehicle to the desired speed between 4 km/h and 18 km/h. Release the brake or accelerator pedal. The current speed is stored. When stationary, 4 km/h or the minimum possible speed for each gear range is stored. DSR maintains the stored speed on the downhill gradient and brakes automatically. The set target speed is indicated under the green status display 📄 on the driver display.MENGUBAH KECEPATAN TARGET MENGGUNAKAN TOMBOL DI RODA KEMUDI
When DSR is activated, you can change the target speed to a value between 4 km/h and 18 km/h.  To increase the target speed: swipe upwards from the bottom of the control panel. • The target speed is increased by 1 km/h. or  At the top of the control panel ①, press SET- The target speed is increased in 1 km/h increments. To decrease the target speed: swipe downwards from the top of the control panel. • The target speed is decreased by 1 km/h. or At the bottom of the control panel ①, press □. The target speed is reduced in 1 km/h increments. The set target speed is indicated under the green status display ☐ on the driver display. ① This may then only be increased or decreased upon reaching the set target speed.  G-Class - Owner's Manual Driving and parking Driving and driving safety systemsActive Steering Assist
FUNGSI ACTIVE STEERING ASSIST
PERINGATAN
Risk of accident if Active Steering Assist unexpectedly stops functioning If the system limits of Active Steering Assist are reached there is no guarantee that the system will remain active or will keep the vehicle in lane. ▶ Always keep your hands on the steering wheel and observe the traffic carefully. ▶ Always steer the vehicle paying attention to traffic conditions. PERINGATAN
Risk of accident if Active Steering Assist unexpectedly intervenes The detection of lane markings and objects may malfunction and cause unexpected steering interventions. ▶ Steer according to traffic conditions. Active Steering Assist is not available in the drive programs Rock and Sand. Active Steering Assist is available up to a speed of 160 km/h.  The system helps you to stay in the centre of the lane by means of moderate steering interventions. Depending on the vehicle speed, Active Steering Assist uses the vehicles ahead and lane markings as a reference. Depending on the respective country of use, Active Steering Assist can use the surrounding traffic as a reference in the lower speed range. If necessary, Active Steering Assist can also assist when driving outside the centre of the lane, forexample, to form an emergency corridor. If the detection of lane markings and vehicles ahead is impaired, Active Steering Assist switches to passive mode. The system provides no support in this case.TAMPILAN STATUS ACTIVE STEERING ASSIST
 Grey: activated and in passive mode  Green: activated and active  Red, flashing: prompt to the driver to actively confirm or transition from active to passive mode, system limits detected  White, red hands: "hands on the steering wheel" prompt During the transition from active mode to passive mode, the symbol is shown as enlarged and flashing. Once the system is in passive mode, the symbol is shown as grey on the driver display.  G-Class - Owner's Manual Driving and parking Driving and driving safety systems  Depending on the selected vehicle settings, Active Steering Assist may be unavailable.DETEKSI KEMUDI DAN SENTUHAN
The driver is required to keep their hands on the steering wheel at all times to ensure that they can intervene at any time to correct the course of the vehicle and keep it in lane. The driver must anticipate a change from active mode to passive mode or vice versa at any time.  If the system detects that the driver has not steered the vehicle for a considerable period of time or has removed their hands from the steering wheel, an initial visual warning is issued. The notification 🟢 appears on the driver display. If the driver still does not steer the vehicle, or gives no confirmation to the system, a repetitive warning tone sounds in addition to the visual warning message. If the driver does not react to this warning for a considerable period, an emergency stop may be initiated ( → page 368). The warning is not issued or stops as soon as the system detects the driver touching or steering the steering wheel. The touch detection may be limited or inoperative if there is no direct contact between the hand and the steering wheel, e.g. when wearing gloves or if there is a steering wheel cover on the steering wheel. If Active Steering Assist detects that a system limit has been reached, a visual warning is issued and a warning tone sounds. Observe the notes on driving systems and your responsibility; otherwise you may fail to recognise potential dangers ( → page 338).BATASAN SISTEM
Active Steering Assist has a limited steering torque for lateral guidance. In some cases, the steering intervention is not sufficient to keep the vehicle in the lane or to drive through exits.SISTEM MUNGKIN TERGANGGU ATAU TIDAK BERFUNGSI DALAM SITUASI BERIKUT:
- There is poor visibility, e.g. due to snow, rain, fog, heavy spray, greatly varying light conditions or dense shadows on the carriageway. • There is glare, e.g. from oncoming traffic, direct sunlight or reflections. • If there is insufficient road illumination. - The windscreen is dirty, misted up, damaged or covered in the vicinity of the camera, e.g. by a sticker. - If there are no lane markings in a given lane, or the markings are not easily discernible or change quickly, forexample, in a construction area or at junctions. - If the lane markings are worn away, dark or covered up, e.g. by dirt or snow. - If the distance to the vehicle in front is too short and the lane markings can therefore not be detected. • If the roadway is narrow and winding. - If there are obstacles on the lane or projecting out into the lane, such as object markers. - If transport equipment, e.g. a trailer or bicycle rack, is attached to the trailer hitch and the electrical connection has been correctly established.   G-Class - Owner's Manual Driving and parking Driving and driving safety systems SISTEM TIDAK MEMBERIKAN BANTUAN DALAM KONDISI BERIKUT:
• in very tight bends and when turning - when crossing junctions • at roundabouts or toll stations - when actively changing lane without switching on the turn signal indicator • when the tyre pressure is too low You can watch an animation on this topic via the following link:MENGAKTIFKAN/MENONAKTIFKAN ACTIVE STEERING ASSIST
Persyaratan:
- ESP ® is activated, but is not intervening. • Active Distance Assist DISTRONIC is activated. Multimedia system:  ▶ Activate or deactivate Active Steering Assist.Fungsi Active Emergency Stop Assist
The following function is only available in combination with the Driving Assistance Package. Active Emergency Stop Assist monitors the steering wheel, as well as the accelerator and brake pedals. If the system detects a lack of driver activity or the vehicle is in danger of leaving the lane, a warning may be issued and an emergency stop initiated. If Active Steering Assist is switched off, the system is available from a speed of approx. 60 km/h.JIKA KENDARAAN DALAM BAHAYA MENINGGALKAN JALUR, PERINGATAN DIBERIKAN DALAM KEADAAN BERIKUT.
- The driver has not touched the steering wheel for a while, or no steering movement is detected for a while (depending on the respective vehicle equipment). • Neither the accelerator pedal nor the brake pedal is depressed. If Active Steering Assist is switched on and active, the system only monitors the steering wheel. If the driver has not touched the steering wheel for a certain period of time, a warning may be issued despite pedal actuation. Also observe the notes on touch detection of Active Steering Assist ( → page 366). ACTIVE EMERGENCY STOP ASSIST MENGELUARKAN PERINGATAN BERIKUT SECARA BERURUTAN:
• The notification ① appears on the driver display.   G-Class - Owner's Manual Driving and parking Driving and driving safety systems • In addition to the notification ①, a warning tone sounds. - The Beginning emergency stop message appears on the driver display, a continuous warning tone sounds and the vehicle will no longer accelerate. - The vehicle speed is reduced in increments until the vehicle comes to a standstill. This generates jerky braking impulses. Upon implementation of automatic braking, or if the vehicle comes to a standstill in certain countries, Active Distance Assist DISTRONIC is deactivated. Depending on the respective country of use, the hazard warning light system is also switched on.KETIKA KENDARAAN TELAH MELAMBAT HINGGA BERHENTI:
• the vehicle is secured with the electric parking brake. • the vehicle is unlocked. - if possible, an emergency call is made to the Mercedes-Benz emergency call centre. Before the Beginning emergency stop message is displayed, you can cancel Active Emergency Stop Assist by turning the steering wheel.SETELAH PESAN PERINGATAN DARURAT MULAI DITAMPILKAN, ANDA DAPAT MEMBATALKAN ACTIVE EMERGENCY STOP ASSIST SEBAGAI BERIKUT:
- Accelerating or braking: braking is cancelled, but the warning message, warning tone and electric power steering remain active. • Steering: electric power steering is cancelled, the warning message and warning tone remain active and the vehicle continues to be braked. - Steering and accelerating or braking: The emergency stop and electric power steering are cancelled. The warning message and the warning tone are cancelled.  Active Emergency Stop Assist can initiate an emergency stop a maximum of three times within a driving cycle. After that, Active Steering Assist and Active Emergency Stop Assist are disabled until the vehicle has been restarted.BATASAN SISTEM
UNTUK MENDETEKSI KENDARAAN DAN HALANGAN LAIN, PERHATIKAN BATASAN SISTEM DARI FUNGSI BERIKUT:
• Active Distance Assist DISTRONIC ( → page 354) • Active Steering Assist ( → page 366) • Active Lane Keeping Assist ( → page 379) • Active Brake Assist ( → page 369)ACTIVE EMERGENCY STOP ASSIST TIDAK AKTIF DALAM KASUS BERIKUT:
• Active Lane Keeping Assist and Active Steering Assist are switched off.Active Brake Assist
FUNGSI ACTIVE BRAKE ASSIST
Active Brake Assist is not available in drive program Rock and Sand.ACTIVE BRAKE ASSIST TERDIRI DARI FUNGSI BERIKUT:
• Distance warning function - Collision warning  G-Class - Owner's Manual Driving and parking Driving and driving safety systems • Autonomous braking function • Situation-based brake force boosting Active Brake Assist can help you to minimise the risk of a collision with vehicles, cyclists or pedestrians, or to reduce the effects of such a collision. If Active Brake Assist has detected a risk of collision, a warning tone sounds and the ▲ Active Brake Assist warning lamp lights up.  Notification on the driver display in the menu Assistance ① Distance insufficient 2 Red radar waves In the Assistance menu, an insufficient distance to the vehicle in front ① is displayed in red. If you further reduce the distance, the vehicle in front is also highlighted in red. When the system detects a risk of collision, red radar waves ② appear ahead of the vehicle. If you do not react to the warning, autonomous braking can be initiated in critical situations. In particularly critical situations, Active Brake Assist can also initiate autonomous braking directly. In this case, the warning tone and the distance warning lamp are simultaneous with the braking action.  If you apply the brakes yourself in a critical situation or apply the brakes during autonomous braking, situation-based braking assistance is given. The brake pressure increases up to maximum emergency braking if necessary.  If autonomous braking, situation-related based assistance or evasive action has occurred, pop-up ① appears on the driver display. It automatically disappears after a short time. If the autonomous braking function or the situation-based braking assistance is triggered, additional preventive measures for occupant protection by PRE-SAFE ® may also be initiated.  G-Class - Owner's Manual Driving and parking Driving and driving safety systems  PERINGATAN
Risk of an accident caused by limited detection performance of Active Brake Assist Active Brake Assist cannot always clearly identify objects and complex traffic situations.DALAM KASUS SEPERTI INI, ACTIVE BRAKE ASSIST MUNGKIN:
• Give a warning or brake without reason • Not give a warning or not brake Active Brake Assist is only an aid. The driver is responsible for maintaining a sufficiently safe distance to the vehicle in front, vehicle speed and for braking in good time. ▶ Always pay careful attention to the traffic situation; do not rely on Active Brake Assist alone. ▶ Be prepared to brake or swerve if necessary. If Active Brake Assist is deactivated or the functions are restricted, e.g. owing to activation of another driving system, the Active Brake Assist warning lamp appears in the driver display. If the system is unavailable due to soiled or damaged sensors or a fault, or if the functions are restricted, the ▶Active Brake Assist warning lamp appears on the driver display. Also observe the system limits of Active Brake Assist.FUNGSI PERINGATAN JARAK
From approximately 30 km/h, you are warned by the distance warning function if the safety distance to the vehicle travelling ahead is insufficient at the cur- rent speed for several seconds. In this case, the distance warning lamp in the driver display lights up. If the distance to the vehicle in front continues to decrease at higher speeds, the distance warning lamp begins to flash.PERINGATAN TABRAKAN
PERINGATAN TABRAKAN DAPAT MEMBANTU ANDA DALAM SITUASI BERIKUT DENGAN NADA PERINGATAN TERPUTUS-PUTUS DAN LAMPU PERINGATAN △:
- at speeds up to approximately 210 km/h when approaching moving vehicles ahead. - at speeds up to approximately 80 km/h when approaching stationary vehicles, pedestrians walking along the road and moving cyclists ahead. - at speeds up to approximately 70 km/h when approaching crossing pedestrians and cyclists. - at speeds up to approximately 60 km/h when approaching stationary pedestrians and cyclists.FUNGSI PENGEREMAN OTONOM
PADA KECEPATAN DI ATAS KURANG LEBIH 7 KM/JAM, FUNGSI PENGEREMAN OTONOM DAPAT BERINTERVENSI DALAM SITUASI BERIKUT:
- at speeds up to approximately 210 km/h when approaching moving vehicles ahead. - at speeds up to approximately 80 km/h when approaching moving cyclists ahead, pedestrians walking along the road and stationary vehicles. - at speeds up to approximately 70 km/h when approaching crossing pedestrians and cyclists.  G-Class - Owner's Manual Driving and parking Driving and driving safety systemsPENINGKATAN GAYA REM BERDASARKAN SITUASI
PADA KECEPATAN DI ATAS KURANG LEBIH 7 KM/JAM, PENINGKATAN GAYA REM TERKAIT SITUASI DAPAT BERINTERVENSI DALAM SITUASI BERIKUT.
- at speeds up to approximately 210 km/h when approaching moving vehicles ahead. - at speeds up to approximately 80 km/h when approaching moving cyclists ahead, pedestrians walking along the road and stationary vehicles. - at speeds up to approximately 70 km/h when approaching crossing pedestrians and cyclists. - at speeds up to approximately 60 km/h when approaching stationary pedestrians and cyclists.MEMBATALKAN INTERVENSI PENGEREMAN OLEH ACTIVE BRAKE ASSIST ANDA DAPAT MEMBATALKAN PENGEREMAN ACTIVE BRAKE ASSIST KAPAN SAJA DENGAN:
• firmly depressing the accelerator pedal or by kickdown • releasing the brake pedal.ACTIVE BRAKE ASSIST DAPAT MEMBATALKAN INTERVENSI PENGEREMAN KETIKA SALAH SATU KONDISI BERIKUT TERPENUHI:
• You steer to avoid an obstacle. • there is no longer a risk of collision • An obstacle is no longer detected in front of your vehicle.FUNGSI MANUVER BELOK (KENDARAAN DENGAN PAKET BANTUAN MENGEMUDI):
If the system detects a risk of a collision with an oncoming vehicle when turning across an oncoming lane, autonomous braking can be initiated at speeds below 15 km/h before you have left your own lane. You can watch an animation on this topic via the following link:MENGATUR ACTIVE BRAKE ASSIST
Persyaratan:
• The vehicle is switched on. Multimedia system:  ▶ Activate or deactivate the function. ① It is recommended that you always leave Active Brake Assist activated. When switching off the Active Brake Assist, the distance warning function, the collision warning and the autonomous braking function are switched off. If Active Brake Assist is deactivated, the symbol appears in the status bar of the driver display and when the vehicle is next started the system is activated again. The setting after starting the vehicle depends on the country.  G-Class - Owner's Manual Driving and parking Driving and driving safety systems MENGATUR WAKTU PERINGATAN
Select □ alongside Active Brake Assist. ▶ Select Early, Medium or Late. If the ATTENTION ASSIST has detected signs of fatigue, depending on the country, the system can issue a warning earlier than set. Further information about ATTENTION ASSIST ( → page 349).Bantuan Rambu Lalu Lintas
FUNGSI TRAFFIC SIGN ASSIST
Traffic Sign Assist detects the traffic signs with the multifunction camera and compares them with the information from the digital road map of the navigation system. It supports you by showing detected speed limits and no-overtaking zones on the driver display. The system can issue a warning when you exceed the maximum permissible speed. In some countries, the system can provide you with additional functions and can warn you when you are approaching pedestrian crossings. If the system detects that you are driving onto a section of road in the wrong direction of travel, it issues a warning. The camera also detects and evaluates traffic signs with a restriction indicated by an additional sign (e.g. in wet conditions). Traffic Sign Assist only shows selected signs on the driver display. Actual traffic signs and speed limits are always prioritised over traffic signs and speed limits shown on the driver display.HAL-HAL BERIKUT JUGA HARUS DIPERHATIKAN SAAT MENGGUNAKAN TRAFFIC SIGN ASSIST:
- Select a speed suitable for the traffic, surroundings and weather conditions. - Observe actual traffic signs. - Observe applicable traffic rules and regulations. Observe the notes on driving systems and your responsibility; otherwise you may fail to recognise potential dangers ( → page 338).PEMBERITAHUAN PADA LAYAR PENGEMUDI
 Example 1 Permissible speed 2 Permissible speed when there is a restriction 3 Additional sign with restriction 4 Speed limits up ahead Speed limits are always shown as a priority over other traffic signs, such as no-overtaking zones, forexample. Important information from other systems can cause traffic signs to be hidden for a short time.   G-Class - Owner's Manual Driving and parking Driving and driving safety systems TERGANTUNG PADA NEGARA PENGGUNAAN, TRAFFIC SIGN ASSIST DAPAT MENDETEKSI DAN MENAMPILKAN RAMBU LALU LINTAS BERIKUT, MISALNYA:
speed limits • end of the speed limit • overtaking restrictions • residential streets • signs showing the start or end of motorways and dual carriageways  Detected traffic signs (examples)TRAFFIC SIGN ASSIST JUGA DAPAT MENDETEKSI RAMBU TAMBAHAN BERIKUT ③, MISALNYA, DAN MENGEVALUASI RELEVANSI PEMBATASAN JIKA PERLU MENGGUNAKAN SENSOR KENDARAAN PENDUKUNG:
• in wet conditions • slippery road surfaces in fog • temporary restrictions • exits • restrictions for vehicle/trailer combinations Traffic Sign Assist also uses data from the digital road map of the navigation system. When you leave or enter a municipality or change roads, on a motorway exit or slip road forexample, or after you turn at a junction, the display on the driver display can thus be updated without a traffic sign having been detected. Regularly update the digital road map of the navigation system to ensure optimum functioning of Traffic Sign Assist ( → page 43). Depending on the respective vehicle equipment and country of use, the system may also show upcoming speed limits on the driver display. The driver display may also show the distance to an upcoming lower speed limit. Information from the digital road map of the navigation system is used for this purpose. The Assistance menu can also display a dynamic visualisation of the speed limits ahead. If Traffic Sign Assist cannot determine the current maximum permissible speed, e.g. due to a lack of signage, the following symbol appears on the driver display:  Traffic Sign Assist is not available in all countries. This symbol is shown permanently in the vehicle when travelling in countries which do not support Traffic Sign Assist. If the system is temporarily or permanently unavailable due to a technical fault or because the windscreen is dirty, a corresponding display message appears on the driver display. The Traffic Sign Assist warning lamp ☑ for also lights up on the driver display in certain countries.  G-Class - Owner's Manual Driving and parking Driving and driving safety systems  ① Please also note the information on the display messages from Traffic Sign Assist ( → page 769).PERINGATAN SAAT KECEPATAN MAKSIMUM YANG DIIZINKAN DILAMPAUI
The system can warn you if you are about to exceed the maximum permissible speed. Depending on the respective country of use, you can set the extent to which the maximum permissible speed may be exceeded in the multimedia system before a warning is issued. You can switch off the warning, or in the settings, select whether the warning should be issued visually, with the traffic sign flashing on the driver display, or as a combination of a visual and audible warning. Selection of the type of warning is confirmed via a notification on the driver display, depending on the respective country of use.  Contoh
① Visual warning only 2 Warning off The type, duration and deployment stages of the speed warning, as well as the option to set the timing of the deployment stages upon which the warning is issued, are subject to legislation valid for the respective country in which the vehicle is delivered.FUNGSI PERINGATAN TAMBAHAN
Warning for no-entry signs: Traffic Sign Assist can warn you if you drive down a section of road in the wrong direction of travel, forexample, on motor-way slip roads or one-way streets. Warning at pedestrian crossings: if you approach pedestrian crossings, provided that pedestrians are in the danger zone or are moving towards it, Traffic Sign Assist can warn you up to a speed of approximately 70 km/h.PENGGUNAAN TRAILER
① Refer to the chapter on the trailer hitch ( → page 413). If a trailer or bicycle rack is connected correctly, the central display shows the query regarding the type of trailer and its maximum permissible speed ( → page 416). The driver is solely responsible for ensuring that the maximum permissible speed is adapted manually in the Trailer type category.TERUTAMA, HUKUM KHUSUS NEGARA HARUS DIPERHATIKAN, MISALNYA TENTANG:
• maximum design speed or maximum permissible speed • permissible gross mass with or without towing vehicle • required number of years with a corresponding driving licence • type and condition of the road used • the weather conditions The maximum permissible speed adapted to the vehicle/trailer combination can be transferred to the manual or automatic speed control during the journey (depending on the respective equipment).  G-Class - Owner's Manual Driving and parking Driving and driving safety systems The system can take into account additional signs for the vehicle combination regarding speed limits and clear road traffic rules (country-dependent). No maximum permissible speed can be selected for a bicycle rack in the multimedia system. When using a bicycle rack, observe the specifications for the maximum permissible speed in the Owner's Manual.BATASAN SISTEM
SISTEM MUNGKIN TERGANGGU ATAU TIDAK BERFUNGSI DALAM SITUASI BERIKUT, TERUTAMA:
- If visibility is poor, e.g. due to insufficient illumination of the road, highly variable shade conditions, rain, snow, fog, swirling dust or heavy spray. • If there is glare, e.g. from oncoming traffic, direct sunlight or reflections. - If the windscreen in the area of the multifunction camera is dirty, or if the camera is misted up, damaged or obscured. - If the traffic signs are difficult to see because, forexample, they are dirty, obscured, faded, iced over, damaged, inconveniently positioned, insufficiently illuminated or askew. • Active traffic signs with LED displays may not be detected correctly, or even at all due to technical factors, such as transmission frequency. - If the information on the navigation system's digital road map is incorrect, incomplete or out of date. - If the signs, road markings or road layout are ambiguous, e.g. traffic signs at roadworks, at exits and slip roads, adjacent lanes or parallel roads, and pedestrian crossing markings at traffic lights. • If the signage or road markings do not comply with the standard. - If the signage, road markings or road layout are country-specific and deviate from the navigation system's route guidance, e.g. at or after roadworks. • After sharp turns and in tight bends, if traffic signs are outside the camera's field of vision. • If you overtake vehicles with traffic signs affixed or attached to them.PENGATURAN TRAFFIC SIGN ASSIST
Multimedia system: MENGAKTIFKAN ATAU MENONAKTIFKAN PERINGATAN BATAS KECEPATAN
The speed limit warning is switched on by default (depending on the respective country). ▶ Switch off Speed limit warning. Following country-specific legislation, the speed limit warning remains deactivated until the next time the vehicle is switched on or off. The audible speed limit warning can also be switched off and on via quick-access, by pressing and holding the mute button on the steering wheel, by pressing the speed icon in the status line of the media display or via a voice control command (availability of these functions is country-dependent).MENGUBAH JENIS PERINGATAN BATAS KECEPATAN
Change the warning to Visual or Visual & audible.MENGATUR AMBANG BATAS PERINGATAN
This value determines the speed at which a warning is issued when exceeded. ▶ Set the desired speed under Warning Threshold. i Availability of the function is subject to country-specific legislation. G-Class - Owner's Manual Driving and parking Driving and driving safety systemsMENGAKTIFKAN ATAU MENONAKTIFKAN SINYAL AKUSTIK UNTUK BATAS KECEPATAN MAKSIMUM BARU
The acoustic signal for a new maximum permissible speed is switched off at the factory. The function determines whether a subtle, non-intrusive sound supports each change of the displayed speed in the driver display. ▶ Activate or deactivate the function. i Availability of the function is dependent on the respective country.Tampilan lampu lalu lintas
INFORMASI TENTANG TAMPILAN LAMPU LALU LINTAS
The traffic light view supports the driver when waiting in front of a red light by displaying the camera image on the central display. The camera image is displayed when the driver is the first vehicle in front of the red light and faded out when the vehicle drives off.MENAMPILKAN TAMPILAN LAMPU LALU LINTAS
Persyaratan:
• The Traffic light view option is switched on. • A traffic light view is available. Multimedia system:  ① This function is not available in all countries. If the vehicle is in first position at a traffic light, the camera image with traffic light view is shown on the central display. When the vehicle pulls away, the camera image is faded out. Activate or deactivate Traffic light view.MENGGUNAKAN FUNGSI LAIN YANG TERSEDIA
Select ▶ Select On request or Automatic. If On request is set and a traffic light view is available, the Please tap here for traffic light view. message is displayed. The camera image is shown after confirmation of the message. When Automatic is set, the camera image is automatically displayed when the traffic light view is available.Blind Spot Assist
FUNGSI BLIND SPOT ASSIST DENGAN PERINGATAN KELUAR
Blind Spot Assist uses two lateral, rear-facing radar sensors to monitor the area up to 40 m behind and 3 m next to your vehicle. If at speeds above approximately 12 km/h a vehicle is detected and this vehicle subsequently enters the monitoring range directly next to your vehicle, the warning lamp in the outside mirror lights up red.   G-Class - Owner's Manual Driving and parking Driving and driving safety systemsTAMPILAN STATUS PADA LAYAR PENGEMUDI
Grey: the system is activated but inoperative. Green: the system is activated and operational. If a vehicle is detected close to your vehicle and you actuate the turn signal indicator in its direction, a double warning tone sounds and the red warning lamp in the outside mirror flashes. If the turn signal indicator remains switched on, all other detected vehicles are indicated only by the flashing of the red warning lamp. If you overtake a vehicle quickly, no warning is given. PERINGATAN
Risk of accident despite Blind Spot Assist Blind Spot Assist does not react to vehicles approaching and overtaking you at a greatly different speed. Blind Spot Assist cannot warn drivers in this situation. ▶ Always pay careful attention to the traffic situation and maintain a safe distance at the side of the vehicle. Blind Spot Assist is only an aid. It may fail to detect some vehicles and is not a substitute for attentive driving. Observe the notes on driving systems and your responsibility; you may otherwise fail to recognise potential dangers ( → page 338).PERINGATAN KELUAR
The exit warning is an additional function of Blind Spot Assist and can warn vehicle occupants about approaching vehicles when leaving the vehicle when stationary.  PERINGATAN
Risk of accident despite exit warning The exit warning neither reacts to stationary objects nor to persons or road users approaching you at a greatly differing speed. The exit warning cannot warn drivers in these situations. ▶ Always pay particular attention to the traffic situation when opening the doors and make sure there is sufficient clearance. If there is a vehicle in the monitoring range, this is indicated in the outside mirror. If a vehicle occupant opens the door on the side with the warning, a warning tone sounds and the warning lamp in the outside mirror starts to flash. This additional function is only available when Blind Spot Assist is active. When the exit warning is activated, it can warn vehicle occupants for up to three minutes after switching the vehicle off. The exit warning is no longer available once the warning lamp in the outside mirror flashes three times. The exit warning is only an aid and not a substitute for the attention of vehicle occupants. The responsibility for opening the doors and exiting the vehicle remains with the vehicle occupants at all times.BATASAN SISTEM
BLIND SPOT ASSIST MUNGKIN TERBATAS DALAM SITUASI BERIKUT, TERUTAMA:
• if there is dirt on the sensors or the sensors are obscured • in poor visibility, e.g. owing to fog, heavy rain or snow • if there are narrow vehicles, e.g. bicycles or motorcycles • if the road has very wide or narrow lanes   G-Class - Owner's Manual Driving and parking Driving and driving safety systems • if vehicles are not driving in the middle of their lane Warnings may be issued in error when driving close to crash barriers or similar continuous lane borders. Always make sure that there is sufficient distance to the side for other traffic or obstacles. Warnings may be interrupted when driving alongside long vehicles, e.g. trucks, for a prolonged period. Blind Spot Assist is not operational when reverse gear is engaged. Blind Spot Assist and the exit warning are not operational when a trailer is coupled to the vehicle and the electrical connection has been correctly established.PERINGATAN KELUAR MUNGKIN TERBATAS DALAM SITUASI BERIKUT:
- when the sensors are covered by adjacent vehicles in narrow parking spaces • when people approach the vehicle • in the event of stationary or slowly moving objects You can watch an animation on this topic via the following link:MENGAKTIFKAN ATAU MENONAKTIFKAN BLIND SPOT ASSIST ATAU ACTIVE BLIND SPOT ASSIST
Multimedia system: Settings Assistance Collision avoidance ▶ Activate or deactivate Active Blind Spot Assist.Active Lane Keeping Assist
FUNGSI ACTIVE LANE KEEPING ASSIST
 Active Lane Keeping Assist monitors the area in front of your vehicle using the multifunction camera ( → page 338). It can protect you against unintentionally departing your lane. The system can guide you back into your lane with a course-correcting steering intervention, and warn you with tangible steering wheel feedback. Active Lane Keeping Assist is available in the speed range between 60 km/h and 200 km/h.SISTEM DAPAT BERINTERVENSI JIKA KONDISI BERIKUT TERPENUHI:
• Active Lane Keeping Assist detects a lane marking. • You touch this lane marking with one of your front wheels. If you activate the turn signal indicators, there is no steering intervention on that side. There is no steering intervention if you leave your lane without activating the turn signal indicators, but there is a risk of collision with a moving obstacle in your own lane. Vehicles with Blind Spot Assist or Driving Assistance Package: If the system detects an obstacle, e.g. another vehicle, in the adjacent lane, there is steering intervention despite the direction indicators.  G-Class - Owner's Manual Driving and parking Driving and driving safety systems  DALAM KASUS BERIKUT, PERINGATAN ① MUNCUL DI LAYAR PENGEMUDI DAN TERDENGAR SUARA PERINGATAN:
- A steering intervention by Active Lane Keeping Assist lasts more than approximately ten seconds. - There are two or more steering interventions by the systems within approximately three minutes, without steering intervention by the driver. You can set the sensitivity of the system in the Active Lane Keeping Assist settings in order to determine the level of assistance. You can also determine whether the system is to react to broken lane markings, or only to continuous lane markings ( → page 381).TAMPILAN STATUS ACTIVE LANE KEEPING ASSIST
White: Active Lane Keeping Assist is switched off. If ESP ® is switched off or a tyre pressure loss warning is indicated, Active Lane Keeping Assist is automatically switched off. Yellow: There is a malfunction. Also note any display messages. Grey: Active Lane Keeping Assist is switched on but not ready. Green: Active Lane Keeping Assist is switched on and ready. Red: Active Lane Keeping Assist has guided you back into your lane by a course-correcting steering intervention. If a tangible warning is also given in the steering wheel, the status display flashes. The lane marking of the affected side is shown in red.  Notification on the driver display in the Assistance menu If one of your front wheels moves onto a detected lane marking, this is highlighted in red in the Assistance menu on the driver display.BATASAN SISTEM
DALAM SITUASI BERIKUT, MUNGKIN TIDAK ADA INTERVENSI KEMUDI YANG MENGOREKSI ARAH, TETAPI PERINGATAN MUNGKIN DIBERIKAN DI RODA KEMUDI TERGANTUNG PADA SITUASI:
• if you clearly and actively steer, brake or accelerate. - if a driving safety system is intervening, e.g. ESP ® or Active Brake Assist. - if you have adopted a sporty driving style with high cornering speeds or high rates of acceleration. - If transport equipment, e.g. a trailer or bicycle rack, is attached to the trailer hitch and the electrical connection has been correctly establishedSISTEM MUNGKIN TERGANGGU ATAU TIDAK BERFUNGSI DALAM SITUASI BERIKUT:
\- if there is poor visibility, e.g. owing to insufficient illumination of the road, highly variable shade conditions, rain, snow, fog or heavy spray   G-Class - Owner's Manual Driving and parking Driving and driving safety systems • if there is glare, e.g. from oncoming traffic, direct sunlight or reflections. - If there is soiling on the windscreen in the vicinity of the multifunction camera, or if the camera is misted up, damaged or obscured. - if the bumper is soiled in the area of the radar sensors, or if these are damaged or obscured - If there are no lane markings or several unclear lane markings for one lane, e.g. around roadworks • If the lane markings are worn, dark or covered - If the distance to the vehicle in front is too short and therefore the lane markings cannot be detected - If the lane markings change quickly, e.g. lanes branch off, cross one another or merge • If the lanes are very narrow and winding Observe the notes on driving systems and your responsibility; otherwise you may fail to recognise potential dangers ( → page 338).MENGAKTIFKAN/MENONAKTIFKAN ACTIVE LANE KEEPING ASSIST
Multimedia system: Settings Assistance Collision avoidance Active Lane Keeping Assist ▶ Activate or deactivate the function. Alternatively, Active Lane Keeping Assist can be activated and deactivated via vehicle quick-access [☐]. ① The setting after starting the vehicle depends on the country.MENGATUR ACTIVE LANE KEEPING ASSIST
Multimedia system: Settings Assistance Collision avoidance Active Lane Keeping AssistMENGATUR SENSITIVITAS
Select Select Early, Med. or Late. The last setting selected will be applied the next time the vehicle is started. The standard setting of this function is country-dependent. The function may not be available on vehicles with Driving Assistance Package, depending on the country.MENGAKTIFKAN/MENONAKTIFKAN BANTUAN SAAT MARKA JALAN TERPUTUS
Select Advanced support. The last setting selected will be applied the next time the vehicle is started. ① The standard setting of this function is country-dependent. Depending on the country, this function must be activated in order for the full scope of Emergency Stop Assist to be available. Further information on Emergency Stop Assist ( → page 368).  G-Class - Owner's Manual Driving and parking Driving and driving safety systemsFungsi Sistem Damping Adaptif
The Adaptive Damping System improves driving comfort and ensures the best possible suspension tuning even when the vehicle is fully loaded. The damping is adjusted depending on the driving mode selected, or when using the off-road systems.SISTEM PEREDAM ADAPTIF TERDIRI ATAS:
- Steel suspension • Adaptive Damping System with continuous damper adjustment • Five damper stages: - Comfort - Sport - Trail - Rock Sand • DYNAMIC SELECT ( → page 294) ① Damper stage is active in drive programmes C and E.AMG RIDE CONTROL
FUNGSI AMG RIDE CONTROL
AMG RIDE CONTROL is an electronically controlled damping system for improved driving comfort and increased driving safety.PEREDAMAN DISESUAIKAN SECARA INDIVIDU UNTUK SETIAP RODA DAN TERGANTUNG PADA FAKTOR-FAKTOR BERIKUT:
• driving style, e.g. sporty • road condition, e.g. undulations • individual selection of SPORT, SPORT + or COMFORT The suspension tuning depends on the selected drive program. In the on-road drive programs, the suspension and steering settings are optimised to be either comfortable or firm for sporty driving. In each on-road drive program, you can also select the tuning individually using the AMG steering wheel button ( → page 383). After every change of drive program, automatic suspension tuning is active again. With the exception of the AMG Offroad Package PRO, the suspension and steering settings cannot be selected in the Offroad drive programs. The suspension and steering settings are optimised for driving either on sand, on unpaved roads or on hard, rocky ground. Vehicles with the AMG Offroad Package PRO are equipped with AMG ACTIVE RIDE CONTROL and AMG Active Balance Control. With AMG Active Balance Control, the roll resistance of the vehicle can be set in three stages to suit the driving situation in all Offroad drive programs ( → page 384). When the vehicle is started again, the COMFORT setting is activated automatically. G-Class - Owner's Manual Driving and parking Driving and driving safety systemsMEMILIH PENYESUAIAN SUSPENSI DENGAN TOMBOL RODA KEMUDI AMG
You can also adjust the suspension setting via the multimedia system ( → page 301). In offroad drive programs 📄, 📄 and 📄, the suspension setting is permanently assigned and cannot be selected.ANDA DAPAT MEMILIH DARI TIGA PENGATURAN SUSPENSI YANG BERBEDA:
• COMFORT ensures a comfortable suspension setting. Select this suspension setting if you prefer a comfortable driving style. - SPORT ensures a firmer suspension setting. Select this suspension setting when employing a sporty driving style, e.g. on winding country roads. • SPORT + ensures a very firm suspension setting.  Press the upper or lower Ⓤ display button repeatedly, until it displays the ⏻ symbol.  If the display button does not show the symbol, then it is hidden. How functions are displayed and the order in which they are displayed can be set in the multimedia system ( → page 292). Press the corresponding button ②. The selected suspension setting is shown on the driver display as a message.SIMBOL MENUNJUKKAN MODE YANG SAAT INI DIPILIH:
( blue ): COMFORT (yellow): SPORT ( red ): SPORT +AMG ACTIVE RIDE CONTROL
FUNGSI AMG ACTIVE RIDE CONTROL
AMG ACTIVE RIDE CONTROL additionally supplements the functions of AMG RIDE CONTROL with an active roll stabilisation system. Depending on the selected drive program, the suspension setting is adapted to the driving situation by means of continuous roll resistance adjustment, thus influencing the vehicle's roll behaviour. As a result, the driving comfort and safety of the vehicle are noticeably improved. In the Off-road drive programs, this allows the maximum axle articulation to maintain both ground contact and traction. As a result, the vehicle's off-road performance and a horizontal attitude when off-road are greatly improved. Vehicles with the AMG Offroad Package PRO are equipped with AMG Active Balance Control. With AMG Active Balance Control, the roll resistance of the vehicle can be additionally set in three stages to suit the driving situation in all Offroad drive programmes ( → page 384).  G-Class - Owner's Manual Driving and parking Driving and driving safety systems PENGATURAN SUSPENSI PER PROGRAM BERKENDARA
PROGRAM BERKENDARA
• Roll resistance is reduced, allowing more axle articulation. Vehicles with AMG Offroad Package PRO: roll resistance is adjustable via AMG Active Balance Control. • Traction is improved for driving on sand.PROGRAM BERKENDARA OFF-ROAD
• Roll resistance is increased, allowing more axle articulation. • The suspension setting is configured for improved off-road performance. Vehicles with AMG Offroad Package PRO: roll resistance is adjustable via AMG Active Balance Control. • Traction is improved for driving off-road and on loose surfaces.PROGRAM BERKENDARA OFF-ROAD
• Roll resistance is greatly reduced, allowing maximum axle articulation. • The suspension setting is configured for optimum off-road performance. Vehicles with AMG Offroad Package PRO: roll resistance is adjustable via AMG Active Balance Control. • Traction is improved in difficult terrain and on hard, rocky surfaces.PROGRAM BERKENDARA C:
• Body roll is reduced during cornering. • Rolling movements caused by uneven road surfaces are reduced.PROGRAM BERKENDARA S DAN S+ :
• Body roll is significantly reduced when cornering. - [S + ]: the driving characteristics become even more agile owing to increased roll resistance.PROGRAM PENGEMUDIAN
• Individual settings of the suspension setting via AMG DYNAMICSAMG Active Balance Control
FUNGSI AMG ACTIVE BALANCE CONTROL
i AMG Active Balance Control is only available for vehicles with the AMG Offroad Package PRO. AMG Active Balance Control supplements the functions of AMG ACTIVE RIDE CONTROL for all Offroad driving modes. You can adjust the roll resistance of the vehicle in three stages to suit the substrate, from LOW to HIGH. This allows you to achieve a balance between a comfortable and precise suspension set-up. Body stabilisation and the ground contact of the vehicle, as well as traction when off-road, can be greatly improved as a result. When the vehicle is restarted, the LOW setting is activated automatically. You can watch an animation on this topic via the following link:MENGATUR RESISTENSI GULING
Persyaratan:
• AMG Offroad Package PRO  G-Class - Owner's Manual Driving and parking Driving and driving safety systems • An Offroad driving mode has been selected. Depending on the equipment level, you can adjust the vehicle's roll resistance in Offroad driving modes 📄, 🙏 and 🗑.ANDA DAPAT MEMILIH DI ANTARA TIGA SETELAN:
- LOW provides a comfortable suspension set-up (standard setting). • MID has a stiffer suspension set-up. • HIGH has a very taut and stiff suspension set-up. ① After restarting the vehicle, LOW is set automatically.  Press the upper or lower ① display button repeatedly, until it displays the [W] symbol. If the display button does not show the symbol, then it is hidden. How functions are displayed and the order in which they are displayed can be set in the multimedia system ( → page 292).  If the display is greyed out, the requirements are not met and setting is not possible. When the [图标] symbol is shown with a red ! on the display button, AMG Active Balance Control has a malfunction. Observe the information on warning lamps and display messages which are shown in the driver display. Press the corresponding button ②. THE SYMBOL INDICATES THE CURRENTLY SELECTED MODE: - LOW (blue) MID (yellow) HIGH (sand brown)AMG Traction PRO
FUNGSI AMG TRACTION PRO
i AMG Traction PRO is only available for vehicles with AMG Off-road Package PRO. AMG Traction PRO uses wheel-selective braking and drive torque control to generate the maximum traction depending on the road surface. In addition the locking effect of the electronically controlled interwheel differential lock can be incrementally adjusted to suit the situation. Deactivating ESP and using adjustable traction control requires a highly qualified and experienced driver.  G-Class - Owner's Manual Driving and parking Driving and driving safety systems AMG Traction PRO must not be used in normal road operation. AMG Traction PRO must only be activated off-road, away from the public roads. Be sure to observe the safety notes and information on ESP ® (→ page 342). You can watch an animation on this topic via the following link:MENGAKTIFKAN AMG TRACTION PRO
Persyaratan:
• AMG Offroad Package PRO • The vehicle is stationary. - Drive programme 📄 Sand or 🌐 Rock has been selected. - The transmission is in manual mode - manual gearshifting is activated ( → page 309). - (→ page 312)The LOW RANGE off-road gear is engaged. In Mercedes-AMG vehicles, the off-road gear can be engaged in both drive programmes.MENGAKTIFKAN ATAU MENONAKTIFKAN
① AMG Traction PRO is deactivated when the vehicle is restarted.  Press the upper or lower ① display button repeatedly, until it displays the symbol. ① If the display button does not show the symbol, then it is hidden. How functions are displayed and the order in which they are displayed can be set in the multimedia system ( → page 292). If the display is greyed out, the requirements are not met and setting is not possible. When the symbol is shown with a red! on the display button, AMG Traction PRO has a malfunction. Observe the information on warning lamps and display messages which are shown in the driver display. Press the corresponding button 2.SIMBOL MENUNJUKKAN STATUS AMG TRACTION PRO:
blue: deactivated red: activated When AMG Traction PRO is active, the driver display shows the status traction.  G-Class - Owner's Manual Driving and parking Driving and driving safety systems If you change the direction of travel and therefore the transmission position in drive programme Rock, AMG Traction PRO is deactivated.MENGATUR EFEK PENGUNCIAN
When AMG Traction PRO is activated, the locking effect of the electronically controlled inter-wheel differential lock can be incrementally adjusted to suit the situation.  When display button is showing the Offroad mode, press the display button.  The display key ⚫ shows the symbol ☐ with a seven-section segment display. When the segment display shows only one segment lit up, the locking effect is minimal (-). When all seven segments light up, the locking effect is at its  maximum (+). When the vehicle is restarted, the medium setting is active and four segments light up. ▶ Turn the rotary control Ⓐ to the right or left to increase or reduce the locking effect. When you press the display button ③ again, the display button shows the current drive programme.RACE START
INFORMASI TENTANG RACE START
i RACE START is available only for Mercedes-AMG vehicles. i RACE START is available only for vehicles with the AMG Performance package. RACE START enables optimum vehicle acceleration from a standstill. This will necessitate a suitably high-grip road surface, and the tyres and vehicle must also be in good condition. You can use RACE START only after the vehicle has been run in for approximately 1,500 km. RACE START must not be used in normal road operation. RACE START may be activated and used only on dedicated race circuits, not on public roads. Read the safety notes and information on ESP * (→ page 342).   G-Class - Owner's Manual Driving and parking Driving and driving safety systems PERINGATAN
Risk of skidding and having an accident from wheels spinning If you use RACE START, depending on the ESP ® mode selected, there is an increased risk of skidding and having an accident. ▶ Make sure that no persons or obstacles are in the close vicinity of your vehicle.MENGaktifKAN START BALAP
PERINGATAN
Risk of skidding and having an accident from wheels spinning If you use RACE START, depending on the ESP mode selected, there is an increased risk of skidding and having an accident. ▶ Make sure that no persons or obstacles are in the close vicinity of your vehicle.Persyaratan:
- The vehicle is switched on and the transmission and the engine are at normal operating temperature. The temperature indicators on the driver display are white instead of blue. • The driver's door is closed. - All vehicle occupants have their seat belts fastened properly and are seated correctly. • The front wheels are in the straight-ahead position. • The vehicle is on level ground. - The vehicle is stationary, the brake pedal is depressed (left foot) and the parking brake is released. • The transmission is in position D. • One of the S or S+ drive programs is selected ( → page 295). RACE START must not be used in normal road operation. RACE START may be activated and used only on dedicated race circuits, not on public roads. Read the safety notes and information on ESP ® (→ page 342). Rapidly depress the accelerator pedal fully. The engine speed will increase. If the activation conditions are not fulfilled, RACE START cannot be used. The RACE START not possible See Owner's Manual message will appear on the driver display. The RACE START Release brake to start message will appear on the driver display. If the brake pedal is not released after a short while, RACE START will be cancelled. The RACE START cancelled message will appear on the driver display. Take your foot off the brake, but keep the accelerator pedal depressed. The vehicle will pull away at maximum acceleration. The RACE START active message will appear on the driver display.    G-Class - Owner's Manual   Driving and parking Driving and driving safety systems  RACE START will be deactivated immediately if you release the accelerator pedal during RACE START or if any of the activation conditions is no longer fulfilled. The RACE START cancelled message will appear on the driver display. ① After being used several times in short succession, RACE START will be unavailable until a certain distance has been driven.Kamera mundur
FUNGSI KAMERA MUNDUR
The reversing camera serves solely as an aid. It is not a substitute for you having to pay attention to your surroundings. The responsibility for safe manoeuvring and parking remains with you. Ensure that there are no persons, animals or objects etc. in the manoeuvring area while manoeuvring and parking. The area behind the vehicle is displayed as a mirror image, as it would appear in the inside mirror.PERSPEKTIF KAMERA PADA LAYAR TENGAH
 Example Guide lines at a distance of approximately 0.5 m, 1.0 m, 1.5 m and 3.0 m from the rear area Path indicating the route the wheels will take at the current steering angle (dynamic) Driven surface depending on the current steering angle (dynamic) Guide line at a distance of approximately 0.3 m from the rear area Warning display of Parking Assist PARKTRONIC (→ page 398) 6 Trailer view or reversing camera (depending on the respective vehicle version) ⑦ Activate/deactivate Parking Assist PARKTRONIC (→ page 400) Menu Parking Assistance 9 Wide-angle view When Active Parking Assist is active, the paths are displayed in green ( → page 401).  G-Class - Owner's Manual Driving and parking Driving and driving safety systemsTAMPILAN SUDUT LEBAR
 Example Switch on the standard view Warning display of Parking Assist PARKTRONIC ( → page 398) 3 Activate/deactivate Parking Assist PARKTRONIC (→ page 400)TAMPILAN TRAILER
 Example ① Warning display of Parking Assist PARKTRONIC (→ page 398) 2 Yellow guide line, locating aid Red guide line at a distance of approximately 0.3 m from the ball head of the trailer hitch Ball head of the trailer hitchBATASAN SISTEM
If the system is not ready for operation, the message System inoperative appears on the driver display and/or on the central display. If a camera perspective is selected and the central display is temporarily black or does not show a camera image, the camera system is also faulty or is not ready for operation. PERINGATAN
Risk of accident due to functional limitations of the reversing camera Functional limitations of the reversing camera could lead to a risk of collision with persons or objects. Do not use the reversing camera if its functions are limited. ▶ Ensure that there are no persons, animals or objects etc., in the manoeuvring area while manoeuvring and parking.KAMERA MUNDUR TIDAK AKAN BERFUNGSI, ATAU HANYA BERFUNGSI SEBAGIAN DALAM SITUASI BERIKUT:
• You are driving forwards at a speed greater than approximately 16 km/h. • The rear-end door is open. - The weather conditions are poor, e.g. heavy rain, snow, fog, storm or spray. - The light conditions are poor, e.g. at night or if a light is shining into the camera. - The camera lens is obstructed, dirty or misted up. Observe the notes on cleaning the reversing camera ( → page 620).   G-Class - Owner's Manual Driving and parking Driving and driving safety systems \- The camera or rear of your vehicle is damaged. In this case, have the camera, its position and setting checked at a qualified specialist workshop. The field of vision and other functions of the camera system may be restricted due to additional vehicle attachments (e.g. licence plate bracket or bicycle rack). The contrast of the display can be impaired by incidental light or other light sources, e.g. when driving out of a garage. Particular attention must be afforded in this case. i Have the display repaired or replaced if, forexample, its use is considerably restricted due to pixel errors. Observe also the information on vehicle sensors and cameras ( → page 338).Kamera 360°
FUNGSI KAMERA 360°
KAMERA 360° ADALAH SISTEM YANG TERDIRI DARI EMPAT KAMERA:
- Front camera - Reversing camera • Two outside mirror cameras The cameras record the immediate surroundings of the vehicle and provide assistance, e.g. during parking or at exits which are difficult to see.  The cameras serve solely as aids and may show a distorted view of obstacles, show them incorrectly or even omit them altogether. They are not a substitute for you having to pay attention to your surroundings. The responsibility for safe manoeuvring and parking remains with you. Ensure that there are no persons, animals or objects etc. in the manoeuvring area while manoeuvring and parking.PERSPEKTIF KAMERA PADA LAYAR TENGAH
 Example Switching between standard view and wide-angle view 2 Image from the front camera 3D auto view 3D view right-hand side of the vehicle 3D view left-hand side of the vehicle Trailer view (depending on the respective equipment) or reversing camera Set the GPS activation point ( → page 397) Activate/deactivate Parking Assist PARKTRONIC (→ page 400) Menu Parking Assistance  G-Class - Owner's Manual Driving and parking Driving and driving safety systems  The warning display of Parking Assist PARKTRONIC is shown in all views ( → page 398). Availability of the 3D-Auto-View and 3D-View functions is dependent upon the respective equipment. FUNCTION OF THE GUIDE LINES  Example ① Guide lines at a distance of approximately 0.5 m, 1.0 m, 1.5 m and 3.0 m from the rear area 2 Path indicating the route the wheels will take at the current steering angle (dynamic) 3 Driven surface depending on the current steering angle (dynamic) Guide line at a distance of approximately 0.3 m from the rear area When Active Parking Assist is active, paths and guide lines are displayed in green instead of yellow ( → page 401). TOP VIEW WITH THE IMAGE FROM THE FRONT OR REVERSING CAMERA  Example Warning display of Parking Assist PARKTRONIC (→ page 398) Path indicating the current steering angle 3D VIEW, LEFT/RIGHT-HAND SIDE OF THE VEHICLEPERINGATAN
Risk of accidents due to objects not being displayed or being displayed as heavily distorted Due to the projection of the cameras, objects in the 3D views may be heavily distorted or not displayed at all. ▶ Ensure that there are no persons, animals or objects in the manoeuvring area while manoeuvring and parking. G-Class - Owner's Manual Driving and parking Driving and driving safety systems   Example Top view with warning display of Parking Assist PARKTRONIC 2 Side view of the outside mirror cameras In the 3D view, left/right-hand side of the vehicle, the virtual camera moves to the respective side of the vehicle. When you change the transmission position, the view is automatically adapted. In addition, the top view is displayed with the Parking Assist PARKTRONIC warning display. i Display of the area beneath the vehicle may deviate from the actual circumstances.TAMPILAN 3D OTOMATIS
The area behind the vehicle is not displayed as a conventional mirror image in the 3D views.  Example Warning display of Parking Assist PARKTRONIC ( → page 398) 2 Guide lines In the 3D auto view, the virtual camera moves to the standard view, facing forward from the rear above the roof. The view changes automatically when approaching obstacles. If you touch the touchscreen, the view changes to a 3D view with free rotation. You can turn, tilt and zoom the views by touch.TAMPILAN SUDUT LEBAR
 Example Switching between standard view and wide-angle view 2 Display of Parking Assist PARKTRONIC ( → page 398) ③ Activating/deactivating Parking Assist PARKTRONIC ( → page 400)   G-Class - Owner's Manual Driving and parking Driving and driving safety systemsTAMPILAN TRAILER
If you select the trailer view and no trailer is coupled to the vehicle, the following display appears: Contoh
1 Switching between standard view and trailer view 2 Yellow guide line, locating aid Ball head of the trailer hitch Red guide line at a distance of approximately 0.3 m from the ball head of the trailer hitch In trailer mode, the guide lines are shown at the level of the trailer hitch. When the electrical connection is established between the vehicle and the trailer, the display changes to the side camera view. TAMPILAN SAMPING KAMERA KACA SPION LUAR PADA TAMPILAN TRAILER
 Example Switching to the reversing camera or trailer viewBATASAN SISTEM
If the system is not ready for operation, the message System inoperative appears on the driver display and/or on the central display. If a camera perspective is selected and the central display is temporarily black or does not show a camera image, the camera system is also faulty or is not ready for operation. ▲ WARNING Risk of accident due to functional limitations of the 360° camera If the function of the 360° camera is restricted, there is a risk of collision with persons or objects. Do not use the 360° camera in case of functional limitations. ▶ Ensure that there are no persons, animals or objects etc., in the manoeuvring area while manoeuvring and parking.  G-Class - Owner's Manual Driving and parking Driving and driving safety systemsKAMERA 360° TIDAK AKAN BERFUNGSI, ATAU HANYA BERFUNGSI SEBAGIAN DALAM SITUASI BERIKUT, MISALNYA:
• You are driving forwards at a speed greater than approximately 16 km/h. • The doors are open. • An outside mirror is not completely extended. • The rear-end door is open. - The weather conditions are poor, e.g. heavy rain, snow, fog, storm or spray. - The light conditions are poor, e.g. at night or if a light is shining into the camera. - The camera lens is obstructed, dirty or misted up. Refer to the notes on cleaning the 360° camera (→ page 620). - If cameras or vehicle components in which the cameras are fitted are damaged. In this event, have the cameras, their positions and their setting checked at a qualified specialist workshop. For technical reasons, the standard height of the vehicle may be altered if the vehicle is carrying a heavy load and this can result in inaccuracies in the guide lines and in the display of generated images. The field of vision and other functions of the camera system may be restricted due to additional vehicle attachments (e.g. licence plate bracket or bicycle rack). (i) Contrast of the display may be impaired by abrupt direct sunlight or other light sources, e.g. when driving out of a garage. Particular attention must be afforded in this case.  i Have the display repaired or replaced if, forexample, its use is considerably restricted due to pixel errors. Observe also the information on vehicle sensors and cameras ( → page 338).FUNGSI KAMERA OFF-ROAD
The off-road camera provides support with various views when driving over rough terrain.TAMPILAN BERIKUT TERSEDIA:
• Transparent bonnet - Front view Rear view Active Parking Assist is not available in the drive programs Trail, Rock and Sand. Parking Assist PARKTRONIC is permanently deactivated in the drive programs Rock and Sand (depending on the respective country of use). Observe the system limits of the respective functions. Call up the off-road camera in the off-road menu of the multimedia system ( → page 477).  G-Class - Owner's Manual Driving and parking Driving and driving safety systems BONNET TRANSPARAN
 View of the transparent bonnet (example) Activating/deactivating Parking Assist PARKTRONIC ( → page 398) Switching the off-road camera on or off 3 Cardinal point Position of the wheels Area under the bonnet 6 Path indicating the current steering angle 7 Altitude above sea level Activating/deactivating automatic, speed-dependent switching between the transparent bonnet view and the front view If the Offroad menu is open in the central display and the button Ⓞ is switched on, the transparent bonnet view is automatically displayed in the transmission position [D]. This shows a virtual image of the area directly in front of the bumper, in front of the wheels and under the bonnet at speeds below approx. 6 km/h to 8 km/h. In addition, the current lane is displayed. The transparent bonnet view provides support when driving over difficult terrain, e.g. on rocky or uneven ground. The front camera captures and records the shaded area under the bonnet. This area is then shown as soon as it has been traversed by the vehicle. If the vehicle has not been moved for some time, the recorded area is displayed in greyscale and faded out. NOTE Damage caused by obstacles which were not indicated The transparent bonnet view is generated from images recorded previously by the 360° camera. These recorded images may therefore possibly deviate from the actual conditions. In the meantime, moving objects may have found their way underneath the vehicle which are not showing up in the current display. ▶ Avoid any obstacles or navigate them with extreme caution. Adapt the travel speed to the respective conditions.TAMPILAN DEPAN DAN BELAKANG
 Image of front and rear view (example) 1 Downhill gradient indicator 2 Path indicating the current steering angle 3 Uphill gradient indicator (i) Note that the area between the vehicle and up to approximately 1 m in front of the vehicle is not displayed.   G-Class - Owner's Manual Driving and parking Driving and driving safety systems The downhill gradient and uphill gradient displays are only shown in the front view. If the vehicle is travelling faster than approximately 8 km/h the view automatically changes from transparent bonnet to front view. The camera image is closed if the vehicle is travelling faster than approximately 20 km/h - 30 km/h (depending on the drive program). If reverse gear is engaged, the rear view is automatically shown with the image of the reversing camera.BATASAN SISTEM
AREA DI BAWAH BONNET TIDAK DITAMPILKAN DENGAN BENAR DALAM SITUASI BERIKUT:
in the rain • when driving in the dark • when shadows fall on the area recorded by the camera Observe the instructions on the 360° camera's function and its system limits. You may otherwise fail to recognise potential dangers (→ page 391).MEMANGGIL TAMPILAN KAMERA 360° MENGGUNAKAN TOMBOL
 Press button 1 ▶ Select the menu Camera views. Select the desired view in the multimedia system ( → page 391).MEMILIH TAMPILAN UNTUK KAMERA 360° (GIGI MUNDUR)
Engage reverse gear. Select the desired view in the multimedia system ( → page 391).MENGELOLA KAMERA 360° DENGAN POSISI AKTIVASI GPS
Multimedia system: MENGUBAH NAMA POSISI AKTIVASI
(i) You can determine activation positions in the Camera views menu ( → page 391). Select □□□ for the desired activation position.   G-Class - Owner's Manual Driving and parking Driving and driving safety systems Select Edit. Enter a name and confirm. The activation position is stored under the new name.MENGHAPUS POSISI AKTIVASI
Select □□ for the desired activation position. Select Delete entry. Confirm the prompt. The activation position is deleted.PARKIR ASSIST PARKTRONIC
FUNGSI PARKIR ASSIST PARKTRONIC
Parking Assist PARKTRONIC is not available in the drive programs Rock and Sand (country-dependent). Parking Assist PARKTRONIC is an electronic parking assistance system which monitors the area surrounding your vehicle. The distance between your vehicle and a detected obstacle is displayed visually and acoustically. The passive side impact protection also warns you of obstacles to the side. These must be detected beforehand by the sensors in the front or rear bumper while driving by them. If you steer in the direction of a detected obstacle and there is a risk of a lateral collision, a warning is issued. Passive side impact protection can be activated and deactivated via the multi-media system ( → page 401).  In order that front or rear obstacles to the side can be displayed, the vehicle must first travel a distance of at least half a vehicle length. Once the vehicle has travelled a distance of one vehicle length, obstacles on all sides can be shown. Parking Assist PARKTRONIC serves solely as an aid. It is not a substitute for you having to pay attention to your surroundings. The responsibility for safe manoeuvring, parking and exiting parking spaces remains with you. Ensure that there are no persons, animals or objects etc. in the manoeuvring area while manoeuvring and parking in/exiting parking spaces.TAMPILAN PADA LAYAR TENGAH
 Example: vehicles with 360° camera Ready for display at the front and rear 2 Ready for display all around 3 Ready for display all around and obstacles detected  G-Class - Owner's Manual Driving and parking Driving and driving safety systems   Example: vehicles with reversing camera Ready for display at the front and rear 2 Ready for display all around 3 Ready for display all around and obstacles detected As soon as Parking Assist PARKTRONIC is ready for display, the respective areas ① to ③ of the display are shown in blue.WARNA TAMPILAN BERUBAH TERGANTUNG PADA JARAK KE OBSTAKEL YANG TERDETEKSI:
• Blue: > 1 m (no obstacles detected) • Yellow: approximately 1 m - 0.7 m • Orange: approx. 0.7 m - 0.4 m Red: < 0.4 m Vehicles with 360° camera: the boundary line shifts dynamically depending on the position and distance of the obstacles detected. An intermittent warning tone also sounds depending on the distance to the obstacle detected. You can set the timing of the warnings in the multimedia system. In the Warn early setting, the system warns you from a distance of 1 m. In the standard setting, from a shorter distance of 0.4 m.  Example: vehicles with 360° camera  Example: vehicles with reversing cameraJIKA ANDA TIDAK BERADA DI MENU KAMERA & PARKIR DAN OBSTAKEL DI JALUR KENDARAAN TERDETEKSI, JENDELA POP-UP ① MUNCUL DI LAYAR TENGAH JIKA PERSYARATAN BERIKUT TERPENUHI:
• Vehicles without Active Parking Assist: when driving no faster than 12 km/h. • Vehicles with Active Parking Assist: when driving no faster than 18 km/h.BATASAN SISTEM
PARKIR ASSIST PARKTRONIC TIDAK SELALU MEMPERHITUNGKAN OBSTAKEL BERIKUT:
• Obstacles below the detection range, e.g. persons, animals or objects - Obstacles above the detection range, e.g. protruding loads, overhangs or loading ramps of lorries   G-Class - Owner's Manual Driving and parking Driving and driving safety systems • Pedestrians or animals approaching the vehicle from the side - Objects placed next to the vehicleOBSTAKEL DI SISI TIDAK DITAMPILKAN DALAM SITUASI BERIKUT, MISALNYA:
• You park the vehicle and switch it off. • You open the doors. After the vehicle is restarted, obstacles must be detected again by driving past them before a new warning can be issued.PERHATIKAN JUGA BATASAN SISTEM DARI SISTEM BERIKUT:
• Reversing camera ( → page 389) • 360° camera ( → page 391) Observe the information on vehicle sensors and cameras; otherwise the system cannot function properly ( → page 338). Vehicles with trailer hitch: If a transport device, e.g. trailer or bicycle rack is attached to the trailer hitch and the electrical connection is correctly established, Parking Assist PARKTRONIC is deactivated for the rear zone.MASALAH DENGAN PARKIR ASSIST PARKTRONIC
If the Parking Assist PARKTRONIC display lights up red for approximately three seconds and then goes out, and the P98 symbol appears on the driver display, the system may have been deactivated due to signal interference. Start the vehicle again and check whether Parking Assist PARKTRONIC works in a different location.Jika nada peringatan juga berbunyi, penyebabnya mungkin sebagai berikut:
• The sensors are dirty: clean the sensors ( → page 620). - Parking Assist PARKTRONIC has been deactivated due to a malfunction: restart the vehicle. If the problem persists, consult a qualified specialist workshop.MENGAKTIFKAN/MENONAKTIFKAN PARKIR ASSIST PARKTRONIC
CATATAN
Vehicle damage when parking or manoeuvring due to nearby objects Parking Assist PARKTRONIC may not detect certain objects in the close-up range. When parking or manoeuvring, pay particular attention to objects that are under or above the sensors, e.g. flower pots or drawbars. The vehicle or other objects may otherwise be damaged.Persyaratan:
- Neither drive program 📁 Rock nor 🐵 Sand is selected (→ page 294). • The camera menu is open. • Or: the Parking Assist PARKTRONIC pop-up window is displayed. Tap Pw on the central display. If the indicator lamp is lit, Parking Assist PARKTRONIC is active. If the indicator lamp does not light up or the symbol P0CH is displayed, Parking Assist PARKTRONIC is not active. G-Class - Owner's Manual Driving and parking Driving and driving safety systems Parking Assist PARKTRONIC is automatically activated when the vehicle is started. Alternatively, Parking Assist PARKTRONIC can be activated or deactivated in the quick-access menu.MENGATUR NADA PERINGATAN PARKIR ASSIST PARKTRONIC
Multimedia system: MENGATUR NADA PERINGATAN
▶ Select Set warning tones. ▶ Set the desired level under Volume or Tone pitch.MENGAKTIFKAN/MENONAKTIFKAN REDAMAN AUDIO
▶ Select Audio fadeout and activate or deactivate Audio fade for warnings. The volume of the media source currently playing is reduced when a warning tone sounds in Parking Assist PARKTRONIC. or ▶ Select Audio fadeout and activate or deactivate Audio fadeout in trans. position R. The volume of the media source currently playing is reduced when reverse gear is engaged.MENGATUR WAKTU PERINGATAN
▶ Select Time of warning. Set the desired warning time for Front or Rear. ▶ Activate or deactivate Side warning.Parkir Assist Aktif
FUNGSI PARKIR ASSIST AKTIF
PERINGATAN
Risk of accident due to objects located above or below the detection range of Active Parking AssistJIKA ADA OBJEK DI ATAS ATAU DI BAWAH JANGKAUAN DETEKSI, SITUASI BERIKUT MUNGKIN TERJADI:
• Active Parking Assist may steer too early. • The vehicle may not stop in front of these objects. There is a danger of collision! In these situations, do not use Active Parking Assist. Active Parking Assist is not available in the drive programs Trail, Rock and Sand. Active Parking Assist is an electronic parking assistance system which uses ultrasound with the assistance of the reversing camera or 360° camera. When you are driving forwards up to approximately 35 km/h, the system automatically measures parking spaces on both sides of the vehicle. Active Parking Assist serves solely as an aid. It is not a substitute for you having to pay attention to your surroundings. The responsibility for safe manoeuvring, parking and unparking remains with you at all times. Ensure that no persons, animals or objects etc. are in the vehicle's path. Active Parking Assist offers the following functions:   G-Class - Owner's Manual Driving and parking Driving and driving safety systemsKENDARAAN DENGAN KAMERA MUNDUR
• Parking in parking spaces parallel to the roadway • Reversing into parking spaces perpendicular to the roadway The parking space is freely selectable. The parking procedure is executed with the vehicle reversing.KENDARAAN DENGAN KAMERA 360°
• Parking in parking spaces parallel to the roadway - Parking in parking spaces perpendicular to the roadway (either forwards or reversing as desired) - Parking in parking spaces that can only be detected as such from markings (forexample at the roadside) - Exiting parking spaces if you have parked using Active Parking Assist The parking space is freely selectable. The parking direction (forwards or reversing) can also be freely selected, depending on the orientation of the parking space. If Active Parking Assist is available, the notification [P] appears on the driver display. When the system detects parking spaces, the notification [IP] appears. The arrows show the side of the roadway on which free parking spaces are detected. These are then shown on the central display. When Active Parking Assist is activated, the turn signal indicator is activated based on the calculated path of your vehicle. The parking and unparking procedures are assisted by acceleration, braking, steering and gear changes. To start the parking procedure, press the button [P] (→ page 403).PARKIR ASSIST AKTIF AKAN DIBATALKAN DALAM SITUASI BERIKUT:
• You press the button P again. • You begin steering. • You select the park position P. • You engage the electric parking brake. - ESP ® intervenes. • You open the driver's door.BATASAN SISTEM
If the exterior lighting is malfunctioning, Active Parking Assist is not available.PERHATIKAN JUGA BATASAN SISTEM DARI SISTEM BERIKUT:
• Reversing camera ( → page 389) • 360° camera (→ page 391) Objects above or below the detection range of Active Parking Assist, e.g. protruding loads, overhangs or loading ramps of trucks or parking space boundaries are not detected when measuring the parking space. These are also not subsequently taken into account when calculating the parking procedure. In some circumstances, Active Parking Assist may therefore prematurely guide you into the parking space or brake too late. Certain environmental conditions, such as snowfall or heavy rain, may lead to a parking space being mismeasured. Parking spaces that are partially occupied by trailer drawbars might not be identified as such or may be measured incorrectly. Only use Active Parking Assist on level road surfaces with adequate grip. Active Parking Assist can also display unsuitable parking spaces, e.g. parking spaces in which parking is not permitted or on unsuitable surfaces.  G-Class - Owner's Manual Driving and parking Driving and driving safety systems JANGAN GUNAKAN ACTIVE PARKING ASSIST DALAM SITUASI BERIKUT, MISALNYA:
• in extreme weather conditions, such as ice, packed snow or in heavy rain. • when transporting a load that protrudes beyond the vehicle • if the parking space is on a steep downhill or uphill gradient • when snow chains are fitted • when a trailer or bicycle rack is attached • directly after a tyre change or when spare tyres are fitted • if the tyre pressure is too low or too high • on steep downhill gradients of more than approximately 15% - if the vehicle level has been offset, e.g. mounting the kerb on one side (vehicles with level control) You can watch an animation on this topic via the following link:PARKIR DENGAN ACTIVE PARKING ASSIST
PERINGATAN
Risk of accident due to objects located above or below the detection range of Active Parking AssistJIKA ADA OBJEK DI ATAS ATAU DI BAWAH JANGKAUAN DETEKSI, SITUASI BERIKUT DAPAT TERJADI:
• Active Parking Assist may steer too early. • The vehicle may not stop in front of these objects. There is a danger of collision! In these situations, do not use Active Parking Assist.Persyaratan:
\- None of the drive programs 📄 Trail, 📋 Rock or 📄 Sand is selected (→ page 294).  Press the button ⓘ.  Parking Assist menu (example for left-hand side of the screen) Select the menu Parking Assistance ②. Parking spaces ③ detected by the system are shown on the central display.  G-Class - Owner's Manual Driving and parking Driving and driving safety systems At speeds greater than approximately 16 km/h, the camera perspective on the right-hand side of the screen switches off.  Parking Assist menu (example) When the vehicle is at a standstill, the indicated vehicle path ⑤ into the currently selected parking space ⑥ also appears. If a parking space is displayed: stop the vehicle. If necessary, select another parking space. ▶ Vehicles with 360° camera: to change the parking direction, tap the selected parking space again. To start the parking procedure: press the button ① again. Of Depress the brake pedal and select Start parking procedure Take your hands off the steering wheel and release the brake pedal. The vehicle drives into the selected parking space. The duration of the parking procedure is indicated by a progress bar. The turn signal indicator is switched on automatically when the parking procedure begins. You are responsible for selecting the turn signal indicator in accordance with the traffic conditions. If necessary, select the turn signal indicator accordingly.  WARNING Risk of accident due to vehicle swinging out while parking or pulling out of a parking space While parking or exiting a parking space, the vehicle swings out and can drive onto areas of the oncoming lane. This could cause you to collide with objects or other road users. Pay attention to objects and other road users. Where necessary, stop the vehicle or cancel the parking procedure with Active Parking Assist. Following completion of the parking procedure, the message Active Parking Assist finished appears. Secure the vehicle against rolling away. When necessitated by legal requirements or local conditions; turn the wheels towards the kerb. You can stop the vehicle and change the transmission position during the parking procedure. The system then calculates a new vehicle path. If no new vehicle path is available, the transmission position can be changed again, or the process can be cancelled.  Immediate parking via the Camera views menu  G-Class - Owner's Manual Driving and parking Driving and driving safety systems ▶ Select the Camera views menu. When the vehicle is stationary and in transmission position R, and the symbol ⑦ appears in the camera image: press the button ① again. or Depress the brake pedal and select Start parking procedure. The parking procedure is initiated for the detected parking space. The parking space and parking direction cannot be changed in immediate parking.KELUAR DARI TEMPAT PARKIR DENGAN ACTIVE PARKING ASSIST
PERINGATAN
Risk of accident due to objects located above or below the detection range of Active Parking AssistJIKA ADA OBJEK DI ATAS ATAU DI BAWAH JANGKAUAN DETEKSI, SITUASI BERIKUT DAPAT TERJADI:
• Active Parking Assist may steer too early. • The vehicle may not stop in front of these objects. There is a danger of collision! In these situations, do not use Active Parking Assist.Persyaratan:
• The vehicle is equipped with a 360° camera. • The vehicle has been parked with Active Parking Assist. Start the vehicle.  Press the button 1.  Parking Assist menu (example for left-hand side of the screen) Select the menu Parking Assistance ②. If necessary, change the direction of exit To initiate the unparking procedure: press the button 📄 again. or   G-Class - Owner's Manual Driving and parking Driving and driving safety systems Depress the brake pedal and select Start unparking procedure ③ (depending on the respective vehicle equipment). If necessary, change the transmission position. Observe any messages displayed on the driver display and central display. The vehicle moves out of the parking space. The duration of the unparking procedure is indicated by a progress bar. The turn signal indicator is automatically switched on when the unparking procedure is initiated, and automatically switched off again when it is completed. You are responsible for selecting the turn signal indicator in accordance with the traffic conditions. If necessary, select the turn signal indicator accordingly. PERINGATAN
Risk of accident due to vehicle swinging out while parking or pulling out of a parking space While parking or exiting a parking space, the vehicle swings out and can drive onto areas of the oncoming lane. This could cause you to collide with objects or other road users. Pay attention to objects and other road users. ▶ Where necessary, stop the vehicle or cancel the parking procedure with Active Parking Assist. After the parking space has been exited, a warning tone and the Active Parking Assist finished, take control of vehicle message prompt you to take control of the vehicle. You have to accelerate, brake, steer and change gear yourself again. If you do not react to the prompt to reassume control of the vehicle, the system will brake the vehicle to a standstill.MENJEDA ACTIVE PARKING ASSIST
PERINGATAN
Risk of accident due to objects located above or below the detection range of Active Parking AssistJIKA ADA OBJEK DI ATAS ATAU DI BAWAH JANGKAUAN DETEKSI, SITUASI BERIKUT DAPAT TERJADI:
• Active Parking Assist may steer too early. • The vehicle may not stop in front of these objects. There is a danger of collision! In these situations, do not use Active Parking Assist.ANDA DAPAT MENGGANGGU PROSEDUR PARKIR ATAU KELUAR PARKIR DARI ACTIVE PARKING ASSIST DENGAN MELAKUKAN SALAH SATU TINDAKAN BERIKUT, CONTOHNYA:
▶ Depress the brake pedal. Open the front passenger door, a rear door, the rear-end door or the bonnet. ▶ Apply the electric parking brake or activate the HOLD function.MEMULAI ULANG PROSEDUR PARKIR ATAU KELUAR PARKIR:
▶ Check the vehicle surroundings. Ensure once again that there are no persons, animals or objects in the vehicle's path. Gently depress the accelerator pedal. Observe the messages shown on the driver display and central display.   G-Class - Owner's Manual Driving and parking Driving and driving safety systems Observe the system limits of Active Parking Assist ( → page 401).FUNGSI PENGEREMAN OTOMATIS DARI ACTIVE PARKING ASSIST
PERINGATAN
Risk of accident due to objects located above or below the detection range of Active Parking AssistJIKA ADA OBJEK DI ATAS ATAU DI BAWAH JANGKAUAN DETEKSI, SITUASI BERIKUT DAPAT TERJADI:
• Active Parking Assist may steer too early. • The vehicle may not stop in front of these objects. There is a danger of collision! In these situations, do not use Active Parking Assist. Persons or objects detected in the vehicle's path may trigger a sudden braking action, which will in turn halt the parking or unparking procedure. The vehicle will then remain at a standstill. The parking or unparking procedure is resumed if you depress the accelerator pedal. Check the area around your vehicle again before resuming the parking or unparking procedure. Ensure once again that no persons, animals or objects are in the vehicle's path. Observe also the system limits of Active Parking Assist. Asisten manuver
FUNGSI DRIVE AWAY ASSIST
 Drive Away Assist can reduce the severity of an impact when pulling away. If the system detects an obstacle in the direction of travel, the vehicle's speed is briefly restricted to approximately 2 km/h. When a critical situation is detected, the symbol △ appears on the central display. Drive Away Assist can be switched off or on in the Manoeuvring assistance menu. You can cancel an intervention by Drive Away Assist at any time by deactivating Parking Assist PARKTRONIC.PERINGATAN
Risk of accident caused by limited detection performance of Drive Away Assist Drive Away Assist cannot always clearly identify objects and traffic situations. ▶ Always pay careful attention to the traffic situation; do not rely on Drive Away Assist alone. Be prepared to brake or swerve as necessary, provided the traffic situation permits and that it is safe to take evasive action.  G-Class - Owner's Manual Driving and parking Driving and driving safety systems Drive Away Assist serves solely as an aid. It is not a substitute for you having to pay attention to your surroundings. The responsibility for safe manoeuvring, parking and exiting parking spaces remains with you. Ensure that no persons, animals or objects etc. are in the vehicle's path.RISIKO TABRAKAN DAPAT TERJADI DALAM SITUASI BERIKUT, CONTOHNYA:
• If the driver mixes up the accelerator and brake pedals. • If an incorrect transmission position is engaged.FUNGSI DRIVE AWAY ASSIST AKTIF DALAM KONDISI BERIKUT:
- Neither drive program 📁 Rock or 🐘 Sand is selected (→ page 294). • If Parking Assist PARKTRONIC is activated. - If you shift the transmission position to R or D when the vehicle is at a standstill. • If the detected obstacle is less than approx. 1.0 m away. • Manoeuvring assistant is activated ( → page 410).BATASAN SISTEM
The performance of Drive Away Assist is limited on uphill gradients. If a transport device, e.g. trailer or bicycle rack, is attached to the trailer hitch and the electrical connection is correctly established, Drive Away Assist is not available. ① Observe also the system limits of Parking Assist PARKTRONIC ( → page 398).FUNGSI CROSS TRAFFIC ALERT
The Cross Traffic Alert function is only available for vehicles with Blind Spot Assist. The Cross Traffic Alert function is not available in the drive programs Rock and Sand. The Cross Traffic Alert function can warn drivers of any crossing traffic when reversing and manoeuvring out of a parking space. The radar sensors in the bumper also monitor the area adjacent to the vehicle. If a critical situation is detected, the symbol 🙏 appears on the central display, and the vehicle can be braked automatically. If the radar sensors are obstructed by vehicles or other objects, detection is not possible. Depending on the respective country, Cross Traffic Alert can be switched off or on in the menu Manoeuvring assistance ( → page 410).FUNGSI CROSS TRAFFIC ALERT AKTIF DALAM KONDISI BERIKUT:
- Neither drive program 📄 Rock or 🐃 Sand is selected (→ page 294). • If the vehicle is reversing at walking pace. • Manoeuvring assistant is activated ( → page 410). ① Observe also the instructions on Blind Spot Assist ( → page 377).BATASAN SISTEM
The Cross Traffic Alert function is not available on uphill gradients. G-Class - Owner's Manual Driving and parking Driving and driving safety systems If a transport device, e.g. trailer or bicycle rack is attached to the trailer hitch, and the electrical connection is correctly established, the Cross Traffic Alert function is not available.FUNGSI PENGEREMAN JARAK DEKAT
PERINGATAN
Risk of accident caused by limited detection by the manoeuvring brake function The manoeuvring brake function cannot always clearly detect people. Other obstacles are not detected by the function. In these cases, the function may brake unnecessarily or not brake at all. ▶ Always pay careful attention to the traffic situation; do not rely on the manoeuvring brake function alone. Be ready to brake. i Close-range braking is not available in the drive programs Rock and Sand. Close-range braking can prevent collisions with pedestrians when the vehicle is reversing at slow speeds. If the reversing camera detects a person in the vehicle's path, the vehicle can be braked to a standstill.PENGEREMAN JARAK DEKAT DAPAT BEKERJA DALAM KONDISI BERIKUT:
• The vehicle is reversing at a speed slower than 10 km/h. • The camera image is shown on the central display ( → page 397).  Depending on the respective country, close-range braking can be deactivated or activated in the Manoeuvring assistance menu ( → page 410). When close-range braking is triggered, the symbol 🔒 appears in red in the selected view in the menu Camera & parking. If close-range braking is not available, the symbol 🚗 appears in grey. Close-range braking serves solely as an aid. It is not a substitute for you having to pay attention to your surroundings. The responsibility for safe manoeuvring, parking and unparking remains with you at all times. Ensure that no persons, animals or objects etc. are in the vehicle's path.BATASAN SISTEM
PERHATIKAN BATASAN SISTEM DARI FUNGSI-FUNGSI BERIKUT:
• Active Parking Assist ( → page 401) • 360° camera (→ page 391) • Reversing camera (→ page 389)FUNGSI PENGEREMAN JARAK DEKAT TIDAK TERSEDIA DALAM SITUASI BERIKUT:
• in the drive programs 📄 Rock and 🐵 Sand (→ page 294). • on uphill gradients - if transport equipment, e.g. a trailer or bicycle rack, is attached to the trailer hitch and the electrical connection has been correctly established.  G-Class - Owner's Manual Driving and parking Driving and driving safety systemsMENGAKTIFKAN/MENONAKTIFKAN ASISTEN MANUVER
Multimedia system:  ① This function is a Digital Extra ( → page 96). The 'activating/deactivating manoeuvring assistant' function is not available in all countries. Select Manoeuvring assistance. Activate or deactivate the desired manoeuvring assistant.Asisten Manuver Trailer
FUNGSI ASISTEN MANUVER TRAILER
Trailer Manoeuvring Assist is not available in the drive programs Trail, Rock and Sand.PERINGATAN
Risk of accident due to unsuitable trailers Trailers with a steered axle or a fifth wheel cannot be used with Trailer Manoeuvring Assist. Due to this, the trailer cannot be manoeuvred in the desired direction and you can cause a collision or the trailer can overturn. Only use Trailer Manoeuvring Assist with trailers with fixed drawbars and axles.CATATAN
Damage due to overhanging loads in front or drawbar installations The vehicle and the trailer may be damaged during manoeuvring due to overhanging loads at the front of the trailer or drawbar installations. Pay attention to overhanging loads or drawbar installations while manoeuvring. Trailer Manoeuvring Assist assists you when reversing with a trailer. The reversing camera monitors the articulation angle between the vehicle and the trailer and adjusts it to a specified value. Trailer Manoeuvring Assist also limits your speed. Trailer Manoeuvring Assist serves solely as an aid. It is not a substitute for you having to pay attention to your surroundings. The responsibility for safe manoeuvring, parking and exiting parking spaces remains with you. Ensure that there are no persons, animals or objects etc. in the manoeuvring area while manoeuvring and parking in/exiting parking spaces.   G-Class - Owner's Manual   Driving and parking Driving and driving safety systems You can enter the articulation angle value directly via the multimedia system, or use a straightening or 90° manoeuvre. When carrying out a straightening manoeuvre, the system calculates the articulation angle automatically and straightens the vehicle/trailer combination to the trailer's current direction. Observe the notes on trailer operation ( → page 413).BATASAN SISTEM
PERHATIKAN BATASAN SISTEM DARI FUNGSI-FUNGSI BERIKUT:
• Active Parking Assist ( → page 401) 360° camera (→ page 391) • Reversing camera ( → page 389)SISTEM MUNGKIN TERGANGGU ATAU TIDAK BERFUNGSI DALAM SITUASI BERIKUT:
• The uphill gradient is greater than approximately 15%. For a heavy trailer with inertia-activated brake, functional restrictions may occur on uphill gradients less than approx. 15%. In these situations the driver must intervene accordingly.MENGGUNAKAN ASISTEN MANUVER TRAILER
Persyaratan:
• The vehicle has been started and is stationary. - Neither drive program 📄 Trail, 📄 Rock or 📄 Sand is selected (→ page 294). • A trailer is selected in the Vehicle menu ( → page 416). • A trailer has been detected. • The uphill gradient is less than approximately 15 %. • The rear-end door is closed. • The electric parking brake is not applied. • The driver's seat belt is fastened.  Engage reverse gear R. Press the button ①. The camera image is shown on the central display. Take your hands off the steering wheel.    G-Class - Owner's Manual Driving and parking Driving and driving safety systems ① This image is shown as an example and is without trailer. You can select various manoeuvres in the Trailer Manoeuvring Assist menu. The manoeuvres available depend on the trailer's current articulation angle and length. To adjust the articulation angle: select Ⓐ. To change the articulation angle, swipe to the left or to the right across the entire range of the camera image in the central display. or To activate the straightening manoeuvre: select ②. The system calculates the articulation angle in such a way that the direction of the trailer at the time of activation is maintained. There is a short countersteering movement of the trailer while the vehicle is reversing, which then guides it back to the desired line. This allows the vehicle to align with the trailer, while at the same time maintaining the trailer's direction. or To activate the 90° manoeuvre: - Align the vehicle in the same direction (line) as the trailer. - Select Ⓤ (left or right). The system calculates the articulation angle so that a trailer can be manoeuvred into a driveway at the most acute angle possible when it is perpendicular to its own vehicle. After the manoeuvre, the vehicle is aligned again in the trailer's direction. ▶ Accelerate and brake as required.  The maximum articulation angle depends on the length of the trailer. The system calculates this by driving the vehicle forwards, including cornering. Before the trailer length has been calculated, the maximum articulation angle is approximately 23° . The longer the trailer, the greater the maximum articulation angle (max. approximately 60° ). ① Be aware of all surroundings and always remain ready to brake.   G-Class - Owner's Manual Driving and parking Trailer hitch< Penarik trailer
Catatan tentang pengoperasian trailer
CATATAN
The operating permit may be invalidated due to the illegal installation of trailer hitches The installation – including retrofitting – of a non-folding or non-removable trailer hitch that even partially conceals the license plate or the lighting system is prohibited. ▶ Observe the applicable legal regulations for the installation of trailer hitches.  PERINGATAN
Risk of accident due to car/trailer combination swerving If you drive too fast in trailer operation, the car/trailer combination may start to swerve. This could cause you to lose control of the car/trailer combination. The car/trailer combination may even overturn. ▶ Under no circumstances should you try to straighten the car/trailer combination by increasing your speed. ▶ Reduce the speed and do not countersteer. Brake if necessary. CATATAN
Damage to the engine due to overheating If you have a trailer hitch retrofitted, modifications to the engine cooling system may be necessary depending on the vehicle type. If you have a trailer tow hitch retrofitted, observe the fastening points on the vehicle frame.  G-Class - Owner's Manual Driving and parking Trailer hitch Retrofitting a trailer hitch is permissible only if a trailer load is specified in your vehicle documents. If this is not the case, the vehicle is not approved for trailer operation. Further information can be obtained at a qualified specialist workshop.PERHATIKAN CATATAN BERIKUT TENTANG BEBAN LIDAH:
• do not use a tongue weight that exceeds or falls below the permissible tongue weight • use a tongue weight as close as possible to the maximum tongue weightJANGAN MELEBIHI NILAI BERIKUT:
• permissible trailer load • permissible rear axle load of the towing vehicle • gross vehicle weight rating of the towing vehicle • permissible gross mass of the trailer • maximum permissible speed of the trailerPASTIKAN HAL BERIKUT SEBELUM MEMULAI PERJALANAN:
- the tyre pressure on the rear axle of the towing vehicle is set for a maximum load • the lighting of the connected trailer is operational In the event of increased rear axle load, the car/trailer combination may not exceed a maximum speed of 100 km/h for reasons concerning the operating permit. This also applies in countries in which the permissible maximum speed for car/trailer combinations is above 100 km/h.  When you are reversing with a trailer, remember to use the Trailer Manoeuvring Assist function ( → page 410).Menghubungkan/memutuskan trailer
TRAILER AKAN TERDETEKSI DENGAN BENAR OLEH KENDARAAN HANYA JIKA KONDISI BERIKUT TERPENUHI:
• the trailer is connected correctly • the trailer lighting system is in working orderTRAILER YANG TERHUBUNG DENGAN BENAR MEMPENGARUHI FUNGSI SISTEM BERIKUT, CONTOHNYA:
- ESP ® trailer stabilisation • Trailer Manoeuvring Assist • Active Lane Keeping Assist • Parking Assist PARKTRONIC • Active Parking Assist - Blind Spot Assist Cross Traffic Alert - Close-range braking - Reversing camera 360° camera  G-Class - Owner's Manual Driving and parking Trailer hitchMENGHUBUNGKAN TRAILER
CATATAN
Damage to the starter battery due to full discharge Charging the trailer battery using the power supply of the trailer can damage the starter battery. Do not use the vehicle's power supply to charge the trailer battery.i TRAILER DENGAN STECKER 7-PIN DAPAT DIHUBUNGKAN KE KENDARAAN DENGAN ADAPTOR BERIKUT:
- adapter plug - adapter cable  Ball head with cover cap Eyelet for breakaway cable ▶ Secure the vehicle against rolling away. Remove the cover cap ① from the ball head and store it in a safe place. Position the trailer on a level surface behind the vehicle and couple it with the vehicle.  Open the socket cap. Insert the plug with the lug ① in the groove ③ on the socket. Turn the bayonet coupling ② in a clockwise direction as far as it will go. Allow the cap to engage. - Secure the cable to the trailer with cable ties (when using an adapter cable only). Ensure that the cable exhibits ample freedom of movement for cornering manoeuvres.DALAM KEADAAN BERIKUT, PESAN MUNGKIN MUNCUL DI LAYAR PENGEMUDI, MESKIPUN TRAILER TELAH TERHUBUNG DENGAN BENAR:
• LEDs have been installed in the trailer lighting system. - The current level has fallen below the trailer lighting system's minimum current level (50 mA).   G-Class - Owner's Manual Driving and parking Trailer hitch  Accessories can be connected to the permanent power supply up to 180 W and to the power supply that is switched on via the ignition lock.Melepas trailer
PERINGATAN
Risk of being crushed and becoming trapped when uncoupling a trailer When uncoupling a trailer with an engaged inertia-activated brake, your hand may become trapped between the vehicle and the trailer drawbar. Do not uncouple trailers with an engaged overrun brake. CATATAN
Damage during uncoupling with an engaged overrun brake The vehicle may be damaged if you uncouple with an engaged overrun brake. Do not uncouple trailers with an engaged overrun brake. ▶ Secure the vehicle against rolling away. ▶ Disconnect the electrical connection between the vehicle and the trailer. ▶ Uncouple the trailer. Fit the cover cap on the ball head. Trailers with LED lighting: after uncoupling the trailer, switch the vehicle on and then off again.Memilih tipe trailer
Multimedia system: Settings Vehicle Driving Trailer typeMENGATUR PENGATURAN UNTUK TRAILER
The settings on this menu make it possible to calculate a route suitable for the selected trailer and optimise the calculated arrival time. Select the desired trailer type. Select the maximum permissible speed for the selected trailer. To save changes: select Confirm. When contact with the trailer socket is established (trailer/rear bicycle rack), a menu will automatically appear on the display. THE FOLLOWING OPTIONS ARE AVAILABLE: - Small trailer • Large trailer  G-Class - Owner's Manual Driving and parking Vehicle towing instructionsInstruksi penarik kendaraan
The vehicle is not suitable for the use of tow bar systems that are used for flat towing or dinghy towing, forexample. Attaching and using tow bar systems may result in damage to the vehicle. When you are towing a vehicle with tow bar systems, safe driving characteristics cannot be guaranteed for the towing vehicle or the towed vehicle. The vehicle-trailer combination may swerve from side to side.PERHATIKAN INFORMASI BERIKUT:
• Permitted towing methods ( → page 639) - The notes on towing the vehicle with both axles on the ground ( → page 64)   Back to Contents G-Class - Owner's Manual Driver display < Tampilan pengemudi
This interactive PDF works like a website - tap or click a button to jump straight to where you want to go. You can return here at any time via the navigation bar at the top left. Notes on the driver display 419 Driver display malfunction 420 Operating the driver display 421 Driver display menus 423 Vehicles with a 48 V on-board electrical system Overview of status indicators on the driver display 4.5 G-Class - Owner's Manual Driver display Notes on the driver displayCatatan tentang tampilan pengemudi
PERINGATAN
Risk of accident if the driver's display fails If the driver's display fails or malfunctions, you may not be aware of any functional limitations to safety-critical systems. This may affect the operating safety of the vehicle. Park the vehicle safely as soon as possible and notify a qualified specialist workshop.TAMPILAN PENGEMUDI MENAMPILKAN INFORMASI DASAR SEPERTI:
• Indicator and warning lamps Speed • Transmission position Fuel levelFUNGSI TAMBAHAN YANG TERSEDIA MELIPUTI:
• Various menus, such as Navigation and Assistance • Status displays for the driving systems • Display messages • Information on Consumption and range The content on the menus can be changed and customised ( → page 424). Kerusakan tampilan pengemudi
PERINGATAN
Risk of accident if the driver display malfunctions If the driver display is inoperative or its functions are restricted, you will not receive information about such issues as other function restrictions, speed, current drive range and the status of the electric parking brake. This will impair operating safety. ▶ Stop the vehicle immediately in accordance with the traffic conditions and switch it off. Do not continue driving. Consult a qualified specialist workshop. ▶ Have the vehicle transported rather than towed.Mengidentifikasi kerusakan tampilan pengemudi
Gangguan pada tampilan pengemudi dapat diidentifikasi melalui karakteristik seperti berikut:
- When the vehicle is switched on, the driver display continues to show nothing but a black screen. • The driver display restarts. • The content freezes. - The display stops showing data such as speed. Various indicator and warning lamps are also displayed.Yang harus dilakukan jika terjadi gangguan pada tampilan pengemudi
If the driver display is inoperative or its functions are restricted, stop the vehicle immediately in accordance with the traffic conditions and switch it off. The following procedure is recommended in this eventuality: ▶ Stop the vehicle in accordance with the traffic conditions. While the vehicle is stationary, continue to hold the brake pedal down. Press the P button on the DIRECT SELECT lever. Apply the parking brake. ▶ Slowly release the brake pedal and make sure that the vehicle is secured against rolling away. Press and hold the start/stop button ( → page 326) once for roughly three seconds to switch off the drive system. Contact a qualified specialist workshop immediately. ▶ Have the vehicle transported rather than towed. In addition, note the additional information about switching off the vehicle ( → page 326) and the notes on transporting the vehicle ( → page 642). G-Class - Owner's Manual Driver display Operating the driver displayMengoperasikan tampilan pengemudi
PERINGATAN
Risk of distraction from information systems and communications equipment If you operate information systems and communication devices integrated in the vehicle when driving, you could be distracted from the traffic situation. This could also cause you to lose control of the vehicle. ▶ Only operate this equipment when the traffic situation permits. If you cannot be sure of this, stop the vehicle whilst paying attention to road and traffic conditions and operate the equipment with the vehicle stationary. Observe the legal requirements for the country in which you are currently driving when operating the driver display. SCROLLING ON THE MENU BAR  1 Back button 2 Main menu 3 Touch Control   G-Class - Owner's Manual Driver display Operating the driver display  Mercedes-AMG vehicles ① Back button 2 Main menu 3 Touch Control You can manage the content of the driver display with the controls on the left of the steering wheel. You can navigate the content by swiping vertically and horizontally with one finger on Touch Control Ⓞ. Press the Touch Control to confirm your selection. To operate Touch Control in the most effective way, use the tip of your thumb if possible. You can also set the sensitivity of the Touch Control on the central display ( → page 454). Briefly press main menu button 2. Select a menu by swiping to the left or right on Touch Control To confirm: press Touch Control 3.  G-Class - Owner's Manual Driver display Driver display menusMenu tampilan pengemudi
Catatan tentang menu pada tampilan pengemudi
PERINGATAN
Risk of distraction from information systems and communications equipment If you operate information systems and communication devices integrated in the vehicle when driving, you could be distracted from the traffic situation. This could also cause you to lose control of the vehicle. ▶ Only operate this equipment when the traffic situation permits. If you cannot be sure of this, stop the vehicle whilst paying attention to road and traffic conditions and operate the equipment with the vehicle stationary. Observe the legal requirements for the country in which you are currently driving when operating the driver display.Menu berikut dapat dipanggil melalui bilah menu pada tampilan pengemudi:
- Understated - Sport Classic Navigation - Assistance Offroad Service • Mercedes-AMG vehicles: Supersport • Mercedes-AMG vehicles: TRACK PACE On some of these menus, you can choose from a range of information for the centre display content. On most of the menus, you can use Options to configure further settings for the menu-specific display content. G-Class - Owner's Manual Driver display Driver display menus  Calling up and operating menus on the driver display CALLING UP A MENU ON THE DRIVER DISPLAY  1 Back button Main menu 3 Touch Control  Mercedes-AMG vehicles ① Back button ② Main menu 3 Touch Control Press the ② main menu button on the steering wheel. The menu bar will be shown in the lower area of the driver display.  Swipe to the left or right on Touch Control ③ and select a menu (e.g. the Classic menu) on the menu bar. To confirm: press Touch Control 3.   G-Class - Owner's Manual Driver display Driver display menus MEMANGGIL ATAU MENUTUP SUBMENU OPSI
To call up: press Touch Control 3. To exit: press back button 1.MENJELAJAHI ISI TAMPILAN ATAU DAFTAR
Swipe upwards/downwards or to the left/right on Touch Control ③.MENGATUR TAMPILAN
You can preset individually configured information of a menu and thus determine the standard display. Press Touch Control ③ until the bar is completely filled. Answer the Set direct entry? query as follows. Swipe to the left on Touch Control ③ and select Yes. To confirm: press Touch Control To call up presettings: press the back button Ⓞ on the upper level of a menu. i Pressing back button Ⓞ on the standard display will open the previous menu.MENGATUR ULANG NILAI
To call up the Options submenu: press Touch Control Select Yes. To confirm: press Touch Control ③.Menu Klasik atau Sederhana
Driver display: MEMILIH ISI TAMPILAN TENGAH
The Classic menu shows the driver display separated into speedometer and rev counter. The area in between can be filled with various types of information.  Speedometer 2 Rev counter 3 Transmission position Coolant temperature display Outside temperature 6 Centre display content (example: trip distance) 7 Time Fuel level and fuel filler flap location indicator   G-Class - Owner's Manual Driver display Driver display menus  Mercedes-AMG vehicles ① Speedometer 2 Rev counter Gear display Coolant temperature display Outside temperature 6 Centre display content (example: temperature) 7 Time Fuel level and fuel filler flap location indicator ▶ Call up the Classic menu via the driver display menu bar. To select display content: Swipe upwards or downwards on the Touch Control and select the display content.Informasi berikut dapat ditampilkan dalam isi tampilan tengah ⑥:
- Trip and total distance - Trip computer From start and From reset ECO display Consumption • ATTENTION ASSIST Audio Navigation • Mercedes-AMG vehicles: - Engine oil Transmission oil coolant • Mercedes-AMG vehicles: Setup • Mercedes-AMG vehicles: Engine data Depending on the vehicle equipment, AMG-specific content regarding temperature, set-up and engine data will be displayed. The settings for the setup display content can be configured either via the buttons on the multifunction steering wheel or via the MBUX multimedia system ( → page 301).MEMILIH STASIUN RADIO ATAU LAGU PADA DAFTAR STASIUN ATAU LAGU
You can change radio stations or tracks on the station or track list in the centre display content with audio information.HAL-HAL BERIKUT AKAN DISESUAIKAN DALAM SISTEM MULTIMEDIA MBUX:
- Configuring the station or track list • Switching between media sources • Setting the frequency band   G-Class - Owner's Manual Driver display Driver display menus  Track list in the centre display content (example) To change radio stations or tracks: swipe left or right on the Touch Control and select a radio station or track on the station or track list. If you do not select something immediately after opening the station or track list, the view will return to the radio station or track selected. The radio station or track displayed when the vehicle is restarted depends on the user profile used for the previous trip.MEMANGGIL ATAU MENUTUP SUBMENU OPSI
Depending on the information in the centre display content, you can configure various settings on the Options submenu. To call up the submenu: press the Touch Control. To exit the submenu: press the ← back button.FUNGSI-FUNGSI BERIKUT MUNGKIN TERSEDIA PADA SUBMENU OPSI, MISALNYA:
- Navigation: selecting and adjusting zoom, route guidance and map settings - Resetting the trip odometer • Resetting the trip computer From start • Resetting the trip computer From reset • Resetting the ECO display valuesMENGUBAH PENGATURAN WARNA PADA MENU YANG SEDERHANA
▶ Call up the Understated menu via the driver display menu bar. To call up the colour list: press the Touch Control. The colour list on the Understated menu will be displayed. To select colour settings: swipe upwards or downwards on the left-hand Touch Control and select the desired colour setting. If you do not select anything within a limited time after opening the colour list, the view will switch back to the default view of the Understated menu. To exit the colour list: press the back button ↩. Depending on the equipment, the selected colour setting will also be adopted for the MBUX multimedia system. If you select the Understated menu on the driver display, the content in the MBUX multimedia system will also be made smaller.   G-Class - Owner's Manual Driver display Driver display menus Menu layanan
Driver display:  The current status of the vehicle is shown on the Service menu. To call up the menu: press the Touch Control.KONTEN TAMPILAN BERIKUT TERSEDIA DI MENU LAYANAN (TERGANTUNG PERLENGKAPAN):
• Information about how many messages are in the message memory • AdBlue: AdBlue ® range and fill level - Tyre pressure: \- Checking the tyre pressure with the tyre pressure monitoring system ( → page 655) \- Restarting the tyre pressure monitoring system ( → page 655) • ASSYST PLUS: calling up the service due date ( → page 602) • Engine oil level: checking the engine oil level ( → page 38) • Mercedes-AMG vehicles: temperature - Engine oil - Transmission oil - coolant Coolant indicatorFUNGSI-FUNGSI BERIKUT TERSEDIA PADA SUBMENU OPSI:
• Tyre pressure ( → page 655) • Message memory ( → page 769)Menu bantuan
Driver display:  The Assistance menu displays various driver assistance systems and navigation instructions. To call up the display: select Assistance on the driver display. Press the Touch Control.  Active Distance Assist DISTRONIC indicator on the assistant display (example)TAMPILAN BERIKUT DAPAT BERBEDA TERGANTUNG PADA SITUASI BERKENDARA:
• The navigation instructions in the left-hand display section • The traffic light view in the right-hand display section • The display of the driver assistance systems • The level of detail on the assistant displayTAMPILAN STATUS BERIKUT TERSEDIA PADA TAMPILAN ASISTEN:
\- Green radar waves next to vehicle: Blind Spot Assist is enabled and ready for operation   G-Class - Owner's Manual Driver display Driver display menus \- Grey radar waves next to vehicle: Blind Spot Assist is enabled but not ready for operationKONTEN PADA TAMPILAN ASISTEN AKAN BERADAPTASI DENGAN SITUASI BERIKUT:
- Driving manoeuvre • Current road conditions Road users detected The assistant display will not show other detected obstacles with the exception of road users.FUNGSI-FUNGSI BERIKUT TERSEDIA PADA SUBMENU OPSI:
• Starting route guidance • With active route guidance: end route guidance • Call up previous destinations and favourites • Start new route guidance to a recent destination • Start new route guidance to a favouriteMenu olahraga
Driver display:  The Sport menu provides information about the engine data of the vehicle.  When you call up the Sport menu on the menu bar of the driver display, the menu colour setting will automatically be applied to the MBUX multimedia system. To call up the menu: press the Touch Control.  Current torque 2 G-meter 3 Current power output Boost pressure 5 Engine oil temperature 6 Engine speedMenu supersport
Persyaratan:
• For Mercedes-AMG vehicles only. Driver display:  To call up the menu: press the Touch Control.   G-Class - Owner's Manual Driver display Driver display menus To select: Swipe upwards or downwards on the Touch Control and select the display content.  Current torque 2 Centre display content (example: setup) Current power output The displays for current torque ① and current power ③ vary depending on the display content in the centre display area.KONTEN LAYAR TENGAH AKAN MENAMPILKAN HAL BERIKUT:
Gear display • Temperature display - Engine oil - Transmission oil coolant Setup G-force - Trip and total distance • Distance From start and From reset Consumption Audio Navigation The AMG-specific content for temperature, set-up and engine data depends on the vehicle equipment. You can configure the set-up information either using the buttons on the multifunction steering wheel or via the MBUX multimedia system (→ page 301).Menu Track Pace
Persyaratan
• For Mercedes-AMG vehicles only. Driver display: TRACK PACE The Track Pace function is intended only for closed race tracks. Do not use this function on public roads, and adapt your driving style to your personal capabilities and the ambient conditions.PILIHAN BERIKUT AKAN DITAMPILKAN PADA MENU TRACK PACE:
G-meter • Race track selected • Braking and acceleration procedure • Gear currently selected  G-Class - Owner's Manual Driver display Driver display menus   Indicators on the Track Pace menu (example) G-meter 2 Centre display content (example: gear display) Telemetry display (example: selected race track) To call up the menu: press the Touch Control.KONTEN MENU TRACK PACE AKAN MENYESUAIKAN DIRI DENGAN PENGATURAN YANG DIPILIH PADA LAYAR TENGAH:
Gear display - Braking points Acceleration • Quarter-miles • Race track selected on the central display - Current race - Record route While the vehicle is in motion, the G-meter will show the forces that are exerted on the vehicle occupants both laterally and in the direction of travel. The maximum values will appear in red in the coordinate system.Menu Off-road
Driver display:  To call up the menu: press the Touch Control. ANTARA LAIN, MENU TERSEBUT BERISI INFORMASI BERIKUT:
- Steering angle • Elevation above sea level Coordinates • Compass with direction of travel - Record route Incline Angle - LOW RANGE When route recording is active, the compass view will be replaced by a display showing the course of the route.  G-Class - Owner's Manual Driver display Driver display menusMenu Navigasi
Driver display: 4 Navigation The Navigation menu shows the relevant map with navigation instructions. To call up the menu: press the Touch Control. CHANGING THE SCALE OF THE SELECTED MAP VIEW 1 Distance to the change of direction 2 Road to which the change of direction leads 3 Traffic incident indicator 4 Currently selected route 5 Indicator showing vehicle's current position 6 Change-of-direction symbol 7 Recommended lane (white) 8 Lane not recommended (grey) 9 Current lane % The level of detail in the navigation instructions in the left-hand display section may vary. To zoom in and out on the map directly: swipe upwards or downwards on the Touch Control. % If you do not operate anything in Autozoom, the system will reset the scale of the map view already selected after a short time. You can set the map scale permanently in the MBUX multimedia system (/ page 514). THE FOLLOWING FUNCTIONS ARE AVAILABLE ON THE OPTIONS SUBMENU: R With active route guidance: end route guidance R Select route guidance R Map settings % If the current route guidance is ended on the Navigation menu of the driver display, it will also be ended in the MBUX multimedia system. On the Options submenu, you can use other functions in the Destinations and Map settings categories. YOU CAN USE THE FOLLOWING FUNCTIONS IN THE DESTINATIONS CATEGORY: R Call up previous destinations and favourites R Start new route guidance to a favourite % The two options Work and Home will be displayed in Favourites even if no address is stored. G-Class - Owner's Manual Driver display Driver display menusANDA DAPAT MENGGUNAKAN FUNGSI BERIKUT DALAM KATEGORI PENGATURAN PETA:
• Activate auto zoom • Set the map view, satellite view and route overview.TAMPILAN PETA BERIKUT TERSEDIA PADA MENU NAVIGASI:
Entire route • 2D direction of travel 2D north-up 3D map   G-Class - Owner's Manual Driver display Vehicles with a 48 V on-board electrical system Kendaraan dengan sistem kelistrikan 48 V
 Electric drive support Recuperation behaviour of the electric motor Due to various system limits, the values displayed may temporarily differ slightly from the actual value.   G-Class - Owner's Manual Driver display Overview of status indicators on the driver display Ikhtisar indikator status pada layar pengemudi
The status indicators for the driving and driving safety systems can be found in the highlighted display sections.   Mercedes-AMG vehicles The number, position and presentation of the status indicators on the driver display depend on which systems are activated or deactivated. LOW RANGE off-road gear ( → page 312) (A) ECO start/stop function ( → page 287) HOLD HOLD function (→ page 347) Cruise control ( → page 350) Limiter ( → page 350) Active Distance Assist DISTRONIC ( → page 354) Specified distance for Active Distance Assist DISTRONIC ( → page 354) Active Steering Assist ( → page 366) Active Stop-and-Go Assist ( → page 363) Active Brake Assist switched off (→ page 372) Active Brake Assist impaired or not functioning (→ page 372) Active Lane Keeping Assist (→ page 379) Adaptive Highbeam Assist Plus ( → page 244) Active Parking Assist is available ( → page 403) Active Parking Assist has detected a parking space ( → page 403) Parking Assist PARKTRONIC deactivated (→ page 400) Maximum permissible speed exceeded (for certain countries only)   G-Class - Owner's Manual Driver display Overview of status indicators on the driver display * Slippery road surface warningKENDARAAN MERCEDES-AMG
TRACT ON AMG Traction PRO (→ page 385) Engine operating temperature warning lamp ( → page 278) OFF ESP SPORT ESP® SPORT (→ page 342) AMG RIDE CONTROL ( → page 382) AMG ACTIVE RIDE CONTROL (→ page 383) Vehicles with Traffic Sign Assist: detected instructions and traffic signs ( → page 373) Important information from other driving systems may briefly appear in front of the displayed traffic signs.   Back to Contents G-Class - Owner's Manual MBUX Voice Assistant < Asisten Suara MBUX
This interactive PDF works like a website - tap or click a button to jump straight to where you want to go. You can return here at any time via the navigation bar at the top left. Notes on operating safety 438 Operation 439 Using MBUX Voice Assistant effectively 442 Essential voice commands 444 G-Class - Owner's Manual MBUX Voice Assistant Notes on operating safetyCatatan tentang keselamatan pengoperasian
DEMI KESELAMATAN ANDA, SELALU PERHATIKAN HAL-HAL BERIKUT SAAT MENGOPERASIKAN PERALATAN KOMUNIKASI SELULER DAN TERUTAMA SISTEM KONTROL SUARA ANDA:
- Observe the legal requirements for the country in which you are driving. - If voice control is used in an emergency situation, commands may be less easily recognised due to a change in voice. - Familiarise yourself with the voice control system functions before starting the journey.Sistem kontrol suara tidak menggantikan Buku Petunjuk Pemilik.
The answers from the voice control system do not provide the complete scope of information contained in the Owner's Manual. The voice control system also does not give detailed warning or damage information. Therefore read the Owner's Manual so that you are fully informed about the functions and the safe operation of the vehicle.  G-Class - Owner's Manual MBUX Voice Assistant OperationPengoperasian
Fungsi Asisten Suara MBUX
You can watch an animation on this topic via the following link: Using the MBUX Voice Assistant, vehicle functions and various areas of the MBUX multimedia system can be operated by voice input, e.g. Navigation or Telephone. The MBUX Voice Assistant is operational about half a minute after switching on the vehicle and can be operated from all seats (depending on the special equipment).Melakukan dialog
Persyaratan:
• Voice activation is activated in the multimedia system ( → page 440).MEMULAI DIALOG
Say Hey Mercedes to activate the MBUX Voice Assistant. or Press the □ button on the multifunction steering wheel. A wave appears in the MBUX multimedia system. The dialogue can be started. For the dialogue with the MBUX Voice Assistant, you can use complete sentences of colloquial language as voice commands. Voice activation can also be combined directly with a voice command, e.g. Hey Mercedes, how warm is it outside?MENGGANGGU DIALOG
During the dialogue say Pause. The dialogue is interrupted. Say Hey Mercedes to continue the dialogue.MENGUBAH TINGKAT DIALOG
During the dialogue, say Back. The MBUX Voice Assistant jumps back to the previous dialogue step.BERNAVIGASI DALAM DAFTAR PILIHAN
If a voice command does not achieve a clear result, a selection list is shown. Say the line number or the content to select an entry or to have further details shown. Say Next page or Previous page to browse the selection list.MEMANGGIL BANTUAN
Information on the MBUX Voice Assistant: call up the following app in the multimedia system: Hey Mercedes Info. Current application: say Help. You will receive suggestions and information about operation of MBUX Voice Assistant for the current application.   G-Class - Owner's Manual MBUX Voice Assistant Operation ▶ Specific function: call up the voice command for the required function, for example with Hey Mercedes, I need help with the radio. Digital Owner's Manual: say Show me the Owner's Manual. The full extent of the Digital Owner's Manual is available on the media display when the vehicle is stationary.Ikhtisar fungsi yang dapat dioperasikan dari Asisten Suara MBUX
ANDA DAPAT MENGGUNAKAN ASISTEN SUARA MBUX UNTUK MENGOPERASIKAN FUNGSI-FUNGSI BERIKUT TERGANTUNG PADA PERLENGKAPAN KENDARAAN:
Telephone • Text message and e-mail Navigation Radio and media - Vehicle functions • Online functions Full functionality of the voice control system is only available for you with activation of online voice control ( → page 440).Informasi tentang pengaturan bahasa
You can change the language of the MBUX Voice Assistant via the system language settings ( → page 471). If the set system language is not supported by the MBUX Voice Assistant, English will be selected.Mengatur fungsi MBUX Voice Assistant menggunakan sistem multimedia
Multimedia system: Settings ▶ System ▶ Voice assistantMENGAKTIFKAN ATAU MENONAKTIFKAN AKTIVASI SUARA MBUX VOICE ASSISTANT
Select Hey Mercedes. When the function is active, the Hey Mercedes voice command can activate the dialogue.MENGAKTIFKAN ATAU MENONAKTIFKAN PERINTAH LANGSUNG
Select ☐. ▶ Activate or deactivate the function. If the function is active, some commands can be used without saying Hey Mercedes, for example Next track.MENGAKTIFKAN ATAU MENONAKTIFKAN AKTIVASI SUARA UNTUK KURSI INDIVIDU
Select ▶ Switch the function for the desired seats on or off.MENGAKTIFKAN ATAU MENONAKTIFKAN PROAKTIVITAS
Select Proactivity. Select the desired situation, e.g. Activate your profile or Don't forget your phone. When the function is active, the voice assistant proactively provides information in specific situations.   G-Class - Owner's Manual MBUX Voice Assistant OperationMENGAKTIFKAN ATAU MENONAKTIFKAN KONTROL SUARA ONLINE
① Online voice control is activated at the factory. ▶ Select Online recognition. ▶ Activate or deactivate the function. If the function is switched on and a Mercedes-Benz user account is linked to the vehicle, additional results are available through external information, e.g. information on points of interest. By clicking the symbol in the wave, more information about the online voice control can be displayed.MENGAKTIFKAN ATAU MENONAKTIFKAN KONTAK UNTUK PENGGUNAAN ONLINE
▶ Select Contact upload for online recognition. When the function is active, contacts will be found more easily and accurately using voice input.  Menggunakan MBUX Voice Assistant secara efektif
Catatan tentang penggunaan optimal MBUX Voice Assistant
- The MBUX Voice Assistant is operational half a minute after switching on the vehicle and can be operated from all seats, depending on the equipment installed. The system recognises from which seat the command was spoken and performs actions according to the seat position. - When a dialogue is ended, the MBUX Voice Assistant continues to be active for as long as the wave is displayed in the multimedia system. You can say another voice command without saying Hey Mercedes. - Using the direct command Change language to English, the system language can be changed to English without Hey Mercedes. Direct commands must be activated for this. - If a user profile has been stored and is active, the MBUX Voice Assistant can make suggestions based on the habits of the user. Say Hey Mercedes, load my personal profile, to activate the profile. The user's voice must first be taught in by the system and assigned to a profile. Further information on user profiles ( → page 458). - With the MBUX Voice Assistant, incoming calls can be accepted or rejected without the keyword Hey Mercedes.Informasi tentang asisten suara online MBUX
The online voice control facilitates recognition and thanks to external information makes additional results available. Therefore, Mercedes-Benz recommends that you activate online voice control ( → page 440). You will need a Mercedes-Benz user account for this. If you do not yet have a user account you must create one and connect it with your vehicle ( → page 555). Then call up your Mercedes-Benz user account. The Mercedes-Benz Digital Extras are displayed and can be activated ( → page 555). By clicking on the symbols displayed in the wave, further information on the online status is displayed.KETIKA KONTROL SUARA ONLINE AKTIF, FUNGSI TAMBAHAN TERSEDIA SEPERTI:
Weather General knowledge • Public holidays and school holidays Smart home - Messages • Time, date and time zones  G-Class - Owner's Manual MBUX Voice Assistant Using MBUX Voice Assistant effectively - Pocket and currency calculator • Football results and fixture lists Share prices - Calendar ChitChat Horoscope Geo Quiz Giving feedback The availability of these functions is country and equipment-dependent. ① Text content is taken from Wikipedia in accordance with the CC BY-SA 3.0 licence.  Perintah suara penting
Catatan tentang perintah suara
You can watch an animation on this topic via the following link: It is not necessary to use exact voice commands to call up a specific function. The MBUX Voice Assistant also understands you when you use your colloquial speech. Some examples are listed below. For some languages however these examples are only available to a limited extent.CONTOH PERINTAH SUARA:
• Navigation ( → page 444) • Telephone ( → page 444) • Radio and TV ( → page 445) • Media player ( → page 445) - Messages (→ page 445) • Vehicle functions ( → page 445) • Online functions ( → page 446)Contoh perintah suara navigasi
You can operate the navigation system using the MBUX Voice Assistant. The following list offers just a small selection of the possible navigation commands. You will receive additional suggestions if you say Help for navigation. \- Drive me home. • Where is the nearest service station? • Is there a service area along the route? • Set Covent Garden as intermediate destination. - Cancel the route guidance. • Show my last destination. • I want to buy juice. • Search for an Asian restaurant, but not Japanese, in South London.Contoh perintah suara telepon
You can operate phones connected with the MBUX multimedia system using the MBUX Voice Assistant. The following list offers just a small selection of the possible telephone commands. You will receive additional suggestions if you say Help for phone. • Call Peter Miller on the mobile phone. Dial 0711 17 0. Call my father. - Accept call Reject call • Search for the contact Peter Miller. - Switch to address book • Show me the incoming calls. - Switch phone Contoh perintah suara radio dan TV
Depending on the vehicle equipment, you can operate the radio and TV using the MBUX Voice Assistant. The following list offers just a small selection of the possible radio or TV voice commands. You will receive additional suggestions if you say Help for radio or Help for TV. • Play the radio station Heart FM. Next station. Previous station. • Show me the list of radio stations - Save the station • What am I listening to?Contoh perintah suara media
You can operate connected media sources and online music using the MBUX Voice Assistant. The following list offers just a small selection of the possible media voice commands. You will receive additional suggestions if you say Help for media or Help for player. • Play Michael Jackson. • Play "Yellow Submarine" by the Beatles. - Next track. Previous track. - Repeat this track. - Switch on random playback. - Mute the music. - Switch to USB.Contoh perintah suara pesan
Messages can be created, edited and listened to using the MBUX Voice Assistant. The following list offers just a small selection of the possible message voice commands. You will receive additional suggestions if you say Help for messaging. • Write a text message to Jane Doe: When will the next meeting take place? • Show me my new e-mails. • Write an e-mail to Jane Doe. • Read me my new text messages. • Show all new text messages. • Write an e-mail to John Doe in EnglishContoh perintah suara kendaraan
You can operate vehicle settings and vehicle functions using the MBUX Voice Assistant. The following list offers only a small selection of possible vehicle-specific voice commands and depends on the vehicle equipment and the language set. If no seat is mentioned for commands, the action is carried out automatically for the seat from which the command was spoken or for the function which is closest to that seat. • Switch the seat heating to level 2. • My feet are cold. • Start the Refresh programme. • Switch the relaxation programme on. • I would like to set the ambient light to blue  G-Class - Owner's Manual MBUX Voice Assistant Essential voice commands • Switch on the reading lamp. • Turn off the rear light. • How fast can I drive here? • Tell me my next service appointment • How warm is it outside?INFORMASI TENTANG KENDARAAN JUGA DAPAT DIMINTA:
• Information about individual items of the vehicle equipment - Hey Mercedes, which relaxation programmes do you have? - Hey Mercedes, do I have Blind Spot Assist? - Hey Mercedes, where is the warning triangle? • Information about functioning of the systems and components installed in the vehicle - Hey Mercedes, what is DISTRONIC? Hey Mercedes, what do I need ESP for? - Hey Mercedes, what is MBUX? • Information about operating the systems and components installed in the vehicle Hey Mercedes, how do I connect my smartphone? - Hey Mercedes, how can I turn on the main beam headlamps? - Hey Mercedes, how do I stop the ionization function?Contoh fungsi online
Depending on the country, language and vehicle equipment, additional functions are available when online voice control is active. The system accesses external information and can, as a result, answer general knowledge questions and make calculations, for example. • Is the sun shining in Manchester? • Is it raining at my destination? • What are the skiing conditions on the Zugspitze? • What's the time in Sydney now? • In which country do you pay with dollars? • How many Swiss franks make 25 euros? • How long now until the holidays? • What day is it tomorrow? • What is 20 % of 29? • What does my horoscope say? • What is the price of Mercedes-Benz Group shares? Let's play Geo Quiz. I'm bored. • Who is the current prime minister? • What do you know about the Globe Theatre in London? • Who painted the picture "The Scream"? • What's the status in the Premier League? • Create a calendar entry tomorrow at 9 am. • What's my next task? Tell me a joke. • How many languages do you speak? • What is your favourite animal? Are there any updates? • Is the light still on in the kitchen? • Switch off all the devices in my house. • Please set the temperature in the living room to 24 degrees. • I'd like to give you feedback.    G-Class - Owner's Manual MBUX Voice Assistant Essential voice commands Contoh perintah langsung
With direct commands, some functions can be operated without first saying the voice command Hey Mercedes. To use direct commands, the function must be activated in the multimedia system ( → page 440). Next TV channel • Previous TV channel • Next radio station • Previous radio station Next station Previous station Next track Previous track • Start dashcam recording - Stop dashcam recording • Show the map 3D map 2D map - Align map to north • Align map in direction of travel • Show all routes • Show traffic - Navigate to work - Navigate home • Repeat driving instruction - Cancel route guidance • Change language to English  Back to Contents G-Class - Owner's Manual MBUX multimedia system < Sistem multimedia MBUX
This interactive PDF works like a website - tap or click a button to jump straight to where you want to go. You can return here at any time via the navigation bar at the top left. Overview and operation 449 > Media 573 > System settings 467 > Radio 582 > Off-road menu 477 > Sound 586 > Fit & Healthy 480 > MBOX high-end rear seat entertainment system 598 Navigation and traffic 485 Telephone 526 Online and Internet functions 564 G-Class - Owner's Manual MBUX multimedia system Overview and operationIkhtisar dan pengoperasian
Ikhtisar sistem multimedia MBUX
PERINGATAN
Risk of distraction from information systems and communications equipment If you operate information systems and communication devices integrated in the vehicle when driving, you could be distracted from the traffic situation. This could also cause you to lose control of the vehicle. ▶ Only operate this equipment when the traffic situation permits. If you cannot be sure of this, stop the vehicle whilst paying attention to road and traffic conditions and operate the equipment with the vehicle stationary. You must observe the legal requirements for the country in which you are currently driving when operating the multimedia system.  CATATAN
Increased surface temperature due to direct sunlight on the central display The surface of the central display is very dark. If the display is exposed to direct sunlight, the surface can become very hot. If the central display has been exposed to direct sunlight, allow it to cool down before touching it for a long time. FUNGSI SISTEM MULTIMEDIA MBUX ANDA MUNGKIN BERBEDA DAN TERGANTUNG PADA FAKTOR-FAKTOR BERIKUT:
Market • National version • Technical conditions Functions and Digital Extras provided by Mercedes-Benz and/or third-party providers may no longer be available when the contractual period expires. This may also be due to technical prerequisites. There is therefore no entitlement to the continuous provision of functions and Digital Extras. The described functions may be modified, optimised and adapted after the time of going to press. G-Class - Owner's Manual MBUX multimedia system Overview and operation Mercedes-Benz therefore reserves the right to introduce changes to functions and Digital Extras. For these reasons, descriptions and depictions relating to the MBUX multimedia system may, in some cases, differ for your vehicle.  Touch Control and control panel for the MBUX multimedia system MBUX stands for Mercedes-Benz User Experience. \- Operating Touch Control (→ page 453) 2 Media display with touch functionality • Home screen overview (→ page 452) \- Operating the touchscreen (→ page 454) 3 Touchpad Operating the touchpad ( → page 455) Controller Turn: adjusts the volume Press briefly: switches the mute function on/off Press and hold: switches the MBUX multimedia system or media display on or off 5 Buttons for navigation [NAV/NAV], radio/media RADIO MEDUS and telephone TEL Button for vehicle functions and favourites button ★ Alternatively, the MBUX Voice Assistant allows voice dialogue. Operation with natural speech starts after the wake-up call "Hey Mercedes" (→ page 439). You can start a voice navigation, for example. If the vehicle is fitted with the MBUX Interior Assistant, selected functions of the multimedia system can be operated contact-free. In addition, the reading light or search light can be switched on or off contact-free. Numerous apps and Digital Extras are available to you. These can be called up via the home screen. You can conveniently call up your favourites using the ★ button on the steering wheel. Quick-access in the home screen and in the applications serve to select functions more quickly. If you use the learning function of the multimedia system, you will receive suggestions during operation of the most probable navigation destinations, media sources, radio stations and contacts. The configuration of the suggestions is completed in the system settings. You can compile your user profile from various vehicle settings and settings of the multimedia system. Some functions and Digital Extras are protected by a PIN. You can teach in biometric procedures to identify yourself with these instead of the four-digit Mercedes me ID PIN. The Notifications Centre collects incoming notifications, e.g. about an available software update. Depending on the type of notification it offers various actions. The call is made via the Control Centre.   G-Class - Owner's Manual MBUX multimedia system Overview and operation With the global search, you can search on the home screen via categories, e.g. in the navigation, and on the Internet.PERLINDUNGAN ANTI-PENCURIAN
This device is equipped with technical provisions to protect it against theft. More detailed information about anti-theft protection can be obtained at a qualified specialist workshop.Ikhtisar sistem multimedia MBUX (kendaraan Mercedes-AMG)
PERINGATAN
Risk of distraction from information systems and communications equipment If you operate information systems and communication devices integrated in the vehicle when driving, you could be distracted from the traffic situation. This could also cause you to lose control of the vehicle. ▶ Only operate this equipment when the traffic situation permits. If you cannot be sure of this, stop the vehicle whilst paying attention to road and traffic conditions and operate the equipment with the vehicle stationary. You must observe the legal requirements for the country in which you are currently driving when operating the multimedia system.  CATATAN
Increased surface temperature due to direct sunlight on the central display The surface of the central display is very dark. If the display is exposed to direct sunlight, the surface can become very hot. If the central display has been exposed to direct sunlight, allow it to cool down before touching it for a long time.  ① Touch Control and control panel for the MBUX multimedia system MBUX stands for Mercedes-Benz User Experience. \- Operating Touch Control (→ page 453) 2 Media display with touch functionality • Home screen overview (→ page 452) - Operating the touchscreen (→ page 454)  Touchpad Operating the touchpad ( → page 455)   G-Class - Owner's Manual MBUX multimedia system Overview and operation  Controller Turn: adjusts the volume Press briefly: switches the mute function on/off Press and hold: switches the MBUX multimedia system or media display on or off Buttons for navigation 📄, radio/media 📄 and telephone 📄 Calls up applications (→ page 456, 455, 456) Button for vehicle functions 📁 and favourites button ★ Alternatively, the MBUX Voice Assistant allows voice dialogue. Operation with natural speech starts after the wake-up call "Hey Mercedes" (→ page 439). You can start a voice navigation, for example. If the vehicle is equipped with the MBUX Interior Assistant, vehicle and infotainment functions can be used. The interaction then follows intelligently, reactively or with hand or head movements. Numerous application, online services, services and apps are available for you. These can be called up via the home screen. You can conveniently call up your favourites using the ★ button on the steering wheel. Quick-access in the home screen and in the applications serve to select functions more quickly. If you use the learning function of the multimedia system, you will receive suggestions during operation of the most probable navigation destinations, media sources, radio stations and contacts. The configuration of the suggestions is completed in the system settings. You can compile your user profile from various vehicle settings and settings of the multimedia system. Some functions and services are protected by a PIN. You can teach in biometric procedures to identify yourself with these instead of the four-digit Mercedes me PIN. The Notifications Centre collects incoming notifications, e.g. about an available software update. Depending on the type of notification it offers various actions. The call is made in the home screen via the Control Centre. With the global search, you can search on the home screen via categories, e.g. in the navigation, and on the internet.PERLINDUNGAN ANTI-PENCURIAN
This device is equipped with technical provisions to protect it against theft. More detailed information about anti-theft protection can be obtained at a qualified specialist workshop.Ikhtisar layar utama
 ① On the home screen: displays the first three applications. In other displays: calls up the home screen 2 Calls up user profile settings and switches user 3 Using the global search Calls up the Control Centre: pull the bar down   G-Class - Owner's Manual MBUX multimedia system Overview and operation 5 Calls up favourites 6 Displays in the status line 7 Calls up applications Quick-access to application 9 Index points for selected display area 10 Calling up the air-conditioning menuFUNGSI-FUNGSI BERIKUT DIPANGGIL DI PUSAT KENDALI:
- Notifications Centre Favourites • Vehicle quick-access In the image, the applications are arranged as a carousel. Pressing and holding on 📄 arranges the applications in a grid. This view is also used by a smartphone, for example.Kontrol Sentuh
MENGOPERASIKAN KONTROL SENTUH (SISTEM MULTIMEDIA MBUX)
 1 Shows the home screen ② Touch Control ◀ ▲ ▶ ▼ swipe in the direction of the arrow (navigate) OK Press (confirm) Returns to the previous display Makes or accepts a call 5 Rejects or ends a call To increase volume: swipe upwards To reduce volume: swipe down To switch off the sound: press 7 ★ Calls up favourites Starts the MBUX Voice Assistant  Mercedes-AMG vehicles 1 Shows zero layer/home screen 1 Shows the home screen 2 Touch Control ◀ ▲ ▶ ▼ swipe in the direction of the arrow (navigate) OK Press (confirm) Returns to the previous display Makes or accepts a call 5 Rejects or ends a call To increase volume: swipe upwards To reduce volume: swipe down To switch off the sound: press    G-Class - Owner's Manual MBUX multimedia system Overview and operation 7 Calls up favourites 8 Starts the MBUX Voice Assistant To operate Touch Control in the most effective way, use the tip of your thumb if possible. You can navigate through menus and lists via the touch-sensitive surface of Touch Control using a single-finger swipe, e.g.: To enter a character: select a character using the keyboard and press on Touch Control ②. To select a menu option: scroll in a list and press Touch Control 2. To move the digital map: swipe in any direction.MENGATUR SENSITIVITAS KONTROL SENTUH
Multimedia system: Settings ▶ System ▶ Control elements ▶ Touch Control sensitivity ▶ Select Fast, Medium or Slow.MENGATUR UMPAN BALIK AKUSTIK OPERASIONAL UNTUK SEMUA ELEMEN KONTROL
Multimedia system: Settings ▶ System ▶ Control elements Acoustic feedback The function is supported by the selection in a list. ▶ Set Off, Unleaded or Loud. If the function is activated you will hear a clicking sound when selecting control elements or when scrolling in a list. When the beginning or end of the list is reached you will hear another clicking sound. Layar Sentuh
MENGOPERASIKAN LAYAR SENTUH
MENYENTUH
To select a menu item or entry: tap on a symbol or an entry. To increase the map scale: tap twice quickly with one finger. To reduce the map scale: tap with two fingers. To enter characters with the keypad: tap on a button.GESER SATU JARI
To navigate in menus: swipe up, down, left or right. To move the digital map: swipe in any direction. To use handwriting to enter characters: write the character with one finger on the touchscreen.GESER DUA JARI
To zoom in and out of the map: move two fingers together or apart. To enlarge or reduce the size of a section of a website: move two fingers together or apart. To turn the map: turn anti-clockwise or clockwise using two fingers.GESERAN TIGA JARI
To call up the home screen: swipe up with three fingers in an application.MENYENTUH, MENAHAN, DAN MENGGERAKKAN
To move the map: touch the touchscreen and move your finger in any direction.  G-Class - Owner's Manual MBUX multimedia system Overview and operation To set the volume on a scale: touch the touchscreen and move your finger to the left or right.MENYENTUH DAN MENAHAN
To save the destination in the map: touch the touchscreen and hold until a message is shown. To call up a global menu in the applications: touch the touchscreen and hold until the Options menu appears. Touchpad OPERATING THE TOUCHPAD  ① button Returns to the previous display button Calls up the control menu of the last active audio source 3 button Shows the home screen and calls up applications 4 Turn: adjusts the volume Press briefly: switches the mute function on/off Press and hold: switches the MBUX multimedia system or media display on or off 5 Calls up navigation or the map 6 Calls up radio or media 7 Calls up the telephone 8 Calls up favourites 9 Calls up vehicle functions To enter a character: enter a character using the keyboard. or Write a character on the touch-sensitive surface of the touch-pad.MEMILIH ITEM MENU ATAU ENTRI DENGAN GESERAN SATU JARI
Swipe up, down, left or right. Press the touchpad.MENGGERAKKAN PETA DIGITAL
Swipe in any direction.GUNAKAN FUNGSI-FUNGSI BERIKUT DENGAN GESERAN DUA JARI:
To call up the Notifications Centre: swipe down with two fingers. To close the Notifications Centre: swipe up with two fingers. To call up the control menu of the last active audio source: swipe up with two fingers. To zoom in and out of the map: move two fingers together or apart. To enlarge or reduce the size of a section of a website: move two fingers together or apart.   G-Class - Owner's Manual MBUX multimedia system Overview and operationMENGATUR SENSITIVITAS TOUCHPAD
Multimedia system: Settings ▶ System ▶ Control elements Select Sensitivity. ▶ Select Fast, Medium or Slow. To set the pressure sensitivity: switch Touchpad tap on or off. If the function is switched on, a tap on the touchpad is enough to select a menu item.MENGAKTIFKAN ATAU MENONAKTIFKAN UMPAN BALIK OPERASI HAPTIK UNTUK TOUCHPAD
Multimedia system: Settings ▶ System ▶ Control elements The function supports you when making entries on the touchpad and when selecting menus. ▶ Switch Haptic feedback on or off. When the function is activated, a tactile feedback in the form of a vibration is effected when the touchpad is operated.MEMILIH STASIUN DAN LAGU MENGGUNAKAN TOUCHPAD
Press the ◀◀▶ button on the touchpad. The control menu appears for the audio source that was last selected. Swipe left or right using one finger. Radio: the previous or next station is set. Media source: the previous or next track is selected. To hide the control menu: press the ◀▶ button on the touchpad.Profil pengguna
CATATAN TENTANG PROFIL PENGGUNA
PERINGATAN
Risk of becoming trapped during adjustment of the driver's seat after calling up a driver profile Selecting a user profile may trigger an adjustment of the driver's seat to the position saved under the user profile. You or other vehicle occupants could be injured in the process. Make sure that when the position of driver's seat is being adjusted using the multimedia system, no people or body parts are in the seat's range of movement. If there is a risk of someone becoming trapped, immediately stop the adjustment process by: a) Tapping the warning message on the central display. or b) Pressing a position button of the memory function or a seat adjustment switch in the driver's door. The adjustment process is stopped. The electrically adjustable driver's seat is equipped with an automatic reversing function. If the driver's door is open, the driver's seat will not be set after calling up the driver's profile.   G-Class - Owner's Manual MBUX multimedia system Overview and operationIKHTISAR PROFIL PENGGUNA
PERSYARATAN PENGGUNAAN
- You have registered with a Mercedes me ID and confirmed the terms of use. • Your Mercedes me ID is linked to the vehicle. • You have a Mercedes me ID PIN. If one of the pre-requisites listed is missing or if no user profile has been selected, the data described in the following section will be saved in the vehicle as the standard setting. Standard settings can be changed by all vehicle users. User profiles save personal settings. If the vehicle is used by several people, a person can change their profile settings without changing the settings of other users. You can individualise a user profile in the vehicle using the set-up assistant or using the settings in your user profile. Some settings, e.g. the Mercedes me ID PIN and a profile photo, are made in the Mercedes-Benz App or on the Mercedes-Benz website. If the user profile is downloaded while travelling, user profiles are not set up using the set-up assistant. User-specific content and applications with personal data are protected by different levels of security ( → page 458). To access protected content, the Mercedes me ID PIN and, depending on the vehicle equipment, biometric sensors are used. The security level is set by the multimedia system and calculated from the combination of all sensor inputs. Some security levels cannot be turned off. WHEN A USER PROFILE IS ACTIVATED, THE FOLLOWING PERSONALISED COMFORT SYSTEMS, FOR EXAMPLE, CAN BE ADJUSTED OR THEIR SETTINGS LOADED: Seat \- Ambient light \- Outside mirrors • Air-conditioning settings If the user profile is activated when driving then the driver's seat position will not be adjusted.KONTEN KHUSUS PENGGUNA
TERGANTUNG PADA PERLENGKAPAN KENDARAAN, ANDA SEBAGAI PENGGUNA DAPAT MENYIMPAN PENGATURAN BERIKUT, MISALNYA:
• Driver's seat, steering wheel and mirror settings • Climate control - Ambient light • Radio (including station list) • Suggestions and favourites You can watch an animation on this topic via the following link:  G-Class - Owner's Manual MBUX multimedia system Overview and operation MENAMBAH PENGGUNA
Persyaratan:
• The vehicle is stationary. Multimedia system:  Select + Add user. A QR code is loaded. ▶ Scan the displayed QR code with the Mercedes-Benz App or any QR code scanner on a mobile device. If the Mercedes-Benz App is not yet installed on your mobile device, you will be directed to the store on your mobile device. Follow the steps in the Mercedes-Benz App. The vehicle is linked to your Mercedes me ID. This automatically creates your user profile in the vehicle. You will be informed when your user profile is available. When the vehicle is stationary, the set-up assistant starts automatically after user selection. When the user has been added, they can be selected ( → page 460).MEMILIH OPSI PENGGUNA
Multimedia system: MELINDUNGI KONTEN DAN APLIKASI KHUSUS PENGGUNA
If you add a new user, access protection is already activated for the user profile. The Mercedes me ID PIN and, depending on the vehicle equipment, biometric sensors are available for access. Biometric sensors in the vehicle must be taught in. The authentication process then takes all taught-in and available sensors into account.KONTEN DAN APLIKASI KHUSUS PENGGUNA BERIKUT DILINDUNGI, MISALNYA:
• User selection and user profile settings • ENERGIZING COACH The recorded health data and its evaluation. • In-Car Office The calendar, the tasks and the e-mails. - Parking service The payment transactions. • Mercedes-Benz Store The purchase of Digital Extras • System activations of paid vehicle functions \- Biometric sensors The teaching-in of biometric sensors For teaching in and editing biometric recognition see the following section. \- Suggestions The data and determination of the most probable navigation destinations, media sources, radio stations, contacts and messages.   G-Class - Owner's Manual MBUX multimedia system Overview and operationDALAM KASUS BERIKUT, ANDA AKAN DIMINTA UNTUK MELAKUKAN OTENTIKASI ATAU OTENTIKASI ULANG MENGGUNAKAN SENSOR ATAU PIN MERCEDES ME ID:
• When selecting a protected user profile - When calling up a function requiring special protection • If biometric sensors provide insufficient or contradictory information • If the multimedia system no longer trusts a sensor - If the seat belt buckle and the door are opened at the same seat and a function requiring special protection is called up - When the vehicle is locked from outside Select Protect content. ▶ Switch Access protection on or off. When access protection is switched off, your user profile can be viewed from any seat and changes can be made. Access protection is switched on or off on a vehicle-specific basis. ① Please note that authentication is necessary for several functions such as In-Car Office and cannot therefore be completely switched off.MENYETEL DAN MENGEDIT PENGENALAN BIOMETRIK
The biometric data models are saved in the sensors in the vehicle. If recognition has been set up, this sensor serves as a contributory factor for authentication on the multimedia system. Select Protect content. Select Voice recognition. ① If necessary, authenticate yourself on the multimedia system.MENYETEL PENGENALAN SUARA
Speak the sentence shown on the media display and follow the voice assistant's instructions. If voice recognition was successful, a message appears on the media display. You can unlock your user profile. ① Avoid background or disturbing noises during voice recognition.MENGHAPUS DATA BIOMETRIK
Tap on □ behind Voice recognition. Select Yes.MEMANGGIL ASISTEN PENYETELAN
Select Profile. Select Set-up assistant. ▶ Follow the directions from the set-up assistant.  G-Class - Owner's Manual MBUX multimedia system Overview and operation MENGUBAH NAMA PENGGUNA ATAU FOTO PROFIL
Select Profile. Select Change user name. or Select Profile picture. Enter the user name or select a user image. Select Finished. You can use the Mercedes me ID to store your photo in the Mercedes-Benz App or in the Mercedes-Benz Portal. The photo will then be shown in the vehicle. In the vehicle itself, you can select other sample images instead of the photo.MENGHAPUS PROFIL PENGGUNA
Select Profile. Select Remove. ▶ Select Remove user profile. Your Mercedes me ID and your personal data are retained in the Mercedes-Benz ecosystem.MERESET PROFIL PENGGUNA KE PENGATURAN PABRIK
Select Profile. Select Reset. Select Yes. This resets the contents of the user profile to factory settings, but not the vehicle. You can watch an animation on this topic via the following link:MEMILIH PENGGUNA
Multimedia system:  When you call up your driver profile, the driver's seat and the steering wheel can be set. YOU CAN CANCEL THE SETTING PROCESS WITH THE FOLLOWING ACTIONS: \- Press one of the seat operating buttons in the driver's door. Select Select user. Select a user. When requested to do so, authenticate with the Mercedes me PIN or a taught-in biometric characteristic. The user profile is loaded and activated. If you select Continue without selecting user, no specific settings for the user profile are loaded.MENYINKRONKAN PROFIL PENGGUNA
Persyaratan:
• You have a Mercedes me ID.   G-Class - Owner's Manual MBUX multimedia system Overview and operation • The vehicle is linked to your Mercedes me ID. Multimedia system:  ▶ Synchronise automatically. When the vehicle is switched on or off, the data stored in the vehicle is automatically synchronised with the Mercedes me IDs. This synchronisation is done for all user profiles and is not profile-specific. or Select Synchronise now. The data stored in the vehicle is synchronised with the personal profiles after selecting this option. Not all user profile functions are available during synchronisation. During synchronisation, the most recently changed data is applied. IF THE PERSONALISATION SERVICE IN THE VEHICLE IS DEACTIVATED, ONLY THE FOLLOWING USER PROFILE MASTER DATA IS SYNCHRONISED: Profile name Profile image • Mercedes me ID PINFavorit
IKHTISAR FAVORIT
Favourites offer you quick access to frequently used applications. 100 favourites are available in total. You can select favourites from categories or you add favourites directly from an application. ① You can add and edit navigation favourites within the application.MEMANGGIL FAVORIT
Multimedia system:  Alternatively, in the home screen pull down bar in the centre of the status line ( → page 452). Select | ★ | in the Control Center.MENAMBAH FAVORIT
Multimedia system: MEMILIH FAVORIT DARI KATEGORI
Select ▷. Select + Create new favourite. Select the category. Select a favourite. The favourite is stored at the next available position.  G-Class - Owner's Manual MBUX multimedia system Overview and operation All positions in the favourites are taken: confirm the message shown. A list shows all the favourites. ▶ Select a favourite to be overwritten.MENAMBAH FAVORIT DARI APLIKASI
You can, for example, save a contact (example), or add an ENERGIZING COMFORT programme. To save a contact as a global favourite: select a contact ( → page 534). Press on a telephone number until a menu is shown. ▶ Select Save as favourite. The contact is added as a favourite.MENGUBAH NAMA FAVORIT
Multimedia system:  Press on a favourite until a menu is shown. Select Rename. Enter the name. Save the names.MEMINDAHKAN FAVORIT
Multimedia system:  Press on a favourite until a menu is shown. Select Move. Move the favourite to the new position. Tap on ▼.MENGHAPUS FAVORIT
Multimedia system:  Press on a favourite until a menu is shown. Select Delete. Select Yes.MENGATUR ULANG FAVORIT
In the menu, select Reset all favourites. Select Yes.Pusat Notifikasi
IKHTISAR PUSAT NOTIFIKASI
KOMUNIKASI BERIKUT DIKUMPULKAN DI PUSAT NOTIFIKASI:
- Communications which are generated by the vehicle or from the multimedia system. - Messages that arrive through the use of Digital Extras.Jenis notifikasi berikut tersedia untuk Anda:
• Navigable destinations and routes - Messages (text messages) - Calendar entries and reminders, e.g. from In-Car Office This function is not available in all countries.   G-Class - Owner's Manual MBUX multimedia system Overview and operation - System information, e.g. Important software update available. Confirm to start the update. - Other notifications, e.g. from additional Digital Extras that can be booked or from emergency reports (e.g. tornado) The Notifications Centre is in the Control Centre. Depending on the style set, newly received notifications are shown using a coloured dot. Notifications are normally briefly shown as they are received. If you take no action, these are stored for future access in the Notifications Centre. The notifications are sorted chronologically. The most recent notifications are at the top.  Example of a message ① Calls up the Notifications Centre Time message received Calls up the settings 4 Display for available actions Description of the notification and the issuing service 6 Symbol for notifications Date of the received notifications Depending on the type of notification, up to four different actions are available.Contoh tindakan meliputi:
- Reading aloud - Placing a call - Replying - Calling up a web page Navigation Some notifications, e.g. a navigation destination, are stored longer. Therefore, it is not necessary to carry out available actions directly upon receipt of the notifications. A route guidance can be started at a later time. You can pin a notification so that it is not deleted automatically after a certain time has elapsed ( → page 464).Memanggil notifikasi
Membuka pusat notifikasi
Select [icon] in the Control Center.Memilih notifikasi
If several messages are available swipe up or down. Select an action.Menutup pusat notifikasi
SelectMemilih tindakan untuk notifikasi. Opsi berikut tersedia:
\- Select the action directly after a notification is received and shown.  G-Class - Owner's Manual MBUX multimedia system Overview and operation • Select the action later after calling up in the Notifications Centre. Up to two actions available: select the action. ▶ More than two actions available: select ◀. ▶ Select the action. The notification is still available. ▶ Close the actions with ▶.Mengedit notifikasi
▶ Call up the Notifications Centre ( → page 463).Mengonfigurasi pengaturan
Select Settings. Select the service. ▶ Switch the options on or off.Opsi berikut tersedia tergantung pada layanan:
- Allow notifications • Display in notification centre • Show notifications • Switching Acoustic signals on or off - External access The option allows an external service access to specific data, e.g. the current vehicle position. The detailed, approved information is shown with ①.  If Allow notifications is switched off, the options cannot be selected with the exception of External access.Menyemat notifikasi
Drag a notification to the right on the touchscreen. A pin appears. Tap on the pin. The notification is marked with a pin.Menghapus notifikasi
Drag a notification to the left on the touchscreen. or Select □. Select Yes. All messages are deleted.Pencarian global
IKHTISAR PENCARIAN GLOBAL
You can call up the global search on the home screen. You can input characters using the keyboard or the handwriting recognition. Alternatively, the MBUX voice assistant allows voice input.PENCARIAN GLOBAL MENYEDIAKAN HASIL PENCARIAN UNTUK KATEGORI BERIKUT:
Navigation Entertainment • Phone, In-Car Office In-Car Office is not available in all countries.   G-Class - Owner's Manual MBUX multimedia system Overview and operation • Digital Owner's Manual Website The global search enables you to search for towns, roads and tourist attractions in the navigation category, for example. If the search field is empty, you will first see smart suggestions in the Suggestions category. If a letter is entered, the best hits are displayed in the All category. You will find further search results in the individual categories. Next to the category is the number of results. After selecting a category you can select the search results within the category. When you select a search result, a detailed view is opened depending on the category.MENGGUNAKAN PENCARIAN GLOBAL
Multimedia system:  In the Suggestions category up to six smart suggestions are displayed, even if no search entry has been entered yet. Enter the search term into the search field. As soon as a character is entered the All category is marked. Up to ten search results per category are displayed there. In the other categories suitable search results for the entered search item are displayed.  Alternatively, the MBUX Voice Assistant allows voice input using 📄 or you switch to the handwriting recognition 📋 (→ page 465). To end the search: select OK. To show search results for a category: select a category. To accept the search result: select the search result. An action starts, e.g. a radio station is set or a detailed view is displayed, e.g. for a contact.Memasukkan karakter
MENGGUNAKAN FUNGSI INPUT KARAKTER
Enter the characters on the Touch Control or on the touchscreen. Character input can be started with a control element and resumed with another. When the keypad is shown, enter the characters by swiping and pressing on the Touch Control or by tapping on the touchscreen. Examples for character input include the global search, entering a navigation destination or the renaming of a favourite, for example.MEMASUKKAN KARAKTER PADA LAYAR SENTUH
Persyaratan:
• An online connection is required for some functions.  G-Class - Owner's Manual MBUX multimedia system Overview and operation  Character input with the keypad (destination entry) ① Input line with current entry 2 Deletes an entry 3 Selects previous destinations Displays and selects additional destination searches 5 Adopts the search result in the input line and continues the search 6 Search result ⑦ Deletes the last character entered Hides the keypad 9 Activates voice entry. 10 Sets the written language Switches to digits and special characters 12 Switches to upper-case or lower-case letters Example: call up the navigation and enter a destination address ( → page 44). ▶ Briefly press on a character. The character is entered in input line ①. Resume character input. The available editing functions depend on the editing task, the language set and the character level.MEMASUKKAN KARAKTER ALTERNATIF
Press and hold on a character. Select the character.MENGAKHIRI INPUT KARAKTER
Hide keypadMENGATUR KEYBOARD UNTUK MEMASUKKAN KARAKTER
Multimedia system: Settings ▶ System ▶ Keyboards and handwritingMENGATUR BAHASA KEYBOARD
Select Keyboard languages. Select one or more keyboard languages.MENGHAPUS KAMUS PENGGUNA
The user dictionary learns from your inputs and offers suggestions during character input. You can reset the user dictionary. Select Reset my dictionary. Select Yes. G-Class - Owner's Manual MBUX multimedia system System settingsPengaturan sistem
Tampilan
MENGONFIGURASI PENGATURAN TAMPILAN
Multimedia system: MENYESUAIKAN KECERAHAN
Select Display brightness. ▶ Vehicles with a driver display and media display: adjust the display brightness of the driver display or media display.Waktu dan tanggal
MENGATUR ZONA WAKTU
Multimedia system:  Select Time zone. The list of countries is displayed. If there are several time zones available in a country, these will be shown after the country is selected. Select a country and, if required, a time zone. The time zone set is displayed after Time zone. or Select the Automatic time zone entry from the country list. The time zone will be set automatically according to the vehicle location. The Automatic time zone option is available for vehicles with satellite reception.MENGATUR FORMAT WAKTU DAN TANGGAL
Multimedia system: MENGATUR WAKTU DAN TANGGAL SECARA MANUAL
Persyaratan:
• The vehicle does not have satellite reception. Multimedia system: MENGATUR WAKTU
Select Set time. Set a time. Press OK to confirm.   G-Class - Owner's Manual MBUX multimedia system System settings MENGATUR TANGGAL
Select Set date. Select a date. Press OK to confirm. On vehicles with satellite reception, the time and date settings are determined automatically based on the vehicle location and cannot be set manually.MENYESUAIKAN WAKTU
Select Adjust time. Set a value. Press OK to confirm. ① The function is only available in vehicles with satellite reception.Posisi kendaraan
MENGAKTIFKAN/MENONAKTIFKAN TRANSMISI POSISI KENDARAAN
Persyaratan:
• The vehicle is linked to a Mercedes-Benz ID. - At least one Digital Extra is activated for the vehicle, which can be used to display the vehicle position to customers and/or co-users via the respective user accesses. With this setting, you decide whether the vehicle position will be transmitted in order to show it to users who have access to the digital Mercedes-Benz services for this vehicle. The function is country-dependent. For more information, consult a Mercedes-Benz Service Centre. Multimedia system: Settings ▶ System ▶ Data protection ▶ Activate or deactivate the Transmit veh. position function. Alternatively, you can also switch the function on or off in the status line via ☐.Mengatur izin
Multimedia system: Settings ▶ System ▶ Data protection ▶ Permissions In the Permissions menu, you can set access authorisations for various data points (such as microphone, camera) used in an application. You can change permissions that have already been granted here. You can set permissions either for individual data points or for certain applications or websites. Select Requests or Apps/websites. Make the required settings for the permissions.   G-Class - Owner's Manual MBUX multimedia system System settings Bluetooth®
INFORMASI TENTANG BLUETOOTH*
Bluetooth ® technology is a standard for short-range wireless data transfer up to approximately 10 m.ANDA DAPAT MENGGUNAKAN BLUETOOTH® UNTUK MENGHUBUNGKAN PONSEL ANDA KE SISTEM MULTIMEDIA DAN MENGGUNAKAN FUNGSI-FUNGSI BERIKUT, MISALNYA:
\- Hands-free system with access to the following options: Contacts ( → page 534) \- Call lists ( → page 536) \- Text messages (→ page 537) • Internet connection ( → page 564) Bluetooth ® is a registered trademark of Bluetooth Special Interest Group (SIG) Inc. ① Internet connection via Bluetooth * is not available in all countries.MENGAKTIFKAN/MENONAKTIFKAN BLUETOOTH®
Multimedia system:  ▶ Activate or deactivate Bluetooth.Near Field Communication (NFC)
INFORMASI TENTANG NEAR FIELD COMMUNICATION (NFC)
NFC enables short-range wireless data transfer or connection of a mobile phone with the multimedia system. Further information can be found at: https://www.mercedes-benz-mobile.com/MENGAKTIFKAN ATAU MENONAKTIFKAN NEAR-FIELD COMMUNICATION
Multimedia system:  ▶ Activate or deactivate NFC.Wi-Fi
IKHTISAR KONEKSI WI-FI
You can use Wi-Fi to set up a connection to the Internet or to external network devices. The availability of the function is dependent on the country.SECARA UMUM, TERSEDIA DUA JENIS KONEKSI WI-FI:
• Using the multimedia system as a Wi-Fi hotspot ( → page 470) The vehicle's multimedia system serves as a Wi-Fi hotspot for mobile communication devices, such as smartphones or tablet PCs, for example. • Using a mobile communication device as a Wi-Fi hotspot (tethering) ( → page 566) An external Wi-Fi hotspot is accessed for the Internet connection of the vehicle's multimedia system.   G-Class - Owner's Manual MBUX multimedia system System settingsMENGAKTIFKAN ATAU MENONAKTIFKAN WI-FI
Multimedia system: Settings ▶ System ▶ Internet and Bluetooth Select Wi-Fi. The controller is to the right: Wi-Fi is switched on. When Wi-Fi is switched on, you can connect the multimedia system with external hotspots or make it available as a hotspot for external devices. When Wi-Fi is switched off, it is not possible to establish a hotspot connection. i Availability of the function is dependent on the respective country.MENGGUNAKAN SISTEM MULTIMEDIA SEBAGAI HOTSPOT WI-FI
Persyaratan:
\- The device to be connected supports at least one of the types of connection described. The connection types shown depend on the device to be connected. The function must be supported by the multimedia system and by the device to be connected. The type of connection must be selected on the multimedia system and on the device to be connected. The data volume of the vehicle or an already connected tethering device is used for the data connection. Vehicle data volume: depending on the vehicle equipment, you can purchase an Entertainment Package via the Mercedes-Benz Store. In order to use the data package included, you must conclude your own contract with a mobile phone network provider  via the Mercedes-Benz App. This can be terminated at any time and incurs no costs. Without this contract it is not possible to use the services included in the previously acquired Entertainment Package. The availability of this option is dependent on the country. If the data package option is not available or can be upgraded, you can purchase data volume directly from the mobile phone network provider for a fee. The availability of this option is dependent on the country. Some functions may first need to be activated on the device being connected. More detailed information can be found in the manufacturer's operating instructions. The use of the vehicle data tariff by external devices is not available in all countries. Multimedia system: Settings ▶ System ▶ Internet and Bluetooth Select MBUX hotspot. Select one of the following connection options.MENGHUBUNGKAN MENGGUNAKAN KODE QR
Requirement: an app for scanning the QR code is installed on the device being connected. Alternatively: the device being connected has an integrated QR code scanner (see the manufacturer's operating instructions).   G-Class - Owner's Manual MBUX multimedia system System settings ▶ Scan the QR code shown. The WLAN connection is established.MENGHUBUNGKAN MENGGUNAKAN NFC
▶ Activate NFC on the device to be connected. When the NFC symbol is displayed in the MBUX hotspot menu, hold the device to be connected to the NFC interface. Follow the instructions on the device. The WLAN connection is established.MENGHUBUNGKAN MENGGUNAKAN KUNCI KEAMANAN
Select the vehicle from the device to be connected. The vehicle is displayed with the MBUX XXXXX network name. Enter the security key which is shown in the media display on the device to be connected. Confirm the entry.MEMBUAT KUNCI KEAMANAN BARU
Select the Generate new security key option in the MBUX hotspot menu. Confirm the prompt with Yes. A new security key is generated. A connection will be established with the newly created security key. When a new security key is generated, all existing WLAN connections are then disconnected. If the WLAN connections are re-established, the new security key must be entered.Bahasa sistem
CATATAN TENTANG BAHASA SISTEM
This function allows you to determine the language for the menus and navigation announcements. The selected language affects the characters available for entry. The navigation announcements are not available in all languages. If a language is not available, the navigation announcements will be in English.MENGATUR BAHASA
Multimedia system: MENGATUR BAHASA SISTEM
A list of the available system languages is shown. Select a language. The system language is switched to the selected language.Mengatur satuan jarak
Multimedia system:  ① This function is not available in all countries. Select a unit for the distance. ▶ Activate Additional speedometer for an additional display in the driver display.  G-Class - Owner's Manual MBUX multimedia system System settingsMengaktifkan/menonaktifkan proteksi PIN sistem
Multimedia system: Settings ▶ System ▶ Data protection ▶ PIN protectionMENGATUR PIN SISTEM
Select Set PIN. Enter a four-digit system PIN. Enter the four-digit system PIN again. If both system PINs match, then the system PIN protection is active.MENGUBAH PIN SISTEM
▶ Select Change settings. Enter the current system PIN. Select Change PIN. Set a new system PIN.MENGAKTIFKAN PROTEKSI PIN SISTEM UNTUK PEMBARUAN PERANGKAT LUNAK
▶ Select Protect software updates. ▶ Activate or deactivate the function.Mengonfigurasi saran
Multimedia system: Settings ▶ System ▶ Suggestions Select [O]. ▶ Switch the options on or off individually. If an option is switched on and sufficient data has been gathered, personalised suggestions based on your user behaviour will be offered to you. These are, for example, navigation destinations visited, phone numbers dialled as well as suggestions based on your music preferences.Navigasi
When Allow destination suggestions is switched on, the vehicle makes suggestions based on your visited navigation destinations. If Commuter route is switched on, the navigation automatically detects that the vehicle is on a commuter route.Panggilan & pesan
Suggestions are offered for numbers dialled and messages sent.Kenyamanan
The vehicle makes suggestions based on the use of your comfort functions, e.g. which massage programme should be started at what time.Hiburan
Suggestions are offered for the currently played media source. Suggestions are also made for Digital Extras such as Spotify, TuneIn Radio and other streaming providers as well as for categories, for example, genre, artist and mood.Kendaraan
The suggestions for vehicle functions are displayed, e.g. for Parking Assist PARKTRONIC.Layanan suara daring
The suggestions are made available online based on your voice input and are offered on the zero layer. The zero layer is your own personalised user interface with the digital map in the foreground and the applications that you use the most. You can switch between the zero layer and the home screen with a classic menu.    G-Class - Owner's Manual MBUX multimedia system System settings  The suggestions offered depend on the equipment.Menghapus saran yang terkumpul
Multimedia system: Settings ▶ System ▶ Suggestions Select Select Yes. The suggestions are reset.Pembaruan perangkat lunak
INFORMASI TENTANG PEMBARUAN PERANGKAT LUNAK
Software updates keep your vehicle and the related systems up-to-date and prevent security flaws. Software updates are available online for vehicle components such as control units, convenience systems, locking and safety systems, driver assistance systems, suspension and drive systems as well as for the MBUX multimedia system. Software updates are available via the communication module or a Wi-Fi connection to an external hotspot. The navigation maps are also updated via updates from external storage media (e.g. USB flash drive). Install available software updates regularly. Otherwise the security of your MBUX multimedia system and individual vehicle components cannot be ensured. ① Software updates can be protected with a system PIN. Further information about the system PIN ( → page 472). Further information about software updates can be found at https://me.secure.mercedes-benz.com.MELAKUKAN PEMBARUAN PERANGKAT LUNAK
Persyaratan:
UNTUK PEMBARUAN PERANGKAT LUNAK MELALUI MODUL KOMUNIKASI DAN WI-FI:
- Your vehicle is linked to a Mercedes me user account (→ page 555). - Software updates without Mercedes me user account: The Allow software updates option is activated in the Software update menu. - For software updates via the communication module: an Internet connection exists via the communication module ( → page 565). - For software updates via Wi-Fi: a connection to an external Wi-Fi hotspot exists (→ page 566). Depending on the software update, this is started via the communication module, Wi-Fi or an external storage medium. ① Online software updates cannot be performed via external Wi-Fi hotspots that are encrypted via TKIP. G-Class - Owner's Manual MBUX multimedia system System settings If the Wi-Fi hotspot requires logging in via the browser, once the connection is successfully established the browser will open in order to start the update. To start the download follow the instructions in the browser. Multimedia system: Settings ▶ System ▶ Software update ▶MEMULAI PEMBARUAN PETA DARI MEDIA PENYIMPANAN EKSTERNAL
Connect the storage medium with the vehicle via a media interface. A message about an available map update appears on the media display. Select the message. Select Start. The map update is started.MEMULAI PEMBARUAN PERANGKAT LUNAK MELALUI MODUL KOMUNIKASI
If the Automatic online update option is active, available software updates are downloaded and installed automatically. Activate the option in order to always keep your vehicle up-to-date and avoid security flaws. ▶ Select Automatic online update. The software update is downloaded and installed automatically. If the option is deactivated, you will be informed of new software updates once. The updates are available for downloading for a limited period of time. Select an update from the list of available updates. Start the update. The software update is downloaded and installed automatically.MEMULAI PEMBARUAN PERANGKAT LUNAK MELALUI WI-FI
Some software updates require an additional connection to a Wi-Fi hotspot. The connection to an external hotspot can be established when the software update is started. Select an update from the list of available updates. Start the update. Establish the connection to a Wi-Fi hotspot. The update is downloaded and installed automatically. For software updates requiring a safe vehicle status: when the last installation step is reached, a message appears on the media display after the vehicle is switched off. Follow the step-by-step instructions on the media display to complete the installation. There are software updates that can only be installed when the vehicle is safely parked, there are no more people in the vehicle and the vehicle is locked.MEMASANG PEMBARUAN PERANGKAT LUNAK
Software updates are installed automatically after they are downloaded. As soon as the software update has been completed, a message appears in the media display. It may be necessary to restart the MBUX multimedia system. Some software updates require a safe vehicle status for the installation to be completed. They can only be carried out in a safely parked vehicle with the vehicle switched off. If this is necessary, a message appears on the media display after the vehicle is switched off. ▶ Follow the instructions on the media display. For some software updates, you can set a time for installation. The installation is carried out automatically at the scheduled time. You do not need to be in   G-Class - Owner's Manual MBUX multimedia system System settings the vehicle during installation. Note that the planned installation is cancelled as soon as the vehicle door is opened. If an installation is available where you can set the time, a message appears on the media display after the vehicle is switched off. ▶ Follow the instructions on the media display. The vehicle cannot be used while these software updates are being installed. Make sure that no persons or animals are in the path of your vehicle. Events stored in the vehicle's control units can be overwritten.KETERSEDIAAN LAYAR PENGEMUDI DAN LAYAR MEDIA
During the installation of software updates, it is not possible to use the vehicle, driver display and media display. You may receive the following display message when an installation is running:  The display message does not appear every time a software update is installed. In rare cases, an error can occur during the installation. The multimedia system automatically attempts to restore the previous version. If it is not possible to restore the previous version, the display message shown above appears every time the vehicle is started. KEGAGALAN LAYAR PENGEMUDI:
If the driver display fails or there is a malfunction, you may not recognise limitations in the functions of systems relevant to safety or the speed display, for example. This may impair the operating safety of the vehicle. Park the vehicle safely as soon as possible and notify a qualified specialist workshop ( → page 784). Further information about software updates can be found at https://me.secure.mercedes-benz.comKEGAGALAN LAYAR MEDIA:
If the media display fails or the display message shown above is shown continuously, several systems such as the reversing camera, Parking Assist PARKTRONIC or climate control are no longer available. Drive on carefully and consult a specialist workshop as soon as possible.Mengatur ulang sistem multimedia (fungsi reset)
WARNING Risk of accident due to failure of central display functions While the multimedia system is reset, its functions, such as the reversing camera, are not available. ▶ Only reset the multimedia system when the vehicle is stationary.Persyaratan:
• The vehicle is switched on. • The vehicle is stationary.   G-Class - Owner's Manual MBUX multimedia system System settings Multimedia system: Settings System ResetSAAT MENGATUR ULANG SISTEM, DATA PRIBADI DAN PENGATURAN AKAN DIHAPUS, CONTOHNYA:
• Connected devices • Individual user profiles • Biometric data The data used and saved in the multimedia system by the driver assistance systems is deleted. Select Reset. A query appears asking if the system should really be reset. Select Yes. The multimedia system is reset to the factory settings. The multimedia system is restarted after the system reset. Due to data protection, as well as the function of individual driving systems and driving safety systems, it is a requirement to carry out a complete system reset before selling the vehicle or transferring it to a third party, or after use as a hire car.  Menu Off-road
Ikhtisar menu Off-road pada sistem multimedia MBUX
You can watch an animation on this topic via the following link:MENU OFF-ROAD MENAMPILKAN INFORMASI TENTANG TOPIK-TOPIK BERIKUT:
• Overview of the most important data relevant to off-road driving. • Functions to assist driving off-road. - Recording of routes for subsequent re-use or for sharing with other drivers.KOKPIT
This tab provides an overview of the most important data. Content is displayed in different tiles that can be changed using the directional arrows. In addition, this menu contains buttons for quick-access to certain vehicle functions relevant to off-road operation.CONTOH DATA YANG DITAMPILKAN:
• Artificial horizon - Compass Altitude • Steering angle of the front wheels - Torque and power • Tyre pressure and temperature • Transparent bonnet Further information on the Cockpit tab ( → page 478).RUTE
In the Tracks tab, off-road tracks can be recorded and retraced. Depending on the equipment, dashcam videos with graphic overlays can also be generated. In conjunction with the Mercedes-Benz Stories app, video recording and route management can also be offered on a third-party device. The function helps you to drive your own routes in off-road terrain and to record these. At the start of the journey, you can set a destination and be navigated in that direction. These routes can then also be retraced. Furthermore, the Mercedes-Benz Stories App enables photos to be taken and videos to be recorded during the journey, which are then linked directly to the corresponding vehicle data. The recorded routes can be shared with other members of the community from the vehicle. Further information on the Tracks ( → page 478) tab.JELAJAHI
The Explore tab is used to download nearby tracks from the community. Further information on the Explore ( → page 479) tab.  G-Class - Owner's Manual MBUX multimedia system Off-road menuMengatur menu off-road pada sistem multimedia
Multimedia system: MENGATUR TAMPILAN PADA LAYAR TENGAH
Press ◀, ▶ or on the display itself to jump to the next display.AKSES CEPAT: MENGAKTIFKAN ATAU MENONAKTIFKAN PARKTRONIC (BANTUAN PARKIR)
Press P### to switch the function on or off. i Further information on Parking Assist PARKTRONIC ( → page 398).AKSES CEPAT: MENGAKTIFKAN ATAU MENONAKTIFKAN DSR (PENGATUR KECEPATAN SAAT MENURUN)
Press ☐ to switch the function on or off. ① Further information on DSR ( → page 364).AKSES CEPAT: MENGATUR KETINGGIAN KENDARAAN
Press 📄 to raise or lower the vehicle. Additional information about vehicle level ( → page 382).  The availability of individual functions depends on country and equipment.AKSES CEPAT: MENGHIDUPKAN ATAU MEMATIKAN KAMERA OFF-ROAD
Press ☐ to switch the function on or off. (i) Further information on the off-road camera ( → page 395). The off-road camera can also be switched on or off using the button in the off-road control panel. The availability of individual functions depends on country and equipment.Menggunakan Trek Off-road
Multimedia system: MEMBUAT TREK BARU SENDIRI
Select REC. The recording is started and the Cockpit tab is displayed while driving. When the track is completed, select STOP. Enter a track name and select the weather during the journey and the level of difficulty.  G-Class - Owner's Manual MBUX multimedia system Off-road menu Press OK to confirm. The route is saved.MEMANGGIL LAGU LOKAL ATAU LAGU YANG DIUNDUH
Select a track from the carousel. Select Drive track. The Offroad Track tile is opened. The fact that the journey is being recorded on the route is displayed below the tile. Depending on the settings and equipment, a dashcam video can be created when a USB flash drive is inserted. If the vehicle is too far away from the starting point of the route, it is automatically navigated to the start of the track. The route must be restarted at the starting point. Further information on navigation: (→ page 485).MENGEDIT/MENGHAPUS RUTE
▶ Select a track in the carousel. ▶ Call up the context menu by pressing and holding the tile. ▶ Select Rename or Delete. You can watch an animation on this topic via the following link: Menjalankan Offroad Explore
Multimedia system: Offroad ExploreMEMANGGIL DAN MENGUNDUH RUTE
The Explore tab displays routes close to the current position. If the tab has been open for some time, select Update. Select a route from the carousel. Select Download track. The selected route is downloaded and opened. It can also be accessed via the Tracks tab.  G-Class - Owner's Manual MBUX multimedia system Fit & Healthy< Fit & Healthy
Mengatur seat kinetics ENERGIZING
Persyaratan:
These functions are available only for fully electric seats with a memory function.Sistem multimedia:
Comfort Seat ▶ Select Seat kinetics. ENERGIZING seat kinetics can support back health by changing the seat position during a journey. This involves repeatedly stressing and relieving the muscles and joints by means of minor movements of the cushion and backrest.MEMULAI SEAT KINETICS
Select ▶ for the desired seat. The programme will run for the set duration.MENGONFIGURASI SEAT KINETICS
Select 📄 for the desired seat. Select Backrest, Backrest & seat surface or Seat surface. Select the desired duration for the selected seat.ENERGIZING COMFORT
IKHTISAR PROGRAM ENERGIZING COMFORT
Note that the available programmes and the associated functions depend on your vehicle equipment. Depending on your equipment, fewer functions may be available.IKHTISAR PROGRAM
- Refresh: Can have a refreshing effect with short, cool puffs of air. The seat is ventilated, the vehicle interior is illuminated with cool colours and the programme is completed with appropriate sound. - Warmth: Can increase the comfort level of the vehicle occupants. Seat, surface and steering wheel heater provide soothing warmth. The programme is completed with unobtrusive sound and warm colours. - Vitality: Can counteract diminishing attentiveness in monotonous driving situations. The activating stimulation of the vehicle occupants is carried out with invigorating sound, activating light and a vitalising massage. - Joy: Can promote a positive mood in the vehicle occupants as well as mental regeneration. This results from the activation of a massage programme, friendly sound and illumination with suitable colours. • Well-being: Can help relax the vehicle occupants. This is achieved through a relaxing massage programme, friendly light and calming sound.  G-Class - Owner's Manual MBUX multimedia system Fit & Healthy - Forest Glade: Can have a calming and soothing effect on the vehicle occupants thanks to the acoustics of the forest. The ambience is supported by a suitable animation, colours and sound. - Sounds of the Sea: Can contribute to calming the vehicle occupants. The acoustics of wave sounds and seagulls in combination with other vehicle functions create a relaxing seashore atmosphere. - Summer Rain: Can help relax the vehicle occupants. The relaxing effect of a rain shower can be experienced via acoustics and other vehicle functions inside the vehicle. • Power Nap: The programme consists of three phases. Falling asleep phase: here relaxing music is played and the air is purified by ionisation. - Sleeping phase: the active functions are deactivated or restricted as much as possible. - Waking phase: slightly stimulating music is played and the air is purified by ionisation. Additionally, functions such as fragrancing, seat ventilation and a massage programme are activated. \- Training: Can counteract the onset of muscle tension, limbs falling asleep or stress with targeted relaxation or stimulation exercises. The exercises are demonstrated in short videos. The training consists of audio content and a brief animation. The audio content is conceived so that it can also be played back when you are driving. Animations are only shown when the vehicle is stationary. Always observe the traffic conditions if you are training when driving. \- Tips: The system gives auditory tips for possible exercises or measures for improving the comfort level of the vehicle occupants. By selecting the desired area of the body you can receive targeted tips for the comfort level of this area. Most programmes that have been started for one seat can also be transferred simultaneously to another seat. MEMULAI PROGRAM ENERGIZING COMFORT
PERINGATAN
Increased risk of accident when using the ENERGIZING COMFORT programmes Tips and Training The ENERGIZING COMFORT programmes Tips and Training can distract you while driving. ▶ Only carry out exercises when the traffic situation permits. When listening to the tips, make sure that you are aware of the traffic situation around you at all times.PERINGATAN
Risk of becoming trapped when using the ENERGIZING COMFORT programme Power Nap The following systems may be automatically moved when using the ENERGIZING COMFORT programme Power Nap: - Side windows - Sliding sunroof - Roller sunblinds As a result you or other vehicle occupants may become entrapped. ▶ Make sure that there is sufficient space behind the front seats. ▶ Make sure that no body parts are in the area of movement.   G-Class - Owner's Manual MBUX multimedia system Fit & HealthyPersyaratan:
• The vehicle is switched on.UNTUK MULAI POWER NAP:
• Only the power supply is on. • The doors are closed. • The vehicle is secured against rolling away. - The state of charge of the high-voltage battery is sufficient for the use of the auxiliary climate control. Multimedia system: MEMULAI DAN MENGHENTIKAN PROGRAM
Select a programme. Select ▶ for the desired seat. Select □ to stop the programme. If, during an active programme, a function requirement is no longer met, a corresponding message appears. The active programme is cancelled.MENGONFIGURASI PROGRAM
Select a programme. Select Settings. ▶ Switch the functions included in the programme on or off.MENGATUR DURASI
Select a programme. Select Settings. ▶ Select the desired duration.MEMULAI POWER NAP
Select Power Nap. Select ▶ for the desired seat.SAAT KENDARAAN DIAM, TINDAKAN BERIKUT DILAKUKAN SAAT POWER NAP DIMULAI:
• The roller sunblinds are extended. • The doors are locked. • The windows and sliding sunroof are closed. • The parking brake is applied. Select ■ to stop the programme.MEMULAI PROGRAM LATIHAN
Select Training. Select ▶ a programme. Select ■ to stop the training programme. The animations demonstrating the exercises are faded out when the vehicle is in motion and you only hear the instructions.  G-Class - Owner's Manual MBUX multimedia system Fit & HealthyTIPS MEMULAI
Select Tips. Select ▶ an area of the body. Select ■ to stop playback of the tip.ENERGIZING COACH
FUNGSI ENERGIZING COACH
PERSYARATAN:
- The ENERGIZING COACH Digital Extra is activated in the Mercedes-Benz Portal or the Mercedes-Benz App. - The Mercedes-Benz ENERGIZING app is installed on the mobile phone to use the Digital Extra. With ENERGIZING COACH you can evaluate the driving and driver situation. Depending on the situation, it offers recommendations for the start of an appropriate ENERGIZING COMFORT programme.PROGRAM BERIKUT MUNGKIN DISARANKAN:
Vitality As an activating programme in monotonous driving situations or for long journey times, for example Information on the vitality program see ( → page 480). - Joy As a balancing programme in demanding driving situations Information on the Joy programme see ( → page 480). - Refresh As a refreshing programme when temperatures rise Information on the Refresh programme; see ( → page 480). \- Warmth As a warming programme when temperatures drop Information on the Warmth programme; see ( → page 480). By connecting a Garmin fitness tracker, for example the Garmin vivoactive ® 3, additional information can be entered into the evaluation for the recommendation of an ENERGIZING COMFORT programme. The additional information includes the stress level, that is calculated by the fitness tracker. The stress level is based primarily on the pulse rate.PERSYARATAN UNTUK INTEGRASI INFORMASI TAMBAHAN MELALUI PELACAK KEBUGARAN GARMIN:
- Your fitness tracker is connected with your Garmin account. - Your Garmin account is linked to your Mercedes-Benz user account. If you wear your Garmin fitness tracker at night also, the sleep data is included in the evaluation of the ENERGIZING COACH.PERSYARATAN INTEGRASI DATA TIDUR:
\- The Garmin fitness tracker is synchronised with the Garmin account before the beginning of the journey.MEMANGGIL TAMPILAN COACH ENERGI
Persyaratan:
• The fitness tracker is connected with your Garmin account. - Your Garmin account is connected with your Mercedes-Benz user account in the Mercedes-Benz ENERGIZING app.   G-Class - Owner's Manual MBUX multimedia system Fit & Healthy • The mobile phone is connected to the multimedia system ( → page 528). - You are logged in with your Mercedes-Benz profile both in the vehicle and in the Mercedes-Benz ENERGIZING app. Multimedia system: Apps ENERGIZING COACH Your current pulse as well as an evaluation of your pulse for the last 30 minutes driving time are shown. A corresponding fault message is shown if there is no mobile phone connected or no pulse can be sent to the system for an extended period. Only pulse values which fall into the range from 30 - 140 (possibly also 150) bpm will be shown on the media display. The pulse values have no medical validity but are only informative in nature and are therefore also not required to be accurate.   G-Class - Owner's Manual MBUX multimedia system Navigation and trafficNavigasi dan lalu lintas
Mengaktifkan navigasi
Multimedia system:  Alternatively, switch on the MBUX voice assistant ( → page 439). Switch to navigation. The map appears.Ikhtisar navigasi
DIGITAL MAP  ① Navigation module (reduced view) Route guidance active: The navigation module shows the information relevant to the route in the zoomed-out view, e.g. the destination or a traffic delay ☒ Ends the current route guidance Tapping opens the navigation module and displays the route overview ( → page 496) Sets map orientation and map type 3 Calls up the telephone menu Current vehicle position (vehicle symbol or arrow) 5 Calls up entertainment applications Elevation and map scale ( → page 514) 7 Navigation window shows the next manoeuvre (zoomed out view) or the route monitor (zoomed in view) Route guidance active: route monitor shows, e.g. route sections, upcoming driving manoeuvres with lane recommendations, destination, traffic delays, 3D images at motorway exits, online contentMENekan Ⓞ BEBERAPA KALI MENGUBAH ORIENTASI PETA DALAM URUTAN INI:
2D and to the north • 2D and in the direction of travel • 3D and in the direction of travel • Map with complete route   G-Class - Owner's Manual MBUX multimedia system Navigation and traffic If the map is moved, the map switches between 3D direction of travel and 2D north orientation.JENIS PETA BERIKUT ② TERSEDIA:
Daytime display • Night-time display Satellite map If you notice a problem with the digital map, you can report it at https://mapfeedback.here.com/#/report. You can watch an animation on this topic via the following link: You can watch an animation on this topic via the following link: You can watch an animation on this topic via the following link:Memasukkan tujuan
CATATAN TENTANG MEMASUKKAN TUJUAN
⚠ WARNING Risk of distraction from operating integrated communication equipment while the vehicle is in motion If you operate communication equipment integrated in the vehicle when driving, you could be distracted from the traffic situation. This could also cause you to lose control of the vehicle. ▶ Only operate this equipment when the traffic situation permits. If you cannot be sure of this, stop the vehicle whilst paying attention to road and traffic conditions and operate the equipment with the vehicle stationary. You must observe the legal requirements for the country in which you are currently driving when operating the multimedia system.MEMASUKKAN POI ATAU ALAMAT
Persyaratan:
• For the online search: - There is an Internet connection. - Digital Extras are available. - You have created a Mercedes me ID. - The vehicle is linked to the Mercedes me ID and you have accepted the terms of use. - Further information can be found at: https://www.mercedes.me   G-Class - Owner's Manual MBUX multimedia system Navigation and traffic The Digital Extra is available and has been activated. ① If Online Search is not available, the search is performed using the data of the digital map. Multimedia system:   Example: entering a POI or address ① Input line with current entry 2 Deletes an entry 3 Selects previous destinations Displays and selects additional destination searches Adopts the search result in the input line and continues the search 6 Search result 7 Deletes the last character entered Hides the keypad 9 Activates voice entry. Sets the written language 11 Switches to digits and special characters 12 Switches to upper-case or lower-case letters If available, selecting the 3 symbol starts the MBUX Voice Assistant. Enter a destination. The entries can be made in any order. The search results are displayed in a list. ① Online search results for POIs may contain additional information, for example opening times and ratings. The information is provided by an online map service. This online function is not available in all countries.ENTRI BERIKUT DAPAT DIBUAT, MISALNYA DI ①:
• Town, street, house number or street, town Postcode • POI name or POI category, e.g. Restaurants Town, POI name - Contact name • Geo-coordinates ( → page 490) Hide the keyboard with OK. ▶ Select the destination in the list. The following menu shows the selected destination with the address information and a corresponding map section. The menu enables the route to be calculated.   G-Class - Owner's Manual MBUX multimedia system Navigation and trafficMEMILIH SARAN TUJUAN
Persyaratan:
• The Allow destination suggestions option is switched on ( → page 472). - The multimedia system has gathered sufficient data in order to show destination suggestions. Multimedia system:  Select Suggestions. The route is calculated in the following menu. ① If Suggestions has been selected, a menu is available via ⋯. The menu offers settings for the suggestions and memory functions. i Managing destination suggestions ( → page 506).MEMILIH DESTINASI SEBELUMNYA
Multimedia system:  ▶ Select Previous destinations. Select the destination. The following menu enables the route to be calculated. (i) You can save a destination as a favourite ( → page 505).MEMILIH POI
Persyaratan:
- For use of personal POIs: a USB device is connected with the multimedia system. - Personal POIs with the GPS Exchange format (.gpx) have been saved in the PersonalPOI folder on the USB device. Multimedia system:  Select POIs. Select one of the displayed quick-access categories, e.g. P. Select the POI. The following menu enables the route to be calculated. or Select All categories or Personal POIs (see requirements). Select the category. Select the POI. The following menu enables the route to be calculated.MENGATUR FILTER PENCARIAN SETELAH MEMILIH KATEGORI POI
POSISI PENCARIAN DEFAULT TERGANTUNG PADA STATUS PANDUAN RUTE:
• If route guidance is not active, In the vicinity is searched. • If route guidance is active, Along the route is searched.   G-Class - Owner's Manual MBUX multimedia system Navigation and traffic When the search results are displayed, select Filter. Select the search position, e.g. In the vicinity. If a route with intermediate destinations already exists and Near destination has been selected in the search filters, the destination is selected for the search. or Select the desired travelling time to the point of interest. Select Search results.MENGONFIGURASI KATEGORI UNTUK AKSES CEPAT
KATEGORI DITAMPILKAN:
• As symbols after calling up the destination entry via 📞 • As a list after calling up All categories In the POI menu, select All categories. Select ☆ or ★ for a category. Tapping on ☆ adds the category. Tapping on ★ removes the category. Use → to change back. The new categories are shown after the destination entry is called up the next time. If all available quick-access positions are full, select the category to be replaced.MENGUBAH URUTAN KATEGORI AKSES CEPAT
In the POI menu, press and hold a category for quick access. Tap on the arrows next to the selected category. The arrows for the other categories are greyed out. Drag the category up or down. SelectMENGHAPUS KATEGORI AKSES CEPAT
In the POI menu, press and hold a category for quick access. Select ★ for the chosen category. Select Delete. Select ▼.MENGUBAH KATEGORI UNTUK POI PRIBADI
Select Personal POIs. Press on a category as long as is necessary until a menu appears. ▶ Select Change name and enter a name. ▶ Select Change icon and select a symbol. ▶ Select Delete and confirm the prompt with Yes.MEMILIH KONTAK UNTUK MEMASUKKAN DESTINASI
Persyaratan:
• A mobile phone is connected to the multimedia system ( → page 528). • The contacts from the mobile phone have been downloaded. • The contact has a navigable address.   G-Class - Owner's Manual MBUX multimedia system Navigation and traffic • The address data can be located on the digital map.Sistem multimedia:
 Enter a contact in the entry line. Select the address. The following menu enables the route to be calculated. Alternatively, after calling up the destination entry, you can enter the name of a contact in the search field.MEMASUKKAN KOORDINAT GEO
Multimedia system:  Enter the geo-coordinates as latitude and longitude.CONTOH FORMAT INPUT:
• 47°58'11"N 7°57'25"E (degrees, minutes and seconds) • 47.969722 7.956944 (decimal degrees) Confirm the entry. The following menu enables the route to be calculated.MEMILIH TUJUAN DI PETA
Multimedia system:  If necessary, move the map ( → page 513).  Press and hold on the map. Available destinations are displayed. or ▶ Briefly press on a POI symbol. The POI is selected. If there are several POIs at this map position, a list appears. Select the destination in the Selected objects list. The following menu enables the route to be calculated.MEMILIH TUJUAN DARI FAVORIT
Persyaratan:
• Destinations are saved as favourites. Save a previous destination or a destination suggestion as a favourite (→ page 505). Multimedia system:  Select Favourites. Select a favourite. The route is calculated in the following menu.ALAMAT RUMAH DAN KANTOR SUDAH DIATUR
Select Home or Work. The following menu enables the route to be calculated.  G-Class - Owner's Manual MBUX multimedia system Navigation and trafficALAMAT RUMAH DAN KANTOR BELUM DIATUR
▶ Select Home or Work. The prompt No "Home" address available. Set address now? appears, for example. Select Yes. ▶ Search for or select the address. Select Save.MENGHAPUS FAVORIT
Select ⋯ for a favourite. Select Delete. or ▶ Select Delete all. Confirm the prompt. When all the favourites have been deleted, Add favourite is available, for example.MEMILIH TUJUAN YANG DITERIMA
Persyaratan:
• There is an Internet connection for receiving external destinations. • A destination has been sent to the vehicle. • Destinations have been shared from another seat in the vehicle. Multimedia system:  The vehicle can receive destinations from Digital Extras. You will be informed when a destination is received. ▶ Select Received destinations. ▶ Select a destination. The route is calculated in the following menu. MENGHAPUS TUJUAN YANG DITERIMA
Delete a destination with □. or Select Delete all.  G-Class - Owner's Manual MBUX multimedia system Navigation and trafficRute
MENGHITUNG RUTE
 Example: detailed display ① Calls up alternative routes ② Calculates the route and starts route guidance 3 Selects a point of interest in the vicinity of the destination 4 Destination address The detailed display can contain additional entries such as online content After selection of a destination the route is be calculated. ▶ Select one of the options.MEMANGGIL RUTE ALTERNATIF
Select Routes. ▶ Select an alternative route ( → page 497).MEMULAI PANDUAN RUTE
Select Let's go!.MEMANGGIL TAMPILAN RINCI DENGAN ALAMAT TUJUAN
▶ Pull the bar above ② upwards. Depending on the destination selection and availability, online content, for example ratings and weather information, is shown.  If the destination is in a different time zone, a message is displayed. To share a destination: select Share. This option allows you to scan the displayed QR code. To save a destination as a favourite: select ★ Favourite and then an option. To call up an Internet address: if a web address is available, select www. To call the destination: if a telephone number is available, select Call.MENCARI POI DI SEKITAR TUJUAN YANG DITAMPILKAN
▶ Select In the vicinity. Search using categories, enter a search entry or search for a personal POI ( → page 488).MENAMBAHKAN TUJUAN ANTARA PADA RUTE YANG ADA ATAU MEMULAI PANDUAN RUTE BARU
Select Add. The selected destination address is set as the next intermediate destination. Route guidance begins. There are already four intermediate destinations: confirm the prompt with Yes and select an intermediate destinations in the route overview ( → page 496), that should be overwritten with the new intermediate destination. or Select Replace. The selected destination address is set as a new destination. Route guidance begins.   G-Class - Owner's Manual MBUX multimedia system Navigation and traffic JIKA ANDA MEMANGGIL MENU SELAMA PANDUAN RUTE, LEBIH BANYAK PILIHAN YANG TERSEDIA:
• To change the order of destinations, select Move ( → page 496). • To delete the destination, select Delete ( → page 496). • To cancel route guidance, select Cancel route guidance.MENGAKTIFKAN ATAU MENONAKTIFKAN ZONA EMISI RENDAH UNTUK RUTE
Persyaratan:
• Digital Extras are available. • You have created a Mercedes me ID. - The vehicle is linked to the Mercedes me ID and you have accepted the terms of use. - The Digital Extra Traffic restriction is available and activated in the Mercedes-Benz Portal. The Digital Extra is free of charge for three years after registration. Multimedia system:  ▶ Switch on Traffic restrictions. The low emission zones along the route are shown on the digital map and in the route overview. Before you enter a low emission zone, you will be shown a notification in the central display.i FUNGSI PEMBATASAN LALU LINTAS DINONAKTIFKAN:
• No low emission zones are shown on the map.MEMILIH JENIS RUTE
Multimedia system: MENGGUNAKAN RUTE ONLINE
The route is calculated as a fast route with a short journey time. ▶ Switch on the option.MEMPERHITUNGKAN INFORMASI LALU LINTAS UNTUK RUTE
Select Dynamic route guidance ▶. Select one of the options.PENJELASAN PILIHAN:
• Automatic Traffic reports via Live Traffic Information are taken into account ( → page 506). Live Traffic Information and FM home screen are not available in all countries. After asking A prompt appears when a new route is detected with a shorter journey time based on traffic reports. You can continue to use the current route or use the dynamic route instead ( → page 494). Off No traffic reports are taken into account for the route.  G-Class - Owner's Manual MBUX multimedia system Navigation and trafficMENGHITUNG RUTE ALTERNATIF
Multimedia system: Navigation View ▶ Activate Overview of route after start. Alternative routes are calculated for every route.MENERIMA REKOMENDASI JALAN MEMUTAR SETELAH PERMINTAAN
Persyaratan:
- After asking is switched on (→ page 493) in the Dynamic route guidance menu. • Route guidance is active. • There are traffic reports for the current route. If a new route with a shorter driving time is determined, the current and new routes will be shown. If another application is active, a notification is hidden. ▶ Confirm the notification. To accept the new route: select Accept. To maintain the current route: select Keep to current route.MEMILIH OPSI RUTE
Multimedia system: Navigation Route Avoid optionsMENGHINDARI ATAU MENGGUNAKAN BAGIAN RUTE, MIS. JALAN TOL ATAU FERI
▶ Activate or deactivate the avoid option. Avoid: the option is activated. The route avoids motorways, for example.  Use: the option is deactivated. The route takes motorways into consideration, for example. The selected route options cannot always be taken into account. Therefore, a route may include a ferry, for instance, even though the Avoid ferries avoid option is enabled. A message then appears and you will hear a corresponding message.MENGHINDARI ATAU MENGGUNAKAN JALAN BERBAYAR
The use of toll roads requires a usage fee (toll). Select Toll roads ▶. ▶ Activate or deactivate Avoid all. If the option is activated, the route avoids toll roads. If the option is deactivated, the route takes toll roads into account. or Select an option for Payment by cash or card or Electronic billing. Avoid: the route avoids toll roads with the selected method of payment. Use: the route takes into account roads that require a toll corresponding with the payment type selected.MENGHINDARI ATAU MENGGUNAKAN JALAN YANG MEMERLUKAN STIKER TOLL KHUSUS
A vignette allows for the use of a route network for a limited time period. Select Avoid vignette roads ▶. ▶ Activate or deactivate Avoid all. or  G-Class - Owner's Manual MBUX multimedia system Navigation and traffic ▶ Switch individual countries on or off in the list. Avoid: the option is activated. The route avoids roads requiring a special toll sticker in the selected countries. Use: the option is deactivated. The route takes into account roads in the selected country which require you to pay a time-based fee (vignette). ① These route options are not available in every country.MENGHINDARI ATAU MENGGUNAKAN AREA DENGAN PERSYARATAN ZONA EMISI RENDAH:
- An active Internet connection is indicated in the status line on the media display with the ➕ symbol. • The Traffic restrictions option is switched on. ▶ Activate or deactivate Area with low emission zones. Avoid: the option is activated. The route avoids all low emission zones restricted for the vehicle. These are displayed in red on the map. Use: the option is deactivated. The restricted low emission zones for the vehicle are passed through on the route. A warning is displayed before you drive into a low emission zone.MENGHINDARI AREA
Select Avoid areas ≥ ( → page 514).MEMILIH NOTIFIKASI UNTUK RUTE
Persyaratan:
- For an audible indication when approaching a personal POI: the USB device contains personal POIs. • The USB device is connected with the multimedia system.  • The category in which the personal POI belongs is activated. Multimedia system: Navigation Messages & tonesMENGAKTIFKAN ATAU MENONAKTIFKAN PENGUMUMAN NAVIGASI
▶ Activate Reduced messages. If a driving instruction is available for a simple change in direction, you hear a brief announcement, e.g. "turn right in 200 m". The number of driving instructions along the route is minimised. ▶ Activate Detailed messages. If a driving instruction is available and there is a complex driving situation, you hear supplementary information, e.g. "In 200 m turn right and continue to follow the major road". Additional driving instructions are issued for the route, for example on turning major roads. ▶ Activate Announce street names. The name of the street into which the vehicle should turn is announced. ① This option is not available in all countries and languages.MENGAKTIFKAN ATAU MENONAKTIFKAN PENGUMUMAN LALU LINTAS
▶ Activate or deactivate Announce traffic warnings. If available, traffic warnings are announced, e.g. before the end of traffic jams that pose a risk.INDIKASI AUDIBLE SAAT MENDEKATI POI PRIBADI
Select Personal POIs. Activate a category. When approaching a personal POI in the selected category an audible indication will be issued.   G-Class - Owner's Manual MBUX multimedia system Navigation and trafficMENAMPILKAN RINGKASAN RUTE
Persyaratan:
• A destination is entered. Multimedia system:   Example: route guidance is active ① Enters an address or POI 2 Destination and time of arrival beneath that the current distance to the destination and the chequered flag Alternative routes Searches for parking 5 Switches traffic information display on or off ⑥ Makes settings for View, Messages & tones and Route When route guidance is active, the destination and entered intermediate destinations are shown.TERGANTUNG PADA RUTE, SITUASI LALU LINTAS, DAN DATA YANG TERSEDIA, INFORMASI LEBIH LANJUT DITAMPILKAN:
• Name, destination address Symbols for intermediate destination and destination • Phone number (if available) • Web address (if available) - Traffic information The route can include up to four intermediate destinations. ▶ Select one of the options.MERENCANAKAN RUTE
Multimedia system:  Enter the intermediate destination ( → page 44). After entering the destination and new calculation of the route, the route overview is shown again. The route contains a new intermediate destination. If there are already four intermediate destinations, delete an intermediate destination ( → page 496).MENGEDIT RUTE DENGAN TUJUAN ANTARA
Persyaratan:
\- The destination and at least one intermediate destination have been entered.   G-Class - Owner's Manual MBUX multimedia system Navigation and traffic Multimedia system: MENGUBAH URUTAN TUJUAN
In the route overview, press and hold on a destination. Move the destination with ◀ or ▶. Tap on [♥]. The editing mode is ended.MENGHAPUS TUJUAN
In the route overview, press and hold on a destination. Tap on □. The editing mode is ended.MENAMPILKAN DAFTAR RUTE
Multimedia system:  Tap on navigation window ⑦ on the digital map (→ page 485).  Example: route list Upcoming manoeuvre with turning arrow, distance to manoeuvre, street number, street name Switches on navigation announcements Switches off navigation announcements Including the following route sections on the route to the destination 2 Current vehicle position The route sections are displayed in the navigation window. The route list is updated during the journey. Motorway information shows the available service facilities. After selecting symbols, e.g. for car parks, service areas or motorway exits, the POI is adopted as an intermediate destination or destination. Press the arrow at the bottom of the navigation window briefly. Swipe up or down. Select a route section. The map section is displayed. To return to vehicle position: select Current position.MEMILIH RUTE ALTERNATIF
Persyaratan:
• A route has already been created. • The Overview of route after start option is switched on (→ page 494).   G-Class - Owner's Manual MBUX multimedia system Navigation and traffic Multimedia system:   Example: alternative routes Original route is highlighted Alternative routes with indication of the difference in driving time In ② a faster route may also be shown that is considerably longer.INFORMASI RUTE BERIKUT DITAMPILKAN:
- Driving time • Time of arrival • Distance to the destination - Avoid options based on the set route options - Driving time saved or lost compared with the original route When the alternative routes have been calculated, display the route in the navigation window by swiping to the right or left.MENGUBAH JENIS RUTE
Select Filter. ▶ Switching the route type on or off.MENGHINDARI ATAU MENGGUNAKAN OPSI RUTE
Select Filter. ▶ Switch the route options on or off (→ page 494). ▶ Confirm the settings with Finished. To start route guidance to the alternative route: select Start. To select an alternative route on the map: touch any point on the alternative route. The alternative route is highlighted.MENGAKTIFKAN RUTE KOMUTER
Persyaratan:
• You have created a profile ( → page 458). • The Allow destination suggestions option is switched on (→ page 472). • The Commuter route option is switched on. • The multimedia system has gathered sufficient data in order to show destination suggestions. • Routes have been learned for these destination suggestions. • Route guidance is active. ① This commuter route is not available in all countries. G-Class - Owner's Manual MBUX multimedia system Navigation and traffic  Multimedia system:  ▶ Activate Commuter route. The navigation system automatically detects that the vehicle is on a commuter route. For the daily commuter route, traffic incidents on the route are also reported when driving without active route guidance. To select commuter route: select Start. Route guidance begins without spoken driving instructions. i A commuter route is suggested even with delays on the route.  SWITCHING THE AUTOMATIC FILLING STATION SEARCH ON OR OFF Multimedia system:  Select Driving. ▶ Activate or deactivate Automatic filling station search. If Automatic filling station search is switched on, a notification appears in which the search for filling stations is started.MEMULAI PENCARIAN SPBU OTOMATIS
Requirements: • The automatic filling station search is activated ( → page 499).SITUASI BERKENDARA
The fuel level in the fuel tank reaches the reserve fuel level. The following notification is shown on the central display: Fuel reserve Tap here to search for filling stations.. ▶ Confirm the notification. The automatic filling station search begins. The available filling stations along the route or in the vicinity of the vehicle's current position are displayed. ▶ Select a filling station. Calculate the route with the filling station as an intermediate destination or as a destination ( → page 492). If there are already four intermediate destinations: select Yes in the prompt. The selected filling station is entered in the route overview at position 1. Intermediate destination 4 is deleted. Route guidance begins.MEMULAI PENCARIAN SPBU OTOMATIS
Persyaratan
• ATTENTION ASSIST is activated ( → page 349). • You are driving on a motorway. • There are service stations along the route section ahead.SITUASI BERKENDARA
▶ Confirm the notification. The service station search starts. The available service stations along the route or in the vicinity of the vehicle's current position are displayed. Select a service station.   G-Class - Owner's Manual MBUX multimedia system Navigation and traffic Calculate the route with the service station as an intermediate destination or as a destination ( → page 492). If there are already four intermediate destinations: select Yes in the prompt. The selected service station is entered in the route overview at position 1. Intermediate destination 4 is deleted. Route guidance begins.MEMULAI DAN MENGEDIT RUTE TERSIMPAN
Persyaratan:
- A USB device with stored routes is connected with the multimedia system ( → page 575). - The route is stored in the "Routes" folder with the GPS Exchange data format (.gpx).Sistem multimedia:
Navigation Press the double arrow in the destination input line until Stored routes is displayed. ▶ Select Stored routes.MEMULAI RUTE TERSIMPAN
Select a route. Select Start: route guidance at start or Start: current location. Route guidance begins.MENGUBAH NAMA RUTE
▶ Press on a route until a menu is shown. Select Rename. Enter the name. Select OK.MEREKAM DAN MENYIMPAN RUTE
Persyaratan:
• A USB device is connected with the multimedia system ( → page 575).Sistem multimedia:
Navigation Press the double arrow in the destination input line until Stored routes is displayed. ▶ Select Stored routes.MEMULAI PEREKAMAN
▶ Select Start recording. A white rectangle is displayed. The route is stored on the USB device.MENGHENTIKAN PEREKAMAN
▶ Press the white rectangle. ▶ Select End recording.   G-Class - Owner's Manual MBUX multimedia system Navigation and trafficPanduan rute
CATATAN TENTANG PANDUAN RUTE
PERINGATAN
Risk of distraction from operating integrated communication equipment while the vehicle is in motion If you operate communication equipment integrated in the vehicle when driving, you could be distracted from the traffic situation. This could also cause you to lose control of the vehicle. ▶ Only operate this equipment when the traffic situation permits. If you cannot be sure of this, stop the vehicle whilst paying attention to road and traffic conditions and operate the equipment with the vehicle stationary. You must observe the legal requirements for the country in which you are currently driving when operating the multimedia system. Route guidance begins once a route has been calculated. The road and traffic rules and regulations always have priority over multimedia system driving instructions. Driving instructions are, for example navigation announcements, changes in direction and lane recommendations. Changes in direction and lane recommendations are shown in the navigation window.TAMPILAN DAN FUNGSI BERIKUT JUGA TERSEDIA DI JENDELA NAVIGASI, MISALNYA:
- Route list • Destination information • Traffic information, e.g. length of traffic jam, delay • Motorway facilities - Car park search Emergency corridors If you do not follow the driving instructions or if you leave the calculated route, a new route is calculated automatically. If, for example, the route is diverted or the direction of a one-way road has been reversed, driving instructions may deviate from the actual traffic situation. Alternatives may be offered during route guidance, e.g. before passing a motorway exit road. The additional driving time for the journey along the motorway exit is shown. For this reason, you must always observe road and traffic rules and regulations during your journey as well as the prevailing traffic conditions. The route can differ from the ideal route, for example in the event of roadworks or incomplete digital map data.CATATAN TENTANG PENERIMAAN SATELIT
The correct function of the navigation system depends amongst other things on reception of the satellite system used. In certain situations satellite reception can be impaired, malfunction or even not be possible, e.g. in tunnels or in multi-storey car parks.IKHTISAR PERUBAHAN ARAH
PERUBAHAN ARAH DITAMPILKAN PADA TAMPILAN BERIKUT:
• Detailed image of the junction The display appears when you drive into a junction. 3D image   G-Class - Owner's Manual MBUX multimedia system Navigation and traffic The display appears when driving on junction-free, multi-lane roads, for example at motorway exits and motorway interchanges.  Example: detailed image of the crossing with upcoming changes of direction 1 Name of the street to turn into Change of direction arrow (also on the map) 3 Current vehicle position Current distance to the change of direction  Example: 3D image of the upcoming change of direction Manoeuvre point Change of direction arrow (also on the map) Larger map scales show change of direction points instead of change of direction arrows. 3 Current distance to the change of direction Current vehicle position ADA TIGA FASE SAAT BERUBAH ARAH:
• Preparation phase If there is enough time between the changes of direction, the multimedia system prepares you for the upcoming change of direction. A navigation announcement is issued, e.g. "Prepare to turn right". The navigation window shows: the direction information or the name of the road which is to be turned into as well as the distance to the change of direction. - Announcement phase The multimedia system announces the upcoming change of direction, e.g. by announcing "Turn right in 300 m". When the Auto zoom map orientation is switched off ( → page 517), a detailed representation of the junction or a 3D image of the upcoming change in direction appears in the navigation window. • Change-of-direction phase The multimedia system announces the imminent change of direction, e.g. by announcing "Now turn right". Example of 3D image: when the distance to manoeuvre point ① is shown with 0 m and the symbol for current vehicle position ④ has reached manoeuvre point ① the change in direction is carried out. ① Changes of direction are also shown in the driver display. G-Class - Owner's Manual MBUX multimedia system Navigation and trafficIKHTISAR REKOMENDASI JALUR
 Example: lane recommendations ① Non-recommended lane (grey arrow) ② Possible lane (white arrow) Recommended lane (white arrow, blue background) This display appears for multi-lane roads. If the digital map contains the relevant data, lane recommendations are displayed in the navigation window.PENJELASAN JALUR YANG DITAMPILKAN:
• Recommended lane In this lane, you will be able to complete both the next change of direction and the one after that. Possible lane In this lane, you will only be able to complete the next change of direction. • Non-recommended lane In this lane, you will not be able to complete the next change of direction without changing lane. During the change of direction, new lanes may be added. Bus lanes are also shown.  ① Lane recommendations are also shown in the driver display.MENGGUNAKAN INFORMASI JALAN TOL
When driving on the motorway, upcoming motorway facilities and available service facilities are shown in the route list. These include car parks, service stations or motorway exits with service POIs, for example. The entries are sorted according to increasing distance from the current vehicle position. Select an entry. If several service facilities are available, select a service facility from the list. The destination address and the map position are shown. Calculate the route ( → page 492). or ▶ Search for a POI in the vicinity. or Use other functions, e.g. store the destination address of the service facility.TUJUAN TERCAPAI
Once the destination is reached, you will see the ☐ chequered flag. Route guidance will now be complete. The navigation menu is shown. When an intermediate destination has been reached, you will see the intermediate destination flag with the number of your intermediate destination. Route guidance is continued.   G-Class - Owner's Manual MBUX multimedia system Navigation and trafficMENGAKTIFKAN ATAU MENONAKTIFKAN PENGUMUMAN NAVIGASI
MENONAKTIFKAN
During a navigation announcement, press the button on the steering wheel or controller in the centre console. The Spoken driving recommendations have been deactivated. message appears. or In the route list for a driving manoeuvre select 📄 (→ page 497). The symbol changes to 📄.MENGAKTIFKAN
Press the button on the steering wheel or on the controller in the centre console again. or In the navigation window, select 📄 for an upcoming driving manoeuvre. The current navigation announcement is played. The symbol changes to 📄.MENGAKTIFKAN ATAU MENONAKTIFKAN PENGUMUMAN NAVIGASI SELAMA PANGGILAN TELEPON
Press the button on the steering wheel on the right. or Tap on in the media display. Select Settings. Select System. Select Audio. ▶ Select Navigation & traffic announcements. ▶ Activate or deactivate Driving recommendations during call. To leave the menu: select ↩.MENYESUAIKAN VOLUME PENGUMUMAN NAVIGASI
Multimedia system: Settings ▶ System ▶ Audio Navigation & traffic announcements ▶ Select Driving recommendation vol.. Set the volume. To leave the menu: selectPANDUAN RUTE AKTIF
MENGAKTIFKAN ATAU MENONAKTIFKAN PEMADAMAN AUDIO SELAMA PENGUMUMAN NAVIGASI
Press the button on the steering wheel on the right. or Tap on in the media display. Select Settings. Select System. Select Audio. ▶ Select Navigation & traffic announcements. ▶ Activate or deactivate Audio fadeout during navigation announcements.    G-Class - Owner's Manual MBUX multimedia system Navigation and traffic  To leave the menu: select ↗.MENGULANG PENGUMUMAN NAVIGASI
Persyaratan:
• A route has already been created. • Route guidance is active. Multimedia system: Navigation In the navigation window, select 📄 for an upcoming driving manoeuvre. Select The current navigation announcement is repeated.MEMBATALKAN PANDUAN RUTE
Persyaratan:
• A route has already been created. • Route guidance is active. Show the navigation menu. Select ☐ in the navigation menu (→ page 485).TINJAUAN STATUS DI LUAR JALAN SELAMA PANDUAN RUTE
Due to roadworks, for example, there may be differences between the data on the digital map and the actual course of the road. In such cases, the multimedia system will temporarily be unable to locate the vehicle's current position on the digital map. The vehicle is off-road. Road not mapped will be shown. Route guidance may be restricted. When the vehicle is back on a road known to the multimedia system, route guidance continues as normal.Tujuan
MENYIMPAN POSISI KENDARAAN SAAT INI
Multimedia system: Navigation When the map is shown, tap on the current vehicle position. Select Store position. To save as a favourite: select Save as favourite. To save as "Home" address: select Home. To save as "Work" address: select Work.MENGELOLA TUJUAN SEBELUMNYA
Multimedia system: Navigation ▶ Select Previous destinations. Select ⋯ for the last destination.MENYIMPAN TUJUAN TERAKHIR SEBAGAI FAVORIT
Press and hold on one of the previous destinations. A menu appears. To save as a favourite: select Save as favourite. To save as "Home" address: select Home. To save as "Work" address: select Work.   G-Class - Owner's Manual MBUX multimedia system Navigation and trafficMENGHAPUS TUJUAN SEBELUMNYA
▶ Select Previous destinations. Select ⋯ for the last destination. Select Delete. or ▶ Select Delete all. Confirm the prompt. When all the favourites have been deleted, Add favourite is available, for example.MENGEDIT SARAN TUJUAN
Persyaratan:
• The Allow destination suggestions option is switched on ( → page 472). - For the display of destination suggestions: the multimedia system has gathered sufficient data. Multimedia system: Navigation Select Suggestions. ▶ Press and hold on a destination suggestion. A menu appears. To cancel a destination suggestion: select Do not suggest now or No longer suggest. To save a destination suggestion: select Save as favourite, Home or Work. i Delete a destination suggestion from the favourites ( → page 490).Panduan rute dengan laporan lalu lintas terkini
TINJAUAN INFORMASI LALU LINTAS
Current traffic reports are received with the Live Traffic Information subscription service. If the subscription has expired, then FM RDS-TMC is available in selected countries. i Live Traffic Information is not available in all countries. The Digital Extra must be registered ( → page 507). This secures the free-of-charge period of three years. The Digital Extra updates the traffic situation at short, regular intervals via the internet connection. Information on the vehicle's position is regularly sent to Mercedes-Benz AG. The data is immediately rendered anonymous by Mercedes-Benz AG and forwarded to the traffic data provider. Using this data, traffic reports relevant to the vehicle's position are sent to the vehicle. The vehicle acts as a sensor for the flow of traffic and helps to improve the quality of the traffic reports. There may be differences between the traffic reports received and the actual road and traffic conditions.   G-Class - Owner's Manual MBUX multimedia system Navigation and trafficJIKA ANDA TIDAK INGIN MENGIRIMKAN POSISI KENDARAAN, ANDA MEMILIKI OPSI BERIKUT:
• You can deactivate the Digital Extra in your Mercedes me ID. - You can have the Digital Extra deactivated at a Mercedes-Benz service centre. Further hazard warnings are received via the Car-to-X Digital Extra ( → page 510).MENAMPILKAN INFORMASI DARI PENYEDIA LAYANAN UNTUK INFORMASI LALU LINTAS LANGSUNG
Persyaratan:
• The vehicle is equipped with Live Traffic Information. Multimedia system: → Apps ➤ Mercedes me ➤ My services ▶ Select Live Traffic. When the subscription for Live Traffic Information has expired then in selected countries FM RDS-TMC is available.MENDAFTARKAN INFORMASI LALU LINTAS LANGSUNG
Persyaratan:
• The vehicle is equipped with Live Traffic Information. • You have a Mercedes me ID. Create a Mercedes me ID at: https://www.mercedes.me. A valid email address is required for this. Register the vehicle using the vehicle identification number (VIN). Link the vehicle to your Mercedes me ID. A code is sent to the multimedia system. Enter the code into the multimedia system. Accept the general and specific terms of use. Alternatively, you can have the connection completed at a Mercedes-Benz service centre.MEMPERPANJANG LANGGANAN INFORMASI LALU LINTAS LANGSUNG
Persyaratan:
• The vehicle is equipped with Live Traffic Information. • You have a Mercedes me ID. Visit the Mercedes-Benz website. Log in with the Mercedes me ID. Switch to the Mercedes-Benz Store via the linked vehicle. ▶ Select Live Traffic Information. ▶ Select the renewal period. ▶ Add the product to the shopping basket.   G-Class - Owner's Manual MBUX multimedia system Navigation and traffic Accept the general and specific terms of use. Live Traffic Information remains activated for the selected extension period. Activation begins on the date of extension.MENAMPILKAN INFORMASI LALU LINTAS DI PETA
Persyaratan:
• Traffic incidents and Free-flowing traffic are switched on ( → page 509). Multimedia system:  If necessary, move the map ( → page 513).PETA MENAMPILKAN INFORMASI LALU LINTAS BERIKUT TERGANTUNG PADA PENGATURAN YANG DIAKTIFKAN:
- Traffic incidents These are roadworks, road blocks and warning messages, for example. When route guidance is active, the symbols for traffic incidents will be shown in colour on the route. Off the route they are grey. - Warning messages Warning messages are shown as the △ symbol. Traffic safety information can be shown, e.g. if there are people on the carriageway. If the vehicle approaches a danger area, for example the end of a traffic jam in a dangerous position, the △ symbol is shown on the map. If Announce traffic warnings is switched on and a message has been issued, an additional announcement is made. • Traffic flow information: - Traffic jam (red line) - Slow-moving traffic (orange line) - Heavy traffic (yellow line) - Free-flowing traffic (green line) • Display for traffic delays on the current route The smallest value for the display for traffic delays is a minute.MENAMPILKAN INSIDEN LALU LINTAS DI RUTE
Persyaratan:
• The Traffic incidents display is switched on ( → page 509). Multimedia system:  If there are traffic incidents on the route, these are shown on the map and in the route overview. With the MBUX Voice Assistant you can inform yourself about traffic incidents on your route. Ask, for example How is the traffic on my route? or How is the traffic at home?. A voice output is issued.  Example: traffic incidents on the route Total delay or message that there are no delays along the route    G-Class - Owner's Manual MBUX multimedia system Navigation and traffic 2 Switches traffic information display on or off Calls up settings for View, Messages & tones and RouteJIKA ADA KETERLAMBATAN DI SEPANJANG RUTE, INI DITAMPILKAN DI TAMPILAN RUTE BERSAMA DENGAN INFORMASI BERIKUT:
• Traffic jam section: red bars • Slow-moving traffic: orange bar • Heavy traffic: yellow bar For each section: The delay The length - The street name or the street numberSELAMA PANDUAN RUTE AKTIF, TOTAL KETERLAMBATAN DI RUTE JUGA DITAMPILKAN DI SINI:
• in the navigation system in the navigation module • in other applications in the status line at the top Traffic incident symbols are shown in the route overview and in the map. A traffic incident symbol is, for example [△] for roadworks. In the map several traffic incidents may be shown on top of each other. The traffic incident symbol shows a plus sign. If available, the street number can be replaced by a street name or both the name and number. ① If a message about forming an emergency corridor has been issued, Emergency corridor is shown in the navigation window. To see all of the traffic incidents on the route, swipe to the right or left. The route section is highlighted on the map. To show detailed information in the route overview: tap on a display in the route overview. The detailed information is shown, for example the road section and the direction.MEMANGGIL INFORMASI RINCI DI PETA
Tap on traffic flow information on the map, e.g. a red line for a traffic jam section. The detail information is displayed. If several lines are shown on top of the other, then select an item of traffic flow information from the list.MENAMPILKAN INSIDEN LALU LINTAS DI PETA
Tap on a traffic incident symbol. The detail information is displayed. Several traffic incidents are in the immediate vicinity: tap on the top traffic incident symbol and select from the list of traffic incidents.MENGAKTIFKAN TAMPILAN INFORMASI LALU LINTAS
Multimedia system:  Select View. Traffic.  G-Class - Owner's Manual MBUX multimedia system Navigation and traffic ▶ Activate Traffic incidents and Free-flowing traffic. Traffic incidents, for example roadworks, local area reports (e.g. fog) and warning messages, are shown on the route.Komunikasi Car-to-X
IKHTISAR KOMUNIKASI CAR-TO-X
PERSYARATAN BERIKUT BERLAKU UNTUK KOMUNIKASI CAR-TO-X DIGITAL EKSTRA:
- The vehicle is equipped with an MBUX multimedia system with navigation function. • There is a subscription for the Live Traffic Information service. • Car-to-X-Communication is activated in your Mercedes-Benz user account. Car-to-X-Communication is available in selected countries. The communication module automatically establishes an Internet connection once the vehicle is switched on. If there are any hazard warnings, they will be provided shortly thereafter. Depending on the mobile phone connection, provision takes place from within a second up to about a minute.MANFAAT KOMUNIKASI CAR-TO-X:
- Dangers are automatically detected by the vehicle or can be reported by the driver. These are then sent to vehicles with Car-to-X-Communication in the immediate vicinity. - If available, current details relating to hazard spots near the vehicle's current position are received.  This gives you sufficient time to adapt your driving style to the traffic conditions. The use of Car-to-X-Communication requires the regular transmission of vehicle data to Mercedes-Benz AG. The data is then immediately pseudonymised by Mercedes-Benz AG. The vehicle data is deleted after an appropriate amount of time has elapsed (several weeks) and is not stored permanently. Data which serves as identification is replaced during the pseudonymisation process. In this way, your identity is protected against access by unauthorised third parties.MENAMPILKAN PERINGATAN BAHAYA
Multimedia system: Navigation If hazard warnings are available these can be shown as symbols on the map. The display depends on the settings for the Traffic incidents option. Set the option via ⏱ (→ page 509). If the option is activated, all of the symbols are shown. If the option is deactivated, the symbols are only shown when there is a hazard warning.BAHAYA BERIKUT DAPAT DITAMPILKAN DI PETA:
• Accidents and breakdowns • Slippery roads, fog, crosswinds and heavy rain • Hazards reported manually • Vehicle with active hazard warning light Roadworks • Additional hazards (if available)   G-Class - Owner's Manual MBUX multimedia system Navigation and traffic  If Announce traffic warnings is switched off ( → page 495), voice output can indicate a danger area.MENGIRIM PERINGATAN BAHAYA
MELAPORKAN BAHAYA SECARA MANUAL
① Automatically detected hazard warnings are sent by the vehicle. When the map is shown, tap on the current vehicle position. The Position menu is shown. Select Report traffic incident. A prompt is shown. Select Yes. The Thank you for supporting accident prevention! message appears.Panduan rute dengan realitas tertambah
IKHTISAR PANDUAN RUTE DENGAN REALITAS TERTAMBAH
PERINGATAN
Risk of accident and injury as a result of distraction, Incorrect depiction or wrong interpretation of the display The camera image of the augmented reality display is not suitable as a guide for driving. ▶ Always keep an eye on the actual traffic situation. ▶ Avoid extended observation of the camera image. During route guidance with augmented reality a camera image with the real traffic scene is shown in the media display before a turning manoeuvre. The camera image includes additional information, for example arrows indicating a change of direction. If the options are switched on and this additional information is available, road names and house numbers are displayed ( → page 512).  ① Street name 2 Change of direction arrow   G-Class - Owner's Manual MBUX multimedia system Navigation and traffic Route guidance with augmented reality will not be available in some situations, e.g. in the event of poor satellite reception or roads that have not been digitised. Route guidance with augmented reality is not available in all countries. You can watch an animation on this topic via the following link:MENGAKTIFKAN PANDUAN RUTE DENGAN REALITAS TERTAMBAH
PERINGATAN
Risk of accident and injury due to imprecise positioning of additional information The additional information from the augmented reality display may be inaccurate and is not a substitute for observing and assessing the actual driving situation. ▶ Always keep an eye on the actual traffic situation when carrying out all driving manoeuvres. Multimedia system:  Select View. ▶ Select Augmented reality video. ▶ Activate or deactivate Augmented reality video.MENAMPILKAN INFORMASI PROPERTI UNTUK PANDUAN RUTE DENGAN REALITAS TERTAMBAH
Requirements: • Augmented reality is activated ( → page 512). Multimedia system:    Navigation   Select View. ▶ Select Augmented reality video. ▶ Activate Street names and House numbers. During route guidance, the activated options are shown as additional information in the camera image.Peta
MENGATUR SKALA PETA
Multimedia system:    NavigationMEMPERBESAR TAMPILAN
When the map is shown, tap twice quickly with one finger on the media display. or ▶ Move two fingers apart on the media display.MEMPERKECIL TAMPILAN
Tap with two fingers on the media display. or Move two fingers together on the media display. ① You can set the unit of measurement of the map scale ( → page 471).    G-Class - Owner's Manual MBUX multimedia system Navigation and trafficMENGGERAKKAN PETA
Multimedia system: Navigation When the map is displayed, swipe in any direction with one finger on the media display.FUNGSI-FUNGSI BERIKUT TERSEDIA:
• Selecting a destination on the map ( → page 490). • Selecting a POI ( → page 488). • Showing traffic incidents on the map ( → page 508). To reset the map to the current vehicle position: select Centre.MENGAKTIFKAN ATAU MENONAKTIFKAN TAMPILAN RINGKASAN RUTE SETELAH MULAI
Multimedia system: Navigation Select View. Activate [O] or deactivate [O] Overview of route after start. If the option is enabled, the map shows the full route after route guidance is started and, if available, all alternative routes.MEMILIH SIMBOL POI UNTUK TAMPILAN PETA
Multimedia system: Navigation POIs include restaurants and hotels, for example. These are displayed as symbols on the map. Not all POIs are available in all countries. Personal POIs are destinations which you have saved on a USB device, for example.  The display of POI symbols on the map can be activated or deactivated as a favourite. Select View. Select POI symbols on map ▶ Activate Hide all points of interest. If the option is switched off, POI symbols are displayed on the map which correspond to the settings in the POI categories. If the conditions are fulfilled, the POI symbols are shown with current online information ( → page 518).MENGAKTIFKAN ATAU MENONAKTIFKAN TAMPILAN KATEGORI UNTUK AKSES CEPAT
▶ Switch a category on or off in the menu.MEMILIH KATEGORI
In the menu, select Other categories ▷. ▶ Activate or deactivate Show all. When the option is switched on, the POI symbols for all categories are shown on the map. or Select ▶ the categories. ▶ Activate or deactivate the categories. The POI symbols for the selected categories are shown on the map.  G-Class - Owner's Manual MBUX multimedia system Navigation and trafficMEMILIH KATEGORI POI PRIBADI
In the menu, select Personal POIs ▶. Select ▶ a category. ▶ Activate or deactivate Display on the map. To issue a signal when approaching: activate Visual warning and Acoustic notification.MENGATUR ULANG TAMPILAN SIMBOL POI
In the menu, select Reset POIs. The settings are reset to the standard settings.MEMILIH TAMPILAN INFORMASI TAMBAHAN DI PETA
Multimedia system:  Select View. ▶ Select Show additional information. ▶ Switch the options on or off.PILIHAN-PILIHAN BERIKUT TERSEDIA:
- Current street If the option is enabled, it will be displayed in the navigation window. - Scale If the option is switched off, the map scale is only displayed on the map when zooming. If the option is enabled, the map scale is permanently displayed on the map. The option also influences the display on the driver display. \- Altitude \- Next junction If the option is switched on and the journey continues without route guidance, the name of the next intersecting street will be displayed in the navigation window.MENAMPILKAN VERSI PETA
Multimedia system:  ▶ Select View. ▶ Select Map data version. The detail information is displayed. You can update the map data with the Online Map Update Digital Extra ( → page 43). Information about new versions of the digital map can be obtained from a Mercedes-Benz service centre.RINGKASAN PENGHINDARAN AREA DI RUTE
You can define areas along a route that you would like to avoid. Motorways or multi-lane expressways that pass through an area to be avoided may be included in the route despite being blocked.MENGHINDARI AREA BARU UNTUK RUTE
Multimedia system:  ▶ Select Avoid new area.   G-Class - Owner's Manual MBUX multimedia system Navigation and trafficMEMULAI PENGGUNAAN PETA
Select Using map. A red rectangle appears. This designates the area that should be avoided. Move the map ( → page 513). ▶ Set the map scale ( → page 512). Select OK. The area is entered into the list.MEMULAI PENGGUNAAN PENCARIAN TUJUAN
▶ Select Via address entry. Enter the address ( → page 44). ▶ Select the destination in the list. The map appears. The area is saved.MENGUBAH AREA YANG HARUS DIHINDARI
Multimedia system: Navigation Route Avoid areas ▶ Select an area in the list. Select Edit. To move an area on the map: swipe in any direction on the media display.MENGUBAH UKURAN AREA
Move two fingers apart or together on the media display. Select OK. The area is entered into the list.MEMPERHITUNGKAN AREA UNTUK RUTE
▶ Select the area in the list. Activate Avoid area. If route guidance is active, a new route is calculated. If there is no route yet, the setting is carried over to the next route guidance.RUTE DAPAT MENCANTUMKAN AREA YANG HARUS DIHINDARI DALAM KASUS BERIKUT:
• The destination is located in an area that is to be avoided. - The route includes motorways or multi-lane expressways which pass through an area to be avoided. • There is no practical alternative route.MENGHAPUS AREA YANG HARUS DIHINDARI
Multimedia system: Navigation Route Avoid areasMENGHAPUS AREA YANG HARUS DIHINDARI
▶ Select an area in the list. Select Delete. ▶ Confirm the prompt with Yes.MENGHAPUS SEMUA AREA YANG HARUS DIHINDARI
If at least two areas to be avoided are set, select Delete all. ▶ Confirm the prompt with Yes.IKHTISAR PEMBARUAN DATA PETA
As the content of a digital road map has a short life, outdated data may have a negative effect on all navigation functions. For the best MBUX navigation  G-Class - Owner's Manual MBUX multimedia system Navigation and traffic experience, you should install all of the map updates offered by Mercedes-Benz.PILIHAN BERIKUT TERSEDIA UNTUK PEMBARUAN DATA PETA:
• Online map update • Updates via the Mercedes-Benz Portal • Update at a Mercedes-Benz service centre Additional costs can be incurred in this process.PEMBARUAN PETA ONLINE
PERSYARATAN:
• Digital Extras are available. • You have a Mercedes me ID. • The Digital Extra Online Map Update is available for your region. • Online Map Update has been activated. i Online Map Update is only available in certain countries. Installation takes place in the background as an automatic map update. The MBUX multimedia system installs all of the available map updates for the European regions in which the vehicle is located or is moved. The online map update is activated at the latest after the next time the vehicle is switched on.PEMBARUAN MELALUI PORTAL MERCEDES-BENZ
The map data for several regions can also be updated manually. Log in with your Mercedes-Benz user account at: https://www.mercedes-benz.de/ Click on your account at the top right and follow the menu path My dashboard > Manage vehicle > Manage Digital Extras > Online Map Update. Select the regions to be downloaded to a storage medium. After the map data has been copied, connect the storage medium with your vehicle. Select the notification with information about a new version of the map data and start the installation. After the MBUX multimedia system has been restarted, the updated map data is used.IKHTISAR DATA PETA
If map data is reinstalled in a vehicle, no activation code needs to be entered. For map data purchased as data media, the enclosed activation code must be entered after starting the installation. Activation codes are only ever valid for one vehicle.JIKA TERJADI MASALAH BERIKUT, HUBUNGI PUSAT LAYANAN MERCEDES-BENZ:
• The multimedia system does not accept the activation code. • You have lost the activation code.MENAMPILKAN KOMPAS
Multimedia system: Navigation When the map is shown, tap on the current vehicle position until the Position menu is shown. Select Compass.TAMPILAN KOMPAS MENUNJUKKAN INFORMASI BERIKUT:
\- The current direction of travel with bearing (360° format) and compass direction  G-Class - Owner's Manual MBUX multimedia system Navigation and traffic • Longitude and latitude coordinates in degrees, minutes and seconds • Number of satellites from which a signal can be received The information is not available in every country.MENAMPILKAN KIBLAT
Multimedia system: Navigation When the map is shown, tap on the current vehicle position until the Position menu is shown. Select Alerts. The arrow on the compass shows the direction to Mecca in relation to the current direction of travel. The number of satellites received is shown. This function is not available in all countries.MENGATUR SKALA PETA SECARA OTOMATIS
Multimedia system: Navigation Select View. Activate Auto zoom. When the option is switched on, the map scale is set automatically depending on your driving speed and the type of road. The automatically selected map scale can be changed manually. After a few seconds, this is automatically reset.  When the option is activated, no detailed display of the junction or a 3D image is shown in the navigation window during an upcoming driving manoeuvre.MENAMPILKAN PETA SATELIT
Multimedia system: Navigation Select View. ▶ Activate or deactivate Satellite map. WHEN SATELLITE MAP IS SELECTED, THEY ARE DISPLAYED AT THE FOLLOWING MAP SCALES: - On-board maps The satellite maps are displayed in map scales from 2 km. • Online maps The satellite maps are displayed in high-resolution map scales from 10 m. When Satellite map is not selected, no satellite maps are displayed. The satellite maps for these map scales are not available in all countries.MENAMPILKAN JANGKAUAN
Requirements: • There is an Internet connection. • Mercedes me connect is available. • You have a Mercedes me user account.   G-Class - Owner's Manual MBUX multimedia system Navigation and traffic - The vehicle is connected with the user account and you have accepted the Mercedes me connect terms of use. Further information can be found at: https://www.mercedes.me • The service is available and has been activated. Multimedia system:  Select View. Range.JANGKAUAN DITAMPILKAN PADA PETA DENGAN TAMPILAN BERIKUT:
• For petrol and diesel vehicles: green display When the lower reserve capacity is reached then the range display on the map is switched off. ① The range display on the map is not available in all countries.MENAMPILKAN KONTEN PETA ONLINE
Persyaratan:
• There is an Internet connection. • Digital Extras are available. • You have a Mercedes me ID. - The vehicle is linked to the Mercedes me ID and you have accepted the Mercedes-Benz terms of use. Further information can be found at: https://www.mercedes.me • The Digital Extra is available and has been activated. Multimedia system:  Select View. Switch on a Digital Extra, e.g. Weather. Current weather information is displayed on the navigation map, e.g. temperature or cloud cover. The information provided by the Digital Extras is not displayed in all map scales, e.g. weather symbols. The display of online map content is not available in all countries.Layanan parkir
CATATAN TENTANG LAYANAN PARKIR
CATATAN
Vehicle damage due to failure to observe the maximum permissible clearance height If the vehicle height exceeds the maximum permissible clearance height, the roof and other vehicle parts may be damaged. Please observe the indicated maximum clearance height. If the vehicle exceeds the permissible clearance height, do not drive in. Take the modified vehicle height in the case of roof superstructures or other carrier systems into account.   G-Class - Owner's Manual MBUX multimedia system Navigation and traffic ① This service is not available in all countries.MENAMPILKAN OPSI PARKIR DI PETA
Persyaratan:
- The Navigation Services service is activated in your Mercedes-Benz user account. • The parking service is part of the scope of the Navigation Services. Multimedia system:  Switch on Parking. The parking options within the vicinity of the current vehicle position are shown.MEMILIH OPSI PARKIR
CATATAN
Vehicle damage due to failure to observe local information and parking conditions The data is based on the information provided by the respective service providers. Mercedes-Benz does not guarantee the accuracy of the information provided in relation to the car park or parking area. ▶ Always observe the local information and conditions.Persyaratan:
• The Navigation Services service is activated in your Mercedes-Benz user account. • The parking service is part of the scope of the Navigation Services. • Parking is activated ( → page 519). Multimedia system:  Tap on P the map. or In the route overview, select P Parking spaces (→ page 496). Select the search position and search filter, e.g. Near destination and Multi-storey car parks. The map shows car parks suited to the selected settings. Select a parking option.INFORMASI BERIKUT DITAMPILKAN (JIKA TERSEDIA):
- Destination address, distance from current vehicle position and arrival time • Information on the car park, e.g. - Opening times - Parking charges - Current occupancy - Maximum parking time - Maximum access height  G-Class - Owner's Manual MBUX multimedia system Navigation and traffic The maximum access height shown by the parking service does not replace the need for observation of the actual circumstances. • Available payment options (Mercedes pay, coins, bank notes, cards) • Details on parking tariffs • Number of available parking spaces • Payment method (e.g. at parking meters) • Services/facilities at the parking option - Telephone number ▶ Calculate the route ( → page 492).FUNGSI BERIKUT DAPAT DIGUNAKAN (JIKA TERSEDIA):
• Searching for POIs in the vicinity. • Saving the destination. - Placing a call at the destination. • Sharing the destination via the QR code. - Calling up the web address. • Showing the destination on the map.PEMESANAN AWAL TEMPAT PARKIR
Persyaratan:
- The Navigation Services service is activated in your Mercedes-Benz user account. • The parking service is part of the scope of the Navigation Services. - You have registered in the Mercedes-Benz Portal with Mercedes pay and the respective contract partners with your payment details for paying for parking. • Parking is activated ( → page 519). This option is not available in all countries.Sistem multimedia:
Navigation ▶ Select a parking option on the map. If a parking space available to book has been selected, select Book parking space. Select the desired booking period. Take note of the cancellation conditions. If the parking space is available for the selected period, the price will be shown. Press OK to confirm. In the booking overview, confirm with Book. If required, enter the Mercedes me ID PIN. The parking space will be booked in the background. A booking confirmation including a car park ticket will be sent to your registered email address.MENGGUNAKAN ATAU MEMBATALKAN PEMESANAN
Start the Mercedes-Benz App on your smartphone. Open Menu. ▶ Select My transactions.   G-Class - Owner's Manual MBUX multimedia system Navigation and traffic Select Parking transactions. ▶ Select the desired booking. To make use of the booking: select Show car park ticket. or To cancel the booking: select Cancel booking. If possible, a parking space booking can be cancelled up to the stated time. If a booking cannot be cancelled, this will already be shown to you during the booking procedure.MEMBAYAR BIAYA PARKIR
Persyaratan:
- The Navigation Services service is activated in your Mercedes-Benz user account. • The parking service is part of the scope of the Navigation Services. - You have registered in the Mercedes-Benz Portal with Mercedes pay and the respective contract partners with your payment details for paying for parking. • Parking is activated ( → page 519). ① This option is not available in all countries. Multimedia system:  ▶ Select a parking option on the map. If a car park that can be paid for has been selected, scroll down in the parking details. Select Payment. Once the vehicle has reached a parking position with payment function and the vehicle is switched off, a message appears. Using this message you can pay from the vehicle and start the payment process.MEMULAI PROSEDUR PEMBAYARAN
▶ Acknowledge the message. Please note the maximum parking period displayed and any existing additional limitations. If required, a message will inform you about the necessity of displaying information confirming the online payment for the parking space. ① You will receive the receipt as a printout from the parking machine after successfully completing the payment process. ▶ Select Start the payment process. If required, enter the Mercedes me PIN. Press OK to confirm. The successful start of your parking transaction is shown. ▶ Complete the booking with OK. To cancel a parking transaction: after receiving the confirmation request, select Cancel. Minimum charges may be incurred.    G-Class - Owner's Manual MBUX multimedia system Navigation and trafficMENGAKHIRI TRANSAKSI PARKIR
▶ Stop the active transaction via the Mercedes-Benz App. You receive a summary of the procedure and the costs. If an uncompleted parking transaction is detected for your vehicle as you continue your journey, a message will appear asking whether you would like to end it. ▶ Acknowledge the message. When the parking transaction is stopped successfully, another message appears with the details about your completed parking.Dashcam
CATATAN TENTANG DASHCAM
CATATAN
Risk of legal consequences due to violation of legal regulations and data protection provisions You are legally responsible for operation and use of the dashcam functions. The legal requirements relating to operation and use of the dashcam can vary depending on the country in which the dashcam is operated. This function is not permitted in all countries. Before using the dashcam, read up on the content of the legal regulations, in particular the data protection requirements in the respective country of use. ▶ Observe the legal regulations, in particular the data protection requirements.SAYA MENGIKUTI PETUNJUK BERIKUT UNTUK PENGOPERASIAN YANG AMAN:
• Only use FAT32 or exFAT formatted USB storage devices. - Use USB-IF certified USB storage devices. USB-IF is a non-profit corporation and stands for USB Implementers Forum. Based on the USB specification, USB-IF certifies, for example, USB versions, corresponding cables and plugs as well as energy supply processes via the USB interface. - USB storage devices may be damaged if often or permanently overwritten at high speed. Mercedes-Benz recommends a high-quality external SSD drive. The abbreviation SSD stands for Solid State Drive. The file size and therefore the duration of single recording is limited by the limitations of the USB flash drive format. So FAT32 formatted USB flash drives do not allow files larger than 4 GB, for example. When the file size is reached, the recording stops and you receive a notification.FUNGSI-FUNGSI BERIKUT TERSEDIA DI APLIKASI GALERI:
• Switching write protection on or off - Deleting video files Additional information about the Gallery app ( → page 556).   G-Class - Owner's Manual MBUX multimedia system Navigation and trafficMEMILIH PERANGKAT USB UNTUK REKAMAN VIDEO DENGAN DASHCAM
Persyaratan:
\- At least one USB device is connected with the multimedia system ( → page 575). Multimedia system:  Select the USB symbol. Select the USB device. When USB devices contain multiple partitions, recorded video files are not always displayed in the recording list. Mercedes-Benz recommends that you use USB devices with one partition.MEMULAI ATAU MENGHENTIKAN REKAMAN LOOP DENGAN DASHCAM
Persyaratan:
- For recording and saving a video file: a USB device is connected with the multimedia system ( → page 575). • The vehicle is switched on. Multimedia system:  If several USB devices are connected with the multimedia system, select a USB device ( → page 523). If no USB device is selected, a selection is made automatically when recording starts. To select recording mode: select Loop recording. Loop recording continuously records short video files. When the memory is full, recording is continued automatically. In doing so, the oldest video file is written over. To start: select Start recording. The length of the recording is shown. The Do not remove the storage medium during recording. Before removing the storage medium, eject it first. message appears. The video file is stored on the USB device. To end: select End recording. In some countries, geo-coordinates (longitude and latitude) are shown in the video image. For technical reasons, the geo-coordinates may show greater inaccuracies.PESAN MUNGKIN MUNCUL DALAM KASUS BERIKUT:
- The camera is not functional, the Camera unavailable message appears. Have the camera checked in a Mercedes-Benz service centre. • If the country border indication has been switched on (→ page 524). - If an outdoor recording is started with the camera app during a dashcam recording, the dashcam recording pauses and resumes automatically   G-Class - Owner's Manual MBUX multimedia system Navigation and traffic after the camera recording is finished. A notification to this effect is displayed.MEMULAI ATAU MENGHENTIKAN REKAMAN INDIVIDU DENGAN DASHCAM
Persyaratan:
- For recording and saving a video file: a USB device is connected with the multimedia system ( → page 575). • The vehicle is switched on. Multimedia system: → | ➤ Apps ➤ Dashcam If several USB devices are connected with the multimedia system, select a USB device ( → page 523). If no USB device is selected, a selection is made automatically when recording starts. To select recording mode: select Individual recording. Individual recording stops recording when the memory limit is reached. An individual recording is automatically protected against being overwritten. To start: select Start recording. The length of the recording is shown. The Do not remove the storage medium during recording. Before removing the storage medium, eject it first. message appears. The video file is stored on the USB device. To end: select End recording. ① In some countries, geo-coordinates (longitude and latitude) are shown in the video image.  For technical reasons, the geo-coordinates may show greater inaccuracies.PESAN MUNGKIN MUNCUL DALAM KASUS BERIKUT:
- Individual recording: the memory is full or there are only a few minutes recording time available. The video recording stops or will be stopped imminently. Change the USB device or delete a video file. - The camera is not functional, the Camera unavailable message appears. Have the camera checked in a Mercedes-Benz service centre. • If the country border indication has been switched on (→ page 524). - If an outdoor recording is started with the camera app during a dashcam recording, the dashcam recording pauses and resumes automatically after the camera recording is finished. A notification to this effect is displayed.MENGONFIGURASI PENGATURAN DASHCAM
Persyaratan:
• A USB device is connected with the multimedia system ( → page 575). Multimedia system: → Apps >> Dashcam SelectMENERIMA NOTIFIKASI SETELAH MELEWATI PERBATASAN
▶ Activate National border alert. A message is shown if video is being recorded and the vehicle passes a border.   G-Class - Owner's Manual MBUX multimedia system Navigation and traffic This function is not available in all countries.MEMULAI REKAMAN VIDEO OTOMATIS
▶ Select Automatic loop recording. ▶ Activate Automatic loop recording. When the vehicle is started, video recording starts automatically. ① This function is not available in all countries.   G-Class - Owner's Manual MBUX multimedia system TelephoneTelepon
Telepon
CATATAN TENTANG TELEPON
PERINGATAN
Risk of distraction from operating integrated communication equipment while the vehicle is in motion If you operate communication equipment integrated in the vehicle when driving, you could be distracted from the traffic situation. This could also cause you to lose control of the vehicle. ▶ Only operate this equipment when the traffic situation permits. If you cannot be sure of this, stop the vehicle whilst paying attention to road and traffic conditions and operate the equipment with the vehicle stationary. PERINGATAN
Risk of accident from operating mobile communication equipment while the vehicle is in motion Mobile communication devices distract the driver from the traffic situation. This can also cause the driver to lose control of the vehicle. As a driver, only operate mobile communication devices when the vehicle is stationary. As a vehicle occupant, use mobile communication devices only in the designated area, e.g. in the rear passenger compartment. When operating the multimedia system and mobile communication devices in the vehicle, observe the legal regulations of the country in which you are currently travelling.  G-Class - Owner's Manual MBUX multimedia system Telephone PERINGATAN
Risk of injury due to objects being stowed incorrectly If objects in the vehicle interior are stowed incorrectly, they may slide or be thrown around and hit vehicle occupants. In addition, cup holders, open stowage spaces and mobile phone receptacles will not always be able to retain all objects that they contain in the event of an accident. There is a risk of injury, particularly in the event of sudden braking or a sudden change in direction. ▶ Always stow objects such that they cannot be thrown around in such situations. ▶ Always make sure that objects do not protrude from stowage spaces, luggage nets or stowage nets. ▶ Close the lockable stowage spaces before starting a journey. ▶ Always stow and secure heavy, hard, pointed, sharp-edged, fragile or bulky objects in the boot/load compartment.PERHATIKAN INFORMASI TAMBAHAN TENTANG CARA MENYIMPAN PERANGKAT KOMUNIKASI SELULER DENGAN BENAR:
\- Loading the vehicle ( → page 210) Further information can be obtained from a Mercedes-Benz service centre or at: https://www.mercedes-benz-mobile.com/ IKHTISAR MENU TELEPON
 Bluetooth ® device name of the currently connected mobile phone/of the mobile phone ② Bluetooth * device name of the other currently connected mobile phone/of the mobile phone 3 Signal strength of the mobile phone network Battery status of the connected mobile phone 5 Options 6 Messages 7 Calls up devices Numerical pad 9 Starts contact search BLUETOOTH® PROFILE OVERVIEW| Bluetooth® profile of the mobile phone | Function |
| PBAP (Phone Book Access Profile) | Contacts are automatically displayed in the multimedia system |
| MAP (Message Access Profile) | Message functions can be used |
| HFP (Hands Free Profile) | Wireless telephony is available |
IKHTISAR MODE OPERASI TELEPON
TERGANTUNG PADA PERALATAN ANDA, MODE OPERASI TELEPON BERIKUT TERSEDIA:
- A mobile phone is connected to the multimedia system via Bluetooth (→ page 528). - Two mobile phones are connected with the multimedia system via Bluetooth 6 (two phone mode) (→ page 529). - You can use all the functions of the multimedia system with both mobile phones. Irrespective of this, Bluetooth ® audio functionality can be used with any mobile phone ( → page 576).INFORMASI TENTANG TELEPON
SITUASI BERIKUT DAPAT MENYEBABKAN PANGGILAN TERPUTUS SAAT KENDARAAN BERGERAK:
• There is insufficient network coverage in the area - You move from one transmission/reception station to another and no communication channels are free • The SIM card used is not compatible with the network available - A mobile phone with "Twincard" is logged into the network with the second SIM card at the same time The multimedia system supports calls in HD Voice ® for improved speech quality. A requirement for this is that the mobile phone and the mobile phone network provider of the person you are calling support HD Voice ® . Depending on the quality of the connection, the voice quality may fluctuate.MENGHUBUNGKAN PONSEL
Persyaratan:
- Bluetooth is activated on the mobile phone (see the manufacturer's operating instructions). - Bluetooth* is activated on the multimedia system (→ page 469). Multimedia system: MENCARI PONSEL
▶ Select Connect new device.MENGIZINKAN TELEPON GENGGAM
Select a mobile phone. A code is displayed in the multimedia system and on the mobile phone. If the codes match: confirm the code on the mobile phone. For older mobile phone models, enter a 1 to 16-digit number code on the mobile phone and on the multimedia system for authorisation. (i) Up to 15 mobile phones can be authorised on the multimedia system. Authorised mobile phones are reconnected automatically. The connected mobile phone can also be used as a Bluetooth * audio device ( → page 576).  G-Class - Owner's Manual MBUX multimedia system Telephone You can watch an animation on this topic via the following link:MENGHUBUNGKAN TELEPON GENGGAM KEDUA (MODE DUA TELEPON)
Persyaratan:
\- At least one mobile phone is already connected to the multimedia system via Bluetooth®. Multimedia system: Phone Devices ▶ Select Connect new device. ▶ Select the mobile phone. In some cases, if the query appears, confirm the selection of the mobile phone pair with the Device name 1 + Device name 2 option. The selected mobile phone is connected to the multimedia system.MEMERTUKARKAN TELEPON GENGGAM (MODE DUA TELEPON)
Multimedia system: Phone Both mobile phones are shown individually in separate tabs. ▶ Select the tab with the desired mobile phone. Selecting the tab of a specific mobile phone displays the associated telephone contents. Selecting the other tab switches the view to the other telephone. The submenus in the telephone menu (e.g. contacts, call lists, messages) relate to the currently selected mobile phone with the exception of the telephone settings. In the telephone settings, settings can be made for both mobile phones.MENGGANTI FUNGSI TELEPON GENGGAM
Multimedia system: Phone DevicesMENGAKTIFKAN FUNGSI
Select a grey symbol in the line of a mobile phone. The corresponding function is activated.MENONAKTIFKAN FUNGSI
One function is active: select the coloured symbol in the line of a mobile phone. The mobile phone is disconnected from the multimedia system. Several functions are active: de-select an active function in the line of one of the mobile phones. The corresponding function is deactivated.MENGGANTI TELEPON GENGGAM
Multimedia system: Phone DevicesTIDAK ADA TELEPON GENGGAM TEROTORISASI TERSEDIA:
▶ Select Connect new device. Select a mobile phone. Newly authorised mobile phone: confirm the numerical code on the mobile phone.PENGGUNAAN DALAM MODE TELEPON TUNGGAL
▶ Select Device name. A newly authorised mobile phone is connected in single telephone mode. If the mobile phone has already been authorised and connected in single telephone mode, it is connected again in single telephone mode.   G-Class - Owner's Manual MBUX multimedia system Telephone If a mobile phone is already authorised and has been connected in two phone mode with another mobile phone, a query may come, whether the mobile phone should in future be operated in single telephone mode or connected with another mobile phone in two phone mode. If required, confirm the query about operating mode (single telephone or two phone mode) by confirming the Device name option.PENGGUNAAN DALAM MODE DUA TELEPON
▶ Select Device name 1 + Device name 2. A newly authorised mobile phone is connected with the selected mobile phone in two phone mode. If the mobile phone has already been authorised and connected in single telephone mode, it will be connected in future with the selected mobile phone in two phone mode. If the mobile phone was previously connected with another mobile phone, this connection is cancelled.MEMUTUSKAN ATAU MENGHAPUS TELEPON GENGGAM
Multimedia system: MEMUTUSKAN TELEPON GENGGAM
▶ Select Disconnect. If applicable, the mobile phone will be automatically reconnected when the vehicle is next started.MENGHAPUS TELEPON GENGGAM
Select Devices. Select ⋯ in the line of the mobile phone. ▶ Select Delete device. The mobile phone is deleted from the system.MENGGUNAKAN TELEPON GENGGAM DENGAN KOMUNIKASI MEDAN DEKAT (NFC)
Persyaratan:
- NFC is activated on the mobile phone (see the manufacturer's operating instructions). - The mobile phone's screen is switched on and unlocked (see the manufacturer's operating instructions).MENGHUBUNGKAN PONSEL
 Hold the NFC interface of the mobile phone (see manufacturer's operating instructions) on mat ① or place the mobile phone on mat ① with the display facing upwards. ▶ Follow the additional prompts on the media display to connect the mobile phone. Connect the mobile phone in single telephone mode ( → page 528). Connect the mobile phone in two phone mode ( → page 529).MENGGANTI PONSEL
Hold the NFC interface of the mobile phone (see the manufacturer's operating instructions) against NFC interface ⓘ in the front storage compartment. ▶ Follow the additional prompts on the media display to replace the mobile phone in single or two phone mode ( → page 529).   G-Class - Owner's Manual MBUX multimedia system Telephone If required, confirm the prompts on your mobile phone (see the manufacturer's operating instructions). If your mobile phone supports wireless charging, it can be charged on the mat ( → page 234). If the mobile phone is not charging, switch off NFC on the mobile phone (see the manufacturer's operating instructions). Further information can be found at: https://www.mercedes-benz-mobile.com/MENGATUR VOLUME PENERIMAAN DAN TRANSMISI
Persyaratan:
• A mobile phone is connected ( → page 528). Multimedia system:  This function ensures optimal language quality. Please note that the respective mobile phone must be selected for adjustment of the reception and transmission volume. Select ⋯ in the line of the mobile phone. Select Volume. Set the reception and transmission volume using Reception volume and Transmission volume. Further information on the recommended reception and transmission volume: https://www.mercedes-benz-mobile.com/MENGATUR NADA DERING
Multimedia system:  Set the ringtone. If the mobile phone supports the transfer of the ringtone, you will hear the ringtone of the mobile phone instead of that of the vehicle audio system.MEMULAI ATAU MENGHENTIKAN PENGENALAN SUARA PONSEL
Persyaratan
- At least one mobile phone is connected to the multimedia system ( → page 528). - The tab with the mobile phone for which voice recognition should be started is selected (→ page 529).MEMULAI PENGENALAN SUARA PONSEL
Press and hold the button on the multifunction steering wheel for more than one second. Voice recognition is started for the currently selected mobile phone.MENGHENTIKAN PENGENALAN SUARA PONSEL
Press the 🔔 or 📞 button on the multifunction steering wheel.  G-Class - Owner's Manual MBUX multimedia system Telephone If a mobile phone is connected via Smartphone Integration, the voice recognition of this mobile phone is always started or stopped.CATATAN TENTANG SARAN KONTAK
The multimedia system can show contact suggestions based on frequently used contacts, outgoing calls and text messages. For this, the Allow contact suggestions option must be switched on (→ page 472). When you open the call list or the message menu, contacts which you can call or write to will be suggested to you. Suggestions will be shown in the Suggestionstab. The multimedia system does not use the content of messages for suggestions.MEMILIH OPSI UNTUK SARAN KONTAK
Persyaratan:
• The Allow contact suggestions option is switched on (→ page 472). - The multimedia system has gathered sufficient data in order to show contact suggestions. Multimedia system:  ▶ Select Call list or Contacts. Select Suggestions. Select ⋯ in the line of the suggested contact. THE FOLLOWING OPTION IS AVAILABLE FOR SELECTION: • Do not suggest nowPanggilan
OPERASI TELEPON
Multimedia system: MELAKUKAN PANGGILAN DENGAN MEMASUKKAN NOMOR
Select □. Enter a number. Select □. The call is made.MENERIMA PANGGILAN
Select Accept.MENOLAK PANGGILAN
Select Reject.MENJAWAB PANGGILAN DENGAN PESAN
Select Message.MENGAKHIRI PANGGILAN
SelectMENEMPATKAN PANGGILAN KE DAFTAR TUGAS KANTOR DALAM MOBIL
Select ☐ Put call on In-Car Office's to-do list.   G-Class - Owner's Manual MBUX multimedia system TelephoneMENGAKTIFKAN FUNGSI SELAMA PANGGILAN
FUNGSI BERIKUT TERSEDIA SELAMA PANGGILAN:
  End call  Micro. off  Keypad (show to send DTMF tones)  Add call \- Hands-free Transfer the call, e.g. to Front, Rear or All seats. \- Private mode Transfer the call to the telephone or headphones, for example.  Select a function. ① Observe that the functions and symbols can vary depending on the vehicle equipment.MELAKUKAN PANGGILAN DENGAN BEBERAPA PESERTA
Persyaratan:
• There is an active call ( → page 532). • Another call is being made.BERALIH ANTAR PANGGILAN
▶ Select the contact. The selected call is active. The other call is on hold.MENGAKTIFKAN PANGGILAN YANG DITAHAN
▶ Select the contact of the call on hold.MELAKUKAN PANGGILAN KONFERENSI
 Select Conference. The new participant is included in the conference call.MENGAKHIRI PANGGILAN AKTIF
 Select End call. On some mobile phones, the call on hold is activated as soon as the active call is ended.MENERIMA ATAU MENOLAK PANGGILAN YANG MENUNGGU
Persyaratan:
• There is an active call ( → page 532). If you receive a call while already in a call, a message is displayed. Depending on the mobile phone and mobile phone network provider you will hear a call waiting signal. Alternatively, in two phone mode you will hear an acoustic signal when the call goes through to the other (not yet active) mobile phone.  Select Accept. The incoming call is active. If only one mobile phone is connected with the multimedia system, the previous call will be put on hold. If during a call you accept a call with the other mobile phone when in two phone mode then the existing call is ended. or G-Class - Owner's Manual MBUX multimedia system Telephone Select Message. The incoming call is not accepted. You answer with a message. or Select Reject. The function and the behaviour depend on your mobile phone network provider as well as on the mobile phone (see the manufacturer's operating instructions).MENGGUNAKAN KODE PANGGILAN INTERNASIONAL
Multimedia system:  Press and "0" until a "+" appears in the selection field. Enter the numbers of the country code, regional code and the telephone number. Select □. The call is made.Kontak
INFORMASI TENTANG MENU KONTAK
The contacts menu contains all contacts from existing data sources, e.g. mobile phone or data storage medium.TERGANTUNG PADA SUMBER DATA, MUNGKIN UNTUK MENYIMPAN/MEMUAT JUMLAH KONTAK BERIKUT:
• Permanently saved contacts: 3,000 entries - Contacts loaded from the mobile phone: 5,000 entries per mobile phoneDARI MENU KONTAK, ANDA DAPAT MELAKUKAN TINDAKAN BERIKUT:
• Make a call, for example call a contact ( → page 535) • Navigation ( → page 489) • Compose messages ( → page 537) • Additional options (→ page 536) Mobile phone contacts are automatically displayed when a mobile phone is connected to the multimedia system ( → page 528).MENGUNDUH KONTAK FAVORIT PONSEL
If the mobile phone supports the function, the favourites of the mobile phone are automatically loaded and appear in the overview of the phone menu.MEMANGGIL KONTAK
Multimedia system: PILIHAN BERIKUT DAPAT DIGUNAKAN UNTUK MENCARI KONTAK:
• Searching by initials - Searching by name • Searching by phone number Enter characters into the search field.   G-Class - Owner's Manual MBUX multimedia system Telephone Select the contact.SUATU KONTAK DAPAT BERISI RINCIAN BERIKUT:
- Phone numbers • Navigation addresses - Internet address - Email addresses - Relationship (if set)MENGELOLA FORMAT NAMA KONTAK
Multimedia system:  Select Contacts. ▶ Select Name format. Select an option.IKHTISAR IMPOR KONTAK
MENGIMPOR KONTAK KE MENU KONTAK
Persyaratan Sumber
USB device The USB device is connected with the USB port. Mobile phone A mobile phone is connected to the multime- dia system via Bluetooth ® . Contacts are available. Note that the imported contacts remain in the vehicle and can be accessed at any time regardless of the connected mobile phones.MENGIMPOR KONTAK KE MENU KONTAK
Multimedia system: Phone Contacts Import contacts Select a mobile phoneMENYIMPAN KONTAK PONSel
Multimedia system: Phone Contacts Select ➞ in the line of the mobile phone contact. Select ... Select Save. Select Yes. The contact saved in the multimedia system is identified by the MBUX symbol.MEMANGGIL KONTAK
Multimedia system: Phone Contacts Select Search contacts. Enter characters into the search field. Select the contact. Select the telephone number. The number is dialled.  G-Class - Owner's Manual MBUX multimedia system TelephoneMEMILIH OPSI TAMBAHAN DI MENU KONTAK
Multimedia system: Phone Contacts Select ▶ in the line of the contact. Select ⋯. Select an option.MENGHAPUS KONTAK
Persyaratan:
• The contacts are saved in the vehicle. - To delete an individual contact, this has been imported manually into the vehicle. Multimedia system: PhoneMENGHAPUS SEMUA KONTAK
Select Select Contacts. ▶ Select Delete all MBUX contacts. Select an option.MENGHAPUS SATU KONTAK
Select Contacts. Select ▶ in the line of the contact. Select ⋯. ▶ Select Delete contact. Select Yes.Daftar panggilan
IKHTISAR DAFTAR PANGGILAN
Depending on whether your mobile phone supports the PBAP Bluetooth ® profile or not, this can have different effects on the presentation and functions of the call list.JIKA PROFIL PBAP BLUETOOTH* DIDUKUNG, EFEKNYA ADALAH SEBAGAI BERIKUT:
- The call lists from the mobile phone are displayed in the multimedia system. - When connecting the mobile phone, you may have to confirm the connection for the PBAP Bluetooth® profile.JIKA PROFIL PBAP BLUETOOTH® TIDAK DIDUKUNG, EFEKNYA ADALAH SEBAGAI BERIKUT:
- The multimedia system generates a call list independently as soon as calls are made in the vehicle. • The call list is not synchronised with the call lists in the mobile phone.MELAKUKAN PANGGILAN DARI DAFTAR PANGGILAN
Multimedia system: Phone Select Call list.  G-Class - Owner's Manual MBUX multimedia system Telephone Select an entry. The call is made.MEMILIH OPSI TAMBAHAN DI DAFTAR PANGGILAN
Multimedia system: Phone Select Call list. For contacts that are in the address book: select options. The contact details are called up. For contacts where only one number is shown (not in the address book): select 🔒.MENGHAPUS DAFTAR PANGGILAN
Multimedia system: PhonePesan teks
IKHTISAR FUNGSI PESAN
In the message menu you can receive text messages and create and send them with the help of the MBUX voice assistant. If the connected mobile phone supports the Bluetooth ® MAP profile, the message functions can be used on the multimedia system.  You can obtain further information about settings and supported functions of Bluetooth ® -capable mobile phones at a Mercedes-Benz service centre or at: https://www.mercedes-benz-mobile.com/ Some mobile phones require further settings after being connected to the multimedia system to activate the messaging functionality (see manufacturer's operating instructions).MENGATUR TAMPILAN PESAN
Multimedia system: PhoneMEMBACA PESAN
Multimedia system: PhoneMENGGUNAKAN FUNGSI BACA DENGAN SUARA
A message list is shown. To read aloud, select the symbol at a conversation. The message is read aloud.MEMBUAT DAN MENGIRIM PESAN BARU
Persyaratan
• There is an Internet connection. • At least one mobile phone with reception is connected. - If applicable, the message function must be activated on the mobile phone.  G-Class - Owner's Manual MBUX multimedia system Telephone Multimedia system:  Using the MBUX voice assistant, speak the voice command Send a message to, and name the desired contact ( → page 439).MENDIKTEKAN TEKS
Say the message. You are guided by the voice dialogue.MEMBALAS PESAN DALAM RIWAYAT PESAN
Multimedia system:  A message list is shown. Select ➤ next to a contact. The messaging history with this contact is shown. You will be guided through the steps with the help of a voice dialogue. Say the message.MENERUSKAN PESAN
Multimedia system:  A message list is shown. Speak the voice command Forward message. You are guided by the voice dialogue.MENGHUBUNGI PENGIRIM PESAN
Multimedia system:  A message list is shown. Select ➤ next to a contact. The messaging history with this contact is shown. Select ⋯. Select Call.MENGGUNAKAN NOMOR TELEPON, URL, ATAU ALAMAT EMAIL DARI PESAN TEKS
Persyaratan
• An Internet connection is available to call up a URL. Multimedia system:  A message list is shown. Select ▶ next to a contact. The messaging history with this contact is shown. Select a telephone number or a URL in the message. If a URL is selected the web browser opens.JIKA NOMOR TELEPON DIPILIH, OPSI BERIKUT TERSEDIA:
Call - New message or If In-Car Office and the email function are available: select an email address. In-Car Office opens.    G-Class - Owner's Manual MBUX multimedia system Telephone  The availability of In-Car Office is country-dependent. Select an option.MENGHAPUS PESAN
Multimedia system:  A message list is shown. Select a contact. Press and hold on a message. To delete the message: select Delete.Kantor Dalam Mobil
FUNGSI IN-CAR OFFICE
Using In-Car Office, you can connect your online services to the multimedia system.FUNGSI-FUNGSI BERIKUT TERSEDIA:
- Calendar Showing appointments and triggering actions, e.g. reading aloud, placing a call, navigating E-mail Reading, reading aloud, creating, answering and forwarding e-mails - Tasks and calls Managing tasks and pre-booked calls • Voice input Creating appointments/reminders and tasks ① Alternatively, you can record text contents via the MBUX Voice Assistant or via the dictation function. Further information on the MBUX Voice Assistant ( → page 440). (i) Please note that certain functions are only available when the vehicle is stationary.MEMANGGIL IN-CAR OFFICE
Persyaratan:
• You have a Mercedes me ID. • The Digital Extra In-Car Office is activated in your Mercedes me ID. - You have a user account with an online service, for example Office 365. In this way, appointments, e-mails and tasks can be synchronised and facilitated.Sistem multimedia:
 Select In-Car Office. Individual functions from In-Car Office can be called up.MENGHUBUNGKAN AKUN PENGGUNA
▶ Select the desired online service. Scan the QR code. ▶ Follow the instructions on the device.   G-Class - Owner's Manual MBUX multimedia system TelephoneMEMILIH FUNGSI KALENDER DI IN-CAR OFFICE
Multimedia system: FUNGSI-FUNGSI BERIKUT TERSEDIA:
 Select a function. i Functions are available if corresponding appointment information is saved.CONTOH-CONTOHNYA ADALAH:
- If a telephone number has been saved for the appointment, Call is available. • If a navigable address has been saved in the Online Account for the appointment, Navigate is available.MEMILIH FUNGSI TUGAS & PANGGILAN DI "IN-CAR OFFICE"
Multimedia system:  ▶ Select a function for an entry.FUNGSI-FUNGSI BERIKUT TERSEDIA:
\- Reading aloud  - Placing a call This task function requires a telephone number. - Marking as completed ☑ In the current edit, an entry that has been marked as completed can be marked as open again by removing the tick. - Deleting - Displaying detailsMENANDAI ENTRI SEBAGAI SELESAI DI TUGAS & PANGGILAN
Multimedia system:  Select Tasks & calls. An overview appears. Select √.MEMBACA DAN MENGELOLA E-MAIL
Multimedia system:  Select an e-mail. The e-mail is opened.FUNGSI TAMBAHAN TERSEDIA:
- Reading e-mails • Answering e-mails (→ page 541) - Forwarding e-mails to (→ page 541) • Delete e-mails  G-Class - Owner's Manual MBUX multimedia system TelephoneMEMBUAT E-MAIL BARU
Multimedia system: → Apps In-Car Office E-mail Select + Create e-mail. Select +. Enter an e-mail address directly via the keyboard. or Select an e-mail address from the contacts. Contacts can be used from the contacts menu or from linked online services such as Office 365 or Gmail. Further information about the contacts menu ( → page 534). (i) Please note that e-mails can only be written when the vehicle is stationary. Enter the subject and text of the e-mail in the corresponding fields with the keypad. Select Send.MENJAWAB EMAIL
Multimedia system: Apps In-Car Office E-mail Select an e-mail. Select Reply. Enter the e-mail text in the corresponding field using the keypad. Select Send. ① Please note that e-mails can only be written when the vehicle is stationary.MENERUSKAN EMAIL
Multimedia system: → Apps In-Car Office E-mail Select an e-mail. Select Forward. To forward with attachment: select Forward with attachment. Contacts can be used from the contacts menu or from linked online services such as Office 365 or Gmail. Further information about the contacts menu (→ page 534). Forwarding with an attachment is only possible if an attachment is available. To forward without attachment: select Forward without attachment. Enter the e-mail text in the corresponding field using the keypad. Select Send.   G-Class - Owner's Manual MBUX multimedia system TelephoneMENGGUNAKAN KANTOR DALAM MOBIL DENGAN ASISTEN SUARA MBUX DAN FUNGSI DIKTE
Multimedia system: → Apps In-Car Office E-mailMENGGUNAKAN KANTOR DALAM MOBIL DENGAN FUNGSI DIKTE
The dictation function allows you to dictate text content, such as the subject or text of an e-mail, instead of typing the content using the keyboard. The dictation function is not available everywhere with the full range of functions. To activate the function for the first time, it may be necessary to accept the Mercedes-Benz Connect terms of use in your Mercedes me ID. The following is an example of how you can dictate the subject and text of an e-mail. Select + Create e-mail. ▶ Add recipients using ⊕. Select □. The dictation function is started. ▶ Dictate the subject and text of the e-mail. After the voice input has been processed, it is shown as text. Select Send.MENGGUNAKAN KANTOR DALAM MOBIL DENGAN ASISTEN SUARA MBUX
With the voice control of the MBUX Voice Assistant you can operate various functions of In-Car Office and speak in text contents. Further information on operating the MBUX Voice Assistant ( → page 439). The following are examples of some voice commands that you can use to operate In-Car Office. To write new e-mail: say the voice command I want to send an e-mail to John Doe. You are guided by the dialogue. To reply to an e-mail: say the voice command Reply to e-mail. You are guided by the dialogue. To forward an e-mail: say the voice command Forward e-mail. Dictate the text of the e-mail. To show tasks: say the voice command Show my tasks. The tasks are shown. To create a calendar entry: say the voice command Create a calendar entry tomorrow at 9 a.m.. You are guided by the dialogue.  G-Class - Owner's Manual MBUX multimedia system TelephoneApple CarPlay®
IKHTISAR APPLE CARPLAY*
PERINGATAN
Risk of distraction from information systems and communications equipment If you operate information systems and communication devices integrated in the vehicle when driving, you could be distracted from the traffic situation. This could also cause you to lose control of the vehicle. ▶ Only operate this equipment when the traffic situation permits. If you cannot be sure of this, stop the vehicle whilst paying attention to road and traffic conditions and operate the equipment with the vehicle stationary. You must observe the legal requirements for the country in which you are currently driving when operating the multimedia system. iPhone * functions can be used via the multimedia system using Apple CarPlay * . They are operated using the touchscreen, Touch Control or Sir voice control. You can activate voice control by pressing and holding the button on the multifunction steering wheel. By briefly pressing the □ button on the multifunction steering wheel you can continue to operate the multimedia system using the MBUX Voice Assistant (→ page 439). Only one iPhone ® at a time can be connected via Apple CarPlay ® with the multimedia system. Also for use of Apple CarPlay ® with two phone mode, only one additional mobile phone can be connected using Bluetooth ® with the multimedia system. As access to the iPhone ® is restricted by MBUX when an Apple CarPlay ® session is active, not all MBUX functions (e.g. dialling from the address book) can be fully provided for the connected device. In this case use Apple CarPlay ® . The full range of functions for Apple CarPlay ® is only available with an Internet connection. The availability of Apple CarPlay ® may vary according to the country. The service provider is responsible for this application and the services and content connected to it. Apple CarPlay ® is a registered trademark of Apple Inc. You can watch an animation on this topic via the following link:INFORMASI TENTANG APPLE CARPLAY®
The Apple CarPlay ® symbol in the status line switches within Apple CarPlay ® to the last active display. If route guidance is active on the multimedia system, it is closed when route guidance is started on the mobile phone.MENGHUBUNGKAN IPHONE* MELALUI APPLE CARPLAY* (BERKABEL)
Persyaratan:
\- The current version of your device's operating system is being used (see the manufacturer's operating instructions).  G-Class - Owner's Manual MBUX multimedia system Telephone  For safety reasons, the first activation of Apple CarPlay ® on the multimedia system must be carried out when the vehicle is stationary and the parking brake applied. Connect the iPhone ® to a USB port on the multimedia system using a suitable cable ( → page 575). When the application is connected for the first time, a message about data protection regulations appears. Select Accept & start if the application should be started. or ▶ Open the device manager ( → page 529). Start Apple CarPlay ® using the relevant symbol next to the device name. If applicable, a message about data protection regulations appears. If required confirm the use of Apple CarPlay® on your iPhone®.KELUAR DARI APPLE CARPLAY ®
Select or Press the button on the multifunction steering wheel (MBUX multimedia system). If Apple CarPlay ® was not displayed in the foreground before disconnecting, the application starts in the background when reconnected. You can call up Apple CarPlay ® using the Apple CarPlay ® symbol in the status line.MENGHUBUNGKAN IPHONE* MELALUI APPLE CARPLAY* (NIRKABEL)
Persyaratan:
- The current version of your device's operating system is being used (see the manufacturer's operating instructions). - Bluetooth ® is activated on the device (see the manufacturer's operating instructions). • The device is "visible" for other devices. For safety reasons, the first activation of Apple CarPlay® on the multimedia system must be carried out when the vehicle is stationary and the parking brake applied.Sistem multimedia:
Phone Devices Connect the mobile phone using Bluetooth ® (→ page 528). When the application is connected for the first time, a message about data protection regulations appears. Select OK, start Apple CarPlay if the application should be started. If required confirm the use of Apple CarPlay ® on your iPhone ® . It is possible at any time to switch between a connection via Bluetooth a or Apple CarPlay b (wireless) in the device list.   G-Class - Owner's Manual MBUX multimedia system Telephone  If you have already connected a mobile phone via Bluetooth, you can connect another iPhone * via Bluetooth * to use Apple CarPlay * via the device manager.KELUAR DARI APPLE CARPLAY 1
Select [ ] or Press the button on the Touch Control (MBUX multimedia system). If Apple CarPlay ® was not displayed in the foreground before disconnecting, the application starts in the background when reconnected. You can call up Apple CarPlay ® using the Apple CarPlay ® symbol in the status line.MEMANGGIL PENGATURAN SUARA APPLE CARPLAY®
Multimedia system:  Select the sound settings.MENGAKHIRI APPLE CARPLAY*
Select the Apple CarPlay ® symbol in the device manager (telephone, media) that is next to the device name of the iPhone ® . ① Select the Apple CarPlay® symbol in the device manager in the telephone or media applications if Apple CarPlay® should be restarted. If Apple CarPlay * was not displayed in the foreground before disconnecting, the application starts in the background the next time it is started automatically. You can call up Apple CarPlay * using the relevant symbol in the status line.Android Auto
TINJAUAN ANDROID AUTO
PERINGATAN
Risk of distraction from information systems and communications equipment If you operate information systems and communication devices integrated in the vehicle when driving, you could be distracted from the traffic situation. This could also cause you to lose control of the vehicle. ▶ Only operate this equipment when the traffic situation permits. If you cannot be sure of this, stop the vehicle whilst paying attention to road and traffic conditions and operate the equipment with the vehicle stationary. You must observe the legal requirements for the country in which you are currently driving when operating the multimedia system. Mobile phone functions can be used with Android Auto using the Android operating system on the multimedia system. They are operated using the touchscreen, Touch Control or voice control. You can activate the voice control system by pressing and holding the ☐ button on the multifunction steering wheel.  G-Class - Owner's Manual MBUX multimedia system Telephone By briefly pressing the button on the multifunction steering wheel you can continue to operate the multimedia system using the MBUX Voice Assistant (→ page 439). Only one mobile phone at a time can be connected via Android Auto with the multimedia system. Also for use of Android Auto with two phone mode, only one additional mobile phone can be connected using Bluetooth ® with the multimedia system. The full range of functions for Android Auto is only possible with an Internet connection. The availability of Android Auto and Android Auto apps may vary according to the country. The service provider is responsible for this application and the services and content connected to it. You can watch an animation on this topic via the following link:INFORMASI TENTANG ANDROID AUTO
The Android Auto symbol in the status line switches within Android Auto to the last active display. If route guidance is active on the multimedia system, it is closed when route guidance is started on the mobile phone.MENGHUBUNGKAN PONSEL MELALUI ANDROID AUTO (BERKABEL)
Persyaratan:
• The mobile phone supports Android Auto from Android 5.0. - The current version of the Android Auto app is installed on the mobile phone. \- In order to use the telephone functions, the mobile phone must be connected to the multimedia system via Bluetooth (→ page 528). If there was no prior Internet connection, this is established with the use of the mobile phone with Android Auto. For safety reasons, the first activation of Android Auto on the multimedia system must be carried out when the vehicle is stationary with the parking brake. Connect the mobile phone to a USB port on the multimedia system using a suitable cable ( → page 575). When the application is connected for the first time, a message about data protection regulations appears. Select Accept & start if the application should be started. or \- Open the device manager ( → page 529). - Start Android Auto using the relevant symbol next to the device name.KELUAR DARI ANDROID AUTO
Select [ ] or Press the button on the Touch Control (MBUX multimedia system). G-Class - Owner's Manual MBUX multimedia system Telephone If Android Auto was not displayed in the foreground before disconnecting, the application starts in the background when reconnected. You can call up Android Auto using the Android Auto symbol in the status line.MENGHUBUNGKAN PONSEL MELALUI ANDROID AUTO (NIRKABEL)
Persyaratan:
- The current version of your device's operating system is being used (see the manufacturer's operating instructions). • The device supports the Android Auto function (wireless). - Bluetooth ® is activated on the device (see the manufacturer's operating instructions). • The device is "visible" for other devices. - Bluetooth 5 is activated on the multimedia system (→ page 469) For safety reasons, the first activation of Android Auto on the multimedia system must be carried out when the vehicle is stationary and the parking brake applied. The Android Auto function (wireless) is not available in all countries. Multimedia system:  Connect the mobile phone using Bluetooth ® (→ page 528).  Depending on the device configuration, the query whether Android Auto should be started may appear after connecting the mobile phone via Bluetooth. In this case, the query must be answered with Yes. Select Start Android Auto. When the application is connected for the first time, a message about data protection regulations appears. Select Accept & start. It is possible at any time to switch between a connection via Bluetooth® or Android Auto (wireless) in the device list. If you have already connected a mobile phone via Bluetooth ® , you can connect another mobile phone via Bluetooth ® to use Android Auto via the device manager.KELUAR DARI ANDROID AUTO
Select or Press the button on the Touch Control (MBUX multimedia system). If Android Auto was not displayed in the foreground before disconnecting, the application starts in the background when reconnected. You can call up Android Auto using the Android Auto symbol in the status line.  G-Class - Owner's Manual MBUX multimedia system Telephone MEMANGGIL PENGATURAN SUARA ANDROID AUTO
Multimedia system: Settings ▶ System ▶ Audio Select the sound settings.MENGAKHIRI ANDROID AUTO
Select the Android Auto symbol in the device manager (telephone, media) that is next to the device name of the mobile phone. i Select the Android Auto symbol in the device manager if Android Auto should be restarted. If Android Auto was not displayed in the foreground before disconnecting, the application starts in the background the next time it is started automatically. You can call up Android Auto using the Android Auto symbol in the status line.Data kendaraan yang ditransfer dengan Android Auto dan Apple CarPlay®
IKHTISAR DATA KENDARAAN YANG DITRANSFER
When using Smartphone Integration, certain vehicle data is transferred to the mobile phone. This enables you to get the best out of selected mobile phone services. Vehicle data is not directly accessible.INFORMASI SISTEM BERIKUT INI DITRANSMISIKAN:
• Software release of the multimedia system • System ID (anonymised) The transfer of this data is used to optimise communication between the vehicle and the mobile phone. To do this, and to assign several vehicles to the mobile phone, a vehicle identifier is randomly generated. This has no connection to the vehicle identification number (VIN) and is deleted when the multimedia system is reset ( → page 475).DATA STATUS BERKENDARA BERIKUT INI DITRANSMISIKAN:
• Transmission position engaged • Distinction between parked, standstill, rolling and driving • Day/night mode of the driver display Drive type The transfer of this data is used to alter how content is displayed to correspond to the driving situation.DATA POSISI BERIKUT INI DITRANSMISIKAN:
Coordinates Speed - Compass direction • Acceleration direction This data is used by the mobile phone to improve the accuracy of the navigation (e.g. for continuity in a tunnel).  G-Class - Owner's Manual MBUX multimedia system TelephonePanggilan Dukungan Mercedes-Benz
MELAKUKAN PANGGILAN MELALUI PANEL KONTROL ATAS
Mercedes-Benz Connect calls are not possible in every country. Find out at a Mercedes-Benz service centre if these functions are available in your country.  me button for a Mercedes-Benz Connect call ② SOS button cover SOS button (emergency call system)Melakukan panggilan Mercedes-Benz Connect
Press me button ①.MELAKUKAN PANGGILAN DARURAT
To open the cover of SOS button Ⓞ, press it briefly. Press and hold SOS button ③ for at least one second. If a Mercedes-Benz Connect call is active, an emergency call can still be triggered. This has priority over all other active calls.INFORMASI TENTANG PANGGILAN DUKUNGAN MERCEDES-BENZ MELALUI TOMBOL ME
A call was made via the me button to Mercedes-Benz Support via the overhead control panel or the multimedia system ( → page 549).DENGAN MENGGUNAKAN SISTEM DIALOG SUARA, ANDA MENGAKSES LAYANAN YANG DIINGINKAN:
• Accident and Breakdown Management • Mercedes-Benz Support for general information about the vehicleANDA DAPAT MENEMUKAN INFORMASI TENTANG TOPIK BERIKUT:
• Activation of Digital Extras • Operating the vehicle • Nearest Mercedes-Benz service centre • Further products from Mercedes-Benz Data is transferred during the connection to Mercedes-Benz Support ( → page 551).MEMANGGIL DUKUNGAN MERCEDES-BENZ MENGGUNAKAN SISTEM MULTIMEDIA
Persyaratan:
• Access to a mobile phone network is available. - Sufficient network coverage is provided by the mobile phone network providers in the respective region. • For automatic transmission of vehicle data: the vehicle is switched on.  Sistem multimedia:
 ▶ Call Mercedes me connect. • After confirmation, the multimedia system sends the required vehicle data. The data transfer is shown in the display. Select a service via the voice dialogue system. You will be put in touch with a contact person at Mercedes-Benz Support.Pilihan berikut mungkin tersedia:
• Accident and Breakdown Management • Workshop service • Mercedes-Benz Support for general information about the vehicle The availability of the individual selection options is country-dependent.MENGHUBUNGI DUKUNGAN MERCEDES-BENZ SETELAH DETEKSI KECELAKAAN/KERUSAKAN OTOMATIS
Persyaratan:
The vehicle can detect accident or breakdown situations under certain circumstances. Accident: no requirements.Kerusakan:
• The vehicle is stationary. • The hazard warning lights are switched on. Additional requirements may apply for collision detection with a parked vehicle ( → page 336). ① This function is not available in all countries.PROSEDUR DETEKSI KECELAKAAN/KERUSAKAN
- The vehicle has detected an accident or breakdown situation ( → page 336). - In the event an accident or breakdown is detected, the emergency guide shows safety notes in the multimedia system display. This may take a few seconds. Depending on the severity of the accident, an automatic emergency call can be initiated. This has priority over all other active calls ( → page 559). Exit the emergency guide display. A prompt appears asking whether you would like to receive support from Mercedes-Benz Support. ▶ Assistance from Mercedes-Benz Support immediately after the breakdown or accident has been recognised: select Call. - The vehicle data is transferred automatically after your consent or if the "Breakdown Management" Digital Extra is activated (→ page 554). • Mercedes-Benz Support will take your call and organise accident/breakdown assistance.   G-Class - Owner's Manual MBUX multimedia system Telephone You may be charged for these services. ▶ Support from Mercedes-Benz Support at a later time: select Call later. The message will disappear and reappear at a later time. Additional prompt when the "Guard 360" Digital Extra is active: If the "Guard 360" Digital Extra is active, a message may appear in the multimedia system when the vehicle is switched on after a collision is detected, indicating the affected area and the severity of the impact. ▶ Support from Mercedes-Benz Support directly after collision detection: select Call. No support from Mercedes-Benz Support required: reject the prompt.MENGATUR JANJI TEMU SERVIS MELALUI PANGGILAN DUKUNGAN MERCEDES-BENZ
If you have activated the Digital Extra Maintenance Management, relevant vehicle data is automatically transferred to Mercedes-Benz Support. You will then receive individual recommendations regarding the maintenance of your vehicle. Regardless of whether you have consented to the maintenance management service, the multimedia system reminds you after a certain amount of time that a service is due. A prompt appears asking if you would like to make an appointment. To arrange a service appointment: select Call. The vehicle data will be transferred after your approval and Mercedes-Benz Support will accept your appointment request. The information is then sent to your desired service outlet. This will contact you to confirm the appointment and if necessary consult about the details.  If you select Call later after the service message appears, the message is hidden and reappears at a later time.MENYETUJUI TRANSFER DATA UNTUK PANGGILAN DUKUNGAN MERCEDES-BENZ Persyaratan:
\- There is an active Mercedes-Benz Support call via the multimedia system or the me button in the overhead control panel ( → page 549). The prompt to confirm data transfer does not appear in all countries. If the Accident/Breakdown Management Digital Extras are not activated, a prompt appears to confirm the data transfer. Select Yes. • The relevant vehicle data is sent automatically ( → page 551). or ▶ Select No and confirm. • Only call control data is transmitted ( → page 551). More information on Digital Extras: https://www.mercedes.meDATA YANG DIKIRIMKAN SELAMA PANGGILAN DUKUNGAN MERCEDES-BENZ
If you initiate a Mercedes-Benz Support call, data is transferred to enable targeted advice and an efficient service.  G-Class - Owner's Manual MBUX multimedia system TelephonePERSYARATAN BERIKUT HARUS DIPENUHI UNTUK TRANSFER DATA:
• The vehicle is switched on. - The required data transfer technology is supported by the mobile phone network provider. • The quality of the mobile connection is sufficient.TRANSFER BERTAHAP TERGANTUNG PADA FAKTOR-FAKTOR BERIKUT:
• Reason for the initiation of the call • The available mobile phone transmission technology • Activated Digital Extras • The service selected in the voice control system A prompt for consent to data transmission is only made if the corresponding Digital Extra has not been activated. The scope of the data transmitted depends on the vehicle model and vehicle equipment. For technical reasons, not all data is available at all times.TRANSMISI DATA SAAT EKSTRA DIGITAL TIDAK DIAKTIFKAN JIKA EKSTRA DIGITAL TIDAK DIAKTIFKAN DAN PERMINTAAN PERLINDUNGAN DATA TELAH DIKONFIRMASI, DATA BERIKUT DIKIRIMKAN:
• Vehicle identification number • Time of the call • Reason for the initiation of the call • Confirmation of the data protection prompt • Country indicator of the vehicle • Set language for the multimedia system - Telephone number of the communication platform installed in the vehicleJIKA PANGGILAN DILAKUKAN UNTUK JANJI TEMU SERVIS MELALUI PENGINGAT SERVIS, DATA BERIKUT JUGA DIKIRIMKAN:
• Current mileage and maintenance dataJIKA PANGGILAN DILAKUKAN SETELAH DETEKSI KECELAKAAN ATAU KERUSAKAN OTOMATIS MENGGUNAKAN SISTEM MULTIMEDIA, DATA BERIKUT JUGA DIKIRIMKAN:
• Current mileage and maintenance data • Current vehicle locationJIKA PILIHAN MANAJEMEN KECELAKAAN DAN KERUSAKAN TELAH DIBUAT MELALUI SISTEM DIALOG SUARA DAN TIDAK ADA EKSTRA DIGITAL YANG DIAKTIFKAN, TETAPI PERMINTAAN PERLINDUNGAN DATA TELAH DIKONFIRMASI, DATA BERIKUT DAPAT DIMINTA TAMBAHAN DARI KENDARAAN OLEH DUKUNGAN MERCEDES-BENZ:
• Current vehicle locationJIKA PERMINTAAN PERLINDUNGAN DATA TELAH DITOLAK, DATA BERIKUT DIKIRIMKAN UNTUK MEMUNGKINKAN SARAN YANG TERTARGET DAN LAYANAN YANG EFISIEN:
• Time of the call  G-Class - Owner's Manual MBUX multimedia system Telephone • Reason for the initiation of the call • Rejection of the data protection prompt • Country indicator of the vehicle • Set language for the multimedia system - Telephone number of the communication platform installed in the vehicleTRANSMISI DATA SAAT EKSTRA DIGITAL DIAKTIFKAN
Only in the second step and only for the respective activated Digital Extras, further case-specific data is transmitted in order to enable an optimal service. An overview of the data transferred is contained in the data protection notes for the Digital Extras. You can find these in your Mercedes me ID.PEMROSESAN DATA
The data transmitted as part of the call will be deleted from the transmitting systems once the call has been completed, provided they are not used for other activated Digital Extras. The incident-specific data is processed and stored by Mercedes-Benz Support and, if required to process the incident, forwarded to the service partner authorised by Mercedes-Benz Support. Please observe the data protection note on the Mercedes-Benz website at https://me.secure.mercedes-benz.com or in the announcement immediately after a call to Mercedes-Benz Support is connected. ① The recorded message is not available in every country.Mercedes-Benz Connect
INFORMASI TENTANG MERCEDES-BENZ CONNECT
① Individual Digital Extras or certain packages are not available in every country. Find out at a Mercedes-Benz service centre if these functions are available in your country.ANDA DAPAT MENGGUNAKAN EKSTRA DIGITAL BERIKUT MELALUI SISTEM MULTIMEDIA DAN PANEL KONTROL ATAS, MISALNYA:
- Accident Recovery (me button or the situation-dependent display in the multimedia system) Breakdown Management (me button or the situation-dependent display in the multimedia system) • Mercedes-Benz Emergency Call System (automatic emergency call and SOS button) The Digital Extras Accident and Breakdown Management and the Mercedes-Benz emergency call system are available to you around the clock. The me button and the SOS button can be found on the vehicle's overhead control panel ( → page 549). You can also call Mercedes-Benz Support via the multimedia system ( → page 549). Please note that Mercedes-Benz Connect is a Mercedes-Benz service. In an emergency, use the emergency call system in the vehicle ( → page 69) or contact the standard national emergency numbers. Please note the terms of use and the data protection notes for Digital Extras. You can find these in your Mercedes-Benz user account. EKSTRA DIGITAL MANAJEMEN KECELAKAAN DAN BREAKDOWN
The Accident and Breakdown Management Digital Extras are not available in every country. Contact a Mercedes-Benz service centre to find out whether this function is available in your country.MANAJEMEN KECELAKAAN DAN BREAKDOWN DAPAT MENCakup FUNGSI-FUNGSI BERIKUT:
- Supplement to the Mercedes-Benz emergency call system (→ page 69) If necessary, the contact person at the Mercedes-Benz emergency call centre forwards the call to Accident and Breakdown Management. Forwarding the call is however not possible in all countries. Breakdown assistance by a technician on location and/or the towing away of the vehicle to the nearest Mercedes-Benz service centre. You may be charged for these services. - Addition to the emergency guide after automatic accident or breakdown detection ( → page 550) In the event of a breakdown or accident, further vehicle data is sent which enables optimal support by Mercedes-Benz Support and the authorised service partner or breakdown assistance. • Supplement to the Digital Extra Telediagnosis With the Telediagnosis function, specific wear and failure reports are recorded by the service provider, in so far as these can be clearly interpreted and are available through the monitoring of components that are subject to diagnostics. If your vehicle detects a breakdown or threat of a breakdown, you may be prompted via the multimedia system to contact Mercedes-Benz Sup- port for further help. This prompt in the multimedia system only appears when the vehicle is stationary. These Digital Extras are subject to technical restrictions such as the mobile phone coverage, mobile network quality and the ability of the processing systems to interpret the transferred data. In some circumstances, this can result in delays or the failure of the information to appear in the multimedia system. Please note that the Mercedes-Benz Support Call is a Mercedes-Benz service. In emergencies, be sure to contact the usual national emergency number first or use the Mercedes-Benz emergency call system ( → page 557). You can find more information on Digital Extras on the Mercedes-Benz Portal: https://me.secure.mercedes-benz.comDATA YANG DIKIRIM DENGAN MERCEDES-BENZ CONNECT
DATA YANG DITRANSFER SELAMA PANGGILAN DUKUNGAN MERCEDES-BENZ TERGANTUNG PADA:
• The reason for initiation of the call • The service that is selected in the voice control system • The activated Digital Extras ( → page 551) Which data is transferred for the Digital Extras can be taken from the currently valid terms of use and the data protection notes for Digital Extras. You can find these in your Mercedes me ID.  G-Class - Owner's Manual MBUX multimedia system TelephoneMB Apps (Ekstra Digital)
INFORMASI TENTANG MB APPS DAN EKSTRA DIGITAL
With a Mercedes me ID, you have access to services and offers from Mercedes-Benz. Availability is dependent both on the country and equipment. You can obtain further information at a Mercedes-Benz service centre or in the Mercedes-Benz Portal: https://www.mercedes.meMENGAKSES AKUN PENGGUNA MERCEDES ME ID
Multimedia system: ANDA MEMILIKI MERCEDES ME ID DAN KENDARAAN TERKAIT DENGAN MERCEDES ME ID
Select Mercedes me ID. Information regarding the linked Mercedes me ID user account appears.ANDA BELUM MEMILIKI MERCEDES ME ID DAN KENDARAAN BELUM TERKAIT DENGAN MERCEDES ME ID
If you do not yet have a Mercedes me ID, you can create a Mercedes me ID at: https://www.mercedes.me or in the Mercedes-Benz App. A valid email address or phone number is required for this. Select Select MB Apps. Select Mercedes me. To link your Mercedes me ID to the vehicle, follow the instructions on the display. If the Mercedes-Benz App is available on a mobile phone, the vehicle link can be made via the displayed QR code.MENGAKSES EKSTRA DIGITAL
Persyaratan:
• The vehicle is linked to your Mercedes me ID. Multimedia system:  Select My services. The Digital Extras for which you have a valid licence are displayed in alphabetical order.MEMESAN ATAU MEMPERBARUI EKSTRA DIGITAL
To order or extend Digital Extras, use the Mercedes-Benz Store. Select Select Store.MENGHAPUS TAUTAN ANTARA ID MERCEDES ME ANDA DAN KENDARAAN
Persyaratan:
• The Mercedes me ID that was first linked to the vehicle is registered. • The user profile is synchronised ( → page 460). • A Mercedes me PIN has been set.   G-Class - Owner's Manual MBUX multimedia system Telephone Multimedia system: MB Apps > Mercedes me Select Mercedes me ID. ▶ Select Delete vehicle connection. Only the user whose Mercedes me ID was first linked to the vehicle can delete the link between all users and the vehicle.MEMILIH APLIKASI
Persyaratan:
• Depending on the app, the general terms and conditions are confirmed. Multimedia system: Apps Select an app.APLIKASI BERIKUT TERSAJIA, MISALNYA:
- Weather - Browser • Additional apps, which are purchased or installed subsequently You can also access both of the first two apps via the quick access at Apps. The available features are country-dependent. Licence fees may be applicable.FUNGSI BERIKUT TERSAJIA UNTUK APLIKASI, MISALNYA:
- Search function - Filter function, for displaying search results at the current vehicle position or at the destination • Display of detailed information Read-aloud function - Setting functionsMENGGUNAKAN APLIKASI GALERI
Multimedia system: Apps Select Gallery. IMAGES AND VIDEO RECORDINGS ARE DISPLAYED FROM THE FOLLOWING SOURCES, FOR EXAMPLE: • Dashcam video recordings • Video recordings and images from other available sources • Video recordings from AMG TRACK PACE Favourites Select a tab.MENYARING TAMPILAN
Select ☐. Select an option. All files, all images or all video recordings are displayed.MEMUTAR REKAMAN VIDEO
Select ▶. Playback starts.   G-Class - Owner's Manual MBUX multimedia system Telephone To continue playback in full screen mode: tap on the display. To pause playback: select 📄. To continue playback from the desired position: move the ⏻ position on the timeline by sliding it. To select the previous or next video recording: swipe to the right or left.MENGGULIR DAN MEMPERBESAR GAMBAR
To scroll: swipe on the image in one direction. To zoom: tap twice in quick succession on an image. To select the previous or next image: swipe to the right or left.MENAMBAH ATAU MENGHAPUS BERKAS DARI FAVORIT
▶ Press and hold on a file. ▶ Select Add to favourites/Remove from favourites. A corresponding message appears.MENGAKTIFKAN ATAU MENONAKTIFKAN PERLINDUNGAN TULIS
Active write protection is not supported by every app. ▶ Press and hold on a file. Activate or deactivate Write protection.MENGHAPUS BERKAS
Select To delete a single file: tap on a file. will appear. To delete all files: tap on 📄. To delete: select ☐. A prompt appears. Select Yes. A single file can be deleted even after a long press on the file.Sistem panggilan darurat
INFORMASI TENTANG SISTEM PANGGILAN DARURAT YANG TERSEDIA
DUA JENIS SISTEM PANGGILAN DARURAT TERSEDIA UNTUK ANDA DI DALAM KENDARAAN:
• Mercedes-Benz emergency call system • 112 emergency call system (EU eCall) The Mercedes-Benz emergency call system is generally available for your vehicle for 10 years ex works. The Mercedes-Benz Emergency Call System is not available in all countries. You can find out about the regional availability of the Mercedes-Benz emergency call system at: https://www.mercedes-benz-mobile.com/extra/ecall/  BERIKUT INI BERLAKU UNTUK KEDUA SISTEM PANGGILAN DARURAT:
- The transfer of specific data is required for the intended function of both emergency call systems. This will be explained in the "Data transfer" section ( → page 560). - Both emergency call systems are included as standard equipment in your vehicle and are activated at the factory. • The use of both emergency call systems is exempt from charges. - Both emergency call systems only function in areas in which the mobile phone network providers offer mobile phone coverage. For both systems, insufficient network coverage from the mobile phone network providers can result in an emergency call not being transmitted.PERBEDAAN ANTARA SISTEM PANGGILAN DARURAT MERCEDES-BENZ DAN SISTEM PANGGILAN DARURAT 112 (EU ECALL)
Sistem panggilan darurat Mercedes-Benz Sistem panggilan darurat 112 (EU eCall)
The Mercedes-Benz emergency call system is permanently logged in to the mobile phone network. • Automatic and manual Mercedes-Benz emergency calls are transmitted to a Mercedes-Benz emergency call centre. In the event that the emergency call centre of the Mercedes-Benz emergency call system cannot be reached (e.g. due to a lack of network coverage), the 112 emergency call is carried out automatically. If you decide on the 112 emergency call system (EU eCall) only, then the system only logs in to the mobile phone network after the triggering of a manual or automatic emergency call. The 112 emergency call system (EU eCall) transmits automatic and manual emergency calls directly to public coordination centres. The 112 emergency call system (EU eCall) in your vehicle meets the delegated regulation EU 2017/79. Proper and full functionality of the 112 emergency call system (EU eCall) depends on circumstances beyond the influence of Mercedes-Benz AG. This includes mobile network coverage and the technical infrastructure of the public reception centres in the respective countries. Please observe that in the event of a repair genuine Mercedes-Benz batteries must be used which have been certified pursuant to the delegated regulation EU 2017/79 (Appendix I). Other manufacturers are also permitted provided their batteries are certified according to the delegated regulation EU 2017/79. There is the option of deactivating the Mercedes-Benz emergency call system and using only the 112 emergency call system (EU eCall). Contact address for carrying out deactivation of the Mercedes-Benz emergency call system are the local dealers.MERCEDES-BENZ MEREKOMENDASIKAN AKTIVASI SISTEM PANGGILAN DARURAT MERCEDES-BENZ DENGAN ALASAN BERIKUT:
- In emergency situations when abroad, you can also get support in a language you speak. • Several transmission technologies are used to accelerate the transfer of the accident data and improve reliability of the transmission. - The Mercedes-Benz emergency call system is permanently logged in to the mobile phone network, which ensures faster placement of the emergency call and faster transfer of the accident data. G-Class - Owner's Manual MBUX multimedia system Telephone Measures for rescue, recovery or towing away can then be initiated in quickly. - With a Mercedes-Benz emergency call, the accident data is only transferred to the public coordination centre with the approval of the customer. In the event of an automatically triggered emergency call in which there is no voice contact, the accident data is transmitted immediately to the public emergency call centre. - If the Mercedes-Benz emergency call centre is not available, the 112 emergency call is carried out automatically.IKHTISAR SISTEM PANGGILAN DARURAT
Both the Mercedes-Benz emergency call system as well as the 112 emergency call system (EU eCall) can help to reduce the time between an accident and the arrival of emergency services at the site of the accident. They help locate an accident site in places that are difficult to access. Both emergency call systems can initiate an emergency call automatically ( → page 559) or manually ( → page 560). Only make emergency calls if you or others are in need of rescue. Do not make an emergency call in the event of a breakdown or a similar situation.INDIKATOR DI LAYAR
PESAN BERIKUT MUNCUL DI LAYAR TENGAH ATAU LAYAR MEDIA DARI KEDUA SISTEM PANGGILAN DARURAT:
\- SOS NOT READY: the vehicle is not switched on or the emergency call system is malfunctioning. This does not necessarily indicate complete failure of the emergency call system. Emergency calls can still be transmitted. The display only refers to the vehicle and does not take account of the availability of mobile phone networks and the Mercedes-Benz emergency call centre.  The functional readiness of the emergency call system on the vehicle can be seen when the SOS NOT READY display disappears once the vehicle is switched on. \- SOS: the icon appears in the display during an active emergency call. In case of a malfunction of the emergency call system, the loudspeakers, microphone, airbag or the SOS button, for example, are faulty.ANDA DAPAT MENGENALI KERUSAKAN PADA SISTEM PANGGILAN DARURAT DENGAN TAMPILAN BERIKUT:
\- A corresponding message appears on the driver and media display.MEMICU PANGGILAN DARURAT OTOMATIS
Persyaratan:
• The vehicle is switched on. • The starter battery is sufficiently charged.PANGGILAN DARURAT DIPICU SECARA OTOMATIS:
• After activation of the restraint systems such as airbags or seat belt tensioners after an accident • After an automatically initiated emergency stop by Active Emergency Stop AssistPANGGILAN DARURAT TELAH DILAKUKAN:
• A voice connection is established with the emergency call centre.   G-Class - Owner's Manual MBUX multimedia system Telephone \- A message with accident data is transmitted to the emergency call centre. If no connection can be made to the public emergency services, a corresponding message appears in the display. ▶ Dial the emergency number 112 or the appropriate local emergency call number on your mobile phone.JIKA PANGGILAN DARURAT TELAH DIMULAI:
- If the traffic conditions and safety permit, remain in the vehicle until a voice connection is established with the emergency call centre. - On the basis of the call, the emergency call centre decides whether it is necessary to call rescue teams and/or the police to the accident site. - If no vehicle occupant answers, an ambulance is sent to the vehicle immediately.MEMICU PANGGILAN DARURAT MANUAL
To use the SOS button in the overhead control panel: press the SOS button for at least one second ( → page 549). or To use voice control: use the voice commands of the MBUX Voice Assistant ( → page 444).PANGGILAN DARURAT TELAH DILAKUKAN:
• A voice connection is established with an emergency call centre. - If the traffic conditions and safety permit, remain in the vehicle until a voice connection is established with the emergency call centre. - On the basis of the call, the emergency call centre decides whether it is necessary to call rescue teams and the police to the accident site. - A message with accident data is transmitted to the emergency call centre. If no connection can be made to the public emergency services, a corresponding message appears in the display. ▶ Dial the emergency number 112 or the appropriate local emergency call number on your mobile phone.TRANSFER DATA SISTEM PANGGILAN DARURAT
For both the Mercedes-Benz emergency call system as well as the 112 emergency call system (EU eCall) data is transferred to the Mercedes-Benz emergency call centre or the public emergency services call centre. Depending on the emergency call system ( → page 557) activated different data is transmitted to the appropriate emergency call centre.DATA YANG DIKIRIMKAN SESUAI DENGAN SISTEM PANGGILAN DARURAT YANG DIAKTIFKAN:
Panggilan darurat Mercedes-Benz 112 panggilan darurat
• Position data of the vehicle • Position data on the route (a few 100 m before the incident) Direction of travel • Vehicle Identification number Drive type of the vehicle (e.g. petrol, diesel, CNG, LPG, electric or hydrogen) • Number of people detected in the vehicle Whether the emergency call was initiated manually or automatically • Time of the accident • Language setting on the multimedia system Digital Extras available or not This determines whether the call can be forwarded to Mercedes-Benz Support if required. • Position data of the vehicle • Position data on the route (a few 100 m before the incident) Direction of travel • Vehicle identification number Drive type of the vehicle (e.g. petrol, diesel, CNG, LPG, electric or hydrogen) • Number of people detected in the vehicle Whether the emergency call was initiated manually or automatically • Time of the accident If only the 112 emergency call system (EU eCall) is activated in the vehicle, the accident data is transmitted directly to the public emergency call centre.UNTUK KEPERLUAN KLARIFIKASI KECELAKAAN, LANGKAH-LANGKAH BERIKUT DAPAT DIAMBIL HINGGA SATU JAM SETELAH PANGGILAN DARURAT DIMULAI:
• The current vehicle position can be determined. • A voice connection to the vehicle occupants can be established. • Emergency call data can be called up. For Russia: various functions, e.g. receiving traffic information, cannot be performed for up to two hours after sending an emergency call.FUNGSI DIAGNOSIS MANDIRI SISTEM PANGGILAN DARURAT
Your vehicle checks the functionality of the emergency call system every time the vehicle is switched on. During this time, the SOS button lights up red continuously for five seconds. In the event of a system failure, you will be informed via a text message on the driver's display and the red SOS NOT READY indicator on the central display or media display. Please, make sure, that during 30 seconds after switching vehicle ON the red indicator SOS NOT READY in the upper right corner of display is switched OFF, this means the emergency call system passed diagnostics successfully.  G-Class - Owner's Manual MBUX multimedia system Telephone MEMULAI/MENGAKHIRI MODE UJI ERA-GLONASS
Persyaratan
• The starter battery is sufficiently charged. • The vehicle is switched on. • The vehicle has been stationary for at least one minute.MODE UJI SAAT INI TERSEDIA DI NEGARA-NEGARA BERIKUT, MISALNYA:
Russia - Belarus Kazakhstan Armenia Kyrgyzstan To start the test mode: press and hold the 📞 button on the multifunction steering wheel for at least five seconds. The test mode is started and automatically ends after the language test has been performed. To stop manual test mode: switch off the vehicle. The test mode is ended.INFORMASI TENTANG PEMROSESAN DATA
PEMROSESAN DATA PRIBADI MELALUI SISTEM PANGGILAN DARURAT MERCEDES-BENZ
All processing of personal data via the Mercedes-Benz emergency call system corresponds with the specifications in the EU Regulation 2016/679 "on the protection of natural entities with regard to the processing of personal data (GDPR)". The data is solely used by the Mercedes-Benz emergency call system for rescue and recovery in the event of an accident. The owner of a vehicle, that is equipped with a Mercedes-Benz emergency call system in addition to the 112 emergency call system (EU eCall), has the right to use the 112 emergency call system instead of the Mercedes-Benz emergency call system. Contact address for carrying out deactivation of the Mercedes-Benz emergency call system are the local dealers.PEMROSESAN DATA PRIBADI MELALUI SISTEM PANGGILAN DARURAT 112 (EU ECALL)
All processing of personal data via the 112 emergency call system (EU eCall) corresponds with the specifications in the EU Regulation 2016/679 "on the protection of natural entities with regard to the processing of personal data (GDPR)" and is based particularly on the necessity of upholding the vital interests of the affected person in accordance with article 6, paragraph 1, letter d of the GDPR. The processing of this type of data is strictly limited to the purpose of operating the emergency calls to the standard European emergency call number 112.PENERIMA DATA
The recipients of data that is processed by the 112 emergency call system (EU eCall) are the relevant emergency call inquiry terminals. These are configured by the appropriate authorities of the respective country in which they are located to first accept and subsequently process emergency calls to the standard European emergency call number 112.  G-Class - Owner's Manual MBUX multimedia system Telephone PENGATURAN UNTUK PEMROSESAN DATA
KEDUA SISTEM PANGGILAN DARURAT DIRANCANG SEHINGGA PERSYARATAN BERIKUT TERPENUHI:
- The data contained in the system memory is not accessible outside the system prior to the initiation of an emergency call. - Both emergency call systems cannot be traced and there is no continuous tracking in normal operation. - The data in the system's internal memory is automatically and continuously deleted. - The location data of the vehicle is continuously overwritten in the system's internal memory, so that no more than the last three current locations required for the normal function of the system are available. - The record of the activity data of both emergency call systems is only kept for as long as is required to fulfil the purpose of handling the emergency call, and under no circumstances for more than 13 hours after the time that an emergency call is initiated.HAK-HAK ORANG YANG TERPENGARUH OLEH PEMROSESAN DATA
The person affected by the data processing (the vehicle owner) has the right to access the data and if applicable can demand the correction, deletion or barring of data that affects him or her and that the processing of which does not correspond with the GDPR regulations. Each correction, deletion or barring carried out according to this regulation must be shared with the third party to which the data has been transmitted, provided this does not prove to be infeasible and does not incur disproportionate expenditure. The person affected by the data processing has the right to complain to the appropriate data protection authority should they be of the opinion that their rights have been infringed by the processing of their personal data. Responsible contact point for the processing of access rights: Konzernbeauftragter für den Datenschutz, Mercedes-Benz Group AG, HPC E600, D-70546 Stuttgart, Germany Fungsi daring dan internet
Koneksi internet
INFORMASI TENTANG MENGHUBUNGKAN KE INTERNET
PERINGATAN
Risk of distraction from information systems and communications equipment If you operate information systems and communication devices integrated in the vehicle when driving, you could be distracted from the traffic situation. This could also cause you to lose control of the vehicle. ▶ Only operate this equipment when the traffic situation permits. If you cannot be sure of this, stop the vehicle whilst paying attention to road and traffic conditions and operate the equipment with the vehicle stationary. You must observe the legal requirements for the country in which you are currently driving when operating the multimedia system. PERINGATAN
Risk of accident from operating mobile communication equipment while the vehicle is in motion Mobile communication devices distract the driver from the traffic situation. This can also cause the driver to lose control of the vehicle. As a driver, only operate mobile communication devices when the vehicle is stationary. As a vehicle occupant, use mobile communication devices only in the designated area, e.g. in the rear passenger compartment. You must observe the legal requirements for the country in which you are currently driving when operating mobile communication equipment in the vehicle.TERGANTUNG PADA PERLENGKAPAN KENDARAAN DAN KETERSEDIAAN DI NEGARA, ANDA DAPAT MEMBUAT KONEKSI INTERNET DENGAN CARA BERIKUT:
• Vehicles with a communication module: - Using the communication module including data roaming ( → page 565) - Using Bluetooth ® or Wi-Fi with a data-enabled mobile phone • Vehicles without a communication module: Using Bluetooth ® or Wi-Fi with a data-enabled mobile phone   G-Class - Owner's Manual MBUX multimedia system Online and Internet functions The Internet functions can only be used to a limited degree whilst driving.MENYIAPKAN KONEKSI INTERNET MENGGUNAKAN MODUL KOMUNIKASI
Persyaratan:
- The vehicle is equipped with a permanently installed communication module. • A Mercedes me ID is available. • The vehicle is linked to a Mercedes me ID. • The Entertainment Package is active. • The Comfort Data Volume Digital Extra is activated. Multimedia system:    For most Digital Extras, data volume can be obtained when procuring the Digital Extras. Additional data volume is required to use some functions, e.g. web browser or Wi-Fi hotspot. If the data volume is reached, availability of the Digital Extras is limited. Depending on the vehicle equipment, you can obtain an Entertainment Package via the Mercedes-Benz Store. In order to use the data package included, you must conclude your own contract with a mobile phone network provider via the Mercedes-Benz App. This can be terminated at any time and incurs no costs. Without this contract it is not possible to use the Digital Extras included in the previously acquired Entertainment Package. The availability of this option is dependent on the country. If the data package option is not available or can be upgraded, you can purchase data volume directly from the mobile phone network provider for a fee. The availability of this option is dependent on the country. Visit a Mercedes-Benz service centre to find out whether it is possible to purchase data volume in your country directly from a mobile phone network provider. Alternatively, and if available, you can utilise the tethering function of a mobile phone via Wi-Fi or Bluetooth® to use the web browser or Wi-Fi hotspot. With external Wi-Fi hotspots, which are encrypted via TKIP, online software updates cannot be carried out via the external Wi-Fi hotspot.MEMUTUSKAN KONEKSI INTERNET OTOMATIS MELALUI MODUL KOMUNIKASI
Persyaratan:
• Wi-Fi or Bluetooth ® tethering are available in the vehicle.Sistem multimedia:
  Select the ⋯ settings in the line of Data package. To disconnect the automatic connection: select the Delete entry option.  G-Class - Owner's Manual MBUX multimedia system Online and Internet functions The communication module is removed from the list of known hotspots, but can be reconnected manually at any time ( → page 565). The Delete entry option permits the use of purchased data volume to be limited. The system is prevented from automatically establishing a connection to the communication module after this option has been activated.MENYIAPKAN KONEKSI INTERNET MELALUI WLAN
Persyaratan:
• The Wi-Fi function is activated on the multimedia system ( → page 470). - The Wi-Fi hotspot function is activated on the mobile phone (see the manufacturer's operating instructions). - Internet access via Wi-Fi is activated (see the manufacturer's operating instructions). Multimedia system:  ① This function is country-dependent.Telepon seluler terdaftar di pengelola perangkat Internet
Select the mobile phone with the Wi-Fi symbol. The mobile phone is not listed in the Internet device manager ▶ Select Search for access. Select the mobile phone with the Wi-Fi symbol. It may take a few seconds until the device is found by the Wi-Fi search. Log in to the Wi-Fi network ( → page 470).KONEKSI INTERNET MELALUI WI-FI DIBATASI ATAU TIDAK BERFUNGSI DALAM KASUS BERIKUT:
• The mobile phone is switched off. • Mobile data use is deactivated on the mobile phone. • The Wi-Fi function is deactivated on the multimedia system. • The Wi-Fi function is deactivated on the mobile phone. • Internet access via Wi-Fi is deactivated on the mobile phone.MENYIAPKAN KONEKSI INTERNET MELALUI BLUETOOTH*
Persyaratan:
- The mobile phone supports the Bluetooth® profile PAN (Personal Area Network). - The mobile phone is connected to the multimedia system via Bluetooth ® (→ page 528). - Internet access via Bluetooth ® is activated (see the manufacturer's operating instructions). Multimedia system:  ① This function is country-dependent. The mobile phone is listed in the Internet device manager  G-Class - Owner's Manual MBUX multimedia system Online and Internet functions Select the mobile phone with the Bluetooth® symbol.Telepon seluler tidak terdaftar di pengelola perangkat Internet
▶ Select Search for access. In the list displayed, all mobile phones already known to the multimedia system are shown. New devices can be set up using the phone application. Connect the mobile phone using Bluetooth * ( → page 528). If a new mobile phone is connected using Bluetooth * , this is also used for the telephone application.KONEKSI INTERNET MELALUI BLUETOOTH ® DIBATASI ATAU TIDAK BERFUNGSI DALAM KASUS BERIKUT:
• The mobile phone is switched off. • The mobile phone network coverage is insufficient. • Mobile data use is deactivated on the mobile phone. - The Bluetooth function on the multimedia system is switched off and the mobile phone is to be connected via Bluetooth . - The Bluetooth function is switched off on the mobile phone and the mobile phone is to be connected via Bluetooth . - Neither the mobile phone network nor the mobile phone allow simultaneous use of a telephone and an Internet connection. - The mobile phone has not been enabled for Internet access via Bluetooth 4 .MEMBATALKAN IZIN AKSES INTERNET UNTUK TELEPON SELULER
Multimedia system: Settings ▶ System ▶ Internet and Bluetooth Manage Internet access Select options ⋯ next to the name of the mobile phone. ▶ Select Delete configuration. Select Yes.MEMBUAT KONEKSI INTERNET
Multimedia system: → Apps For example, select Browser. If you select a function that requires an Internet connection and the system is currently offline, a menu opens with a selection of possible Internet accesses as well as all tethering devices that are within range. ▶ Select an Internet access from the list. The Internet connection is established. The list of possible Internet connections can also be displayed using the extended status line. Depending on the vehicle equipment and country availability, you can establish an Internet connection via the communication module or connected mobile phones.  G-Class - Owner's Manual MBUX multimedia system Online and Internet functions The availability of the web browser depends on the country.Status koneksi
IKHTISAR STATUS KONEKSI
TERGANTUNG PADA STATUS KONEKSI, SIMBOL BERIKUT DAPAT MUNCUL DI LAYAR MEDIA PADA GARIS STATUS:
• Wi-Fi device is selected as Internet access. • ⚙: a Bluetooth * device is selected as Internet access. - Mobile communications standard (e.g. 4G + double arrow symbol): the communication module is selected as the hotspot.MENAMPILKAN STATUS KONEKSI
Multimedia system:  ▶ Briefly press the status line. The extended status line is displayed. Briefly press the Internet symbol in the symbol overview. The current connection status is displayed.CATATAN TENTANG MENAMPILKAN STATUS KONEKSI
- When connecting via Wi-Fi, the connection status and device name are displayed. - When connecting via a Bluetooth device, the connection status, device name, and network type are displayed. - In the case of a connection via the communication module the following status information can be shown: Type of network  Status (online, offline, data volumes available or used, limited service) \- For vehicles with a communication module, the connection data of Digital Extras for which the user does not have to pay can be displayed under Digital Extras.Peramban web
MEMBUKA HALAMAN WEB
PERINGATAN
Risk of distraction from information systems and communications equipment If you operate information systems and communication devices integrated in the vehicle when driving, you could be distracted from the traffic situation. This could also cause you to lose control of the vehicle. ▶ Only operate this equipment when the traffic situation permits. If you cannot be sure of this, stop the vehicle whilst paying attention to road and traffic conditions and operate the equipment with the vehicle stationary. You must observe the legal requirements for the country in which you are currently driving when operating the multimedia system. Multimedia system: MEMBUKA HALAMAN WEB BARU
Select Search.  G-Class - Owner's Manual MBUX multimedia system Online and Internet functions Entering a web address. Select OK. The function is country-dependent. No web pages can be displayed on the multimedia system while driving.MEMBUKA SITUS WEB DARI RIWAYAT PERAMBAN
To call up the previous page from the history: selectIKHTISAR PERAMBAN WEB
 ① Previous website 2 Next website 3 Update 4 URL 5 Adds/removes bookmarks 6 Options 7 Settingsi UNDER ⋯ ANDA MEMILIKI OPSI BERIKUT:
- Tabs - Bookmarks & history - Reading mode Share link - Share content - Request mobile websiteMEMBUKA OPSI PERAMBAN WEB
Multimedia system: FUNGSI BERIKUT TERSEDIA:
Bookmarks - Browsing history Entered URLs Select an option. Change the settings.MEMBUKA PENGATURAN PERAMBAN WEB
Multimedia system: FUNGSI BERIKUT TERSEDIA:
- Block popups - Enable cookies - Enable Javascript   G-Class - Owner's Manual MBUX multimedia system Online and Internet functions ▶ Switch a function on ☐ or off ☐.MENGHAPUS DATA PERAMBAN
Multimedia system:  THE FOLLOWING SPECIFIC BROWSER DATA CAN BE DELETED: - Cache - Cookies Form data ▶ Select one of the options shown.MENGELOLA MARKAH
Multimedia system:  ▶ Select Bookmarks & history. Select ▪ after the bookmark. A menu with options opens.OPSI BERIKUT TERSEDIA:
- Delete entry - Delete all Edit Share ▶ Select one of the options shown.MENGELOLA TAB
Multimedia system: MEMBUKA TAB BARU
▶ Select New tab.MENGUBAH TAB
▶ Select the icon for the desired tab.MENUTUP TAB
Press and hold the icon of the tab to be closed until a menu appears. Select Close. The tab is closed.MODE PRIBADI
Switch private mode on ☐ or off ☐. If the private mode is switched on, an icon appears in the input line of the web browser. In private mode, neither the history nor cookies are saved. Bookmarks can also be created in private mode.BERBAGI URL DARI PERAMBA WEB
Persyaratan:
\- To share via QR code: an app for scanning the QR code is installed on the mobile device.  G-Class - Owner's Manual MBUX multimedia system Online and Internet functions Multimedia system: BERBAGI URL MELALUI KODE QR
Select Share link. A QR code appears. ▶ Scan the displayed QR code with a mobile device.BERBAGI URL DENGAN LAYAR LAIN
Select Share content. In the menu drag and drop a display to another display. The displayed web page opens on the other display.MENGATUR PERAMBA WEB DI LATAR BELAKANG
Multimedia system:  Press. Audio playback continues.TuneIn Radio
MEMANGGIL TUNEIN RADIO
Persyaratan:
• There is a user account at https://www.mercedes.me. • The vehicle is linked to the Mercedes me user account. • The TuneIn radio service is activated. • The data volume is available. Depending on the country, data volume may need to be purchased.  • A fast Internet connection for data transmission free of interference. The functions and services are country-dependent. For more information, consult a Mercedes-Benz service centre. Multimedia system:  Select TuneIn Radio. The TuneIn Radio menu appears. The last station set starts playing. The connection quality depends on the local mobile phone reception.TINJAUAN TUNEIN RADIO
 Internet Radio provider Additional information on the currently selected station 3 Previous or next station   G-Class - Owner's Manual MBUX multimedia system Online and Internet functions 4 Settings Additional options 6 Favourites 7 Controls playback Station list SearchMEMILIH DAN MENGHUBUNGKAN KE STASIUN TUNEIN RADIO
Multimedia system: Radio ▶▶▶ Tuneln Radio Select □ Select a category. Select a station. The connection is established automatically. or ▶ Select the search field. Enter a station name. A relatively large volume of data can be transmitted when using Internet Radio.MENYIMPAN/MENGHAPUS STASIUN TUNEIN RADIO SEBAGAI FAVORIT
Multimedia system: Radio ▶ Tuneln RadioMENYIMPAN FAVORIT
Select a station. Press the symbol next to the station name. MENGHAPUS FAVORIT
Select a station. Press the symbol next to the station name.MENGATUR OPSI RADIO INTERNET
Multimedia system: Radio Tuneln RadioOPSI BERIKUT TERSEDIA:
• Select Stream: select the stream quality - Login to TuneIn Account: log in to your TuneIn user account • Log Out of Account: log out of your TuneIn user account Select an option.   G-Class - Owner's Manual MBUX multimedia system MediaMedia
Informasi tentang mode media
INFORMASI TENTANG FORMAT YANG DIDUKUNG DAN MEDIA PENYIMPANAN DATA
PERINGATAN
Risk of distraction when handling data storage media If you handle a data storage medium while driving, your attention is diverted from the traffic conditions. This could also cause you to lose control of the vehicle. ▶ Only handle a data storage medium when the vehicle is stationary.i PERHATIKAN CATATAN BERIKUT:
- The multimedia system supports a total of up to 50,000 files. • Data storage media up to 2 TB are supported (32-bit address space). - Due to the large variety of available music and video files regarding encoders, sampling frequency and data transfer rates, playback cannot be guaranteed. • Due to the wide range of USB devices available on the market, playback cannot be guaranteed for all USB devices. • Videos up to FullHD (1920x1080) are supported. • Copy-protected music and video files or DRM (Digital Rights Management) encrypted files cannot be played back. • MP3 players must support Media Transfer Protocol (MTP). - Files with the corresponding format can be played back from the USB device in Dolby Atmos.INFORMASI TENTANG PERLINDUNGAN HAK CIPTA DAN MEREK DAGANG
Audio files which you create yourself (e.g. copies of data storage media you make yourself) are generally subject to copyright protection. In many countries, reproductions are not permitted without the prior consent of the copyright holder, even for private use. Make sure that you know about the applicable copyright regulations and that you comply with these.Dolby
ATMOS
Manufactured under licence from Dolby Laboratories. Dolby and the double-D symbol are registered trademarks of Dolby Laboratories Licensing Corporation. Confidential unpublished works. Copyright 2020-2022 Dolby Laboratories. All Rights Reserved.   G-Class - Owner's Manual MBUX multimedia system Media  Manufactured under licence from Dolby Laboratories. Dolby, Dolby Audio and the double-D symbol are trademarks of Dolby Laboratories.   LISTEN For DTS Patents, see https://patents.dts.com. Manufactured under licence from DTS Licensing Limited. DTS, the Symbol, & DTS and the Symbol together are registered trademarks, and DTS TruVolume is a trademark of DTS, Inc 8 . DTS, Inc. All Rights Reserved.   DTS ® Connected Radio ™ For DTS Patents, see http://patents.dts.com. Manufactured under licence from DTS Licensing Limited. DTS, DTS Connected Radio, and the DTS logo are registered trademarks or trademarks of DTS, Inc. in the United States and other countries. ® 2020 DTS, Inc. ALL RIGHTS RESERVED. Lyrics licensed and provided by Lyric Find ™ . Content licensed and sourced from Radioplayer ™ .  gracenote. A NIELSEN COMPANY Gracenote, the Gracenote logo and logotype, "Powered by Gracenote", MusicID and Playlist Plus are either registered trademarks or trademarks of Gracenote, Inc. in the United States and/or other countries. This product incorporates Spotify software which is subject to 3rd party licences found here: https://www.spotify.com/connect/third-party-licenses  G-Class - Owner's Manual MBUX multimedia system Media  TIDAL
TIDAL and TIDAL logo are registered trademark of Aspiro AB in the European Union and other countries. Overview of the media menu  ① Album cover Active media source Track and artist Active data storage medium and current track number/track in playback list 5 Repeat 6 Random playback 7 Settings 8 Additional options Additional categories 10 Playlists and categories Timeline Media search 13 Next track or fast forward Controls playback 15 Previous track or fast rewindMenghubungkan media penyimpanan data ke sistem multimedia
MENGHUBUNGKAN PERANGKAT USB
CATATAN
Damage caused by high temperatures High temperatures can damage USB devices. Remove the USB device after use and take it out of the vehicle.   G-Class - Owner's Manual MBUX multimedia system Media  The multimedia connection unit is found in the centre console storage compartment and has two type C USB ports. Depending on the vehicle equipment, there are further USB ports in the stowage compartment under the armrest. The charging power of the USB ports is at least 5 V (3 A) and, depending on the vehicle equipment, a maximum of 20 V (5 A). Connect the USB device to the USB port.MENCARI DAN MENGIZINKAN PERANGKAT AUDIO BLUETOOTH
Persyaratan:
- Bluetooth® is activated on the multimedia system and audio device. - The audio device supports the Bluetooth* audio profiles A2DP and AVRCP. • The audio device is "visible" for other devices. Multimedia system: MENGIZINKAN PERANGKAT AUDIO BLUETOOTH® BARU
▶ Select Connect device. Detected equipment is displayed in the device list. ▶ Select an audio device. Authorisation starts. A code is displayed on the multimedia system and on the mobile phone. If the codes are identical, confirm on the audio device. Select No, only music. The Bluetooth ® audio device is connected with the multimedia system.MENGHUBUNGKAN PERANGKAT AUDIO BLUETOOTH YANG SEBELUMNYA TELAH DIIZINKAN
Select a Bluetooth ® audio device from the list. The connection is being established.Memulai pemutaran media
Persyaratan:
• A data storage medium is connected to the multimedia system. Multimedia system:  Select a media source.  G-Class - Owner's Manual MBUX multimedia system MediaMengontrol pemutaran media
Multimedia system:  To pause playback: select 📄. To continue playback: select ▶. To repeat a track: select □. FOR THE REPEAT FUNCTION THERE ARE THE FOLLOWING SETTINGS: • Select once: the active playlist is repeated. - Select twice: the current track is repeated. - Select three times: the repeat function is deactivated. To play back tracks in random order: select ✗. To rewind or fast-forward a track: tap on the desired point on the timeline. To select the next track: select ▶. To select the previous track: select ◀. To scroll through tracks quickly: press and hold ▶ or ▷. To show the current track list: select ≡.Opsi tambahan untuk mengatur pemutaran media
Multimedia system: MEMANGGIL OPSI TAMBAHAN
Select The additional options are shown. Select an option.Pencarian media
CATATAN TENTANG FUNGSI PENCARIAN DALAM KATEGORI
Under [≡] you can search through all available media files. There are several categories available for selection. The categories shown depend on the connected device and data format. The categories are available as soon as the entire media content has been read in and analysed. Availability of the media search with Android devices may be limited.MEMULAI PENCARIAN DALAM KATEGORI
Multimedia system:  Select a category.  G-Class - Owner's Manual MBUX multimedia system MediaMENGGUNAKAN PENCARIAN KATA KUNCI
Multimedia system:  You can look for content using the keyword search with free text input. Select A keyboard for character entry appears. Enter the term searched for. The search begins with the first character entered. The more characters entered the more concrete the search results become. Select the desired entry from the result list. If a list with several tracks is selected, then this is opened in the search. To playback all of the tracks in the list, select ⋯ and then Play now.Musik online
PERSYARATAN
• There is an account for the music streaming service. • A subscription for the music streaming service has been obtained. • The data volume is available. Depending on the country, data volume may need to be purchased. • A fast Internet connection for data transmission free of interference. The functions and services are country-dependent. For more information, consult a Mercedes-Benz Service Centre. Multimedia system: MENAMBAHKAN PENYEDIA STREAMING PERTAMA KALI ANDA MEMULAI APLIKASI
Select Online music. The overview of all supported streaming providers appears. ▶ Select a streaming provider. A QR code is shown on the display. ▶ Scan the QR code with the mobile phone. ▶ Confirm the connection request on the mobile phone.MENAMBAHKAN LEBIH BANYAK PENYEDIA STREAMING
Select Online music. The last active streaming provider is active. Select Select Music services. The overview of all supported streaming providers appears. Select a streaming provider. A QR code is shown on the display. ▶ Scan the QR code with the mobile phone. ▶ Confirm the connection request on the mobile phone.KELUAR DARI PENYEDIA STREAMING
Select Online music. The last active streaming provider is active.   G-Class - Owner's Manual MBUX multimedia system Media Select ☐. ▶ Select Music services. The overview of all supported streaming providers appears. Tap on Log out.MEMANGGIL MUSIK SECARA ONLINE
Multimedia system:  Select Online music. Music playback can be controlled with the Touch Control or by using the media application.MENCARI MUSIK DI MUSIK ONLINE
Multimedia system: MENCARI KATEGORI DI MUSIK ONLINE
The media content of the streaming provider can be scanned through in the category search. The available categories and the symbol for the category search depend on the streaming provider. ▶ Start the category search. The list of available categories appears. Select a category.PENCARIAN KATA KUNCI DI MUSIK ONLINE
You can look for content using the keyword search with free text input. Select □. A keyboard for character entry appears. Enter the term searched for. The more characters entered when using the keyword search, the more concrete the search results are. ▶ Select the desired entry from the result list. Depending on the selected hit, playback is started or a lower level in the search is opened.MEMANGGIL PENGATURAN MUSIK ONLINE
Multimedia system:  Select ☐. Select Music services. Select ☐ next to a streaming provider. Select a setting.INFORMASI TENTANG DOLBY ATMOS*
The MBUX multimedia system enables playback of Dolby Atmos ® content via the Burmester ® sound system, thereby providing an even more immersive three-dimensional sound experience. The function is available with Amazon Music ® or Apple Music ® or by using a USB device with the corresponding file formats. Availability of this function depends on the respective equipment.   G-Class - Owner's Manual MBUX multimedia system MediaMENGAKTIFKAN ATAU MENONAKTIFKAN DOLBY ATMOS*
Persyaratan:
- An account for the Amazon Music ® or Apple Music ® music streaming service is available. - A subscription to the Amazon Music ® or Apple Music ® music streaming service has been obtained. • Sufficient data volume is available. Depending on the country, data volume may need to be purchased. • A fast Internet connection for data transmission free of interference. The functions and services are country-dependent. For more information, consult a Mercedes-Benz Service Centre. Multimedia system: Media ▶ Select Online music. The overview of all supported streaming providers appears. Select Amazon Music ® or Apple Music ® . Select ☐. Tap to switch on Dolby Atmos ® . or Tap to switch off Dolby Atmos ® . Tracks which are present or available in Dolby Atmos ® will be played accordingly in this format by the sound system. MBUX SOUND DRIVE
INFORMASI TENTANG MBUX SOUND DRIVE
MBUX SOUND DRIVE allows you to experience your favourite song in a new interactive way. You can use various driving conditions to influence elements, e.g. instruments or voices in real time, and recreate them while driving. Different elements of your favourite song are thus built up and broken down again through the experience of different driving situations.KONDISI BERKENDARA BERIKUT MEMUNGKINKAN ANDA MENJADI BAGIAN DARI MUSIK (CONTOH):
- Accelerate - Brake SteerLAGU FAVORIT ANDA DAPAT DIPERLUAS DENGAN LAPISAN BERIKUT (CONTOH):
Bass Melody • Certain instruments i Availability of this function depends on the respective equipment.MENGOPERASIKAN MBUX SOUND DRIVE
Persyaratan:
• You have a Mercedes me ID. • The vehicle is linked to the Mercedes me ID.   G-Class - Owner's Manual MBUX multimedia system Media • The Digital Extra is available and has been activated. • There is an Internet connection. • The track is available. Multimedia system: Media Sound DriveMENGONTROL PEMUTARAN
Tap on ▶ to start playback. Playback starts. or Tap on ■ to stop playback. Playback stops.MENGAKTIFKAN ATAU MENONAKTIFKAN PEMUTARAN ACAK
Tap on [✗] to switch on random playback. Random playback starts. or Tap again on ✗ to switch off random playback. Random playback stops.MEMBUKA PENGATURAN
Tap on 📞 to access the settings. Select a setting.MEMBUKA DAFTAR PUTAR
Tap on 📊 to search the available content. Select a track.MENCARI LAGU
Tap on 🔒 to search for a track. G-Class - Owner's Manual MBUX multimedia system Radio Radio
Menyalakan radio
Multimedia system:  Start the application on the multimedia system home screen. The radio menu appears. You will hear the last station played on the last frequency band selected.Ikhtisar radio
 1 Preview image 2 Active frequency band 3 Station name, set frequency and additional information on the station Previous or next station 5 Settings Sound settings 7 Switches on traffic reports 8 Station list SearchMengatur pita frekuensi
Multimedia system:  Select a frequency band or a favourite in the selection above the preview image.Memilih stasiun radio
Multimedia system:  Swipe to the left or right on the control element or select a radio station.   G-Class - Owner's Manual MBUX multimedia system RadioMembuka daftar stasiun radio
Multimedia system:  Select :≡. The station list appears. Swipe the station list up or down. ▶ Select a station.Mencari stasiun radio menggunakan nama stasiun atau entri frekuensi
Multimedia system:  Select ⭕. Enter a station name or frequency. Select a station.Memilih stasiun radio yang direkomendasikan
Persyaratan:
\- The multimedia system has gathered sufficient data in order to show station suggestions. Multimedia system:  Select ☐. The recommended stations are shown. ▶ Select a suggested station. The selected station is played.Menyimpan stasiun radio
Multimedia system:  ▶ Select a radio station. Select ☆.Mengelola favorit
Multimedia system: MEMINDAHKAN STASIUN
Press :≡★. The list of favourites appears. Press ⋯ to the far right of the station name. Select Move. ▶ Move the station to the new position. - Press [≡★]. The list of favourites appears. - Press ⋯ to the far right of the station name. - Select Move. - Move the station to the new position.   G-Class - Owner's Manual MBUX multimedia system RadioMengatur pelacakan stasiun melalui radio internet
Persyaratan:
• A fast Internet connection for data transmission free of interference. Multimedia system:  Select Internet radio. ▶ Activate or deactivate the Service Following function. When the function is on, the station is searched for via Internet Radio. If you are driving out of the station's coverage area and the station is available via Internet radio, the Poor reception. Tap here to switch to Internet radio. message appears on the central display.Memanggil tayangan slide (mode radio FM/DAB)
Multimedia system:  The slide show displays additional information provided by the station as an image. This can include logos, album covers, music tracks, programmes, news or service information, for example. The slide show is available for DAB+ channels that broadcast additional information. Press the station picture on the central display. The image is enlarged.Mengaktifkan/menonaktifkan tayangan slide (mode radio FM/DAB)
Multimedia system:  Switch DAB Slideshow or Expanded Radio Slideshow on ☐ or off ☐. When both slideshows are switched on, the contents of both slideshows alternate.Mengaktifkan/menonaktifkan fungsi fiksasi frekuensi
Multimedia system:  ▶ Activate or deactivate Frequency fix. If the function is activated, the set frequency is kept even if the reception is poor.  G-Class - Owner's Manual MBUX multimedia system Radio Mengaktifkan/menonaktifkan pengumuman lalu lintas
Multimedia system:  ▶ Select Radio announcements. The traffic information service is switched on or off.Mengaktifkan/menonaktifkan pengumuman radio
Multimedia system:  ▶ Switch on Radio announcements. The selected radio announcements are played. When Radio announcements are first switched on, Traffic information service (TA), Travel and Warning are preset. or ▶ Switch off Radio announcements. No radio announcements are played.Memilih pengumuman radio
Multimedia system:  ▶ Switch an announcement on or off. For example, Traffic information service (TA), Travel or Warning can be selected. The radio announcements are not station-dependent.Mengatur peningkatan volume informasi lalu lintas
Multimedia system:  ▶ Select Navigation & traffic announcements. ▶ Set a value for Traffic announce. vol. increase. Increasing the volume of the traffic information service increases the volume of traffic announcements.Menampilkan teks radio
Multimedia system:  ▶ Activate or deactivate Radio text information.  G-Class - Owner's Manual MBUX multimedia system Sound Suara
Sistem suara surround Burmester®
INFORMASI TENTANG SISTEM SUARA SURROUND 3D BURMESTER®
The Burmester® 3D surround sound system is equipped with 18 loudspeakers. It is available for all functions in the radio and media modes. The call can also be made from other audio sources. Replace Media with, for example, Radio in the menu path.MEMANGGIL MENU SUARA PADA SISTEM SUARA SURROUND BURMESTER®
Multimedia system:  Select one of the functions shown to make settings.MENYESUAIKAN PENGATURAN TREBLE, MID, DAN BASS PADA SISTEM SUARA SURROUND BURMESTER
Multimedia system:  Set Treble, Mid or Bass.MENGAKTIFKAN ATAU MENONAKTIFKAN NORMALISASI KEKERASAN SUARA PADA SISTEM SUARA SURROUND BURMESTER®
Multimedia system:  The function compensates for differing loudness when changing between audio sources and within an audio source. Several levels are available for this purpose. The currently set level is displayed. Loudness normalisation can also be switched off. Switch on one level. or ▶ Switch off loudness normalisation.MENYESUAIKAN BALANCE DAN FADER PADA SISTEM SUARA SURROUND BURMESTER®
Multimedia system: MENGATUR BALANCE DAN FADER
Move the volume distribution between the right and left side of the vehicle and the front and rear of the vehicle in the grid shown. The volume is distributed between the left and right and front and rear loudspeakers in the vehicle.  G-Class - Owner's Manual MBUX multimedia system SoundMEMILIH PROFIL SUARA PADA SISTEM SUARA SURROUND BURMESTER®
Multimedia system: MENGATUR PROFIL SUARA YANG SUDAH ADA
▶ Select a sound profile.MEMBUAT PROFIL SUARA PRIBADI
Select Personal sound profile and 📄. Select Reconfigure. ▶ Restart the set-up assistant.MEMBUAT PROFIL SUARA PRIBADI UNTUK PERTAMA KALI:
▶ Select Personal sound profile. ▶ Open the set-up assistant with Start. Observe the messages on the display and select the preferred settings. The personal sound profile is created with the selected settings and can be selected in the Sound profiles menu.MENGUBAH PENGATURAN INDIVIDU PROFIL SUARA PRIBADI DI KEMUDIAN HARI:
Select Personal sound profile and [icon]. Adjust the desired settings. The availability of a Personal sound profile is dependent on the equipment. The set-up assistant is available when the vehicle is stationary. MENYESUAIKAN FOKUS SUARA PADA SISTEM SUARA SURROUND BURMESTER®
Multimedia system:  Select a seat row for sound focus. Sound focus is activated. or ▶ Select the row of seats again. Sound focus is deactivated.   G-Class - Owner's Manual MBUX multimedia system MBUX high-end rear seat entertainment system Sistem hiburan kursi belakang MBUX high-end
Keselamatan pengoperasian
PERINGATAN
Risk of injury from unsecured items in the vehicle If objects such as headphones/headsets or external audio/video sources are not secured in the vehicle interior, they can be flung around and hit vehicle occupants. Always stow these items or similar objects carefully so that they cannot be flung around, for example in a lockable vehicle stowage compartment. Observe the notes on loading the vehicle. ① Ventilation must not be impeded by covering the ventilation openings with items (such as newspaper, table-cloths, clothes, curtains, etc). ① No naked flame sources (such as lighted candles), shall be placed on apparatus.Ikhtisar Sistem Hiburan Kursi Belakang Kelas Atas
SISTEM HIBURAN KURSI BELAKANG KELAS ATAS TERDIRI ATAS:
• Two rear displays ① behind the head restraints of the front seats • A connection jack each for wired headphones • Two USB ports for charging USB devices ( → page 233) • Two ports for HDMI miniTERGANTUNG PADA PERLENGKAPAN, ANDA DAPAT MENGOPERASIKAN SISTEM HIBURAN KURSI BELAKANG KELAS ATAS:
- On the rear displays • Via the MBUX Voice Assistant   G-Class - Owner's Manual MBUX multimedia system MBUX high-end rear seat entertainment systemLayar belakang
IKHTISAR LAYAR BELAKANG
 Port for corded headphones with 4 pin stereo jack (headset with microphone) or 3 pin stereo jack, 3.5 mm stereo The rear displays are located behind the head restraints of the front seats. The rear displays are equipped with capacitive touchscreens. Further information on operating touchscreens ( → page 454). When the rear door is closed, the welcome screen appears. Nearly all MBUX multimedia system functions are also supported on the Rear Seat Entertainment System. Settings for the driver or for driver assistance systems as well as some system settings are however not possible. External user interfaces, e.g. Apple CarPlay ® and Android Auto cannot be used on the rear displays. Contents of the Digital Owner's Manual can only be called up on the MBUX multimedia system.MENGHIDUPKAN ATAU MEMATIKAN LAYAR BELAKANG
▶ Touch the Ⓞ button on the rear display. The rear display is switched on or off.MEMILIH ATAU MENAMBAH PENGGUNA
If the vehicle is linked with your Mercedes me user account, select a user. A set-up assistant guides you through the most important settings during first use. or ▶ Add a user (→ page 458). If you select Continue without selecting user, no specific settings for the user profile are loaded. The use of user profiles is seat-specific.INFORMASI LEBIH LANJUT TENTANG PROFIL PENGGUNA
• Overview of user profiles ( → page 457) • Selecting user options ( → page 458) • Synchronising user profiles ( → page 460) ① No biometric data can be stored at the rear seats.  G-Class - Owner's Manual MBUX multimedia system MBUX high-end rear seat entertainment system  HOME SCREEN OVERVIEW (REAR DISPLAY)  Example: home screen on the right rear display ① Calls up user profile settings and switches user 2 Uses the global search 3 Calls up the Control Centre (pull down) - Calls up Favourites - Shares display content - Calls up the Notifications Centre 4 Calls up favourites ⑤ Displays for status line, e.g. connection status, time, □ poor radio or TV reception 6 Adjusts climate control, for example on the right-hand rear display 7 Automatic air cleaning and fine particle status display (PM2.5 sensor) Starts the MBUX Voice Assistant 9 Calls up the home screen 10 Calls up application, including quick-access Calls up the device manager Display connection status for headphones, e.g. 📄 for connected Bluetooth® headphones 12 Selects playback via vehicle speakers 13 Press briefly: adjusts volume for headphones (if connected) or for vehicle speakers Press and hold: switches off sound for headphones (if connected) or for vehicle speakers The arrangement of buttons ⑥, ⑦ and ⑧ as well as ⑪, ⑫ and ⑬ in the lower menu bar depends on the seat.Headphone
IKHTISAR HEADPHONE (SISTEM HIBURAN KURSI BELAKANG)
WARNING Health hazard due to excessive volume on headphones Excessive volume can damage your hearing. Avoid wearing headphones for long periods of time and at too high a volume (85 decibels). ▶ Ensure that the volume is set to a comfortable level.HEADPHONE EKSTERNAL BERIKUT DAPAT DIHUBUNGKAN KE SETIAP LAYAR BELAKANG:
- Bluetooth ® headphones • A headset with microphone via a 4-pin stereo jack • Corded headphones via a 3-pin stereo jack, 3.5 mm  G-Class - Owner's Manual MBUX multimedia system MBUX high-end rear seat entertainment system The headphones are special equipment for the Rear Seat Entertainment System. You can also obtain the headphones from Mercedes-Benz Customer Solutions or in a specialist shop (see the manufacturer's operating instructions). The function of wireless headphones can be impaired by other radio-based electronic devices, such as mobile phones, for example.MENGHUBUNGKAN HEADPHONE BLUETOOTH* DENGAN SISTEM HIBURAN KURSI BELAKANG
Persyaratan:
\- Bluetooth ® is switched on in the multimedia system (→ page 469). On the headphones: press and hold the ⏻ button on the MB headphones. The headphones are switched on and the battery charge level is announced. Pairing mode is activated. If different headphones are used, the power button may be displayed differently. If the Bluetooth® headphones are connected to several vehicles or devices, reconnecting may take a longer time. In this case, you can reset the headphones and then reconnect them (see the manufacturer's Owner's Manual). On the rear display: select the 📊 headphones symbol in the lower menu bar. ▶ Select Connect new device. ▶ Select MB Headphones in the device list. The connection is established. When the connection is established, the headphones will announce "Bluetooth" connected" and "MBUX rear seat". In the lower menu bar, the * headphone symbol is shown on the left or right rear display. When connecting headphones, corded headphones have priority over Bluetooth® headphones.Kursi belakang
MENYESUAIKAN KURSI BELAKANG PADA SISTEM HIBURAN KURSI BELAKANG
Rear Seat Entertainment System: MENGATUR PEMANAS KURSI
Select Seat climate control. Select Seat heating.   G-Class - Owner's Manual MBUX multimedia system MBUX high-end rear seat entertainment system Press the seat symbol repeatedly until the desired heating level is set. Depending on the heating level, up to three indicator lamps will light up. If all indicator lamps are off, the seat heating is switched off.MENGATUR KESEIMBANGAN PEMANAS KURSI
▶ Select Seat climate control. ▶ Select Seat heating balance. Adjust the heat distribution for the desired seat.Menyesuaikan kontrol iklim belakang pada Sistem Hiburan Kursi Belakang
MENGATUR ALIRAN UDARA
▶ Select the temperature indicator at the lower edge of the rear display. Set the airflow with 📄 or ⚙ on the left or right seat.MENGATUR SUHU
Select the temperature indicator at the lower edge of the rear display. Set the temperature with ▲ or ▼ on the left or right seat.MENONAKTIFKAN KONTROL IKLIM BELAKANG
Set 0 on the left or right seat using Blower down. Rear climate control is deactivated.JIKA TERSEDIA, FUNGSI KONTROL IKLIM LAINNYA DAPAT DIAKSES:
Air quality • Stationary heaterMEMBUKA MENU KUALITAS UDARA
The fine particle status display informs you about the current particulate values inside and outside the vehicle. The measurement values are shown with the µg/m3 units (microgrammes per cubic metre). Select the fine particle status display. An animation of the automatic air cleaning taking place is shown. To improve the quality of the air inside the vehicle: switch on Ionisation. To switch on air-recirculation mode: select the vehicle symbol.Menyesuaikan pencahayaan ambient di kompartemen penumpang belakang
Rear Seat Entertainment System: Comfort Ambient lightMENGATUR WARNA
Select Colour. ▶ Select Monochrome or Multi-colour. ▶ Set the desired colour or colour scheme.MENYESUAIKAN KECERAHAN
Select Brightness. Adjust the brightness. Depending on the ambient light conditions, the ambient lighting will automatically switch between day and night modes.  G-Class - Owner's Manual MBUX multimedia system MBUX high-end rear seat entertainment systemMENGAKTIFKAN KECERAHAN UNTUK ZONA
Select Brightness. ▶ Switch off Link zones. The Direct, Indirect and Accents zones can be set separately.MENGAKTIFKAN EFEK
PERINGATAN
Risk of accident if ambient lighting and active ambient lighting effects are not switched on The warning support effects are fully active only if the respective driving or driving safety systems are switched on on the driving assistance menu. ▶ Ensure that the respective driving or driving safety systems are switched on. Select Effects. ▶ Activate the desired effect. i Further information on effects ( → page 247)Memilih pengaturan sistem di kompartemen penumpang belakang
Rear Seat Entertainment System:      MENYESUAIKAN KECERAHAN
Select Display. ▶ Select Display brightness. Adjust the brightness.MENGATUR DESAIN
Select Display. Select Designs. Set the design. or ▶ Adopt the design from the media display.MENGAKTIFKAN ATAU MENONAKTIFKAN LAYAR BERANDA
Select Display. ▶ Activate or deactivate Intelligent Homescreen.MENGATUR PAPAN KETIK DAN TULISAN TANGAN
Select Display. ▶ Select Keyboards and handwriting.FUNGSI-FUNGSI BERIKUT TERSEDIA:
• Selecting Keyboard languages    G-Class - Owner's Manual MBUX multimedia system MBUX high-end rear seat entertainment system • Activating Read out handwriting recognition • Activating Handwriting recognition • Selecting Writing speed • Selecting Reset my dictionary Further information on setting the keyboard and handwriting recognition for character entry ( → page 466)MENYESUAIKAN VOLUME AUDIO
To use quick-access: select the loudspeaker symbol in the lower menu bar. Adjust the volume for the headphones (if connected) or the volume of the vehicle speakers. In the System menu: select Audio. ▶ Select a setting, for example Navigation & traffic announcements ( → page 504).MENGHUBUNGKAN PERANGKAT DI PENGELOLA PERANGKAT
To use quick-access: select the 📄 headphones symbol in the lower menu bar. or In the System menu: select My devices. ▶ Select Search devices. ▶ Select a device that is to be connected. Headphones or headsets are connected with the rear display. Mobile phones or other devices are connected with the multimedia system.MENGATUR SENSITIVITAS LAYAR BELAKANG
▶ Select Touch Sensitivity. Select an option.MENAMPILKAN INFORMASI SISTEM
▶ Select System information.Menyiapkan Internet dan Bluetooth®
Rear Seat Entertainment System: PENGATURAN BLUETOOTH®
▶ Activate or deactivate Bluetooth. i Further information on Bluetooth ® ( → page 469).MENGGUNAKAN SISTEM MULTIMEDIA SEBAGAI WI-FI HOTSPOT
The multimedia system serves as a Wi-Fi hotspot for mobile communication devices such as a smartphone or tablet PC. With the connected devices, you can use apps which interact with the multimedia system. The data volume of the vehicle or an already connected tethering device is used for the data connection. ▶ Activate Wi-Fi ( → page 470). Select MBUX hotspot. Select Continue.   G-Class - Owner's Manual MBUX multimedia system MBUX high-end rear seat entertainment systemMENGHUBUNGKAN KE MBUX HOTSPOT
▶ Scan the QR code shown. i Further information on Wi-Fi connections ( → page 469). Further information on requirements and use of the multimedia system as a Wi-Fi hotspot ( → page 470).MENGGUNAKAN PERANGKAT KOMUNIKASI SELULER SEBAGAI WI-FI HOTSPOT (TETHERING)
An external Wi-Fi hotspot is accessed for the Internet connection of the multimedia system. The data tariff of the mobile communication device is used for the data connection. ① This function is country-dependent. Activate Wi-Fi. Select Manage Internet access. To select an Internet source: select Central display. In this way, the Internet access is used for the entire vehicle. or Select Rear. This enables Internet access via a Wi-Fi hotspot. ① Acquired package can only be selected on the media display. Select Continue. ▶ Select Search for access. Select the network. Log in at the Wi-Fi hotspot ( → page 470). Select Continue. Further information on requirements and use of a mobile communication device as a Wi-Fi hotspot ( → page 566).Navigasi
MENGAKTIFKAN NAVIGASI DI KOMPARTEMEN PENUMPANG BELAKANG Sistem Hiburan Kursi Belakang:
Navigation The map appears and shows the current vehicle position. Select an option in the navigation menu ( → page 485). In principle, you can use the multimedia system functions on the Rear Seat Entertainment System also.PILIHAN BERIKUT TERSEDIA DI LAYAR BELAKANG, CONTOHNYA:
- Enter the destination as a POI or address, for example (→ page 44). - Adopt the destination from the multimedia system or share with another seat. • Set the map scale ( → page 512).   G-Class - Owner's Manual MBUX multimedia system MBUX high-end rear seat entertainment system • Calculate the route ( → page 492). Route settings and route options, e.g. toll roads, are available for the route. You can add and manage intermediate destinations for the route planning ( → page 496). Alternative routes are available. • Route and destination information is shown during route guidance. \- The Live Traffic Information service shows traffic incidents, traffic flow information and warning message symbols. This option is not available in all countries. When starting the navigation in the rear passenger compartment for the first time, the map material of the multimedia system may still synchronise. A corresponding message appears in the navigation on the displays in the rear passenger compartment. After successful synchronisation, the navigation in the rear passenger compartment is restarted and can be used.Menggunakan ponsel di kompartemen penumpang belakang
Persyaratan:
• A mobile phone is connected to the multimedia system ( → page 528). Rear Seat Entertainment System:  Select Phone 1 or Phone 2. Access to phone content is made possible on the multimedia system. On the rear display: select Send access request. On the media display: confirm the access request with Yes. You can access the contacts on the mobile phone in the rear passenger compartment, for example.Layanan dan peramban web
IKHTISAR PERAMBAN WEB (SISTEM HIBURAN KURSI BELAKANG)
Depending on the country and the vehicle equipment, a web browser can be called up on the rear display. The Internet connection can be established using the communication module, Bluetooth ® or Wi-Fi.UNTUK INFORMASI LEBIH LANJUT TENTANG MENYIAPKAN KONEKSI INTERNET:
• Via communication module ( → page 565) Via Wi-Fi (→ page 566) Via Bluetooth * (→ page 566)MEMBUKA PERAMBAN WEB (SISTEM HIBURAN KURSI BELAKANG)
Persyaratan:
\- The vehicle is equipped with a permanently installed communication module.   G-Class - Owner's Manual MBUX multimedia system MBUX high-end rear seat entertainment system \- Alternatively, the Internet connection can be set up and established using Wi-Fi ( → page 566) or Bluetooth * ( → page 566). Rear Seat Entertainment System:  ▶ Call up a page. To stop the web browser: selectFUNGSI BERIKUT TERSEDIA:
- Calling up the web browser settings (→ page 569) • Deleting browser data ( → page 570) • Managing bookmarks ( → page 570)Media
INFORMASI TENTANG MODE MEDIA DI KOMPARTEMEN PENUMPANG BELAKANG
The Rear Seat Entertainment System has two HDMI mini connections for use on both rear displays. Additional information on the connections ( → page 588). The Rear Seat Entertainment System has two USB ports for charging USB devices ( → page 233), for example Bluetooth ® headphones. Data storage media for playing back content on the Rear Seat Entertainment System are connected via the USB ports for the multimedia system in the storage compartment in the centre console ( → page 575).SISTEM HIBURAN KURSI BELAKANG MENDUKUNG MEDIA PENYIMPANAN DATA BERIKUT:
USB devices - iPhone or iPod Apple CarPlay ® is not supported in the rear. • Devices which support the Media Transfer Protocol • Android devices that are used as MTP devices Android Auto is not supported in the rear. \- Bluetooth ® audio devices Authorisation of a Bluetooth ® audio device is carried out on the multimedia system ( → page 576) or on the Rear Seat Entertainment System. The Rear Seat Entertainment System can access the files on the multimedia system. Further information about media mode ( → page 573).  HIGH-DEFINITION MULTIMEDIA INTERFACE The terms HDMI and HDMI High-Definition Multimedia Interface, and the HDMI Logo are trademarks or registered trademarks of HDMI Licensing LLC in the United States and other countries.  G-Class - Owner's Manual MBUX multimedia system MBUX high-end rear seat entertainment systemMENGAKTIFKAN MODE MEDIA DI KOMPARTEMEN PENUMPANG BELAKANG
Persyaratan:
• A data storage medium is connected to the multimedia system. A Bluetooth® audio device is connected with the multimedia system. Rear Seat Entertainment System:  ▶ Close the media source. Select Bluetooth, USB, HDMI 1 or HDMI 2. A possible audio source is Online music. Further information on availability and perquisites ( → page 579).FUNGSI-FUNGSI BERIKUT TERSEDIA:
• Controlling media playback ( → page 598) • Using media search ( → page 578) - Searching for media files using categories (→ page 577) • □□ Calling up options (→ page 577) - Calling up settings (video and sound settings)BERBAGI SUMBER MEDIA DI DALAM KENDARAAN:
Select Select Share.MENGONTROL PEMUTARAN MEDIA DI SISTEM HIBURAN KURSI BELAKANG
Rear Seat Entertainment System:  To pause or continue playback: select □ or ▶. To select the next or previous track: select ▶ or ◀. To scroll through tracks quickly: press and hold ▶ or ▶. To rewind or fast-forward a track: tap on the desired point on the timeline. To play back tracks in random order: select ✗. To repeat a track: select FOR THE REPEAT FUNCTION THERE ARE THE FOLLOWING OPTIONS: Tap once: the active playlist is repeated. Tap twice: the current track is repeated. • Tap three times: the repeat function is deactivated. To display a full screen: select the cover.BERALIH KE VIDEO HDMI DI SISTEM HIBURAN KURSI BELAKANG
Rear Seat Entertainment System:  Connect an HDMI device using one of the two connections for HDMI mini. When the HDMI signal is connected to the rear seat entertainment system, the media of the connected HDMI device can be played back on the rear display. An HDMI device is, for example, a notebook or a smartphone.  G-Class - Owner's Manual MBUX multimedia system MBUX high-end rear seat entertainment system For further information about the HDMI connections; see ( → page 597). HDMI content cannot be controlled by touchscreen due to the technology.Radio
BERALIH KE RADIO DI RUANG PENUMPANG BELAKANG
Rear Seat Entertainment System: Radio Swipe left or right on the rear display. or Select a channel with ◀ or ▶. If the channel is changed on the multimedia system it changes also on the rear display. This is also done in reverse when setting the station or selecting a radio favourite on the rear displays.BERBAGI STASIUN RADIO DI DALAM KENDARAAN:
Select ⋯. Select Share.FUNGSI-FUNGSI BERIKUT TERSEDIA:
- Searching for radio stations (→ page 46) • Selecting from the station list ( → page 583) • Storing radio stations ( → page 583) • Setting the frequency band ( → page 582) • Calling up a slide show (→ page 584) - Switching settings on or off using 📄: Frequency fix Radio text information Adjusting sound settingsSuara
IKHTISAR PENGATURAN SUARA DI RUANG PENUMPANG BELAKANG
The sound settings depend on which sound system is available.TERGANTUNG PADA PERALATAN YANG TERPASANG, SALAH SATU SISTEM SUARA BERIKUT DIDUKUNG:
Sound system - Burmester ® surround sound system (→ page 586) • Burmester ® high-end 3D surround sound systemMEMILIH PENGATURAN SUARA DI RUANG PENUMPANG BELAKANG
Rear Seat Entertainment System: Settings System Select Sound. Select the sound settings.MENGAKTIFKAN ATAU MENONAKTIFKAN SPEAKER KENDARAAN DAN MENYESUAIKAN TINGKAT VOLUME
The audio playback can be moved from the headphones into the vehicle interior.   G-Class - Owner's Manual MBUX multimedia system MBUX high-end rear seat entertainment system Select ▶ Select the symbol for the vehicle loudspeaker in the lower menu bar. Playback via the vehicle loudspeakers is switched on or off. To set the volumes: move the control knob to the left or right on one of the scales and hold it until the desired volume is set.Menggunakan Asisten Suara MBUX
Persyaratan:
- The Voice Assistant wake-up call "Hey Mercedes" is switched on in the MBUX multimedia system settings ( → page 440). • Online functionality offers the full range of functions. Using the MBUX Voice Assistant you can operate the MBUX Rear Seat Entertainment System using voice input. You can use vernacular sentences for this. The voice assistant recognises different voices, learns and can thereby offer suitable suggestions. To activate the voice assistant: say the wake-up call "Hey Mercedes". or Select [0] in the lower menu bar. Say a voice command, e.g. set station. To deactivate the Voice Assistant: select in the lower menu bar. or Say the voice command "Close".  You can activate and deactivate the voice assistant from different seats.INFORMASI LEBIH LANJUT TENTANG ASISTEN SUARA:
• Conducting a dialogue ( → page 439) - Activating online voice control on the multimedia system (→ page 440) - Activating or deactivating the Contact upload for online recognition setting on the multimedia system ( → page 440) • Using audible help functions ( → page 445) • Notes on online voice control ( → page 442)  Back to Contents G-Class - Owner's Manual > Maintenance and care < Perawatan dan perawatan
This interactive PDF works like a website - tap or click a button to jump straight to where you want to go. You can return here at any time via the navigation bar at the top left. ASSYST PLUS service interval display 602 Maintenance Management 604 Telediagnostics 605 Engine compartment 606 Cleaning and care 615 G-Class - Owner's Manual > Maintenance and care ASSYST PLUS service interval display Tampilan interval servis ASSYST PLUS
Fungsi tampilan interval servis ASSYST PLUS
The ASSYST PLUS service interval display on the driver's display provides information on the remaining time or distance before the next service due date. You can hide this service display using the back button ↩ on the steering wheel.TERGANTUNG PADA CARA KENDARAAN DIGUNAKAN, TAMPILAN INTERVAL SERVIS ASSYST PLUS DAPAT MEMPERPENDEK INTERVAL SERVIS, MIS. DALAM KASUS BERIKUT:
• Mainly short-distance driving - When the engine is often left idling for long periods • In the event of frequent cold start phases • Vehicles with diesel particulate filters: in the event of frequently interrupted regeneration of the diesel particulate filter Mercedes-Benz recommends avoiding such operating conditions. You can obtain information concerning the servicing of your vehicle from a qualified specialist workshop, e.g. a Mercedes-Benz Service Centre.Menampilkan tanggal jatuh tempo servis
Driver display:  The next service due date is displayed. To exit the display: press the back button ↩ on the steering wheel.Informasi tentang pekerjaan servis rutin
CATATAN
Premature wear through failure to observe service due dates Service work which is not carried out at the right time or incompletely can lead to increased wear and damage to the vehicle. Observe the specified service intervals. If there are any uncertainties regarding the service due date, forexample if the battery is disconnected, operating conditions are difficult, etc., contact a qualified specialist workshop. ▶ Have the prescribed service work carried out at a qualified specialist workshop. G-Class - Owner's Manual > Maintenance and care ASSYST PLUS service interval displayCatatan tentang persyaratan servis khusus
The prescribed service interval is based on normal operation of the vehicle. Have the maintenance work carried out more often than prescribed if operating conditions are difficult or the vehicle is subject to increased stress. The ASSYST PLUS service interval display is only an aid. It is the responsibility of the driver of the vehicle to have maintenance work carried out more often than prescribed due to actual operating conditions and/or stresses.CONTOH KONDISI OPERASI YANG BERAT:
• Regular city driving with frequent intermediate stops • Mainly short-distance driving • Frequent operation in mountainous terrain or on poor road surfaces - When the engine is often left idling for long periods • Operation in particularly dusty conditions and/or if air-recirculation mode is frequently used In these or similar operating conditions, have the interior air filter, air filter, engine oil and oil filter, for example, changed more frequently. Check the tyres more frequently if the vehicle is operated under increased stress. Further information can be obtained at a qualified specialist workshop.Periode pemutusan baterai
The ASSYST PLUS service interval display can calculate the service due date only when the battery is connected. ▶ Display and note down the service due date on the driver display before disconnecting the battery ( → page 602). The period with disconnected battery is not taken into account by ASSYST PLUS. Deduct the period with disconnected battery from the time indicated on the driver display. • The calculated date serves as a new service due date. - The service interval for distance before service due date (km) is not affected in this regard.   G-Class - Owner's Manual > Maintenance and care Maintenance Management Manajemen Perawatan
Catatan tentang Manajemen Perawatan
If the Maintenance Management service is activated, relevant data is automatically transferred to the Mercedes-Benz customer centre. The customer centre transmits the data to the service partner that you have entered on the Mercedes-Benz website at: https://www.mercedes.me. You will then receive individual recommendations regarding the maintenance of your vehicle. The calculation of the optimal transmission time of the maintenance request to the service partner is subject to technical limitations that may cause the maintenance recommendation to be perceived as too early or too late or not to be made at all. In this case, you can conveniently arrange a maintenance appointment with the customer centre via the maintenance reminder in the multimedia system. Maintenance Management and the maintenance reminder in the multimedia system are not available in every country. Contact a Mercedes-Benz service centre to find out whether this function is available in your country.Data yang ditransfer saat menggunakan Manajemen Perawatan
When the service is activated, relevant data is automatically transferred to determine the required scope of maintenance as well as fault detection and fault rectification. Details on data transmission can be found in the data protection notes for Mercedes-Benz Support. These can be found at: https://www.mercedes.me under "My Account", "Privacy & Legal". (i) Maintenance Management and the maintenance reminder in the multimedia system are not available in every country.  G-Class - Owner's Manual > Maintenance and care TelediagnosticsTelediagnostik
Catatan tentang Telediagnosis
① This service is not available in all countries. The vehicle can detect if certain wear parts need to be replaced or if malfunctions have occurred in vehicle systems. If the Telediagnosis service is activated, relevant data is automatically transmitted to the manufacturer. If fault conditions are detected by the vehicle system self-diagnosis, the system transmits recommendations for action to the Mercedes-Benz customer centre depending on the fault detected. The customer centre transmits the data to the service partner that you have entered on the Mercedes-Benz website at: https://www.mercedes.me. For selected faults, the notification that a malfunction has been detected may appear in the multimedia system with a request to contact the Mercedes-Benz Customer Centre. From this message, a call can be made directly to the customer centre for assistance. The transmission of a notification to the multimedia system depends on the country, vehicle model and equipment and requires a fast data connection, over which the service provider has no influence. ① Reliable fault detection is subject to technical limitations. Therefore, only a limited selection of faults can be detected and rec- ommendations for action transmitted to the customer centre and the service partners. Mercedes-Benz AG is continuously working on the expansion of this service. The fault detection depends on the country, vehicle model and equipment.Data yang dikirim saat menggunakan Telediagnosis
When the service is activated, relevant data is automatically transferred to determine the required scope of maintenance as well as fault detection and fault rectification. Details on data transmission can be found in the data protection notes for Mercedes-Benz Support. These can be found at: https://www.mercedes.me under "My Account", "Privacy & Legal". The scope of the transmitted data depends on the vehicle model and its equipment. For technical reasons, not all data is available at all times. G-Class - Owner's Manual > Maintenance and care Engine compartmentRuang mesin
Membuka dan menutup kap mesin
PERINGATAN
Risk of accident due to driving with the bonnet unlocked The bonnet may open and block your view. ▶ Never release the bonnet when driving. Before every trip, ensure that the engine bonnet is locked. PERINGATAN
Risk of accident and injury when opening and closing the bonnet The bonnet may suddenly drop into the end position. There is a risk of injury for anyone in the engine bonnet's range of movement. Do not open or close the bonnet if there is a person in the bonnet's range of movement. PERINGATAN
Risk of burns when opening the bonnetJIKA ANDA MEMBUKA KAP MESIN SAAT MESIN MENGALAMI PANAS BERLEBIH ATAU TERJADI KEBAKARAN DI RUANG MESIN, SITUASI BERIKUT DAPAT TERJADI:
• You may come into contact with hot gases. - You may come into contact with other escaping hot operating fluids. Before opening the bonnet, allow the engine to cool down. In the event of a fire in the engine compartment, keep the bonnet closed and call the fire service.   G-Class - Owner's Manual > Maintenance and care Engine compartment A
PERINGATAN
Risk of injury due to moving parts Components in the engine compartment can continue to run or start unexpectedly even when the ignition is switched off. Observe the following before performing tasks in the engine compartment: ▶ Switch off the ignition. ▶ Never touch the danger zone surrounding moving components, e.g. the rotation area of the fan. Remove jewellery and watches. ▶ Keep items of clothing and hair away from moving parts.A
PERINGATAN
Risk of injury from touching components under voltage The ignition system and the fuel injection system operate at high voltage. You could receive an electric shock. ▶ Never touch ignition system or fuel injection system components when the vehicle is switched on.KOMPONEN BERALIRAN LISTRIK MELIPUTI CONTOH BERIKUT:
Ignition coils - Fuel injectors • Electric lines to the ignition coils and the fuel injectorsA
PERINGATAN
Risk of burns from hot component parts in the engine compartment Certain component parts in the engine compartment can be very hot, e.g. the engine, the cooler and parts of the exhaust system. Allow the engine to cool down and only touch component parts described in the following.A
PERINGATAN
Risk of injury from using the windscreen wipers when the bonnet is open If the windscreen wipers start moving when the bonnet is open, you could be trapped by the wiper linkage. ▶ Always switch off the windscreen wipers and vehicle before opening the engine bonnet.MEMBUKA KAP MESIN
  G-Class - Owner's Manual > Maintenance and care Engine compartment To release the bonnet, pull on handle ①.  Push handle of the bonnet catch upwards and lift the bonnet by approximately 40 cm. The bonnet will be opened and held open automatically by the pneumatic spring.MENUTUP KAP MESIN
▶ Lower the bonnet until the bonnet catch engages. Then, press the bonnet firmly into the lock with both hands until it is completely closed. If the bonnet can still be lifted slightly, open the bonnet again and repeat the previous step until it engages correctly.Oli mesin
MEMERIKSA LEVEL OLI MESIN MENGGUNAKAN TAMPILAN PENGEMUDI
Persyaratan
• The engine has been warmed up. • The vehicle is parked on a level surface. • The engine is running at idle speed. • The bonnet is closed. Determining the engine oil level can take up to 30 minutes with a normal driving style and even longer with an active driving style. Before every off-road drive, fill the engine oil level up to the maximum. Wait at least five minutes after the initial check using the on-board computer. After this, make a second request and top up the engine oil according to the specifications. Driver display: Service The engine oil level is shown.SALAH SATU PESAN BERIKUT AKAN MUNCUL DI TAMPILAN PENGEMUDI:
- Engine oil level Measuring now...: the engine oil level cannot be determined yet. Repeat the request after a maximum of 30 minutes' driving. - Engine oil level OK and the bar display for indicating the engine oil level on the driver's display is green and is between "min" and "max": the engine oil level is correct. If the bar is at "min": Add around 1 l of engine oil.   G-Class - Owner's Manual > Maintenance and care Engine compartment If the bar is in the middle: Add approximately 0.5 l of engine oil. - Engine oil level Top up 1,0 l and the bar display for indicating the engine oil level on the driver's display is yellow and is below "min": ▶ Add 1 l of engine oil. - Engine oil level Reduce and the bar display for indicating the engine oil level on the driver's display is yellow and is above "max": Drain off any excess engine oil that has been added. To do so, consult a qualified specialist workshop. • For engine oil level, switch on vehicle Switch on the vehicle to check the engine oil level. - Engine oil level System inoperative: The oil level sensor is defective or not connected. Consult a qualified specialist workshop. • Engine oil level System currently inoperative ▶ Close the bonnet. MENAMBAH OLI MESIN
PERINGATAN
Risk of burns when opening the bonnetJIKA ANDA MEMBUKA KAP MESIN SAAT MESIN TERLALU PANAS ATAU TERJADI KEBAKARAN DI RUANG MESIN, SITUASI BERIKUT DAPAT TERJADI:
• You may come into contact with hot gases. - You may come into contact with other escaping hot operating fluids. Before opening the bonnet, allow the engine to cool down. In the event of a fire in the engine compartment, keep the bonnet closed and call the fire service.PERINGATAN
Risk of injury due to moving parts Components in the engine compartment may continue to run or start unexpectedly even when the drive system is switched off. Observe the following if you must open the bonnet: ▶ Switch off the vehicle. ▶ Never touch the danger zones surrounding moving components, e.g. the rotation area of the fan. Remove jewellery and watches. ▶ Keep items of clothing and hair away from moving parts. G-Class - Owner's Manual > Maintenance and care Engine compartmentA
PERINGATAN
Risk of burns from hot component parts in the engine compartment Certain component parts in the engine compartment can be very hot, e.g. the engine, the cooler and parts of the exhaust system. ▶ Allow the engine to cool down and only touch component parts described in the following.A
PERINGATAN
Risk of fire and injury from engine oil If engine oil comes into contact with hot component parts in the engine compartment, it may ignite. ▶ Make sure that no engine oil is spilled next to the filler opening. Allow the engine to cool off and thoroughly clean the engine oil from component parts before starting the vehicle.!
CATATAN
Engine damage caused by an incorrect oil filter, incorrect oil or additives Do not use engine oils or oil filters which do not correspond to the specifications explicitly prescribed for the service intervals. ▶ Follow the instructions on the service interval display for changing the engine oil and observe the prescribed change intervals. Do not use additives.!
CATATAN
Damage caused by topping up too much engine oil Excess engine oil can damage the engine or catalytic converter. ▶ Have excess engine oil removed at a qualified specialist workshop.i
Depending on driving style, the vehicle will consume up to 0.8 litres of oil per 1000 km. The oil consumption may also be higher than this when the vehicle is new or if you frequently drive at high engine speeds.    G-Class - Owner's Manual > Maintenance and care Engine compartment  ▶ Turn cap ⓘ anti-clockwise and remove it. Top up the engine oil. Replace cap ① and turn it clockwise until it engages. ▶ Check the oil level again ( → page 38). Memeriksa level cairan pendingin
PERINGATAN
Risk of burns when opening the bonnetJIKA ANDA MEMBUKA KAP MESIN SAAT MESIN TERLALU PANAS ATAU TERJADI KEBAKARAN DI RUANG MESIN, SITUASI BERIKUT DAPAT TERJADI:
• You may come into contact with hot gases. - You may come into contact with other escaping hot operating fluids. Before opening the bonnet, allow the engine to cool down. In the event of a fire in the engine compartment, keep the bonnet closed and call the fire service.  G-Class - Owner's Manual > Maintenance and care Engine compartment A
PERINGATAN
Risk of injury due to moving parts Components in the engine compartment can continue to run or start unexpectedly even when the ignition is switched off. Observe the following before performing tasks in the engine compartment: ▶ Switch off the ignition. ▶ Never touch the danger zone surrounding moving components, e.g. the rotation area of the fan. Remove jewellery and watches. ▶ Keep items of clothing and hair away from moving parts.A
PERINGATAN
Risk of burns from hot component parts in the engine compartment Certain component parts in the engine compartment can be very hot, e.g. the engine, the cooler and parts of the exhaust system. ▶ Allow the engine to cool down and only touch component parts described in the following.A
PERINGATAN
Risk of scalding from hot coolant If you open the cap, you could scald yourself. ▶ Allow the engine to cool down before opening the cap. When opening the cap, wear protective gloves and safety glasses. ▶ Open the cap slowly to release pressure.   Park the vehicle on a level surface. Check the coolant temperature display on the driver display. The coolant temperature must be below 70°C. Slowly turn cap ⓘ anti-clockwise to release overpressure. Continue turning cap ① anti-clockwise and remove it.  G-Class - Owner's Manual > Maintenance and care Engine compartmentKADAR CAIRAN PENDINGIN BENAR DALAM KASUS BERIKUT:
• If the engine is cold, the coolant is up to marker bar 2. - If the engine is warm, the coolant is up to 1.5 cm above marker bar 2 . If necessary, top up with coolant that has been approved for Mercedes-Benz. (i) Further information on coolant ( → page 754).Mengisi ulang sistem pencuci kaca depan
PERINGATAN
Risk of burns when opening the bonnetJIKA ANDA MEMBUKA KAP MESIN SAAT MESIN TERLALU PANAS ATAU TERJADI KEBAKARAN DI RUANG MESIN, SITUASI BERIKUT DAPAT TERJADI:
• You may come into contact with hot gases. - You may come into contact with other escaping hot operating fluids. Before opening the bonnet, allow the engine to cool down. In the event of a fire in the engine compartment, keep the bonnet closed and call the fire service.  PERINGATAN
Risk of burns from hot component parts in the engine compartment Certain component parts in the engine compartment can be very hot, e.g. the engine, the cooler and parts of the exhaust system. Allow the engine to cool down and only touch component parts described in the following. PERINGATAN
Risk of injury due to moving parts Components in the engine compartment can continue to run or start unexpectedly even when the ignition is switched off. Observe the following before performing tasks in the engine compartment: ▶ Switch off the ignition. ▶ Never touch the danger zone surrounding moving components, e.g. the rotation area of the fan. Remove jewellery and watches. ▶ Keep items of clothing and hair away from moving parts.  G-Class - Owner's Manual > Maintenance and care Engine compartment PERINGATAN
Risk of fire and injury due to windscreen washer concentrate Windscreen washer concentrate is highly flammable. It could ignite if it comes into contact with hot engine component parts or the exhaust system. Make sure that no windscreen washer concentrate spills out next to the filler opening.  ▶ Turn cap 🔒 anti-clockwise and remove it. Top up the washer fluid. Replace cap ① and turn it clockwise until it engages.Menjaga saluran udara/air tetap bersih
Keep the area between the bonnet and the windscreen free of deposits, e.g. ice, snow or leaves.    G-Class - Owner's Manual > Maintenance and care Cleaning and care< Pembersihan dan perawatan
Information on washing the vehicle in a car wash PERINGATAN
Risk of an accident due to reduced braking power after washing the vehicle Braking efficiency is reduced after washing the vehicle. After the vehicle has been washed, brake carefully while paying attention to the traffic conditions until braking power has been fully restored.  CATATAN
Damage from automatic brakingKENDARAAN AKAN MENGEREM SECARA OTONOM DALAM SITUASI TERTENTU JIKA FUNGSI BERIKUT AKTIF:
• Active Brake Assist • Active Distance Assist DISTRONIC • HOLD function • Active Parking Assist To avoid damage to the vehicle, switch these systems off e.g. before towing it or in a car wash. CATATAN
Damage due to unsuitable car wash Before driving into a car wash make sure that the car wash is suitable for the vehicle dimensions. ▶ Ensure there is sufficient ground clearance between the underbody and the guide rails of the car wash. ▶ Ensure that the clearance width of the car wash, in particular the width of the guide rails, is sufficient.  UNTUK MENGHINDARI KERUSAKAN PADA KENDARAAN ANDA SAAT MENGGUNAKAN CUCIAN MOBIL, PASTIKAN HAL BERIKUT SEBELUMNYA:
• Active Distance Assist DISTRONIC is switched off. • The HOLD function is switched off. • The 360° camera or the reversing camera is switched off. • The side windows and sliding sunroof are completely closed. • The outside mirrors are retracted. • The blower for the ventilation and heating is switched off. • The windscreen wiper switch is in position 0. - Vehicles with KEYLESS-GO: The key is a minimum distance of 3 m away from the vehicle. Otherwise a door may lock and unlock unintentionally. • For car washes with conveyor systems: Neutral gear N is engaged. \- If you leave the vehicle while it is being washed, ensure the key is located in the vehicle. The park position P is otherwise automatically engaged. Removing the wax from the windscreen and the wiper rubber after washing the vehicle will help to avoid smearing and reduce wiper noise.Mode pencucian mobil
In car wash mode, the vehicle is prepared for driving into an automatic car wash. Car wash mode can be activated up to a speed of 20 km/h ( → page 617).KETIKA MODE CUCI MOBIL DIAKTIFKAN, PESAN MODE CUCI MOBIL AKTIF AKAN MUNCUL DI LAYAR PENGEMUDI. PENYESUAIAN BERIKUT AKAN DILAKUKAN:
• The outside mirrors will be folded in. - To prevent the windscreen washer system from starting up automatically, the rain sensor will be deactivated. • Air-recirculation mode will be activated. • The rear window wiper will be deactivated. • The windows and the sliding sunroof will be closed. • Parking Assist PARKTRONIC will be deactivated. - Vehicles with 360° camera: the front image will be activated after approximately eight seconds. If one of the settings cannot be selected, this is displayed by a behind the respective setting. Pressing Switch off will cancel car wash mode. Car wash mode will automatically be deactivated above a speed of 20 km/h. You can also switch off car wash mode via the MBUX multimedia system ( → page 617).PENGATURAN BERIKUT AKAN DIATUR ULANG KETIKA MODE CUCI MOBIL DINONAKTIFKAN:
• The outside mirrors will be folded out. • The rain sensor will be activated. • Air-recirculation mode will be deactivated. • The windows and the sliding sunroof will remain closed. • The rear window wiper will be activated.  G-Class - Owner's Manual > Maintenance and care Cleaning and care - Parking Assist PARKTRONIC will be reset to the previously selected setting. - Vehicles with 360° camera: the front image will be deactivated at speeds above 18 km/h.Mengaktifkan/menonaktifkan mode cuci mobil
Persyaratan:
• The vehicle is stationary. • The vehicle is switched on. Multimedia system: MENGAKTIFKAN MODE CUCI MOBIL
Select Car wash mode. Select Activate. If one of the settings cannot be selected, this will be shown by a X next to the respective setting. For an overview of the settings configured when you activate car wash mode (→ page 616).MENONAKTIFKAN MODE CUCI MOBIL
Select Switch off. The settings of car wash mode will be reset.  Car wash mode will be automatically deactivated as soon as your speed exceeds 20 km/h.Informasi penggunaan pembersih bertekanan tinggi
⚠ WARNING Risk of an accident when using high-pressure cleaners with round-spray nozzles The water jet can cause externally invisible damage. Components damaged in this way may unexpectedly fail. Do not use a high-pressure cleaner with round-spray nozzles. ▶ Have damaged tyres or chassis parts replaced immediately.UNTUK MENGHINDARI KERUSAKAN PADA KENDARAAN ANDA, PERHATIKAN HAL BERIKUT SAAT MENGGUNAKAN PEMBERSIH BERTEKANAN TINGGI:
- Vehicles with KEYLESS-GO: The key is at a minimum distance of 3 m away from the vehicle. Otherwise the doors could lock and unlock unintentionally. - Maintain a distance of at least 30 cm to the vehicle. - Vehicles with decorative foil: Parts of your vehicle are covered with a decorative foil. Maintain a distance of at least 70 cm between the foil-covered parts of the vehicle and the nozzle of the high-pressure cleaner. Move the nozzle of the high-pressure cleaner around while cleaning. The water temperature of the high-pressure cleaner must not exceed 60°C.  G-Class - Owner's Manual > Maintenance and care Cleaning and care - Observe the information on the correct distance in the equipment manufacturer's operating instructions. - Do not direct the nozzle of the high-pressure cleaner directly at sensitive parts, e.g. tyres, gaps, electrical components, batteries, illuminants or louvres.Mencuci kendaraan dengan tangan
CATATAN
Damage to the wheel arch flares and bumpers if used as a step The wheel arch flares and bumpers can be damaged or become detached from the vehicle if you use them as a step. ▶ Only use the two steps indicated on the rear bumper. CATATAN
Engine damage due to water ingress Take care not to point the water jet directly towards the air inlet grille below the bonnet. Observe the relevant legal requirements (for example in some countries, washing by hand is permitted only in specially designated wash bays). Use a mild cleaning agent, e.g. car shampoo. Do not use acidic cleaning agents. Wash the vehicle with lukewarm water using a soft car sponge. When doing so, do not expose the vehicle to direct sunlight. Carefully hose the vehicle off with water and dry using a chamois. i Observe the notes on the care of car parts ( → page 620).Catatan perawatan cat/finishing doff
To avoid damaging the paintwork and interfering with the driving assistance systems, please observe the following notes:CAT
- Insect remains: soak with insect remover and rinse off the treated areas afterwards. • Bird droppings: soak with water and rinse off afterwards. - Tree resin, oils, fuels and greases: remove by rubbing gently with a cloth soaked in petroleum ether or lighter fluid. • Coolant and brake fluid: remove with a damp cloth and clean water. • Tar stains: use tar remover. • Wax: use silicone remover. - Do not attach stickers, foil or similar materials. Only have foil attached to the bumper at a qualified specialist workshop. - Remove dirt immediately, where possible. Do not use acid solutions and acidic cleaners.FINISHING DOFF
• Only use care products approved for Mercedes-Benz. - Do not attach stickers, foils or similar materials. Only have foil attached to the bumper at a qualified specialist workshop. • Do not polish the vehicle and light-alloy wheels. • Only use car washes that correspond to the latest engineering standards.   G-Class - Owner's Manual > Maintenance and care Cleaning and care • Do not use car wash programmes with a final hot wax treatment. - Do not use paint cleaners, buffing or polishing products, gloss preservers, e.g.wax.JIKA TERJADI KERUSAKAN CAT:
- Always have paintwork repairs carried out at a qualified specialist workshop. • Make sure the radar sensors are working ( → page 338).Catatan tentang membersihkan film dekoratif
Observe the "Notes on paintwork / matt finish paintwork care" ( → page 618). They also apply to matt decorative films. Observe the notes on cleaning decorative films to avoid damage.PEMBERSIHAN
- When cleaning with the high-pressure cleaner, maintain a distance of at least 70 cm between the foil-covered parts of the vehicle and the nozzle of the high-pressure cleaner. - For cleaning, use plenty of water and a mild cleaning agent without additives or abrasive substances (e.g. a car shampoo approved for Mercedes-Benz). • Do not use acidic cleaning agents. - Remove dirt as soon as possible. Avoid rubbing too hard in order not to damage the decorative film irreparably. - If there is dirt on the finish or if the decorative film is dull: use the paint cleaner recommended and approved for Mercedes-Benz. - Insect remains: Soak with insect remover and rinse off the treated areas afterwards. • Bird droppings: Soak with water and rinse off afterwards. \- To prevent water stains, dry a film-wrapped vehicle with a soft, absorbent cloth after every car wash.MENGHINDARI KERUSAKAN PADA FILM DEKORATIF
• The service life and colouring of decorative films are impaired by: - Sunlight - Temperature (e.g. hot air blower) - Weather conditions - Stone chippings and dirt Chemical cleaning agents Oily products - Do not use polish on matt decorative film. Polishing will have the effect of shining the film-wrapped surface. - Do not treat matt or structured decorative films with wax. Permanent stains may occur. Scratches, corrosive deposits, areas affected by corrosion and damage caused by incorrect care cannot always be completely repaired. In this case, contact a qualified specialist workshop. You can obtain more information on care and cleaning agents from the manufacturer. In the case of film-wrapped surfaces, visual differences may occur between the surfaces that were not protected by a decorative film after a decorative film has been removed. i Have work or repairs to decorative films carried out at a qualified specialist workshop (e.g. at a Mercedes-Benz Service Centre).  G-Class - Owner's Manual > Maintenance and care Cleaning and careInformasi tentang film kaca
CATATAN
Damage to electronic components due to excess fluids When window films have been retrofitted, fluids such as cleaning agents or water may run down and get behind trim parts of the vehicle interior and cause damage to electronic components. ▶ Use cleaning agents as sparingly as possible. ▶ Immediately absorb any excess fluids.Catatan tentang pembersihan dan perawatan suku cadang mobil
PERINGATAN
Risk of entrapment if the windscreen wipers are switched on while the windscreen is being cleaned If the windscreen wipers are set in motion while you are cleaning the windscreen or wiper blades, you can be trapped by the wiper arm. ▶ Always switch off the windscreen wipers and the vehicle before cleaning the windscreen or wiper blades. CATATAN
Damage due to use of acidic cleaning agents Do not use acidic cleaning agents. Otherwise, the surfaces could be damaged. To avoid damage to the vehicle, observe the notes on cleaning and care of the following car parts:KACA
CATATAN
Damage to electronic components due to excess fluids When cleaning the windows from the inside, fluids such as cleaning agents or water may run down and get behind trim parts of the vehicle interior and cause damage to electronic components. ▶ Use cleaning agents as sparingly as possible. ▶ Immediately absorb any excess fluids. - Clean the windows on the inside and outside with a damp cloth and with a cleaning agent recommended for Mercedes-Benz. - Do not use dry cloths or abrasive or solvent-based cleaning agents to clean the insides of windows. After changing the wiper blades or treating the vehicle with wax, clean the windscreen thoroughly with cleaning agents recommended for Mercedes-Benz. Failure to observe the application instructions may result in damage, smear marks or dazzling spots. Remove external misting or dirt on the windscreen in front of the multifunction camera. Otherwise, driving systems and driving safety systems may be impaired or unavailable ( → page 338).   G-Class - Owner's Manual > Maintenance and care Cleaning and careRODA DAN VELG
• Use water and acid-free wheel cleaners. - Do not use acidic wheel cleaners to remove brake dust. This could damage wheel bolts and brake components. - To avoid corrosion of the brake discs and pads, drive the vehicle for a few minutes after cleaning before parking it. The brake discs and brake linings will warm up and dry out.LAMPU EKSTERIOR
- Clean the lenses with a wet sponge and mild cleaning agent (e.g. car shampoo). - Use only cleaning agents or cleaning cloths that are suitable for plastic lenses.SENSOR
- Clean the sensors in the front and rear part of the vehicle with car shampoo, plenty of water and a soft cloth ( → page 338). - When using a high-pressure cleaner, maintain a minimum distance of 30 cm.PENARIK TRAILER
- Observe the notes on care in the trailer hitch manufacturer's owner's manual. • Do not clean the ball neck with a high-pressure cleaner or solvent. - Remove traces of rust on the ball (e.g. with a wire brush). - Remove dirt with a lint-free cloth. • After cleaning, lightly oil or grease the ball head. Before using trailers with anti-swerve coupling, note the manufacturer's owner's manual. Catatan tentang perawatan interior
⚠ WARNING Risk of injury from plastic parts breaking off after the use of solvent-based care products Care and cleaning products containing solvents can cause surfaces in the cockpit to become porous. When the airbags are deployed, plastic parts may break away. Do not use any care or cleaning products containing solvents to clean the cockpit. ⚠ WARNING Risk of injury or fatal injuries from bleached seat belts Bleaching or dyeing seat belts can severely weaken them. This can, for example, cause seat belts to tear or fail in an accident. ▶ Never bleach or dye seat belts.  CATATAN
Property damage due to disinfectants The interior includes a number of sensitive surfaces such as displays, plastics and leather. Disinfectants can contain alcohol and other substances that penetrate and damage surfaces. Technology behind buttons and displays can also be damaged. ▶ Do not use disinfectant on interior surfaces. To avoid damage to the vehicle, observe the following notes on cleaning and care:SABUK PENGAMAN
• Clean with lukewarm, soapy water. • Do not use chemical cleaning agents. • Do not dry by heating to more than 80 °C or exposing to direct sunlight.LAYAR
• Switch off the display and allow it to cool. - Clean the surface carefully with a microfibre cloth and a suitable display care product (TFT LCD). • Do not use any other agents.TRIM PLASTIK
• Clean with a damp microfibre cloth. • If it is very dirty, use a cleaning agent recommended for Mercedes-Benz. • Do not attach stickers, plastic film or similar materials. - Do not allow cosmetics, insect repellent or sun cream to come into contact with the plastic trim.KAYU ASLI DAN ELEMEN TRIM
• Clean with a microfibre cloth. - Black piano-lacquer look: clean with a damp cloth and soapy water. • If it is very dirty, use a cleaning agent recommended for Mercedes-Benz. • Do not use solvent-based cleaning agents, polishes or waxes.HEADLINER
• Clean with a brush or dry shampoo.KARPET
\- Use a carpets and textiles cleaning agent recommended for Mercedes-Benz.RODA KEMUDI DARI KULIT IMITASI
- Clean the entire steering wheel with a damp cotton cloth and a 1% soap solution. Do not spot clean. • Use cleaning and care products recommended for Mercedes-Benz. • Do not use a microfibre cloth. • Do not use oil-based cleaning and care products.RODA KEMUDI DARI KULIT ASLI ATAU DINAMICA
CATATAN
Damage caused by wrong cleaners Do not use solvent-based cleaning agents such as tar remover or wheel cleaner; neither should you use polishes or waxes. Otherwise you may damage the finish. - Clean with a damp cloth and a 1% soap solution and then wipe with a dry cloth. • If it is very dirty, use a cleaning agent recommended for Mercedes-Benz. • Leather care: use a leather care agent recommended for Mercedes-Benz.   G-Class - Owner's Manual > Maintenance and care Cleaning and care • Do not allow the leather to become too damp. • Do not use a microfibre cloth. Leather is a natural product. It has natural surface characteristics, such as differences in structure, marks caused by growth and injury or subtle colour differences. These surface characteristics are particular to leather, and are not material defects. Leather is also subject to a natural ageing process, which changes the surface characteristics.SARUNG KURSI KULIT ASLI
- Vacuum up dirt such as crumbs or dust and then clean the seat covers with a damp cotton cloth and wipe down with a dry cloth. Regularly clean the seat covers. - If they are very dirty, use an aftercare leather care agent recommended for Mercedes-Benz. • Leather care: use a leather care agent recommended for Mercedes-Benz. • Do not use a microfibre cloth. • Do not allow the leather to become too damp. • Do not use oil-based cleaning and care products. Leather is a natural product. It has natural surface characteristics, such as differences in structure, marks caused by growth and injury or subtle colour differences. These surface characteristics are particular to leather, and are not material defects. Leather is also subject to a natural ageing process, which changes the surface characteristics. Waves or wrinkling in the seat cover may occur due to the stress on the seat; this is caused by the natural leather material.  Regular cleaning and care of the leather will reduce dirt build-up, wear marks and ageing damage and thus significantly extend its life span. Clothing that can leave stains (e.g. jeans) may discolour the leather.SARUNG KURSI KULIT IMITASI
• Vacuum up dirt such as crumbs or dust and then use a damp cotton cloth and a 1% soap solution to clean the entire seat cover. Do not spot clean. • Use cleaning and care products recommended for Mercedes-Benz. • Do not use a microfibre cloth. • Do not use oil-based cleaning and care products.LANTAI BAGASI KAYU
CATATAN
Damage caused to the wood luggage compartment floor by wrong cleaners Do not use microfibre cloths. Do not use commercially available furniture polishes and sprays. Do not use steam cleaners. Do not apply self-adhesive films or adhesive strips to the wooden luggage-compartment floor; the solvent residue and plasticisers contained in them may destroy the paintwork.MEMBERSIHKAN LANTAI BAGASI KAYU
• Use a cotton cloth to remove dust, dirt and fingerprints. • If necessary, moisten the cotton cloth with clean water.   G-Class - Owner's Manual > Maintenance and care Cleaning and care Use care oil recommended and approved by Mercedes-Benz to care for and protect the wooden luggage-compartment floor. This revitalises the wooden surface and increases the resilience of the wood.MERAWAT LANTAI BAGASI KAYU
- Sand the wooden surface along the grain with the sanding pad. • Clean off the sanding dust. • Using a cotton cloth, distribute a thin layer of care oil evenly along the grain on the wooden surface. • Using a second cotton cloth, rub in the remaining care oil. - Allow to soak in for approx. four hours before loading. • For heavily worn surfaces, repeat the treatment if necessary.   Back to Contents G-Class - Owner's Manual Breakdown assistance < Bantuan gangguan
This interactive PDF works like a website - tap or click a button to jump straight to where you want to go. You can return here at any time via the navigation bar at the top left. Emergency 626 Flat tyre 628 Battery (vehicle) 632 Tow-starting or towing away 639 Electrical fuses 645 G-Class - Owner's Manual Breakdown assistance Emergency Darurat
Melepas rompi keselamatan
The safety vests are located in the driver's door and front passenger door stowage compartments. ▶ Pull out the safety vest bag using the loop. Open the safety vest bag and take out the safety vest.  1 Maximum number of washes 2 Maximum wash temperature Do not bleach Do not iron Do not tumble dry Do not dry clean Class 2 safety vest The requirements defined by the legal standard are only fulfilled if the safety vest is the correct size and is fully closed.GANTI ROMPI KESELAMATAN DALAM KASUS BERIKUT:
• The reflective strips are damaged or dirty. • The maximum permissible number of washes is exceeded. - The fluorescence property decreases, e.g. due to permanent exposure to sunlight.BUANG ROMPI KESELAMATAN DENGAN CARA YANG RAMAH LINGKUNGAN:
• Please contact your local waste disposal company.Segitiga pengaman
REMOVING THE WARNING TRIANGLE  G-Class - Owner's Manual Breakdown assistance Emergency Open the tabs 2. Remove the warning triangleMEMASANG SEGITIGA PENGAMAN
Fold the side reflectors upwards to form a triangle and attach using the upper snap fastener. ▶ Fold the legs down and out to the side. First-aid kit overview  The first-aid kit Ⓞ is located in the door stowage compartment of the front passenger door.Melepas alat pemadam kebakaran
WARNING Risk of accident due to an incorrectly secured fire extinguisher in the driver's footwell A fire extinguisher may impede pedal travel or block a depressed pedal. This jeopardises the operating and road safety of the vehicle. The fire extinguisher can be flung around and injure the driver or other vehicle occupants. ▶ Always store and secure the fire extinguisher in the bracket. Do not remove the fire extinguisher while driving.  Left-hand drive vehicle: pull the tab 1 upwards. Right-hand drive vehicle: pull the tab ① downwards. Remove the fire extinguisher ②.   G-Class - Owner's Manual > Breakdown assistance Flat tyreBan kempes
Catatan tentang ban kempes
PERINGATAN
Risk of accident due to a flat tyre A flat tyre strongly impairs the vehicle's driving characteristics, as well as its steering and braking characteristics. Do not drive with a flat tyre. Replace the flat tyre with the spare wheel. Alternatively, consult a qualified specialist workshop.JIKA BAN KEMPES, PILIHAN BERIKUT TERSEDIA TERGANTUNG PADA PERALATAN KENDARAAN ANDA:
- Vehicles with Mercedes-Benz Support: in the event of a breakdown, you can make a breakdown call via the overhead control panel (→ page 549). • All vehicles: change the wheel ( → page 661). ① The emergency spare wheel is only available in certain countries.Ikhtisar dudukan ban cadangan di pintu belakang
Pembawa roda cadangan dari baja tahan karat
PERINGATAN
Risk of injury when changing a wheel The wheels are very heavy. When being removed, a wheel can tip over or roll away uncontrollably. As a result, you or other persons could be hit by the wheel. ▶ Have a second person assist you in removing the wheel.  Removing the stainless-steel spare wheel cover   G-Class - Owner's Manual > Breakdown assistance Flat tyre Remove screwdriver ④ from the vehicle tool kit (→ page 661). Open the lock on cover ring ① with screwdriver ④. Fold tab a down. ▶ Pull cover ring ① apart and remove it. Remove cover panel ②. Melepas roda cadangan
Remove wheel nuts 5. Remove spare wheel Memasang roda pada pembawa roda cadangan
Use the wheel nuts to attach the defective wheel Ⓔ to the spare wheel carrier. Specified tightening torque: 20 Nm Position cover panel ② again. Make sure that retainer ⑥ of cover panel ② engages in recess ⑦. Attach cover ring ① again and close the lock. Make sure that the lock does not cover the reversing camera. If necessary, turn cover ring slightly. (i) (→ page 667) Vehicles with an emergency spare wheel: observe the notes on the emergency spare wheel.PEMBAWA RODA CADANGAN DENGAN PENUTUP BAN PELINDUNG
Melepas penutup ban pelindung
▶ Pull protective tyre cover Ⓞ on the rear side apart and remove it.     G-Class - Owner's Manual > Breakdown assistance Flat tyreMelepas roda dari pembawa roda cadangan dan memasang roda yang rusak
Remove wheel nuts 2. Remove spare wheel Use the wheel nuts to attach the defective wheel Ⓞ to the spare wheel carrier. Specified tightening torque: 20 Nm Kendaraan dengan roda cadangan darurat: melepas setengah cangkang
Remove half shell 3.  Remove wheel nuts 2. Remove the emergency spare wheel. Remove the rear half shell. Use the wheel nuts to attach the defective wheel Ⓞ to the spare wheel carrier. Specified tightening torque: 20 Nm Stow the half shells in the luggage compartment. (i) (→ page 667) Vehicles with an emergency spare wheel: observe the notes on the emergency spare wheel.PEMBAWA RODA CADANGAN PROFESIONAL
PERINGATAN
Risk of injury when changing a wheel The wheels are very heavy. When being removed, a wheel can tip over or roll away uncontrollably. As a result, you or other persons could be hit by the wheel. Have a second person assist you in removing the wheel.CATATAN
Damage to the vehicle when opening the rear door with the spare wheel carrier open If you open the rear door with the spare wheel carrier open, the carrier can strike the vehicle and cause damage. Before opening the rear door, fully close the spare wheel carrier. G-Class - Owner's Manual Breakdown assistance Flat tyre   (→ page 661)Open cover Ⓞ with the triangular socket wrench from the vehicle tool kit and fold it open.  (→ page 661)Unscrew central nut Ⓐ of the retaining bracket with the socket wrench (SW 18) from the vehicle tool kit. Open the spare wheel carrier by 90°.  Remove wheel nuts (SW 19) Remove ④ spare wheel ▶ Secure the spare wheel in reverse order.   G-Class - Owner's Manual Breakdown assistance Battery (vehicle)Baterai (kendaraan)
Catatan tentang baterai 12 V
PERINGATAN
Risk of explosion due to electrostatic charge Electrostatic charge can ignite the highly explosive gas mixture in the battery. To discharge any electrostatic charge that may have built up, touch the metal vehicle body before handling the battery. The highly flammable gas mixture is created while the battery is charging and during starting assistance. For safety reasons, Mercedes-Benz recommends that you only use batteries which have been tested and approved for your vehicle by Mercedes-Benz. PERINGATAN
Danger of chemical burns from the battery acid Battery acid is caustic. ▶ Avoid contact with the skin, eyes or clothing. Do not lean over the battery. ▶ Do not inhale battery gases. ▶ Keep children away from the battery. ▶ Immediately rinse battery acid off thoroughly with plenty of clean water and seek medical attention immediately. CATATAN LINGKUNGAN
Environmental damage due to improper disposal of batteries ☒ Batteries contain pollutants. It is illegal to dispose of them with the household rubbish.  Dispose of batteries in an environmentally responsible manner. Take discharged batteries to a qualified specialist workshop or to a collection point for used batteries. Consult a qualified specialist workshop to disconnect the 12 V battery.   G-Class - Owner's Manual > Breakdown assistance Battery (vehicle)  Comply with safety notes and take protective measures when handling batteries. Risk of explosion. Fire, open flame and smoking are prohibited when handling the battery. Avoid creating sparks. Electrolyte or battery acid is corrosive. Avoid contact with your skin, eyes or clothing. Wear suitable protective clothing, in particular gloves, apron and face mask. Immediately rinse electrolyte or acid splashes off with clean water. Consult a doctor. Wear safety glasses. Keep children away. Observe this Owner's Manual.JIKA ANDA TIDAK BERMAKSUD MENGGUNAKAN KENDARAAN UNTUK JANGKA WAKTU YANG LAMA:
• Activate standby mode ( → page 337). - Connect the battery to a battery charger approved by Mercedes-Benz. - Consult a qualified specialist workshop to disconnect the battery.Catatan tentang baterai 48 V
WARNING Risk of an accident due to work carried out incorrectly on the battery Work carried out incorrectly on the battery can, for example, lead to a short circuit. This can restrict functions relevant for safety systems and impair the operating safety of your vehicle.ANDA BISA KEHILANGAN KENDALI ATAS KENDARAAN TERUTAMA DALAM SITUASI BERIKUT:
- when braking - in the event of abrupt steering manoeuvres and/or when the vehicle's speed is not adapted to the road conditions In the event of a short circuit or a similar incident, contact a qualified specialist workshop immediately. Do not drive on. ▶ Always have work on the battery carried out at a qualified specialist workshop. • Further information on ABS ( → page 340) • Further information on ESP ® ( → page 341) • Further information on ESP ® (Mercedes-AMG vehicles) (→ page 341, 344, 342)  G-Class - Owner's Manual Breakdown assistance Battery (vehicle) CATATAN LINGKUNGAN
Environmental damage due to improper disposal of batteries Batteries contain pollutants. It is illegal to dispose of them with the household rubbish.  Disposition of batteries in an environmentally responsible manner. Take discharged batteries to a qualified specialist workshop or to a collection point for used batteries. Only have work on the 48 V battery carried out at a qualified specialist workshop. Comply with safety notes and take protective measures when handling batteries.  Risk of explosion if the 48 V battery is used improperly.  The surface of the 48 V battery may be hot.  Fire, open flame and smoking are prohibited when handling the battery. Avoid creating sparks.  Electrolyte or battery acid is corrosive. Avoid contact with your skin, eyes or clothing. Wear suitable protective clothing, in particular gloves, apron and face mask. Immediately rinse off splashes of electrolyte or acid with plenty of clean water. Consult a doctor.  Do not place heavy objects on the surface of the battery or use the battery to support a person in any way.  Do not perform any work on the battery. Always have any work on the battery carried out at a qualified specialist workshop. Do not  disconnect the battery yourself. Do not remove the battery yourself. Do not attempt to open the battery.  Keep children away.  Wear safety glasses.  Observe this Owner's Manual.JIKA ANDA TIDAK BERMAKSUD MENGGUNAKAN KENDARAAN UNTUK JANGKA WAKTU YANG LAMA, PERHATIKAN HAL BERIKUT:
• If available: activate standby mode (→ page 337).Catatan tentang bantuan start dan pengisian baterai 12 V
Always use the jump-start connection point in the engine compartment for charging the battery and jump starting. CATATAN
Damage to the battery due to overvoltage When charging using a battery charger without a maximum charging voltage, the battery or the on-board electronics may be damaged.  Only use battery chargers with a maximum charging voltage of 14.8 V.   G-Class - Owner's Manual > Breakdown assistance Battery (vehicle) PERINGATAN
Risk of explosion due to the ignition of hydrogen gas If there is a short circuit or sparks are created, there is a danger of hydrogen gas igniting when you charge the battery. ▶ Take care that the positive terminal of a connected battery does not come into contact with vehicle parts. ▶ Never place metal objects or tools on a battery. When connecting and disconnecting the battery, always observe the sequence of battery terminals described. During starting assistance, always take care to connect only battery terminals of identical polarity. During starting assistance, observe the sequence described for connecting and disconnecting the jump leads. Do not connect or disconnect the battery terminals with the engine running.  PERINGATAN
Risk of explosion due to explosive mixture of gases An explosive mixture of gases can escape from the battery during charging and starting assistance. ▶ Fire, naked flames, smoking and creating sparks must be avoided. ▶ Make sure there is adequate ventilation. ▶ Do not stand over the battery. PERINGATAN
Risk of explosion from a frozen battery A discharged battery may freeze at temperatures slightly above or below freezing point. During starting assistance or battery charging, battery gas can be released. ▶ Always allow a battery to thaw before charging it or performing starting assistance. If the indicator/warning lamps in the driver display do not light up at low temperatures, the discharged battery is very likely frozen. In this case you must neither charge the battery nor give the vehicle starting assistance. The service life of a defrosted battery may be drastically shortened. The starting behaviour may deteriorate, in particular at low temperatures. It is recommended to have a defrosted battery checked at a qualified specialist workshop.   G-Class - Owner's Manual Breakdown assistance Battery (vehicle)  CATATAN
Damage caused by numerous or extended attempts to start the engine Numerous or extended attempts to start the engine may damage the catalytic converter due to non-combusted fuel. Avoid numerous and extended attempts to start the engine.PERHATIKAN HAL-HAL BERIKUT SELAMA BANTUAN START DAN SAAT MENGISI BATERAI:
- Only use undamaged jump leads/charging cables with a sufficient cross-section and insulated terminal clamps. - Uninsulated parts of the terminal clamps must not come into contact with other metal parts as long as the jump leads/charging cables are connected to the battery/the jump-start connection point. - The jump leads/charging cables must not touch any parts which may move when the engine is running. • Always ensure that neither you nor the battery are electrostatically charged. - Avoid fire and open flames at all times. • Do not bend over a battery.SAAT MENGISI BATERAI, PERHATIKAN JUGA HAL-HAL BERIKUT:
• Only use chargers tested and approved for Mercedes-Benz. - Read the charger's operating instructions before you charge the battery.PERHATIKAN JUGA HAL-HAL BERIKUT SELAMA BANTUAN START:
• Only use batteries with a rated voltage of 12 V for starting assistance. • The vehicles must not touch each other. - Petrol engine: Only give starting assistance when the engine is cold and the exhaust system has cooled down.Bantuan start dan pengisian baterai 12 V
PERSIAPAN PROSES BANTUAN START/PENGISIAN
▶ Secure the vehicle against rolling away. ▶ Switch off the vehicle and all electrical consumers. ▶ Open the bonnet ( → page 606).  Slide cover ① of positive terminal ② on the jump-starting connection point in the direction of the arrow.   G-Class - Owner's Manual > Breakdown assistance Battery (vehicle)BANTUAN START
Connect the positive terminal of your own vehicle to the jump lead. Connect the positive terminal of the booster battery to the jump lead. On the assisting vehicle, let the engine run at idling speed. Connect the negative terminal of the booster battery to the jump lead. Connect the jump lead to your vehicle's earth point ③. ▶ Start the engine of your own vehicle. Let the engines run for several minutes. Before disconnecting the jump lead, switch on an electrical consumer in your own vehicle, e.g. the rear window heater or the lighting. When the starting assistance process is complete: Disconnect the jump lead from your vehicle's earth point ③. Remove the jump lead from the negative terminal of the booster battery. Remove the jump lead from the positive contact of your vehicle. Remove the jump lead from the positive terminal of the booster battery. After removing the jump lead, close cover ① of the positive terminal ②. Further information can be obtained at a qualified specialist workshop.PENGISIAN BATERAI 12 V
Connect the positive terminal of your own vehicle to the charging cable. Connect the positive terminal of the charger to the charging cable. Connect the negative terminal of the charger to the charging cable. Connect the charging cable to your vehicle's earth point ③ ▶ Start the charging process. When the charging process is complete: Disconnect the charging cable from your vehicle's earth point ③ Remove the charging cable from the negative terminal of the charger. Remove the charging cable from the positive terminal of your own vehicle. Remove the charging cable from the positive terminal of the charger. After removing the charging cable, close cover ① of the positive terminal ②.Penggantian baterai 12 V
Observe the notes on the 12-V-battery ( → page 632). Mercedes-Benz recommends that you have the 12-V-battery replaced at a qualified specialist workshop, e.g. at a Mercedes-Benz Service Centre.PERHATIKAN CATATAN BERIKUT JIKA ANDA INGIN MENGGANTI BATERAI SENDIRI:
• Always replace a faulty battery with a battery which meets the specific vehicle requirements. The vehicle is equipped with a fleece battery. Full vehicle functionality is only guaranteed with a fleece battery. For safety reasons, Mercedes-    G-Class - Owner's Manual > Breakdown assistance Battery (vehicle) Benz recommends that you only use batteries which have been tested and approved for your vehicle by Mercedes-Benz. - Use the detachable parts such as vent hose, elbow fittings or terminal covers from the battery to be replaced. - Make sure that the vent hose is always connected to the original opening on the side of the battery. Fit any existing or supplied stop plugs. Otherwise, gases or battery acid could escape. • Make sure that detachable parts are reconnected in the same way.   G-Class - Owner's Manual Breakdown assistance Tow-starting or towing away< Penarik awal atau penarik kendaraan
Ikhtisar metode penarik yang diizinkan
CATATAN
Damage from automatic brakingKENDARAAN AKAN MENGEREM SECARA OTONOM DALAM SITUASI TERTENTU JIKA FUNGSI-FUNGSI BERIKUT AKTIF:
• Active Brake Assist • Active Distance Assist DISTRONIC - HOLD function • Active Parking Assist To avoid damage to the vehicle, switch these systems off e.g. before towing it or in a car wash. Mercedes-Benz recommends transporting your vehicle in case of a breakdown, rather than towing it. For towing with both axles on the ground, use a tow rope or tow bar. Do not use tow bar systems. CATATAN
Damage to the vehicle due to towing away incorrectly  Observe the instructions and notes on towing away.  If you tow the vehicle with raised front or rear axle, you must remove the propeller shaft between the transfer case and the rolling axle.METODE PENARIK YANG DIIZINKAN
 Both axles on the ground Front axle raised Rear axle raised   Yes, for a maximum of 50 km at 50 km/h Yes Yes   G-Class - Owner's Manual Breakdown assistance Tow-starting or towing awayMenarik kendaraan dengan kedua poros di tanah
Observe the notes on the permitted towing methods ( → page 639). Make sure that the battery is connected and charged.KETIKA BATERAI HABIS:
• The vehicle cannot be started. • The electric parking brake cannot be released or applied. • The transmission cannot be shifted to position N or P. If the transmission cannot be shifted to position N, transport the vehicle ( → page 642). A tow truck with lifting equipment is required for vehicle transport. CATATAN
Damage due to towing away at excessively high speeds or over long distances The drivetrain could be damaged when towing at excessively high speeds or over long distances. ▶ A towing speed of 50 km/h must not be exceeded. ▶ A towing distance of 50 km must not be exceeded.  PERINGATAN
Risk of accident when towing a vehicle with too much weightJIKA KENDARAAN YANG AKAN DIDEREK LEBIH BERAT DARI MASSA KOTOR YANG DIIZINKAN DARI KENDARAAN ANDA, SITUASI BERIKUT DAPAT TERJADI:
• The towing eye breaks off. • The combination oscillates and can capsize. Before towing, check whether the vehicle to be towed exceeds the permissible gross mass. If a vehicle is to be towed away, its permissible gross mass must not exceed the permissible gross mass of the towing vehicle. Information on the permissible gross mass of the vehicle can be found on the vehicle identification plate ( → page 743). Attach the towing device to the towing eyes ( → page 644). CATATAN
Damage due to incorrect connection of the tow bar ▶ Only connect the tow rope or tow bar to the towing eyes. ▶ Deactivate the automatic locking mechanism ( → page 177). Do not activate the HOLD function ( → page 347). Deactivate tow-away protection ( → page 190).   G-Class - Owner's Manual Breakdown assistance Tow-starting or towing away ▶ Deactivate Active Brake Assist ( → page 372). ▶ Deactivate Active Parking Assist ( → page 401). ▶ Deactivate Active Distance Assist DISTRONIC ( → page 354). Shift the transmission to position N. Do not open the driver's door or front passenger door. Otherwise the transmission automatically shifts to position P. Release the electric parking brake. PERINGATAN
Risk of accidents due to restricted safety-related functions during towingFUNGSI-FUNGSI YANG RELEVAN TERHADAP KESELAMATAN DIBATASI ATAU TIDAK LAGI TERSEDIA DALAM SITUASI BERIKUT:
• The vehicle is switched off. • The brake system or the power steering is malfunctioning. • The power supply or the on-board electrical system is defective. If your vehicle is being towed, considerably more force may be required for steering and braking. In addition, important vehicle display messages cannot be seen if the driver display is faulty. ▶ Use a tow bar. Before towing, ensure that the driver's display is operational and the steering can move freely.  CATATAN
Damage due to excessive tractive power If you pull away sharply, the tractive power may be too high and the vehicles could be damaged. ▶ Pull away slowly and smoothly.Catatan tentang pemulihan kendaraan yang macet
CATATAN
Damage as a result of recovering a vehicle that is stuck If the tractive power is too high, the vehicles could be damaged. ▶ Pull out the vehicle that is stuck as straight and evenly as possible during recovery.PERHATIKAN HAL BERIKUT SELAMA PEMULIHAN UNTUK MENGHINDARI KERUSAKAN PADA KENDARAAN ANDA:
- if the driven wheels get stuck in loose or muddy ground, recover the vehicle with the utmost care, especially so if the vehicle is laden. • Never attempt to recover a stuck vehicle with a trailer attached. - Pull out the stuck vehicle backwards, if possible, using the tracks it made before.   G-Class - Owner's Manual Breakdown assistance Tow-starting or towing awayMenderek kendaraan jika terjadi kerusakan
CATATAN TENTANG PENDEREKAN JIKA TERJADI KERUSAKAN
CATATAN
Damage due to incorrect attachment and use of old nuts The vehicle and components of the vehicle can be damaged due to incorrect attachment and use of old nuts. If you remove the propeller shaft, place the M10 nuts on the M8 bolts as spacers and secure them with M8 nuts. ▶ Always use new self-locking nuts when installing the propeller shafts. Observe the notes on towing ( → page 639). ① For further information, consult a Mercedes-Benz Service Centre.PENDEREKAN JIKA TERJADI KERUSAKAN
PENDEREKAN JIKA TERJADI KERUSAKAN PADA MESIN, TRANSMISI, ATAU KELISTRIKAN
Shift the transmission to position N. Release the parking brake. The transmission may be locked in position in the event of damage to the electrics. To shift to , provide the on-board electrical system with power (→ page 61).PENDEREKAN JIKA TERJADI KERUSAKAN PADA KOTAK TRANSFER
Remove the propeller shafts between the axles and the transfer case.PENARIKAN JIKA TERJADI KERUSAKAN PADA AS RODA DEPAN
Remove the propeller shaft between the rear axle and the transfer case. ▶ Towing the vehicle with a raised front axle.PENARIKAN JIKA TERJADI KERUSAKAN PADA AS RODA BELAKANG
Remove the propeller shaft between the front axle and the transfer case. Tow the vehicle with a raised rear axle and with wheel rollers under the front axle.Memuat kendaraan untuk transportasi
Observe the notes on towing away ( → page 64, 63). Connect the towing device to the towing eye in order to load up the vehicle. ① If the vehicle cannot be loaded with the help of the towing device, use a crane. Shift the transmission to position N. The transmission may be locked in position P in the event of damage to the electrics. To shift to N, supply power to the on-board electrical system ( → page 61). Load the vehicle correctly onto the transporter.  G-Class - Owner's Manual Breakdown assistance Tow-starting or towing away • Ensure that all wheels are on the transportation surface. - Ensure that the vehicle is positioned parallel with the direction of travel. Put the selector lever into position P. Use the electric parking brake to secure the vehicle against rolling away. ▶ Stop the vehicle and switch off the power supply. ▶ Only secure the vehicle by the wheels.KENDARAAN DENGAN SISTEM PEREDAM ADAPTIF
PERINGATAN
Risk of an accident when transporting vehicles with adaptive damping adjustment When transporting vehicles with adaptive damping adjustment, the vehicle/trailer combination may begin to rock and start to skid. ▶ Load the vehicle correctly onto the transporter. - Secure the vehicle on all four wheels with suitable tensioning straps. CATATAN
Damage to the vehicle from securing it incorrectly - Secure the vehicle at all four wheels after loading it up. Otherwise, the vehicle could be damaged. Maintain a minimum vertical distance of 20 cm from the transport platform. ▶ Load the vehicle correctly onto the transporter. • Ensure that all wheels are on the transportation surface. - Ensure that the vehicle is positioned parallel with the direction of travel. Put the selector lever into position P. ▶ Use the electric parking brake to secure the vehicle against rolling away. ▶ Stop the vehicle and switch off the power supply. ▶ Secure the vehicle at all four wheels.  Make sure that the front and rear axles come to rest on the same transport vehicle. CATATAN
Damage to the drive train due to incorrect positioning of the vehicle Do not position the vehicle above the connection point of the transport vehicle. G-Class - Owner's Manual Breakdown assistance Tow-starting or towing away Position of towing eyes   Towing eyes ① are attached to the front and rear of the vehicle.Menyalakan kendaraan dengan cara diderek (start darurat kendaraan)
CATATAN
Damage to the automatic transmission due to tow-starting The automatic transmission may be damaged in the process of tow-starting vehicles with automatic transmission. ▶ Vehicles with automatic transmission must not be tow-started. Do not tow-start the vehicle.   G-Class - Owner's Manual Breakdown assistance Electrical fusesSekring listrik
Catatan tentang sekring listrik
PERINGATAN
Risk of accident and injury due to overloaded lines If you manipulate or bridge a faulty fuse or if you replace it with a fuse with a higher amperage, the electric line could be overloaded. This could result in a fire. ▶ Always replace faulty fuses with specified new fuses containing the correct amperage. CATATAN
Damage due to incorrect fuses Using incorrect fuses can result in damage to electrical components or systems or their functions being considerably restricted. ▶ Use only fuses approved for Mercedes-Benz with the respective specified fuse rating. Replace blown fuses with equivalent fuses, identifiable by their colour and label. The fuse ratings and further information to be observed can be found in the fuse assignment diagram.  Fuse assignment diagram: on the fuse box in the rear passenger compartment ( → page 647). CATATAN
Damage or malfunctions caused by moisture Moisture may cause damage to the electrical system or cause it to malfunction. When the fuse box is open, make sure that no moisture can enter the fuse box. When closing the fuse box, make sure that the seal of the lid is positioned correctly on the fuse box. If the newly inserted fuse also blows, have the cause determined and rectified at a qualified specialist workshop.PASTIKAN HAL BERIKUT SEBELUM MENGGANTI SEKERING:
• The vehicle is secured against rolling away. • All electrical consumers are switched off. • The vehicle is switched off.Sekring listrik terletak di berbagai kotak sekring:
\- Fuse box in the engine compartment on the left-hand side (→ page 646)   G-Class - Owner's Manual > Breakdown assistance Electrical fuses • Fuse box in the front passenger footwell ( → page 646) • Fuse box in the rear passenger compartment ( → page 647)Membuka dan menutup kotak sekring di kompartemen mesin
Persyaratan:
• A dry cloth and a screwdriver are available. Observe the notes on electrical fuses ( → page 62).MEMBUKA
▶ Open the bonnet ( → page 606).  Remove any existing moisture from the fuse box using a dry cloth. Loosen screws Fold out cover ② in the direction of the arrow and remove it. MENUTUP
▶ Check whether the seal is positioned correctly in the cover.  Place tabs ③ of cover ② in the fuse box. Ensure that cover ② is seated on the fuse box. Tighten screws ①. Close the bonnet.Membuka dan menutup kotak sekring di area kaki penumpang depan
Persyaratan:
• Observe the notes on electrical fuses ( → page 62). Right-hand drive vehicles: the fuse box is on the left side.   G-Class - Owner's Manual > Breakdown assistance Electrical fuses   Example: left-hand drive vehicle To open the fuse box: remove cover ①. To close the fuse box: reinsert cover ①.  ▶ Fold the right-hand seat cushion forward ( → page 49). Flip open and remove cover ①.Membuka dan menutup kotak sekring di bagian belakang
Persyaratan
• Observe the notes on electrical fuses.  Back to Contents G-Class - Owner's Manual Wheels and tyres < Roda dan ban
This interactive PDF works like a website - tap or click a button to jump straight to where you want to go. You can return here at any time via the navigation bar at the top left. Notes on noise or unusual handling characteristics Notes on regularly inspecting wheels and tyres Notes on snow chains 652 Tyre pressure 653 Wheel change 657 Emergency spare wheel 667 G-Class - Owner's Manual Wheels and tyres Notes on noise or unusual handling characteristics Catatan tentang kebisingan atau karakteristik penanganan yang tidak biasa
Make sure there are no vibrations, noises or unusual handling characteristics when the vehicle is in motion. This may indicate that the wheels or tyres are damaged. Hidden tyre damage could also be causing the unusual handling characteristics. If you suspect that a tyre is defective, reduce your speed immediately and have the tyres and wheels checked at a qualified specialist workshop. G-Class - Owner's Manual Wheels and tyres Notes on regularly inspecting wheels and tyres Catatan tentang memeriksa roda dan ban secara teratur
PERINGATAN
Risk of injury due to damaged tyres Damaged tyres can cause tyre pressure loss. ▶ Check the tyres regularly for signs of damage and replace any damaged tyres immediately. PERINGATAN
Risk of aquaplaning due to insufficient tyre tread Insufficient tyre tread will result in reduced tyre grip. There is a risk of an accident. On a wet road surface the risk of aquaplaning is increased, in particular where speed is not adapted to suit the conditions. ▶ Check the tread depth and the condition of the tyre contact surface across the entire width of all tyres on a regular basis.KEDALAMAN TAPAK MINIMUM UNTUK
• Summer tyres: 3 mm • M+S tyres: 4 mm For safety reasons, replace the tyres before the legally-prescribed limit for the minimum tread depth is reached. Replace the tyres immediately if the legally-prescribed limit for the minimum tread depth is reached.LAKUKAN PEMERIKSAAN BERIKUT PADA SEMUA RODA SECARA TERATUR, SETIDAKNYA SEKALI SEBULAN ATAU SESUAI KEBUTUHAN, MISALNYA, SEBELUM PERJALANAN JAUH ATAU MENGEMUDI DI JALAN OFF-ROAD:
• Check the tyre pressure ( → page 653).   G-Class - Owner's Manual Wheels and tyres Notes on regularly inspecting wheels and tyres • Visually inspect wheels and tyres for damage. - Check the valve caps. - Visual check of the tyre tread depth and the tyre contact surface across the entire width. The minimum tread depth for summer tyres is 3 mm and for winter tyres 4 mm.   G-Class - Owner's Manual Wheels and tyres Notes on snow chainsCatatan tentang rantai salju
Mercedes-AMG vehicles: the notes on using snow chain-compatible AMG winter tyres apply to AMG tyres. Snow chains are permitted for use only with these.PERHATIKAN CATATAN BERIKUT SAAT MENGGUNAKAN RANTAI SALJU:
- Snow chains are only permissible for certain wheel/tyre combinations. You can obtain information about this from a Mercedes-Benz Service Centre. - For safety reasons, only use snow chains that have been specifically approved for your vehicle by Mercedes-Benz, or snow chains of the same quality standard. • If snow chains are fitted, the maximum permissible speed is 50 km/h. • Vehicles with Active Parking Assist: do not use Active Parking Assist when snow chains are fitted. You can permanently limit the maximum vehicle speed for driving with winter tyres ( → page 353). You can deactivate ESP ® to start off ( → page 345). Spinning the wheels results in a cutting action, which enhances traction.   G-Class - Owner's Manual Wheels and tyres Type pressure< Tekanan ban
Catatan tentang tekanan ban
PERINGATAN
Risk of an accident due to tyre pressure that is insufficient or too highBAN DENGAN TEKANAN YANG TIDAK CUKUP ATAU TERLALU TINGGI MENIMBULKAN BAHAYA BERIKUT:
• The tyres can burst. • The tyres can wear excessively and/or unevenly. - The driving characteristics as well as the steering- and braking may be greatly impaired. ▶ Observe the recommended tyre pressures and check the tyre pressure of all tyres including the spare wheel: • monthly • when the load changes • before embarking on a longer journey • when the operating conditions change, e.g. off-road driving • when driving at over 250 km/h Adjust the tyre pressure, if necessary.TEKANAN BAN TINGGI ATAU RENDAH DAPAT:
• shorten the service life of the tyres. • cause increased tyre damage. - adversely affect driving characteristics and thus driving safety, e.g. due to aquaplaning. PERINGATAN
Risk of accident due to repeated pressure drop in the tyres The wheels, valves or tyres could be damaged. Too low a tyre pressure can lead to the tyres bursting. ▶ Examine the tyres for foreign objects. ▶ Check whether the tyre has a puncture or the valve has a leak. If you are unable to rectify the damage, contact a qualified specialist workshop. Information on the recommended tyre pressure for the vehicle's factory-fitted tyres can be found on the tyre pressure table on the inside of the fuel filler flap ( → page 654). Use a suitable pressure gauge to check the tyre pressure. The outer appearance of a tyre does not permit any reliable conclusion about the tyre pressure.   G-Class - Owner's Manual Wheels and tyres Type pressure You can also check the tyre pressure using the on-board computer ( → page 654).HANYA KOREKSI TEKANAN BAN SAAT BAN DALAM KEADAAN DINGIN. KONDISI BAN DINGIN:
- The vehicle has been parked with the tyres out of direct sunlight for at least three hours. • The vehicle has travelled less than 1.6 km. A rise in the tyre temperature by 10 °C increases the tyre pressure by approx. 10 kPa (0.1 bar/1.5 psi). Take this into account when checking the tyre pressure of warm tyres.CATATAN TENTANG OPERASI TRAILER
Always inflate the rear axle tyres to the recommended tyre pressures on the tyre pressure table for increased load.CATATAN TENTANG MENGEMUDI DI PASIR
When driving on sand, you can lower the tyre pressure ( → page 283).Tabel tekanan ban
The tyre pressure table is on the inside of the fuel filler flap.  The tyre pressure table shows the recommended tyre pressure for all tyres approved for this vehicle. The recommended tyre pressures apply for cold tyres under various operating conditions, i.e. load and/or speed of the vehicle. If one or more tyre sizes precede a tyre pressure, the tyre pressure information following is only valid for those tyre sizes. The load conditions "partially laden" and "fully laden" are defined in the table for different numbers of passengers and amounts of luggage. The actual number of seats may differ from this.PASTIKAN JUGA UNTUK MEMPERHATIKAN TOPIK TERKAIT BERIKUT:
• Notes on tyre pressure ( → page 653)Sistem pemantauan tekanan ban
FUNGSI SISTEM PEMANTAUAN TEKANAN BAN
The system checks the tyre pressure and the temperature of the tyres fitted to the vehicle by means of a tyre pressure sensor. The tyre pressure and the tyre temperature are displayed on the driver display. In the event of significant pressure loss or excessive temperature of the tyres, you will be warned by display messages ( → page 822) or the warning light ☐ on the driver display ( → page 843). The tyre pressure monitoring system serves solely as an aid. It is the driver's responsibility to set the tyre pressure to the recommended cold tyre pressure suitable for the operating situation. In most cases, the tyre pressure monitoring system will automatically update the new reference values after you have changed the tyre pressure. You can, however, also update the reference values by restarting the tyre pressure monitoring system manually ( → page 655).  G-Class - Owner's Manual Wheels and tyres Type pressure BATASAN SISTEM
SISTEM MUNGKIN TERGANGGU ATAU TIDAK BERFUNGSI DALAM SITUASI BERIKUT:
• Incorrect reference values were taught in. - Sudden pressure loss caused, e.g. by a foreign object penetrating the tyre. • There is a malfunction caused by another radio signal source. After a maximum of ten minutes of driving through water, the message Tyre press. monitor currently unavailable appears on the driver display. The tyre pressure monitoring system is then temporarily unavailable due to fording. This message disappears approximately one minute after fording.MEMERIKSA TEKANAN BAN DENGAN SISTEM PEMANTAUAN TEKANAN BAN
Persyaratan:
• The vehicle is switched on. Driver display:  Press OK to confirm.SALAH SATU PESAN BERIKUT MUNCUL:
• Current tyre pressure of each wheel:  - Tyre pressures will be displayed after a few minutes of driving: Current values are not yet known to the system. The pressure/temperature values of each tyre are displayed as soon as they are known to the system. - Tyre pressure monitor active: the break-in process of the system is not yet complete. The tyre pressures are already being monitored. Compare the current tyre pressure with the recommended tyre pressure for the current operating status ( → page 654). Additionally, observe the notes on cold tyres ( → page 653). The values displayed on the driver display may deviate from those of the tyre pressure gauge as they relate to sea level. At high elevations, the tyre pressure values indicated by a pressure gauge are higher than those shown on the driver display.MEMULAI ULANG SISTEM PEMANTAUAN TEKANAN BAN
Persyaratan:
\- The recommended tyre pressure is correctly set for the respective operating condition in each of the four wheels ( → page 653).  G-Class - Owner's Manual Wheels and tyres Type pressure MULAI ULANG SISTEM PEMANTAUAN TEKANAN BAN DALAM SITUASI BERIKUT:
• The tyre pressure has changed. • The wheels or tyres have been changed or newly fitted. Driver display:  ▶ Select Tyre pressure and confirm with OK. Swipe down on the Touch Control on the steering wheel. The driver display shows the message Use current tyre pressures as new reference values? Select Yes and confirm the restart with OK. The driver display shows the message Tyre pressure monitor restarted. Current warning messages are deleted and the ⏻ yellow warning lamp goes out. After you have driven for a few minutes, the system checks whether the current tyre pressures are within the specified range. The current tyre pressures are then accepted as reference values and monitored. If the tyre pressure values are not within the specified range, the message Please correct tyre pressure appears.  G-Class - Owner's Manual Wheels and tyres Wheel changePenggantian roda
Catatan tentang memilih, merakit, dan mengganti ban
You can ask for information regarding permitted wheel/tyre combinations at a Mercedes-Benz Service Centre. PERINGATAN
Risk of accident due to incorrect wheel and tyre dimensions If wheels and tyres of the wrong size are fitted, the service brakes or components in the brake system and in the wheel suspension may be damaged. ▶ Always replace wheels and tyres with those that fulfil the specifications of the original part.UNTUK RODA, PERHATIKAN HAL BERIKUT:
- Designation TypeUNTUK BAN, PERHATIKAN HAL BERIKUT:
- Designation Manufacturer - Type PERINGATAN
Risk of injury through exceeding the specified tyre load-bearing capacity or the permissible speed rating Exceeding the load-bearing capacity of the tyres can lead to tyre damage and could cause the tyres to explode. Therefore, only use tyre types and sizes approved for your vehicle model. ▶ Observe the tyre load-bearing capacity rating and speed rating required for your vehicle.   G-Class - Owner's Manual Wheels and tyres Wheel change CATATAN
Vehicle and tyre damage caused by non-approved tyre types and sizes For safety reasons, only use tyres, wheels and accessories which have been specially approved by Mercedes-Benz for your vehicle.BAN INI DIKONFIGURASI KHUSUS UNTUK SISTEM KESELAMATAN AKTIF SEPERTI ABS, ESP 2 DAN 4MATIC, DAN DITANDAI SEBAGAI BERIKUT:
• MO = Mercedes-Benz Original • MOE = Mercedes-Benz Original Extended (tyres with run-flat characteristics, only for certain wheels) • MO1/MO1A = Mercedes-Benz Original (only certain AMG tyres) Otherwise certain properties such as driving characteristics, noise emissions, consumption, etc. could be adversely affected. Furthermore, other tyre sizes could result in the tyres rubbing against the body and axle components when loaded. This could result in damage to the tyre or the vehicle. Only use tyres, wheels and accessories that have been checked and recommended by Mercedes-Benz.  CATATAN
Risk to driving safety from retreaded tyres Retreaded tyres are neither tested nor recommended by Mercedes-Benz, since previous damage cannot always be detected on retreaded tyres. For this reason driving safety cannot be guaranteed. Do not use used tyres if you have no information about their previous usage. CATATAN
Possible wheel and tyre damage when driving over obstacles Large wheels have a smaller section width. As the section width decreases, the risk of wheels and tyres being damaged when driving over obstacles increases. ▶ Avoid obstacles or drive especially carefully. ▶ Reduce your speed when driving over kerbs, speed bumps, manhole covers and potholes. ▶ Avoid particularly high kerbs. G-Class - Owner's Manual Wheels and tyres Wheel change CATATAN
Possible wheel and tyre damage when parking on kerbs or in potholes Parking on kerbs or in potholes can damage the wheels and tyres. ▶ Only park on level surfaces if possible. ▶ Avoid kerbs and potholes when parking. CATATAN
Damage to electronic component parts due to the use of tyre-fitting tools Vehicles with tyre pressure monitoring system: there are electronic components in the wheel. Positioning tyre-fitting tools in the area of the valve may damage the electronic components. ▶ Tyre-fitting tools should not be applied in the area of the valve. ▶ Always have tyres changed at a qualified specialist workshop. CATATAN
Damage to summer tyres at low ambient temperatures At low ambient temperatures, tears could form when driving with summer tyres, causing permanent damage to the tyre. At temperatures below 7 °C use M+5 tyres. Accessory parts which are not approved for your vehicle by Mercedes-Benz, or which are not used correctly, can impair driving safety.SEBELUM MEMBELI DAN MENGGUNAKAN AKSESORIS YANG TIDAK DISETUJUI, KUNJUNGI BENGKEL SPESIALIS YANG KOMPETEN DAN TANYAKAN TENTANG HAL-HAL BERIKUT:
Suitability - Legal provisions • Factory recommendations PERINGATAN
Risk of accident with sport tyres The special tyre tread in combination with the optimised tyre compound means that the risk of skidding or aquaplaning on wet roads is increased. In addition, the tyre grip is greatly reduced at a low outside temperature and tyre running temperature. Switch on the ESP ® and adapt your driving style accordingly. ▶ Use ⚠️ M+S tyres at outside temperatures of less than 7 °C. ▶ Only use tyres suitable for the intended use.PERHATIKAN HAL-HAL BERIKUT SAAT MEMILIH, MEMASANG, DAN MENGGANTI BAN:
\- Country-specific requirements for tyre approval that define a specific tyre type for your vehicle.  Furthermore, the use of certain tyre types in certain regions and areas of operation can be highly beneficial. - Only use tyres and wheels of the same type (summer tyres, winter tyres) and the same manufacture. • Only fit wheels of the same size on one axle (left and right). It is only permissible to fit a different wheel size in the event of a flat tyre in order to drive to the specialist workshop. • Only fit tyres of the correct size onto the wheels. - Do not make any modifications to the brake system, the wheels or the tyres. The use of shims or brake dust shields is not permitted and may invalidate the vehicle's general operating permit. - Vehicles with a tyre pressure monitoring system: All fitted wheels must be equipped with functioning sensors for the tyre pressure monitoring system. - At temperatures below 7 °C, use winter tyres or all-season tyres marked M+S on all wheels. Winter tyres bearing the snowflake symbol in addition to the M+S marking provide the best possible grip in wintry road conditions. • For M+S tyres, only use tyres with the same tread. - Observe the maximum permissible speed for the M+S tyres fitted. If this is below the vehicle's maximum speed, this must be indicated in an appropriate label in the driver's field of vision. • Drive the vehicle with new tyres at moderate speeds for the first 100 km. - Replace the tyres after six years at the latest, regardless of wear. You can permanently limit the maximum speed for winter tyre mode ( → page 353). For more information on wheels and tyres, contact a qualified specialist workshop.PASTIKAN JUGA UNTUK MEMPERHATIKAN TOPIK TERKAIT BERIKUT INI:
• Notes on tyre pressure ( → page 653) • Tyre pressure table ( → page 654) • Notes on the emergency spare wheel ( → page 667)Catatan tentang penggantian roda
PERINGATAN
Risk of injury through different wheel sizes Interchanging the front and rear wheels can severely impair the driving characteristics. The disk brakes or wheel suspension components may also be damaged. ▶ Only interchange the front and rear wheels if the wheels and tyres have the same dimensions. Interchanging the front and rear wheels if the wheels or tyres have different dimensions can render the general operating permit invalid. Observe the instructions and safety notes on "Changing a wheel" ( → page 657).POLA KEAUSAN PADA RODA DEPAN DAN BELAKANG BERBEDA:
• front wheels wear more on the tyre shoulder   G-Class - Owner's Manual Wheels and tyres Wheel change • rear wheels wear more in the centre of the tyre Do not drive with tyres that have too little tread depth. This significantly reduces traction on wet roads (aquaplaning). On vehicles with the same front and rear wheel size, you can interchange the wheels every 5000 to 10,000 km, depending on the wear. Ensure the direction of rotation is maintained for the wheels.Catatan tentang penyimpanan roda
SAAT MENYIMPAN RODA, PERHATIKAN CATATAN BERIKUT:
• After removing wheels, store them in a cool, dry and preferably dark place. - Protect the tyres from contact with oil, grease or fuel.Ikhtisar peralatan kendaraan
PERALATAN KENDARAAN BERISI:
- vehicle tool bag with: - pump lever for jack - wheel wrench with T-piece - screwdriver (inserted in a pump lever) - dismantling tool for roof luggage rack (inserted in a pump lever) \- jack with adapter The vehicle tool kit is located under the rear bench seat ( → page 50).  1 Vehicle tool bag Jack The jack weighs approximately 4.4 kg. The maximum load capacity of the jack can be found on the sticker affixed to the jack. The jack is maintenance-free. In the event of a malfunction, please contact a qualified specialist workshop.Mempersiapkan kendaraan untuk penggantian roda
Persyaratan
- The required tyre-change tool kit is available. If your vehicle is not equipped with the tyre-change tool kit, consult a qualified specialist workshop to find out about suitable tools. • The vehicle is not on a slope. • The vehicle is on solid, non-slippery and level ground.   G-Class - Owner's Manual Wheels and tyres Wheel change Apply the electric parking brake. Move the front wheels to the straight-ahead position. Shift the transmission to position P. ▶ Switch off the vehicle. Make sure that the vehicle cannot be started. Place chocks or other suitable items under the front and rear of the wheel that is diagonally opposite the wheel you wish to change. ▶ Raise the vehicle ( → page 662).Menaikkan kendaraan untuk penggantian roda
Persyaratan:
• There are no persons in the vehicle. • The vehicle has been prepared for a wheel change ( → page 661).  ASSEMBLING THE JACK  Assemble pump lever ①. Place pump lever ① with the recess on drain screw ② on the jack. Turn pump lever ① clockwise as far as it will go. Drain screw ② is closed.  3 Adapter To raise the vehicle at the front: adapter Ⓐ must be secured on the jack. To raise the vehicle at the rear: remove adapter 3 from the jack.  G-Class - Owner's Manual Wheels and tyres Wheel changeCATATAN PENTING TENTANG PENGGUNAAN DONGKRAK:
- Use only the vehicle-specific jack that has been tested and approved by Mercedes-Benz to raise the vehicle. - The jack is only designed for raising and holding the vehicle for a short time while a wheel is being changed and not for maintenance work under the vehicle. - The jack must be placed on a firm, level and non-slip surface. If necessary, use a large, flat, load-bearing, non-slip underlay. • Position the jack only at the vehicle lift support point.ATURAN PERILAKU SAAT KENDARAAN DIANGKAT:
• Never place your hands or feet under the vehicle. • Never lie under the vehicle. • Do not start the vehicle and do not release the electric parking brake. • Do not open or close any doors or the rear-end door.  Using the wheel spanner, loosen the wheel bolts on the wheel you wish to change by about one full turn. Do not unscrew the screws completely.  WARNING Risk of injury from incorrect positioning of the jack If you do not position the jack correctly at the appropriate jacking point of the vehicle, the jack could tip with the vehicle raised. Only position the jack at the appropriate jacking point of the vehicle. The base of the jack must be positioned vertically under the jacking point of the vehicle. NOTE Damage to the vehicle due to the jack If the jack has not been positioned at the prescribed jack support points, the vehicle may suffer damage. ▶ Only position the jack at the jack support points provided for this purpose. RAISING THE VEHICLE AT THE FRONT   G-Class - Owner's Manual Wheels and tyres Wheel change Make sure that the adapter is secured on the jack. Position jack ⚠ on the comfort bushing on transverse control arm ⚡. Raise the vehicle by pumping until the tyre is no more than 3 cm off the ground. Loosen and remove the wheel ( → page 664). RAISING THE VEHICLE AT THE REAR  ▶ Pull out the adapter from the jack. Position jack ④ at the vehicle lift support point of axle tube ⑥. Keep pumping until axle tube is seated securely in the vehicle lift support point and the base of the jack lies evenly on the ground. Raise the vehicle by pumping until the tyre is no more than 3 cm off the ground. Loosen and remove the wheel ( → page 664). Melepas roda
Persyaratan:
• The vehicle is raised ( → page 662). When changing a wheel, avoid applying any force to the brake discs, as this could impair the level of comfort when braking.CATATAN
Damage to threading from dirt on wheel bolts Do not place wheel bolts in sand or on a dirty surface. Unscrew the wheel bolts. Remove the wheel. Fit the new wheel ( → page 664).Memasang roda baru
Persyaratan:
• The wheel has been removed ( → page 664).  G-Class - Owner's Manual Wheels and tyres Wheel change PERINGATAN
Risk of accident from losing a wheel Oiled or greased wheel bolts can cause the wheel bolts to come loose, as too can damaged wheel bolts or wheel hub threads. ▶ Never oil or grease the threads. In the event of damage to the threads, contact a qualified specialist workshop immediately. ▶ Have the damaged wheel bolts or damaged hub threads replaced. ▶ Do not continue driving. Observe the information on the choice of tyres ( → page 657). For tyres with a specified running direction, an arrow on the side wall of the tyre indicates the correct running direction. Observe the direction of rotation when assembling. PERINGATAN
Risk of injury from tightening wheel bolts and nuts If you tighten the wheel bolts or wheel nuts when the vehicle is raised, the jack could tip. ▶ Only tighten wheel bolts or wheel nuts when the vehicle is on the ground. Place the wheel to be fitted on the wheel hub and push it on.  For safety reasons, only use wheel bolts which have been approved for Mercedes-Benz and for the wheel in question.  ▶ Tighten the wheel bolts evenly in a diagonal pattern in the order indicated ① to ⑤ until they are hand-tight. Lower the vehicle and tighten wheel bolts to the prescribed tightening torque ( → page 665).Menurunkan kendaraan setelah penggantian roda
Persyaratan:
• The new wheel has been fitted ( → page 664). Lowering the vehicle: Use the pump lever to open the pressure release screw on the jack, turning it ( → page 662) approximately one quarter turn. Place the jack to one side.  G-Class - Owner's Manual Wheels and tyres Wheel change  ▶ Tighten the wheel bolts evenly in a diagonal pattern in the indicated order ① to ⑤ with an initial maximum force of 80 Nm. Tighten the wheel bolts evenly in a diagonal pattern in the indicated order ① to ⑤ with the specified tightening torque of 180 Nm. PERINGATAN
Risk of accident due to incorrect tightening torque The wheels could come loose if the wheel bolts or wheel nuts are not tightened to the prescribed torque. ▶ Ensure that the wheel bolts or wheel nuts are tightened to the prescribed tightening torque. If you are not sure, do not move the vehicle. Contact a qualified specialist workshop and have the tightening torque checked immediately. ▶ Push the jack piston back in and close the pressure release screw. Stow the jack and tool kit in the vehicle. Check the tyre pressure of the newly fitted wheel and adjust it if necessary.  The following does not apply if the new wheel is an emergency spare wheel. ▶ Vehicles with a tyre pressure monitoring system: restart the tyre pressure monitoring system ( → page 655).  G-Class - Owner's Manual Wheels and tyres Emergency spare wheelRoda cadangan darurat
Catatan tentang roda cadangan darurat
PERINGATAN
Risk of accident caused by incorrect wheel and tyre dimensions The wheel or tyre size and the tyre type of the emergency spare wheel or spare wheel and the wheel to be replaced may differ. The emergency spare wheel or spare wheel can significantly impair driving characteristics of the vehicle. To prevent hazardous situations: Drive carefully. ▶ Never fit more than one emergency spare wheel or spare wheel that differs in size. ▶ Only use an emergency spare wheel or spare wheel briefly. Do not deactivate ESP*. ▶ Have the emergency spare wheel or spare wheel of a different size replaced at the nearest qualified specialist workshop. The new wheel must have the correct dimensions. The emergency spare wheel is attached to the carrier on the rear door. PERHATIKAN CATATAN BERIKUT TENTANG PEMASANGAN RODA CADANGAN DARURAT:
- The maximum permissible speed with an emergency spare wheel fitted is 80 km/h. • Do not fit the emergency spare wheel with snow chains. - Replace the emergency spare wheel after six years at the latest, regardless of wear. - Check the tyre pressure of the emergency spare wheel when fitted. Correct the pressure as necessary. The specified tyre pressure is stated on the label of the emergency spare wheel. ① Vehicles with a tyre pressure monitoring system: if an emergency spare wheel is fitted, the tyre pressure monitoring system cannot function reliably. For a few minutes after an emergency spare wheel is fitted, the system may still display the tyre pressure of the removed wheel. Only restart the system when the emergency spare wheel has been replaced with a new wheel.PASTIKAN JUGA MEMPERHATIKAN TOPIK TERKAIT BERIKUT INI:
• Notes on tyre pressure ( → page 653) • Tyre pressure table ( → page 654)   G-Class - Owner's Manual Wheels and tyres Emergency spare wheel • Notes on fitting tyres ( → page 657) • Fitting an emergency spare wheel ( → page 661)   Back to Contents G-Class - Owner's Manual > Technical data < Data teknis
This interactive PDF works like a website - tap or click a button to jump straight to where you want to go. You can return here at any time via the navigation bar at the top left. Notes on technical data 670 On-board electronics 671 Regulatory radio information 673 Vehicle identification plate, VIN and engine number 723 Operating fluids 745 Vehicle data 757 Trailer hitch 764 G-Class - Owner's Manual > Technical data Notes on technical dataCatatan tentang data teknis
The technical data was determined in accordance with EU Directives. The data stated only applies to vehicles with standard equipment. You can obtain further information from a Mercedes-Benz Service Centre. Only for certain countries: you can find vehicle-specific vehicle data in the COC documents (CERTIFICATE OF CONFORMITY). These documents are supplied upon delivery of the vehicle.  670 G-Class - Owner's Manual > Technical data On-board electronicsElektronik kendaraan
Notes on tampering with the engine electronics CATATAN
Premature wear through improper maintenance Improper maintenance may cause vehicle components to wear more quickly and the vehicle's operating permit may be invalidated. ▶ Always have work on the engine electronics and related components carried out at a qualified specialist workshop.Radio dua arah
NOTES ON INSTALLING TWO-WAY RADIOS PERINGATAN
Risk of accident due to improper work on two-way radios If two-way radios are manipulated or retrofitted incorrectly, the electromagnetic radiation from the two-way radios can interfere with the vehicle electronics and jeopardise the operating safety of the vehicle. You should have all work on electrical and electronic components carried out at a qualified specialist workshop.  PERINGATAN
Risk of accident due to improper operation of two-way radios If you use two-way radios in the vehicle improperly, their electromagnetic radiation can disrupt the vehicle's electronics. This is the case in the following situations, in particular: • The two-way radio is not connected to an exterior aerial. - The exterior aerial is fitted incorrectly or is not a low-reflection aerial. This could jeopardise the operating safety of the vehicle. ▶ Have the low-reflection exterior aerial fitted at a qualified specialist workshop. When operating two-way radios in the vehicle, always connect them to the low-reflection exterior aerial.  G-Class - Owner's Manual > Technical data On-board electronics CATATAN
Invalidation of the operating permit due to failure to comply with the instructions for installation and use The operating permit may be invalidated if the instructions for installation and use of two-way radios are not observed. ▶ Only use approved frequency bands. ▶ Observe the maximum permissible output power in these frequency bands. ▶ Only use approved aerial positions.  1 Front roof area 2 Rear roof area Fitting a roof aerial to vehicles with a roof luggage rack is subject to restrictions, and cannot be generally permitted. Further information about these restrictions can be obtained at a qualified specialist workshop. Use Technical Specification ISO/TS 21609 (Road Vehicles - "EMCs for installation of aftermarket radio frequency transmitting equipment") when retrofitting two-way radios. Comply with the legal requirements for detachable parts. If your vehicle is equipped with the pre-installation for a two-way radio, use the power supply and aerial connectors provided in the pre-installation. Observe the manufacturer's supplements when fitting.DAYA KELUARAN TRANSMISI TELEPON SELULER
The maximum transmission output (PEAK) at the base of the aerial must not exceed the values in the following table. FREQUENCY BAND AND MAXIMUM TRANSMISSION OUTPUT| Frequency band Maximum transmission output | |
| 2-m- frequency band | 50 W |
| 144 - 174 MHz | |
| Terrestrial Trunked Radio (TETRA) | 10 W |
| 380 - 460 MHz | |
| Mobile phone | 2 W |
| 2G | |
| Mobile phone | 0.5 W |
| 3G/4G/5G | |
BERIKUT INI DAPAT DIGUNAKAN DI DALAM KENDARAAN TANPA BATASAN:
• two-way radios with a maximum transmission output of up to 100 mW - two-way radios with transmitter frequencies in the 380 -410 MHz frequency band and a maximum transmission output of up to 2 W (TETRA) • mobile phones (2G/3G/4G/5G)TIDAK ADA BATASAN SAAT MENEMPATKAN ANTENA DI BAGIAN LUAR KENDARAAN UNTUK PITA FREKUENSI BERIKUT:
• Terrestrial Trunked Radio (TETRA) 2G/3G/4G/5G  G-Class - Owner's Manual > Technical data > Regulatory radio information< Informasi radio peraturan
Informasi khusus tentang aplikasi nirkabel sesuai dengan 2014/53/EU
Besides the typical frequencies for mobile communication cars by Mercedes-Benz make use of the following automotive radio applications. TYPE OF WIRELESS APPLICATIONS AND SPECIFICATIONS IN ACCORDANCE WITH 2014/53/EU| Technology Frequency range Transmission output/magnetic field strength | |
| Remote Keyless Entry 20 kHz (9 - 90 kHz) ≤ 72 dBμA/m at 10m | |
| Wireless Power Transmission 105 kHz (90 - 119 kHz) ≤ 42 dBμA/m at 10m | |
| Remote Keyless Entry 120 kHz (119 - 135 kHz) ≤ 42 dBμA/m at 10m | |
| Wireless Power Transmission 127 kHz (119 - 135 kHz) ≤ 66 dBμA/m at 10m with the magnetic field strength level | decreasing 3dB/octave above 119 kHz |
| Near-field communication 13.553 - 13.567 MHz ≤ 42 dBμA/m at 10m | |
| Remote Keyless Entry, Garage Door Opener, Tire Pressure Monitoring | 433 MHz (433.05 - 434.79 MHz) ≤ 10 mW ERP |
| Block Heater Remote Control, Garage Door Opener 868 MHz (868.0 - 868.6 MHz) ≤ 25 mW ERP | |
| Block Heater Remote Control, Garage Door Opener 869 MHz (868.7 - 869.2 MHz) ≤ 25 mW ERP | |
| Bluetooth, Kleer, RLAN, wireless Headphones 2.4 GHz ISM band (2400 - 2483.5 MHz) ≤ 100 mW EIRP | |
| RLAN 5.1 GHz UNII-1 (5150 - 5250 MHz) | ≤ 40 mW EIRP |
| Remote Keyless Entry 7.25 GHz UWB (6.0–8.5 GHz) ≤ -41.3 dBm/MHz EIRP mean ≤ 0 dBm/MHz EIRP peak |
| 76 | GHz radar 76-77 | GHz ≤ 55 dBm peak EIRP |
| Compensator ECE DE003 and ECE DE004 GSM (E-GSM 900) | < +33 dBm | |
| GSM (E-GSM 1800) | < +30 dBm | |
| UMTS (I, III, VIII) < +23 dBm | ||
| LTE (B1, B3, B7, B8, B20) < -23 dBm | ||
| HERMES (Hardware for Enhanced Remote, Mobility & Emergency Services) | WLAN (2400-2483.5 MHz) | < 20 dBm |
| WLAN (5736-5833 MHz) | < 14 dBm | |
| GSM (E-GSM 900, Class 4) | < +33 dBm ( ± 2 dB) | |
| GSM (E-GSM 1800, Class 1) | < +30 dBm (+2 dB) | |
| GSM (E-GSM 900 8-PSK, Class E2) | < +27 dBm (+3 dB) | |
| GSM (E-GSM 1800 8-PSK, Class E2) | < +26 dBm ( ± 3 dB/-4 dB) | |
| UMTS (2100 WCDMA FDD B1, Class 3) < +24 dBm (+1 dB/-3 dB) | ||
| LTE (FDD B I, B III, B38, B39, B40, B41, Class 3) < -23 dBm ( ± 2 dB) | ||
| GPS (1575.42 MHz +/- 2 MHz) Receiving only | ||
| RAMSES (Router And Mobile SServiceS) | GSM (E-GSM 850 / L-GSM 900, Class 4) | < +32.5 dBm ( ± 1 dB) |
| GSM (E-GSM 1800 / E-GSM 1900, Class 4) | < +29.5 dBm ( ± 1 dB) | |
| UMTS (WCDMA FDD I, II, III, IV, V, VIII, XIX, Class 3) | < +23.5 dBm (+1 dB) |
Teknologi Rentang frekuensi Daya keluaran/kekuatan medan magnet
LTE (FDD B1, B2, B3, B4, B5, B7, B8, B9, B18, B19, B21, B28, Class < +23 dBm (±1 dB) 3) LTE (TDD B38, B40, B41, Class 3) < +23 dBm (±1 dB) GNSS (1559 - 1610 MHz) Receiving only Further information and updates are available at the following web address: https://regulatoryradioinformation.corpinter.net/en Pengidentifikasi radio peraturan/catatan khusus
The tables and sections contain the following regulatory radio information: • Manufacturer information • Required regulatory radio identifiers, listed by country/region: - Manufacturer's specifications - Model designations - Radio equipment approval numbers • Specific information on radio-based vehicle components Further information and updates are available at the following website: https://regulatoryradioinformation.corpinter.net/en IKHTISAR PRODUSEN
Produsen Informasi produsen
Continental ADC Continental ADC Automotive Distance Con- trol Systems GmbH, Peter-Dornier-Straße 10, 88131 Lindau, Germany Bosch Robert Bosch GmbH, Daimlerstraße 6, 71229 Leonberg, Germany Bury BURY SP. Z O.O., UL. WOJSKA POLSKIEGO 4, 39-300 Mielec, Poland Continental Antenna Continental Advanced Antenna GmbH, Römer ring 1, 31137 Hildesheim, Germany Continental Automotive Continental Automotive GmbH, Siemensstraße 12, 93055 Regensburg, Germany Continental Automotive France Continental Automotive France SAS, 1 Avenue Paul Ourliac, 31100 Toulouse 1, France Continental Automotive Hungary Continental Automotive Hungary Kft., H-1106 Budapest, Napmátka u. 6., Hungary   G-Class - Owner's Manual > Technical data > Regulatory radio information Manufacturer Manufacturer information| Continental Automotive Technologies Continental Automotive Technologies GmbH, VDO-Straße 1, 64832 Babenhausen, Germany |
| Gentex Gentex Corporation, 600 North Centennial Street, Zeeland MI 49464, USA |
| Harman Becker Harman Becker Automotive Systems GmbH, Becker-Goehring-Straße 18, 76307 Karlsbad, Germany |
| HELLA HELLA KGaA Hueck & Co., Rixbecker Straße 75, 59552 Lippstadt, Germany |
| Hirschmann Hirschmann Car Communication GmbH, Stuttgarter Straße 45-51, 72654 Neckartenzlingen, Germany |
| Huf Baolong Huf Baolong Electronics Bretten GmbH, Gewerbestraße 40, 75015 Bretten, Germany |
| HUF HUF Hülsbeck & Fürst GmbH & Co. KG, Steeger Straße 17, 42551 Velbert, Germany |
| MARQUARDT MARQUARDT GmbH, Schloßstraße 16, 78604 Riethelm-Wellhelm, Germany |
| Meta System Meta System S.P.A., Via T. Galimberti 5, 42124 Reggio Emilia, Italy |
| Molex Molex CVS Dabendorf GmbH, Märkische Straße 72, 15806 Zossen, Germany |
| Molex Technologies Molex Technologies GmbH, Mizarstraße 3, 12529 Schönefeld, Germany |
| Panasonic Panasonic Automotive Systems Europe GmbH, Robert-Bosch-Straße 27, 63225 Langen, Germany |
| Schrader | Schrader Electronics Ltd., 11 Technology Park, Belfast Road, Antrim BT41 1QS, Northern Ireland, United Kingdom |
| Sennheiser | Sennheiser electronic GmbH & Co. KG, Am Labor 1, 30900 Wedemark, Germany |
| Valeo | Valeo Telematik und Akustik GmbH, Max-Planck-Straße 28-32, 61381 Friedrichsdorf Germany |
| Veoneer | Veoneer Sweden AB, Wallentlinsvägen 22, 44737 Vårgårda, Sweden |
| Vitesco | Vitesco Technologies GmbH, Siemensstrasse 12, 93055 Regensburg Germany |
| WITTE-Velbert | WITTE-Velbert GmbH & Co. KG, Hoeferstr. 3-15, 42551 Velbert, Germany |
ALJAZAIR
Disetujui oleh ANF
Referensi Sertifikat Kesesuaian
 G-Class - Owner's Manual > Technical data > Regulatory radio informationDisetujui oleh ARPCE Referensi Sertifikat Kesesuaian
REGULATORY RADIO IDENTIFIERS| Manufacturer Model designation Radio equipment approval number | |
| Continental Antenna RKE223GNS (locking system) 71/H/ANF/2021 | |
| Continental Automotive CMKG1 (locking system) 122/H/ANF/2021 | |
| Continental Automotive CMKG2 (locking system) 136/H/ANF/2023 | |
| Continental Automotive MARS Keyless (locking sys-tem) | 168/H/ANF/2024 |
| HELLA DM4 (locking system) 123/H/ANF/2021 | |
| Hirschmann 920287A (locking system) 106/H/ANF/2020 | |
| Hirschmann 920287B (locking system) 107/H/ANF/2020 | |
| Hirschmann 920702A (locking system) 133/H/ANF/2022 | |
| Huf Baolong TSSRE4A (tyre pressure sen-sor) | 198/H/ANF/2021 |
| HUF HUF13145 (locking system) 105/H/ANF/2022 | |
| MARQUARDT DC12A (locking system) 188/H/ANF/2021 | |
| MARQUARDT DC12B (locking system) 189/H/ANF/2021 | |
| MARQUARDT DC12K (locking system) 190/H/ANF/2021 | |
| Manufacturer Model designation Radio equipment approval | number | |
| MARQUARDT MS5 (locking system) | 195/H/ANF/2021 | |
| MARQUARDT MS7 (locking system) | 146/H/ANF/2024 | |
| MARQUARDT MK1 (locking system) | 193/H/ANF/2021 | |
| MARQUARDT MK2 (locking system) | 194/H/ANF/2021 | |
| MARQUARDT MK3 (locking system) | 300/H/ANF/2024 | |
| MARQUARDT 3350.38 (locking system) | 186/H/ANF/2021 | |
| Schrader | AG5SP4 (tyre pressure sensor) | 3681/1-73.OA 1639/DT/DG/ARPT/15 |
| Schrader | AG3PF4 (tyre pressure sensor) | 652/1/DT/DG/ARPCE/2020 |
| Schrader | BG3FP4 (tyre pressure sensor) | 56/H/ANF/2021 |
| Schrader | GG4T (tyre pressure sensor) | 3994/1.69-DA/2098/DT/DG/ARPT/17 |
| Schrader | DG6W2D4 (tyre pressure sensor) | 2695/1-NO.431396/DT/DG/ARPT/17 |
| WITTE-Velbert | SDHTAG3NFC (locking system) | 32/H/ANF/2021 |
ARGENTINA
REGULATORY RADIO IDENTIFIERS| Manufacturer Model designation Radio equipment approval | number | |
| Continental ADC ARS4-A (radar sensor) C-18005 | ||
| Continental ADC ARS6-A (radar sensor) H-28818 | ||
| Continental ADC ARS441DP10 (radar sensor) C-2377 | ||
| Continental Antenna RKE213E1 (aerial amplifier) H-26206 | ||
| Continental Antenna RKE223E1 (aerial amplifier) H-24637 | ||
| Continental Automotive CMKG1 (locking system) H-24376 | ||
| Continental Automotive CMKG2 (locking system) H-28998 | ||
| Continental Automotive MARS Keyless (locking sys-tem) | H-17929 | |
| Continental Automotive D-WMI2020A (control unit) H-23974 | ||
| Continental Automotive Tech-nologies | NTG7Q MID LF2 (head unit) C-29127 | |
| Continental Automotive Tech-nologies | NTG7Q HIGH LF2 (head unit) C-29126 | |
| Continental Automotive Tech-nologies | NTG7Q PREMIUM LF2 (head unit) | C-29128 |
| Continental Automotive Tech-nologies | NTG7Q PREMIUMPLUS LF2 (head unit) | C-29930 |
| HELLA DM4 (locking system) H-17845 | ||
| Manufacturer Model designation Radio equipment approval | number | |
| Hirschmann 920287A (locking system) | H-15694 | |
| Hirschmann 920287B (locking system) | H-15695 | |
| Hirschmann 920702A (locking system) | H-28310 | |
| Huf Baolong | TSSRE4A (tyre pressure sen-sor) | H-27592 |
| HUF | HUF13482 (locking system) H-31125 | |
| HUF | HUF13145 (locking system) H-28067 | |
| HUF | HUF14632 (locking system) H-15541 | |
| HUF | HUF4761 (locking system) | H-11545 |
| MARQUARDT | DC12A (locking system) | H-17689 |
| MARQUARDT | DC12B (locking system) | H-21034 |
| MARQUARDT | DC12K (locking system) | H-21035 |
| MARQUARDT | MS2 (locking system) | H-17598 |
| MARQUARDT | MS4 (locking system) | H-23101 |
| MARQUARDT | MS5 (locking system) | H-24933 |
| MARQUARDT | MS6 (locking system) | H-30441 |
| MARQUARDT | MS7 (locking system) | H-29810 |
| MARQUARDT | MK1 (locking system) | H-17213 |
AUSTRALIA
REGULATORY RADIO IDENTIFIERS| Manufacturer Model designation | |
| Continental ADC | ARS4-A (radar sensor) |
| Continental ADC | ARS6-A (radar sensor) |
| Continental ADC | ARS4-C (radar sensor) |
| Continental ADC | ARS441DP10 (radar sensor) |
| Bosch | MRR1Rear (radar sensor) |
| Bosch | MRRe14FCR (radar sensor) |
| Bosch | F5CP12 (radar sensor) |
| Continental Antenna | RKE213E1 (aerial amplifier) |
| Continental Antenna | RKE223E1 (aerial amplifier) |
| Continental Automotive | CMKG1 (locking system) |
| Continental Automotive | CMKG2 (locking system) |
| Continental Automotive | MARS Keyless (locking system) |
| Continental Automotive Technologies | NTG7Q MID LF2 (head unit) |
| Continental Automotive Technologies | NTG7Q HIGH LF2 (head unit) |
| Continental Automotive Technologies | NTG7Q PREMIUM LF2 (head unit) |
| Hirschmann | 920287A (locking system) |
| Hirschmann | 920287B (locking system) |
| Hirschmann 920702A (locking system) |
| Huf Baolong TSSRE4A (tyre pressure sensor) |
| HUF HUF13145 (locking system) |
| MARQUARDT MS6 (locking system) |
| MARQUARDT MS7 (locking system) |
| MARQUARDT MK1 (locking system) |
| MARQUARDT MK2 (locking system) |
| MARQUARDT MK3 (locking system) |
| MARQUARDT 3350.38 (locking system) |
| MARQUARDT MU3 (locking system) |
| MARQUARDT MUB1 (locking system) |
| Schrader AG5SP4 (tyre pressure sensor) |
| Schrader AG3PF4 (tyre pressure sensor) |
| Schrader BG3FP4 (tyre pressure sensor) |
| Schrader GG4T (tyre pressure sensor) |
| Schrader DG6W2D4 (tyre pressure sensor) |
| Veoneer 77V12BSM (radar sensor) |
| Veoneer 77V12CRN (radar sensor) |
| Veoneer 77V125CRN (radar sensor) |
| Veoneer MMRV1 (radar sensor) |
| Manufacturer Model designation Radio equipment approval | number | |
| Continental ADC ARS4-A (radar sensor) URCA_TA_2014_082 | ||
| Continental ADC ARS6-A (radar sensor) URCA_TA_2023_211 | ||
| Continental ADC ARS4-C (radar sensor) URCA_TA_2019_167 | ||
| Bosch MRR1Rear (radar sensor) URCA_TA/2017_184 | ||
| Bosch MRRe14FCR (radar sensor) URCA_TA/2017_157 | ||
| Bosch FR5CPCCF (radar sensor) | URCA_TA_2019_195 | |
| Bosch F5CP12 (radar sensor) | URCA_TA_2022_077 | |
| Continental Automotive | CMKG1 (locking system) | URCA_TA/2020_068 |
| Continental Automotive | CMKG2 (locking system) | URCA_TA/2023_028 |
| Continental Automotive | MARS Keyless (locking sys-tem) | URCA_TA/2017_119 |
| Continental Antenna | RKE213E1 (aerial amplifier) | UCRA_TA/2016_009 |
| Continental Antenna | RKE223E1GNS (aerial ampli-fer) | UCRA_TA/2020_032 |
| HELLA DM4 (locking system) URCA_TA/2017_078 | |
| HELLA RS6 (locking system) URCA_TA_2023_174 | |
| Hirschmann 920287A (locking system) URCA_TA/2019_053 | |
| Hirschmann 920287B (locking system) URCA_TA/2019_052 | |
| Hirschmann 920702A (locking system) URCA_TA/2022_043 | |
| HUF HUF13145 (locking system) URCA_TA_2022_057 | |
| HUF HUF14632 (locking system) URCA_TA/2015_087 | |
| HUF HUF4761 (locking system) URCA_TA/2015_087 | |
| Huf Baolong TSSRE4A (tyre pressure sensor) | URCA_TA/2017_094 |
| MARQUARDT DC12A (locking system) URCA_TA_2017_042 | |
| MARQUARDT DC12B (locking system) URCA_TA_2019_128 | |
| MARQUARDT DC12K (locking system) URCA_TA_2019_129 | |
| MARQUARDT MS2 (locking system) URCA_TA/2017_021 | |
| MARQUARDT MS4 (locking system) URCA_TA_2019_141 | |
| MARQUARDT MS5 (locking system) URCA_TA_2020_141 | |
| MARQUARDT MS6 (locking system) URCA_TA_2024-035 | |
| MARQUARDT MS7 (locking system) URCA_TA_2024-066 | |
| MARQUARDT MK1 (locking system) URCA_TA/2015_031 | |
| MARQUARDT MK3 (locking system) URCA_TA_2024_025 | ||
| MARQUARDT 3350.38 (locking system) | URCA_TA/2019_250 | |
| MARQUARDT MU3 (locking system) URCA_TA/2023_245 | ||
| MARQUARDT MUB1 (locking system) | URCA_TA/2024_060 | |
| Schrader | AG5SP4 (tyre pressure sensor) | URCA_TA_TA/2015_009 |
| Schrader | AG3PF4 (tyre pressure sensor) | URCA_TA_2019_101 |
| Schrader | BG3FP4 (tyre pressure sensor) | URCA_TA_2021_001 |
| Schrader | GG4T (tyre pressure sensor) | URCA_TA_2020_046 |
| Schrader | DG6W2D4 (tyre pressure sensor) | URCA_TA_2019_247 |
| Valeo | ARTEMIS-SUB-01 (locking system) | URCA_TA_2024_056 |
| Veoneer | 77V12BSM (radar sensor) | URCA_TA_2019_169 |
| Veoneer | 77V12CRN (radar sensor) | URCA_TA_2019_168 |
| Veoneer | 77V125CRN (radar sensor) | URCA_TA_2021_027 |
| Veoneer | MMRV1 (radar sensor) | URCA_TA/2015_063 |
| Vitesco Technologies | HFA30 (Handsfree-Access) | URCA_TA_2023_247 |
| WITTE-Velbert | SDHTAG3NFC (locking system) | URCA_TA_2020_056 |
BELARUS
REGULATORY RADIO IDENTIFIERS
 Manufacturer Model designation Continental ADC ARS4-A (radar sensor) Continental ADC ARS4-C (radar sensor) Bosch MRR1Rear (radar sensor) Bosch MRRe14FCR (radar sensor) Bosch FR5CPCCF (radar sensor) Bosch F5CP12 (radar sensor) Continental Antenna RKE213E1 (aerial amplifier) Continental Antenna RKE223E1GNS (aerial amplifier) Continental Automotive CMKG1 (locking system) Continental Automotive CMKG2 (locking system) Continental Automotive MARS Keyless (locking system) Harman Becker HERMES 3.0 (communication module) HELLA DM4 (locking system) HUF HUF13145 (locking system) MARQUARDT DC12A (locking system) MARQUARDT DC12B (locking system) MARQUARDT DC12K (locking system)  Manufacturer Model designation MARQUARDT MS2 (locking system) MARQUARDT MS4 (locking system) MARQUARDT MS5 (locking system) MARQUARDT MS7 (locking system) MARQUARDT MK1 (locking system) MARQUARDT MK2 (locking system) MARQUARDT MK3 (locking system) MARQUARDT 3350.38 (locking system) MARQUARDT MU3 (locking system) MARQUARDT MUB1 (locking system) Veoneer 77V12BSM (radar sensor) Veoneer 77V12CRN (radar sensor) Veoneer 77V125CRN (radar sensor) Veoneer MMRV1 (radar sensor) WITTE-Velbert SDHTAG3NFC (locking system)    G-Class - Owner's Manual > Technical data > Regulatory radio informationBOTSWANA
REGULATORY RADIO IDENTIFIERS| Manufacturer Model designation Radio equipment approval | number | |
| Continental ADC ARS4-A (radar sensor) BOCRA/TA/2018/2026 | ||
| Continental ADC ARS6-A (radar sensor) BOCRA/TA/2022/7599 | ||
| Continental ADC ARS4-C (radar sensor) BOCRA/TA/2020/5186 | ||
| Bosch MRRe14FCR (radar sensor) BOCRA/TA/2019/4674 | ||
| Bosch FR5CPCCF (radar sensor) BOCRA/TA/2019/4975 | ||
| Bosch MRR1Rear (radar sensor) BOCRA/TA/2017/3788 | ||
| Bosch F5CP12 (radar sensor) BOCRA/TA/2022/7110 | ||
| Continental Antenna RKE213E1 (aerial amplifier) BOCRA/TA/2019/4387 | ||
| Continental Antenna RKE223E1GNS (aerial amplifier) | BOCRA/TA/2019/5050 | |
| Continental Automotive CMKG1 (locking system) BOCRA/TA/2019/5075 | ||
| Continental Automotive CMKG2 (locking system) BOCRA/TA/2023/8144 | ||
| Continental Automotive MARS Keyless (locking system) | BOCRA/TA/2019/4661 | |
| HELLA DM4 (locking system) | BOCRA/TA/2019/4662 | |
| HELLA RS6 (locking system) | BOCRA/TA/2023/8610 | |
| Hirschmann | 920287A (locking system) | BOCRA/TA/2019/4724 |
| Hirschmann | 920287B (locking system) | BOCRA/TA/2019/4723 |
| Number | ||
| Hirschmann | 920702A (locking system) | BOCRA/TA/2022/7099 |
| HUF | HUF13145 (locking system) HUF13145 | |
| HUF | HUF4761 (locking system) | BOCRA/TA/2019/4664 |
| MARQUARDT | DC12A (locking system) | BOCRA/TA/2019/4389 |
| MARQUARDT | DC12B (locking system) | BOCRA/TA/2019/4388 |
| MARQUARDT | DC12K (locking system) | BOCRA/TA/2019/4390 |
| MARQUARDT | MS2 (locking system) | BOCRA/TA/2019/5135 |
| MARQUARDT | MS4 (locking system) | BOCRA/TA/2019/4758 |
| MARQUARDT | MS5 (locking system) | BOCRA/TA/2020/5473 |
| MARQUARDT | MS6 (locking system) | BOCRA/TA/2024/259 |
| MARQUARDT | MS7 (locking system) | BOCRA/TA/2024/374 |
| MARQUARDT | MK1 (locking system) | BOCRA/TA/2019/4359 |
| MARQUARDT | MK2 (locking system) | BOCRA/TA/2019/4360 |
| MARQUARDT | MK3 (locking system) | BOCRA/TA/2024/373 |
| MARQUARDT | 3350.38 (locking system) BOCRA/TA/2019/4687 | |
| MARQUARDT | MU3 (locking system) | BOCRA/TA/2023/8771 |
| MARQUARDT | MUB1 (locking system) | BOCRA/TA/2024/386 |
| Veoneer | 77V12BSM (radar sensor) | BOCRA/TA/2019/4975 |
| Veoneer | 77V12CRN (radar sensor) | BOCRA/TA/2019/4980 |
| Veoneer 77V125CRN (radar sensor) BOCRA/TA/2021/6191 |
| WITTE-Velbert SDHTAG3NFC (locking system) | BOCRA/TA/2020/5342 |
BRAZIL
Informasi tentang sistem radio dua arah di dalam kendaraan:
These systems are not protected against harmful interference and must not cause interference in properly approved systems. REGULATORY RADIO IDENTIFIERS  Manufacturer Model designation Radio equipment approval number| Continental ADC ARS4-A (radar sensor) 02217-14-06068 |
| Continental ADC ARS441DP10 (radar sensor) 06783-19-02496 |
| Bury A167 820 19 03 /A247 820 84 | 20280-23-04457 |
| 02 (mobile phone charger) |
| Bury A247 820 86 02 (mobile phone charger) | 20288-23-04457 |
| Bury A174 820 42 00 (USB-C | 07785-24-04457 |
| charger) |
| Continental Antenna RKE223E1 (aerial amplifier) 03691-15-05298 |
| Continental Antenna RKE213E1 (aerial amplifier) 07359-21-12817 |
| Continental Antenna RKE213E1 (aerial amplifier) 3691-15-5298 |
| Continental Automotive CMKG1 (locking system) 00325-20-02149 |
| Continental Automotive CMKG2 (locking system) 01334-23-02149 |
| Continental Automotive MARS Keyless (locking system) | 03189-17-02856 |
| Continental Automotive Technologies | NTG7Q MID LF2 (head unit) 12520-23-06353 |
| Continental Automotive Technologies | NTG7Q HIGH LF2 (head unit) | 12525-23-06353 |
| Continental Automotive Technologies | NTG7Q PREMIUM LF2 (head unit) | 12522-23-06353 |
| Continental Automotive Technologies | NTG7Q PREMIUMPLUS LF2(head unit) | 17830-23-06353 |
| HELLA | DM4 (locking system) | 04689-17-05364 |
| Hirschmann | 920287A (locking system) | 1855-12-5762 |
| Hirschmann | 920287B (locking system) | 1787-12-8058 |
| Huf Baolong | TSSRE4A (tyre pressure sensor) | 08539-19-03616 |
| HUF | HUF13482 (locking system) 07889-24-06643 |
| HUF | HUF13145 (locking system) HUF13145 |
| HUF | HUF14632 (locking system) 03627-15-06643 |
| HUF | HUF4761 (locking system) | 00053-13-06643 |
Informasi tambahan spesifik
Sistem Hiburan Kursi Belakang:
This system is not protected against harmful interference and must not cause interference in properly approved systems. This product is approved by ANATEL in accordance with the procedures set out in Resolution 242/2000 and complies with the relevant technical requirements. You will find additional information on the https://www.anatel.gov.brUnit pengisian daya untuk pengisian nirkabel perangkat komunikasi seluler (WMI):
This device operates in secondary mode, which means it has no protection against harmful interference, not even from stations of the same type, and must not cause interference with systems operating on a primary basis. This product is approved in accordance with the procedures defined in Directive 242/2000 by the Brazilian telecommunications agency ANATEL and complies with the applicable technical requirements. Additional information can be found on the www.anatel.gov.br website.Produk telekomunikasi:
  G-Class - Owner's Manual > Technical data > Regulatory radio information This product has been approved by Anatel in accordance with the procedures stipulated in Resolution No. 715/2020, and satisfies all applied technical requirements. Additional information can be found on the www.anatel.gov.br website.BRUNEI DARUSSALAM
REGULATORY RADIO IDENTIFIERS| Manufacturer Model designation Radio equipment approval number | |
| Continental ADC ARS4-C (radar sensor) DTA-004005 | |
| Continental ADC ARS6-A (radar sensor) DTA-020359 | |
| Bosch FR5CPCCF (radar sensor) DTA-004222 | |
| Bosch LRR3 (radar sensor) DTA-011039 | |
| Bosch MRR1Rear (radar sensor) DTA-006601 | |
| Bosch MRRe14FCR (radar sensor) DTA-006678 | |
| Bosch F5CP12 (radar sensor) DTA-018042 | |
| Continental Antenna RKE213E1 (aerial amplifier) DTA-006665 | |
| Continental Antenna RKE223E1GNS (aerial amplifier) | DTA-004998 |
| Continental Automotive CMKG1 (locking system) | DTA-005043 |
| Continental Automotive CMKG2 (locking system) | DTA-023993 |
| Continental Automotive MARS Keyless (locking system) | DTA-017264 |
| Manufacturer Model designation Radio equipment approval | number | |
| HELLA | DM4 (locking system) | DTA-020187 |
| HELLA | RS6 (locking system) | AA-000081 |
| Hirschmann | 920287A (locking system) | DTA-001661 |
| Hirschmann | 920287B (locking system) | DTA-000794 |
| Hirschmann | 920702A (locking system) | DTA-018051 |
| Huf Baolong | TSSRE4A (tyre pressure sensor) | DTA-011045 |
| Huf Baolong | TSSSG4G6b (tyre pressure monitoring system control unit) | DTA-003757 |
| HUF | HUF13145 (locking system) DTA-017926 | |
| HUF | HUF14632 (locking system) DTA-006138 | |
| HUF | HUF4761 (locking system) | DTA-000615 |
| MARQUARDT | DC12A (locking system) | DTA-019403 |
| MARQUARDT | DC12B (locking system) | DTA-000068 |
| MARQUARDT | DC12K (locking system) | DTA-000066 |
| MARQUARDT | MS2 (locking system) | LPD-38890 |
| MARQUARDT | MS4 (locking system) | DTA-003525 |
| MARQUARDT | MS5 (locking system) | DTA-005850 |
UNI EKONOMI EURASIA
REGULATORY RADIO IDENTIFIERS| Manufacturer | CAC |
| Model designation | |
| Continental ADC | ARS4-A (radar sensor) |
| Continental ADC | ARS4-C (radar sensor) |
| Continental ADC | ARS6-A (radar sensor) |
| Continental ADC | ARS441DP10 (radar sensor) |
| Bosch | FR5CPCCF (radar sensor) |
| Bosch | LRR3 (radar sensor) |
EAC
EAC
Manufacturer Model designation| Bosch MRR1Rear (radar sensor) |
| Bosch MRRe14FCR (radar sensor) |
| Bosch F5CP12 (radar sensor) |
| Continental Antenna RKE213E1 (aerial amplifier) |
| Continental Antenna RKE223E1GNS (aerial amplifier) |
| Continental Automotive MARS Keyless (locking system) |
| Continental Automotive CMKG1 (locking system) |
| Continental Automotive CMKG2 (locking system) |
| HELLA DM4 (locking system) |
| Hirschmann 920287A (locking system) |
| Hirschmann 920287B (locking system) |
| Hirschmann 920702A (locking system) |
| Huf Baolong TSSRE4A (tyre pressure sensor) |
| HUF HUF13145 (locking system) |
| HUF HUF4761 (locking system) |
| HUF HUF14632 (locking system) |
| HUF HUF13482 (locking system) |
| MARQUARDT DC12A (locking system) |
| MARQUARDT DC12B (locking system) |
| MARQUARDT DC12K (locking system) |
| MARQUARDT MS2 (locking system) |
| MARQUARDT MS4 (locking system) |
| MARQUARDT MS5 (locking system) |
| MARQUARDT MS6 (locking system) |
| MARQUARDT MS7 (locking system) |
| MARQUARDT MK1 (locking system) |
| MARQUARDT MK2 (locking system) |
| MARQUARDT MK3 (locking system) |
| MARQUARDT 3350.38 (locking system) |
| MARQUARDT MU3 (locking system) |
| MARQUARDT MUB1 (locking system) |
| Schrader AG5SP4 (tyre pressure sensor) |
| Schrader AG3PF4 (tyre pressure sensor) |
| Schrader BG3FP4 (tyre pressure sensor) |
| Schrader GG4T (tyre pressure sensor) |
| Schrader DG6W2D4 (tyre pressure sensor) |
| Valeo ARTEMIS-SUB-01 (locking system) |
| Veoneer 77GHz MMRV1 (radar sensor) |
| Veoneer 77V12BSM (radar sensor) |
| Veoneer 77V12CRN (radar sensor) |
| Veoneer 77V125CRN (radar sensor) |
| WITTE-Velbert SDHTAG3NFC (locking system) |
GHANA
REGULATORY RADIO IDENTIFIERS Manufacturer Model designation Radio equipment approval number| NCA APPROVED | |
| Continental ADC ARS4-C (radar sensor) ZRO-1H-7E3-152 | |
| Continental ADC ARS6-A (radar sensor) 7E6-M1-16C-SRD | |
| Continental ADC AR5441DP10 (radar sensor) ZRO-1H-7E3-152 | |
| Bosch FR5CPCCF (radar sensor) ZRO-M8-7E3-230 | |
| Bosch F5CP12 (radar sensor) 7E6-M1-X9B-SRD | |
| Continental Antenna RKE213E1 (aerial amplifier) | ZRO-M8-7E3-X53 |
| Continental Antenna RKE223E1GNS (aerial amplifier) | ZRO-M8-7E3-225 |
| Continental Automotive | CMKG1 (locking system) | ZRO-M8-7E3-277 |
| Continental Automotive | CMKG2 (locking system) | 7M-7E7-X25-DSR |
| Continental Automotive | MARS Keyless (locking sys-tem) | BR3-1M-GE2-16A |
| Continental Automotive Tech-nologies | NTG7Q MID LF2 (head unit) | 7M-7E7-X09-DSR |
| Continental Automotive Tech-nologies | NTG7Q HIGH LF2 (head unit) | 7M-7E7-X05-DSR |
| Continental Automotive Tech-nologies | NTG7Q PREMIUM LF2 (head unit) | 7M-7E7-X03-DSR |
| HELLA | DM4 (locking system) | BR3-1M-GE2-157 |
| Hirschmann | 920287A (locking system) | ZRO-M8-7E3-X45 |
| Hirschmann | 920287B (locking system) | ZRO-M8-7E3-X47 |
| HUF | HUF13145 (locking system) | 7E6-M1-X14-SRD |
| HUF | HUF4761 (locking system) | EX6-6M-GE2-16C |
| MARQUARDT | DC12A (locking system) | ZRO-M8-7E3-X50 |
| MARQUARDT | DC12B (locking system) | ZRO-M8-7E3-X51 |
| MARQUARDT | DC12K (locking system) | ZRO-M8-7E3-X52 |
| MARQUARDT | MS2 (locking system) | BR3-1M-GE-129 |
| MARQUARDT | MS4 (locking system) | ZRO-1H-7E3-26E |
| MARQUARDT | MS5 (locking system) | SRO-1M-7E4-11B |
INDONESIA
REGULATORY RADIO IDENTIFIERS| Manufacturer Model designation Radio equipment approval | number | |
| Bury | MB-WMI2024 (control unit) | 100200/SDPPI/20247163 |
| Continental ADC | ARS3-A (radar sensor) | 97128/SDPPI/20247163 |
| Continental ADC | ARS3-B (radar sensor) | 97129/SDPPI/20247163 |
| Continental ADC | ARS4-B (radar sensor) | 97127/ SDPPI/ 20247163 |
| Continental ADC | ARS4-C (radar sensor) | 68676/SDPPI/20207163 |
| Continental ADC | ARS4-A (radar sensor) | 90362/SDPPI/20237163 |
| Continental ADC | ARS6-A (radar sensor) | 84770/SDPPI/20227163 |
| Manufacturer Model designation Radio equipment approval | number |
| Continental ADC AR5441DP10 (radar sensor) 89748/SDPPI/2023 | 7163 |
| Bosch LRR3 (radar sensor) 74264/SDPPI/2021 | 7163 |
| Bosch MRR1Rear (radar sensor) 74267/SDPPI/2021 | 7163 |
| Bosch MRRevo14F (radar sensor) 74265/SDPPI/2021 | 7163 |
| Bosch MRRe14FCR (radar sensor) 74266/SDPPI/2021 | 7163 |
| Bosch FR5CPCCF (radar sensor) 67882/SDPPI/2020 | 7163 |
| Dilarang melakukan perubahan spesifikasi yang dapat menimbulkan gangguan fisik dan/atau elektromagnetik terhadap lingkungan sekitarnya |
| Manufacturer Model designation Radio equipment approval | number |
| Bosch F5CP12 (radar sensor) 86858/SDPPI/2022 | 84754⚠️Dilarang melakukan perubahan spesifikasi yang dapat menimbulkan gangguan fisik dan/atau elektromagnetik terhadap lingkungan sekitarnya[IMAGE] |
| Continental Antenna RKE213E1 (aerlal amplifier) 103697/SDPPI/2024 | 7163⚠️Dilarang melakukan perubahan spesifikasi yang dapat menimbulkan gangguan fisik dan/atau elektromagnetik terhadap lingkungan sekitarnya[IMAGE] |
| Continental Antenna RKE223E1GNS (aerlal amplifier) | 86957/ SDPPI/ 202210325⚠️Dilarang melakukan perubahan spesifikasi yang dapat menimbulkan gangguan fisik dan/atau elektromagnetik terhadap lingkungan sekitarnya[IMAGE] |
Pabrikan Penunjukan model Persetujuan peralatan radio
nomor
Continental Automotive CMKG1 (locking system) 87836/SDPPI/2023 7163  Dilarang melakukan perubahan spesifikasi yang dapat menimbulkan gangguan fisik dan/atau elektromagnetik terhadap lingkungan sekitarnya  Continental Automotive CMKG2 (locking system) 88721/SDPPI/2023 7163  Dilarang melakukan perubahan spesifikasi yang dapat menimbulkan gangguan fisik dan/atau elektromagnetik terhadap lingkungan sekitarnya  Continental Automotive MARS Keyless (locking system) 69379/SDPPI/2020 7163  Dilarang melakukan perubahan spesifikasi yang dapat menimbulkan gangguan fisik dan/atau elektromagnetik terhadap lingkungan sekitarnya Pabrikan Penunjukan model Persetujuan peralatan radio
nomor
Continental Automotive CORT1508 (tyre pressure monitoring system control unit) 97476//SDPPI/2024 7163  Dilarang melakukan perubahan spesifikasi yang dapat menimbulkan gangguan flisk dan/atau elektromagnetik terhadap lingkungan sekitarnya  Continental Automotive D-WMI2020A (control unit) 66678/SDPPI/2020 7163  Dilarang melakukan perubahan spesifikasi yang dapat menimbulkan gangguan fisik dan/atau elektromagnetik terhadap lingkungan sekitarnya  Continental Automotive NTG7 MID (Headunit) Production: Hungary 92192/SDPPI/2023 7163  Dilarang melakukan perubahan spesifikasi yang dapat menimbulkan gangguan fisik dan/atau elektromagnetik terhadap lingkungan sekitarnya   G-Class - Owner's Manual > Technical data Regulatory radio information  Manufacturer Model designation Radio equipment approval| Number | |
| Continental Automotive NTG7 HIGH(Headunit)Production: Hungary | 92190/SDPPI/2023 7163⚠️Dilarang melakukan perubahan spesifikasi yang dapat menimbulkan gangguan fisik dan/atau elektromagnetik terhadap lingkungan sekitarnya[IMAGE] |
| Continental Automotive NTG7 PREMIUM(Headunit)Production: Hungary | 92188/SDPPI/2023 7163⚠️Dilarang melakukan perubahan spesifikasi yang dapat menimbulkan gangguan fisik dan/atau elektromagnetik terhadap lingkungan sekitarnya[IMAGE] |
| Continental Automotive NTG7 PREMIUM PLUS(Headunit)Production: Hungary | 92195/SDPPI/2023 7163⚠️Dilarang melakukan perubahan spesifikasi yang dapat menimbulkan gangguan fisik dan/atau elektromagnetik terhadap lingkungan sekitarnya[IMAGE] |
| Continental Automotive France | CORTIS08 (tyre pressure monitoring system control unit) | 97476/SDPPI/2024 7163 |
| ⚠️Dilarang melakukan perubahan spesifikasi yang dapat menimbulkan gangguan fisik dan/atau elektromagnetik terhadap lingkungan sekitarnya | ||
| Continental Automotive Technologies | NTG7Q MID LF2 (head unit) 88477/SDPPI/2023 7163 | ⚠️Dilarang melakukan perubahan spesifikasi yang dapat menimbulkan gangguan fisik dan/atau elektromagnetik terhadap lingkungan sekitarnya |
| Continental Automotive Technologies | NTG7Q HIGH LF2 (head unit) 88579/SDPPI/2023 7163 | ⚠️Dilarang melakukan perubahan spesifikasi yang dapat menimbulkan gangguan fisik dan/atau elektromagnetik terhadap lingkungan sekitarnya |
| Continental Automotive Technologies | NTG7Q PREMIUM LF2 (head unit) |
| (Headunit) |
| Production: Germany |
| (Headunit) |
| Production: Germany |
| Harman Becker NTG6N ENTRY/MID |
| 63775/SDPPI/2019 7163 |
| Number | ||
| Harman Becker NTG7 HIGH(Headunit) | 70513/SDPPI/2020 7163 | |
| ⚠️Dilarang melakukan perubahan spesifikasi yang dapat menimbulkan gangguan fisik dan/atau elektromagnetik terhadap lingkungan sekitarnya | ||
| Harman Becker NTG7 PREMIUM(Headunit) | 65543/SDPPI/2020 7163 | |
| ⚠️Dilarang melakukan perubahan spesifikasi yang dapat menimbulkan gangguan fisik dan/atau elektromagnetik terhadap lingkungan sekitarnya | ||
| Harman Becker NTG7 PREMIUM PLUS(Headunit) | 70512/SDPPI/2020 7163 | |
| ⚠️Dilarang melakukan perubahan spesifikasi yang dapat menimbulkan gangguan fisik dan/atau elektromagnetik terhadap lingkungan sekitarnya | ||
| Number | |
| Harman Becker NTG7 RSU (control unit) 66387/SDPPI/2020 7163 | |
| Dilarang melakukan perubahan spesifikasi yang dapat menimbulkan gangguan fisik dan/atau elektromagnetik terhadap lingkungan sekitarnya | |
| HELLA DM4 (locking system) 69378/SDPPI/2020 | |
| 7163 | |
| Dilarang melakukan perubahan spesifikasi yang dapat menimbulkan gangguan fisik dan/atau elektromagnetik terhadap lingkungan sekitarnya | |
| Huf Baolong TSSRE4A (tyre pressure sensor) | 72438/SDPPI/2021 |
| 7163 | |
| Hirschmann 920287A (locking system) 71369 /SDPPI/2020 | |
| 7163 | |
| Hirschmann 920287B (locking system) 72974 /SDPPI/2021 |
7163
 Dilarang melakukan perubahan spesifikasi yang dapat menimbulkan gangguan fisik dan/atau elektromagnetik terhadap lingkungan sekitarnya  Hirschmann 920702A (locking system) 82675/SDPPI/2022 7163  Dilarang melakukan perubahan spesifikasi yang dapat menimbulkan gangguan fisik dan/atau elektromagnetik terhadap lingkungan sekitarnya  HUF HUF13482 (locking system) 104103/SDPPI/2024 7163  Dilarang melakukan perubahan spesifikasi yang dapat menimbulkan gangguan fisik dan/atau elektromagnetik terhadap lingkungan sekitarnya  Manufacturer Model designation Radio equipment approval number| HUF HUF14632 (locking system) 78368/SDPPI/2021 |
7163
 Dilarang melakukan perubahan spesifikasi yang dapat menimbulkan gangguan flisk dan/atau elektromagnetik terhadap lingkungan sekitarnya  HUF HUF4761 (locking system) 26742/SDPPI/20153533
 Dilarang melakukan perubahan spesifikasi yang dapat menimbulkan gangguan fisik dan/atau elektromagnetik terhadap lingkungan sekitarnya  HUF HUF13145 (NFC reader) 83988/SDPPI/2022  Dilarang melakukan perubahan spesifikasi yang dapat menimbulkan gangguan fisik dan/atau elektromagnetik terhadap lingkungan sekitarnya  G-Class - Owner's Manual > Technical data Regulatory radio information  Manufacturer Model designation Radio equipment approval number MARQUARDT DC12A (locking system) 67373/SDPPI/2020 7163  Dilarang melakukan perubahan spesifikasi yang dapat menimbulkan gangguan fisik dan/atau elektromagnetik terhadap lingkungan sekitarnya  MARQUARDT DC12B (locking system) 80676/SDPPI/2022 7163  Dilarang melakukan perubahan spesifikasi yang dapat menimbulkan gangguan fisik dan/atau elektromagnetik terhadap lingkungan sekitarnya  MARQUARDT DC12K (locking system) 80621/SDPPI/2022 7163  Dilarang melakukan perubahan spesifikasi yang dapat menimbulkan gangguan fisik dan/atau elektromagnetik terhadap lingkungan sekitarnya  Manufacturer Model designation Radio equipment approval number MARQUARDT MS2 (locking system) 67372/SDPPI/2020 7163  Dilarang melakukan perubahan spesifikasi yang dapat menimbulkan gangguan flisk dan/atau elektromagnetik terhadap lingkungan sekitarnya  MARQUARDT MS4 (locking system) 64126/SDPPI/2019 7163  Dilarang melakukan perubahan spesifikasi yang dapat menimbulkan gangguan fisik dan/atau elektromagnetik terhadap lingkungan sekitarnya  MARQUARDT MS5 (locking system) 90695/SDPPI/2023 7163 7163  Dilarang melakukan perubahan spesifikasi yang dapat menimbulkan gangguan fisik dan/atau elektromagnetik terhadap lingkungan sekitarnya   G-Class - Owner's Manual > Technical data Regulatory radio information  Manufacturer Model designation Radio equipment approval| number | |
| MARQUARDT MS6 (locking system) 102883/SDPPI/2024 7163 | 7163⚠️Dilarang melakukan peruba-han spesifikasi yang dapat menimbulkan gangguan fisik dan/atau elektromagnetik ter-hadap lingkungan sekitarnya[IMAGE] |
| MARQUARDT MS7 (locking system) 102735/SDPPI/2024 7163 | 7163⚠️Dilarang melakukan peruba-han spesifikasi yang dapat menimbulkan gangguan fisik dan/atau elektromagnetik ter-hadap lingkungan sekitarnya[IMAGE] |
| MARQUARDT MK1 (locking system) 100207/ SDPPI/ 2024 | 7163⚠️Dilarang melakukan peruba-han spesifikasi yang dapat menimbulkan gangguan fisik dan/atau elektromagnetik ter-hadap lingkungan sekitarnya[IMAGE] |
| number | |
| MARQUARDT MK2 (locking system) 100209/ SDPPI/ 2024 | |
| 7163⚠️Dilarang melakukan perubahan spesifikasi yang dapat menimbulkan gangguan fisik dan/atau elektromagnetik terhadap lingkungan sekitarnya | |
| MARQUARDT MK3 (locking system) 102736/ SDPPI/ 2024 | |
| 7163⚠️Dilarang melakukan perubahan spesifikasi yang dapat menimbulkan gangguan fisik dan/atau elektromagnetik terhadap lingkungan sekitarnya | |
| MARQUARDT 3350.38 (locking system) 82980/SDPPI/2022 | |
| 7163⚠️Dilarang melakukan perubahan spesifikasi yang dapat menimbulkan gangguan fisik dan/atau elektromagnetik terhadap lingkungan sekitarnya | |
Pabrikan Penunjukan model Persetujuan peralatan radio
nomor
Molex WCH-302b (control unit) 71668/SDPPI/2020 7163  Dilarang melakukan perubahan spesifikasi yang dapat menimbulkan gangguan flisk dan/atau elektromagnetik terhadap lingkungan sekitarnya  Molex WCH-302d (control unit) 71220/SDPPI/2020 7163  Dilarang melakukan perubahan spesifikasi yang dapat menimbulkan gangguan fisik dan/atau elektromagnetik terhadap lingkungan sekitarnya  Molex WCH-302e (control unit) 71669/SDPPI/2020 7163  Dilarang melakukan perubahan spesifikasi yang dapat menimbulkan gangguan fisik dan/atau elektromagnetik terhadap lingkungan sekitarnya Pabrikan Penunjukan model Persetujuan peralatan radio
nomor
Panasonic DAIRSE (control unit) 63550/SDPPI/2019  Dilarang melakukan perubahan spesifikasi yang dapat menlmbulkan gangguan fisik dan/atau elektromagnetik terhadap lingkungan sekitarnya  Schrader GG4T (tyre pressure sensor) 72023/SDPPI/2020 9338 Schrader AG5SP4 (tyre pressure sensor) 75465/SDPPI/2021 7163  Schrader BG3FP4 (tyre pressure sensor) 72765/SDPP/2021 7163  Schrader DG6W2D4 (tyre pressure sensor) 57058/SDPPI/2018 3612 Schrader MC34MA4 (tyre pressure 25626/SDPPI/2015 3612 Schrader AG3PF4 (tyre pressure sensor) 62396/SDPPI/2020 7163    G-Class - Owner's Manual > Technical data > Regulatory radio information | Manufacturer Model designation Radio equipment approval | number |
| Schrader GG4T (tyre pressure sensor) 72023/SDPPI/2020 | 7163 |
| Veoneer 77GHz MMRV1 (radar sensor) 74749/SDPPI/2021 | 7163 |
| Veoneer 77V12CRN (radar sensor) 66830/SDPPI/2020 | 7163 |
| Veoneer 77V125CRN (radar sensor) 78366/SDPPI/2021 | 7163 |
| Veoneer 77V12BSM (radar sensor) 66792/SDPPI/2020 | 7163 |
| WITTE-Velbert SDHTAG3NFC (locking sys-tem) | 67233/SDPPI/202010325 |
| Dilarang melakukan perubahan spesifikasi yang dapat menimbulkan gangguan fisik dan/atau elektromagnetik ter-hadap lingkungan sekitarnya |
ISRAEL
REGULATORY RADIO IDENTIFIERS| Manufacturer Model designation Radio equipment approval | number | |
| Approval number of the Min-istry of Communications: | ||
| Continental ADC ARS4-A (radar sensor) 55-09697 | ||
| Continental ADC ARS6-A (radar sensor) 55-14225 | ||
| Continental ADC ARS4-C (radar sensor) 55-07525 | ||
| Bosch FR5CPCCF (radar sensor) | 55-08783 | |
| Bosch LRR3 (radar sensor) | 55-08334 | |
| Bosch MRR1Rear (radar sensor) | 55-08333 | |
| Bosch MRRe14FCR (radar sensor) | 55-08395 | |
| Bosch F5CP12 (radar sensor) | 55-12854 | |
| Bosch MBCI2LS3PR1 (head unit) | 51-91228 | |
| Bosch MBCI2LS4PR1 (head unit) | 51-91226 | |
| Continental Antenna | RKE213E1 (aerial amplifier) | 55-13929 |
| Continental Antenna | RKE223E1GNS (aerial amplifier) | 51-97825 |
| Continental Automotive | D-WMI2017B (control unit) | 51-75654 |
| Continental Automotive | D-WMI2017A (control unit) | 51-75367 |
| Continental Automotive | D-WMI2016A (control unit) | 55-08177 |



- G-CLASS
- TAHUKAH ANDA
- DIGITAL - DI DALAM KENDARAAN
- DIGITAL - DI INTERNET
- CETAK DI DALAM KENDARAAN
- DIGITAL - SEBAGAI APLIKASI
- PERINGATAN AIRBAG PENUMPANG DEPAN
- PERINGATAN
- SELAMAT DATANG DI DUNIA MERCEDES-BENZ
- FITUR PERALATAN ATAU PENANDAAN PRODUK KENDARAAN ANDA MUNGKIN BERBEDA DARI ISI YANG DIJELASKAN DALAM BUKU PANDUAN PEMILIK. BUKU PANDUAN PEMILIK MENJELASKAN ISI BERIKUT
- MERCEDES-BENZ TERUS MENGEMBANGKAN KENDARAANNYA SECARA KONSTAN DAN OLEH KARENA ITU BERHAK UNTUK MEMPERKENALKAN PERUBAHAN DI BIDANG BERIKUT
- DOKUMEN BERIKUT ADALAH KOMPONEN KENDARAAN
- PERNYATAAN PENYANGKALAN
- HAK CIPTA
- DAFTAR ISI
- THIS INTERACTIVE PDF WORKS LIKE A WEBSITE - TAP OR CLICK A BUTTON TO JUMP STRAIGHT TO WHERE YOU WANT TO GO. YOU CAN RETURN HERE AT ANY TIME VIA THE NAVIGATION BAR AT THE TOP LEFT. G-CLASS - OWNER'S MANUAL SYMBOLS IN THIS OWNER'S MANUAL, YOU WILL FIND THE FOLLOWING SYMBOLS:  PERINGATAN
- CATATAN
- PANDUAN MEMULAI CEPAT DAN TIPS
- KURSI
- ANAK-ANAK DI DALAM KENDARAAN
- MENGANGKUT ANAK-ANAK DENGAN AMAN DI DALAM KENDARAAN
- MULTIBEAM LED
- FUNGSI ADAPTIF, MULTIBEAM LED
- SISTEM INI TERDIRI DARI FUNGSI-FUNGSI BERIKUT
- MENGAKTIFKAN ATAU MENONAKTIFKAN MULTIBEAM LED
- KONTROL SENSITIF SENTUHAN
- RADIO
- MENGOPERASIKAN RADIO
- UNTUK BERALIH KE RADIO
- UNTUK MENGATUR PITA FREKUENSI
- UNTUK MENYETEL STASIUN RADIO
- UNTUK MEMANGGIL DAFTAR STASIUN RADIO
- UNTUK MENCARI STASIUN RADIO MENGGUNAKAN NAMA STASIUN ATAU ENTRI FREKUENSI
- UNTUK MENYIMPAN STASIUN RADIO
- UNTUK MENGATUR PENINGKATAN VOLUME LAYANAN INFORMASI LALU LINTAS
- HOTSPOT WI-FI
- MENYIAPKAN HOTSPOT WI-FI
- UMUMNYA, DUA JENIS KONEKSI WI-FI TERSEDIA
- PILIHAN UNTUK MENYIAPKAN KONEKSI
- MENGHUBUNGKAN PONSEL
- MENGAKTIFKAN BLUETOOTH
- MENCARI PONSEL
- MENGOTORISASI PONSEL
- ASISTEN SUARA MBUX
- MENGOPERASIKAN ASISTEN SUARA MBUX
- ANDA DAPAT MENGGUNAKAN ASISTEN SUARA MBUX UNTUK MENGOPERASIKAN FUNGSI-FUNGSI BERIKUT TERGANTUNG PADA PERLENGKAPAN KENDARAAN
- CONTOH PERINTAH SUARA YANG MUNGKIN
- PAKET ENERGIZING
- MENGOPERASIKAN ENERGIZING COMFORT
- UNTUK MEMULAI PROGRAM ENERGIZING
- UNTUK MENGONFIGURASI PROGRAM ENERGIZING
- UNTUK MEMULAI POWER NAP
- UNTUK MEMULAI PROGRAM PELATIHAN
- UNTUK MEMULAI TIPS
- PAKET BANTUAN MENGEMUDI
- FUNGSI PAKET BANTUAN MENGEMUDI
- PAKET PARKIR
- FUNGSI PAKET PARKIR
- MEMASUKKAN TUJUAN NAVIGASI
- PILIH OPSI BERIKUT UNTUK MEMASUKKAN TUJUAN
- FITUR BARU SISTEM MULTIMEDIA
- IKHTISAR MENU TELEPON
- FUNGSI BERIKUT DAPAT DIGUNAKAN
- MENGGUNAKAN DAFTAR PANGGILAN
- FUNGSI BERIKUT TERSEDIA
- PESAN
- PENGELOLA PERANGKAT
- MENGGUNAKAN KONTAK
- OPSI BERIKUT TERSEDIA UNTUK ANDA MELALUI MENU KONTAK
- MELAKUKAN PANGGILAN
- SELAMA PANGGILAN, ANDA DAPAT MENGAKTIFKAN FUNGSI BERIKUT
- INFORMASI TENTANG NAVIGASI
- OPSI BERIKUT TERSEDIA UNTUK PERENCANAAN RUTE, MISALNYA
- MODUL NAVIGASI (TAMPILAN DIPERLUAS) DENGAN RINGKASAN RUTE
- INFORMASI TENTANG RADIO
- CATATAN TENTANG KENYAMANAN
- KENYAMANAN KURSI
- PIJAT
- CAHAYA AMBIEN
- INFORMASI TENTANG INTEGRASI PONSEL PINTAR
- INFORMASI TENTANG AMG PERFORMANCE
- TERGANTUNG PADA KENDARAAN, MENU BERIKUT TERSEDIA
- INFORMASI TENTANG INFO KENDARAAN
- DATA KENDARAAN
- CONTOH DATA BERIKUT AKAN DITAMPILKAN
- DATA MESIN
- DATA BERIKUT DITAMPILKAN
- DATA KONSUMSI
- INFORMASI TENTANG IN-CAR OFFICE
- ANDA KEMUDIAN MEMILIKI BEBERAPA OPSI YANG TERSEDIA
- INFORMASI TENTANG MB APPS (EKSTRA DIGITAL)
- BERBAGAI LAYANAN DAN FUNGSI ONLINE TERSEDIA MELALUI MENU MB APPS
- INFORMASI TENTANG PENGATURAN
- PENGATURAN TERSTRUKTUR DALAM MENU BERIKUT
- MENU BANTUAN
- MENU KENDARAAN
- DI SINI ANDA DAPAT MENGAKTIFKAN FUNGSI BERIKUT, MISALNYA
- MENU LAMPU
- MENU SISTEM
- ANDA DAPAT MELAKUKAN PENGATURAN BERIKUT, MISALNYA
- DI POM BENSIN
- MENGISI BAHAN BAKAR KENDARAAN
- JANGAN PERNAH MENGISI BAHAN BAKAR DENGAN BAHAN BAKAR BERIKUT
- JIKA ANDA TIDAK SENGAJA MENGISI BAHAN BAKAR YANG SALAH
- PERSYARATAN
- MENGISI ULANG ADBLUE®
- PESAN-PESAN BERIKUT MUNCUL SECARA BERURUTAN DI LAYAR PENGEMUDI KETIKA TANGKI ADBLUE® PERLU DIISI ULANG
- MENGISI ULANG SISTEM PENCUCI KACA DEPAN
- JIKA ANDA MEMBUKA KAP MESIN SAAT MESIN OVERHEAT ATAU TERJADI KEBAKARAN DI RUANG MESIN, SITUASI BERIKUT DAPAT TERJADI
- MENGGANTI BILAH PENGHAPUS KACA DEPAN
- MEMERIKSA LEVEL OLI MESIN MENGGUNAKAN LAYAR PENGEMUDI
- SALAH SATU PESAN BERIKUT AKAN MUNCUL DI LAYAR PENGEMUDI
- INFORMASI TENTANG MENCUCI KENDARAAN DI TEMPAT CUCI MOBIL
- KENDARAAN AKAN MENGEREM SECARA OTONOM DALAM SITUASI TERTENTU JIKA FUNGSI-FUNGSI BERIKUT AKTIF
- UNTUK MENGHINDARI KERUSAKAN PADA KENDARAAN ANDA SAAT MENGGUNAKAN TEMPAT CUCI MOBIL, PASTIKAN HAL BERIKUT SEBELUMNYA
- PERSIAPAN UNTUK LIBURAN
- CATATAN TENTANG PENYESUAIAN LAMPU SAAT BERKENDARA DI LUAR NEGERI
- DALAM KASUS BERIKUT, PERIKSA PENGATURAN LAMPU UTAMA DAN UBAH SECARA MANUAL JIKA PERLU
- SETELAH LAMPU UTAMA DIUBAH
- CATATAN TENTANG PEMERIKSAAN RUTIN BAN DAN RODA
- KEDALAMAN TAPAK MINIMUM UNTUK
- LAKUKAN PEMERIKSAAN BERIKUT PADA SEMUA RODA SECARA TERATUR, SETIDAKNYA SEKALI SEBULAN ATAU SESUAI KEBUTUHAN, MISALNYA SEBELUM PERJALANAN JAUH ATAU BERKENDARA DI JALAN OFF-ROAD
- MELEPAS ROMPI KESELAMATAN
- GANTI ROMPI KESELAMATAN DALAM KASUS BERIKUT
- BUANG ROMPI KESELAMATAN DENGAN CARA YANG RAMAH LINGKUNGAN
- RINGKASAN PEMBARUAN DATA PETA
- PILIHAN BERIKUT TERSEDIA UNTUK PEMBARUAN DATA PETA
- PEMBARUAN PETA ONLINE
- PEMBARUAN MELALUI PORTAL MERCEDES-BENZ
- MEMASUKKAN POI ATAU ALAMAT
- UNTUK PENCARIAN ONLINE
- ENTRI BERIKUT DAPAT DIBUAT, MISALNYA DI ①
- MENCARI STASIUN RADIO MENGGUNAKAN NAMA STASIUN ATAU ENTRI FREKUENSI
- BAGASI DAN PEMUATAN
- MEMASANG RAK ATAP
- JIKA ANDA MENGGUNAKAN BUKAAN PADA BODI ATAU PENGIKAT SEBAGAI PIJAKAN, ANDA DAPAT
- MELIPAT KURSI BELAKANG KE DEPAN
- MELIPAT KEMBALI KURSI BELAKANG
- IKHTISAR MATA PENGIKAT
- GAMBARAN UMUM KOMPARTEMEN PENYIMPANAN DEPAN
- MENGUNCI/MEMBUKA KUNCI KOTAK SARUNG TANGAN
- ES DAN SALJU
- CATATAN TENTANG MEMERIKSA RODA DAN BAN SECARA TERATUR
- MENGATUR BATAS KECEPATAN UNTUK BAN MUSIM DINGIN
- MENGATUR KECEPATAN
- CATATAN TENTANG RANTAI SALJU
- PERHATIKAN CATATAN BERIKUT SAAT MENGGUNAKAN RANTAI SALJU
- CATATAN TENTANG CAIRAN PENCUCI KACA DEPAN
- CAIRAN PENCUCI KACA DEPAN YANG DIREKOMENDASIKAN
- JIKA ANDA MEMBUKA KAP MESIN SAAT MESIN MENGALAMI PANAS BERLEBIH ATAU TERJADI KEBAKARAN DI RUANG MESIN, SITUASI BERIKUT DAPAT TERJADI
- MENGHIDUPKAN/MEMATIKAN PEMANAS/VENTILASI STASIONER MELALUI PANEL KONTROL AC
- BAHAYA
- A
- WARNA LAMPU INDIKATOR MEMILIKI ARTI BERIKUT
- BANTUAN JIKA TERJADI KERUSAKAN
- MELEPAS ALAT PEMADAM KEBAKARAN
- A PERINGATAN
- GANTI ROMBI KESELAMATAN DALAM KASUS BERIKUT
- BUANG ROMBI KESELAMATAN DENGAN CARA YANG RAMAH LINGKUNGAN
- MELEPAS SEGITIGA PENGAMAN
- KODE QR UNTUK KARTU PENYELAMATAN
- PERSIAPKAN BANTUAN STARTER/PROSES PENGISIAN DAYA
- BANTUAN SAAT MULAI
- MENGISI DAYA BATERAI 12 V
- CATATAN TENTANG SEKRING LISTRIK
- PASTIKAN HAL BERIKUT SEBELUM MENGGANTI SEKERING
- SEKRING LISTRIK TERLETAK DI BERBAGAI KOTAK SEKERING
- CATATAN TENTANG BAN KEMPES
- JIKA TERJADI BAN KEMPES, PILIHAN BERIKUT TERSEDIA TERGANTUNG PADA PERLENGKAPAN KENDARAAN ANDA
- MENDEREK JIKA TERJADI KERUSAKAN PADA POROS BELAKANG
- MENDEREK JIKA TERJADI KERUSAKAN PADA POROS DEPAN
- MENDEREK KENDARAAN JIKA TERJADI KERUSAKAN
- MENDEREK JIKA TERJADI KERUSAKAN PADA MESIN, TRANSMISI, ATAU KELISTRIKAN
- PENARIKAN KENDARAAN APABILA TERJADI KERUSAKAN PADA TRANSFER CASE
- MENARIK KENDARAAN DENGAN KEDUA POROS RODA MENYENTUH TANAH
- KETIKA AKI MENGALAMI KELUARAN DAYA (DISCHARGE)
- JIKA KENDARAAN YANG AKAN DITARIK LEBIH BERAT DARI BEBAN KOTOR YANG DIIZINKAN DARI KENDARAAN ANDA, MAKA SITUASI BERIKUT DAPAT TERJADI
- FUNGSI-FUNGSI YANG BERKAITAN DENGAN KESELAMATAN MENJADI TERBATAS ATAU TIDAK LAGI TERSEDIA DALAM SITUASI-SITUASI BERIKUT
- PENGETAHUAN AHLI
- FUNGSI TAMBAHAN DARI TOMBOL-TOMBOL
- MEMBUKA DAN MENUTUP JENDELA MENGGUNAKAN TOMBOL SIRKULASI UDARA (PENUTUPAN/PEMBUKAAN KENYAMANAN)
- JIKA BAGIAN TUBUH TERJEBAK DI ATAP SURYA GESER
- MENGATUR ULANG PENGATURAN KONTROL IKLIM
- MENGAKTIFKAN/MENONAKTIFKAN PENGUMUMAN LALU LINTAS
- FUNGSI KENDARAAN YANG BERGUNA
- CATATAN TENTANG WIPER KACA BELAKANG YANG AKTIF SECARA OTOMATIS WIPER KACA BELAKANG AKAN AKTIF SECARA OTOMATIS JIKA KONDISI BERIKUT TERPENUHI PADA SAAT YANG SAMA
- MENYIMPAN POSISI PARKIR KACA SPION LUAR PENUMPANG DEPAN MENGGUNAKAN TOMBOL MEMORI
- TIPS SAAT BERKENDARA
- KONDISI KENDARAAN UNTUK MESIN BERHENTI ATAU HIDUP OTOMATIS KONDISI UNTUK MESIN BERHENTI OTOMATIS
- KONDISI UNTUK MESIN HIDUP OTOMATIS
- MENONAKTIFKAN FUNGSI KUNCI
- ANDA MEMILIKI OPSI BERIKUT UNTUK MENGAKTIFKAN KEMBALI KUNCI
- IKHTISAR SISTEM PANGGILAN DARURAT
- INDIKATOR DI LAYAR
- PESAN-PESAN BERIKUT MUNCUL DI LAYAR TENGAH ATAU LAYAR MEDIA DARI KEDUA SISTEM PANGGILAN DARURAT
- ANDA DAPAT MENGENALI KERUSAKAN PADA SISTEM PANGGILAN DARURAT MELALUI TAMPILAN BERIKUT
- PANDUAN DARURAT
- INI TERMASUK, MISALNYA
- PANDUAN DARURAT DIAKTIFKAN DALAM SITUASI BERIKUT
- SEKILAS
- KOKPIT
- LAMPU INDIKATOR DAN LAMPU PERINGATAN
- PANEL KONTROL DI ATAS KEPALA
- UNIT PENGOPERASIAN PINTU DAN PENYESUAIAN KURSI
- KEADAAN DARURAT DAN KERUSAKAN
- BUKU PEDOMAN PEMILIK DIGITAL
- MEMANGGIL BUKU PEDOMAN OPERATOR DIGITAL
- OPSI TAMBAHAN UNTUK MEMANGGIL BUKU PEDOMAN OPERATOR DIGITAL
- CATATAN UMUM
- PERLINDUNGAN LINGKUNGAN
- CATATAN LINGKUNGAN
- KONDISI PENGOPERASIAN
- GAYA MENGEMUDI PRIBADI
- PENGAMBILAN KEMBALI KENDARAAN AKHIR MASA PAKAI
- HANYA NEGARA UE
- SUKU CADANG ASLI MERCEDES-BENZ
- KANTUNG UDARA DAN PENGENCANG SABUK PENGAMAN, SERTA UNIT KONTROL DAN SENSOR DAPAT DIPASANG DI AREA BERIKUT KENDARAAN UNTUK SISTEM PENAHAN
- INI AKAN BERLAKU DALAM SITUASI BERIKUT
- ELEMEN KONTROL SENSITIF SENTUHAN
- INI TERLETAK DI AREA BERIKUT KENDARAAN ANDA
- PENGAKUAN HAPTIK DISAMPAIKAN DALAM SITUASI BERIKUT, CONTOHNYA
- SAAT MENGGUNAKAN PERMUKAAN ANTAR MUKA PENGGUNA SENSITIF SENTUHAN, PERHATIKAN HAL-HAL BERIKUT UNTUK MENGHINDARI MASALAH OPERASIONAL
- APLIKASI MERCEDES-BENZ
- CATATAN TENTANG DIGITAL EXTRAS
- MEMESAN DAN MENGAKTIFKAN DIGITAL EXTRAS
- MEMPERCEPAT AKTIVASI
- KESELAMATAN PENGOPERASIAN
- TERUTAMA DALAM SITUASI BERIKUT, ADA RISIKO KERUSAKAN PADA KENDARAAN
- KENDARAAN DENGAN SISTEM KELISTRIKAN 48 V
- MEMASANG PLAT NOMOR PADA BRAKET PLAT NOMOR DEPAN
- DEKLARASI KESESUAIAN DAN INFORMASI KHUSUS NEGARA
- KOMPATIBILITAS ELEKTROMAGNETIK
- INFORMASI KHUSUS NEGARA UNTUK KOMPONEN RADIO REGULASI
- INFORMASI MENGENAI MODIFIKASI KOMPONEN RADIO
- INFORMASI MENGENAI MELINTASI BATAS NEGARA
- KOMPONEN KENDARAAN NIRKABEL
- KHUSUS UNTUK ISRAEL
- KHUSUS UNTUK JAMAICA
- KHUSUS UNTUK NIGERIA
- KHUSUS UNTUK NEGARA-NEGARA UNI EKONOMI EURASIA
- KHUSUS UNTUK UKRAINA
- BATERAI
- UNTUK NEGARA-NEGARA UE DAN NEGARA-NEGARA YANG MENGAKUI DEKLARASI KESESUAIAN MANUFAKTUR UE
- CE
- JACK
- DEKLARASI KESESUAIAN CE
- DEKLARASI KESESUAIAN EC
- KAMI WEBER-HYDRAULIK GMBH
- HEILBRONNER STRASSE 30 – 74363 GÜGLINGEN
- DEKLARASI KESESUAIAN EC INI TIDAK BERLAKU LAGI
- WEBER-HYDRAULIK GMBH
- DEKLARASI KESESUAIAN UKCA
- KONEKSI DIAGNOSTIK
- MENGHUBUNGKAN DAN MENGGUNAKAN PERANGKAT LAIN DENGAN KONEKSI DIAGNOSTIK DAPAT MENYEBABKAN KONSEKUENSI BERIKUT
- BENGKEL SPESIALIS YANG BERKUALIFIKASI
- SELALU LAKUKAN PEKERJAAN BERIKUT PADA KENDARAAN ANDA DI BENGKEL SPESIALIS YANG BERKUALIFIKASI
- REGISTRASI KENDARAAN
- MUNGKIN KENDARAAN ANDA BELUM DIDAFTARKAN ATAS NAMA ANDA DALAM KASUS BERIKUT
- PENGGUNAAN KENDARAAN YANG BENAR
- PERHATIKAN INFORMASI BERIKUT TERUTAMA SAAT MENGEMUDIKAN KENDARAAN ANDA
- PERATURAN REACH
- KHUSUS UNTUK NEGARA-NEGARA UE DAN EFTA
- INFORMASI LEBIH LANJUT DAPAT DIPEROLEH DI ALAMAT BERIKUT
- CATATAN UNTUK ORANG DENGAN ALAT BANTU MEDIS ELEKTRONIK
- DALAM BEBERAPA KASUS, HAL INI DAPAT MENGAKIBATKAN HAL BERIKUT, TERGANTUNG PADA ALAT BANTU YANG DIGUNAKAN
- SELALU LAKUKAN PERBAIKAN DAN PERAWATAN PADA AREA KOMPONEN BERIKUT DI BENGKEL SPESIALIS YANG KOMPETEN
- TANGGUNG JAWAB ATAS CACAT MATERIAL
- KODE QR UNTUK KARTU PENYELAMAT
- PENYIMPANAN DATA
- PEMROSESAN DATA DI DALAM KENDARAAN
- UNIT KONTROL ELEKTRONIK
- DATA PRIBADI
- PERSYARATAN HUKUM TERKAIT PENGUNGKAPAN DATA
- DATA OPERASIONAL DI DALAM KENDARAAN
- INI TERMASUK DATA BERIKUT, CONTOHNYA
- TERGANTUNG PADA PERALATAN TEKNIS, DATA BERIKUT DISIMPAN
- FUNGSI KENYAMANAN DAN INFOTAINMENT
- TERGANTUNG PADA PERLENGKAPAN KENDARAAN, INI TERMASUK PENGATURAN BERIKUT, CONTOHNYA
- TERGANTUNG PADA PERLENGKAPAN KENDARAAN, INI TERMASUK DATA BERIKUT, CONTOHNYA
- INTEGRASI SMARTPHONE (MISALNYA ANDROID AUTO ATAU APPLE CARPLAY)
- LAYANAN ONLINE
- KONEKSI JARINGAN NIRKABEL
- LAYANAN DARI PABRIKAN
- LAYANAN PIHAK KETIGA
- HAK PERLINDUNGAN DATA
- INFORMASI TENTANG LISENSI UNTUK PERANGKAT LUNAK GRATIS DAN SUMBER TERBUKA YANG BERLAKU UNTUK KENDARAAN ANDA DAPAT DIPEROLEH SEBAGAI BERIKUT
- KESELAMATAN PENUMPANG
- RINGKASAN SINGKAT POIN-POIN TERPENTING
- INFORMASI DASAR
- KHUSUSNYA PASTIKAN KONDISI BERIKUT UNTUK MEMUNGKINKAN KOMPONEN SISTEM PENAHAN MENGEMBANGKAN POTENSI PERLINDUNGANNYA
- UNTUK PEMAHAMAN YANG JELAS
- INFORMASI DISUSUN SEBAGAI BERIKUT
- INFORMASI TENTANG SUBJEK BERIKUT, ANTARA LAIN, TIDAK DISEDIAKAN DALAM BAB "KESELAMATAN PENUMPANG
- MENDEFINISIKAN ISTILAH UMUM DENGAN JELAS
- DALAM BUKU PANDUAN PEMILIK INI, ISTILAH UMUM BERIKUT DIGUNAKAN
- BERHATI-HATILAH
- INFORMASI TENTANG POSISI DUDUK YANG BENAR
- AGAR SISTEM PENAHAN MEMBERIKAN TINGKAT PERLINDUNGAN YANG DIMAKSUDKAN, PERHATIKAN INFORMASI BERIKUT
- CATATAN TENTANG PENGGUNAAN SABUK PENGAMAN YANG BENAR
- SETIAP PENUMPANG KENDARAAN WAJIB MEMPERHATIKAN CATATAN BERIKUT
- MENGGUNAKAN SABUK PENGAMAN SELAMA KEHAMILAN
- PERHATIKAN KHUSUS PETUNJUK BERIKUT SELAMA KEHAMILAN KARENA PERUBAHAN POSTUR TUBUH DAN JANIN
- PENGGUNAAN SABUK PENGAMAN
- TERUTAMA SELAMA KEHAMILAN, PERHATIKAN CATATAN BERIKUT
- MENGENCANGKAN DAN MENYESUAIKAN SABUK PENGAMAN
- FUNGSI LAMPU PERINGATAN SISTEM PENAHAN
- TERJADI KERUSAKAN PADA SISTEM PENAHAN JIKA
- FUNGSI LAMPU PERINGATAN SABUK PENGAMAN
- FUNGSI TAMPILAN STATUS SABUK PENGAMAN BELAKANG
- KEMUNGKINAN WARNA SIMBOL
- FUNGSI LAMPU INDIKATOR AIRBAG PENUMPANG (AIRBAG PENUMPANG DEPAN)
- SETELAH UJI MANDIRI, ANDA DAPAT MENENTUKAN STATUS AIRBAG PENUMPANG DEPAN SEBAGAI BERIKUT
- JIKA KURSI PENUMPANG DEPAN TERISI, SELALU PASTIKAN BAHWA
- KERUSAKAN PADA PENONAKTIFAN OTOMATIS AIRBAG PENUMPANG DEPAN
- MENONAKTIFKAN ATAU MENGAKTIFKAN AIRBAG PENUMPANG DEPAN
- INFORMASI TENTANG SISTEM PENGAMAN ANAK
- CATATAN TENTANG SISTEM PENGAMAN ANAK DI KURSI PENUMPANG DEPAN
- INFORMASI TENTANG FUNGSI OTOMATIS SISTEM PENGAMAN
- FUNGSI PENONAKTIFAN OTOMATIS AIRBAG PENUMPANG DEPAN
- SESEORANG DI KURSI PENUMPANG DEPAN HARUS MEMATUHI PETUNJUK BERIKUT
- PADA SITUASI BERIKUT, AIRBAG SAMPING DAN PENGENCANG SABUK KESELAMATAN DINONAKTIFKAN
- PASTIKAN ANDA MEMPERHATIKAN INFORMASI BERIKUT
- STATUS AIRBAG PENUMPANG DEPAN TERKAIT DENGAN POSTUR TUBUH ORANG
- BATASAN SISTEM
- AIRBAG PENUMPANG DEPAN MUNGKIN DINONAKTIFKAN SECARA KELIRU, MIS. PADA SITUASI BERIKUT
- DALAM KECELAKAAN, KOMPONEN SISTEM PENAHAN MUNGKIN MENGEMBANG TANPA PERLU DI SISI PENUMPANG DEPAN JIKA
- FUNGSI PRE-SAFE ® (PERLINDUNGAN PENUMPANG ANTISIPATIF)
- PRE-SAFE® DAPAT MENERAPKAN LANGKAH-LANGKAH BERIKUT SECARA INDEPENDEN SATU SAMA LAIN
- MEMBALIKKAN LANGKAH-LANGKAH SISTEM PRE-SAFE ®
- FUNGSI PENYESUAIAN SABUK KESELAMATAN
- MENGAKTIFKAN/MENONAKTIFKAN PENYESUAIAN SABUK KESELAMATAN MELALUI SISTEM MULTIMEDIA
- IKHTISAR LANGKAH-LANGKAH OTOMATIS SETELAH KECELAKAAN
- TERGANTUNG PADA JENIS DAN TINGKAT KEPARAHAN KECELAKAAN, DAN TERGANTUNG PADA PERLENGKAPAN KENDARAAN, LANGKAH-LANGKAH BERIKUT DAPAT DITERAPKAN, MISALNYA
- FUNGSI REM PASCA-TABRAKAN SETELAH KECELAKAAN
- PENGEMUDI DAPAT MEMBATALKAN PENGEREMAN OTOMATIS DENGAN MELAKUKAN TINDAKAN BERIKUT
- TUJUAN DAN FUNGSI SISTEM PENAHAN
- IKHTISAR SITUASI PENGAKTIFAN (SISTEM PENAHAN)
- TERUTAMA PASTIKAN KONDISI BERIKUT UNTUK MEMUNGKINKAN KOMPONEN SISTEM PENAHAN MENGEMBANGKAN POTENSI PERLINDUNGANNYA
- TERGANTUNG PADA SITUASI PENGAKTIFAN YANG TERDETEKSI, KOMPONEN SISTEM PENAHAN DAPAT DIAKTIFKAN ATAU DIKEMBANGKAN SECARA INDEPENDEN SATU SAMA LAIN
- INFORMASI TENTANG CARA KERJA SISTEM PENAHAN
- PERLINDUNGAN POTENSIAL YANG DIBERIKAN OLEH SETIAP AIRBAG
- INFORMASI TENTANG PERLINDUNGAN TERBATAS YANG DIBERIKAN OLEH SISTEM PENAHAN
- RISIKO AKIBAT BENDA DI DALAM KABIN KENDARAAN
- SETIAP PENUMPANG KENDARAAN HARUS MEMASTIKAN HAL BERIKUT TERUTAMA
- RISIKO AKIBAT MEMASANG AKSESORIS
- RISIKO AKIBAT HEWAN PELIHARAAN DI DALAM RUANG KABIN KENDARAAN
- HEWAN DAPAT
- RISIKO AKIBAT MODIFIKASI, KERUSAKAN, ATAU KEAUSAN PADA KOMPONEN SISTEM PENGAMAN
- SABUK PENGAMAN TIDAK DAPAT MEMBERIKAN PERLINDUNGAN DALAM SITUASI BERIKUT
- RISIKO AKIBAT KOMPONEN SISTEM PENGAMAN YANG TELAH BEKERJA
- SABUK PENGAMAN
- MELEPAS SABUK PENGAMAN
- AIRBAG
- IKHTISAR AIRBAG
- FAKTA PENTING SECARA SINGKAT
- SELALU PERHATIKAN HAL BERIKUT SAAT MENGANGKUT ANAK-ANAK
- KURSI BELAKANG KIRI/KANAN (KURSI YANG DIUTAMAKAN)
- SISTEM PENGIKAT YANG DIUTAMAKAN
- SISTEM PENGIKAT ALTERNATIF
- KURSI PENUMPANG DEPAN
- SISTEM PENGIKAT
- PASTIKAN UNTUK MEMPERHATIKAN
- KURSI BELAKANG TENGAH
- PERINGATAN KESELAMATAN PENTING
- UNTUK MENINGKATKAN PERLINDUNGAN BAGI ANAK-ANAK YANG BERUSIA KURANG DARI DUA BELAS TAHUN ATAU TINGGINYA KURANG DARI 1,50 M, MERCEDES-BENZ SANGAT MEREKOMENDASIKAN AGAR ANDA MEMPERHATIKAN HAL-HAL BERIKUT
- ISTILAH UMUM SISTEM PENGAMAN ANAK
- ISTILAH UMUM SISTEM PENGAMAN ANAK DIGUNAKAN DALAM BUKU PANDUAN PEMILIK INI. SISTEM PENGAMAN ANAK, CONTOHNYA
- PATUHI HUKUM DAN PERSYARATAN HUKUM
- SISTEM PENGAMAN UNTUK SISTEM PENGAMAN ANAK DI DALAM KENDARAAN HANYA GUNAKAN SISTEM PENGAMAN BERIKUT UNTUK SISTEM PENGAMAN ANAK
- STIKER PERINGATAN PENTING
- SELALU AMANKAN SISTEM PENGAMAN ANAK DENGAN BENAR
- JANGAN MEMODIFIKASI SISTEM PENGAMAN ANAK
- HANYA GUNAKAN SISTEM PENGAMAN ANAK YANG DALAM KONDISI LAYAK PAKAI
- HINDARI SINAR MATAHARI LANGSUNG
- PERHATIKAN SAAT BERHENTI ATAU PARKIR
- KETIKA ANAK-ANAK DITINGGALKAN TANPA PENGAWASAN DI DALAM KENDARAAN, MEREKA DAPAT DIHARAPKAN TERUTAMA UNTUK
- SELAIN ITU, ANAK-ANAK JUGA DAPAT MENGGERAKKAN KENDARAAN, MISALNYA DENGAN
- IKHTISAR STIKER PERINGATAN DI DALAM KENDARAAN
- CATATAN TENTANG SISTEM PENGAMAN ANAK MENGHADAP BELAKANG DAN MENGHADAP DEPAN DI KURSI PENUMPANG DEPAN
- JIKA SANGAT PERLU MEMASANG SISTEM PENGAMAN ANAK DI KURSI PENUMPANG DEPAN, SELALU PERHATIKAN INFORMASI BERIKUT
- INFORMASI TENTANG PENONAKTIFAN OTOMATIS AIRBAG PENUMPANG DEPAN
- SISTEM PENGAMAN ANAK MENGHADAP BELAKANG DI KURSI PENUMPANG DEPAN
- I
- SISTEM PENGAMAN ANAK MENGHADAP KE DEPAN DI KURSI PENUMPANG DEPAN
- JIKA ANDA MENGAMANKAN ANAK DALAM SISTEM PENGAMAN ANAK MENGHADAP KE DEPAN DI KURSI PENUMPANG DEPAN DAN ANDA MEMPOSISIKAN KURSI PENUMPANG DEPAN TERLALU DEKAT DENGAN DASHBOARD, PADA SAAT TERJADI KECELAKAAN, ANAK TERSEBUT DAPAT
- CATATAN UNTUK KENDARAAN TANPA PENONAKTIFAN OTOMATIS AIRBAG PENUMPANG DEPAN
- SISTEM PENGAMAN ANAK YANG COCOK UNTUK TRANSPORTASI ANAK
- INFORMASI TENTANG KEUNTUNGAN SISTEM PENGAMAN ANAK MENGHADAP KE BELAKANG
- KATEGORI PERSETUJUAN UNTUK SISTEM PENGAMAN ANAK
- HANYA SISTEM PENGAMAN ANAK YANG MEMENUHI STANDAR UNECE BERIKUT YANG DISETUJUI UNTUK DIGUNAKAN DI KENDARAAN
- IDENTIFIKASI SISTEM PENGAMAN ANAK
- INFORMASI BERIKUT, MISALNYA, TERSEDIA PADA LABEL PERSETUJUAN DI SISTEM PENGAMAN ANAK
- KATEGORI PERSETUJUAN DI BAWAH UN-R44
- KATEGORI PERSETUJUAN DI BAWAH UN-R129
- HARAP PERHATIKAN KESESUAIAN KURSI KENDARAAN
- IKHTISAR SISTEM PENGAMAN ANAK YANG DIREKOMENDASIKAN
- PENGIKATAN DENGAN ISOFIX
- PENGIKATAN DENGAN I-SIZE (SISTEM PENGAMAN ANAK R129)
- KURSI YANG COCOK UNTUK MEMASANG SISTEM PENGAMAN ANAK
- ISOFIX ADALAH SISTEM PENGAMAN STANDAR UNTUK SISTEM PENGAMAN ANAK YANG DIRANCANG KHUSUS
- IKHTISAR KESESUAIAN KURSI UNTUK MEMASANG SISTEM PENGAMAN ANAK I-SIZE
- I-SIZE ADALAH SISTEM PENGAMAN STANDAR UNTUK SISTEM PENGAMAN ANAK YANG DIRANCANG KHUSUS
- IKHTISAR KESESUAIAN KURSI UNTUK MENGENCANGKAN SISTEM PENGAMAN ANAK YANG DIIKAT DENGAN SABUK
- MENGENCANGKAN SISTEM PENGAMAN ANAK
- MENYETEL KURSI DENGAN BENAR
- SAAT MEMASANG SISTEM PENGAMAN ANAK DI KURSI BELAKANG KIRI ATAU KANAN, SELALU PERHATIKAN HAL BERIKUT
- PERHATIKAN JUGA HAL BERIKUT SAAT MEMASANG SISTEM PENGAMAN ANAK ISOFIX ATAU I-SIZE
- SAAT MEMASANG SISTEM PENGAMAN ANAK YANG DIKUNCI DENGAN SABUK PENGAMAN, PERHATIKAN JUGA HAL-HAL BERIKUT
- ☑ TERGANTUNG PADA PERLENGKAPAN KENDARAAN, SELALU PERHATIKAN HAL-HAL BERIKUT SAAT MEMASANG SISTEM PENGAMAN ANAK YANG DIKUNCI DENGAN SABUK PENGAMAN DI KURSI PENUMPANG DEPAN
- MEMASANG SISTEM PENGAMAN ANAK ISOFIX/LATCH ATAU I-SIZE
- SELALU PERHATIKAN INFORMASI TENTANG MASSA SISTEM PENGAMAN ANAK
- SAAT MEMASANG SISTEM PENGAMAN ANAK, PERHATIKAN JUGA HAL-HAL BERIKUT
- MENGENCANGKAN TOP TETHER
- MENGENCANGKAN SISTEM PENGAMAN ANAK DENGAN SABUK PENGAMAN
- KUNCI PENGAMAN ANAK
- KETIKA ANAK-ANAK DITINGGALKAN TANPA PENGAWASAN DI DALAM KENDARAAN, MEREKA DAPAT DIPERKIRAKAN TERUTAMA AKAN
- JIKA ANAK-ANAK BERPERGIAN DENGAN KENDARAAN, MEREKA DAPAT, TERUTAMA
- MENGAKTIFKAN/MENONAKTIFKAN KUNCI PENGAMAN ANAK UNTUK JENDELA SAMPING BELAKANG
- PENGINGAT KEBERADAAN PENUMPANG PASIF
- FUNGSI PENGINGAT KEBERADAAN PENUMPANG PASIF
- MENGAKTIFKAN ATAU MENONAKTIFKAN PENGINGAT KEBERADAAN PENUMPANG PASIF DI SISTEM MULTIMEDIA
- MEMBUKA DAN MENUTUP
- KUNCI
- IKHTISAR FUNGSI KUNCI
- JIKA ANDA MENINGGALKAN ANAK-ANAK TANPA PENGAWASAN DI DALAM KENDARAAN, MEREKA DAPAT TERUTAMA
- KUNCI KENDARAAN
- KUNCI MENGUNCI DAN MEMBUKA KUNCI KOMPONEN BERIKUT
- MENGAKTIFKAN/MENONAKTIFKAN SINYAL VERIFIKASI PENGUNCIAN AKUSTIK
- I HARAP DIPERHATIKAN
- MENGUBAH PENGATURAN PEMBUKAAN KUNCI
- FUNGSI PEMBUKAAN KUNCI YANG MUNGKIN
- PILIHAN JIKA FUNGSI PEMBUKAAN KUNCI UNTUK PINTU PENGEMUDI DAN TUTUP TANGKI BAHAN BAKAR TELAH DIPILIH
- MELEPAS/MEMASUKKAN KUNCI DARURAT MELEPAS KUNCI DARURAT
- MEMASUKKAN KUNCI DARURAT
- MENGGANTI BATERAI KUNCI
- MENGATASI MASALAH PADA KUNCI
- ANDA TIDAK DAPAT LAGI MENGUNCI ATAU MEMBUKA KUNCI KENDARAAN. KEMUNGKINAN PENYEBAB
- ADA GANGGUAN DARI SUMBER SINYAL RADIO YANG KUAT. KEMUNGKINAN PENYEBAB JIKA FUNGSI KUNCI TERGANGGU
- ANDA KEHILANGAN KUNCI
- PINTU
- KENDARAAN TIDAK TERBUKA SAAT TOMBOL Ⓛ DITEKAN
- MENGUNCI/MEMBUKA KUNCI KENDARAAN DENGAN KEYLESS-GO
- PERHATIKAN INFORMASI
- MENGATASI MASALAH DENGAN KEYLESS-GO
- ANDA TIDAK DAPAT LAGI MENGUNCI ATAU MEMBUKA KUNCI KENDARAAN MENGGUNAKAN KEYLESS-GO
- KEMUNGKINAN PENYEBAB
- ADA GANGGUAN DARI SUMBER SINYAL RADIO YANG KUAT. KEMUNGKINAN PENYEBAB JIKA FUNGSI KEYLESS-GO TERGANGGU
- MENGAKTIFKAN/MENONAKTIFKAN PENGUNCIAN OTOMATIS DI SISTEM MULTIMEDIA MBUX
- DALAM SITUASI BERIKUT, ADA BAHAYA TERKUNCI DI LUAR SAAT FUNGSI TERSEBUT DIAKTIFKAN
- MENGUNCI/MEMBUKA KUNCI PINTU PENGEMUDI DENGAN KUNCI DARURAT
- PINTU BELAKANG
- MEMBUKA DAN MENUTUP PINTU BELAKANG
- KENDARAAN DENGAN KEYLESS-GO
- KACA SAMPING
- MEMBUKA DAN MENUTUP KACA SAMPING
- FUNGSI PEMBALIKAN OTOMATIS PADA KACA SAMPING
- FUNGSI PEMBALIKAN TIDAK BERFUNGSI
- PEMBUKAAN KENYAMANAN (VENTILASI KENDARAAN SEBELUM MEMULAI PERJALANAN)
- FUNGSI-FUNGSI BERIKUT DILAKUKAN
- PENUTUPAN KENYAMANAN (MENUTUP KENDARAAN DARI LUAR)
- MENGATASI MASALAH PADA KACA SAMPING
- KACA SAMPING TIDAK DAPAT DITUTUP DAN ANDA TIDAK DAPAT MELIHAT PENYEBABNYA
- KACA SAMPING TIDAK DAPAT DIBUKA ATAU DITUTUP MENGGUNAKAN FITUR PEMBUKAAN KENYAMANAN
- SUNROOF GESER
- MEMBUKA DAN MENUTUP SUNROOF GESER
- FUNGSI PEMBALIKAN OTOMATIS PADA ATAP MOBIL GESER
- KHUSUSNYA, FUNGSI PEMBALIKAN TIDAK BERREAKSI
- FUNGSI OTOMATIS ATAP MOBIL GESER
- ATAP MOBIL GESER AKAN DITUTUP OTOMATIS KETIKA KENDARAAN TELAH DIMATIKAN DALAM SITUASI BERIKUT
- MEMPERBAIKI MASALAH PADA ATAP MOBIL GESER
- ATAP MOBIL GESER TIDAK DAPAT DITUTUP DAN ANDA TIDAK DAPAT MELIHAT PENYEBABNYA
- MENGATUR ULANG ATAP MOBIL GESER
- PERLINDUNGAN ANTI-PENCURIAN
- FUNGSI IMMOBILISER
- ATA (SISTEM ALARM ANTI-PENCURIAN)
- FUNGSI SISTEM ATA
- JIKA SISTEM ATA DIAKTIFKAN, ALARM VISUAL DAN SUARA AKAN BERBUNYI DALAM SITUASI BERIKUT
- SISTEM ATA DIAKTIFKAN SECARA OTOMATIS SETELAH KIRA-KIRA SEPULUH DETIK DALAM SITUASI BERIKUT
- SISTEM ATA DINONAKTIFKAN SECARA OTOMATIS DALAM SITUASI BERIKUT
- MENONAKTIFKAN ALARM SISTEM ATA
- MENONAKTIFKAN ALARM MENGGUNAKAN KEYLESS-GO
- PENONAKTIFAN KUNCI DARURAT
- BERIKUT CARA KERJANYA
- NONAKTIFKAN KUNCI TERTENTU ATAU SEMUA KUNCI
- AKTIFKAN SEMUA KUNCI
- FUNGSI PERLINDUNGAN PENARIK
- PERLINDUNGAN PENARIK DIAKTIFKAN SECARA OTOMATIS SETELAH SEKITAR 60 DETIK
- PERLINDUNGAN DEREK HANYA AKTIF KETIKA KOMPONEN BERIKUT DITUTUP
- PERLINDUNGAN DEREK OTOMATIS NONAKTIF
- MENGAKTIFKAN/MENONAKTIFKAN PERLINDUNGAN DEREK
- PERLINDUNGAN DEREK AKTIF KEMBALI DALAM KASUS BERIKUT
- FUNGSI PERLINDUNGAN INTERIOR
- PERLINDUNGAN INTERIOR AKTIF OTOMATIS SETELAH SEKITAR SEPULUH DETIK
- PERLINDUNGAN INTERIOR HANYA AKTIF KETIKA KOMPONEN BERIKUT DITUTUP
- PERLINDUNGAN INTERIOR OTOMATIS NONAKTIF
- SITUASI BERIKUT DAPAT MENYEBABKAN ALARM PALSU
- MENGAKTIFKAN/MENONAKTIFKAN PERLINDUNGAN INTERIOR
- KURSI DAN PENYIMPANAN
- CATATAN TENTANG POSISI KURSI PENGEMUDI YANG BENAR
- ANDA BISA KEHILANGAN KENDALI KENDARAAN TERUTAMA DALAM SITUASI BERIKUT
- PASTIKAN HAL BERIKUT SAAT MENYESUAIKAN RODA KEMUDI ①, SABUK KESELAMATAN ②, DAN KURSI PENGEMUDI ③
- CATATAN TENTANG PEGANGAN PEGANGAN
- MENYETEL KURSI DEPAN SECARA ELEKTRIK
- ANDA BISA KEHILANGAN KENDALI ATAS KENDARAAN TERUTAMA DALAM SITUASI BERIKUT
- SANDARAN KEPALA
- MENYESUAIKAN SANDARAN KEPALA MEWAH KURSI DEPAN SECARA MANUAL
- ANDA DAPAT KEHILANGAN KENDALI KENDARAAN TERUTAMA DALAM SITUASI BERIKUT
- MENYESUAIKAN SANDARAN KEPALA KURSI BELAKANG SECARA MANUAL
- MENYESUAIKAN SUDUT SANDARAN KEPALA BELAKANG
- MEMASANG/MELEPAS SANDARAN KEPALA KURSI BELAKANG
- MENGONFIGURASI PENYESUAIAN KURSI
- MENYESUAIKAN BANTALAN UDARA
- MENGATUR KESEIMBANGAN PEMANAS KURSI
- IKHTISAR PROGRAM PIJAT
- MEMILIH PROGRAM PIJAT UNTUK KURSI DEPAN
- MENGATUR ULANG PENYESUAIAN KURSI
- MENGHIDUPKAN/MEMATIKAN PEMANAS KURSI
- MENGHIDUPKAN/MEMATIKAN VENTILASI KURSI
- RODA KEMUDI
- MENYESUAIKAN RODA KEMUDI SECARA ELEKTRIK
- MENGHIDUPKAN/MEMATIKAN PEMANAS RODA KEMUDI
- FITUR MASUK DAN KELUAR YANG MUDAH
- MENGGUNAKAN FITUR MASUK DAN KELUAR YANG MUDAH
- JIKA FITUR MASUK DAN KELUAR YANG MUDAH AKTIF, RODA KEMUDI AKAN BERGERAK KE ATAS ATAU MENUJU DASHBOARD SAAT
- RODA KEMUDI AKAN KEMBALI KE POSISI BERKENDARA TERAKHIR JIKA
- POSISI BERKENDARA TERAKHIR AKAN DISIMPAN SAAT
- MENGATUR FITUR MASUK DAN KELUAR YANG MUDAH
- FUNGSI MEMORI
- FUNGSI DARI FUNGSI MEMORI
- ANDA DAPAT MENYIMPAN PENGATURAN UNTUK SISTEM BERIKUT
- MENGOPERASIKAN FUNGSI MEMORI
- AREA PENYIMPANAN
- CATATAN TENTANG MEMUAT KENDARAAN
- KARAKTERISTIK PENANGANAN KENDARAAN ANDA BERGANTUNG PADA DISTRIBUSI BEBAN DI DALAM KENDARAAN. ANDA HARUS MEMPERHATIKAN HAL-HAL BERIKUT SAAT MEMUAT KENDARAAN
- CATATAN TENTANG MEMBAWA BEBAN DI ATAP
- RUANG PENYIMPANAN DI DALAM KABIN KENDARAAN
- IKHTISAR KOMPARTEMEN PENYIMPANAN DEPAN
- MENGUNCI/MEMBUKA KUNCI GLOVE BOX
- MEMBUKA FITUR MUATAN TEMBUS DI KOMPARTEMEN BELAKANG
- FITUR MUATAN TEMBUS TANPA PENUTUP KOMPARTEMEN MUATAN
- FITUR MUATAN TEMBUS DENGAN PENUTUP KOMPARTEMEN MUATAN
- MELIPAT KEMBALI KURSI BARIS BELAKANG
- SANDARAN KURSI BELAKANG
- MENYESUAIKAN KEMIRINGAN SANDARAN KURSI DI BAGIAN BELAKANG
- PENUTUP RUANG BAGASI
- MENGGULUNGKAN PENUTUP RUANG BAGASI MASUK/KELUAR
- MEMASANG DAN MELEPAS PENUTUP RUANG BAGASI
- MELEPAS PENUTUP RUANG BAGASI
- MEMASANG PENUTUP RUANG BAGASI
- MEMASANG/MEMBUKA JARING PEMISAH
- PENYIMPANAN
- IKHTISAR PENGAIT TAS
- JIKA ANDA MENGGUNAKAN BUKAAN PADA BODI ATAU AKSESORIS SEBAGAI PIJAKAN, ANDA DAPAT
- RAK ATAP DENGAN TANGGA
- TEMPAT CANGKIR
- MENGGUNAKAN TEMPAT CANGKIR DI KONSOL TENGAH
- MENGGUNAKAN TEMPAT CANGKIR DI SANDARAN TANGAN BELAKANG
- MENGAKTIFKAN ATAU MENONAKTIFKAN FUNGSI PENDINGINAN ATAU PEMANASAN UNTUK TEMPAT CANGKIR DENGAN PENGATUR SUHU
- ASBAK DAN PEMANTIK ROKOK
- MENGGUNAKAN ASBAK
- MENGGUNAKAN PEMANTIK ROKOK
- SELAIN ITU, BAHAN YANG MUDAH TERBAKAR DAPAT TERBAKAR JIKA
- SOKET
- MENGGUNAKAN SOKET 12 V
- IKHTISAR PORT USB
- PENGISIAN DAYA NIRKABEL PONSEL DI KOKPIT
- NOMOR PERSETUJUAN PERALATAN RADIO UNTUK BRASIL
- MEMASANG/MELEPAS KARPET LANTAI
- MELEPAS KARPET LANTAI
- CAHAYA DAN PANDANGAN
- PENCAHAYAAN EKSTERIOR
- DALAM KASUS BERIKUT, PERIKSA PENGATURAN LAMPU DEPAN DAN UBAH SECARA MANUAL JIKA PERLU
- SETELAH LAMPU DEPAN DIKONVERSI
- INFORMASI TENTANG SISTEM PENCAHAYAAN DAN TANGGUNG JAWAB ANDA
- SAKELAR LAMPU
- LAMPU EKSTERIOR (KECUALI LAMPU POSISI DAN LAMPU PARKIR) AKAN MATI SECARA OTOMATIS SAAT PINTU PENGEMUDI DIBUKA
- FUNGSI LAMPU MENYALA OTOMATIS SAAT BERKENDARA
- MENGHIDUPKAN/MEMATIKAN LAMPU KABUT BELAKANG
- MENGOPERASIKAN SAKELAR KOMBINASI UNTUK LAMPU
- MENYALAKAN LAMPU JAUH
- MEMATIKAN LAMPU JAUH
- KEDIP LAMPU UTAMA
- LAMPU SEIN
- MENGAKTIFKAN/MENONAKTIFKAN LAMPU HAZARD
- DALAM SITUASI BERIKUT, LAMPU HAZARD AKAN MENYALA OTOMATIS
- FUNGSI ADAPTIF, LED MULTIBEAM
- FUNGSI LAMPU JAUH DINAMIS
- SISTEM INI TERDIRI ATAS FUNGSI-FUNGSI BERIKUT
- FUNGSI MODE JALAN TOL
- FUNGSI INI AKTIF JIKA PERJALANAN DI JALAN TOL TERDETEKSI MELALUI
- FUNGSI INI TIDAK AKTIF DALAM KASUS-KASUS BERIKUT
- FUNGSI LAMPU KABUT PENINGKAT
- FUNGSI INI AKTIF SECARA OTOMATIS DALAM KONDISI-KONDISI BERIKUT
- FUNGSI INI NONAKTIF SECARA OTOMATIS DALAM KONDISI-KONDISI BERIKUT
- FUNGSI LAMPU CUACA BURUK
- FUNGSI PENERANGAN KOTA
- FUNGSI INI AKTIF DALAM KASUS-KASUS BERIKUT
- MENGAKTIFKAN/MENONAKTIFKAN LAMPU JAUH DINAMIS
- ADAPTIVE HIGHBEAM ASSIST PLUS
- FUNGSI ADAPTIVE HIGHBEAM ASSIST PLUS
- ADAPTIVE HIGHBEAM ASSIST PLUS TIDAK BERREAKSI TERHADAP
- DETEKSI MUNGKIN TERBATAS DALAM KASUS BERIKUT
- ADAPTIVE HIGHBEAM ASSIST PLUS BERALIH SECARA OTOMATIS ANTARA JENIS LAMPU BERIKUT
- PADA KECEPATAN DI ATAS 30 KM/JAM
- PADA KECEPATAN DI BAWAH 25 KM/JAM ATAU SAAT PENERANGAN JALAN CUKUP
- PADA KECEPATAN DI ATAS KIRA-KIRA 50 KM/JAM
- MENGAKTIFKAN/MENONAKTIFKAN ADAPTIVE HIGHBEAM ASSIST PLUS
- MENGAKTIFKAN
- MENONAKTIFKAN
- MENGATUR LAMPU SOROT RENDAH
- MENGATUR WAKTU TUNDA MEMATIKAN LAMPU EKSTERIOR
- MENGAKTIFKAN/MENONAKTIFKAN LAMPU PENCARI
- LAMPU INTERIOR
- MENYESUAIKAN LAMPU INTERIOR
- MENYESUAIKAN LAMPU SUASANA
- MENGATUR WARNA
- MENYESUAIKAN KECERAHAN
- MENGAKTIFKAN EFEK
- ANIMASI MULTI-WARNA
- IKLIM
- SAPAN
- MENGAKTIFKAN/MENONAKTIFKAN WAKTU TUNDA MEMATIKAN LAMPU INTERIOR
- WIPER KACA DEPAN DAN SISTEM PENCUCI KACA DEPAN
- MENGGANTI BILAH WIPER KACA DEPAN
- MENGGANTI BILAH PENGHAPUS KACA BELAKANG
- MELEPAS BILAH PENGHAPUS
- KACA SPION
- MENGOPERASIKAN KACA SPION LUAR
- ANDA DAPAT KEHILANGAN KENDALI ATAS KENDARAAN TERUTAMA DALAM SITUASI BERIKUT
- FUNGSI KACA SPION ANTI-SILAU OTOMATIS
- SISTEM TIDAK AKAN MASUK KE MODE ANTI-SILAU JIKA
- KACA SPION LUAR PENUMPANG DEPAN AKAN BERPUTAR KE BAWAH MENUJU ARAH RODA BELAKANG DI SISI PENUMPANG DEPAN KETIKA
- KACA SPION LUAR PENUMPANG DEPAN AKAN KEMBALI KE POSISI SEMULA KETIKA
- AREA PERMEABLE TO RADIO WAVES ON THE WINDSCREEN
- CLIMATE CONTROL
- OVERVIEW OF CLIMATE CONTROL SYSTEMS
- NOTES ON CLIMATE CONTROL
- OVERVIEW OF THE AIR CONDITIONING CONTROL PANEL
- REAR OPERATING UNIT
- OPERATING THE CLIMATE CONTROL SYSTEM
- SWITCHING CLIMATE CONTROL ON/OFF
- SWITCHING THE A/C FUNCTION ON/OFF VIA THE OPERATING UNIT
- THE A/C FUNCTION WILL BE DEACTIVATED IN THE FOLLOWING CASES
- CALLING UP THE AIR CONDITIONING MENU VIA MULTIMEDIA SYSTEM OR THE AIR CONDITIONING CONTROL PANEL
- ACTIVATING/DEACTIVATING THE A/C FUNCTION VIA THE AIR CONDITIONING MENU
- SETTING CLIMATE CONTROL TO AUTOMATIC MODE
- OVERVIEW OF THE AIR DISTRIBUTION SETTINGS
- SIMBOL-SIMBOL PADA LAYAR MENUNJUKKAN VENTILASI MANA YANG DILALUI ALIRAN UDARA
- MENGATUR DISTRIBUSI UDARA MENGGUNAKAN MENU AC
- MENGATUR KONTROL IKLIM BELAKANG MENGGUNAKAN MENU AC
- MENGATUR SUHU
- MENGATUR ALIRAN UDARA
- MENGONTROL KONTROL IKLIM BELAKANG SECARA OTOMATIS
- MENGAKTIFKAN/MENONAKTIFKAN FUNGSI SINKRONISASI MELALUI PANEL KONTROL AC
- MENGAKTIFKAN/MENONAKTIFKAN FUNGSI SINKRONISASI MELALUI MENU AC
- MENGEMBUNKAN/MENGHILANGKAN EMBUN PADA KACA
- KACA DEPAN BEKU ATAU BERKABUT
- KACA BERKABUT DI BAGIAN DALAM
- KACA BERKABUT DI BAGIAN LUAR
- MENGAKTIFKAN/MENONAKTIFKAN MODE RESIRKULASI UDARA
- MENGAKTIFKAN/MENONAKTIFKAN PANAS SISA
- MENGAKTIFKAN/MENONAKTIFKAN IONISASI
- INFORMASI TENTANG PEMANAS KACA DEPAN
- PEMANAS/VENTILASI STASIONER
- FUNGSI PEMANAS/VENTILASI STASIONER
- MENGATUR PEMANAS/VENTILASI STASIONER MELALUI SISTEM MULTIMEDIA
- MEMILIH WAKTU KEBERANGKATAN
- MENGATUR WAKTU KEBERANGKATAN
- MENGATUR PEMANAS STASIONER/VENTILASI MELALUI KENDALI JARAK JAUH
- TAMPILAN LAIN YANG MUNGKIN
- LUBANG VENTILASI UDARA
- MENYESUAIKAN LUBANG VENTILASI UDARA DEPAN
- UNTUK MENJAMIN ALIRAN UDARA SEGAR MELALUI LUBANG VENTILASI KE DALAM KABIN KENDARAAN, PERHATIKAN HAL BERIKUT
- MENYESUAIKAN LUBANG VENTILASI UDARA BELAKANG
- MENGEMUDI DAN PARKIR
- MENGEMUDI
- MENYALAKAN CATU DAYA ATAU KENDARAAN
- JIKA ANDA MENINGGALKAN ANAK-ANAK TANPA PENGAWASAN DI DALAM KENDARAAN, MEREKA TERUTAMA DAPAT
- CATU DAYA AKAN DIMATIKAN LAGI JIKA KONDISI BERIKUT TERPENUHI
- KENDARAAN AKAN DIMATIKAN LAGI JIKA SALAH SATU KONDISI BERIKUT TERPENUHI
- MENYALAKAN KENDARAAN DENGAN TOMBOL START/STOP
- MENYALAKAN KENDARAAN DALAM MODE OPERASI DARURAT
- JIKA KENDARAAN TIDAK MENYALA
- MENYALAKAN KENDARAAN MELALUI LAYANAN ONLINE JARAK JAUH
- MENDINGINKAN ATAU MEMANASKAN INTERIOR KENDARAAN SEBELUM MEMULAI PERJALANAN
- PASTIKAN HAL BERIKUT SEBELUM MENYALAKAN MESIN
- MENGISI DAYA BATERAI AWAL SEBELUM MEMULAI PERJALANAN
- MENYALAKAN KENDARAAN (ONLINE JARAK JAUH)
- ANDA DAPAT MEMATIKAN KENDARAAN KAPAN SAJA DENGAN CARA BERIKUT
- MENGAMANKAN KENDARAAN TERHADAP PENYALAAN SEBELUM MELAKUKAN PERAWATAN ATAU PERBAIKAN
- CATATAN PENGOPERASIAN AWAL
- UNTUK MENJAGA MESIN SELAMA 1500 KM PERTAMA
- HARAP JUGA PERHATIKAN CATATAN PENGOPERASIAN AWAL BERIKUT
- DAYA MESIN DAN TORSI MESIN (KENDARAAN MERCEDES-AMG)
- VARIABEL YANG MEMPENGARUHI TERMASUK
- CATATAN TENTANG AKSELERASI YANG DIOPTIMALKAN
- MELAJU DENGAN AKSELERASI YANG DIOPTIMALKAN
- AKSELERASI OPTIMAL DI AKHIR
- CATATAN MENGEMUDI
- ALAS KAKI YANG TIDAK TEPAT TERMASUK, CONTOHNYA
- CATATAN MENGENAI MENGEMUDI DENGAN BEBAN DI ATAP, TRAILER, ATAU KENDARAAN BERMUATAN PENUH
- OLEH KARENA ITU, HARAP PERHATIKAN CATATAN BERIKUT
- CATATAN MENGENAI MENGEMUDI DI JALAN YANG DITABURI GARAM PENGURAI ES
- OLEH KARENA ITU, HARAP INGAT CATATAN BERIKUT
- HILANGKAN PENUMPUKAN GARAM DENGAN CARA BERIKUT
- CATATAN MENGENAI AQUAPLANING
- PERHATIKAN CATATAN BERIKUT SAAT HUJAN DERAS ATAU DALAM KONDISI YANG DAPAT MENYEBABKAN AQUAPLANING
- CATATAN MENGENAI MENGEMUDI MELALUI GENANGAN AIR DI JALAN
- PERHATIKAN HAL BERIKUT JIKA ANDA PERLU MENGEMUDI MELINTASI AIR
- CATATAN TENTANG MENGEMUDI OFF-ROAD
- KENDARAAN DAPAT RUSAK OLEH
- DAFTAR PERIKSA SEBELUM MENGEMUDI OFF-ROAD
- PERIKSA HAL-HAL BERIKUT SEBELUM MENGEMUDI OFF-ROAD
- MENGEMUDI OFF-ROAD
- MENGEMUDI DI ATAS PASIR
- SAAT MENGEMUDI DI ATAS PASIR, PERHATIKAN JUGA PETUNJUK BERIKUT
- MENGARUNGI
- PERHATIKAN JUGA INFORMASI BERIKUT SAAT MENGARUNG AIR
- MENGEMUDI DI MEDAN PEGUNUNGAN
- PERHATIKAN JUGA INFORMASI BERIKUT SAAT MENGEMUDI DI MEDAN PEGUNUNGAN
- DAFTAR PERIKSA SETELAH MENGEMUDI DI JALAN OFF-ROAD
- INFORMASI TENTANG SISTEM REM PERFORMA TINGGI AMG
- KEBISINGAN TERGANTUNG PADA FAKTOR-FAKTOR BERIKUT
- FUNGSI ECO START/STOP
- MESIN AKAN MATI SECARA OTOMATIS DALAM SITUASI BERIKUT JIKA SEMUA KONDISI KENDARAAN UNTUK PENGHENTIAN MESIN OTOMATIS TERPENUHI
- JIKA SISTEM MENDETEKSI SALAH SATU SITUASI BERIKUT, MESIN TIDAK AKAN MATI
- MESIN AKAN MENYALA KEMBALI SECARA OTOMATIS DALAM KASUS BERIKUT
- SIMBOL FUNGSI ECO START/STOP PADA LAYAR PENGEMUDI
- MENGAKTIFKAN/MENONAKTIFKAN FUNGSI ECO START/STOP (KENDARAAN MERCEDES-AMG)
- FUNGSI TAMPILAN ECO
- TAMPILAN ECO MENILAI KRITERIA BERIKUT UNTUK GAYA MENGEMUDI YANG HEMAT
- FUNGSI ECO ASSIST (KENDARAAN DENGAN SISTEM KELISTRIKAN 48 V)
- TAMPILAN ECO ASSIST AKAN DISEMBUNYIKAN LAGI DALAM KASUS BERIKUT
- SELAIN KENDARAAN DI DEPAN ☐, ECO ASSIST DAPAT MENDETEKSI PERISTIWA RUTE BERIKUT ② TERGANTUNG PADA PERLENGKAPAN KENDARAAN
- SISTEM MUNGKIN TERGANGGU ATAU TIDAK BERFUNGSI DALAM SITUASI BERIKUT
- AMG REAL PERFORMANCE SOUND
- MEMILIH KARAKTERISTIK SUARA DENGAN TOMBOL SETIR AMG
- WARNA SIMBOL TOMBOL MENUNJUKKAN KARAKTERISTIK SUARA YANG SAAT INI DIPILIH
- FUNGSI TOMBOL SETIR AMG
- FUNGSI BERIKUT TERSEDIA TERGANTUNG PADA PERLENGKAPAN
- MENGATUR TOMBOL SETIR AMG
- IKHTISAR MENU PILIHAN PENGATURAN AMG
- MENGATUR TOMBOL SETIR
- MENAMBAHKAN FUNGSI BARU UNTUK DIPILIH
- MENGHAPUS PENUGASAN TOMBOL
- DYNAMIC SELECT
- FUNGSI DYNAMIC SELECT
- TAMPILAN DAN PROGRAM BERKENDARA YANG TERSEDIA UNTUK DIPILIH TERGANTUNG PADA STATUS KETERLIBATAN BERIKUT
- INDIVIDUAL
- SPORT
- COMFORT
- E ECO
- TRAIL
- ROCK
- SAND
- KARAKTERISTIK SISTEM BERIKUT AKAN BERUBAH SESUAI DENGAN PROGRAM BERKENDARA YANG BERLAKU
- FUNGSI DYNAMIC SELECT (KENDARAAN MERCEDES-AMG)
- FUNGSI PROGRAM BERKENDARA DI JALAN RAYA
- JIKA KUNCI DIFERENSIAL UNTUK KOTAK TRANSFER DILEPASKAN, ANDA DAPAT MEMILIH DI ANTARA PROGRAM BERKENDARA DI JALAN RAYA BERIKUT
- FUNGSI PROGRAM OFF-ROAD
- ANDA KEMUDIAN AKAN DAPAT MEMILIH ANTARA PROGRAM OFF-ROAD BERIKUT
- OPSI BERIKUT TERSEDIA UNTUK BERALIH KE PROGRAM ON-ROAD
- TERGANTUNG PADA PROGRAM ON-ROAD ATAU OFF-ROAD YANG DIPILIH, KARAKTERISTIK KENDARAAN BERIKUT AKAN BERUBAH
- MEMILIH PROGRAM BERKENDARA
- MEMILIH PROGRAM BERKENDARA (KENDARAAN MERCEDES-AMG)
- MEMILIH PROGRAM BERKENDARA DENGAN TOMBOL AMG DI SETIR KANAN
- MEMILIH PROGRAM OFF-ROAD
- MEMILIH PROGRAM BERKENDARA DENGAN SAKLAR DYNAMIC SELECT
- MENGONFIGURASI DYNAMIC SELECT DI SISTEM MULTIMEDIA
- MENGATUR PROGRAM I DRIVE
- MENGAKTIFKAN/MENONAKTIFKAN TAMPILAN RESET
- MENAMPILKAN DATA KENDARAAN
- MENAMPILKAN DATA MESIN
- MEMANGGIL INDIKATOR KONSUMSI BAHAN BAKAR
- MENGATUR AMG DYNAMIC SELECT DI SISTEM MULTIMEDIA MBUX
- PENGATURAN OPSI UNTUK PROGRAM BERKENDARA (TERGANTUNG PERLENGKAPAN)
- MENGATUR PROGRAM BERKENDARA I
- TRANSMISI OTOMATIS
- TUAS DIRECT SELECT
- FUNGSI TUAS DIRECT SELECT
- MEMASUKKAN GIGI MUNDUR R
- MENGGUNAKAN POSISI NETRAL N
- LAKUKAN LANGKAH BERIKUT JIKA ANDA INGIN TRANSMISI OTOMATIS TETAP DALAM POSISI NETRAL [N], MESKIPUN KENDARAAN DIMATIKAN ATAU PINTU PENGEMUDI DIBUKA
- POSISI PARKIR Ⓟ AKAN OTOMATIS DIKUNCI KEMBALI SEGERA SETELAH SALAH SATU KONDISI BERIKUT TERPENUHI
- MENGGUNAKAN POSISI PARKIR P
- POSISI PARKIR Ⓟ AKAN DIKUNCI OTOMATIS JIKA SALAH SATU KONDISI BERIKUT TERPENUHI
- MENGGUNAKAN POSISI BERJALAN D
- KETIKA TRANSMISI OTOMATIS DALAM POSISI TRANSMISI [D], TRANSMISI AKAN MENGGANTI GIGI SECARA OTOMATIS. INI TERGANTUNG, ANTARA LAIN, PADA FAKTOR-FAKTOR BERIKUT
- MENGGOYANGKAN KENDARAAN AGAR BEBAS (KENDARAAN MERCEDES-AMG)
- PERPINDAHAN GIGI MANUAL
- PERPINDAHAN GIGI MANUAL (KENDARAAN MERCEDES-AMG)
- SIMBOL MENUNJUKKAN POSISI TRANSMISI YANG SAAT INI DIPILIH
- PERPINDAHAN GIGI KE ATAS DAN KE BAWAH
- REKOMENDASI PERPINDAHAN GIGI
- MENGGUNAKAN KICKDOWN
- FUNGSI MODE MELUNCUR
- MODE MELUNCUR DITANDAI DENGAN HAL-HAL BERIKUT
- MODE MELUNCUR AKAN AKTIF JIKA KONDISI BERIKUT TERPENUHI
- MODE MELUNCUR JUGA DAPAT DICEGAH OLEH PARAMETER BERIKUT
- TRANSFER CASE
- FUNGSI TRANSFER CASE
- PADA PERMUKAAN JALAN YANG LICIN, RODA DAPAT KEHILANGAN CAKRAAM PADA SITUASI BERIKUT KHUSUSNYA
- RENTANG PERPINDAHAN GIGI
- KARAKTERISTIK GIGI RENDAH UNTUK MEDAN OFF-ROAD
- JANGAN GUNAKAN GIGI RENDAH DALAM SITUASI BERIKUT
- MEMINDAHKAN TRANSFER CASE
- PERPINDAHAN KE GIGI RENDAH UNTUK MEDAN OFF-ROAD
- PERPINDAHAN KE GIGI TINGGI UNTUK JALAN RAYA
- KUNCI DIFERENSIAL
- FUNGSI KUNCI DIFERENSIAL
- KENDARAAN INI MEMILIKI TIGA KUNCI DIFERENSIAL
- SAAT KUNCI DIFERENSIAL TERAKTIF, SISTEM BERIKUT AKAN DINONAKTIFKAN
- MENGAKTIFKAN/MENONAKTIFKAN PENGUNCI DIFERENSIAL
- MENGUNCI DIFERENSIAL
- PERHATIKAN SEMUA INFORMASI YANG DITAMPILKAN DI LAYAR PENGEMUDI
- PENGGERAK SEMUA RODA
- PENGISIAN BAHAN BAKAR
- JANGAN PERNAH MENGISI BAHAN BAKAR DENGAN SALAH SATU BAHAN BAKAR BERIKUT
- JIKA ANDA SECARA TIDAK SENGAJA MENGISI BAHAN BAKAR YANG SALAH
- ADBLUE ® (KENDARAAN DENGAN MESIN DIESEL SAJA)
- CATATAN TENTANG PENGISIAN ADBLUE
- ADBLUE 2 DICIRIKAN OLEH HAL BERIKUT
- ADBLUE ® TERSEDIA DI SINI
- PENGISIAN ADBLUE®
- MEMBUKA TUTUP PENGISI ADBLUE®
- MENGISI ULANG ADBLUE 1
- PARKIR
- MEMPARKIR KENDARAAN
- PEMBUKA PINTU GARASI (HOMELINK ® )
- MEMPROGRAM TOMBOL HOMELINK®
- HANYA OPERASIKAN PINTU BERIKUT MENGGUNAKAN PEMBUKA PINTU GARASI
- TOMBOL HOMELINK* YANG DIPILIH SEKARANG TELAH DIPROGRAM
- MELAKUKAN SINKRONISASI KODE BERJALAN (JIKA DIPERLUKAN)
- MENGATASI MASALAH SAAT MEMPROGRAM HOMELINK
- I INFORMASI DUKUNGAN DAN PEMROGRAMAN TAMBAHAN
- MENGHAPUS TOMBOL HOMELINK®
- HANYA OPERASIKAN PINTU BERIKUT DENGAN MENGGUNAKAN PEMBUKA PINTU GARASI
- MODE PEMROGRAMAN KHUSUS (JIKA DIPERLUKAN)
- REM PARKIR ELEKTRIK
- FUNGSI REM PARKIR ELEKTRIK (PENGEREMAN OTOMATIS)
- REM PARKIR ELEKTRIK BEKERJA JIKA TRANSMISI BERADA DI POSISI P DAN SALAH SATU KONDISI BERIKUT TERPENUHI
- FUNGSI REM PARKIR ELEKTRIK (PELEPASAN OTOMATIS) REM PARKIR ELEKTRIK LEPAS KETIKA KONDISI BERIKUT TERPENUHI
- MENGEREMKAN/MELEPASKAN REM PARKIR ELEKTRIK SECARA MANUAL
- SELAIN ITU, ANAK-ANAK JUGA DAPAT MENGGERAKKAN KENDARAAN, CONTOHNYA DENGAN
- INFORMASI TENTANG DETEKSI TABRAKAN UNTUK KENDARAAN YANG DIPARKIR
- ANDA AKAN MENERIMA INFORMASI MENGENAI HAL BERIKUT
- SITUASI BERIKUT DAPAT MENYEBABKAN AKTIVASI TIDAK SENGAJA
- DETEKSI MUNGKIN TERBATAS DALAM SITUASI BERIKUT
- MENGATUR DETEKSI TABRAKAN UNTUK KENDARAAN YANG DIPARKIR
- CATATAN TENTANG MEMARKIR KENDARAAN
- MODE SIAGA (PERPANJANGAN PERIODE PENGGUNAAN BATERAI STARTER)
- FUNGSI MODE SIAGA
- MODE SIAGA DITANDAI DENGAN HAL BERIKUT
- JIKA KONDISI BERIKUT TERPENUHI, MODE SIAGA DAPAT DIAKTIFKAN ATAU DINONAKTIFKAN MENGGUNAKAN SISTEM MULTIMEDIA
- ISI ULANG BATERAI STARTER DALAM SITUASI BERIKUT
- MENGAKTIFKAN/MENONAKTIFKAN MODE SIAGA (MEMARKIR KENDARAAN) PERSYARATAN
- MENGEMUDI DAN SISTEM KESELAMATAN BERKENDARA
- SISTEM KEMUDI DAN TANGGUNG JAWAB ANDA
- INFORMASI TENTANG SENSOR DAN KAMERA KENDARAAN
- IKHTISAR SISTEM KEMUDI DAN SISTEM KESELAMATAN BERKENDARA
- SISTEM KEMUDI DAN SISTEM KESELAMATAN BERKENDARA
- SISTEM PARKIR
- FUNGSI ABS
- SISTEM REM ANTI TERKUNCI (ABS) MENGATUR TEKANAN REM DALAM SITUASI BERKENDARA KRITIS
- FUNGSI ABS OFF-ROAD
- FUNGSI KONTROL ABS DIMODIFIKASI SAAT BERALIH KE PROGRAM BERKENDARA OFF-ROAD
- FUNGSI BAS
- JIKA ANDA MENEKAN PEDAL REM DENGAN CEPAT, BAS AKTIF
- ESP® (ELECTRONIC STABILITY PROGRAM)
- FUNGSI ESP®
- KARAKTERISTIK SAAT ESP® AKTIF
- PROGRAM STABILITAS ELEKTRONIK (ESP®) DAPAT MEMANTAU DAN MENINGKATKAN STABILITAS BERKENDARA DAN TRAKSI DALAM SITUASI BERIKUT DALAM BATAS FISIK
- JIKA KENDARAAN MENYIMPANG DARI ARAH YANG DIINGINKAN PENGEMUDI, ESP® DAPAT MENSTABILKAN KENDARAAN DENGAN CARA INTERVENSI BERIKUT
- SAAT ESP® DINONAKTIFKAN, LAMPU PERINGATAN ⚡️ MENYALA TERUS-MENERUS
- SAAT LAMPU PERINGATAN BERKEDIP, SATU ATAU BEBERAPA RODA TELAH MENCAPAI BATAS GRIP
- KARAKTERISTIK SAAT ESP® DINONAKTIFKAN
- UNTUK MENINGKATKAN TRAKSI, ESP® DAPAT DIMATIKAN DALAM SITUASI BERIKUT
- PERHATIKAN INFORMASI BERIKUT
- ETS/4ETS
- ETS/4ETS DAPAT MENINGKATKAN TRAKSI KENDARAAN DENGAN CARA INTERVENSI BERIKUT
- PENGARUH PROGRAM BERKENDARA TERHADAP ESP®
- FUNGSI ESP® (KENDARAAN MERCEDES-AMG)
- ESP 6 MEMANTAU DAN MENINGKATKAN STABILITAS DAN TRAKSI BERKENDARA, TERUTAMA DALAM SITUASI BERIKUT
- ESP ® DAPAT MENSTABILKAN KENDARAAN DENGAN CARA INTERVENSI BERIKUT
- KETIKA LAMPU PERINGATAN Ⓞ BERKEDIP, SATU ATAU BEBERAPA RODA TELAH MENCAPAI BATAS GRIPNYA
- KARAKTERISTIK ESP® SPORT
- ESP ® SPORT JUGA MEMILIKI KARAKTERISTIK BERIKUT
- KARAKTERISTIK SAAT ESP 9 DINONAKTIFKAN
- MENONAKTIFKAN ESP ® MEMILIKI EFEK BERIKUT
- MUNGKIN TERBAIK UNTUK MENGAKTIFKAN ESP® SPORT ATAU MENONAKTIFKAN ESP® DALAM SITUASI BERIKUT
- PERHATIKAN PESAN TAMPILAN DAN LAMPU INDIKATOR SERTA PERINGATAN YANG DITAMPILKAN
- ETS/4ETS (SISTEM TRAKSI ELEKTRONIK)
- FUNGSI STABILISASI TRAILER ESP®
- SAAT BERKENDARA DENGAN TRAILER, STABILISASI TRAILER ESP® DAPAT MENSTABILKAN KENDARAAN ANDA JIKA TRAILER MULAI BERGOYANG DARI SISI KE SISI
- STABILISASI TRAILER ESP® MUNGKIN TERGANGGU ATAU TIDAK BERFUNGSI JIKA
- MENGAKTIFKAN ATAU MENONAKTIFKAN ESP® DI SISTEM MULTIMEDIA MBUX
- MENGATUR ESP® DENGAN TOMBOL RODA KEMUDI AMG
- WARNA JALAN PADA SIMBOL TOMBOL 📁 MENUNJUKKAN PENGATURAN SAAT INI
- MENYESUAIKAN ESP ® DI SISTEM MULTIMEDIA (KENDARAAN MERCEDES-AMG)
- FUNGSI EBD
- DISTRIBUSI GAYA REM ELEKTRONIK (EBD) DITANDAI DENGAN HAL-HAL BERIKUT
- FUNGSI HOLD
- MENGAKTIFKAN/MENONAKTIFKAN FUNGSI HOLD
- JIKA KENDARAAN HANYA DIREM DENGAN FUNGSI HOLD, KENDARAAN DAPAT MELUNCUR DALAM SITUASI BERIKUT
- MENGAKTIFKAN FUNGSI HOLD
- MENONAKTIFKAN FUNGSI HOLD
- FUNGSI HOLD JUGA DINONAKTIFKAN DALAM SITUASI BERIKUT
- DALAM SITUASI BERIKUT, KENDARAAN DITAHAN OLEH POSISI PARKIR P DAN/ATAU REM PARKIR ELEKTRIK
- FUNGSI HILL START ASSIST
- HILL START ASSIST MENAHAN KENDARAAN UNTUK WAKTU SINGKAT SAAT MULAI BERJALAN DI TANJAKAN DENGAN KONDISI BERIKUT
- FUNGSI LAMPU REM ADAPTIF
- LAMPU REM ADAPTIF MEMPERINGATKAN LALU LINTAS DI BELAKANG DALAM SITUASI PENGEREMAN DARURAT DENGAN TINDAKAN BERIKUT
- ATTENTION ASSIST
- FUNGSI ATTENTION ASSIST
- ANDA DAPAT MEMILIH ANTARA DUA PENGATURAN
- INFORMASI BERIKUT DITAMPILKAN PADA LAYAR PENGEMUDI
- FUNGSIONALITAS ATTENTION ASSIST DIBATASI, DAN PERINGATAN MUNGKIN TERTUNDA ATAU TIDAK DIBERIKAN SAMA SEKALI DALAM SITUASI BERIKUT
- PENILAIAN KANTUK DAN KEWASPADAAN ATTENTION ASSIST DIATUR ULANG DAN DIMULAI KEMBALI SAAT MELANJUTKAN PERJALANAN DALAM SITUASI BERIKUT
- PENGATURAN BANTUAN PERHATIAN
- MENGATUR SENSITIVITAS
- KONTROL JELAJAH DAN PEMBATAS
- FUNGSI KONTROL JELAJAH
- NOTIFIKASI DI LAYAR PENGEMUDI
- JANGAN GUNAKAN KONTROL JELAJAH DALAM SITUASI BERIKUT
- FUNGSI PEMBATAS
- ANDA DAPAT MEMBATASI KECEPATAN SEBAGAI BERIKUT
- PEMBATAS VARIABEL DIAKTIFKAN KEMBALI DALAM SITUASI BERIKUT
- MENGOPERASIKAN KONTROL JELAJAH ATAU PEMBATAS VARIABEL
- KONTROL JELAJAH
- PEMBATAS VARIABEL
- MENGOPERASIKAN KONTROL JELAJAH DAN PEMBATAS VARIABEL
- BERALIH ANTARA KONTROL JELAJAH DAN PEMBATAS VARIABEL
- MENGAKTIFKAN KONTROL JELAJAH ATAU PEMBATAS VARIABEL
- MENAMBAH/MENGURANGI KECEPATAN YANG TERSIMPAN
- MENGADOPSI KECEPATAN YANG TERDETEKSI
- MENONAKTIFKAN KONTROL JELAJAH ATAU PEMBATAS VARIABEL
- INFORMASI TENTANG PEMBATAS PERMANEN
- ACTIVE DISTANCE ASSIST DISTRONIC
- FUNGSI ACTIVE DISTANCE ASSIST DISTRONIC
- ACTIVE DISTANCE ASSIST DISTRONIC DAPAT MEMPERCEPAT ATAU MENGEREM DALAM KASUS BERIKUT, CONTOHNYA
- ACTIVE DISTANCE ASSIST DISTRONIC TIDAK BERREAKSI ATAU MEMILIKI REAKSI TERBATAS
- FITUR LAIN DARI ACTIVE DISTANCE ASSIST DISTRONIC
- TAMPILAN STATUS PERMANEN
- SISTEM MUNGKIN TERGANGGU ATAU TIDAK BERFUNGSI DALAM KASUS BERIKUT, MISALNYA
- MENGOPERASIKAN ACTIVE DISTANCE ASSIST DISTRONIC DAN PEMBATAS VARIABEL
- ACTIVE DISTANCE ASSIST DISTRONIC MUNGKIN MEMPERCEPAT ATAU MENGEREM DALAM KASUS BERIKUT, MISALNYA
- BANTUAN JARAK AKTIF DISTRONIC
- BERALIH ANTARA PEMBATAS VARIABEL DAN BANTUAN JARAK AKTIF DISTRONIC
- MENGAKTIFKAN BANTUAN JARAK AKTIF DISTRONIC/PEMBATAS VARIABEL
- MENAMBAH/MENGURANGI KECEPATAN
- MENGADOPSI BATAS KECEPATAN YANG DITAMPILKAN DI LAYAR PENGEMUDI
- MELAJU DENGAN BANTUAN JARAK AKTIF DISTRONIC
- MENAMBAH/MENGURANGI JARAK YANG DITENTUKAN KE KENDARAAN DI DEPAN
- MENONAKTIFKAN BANTUAN JARAK AKTIF DISTRONIC/PEMBATAS VARIABEL
- FUNGSI BANTUAN BATAS KECEPATAN AKTIF
- BATAS SISTEM
- FUNGSI ADAPTASI KECEPATAN BERDASARKAN RUTE
- KEJADIAN RUTE BERIKUT DIPERHITUNGKAN
- SELAIN ITU, KECEPATAN DIKURANGI JIKA INDIKATOR SEIN DIHIDUPKAN DAN SALAH SATU SITUASI BERIKUT TERDETEKSI
- PENYESUAIAN KECEPATAN DIBATALKAN DALAM KASUS BERIKUT
- DALAM KONDISI SULIT, PEMILIHAN KECEPATAN YANG DILAKUKAN OLEH SISTEM MUNGKIN TIDAK SELALU SESUAI. INI BERLAKU UNTUK SITUASI BERIKUT, MISALNYA
- MENGATUR GAYA BERKENDARA UNTUK ASSISTEN JARAK AKTIF DISTRONIC
- MENGATUR PENYESUAIAN KECEPATAN
- ① JIKA SALAH SATU SISTEM BERIKUT DIAKTIFKAN, KECEPATAN YANG TERDETEKSI DAPAT DIADOPSI SECARA MANUAL SEBAGAI KECEPATAN MAKSIMUM YANG DIIZINKAN
- FUNGSI ASSISTEN STOP-AND-GO AKTIF
- JIKA SEMUA KONDISI BERIKUT TERPENUHI, ASSISTEN STOP-AND-GO AKTIF AKTIF SECARA OTOMATIS
- DSR (PENGATURAN KECEPATAN MENURUN)
- FUNGSI SISTEM DSR
- DSR AKAN MATI SECARA OTOMATIS
- INFORMASI TENTANG DSR
- MENGAKTIFKAN ATAU MENONAKTIFKAN DSR (REGULASI KECEPATAN SAAT MENURUN)
- MENGUBAH KECEPATAN TARGET
- MENGUBAH KECEPATAN TARGET DENGAN PEDAL REM ATAU PEDAL GAS
- MENGUBAH KECEPATAN TARGET MENGGUNAKAN TOMBOL DI RODA KEMUDI
- ACTIVE STEERING ASSIST
- FUNGSI ACTIVE STEERING ASSIST
- TAMPILAN STATUS ACTIVE STEERING ASSIST
- DETEKSI KEMUDI DAN SENTUHAN
- SISTEM TIDAK MEMBERIKAN BANTUAN DALAM KONDISI BERIKUT
- MENGAKTIFKAN/MENONAKTIFKAN ACTIVE STEERING ASSIST
- FUNGSI ACTIVE EMERGENCY STOP ASSIST
- JIKA KENDARAAN DALAM BAHAYA MENINGGALKAN JALUR, PERINGATAN DIBERIKAN DALAM KEADAAN BERIKUT
- ACTIVE EMERGENCY STOP ASSIST MENGELUARKAN PERINGATAN BERIKUT SECARA BERURUTAN
- KETIKA KENDARAAN TELAH MELAMBAT HINGGA BERHENTI
- SETELAH PESAN PERINGATAN DARURAT MULAI DITAMPILKAN, ANDA DAPAT MEMBATALKAN ACTIVE EMERGENCY STOP ASSIST SEBAGAI BERIKUT
- UNTUK MENDETEKSI KENDARAAN DAN HALANGAN LAIN, PERHATIKAN BATASAN SISTEM DARI FUNGSI BERIKUT
- ACTIVE EMERGENCY STOP ASSIST TIDAK AKTIF DALAM KASUS BERIKUT
- ACTIVE BRAKE ASSIST
- FUNGSI ACTIVE BRAKE ASSIST
- ACTIVE BRAKE ASSIST TERDIRI DARI FUNGSI BERIKUT
- DALAM KASUS SEPERTI INI, ACTIVE BRAKE ASSIST MUNGKIN
- FUNGSI PERINGATAN JARAK
- PERINGATAN TABRAKAN
- PERINGATAN TABRAKAN DAPAT MEMBANTU ANDA DALAM SITUASI BERIKUT DENGAN NADA PERINGATAN TERPUTUS-PUTUS DAN LAMPU PERINGATAN △
- FUNGSI PENGEREMAN OTONOM
- PADA KECEPATAN DI ATAS KURANG LEBIH 7 KM/JAM, FUNGSI PENGEREMAN OTONOM DAPAT BERINTERVENSI DALAM SITUASI BERIKUT
- PENINGKATAN GAYA REM BERDASARKAN SITUASI
- PADA KECEPATAN DI ATAS KURANG LEBIH 7 KM/JAM, PENINGKATAN GAYA REM TERKAIT SITUASI DAPAT BERINTERVENSI DALAM SITUASI BERIKUT
- MEMBATALKAN INTERVENSI PENGEREMAN OLEH ACTIVE BRAKE ASSIST ANDA DAPAT MEMBATALKAN PENGEREMAN ACTIVE BRAKE ASSIST KAPAN SAJA DENGAN
- ACTIVE BRAKE ASSIST DAPAT MEMBATALKAN INTERVENSI PENGEREMAN KETIKA SALAH SATU KONDISI BERIKUT TERPENUHI
- FUNGSI MANUVER BELOK (KENDARAAN DENGAN PAKET BANTUAN MENGEMUDI)
- MENGATUR ACTIVE BRAKE ASSIST
- MENGATUR WAKTU PERINGATAN
- BANTUAN RAMBU LALU LINTAS
- FUNGSI TRAFFIC SIGN ASSIST
- HAL-HAL BERIKUT JUGA HARUS DIPERHATIKAN SAAT MENGGUNAKAN TRAFFIC SIGN ASSIST
- PEMBERITAHUAN PADA LAYAR PENGEMUDI
- TERGANTUNG PADA NEGARA PENGGUNAAN, TRAFFIC SIGN ASSIST DAPAT MENDETEKSI DAN MENAMPILKAN RAMBU LALU LINTAS BERIKUT, MISALNYA
- TRAFFIC SIGN ASSIST JUGA DAPAT MENDETEKSI RAMBU TAMBAHAN BERIKUT ③, MISALNYA, DAN MENGEVALUASI RELEVANSI PEMBATASAN JIKA PERLU MENGGUNAKAN SENSOR KENDARAAN PENDUKUNG
- PERINGATAN SAAT KECEPATAN MAKSIMUM YANG DIIZINKAN DILAMPAUI
- CONTOH
- FUNGSI PERINGATAN TAMBAHAN
- PENGGUNAAN TRAILER
- TERUTAMA, HUKUM KHUSUS NEGARA HARUS DIPERHATIKAN, MISALNYA TENTANG
- SISTEM MUNGKIN TERGANGGU ATAU TIDAK BERFUNGSI DALAM SITUASI BERIKUT, TERUTAMA
- PENGATURAN TRAFFIC SIGN ASSIST
- MENGAKTIFKAN ATAU MENONAKTIFKAN PERINGATAN BATAS KECEPATAN
- MENGUBAH JENIS PERINGATAN BATAS KECEPATAN
- MENGATUR AMBANG BATAS PERINGATAN
- MENGAKTIFKAN ATAU MENONAKTIFKAN SINYAL AKUSTIK UNTUK BATAS KECEPATAN MAKSIMUM BARU
- TAMPILAN LAMPU LALU LINTAS
- INFORMASI TENTANG TAMPILAN LAMPU LALU LINTAS
- MENAMPILKAN TAMPILAN LAMPU LALU LINTAS
- MENGGUNAKAN FUNGSI LAIN YANG TERSEDIA
- BLIND SPOT ASSIST
- FUNGSI BLIND SPOT ASSIST DENGAN PERINGATAN KELUAR
- TAMPILAN STATUS PADA LAYAR PENGEMUDI
- PERINGATAN KELUAR
- BLIND SPOT ASSIST MUNGKIN TERBATAS DALAM SITUASI BERIKUT, TERUTAMA
- PERINGATAN KELUAR MUNGKIN TERBATAS DALAM SITUASI BERIKUT
- MENGAKTIFKAN ATAU MENONAKTIFKAN BLIND SPOT ASSIST ATAU ACTIVE BLIND SPOT ASSIST
- ACTIVE LANE KEEPING ASSIST
- FUNGSI ACTIVE LANE KEEPING ASSIST
- SISTEM DAPAT BERINTERVENSI JIKA KONDISI BERIKUT TERPENUHI
- DALAM KASUS BERIKUT, PERINGATAN ① MUNCUL DI LAYAR PENGEMUDI DAN TERDENGAR SUARA PERINGATAN
- TAMPILAN STATUS ACTIVE LANE KEEPING ASSIST
- DALAM SITUASI BERIKUT, MUNGKIN TIDAK ADA INTERVENSI KEMUDI YANG MENGOREKSI ARAH, TETAPI PERINGATAN MUNGKIN DIBERIKAN DI RODA KEMUDI TERGANTUNG PADA SITUASI
- MENGAKTIFKAN/MENONAKTIFKAN ACTIVE LANE KEEPING ASSIST
- MENGATUR ACTIVE LANE KEEPING ASSIST
- MENGAKTIFKAN/MENONAKTIFKAN BANTUAN SAAT MARKA JALAN TERPUTUS
- FUNGSI SISTEM DAMPING ADAPTIF
- SISTEM PEREDAM ADAPTIF TERDIRI ATAS
- AMG RIDE CONTROL
- FUNGSI AMG RIDE CONTROL
- PEREDAMAN DISESUAIKAN SECARA INDIVIDU UNTUK SETIAP RODA DAN TERGANTUNG PADA FAKTOR-FAKTOR BERIKUT
- MEMILIH PENYESUAIAN SUSPENSI DENGAN TOMBOL RODA KEMUDI AMG
- ANDA DAPAT MEMILIH DARI TIGA PENGATURAN SUSPENSI YANG BERBEDA
- SIMBOL MENUNJUKKAN MODE YANG SAAT INI DIPILIH
- AMG ACTIVE RIDE CONTROL
- FUNGSI AMG ACTIVE RIDE CONTROL
- PENGATURAN SUSPENSI PER PROGRAM BERKENDARA
- PROGRAM BERKENDARA
- PROGRAM BERKENDARA OFF-ROAD
- PROGRAM BERKENDARA C
- PROGRAM BERKENDARA S DAN S
- PROGRAM PENGEMUDIAN
- AMG ACTIVE BALANCE CONTROL
- FUNGSI AMG ACTIVE BALANCE CONTROL
- MENGATUR RESISTENSI GULING
- ANDA DAPAT MEMILIH DI ANTARA TIGA SETELAN
- AMG TRACTION PRO
- FUNGSI AMG TRACTION PRO
- MENGAKTIFKAN AMG TRACTION PRO
- MENGAKTIFKAN ATAU MENONAKTIFKAN
- SIMBOL MENUNJUKKAN STATUS AMG TRACTION PRO
- MENGATUR EFEK PENGUNCIAN
- RACE START
- INFORMASI TENTANG RACE START
- MENGAKTIFKAN START BALAP
- KAMERA MUNDUR
- FUNGSI KAMERA MUNDUR
- PERSPEKTIF KAMERA PADA LAYAR TENGAH
- TAMPILAN SUDUT LEBAR
- TAMPILAN TRAILER
- KAMERA MUNDUR TIDAK AKAN BERFUNGSI, ATAU HANYA BERFUNGSI SEBAGIAN DALAM SITUASI BERIKUT
- KAMERA 360°
- FUNGSI KAMERA 360°
- KAMERA 360° ADALAH SISTEM YANG TERDIRI DARI EMPAT KAMERA
- TAMPILAN 3D OTOMATIS
- TAMPILAN SAMPING KAMERA KACA SPION LUAR PADA TAMPILAN TRAILER
- KAMERA 360° TIDAK AKAN BERFUNGSI, ATAU HANYA BERFUNGSI SEBAGIAN DALAM SITUASI BERIKUT, MISALNYA
- FUNGSI KAMERA OFF-ROAD
- TAMPILAN BERIKUT TERSEDIA
- BONNET TRANSPARAN
- TAMPILAN DEPAN DAN BELAKANG
- AREA DI BAWAH BONNET TIDAK DITAMPILKAN DENGAN BENAR DALAM SITUASI BERIKUT
- MEMANGGIL TAMPILAN KAMERA 360° MENGGUNAKAN TOMBOL
- MEMILIH TAMPILAN UNTUK KAMERA 360° (GIGI MUNDUR)
- MENGELOLA KAMERA 360° DENGAN POSISI AKTIVASI GPS
- MENGUBAH NAMA POSISI AKTIVASI
- MENGHAPUS POSISI AKTIVASI
- PARKIR ASSIST PARKTRONIC
- FUNGSI PARKIR ASSIST PARKTRONIC
- TAMPILAN PADA LAYAR TENGAH
- WARNA TAMPILAN BERUBAH TERGANTUNG PADA JARAK KE OBSTAKEL YANG TERDETEKSI
- JIKA ANDA TIDAK BERADA DI MENU KAMERA & PARKIR DAN OBSTAKEL DI JALUR KENDARAAN TERDETEKSI, JENDELA POP-UP ① MUNCUL DI LAYAR TENGAH JIKA PERSYARATAN BERIKUT TERPENUHI
- PARKIR ASSIST PARKTRONIC TIDAK SELALU MEMPERHITUNGKAN OBSTAKEL BERIKUT
- OBSTAKEL DI SISI TIDAK DITAMPILKAN DALAM SITUASI BERIKUT, MISALNYA
- PERHATIKAN JUGA BATASAN SISTEM DARI SISTEM BERIKUT
- MASALAH DENGAN PARKIR ASSIST PARKTRONIC
- JIKA NADA PERINGATAN JUGA BERBUNYI, PENYEBABNYA MUNGKIN SEBAGAI BERIKUT
- MENGAKTIFKAN/MENONAKTIFKAN PARKIR ASSIST PARKTRONIC
- MENGATUR NADA PERINGATAN PARKIR ASSIST PARKTRONIC
- MENGATUR NADA PERINGATAN
- MENGAKTIFKAN/MENONAKTIFKAN REDAMAN AUDIO
- PARKIR ASSIST AKTIF
- FUNGSI PARKIR ASSIST AKTIF
- JIKA ADA OBJEK DI ATAS ATAU DI BAWAH JANGKAUAN DETEKSI, SITUASI BERIKUT MUNGKIN TERJADI
- KENDARAAN DENGAN KAMERA MUNDUR
- KENDARAAN DENGAN KAMERA 360°
- PARKIR ASSIST AKTIF AKAN DIBATALKAN DALAM SITUASI BERIKUT
- JANGAN GUNAKAN ACTIVE PARKING ASSIST DALAM SITUASI BERIKUT, MISALNYA
- PARKIR DENGAN ACTIVE PARKING ASSIST
- JIKA ADA OBJEK DI ATAS ATAU DI BAWAH JANGKAUAN DETEKSI, SITUASI BERIKUT DAPAT TERJADI
- KELUAR DARI TEMPAT PARKIR DENGAN ACTIVE PARKING ASSIST
- MENJEDA ACTIVE PARKING ASSIST
- ANDA DAPAT MENGGANGGU PROSEDUR PARKIR ATAU KELUAR PARKIR DARI ACTIVE PARKING ASSIST DENGAN MELAKUKAN SALAH SATU TINDAKAN BERIKUT, CONTOHNYA
- MEMULAI ULANG PROSEDUR PARKIR ATAU KELUAR PARKIR
- FUNGSI PENGEREMAN OTOMATIS DARI ACTIVE PARKING ASSIST
- ASISTEN MANUVER
- FUNGSI DRIVE AWAY ASSIST
- RISIKO TABRAKAN DAPAT TERJADI DALAM SITUASI BERIKUT, CONTOHNYA
- FUNGSI DRIVE AWAY ASSIST AKTIF DALAM KONDISI BERIKUT
- FUNGSI CROSS TRAFFIC ALERT
- FUNGSI CROSS TRAFFIC ALERT AKTIF DALAM KONDISI BERIKUT
- FUNGSI PENGEREMAN JARAK DEKAT
- PENGEREMAN JARAK DEKAT DAPAT BEKERJA DALAM KONDISI BERIKUT
- PERHATIKAN BATASAN SISTEM DARI FUNGSI-FUNGSI BERIKUT
- FUNGSI PENGEREMAN JARAK DEKAT TIDAK TERSEDIA DALAM SITUASI BERIKUT
- MENGAKTIFKAN/MENONAKTIFKAN ASISTEN MANUVER
- ASISTEN MANUVER TRAILER
- FUNGSI ASISTEN MANUVER TRAILER
- MENGGUNAKAN ASISTEN MANUVER TRAILER
- PENARIK TRAILER
- CATATAN TENTANG PENGOPERASIAN TRAILER
- PERHATIKAN CATATAN BERIKUT TENTANG BEBAN LIDAH
- JANGAN MELEBIHI NILAI BERIKUT
- PASTIKAN HAL BERIKUT SEBELUM MEMULAI PERJALANAN
- MENGHUBUNGKAN/MEMUTUSKAN TRAILER
- TRAILER AKAN TERDETEKSI DENGAN BENAR OLEH KENDARAAN HANYA JIKA KONDISI BERIKUT TERPENUHI
- TRAILER YANG TERHUBUNG DENGAN BENAR MEMPENGARUHI FUNGSI SISTEM BERIKUT, CONTOHNYA
- MENGHUBUNGKAN TRAILER
- I TRAILER DENGAN STECKER 7-PIN DAPAT DIHUBUNGKAN KE KENDARAAN DENGAN ADAPTOR BERIKUT
- DALAM KEADAAN BERIKUT, PESAN MUNGKIN MUNCUL DI LAYAR PENGEMUDI, MESKIPUN TRAILER TELAH TERHUBUNG DENGAN BENAR
- MELEPAS TRAILER
- MEMILIH TIPE TRAILER
- MENGATUR PENGATURAN UNTUK TRAILER
- INSTRUKSI PENARIK KENDARAAN
- TAMPILAN PENGEMUDI
- CATATAN TENTANG TAMPILAN PENGEMUDI
- TAMPILAN PENGEMUDI MENAMPILKAN INFORMASI DASAR SEPERTI
- FUNGSI TAMBAHAN YANG TERSEDIA MELIPUTI
- KERUSAKAN TAMPILAN PENGEMUDI
- MENGIDENTIFIKASI KERUSAKAN TAMPILAN PENGEMUDI
- GANGGUAN PADA TAMPILAN PENGEMUDI DAPAT DIIDENTIFIKASI MELALUI KARAKTERISTIK SEPERTI BERIKUT
- YANG HARUS DILAKUKAN JIKA TERJADI GANGGUAN PADA TAMPILAN PENGEMUDI
- MENGOPERASIKAN TAMPILAN PENGEMUDI
- MENU TAMPILAN PENGEMUDI
- CATATAN TENTANG MENU PADA TAMPILAN PENGEMUDI
- MENU BERIKUT DAPAT DIPANGGIL MELALUI BILAH MENU PADA TAMPILAN PENGEMUDI
- MEMANGGIL ATAU MENUTUP SUBMENU OPSI
- MENJELAJAHI ISI TAMPILAN ATAU DAFTAR
- MENGATUR TAMPILAN
- MENGATUR ULANG NILAI
- MENU KLASIK ATAU SEDERHANA
- MEMILIH ISI TAMPILAN TENGAH
- INFORMASI BERIKUT DAPAT DITAMPILKAN DALAM ISI TAMPILAN TENGAH ⑥
- MEMILIH STASIUN RADIO ATAU LAGU PADA DAFTAR STASIUN ATAU LAGU
- HAL-HAL BERIKUT AKAN DISESUAIKAN DALAM SISTEM MULTIMEDIA MBUX
- FUNGSI-FUNGSI BERIKUT MUNGKIN TERSEDIA PADA SUBMENU OPSI, MISALNYA
- MENGUBAH PENGATURAN WARNA PADA MENU YANG SEDERHANA
- MENU LAYANAN
- KONTEN TAMPILAN BERIKUT TERSEDIA DI MENU LAYANAN (TERGANTUNG PERLENGKAPAN)
- FUNGSI-FUNGSI BERIKUT TERSEDIA PADA SUBMENU OPSI
- TAMPILAN BERIKUT DAPAT BERBEDA TERGANTUNG PADA SITUASI BERKENDARA
- TAMPILAN STATUS BERIKUT TERSEDIA PADA TAMPILAN ASISTEN
- KONTEN PADA TAMPILAN ASISTEN AKAN BERADAPTASI DENGAN SITUASI BERIKUT
- MENU OLAHRAGA
- MENU SUPERSPORT
- KONTEN LAYAR TENGAH AKAN MENAMPILKAN HAL BERIKUT
- MENU TRACK PACE
- PILIHAN BERIKUT AKAN DITAMPILKAN PADA MENU TRACK PACE
- KONTEN MENU TRACK PACE AKAN MENYESUAIKAN DIRI DENGAN PENGATURAN YANG DIPILIH PADA LAYAR TENGAH
- MENU OFF-ROAD
- ANTARA LAIN, MENU TERSEBUT BERISI INFORMASI BERIKUT
- MENU NAVIGASI
- ANDA DAPAT MENGGUNAKAN FUNGSI BERIKUT DALAM KATEGORI PENGATURAN PETA
- TAMPILAN PETA BERIKUT TERSEDIA PADA MENU NAVIGASI
- IKHTISAR INDIKATOR STATUS PADA LAYAR PENGEMUDI
- KENDARAAN MERCEDES-AMG
- CATATAN TENTANG KESELAMATAN PENGOPERASIAN
- DEMI KESELAMATAN ANDA, SELALU PERHATIKAN HAL-HAL BERIKUT SAAT MENGOPERASIKAN PERALATAN KOMUNIKASI SELULER DAN TERUTAMA SISTEM KONTROL SUARA ANDA
- SISTEM KONTROL SUARA TIDAK MENGGANTIKAN BUKU PETUNJUK PEMILIK
- PENGOPERASIAN
- FUNGSI ASISTEN SUARA MBUX
- MELAKUKAN DIALOG
- MEMULAI DIALOG
- MENGGANGGU DIALOG
- MENGUBAH TINGKAT DIALOG
- BERNAVIGASI DALAM DAFTAR PILIHAN
- MEMANGGIL BANTUAN
- IKHTISAR FUNGSI YANG DAPAT DIOPERASIKAN DARI ASISTEN SUARA MBUX
- INFORMASI TENTANG PENGATURAN BAHASA
- MENGATUR FUNGSI MBUX VOICE ASSISTANT MENGGUNAKAN SISTEM MULTIMEDIA
- MENGAKTIFKAN ATAU MENONAKTIFKAN AKTIVASI SUARA MBUX VOICE ASSISTANT
- MENGAKTIFKAN ATAU MENONAKTIFKAN PERINTAH LANGSUNG
- MENGAKTIFKAN ATAU MENONAKTIFKAN AKTIVASI SUARA UNTUK KURSI INDIVIDU
- MENGAKTIFKAN ATAU MENONAKTIFKAN PROAKTIVITAS
- MENGAKTIFKAN ATAU MENONAKTIFKAN KONTROL SUARA ONLINE
- MENGAKTIFKAN ATAU MENONAKTIFKAN KONTAK UNTUK PENGGUNAAN ONLINE
- MENGGUNAKAN MBUX VOICE ASSISTANT SECARA EFEKTIF
- CATATAN TENTANG PENGGUNAAN OPTIMAL MBUX VOICE ASSISTANT
- INFORMASI TENTANG ASISTEN SUARA ONLINE MBUX
- KETIKA KONTROL SUARA ONLINE AKTIF, FUNGSI TAMBAHAN TERSEDIA SEPERTI
- PERINTAH SUARA PENTING
- CATATAN TENTANG PERINTAH SUARA
- CONTOH PERINTAH SUARA
- CONTOH PERINTAH SUARA NAVIGASI
- CONTOH PERINTAH SUARA TELEPON
- CONTOH PERINTAH SUARA RADIO DAN TV
- CONTOH PERINTAH SUARA MEDIA
- CONTOH PERINTAH SUARA PESAN
- CONTOH PERINTAH SUARA KENDARAAN
- INFORMASI TENTANG KENDARAAN JUGA DAPAT DIMINTA
- CONTOH FUNGSI ONLINE
- CONTOH PERINTAH LANGSUNG
- SISTEM MULTIMEDIA MBUX
- IKHTISAR DAN PENGOPERASIAN
- IKHTISAR SISTEM MULTIMEDIA MBUX
- FUNGSI SISTEM MULTIMEDIA MBUX ANDA MUNGKIN BERBEDA DAN TERGANTUNG PADA FAKTOR-FAKTOR BERIKUT
- IKHTISAR SISTEM MULTIMEDIA MBUX (KENDARAAN MERCEDES-AMG)
- IKHTISAR LAYAR UTAMA
- FUNGSI-FUNGSI BERIKUT DIPANGGIL DI PUSAT KENDALI
- KONTROL SENTUH
- MENGOPERASIKAN KONTROL SENTUH (SISTEM MULTIMEDIA MBUX)
- MENGATUR SENSITIVITAS KONTROL SENTUH
- MENGATUR UMPAN BALIK AKUSTIK OPERASIONAL UNTUK SEMUA ELEMEN KONTROL
- LAYAR SENTUH
- MENGOPERASIKAN LAYAR SENTUH
- MENYENTUH
- GESER SATU JARI
- GESER DUA JARI
- GESERAN TIGA JARI
- MENYENTUH, MENAHAN, DAN MENGGERAKKAN
- MENYENTUH DAN MENAHAN
- MEMILIH ITEM MENU ATAU ENTRI DENGAN GESERAN SATU JARI
- MENGGERAKKAN PETA DIGITAL
- GUNAKAN FUNGSI-FUNGSI BERIKUT DENGAN GESERAN DUA JARI
- MENGATUR SENSITIVITAS TOUCHPAD
- MENGAKTIFKAN ATAU MENONAKTIFKAN UMPAN BALIK OPERASI HAPTIK UNTUK TOUCHPAD
- MEMILIH STASIUN DAN LAGU MENGGUNAKAN TOUCHPAD
- PROFIL PENGGUNA
- CATATAN TENTANG PROFIL PENGGUNA
- IKHTISAR PROFIL PENGGUNA
- PERSYARATAN PENGGUNAAN
- KONTEN KHUSUS PENGGUNA
- TERGANTUNG PADA PERLENGKAPAN KENDARAAN, ANDA SEBAGAI PENGGUNA DAPAT MENYIMPAN PENGATURAN BERIKUT, MISALNYA
- MENAMBAH PENGGUNA
- MEMILIH OPSI PENGGUNA
- MELINDUNGI KONTEN DAN APLIKASI KHUSUS PENGGUNA
- KONTEN DAN APLIKASI KHUSUS PENGGUNA BERIKUT DILINDUNGI, MISALNYA
- DALAM KASUS BERIKUT, ANDA AKAN DIMINTA UNTUK MELAKUKAN OTENTIKASI ATAU OTENTIKASI ULANG MENGGUNAKAN SENSOR ATAU PIN MERCEDES ME ID
- MENYETEL DAN MENGEDIT PENGENALAN BIOMETRIK
- MENYETEL PENGENALAN SUARA
- MENGHAPUS DATA BIOMETRIK
- MEMANGGIL ASISTEN PENYETELAN
- MENGUBAH NAMA PENGGUNA ATAU FOTO PROFIL
- MENGHAPUS PROFIL PENGGUNA
- MERESET PROFIL PENGGUNA KE PENGATURAN PABRIK
- MEMILIH PENGGUNA
- MENYINKRONKAN PROFIL PENGGUNA
- FAVORIT
- IKHTISAR FAVORIT
- MEMANGGIL FAVORIT
- MENAMBAH FAVORIT
- MEMILIH FAVORIT DARI KATEGORI
- MENAMBAH FAVORIT DARI APLIKASI
- MENGUBAH NAMA FAVORIT
- MEMINDAHKAN FAVORIT
- MENGHAPUS FAVORIT
- MENGATUR ULANG FAVORIT
- PUSAT NOTIFIKASI
- IKHTISAR PUSAT NOTIFIKASI
- KOMUNIKASI BERIKUT DIKUMPULKAN DI PUSAT NOTIFIKASI
- JENIS NOTIFIKASI BERIKUT TERSEDIA UNTUK ANDA
- CONTOH TINDAKAN MELIPUTI
- MEMANGGIL NOTIFIKASI
- MEMBUKA PUSAT NOTIFIKASI
- MEMILIH NOTIFIKASI
- MENUTUP PUSAT NOTIFIKASI
- MEMILIH TINDAKAN UNTUK NOTIFIKASI. OPSI BERIKUT TERSEDIA
- MENGEDIT NOTIFIKASI
- MENGONFIGURASI PENGATURAN
- OPSI BERIKUT TERSEDIA TERGANTUNG PADA LAYANAN
- MENYEMAT NOTIFIKASI
- MENGHAPUS NOTIFIKASI
- PENCARIAN GLOBAL
- IKHTISAR PENCARIAN GLOBAL
- PENCARIAN GLOBAL MENYEDIAKAN HASIL PENCARIAN UNTUK KATEGORI BERIKUT
- MENGGUNAKAN PENCARIAN GLOBAL
- MEMASUKKAN KARAKTER
- MENGGUNAKAN FUNGSI INPUT KARAKTER
- MEMASUKKAN KARAKTER PADA LAYAR SENTUH
- MEMASUKKAN KARAKTER ALTERNATIF
- MENGAKHIRI INPUT KARAKTER
- MENGATUR KEYBOARD UNTUK MEMASUKKAN KARAKTER
- MENGATUR BAHASA KEYBOARD
- MENGHAPUS KAMUS PENGGUNA
- PENGATURAN SISTEM
- TAMPILAN
- MENGONFIGURASI PENGATURAN TAMPILAN
- WAKTU DAN TANGGAL
- MENGATUR ZONA WAKTU
- MENGATUR FORMAT WAKTU DAN TANGGAL
- MENGATUR WAKTU DAN TANGGAL SECARA MANUAL
- MENGATUR WAKTU
- MENGATUR TANGGAL
- MENYESUAIKAN WAKTU
- POSISI KENDARAAN
- MENGAKTIFKAN/MENONAKTIFKAN TRANSMISI POSISI KENDARAAN
- MENGATUR IZIN
- BLUETOOTH®
- INFORMASI TENTANG BLUETOOTH
- ANDA DAPAT MENGGUNAKAN BLUETOOTH® UNTUK MENGHUBUNGKAN PONSEL ANDA KE SISTEM MULTIMEDIA DAN MENGGUNAKAN FUNGSI-FUNGSI BERIKUT, MISALNYA
- MENGAKTIFKAN/MENONAKTIFKAN BLUETOOTH®
- NEAR FIELD COMMUNICATION (NFC)
- INFORMASI TENTANG NEAR FIELD COMMUNICATION (NFC)
- MENGAKTIFKAN ATAU MENONAKTIFKAN NEAR-FIELD COMMUNICATION
- WI-FI
- IKHTISAR KONEKSI WI-FI
- SECARA UMUM, TERSEDIA DUA JENIS KONEKSI WI-FI
- MENGAKTIFKAN ATAU MENONAKTIFKAN WI-FI
- MENGGUNAKAN SISTEM MULTIMEDIA SEBAGAI HOTSPOT WI-FI
- MENGHUBUNGKAN MENGGUNAKAN KODE QR
- MENGHUBUNGKAN MENGGUNAKAN NFC
- MENGHUBUNGKAN MENGGUNAKAN KUNCI KEAMANAN
- MEMBUAT KUNCI KEAMANAN BARU
- BAHASA SISTEM
- CATATAN TENTANG BAHASA SISTEM
- MENGATUR BAHASA
- MENGATUR BAHASA SISTEM
- MENGATUR SATUAN JARAK
- MENGAKTIFKAN/MENONAKTIFKAN PROTEKSI PIN SISTEM
- MENGATUR PIN SISTEM
- MENGUBAH PIN SISTEM
- MENGAKTIFKAN PROTEKSI PIN SISTEM UNTUK PEMBARUAN PERANGKAT LUNAK
- MENGONFIGURASI SARAN
- NAVIGASI
- PANGGILAN & PESAN
- KENYAMANAN
- HIBURAN
- KENDARAAN
- LAYANAN SUARA DARING
- MENGHAPUS SARAN YANG TERKUMPUL
- PEMBARUAN PERANGKAT LUNAK
- INFORMASI TENTANG PEMBARUAN PERANGKAT LUNAK
- MELAKUKAN PEMBARUAN PERANGKAT LUNAK
- UNTUK PEMBARUAN PERANGKAT LUNAK MELALUI MODUL KOMUNIKASI DAN WI-FI
- MEMULAI PEMBARUAN PETA DARI MEDIA PENYIMPANAN EKSTERNAL
- MEMULAI PEMBARUAN PERANGKAT LUNAK MELALUI MODUL KOMUNIKASI
- MEMULAI PEMBARUAN PERANGKAT LUNAK MELALUI WI-FI
- MEMASANG PEMBARUAN PERANGKAT LUNAK
- KETERSEDIAAN LAYAR PENGEMUDI DAN LAYAR MEDIA
- KEGAGALAN LAYAR PENGEMUDI
- KEGAGALAN LAYAR MEDIA
- MENGATUR ULANG SISTEM MULTIMEDIA (FUNGSI RESET)
- SAAT MENGATUR ULANG SISTEM, DATA PRIBADI DAN PENGATURAN AKAN DIHAPUS, CONTOHNYA
- IKHTISAR MENU OFF-ROAD PADA SISTEM MULTIMEDIA MBUX
- MENU OFF-ROAD MENAMPILKAN INFORMASI TENTANG TOPIK-TOPIK BERIKUT
- CONTOH DATA YANG DITAMPILKAN
- RUTE
- JELAJAHI
- MENGATUR MENU OFF-ROAD PADA SISTEM MULTIMEDIA
- MENGATUR TAMPILAN PADA LAYAR TENGAH
- AKSES CEPAT: MENGAKTIFKAN ATAU MENONAKTIFKAN PARKTRONIC (BANTUAN PARKIR)
- AKSES CEPAT: MENGAKTIFKAN ATAU MENONAKTIFKAN DSR (PENGATUR KECEPATAN SAAT MENURUN)
- AKSES CEPAT: MENGATUR KETINGGIAN KENDARAAN
- AKSES CEPAT: MENGHIDUPKAN ATAU MEMATIKAN KAMERA OFF-ROAD
- MENGGUNAKAN TREK OFF-ROAD
- MEMBUAT TREK BARU SENDIRI
- MEMANGGIL LAGU LOKAL ATAU LAGU YANG DIUNDUH
- MENGEDIT/MENGHAPUS RUTE
- MENJALANKAN OFFROAD EXPLORE
- MEMANGGIL DAN MENGUNDUH RUTE
- FIT & HEALTHY
- MENGATUR SEAT KINETICS ENERGIZING
- SISTEM MULTIMEDIA
- MEMULAI SEAT KINETICS
- MENGONFIGURASI SEAT KINETICS
- ENERGIZING COMFORT
- IKHTISAR PROGRAM ENERGIZING COMFORT
- IKHTISAR PROGRAM
- MEMULAI PROGRAM ENERGIZING COMFORT
- UNTUK MULAI POWER NAP
- MEMULAI DAN MENGHENTIKAN PROGRAM
- MENGONFIGURASI PROGRAM
- MENGATUR DURASI
- MEMULAI POWER NAP
- SAAT KENDARAAN DIAM, TINDAKAN BERIKUT DILAKUKAN SAAT POWER NAP DIMULAI
- MEMULAI PROGRAM LATIHAN
- TIPS MEMULAI
- ENERGIZING COACH
- FUNGSI ENERGIZING COACH
- PROGRAM BERIKUT MUNGKIN DISARANKAN
- PERSYARATAN UNTUK INTEGRASI INFORMASI TAMBAHAN MELALUI PELACAK KEBUGARAN GARMIN
- PERSYARATAN INTEGRASI DATA TIDUR
- MEMANGGIL TAMPILAN COACH ENERGI
- NAVIGASI DAN LALU LINTAS
- MENGAKTIFKAN NAVIGASI
- IKHTISAR NAVIGASI
- MENEKAN Ⓞ BEBERAPA KALI MENGUBAH ORIENTASI PETA DALAM URUTAN INI
- JENIS PETA BERIKUT ② TERSEDIA
- MEMASUKKAN TUJUAN
- CATATAN TENTANG MEMASUKKAN TUJUAN
- MEMILIH SARAN TUJUAN
- MEMILIH DESTINASI SEBELUMNYA
- MEMILIH POI
- MENGATUR FILTER PENCARIAN SETELAH MEMILIH KATEGORI POI
- POSISI PENCARIAN DEFAULT TERGANTUNG PADA STATUS PANDUAN RUTE
- MENGONFIGURASI KATEGORI UNTUK AKSES CEPAT
- KATEGORI DITAMPILKAN
- MENGUBAH URUTAN KATEGORI AKSES CEPAT
- MENGHAPUS KATEGORI AKSES CEPAT
- MENGUBAH KATEGORI UNTUK POI PRIBADI
- MEMILIH KONTAK UNTUK MEMASUKKAN DESTINASI
- MEMASUKKAN KOORDINAT GEO
- CONTOH FORMAT INPUT
- MEMILIH TUJUAN DI PETA
- MEMILIH TUJUAN DARI FAVORIT
- ALAMAT RUMAH DAN KANTOR SUDAH DIATUR
- ALAMAT RUMAH DAN KANTOR BELUM DIATUR
- MEMILIH TUJUAN YANG DITERIMA
- MENGHAPUS TUJUAN YANG DITERIMA
- MENGHITUNG RUTE
- MEMANGGIL RUTE ALTERNATIF
- MEMULAI PANDUAN RUTE
- MEMANGGIL TAMPILAN RINCI DENGAN ALAMAT TUJUAN
- MENCARI POI DI SEKITAR TUJUAN YANG DITAMPILKAN
- MENAMBAHKAN TUJUAN ANTARA PADA RUTE YANG ADA ATAU MEMULAI PANDUAN RUTE BARU
- JIKA ANDA MEMANGGIL MENU SELAMA PANDUAN RUTE, LEBIH BANYAK PILIHAN YANG TERSEDIA
- MENGAKTIFKAN ATAU MENONAKTIFKAN ZONA EMISI RENDAH UNTUK RUTE
- I FUNGSI PEMBATASAN LALU LINTAS DINONAKTIFKAN
- MEMILIH JENIS RUTE
- MENGGUNAKAN RUTE ONLINE
- MEMPERHITUNGKAN INFORMASI LALU LINTAS UNTUK RUTE
- PENJELASAN PILIHAN
- MENGHITUNG RUTE ALTERNATIF
- MENERIMA REKOMENDASI JALAN MEMUTAR SETELAH PERMINTAAN
- MEMILIH OPSI RUTE
- MENGHINDARI ATAU MENGGUNAKAN BAGIAN RUTE, MIS. JALAN TOL ATAU FERI
- MENGHINDARI ATAU MENGGUNAKAN JALAN BERBAYAR
- MENGHINDARI ATAU MENGGUNAKAN JALAN YANG MEMERLUKAN STIKER TOLL KHUSUS
- MENGHINDARI ATAU MENGGUNAKAN AREA DENGAN PERSYARATAN ZONA EMISI RENDAH
- MENGHINDARI AREA
- MEMILIH NOTIFIKASI UNTUK RUTE
- MENGAKTIFKAN ATAU MENONAKTIFKAN PENGUMUMAN NAVIGASI
- MENGAKTIFKAN ATAU MENONAKTIFKAN PENGUMUMAN LALU LINTAS
- INDIKASI AUDIBLE SAAT MENDEKATI POI PRIBADI
- MENAMPILKAN RINGKASAN RUTE
- TERGANTUNG PADA RUTE, SITUASI LALU LINTAS, DAN DATA YANG TERSEDIA, INFORMASI LEBIH LANJUT DITAMPILKAN
- MERENCANAKAN RUTE
- MENGEDIT RUTE DENGAN TUJUAN ANTARA
- MENGUBAH URUTAN TUJUAN
- MENGHAPUS TUJUAN
- MENAMPILKAN DAFTAR RUTE
- MEMILIH RUTE ALTERNATIF
- INFORMASI RUTE BERIKUT DITAMPILKAN
- MENGUBAH JENIS RUTE
- MENGHINDARI ATAU MENGGUNAKAN OPSI RUTE
- MENGAKTIFKAN RUTE KOMUTER
- MEMULAI PENCARIAN SPBU OTOMATIS
- SITUASI BERKENDARA
- MEMULAI DAN MENGEDIT RUTE TERSIMPAN
- MEMULAI RUTE TERSIMPAN
- MENGUBAH NAMA RUTE
- MEREKAM DAN MENYIMPAN RUTE
- MEMULAI PEREKAMAN
- MENGHENTIKAN PEREKAMAN
- PANDUAN RUTE
- CATATAN TENTANG PANDUAN RUTE
- TAMPILAN DAN FUNGSI BERIKUT JUGA TERSEDIA DI JENDELA NAVIGASI, MISALNYA
- CATATAN TENTANG PENERIMAAN SATELIT
- IKHTISAR PERUBAHAN ARAH
- PERUBAHAN ARAH DITAMPILKAN PADA TAMPILAN BERIKUT
- ADA TIGA FASE SAAT BERUBAH ARAH
- IKHTISAR REKOMENDASI JALUR
- PENJELASAN JALUR YANG DITAMPILKAN
- MENGGUNAKAN INFORMASI JALAN TOL
- TUJUAN TERCAPAI
- MENGAKTIFKAN ATAU MENONAKTIFKAN PENGUMUMAN NAVIGASI SELAMA PANGGILAN TELEPON
- MENYESUAIKAN VOLUME PENGUMUMAN NAVIGASI
- PANDUAN RUTE AKTIF
- MENGAKTIFKAN ATAU MENONAKTIFKAN PEMADAMAN AUDIO SELAMA PENGUMUMAN NAVIGASI
- MENGULANG PENGUMUMAN NAVIGASI
- MEMBATALKAN PANDUAN RUTE
- TINJAUAN STATUS DI LUAR JALAN SELAMA PANDUAN RUTE
- TUJUAN
- MENYIMPAN POSISI KENDARAAN SAAT INI
- MENGELOLA TUJUAN SEBELUMNYA
- MENYIMPAN TUJUAN TERAKHIR SEBAGAI FAVORIT
- MENGHAPUS TUJUAN SEBELUMNYA
- MENGEDIT SARAN TUJUAN
- PANDUAN RUTE DENGAN LAPORAN LALU LINTAS TERKINI
- TINJAUAN INFORMASI LALU LINTAS
- JIKA ANDA TIDAK INGIN MENGIRIMKAN POSISI KENDARAAN, ANDA MEMILIKI OPSI BERIKUT
- MENAMPILKAN INFORMASI DARI PENYEDIA LAYANAN UNTUK INFORMASI LALU LINTAS LANGSUNG
- MENDAFTARKAN INFORMASI LALU LINTAS LANGSUNG
- MEMPERPANJANG LANGGANAN INFORMASI LALU LINTAS LANGSUNG
- MENAMPILKAN INFORMASI LALU LINTAS DI PETA
- PETA MENAMPILKAN INFORMASI LALU LINTAS BERIKUT TERGANTUNG PADA PENGATURAN YANG DIAKTIFKAN
- MENAMPILKAN INSIDEN LALU LINTAS DI RUTE
- JIKA ADA KETERLAMBATAN DI SEPANJANG RUTE, INI DITAMPILKAN DI TAMPILAN RUTE BERSAMA DENGAN INFORMASI BERIKUT
- SELAMA PANDUAN RUTE AKTIF, TOTAL KETERLAMBATAN DI RUTE JUGA DITAMPILKAN DI SINI
- MEMANGGIL INFORMASI RINCI DI PETA
- MENAMPILKAN INSIDEN LALU LINTAS DI PETA
- MENGAKTIFKAN TAMPILAN INFORMASI LALU LINTAS
- KOMUNIKASI CAR-TO-X
- IKHTISAR KOMUNIKASI CAR-TO-X
- PERSYARATAN BERIKUT BERLAKU UNTUK KOMUNIKASI CAR-TO-X DIGITAL EKSTRA
- MANFAAT KOMUNIKASI CAR-TO-X
- MENAMPILKAN PERINGATAN BAHAYA
- BAHAYA BERIKUT DAPAT DITAMPILKAN DI PETA
- MENGIRIM PERINGATAN BAHAYA
- MELAPORKAN BAHAYA SECARA MANUAL
- PANDUAN RUTE DENGAN REALITAS TERTAMBAH
- IKHTISAR PANDUAN RUTE DENGAN REALITAS TERTAMBAH
- MENGAKTIFKAN PANDUAN RUTE DENGAN REALITAS TERTAMBAH
- MENAMPILKAN INFORMASI PROPERTI UNTUK PANDUAN RUTE DENGAN REALITAS TERTAMBAH
- PETA
- MENGATUR SKALA PETA
- MEMPERBESAR TAMPILAN
- MEMPERKECIL TAMPILAN
- MENGGERAKKAN PETA
- FUNGSI-FUNGSI BERIKUT TERSEDIA
- MENGAKTIFKAN ATAU MENONAKTIFKAN TAMPILAN RINGKASAN RUTE SETELAH MULAI
- MEMILIH SIMBOL POI UNTUK TAMPILAN PETA
- MENGAKTIFKAN ATAU MENONAKTIFKAN TAMPILAN KATEGORI UNTUK AKSES CEPAT
- MEMILIH KATEGORI
- MEMILIH KATEGORI POI PRIBADI
- MENGATUR ULANG TAMPILAN SIMBOL POI
- MEMILIH TAMPILAN INFORMASI TAMBAHAN DI PETA
- PILIHAN-PILIHAN BERIKUT TERSEDIA
- MENAMPILKAN VERSI PETA
- RINGKASAN PENGHINDARAN AREA DI RUTE
- MENGHINDARI AREA BARU UNTUK RUTE
- MEMULAI PENGGUNAAN PETA
- MEMULAI PENGGUNAAN PENCARIAN TUJUAN
- MENGUBAH AREA YANG HARUS DIHINDARI
- MENGUBAH UKURAN AREA
- MEMPERHITUNGKAN AREA UNTUK RUTE
- RUTE DAPAT MENCANTUMKAN AREA YANG HARUS DIHINDARI DALAM KASUS BERIKUT
- MENGHAPUS AREA YANG HARUS DIHINDARI
- MENGHAPUS SEMUA AREA YANG HARUS DIHINDARI
- IKHTISAR PEMBARUAN DATA PETA
- IKHTISAR DATA PETA
- JIKA TERJADI MASALAH BERIKUT, HUBUNGI PUSAT LAYANAN MERCEDES-BENZ
- MENAMPILKAN KOMPAS
- TAMPILAN KOMPAS MENUNJUKKAN INFORMASI BERIKUT
- MENAMPILKAN KIBLAT
- MENGATUR SKALA PETA SECARA OTOMATIS
- MENAMPILKAN PETA SATELIT
- MENAMPILKAN JANGKAUAN
- JANGKAUAN DITAMPILKAN PADA PETA DENGAN TAMPILAN BERIKUT
- MENAMPILKAN KONTEN PETA ONLINE
- LAYANAN PARKIR
- CATATAN TENTANG LAYANAN PARKIR
- MENAMPILKAN OPSI PARKIR DI PETA
- MEMILIH OPSI PARKIR
- INFORMASI BERIKUT DITAMPILKAN (JIKA TERSEDIA)
- FUNGSI BERIKUT DAPAT DIGUNAKAN (JIKA TERSEDIA)
- PEMESANAN AWAL TEMPAT PARKIR
- MENGGUNAKAN ATAU MEMBATALKAN PEMESANAN
- MEMBAYAR BIAYA PARKIR
- MEMULAI PROSEDUR PEMBAYARAN
- MENGAKHIRI TRANSAKSI PARKIR
- DASHCAM
- CATATAN TENTANG DASHCAM
- SAYA MENGIKUTI PETUNJUK BERIKUT UNTUK PENGOPERASIAN YANG AMAN
- FUNGSI-FUNGSI BERIKUT TERSEDIA DI APLIKASI GALERI
- MEMILIH PERANGKAT USB UNTUK REKAMAN VIDEO DENGAN DASHCAM
- MEMULAI ATAU MENGHENTIKAN REKAMAN LOOP DENGAN DASHCAM
- PESAN MUNGKIN MUNCUL DALAM KASUS BERIKUT
- MEMULAI ATAU MENGHENTIKAN REKAMAN INDIVIDU DENGAN DASHCAM
- MENGONFIGURASI PENGATURAN DASHCAM
- MENERIMA NOTIFIKASI SETELAH MELEWATI PERBATASAN
- MEMULAI REKAMAN VIDEO OTOMATIS
- TELEPON
- CATATAN TENTANG TELEPON
- PERHATIKAN INFORMASI TAMBAHAN TENTANG CARA MENYIMPAN PERANGKAT KOMUNIKASI SELULER DENGAN BENAR
- IKHTISAR MODE OPERASI TELEPON
- TERGANTUNG PADA PERALATAN ANDA, MODE OPERASI TELEPON BERIKUT TERSEDIA
- INFORMASI TENTANG TELEPON
- SITUASI BERIKUT DAPAT MENYEBABKAN PANGGILAN TERPUTUS SAAT KENDARAAN BERGERAK
- MENGIZINKAN TELEPON GENGGAM
- MENGHUBUNGKAN TELEPON GENGGAM KEDUA (MODE DUA TELEPON)
- MEMERTUKARKAN TELEPON GENGGAM (MODE DUA TELEPON)
- MENGGANTI FUNGSI TELEPON GENGGAM
- MENGAKTIFKAN FUNGSI
- MENONAKTIFKAN FUNGSI
- MENGGANTI TELEPON GENGGAM
- TIDAK ADA TELEPON GENGGAM TEROTORISASI TERSEDIA
- PENGGUNAAN DALAM MODE TELEPON TUNGGAL
- PENGGUNAAN DALAM MODE DUA TELEPON
- MEMUTUSKAN ATAU MENGHAPUS TELEPON GENGGAM
- MEMUTUSKAN TELEPON GENGGAM
- MENGHAPUS TELEPON GENGGAM
- MENGGUNAKAN TELEPON GENGGAM DENGAN KOMUNIKASI MEDAN DEKAT (NFC)
- MENGGANTI PONSEL
- MENGATUR VOLUME PENERIMAAN DAN TRANSMISI
- MENGATUR NADA DERING
- MEMULAI ATAU MENGHENTIKAN PENGENALAN SUARA PONSEL
- MEMULAI PENGENALAN SUARA PONSEL
- MENGHENTIKAN PENGENALAN SUARA PONSEL
- CATATAN TENTANG SARAN KONTAK
- MEMILIH OPSI UNTUK SARAN KONTAK
- PANGGILAN
- OPERASI TELEPON
- MELAKUKAN PANGGILAN DENGAN MEMASUKKAN NOMOR
- MENERIMA PANGGILAN
- MENOLAK PANGGILAN
- MENJAWAB PANGGILAN DENGAN PESAN
- MENGAKHIRI PANGGILAN
- MENEMPATKAN PANGGILAN KE DAFTAR TUGAS KANTOR DALAM MOBIL
- MENGAKTIFKAN FUNGSI SELAMA PANGGILAN
- FUNGSI BERIKUT TERSEDIA SELAMA PANGGILAN
- MELAKUKAN PANGGILAN DENGAN BEBERAPA PESERTA
- BERALIH ANTAR PANGGILAN
- MENGAKTIFKAN PANGGILAN YANG DITAHAN
- MELAKUKAN PANGGILAN KONFERENSI
- MENGAKHIRI PANGGILAN AKTIF
- MENERIMA ATAU MENOLAK PANGGILAN YANG MENUNGGU
- MENGGUNAKAN KODE PANGGILAN INTERNASIONAL
- KONTAK
- INFORMASI TENTANG MENU KONTAK
- TERGANTUNG PADA SUMBER DATA, MUNGKIN UNTUK MENYIMPAN/MEMUAT JUMLAH KONTAK BERIKUT
- DARI MENU KONTAK, ANDA DAPAT MELAKUKAN TINDAKAN BERIKUT
- MENGUNDUH KONTAK FAVORIT PONSEL
- MEMANGGIL KONTAK
- PILIHAN BERIKUT DAPAT DIGUNAKAN UNTUK MENCARI KONTAK
- SUATU KONTAK DAPAT BERISI RINCIAN BERIKUT
- MENGELOLA FORMAT NAMA KONTAK
- IKHTISAR IMPOR KONTAK
- MENGIMPOR KONTAK KE MENU KONTAK
- PERSYARATAN SUMBER
- MENYIMPAN KONTAK PONSEL
- MEMILIH OPSI TAMBAHAN DI MENU KONTAK
- MENGHAPUS KONTAK
- MENGHAPUS SEMUA KONTAK
- MENGHAPUS SATU KONTAK
- DAFTAR PANGGILAN
- IKHTISAR DAFTAR PANGGILAN
- JIKA PROFIL PBAP BLUETOOTH* DIDUKUNG, EFEKNYA ADALAH SEBAGAI BERIKUT
- JIKA PROFIL PBAP BLUETOOTH® TIDAK DIDUKUNG, EFEKNYA ADALAH SEBAGAI BERIKUT
- MELAKUKAN PANGGILAN DARI DAFTAR PANGGILAN
- MEMILIH OPSI TAMBAHAN DI DAFTAR PANGGILAN
- MENGHAPUS DAFTAR PANGGILAN
- PESAN TEKS
- IKHTISAR FUNGSI PESAN
- MENGATUR TAMPILAN PESAN
- MEMBACA PESAN
- MENGGUNAKAN FUNGSI BACA DENGAN SUARA
- MEMBUAT DAN MENGIRIM PESAN BARU
- MENDIKTEKAN TEKS
- MEMBALAS PESAN DALAM RIWAYAT PESAN
- MENERUSKAN PESAN
- MENGHUBUNGI PENGIRIM PESAN
- MENGGUNAKAN NOMOR TELEPON, URL, ATAU ALAMAT EMAIL DARI PESAN TEKS
- JIKA NOMOR TELEPON DIPILIH, OPSI BERIKUT TERSEDIA
- MENGHAPUS PESAN
- KANTOR DALAM MOBIL
- FUNGSI IN-CAR OFFICE
- MEMANGGIL IN-CAR OFFICE
- MENGHUBUNGKAN AKUN PENGGUNA
- MEMILIH FUNGSI KALENDER DI IN-CAR OFFICE
- CONTOH-CONTOHNYA ADALAH
- MEMILIH FUNGSI TUGAS & PANGGILAN DI "IN-CAR OFFICE
- MENANDAI ENTRI SEBAGAI SELESAI DI TUGAS & PANGGILAN
- MEMBACA DAN MENGELOLA E-MAIL
- FUNGSI TAMBAHAN TERSEDIA
- MEMBUAT E-MAIL BARU
- MENJAWAB EMAIL
- MENERUSKAN EMAIL
- MENGGUNAKAN KANTOR DALAM MOBIL DENGAN ASISTEN SUARA MBUX DAN FUNGSI DIKTE
- MENGGUNAKAN KANTOR DALAM MOBIL DENGAN FUNGSI DIKTE
- MENGGUNAKAN KANTOR DALAM MOBIL DENGAN ASISTEN SUARA MBUX
- APPLE CARPLAY®
- IKHTISAR APPLE CARPLAY
- INFORMASI TENTANG APPLE CARPLAY®
- MENGHUBUNGKAN IPHONE* MELALUI APPLE CARPLAY* (BERKABEL)
- KELUAR DARI APPLE CARPLAY ®
- MENGHUBUNGKAN IPHONE* MELALUI APPLE CARPLAY* (NIRKABEL)
- KELUAR DARI APPLE CARPLAY 1
- MEMANGGIL PENGATURAN SUARA APPLE CARPLAY®
- MENGAKHIRI APPLE CARPLAY
- ANDROID AUTO
- TINJAUAN ANDROID AUTO
- INFORMASI TENTANG ANDROID AUTO
- MENGHUBUNGKAN PONSEL MELALUI ANDROID AUTO (BERKABEL)
- KELUAR DARI ANDROID AUTO
- MENGHUBUNGKAN PONSEL MELALUI ANDROID AUTO (NIRKABEL)
- MEMANGGIL PENGATURAN SUARA ANDROID AUTO
- MENGAKHIRI ANDROID AUTO
- DATA KENDARAAN YANG DITRANSFER DENGAN ANDROID AUTO DAN APPLE CARPLAY®
- IKHTISAR DATA KENDARAAN YANG DITRANSFER
- INFORMASI SISTEM BERIKUT INI DITRANSMISIKAN
- DATA STATUS BERKENDARA BERIKUT INI DITRANSMISIKAN
- DATA POSISI BERIKUT INI DITRANSMISIKAN
- PANGGILAN DUKUNGAN MERCEDES-BENZ
- MELAKUKAN PANGGILAN MELALUI PANEL KONTROL ATAS
- MELAKUKAN PANGGILAN MERCEDES-BENZ CONNECT
- MELAKUKAN PANGGILAN DARURAT
- INFORMASI TENTANG PANGGILAN DUKUNGAN MERCEDES-BENZ MELALUI TOMBOL ME
- DENGAN MENGGUNAKAN SISTEM DIALOG SUARA, ANDA MENGAKSES LAYANAN YANG DIINGINKAN
- ANDA DAPAT MENEMUKAN INFORMASI TENTANG TOPIK BERIKUT
- MEMANGGIL DUKUNGAN MERCEDES-BENZ MENGGUNAKAN SISTEM MULTIMEDIA
- PILIHAN BERIKUT MUNGKIN TERSEDIA
- MENGHUBUNGI DUKUNGAN MERCEDES-BENZ SETELAH DETEKSI KECELAKAAN/KERUSAKAN OTOMATIS
- KERUSAKAN
- PROSEDUR DETEKSI KECELAKAAN/KERUSAKAN
- MENGATUR JANJI TEMU SERVIS MELALUI PANGGILAN DUKUNGAN MERCEDES-BENZ
- MENYETUJUI TRANSFER DATA UNTUK PANGGILAN DUKUNGAN MERCEDES-BENZ PERSYARATAN
- DATA YANG DIKIRIMKAN SELAMA PANGGILAN DUKUNGAN MERCEDES-BENZ
- PERSYARATAN BERIKUT HARUS DIPENUHI UNTUK TRANSFER DATA
- TRANSFER BERTAHAP TERGANTUNG PADA FAKTOR-FAKTOR BERIKUT
- TRANSMISI DATA SAAT EKSTRA DIGITAL TIDAK DIAKTIFKAN JIKA EKSTRA DIGITAL TIDAK DIAKTIFKAN DAN PERMINTAAN PERLINDUNGAN DATA TELAH DIKONFIRMASI, DATA BERIKUT DIKIRIMKAN
- JIKA PANGGILAN DILAKUKAN UNTUK JANJI TEMU SERVIS MELALUI PENGINGAT SERVIS, DATA BERIKUT JUGA DIKIRIMKAN
- JIKA PANGGILAN DILAKUKAN SETELAH DETEKSI KECELAKAAN ATAU KERUSAKAN OTOMATIS MENGGUNAKAN SISTEM MULTIMEDIA, DATA BERIKUT JUGA DIKIRIMKAN
- JIKA PILIHAN MANAJEMEN KECELAKAAN DAN KERUSAKAN TELAH DIBUAT MELALUI SISTEM DIALOG SUARA DAN TIDAK ADA EKSTRA DIGITAL YANG DIAKTIFKAN, TETAPI PERMINTAAN PERLINDUNGAN DATA TELAH DIKONFIRMASI, DATA BERIKUT DAPAT DIMINTA TAMBAHAN DARI KENDARAAN OLEH DUKUNGAN MERCEDES-BENZ
- JIKA PERMINTAAN PERLINDUNGAN DATA TELAH DITOLAK, DATA BERIKUT DIKIRIMKAN UNTUK MEMUNGKINKAN SARAN YANG TERTARGET DAN LAYANAN YANG EFISIEN
- TRANSMISI DATA SAAT EKSTRA DIGITAL DIAKTIFKAN
- PEMROSESAN DATA
- MERCEDES-BENZ CONNECT
- INFORMASI TENTANG MERCEDES-BENZ CONNECT
- ANDA DAPAT MENGGUNAKAN EKSTRA DIGITAL BERIKUT MELALUI SISTEM MULTIMEDIA DAN PANEL KONTROL ATAS, MISALNYA
- EKSTRA DIGITAL MANAJEMEN KECELAKAAN DAN BREAKDOWN
- MANAJEMEN KECELAKAAN DAN BREAKDOWN DAPAT MENCAKUP FUNGSI-FUNGSI BERIKUT
- DATA YANG DIKIRIM DENGAN MERCEDES-BENZ CONNECT
- DATA YANG DITRANSFER SELAMA PANGGILAN DUKUNGAN MERCEDES-BENZ TERGANTUNG PADA
- MB APPS (EKSTRA DIGITAL)
- INFORMASI TENTANG MB APPS DAN EKSTRA DIGITAL
- MENGAKSES AKUN PENGGUNA MERCEDES ME ID
- ANDA MEMILIKI MERCEDES ME ID DAN KENDARAAN TERKAIT DENGAN MERCEDES ME ID
- ANDA BELUM MEMILIKI MERCEDES ME ID DAN KENDARAAN BELUM TERKAIT DENGAN MERCEDES ME ID
- MENGAKSES EKSTRA DIGITAL
- MEMESAN ATAU MEMPERBARUI EKSTRA DIGITAL
- MENGHAPUS TAUTAN ANTARA ID MERCEDES ME ANDA DAN KENDARAAN
- MEMILIH APLIKASI
- APLIKASI BERIKUT TERSAJIA, MISALNYA
- FUNGSI BERIKUT TERSAJIA UNTUK APLIKASI, MISALNYA
- MENGGUNAKAN APLIKASI GALERI
- MENYARING TAMPILAN
- MEMUTAR REKAMAN VIDEO
- MENGGULIR DAN MEMPERBESAR GAMBAR
- MENAMBAH ATAU MENGHAPUS BERKAS DARI FAVORIT
- MENGAKTIFKAN ATAU MENONAKTIFKAN PERLINDUNGAN TULIS
- MENGHAPUS BERKAS
- SISTEM PANGGILAN DARURAT
- INFORMASI TENTANG SISTEM PANGGILAN DARURAT YANG TERSEDIA
- DUA JENIS SISTEM PANGGILAN DARURAT TERSEDIA UNTUK ANDA DI DALAM KENDARAAN
- BERIKUT INI BERLAKU UNTUK KEDUA SISTEM PANGGILAN DARURAT
- PERBEDAAN ANTARA SISTEM PANGGILAN DARURAT MERCEDES-BENZ DAN SISTEM PANGGILAN DARURAT 112 (EU ECALL)
- SISTEM PANGGILAN DARURAT MERCEDES-BENZ SISTEM PANGGILAN DARURAT 112 (EU ECALL)
- MERCEDES-BENZ MEREKOMENDASIKAN AKTIVASI SISTEM PANGGILAN DARURAT MERCEDES-BENZ DENGAN ALASAN BERIKUT
- PESAN BERIKUT MUNCUL DI LAYAR TENGAH ATAU LAYAR MEDIA DARI KEDUA SISTEM PANGGILAN DARURAT
- ANDA DAPAT MENGENALI KERUSAKAN PADA SISTEM PANGGILAN DARURAT DENGAN TAMPILAN BERIKUT
- MEMICU PANGGILAN DARURAT OTOMATIS
- PANGGILAN DARURAT DIPICU SECARA OTOMATIS
- PANGGILAN DARURAT TELAH DILAKUKAN
- JIKA PANGGILAN DARURAT TELAH DIMULAI
- MEMICU PANGGILAN DARURAT MANUAL
- TRANSFER DATA SISTEM PANGGILAN DARURAT
- DATA YANG DIKIRIMKAN SESUAI DENGAN SISTEM PANGGILAN DARURAT YANG DIAKTIFKAN
- PANGGILAN DARURAT MERCEDES-BENZ 112 PANGGILAN DARURAT
- UNTUK KEPERLUAN KLARIFIKASI KECELAKAAN, LANGKAH-LANGKAH BERIKUT DAPAT DIAMBIL HINGGA SATU JAM SETELAH PANGGILAN DARURAT DIMULAI
- FUNGSI DIAGNOSIS MANDIRI SISTEM PANGGILAN DARURAT
- MEMULAI/MENGAKHIRI MODE UJI ERA-GLONASS
- MODE UJI SAAT INI TERSEDIA DI NEGARA-NEGARA BERIKUT, MISALNYA
- INFORMASI TENTANG PEMROSESAN DATA
- PEMROSESAN DATA PRIBADI MELALUI SISTEM PANGGILAN DARURAT MERCEDES-BENZ
- PEMROSESAN DATA PRIBADI MELALUI SISTEM PANGGILAN DARURAT 112 (EU ECALL)
- PENERIMA DATA
- PENGATURAN UNTUK PEMROSESAN DATA
- KEDUA SISTEM PANGGILAN DARURAT DIRANCANG SEHINGGA PERSYARATAN BERIKUT TERPENUHI
- HAK-HAK ORANG YANG TERPENGARUH OLEH PEMROSESAN DATA
- FUNGSI DARING DAN INTERNET
- KONEKSI INTERNET
- INFORMASI TENTANG MENGHUBUNGKAN KE INTERNET
- TERGANTUNG PADA PERLENGKAPAN KENDARAAN DAN KETERSEDIAAN DI NEGARA, ANDA DAPAT MEMBUAT KONEKSI INTERNET DENGAN CARA BERIKUT
- MENYIAPKAN KONEKSI INTERNET MENGGUNAKAN MODUL KOMUNIKASI
- MEMUTUSKAN KONEKSI INTERNET OTOMATIS MELALUI MODUL KOMUNIKASI
- MENYIAPKAN KONEKSI INTERNET MELALUI WLAN
- TELEPON SELULER TERDAFTAR DI PENGELOLA PERANGKAT INTERNET
- KONEKSI INTERNET MELALUI WI-FI DIBATASI ATAU TIDAK BERFUNGSI DALAM KASUS BERIKUT
- MENYIAPKAN KONEKSI INTERNET MELALUI BLUETOOTH
- TELEPON SELULER TIDAK TERDAFTAR DI PENGELOLA PERANGKAT INTERNET
- KONEKSI INTERNET MELALUI BLUETOOTH ® DIBATASI ATAU TIDAK BERFUNGSI DALAM KASUS BERIKUT
- MEMBATALKAN IZIN AKSES INTERNET UNTUK TELEPON SELULER
- MEMBUAT KONEKSI INTERNET
- STATUS KONEKSI
- IKHTISAR STATUS KONEKSI
- TERGANTUNG PADA STATUS KONEKSI, SIMBOL BERIKUT DAPAT MUNCUL DI LAYAR MEDIA PADA GARIS STATUS
- MENAMPILKAN STATUS KONEKSI
- CATATAN TENTANG MENAMPILKAN STATUS KONEKSI
- PERAMBAN WEB
- MEMBUKA HALAMAN WEB
- MEMBUKA HALAMAN WEB BARU
- MEMBUKA SITUS WEB DARI RIWAYAT PERAMBAN
- IKHTISAR PERAMBAN WEB
- I UNDER ⋯ ANDA MEMILIKI OPSI BERIKUT
- MEMBUKA OPSI PERAMBAN WEB
- MEMBUKA PENGATURAN PERAMBAN WEB
- MENGHAPUS DATA PERAMBAN
- MENGELOLA MARKAH
- OPSI BERIKUT TERSEDIA
- MENGELOLA TAB
- MEMBUKA TAB BARU
- MENGUBAH TAB
- MENUTUP TAB
- MODE PRIBADI
- BERBAGI URL DARI PERAMBA WEB
- BERBAGI URL MELALUI KODE QR
- BERBAGI URL DENGAN LAYAR LAIN
- MENGATUR PERAMBA WEB DI LATAR BELAKANG
- TUNEIN RADIO
- MEMANGGIL TUNEIN RADIO
- TINJAUAN TUNEIN RADIO
- MEMILIH DAN MENGHUBUNGKAN KE STASIUN TUNEIN RADIO
- MENYIMPAN/MENGHAPUS STASIUN TUNEIN RADIO SEBAGAI FAVORIT
- MENYIMPAN FAVORIT
- MENGATUR OPSI RADIO INTERNET
- MEDIA
- INFORMASI TENTANG MODE MEDIA
- INFORMASI TENTANG FORMAT YANG DIDUKUNG DAN MEDIA PENYIMPANAN DATA
- I PERHATIKAN CATATAN BERIKUT
- INFORMASI TENTANG PERLINDUNGAN HAK CIPTA DAN MEREK DAGANG
- DOLBY
- ATMOS
- TIDAL
- MENGHUBUNGKAN MEDIA PENYIMPANAN DATA KE SISTEM MULTIMEDIA
- MENGHUBUNGKAN PERANGKAT USB
- MENCARI DAN MENGIZINKAN PERANGKAT AUDIO BLUETOOTH
- MENGIZINKAN PERANGKAT AUDIO BLUETOOTH® BARU
- MENGHUBUNGKAN PERANGKAT AUDIO BLUETOOTH YANG SEBELUMNYA TELAH DIIZINKAN
- MEMULAI PEMUTARAN MEDIA
- MENGONTROL PEMUTARAN MEDIA
- OPSI TAMBAHAN UNTUK MENGATUR PEMUTARAN MEDIA
- MEMANGGIL OPSI TAMBAHAN
- PENCARIAN MEDIA
- CATATAN TENTANG FUNGSI PENCARIAN DALAM KATEGORI
- MEMULAI PENCARIAN DALAM KATEGORI
- MENGGUNAKAN PENCARIAN KATA KUNCI
- MUSIK ONLINE
- MENAMBAHKAN PENYEDIA STREAMING PERTAMA KALI ANDA MEMULAI APLIKASI
- MENAMBAHKAN LEBIH BANYAK PENYEDIA STREAMING
- KELUAR DARI PENYEDIA STREAMING
- MEMANGGIL MUSIK SECARA ONLINE
- MENCARI MUSIK DI MUSIK ONLINE
- MENCARI KATEGORI DI MUSIK ONLINE
- PENCARIAN KATA KUNCI DI MUSIK ONLINE
- MEMANGGIL PENGATURAN MUSIK ONLINE
- INFORMASI TENTANG DOLBY ATMOS
- MENGAKTIFKAN ATAU MENONAKTIFKAN DOLBY ATMOS
- MBUX SOUND DRIVE
- INFORMASI TENTANG MBUX SOUND DRIVE
- KONDISI BERKENDARA BERIKUT MEMUNGKINKAN ANDA MENJADI BAGIAN DARI MUSIK (CONTOH)
- LAGU FAVORIT ANDA DAPAT DIPERLUAS DENGAN LAPISAN BERIKUT (CONTOH)
- MENGOPERASIKAN MBUX SOUND DRIVE
- MENGONTROL PEMUTARAN
- MENGAKTIFKAN ATAU MENONAKTIFKAN PEMUTARAN ACAK
- MEMBUKA PENGATURAN
- MEMBUKA DAFTAR PUTAR
- MENCARI LAGU
- MENYALAKAN RADIO
- IKHTISAR RADIO
- MENGATUR PITA FREKUENSI
- MEMILIH STASIUN RADIO
- MEMBUKA DAFTAR STASIUN RADIO
- MEMILIH STASIUN RADIO YANG DIREKOMENDASIKAN
- MENYIMPAN STASIUN RADIO
- MENGELOLA FAVORIT
- MEMINDAHKAN STASIUN
- MENGATUR PELACAKAN STASIUN MELALUI RADIO INTERNET
- MEMANGGIL TAYANGAN SLIDE (MODE RADIO FM/DAB)
- MENGAKTIFKAN/MENONAKTIFKAN TAYANGAN SLIDE (MODE RADIO FM/DAB)
- MENGAKTIFKAN/MENONAKTIFKAN FUNGSI FIKSASI FREKUENSI
- MENGAKTIFKAN/MENONAKTIFKAN PENGUMUMAN RADIO
- MEMILIH PENGUMUMAN RADIO
- MENGATUR PENINGKATAN VOLUME INFORMASI LALU LINTAS
- MENAMPILKAN TEKS RADIO
- SUARA
- SISTEM SUARA SURROUND BURMESTER®
- INFORMASI TENTANG SISTEM SUARA SURROUND 3D BURMESTER®
- MEMANGGIL MENU SUARA PADA SISTEM SUARA SURROUND BURMESTER®
- MENYESUAIKAN PENGATURAN TREBLE, MID, DAN BASS PADA SISTEM SUARA SURROUND BURMESTER
- MENGAKTIFKAN ATAU MENONAKTIFKAN NORMALISASI KEKERASAN SUARA PADA SISTEM SUARA SURROUND BURMESTER®
- MENYESUAIKAN BALANCE DAN FADER PADA SISTEM SUARA SURROUND BURMESTER®
- MENGATUR BALANCE DAN FADER
- MEMILIH PROFIL SUARA PADA SISTEM SUARA SURROUND BURMESTER®
- MENGATUR PROFIL SUARA YANG SUDAH ADA
- MEMBUAT PROFIL SUARA PRIBADI
- MEMBUAT PROFIL SUARA PRIBADI UNTUK PERTAMA KALI
- MENGUBAH PENGATURAN INDIVIDU PROFIL SUARA PRIBADI DI KEMUDIAN HARI
- MENYESUAIKAN FOKUS SUARA PADA SISTEM SUARA SURROUND BURMESTER®
- SISTEM HIBURAN KURSI BELAKANG MBUX HIGH-END
- IKHTISAR SISTEM HIBURAN KURSI BELAKANG KELAS ATAS
- SISTEM HIBURAN KURSI BELAKANG KELAS ATAS TERDIRI ATAS
- TERGANTUNG PADA PERLENGKAPAN, ANDA DAPAT MENGOPERASIKAN SISTEM HIBURAN KURSI BELAKANG KELAS ATAS
- LAYAR BELAKANG
- IKHTISAR LAYAR BELAKANG
- MENGHIDUPKAN ATAU MEMATIKAN LAYAR BELAKANG
- MEMILIH ATAU MENAMBAH PENGGUNA
- INFORMASI LEBIH LANJUT TENTANG PROFIL PENGGUNA
- HEADPHONE
- IKHTISAR HEADPHONE (SISTEM HIBURAN KURSI BELAKANG)
- HEADPHONE EKSTERNAL BERIKUT DAPAT DIHUBUNGKAN KE SETIAP LAYAR BELAKANG
- MENGHUBUNGKAN HEADPHONE BLUETOOTH* DENGAN SISTEM HIBURAN KURSI BELAKANG
- KURSI BELAKANG
- MENYESUAIKAN KURSI BELAKANG PADA SISTEM HIBURAN KURSI BELAKANG
- MENGATUR PEMANAS KURSI
- MENYESUAIKAN KONTROL IKLIM BELAKANG PADA SISTEM HIBURAN KURSI BELAKANG
- MENONAKTIFKAN KONTROL IKLIM BELAKANG
- JIKA TERSEDIA, FUNGSI KONTROL IKLIM LAINNYA DAPAT DIAKSES
- MEMBUKA MENU KUALITAS UDARA
- MENYESUAIKAN PENCAHAYAAN AMBIENT DI KOMPARTEMEN PENUMPANG BELAKANG
- MENGAKTIFKAN KECERAHAN UNTUK ZONA
- MEMILIH PENGATURAN SISTEM DI KOMPARTEMEN PENUMPANG BELAKANG
- MENGATUR DESAIN
- MENGAKTIFKAN ATAU MENONAKTIFKAN LAYAR BERANDA
- MENGATUR PAPAN KETIK DAN TULISAN TANGAN
- MENYESUAIKAN VOLUME AUDIO
- MENGHUBUNGKAN PERANGKAT DI PENGELOLA PERANGKAT
- MENGATUR SENSITIVITAS LAYAR BELAKANG
- MENAMPILKAN INFORMASI SISTEM
- MENYIAPKAN INTERNET DAN BLUETOOTH®
- PENGATURAN BLUETOOTH®
- MENGGUNAKAN SISTEM MULTIMEDIA SEBAGAI WI-FI HOTSPOT
- MENGHUBUNGKAN KE MBUX HOTSPOT
- MENGGUNAKAN PERANGKAT KOMUNIKASI SELULER SEBAGAI WI-FI HOTSPOT (TETHERING)
- MENGAKTIFKAN NAVIGASI DI KOMPARTEMEN PENUMPANG BELAKANG SISTEM HIBURAN KURSI BELAKANG
- PILIHAN BERIKUT TERSEDIA DI LAYAR BELAKANG, CONTOHNYA
- MENGGUNAKAN PONSEL DI KOMPARTEMEN PENUMPANG BELAKANG
- LAYANAN DAN PERAMBAN WEB
- IKHTISAR PERAMBAN WEB (SISTEM HIBURAN KURSI BELAKANG)
- UNTUK INFORMASI LEBIH LANJUT TENTANG MENYIAPKAN KONEKSI INTERNET
- MEMBUKA PERAMBAN WEB (SISTEM HIBURAN KURSI BELAKANG)
- INFORMASI TENTANG MODE MEDIA DI KOMPARTEMEN PENUMPANG BELAKANG
- SISTEM HIBURAN KURSI BELAKANG MENDUKUNG MEDIA PENYIMPANAN DATA BERIKUT
- MENGAKTIFKAN MODE MEDIA DI KOMPARTEMEN PENUMPANG BELAKANG
- BERBAGI SUMBER MEDIA DI DALAM KENDARAAN
- MENGONTROL PEMUTARAN MEDIA DI SISTEM HIBURAN KURSI BELAKANG
- BERALIH KE VIDEO HDMI DI SISTEM HIBURAN KURSI BELAKANG
- BERALIH KE RADIO DI RUANG PENUMPANG BELAKANG
- BERBAGI STASIUN RADIO DI DALAM KENDARAAN
- IKHTISAR PENGATURAN SUARA DI RUANG PENUMPANG BELAKANG
- TERGANTUNG PADA PERALATAN YANG TERPASANG, SALAH SATU SISTEM SUARA BERIKUT DIDUKUNG
- MEMILIH PENGATURAN SUARA DI RUANG PENUMPANG BELAKANG
- MENGAKTIFKAN ATAU MENONAKTIFKAN SPEAKER KENDARAAN DAN MENYESUAIKAN TINGKAT VOLUME
- MENGGUNAKAN ASISTEN SUARA MBUX
- INFORMASI LEBIH LANJUT TENTANG ASISTEN SUARA
- PERAWATAN DAN PERAWATAN
- TAMPILAN INTERVAL SERVIS ASSYST PLUS
- FUNGSI TAMPILAN INTERVAL SERVIS ASSYST PLUS
- TERGANTUNG PADA CARA KENDARAAN DIGUNAKAN, TAMPILAN INTERVAL SERVIS ASSYST PLUS DAPAT MEMPERPENDEK INTERVAL SERVIS, MIS. DALAM KASUS BERIKUT
- MENAMPILKAN TANGGAL JATUH TEMPO SERVIS
- INFORMASI TENTANG PEKERJAAN SERVIS RUTIN
- CATATAN TENTANG PERSYARATAN SERVIS KHUSUS
- CONTOH KONDISI OPERASI YANG BERAT
- PERIODE PEMUTUSAN BATERAI
- MANAJEMEN PERAWATAN
- CATATAN TENTANG MANAJEMEN PERAWATAN
- DATA YANG DITRANSFER SAAT MENGGUNAKAN MANAJEMEN PERAWATAN
- TELEDIAGNOSTIK
- CATATAN TENTANG TELEDIAGNOSIS
- DATA YANG DIKIRIM SAAT MENGGUNAKAN TELEDIAGNOSIS
- RUANG MESIN
- MEMBUKA DAN MENUTUP KAP MESIN
- KOMPONEN BERALIRAN LISTRIK MELIPUTI CONTOH BERIKUT
- MEMBUKA KAP MESIN
- MENUTUP KAP MESIN
- OLI MESIN
- MEMERIKSA LEVEL OLI MESIN MENGGUNAKAN TAMPILAN PENGEMUDI
- SALAH SATU PESAN BERIKUT AKAN MUNCUL DI TAMPILAN PENGEMUDI
- MENAMBAH OLI MESIN
- JIKA ANDA MEMBUKA KAP MESIN SAAT MESIN TERLALU PANAS ATAU TERJADI KEBAKARAN DI RUANG MESIN, SITUASI BERIKUT DAPAT TERJADI
- MEMERIKSA LEVEL CAIRAN PENDINGIN
- KADAR CAIRAN PENDINGIN BENAR DALAM KASUS BERIKUT
- MENJAGA SALURAN UDARA/AIR TETAP BERSIH
- PEMBERSIHAN DAN PERAWATAN
- KENDARAAN AKAN MENGEREM SECARA OTONOM DALAM SITUASI TERTENTU JIKA FUNGSI BERIKUT AKTIF
- UNTUK MENGHINDARI KERUSAKAN PADA KENDARAAN ANDA SAAT MENGGUNAKAN CUCIAN MOBIL, PASTIKAN HAL BERIKUT SEBELUMNYA
- MODE PENCUCIAN MOBIL
- KETIKA MODE CUCI MOBIL DIAKTIFKAN, PESAN MODE CUCI MOBIL AKTIF AKAN MUNCUL DI LAYAR PENGEMUDI. PENYESUAIAN BERIKUT AKAN DILAKUKAN
- PENGATURAN BERIKUT AKAN DIATUR ULANG KETIKA MODE CUCI MOBIL DINONAKTIFKAN
- MENGAKTIFKAN/MENONAKTIFKAN MODE CUCI MOBIL
- MENGAKTIFKAN MODE CUCI MOBIL
- MENONAKTIFKAN MODE CUCI MOBIL
- INFORMASI PENGGUNAAN PEMBERSIH BERTEKANAN TINGGI
- UNTUK MENGHINDARI KERUSAKAN PADA KENDARAAN ANDA, PERHATIKAN HAL BERIKUT SAAT MENGGUNAKAN PEMBERSIH BERTEKANAN TINGGI
- MENCUCI KENDARAAN DENGAN TANGAN
- CATATAN PERAWATAN CAT/FINISHING DOFF
- CAT
- FINISHING DOFF
- JIKA TERJADI KERUSAKAN CAT
- CATATAN TENTANG MEMBERSIHKAN FILM DEKORATIF
- PEMBERSIHAN
- MENGHINDARI KERUSAKAN PADA FILM DEKORATIF
- INFORMASI TENTANG FILM KACA
- CATATAN TENTANG PEMBERSIHAN DAN PERAWATAN SUKU CADANG MOBIL
- KACA
- RODA DAN VELG
- LAMPU EKSTERIOR
- SENSOR
- CATATAN TENTANG PERAWATAN INTERIOR
- LAYAR
- TRIM PLASTIK
- KAYU ASLI DAN ELEMEN TRIM
- HEADLINER
- KARPET
- RODA KEMUDI DARI KULIT IMITASI
- RODA KEMUDI DARI KULIT ASLI ATAU DINAMICA
- SARUNG KURSI KULIT ASLI
- SARUNG KURSI KULIT IMITASI
- LANTAI BAGASI KAYU
- MEMBERSIHKAN LANTAI BAGASI KAYU
- MERAWAT LANTAI BAGASI KAYU
- BANTUAN GANGGUAN
- DARURAT
- SEGITIGA PENGAMAN
- MEMASANG SEGITIGA PENGAMAN
- BAN KEMPES
- JIKA BAN KEMPES, PILIHAN BERIKUT TERSEDIA TERGANTUNG PADA PERALATAN KENDARAAN ANDA
- IKHTISAR DUDUKAN BAN CADANGAN DI PINTU BELAKANG
- PEMBAWA RODA CADANGAN DARI BAJA TAHAN KARAT
- MELEPAS RODA CADANGAN
- MEMASANG RODA PADA PEMBAWA RODA CADANGAN
- PEMBAWA RODA CADANGAN DENGAN PENUTUP BAN PELINDUNG
- MELEPAS PENUTUP BAN PELINDUNG
- MELEPAS RODA DARI PEMBAWA RODA CADANGAN DAN MEMASANG RODA YANG RUSAK
- KENDARAAN DENGAN RODA CADANGAN DARURAT: MELEPAS SETENGAH CANGKANG
- PEMBAWA RODA CADANGAN PROFESIONAL
- BATERAI (KENDARAAN)
- CATATAN TENTANG BATERAI 12 V
- JIKA ANDA TIDAK BERMAKSUD MENGGUNAKAN KENDARAAN UNTUK JANGKA WAKTU YANG LAMA
- CATATAN TENTANG BATERAI 48 V
- JIKA ANDA TIDAK BERMAKSUD MENGGUNAKAN KENDARAAN UNTUK JANGKA WAKTU YANG LAMA, PERHATIKAN HAL BERIKUT
- CATATAN TENTANG BANTUAN START DAN PENGISIAN BATERAI 12 V
- PERHATIKAN HAL-HAL BERIKUT SELAMA BANTUAN START DAN SAAT MENGISI BATERAI
- SAAT MENGISI BATERAI, PERHATIKAN JUGA HAL-HAL BERIKUT
- PERHATIKAN JUGA HAL-HAL BERIKUT SELAMA BANTUAN START
- BANTUAN START DAN PENGISIAN BATERAI 12 V
- PERSIAPAN PROSES BANTUAN START/PENGISIAN
- BANTUAN START
- PENGISIAN BATERAI 12 V
- PENGGANTIAN BATERAI 12 V
- PERHATIKAN CATATAN BERIKUT JIKA ANDA INGIN MENGGANTI BATERAI SENDIRI
- PENARIK AWAL ATAU PENARIK KENDARAAN
- IKHTISAR METODE PENARIK YANG DIIZINKAN
- METODE PENARIK YANG DIIZINKAN
- MENARIK KENDARAAN DENGAN KEDUA POROS DI TANAH
- KETIKA BATERAI HABIS
- JIKA KENDARAAN YANG AKAN DIDEREK LEBIH BERAT DARI MASSA KOTOR YANG DIIZINKAN DARI KENDARAAN ANDA, SITUASI BERIKUT DAPAT TERJADI
- FUNGSI-FUNGSI YANG RELEVAN TERHADAP KESELAMATAN DIBATASI ATAU TIDAK LAGI TERSEDIA DALAM SITUASI BERIKUT
- CATATAN TENTANG PEMULIHAN KENDARAAN YANG MACET
- PERHATIKAN HAL BERIKUT SELAMA PEMULIHAN UNTUK MENGHINDARI KERUSAKAN PADA KENDARAAN ANDA
- CATATAN TENTANG PENDEREKAN JIKA TERJADI KERUSAKAN
- PENDEREKAN JIKA TERJADI KERUSAKAN
- PENDEREKAN JIKA TERJADI KERUSAKAN PADA MESIN, TRANSMISI, ATAU KELISTRIKAN
- PENDEREKAN JIKA TERJADI KERUSAKAN PADA KOTAK TRANSFER
- PENARIKAN JIKA TERJADI KERUSAKAN PADA AS RODA DEPAN
- PENARIKAN JIKA TERJADI KERUSAKAN PADA AS RODA BELAKANG
- MEMUAT KENDARAAN UNTUK TRANSPORTASI
- KENDARAAN DENGAN SISTEM PEREDAM ADAPTIF
- MENYALAKAN KENDARAAN DENGAN CARA DIDEREK (START DARURAT KENDARAAN)
- SEKRING LISTRIK
- SEKRING LISTRIK TERLETAK DI BERBAGAI KOTAK SEKRING
- MEMBUKA DAN MENUTUP KOTAK SEKRING DI KOMPARTEMEN MESIN
- MEMBUKA
- MENUTUP
- MEMBUKA DAN MENUTUP KOTAK SEKRING DI AREA KAKI PENUMPANG DEPAN
- MEMBUKA DAN MENUTUP KOTAK SEKRING DI BAGIAN BELAKANG
- RODA DAN BAN
- CATATAN TENTANG KEBISINGAN ATAU KARAKTERISTIK PENANGANAN YANG TIDAK BIASA
- LAKUKAN PEMERIKSAAN BERIKUT PADA SEMUA RODA SECARA TERATUR, SETIDAKNYA SEKALI SEBULAN ATAU SESUAI KEBUTUHAN, MISALNYA, SEBELUM PERJALANAN JAUH ATAU MENGEMUDI DI JALAN OFF-ROAD
- TEKANAN BAN
- CATATAN TENTANG TEKANAN BAN
- BAN DENGAN TEKANAN YANG TIDAK CUKUP ATAU TERLALU TINGGI MENIMBULKAN BAHAYA BERIKUT
- TEKANAN BAN TINGGI ATAU RENDAH DAPAT
- HANYA KOREKSI TEKANAN BAN SAAT BAN DALAM KEADAAN DINGIN. KONDISI BAN DINGIN
- CATATAN TENTANG OPERASI TRAILER
- CATATAN TENTANG MENGEMUDI DI PASIR
- TABEL TEKANAN BAN
- PASTIKAN JUGA UNTUK MEMPERHATIKAN TOPIK TERKAIT BERIKUT
- SISTEM PEMANTAUAN TEKANAN BAN
- FUNGSI SISTEM PEMANTAUAN TEKANAN BAN
- MEMERIKSA TEKANAN BAN DENGAN SISTEM PEMANTAUAN TEKANAN BAN
- SALAH SATU PESAN BERIKUT MUNCUL
- MEMULAI ULANG SISTEM PEMANTAUAN TEKANAN BAN
- MULAI ULANG SISTEM PEMANTAUAN TEKANAN BAN DALAM SITUASI BERIKUT
- PENGGANTIAN RODA
- CATATAN TENTANG MEMILIH, MERAKIT, DAN MENGGANTI BAN
- UNTUK RODA, PERHATIKAN HAL BERIKUT
- UNTUK BAN, PERHATIKAN HAL BERIKUT
- BAN INI DIKONFIGURASI KHUSUS UNTUK SISTEM KESELAMATAN AKTIF SEPERTI ABS, ESP 2 DAN 4MATIC, DAN DITANDAI SEBAGAI BERIKUT
- SEBELUM MEMBELI DAN MENGGUNAKAN AKSESORIS YANG TIDAK DISETUJUI, KUNJUNGI BENGKEL SPESIALIS YANG KOMPETEN DAN TANYAKAN TENTANG HAL-HAL BERIKUT
- PERHATIKAN HAL-HAL BERIKUT SAAT MEMILIH, MEMASANG, DAN MENGGANTI BAN
- PASTIKAN JUGA UNTUK MEMPERHATIKAN TOPIK TERKAIT BERIKUT INI
- CATATAN TENTANG PENGGANTIAN RODA
- POLA KEAUSAN PADA RODA DEPAN DAN BELAKANG BERBEDA
- CATATAN TENTANG PENYIMPANAN RODA
- SAAT MENYIMPAN RODA, PERHATIKAN CATATAN BERIKUT
- IKHTISAR PERALATAN KENDARAAN
- PERALATAN KENDARAAN BERISI
- MEMPERSIAPKAN KENDARAAN UNTUK PENGGANTIAN RODA
- MENAIKKAN KENDARAAN UNTUK PENGGANTIAN RODA
- CATATAN PENTING TENTANG PENGGUNAAN DONGKRAK
- ATURAN PERILAKU SAAT KENDARAAN DIANGKAT
- MELEPAS RODA
- MEMASANG RODA BARU
- MENURUNKAN KENDARAAN SETELAH PENGGANTIAN RODA
- RODA CADANGAN DARURAT
- CATATAN TENTANG RODA CADANGAN DARURAT
- PERHATIKAN CATATAN BERIKUT TENTANG PEMASANGAN RODA CADANGAN DARURAT
- PASTIKAN JUGA MEMPERHATIKAN TOPIK TERKAIT BERIKUT INI
- DATA TEKNIS
- CATATAN TENTANG DATA TEKNIS
- ELEKTRONIK KENDARAAN
- RADIO DUA ARAH
- DAYA KELUARAN TRANSMISI TELEPON SELULER
- BERIKUT INI DAPAT DIGUNAKAN DI DALAM KENDARAAN TANPA BATASAN
- TIDAK ADA BATASAN SAAT MENEMPATKAN ANTENA DI BAGIAN LUAR KENDARAAN UNTUK PITA FREKUENSI BERIKUT
- INFORMASI RADIO PERATURAN
- INFORMASI KHUSUS TENTANG APLIKASI NIRKABEL SESUAI DENGAN 2014/53/EU
- TEKNOLOGI RENTANG FREKUENSI DAYA KELUARAN/KEKUATAN MEDAN MAGNET
- PENGIDENTIFIKASI RADIO PERATURAN/CATATAN KHUSUS
- IKHTISAR PRODUSEN
- PRODUSEN INFORMASI PRODUSEN
- ALJAZAIR
- DISETUJUI OLEH ANF
- REFERENSI SERTIFIKAT KESESUAIAN
- DISETUJUI OLEH ARPCE REFERENSI SERTIFIKAT KESESUAIAN
- ARGENTINA
- AUSTRALIA
- BELARUS
- REGULATORY RADIO IDENTIFIERS
- BOTSWANA
- BRAZIL
- INFORMASI TENTANG SISTEM RADIO DUA ARAH DI DALAM KENDARAAN
- INFORMASI TAMBAHAN SPESIFIK
- SISTEM HIBURAN KURSI BELAKANG
- UNIT PENGISIAN DAYA UNTUK PENGISIAN NIRKABEL PERANGKAT KOMUNIKASI SELULER (WMI)
- PRODUK TELEKOMUNIKASI
- BRUNEI DARUSSALAM
- UNI EKONOMI EURASIA
- EAC
- GHANA
- INDONESIA
- PABRIKAN PENUNJUKAN MODEL PERSETUJUAN PERALATAN RADIO
- NOMOR
- 7163
- 3533
- ISRAEL
Merek : Mercedes-Benz
Model : G-Class (2025)
Kategori : 112