APF-F291320VW - Kategooriata ALPINE - Tasuta kasutusjuhend
Leidke seadme juhend tasuta APF-F291320VW ALPINE PDF-formaadis.

Kasutajate küsimused teemal APF-F291320VW ALPINE
0 küsimus selle seadme kohta. Vastake nendele, mida teate, või esitage oma.
Esita uus küsimus selle seadme kohta
Laadige alla juhend oma Kategooriata PDF-formaadis tasuta! Leidke oma juhend APF-F291320VW - ALPINE ja võtke oma elektrooniline seade uuesti kätte. Sellel lehel on avaldatud kõik teie seadme kasutamiseks vajalikud dokumendid. APF-F291320VW kaubamärgi ALPINE.
KASUTUSJUHEND APF-F291320VW ALPINE
ALPINE
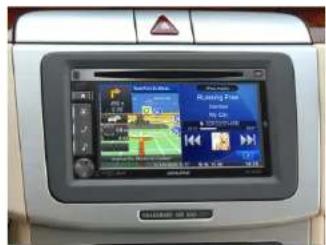
Installation Manual Double DIN Kit APF-F291320VW
• VW Amarok (Type 2H)
• VW Beetle (Type 16)
• VW Caddy (Type 2K)
• VW CC (Type 3CC)
• VW Eos (Type 1F)
• VW Golf V/IV
• VW Jetta V/VI
• VW Passat (Type 3C/CC)
• VW Polo (Type 6R)
• VW Scirocco III (Type 13)
• VW Sharan II (Type 7N)
• VW Tiguan (Type 5N)
• VW Touran (Type 1T/GP/GP2
• VW T5 facelift
Compatible with these Alpine double DIN devices
Alpine Navigation
natural_image
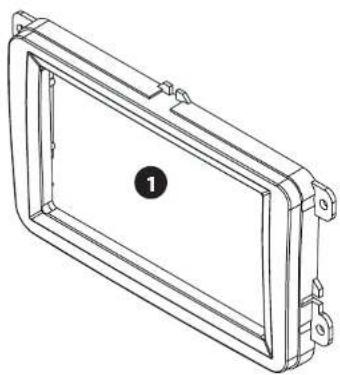
Technical line drawing of a rectangular frame with mounting holes and a central circular marker labeled '1' (no text or symbols beyond the label)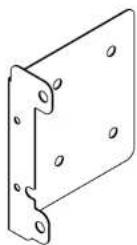
natural_image
Technical line drawing of a metal bracket with mounting holes (no text or symbols)
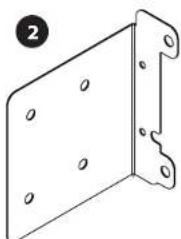
Double DIN Kit contents:
• (1) Facia Plate
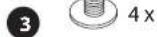
• (2) Metal Brackets • (3) Fixing Screws
Installation Manual Double DIN Kit APF-F291320-10 VW
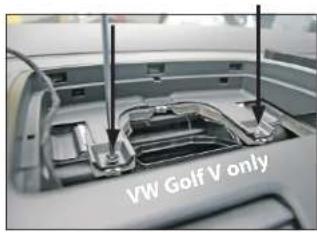
VW Golf V only:
Pull up the aircone unit (fixed by clips). Remove two Torx (TX20) screws (see arrows) which become visible.
- Remove the original trim frame, surrounding the radio (fixed by clips).
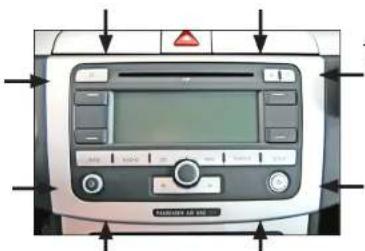
natural_image
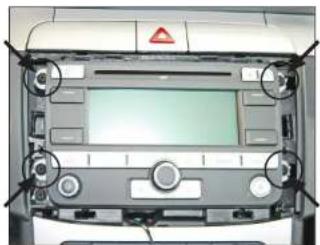
Front view of a car dashboard with control panels and a warning triangle (no visible text or symbols)- Remove the 4 Torx (TX20) screws (These screws will be used again later).
Remove the OEM head unit.

- Mount both metal brackets at the facia plate as shown in the sample picture on the left.
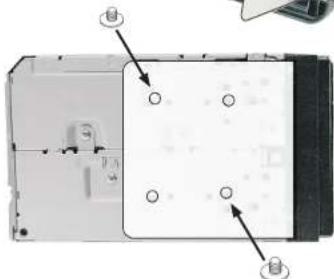
natural_image
Diagram of a computer monitor with labeled ports and connectors (no text or symbols present)- Push the Double DIN head unit into the facia plate and fix the sides of the head unit with 2 screws on each side.
-
Connect all wires and fix the Double DIN head unit with the original Torx (TX20) screws.
-
Reinstall everything in reverse order to finish installation.
All installation work must be performed by a qualified professional installer only. The manufacturer / dealer is not liable for any kind of incidental or indirect damages.