SWRSU-38A - Kategooriata CRUX - Tasuta kasutusjuhend
Leidke seadme juhend tasuta SWRSU-38A CRUX PDF-formaadis.

Kasutajate küsimused teemal SWRSU-38A CRUX
0 küsimus selle seadme kohta. Vastake nendele, mida teate, või esitage oma.
Esita uus küsimus selle seadme kohta
Laadige alla juhend oma Kategooriata PDF-formaadis tasuta! Leidke oma juhend SWRSU-38A - CRUX ja võtke oma elektrooniline seade uuesti kätte. Sellel lehel on avaldatud kõik teie seadme kasutamiseks vajalikud dokumendid. SWRSU-38A kaubamärgi CRUX.
KASUTUSJUHEND SWRSU-38A CRUX
PRODUCT FEATURES:
- Retains factory features in select Subaru vehicles while functioning with an aftermarket radio.
- Pre-programmed to retain factory Steering Wheel Controls.
- EIA color coded wiring for easy installation.
PARTS INCLUDED:
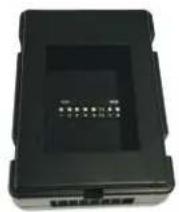
SWRSU-38A Module
natural_image
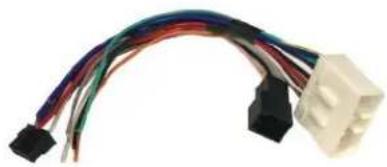
Coiled electrical connector with four white connectors and black connectors (no text or symbols visible)SWRSU-38A T-Harness
natural_image
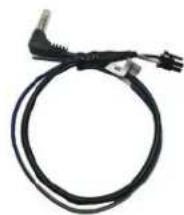
Coiled black cable with a small connector, no visible text or symbolsSWC Cable
INSTALLATION DIAGRAM:
LED TROUBLESHOOTING ON MODULE
| LED LIGHT | LED MODULE FEEDBACK | |
| BLUE LED OFF | NO POWER | CHECK VOLTAGE |
| RED LED FLASHES | WHEN PRESSING SWC BUTTONS | |

DIP SWITCH SETTINGS:
SUBARU STEERING WHEEL CONTROL DIP SWITCH SETTING:
| DIP: | 5 | 6 | 7 | 8 |
| Panasonic made Radio | ON | OFF | OFF | ON |
| Clarion made Radio* | OFF | ON | OFF | ON |
| Clarion made Radio** | ON | OFF | ON | OFF |
| Fujitsu Ten made Radio | OFF | ON | OFF | ON |
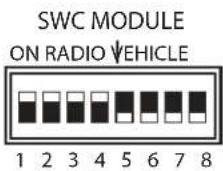
AFTERMARKET RADIO DIP SWITCH SETTINGS:
| RADIO BRAND: | DIP: | 1 | 2 | 3 | 4 | |
| Atoto, Dual, Farenheit, Jensen, Pioneer Power Acoustik, Soundstream Blaupunkt, Most off-brand Radios Alpine Clarion Kenwood JVC Boss, Old Sony New Sony | OFF OFF OFF OFF OFF OFF OFF OFF OFF OFF OFF OFF OFF OFF OFF | OFF OFF OFF OFF OFF OFF OFF ON ON ON ON ON ON ON OFF OFF OFF OFF | OFF OFF OFF OFF OFF ON ON ON ON ON ON ON ON ON ON ON ON ON ON ON ON ON ON ON ON ON ON ON ON ON ON ON ON ON ON ON ON ON ON ON ON ON ON ON ON ON ON ON ON ON ON ON ON ON ON ON ON ON ON ON ON ON ON ON ON ON ON ON ON ON ON ON ON ON ON ON ON ON ON ON ON ON ON ON ON ON ON ON ON ON ON ON ON ON ON ON ON ON ON ON ON ON ON ON ON On On On On On On On On On On On On On On On On On On On On On On On On On On On On On On On On On On On On On On On On On On On On On On On On On On On On On On On On On On On On On On On On On On On On On On On On On On On On On On On On On On On On On On On On On On On On On On On On On On On On on on on on on on on on on on on on on on on on on on on on on on on on on on on on on on on on on on on on on on on on on on on on on on on on on on on on on on on on on on on on on on on on on on on on on on on on on on on on on on on on on on on on on on on on on on on on on on on on on on on on one or more. | |||

NOTE: For Atoto, Blaupunkt, Dual, Farenheit, Power Acoustik, Soundstream, and most off-brand radios, check the aftermarket radio's manual to see if the SWC buttons need to be programmed.
3.5MM SWC CABLE
Plug in the 3.5MM to 4-Pin SWC cable to the SWC module. NOTE: Insulate the Blue/Yellow and Green wires if not being used.
For aftermarket radios that have wires for SWC connections, cut off the 3.5mm plug on the Crux SWC Cable (option B) and connect the SWC wires as follows:
Note that there are some radios that only have SWC1 and SWC2, in this case "shield" does not need to be connected.

RED to SWC Key 1 WHITE to SWC Key 2 SHIELD to SWC Ground
INSTALLATION INSTRUCTIONS:
natural_image
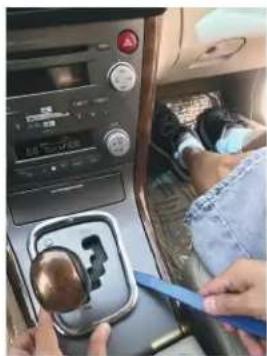
Interior view of a car showing a person using a blue tool to clean the dashboard and switch (no visible text or symbols)- Carefully remove the gear shifter trim ring.
natural_image
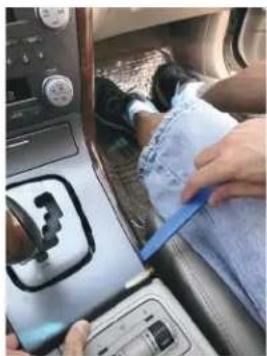
Person cleaning a car interior with a blue tool on the hood (no visible text or symbols)- Use a plastic pry bar and carefully lift and remove the gear shifter trim bezel.
natural_image
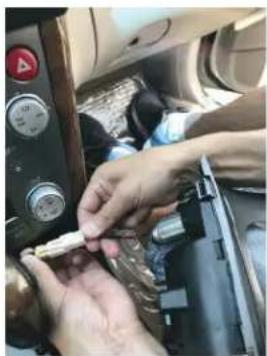
Close-up of hands inserting a small object into a vehicle's dashboard (no visible text or symbols)- Unplug the cigarette lighter connection.

natural_image
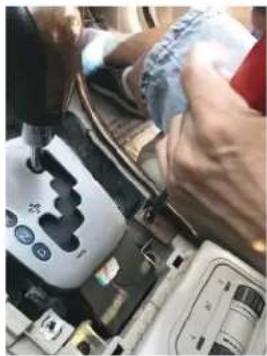
Close-up of hands using a mechanical device to adjust a vehicle's gear (no visible text or symbols)- Remove the screws holding the left and right side trims.
natural_image
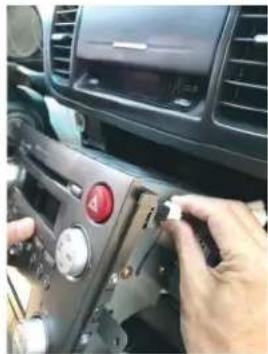
Close-up of hands installing or adjusting a car air vent on the dashboard (no visible text or symbols)- Unplug the hazard light connector. 8.
natural_image
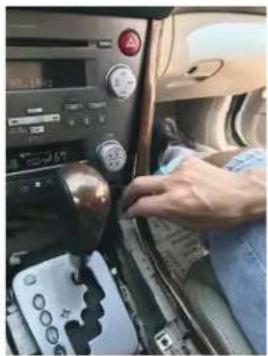
Interior view of a car showing a hand operating the wheel of the dashboard with a gear shift (no visible text or symbols)- Remove the left and right side trims.
natural_image
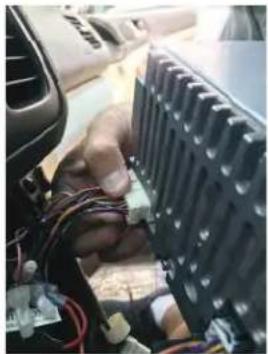
Close-up of hands installing or adjusting a black heat sink component with visible wiring and components (no text or symbols)Unplug the connectors behind the radio.
natural_image
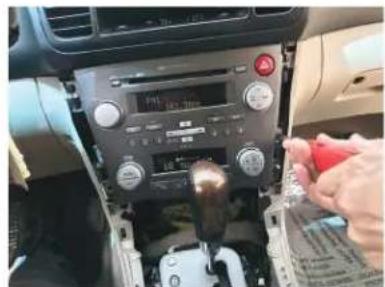
Interior view of a car showing the dashboard and air conditioners with a hand adjusting a red spray bottle (no visible text or symbols)- Remove the screws holding the radio.
natural_image
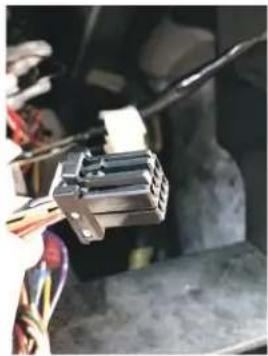
Close-up of a mechanical component with wires and a small white object, no visible text or symbols-
Note that the SWC connection is made on the 8-pin connector.
-
Use the necessary dash kit (not included) to complete the installation. Connect the aftermarket radio wires to the SWRSU-38A T-harness.
-
Plug in the SWRSU-38A 8-pin SWC connector to the factory mate.
-
Confirm the DIP Switch settings and test the steering wheel controls for functionality.
-
Test the radio for other functionality before installing the new radio into the dash. Reverse the radio removal process.
natural_image
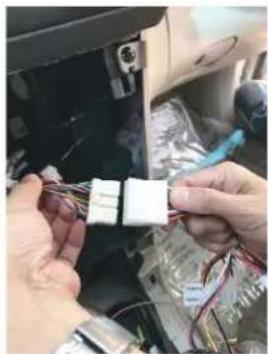
Close-up of hands connecting a white electrical component to a car's rear panel, with visible wiring and components (no text or symbols)VEHICLE APPLICATIONS:
SUBARU
2007-2009
2007-2009
Legacy (without Automatic Climate Controls)
Outback (without Automatic Climate Controls)