
UN40T5300AG - TV SAMSUNG - Free user manual and instructions
Find the device manual for free UN40T5300AG SAMSUNG in PDF.


User questions about UN40T5300AG SAMSUNG
0 question about this device. Answer the ones you know or ask your own.
Ask a new question about this device
Download the instructions for your TV in PDF format for free! Find your manual UN40T5300AG - SAMSUNG and take your electronic device back in hand. On this page are published all the documents necessary for the use of your device. UN40T5300AG by SAMSUNG.
USER MANUAL UN40T5300AG SAMSUNG
Thank you for purchasing this Samsung product. To receive more complete service, please register your product at
www.samsung.com
Model Serial No.
To directly go to the page that provides instructions on how to use the manual for visually impaired users, select the Learn the Menu Screen link below.
"Learn the Menu Screen" Link
Contents
Guide
Connections
5 Connection Guide
6 Connecting an Antenna
7 Connecting to the Internet
10 Screen Sharing (Smart View) with your Mobile Device
13 Connection Cables for External Devices
15 Switching between external devices connected to the TV
17 Connection Notes
Remote Control and Peripherals
20 About the Samsung Smart Remote
23 About the Samsung Smart Remote (The Frame)
26 About the Samsung Smart Remote (The Sero)
29 Connecting the Samsung Smart Remote to the TV
30 Controlling External Devices with a Samsung Remote Control - Using the Universal Remote
31 Using Anynet+ (HDMI-CEC)
32 Controlling the TV with a Keyboard, Mouse, or Gamepad
34 Entering Text using the On-Screen Virtual Keyboard
Smart Features
36 Using Smart Hub
45 Using a Samsung account
47 Using the Ambient Mode
53 Using Remote Access
58 Using the Apps Service
62 Using the Gallery App
63 Using the SmartThings App
64 Using the e-Manual
67 Using the Internet
68 Playing pictures/video/music
74 Using Bixby
TV Viewing
78 Using the Guide
81 Recording Programs
83 Setting Up a Schedule Viewing
85 Using Timeshift
85 Buttons and functions available while recording a program or Timeshift
87 Using the Channel List
88 Editing channels
89 Using a Personal Favorites List
90 TV-Viewing Support Functions
Picture and Sound
93 Using the Intelligent Mode
95 Adjusting the Picture Quality
97 Setting the Viewing Environment for External Devices
99 Changing the Picture Size and Position
100 Configuring a Sound Mode and Expert Settings
102 Using the Sound Support Functions
System and Support
104 Using the Time Functions and the Timers
107 Using the Auto Protection Time and Energy Saving Functions
108 Updating the TV's Software
109 Audio and Video Functions for the Visually or Hearing Impaired
114 Using Voice Assistants on TV
115 Using Other Functions
117 Running Data Service Automatically
Precautions and Notes
118 Before Using the Recording and Timeshift Functions
120 Read Before Using Apps
121 Read Before Using the Internet Function
123 Read Before Playing Photo, Video, or Music Files
131 Read After Installing the TV
132 Supported Resolutions for UHD Input Signals
133 Resolutions for Input Signals supported by Q700T series or higher
134 Supported Resolutions for FreeSync(VRR)
135 Read Before Connecting a Computer (Supported Resolutions)
138 Supported Resolutions for Video Signals
140 Supported Resolutions for HDBT
141 Read Before Using Bluetooth Devices
142 Licenses
Troubleshooting
Picture Issues
143 Testing the picture
Sound and Noise Issues
148 Testing the sound
Channel and Broadcast Issues
External Device Connectivity Issues
Network Issues
Data Service
Anynet+ (HDMI-CEC) Issues
Remote Control Issues
Recording Issues
Apps
Media Files
Voice Assistant Issues
Other issues
Diagnosing TV operational issues
Getting Support
166 Getting support through Remote Management
166 Finding the contact information for service
166 Requesting service
FAQ
The TV Screen does not Display Properly
167 When the TV screen does not display properly
The TV does not Turn On
174 When your TV does not turn on
The Picture is Distorted, or No Sound Comes Out of the Sound Bar
180 When the TV does not connect with an external device properly
Internet Access is not Available
185 When the TV can't connect to the Internet
There is No Sound or the Speakers are Making an Odd Sound
190 When no sound comes out of the TV, or the sound is breaking up
The Remote Control does not Work
197 When the remote control does not work
Updating the Software
202 Updating to the latest TV software
Accessibility Guidance
Learn Menu Screen
209 Using the Remote control
211 Using the accessibility menu
216 Using the TV with Voice Guide on
219 Using the guide
222 Using Schedule Viewing
223 Using the Channel List
225 Recording
228 Using Smart Hub
232 Launching the e-Manual
233 Using Bixby
Guide
Learn how to use various features.
Connections
You can watch live broadcasts by connecting an antenna cable to your TV and can get access to the Internet by using a LAN cable or wireless access point. Using various connectors, you can also connect external devices.
Connection Guide
You can view detailed information about external devices that can be connected to the TV.


Source Connection Guide
Now
It shows you how to connect various external devices such as video devices, game consoles, and PCs using pictures. If you select the connection method and an external device, the connection details appear.
• Audio Device: HDMI (ARC), Optical, Bluetooth, Wi-Fi, Wi-Fi Speaker Surround Setup
HDMI (ARC) is supported by some models. Check the HDMI port name of the purchased product's model.
• Video Device: HDMI
• Smartphone: Screen Sharing (Smart View), SmartThings, Apple AirPlay, NFC on TV, Tap View
• PC: HDMI, Screen Sharing (Wireless), Apple AirPlay
- Input Device: Remote Control, Keyboard, Mouse, USB Gamepad, Bluetooth Device
• Game Console: HDMI
• External Storage: USB Flash Drive, Hard Disk Drive (HDD)
The connection method and available external devices may differ depending on the model.
Using HDMI Troubleshooting, you can check the connection to HDMI cable and external devices (takes approximately 2 minutes).
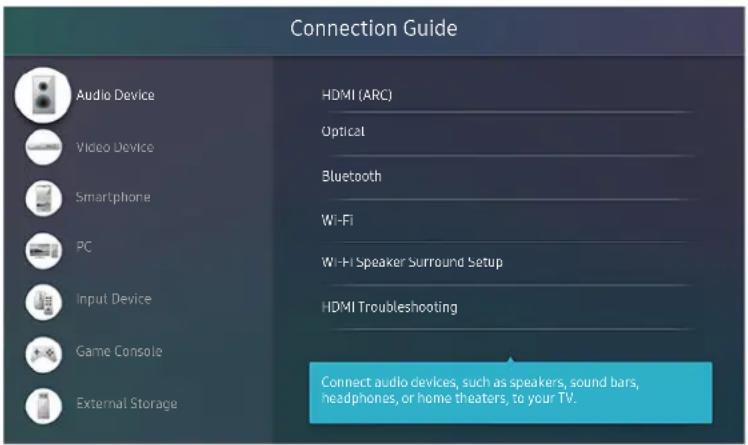
text_image
Connection Guide Audio Device Video Device Smartphone PC Input Device Game Console External Storage HDMI (ARC) Optical Bluetooth Wi-Fi Wi-Fi Speaker Surround Setup HDMI Troubleshooting Connect audio devices, such as speakers, sound bars, headphones, or home theaters, to your TV.The image on your TV may differ from the image above depending on the model and geographical area.
Connecting an Antenna
You can connect an antenna cable to your TV.
An antenna connection is not necessary if you connect a cable box or satellite box.
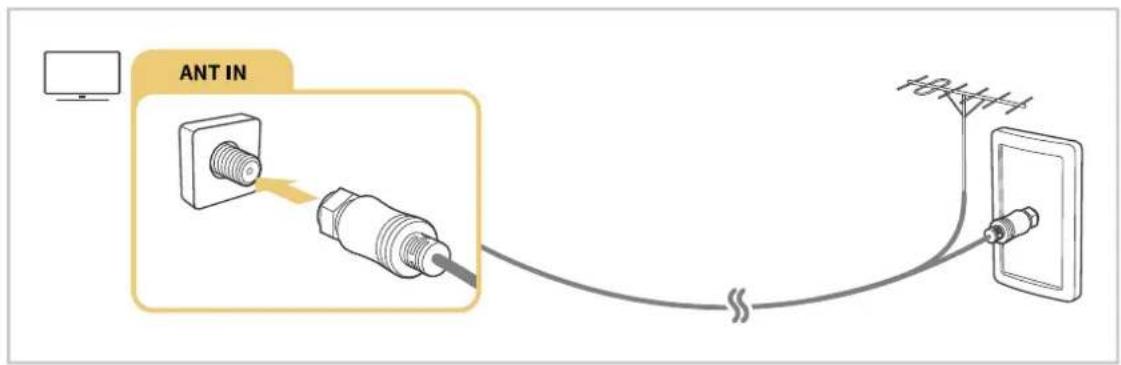
text_image
ANT IN 10V+4+4Connecting to the Internet
You can get access to the Internet through your TV.
Settings > General > Network > Open Network Settings Try Now
Configure network settings to connect to an available network.
Establishing a wired Internet connection
Settings General Network Open Network Settings Wired >
If you connect a LAN cable, the TV automatically accesses the Internet.
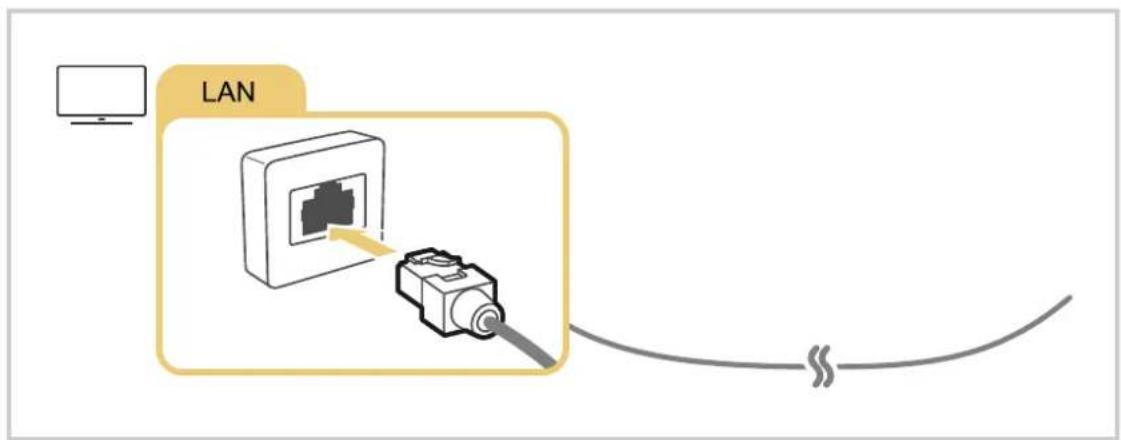
text_image
LANIf the TV does not automatically connect to the network, refer to "Network Issues" in "Troubleshooting."
Use a CAT 7 (*STP type) cable for the connection.
* Shielded Twisted Pair
The TV will not be able to connect to the Internet if your network speed is below 10 Mbps.
This function may not be supported depending on the model.
Establishing a wireless Internet connection
> Settings General Network Open Network Settings Wireless
Make sure that you have the wireless access point's SSID (name) and password settings before attempting to connect. The network name (SSID) and security key are available on the wireless access point's configuration screen. See the wireless access point's user manual for more information.
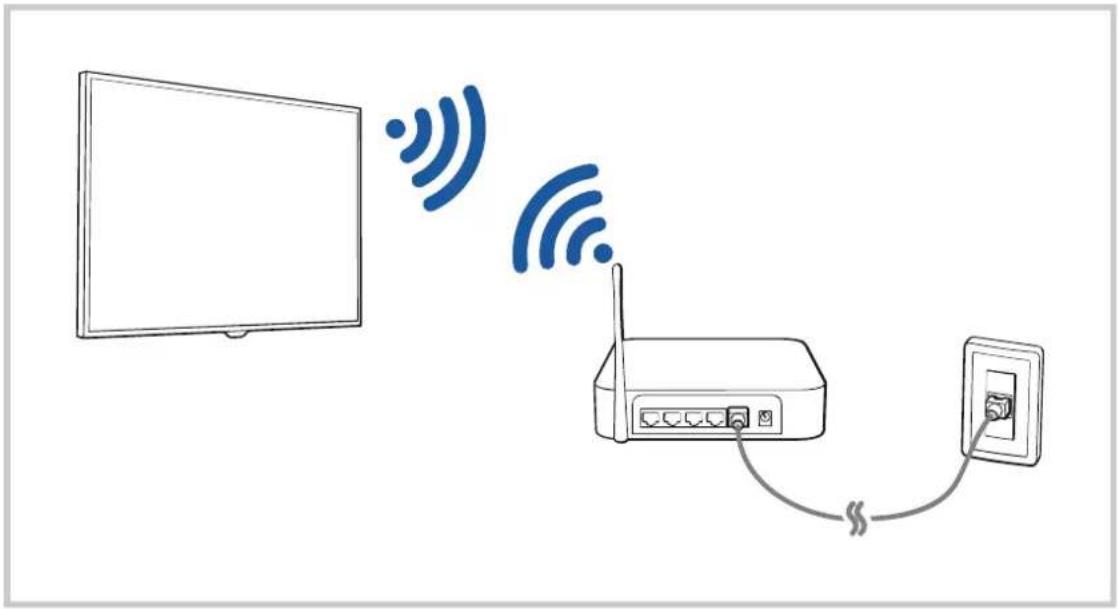
natural_image
Diagram showing a monitor connected to a wireless router via a power outlet, with signal waves indicating wireless connections (no text or symbols present)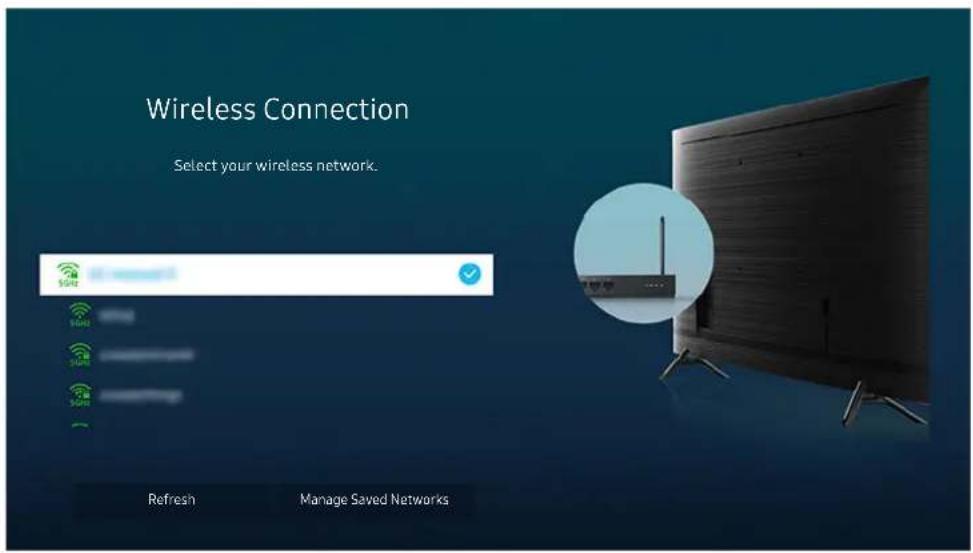
text_image
Wireless Connection Select your wireless network. Refresh Manage Saved NetworksThe image on your TV may differ from the image above depending on the model and geographical area.
If no wireless access point is found, select Add Network at the bottom of the list and enter the network name (SSID).
If your wireless access point has a WPS or PBC button, select Use WPS at the bottom of the list, and then push the WPS or PBC button on your access point within 2 minutes. The TV will connect automatically.
To view or delete previously connected network names (SSIDs), move the focus to Manage Saved Networks, and then press the Select button.
Checking the Internet connection status
Settings > General > Network > Network Status Try Now
View the current network and Internet status.
Resetting Your Network
Settings > General > Network > Reset Network Try Now
Restore the network settings to the factory default.
Turning on the TV with a mobile device
Settings General Network Expert Settings PowerOn with Mobile
You can turn on the TV using a mobile device connected to the same network as the TV.
This function may not be supported depending on the model or geographical area.
This function is available with a mobile device connected to the TV through the SmartThings app on your mobile device or the Apple AirPlay function.
Connecting an IP control device to the TV
Settings General Network Expert Settings IP Remote
You can connect an IP control device to the TV remotely to manage your IP device.
To use this function, Power On with Mobile must be turned on.
Turning this feature on may allow other IP control devices to control your TV. We recommend turning this feature on only if an authorized third-party custom controller is installed and configured specifically for a Samsung TV and if your Wi-Fi network is password protected.
This function may not be supported depending on the model or geographical area.
Changing the name of the TV
Settings > General > System Manager > Device Name Try Now
You can change the name of the TV on the network. Select User Input at the bottom of the list and change the name.
Screen Sharing (Smart View) with your Mobile Device
You can watch the screen of your mobile device on the TV screen through Smart View or Tap View.
For information on how to share the screen with your mobile device, refer to 📋 > ➤ Source Connection Guide ➤ Smartphone Screen Sharing (Smart View).
For more information in the The Terrace for business, refer to the provided user manual.
- To turn off Screen Sharing (Smart View), disconnect the mobile device or press the button on the remote control.
- Using the Smart View menu on your mobile device, you can change the settings such as aspect ratio.
- Use AirPlay if you are an iPhone or iPad user. For more information, refer to 📂 > ➤ Source Connection Guide > Smartphone Apple AirPlay.
This function may not be supported depending on the model.
- The screen sharing function (Smart View/Apple AirPlay) on your mobile device appears on Multi View of the TV (or the screen on your mobile device).
Using the Tap View
Tap your mobile device on the TV, you can watch the Multi View or mobile device's screen through the TV screen.
This function may not be supported depending on the model.
This function is available in Samsung mobile devices with Android 8.1 or higher.
- Enable Tap View on your mobile device.
For more information about configuration, refer to 'Enabling the Tap View' below for how to set.
- Turn on the screen of your mobile device.
- Tap your mobile device on the TV. The TV screen switches to Multi View or mobile device's screen.
When you perform Tap View in Ambient Mode feature or Art mode (only in The Frame models), only the mobile device's screen appears on the TV.
- Watch the Multi View or mobile device's screen on the TV screen.
The displayed TV screen may differ depending on the model.
This function enables mirroring (Smart View) by detecting vibrations generated when you tap the mobile device on the TV.
Be sure to tap away from the TV screen and bezel corners. It may be scratched or broken to the TV or mobile device screen.
We recommend using your mobile device with the cover in place and lightly tap it on any external edge of the TV.
Enabling the Tap View
Enable Tap View in the SmartThings app.
Depending on the SmartThings app version, you may need to register the TV with your mobile device.
- Launch the SmartThings app on your mobile device.
- Select Settings (主) in SmartThings app on your mobile device.
- Set the Tap View to on.
Upon connection for the first time, select Allow on a pop-up window of the TV.
Using the Multi View
While watching the TV, you can see content from your mobile device through mirroring (Smart View).
To start Multi View, run the screen sharing (Smart View/Apple AirPlay) for your mobile device. This function can be started or stopped by pressing the Button on the remote control.
This function operates only by TV broadcasts, external devices, or apps that support Multi View.
While running Multi View, app casting from your mobile device is run on Multi View. This function is not available in some apps.
To stop this function, press and hold the button on the remote control.
This function may not be supported depending on the model.
In some models, you can view the image on the camera connected to the SmartThings app of your mobile device.
Q-Symphony is not supported by Multi View.
When an external device that connects to a receiver or Soundbar is used in Multi View, sound outputs from the TV speaker, not from the receiver or Soundbar.
The following menus can be set by pressing the down directional button on the TV's remote control.
When you press the Select button while running Multi View, the focused screen is viewed in the full screen.
- Select Content
Selects content to be displayed on the left screen.
Press the down directional button on the TV screen. Available content items appear.
- Watch Mobile/Camera
Enjoy your mobile content by mirroring (Smart View).
You can view the camera video connected to the SmartThings app on your mobile.
- Screen Size
Selects the desired size of Multi View.
- PIP Position
Selects the position of a small screen on the full screen.
The focusing left or right screen appears as small window.
This function may not be supported depending on the model.
- Sound Output
You will hear the sound of the selected screen through another speaker connected to the TV.
This function may not be supported depending on the model.
- Sound Distribution
You will hear the sound of both screens at the same time by adjusting the ratio of each screens sound.
This function may not be supported depending on the model.
Connection Cables for External Devices
You can view detailed information about the connection cables for external devices that can be connected to the TV.
| Cable name Image Description | ||
| HDMI to HDMI | 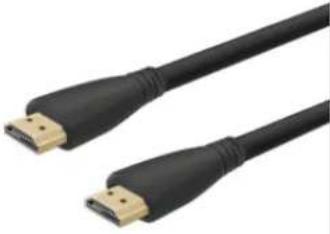 | Each cable simultaneously transmits digital video and audio signals from an external device to the HDMI port on the TV.Cables are divided into various types according to the types of input/output ports on external devices. |
| HDMI to MINI HDMI | 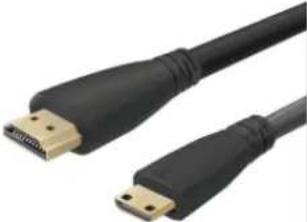 | |
| HDMI to Micro HDMI | 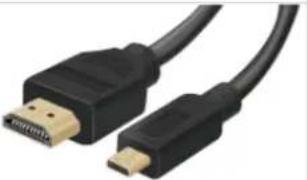 | |
| HDMI to USB Type-C |  | |
| HDMI to DisplayPort | 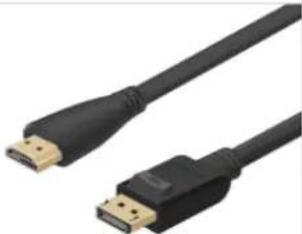 | |
| Mini DisplayPort to HDMI | 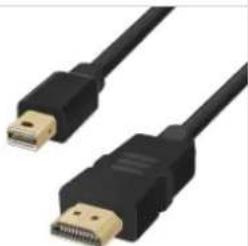 | |
| DVI to HDMI | 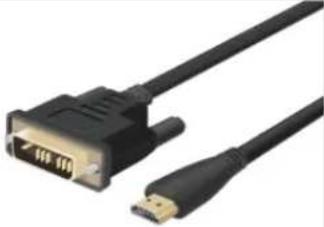 | DVI to HDMI cables can transmit only digital video signals and not audio signals. We recommend that you use HDMI to HDMI cables. |
| Optical | 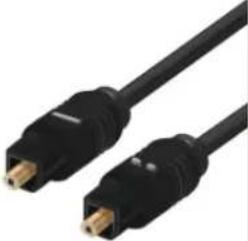 | Optical cables are used to transmit audio signals to external speakers with low signal loss.Optical cables do not transmit video signals. |
| Component | 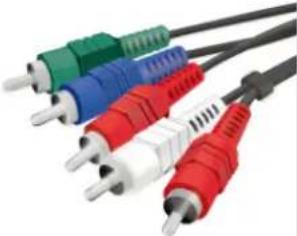 | Component cables transmit analogue signals.The video signal is separated and transmitted to the red, green, and blue terminals to provide HD (1080i) pictures. The audio signal is transmitted to the red and white terminals. |
| Composite | 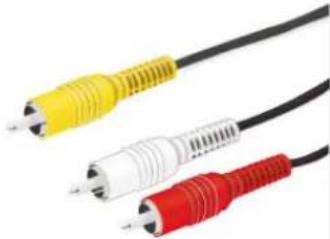 | Composite cables transmit analogue signals.The video signal is transmitted to the yellow terminal, and the audio signal is transmitted to the red and white terminals. |
Available connection cables may differ depending on the model or geographical area.
Switching between external devices connected to the TV
You can switch between TV programs and the content of external devices.
> Source
When you select a connected external device on the Source screen, the output of the selected device is displayed on the TV's screen.
To control a device (Blu-ray player, game console, etc.) that supports universal remote control with the TV's remote control, connect the device to an HDMI port on the TV, and then turn on the device. The output displayed on the TV is automatically switched to the output of the device or you can configure universal remote control for the device automatically. For more information, refer to "Controlling External Devices with a Samsung Remote Control - Using the Universal Remote."
When a USB device is connected to the USB port, a pop-up message appears that lets you switch easily to the media content listed on the device.
This function may not be supported depending on the device and geographical area.
Editing the name and icon of an external device
> Source
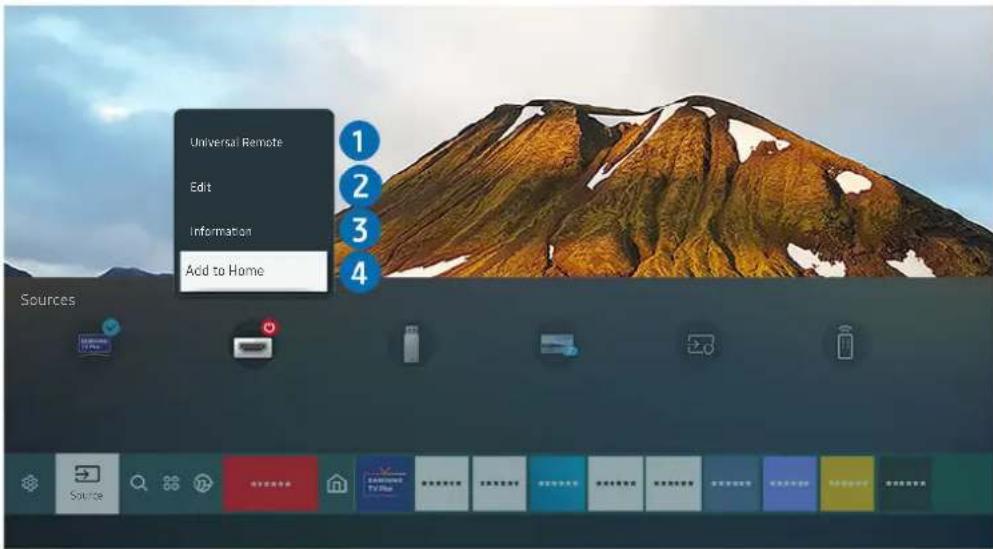
You can change the port name for a connected external device or add it to the Home Screen.
text_image
Universal Remote Edit Information Add to Home SourcesThe image on your TV may differ from the image above depending on the model and geographical area.
- Move the focus to a connected external device.
- Press the up directional button. The following functions become available.
Available functions may differ depending on the port type.
1 Universal Remote
You can control external devices connected to the TV using a Samsung remote control. To control external devices, register them by following the instructions on the screen.
This function may not be supported depending on the model or geographical area.
For more information, refer to "Controlling External Devices with a Samsung Remote Control - Using the Universal Remote."
2 Edit
You can rename the input ports and change the device icons.
3 Information
You can view detailed information about an external device.
4 Add to Home
You can add the port of an external device to the Home Screen for quick switching.
Using additional functions
You can use the following features on the Source screen.
- Remote Access
Use the TV to access your PC via remote PC or Screen Sharing (Wireless).
For more information, refer to "Using Remote Access."
- Connection Guide
Displays device connection instructions.
For more information about the Connection Guide, refer to "Connection Guide."
- Universal Remote
Lets you register external devices to your Samsung remote control and control them using the Remote.
This function may not be supported depending on the model or geographical area.
For more information, refer to "Controlling External Devices with a Samsung Remote Control - Using the Universal Remote."
Connection Notes
When connecting an external device, note the following.
The number of connectors and their names and locations may differ with the model.
Refer to the external device's operating manual when connecting it to the TV. The number of external device connectors and their names and locations may differ with the manufacturer.
Connection notes for HDMI
- The following types of HDMI cables are recommended:
– High Speed HDMI Cable
– High Speed HDMI Cable with Ethernet
– Premium High Speed HDMI Cable
– Premium High Speed HDMI Cable with Ethernet
– Ultra High Speed HDMI Cable
- Use an HDMI cable with a thickness of 17 mm or less.
- Using a non-certified HDMI cable may result in a blank screen or a connection error.
- Some HDMI cables and devices may not be compatible with the TV due to different HDMI specifications.
- This TV does not support HDMI Ethernet Channel. Ethernet is a Local Area Network (LAN) built with coaxial cables standardized by the IEEE.
- Use a cable shorter than 3m to get the best UHD viewing quality.
- Many computer graphics adaptors do not have HDMI ports, but have DVI or DisplayPort ports instead. If your PC does not support HDMI video out, connect your PC with a DVI to HDMI or HDMI to DisplayPort cable.
- When the TV is connected to an external device such as a DVD/BD player or a set-top box via HDMI, power sync mode will be automatically activated. In the power sync mode, the TV continues to detect and connect external devices via HDMI cable. This function can be deactivated by removing the HDMI cable of the connected device.
This function may not be supported depending on the model.
Connection notes for audio devices
- For better audio quality, it is a good idea to use an AV receiver.
- If you connect an external audio device using an optical cable, the Sound Output setting is automatically changed to the connected device. However, to make this happen, you must turn on the external audio device before connecting the optical cable. To manually change the Sound Output setting, do one of the following:
This function may not be supported depending on the model.
- Use the Quick Settings screen to change to the connected device:
Use the Select button to select Optical on the Sound Output menu. (图标 > Settings > up directional button Sound Output).
- Use the Settings screen to change to the connected device:
Select Optical on the Sound Output menu. (图标 > Settings > Sound > Sound Output).
Refer to the sound bar's user manual when connecting it to the TV.
- An unusual noise coming from a connected audio device while you are using it may indicate a problem with the audio device itself. If this occurs, ask for assistance from the audio device's manufacturer.
- Digital audio is only available with 5.1 channel broadcasts.
Connection notes for computers
- For the resolutions supported by the TV, refer to "Read Before Connecting a Computer (Supported Resolutions)."
- If you want to connect your PC and TV wirelessly, both of them must be connected to each other on the same network.
- When sharing content with other network-based devices such as those in an IP (Internet Protocol) storage system, sharing may not be supported due to the network's configuration, quality, or functionality, for example, if the network has an NAS (Network-Attached Storage) device.
Connection notes for mobile devices
- To use the Smart View function, the mobile device must support a mirroring function such as Screen Mirroring or Smart View. To check whether your mobile device supports the mirroring function, refer to the mobile device's user manual.
- The Screen Sharing (Smart View) feature may not operate smoothly in a 2.4 GHz environment. For better experience, 5.0 GHz is recommended. 5 GHz may be available depending on the model.
- To use Wi-Fi Direct, the mobile device must support the Wi-Fi Direct function. To check whether your mobile device supports Wi-Fi Direct function, refer to the mobile device's user manual.
- The mobile device and your Smart TV must be connected to each other on the same network.
- Use AirPlay if you are an iPhone or iPad user. For more information, refer to 📋 > ➤ Source Connection Guide > Smartphone Apple AirPlay.
This function may not be supported depending on the model.
- The video or audio may stop intermittently, depending on network conditions.
- When sharing content with other network-based devices such as those in an IP (Internet Protocol) storage system, sharing may not be supported due to the network's configuration, quality, or functionality, for example, if the network has an NAS (Network-Attached Storage) device.
Remote Control and Peripherals
You can control TV operations with your Samsung Smart Remote. Pair external devices such as a keyboard for ease of use.
About the Samsung Smart Remote
Learn about the buttons on the Samsung Smart Remote.
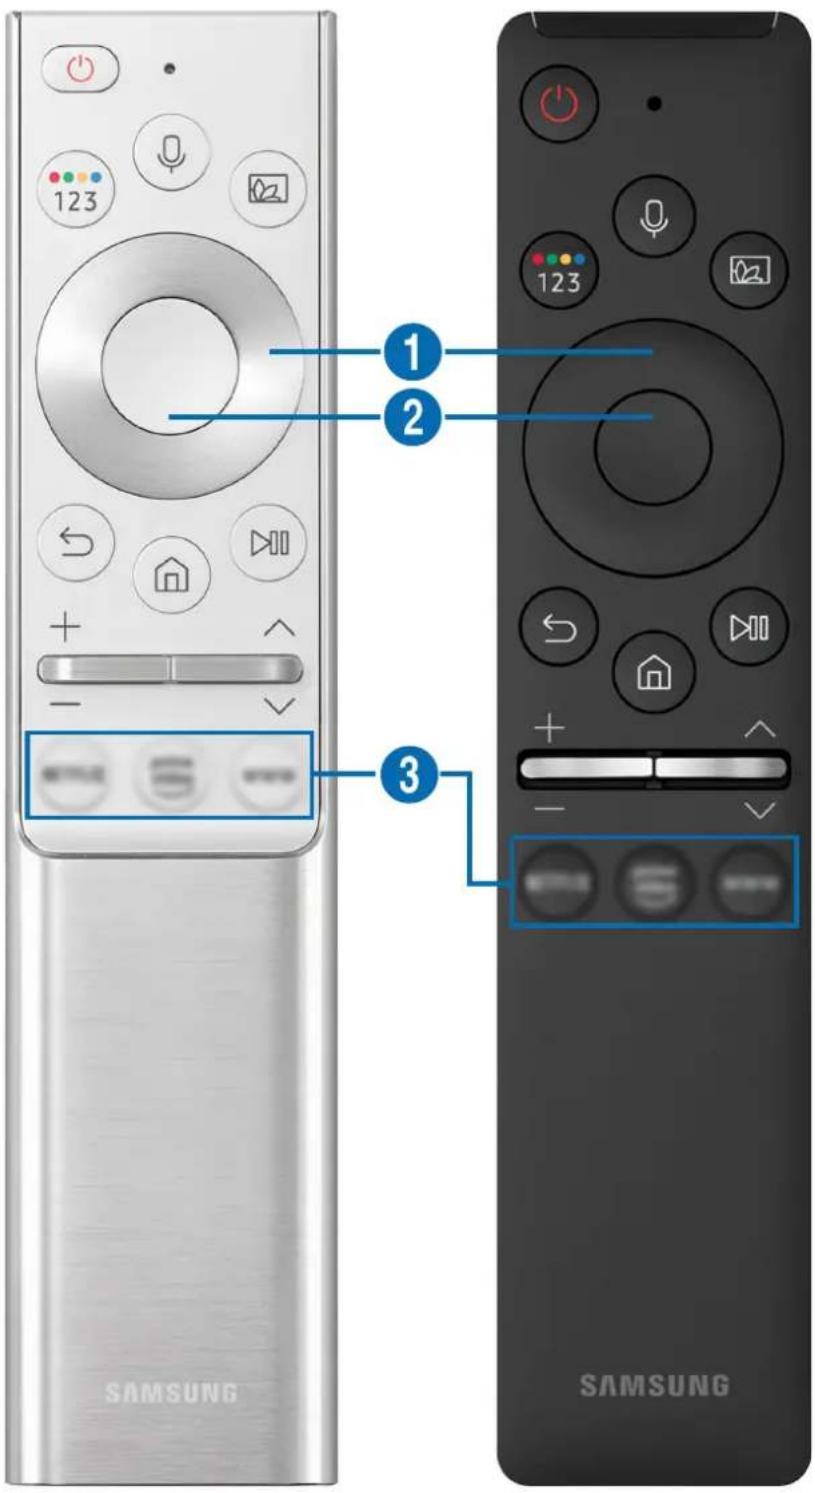
| Button Description | |
| (Voice Assistant) | Runs Voice Assistant. Press and hold the button, say a command, and then release the button to run Voice Assistant. |
| (Color - Number button) | Each time you press this button, the colored buttons window and the virtual numeric pad are displayed alternately.Use this button to access additional options that are specific to the feature in use.Press to bring up the virtual numeric pad on the screen. Use the numeric keypad to enter numeric values. Select numbers and then selectDoneto enter a numeric value. Use to change the channel, enter a PIN, enter a ZIP code, etc.If the Color Button appears with a number strip on the screen, select the Color Button and then select a specific color by using the directional button (up/down/left/right). Use this to access additional options that are specific to the feature in use. |
| (Ambient Mode) | In TV mode, press the button to enterAmbient Mode.If you press the button when the TV is turned off, the TV turns on inAmbient Mode. |
| Directional button (up/down/left/right) | Use to navigate the menu, or moves the focus to highlight items on the Home Screen. |
| Select | Selects or runs a focused item. When pressed while you are watching a broadcast program, detailed program information appears. |
| (Return) | Press to return to the previous menu. When pressed for 1 second or more, the running function is terminated. When pressed while you are watching a program, the previous channel appears. |
| (Smart Hub) | Press to return to the Home Screen. |
| (Play/pause) | When pressed, the playback controls appear. Using these controls, you can control the media content that is playing. |
| +/— (Volume) | Move the button up or down to adjust the volume. To mute the sound, press the button. When pressed for 1 second or more, the Accessibility Shortcuts appears. |
| ^/∨ (Channel) | Move the button up or down to change the channel. To see the Guide screen, press the button. Press and hold the button up or down to quickly change the channel. |
| 3 (Launch app button) | Launch the app indicated by the button. |
Use the Samsung Smart Remote less than 6 m from the TV. The usable distance may vary with the wireless environmental conditions.
The images, buttons, and functions of the Samsung Smart Remote may differ with the model or geographical area.
To use the Samsung Smart Remote to control a compatible external device that does not support HDMI-CEC (Anynet+), you must configure universal remote control for the device. For more information, refer to "Controlling External Devices with a Samsung Remote Control - Using the Universal Remote."
To use the Samsung Smart Remote to control a compatible external device that does support HDMI-CEC (Anynet+), connect the device to an HDMI port on the TV using an HDMI cable. For more information, refer to "Using Anynet+ (HDMI-CEC)."
About the Samsung Smart Remote (The Frame)
Learn about the buttons on the Samsung Smart Remote that comes with The Frame.
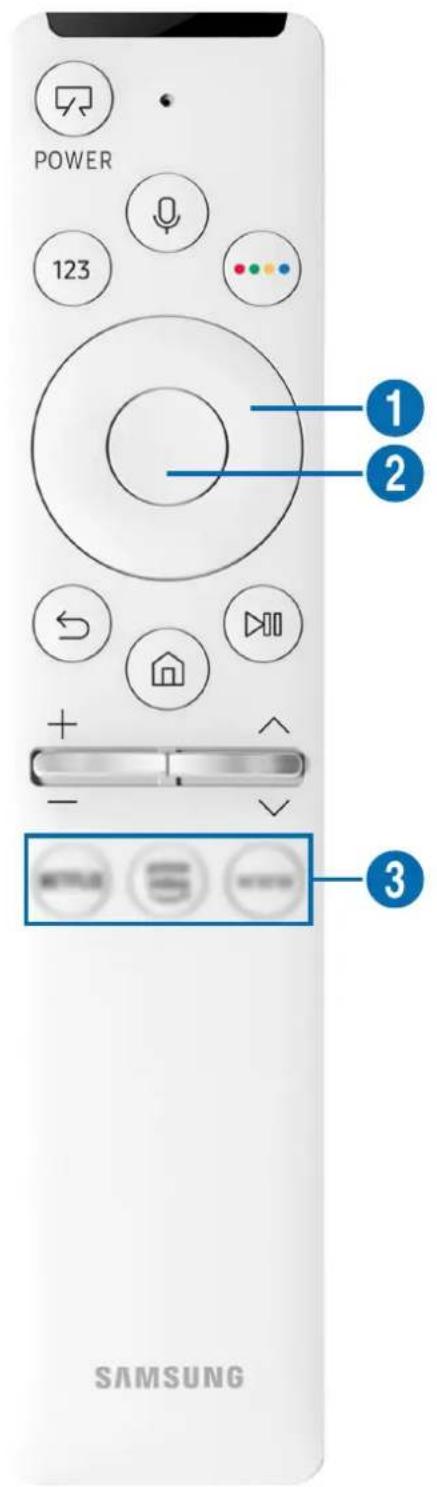
text_image
POWER 123 1 2 + - SAMSUNG 3| Button Description | |
| (Power) | When watching TV, press to switch to Art mode. In Art mode, press to switch to watching TV. Press and hold to turn off the TV completely.When the TV turns off and on again, the last used mode appears. |
| (Voice Assistant) | Runs Voice Assistant. Press and hold the button, say a command, and then release the button to run Voice Assistant. |
| (Number button) | Press to bring up the virtual numeric pad on the screen. Use the numeric keypad to enter numeric values.Select numbers and then select Done to enter a numeric value. Use to change the channel, enter a PIN, enter a ZIP code, etc. |
| (Color button) | When pressed, colored buttons appear on the screen. Use this button to access additional options that are specific to the feature in use.To immediately set Brightness while enjoying Art mode, press the button. |
| Directional button (up/down/left/right) | Use to navigate the menu, or moves the focus to highlight items on the Home Screen. |
| Select | Selects or runs a focused item. When pressed while you are watching a broadcast program, detailed program information appears. |
| (Return) | Press to return to the previous menu. When pressed for 1 second or more, the running function is terminated. When pressed while you are watching a program, the previous channel appears. |
| (Smart Hub) | Press to return to the Home Screen.Press in Art mode to switch to TV mode. |
| (Play/pause) | When pressed, the playback controls appear. Using these controls, you can control the media content that is playing. |
| +/− (Volume) | Move the button up or down to adjust the volume. To mute the sound, press the button. When pressed for 1 second or more, the Accessibility Shortcuts appears. |
| ^/∨ (Channel) | Move the button up or down to change the channel. To see the Guide screen, press the button. Press and hold the button up or down to quickly change the channel. |
| 3 (Launch app button) | Launch the app indicated by the button. |
Use the Samsung Smart Remote less than 6 m from the TV. The usable distance may vary with the wireless environmental conditions.
The images, buttons, and functions of the Samsung Smart Remote may differ with the model or geographical area.
To use the Samsung Smart Remote to control a compatible external device that does not support HDMI-CEC (Anynet+), you must configure universal remote control for the device. For more information, refer to "Controlling External Devices with a Samsung Remote Control - Using the Universal Remote."
To use the Samsung Smart Remote to control a compatible external device that does support HDMI-CEC (Anynet+), connect the device to an HDMI port on the TV using an HDMI cable. For more information, refer to "Using Anynet+ (HDMI-CEC)."
About the Samsung Smart Remote (The Sero)
Learn about the buttons on the Samsung Smart Remote that comes with The Sero.
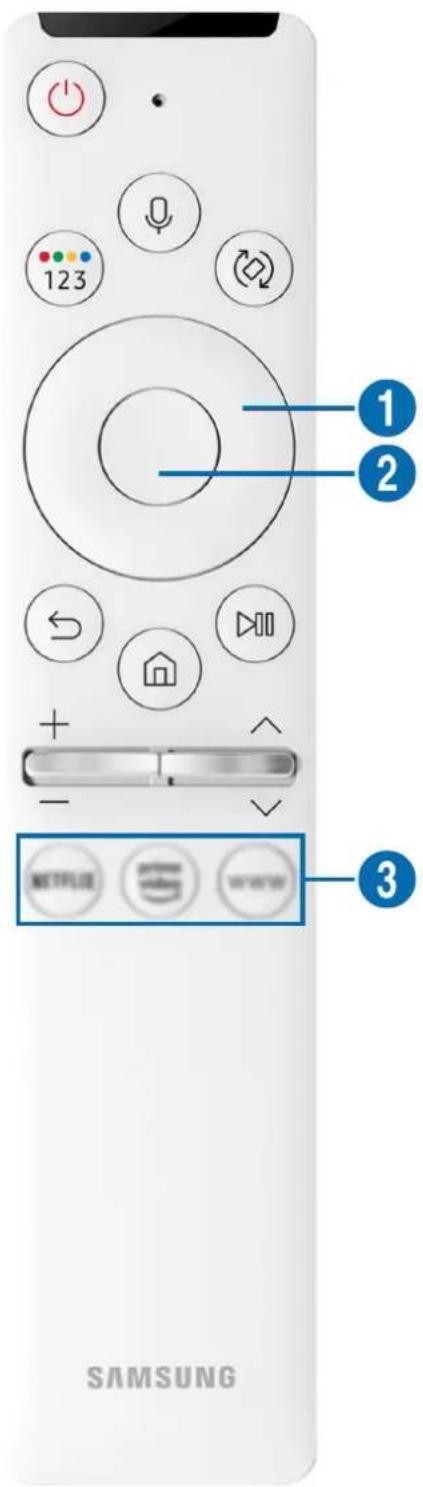
text_image
123 1 2 + - NETFLIO WINNT SAMSUNG| Button Description | |
| (Voice Assistant) | Runs Voice Assistant. Press and hold the button, say a command, and then release the button to run Voice Assistant. |
| (Color - Number button) | Each time you press this button, the colored buttons window and the virtual numeric pad are displayed alternately.Use this button to access additional options that are specific to the feature in use.Press to bring up the virtual numeric pad on the screen. Use the numeric keypad to enter numeric values. Select numbers and then selectDoneto enter a numeric value. Use to change the channel, enter a PIN, enter a ZIP code, etc.If the Color Button appears with a number strip on the screen, select the Color Button and then select a specific color by using the directional button (up/down/left/right). Use this to access additional options that are specific to the feature in use. |
| (Rotate) | Press the button to rotate the screen. |
| Directional button (up/down/left/right) | Use to navigate the menu, or moves the focus to highlight items on the Home Screen. |
| Select | Selects or runs a focused item. When pressed while you are watching a broadcast program, detailed program information appears. |
| (Return) | Press to return to the previous menu. When pressed for 1 second or more, the running function is terminated. When pressed while you are watching a program, the previous channel appears.When pressed for over 1 second inPortrait Mode, the content screen only forPortrait Modeappears. |
| (Smart Hub) | Press to return to the Home Screen. |
| (Play/pause) | When pressed, the playback controls appear. Using these controls, you can control the media content that is playing. |
| +/—(Volume) | Move the button up or down to adjust the volume. To mute the sound, press the button. When pressed for 1 second or more, theAccessibility Shortcutsappears. |
| ^/∨(Channel) | Move the button up or down to change the channel. To see theGuidescreen, press the button. Press and hold the button up or down to quickly change the channel. |
| 3(Launch app button) | Launch the app indicated by the button. |
Use the Samsung Smart Remote less than 6 m from the TV. The usable distance may vary with the wireless environmental conditions.
The images, buttons, and functions of the Samsung Smart Remote may differ with the model or geographical area.
To use the Samsung Smart Remote to control a compatible external device that does not support HDMI-CEC (Anynet+), you must configure universal remote control for the device. For more information, refer to "Controlling External Devices with a Samsung Remote Control - Using the Universal Remote."
To use the Samsung Smart Remote to control a compatible external device that does support HDMI-CEC (Anynet+), connect the device to an HDMI port on the TV using an HDMI cable. For more information, refer to "Using Anynet+ (HDMI-CEC)."
When you launch an app by pressing the button on the Samsung Smart Remote in Portrait Mode, some apps may switch to Landscape according to their app policy.
Connecting the Samsung Smart Remote to the TV
Connect the Samsung Smart Remote to your TV to operate the TV.
When you turn on the TV for the first time, the Samsung Smart Remote pairs to the TV automatically. If the Samsung Smart Remote does not pair to the TV automatically, point it at the front of the TV, and then press and hold the 5 and Buttons simultaneously for 3 seconds or more.
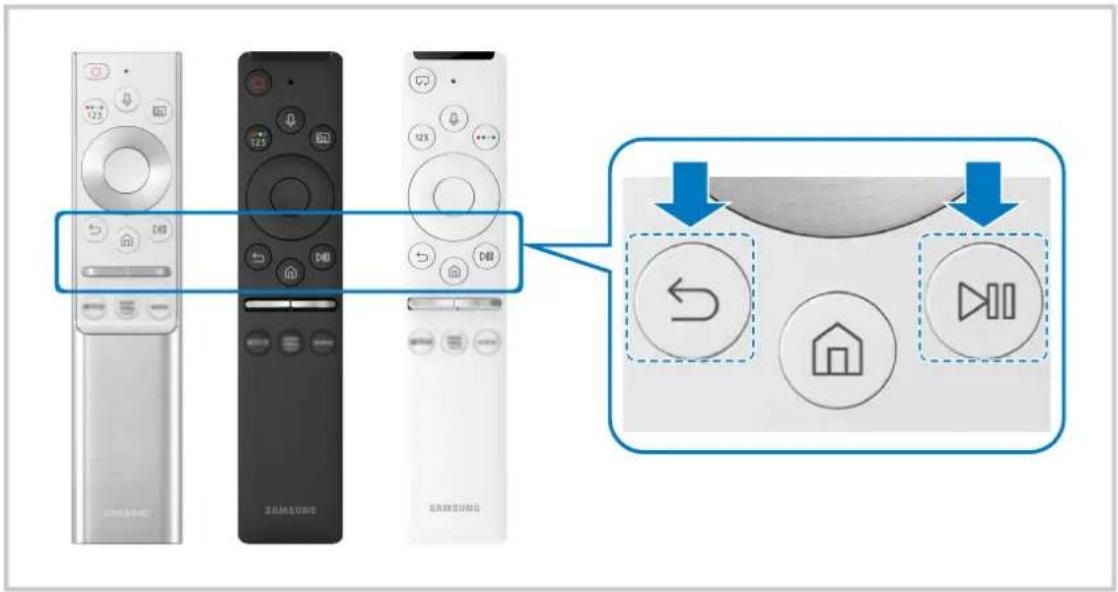
text_image
Diagram showing three remote devices with labeled icons and a zoomed-in view of the device's control panel.The images, buttons, and functions of the Samsung Smart Remote may differ with the model or geographical area.
For more information about the Samsung Smart Remote, refer to "About the Samsung Smart Remote."
For more information about the Samsung Smart Remote that comes with The Frame, refer to "About the Samsung Smart Remote (The Frame)."
For more information about the Samsung Smart Remote that comes with The Sero, refer to "About the Samsung Smart Remote (The Sero)."
Controlling External Devices with a Samsung Remote Control - Using the Universal Remote
Control the TV and connected external devices with a Samsung remote control.
Source Universal Remote
You can control external devices connected to the TV using a Samsung remote control. To control external devices, register them by following the instructions on the screen.
This function may not be supported depending on the model or geographical area.
You can also use the Anynet+ (HDMI-CEC) function to operate external Samsung devices with your TV's remote control without any additional setup. For more information, refer to "Using Anynet+ (HDMI-CEC)."
Specific external devices connected to the TV may not support the universal remote feature.
Do not place any obstacles in front of an external device and TV's logo. It may cause signals from the remote control to be transmitted improperly.
The TV memorizes both the external device and its connection port (HDMI 1, HDMI 2, etc.).
If you have difficulty controlling external devices with the Universal Remote, try adjusting the positions of the external devices.
This function may not operate properly depending on the TV installation environment and the features of external devices.
Using Anynet+ (HDMI-CEC)
Control an external device connected via Anynet+ (HDMI-CEC) with the remote control.
You can use the TV's remote control to control external devices that are connected to the TV by an HDMI cable and that support Anynet+ (HDMI-CEC). Note that you can only set up and operate Anynet+ (HDMI-CEC) with the remote control.
Connecting an external device through Anynet+ and using their menus
Settings > General > External Device Manager > Anynet+ (HDMI-CEC) Try Now
- Set Anynet+ (HDMI-CEC) to On.
- Connect an HDMI-CEC-compliant device to the TV.
- Turn on the connected external device.
The device is automatically connected to the TV. After the connection process is finished, you can access the menu of the connected device using your TV remote and control the device.
The connecting process can take up to 2 minutes to complete.
Read before connecting an Anynet+ (HDMI-CEC) device
Anynet+ (HDMI-CEC)-enabled devices must be connected to the TV with an HDMI cable. Note that some HDMI cables may not support Anynet+ (HDMI-CEC).
You can configure the TV's Universal Remote to control third-party cable boxes, Blu-ray players, and home theaters that do not support HDMI-CEC. For more information, refer to "Controlling External Devices with a Samsung Remote Control - Using the Universal Remote."
Anynet+ cannot be used to control external devices that do not support HDMI-CEC.
The TV remote control may not work under certain circumstances. If this occurs, set up the device as an Anynet+ (HDMI-CEC)-enabled device again.
Anynet+ (HDMI-CEC) works only with external devices that support HDMI-CEC and only when those devices are either in standby mode or turned on.
Anynet+ (HDMI-CEC) can control up to 12 compliant external devices (up to 3 of the same type) except for home theaters. Anynet+ (HDMI-CEC) can control only one home theater system.
To listen to 5.1 channel audio from an external device, connect the device to the TV via an HDMI cable and connect a 5.1 home theater system directly to the external device's digital audio output connector.
If an external device has been set up for both Anynet+ and a universal remote control, the device can be controlled only with the universal remote control.
Controlling the TV with a Keyboard, Mouse, or Gamepad
Connecting a keyboard, mouse or gamepad to make it easier to control the TV.
Settings > General > External Device Manager > Input Device Manager Try Now
You can connect a keyboard, mouse or gamepad to make it easier to control the TV.
Connecting a USB keyboard, mouse, or gamepad
Plug the keyboard, mouse or gamepad cable into the USB port.
If you connect a mouse, it is available only in the Internet app and Remote Access function.
XInput USB gamepads are supported.
For more information, refer to Input Device in Connection Guide (图标 > Source > Connection Guide > Input Device).
Connecting a Bluetooth keyboard, mouse, or gamepad
Settings General External Device Manager Input Device Manager Bluetooth Device List
If your device was not detected, position the keyboard close to the TV, and then select Refresh. The TV scans for available devices again.
If you connect a mouse, it is available only in the Internet app.
For more information about how to connect a Bluetooth device, refer to the Bluetooth device's user manual.
Using the keyboard and mouse
| Button Description | |
| Directional keys Use to navigate the menu, or move the focus to highlight items on the Home Screen. | |
| Windows key Displays the TV settings | |
| Enter key Selects or runs a focused item | |
| ESC key Returns to the previous screen | |
| F1 / F2 / F3 / F4 key Color buttons — / / / [IMAGE] | |
| F5 key Displays the Home Screen | |
| F6 key Displays theSourcescreen | |
| F7 key Displays theChannel List | |
| F8 key Mutes the sound | |
| F9 / F10 key Adjusts the volume | |
| F11 / F12 key Changes the channel | |
| Page Up / Page Down Scrolls a web page displayed by theInternetapp. | |
| Left-click | Available only in theInternetapp. You can click a menu or link to start a function as you do on a PC. |
| Right-click | Available only in theInternetapp. You can use the following functions:The options displayed in the menu may differ depending on the selected item.OpenOpen Link in New TabEnable Scroll Mode |
The key operation may differ depending on some apps or the keyboard.
Setting up the input devices
> Settings General External Device Manager Input Device Manager
- Keyboard Settings
You can set up the keyboard with the Keyboard Language and Keyboard Type functions.
- Mouse Settings
You can set up the mouse with the Primary Button and Pointer Speed functions.
Entering Text using the On-Screen Virtual Keyboard
Use the virtual keyboard to enter text on your TV.
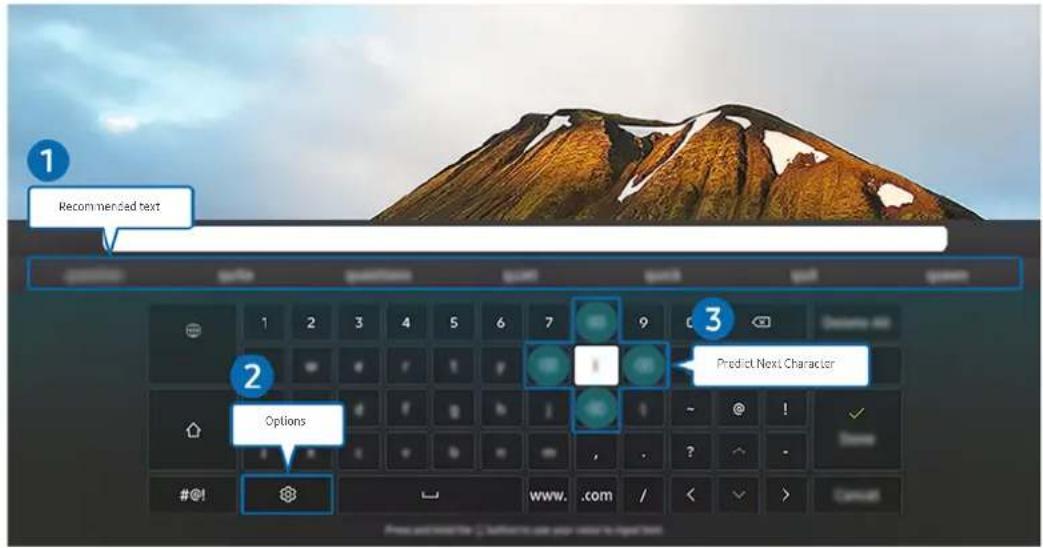
text_image
Recommended text 1 2 3 Options Predict Next Character #@! www. .com / < > CancelThe image on your TV may differ from the image above depending on the model and geographical area.
1 Recommended text
When you type a word you want to use as a search term, this function displays related suggestions from which you can choose one.

Options
Select on the virtual keyboard screen. The following options are available:
The options available may differ depending on the function running currently.
- Recommended text
- Reset Recommended Text Memory
• Accented Character Preview - Language
- Predict Next Character (when using direction buttons)

Predict Next Character
Each time you type a character on the virtual keyboard, the next characters predicted to be typed are displayed. You can use the directional buttons on the remote control to select one.
Entering Text using the remote control's microphone and the on-screen virtual keyboard
When the virtual keyboard is on the screen, press and hold the button 📄 on the Samsung Smart Remote, speak into the microphone on the Samsung Smart Remote, and then release the button. What you say appears on the screen as text.
Entering text with your voice may not be supported for some functions.
This function may not be supported depending on the model or geographical area.
Smart Features
You can enjoy various apps with Smart Hub.
Using Smart Hub
View descriptions of Smart Hub's basic functions.
From Smart Hub, you can use the Internet search function, install and use various apps, view photos and videos, or listen to music stored on external storage devices, and perform more functions.
Some Smart Hub services are paid services.
To use Smart Hub, the TV must be connected to the Internet.
Some Smart Hub features may not be supported depending on the service provider, language, or geographical area.
Smart Hub service outages can be caused by disruptions in your Internet service.
To use Smart Hub, you must agree to the Smart Hub service agreement and the collection and use of personal information. Without giving consent, you cannot use the additional features and services. You can view the entire text of the Terms & Privacy by navigating to > Settings > Terms & Privacy. Try Now
If you want to stop using Smart Hub, you can cancel the agreement. To cancel the Smart Hub service agreement, select Reset Smart Hub ( ⓗ > Settings > Support > Device Care > Self Diagnosis > Reset Smart Hub).
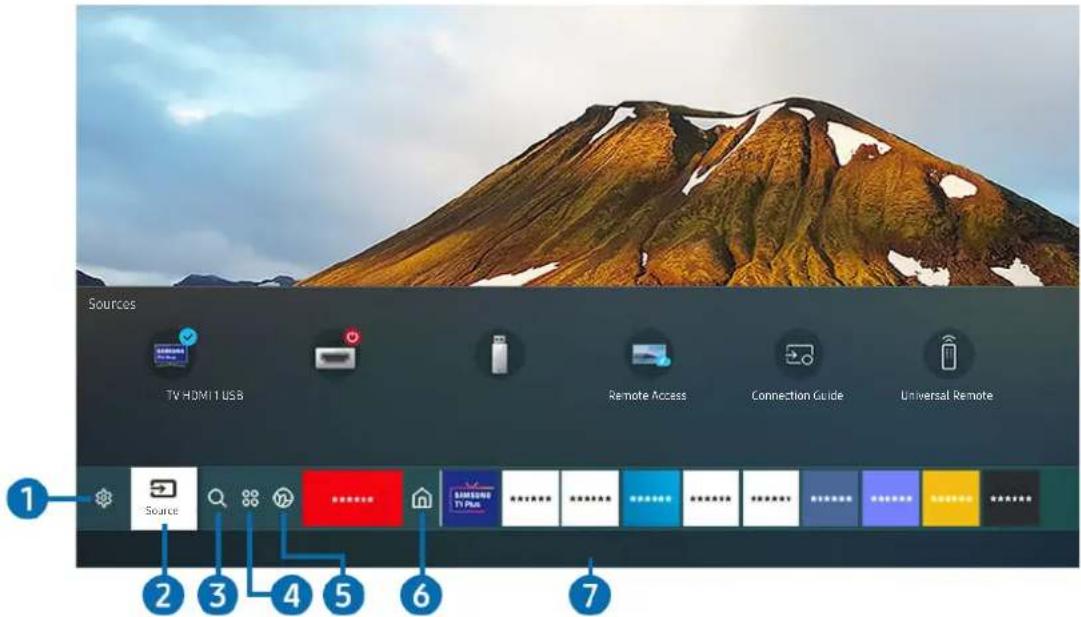
Displaying the Home Screen
Press the button.
text_image
Sources TV HDMI 1 USB Remote Access Connection Guide Universal Remote Source 2 3 4 5 6 7The image on your TV may differ from the image above depending on the model and geographical area.
On the Home Screen, you can easily run the apps you have used previously or frequently. The apps can also be moved or deleted from the screen.
1 Settings
When the focus is moved to Settings, a list of quick settings icons appears above the top of the menu. You can quickly set frequently used functions by clicking the icons.
• e-Manual
You can open the user manual embedded in your TV.
- Intelligent Mode
In Intelligent Mode, the TV recognizes and analyzes the surroundings, noise, the content, and your usage patterns to provide the best viewing experience. To turn Intelligent Mode on or off, press the Select button. To set the detailed options, press the up directional button, and then select Intelligent Mode Settings.
This function is supported only in QLED TV (except for Q60T model), The Frame, The Serif, The Sero, The Terrace and The Terrace for business.
For more information about the Intelligent Mode, refer to "Using the Intelligent Mode."
- Picture Mode
You can select the picture mode that provides the best viewing experience. To change the picture mode, press the Select button. To make fine adjustments, press the up directional button, and then select Picture Setup.
- Sound Mode
You can select a sound mode to optimize your listening experience. To change the sound mode, press the Select button. To make fine adjustments, press the up directional button, and then select Equalizer Setup.
- Sound Output
You can select which speakers the TV uses for audio output. To change the audio output, press the Select button. To connect to a Bluetooth speaker, press the up directional button, and then select Bluetooth Speaker List.
Connecting Bluetooth speaker may not be supported depending on the model or geographical area.
- Game Mode
You can enable game mode to optimize the TV's settings for playing video games with a gaming console, such as a PlayStation™, Xbox™ or Nintendo Switch™. To turn Game Mode on or off, press the Select button. To set the detailed options, press the up directional button, and then select Go to Game Mode Settings.
For more information about Game Mode, refer to "Setting the Viewing Environment for External Devices."
This function is only available when an external input source is being used.
- Audio Language
You can select a audio language. To set the detailed options, press the up directional button, and then select Go to Audio Options.
This function may not be supported depending on the model or geographical area.
- Caption
You can watch TV broadcasts with captions. To activate/deactivate the Caption function, press the Select button. To run Accessibility Shortcuts, press the up directional button, and then select Accessibility Shortcuts.
This function may not be supported depending on the model or geographical area.
- Sleep Timer
You can have the TV automatically turn off at a specific time. To change the sleep time, press the Select button. To set the specific time at which the TV turns off automatically, press the up directional button, and then select Set Up Off Timer.
- Network
You can view the current network and Internet status. Press the up directional button, and then select Network Status or Network Settings.
- Color Tone
You can select a color tone suitable for your viewing preferences. To change to a color tone that you want, press the Select button.
This function may not be supported depending on the model or geographical area.
- Picture Clarity
You can optimize pictures that contain a lot of motions. To turn this function on or off, press the Select button. To set the detailed options, press the up directional button, and then select Picture Clarity Settings.
This function may not be supported depending on the model or geographical area.
• Digital Output Audio Format
You can select an output format for digital audio. Note that the Dolby Digital+ option is only available via HDMI (eARC) for external devices that support the Dolby Digital+ format.
This function may not be supported depending on the model or geographical area.
- Device Care
You can run Device Care to diagnose and optimize your TV. Device Care can also check and optimize the TV's storage. If any problem is found, it can call for technical support.
- All Settings
Display the Settings menu.
This function may not be supported depending on the model or geographical area.
2 → Source
You can select an external device connected to the TV.
For more information, refer to "Switching between external devices connected to the TV."
3 Search
You can search for channels, programs, movie titles, and apps from Smart Hub.
To use this feature, the TV must be connected to the Internet.
4 Apps
You can enjoy a wide range of content including news, sports, weather, and games by installing the corresponding apps on your TV.
To use this feature, the TV must be connected to the Internet.
For more information, refer to "Using the Apps Service."
5 Ambient Mode
You can enhance your living space with decorative content that matches the surroundings or view essential real-time information such as weather, time, and news on the TV screen when you are not watching TV.
To return to the TV mode, press the button in Ambient Mode. To shut off the TV, press the button.
If you use a remote control other than the Samsung Smart Remote, there may be restrictions to entering Ambient Mode.
This function may not be supported depending on the model.
For more information about the Ambient Mode, refer to "Using the Ambient Mode."
6 Home
This menu appears first when you press the Ⓜ button. Then you can quickly access Samsung Account, Notification or Privacy Choices.
- Samsung Account
Go to the Samsung Account screen to create a new account or sign out of your account.
For more information about the Samsung Account, refer to "Using a Samsung account."
- Notification
You can view a list of notifications for all events that occur on your TV. A notification appears on the screen when it is time to schedule viewing or schedule recording or when an event occurs on a registered device.
If you move the focus to Notification, and then press the Select button, a notification window appears on the right and the following functions are available:
- Delete All
You can delete all your notifications.
- Settings
You can select services you want to be notified about.
When you select Allow sound, notifications are displayed with a notification sound.
- Privacy Choices
You can view and set the privacy policy for Smart Hub and various other services.
7 Universal Guide
Universal Guide is an app that allows you to search for and enjoy various content such as TV shows, dramas, and movies in one place. Universal Guide can recommend content tailored to your preferences.
You can use this feature on your mobile device with the Samsung SmartThings app.
To enjoy the content from these apps on your TV, they must be installed on the TV.
When you watch some paid content, you may need to make a payment using their associated app.
Some content may be restricted depending on your network conditions and your subscriptions to paid channels.
Parental control is necessary when children use this service.
Images may look blurry depending on the service provider's circumstances.
This function may not be supported depending on the model or geographical area.
Art
When you are not watching TV or when the TV is turned off, you can use the Art mode function to edit image content such as artworks or photos or to display the content.
This function is supported only in The Frame.
For more information, refer to the provided user manual.
Portrait Mode
When you do not use The Sero, you can rotate its screen vertically to see content such as photos, images, and time display.
This function is supported only in The Sero.
For more information, refer to the provided user manual.
text_image
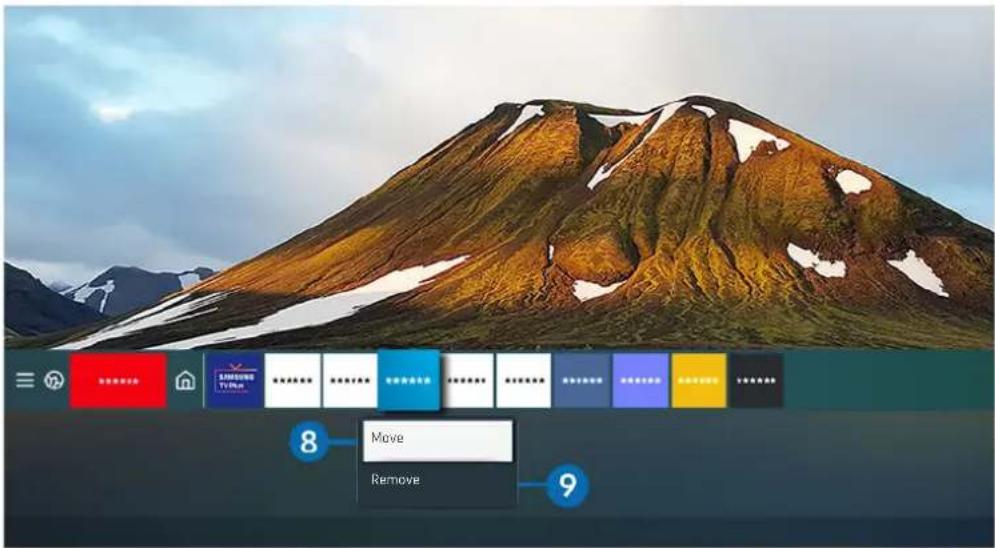
8 Move Remove 9The image on your TV may differ from the image above depending on the model and geographical area.
8 Moving an item on the Home Screen
Move the focus to the app you want to move, press and hold the Select button on the remote control, and then select Move in option menu. Move the app to the desired position by pressing the left or right directional button, and then press the Select button. The selected app is moved on the Home screen.
In the region that does not support the Universal Guide, press the down directional button on the remote control.
9 Removing an item on the Home Screen
Move the focus to the app you want to delete, press and hold the Select button on the remote control, and then select Remove in option menu. The selected app is deleted.
You can add the apps you want to use often to the Home Screen using Apps. To add your favorite apps to the Home Screen, refer to "Managing installed apps."
Launching Smart Hub automatically
Settings > General > Smart Features > Autorun Smart Hub Try Now
When you set Autorun Smart Hub to on, the TV displays the Home Screen automatically when you turn the TV on. You can also turn this function on or off. Press the Select button at the current menu.
Launching the last used app automatically
Settings > General > Smart Features > Autorun Last App Try Now
If Autorun Last App is set to on, the last used app is automatically run when you turn on the TV. You can also turn this function on or off. Press the Select button at the current menu.
This function may not be supported depending on the app.
This function may not be supported depending on the model.
Testing Smart Hub connections
Settings > Support > Device Care > Self Diagnosis > Smart Hub Connection Test Try Now
Resetting Smart Hub
Settings > Support > Device Care > Self Diagnosis > Reset Smart Hub Try Now
You can reset the Smart Hub settings. To reset Smart Hub, enter the PIN. The default PIN is "0000." You can set the PIN in > Settings General System Manager Change PIN.
Using a Samsung account
Create and manage your own Samsung account.
Settings > General > System Manager > Samsung Account Try Now
You can view the entire text of the Terms & Policy in 📄 > Settings > General > System Manager > Samsung Account > My Account Terms & Conditions, Privacy Policy after logging in to your Samsung account.
You can create a Samsung account at http://account.samsung.com. Once you have an account, you can use the same ID on both the TV and the Samsung website.
Signing in to a Samsung account
Settings General System Manager Samsung Account Sign In
Creating a new account
Settings General System Manager Samsung Account Create>Account
Sign up for a Samsung account on your mobile or PC. Visit : https://account.samsung.com
Managing your Samsung account
Settings General System Manager Samsung Account My Account
When you sign in to your Samsung account, you can use the following functions:
- Sign Out
When multiple people share the TV, you can sign out of your account to prevent others from seeing it.
To sign out of your Samsung Account (图标 > Settings > General > System Manager > Samsung Account), move the focus to your account's icon, and then press the Select button. When a pop-up window appears, select Sign Out.
- Edit Profile
You can edit your account information.
To protect personal information, enter Edit Profile and then Sign-in Method is set to Profile image selection and password entry (High security).
If you want the TV to log you into your account automatically whenever you turn on the TV, click Stay Signed In.
- Payment Info
You can view or manage your payment information.
- Back up
You can back up the TV settings to your Samsung Cloud storage. When resetting or replacing the TV, you can also restore its settings with the backed-up settings.
- Sync Internet
Once you sign in to your Samsung account and configure the Sync Internet settings, you can share the favorites and website bookmarks that you registered on other devices.
- Remove Account
You can delete an account from the TV. Although you have deleted your Samsung account from the TV, you are not unsubscribed. To unsubscribe from your Samsung Account, visit the Samsung Accounts website (http://account.samsung.com).
- Terms & Conditions, Privacy Policy
You can view the user agreement and privacy policy.
For more information about the terms and conditions, privacy policy, select View Details.
Using the Ambient Mode
Learn about the functions available in Ambient Mode.
> Ambient Mode
You can enhance your living space with decorative content that matches the surroundings or view essential real-time information such as weather, time, and news on the TV screen when you are not watching TV.
This function may not be supported depending on the model.
Entering Ambient Mode
To enter Ambient Mode from the TV viewing screen, press the button, or select > Ambient Mode.
If you use a remote control other than the Samsung Smart Remote, there may be restrictions to entering Ambient Mode.
When you select 📄 > Ambient Mode, The Sero rotates into Landscape and then enters the Ambient Mode.
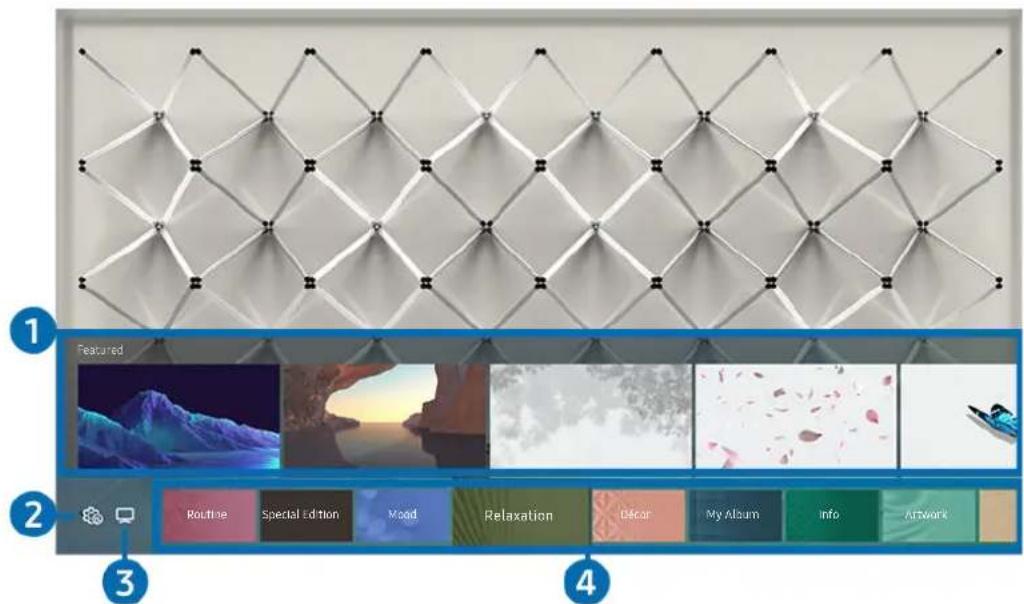
Ambient Mode browser screen
text_image
1 Featured 2 Routine Special Edition Mood Relaxation Decor My Album Info ArtMark 3 4The image on your TV may differ from the image above depending on the model and geographical area.
When you press the 📋 or ⬇ button in Ambient Mode, the Ambient Mode browser screen appears at the bottom of the screen. In the Ambient Mode browser screen, you can select content and change the Ambient Mode settings.
1 Function and content preview
When you select a category at the bottom of the screen, a preview of available functions and content appears here. To view detailed information about a content item, move the focus to it, and then press the up directional button.
2 Ambient Settings
You can configure the following Ambient Mode settings:
Available settings may differ depending on the model.
- Auto Brightness
Changes the auto brightness setting for Ambient Mode.
When this function is set to Off, the brightness level of the TV screen is not automatically adjusted in response to the surrounding light level.
- Sleep After
Sets the time when the Ambient Mode screen turns off automatically.
If there is no remote control input for the set time, the screen goes off.
- Reset All Photos
Resets the photos imported from your mobile device or Samsung Cloud.
This function may not be supported depending on the model.
3 TV
You can enter the TV viewing screen.
4 Selecting a content category
You can select your preferred content and background for the Ambient Mode screen.
You can use the SmartThings app on your mobile device to select the desired content and then change the settings.
The Sero does not support the following functions in the SmartThings app on your mobile device.
Available content categories may differ depending on the model or geographical area.
- Routine
Enjoy a range of routines, each displaying content to suit each part of your day or create your very own routines via the SmartThings app.
This function may not be supported depending on the model.
- Special Edition
Allows you to enjoy creative artwork and interior design content created by the world's finest artists and designers.
- Mood
Enjoy a range of options to create the right ambience to suit your mood.
- Relaxation
Relax with a selection of calming content inspired by nature to soothe your mood.
• Décor
Allows you to select content with a sensible and beautiful design.
- My Album
Allows you to set a photo stored in your mobile device or Samsung Cloud as the wallpaper of the Ambient Mode screen.
To import photos from your mobile device or Samsung Cloud, use the SmartThings app on your mobile device.
For more information about how to configure the photo settings, select View Help. This function is available after you select a photo in the My Album category.
This function may not be supported depending on the model.
- Info
Allows you to select essential real-time information such as weather, temperature, time, and news.
This function may not be supported depending on the geographical area.
- Artwork
Allows you to select content such as world famous photos and artwork.
This function may not be supported depending on the model.
- Background Theme
Allows you to select a background theme provided by Samsung.
Take a picture of a wall using the SmartThings app on your mobile device to create a custom background theme. When you use this function, there may be a delay in image transmission and optimization depending on network conditions.
You can set a background theme you created as a background of a content item. To set a background theme as the background of a content item, press the down directional button while watching the Ambient Mode screen.
- Music Wall
Enjoy listening to music in your living space. Visualizations are generated on your TV that alter and respond to the frequency of your music.
This function may not be supported depending on the model.
- About Ambient Mode
You can view information about Ambient Mode.
Applying effects to the content
When you are enjoying content in Ambient Mode, press the down directional button to change the following settings for the content:
Available functions may not be supported depending on the content.
- Color & Theme
Changes the color or theme of the content.
• Vibes
Selects a mood that matches the content.
This function may not be supported depending on the content.
- Backgrounds
Changes the background of the content.
You can use the SmartThings app on your mobile device to take a picture of a wall and create a custom background. For more information, select the How-To icon. This function may be a delay in image transmission and optimization depending on network conditions.
- Shadow Effects
Applies a shadow effect that you select to the content.
This function may not be supported depending on the content.
- Brightness
Adjusts the brightness of the content.
- Saturation
Adjusts the saturation of the content.
- Color Tone
Adjusts the colors of the content.
• Red Tone / Green Tone / Blue Tone
Adjusts the red, green, blue contrast.
Viewing detailed information about the content
When you are enjoying content in Ambient Mode, press the up directional button to view detailed information about the content.
Entering the TV viewing screen from Ambient Mode
To enter the TV viewing screen from Ambient Mode, press the Ⓜ button, or select □ TV in the Ambient Mode browser screen.
If you press the button when the TV is turned off, the TV viewing screen appears.
Using Remote Access
Use the TV to access your PC via Remote PC, Screen Sharing (Wireless) or Cloud Service.
Source Remote Access
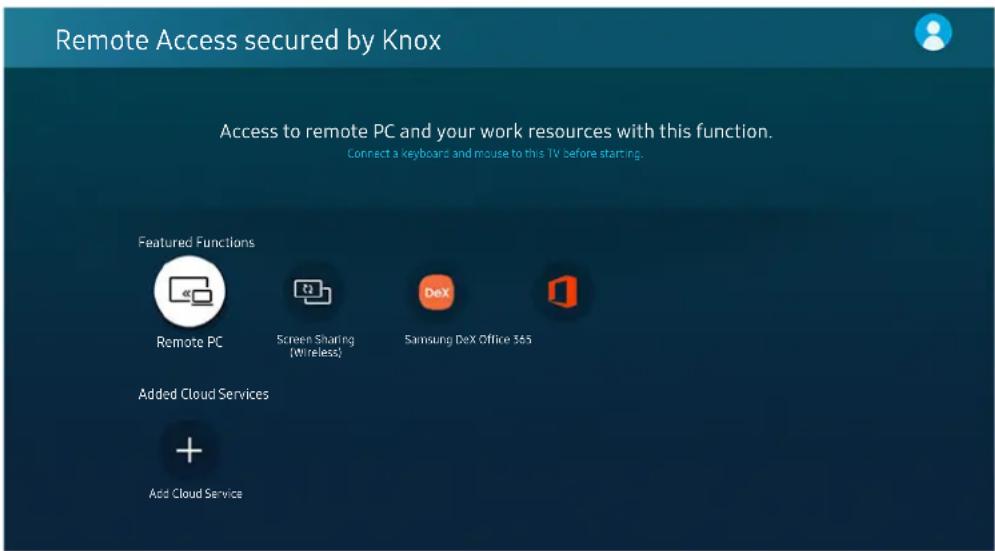
You can use the TV to access your PC via Remote PC, Screen Sharing (Wireless) or Cloud Service.
For smooth use as in a computer, connect a keyboard and a mouse to your TV in advance.
text_image
Remote Access secured by Knox Access to remote PC and your work resources with this function. Connect a keyboard and mouse to this TV before starting. Featured Functions Remote PC Screen Sharing (Wireless) bex Samsung Dex Office 365 Added Cloud Services + Add Cloud ServiceThe image on your TV may differ from the image above depending on the model and geographical area.
Connecting a Remote PC
Provides Remote Desktop Connection (RDP) for remotely connecting to a PC running on Windows and Virtual Network Computing (VNC) for a PC running on Mac. To remotely connect to a PC, you must enter the IP address of the remote PC or select a saved profile. Enter a correct username and password and select a correct protocol. If there is any computer that can be accessed via the same network, the found IP and protocol are displayed.
To register a frequently used PC, move the focus to Manage User Profiles, and then press the Select button. When a pop-up window appears, select Add, and then enter the PC information.
When your PC enters in power saving mode, connection is not available. It is recommended to cancel the power saving mode.
It is recommended to connect the wired network because the screen or sound may be interrupted depending on the network condition.
- Configure your computer's settings to use the Remote Access function.
Remote connection to a PC running on Windows via the RDP protocol is only supported for Windows 7 or later. And the operating system must be a Professional or higher edition.
Remote connection to a PC running on Mac via the VNC protocol is only supported for Mac OS X 10.5 or later.
- Windows OS:
1) Right-click the My Computer icon on Desktop or Windows Explorer and then click Properties.
2) Click Advanced System Settings. The System Properties window appears.
3) Click the Remote tab and then select the Allow Remote Assistance connections to this computer.
- Mac OS:
1) Select Menu > System > Preferences and then click Sharing.
2) Select the Screen Sharing and Remote Login check box.
3) Run the resolution changing app downloaded from App Store and then change the resolution to 1440 x 900 or lower.
If you do not change the resolution in Mac OS, the previous image may appear while connecting a remote computer.
- Enter the required settings for connecting the computer remotely.
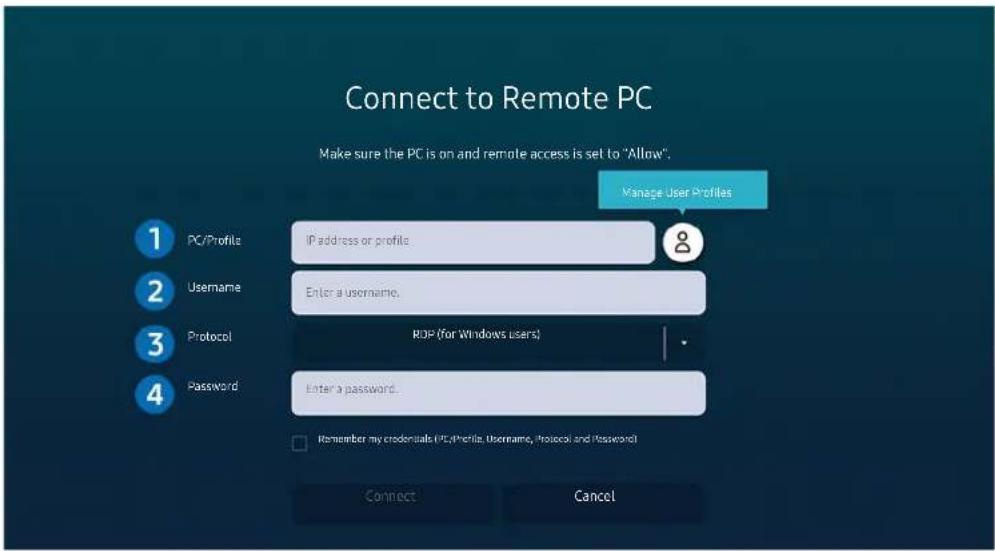
text_image
Connect to Remote PC Make sure the PC is on and remote access is set to "Allow". Manage User Profiles PC/Profile IP address or profile Username Enter a username. Protocol RDP (for Windows Users) Password Enter a password.. Remember my credentials (PC/Profile, Username, Protocol and Rosword) Connect CancelThe image on your TV may differ from the image above depending on the model and geographical area.
1 Enter the IP address of the PC you want to connect to.
- In case of Windows, when the computer to connect is within the same network (router/AP), run "cmd" command in Settings > Network and Internet > View Network properties or in Start > Run, and then run "ipconfig" to check the IPv4 address of the computer.
- In case of Mac, you can check the IP address in Settings > Remote Access.
- When the TV and computer are not within the same network, it is required to know the public IP and configure the router and AP. Check whether the router connected to the computer supports port forwarding. When the company provides additional security features such as firewall, seek help from a security officer.
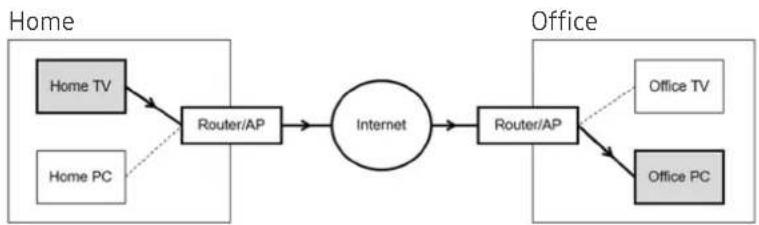
flowchart
graph LR
    A["Home TV"] --> B["Router/AP"]
    C["Home PC"] -.-> B
    B --> D["Internet"]
    D --> E["Router/AP"]
    E --> F["Office TV"]
    E --> G["Office PC"]
2 Enter the Username of the computer.
How to check the Username: Control Panel > User Account Control in Windows, System Preferences > Users & Groups in Mac.
3 Select the Protocol for the computer's OS. (Windows: RDP, Mac: VNC)
4 Enter the password for the login account.
For use of PIN, do not enter PIN but the specified password of the computer.
Playing Multimedia Content on a Remote PC
When you move the mouse cursor to the top of the screen after accessing a remote computer, the top bar appears. When the sharing folder icon is clicked in the top bar, the folders shared on Windows or Mac OS appear. You can play back any media content in a folder.
For more information about playing multimedia content, refer to "Playing pictures/video/music."
To use this function, the folder sharing option on the computer to access must have been enabled as shown below:
- Windows OS:
- Run Windows Explorer and then move to the folder to share.
- Right-click the folder and then click Properties.
- After the Properties window appears, click the Sharing tab and then click Advanced Sharing.
- After the Advanced Sharing window appears, select the Share this folder check box.
- Mac OS:
- Select Menu > System Preferences and then click Sharing.
- Select the File Sharing check box.
- To add a folder to share, click the Add+ button at the bottom.
- Select a folder and then click Add+.
It is recommended to connect the wired network because the screen or sound may be interrupted depending on the network condition.
When playing a video file via a remote computer, the screen or sound breaking may be encountered.
Using Screen Sharing (Wireless)
Follow the instructions on the screen to adjust the PC settings and wirelessly connect the TV to the PC.
This function is only available for PCs that support wireless screen sharing.
This function is supported by Windows 10.
You can connect AirPlay in Mac.
Using Samsung DeX
Samsung DeX can be connected from the TV via wireless network.
When the mobile device does not appear on the screen, select Mobile Connection Guide and then follow the screen instructions.
This function is available only on mobile devices that support the wireless Samsung DeX.
Using Office 365
You can read or create a document after accessing the Office 365 website.
Run the browser in full screen mode.
URL modification is impossible in the Office 365 page.
Adding the Cloud Service
Select the Add Cloud Service icon. Use the bookmarking function of the browser, you can add or delete the cloud service link to or from Remote Access.
To add the cloud service, you must be signed in to your Samsung account.
The number of cloud services that can be added to Remote Access is limited.
Using Cloud Service
You can access the cloud service by selecting the cloud service icon added to Remote Access.
The screen on the web page may differ from that of a computer.
You can copy or paste any text. Some image formats are supported.
For easy and secured login in Cloud Service, Remote Access Pass is additionally supported as well as Samsung Pass.
Setting Samsung Pass or Remote Access Pass.
Set Samsung Pass or Remote Access Pass to Use in
Source
Remote Access
Run the Remote Access browser
(Additionally select Office 365 or Add Cloud Service)
Internet Menu
Settings.
Remote Access Pass allows you to easily manage the cloud service ID and password without biometric authentication on mobile devices. For this purpose, you must be signed in to your Samsung account. The password is encrypted to be safely stored on your TV.
However, the log in to Remote Access Pass may not work depending on the site policy.
To securely access the cloud service, you can use the browser's automatic shutdown or clear the history logs.
Before accessing the cloud service, refer to "Read Before Using the Internet Function."
The cloud service supports the following keyboard shortcuts:
• F1: Returns to Remote Access's Home screen.
• F8: Mutes the sound.
• F9/F10: Adjusts the volume.
• F11: Switches between full screen or default screen.
Using the Apps Service
Download and run various apps from Smart Hub.
> Apps
You can enjoy a wide range of content including news, sports, weather, and games by installing the corresponding apps on your TV.
To use this feature, the TV must be connected to the Internet.
When Smart Hub is launched for the first time, the default apps are automatically installed. The default apps may differ depending on the geographical area.
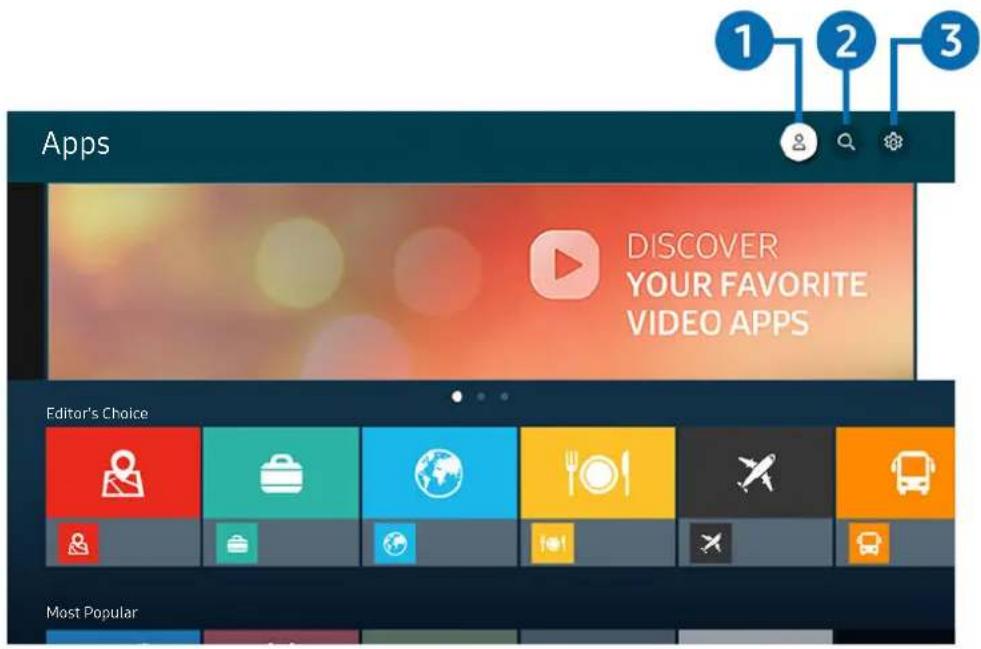
text_image
1 2 3 Apps DISCOVER YOUR FAVORITE VIDEO APPS Editor's Choice Most PopularThe image on your TV may differ from the image above depending on the model and geographical area.
1 Samsung Account
Go to the Samsung Account screen to create a new account or sign out of your account.
If you are signed out of your Samsung account, select Sign In to sign in.
If you want to download new apps using Apps, first sign in to your Samsung account.
2 App Search
You can search for available apps.
3 Settings
You can manage the installed apps.
Installing an app
- Move to the app you want to install, and then press the Select button. The detailed information screen appears.
- Select Install. When the installation is complete, the Open menu appears.
- Select Open to run the app immediately.
You can view installed apps on the Settings screen.
If the TV's internal memory is insufficient, you can install some specific apps on a USB device.
You can run an app installed on a USB device only when the USB device is connected to the TV. If the USB device is disconnected while an app is running, the app is terminated.
You cannot run an app installed on a USB device on a PC or another TV.
Launching an app
You can run the app desired from Downloaded App.
The icons below appear within the selected app's icon and indicate the following:
- : The app is installed on a USB device.
- : The app is locked.
- ©: The app needs to be updated.
- : The app supports the mirroring function.
Managing installed apps
Select Settings on Apps. You can manage installed apps.

text_image
Settings Copyright Auto Update : ON 7 Delete Add to Home Lock Move Reinstall View DetailsThe image on your TV may differ from the image above depending on the model and geographical area.
1 Removing an app
- Select an app to delete.
- Select Delete.
The selected app is deleted.
Ensure that the related app data is also removed when you remove an app.
Standard apps cannot be uninstalled.
2 Adding apps to the Home Screen
- Select an app to add.
- Select Add to Home.
- After the Home screen appears, move the selected app to the desired location.
- Press the Select button.
The selected app is added to the Home Screen.
If the selected app is already added to the Home Screen, this function is disabled.
3 Locking and unlocking apps
- Select an app to lock or unlock.
- Select Lock/Unlock.
The selected app is locked or unlocked.
To lock or unlock an app, enter the PIN. The default PIN is "0000." You can set the PIN in > Settings > General > System Manager Change PIN.
4 Moving apps
- Select an app to move.
- Select Move.
- Move the app to the desired location.
- Press the Select button.
The selected app is moved.
This function may not be supported depending on the model or geographical area.
5 Reinstalling an app
- Select the app to install again.
- Select Reinstall.
Reinstallation starts.
6 Checking the app information details
- Select the app to check.
- Select View Details.
The app information screen appears.
You can rate an app on the View Details screen.
7 Automatically updating apps
To automatically update the installed apps, set Auto Update to ON.
Automatic update is enabled only when the TV is connected to the Internet.
Using the Gallery App
View photos and videos synchronized with the Samsung Cloud.
> Gallery
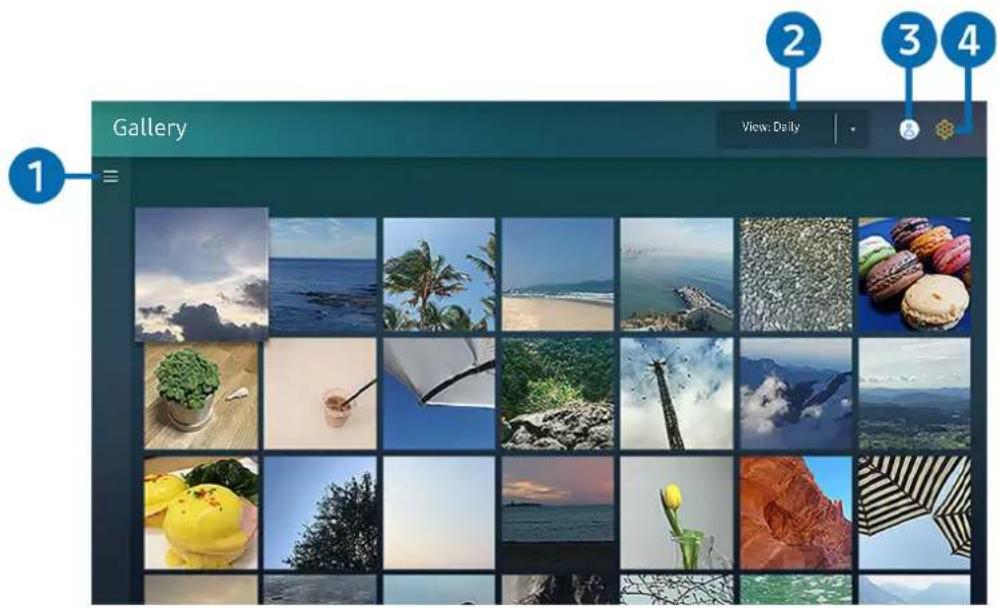
text_image
Gallery View: Daily 1 2 3 4The image on your TV may differ from the image above depending on the model and geographical area.
You can enjoy various content synchronized with a mobile device that supports the Samsung Cloud. The available content types are photos, videos, stories, and other content shared through your groups.
If you have shared content from your groups, you can access them in notifications.
To use the Gallery app, you must be signed in to your Samsung account that uses the Samsung Cloud.
To use this function, the PIN number is required.
This function may not be supported depending on the model.
1 ≡ Open category
Move to ≡at the top left of the screen using the directional buttons on the remote control to view by category the content synchronized with the Samsung Cloud.
2 View: Daily / View: Monthly
Sort the content by day or month.
3 Samsung Account
Go to the Samsung Account screen to create a new account or sign out of your account.
If you are signed out of your Samsung account, select Sign In to sign in.
4 Gallery Settings
Set a PIN for screen lock to restrict access to the Gallery app, or view the terms and condition.
Using the SmartThings App
Monitor and configure the smart devices you have connected to the SmartThings service.
> SmartThings
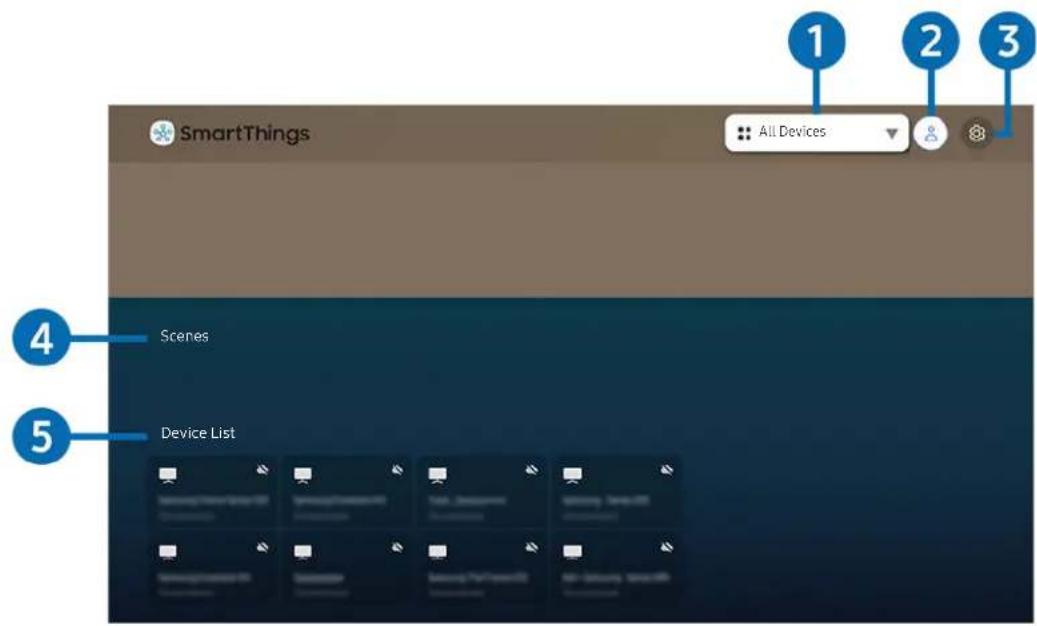
text_image
SmartThings All Devices Scenes Device ListThe image on your TV may differ from the image above depending on the model and geographical area.
From your TV, you can monitor and configure smart devices you connected to the SmartThings service via the SmartThings app installed on them. You can receive notifications about the statuses of your connected devices.
To use this function, you must be logged in to your Samsung account.
This function may not be supported depending on the model or geographical area.
1 Location selection list
Press the Select button to identify all connected devices or the devices specific to a location.
2 Samsung Account
Go to the Samsung Account screen to create a new account or sign out of your account.
If you are signed out of your Samsung account, select Sign In to sign in.
3 Settings
Turn notifications on or off for the connected smart devices.
4 Scenes
Control multiple devices with one command after setting scenes via the SmartThings app on your mobile device.
5 Device list
View a list of the connected smart devices and their statuses.
You can add and control new devices through the SmartThings app on your mobile device. You can check and control various devices such as speaker, smart devices (IoT devices), and home appliances registered on the server. Please refer to the user guide of the SmartThings app on your mobile device for more details.
Controlling your TV with the mobile SmartThings app
You can register your TV and use some features of the TV through the SmartThings app on your mobile device.
Using the e-Manual
Control and read the manual embedded in your TV.
Launching the e-Manual
> Settings Support Open e-Manual
You can view the embedded e-Manual that contains information about your TV's key features.
You can download a copy of the e-Manual from Samsung's website to view or print on your PC or mobile device (http://www.samsung.com).
Some menu screens cannot be accessed from the e-Manual.
Using the buttons in the e-Manual
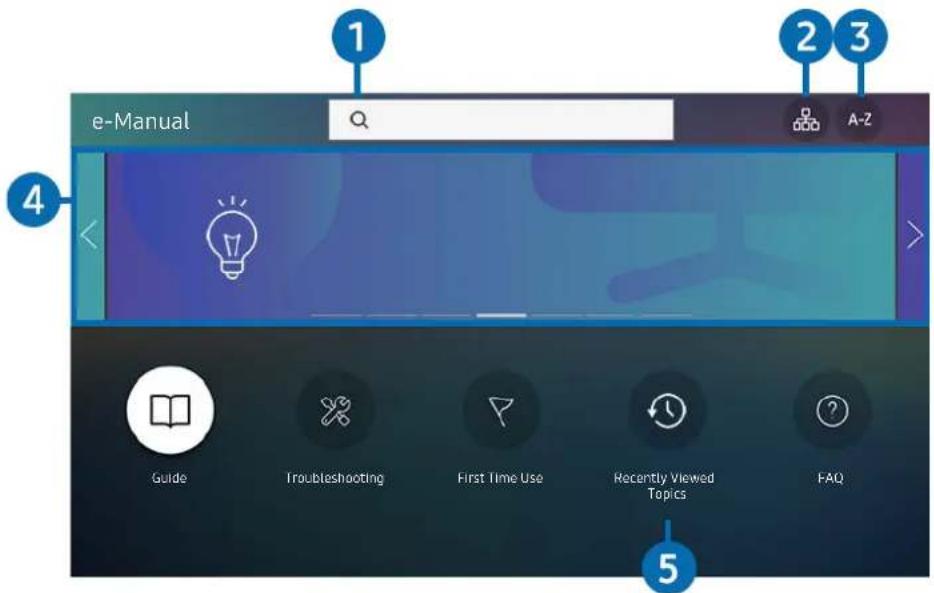
text_image
e-Manual 1 2 3 A-Z Guide Troubleshooting First Time Use Recently Viewed Topics FAQ 4 5The image on your TV may differ from the image above depending on the model and geographical area.
1 Q (Search)
Select an item from the search results to load the corresponding page.
2 (Sitemap)
It displays the lists for each item in e-Manual.
3 A-Z (Index)
Select a keyword to navigate to the relevant page.
This function may not be supported depending on the model or geographical area.
4 Moving to FAQ
You can find the troubleshooting of the selected symptom.
5 (Recently Viewed Topics)
Select a topic from the list of recently viewed topics.
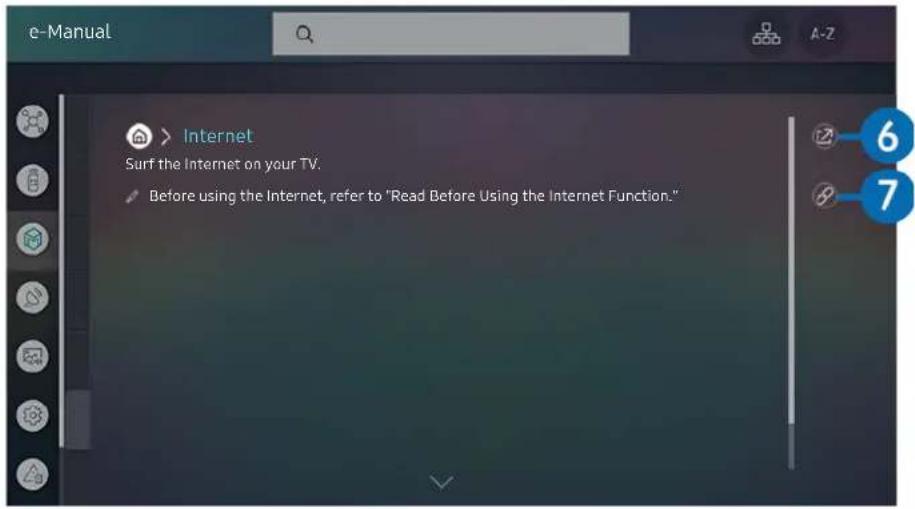
text_image
e-Manual Internet Surf the Internet on your TV. Before using the Internet, refer to "Read Before Using the Internet Function."Words in blue (e.g., Internet) indicate a menu item.
The image on your TV may differ from the image above depending on the model and geographical area.
6 (Try Now)
Allows you to access the corresponding menu item and try out the feature right away.
7 (Link)
Access an underlined topic referred to on an e-Manual page immediately.
Using the Internet
Surf the Internet on your TV.
> Internet
When you run Internet, you can see recently viewed web sites or featured recommendations. When you select a desired web site, you can get immediate access to it.
You can use the Internet function more easily after connecting a keyboard and mouse.
You can scroll web pages with the directional button on the Samsung Smart Remote.
The web pages may differ from those on a PC.
Before using the Internet, refer to "Read Before Using the Internet Function."
The Internet app has an embedded Samsung Pass ( Internet > Internet Menu > Samsung Pass Settings ). With Samsung Pass, you can log into the website easily and securely. When you visit the website again, you can log in with Samsung Pass Biometrics Authentication on your mobile device without entering your ID and password. However, this Samsung Pass login may not work depending on the website policy. For this purpose, you must have been logged in the mobile device with a Samsung account registered in Samsung Pass.
Playing pictures/video/music
Play media content stored on your TV, USB devices, mobile devices, cameras, PCs, etc.


Source Connected Device
Now
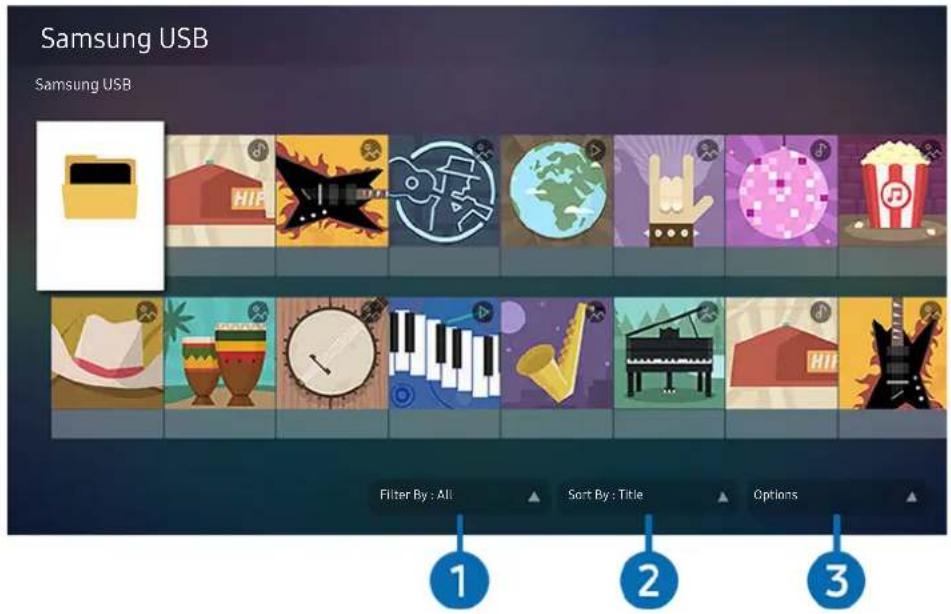
text_image
Samsung USB Samsung USB Filter By : All Sort By : Title Options 1 2 3The image on your TV may differ from the image above depending on the model and geographical area.
You can play media content saved on storage devices, such as USB devices, mobile devices, and cameras on the TV.
You cannot play media content if the content or the storage device is not supported by the TV. For more information, refer to "Read Before Playing Photo, Video, or Music Files."
Backup important files before connecting a USB device. Samsung is not responsible for damaged or lost files.
You can use the following functions on the media content list screen of a storage device.

Filter By
Filters the media content by type of media.
2 Sort By
Sorts the content list by Title, Date or Channel.
This function may not be supported depending on the type of external device.
3 Options
Deletes or plays the selected media content in the media content list. When you select Refresh, the content list is reloaded.
You can delete only the recorded content. To delete content, change the Filter By option to Recorded.
Recorded may not be supported depending on the geographical area.
Playing multimedia content on a PC or mobile device
- Select a device with media content in 📋 > → Source. The media content list in the device appears.
- Select a media content item from the list.
The selected content is played.
The content may not be played depending on the encoding method or file format. Furthermore, several functions may be restricted.
Content on devices connected to the TV via your network may not play smoothly due to network communication problems. If this occurs, use a USB device.
Playing multimedia content on a USB device
- Connect a USB device to the USB port.
- When a pop up message appears on the screen, select Browse to easily move to the list of multimedia content stored on the device.
If a USB device that contains the content you want to play is already connected to the TV, select the USB device in the Source screen.
- Select a content item to play from the list.
The selected content is played.
Listening to your mobile device sound through the TV speaker using Sound Mirroring
- Search for and connect to your TV from the Bluetooth device list on your mobile device.
- Select media content to play on your mobile device.
The selected contents media is played through the TV speaker.
Some models enter Ambient Mode, Art mode or Portrait Mode automatically, and then play the selected media contents.
If the TV and the sound bar are connected wirelessly, the operation may be restricted.
Buttons and functions available while playing multimedia content
Press the Select button while playing any video, photo, or recorded content. The following buttons appear.
The provided buttons and functions may not be supported depending on the model or geographical area.
The available buttons and functions may differ with the content you are viewing or playing.
- Pause / Play
Pauses or plays the multimedia content.
- Jump Backward / Jump Forward
Press the up directional button to move the focus to the playback control bar, and then select the left or right directional button in the playback control bar to move backward or forward by 10 seconds in the video.
- Move to a specific playback section, move up the focus on the playback bar, and then select one of the five thumbnails.
This function may not be supported depending on the file format.
- Stop
Stop the contents being played.
- Previous / Next
Displays the previous or the next multimedia content file.
- Rewind / Fast Forward
Rewinds or fast forwards the multimedia content. To increase the rewind or fast forward speed up to 3 times faster than normal, select the button repeatedly. To return to normal speed, select the ▶ option or press the ▶ button.
You can use the following functions when the video is paused. Note that with the video paused, the TV does not play audio.
- Slow Rewind or Slow Forward: Allows you to play a video slowly backward or forward by selecting the 📄 or ➤ option. There are 3 playback speeds. To change the playback speed, press the option repeatedly. To return to normal speed, select the ➤ option or press the button.
- 360 Mode
Provides a 360-degree view for videos and photos.
This function may not be supported depending on the file format.
Video files using the mjpeg codec do not support a 360-degree view.
When a video or photo does not support a 360-degree view, applying 360 rotation to it may cause the screen to look distorted.
Videos may be interrupted if 360 rotation is applied during double speed playback.
Videos that support a 360-degree view may be interrupted if 360 rotation is simultaneously applied with other functions during playback.
This function may not be supported for some resolutions.
This function may not be supported depending on the model.
- 360 Auto Rotation
Automatically adjusts the video's viewing angle by analyzing the amount of image changes during playback of a video file that provides a 360-degree view. When this function is started, the rotation starts in a short time.
When 360 Auto Rotation is focused, press the Select button to change to the following modes:
- General 360
- Dynamic
- N _360 Natural
This function is only available when 360 Mode is selected.
When 360 Auto Rotation is activated, automatic adjustment is followed. The adjustment position may differ depending on the image.
The video's viewing angle is manually adjusted in General mode.
This function may not be supported depending on the file format.
Video files that use the mjpeg codec do not support a 360-degree view.
When a video does not support a 360-degree view, applying 360 rotation to it may cause the screen to look distorted.
Videos may be interrupted if 360 rotation is applied during double speed playback.
Videos that support a 360-degree view may be interrupted if 360 rotation is simultaneously applied with other functions during playback.
This function may not be supported for some resolutions.
This function may not be supported depending on the model.
- Repeat
Plays the current multimedia content repeatedly or all multimedia content files in the same folder repeatedly.
- Shuffle
Plays music files in random order.
- Picture Off
Plays music files with the screen off.
- Screen Fit
Fits a photo to the screen.
- Rotate left / Rotate right
Rotates a photo left or right.
- Zoom
Zooms in a photo.
- Background Music
Pauses or resumes the background music while the TV displays photos.
This function is available after enabling the Background Music option.
- Options
The available options may differ with the model and content.
| Function Description | |
| Slideshow Speed | Sets the slideshow speed.If there is only one image file in the USB device, the slide show is not played. |
| Slideshow Effect | Applies transition effects to the slide show.If there is only one image file in the USB device, the slide show is not played. |
| Background Music | Plays background music as you set in the pop-up window while the TV displays photos.The music files must be saved in the same USB device as the photo files.To pause the background music, selectBackground Musicon the playback screen bottom. |
| Subtitles | You can set the detailed subtitle options such as the language, sync, size, and color.If subtitles are not displayed correctly, check the encoding setting. |
| Rotate Rotates the video. | |
| Audio Language | Changes the audio language.This function is only available if the video supports multi-track sound. |
| Information Displays detailed information about the current multimedia content. | |
Using Bixby
Set Voice Assistant to Bixby. Speak into the microphone on your Samsung Smart Remote to control your TV.
This function is available only if Voice Assistant is set to Bixby. ( Settings > General > Voice > Voice Assistant)
Bixby is available only when the TV is connected to the Internet.
To use Bixby, you must register and sign in to your Samsung account. Some functions may not be supported if you are not signed in to your Samsung account.
Bixby only supports some languages, and the supported functions may differ depending on the geographical area.
Bixby may not be supported depending on the geographical area.
Starting Bixby with voice
You can immediately start a conversation with Bixby by saying "Hi, Bixby." Say "Hi, Bixby," and the Bixby icon at the bottom of the TV screen is activated in Listen mode. Continue speaking.
The appropriate distance between user and the Samsung Smart Remote is 1.5 m. For more information on how to use this function, refer to "Voice Assistant Issues."
This function is not supported in TU8 series, Q60T, The Frame, The Serif, The Sero, The Terrace and The Terrace for business.
Starting Bixby using buttons on the Samsung Smart Remote
You can have conversation with Bixby using the Samsung Smart Remote buttons. Press and hold the 📄 button on your Samsung Smart Remote, say a command, and then release the ⏻ button.
To view the Bixby guide, press the 📄 button once:
- When you press the 🔒 button, the Explore Now button appears at the bottom of the screen. Press the Select button to go to the Explore Bixby screen.
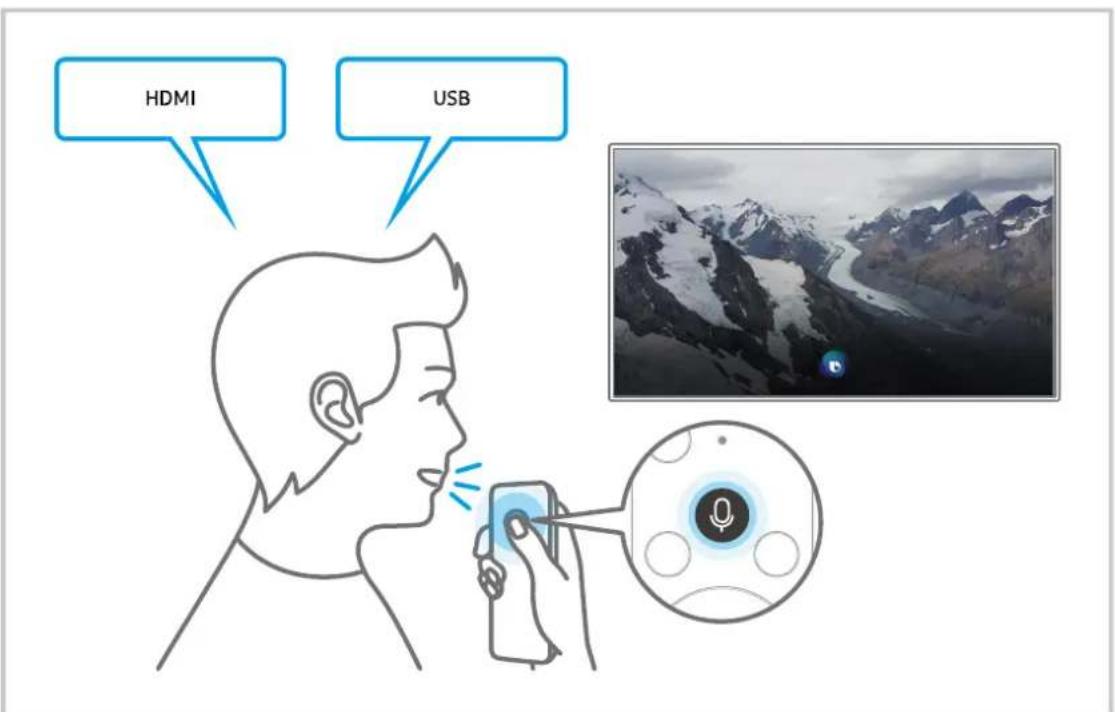
text_image
HDMI USBLearning about the Explore Bixby Screen
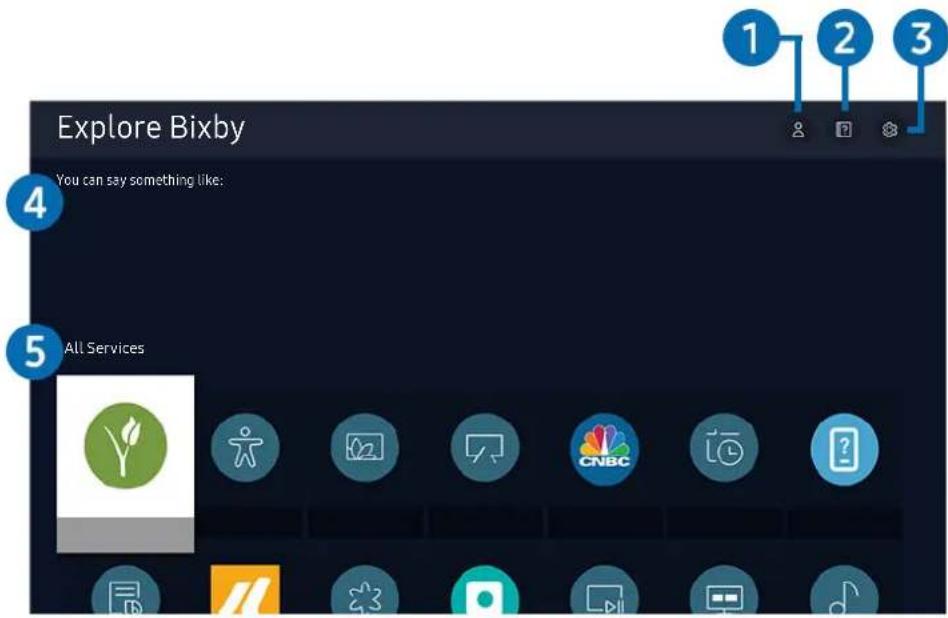
text_image
Explore Bixby You can say something like: All ServicesThe image on your TV may differ from the image above depending on the model and geographical area.
1 My Profile
Go to the My Profile screen to create a new account or register a voice ID. When a voice ID is registered, you can log in with your voice and see the icon that Bixby generated for your voice.
You can delete a voice ID after selecting ⚠ My Profile. When the voice ID is deleted, its icon also disappears.
If you are signed out of your Samsung account, select ⚠ My Profile to sign in.
2 ? Tutorials
The popup window on using Bixby appears.
3 Settings
You can change the settings for using Bixby.
These functions may not be supported depending on the model or geographical area.
These functions can be set in Bixby Voice settings ( Ⓜ > ⚙ Settings > General > Voice > Bixby Voice settings).
- Language
You can change Bixby's language.
The languages of the TV and other apps will not change.
Bixby only supports some languages.
- Voice response
You can change or turn off Bixby's voice.
This function may not be supported depending on the language selected for Bixby.
- Voice Wake-up
You can configure this function to make Bixby respond to your voice. If Bixby does not respond to your voice, turn on the Voice Wake-up function, and then try again. (◀ > Explore Now > Settings > Voice Wake-up)
The appropriate distance between user and the Samsung Smart Remote is 1.5 m. For more information on how to use this function, refer to "Voice Assistant Issues."
The Voice Wake-up function may not be supported depending on the model or geographical area.
- Sound feedback
Play a sound when Bixby starts and stops listening.
This function may not be supported depending on the model or geographical area.
- Privacy
You can permit or prohibit Bixby from utilizing your personal information when you are using Bixby services.
4 Recommended commands
Displays recommended commands you can use to control the TV with Bixby given the current context.
If you do not want to see the recommended commands, set Voice Hint to Off. ( Ⓜ > ⚙ Settings > General > Voice > Voice Hint)
5 All Services
You can learn the voice commands that let you use Bixby in various situations. Use the directional buttons to move to the desired command, and then press the Select button. You can operate the TV with various voice commands.
Read Before Using Bixby
- The supported voice interaction languages and features may differ depending on the geographical area.
- If the language set differs from the language of your country, some features are not available.
- Bixby is available only when the TV is connected to the Internet.
-
Even if the TV is connected to the Internet, there may be no response due to a Bixby server error.
-
The existing functional specifications may be changed if Bixby is updated.
- Bixby is available only on TVs that support it and come with remote controls that have a microphone.
- Symbols including "-" and special characters are not supported. Consequently, if a word or sentence contains numeric values or symbols, the function may not operate properly.
- Searched results may not provide complete results.
- You may be required to pay for some apps. Consequently, you may encounter a service application or contract.
- To change the current channel by saying channel names as voice commands, you must finish Set Up Your Service Provider. If Set Up Your Service Provider is not completed, you can complete it using Reset ( Ⓞ > ⚙ Settings > General Reset). Now
Service provider settings in initial setup may not be supported on geographical area.
- To use the voice text input function and the search function, you must consent to provisions allowing third parties to collect and use your voice data.
• To use the Bixby function, you must:
- Agree to Smart Hub's Terms of Use.
- Agree to a guidance regarding the collection and use of personal information for the Smart Hub service.
- Consent to the collection and use of personal information for the voice interaction-based service.
Provisions for using Bixby
- The voice interaction rate differs with the volume/tone, pronunciation, and ambient sound environment (TV sound and ambient noise).
- The optimal volume for voice commands is between 75 dB and 80 dB.
TV Viewing
You can use convenient features while watching TV. Additionally, you can edit the channel list or create favorite channel lists.
Using the Guide
See an overview of each channel's program lineup.

Live TV Guide
Now
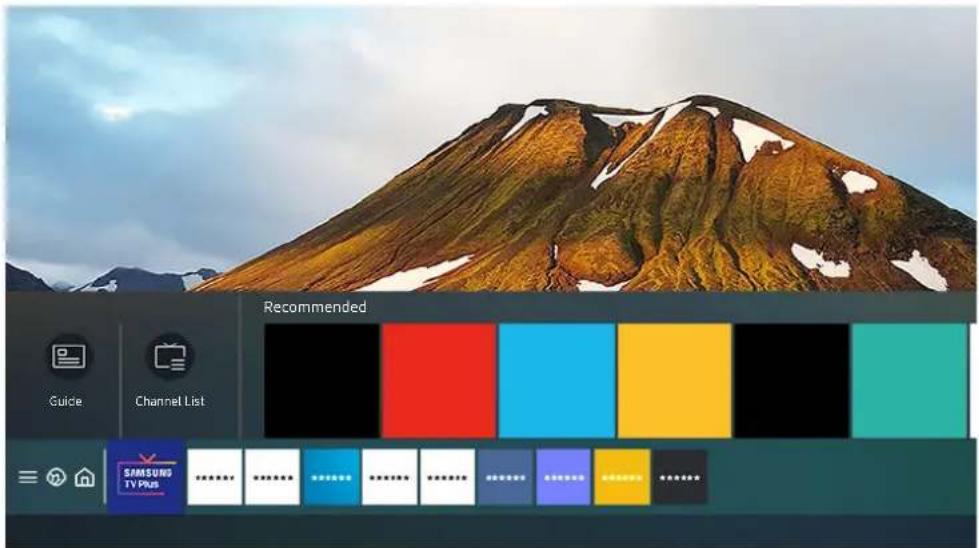
text_image
Recommended Guide Channel List SAMSUNG TV PLUSThe image on your TV may differ from the image above depending on the model and geographical area.
In the Guide, you can see the daily program schedules for each broadcaster, see program information, choose a program to watch, and set up a schedule viewing or recording.
To view the Guide while watching TV, press the ^/∨ (Channel) button on the Samsung Smart Remote.
To see information about analog channels and use the analog channel functions of the Guide, you must finish the service provider settings in initial setup.
Service provider settings in initial setup may not be supported on geographical area.
To view the Guide, you must first set the TV's clock ( Ⓜ > ⚙ Settings > General > System Manager > Time > Clock).
Move the focus to the program you want in the Guide, and then press and hold the Select button. You can use the following functions:
- Record
You can make a recording of a current program.
This function may not be supported depending on the model or geographical area.
- Stop
You can stop the recording function that is currently running.
This function may not be supported depending on the model or geographical area.
- Edit Recording Time
You can change the start and end times of scheduled program recordings.
This function may not be supported depending on the model or geographical area.
- Schedule Viewing
You can schedule the viewing of a broadcast scheduled program.
- Schedule Recording
You can schedule recording of a broadcast scheduled program.
This function may not be supported depending on the model or geographical area.
- Cancel Scheduled Viewing / Cancel Scheduled Recording
You can cancel scheduled viewings or recordings.
This function may not be supported depending on the model or geographical area.
- View Details
You can see detailed information about the selected program. The information may differ or may not be provided depending on the broadcast signal.
To move to the Channel Filter or Antenna Type, Schedule Manager screen: Press the 123 or 124 button. (If the remote control button is 125 press it twice.)
- Channel Filter
You can view channels and programs categorized by the types defined in Channel List.
- Antenna Type
You can change the type of broadcast signals the TV receives.
This function may not be supported depending on the incoming broadcast signal.
- Schedule Manager
You can see the Schedule Manager or Recording & Schedule Manager screen.
These functions may not be supported in the Guide depending on the model or geographical area.
Recording Programs
Record a current or upcoming program using a USB device instead of a video recorder.
This function may not be supported depending on the model or geographical area.
Read all precautions before using the recording feature. Refer to "Before Using the Recording and Timeshift Functions" for more information.
You can record only the programs that are received through an antenna.
The Appears next to the programs and channels scheduled for recording.
If you go to 📋 > Live TV while no USB device is connected, the Schedule Manager screen appears in place of the Recordings screen.
Using the instant and schedule recording options from the Guide screen
- Instant Recording
Select a live program from the Guide, press and hold the Select button, and then select Record from the pop-up menu to start recording immediately.
- Schedule Recording
Select a program scheduled to be broadcast, press the Select button, and then select Schedule Recording to set up a scheduled recording of the scheduled program.
Using the instant and schedule recording options while watching a program
- Instant Recording
If you select Record after pressing the 123 button twice or after pressing the ● button once while watching a broadcast, recording starts.
- Schedule Recording
Press the Select button while watching a program to display the program info window. Use the left or right directional button to select a scheduled program. Press the Select button, and then select Schedule Recording to set up a scheduled recording of the scheduled program.
Scheduling a video recording after entering the date and time
> Live TV Recordings Schedules Add Recording
To schedule a recording, set the values for Antenna, Channel, Repeat, Date, Start Time, and End Time of the broadcast program to record, and then select Save.
The menus may not appear depending on the model or geographical area.
Check the current time in Settings General System Manager Time Clock.
Managing the schedule recording list
> Live TV Recordings Schedules
You can change scheduled recording information or cancel scheduled recordings.
The menus may not appear depending on the model or geographical area.
You can schedule up to 30 recordings or viewings at once using Schedule Recording and Schedule Viewing.
- Edit
You can set the start and end times for a schedule recording. You can set the start time up to 10 minutes before the program starts and the end time up to 10 minutes after the program ends.
- Delete
You can delete scheduled recordings.
• View Details
You can view detailed information about scheduled recordings.
Viewing recorded programs
> Live TV Recordings Recordings
Select a file containing a recording from the list. The file is played back.
Move the focus to the recorded file, and then view Play, Delete or View Details on the right menu.
The menus may not appear depending on the model or geographical area.
Buttons that appear may differ depending on the file being played. For more information about control buttons, refer to "Buttons and functions available while recording a program or Timeshift."
Setting up a schedule recording start
> Live TV Recordings Settings
The menus may not appear depending on the model or geographical area.
- Start Recording Early
You can set the time to start the recording earlier than the broadcast start time in the program guide.
- Continue Recording After
You can set the time to end the recording later than the broadcast end time in the program guide.
- Symbol Information
Provide users with the information of the symbol and the explanation about an icon used in the schedule manager.
The menus may not appear depending on the model or geographical area.
Setting Up a Schedule Viewing
Configure the TV to show a specific channel or program at a specific time and date.
The Appears next to programs that have been configured for a scheduled viewing.
To set up a schedule viewing, you must first set the TV's clock ( Ⓜ > ⚙Settings > General > System Manager > Time > Clock).
Using the schedule viewing options from the guide screen
On the Guide screen, select a program you would like to view, press and hold the Select button, and then select Schedule Viewing in the pop-up menu that appears.
Using the schedule viewing options while watching a program
Press the Select button while watching TV. The Program Info window appears. Select a program that will be broadcast using the left or right directional buttons. Press the Select button, and then select Schedule Viewing to schedule viewing of that program.
Using schedule viewing to view programs at a specified time on a specified date
Live TV Schedule Manager Add Viewing
Live TV Recordings Schedules Add Viewing
To schedule a viewing, set the values for Antenna, Channel, Repeat, Date, and Start Time of the broadcast program to view, and then select Save.
Check the current time in Settings General System Manager Time Clock.
The menus may differ depending on the model or geographical area.
This function may not be supported depending on the geographical area.
Setting the schedule Viewing Time
Live TV Schedule Manager
Live TV Recordings Schedules
You can change scheduled viewing information or cancel scheduled viewings.
You can set up a maximum total of 30 Schedule Viewing and Schedule Recording entries.
The menus may differ depending on the model or geographical area.
- Edit
You can set the start time of a scheduled viewing. If you choose a program from the Guide, the Start Time can be set to up to 10 minutes before the program.
- Delete
You can delete scheduled viewings.
- View Details
You can view detailed information about scheduled viewings.
Using Timeshift
Play, pause, or rewind live TV.
You can pause and rewind live TV by using Timeshift. Activating this function disables the Broadcasting function.
Try Now
To activate the Timeshift function while watching TV, press the 123 button twice or press the 5 button and then select Timeshift, or press the 15 button.
This function may not be supported depending on the model or geographical area.
When the Timeshift function is running, some functions are not available in 📄 > Settings > Broadcasting
To use Timeshift, you must connect a USB device for recording.
Read all precautions before using the Timeshift function. For more information, refer to "Before Using the Recording and Timeshift Functions."
Buttons and functions available while recording a program or Timeshift
Review available buttons and functions of how they are used while recording a program or Timeshift.
This function may not be supported depending on the model or geographical area.
The available buttons and functions may differ with the functions.
When you press the down directional button, the control bar appears and the following options are available:
- Pause / Play
You can use the following functions when the video is paused. Note that with the video paused, the TV does not play audio.
- Slow Rewind or Slow Forward: Allows you to play the video slowly (1/8, 1/4, 1/2) backward or forward by selecting the option. To increase the rewind or forward speed in slow mode up to 3 times, select the option repeatedly. To return to normal speed, select the option.
When the Slow Rewind function is activated, you can view the difference between the current recording time and the current rewind time.
- Jump Backward / Jump Forward
Press the up directional button to move the focus to the playback control bar, and then select the left or right directional button in the playback control bar to move backward or forward by 10 seconds in the video.
When the Jump Backward function is activated, you can view the difference between the current recording time and the current rewind time.
- Rewind / Fast Forward
This function is not available while you are watching a program that is currently being broadcast.
- Stop Recording / Stop Timeshift
Ends the recording or Timeshift function.
- Record
You can switch from the Timeshift function to the recording function. When switching to the recording function, you can include the content recorded by the Timeshift function in the new recording.
This function is only available when the Timeshift function is running.
- Edit Recording Time
You can set for what period of time the program will be recorded.
This function is only available when a program is being recorded.
- Go to Live TV
Select to return to the current scenes of the program when the Timeshift function is playing its past scenes.
- Info
Displays the program info window of the program you are recording or time-shifting.
Using the Channel List
Change the channel or check programs on other digital channels.
> Live TV Channel List
Using the Channel List, you can change the channel or check programs on other digital channels while watching TV.
The Channel List screen contains the following icons:
The Channel List categories may vary depending on the incoming broadcast signals.
- : A favorite channel.
- : A locked channel.
If you press the left directional button when viewing the Channel List screen, you can use the following functions:
- Air or Cable
To select Air or Cable, move the focus to Air or Cable, and then press the Select button. Air is suitable for homes equipped with separate, over-the-air antennas. Cable is suitable for homes that subscribe to a local cable-service, but do not have a cable box. You do not need to use this function if your TV is connected to a cable box or satellite box.
This function may not be supported depending on the incoming broadcast signal.
- All Channels
Displays the channels that the TV found during the Auto Program or Auto Tuning channel search.
These are the channels your TV will receive either over the air if your TV is set to Air or over cable if your TV is set to Cable. See Air or Cable above.
- Favorites
Displays Favorites 1 to Favorites 5.
It displays only the favorites list that includes the favorite channel.
- Channel Type
Sorts the list so that it includes channels of a selected type. However, Channel Type can only be used channels contain the type information.
This function may not be supported depending on the incoming broadcast signal.
- Samsung TV Plus
While the TV is connected to the Internet, you can watch popular programs or highlights for each theme through a virtual channel at any time. As with regular channels, the TV provides the daily program schedules for Samsung TV Plus.
This function may not be supported depending on the model or geographical area.
Editing channels
Edit the channels stored on your TV.
> Live TV Channel List Edit Channels
The Edit Channels screen contains the following icons:
- : A favorite channel.
- 🔒 : A locked channel.
On the Edit Channels screen, you can select channels and use the following functions:
- Delete
After selecting a target channel to remove in Edit Channels, select Delete. Removed channels are not displayed in the Channel List.
- Lock / Unlock
After selecting a target channel in Edit Channels, select Lock or Unlock. Then the channel is locked or unlocked.
A locked channel cannot be viewed.
If you want to use this function or set the password, set 📋 > ⚙️ Settings > Broadcasting > Apply Channel Lock to On.
For more information about how to set your password, refer to "Setting up a password."
- Rename Channel
After selecting a channel to change in Edit Channels, select Rename Channel to change the channel name.
You can rename only one channel at a time.
This function is only available for analog channels.
- Change Number
After selecting a channel to change in Edit Channels, select Change Number to change the channel number.
This function may not be supported depending on the model or geographical area.
When a channel number is changed, its channel information is not updated automatically.
- Restore Samsung TV Plus
You can restore the deleted Samsung TV Plus channels.
This function may not be supported depending on the model or geographical area.
- Save and Exit
Saves and closes the Edit Channels screen.
Using a Personal Favorites List
Designate frequently watched channels as favorite channels.
Favorite channels are highlighted in the Edit Channels and Channel List screens with the ♥ symbol. You can create up to five favorites lists so that your family members can create their own personal favorites list.
Create a favorites list
> Live TV Channel List Edit Channels
- Press the left directional button on the remote control to select the desired Favorites list.
- Press the right directional button to select Add Channels.
- Select the desired channel in the list on the screen.
- Press Add Channels to add the selected channel in the Favorites list.
Select Favorites 1 - Favorites 5 on the Edit Channels screen and the following functions are available:
- Add Channels
In the channel list, select one or more channels to add in the favorite list and then select Add Channels.
- Remove
Removes one or more channels from a favorites list.
- Change order
Changes the order of one or more channels selected in a favorites list.
- Rename Favorites
Renames a favorites list.
- Save and Exit
Saves and closes the Edit Channels screen.
TV-Viewing Support Functions
Use the functions that are available while watching TV.
Changing the broadcast signal
> Live TV Channel List
Press the directional button on your remote control, move the focus to Air or Cable, or Service Provider and then press the Select button.
You do not need to use this function if your TV is connected to a cable box or satellite box.
Scanning for available channels
Settings > Broadcasting > Auto Program or Auto Tuning Try Now
Do not use this function if your TV is connected to a cable box or satellite box.
If the TV has saved channels, Auto Program or Auto Tuning deletes the existing list, and then saves the newly scanned channels.
This function may not be supported depending on the model or geographical area.
The actual name may differ with specific geographical area.
Using Program Rating Lock
Settings Broadcasting Program Rating Lock
This function is useful for controlling what programs children can watch on the TV based on their ratings. Program Rating Lock does not, however, block programs originating from external sources, such as Blu-ray players, DVD players, or USB files.
Every time you access Program Rating Lock, you must enter the security PIN. You must also enter this PIN to watch a blocked program. The default PIN is "0000." To change the PIN, go to 📋 > Settings > General > System Manager Change PIN.
Program Rating Lock may not be supported depending on your input signal.
For more information about how to set your password, refer to "Setting up a password."
This function may not be supported depending on the model or geographical area.
Watching blocked / restricted programs
To watch a blocked program, enter the PIN when requested.
When initially showing a restricted program or movie, the screen is blank because the Program Rating Lock blocks it. Enter the PIN to unblock the program when a message appears requesting the code.
Restricting Viewing to Specific Channels
Settings > Broadcasting > Apply Channel Lock Try Now
By selecting the menu, you can turn on or off the Apply Channel Lock function.
Lock specific channels to prevent children from watching adult content.
To use this function, the PIN number is required.
Configuring advanced broadcasting settings
Settings > Broadcasting > Expert Settings Try Now
Scanning all digital channels
Settings Broadcasting Expert Settings Digital Manual Tuning
This function may not be supported depending on the model or geographical area.
This function is available only when the Antenna is set to Air.
If a channel is locked using the Edit Channels function, the PIN input window appears.
Fine-tuning analog broadcasts
Settings > Broadcasting > Expert Settings > Fine Tune Try Now
This function is only available for analog broadcasts.
Choosing an appropriate video input color
Settings Broadcasting Expert Settings Color System
This function is only available for analog broadcasts.
Configuring advanced broadcasting audio settings
Settings Broadcasting Expert Settings Audio Options
Configure your preferred audio options for viewing broadcasted content. Audio Options functions differently for analog and digital channels.
• Audio Language or Audio Language Settings
This is the language you will hear while watching TV if the language is included in the broadcast signal.
- Audio Format
You can change the audio format you want to hear.
The supported audio format may differ with the broadcast program.
- Multi-Track Sound
You can select the multi-track sound function depending on broadcasting signal.
This function may not be supported depending on the model or geographical area.
This function may not be supported depending on the incoming broadcast signal.
Showing TVkey Interface menu
> Settings Broadcasting Expert Settings TVkey Interface
You can use the following functions:
• TVkey Menu: Show TVkey Interface menu.
- Delete TVkey Operator Profile: Show the TVkey operator list to delete.
This function may not be supported depending on the model or geographical area.
Checking digital channel signal info and strength
Settings > Support > Device Care > Self Diagnosis > Signal Information Try Now
If your TV is attached to a separate, over-the-air antenna, you can use the signal strength information to adjust the antenna for increased signal strength and improved HD channel reception.
This function is only available for digital channels.
This function may not be supported depending on the geographical area.
Picture and Sound
You can change the settings for the picture and the sound according to your preference.
Using the Intelligent Mode
Let the TV analyze the surrounding and the content you are watching so that it can provide an upgraded viewing experience.


Settings General Intelligent Mode Settings
In Intelligent Mode, the TV recognizes and analyzes the surroundings, noise, the content, and your usage patterns to provide the best viewing experience. You can turn the options below on or off. Create your preferred viewing environment.
This function is supported only in QLED TV (except for Q60T model), The Frame, The Serif, The Sero, The Terrace and The Terrace for business.
- Intelligent Mode
Improves your viewing experience by recognizing your content, usage patterns and the environment around your TV.
- Adaptive Picture
Optimizes brightness and provides the best picture quality in real time, based on the lighting condition and the content you're viewing.
This function may not be supported by some modes or apps. (For example, Ambient Mode, and Game Mode)
- Active Voice Amplifier
Analyzes ambient noise and provides optimal sound depending on the noise.
This function can be used only when the sound sensor at the bottom of the TV is active and the sound output is set to TV Speaker.
While using this function, the TV does not save the data.
This function may not be supported depending on the model.
- Adaptive Sound+
Provides optimized sound quality by analyzing the viewing space and the acoustic components of the content.
This function can be used only when the sound sensor at the bottom of the TV is active and the sound output is set to TV Speaker.
This function may not be supported by some modes or apps (e.g., Ambient Mode, Game Mode, and apps that control the TV sound).
While using this function, the TV does not save the data.
- Adaptive Sound
Provides optimized sound quality by analyzing the viewing environment and the acoustic components of the content.
This function is only available when the sound output of the TV is set to TV Speaker.
This function may not be supported by some modes or apps (e.g., Ambient Mode, Game Mode, and apps that control the TV sound).
This function may not be supported depending on the model.
- Adaptive Volume
Automatically adjusts to a specific volume level while you are watching TV. The TV analyzes your volume usage history by time period to automatically adjust the volume when you use an app or switch to an external input source.
This function is only available when the sound output of the TV is set to TV Speaker.
This function may not be supported by some apps or external devices.
This function's operation affects Auto Volume function, but it does not work the other way around.
This function operates based on your volume usage history, and may not operate if the volume usage history by time period is insufficient.
The amount of difference made by this function does not exceed +/- 5 levels from the current volume, and this function does not change the current volume if it exceeds 40.
Adjusting the Picture Quality
Change the Picture Mode and adjust Expert Settings.
Choosing a picture mode


Settings Picture Picture Mode
OW
You can select the Picture Mode that provides the best viewing experience.
• Dynamic
Makes the picture brighter and clearer in bright viewing environments.
- Standard
Is the default mode suitable for general viewing environments.
- Natural
Reduces eye strain for a comfortable viewing experience.
- Movie
Is suitable for watching TV or movies in a dark room.
• FILMMAKER MODE
You can watch the source content (e.g. movie) as it is. The image defined as FILMMAKER MODE automatically switches to FILMMAKER MODE while watching.
FILMMAKER MODE may look darker than other picture modes.
You can change FILMMAKER MODE to a different Picture Mode. However, the changed Picture Mode will be maintained even after watching the picture defined by FILMMAKER MODE.
FILMMAKER MODE™ logo is a trademark of UHD Alliance, Inc.
Configuring advanced picture settings
Settings > Picture > Expert Settings Try Now
Configure the screen settings to your taste by using the following functions:
- Brightness y Now
- Contrast Try Now
- Sharpness y Now
- Color y Now
- Tint (G/R) y Now
- Apply Picture Settings Try Now
• Picture Clarity Settings Try Now
When LED Clear Motion is set to On, the screen appears darker than when it is Off.
- Local Dimming
This function may not be supported depending on the model or geographical area.
Controls the brightness of individual areas on the screen to maximize contrast automatically.
• Contrast Enhancer Now
- Film Mode Try Now
This function is only available when the input signal is TV, AV, Component (480i, 576i, 1080i), or HDMI (1080i).
• Color Tone y Now
• White Balance y Now
- Gamma y Now
- Shadow Detail Try Now
- RGB Only Mode y Now
• Color Space Settings y Now
- Reset Picture Try Now
Setting the Viewing Environment for External Devices
You can optimize the TV for viewing specific video formats.
Playing games on an optimized screen
Settings > General > External Device Manager > (Game Mode Settings) > Game Mode
You can enable game mode to optimize the TV's settings for playing video games with a gaming console, such as a PlayStation™, Xbox™ or Nintendo Switch™.
The game mode is not available for normal TV viewing.
The screen may shake somewhat.
When Game Mode is enabled, Picture Mode and Sound Mode are switched to Game automatically. Sound Mode may not be automatically switched depending on the selected audio device on the Sound Output menu.
When Game Mode is set to On, some functions are not available.
To use a different external device on the same port, remove the game console connection, set Game Mode to Off, and then connect the external device to the port.
The Game Mode functions used for Nintendo Switch™ are subject to change without prior notice.
Adjusting the image quality of HDR game
> Settings General External Device Manager HGiG
Set the optimal resolution based on the brightness for HDR game content.
When HDR sources are input in Game Mode, this menu is activated.
This function may not be supported depending on the model.
Setting the Game Mode details
Settings General External Device Manager Game Mode Settings
These functions may not be supported depending on the model.
- Surround Sound
You can make your games more immersive by using intense, three-dimensional sound optimized for games.
• Dynamic Black Equalizer
You can easily detect items or hidden enemies lurking in dark corners by improving visibility and object details in dark scenes without washing out colors and contrast in brighter scenes.
• Game Motion Plus Settings
You can configure the Game Motion Plus settings.
Using Input Signal Plus
Settings > General > External Device Manager > Input Signal Plus Try Now
Expands the input signal range for HDMI connections.
When you select the HDMI connector you want to use for Input Signal Plus, and then press the Select button to set the Input Signal Plus function to On, the TV screen may flicker.
When you connect the TV to an external device that supports only the UHD 24 Hz or UHD 30 Hz frequency, or any FHD frequency, the Input Signal Plus function may not be available. In this case, turn off the Input Signal Plus function.
For more information about the supported UHD resolutions, refer to "Supported Resolutions for UHD Input Signals."
Using HDMI black level
Settings > General > External Device Manager > HDMI Black Level Try Now
Use HDMI Black Level to adjust the black level to compensate for low black levels, low contrast, or dull colors generated by external devices connected to the TV via an HDMI cable.
This function is only available when the input signal connected to the TV via an HDMI connector is set to RGB444.
Changing the Picture Size and Position
Change the picture size and position for your TV.
Changing the picture size settings
> Settings Picture Picture Size Settings
• Picture Size Now
You can change the size of the picture displayed on the TV screen to 16:9 Standard, Custom, or 4:3.
Supported picture sizes differ with the input signal. For more information about supported picture sizes, refer to "Picture sizes and input signals."
• Fit to Screen Now
Fitting the picture to the screen.
This function may not be supported depending on the Picture Size setting.
This function may not be supported depending on the broadcast signals.
- Zoom and Position Now
Adjusting the picture size and/or position.
This function is available only if Picture Size is set to Custom.
To change the picture position on analog channels, first enlarge the picture and then change the position.
These functions may not be available on Samsung TV Plus and some applications.
Configuring a Sound Mode and Expert Settings
Change the Sound Mode and adjust Expert Settings.
Choosing a sound mode
> Settings Sound Sound Mode
ow
You can select the available sound mode that you prefer for a content type or your listening environment.
When an external device is connected, Sound Mode may change accordingly.
This function may not be supported depending on the model.
Configuring advanced sound settings
Settings > Sound > Expert Settings Try Now
You can personalize the sound quality by adjusting the following settings.
• Balance Try Now
• Equalizer y Now
This function is not available when the Adaptive Sound+ function is turned on.
This function is not available when the Sound Mode function is set to Adaptive Sound or Amplify.
The name and properties of this function may appear differently depending on the connected external device.
- HDMI-eARC Mode
You can connect an audio device that supports eARC via HDMI-eARC. Muting occurs temporarily during device connection.
• Digital Output Audio Format Try Now
Select the digital audio output format. If you select the Auto option, the audio device outputs automatically in a supported format.
If you select the Pass-Through option, audio data is output with no processing.
• Digital Output Audio Delay Try Now
This feature is only available when the external device is connected via HDMI (eARC) and SPDIF (Sony Philips Digital Interface).
This function may not be supported depending on the model.
• Dolby Atmos Compatibility Try Now
You can set the TV to allow Dolby Digital+ with Atmos streams that are input from external devices.
Set to On if the audio device connected via HDMI (eARC) supports Dolby Atmos. The TV screen may flicker when this function is turned on or off.
If this function is on, set Digital Output Audio Format to Auto.
• Auto Volume y Now
Automatically adjusts the sound to a certain level when changing channels or switching to another external input.
• Sound Feedback Now
- Reset Sound y Now
Standard audio signals are sampled at 48 kHz while HD audio signals are sampled at 96 kHz.
Some SPDIF receivers may not be compatible with HD audio format.
Using the Sound Support Functions
Configure the sound settings for your TV.
Selecting speakers
> Settings Sound Sound Output
OW
You can select which speakers the TV uses for audio output.
External speakers may not be controlled with the Samsung remote control. When an external speaker is enabled, some sound menus are not supported.
Samsung TV supports the Q-Symphony function. This function works synchronized with the Samsung Soundbar that supports Q-Symphony so that your TV speaker and Soundbar simultaneously output the sound for best surround effects.
When a Samsung Soundbar that supports Q-Symphony is connected, the menu name such as "TV + Soundbar" appears under Sound Output (图标 > Settings > Sound > Sound Output). Select the menu.
Menu name example) TV + [AV] Soundbar series name (HDMI) or TV + Optical
It works based on the Codec supported by your TV. For more information about Codec information, refer to "Read Before Playing Photo, Video, or Music Files."
This function is supported only when connected via HDMI or optical cable.
This function is available only in some Samsung TVs and Soundbars released in 2020.
Refer to the sound bar's user manual when connecting it to the TV.
Listening to the TV through Bluetooth devices
> Settings Sound Sound Output Bluetooth Speaker List
You can connect Bluetooth audio devices to the TV. They must be paired using the TV's Bluetooth function. Refer to the user manual for your audio device such as Bluetooth speaker, sound bar, and headphones for detailed connection and usage.
If the TV fails to find a Bluetooth audio device, place the device closer to the TV, and then select Refresh.
When you turn on a paired Bluetooth audio device, the TV detects it automatically, and then displays a pop-up window. Use this pop-up window to activate/deactivate the Bluetooth audio device.
The sound quality may be affected by the condition of the Bluetooth connection.
Before using a Bluetooth audio device, refer to "Read Before Using Bluetooth Devices."
Listening to the TV through a Samsung audio device that supports the Wi-Fi function
For more information about how to connect and use a Samsung audio device that supports the Wi-Fi function, refer to its user manual.
Settings > Sound > Wi-Fi Speaker Surround Setup Try Now
If you've connected one or more Samsung wireless audio devices that support the Wi-Fi function to the TV, you can create an optimal sound set up by configuring the surround effect settings. You can select any of the surround sound configurations, with or without a sound bar.
A surround sound configuration can be used if all of the following conditions are met:
- Two or more Samsung wireless speakers of the same type must be connected to the same wireless network.
- The Samsung audio devices that support the Wi-Fi function must be connected to the same wireless network as the TV.
Surround sound configurations with a sound bar may not be supported depending on the product.
If you activate the Screen Mirroring function while using Samsung audio devices that support the Wi-Fi function, the Wi-Fi connection is disconnected.
Mismatched video and audio lip-syncing may occur depending on the device type.
System and Support
You can configure system and support settings such as clock, timers, energy usage and software updates.
Using the Time Functions and the Timers
Set the current time and use the timer function.
Settings > General > System Manager > Time Try Now
You can set the Clock manually or automatically. Once the Clock is set, you can view the current time on the TV anytime.
You must set the clock in the following cases:
- The power cable is disconnected and then connected.
• The Clock Mode is changed from Auto to Manual. - The TV is not connected to the Internet.
- No broadcast signals are received.
Setting the clock automatically
Settings General System Manager Time Clock Clock Mode Auto
This function works only when the TV is connected to the Internet or is receiving digital broadcasts through a connected antenna.
The accuracy of the time information received may differ with the channel and signal.
If you get your TV signal from a cable broadcast receiver/set-top box or a satellite receiver/satellite set-top box connected to an HDMI or Component port, you must set the current time manually.
Adjusting the clock for time zone
Settings General System Manager Time Clock Time Zone
Selects your time zone.
This function is only available when the Clock Mode is set to Auto.
This function may not be supported depending on the model or geographical area.
Changing the current time
Settings General System Manager Time Clock Time Offset
Time Offset adjusts the time through a network connection.
This function is available only when Clock Mode is set to Auto, the TV fails to receive time information through normal broadcast signals, and the TV is connected to the Internet through a local area network.
Setting the clock manually
Settings General System Manager Time Clock Clock Mode Manual
When Clock Mode is set to Manual, you can directly enter the current date and time. Select the Date and Time by using the directional buttons on the remote control.
Using the sleep timer
Settings General System Manager Time Sleep Timer
You can use this function to automatically shut off the TV after a pre-set period of time. You can set the sleep timer for up to 180 minutes after which it will turn off the TV.
This function may not be supported in some viewing modes.
Turning off the TV using the off timer
Settings General System Manager Time Off Timer
You can set Off Timer to shut off the TV automatically at a specific time. Off Timer is only available if the Clock has been set.
To use this function, first set the Clock (图标 > Settings > General > System Manager > Time > Clock).
This function may not be supported in some viewing modes.
Using the Auto Protection Time and Energy Saving Functions
Set the Auto Protection Time and reduce the TV's energy consumption.
Setting the Auto Protection Time
Settings > General > System Manager > Auto Protection Time Try Now
Activate a screensaver when your TV displays a still image for two hours or more.
This function may not be supported in some viewing modes.
Reducing the energy consumption of the TV
Settings General Eco Solution
OW
You can adjust the brightness level of the TV, reduce overall power consumption, and prevent overheating.
• Ambient Light Detection Try Now
Automatically adjusts the brightness level of the TV, according to the ambient light level, to reduce power consumption. If Ambient Light Detection has adjusted the screen brightness to a too bright or dark level, you can select Minimum Brightness to manually adjust the minimum screen brightness.
This function is not available when the Adaptive Picture function is turned on.
• Minimum Brightness Now
When Ambient Light Detection is turned on, you can manually adjust the minimum brightness of the TV screen. This function acts only when the value is less than the setting in Ⓜ > ⚙️ Settings > Picture > Expert Settings > Brightness.
This function is not available when the Adaptive Picture function is turned on.
• Power Saving Mode Now
Adjust the brightness settings to reduce the TV's power consumption.
This function is not available when the Adaptive Picture function is turned on.
- Motion Lighting Now
Adjusts the brightness in response to on-screen movements to reduce power consumption.
This function is not available when the Adaptive Picture function is turned on.
• Auto Power Off y Now
Automatically turns off the TV to reduce unnecessary power consumption if the TV Controller and the remote control are not used for the set period of time.
Updating the TV's Software
View your TV's software version and update it if necessary.
DO NOT turn off the TV's power until the update is complete. The TV will turn off and on automatically after completing the software update. Video and audio settings may be reset to their defaults after a software update.
Settings > Support > Software Update Try Now
Updating through the Internet
Settings > Support > Software Update > Update Now Try Now
Updating from the Internet requires an active Internet connection.
Updating through a USB device
Settings Support Software Update Update Now
After downloading the update file from the Samsung website and storing it on a USB device, connect the USB device to the TV to update.
To update using a USB device, download the update package from Samsung.com to your computer. Then, save the update package in the USB device's top-level folder. Otherwise, the TV will not be able to locate the update package.
Updating the TV automatically
Settings > Support > Software Update > Auto Update Try Now
If the TV is connected to the Internet, you can have the TV's software update itself automatically while you are watching the TV. When the background update is completed, it is applied the next time the TV is turned on.
If you agree to the Smart Hub terms and conditions, Auto Update is set to On automatically. If you want this function disabled, use the Select button to turn it off.
This function may take a longer time if another network function is running concurrently.
This function requires an Internet connection.
For more information in the The Terrace for business, refer to the provided user manual.
Audio and Video Functions for the Visually or Hearing Impaired
You can configure the functions for the visually or hearing impaired.
Running the accessibility functions
Settings > General > Accessibility Try Now
Running Accessibility Shortcuts
The Accessibility Shortcuts provide easy access to the accessibility functions. To display the Accessibility Shortcuts, press and hold the Volume button for 1 second or more. You can easily turn on or turn off the functions such as Voice Guide, Picture Off, Caption, High Contrast, Enlarge, Grayscale, Color Inversion, Learn TV Remote, Learn Menu Screen, Multi-output Audio, Sign Language Zoom, Slow Button Repeat, Accessibility Settings, etc.
Even if the Voice Guide is set to Off or muted, the voice guide for Accessibility Shortcuts is enabled.
The shortcut menus may not appear depending on the model or geographical area.
Enabling voice guides for the visually impaired
Settings > General > Accessibility > Voice Guide Settings Try Now
You can activate voice guides that describe the menu options aloud to aid the visually impaired. To activate this function, set Voice Guide to On. With Voice Guide on, the TV provides voice guides for channel change, volume adjust, information on current and upcoming programs, schedule viewing, other TV functions, and various content in the Internet, and in Search.
You can go to Voice Guide, and then press the Select button to turn the function on or off.
The Voice Guide is provided in the language that is specified on the TV Language. However, some languages are not supported by Voice Guide even though they are listed in the TV Language. English is always supported.
For more information about the TV Language settings, refer to "Changing the menu language."
Changing the volume, speed, and pitch and the TV background volume of the Voice Guide
You can configure the volume, speed, pitch and the TV background volume of the voice guide.
The TV screen is turned off but audio continues
Settings General Accessibility Picture Off
Turn off the TV screen and provide only sound to reduce overall power consumption. When you press a button on the remote control other than Volume and Power while the screen is off, the TV screen turns back on.
This function may not be supported depending on the geographical area.
White text on black background (high contrast)
Settings > General > Accessibility > High Contrast Try Now
You can change Smart Hub and setting menu screens to white text on a black background and change the transparent TV menus to opaque automatically so that text can be more easily read.
If High Contrast is on, some Accessibility menus are not available.
Setting the screen to black and white
Settings > General > Accessibility > Grayscale Try Now
You can change the color of the TV screen to black and white to sharpen blurred edges caused by colors.
If Grayscale is on, some Accessibility menus are not available.
This function may not be supported depending on the model or geographical area.
Inverting the screen color
Settings > General > Accessibility > Color Inversion Try Now
You can invert the colors of the text and background for the setting menus displayed on the TV screen to make it easier to read them.
If Color Inversion is on, some Accessibility menus are not available.
This function may not be supported depending on the model or geographical area.
Enlarging the font (for the visually impaired)
Settings > General > Accessibility > Enlarge Try Now
You can enlarge the size of the font on the screen. To activate, set Enlarge to On.
Learning about the remote control (for the visually impaired)
Settings > General > Accessibility > Learn TV Remote Try Now
This function helps individuals with a visual impairment to learn the positions of the buttons on the remote control. When this function is activated, you can press a button on the remote control and the TV will tell you its name. Press the 📋 button twice to exit Learn TV Remote.
This function is only available when Voice Guide is enabled.
Learning about the TV menu
Settings > General > Accessibility > Learn Menu Screen Try Now
Learn the menus on the TV screen. Once enabled, your TV will tell you the structure and features of the menus you select.
This function is only available when Voice Guide is enabled.
Showing captions
Settings > General > Accessibility > Caption Settings Try Now
Set Caption to On to watch programs with the captions displayed.
Captions are not displayed by programs that do not support captions.
This function has no relationship with the features for controlling sub-titles of DVD or Blu-ray players. To control DVD or Blu-ray subtitles, use the sub-title feature of the DVD or Blu-ray player and the player's remote control.
Selecting the caption language
Settings General Accessibility Caption Settings Caption Mode
- Default / CC1 \~ CC4 / Text1 \~ Text4
(Analog channels only) Operates in either analog TV channel mode or when a signal is supplied from an external device to the TV. (Depending on the broadcast signal, the analog caption function may or may not work with digital channels.)
- Default / Service1 \~ Service6 / CC1 \~ CC4 / Text1 \~ Text4
(Digital channels only) Works with digital channels. These functions may not be available in digital caption mode depending on the broadcast.
Listening to the TV through Bluetooth devices (for the hearing impaired)
Settings General Accessibility Multi-output Audio
You can turn on both the TV speaker and Bluetooth headphone at the same time. When this function is active, you can set the volume of the Bluetooth headphone higher than the volume of the TV speaker.
This function may not be supported depending on the model or geographical area.
When you connect the Bluetooth headphone to the TV, Multi-output Audio is activated. For more information about connecting Bluetooth devices to the TV, refer to "Listening to the TV through Bluetooth devices."
Enlarging the sign language screen for the hearing impaired
Settings > General > Accessibility > Sign Language Zoom Settings Try Now
You can zoom in the sign language screen when the program you are watching provides it. First, set Sign Language Zoom to On, and then select Edit Sign Language Zoom to change the position and magnification of the sign language screen.
Configuring the repeat settings for remote control buttons
Settings > General > Accessibility > Remote Button Repeat Settings Try Now
You can configure the operation speed of the remote control buttons so that they slow down when you continually press and hold them. First, set Slow Button Repeat to On, and then adjust the operation speed in Repeat Interval.
App for the Visually Impaired (SeeColors App)
You can download SeeColors App in Apps.
This application helps color blind people feel rich colors on TV through a simple self-check. Through self-check, colors are changed to be suitable so that each person can experience a richer view of colors.
When the SeeColors App is run, specific menus are disabled.
This function may not be supported depending on the model.
Using Voice Assistants on TV
You can change the settings of a Voice Assistant after selecting it.
Select the Voice Assistant
> Settings General Voice Voice Assistant
Select which Voice Assistant you would like to help control your TV.
To use this function, the TV must be connected to the Internet.
This function may not be supported depending on the model or geographical area.
Voice Wake-up may not be available depending on the Voice Assistant and language.
• Bixby / Amazon Alexa / Google Assistant
To use the Voice Assistant, follow the instructions on the TV screen to enable the selected Voice Assistant.
To change the settings for Voice Assistant, run the Settings menu under each Voice Assistant ( Ⓜ > ⚙Settings > General Voice Voice Assistant).
To enable the Settings menus for each Voice Assistant, log in each Voice Assistant.
For an example of Voice command, see the Settings menus for each Voice Assistant.
Using Other Functions
You can view other functions.
Changing the menu language
Settings > General > System Manager > Language Try Now
Setting up a password
Settings > General > System Manager > Change PIN Try Now
The PIN input window appears. Enter a PIN. Enter it again to confirm it. The default PIN is "0000."
If you forget your PIN, you can reset it with your remote control. With the TV turned on, press the following buttons on the remote control in the order shown to reset the PIN to "0000."
On the Samsung Smart Remote: Press (Volume) button. Volume Up Volume Down Volume Up > >
Enabling the AV Color System
Settings General System Manager AV Color System
Normally the TV can receive image and sound with good quality when the AV Color System mode set to Auto. This mode detects the signal color system automatically. In case of some signal reception with color unsatisfactory, select the AV Color System mode to PAL-M, PAL-N or NTSC.
Available only in AV input mode.
Selecting Usage or Retail Mode
Settings > General > System Manager > Usage Mode Try Now
You can set the TV for retail environments by setting Usage Mode to Retail Mode.
For all other uses, select Home Mode.
Use Retail Mode only in a store. With Retail Mode, some functions are disabled, and the TV settings automatically reset after a preset amount of time.
This function may not be supported depending on the model.
Managing External Devices
Settings > General > External Device Manager > Device Connect Manager Try Now
When you connect external devices such as mobile devices or tablets connected to the same network as the TV so you can share content, you can view the list of allowed devices and connected devices.
- Access Notification
Set whether to display a notification when an external device such as a mobile device or tablet attempts to connect to the TV.
- Device List
Manage a list of external devices registered to the TV.
Using AirPlay
Settings General Apple AirPlay Settings
You can use AirPlay to view content from your iPhone, iPad, or Mac on the TV screen.
This function may not be supported depending on the model or geographical area.
Restoring the TV to the factory settings
Settings General Reset ow
You can restore all TV settings to the factory defaults.
- Select Reset. The security PIN entry window appears.
- Enter the security PIN, and then select Reset. All settings are then reset. The TV turns off and on again automatically and displays the Initial Setup screen.
For more information on Reset, refer to the user manual that came with the TV.
If you skipped some steps in the initial setup, run Set Up TV ( [icon] > Source > up directional button > TV > up directional button > Set Up TV), and then configure the settings in the steps you skipped.
Turning off in Portrait Mode
Settings General System Manager Turn>Off in Portrait
When the TV is turned off, it switches to Portrait Mode and then the TV turns off.
This function is supported only in The Sero.
Using the Outdoor Mode
Settings General System Manager Outdoor Mode
This function is supported only in The Terrace and The Terrace for business.
For more information on Outdoor Mode, refer to the user manual that came with the TV.
Running Data Service Automatically
Allows the user to use information (text, still images, graphics, documents, software, etc.) transmitted via broadcast media.
> Settings Broadcasting Expert Settings Auto Run Data Service
You can set whether or not to automatically run data service. If the channel you are currently watching provides data service, you can enjoy a variety of data services by selecting the red color button.
This function may not be supported depending on the model or geographical area.
This function is not available when any other secondary function is under way.
Provided data service information may vary depending on the broadcast.
Changing the channel with the numeric keys while using data service may not be available, depending on the service.
If Auto Run Data Service is On, the loading screen is displayed and the function is not available temporarily.
Precautions and Notes
You can get instructions and information that you must read after installation.
Before Using the Recording and Timeshift Functions
Read these instructions before using Recording and Timeshift.
Before using the recording and schedule recording functions
Recording may not be supported depending on the model or geographical area.
- To set up a Schedule Recording, you must first set the TV's clock. Set the Clock.
- Settings & General System Manager Time Clock > >
- You can set up a maximum total of 30 Schedule Viewing and Schedule Recording entries.
- Recordings are DRM-protected and therefore cannot be played back on a computer or on a different TV. In addition, these files cannot be played back on your TV if its video circuit has been replaced.
- For a USB device for recording, it is recommended to use the USB hard disk that supports USB 2.0 or later and 5,400 rpm or higher. However, RAID-type USB hard drives are not supported.
- USB memory sticks are not supported.
- The total recording capacity may differ with the amount of available hard drive space and the recording quality level.
- Schedule Recording requires at least 100 MB of free space on the USB storage device. Recording will stop if the available storage space falls below 50 MB while recording is in progress.
- If the available storage space falls below 500 MB while both the Schedule Recording and Timeshift functions are in progress, only the recording will stop.
- The maximum recording time is 720 minutes.
• Videos are played according to the TV settings. -
If the input signal is changed while recording is in progress, the screen will go blank until the change is made. In this case, recording will resume, but ● will not be available.
-
When using the Record or Schedule Recording function, the actual recording may start a second or two later than the specified time.
- If the Schedule Recording function is operating while a recording is being made on an HDMI-CEC external device, the priority is given to the Schedule Recording.
- Connecting a recording device to the TV automatically deletes abnormally saved recorded files.
- If the Sleep Timer or Auto Power Off has been set, the TV will override these settings, continue to record, and turn off after the recording has ended.
- > Settings General System Manager Time Sleep Timer
- Settings General Eco Solution Auto Power Off
Before using the timeshift function
Timeshift may not be supported depending on the model or geographical area.
- For a USB device for recording, it is recommended to use the USB hard disk that supports USB 2.0 or later and 5,400 rpm or higher. However, RAID-type USB hard drives are not supported.
- USB memory sticks or flash drives are not supported.
- The total recording capacity may differ with the amount of available hard drive space and the recording quality level.
- If the available storage space falls below 500 MB while both the Schedule Recording and Timeshift functions are in progress, only the recording will stop.
- The maximum amount of time available for the Timeshift function is 90 minutes.
- The Timeshift function is not available for locked channels.
- Time-shifted videos are played according to the TV settings.
- The Timeshift function may be terminated automatically once it reaches its maximum capacity.
- The Timeshift function requires at least 1.5 GB of free space available on the USB storage device.
Read Before Using Apps
Read this information before using Apps.
- If you want to download new apps using Apps, first sign in to your Samsung account.
- Due to the product characteristics featured on Samsung Smart Hub, as well as limitations in available content, certain features, applications, and services may not be available on all devices or in all territories. Visit http://www.samsung.com for more information on specific device information and content availability. Services and content availability are subject to change without prior notice.
- Samsung Electronics takes no legal responsibility whatsoever for any interruption of app services caused by the service provider for any reason.
- Application services may be provided in English only and available content may differ with the geographical area.
- For more information about applications, visit the applicable service provider's website.
- An unstable Internet connection may cause delays or interruptions. In addition, applications may terminate automatically depending on the network environment. If this occurs, check your Internet connection and try again.
- Application services and updates may become unavailable.
- Application content is subject to change by the service provider without prior notice.
- Specific services may differ with the version of the application installed on the TV.
- An application's functionality may change in future versions of the application. If this occurs, run the application's tutorial or visit the service provider's website.
- Depending on the service provider's policies, certain applications may not support multitasking.
Read Before Using the Internet Function
Read this information before using the Internet function.
- File download is not supported.
- The Internet function may not be able to access certain websites, including websites operated by certain companies.
- The TV does not support playback of flash videos.
- E-commerce for online purchases is not supported.
• ActiveX is not supported.
- Only a limited number of fonts are supported. Certain symbols and characters may not be displayed properly.
- The response to remote commands and the resulting on-screen display may be delayed while a web page is loading.
- Loading a web page may be delayed or suspended completely depending on the status of the participating systems.
- Copy and paste operations are not supported.
- When composing an email or a simple message, certain functions such as the font size and color selection may not be available.
- There is a limit to the number of bookmarks and the size of the log file that can be saved.
- The number of windows that can be opened concurrently is limited.
- Web browsing speed will differ with the network environment.
- Browsing history is saved from latest to oldest, with the oldest entries being overwritten first.
- Depending on the types of video/audio codecs supported, you may not be able to play certain HTML5 video and audio files.
- Video sources from PC-optimized streaming service providers may not play properly on our proprietary Internet browser.
Read before setting up a wireless Internet connection
Precautions for wireless Internet
- This TV supports the IEEE 802.11 a /b /g /n /ac communication protocols. Video files stored on a device connected to the TV via a Home Network may not play back smoothly.
Q950T, Q900T series supports the IEEE 802.11 a /b /g /n /ac /ax communication protocols.
For models other than the Q950T and Q900T series, Samsung recommends using IEEE 802.11n.
- To use wireless Internet, the TV must be connected to a wireless access point or modem. If the wireless access point supports DHCP, the TV can use a DHCP or static IP address to connect to the wireless network.
- Select a channel that is not currently being used by the wireless access point. If the channel set is currently being used by the wireless access point to communicate with another device, the result is usually interference and/or a communications failure.
- Most wireless networks have an optional security system. To enable a wireless network's security system, you need to create a password using characters and numbers. This password is then needed to connect to a security-enabled access point.
Wireless security protocols
The TV only supports the following wireless network security protocols. The TV cannot connect to non-certified wireless access point.
– Authentication Modes: WEP, WPAPSK, WPA2PSK
– Encryption Types: WEP, TKIP, AES
In compliance with the Wi-Fi certification specifications, Samsung TVs do not support WEP or TKIP security encryption in networks running in the 802.11n mode. If the wireless access point supports WPS (Wi-Fi Protected Setup), you can connect the TV to your network using PBC (Push Button Configuration) or a PIN (Personal Identification Number). WPS automatically configures the SSID and WPA key settings.
Read Before Playing Photo, Video, or Music Files
Read this information before playing media content.
Limitations to the use of photo, video, and music files
Try Now
- The TV supports MSC (Mass Storage Class) USB devices only. MSC is a class designation for mass storage devices. Types of MSC devices include external hard drives, flash card readers, and digital cameras. (USB hubs are not supported.) These kinds of devices must be connected directly to the USB port. The TV may not be able to recognize a USB device or read the files on the device if it is connected with a USB extension cable. Do not disconnect USB devices while they are transferring files.
- When connecting an external hard drive, use the USB (HDD 5V 1A) port. We recommend that you use an external hard drive with its own power adapter.
USB (HDD 5V 0.5A) port is supported by some models.
- Certain digital cameras and audio devices may not be compatible with the TV.
- If there are multiple USB devices connected to the TV, the TV might not be able to recognize some or all the devices. USB devices that use high-power input should be connect to the USB (HDD 5V 1A) port.
USB (HDD 5V 0.5A) port is supported by some models.
- The TV supports the FAT, exFAT, and NTFS file systems.
- In the media contents list, the TV can display up to 1,000 files per folder. If the USB device contains more than 8,000 files and folders, however, some files and folders might not be accessible.
- Certain files, depending on how they are encoded, may not play on the TV.
- Certain files are not supported on all models.
- The DivX and DTS codecs are not supported by the Samsung TV models released in 2020.
Supported subtitles
Subtitle formats
| Name Format | |
| MPEG-4 Timed text .ttxt | |
| SAMI .smi | |
| SubRip .srt | |
| SubViewer .sub | |
| Micro DVD .sub or .txt | |
| SubStation Alpha .ssa | |
| Advanced SubStation Alpha .ass | |
| SMPTE-TT Text .xml |
Video formats with subtitles
| Name Container | |
| Xsub AVI | |
| SubStation Alpha MKV | |
| Advanced SubStation Alpha MKV | |
| SubRip MKV | |
| VobSub MKV | |
| MPEG-4 Timed text MP4 | |
| TTML in smooth streaming MP4 | |
| SMPTE-TT TEXT MP4 | |
| SMPTE-TT PNG | MP4 |
Supported image formats and resolutions
| File extension Format Resolution | ||
| *.jpg | JPEG 15360 x 9024 | |
| *.jpeg | ||
| *.png PNG 4096 x 4096 | ||
| *.bmp BMP 4096 x 4096 | ||
| *.mpo MPO 15360 x 8640 | ||

The MPO format is supported partly.
Supported music formats and codecs
| File extension Format Codec Note | |||
| *.mp3 MPEG MPEG1 Audio Layer 3 | |||
| *.m4a*.mpa*.aac | MPEG4 AAC | ||
| *.flacFLAC FLAC Supports up to 2 channels | |||
| *.ogg | OGG | Vorbis | Supports up to 2 channels |
| *.wma | WMA WMA | WMA is supported up to 10 Pro 5.1 channels.WMA lossless audio is not supported. | |
| *.wav | wav | wav | |
| *.mid*.midi | midi | midi | Supports type 0 and type 1.Seek is not supported.Supports USB device only. |
| *.ape | ape | ape | |
| *.aif*.aiff | AIFF | AIFF | |
| *.m4a ALAC | ALAC | ||
Supported video codecs (QLED TV, The Serif, The Frame, The Sero)

For Q60T model, refer to the next section.
| File format | Container | Video codecs Resolution Frame rate (fps) | Bitrate (Mbps) | Audio codecs | ||
| *.avi*.mkv*.asf*.wmv*.mp4*.mov*.3gp*.vro*.mpg*.mpeg*.ts*.tp*.trp*.flv*.vob*.svi*.m2ts*.mts | AVIMKVASFMP43GPMOVFLVVROVOBPSTSSVAF | H.264 BP/MP/HP 4096 x 2160 | 4096 x 2160: 303840 x 2160: 60 | 60 | Dolby DigitalLPCMADPCM(IMA, MS)AACHE-AACWMADolby Digital+MPEG(MP3)AC-4G.711(A-Law, μ-Law)OPUS | |
| HEVC (H.265 - Main, Main10) | 4096 x 2160 | 4096 x 2160: 603840 x 2160: 120 | 80 | |||
| Motion JPEG 3840 x 2160 30 80 | ||||||
| MVC | 1920 x 1080 | 60 | 20 | |||
| MPEG4 SP/ASP | ||||||
| Window MediaVideo v9 (VC1) | ||||||
| MPEG2 | ||||||
| MPEG1 | ||||||
| Microsoft MPEG-4v1, v2, v3 | 30 | |||||
| Window MediaVideo v7 (WMV1), v8(WMV2) | ||||||
| H.263 Sorrenson | ||||||
| VP6 | ||||||
| AV1 3840 x 2160 60 40 | ||||||
| *.webm WebM | VP8 1920 x 1080 60 20 | Vorbis | ||||
| VP9 (Profile 0, profile 2 supported) | 3840 x 2160 60 80 | |||||
| AV1 3840 x 2160 60 40 | ||||||
| *.rmvb RMVB | RV8/9/10(RV30/40) | 1920 x 1080 60 20 RealAudio 6 | ||||
Supported video codecs (Q60T model, TU8 series)
| File format | Container | Video codecs Resolution | Frame rate (fps) | Bitrate (Mbps) | Audio codecs | |
| *.avi | H.264 BP/MP/HP 4096 x 2160 | 4096 x 2160:303840 x 2160:60 | 60 | Dolby DigitalLPCMADPCM(IMA, MS)AACHE-AACWMADolby Digital+MPEG(MP3)AC-4G.711(A-Law, μ-Law)OPUS | ||
| *.mkv | ||||||
| *.asf | ||||||
| *.wmv | AVI | HEVC (H.265 - Main, Main10) | 3840 x 2160 60 80 | |||
| *.mp4 | MKV | |||||
| *.mov | ASF | Motion JPEG 3840 x 2160 30 80 | ||||
| *.3gp | MP4 | MVC | 1920 x 1080 | 60 | 20 | |
| *.vro | 3GP | MPEG4 SP/ASP | ||||
| *.mpg | MOV | Window Media Video v9 (VC1) | ||||
| *.mpeg | FLV | MPEG2 | ||||
| *.ts | VRO | MPEG1 | ||||
| *.tp | VOB | Microsoft MPEG-4 v1, v2, v3 | 30 | |||
| *.trp | PS | |||||
| *.flv | TS | Window Media Video v7 (WMV1), v8 (WMV2) | ||||
| *.vob | SVAF | |||||
| *.svi | H.263 Sorrenson | |||||
| *.m2ts | VP6 | |||||
| *.mts | AV1 3840 x 2160 60 40 | |||||
| *.webm WebM | VP8 1920 x 1080 60 20 | Vorbis | ||||
| VP9 (Profile 0, profile 2 supported) | 3840 x 2160 60 80 | |||||
| AV1 3840 x 2160 60 40 | ||||||
| *.rmvb RMVB RV8/9/10 (RV30/40) 1920 x 1080 60 20 RealAudio 6 | ||||||
Other restrictions
- Codecs may not function properly if there is a problem with the content.
- Video content does not play or does not play correctly if there is an error in the content or container.
- Sound or video may not work if they have standard bit rates/frame rates above the TV's compatibility ratings.
- If the Index Table is has an error, the Seek (Jump) function will not work.
- When playing video over a network connection, the video may not play smoothly because of data transmission speeds.
- Some USB/digital camera devices may not be compatible with the TV.
• HEVC codec is only available in MKV / MP4 / TS containers. - The MVC codec is supported partly.
Video decoders
- H.264 UHD is supported up to Level 5.1, and H.264 FHD is supported up to Level 4.2. (TV does not support FMO / ASO / RS)
- HEVC UHD is supported up to Level 5.2, and HEVC FHD is supported up to Level 4.1.(QLED TV, The Serif, The Frame, The Sero)
• HEVC UHD is supported up to Level 5.1, and HEVC FHD is supported up to Level 4.1.(Q60T model, TU8 series)
• VC1 AP L4 is not supported.
• GMC 2 or above is not supported.
Audio decoders
- WMA is supported up to 10 Pro 5.1 channels.
- WMA1, WMA lossless / Voice are not supported.
• QCELP and AMR NB/WB are not supported.
• Vorbis is supported for up to 5.1 channels. - Dolby Digital+ is supported for up to 5.1 channels.
- The supported sample rates are 8, 11.025, 12, 16, 22.05, 24, 32, 44.1, and 48 KHz, and differ with the codec.
Supported video codecs (Q700T series or higher)
| File format | Container | Video codecs Resolution Frame rate (fps) | Bitrate (Mbps) | Audio codecs | ||
| *.avi | H.264 BP/MP/HP 4096 x 2160 | 4096 x 2160: 303840 x 2160: 60 | 60 | Dolby DigitalLPCMADPCM(IMA, MS)AACHE-AACWMDolby Digital+MPEG(MP3)AC-4G.711(A-Law, μ-Law)OPUS | ||
| *.mkv | ||||||
| *.asf | HEVC (H.265 - Main, Main10) | 7680 x 4320 | 3840 x 2160: 1207680 x 4320: 60(Q700T : 3840 x 2160: 60, 7680 x 4320: 60) | 100 | ||
| *.wmv | AVI | |||||
| *.mp4 | MKV | |||||
| *.mov | ASF | |||||
| *.3gp | MP4 | Motion JPEG 3840 x 2160 30 80 | ||||
| *.vro | 3GP | MVC | 1920 x 1080 | 60 | 20 | |
| *.mpg | MOV | MPEG4 SP/ASP | ||||
| *.mpeg | FLV | Window MediaVideo v9 (VC1) | ||||
| *.ts | VRO | MPEG2 | ||||
| *.tp | VOB | MPEG1 | ||||
| *.trp | PS | Microsoft MPEG-4v1, v2, v3 | 30 | |||
| *.flv | TS | |||||
| *.vob | SVAF | Window MediaVideo v7 (WMV1), v8(WMV2) | ||||
| *.svi | H.263 Sorrenson | |||||
| *.m2ts | VP6 | |||||
| *.mts | AV1 7680 x 4320 60 60 | |||||
| *.webm WebM | VP8 1920 x 1080 60 20 | Vorbis | ||||
| VP9 (Profile 0, profile 2 supported) | 3840 x 2160 60 80 | |||||
| AV1 7680 x 4320 60 60 | ||||||
| *.rmvb RMVB | RV8/9/10(RV30/40) | 1920 x 1080 60 20 RealAudio 6 | ||||
Because the specifications are based on the current 8K connectivity and decoding standards, future connectivity, broadcasting, and decoding standards may not be supported. Upgrading for meeting future standards may require purchase of additional devices.
Some 3rd party standards may not be supported.
Other restrictions
- Codecs may not function properly if there is a problem with the content.
- Video content does not play or does not play correctly if there is an error in the content or container.
- Sound or video may not work if they have standard bit rates/frame rates above the TV's compatibility ratings.
- If the Index Table is has an error, the Seek (Jump) function will not work.
- When playing video over a network connection, the video may not play smoothly because of data transmission speeds.
- Some USB/digital camera devices may not be compatible with the TV.
• HEVC codec is only available in MKV / MP4 / TS containers. - The MVC codec is supported partly.
Video decoders
- H.264 UHD is supported up to Level 5.1, and H.264 FHD is supported up to Level 4.2. (TV does not support FMO / ASO / RS)
- HEVC UHD is supported up to Level 5.2, and HEVC FHD is supported up to Level 4.1.
• HEVC 8K is supported up to Level 6.1.
• AV1 8K is supported up to Level 6.1.
• VC1 AP L4 is not supported.
• GMC 2 or above is not supported.
Audio decoders
- WMA is supported up to 10 Pro 5.1 channels.
- WMA1, WMA lossless / Voice are not supported.
• QCELP and AMR NB/WB are not supported.
• Vorbis is supported for up to 5.1 channels. - Dolby Digital+ is supported for up to 5.1 channels.
- The supported sample rates are 8, 11.025, 12, 16, 22.05, 24, 32, 44.1, and 48 KHz, and differ with the codec.
Read After Installing the TV
Read this information after installing the TV.
Picture sizes and input signals
The Picture Size is applied to the current source. The applied Picture Size will remain in effect whenever you select that source unless you change them.
| Input signal Picture size | |
| Component | 16:9 Standard, Custom, 4:3 |
| Digital channel (720p) | 16:9 Standard, Custom, 4:3 |
| Digital channel (1080i, 1080p) | 16:9 Standard, Custom, 4:3 |
| Digital channel (3840 x 2160p @ 24/30 Hz) | 16:9 Standard, Custom |
| Digital channel (3840 x 2160p @ 50/60 Hz) | 16:9 Standard, Custom |
| Digital channel (4096 x 2160p) | 16:9 Standard, Custom |
| HDMI (720p) | 16:9 Standard, Custom, 4:3 |
| HDMI (1080i, 1080p) | 16:9 Standard, Custom, 4:3 |
| HDMI (3840 x 2160p) | 16:9 Standard, Custom |
| HDMI (4096 x 2160p) | 16:9 Standard, Custom |
| *HDMI (7680 x 4320p) | 16:9 Standard, Custom |
| USB (720p) | 16:9 Standard, Custom, 4:3 |
| USB (1080i/p @ 60 Hz) | 16:9 Standard, Custom, 4:3 |
| USB (3840 x 2160p @ 24/30 Hz) | 16:9 Standard, Custom |
| USB (3840 x 2160p @ 60 Hz) | 16:9 Standard, Custom |
| USB (4096 x 2160p @ 24/30/60 Hz) | |
| *USB (7680 x 4320p @ 24/30/60Hz) | 16:9 Standard, Custom |
*: This input signal is supported by Q700T series or higher.
The input ports for external devices may differ depending on the model and geographical area.
Installing an anti-theft lock
An anti-theft lock is a physical device that can be used to protect the TV against theft. Look for the lock slot on the back of the TV. The slot has a ☑con next to it. To use the lock, wrap the lock cable around an object that is too heavy to carry and then thread it through the TV's lock slot. The lock is sold separately. The method of using an anti-theft lock may differ for each model. Refer to the lock's user manual for more information.
This function may not be supported depending on the model or geographical area.
Supported Resolutions for UHD Input Signals
Check the supported resolution for UHD input signals.
• Resolution: 3840 x 2160p, 4096 x 2160p
If Input Signal Plus is set to Off
| Frame rate (fps) | Color Depth / Chroma Sampling | RGB 4:4:4 | YCbCr 4:4:4 | YCbCr 4:2:2 | YCbCr 4:2:0 |
| 50 / 60 8 bit - - - 0 | |||||
If Input Signal Plus is set to On
- All models for TU series and Q60T model
- For less than 55-inch models (Q80T model, The Sero, The Serif, The Frame):
| Frame rate (fps) | Color Depth / Chroma Sampling | RGB 4:4:4 | YCbCr 4:4:4 | YCbCr 4:2:2 | YCbCr 4:2:0 |
| 50 / 60 | 8 bit 0 0 0 0 | ||||
| 10 bit -- 0 0 |
- For 55-inch or larger models (QLED TV except for Q60T model, The Serif, The Frame):
| Frame rate (fps) | Color Depth / Chroma Sampling | RGB 4:4:4 | YCbCr 4:4:4 | YCbCr 4:2:2 | YCbCr 4:2:0 |
| 50 / 60 | 8 bit 0 0 0 0 | ||||
| 10 bit *O *O 0 0 | |||||
| 120 | 8 bit *O *O *O *O | ||||
| 10 bit *O *O *O *O |

*: These specifications are supported for the HDMI 4 port.
Resolutions for Input Signals supported by Q700T series or higher
Check the resolutions for input signals supported by Q700T series or higher.
• Resolution: 3840 x 2160p, 4096 x 2160p
| Frame rate (fps) | Color Depth / Chroma Sampling | RGB 4:4:4 | YCbCr 4:4:4 | YCbCr 4:2:2 | YCbCr 4:2:0 |
| 50 / 60 | 8 bit O O O O | ||||
| 10 bit *O *O O O | |||||
| 120 | 8 bit *O *O *O *O | ||||
| 10 bit *O *O *O *O |
*: These specifications are supported for the HDMI 4 port.
Q700T series does not support 120 frame rate (fps).
• Resolution: 7680 x 4320p
| Frame rate (fps) | Color Depth / Chroma Sampling | RGB 4:4:4 | YCbCr 4:4:4 | YCbCr 4:2:2 | YCbCr 4:2:0 |
| 24 / 30 / 50 / 60 | 8 bit 0 0 0 0 | ||||
| 10 bit 0 0 0 0 |
These specifications are supported for the HDMI 4 port.
Supported Resolutions for FreeSync(VRR)
Check the supported resolutions for the FreeSync(VRR) signal.
- When Game Mode is set to On or Auto, the FreeSync(VRR) function is activated.
- FreeSync(VRR) is supported only in the following models:
For 55-inch or larger models (QLED TV except for Q60T, Q700T models, The Serif, The Frame, The Terrace and The Terrace for business)
| Resolution(Dots x lines) | Display format | Horizontal frequency(KHz) | Vertical frequency(Hz) | Clock frequency(MHz) | SCAN |
| 1920 x 1080 120 | Hz 135.000 120.000 | 297.000 progressive | |||
| 2560 x 1440 120 | Hz 150.000 120.000 | 495.000 progressive | |||
| 3840 x 2160 120 | Hz 270.000 120.000 | 1188.000 progressive | |||
| 4096 x 2160 120 | Hz 270.000 120.000 | 1188.000 progressive |
Read Before Connecting a Computer (Supported Resolutions)
Check the resolutions supported for PC input signals.
When you connect your TV to a computer, set the computer's video card to one of the standard resolutions listed in the tables below or on the next pages. The TV will automatically adjust to the resolution you choose. Note that the optimal and recommended resolutions are 3840 x 2160 at 60Hz (UHD models) and 7680 x 4320 at 60Hz (Q700 series or higher). Choosing a resolution not included in the tables can result in a blank screen or just the remote control sensor turning on. Refer to the user manual of your graphics card for compatible resolutions.
The native resolution is 3840 x 2160 at 60Hz (UHD models) and 7680 x 4320 at 60Hz (Q700 series or higher) with the Input Signal Plus set to On. The native resolution is 3840 x 2160 at 30 Hz with the Input Signal Plus set to Off.
IBM
| Resolution(Dots x lines) | Display format | Horizontal frequency(KHz) | Vertical frequency(Hz) | Clock frequency(MHz) | Polarity(horizontal / vertical) |
| 720 x 400 70 Hz | 31.469 70.087 28.322 | -/+ |
MAC
| Resolution(Dots x lines) | Display format | Horizontal frequency(KHz) | Vertical frequency(Hz) | Clock frequency(MHz) | Polarity(horizontal / vertical) |
| 640 x 480 67 Hz | 35.000 66.667 30.240 - / - | ||||
| 832 x 624 75 Hz | 49.726 74.551 57.284 - / - | ||||
| 1152 x 870 75 Hz | 68.681 75.062 100.000 - / - |
VESA DMT
| Resolution(Dots x lines) | Display format | Horizontal frequency(KHz) | Vertical frequency(Hz) | Clock frequency(MHz) | Polarity(horizontal / vertical) |
| 640 x 480 60 Hz | 31.469 59.940 25.175 | -/- | |||
| 640 x 480 72 Hz | 37.861 72.809 31.500 | -/- | |||
| 640 x 480 75 Hz | 37.500 75.000 31.500 | -/- | |||
| 800 x 600 60 Hz | 37.879 60.317 40.000 | +/+ | |||
| 800 x 600 72 Hz | 48.077 72.188 50.000 | +/+ | |||
| 800 x 600 75 Hz | 46.875 75.000 49.500 | +/+ | |||
| 1024 x 768 | 60 Hz | 48.363 | 60.004 | 65.000 | -/- |
| 1024 x 768 | 70 Hz | 56.476 70.069 75.000 | -/- | ||
| 1024 x 768 75 Hz | 60.023 75.029 78.750 | +/+ | |||
| 1152 x 864 75 Hz | 67.500 75.000 108.000 | +/+ | |||
| 1280 x 720 | 60 Hz | 45.000 | 60.000 | 74.250 | +/+ |
| 1280 x 800 | 60 Hz | 49.702 | 59.810 | 83.500 | -/+ |
| 1280 x 1024 | 60 Hz | 63.981 60.020 108.000 | +/+ | ||
| 1280 x 1024 | 75 Hz | 79.976 | 75.025 | 135.000 | +/+ |
| 1440 x 900 | 60 Hz | 55.935 | 59.887 | 106.500 | -/+ |
| 1600 x 900 | 60 Hz | 60.000 | 60.000 | 108.000 | +/+ |
| 1680 x 1050 | 60 Hz | 65.290 | 59.954 | 146.250 | -/+ |
| 1920 x 1080 | 60 Hz | 67.500 | 60.000 | 148.500 | +/+ |
VESA CVT
| Resolution(Dots x lines) | Display format | Horizontal frequency(KHz) | Vertical frequency(Hz) | Clock frequency(MHz) | Polarity(horizontal / vertical) |
| *2560 x 1440 60 | Hz 88.787 59.951 241.500 + / - | ||||
| 2560 x 1440 120 | Hz 192.996 119.998 497.750 + / - |
The resolution may not be supported depending on the model.
*: The HDMI4 port does not support the resolution of 2560 x 1440 @ 60 Hz in Game Mode with Q800T series models or higher.
To use the resolution of 2560 x 1440 @ 60 Hz in Game Mode, it is recommended to use the HDMI1/2/3 port.
CTA-861
| Resolution(Dots x lines) | Display format | Horizontal frequency(KHz) | Vertical frequency(Hz) | Clock frequency(MHz) | Polarity(horizontal / vertical) |
| *1920 x 1080 100 Hz | 112.500 100.000 | 297.000 + / + | |||
| *1920 x 1080 120 Hz | 135.000 120.003 | 297.000 + / + | |||
| 3840 x 2160 30 Hz | 67.500 | 30.000 297.000 - / - | |||
| *3840 x 2160 60 Hz | 135.000 60.000 | 594.000 - / - | |||
| *3840 x 2160 | 100 Hz | 225.000 | 100.000 | 1188.000 | + / + |
| *3840 x 2160 | 120 Hz | 270.000 | 120.000 | 1188.000 | + / + |
| 4096 x 2160 | 24 Hz 54.000 | 24.000 | 297.000 + / + | ||
| 4096 x 2160 | 25 Hz | 56.250 | 25.000 | 297.000 | + / + |
| 4096 x 2160 30 Hz | 67.500 | 30.000 297.000 + / + | |||
| *4096 x 2160 | 50 Hz | 112.500 | 50.000 | 594.000 | + / + |
| *4096 x 2160 | 60 Hz | 135.000 | 60.000 | 594.000 | + / + |
| *4096 x 2160 | 100 Hz | 225.000 | 100.000 | 1188.000 | + / + |
| *4096 x 2160 | 120 Hz | 270.000 | 120.000 | 1188.000 | + / + |
| *7680 x 4320 24 Hz | 108.000 24.000 1188.000 | + / + | |||
| *7680 x 4320 | 30 Hz | 132.000 | 30.000 | 1188.000 | + / + |
| *7680 x 4320 | 50 Hz | 220.000 | 50.000 | 2376.000 | + / + |
| *7680 x 4320 | 60 Hz | 264.000 | 60.000 | 2376.000 | + / + |
*: The resolution may not be supported depending on the model.
Supported Resolutions for Video Signals
Check the resolutions supported for video signals.
CTA-861
| Resolution(Dots x lines) | Display format | Horizontal frequency(KHz) | Vertical frequency(Hz) | Clock frequency(MHz) | Polarity(horizontal / vertical) |
| 720 (1440) x 576i 50 Hz 15.625 50.000 27.000 - / - | |||||
| 720 (1440) x 480i 60 Hz 15.734 59.940 27.000 - / - | |||||
| 720 x 576 50 Hz 31.250 50.000 27.000 - / - | |||||
| 720 x 480 60 Hz 31.469 59.940 27.000 - / - | |||||
| 1280 x 720 50 Hz 37.500 50.000 74.250 + / + | |||||
| 1280 x 720 60 Hz 45.000 | 60.000 74.250 + / + | ||||
| 1920 x 1080i | 50 Hz 28.125 50.000 74.250 + / + | ||||
| 1920 x 1080i | 60 Hz 33.750 60.000 | 74.250 + / + | |||
| 1920 x 1080 | 24 Hz 27.000 | 24.000 74.250 + / + | |||
| 1920 x 1080 | 25 Hz | 28.125 25.000 | 74.250 + / + | ||
| 1920 x 1080 | 30 Hz 33.750 30.000 | 74.250 + / + | |||
| 1920 x 1080 | 50 Hz | 56.250 | 50.000 | 148.500 | + / + |
| *1920 x 1080 | 100 Hz | 112.500 | 100.000 | 297.000 | + / + |
| *1920 x 1080 | 120 Hz | 135.000 | 120.003 | 297.000 | + / + |
| 1920 x 1080 | 60 Hz | 67.500 | 60.000 | 148.500 | + / + |
| 3840 x 2160 | 24 Hz | 54.000 | 24.000 | 297.000 | + / + |
| 3840 x 2160 | 25 Hz | 56.250 | 25.000 | 297.000 | + / + |
| 3840 x 2160 | 30 Hz 67.500 30.000 297.000 | + / + | |||
| *3840 x 2160 | 50 Hz 112.500 50.000 | 594.000 + / + | |||
| *3840 x 2160 | 60 Hz 135.000 60.000 | 594.000 + / + | |||
| *3840 x 2160 | 100 Hz | 225.000 | 100.000 | 1188.000 | + / + |
| *3840 x 2160 | 120 Hz | 270.000 | 120.000 | 1188.000 | + / + |
| 4096 x 2160 24 Hz | 54.000 24.000 297.000 + / + | ||||
| 4096 x 2160 25 Hz | 56.250 25.000 297.000 + / + | ||||
| 4096 x 2160 30 Hz | 67.500 30.000 297.000 + / + | ||||
| *4096 x 2160 50 Hz | 112.500 50.000 594.000 + / + | ||||
| *4096 x 2160 60 Hz | 135.000 60.000 594.000 + / + | ||||
| *4096 x 2160 | 100 Hz | 225.000 | 100.000 | 1188.000 | + / + |
| *4096 x 2160 | 120 Hz | 270.000 | 120.000 | 1188.000 | + / + |
| *7680 x 4320 24 Hz | 108.000 24.000 | 1188.000 | + / + | ||
| *7680 x 4320 | 30 Hz | 132.000 | 30.000 | 1188.000 | + / + |
| *7680 x 4320 | 50 Hz | 220.000 50.000 | 2376.000 + / + | ||
| *7680 x 4320 | 60 Hz | 264.000 | 60.000 | 2376.000 | + / + |
*: The resolution may not be supported depending on the model.
VESA CVT
| Resolution(Dots x lines) | Display format | Horizontal frequency(KHz) | Vertical frequency(Hz) | Clock frequency(MHz) | Polarity(horizontal / vertical) |
| 2560 x 1440 60 Hz | 88.787 | 59.951 241.500 + / - | |||
| 2560 x 1440 | 120 Hz 192.996 | 119.998 497.750 | + / - |
The resolution may not be supported depending on the model.
Supported Resolutions for HDBT
Check the resolutions supported for HDBT.

HDBT is used only for The Terrace, The Terrace for business.
CEA-861
| Resolution(Dots x lines) | Display format | Horizontal frequency(KHz) | Vertical frequency(Hz) | Clock frequency(MHz) |
| 640 x 480 60 Hz | 31.469 60.000 25.000 | |||
| 720 x 480 60 Hz | 31.469 60.000 27.000 | |||
| 720 x 576 50 Hz | 31.250 50.000 27.000 | |||
| 1280 x 720 50 Hz | 37.500 50.000 74.000 | |||
| 1280 x 720 60 Hz | 45.000 60.000 74.000 | |||
| 1440 x 480 60 Hz | 15.734 60.000 27.000 | |||
| 1440 x 576 50 Hz | 15.625 50.000 27.000 | |||
| 1440 x 576 50 Hz | 31.250 50.000 54.000 | |||
| 1920 x 1080 24 Hz | 27.000 24.000 74.000 | |||
| 1920 x 1080 25 Hz | 28.125 | 25.000 74.000 | ||
| 1920 x 1080 | 30 Hz | 33.750 30.000 74.000 | ||
| 1920 x 1080 | 50 Hz | 31.250 50.000 72.000 | ||
| 1920 x 1080 | 50 Hz | 33.750 30.000 74.000 | ||
| 1920 x 1080 | 50 Hz | 56.250 50.000 149.000 | ||
| 1920 x 1080 | 60 Hz | 33.750 60.000 74.000 | ||
| 1920 x 1080 | 60 Hz | 67.500 60.000 149.000 | ||
| 1920 x 1080 | 100 Hz | 112.500 | 100.000 | 297.000 |
| 1920 x 1080 | 120 Hz | 135.000 120.000 | 297.000 | |
| 3840 x 2160 | 30 Hz | 67.500 30.000 297.000 |
Read Before Using Bluetooth Devices
Read this information before using a Bluetooth device.
This function may not be supported depending on the model or geographical area.
Restrictions on using Bluetooth
- You can't use Bluetooth devices and the Wi-Fi Speaker Surround Setup feature simultaneously.
- Compatibility issues may occur, depending on the Bluetooth device. (A Mobile exclusive headphone may not be available, depending on the environment.)
- Lip-sync errors may occur.
- The TV and Bluetooth device may disconnect, depending on the distance between them.
-
A Bluetooth device may hum or malfunction:
-
When a part of your body is in contact with the receiving/transmitting system of the Bluetooth device or the TV.
- When the device is subject to electrical variation from obstructions caused by a wall, corner, or office partitioning.
- When the device is exposed to electrical interference from same frequency-band devices including medical equipment, microwave ovens, and wireless LANs.
- If the problem persists, we recommend you use a wired connection.
- DIGITAL AUDIO OUT (OPTICAL) port
This function may not be supported depending on the model.
- HDMI (eARC) port
Licenses
Check the license information and trademarks applied in your TV.
DOLBY AUDIO™
Manufactured under license from Dolby Laboratories. Dolby, Dolby Audio, Pro Logic, and the double-D symbol are trademarks of Dolby Laboratories.

The terms HDMI and HDMI High-Definition Multimedia Interface, and the HDMI Logo are trademarks or registered trademarks of HDMI Licensing LLC in the United States and other countries.
Open Source License Notice
Open Source used in this product can be found on the following webpage. (http://opensource.samsung.com)

This license may not be supported depending on the model or geographical area.

HEVC Advance™ Covered by Patents at patentlist.hevcadvance.com
Troubleshooting
If you have a problem with your TV, you can access various solutions while watching TV. If your problem is not addressed in the Troubleshooting section, view the FAQ section or contact the Samsung Call Center.
Picture Issues
When the TV has trouble with the picture, these steps may help resolve the problem.
Testing the picture
Settings > Support > Device Care > Self Diagnosis > Picture Test Try Now
Before you review the list of problems and solutions below, use Picture Test to determine if the problem is caused by the TV. Picture Test displays a high definition picture you can examine for flaws or faults.
| The problem Try this! | |
| Flickering and Dimming | If your TV is flickering or dimming sporadically, you may need to disable some of the energy efficiency features.Disable Ambient Light Detection, Power Saving Mode, Motion Lighting, or Contrast Enhancer.Settings General Eco Solution Ambient Light DetectionSettings General Eco Solution Power Saving ModeSettings General Eco Solution Motion Lighting >Settings Picture Expert Settings Contrast EnhancerRun Picture Test. When the tested image quality is normal, check the signal of the connected device.Settings Support Device Care Self Diagnosis Picture Test > |
| Component Connections and Screen Color | If the color on your TV screen is not correct or the black and white colors are off, run Picture Test.< img src=""> Settings Support Device Care Self Diagnosis Picture TestIf the test results indicate that the problem is not caused by the TV, do the following:When using the One Connect, confirm that its video input connectors are connected to the correct external device video output connectors.When using the component cable, confirm that the green (Y), blue (Pb), and red (Pr) jacks are plugged into their proper connectors.For more information about how to connect an external device, run Connection Guide.< img src=""> Source Connection Guide |
| Screen Brightness | If the colors on your TV are correct but just a little too dark or bright, try adjusting the following settings first.➢ Settings Picture Expert Settings BrightnessSettings Picture Expert Settings Contrast➢Settings Picture Expert Settings Sharpness➢Settings Picture Expert Settings Color➢Settings Picture Expert Settings Tint (G/R)➢ |
| Blurring, or Juddering | If you notice blurring or juddering on the screen, use thePicture Clarity Settingsfunction to resolve the issue.➢Settings Picture Expert Settings Picture Clarity Settings |
| Unwanted Powering Off | If your TV appears to turn off by itself, try disabling some of the TV's energy efficiency functions.See ifSleep Timerhas been enabled. TheSleep Timerautomatically turns the TV off after a specified period of time.Settings General System Manager Time Sleep Time>➢If theSleep Timerhas not been enabled, see ifAuto Power Off orOff Timerhas been enabled and disable it.Settings General Eco Solution Auto Power Off>Settings General System Manager Time Off Timer>➢In case of The Sero, check the options such as The Sero Auto On/Off and Off Timer in the SmartThings app on your mobile device. The Sero Auto On/Off is intended to automatically turn on The Sero when your mobile device approaches and to automatically turn off it after a specific time when your mobile device gets far away from it. |
| Problems Powering On | If you are having problems powering on your TV, there are a number of things to check before calling the service department.Confirm that the TV's power cord is connected correctly at both ends and that the remote control is operating normally.Make sure that the antenna cable or cable TV cable is firmly connected.If you have a cable box or satellite box, confirm that it is plugged in and turned on.In case of a model that supports One Connect, check the One Invisible Connection between the TV and One Connect. |
| Unable to find a Channel | If your TV is not connected to a cable box or satellite box, runAuto Program or Auto Tuning.➢Settings > Broadcasting > Auto Program or Auto TuningWhen using a broadcast receiver such as set-top box and IPTV, check the connection to the TV.•Service Connection GuideWhen the symptom persists, contact your service provider. |
| The TV image does not look as good as it did in the store. | Store displays are tuned to a digital UHD channel or HD channel.Change the output resolution of your devices such as digital broadcast receiver, IPTV, and set-top box to UHD or HD.Be sure to use an HDMI cable to enjoy high quality videos.•Service Connection Guide Video Device HDMITo connect the TV with your PC, make sure that your PC's graphic card supports UHD resolutions.For more information about the supported UHD resolutions, refer to "Supported Resolutions for UHD Input Signals."Make sure that the set-top box or cable box supports the content or broadcast for UHD and set the resolution. For more information, contact your service provider.When using aSamsung TV Pluschannel, check the network connection. When the network speed is slow, the app may not work or the image quality may be poor. |
| The picture is distorted. | The compression of video content may cause picture distortions, especially in fast moving pictures from sports programs and action movies.If the signal reception is weak or poor, screen distortion may be visible but it is not a malfunction.Mobile phones used close to the TV 1 m may cause noise on analog and digital channels. |
| The color is wrong or missing. | If you're using a Component connection, make sure that the Component cables are connected to the correct jacks.Incorrect or loose connections may cause color problems or a blank screen. |
| The color is poor or the picture is not bright enough. | Go toPictureand then adjust thePicture Mode,Brightness,Sharpness,andColorsettings.➢Settings Picture Picture ModeSettings Picture Expert Settings Brightness➢Settings Picture Expert Settings Sharpness➢Settings Picture Expert Settings Color➢See ifPower Saving Modehas been enabled.Settings General Eco Solution Power Saving ModeTry resetting the picture.Settings Picture Expert Settings Reset Picture> |
| There is a dotted line on the edge of the screen. | ChangePicture Size Settings to 16:9 Standard.➢Settings Picture Picture Size Settings 16:9 Standard |
| The picture is black and white. | Use a composite cable when you connect AV equipment to the TV.If you are using the composite cable, connect the video cable (Yellow) to the VIDEO (Yellow / Green) input port.The COMPONENT IN port may not be supported depending on the model or geographical area.Check whetherGrayscaleis set toOn.➢Settings General Accessibility Grayscale |
| The picture won't display in full screen. | HD channels will have black bars on either side of the screen when displaying upscaled SD (4:3) content.Black bars will appear at the top and bottom of the screen when you watch movies that have aspect ratios different from your TV.Adjust the picture size options on your external device or set the TV to full screen.Settings Picture Size Settings Picture Size > |
| The Caption function in the TV menu is deactivated. | When an external device is connected with an HDMI or Component cable, the Caption function is unavailable. Adjust the caption setting on the external device. |
| Captions appear on the TV screen. | Turn off the Caption function in Caption Settings.>Settings General Accessibility Caption Settings Caption > |
| The HDR of the connected external device turns off. | Expand the reception range of the corresponding HDMI input signal in Input Signal Plus.>Settings General External Device Manager Input Signal PlusThis function may not be supported depending on the model. |
If the test picture does not appear or there is noise or distortion, the TV may have a problem. Contact Samsung's Call Center for assistance.
If the test picture is displayed properly, there may be a problem with an external device. Please check the connections.
If the problem persists, check the Signal Information or refer to the external device's user manual.
Sound and Noise Issues
When the TV has difficulties with sound, these steps may help resolve the problem.
Testing the sound
Settings > Support > Device Care > Self Diagnosis > Sound Test Try Now
If the TV plays the Sound Test melody without distortion, there may be a problem with an external device or the broadcast signal's strength.
| The problem Try this! | |
| How can I connect an audio device to the TV? | The connection method may differ depending on the audio device such as HDMI (eARC), Optical, Bluetooth, and Wi-Fi.For more information about how to connect an audio device, runConnection Guide.·Service Connection Guide Audio Device > |
| There is no sound or the sound is too low at maximum volume. | Check the volume control of your TV, and then check the volume control of the external device (cable box or satellite box, DVD, Blu-ray, etc.) connected to your TV.Check the cable connection between an external device and the TV and then try cable connection again. |
| The picture is good but there is no sound. | SetSound Outputto TV Speaker.·>Settings Sound Sound OutputIf you are using an external device, check the device's audio output option.For example, you may need to change your cable box's audio option to HDMI if the box connected to your TV is using an HDMI cable.To listen to computer sound, connect an external speaker to the computer's audio output connector.If your TV has a headphone jack, make sure there is nothing plugged into it.Reboot the connected device by disconnecting and then reconnecting the device's power cable.With a set-top box or cable box, check the cable connection and reboot the external device. When the symptom persists, contact your service provider. |
| No sound is heard. | Check whetherDigital Output Audio Formatis set toPass-Through.If you select thePass-Throughoption to use an AV receiver that does not support Dolby Digital+, no sound is output withDolby Digital+content.It is recommended to setDigital Output Audio Formatto Autowhen the connected receiver supports only the limited audio formats.•Settings Sound Expert Settings Digital Output Audio FormatAuto> |
| The speakers are making an odd sound. | Run Sound Test.● > Settings Support Device Care Self Diagnosis Sound TestMake sure that the audio cable is connected to the correct audio output connector on the external device.For antenna or cable connections, check the Signal Information. A low signal level may cause sound distortions.• Settings Support Device Care Self Diagnosis Signal Information |
| The sound is interrupted. | The sound may frequently be interrupted when a Bluetooth speaker is used. Make sure that the Bluetooth speaker and the wireless access point are on a straight line, and the Bluetooth speaker is placed as close as possible to the TV.To minimize interruptions, we recommend a wireless access point that uses a 5 GHz frequency.When the symptom persists, it is recommended to use wired connection such as HDMI-eARC and Optical. |
| Whenever a function is used on the TV or the channel is changed, the TV voices the activity.The TV explains in voice-over the video scenes displayed on the screen. | Turn off the Voice Guide function in Voice Guide Settings.• Settings General Accessibility Voice Guide Settings Voice Guide |
| The TV audio is not being played through the AV receiver. | Check the A/V receiver's power supply and its settings.When connecting the optical cable between the TV and A/V receiver, make sure that the sound output is setOpticalon your TV.In case of HDMI-eARC connection, make sure that it is connected to the eARC dedicated HDMI port on your TV. However, the eARC can be used only when the A/V receiver supports the eARC feature. |
| The sound is not heard clearly. | Change to an appropriate sound mode.• Settings Sound Sound Mode >When Intelligent Mode and Adaptive Sound+ are turned on, the sound effects are automatically adjusted to the surroundings.• Settings General Intelligent Mode Settings Intelligent ModeTo optimize the sound depending on the surroundings, select Adaptive Sound+.• Settings General Intelligent Mode Settings Adaptive Sound+This function may not be supported depending on the model. |
| The volume of the external device cannot be adjusted. | Check the cable connection between the TV and the external device.When connecting an external speaker such as home theater via HDMI, make sure it is connected to the HDMI (eARC) port on the TV. Make sure that the Settings > General External Device Manager Anynet+ (HDMI-CEC) is active on your TV. |
| I want to turn off and on the TV and audio device at the same time. | When you connect the Samsung Soundbar to the TV via Bluetooth, the power turns off and on together. It may not be supported depending on the Samsung Soundbar model.When you connect an audio device that supports HDMI-eARC to the HDMI (eARC) port on the TV, the power turns off and on together. |
Channel and Broadcast Issues
When the TV has difficulties receiving broadcasts, these steps may help resolve the problem.
| The problem Try this! | |
| “Weak or No Signal” displayed in TV mode or cannot find channel. | Make sure that the external device is connected securely and turned on. Move to Sources to switch to other input sources.•Source Sources >When using a set-top box or cable box, check the broadcast signals or the network that is connected to the external device. |
| The TV is not receiving all channels. | Confirm that the coaxial cable is securely connected to the TV.Run Reset or Auto Program or Auto Tuning.➢ Settings General Reset➢ Settings > Broadcasting > Auto Program or Auto Tuning |
| The captions are not provided on a digital channel.I want to turn off the captions. | When watching channels with the antenna cable connected, run Caption Settings.➢ Settings General Accessibility Caption SettingsSome channels may not have caption data.When watching a channel on an external device such as set-top box and cable box, turn on the caption function on the device. For more information, contact your service provider. |
| Broadcasting is deactivated. | Broadcasting is only available when Source is set to TV.Broadcasting cannot be accessed while you watch TV using a cable box or satellite box.Broadcasting cannot be accessed while a recording is in progress or the Timeshift function is running. |
External Device Connectivity Issues
When the TV has difficulties connecting to external devices such as a PC, game console, or mobile device, these steps may help resolve the problem.
| The problem Try this! | |
| The "Mode Not Supported" message appears. | Adjust the output resolution of the external device to a resolution supported by the TV. |
| The video is OK but there is no audio. | If you are using an HDMI connection, check the audio output setting on your PC.If you are using a DVI to HDMI cable, a separate audio cable is required.To listen to the computer sound, connect external speakers to the audio output connection of the computer. |
| I want to connect to a PC and mobile device via screen mirroring. | To wirelessly connect the TV to your PC, read the instructions atPC Screen Sharing (Wireless) inConnection Guide, and then try to connect.➢Source Connection Guide PC Screen Sharing (Wireless)Confirm that the TV and your PC are connected to the same network.To wirelessly connect the TV to your mobile device, read the instructions atSmartphone >Screen Sharing (Smart View) inConnection Guide, and then try to connect.➢Source Connection Guide Smartphone Screen Sharing (Smart View)For more information in the The Terrace for business, refer to the provided user manual.If the TV has difficulties connecting to your PC or mobile device due to surrounding radio interferences, change the frequency of the wireless access band, and then try to connect. |
| No screen appears when connecting the TV to an external device. | For more information about how to connect an external device, runConnection Guide.➢Source Connection GuideMake sure that the external device is connected securely and turned on. Move toSources to switch to other input sources.➢Source SourcesUsingHDMI Troubleshooting, you can check the connection to HDMI cable and external devices (takes approximately 2 minutes).➢Source Connection Guide Video Device HDMITroubleshootingWhen using a set-top box or cable box, check the broadcast signals or the network that is connected to the external device. |
| I want to connect to a Bluetooth speaker. | For more information on how to connect a Bluetooth speaker, seeAudio Device>BluetoothinConnection Guide.➢Source Connection Guide Audio Device Bluetooth |
| The PC screen does not appear or it flickers. | When the PC screen does not appear or the PC is not recognized, check the power supply of the PC and then reconnect the HDMI cable between the PC and TV. When the symptom persists, check that the PC is in Sleep mode and then setInput Signal Plusto On.➢Settings General External Device Manager Input SignalPlusWhen the set resolution is not matched, the screen may flicker. For the PC supported resolution, see'Read Before Connecting a Computer (Supported Resolutions).' |
Network Issues
When the TV has difficulties connecting to the Internet, these steps may help resolve the problem.
Settings > Support > Device Care > Self Diagnosis > Smart Hub Connection Test Try Now
If the TV has trouble with network connection or TV services, check the Smart Hub connection status.
| The problem Try this! | |
| Wireless network connection failed. Unable to connect to a wireless access point. | Make sure that no items that can generate electromagnetic interferences are placed between the TV and the wireless/wired access point.Check if the access point is turned on. If it is on, turn it off, wait 1 or 2 minutes, and then turn it on.Enter the correct password if required.If the wireless connection fails, connect the TV to the access point via a LAN cable.If the TV can connect to the Internet normally via the wired connection, there might be a problem with the access point. In this case, try using a different access point. |
| Wired network connection failed. | Check if the LAN cable is plugged in on both ends. If it is plugged in, check if the access point is turned on. If it is on, turn it off, wait 1 or 2 minutes, and then turn it on. |
| Auto IP configuration failed. Unable to connect to the network. | Check if the LAN cable is plugged in on both ends. If it is plugged in, check if the access point is turned on.If the access point is on, turn it off, wait 1 or 2 minutes, and then turn it on.Disconnect and then reconnect the power cable of the TV, or press and hold the power button for 3 seconds. |
| Connected to a local network, but not to the Internet. | 1. Check if the Internet LAN cable is connected to the access point's external LAN port.2. Check the DNS setting in IP Settings.- > Settings General Network Network Status IP > Settings |
| Network setup is completed, but unable to connect to the Internet. | If the problem persists, contact your Internet service provider. |

Wired networks are not supported by some models.
Data Service
When the TV has difficulties using Data Service, these steps may help resolve the problem.
> Settings Broadcasting Expert Settings Auto Run Data Service
This function may not be supported depending on the model or geographical area.
This function is not available when any other secondary function is under way.
Provided data service information may vary depending on the broadcast.
| The problem Try this! | |
| Why am I getting on-screen messages when I haven't selected the Data Service option? | If Auto Run Data Service is set to On, messages will automatically appear on the screen when you watch a broadcast that supports the Data Service. If the broadcast doesn't support the Data Service, no messages will appear on the screen.If you do not wish to receive Data Service messages, disable Auto Run Data Service. |
| How do I hide Data Service messages? | If you do not wish to receive Data Service messages, set Auto Run Data Service to Off.· > Settings Broadcasting Expert Settings Auto Run Data Service |
| How do I use the Data Service? | Enabling the Auto Run Data Service option automatically displays messages on the screen whenever you watch a broadcast that supports the Data Service. You can press the corresponding buttons shown on the screen to access additional features and functions offered by that broadcast. |
| What is an interactive service and how does it work? | Interactive services include viewer surveys, quizzes, ticket requests, product purchases, and other interactions between the viewer and the TV station. Generally, you will need to set up an account with the broadcaster and log in to the account in order to enjoy the interactive services they offer. Note that interactive services are only available when your TV is connected to the Internet. In addition, T-Commerce requires that you have a certificate.Copy your certificate from the computer to a USB device and connect that device to the TV. (Interactive services are not being offered yet. The actual service launch date varies depending on the broadcaster.) |
| A message displays "Receiving" but no change happens. | This indicates an error has occurred while receiving data. An execution error message will also appear on the screen. If this happens, try again. |
| Nothing appears on the screen after the Data Service is launched. | The Data Service may be initializing or the signal may have been severed by the broadcaster |
| What is Blur Reduction? | The Data Service can cause the same screen to appear and create a blur. Blur Reduction prevents this blurring effect.The Blur Reduction function may not be supported depending on the model. |
| Why is the Data Service closed automatically? | The Data Service keeps running during Auto Protection Time.SetAuto Protection Timeto Offto keep the Data Service running.< img >< Settings General System Manager Auto Protection Time |
Anynet+ (HDMI-CEC) Issues
When Anynet+ (HDMI-CEC) isn't working, these steps may help resolve the problem.
| The problem Try this! | |
| What is Anynet+? | You can use the TV's remote control to control external devices that support Anynet+(HDMI-CEC) and that are connected to the TV via an HDMI cable. For example, if a connected external device supports Anynet+, you can have the connected device turn on or off when you turn the TV on or off. |
| Anynet+ does not work. | Confirm that the device is an Anynet+ device. The Anynet+ system supports Anynet+ devices only.Check if the power cord of the Anynet+ device is properly connected.Check the cable connections of the Anynet+ device.Go to Anynet+ (HDMI-CEC) and see if Anynet+ (HDMI-CEC) has been set to On. · > Settings General External Device Manager Anynet+ (HDMI-CEC)Anynet+ may not function when some other functions are active, including Channel Search, Smart Hub, Initial Setup, etc.If you have disconnected and then reconnected the HDMI cable, scan for devices again or turn your TV off and on. |
| I want to start Anynet+.I also want the connected devices to turn on when the TV is turned on. | Move the focus to the Anynet+ device at Source press the up directional button to move to Anynet+ (HDMI-CEC), and then press the Select button.Check if the Anynet+ device is properly connected to the TV, and then select Anynet+(HDMI-CEC) menu to see if Anynet+ (HDMI-CEC) is set to On. · Settings General External Device Manager Anynet+ (HDMI-CEC) |
| I want to exit Anynet+.It is inconvenient to turn on other devices because the TV also turns on. It is inconvenient because the connected devices (e.g. set-top box) turn off together. | To turn off the Anynet+ function of a device connected to the TV, turn off the Anynet+(HDMI-CEC) function of the device. · > Settings General External Device Manager Anynet+ (HDMI-CEC)When Anynet+ (HDMI-CEC) is turned off, the sound bar connected via the HDMI (eARC) port does not turn off and on together with the TV. To prevent a specific device connected to the TV from turning off automatically, turn off the HDMI-CEC function on a specific device connected to the TV. |
| The message "Connecting to Anynet+ device..." or "Disconnecting from Anynet+ device" appears on the screen. | You cannot use the remote control when the TV is configuring Anynet+ or switching to the TV viewing screen.Use the remote control after the TV has completed the Anynet+ configuration or has switched to the TV viewing screen. |
| The Anynet+ device won't play. | You cannot use the play function when Reset is in progress. |
| The connected device is not displayed. | Check whether the device supports Anynet+.Anynet+ devices must be connected to the TV using an HDMI cable. Make sure the device is connected to your TV with an HDMI cable. Some HDMI cables may not support Anynet+.Check whether the HDMI cable is properly connected.Go to Anynet+ (HDMI-CEC) and see if Anynet+ (HDMI-CEC) has been set to On.• Scing General External Device Manager Anynet+ (HDMI-CEC)Scan for Anynet+ devices again.If the connection is terminated because there has been a power failure or the HDMI cable has been disconnected, please scan for the device again. |
Remote Control Issues
When the remote control isn't working, these steps may help resolve the problem.
| The problem Try this! | |
| The remote control does not work. | The connection between the Samsung Smart Remote and the TV may be lost.Point the Samsung Smart Remote at the front of the TV, and then press and hold the ▶ and ▶ buttons simultaneously for 3 seconds or more.Also, if the remote control is not working or slow, the batteries might be low or dead. If this is the case, replace the batteries. Alkaline batteries are recommended for longer battery life. |
| The remote control batteries run out quickly. | The batteries may be consumed quickly if the remote control is used very frequently or the Voice Wake-up function is turned on.You can extend the battery life by turning off the Voice Wake-up function.• Explore Now Settings Voice Wake-upThe Voice Wake-up function may not be supported depending on the model or geographical area. |
| External devices cannot be operated with the TV remote control. | Check the cable connection between the TV and external devices.When the symptom persists, set it manually in Source Universal Remote Universal Remote Setup. |
Recording Issues
When Timeshift or Schedule recording aren't working, these steps may help resolve the problem.
| The problem Try this! | |
| The Timeshift or recording function cannot be used. | Check if there is a storage device connected to the TV.Recording will automatically stop if the signal becomes too weak.Check the free space on the storage device.The function will not work if there isn't enough storage space on the USB device.Before using the recording function, be sure to read all precautions. For more information, refer to "Before Using the Recording and Timeshift Functions." |
| Cannot record videos received from an external device or Samsung TV Plus. | The recording function is only available for digital broadcast channels received by the TV. You cannot record videos received from an external device or Samsung TV Plus. |
| The "Format Device" message appears when the Timeshift or recording function is used. | To use the recording function, the storage device connected to the TV must have been already formatted Rentatting the storage device deletes all data from it, and the storage device is formatted in NTFS. |
| The recorded files on the TV are not played back on a PC. | The recorded files on the TV can only be played back on the same TV. Those video files cannot be played back on a PC or other TV. |
This function may not be supported depending on the model or geographical area.
Apps
When apps aren't working, these steps may help resolve the problem.
| The problem Try this! | |
| I launched an app, but it's in a different language. How can I change the language? | Languages supported by an app may be different from the TVLanguageset in the menu.The ability to change the language depends on the app's provider. |
| The app does not work properly.Its image quality is poor. | Check the network connection. When the network speed is slow, the app may not work or its image quality may be poor.The services of your application are not provided by the TV but by the application service provider.Refer to the Help section on the application service provider's website. |
Media Files
When files don't play, this may help resolve the problem.
| The problem Try this! | |
| Some files are interrupted during playback. | This problem may occur with unsupported files or high-bitrate files. Most files can be played back, but some files may not play smoothly. |
| Some files can't be played. | Some files that use an unsupported codec may not be played back.Make sure that the codec is supported by the TV. For more information about the supported codecs, refer to "Read Before Playing Photo, Video, or Music Files." |
Voice Assistant Issues
When the Voice Assistant isn't working, these steps may help resolve the problem.

The Voice Wake-up function may not be supported depending on the model, Voice Assistant or geographical area.
| The problem Try this! | |
| The voice commands do not work well. | Voice commands may differ depending on the Voice Assistant.Refer to the command examples for each Voice Assistant.Bixby: [IMAGE] > Explore NowAmazon Alexa: [IMAGE] > Settings > General > Voice > Amazon Alexa SettingsGoogle Assistant: [IMAGE] > Settings General Voice Google Assistant Settings |
| Bixby or Alexa answers automatically. | The TV may recognize an ambient noise or everyday conversation as a call to Voice Assistant.Turn off the Voice Wake-up function or set the Wake-Up Sensitivity to Low.Explure Now Settings Wake-up |
| I spoke "Hi, Bixby" but Bixby does not answer.I spoke "Alexa" but Amazon Alexa does not answer. | The Samsung Smart Remote may not recognize your voice when it is far away from you, turned upside down, or located in an environment with loud ambient noise.Use the Samsung Smart Remote less than 1.5 m with the remote control buttons facing upward. (There is a built-in microphone on the front of the Samsung Smart Remote.)Do not place the Samsung Smart Remote near the TV speaker or an audio speaker.Turn on the Voice Wake-up function.Explure Now Settings Wake-up |
| With Samsung Smart Remote, the following features are available except for voice recognition.There is no response even if the voice entry button is pressed. | Try pairing the remote control with the TV. |
| During voice recognition, the heavy load message appears and the function does not work. | Unplug and then plug the TV power cable and then try again after 1 minute and 30 seconds. It may take a while if the voice recognition server is being inspected. |
| I want to see weather information of the desired area. | Say with the area name included. |
Other issues
Use these procedures to resolve other issues that may occur in relation to the product.
| The problem Try this! | |
| The TV is hot. | Watching TV for an extended period of time causes the panel to generate heat.The heat from the panel is dissipated through internal vents running along the top of the TV.The bottom, however, may feel hot to the touch after extended use.Children watching TV need constant adult supervision to prevent them from touching the TV.This heat, however, is not a defect and does not affect the TV's functionality. |
| The TV smells of plastic. This smell is normal and will dissipate over time. | |
| The settings are lost after 5 minutes or every time the TV is turned off. | IfUsage Modeis set toRetail Mode, the TV's audio and video settings are automatically reset every 5 minutes.ChangeUsage Metode to Home Mode.•SettingsGeneral System Manager Usage Mode> |
| The TV is tilted to the side. Remove the base stand from the TV and reassemble it. | |
| The stand is wobbly or crooked. | Refer to the Quick Setup Guide and make sure that the stand is assembled correctly. |
| A POP (TV's internal banner ad) appears on the screen. | ChangeUsage Metode to Home Mode.•SettingsGeneral System Manager Usage Mode |
| The TV is making a popping noise. | The expansion and contraction of the TV's outer casing may cause a popping noise.This does not indicate a product malfunction.The TV is safe to use. |
| The TV is making a humming noise. | Your TV utilizes high-speed switching circuits and high levels of electrical current. Depending on the TV's brightness level, the TV may seem slightly noisier than a conventional TV.Your TV has undergone strict quality control procedures that meet our demanding performance and reliability requirements.Some noise coming from the TV is considered normal and is not an acceptable cause for an exchange or refund. |
| The software update over the Internet has failed. | Check the network connection status.• Settings General Network Network Status >If the TV is not connected to a network, connect it to a network.The upgrade stops if you already have the latest software version. |
| The TV narrates the screen events in voice-over. | To turn off Voice Guide, move the focus from Accessibility Shortcuts to Voice Guide and then press the Select button. You can turn on or off Voice Guide. To run Accessibility Shortcuts, see the following:• Press and hold the +/- (Volume) button on your Samsung Smart Remote.• Settings General Accessibility Voice Guide Settings Voice Guide |
Diagnosing TV operational issues
You can diagnose issues with your TV and Smart Hub and run reset functions.
Settings > Support > Device Care > Self Diagnosis Try Now
You can use the Picture Test to help diagnose video issues and the Sound Test to diagnose sound issues. You can also view signal strength information for over-the-air digital signals, test the Smart Hub Internet connection, and run the Smart Hub and TV factory reset functions.
- Video Test
- Picture Test
- Sound Test
- HDMI Troubleshooting
- Signal Information
• Smart Hub Connection Test - Reset Smart Hub
| The problem Try this! | |
| Cannot selectSignal Information in Self Diagnosis. | Verify that the current channel is a digital channel.Signal Informationis only available for digital channels.➢ Settings Support Device Care Self Diagnosis Signal Information |
| Reset Smart Hub | Resets all Smart Hub settings to their factory defaults and deletes all information related to Samsung accounts, linked service accounts, Smart Hub service agreements, and Smart Hub applications.➢ Settings Support Device Care Self Diagnosis Reset Smart Hub |
| Reset picture | Resets current picture settings to the default settings.➢ Settings Picture Expert Settings Reset Picture |
| Reset sound | Resets current sound settings to the default settings.➢ Settings Sound Expert Settings Reset Sound |
Getting Support
Get help directly from Samsung if you have a problem with your TV.
Getting support through Remote Management
Settings > Support > Remote Management Try Now
After consenting to our service agreement, you can use Remote Management to access Remote Support and have a Samsung service technician diagnose your TV, correct problems, and update your TV's software remotely via the web. You can also turn Remote Management on and off.
You can also start this function by pressing and holding the button for 5 or more seconds.
This function requires an Internet connection.
Finding the contact information for service
Settings > Support > About This TV Try Now
You can view the address of the Samsung website, the call center phone number, your TV's model number, your TV's software version, Open Source License and other information you may need to get service support from a Samsung call agent or the Samsung website.
You can also view information by scanning the QR code of your TV.
You can also start this function by pressing and holding the button for 5 or more seconds. Continue holding the button until the customer information pop-up window appears.
Requesting service
Settings > Support > Device Care > Request Support Try Now
You can request service when you encounter a problem with the TV. Select the item matching the problem that you encountered, enter the required item, move the focus to Next, and then press the Select button. Select Request Now > Send or Schedule Appointment > Request > Send. Your service request will be registered. The Samsung Contact Center will contact you to set up or confirm your service appointment.
You must agree to the terms and conditions for the service request.
This function may not be supported depending on the geographical area.
This function requires an Internet connection.
FAQ
In this section, you'll find the answers to the e-Manual questions we get asked about most often.
The TV Screen does not Display Properly
When the TV screen does not look right, let's find out how to check whether the issue is caused by the product or the broadcasting signals and cables.
When the TV screen does not display properly
The color and design, accessories (including the remote control) and features may differ depending on the model or geographical area.
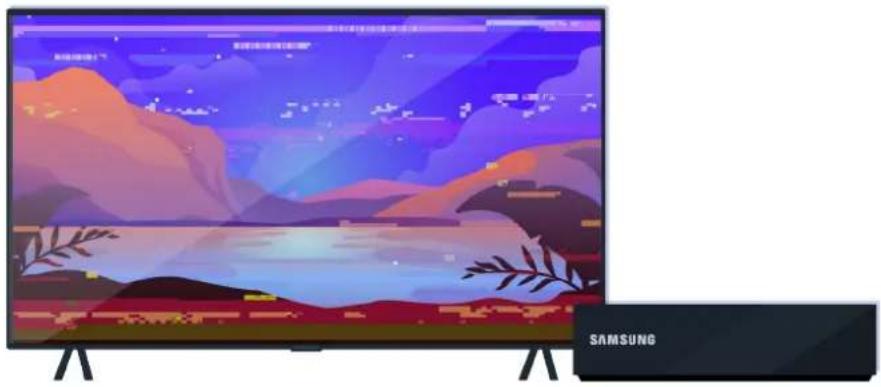
natural_image
Modern TV displaying a scenic mountain landscape with a lake and leafy branches, next to a Samsung screen (no text or symbols on the main image)Check the antenna and input cable connections.
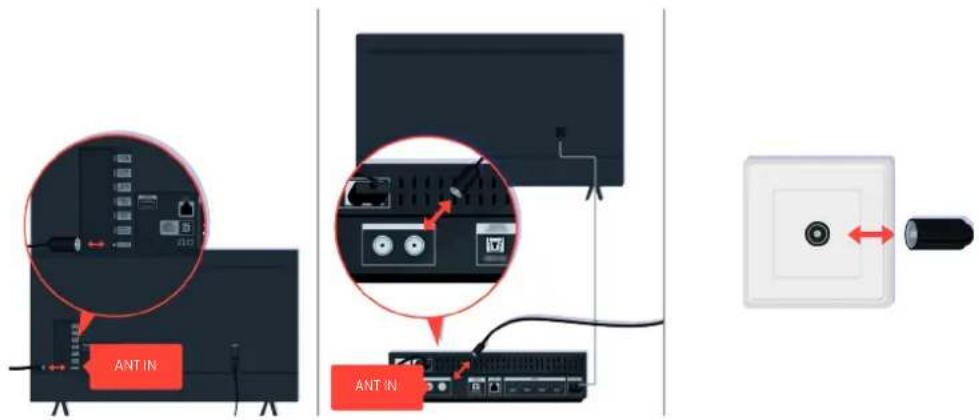
text_image
ANT IN ANT INCheck the antenna and input cable connections.
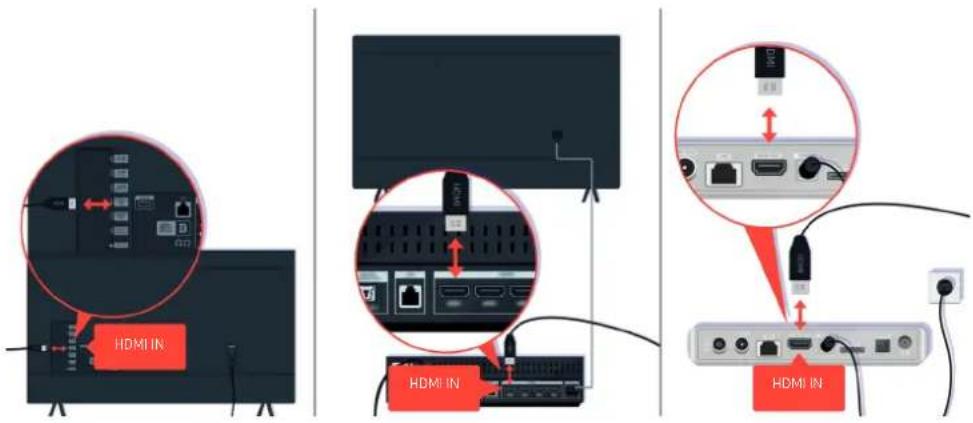
text_image
HDMI IN HDMI IN HDMI INCheck the antenna and HDMI cable connections.
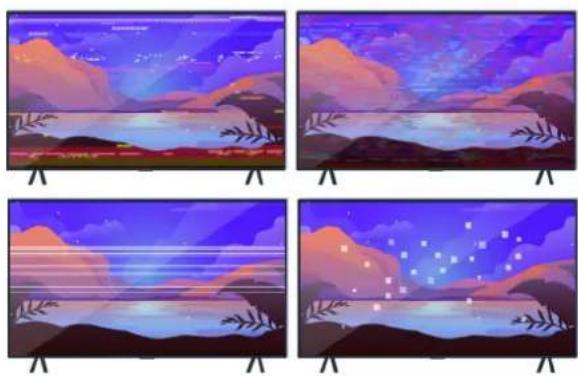
If the issue persists, define exactly what is wrong with the display. For example, mosaics and blocks, multiple lines or white dots, or fixed horizontal or vertical lines.
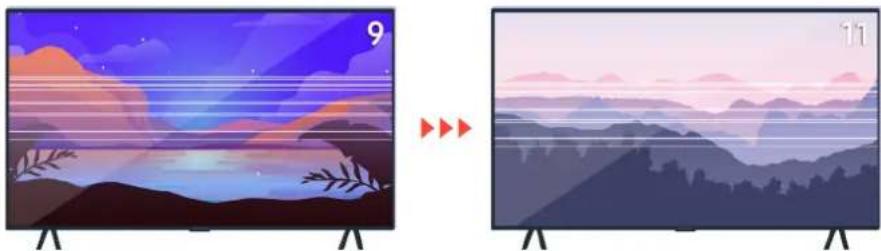
natural_image
Two-panel illustration showing a scenic landscape with mountains, waves, and sky, before and after a transformation (no text or symbols)Try changing channels using the remote control.
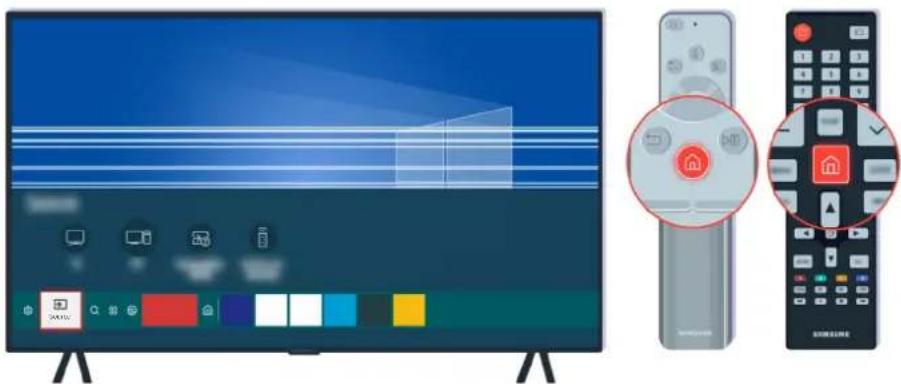
natural_image
Modern TV setup with two remote controls and a colorful display screen (no visible text or symbols)Press the button, select Source, choose another input source.
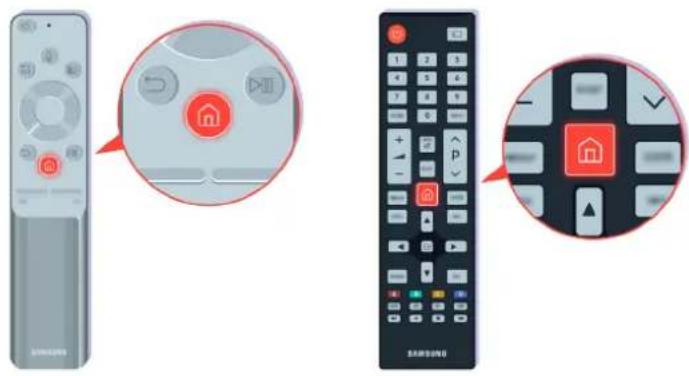
text_image
Diagram showing three views of a Samsung remote control: close-up, home control with play button, and closed-up with home control buttons.If the same problem persists, run a diagnostic test. On the remote control, press the button.
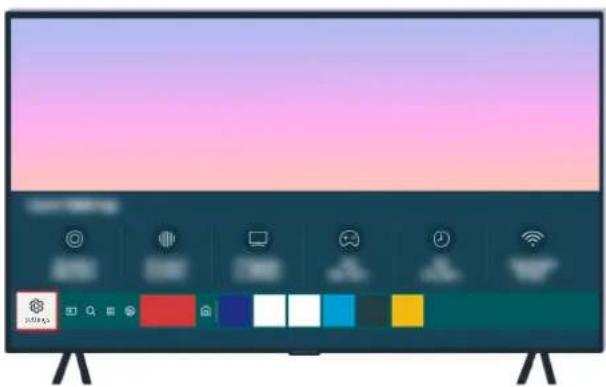
natural_image
Modern TV displaying with colorful UI elements on a desk (no readable text or symbols)Select > Settings > Support > Device Care > Self Diagnosis > Picture Test.
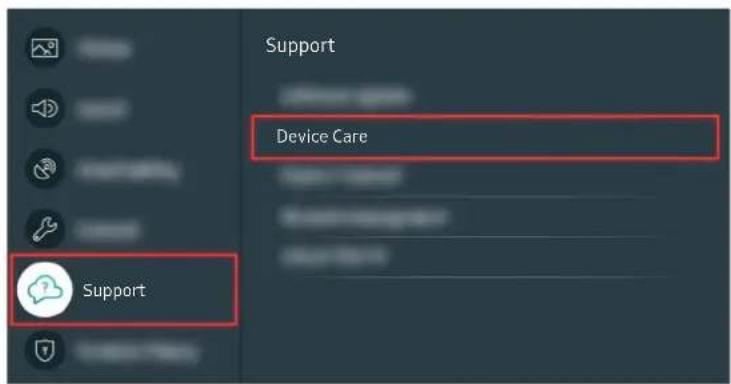
text_image
Support Device Care SupportSelect > Settings > Support > Device Care > Self Diagnosis > Picture Test.
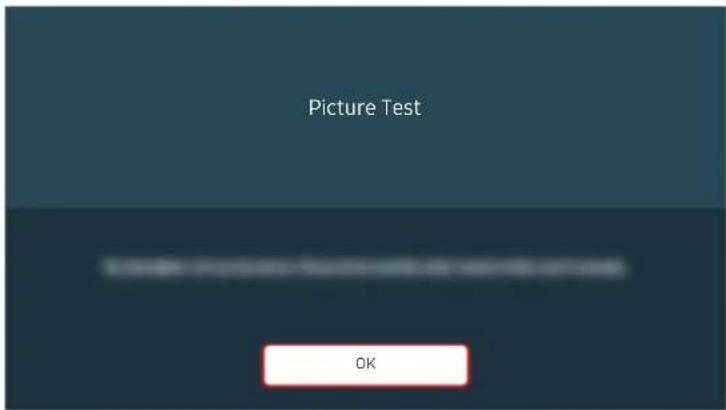
text_image
Picture Test OKWhen a message appears, select OK and follow the on-screen instructions to complete the test.
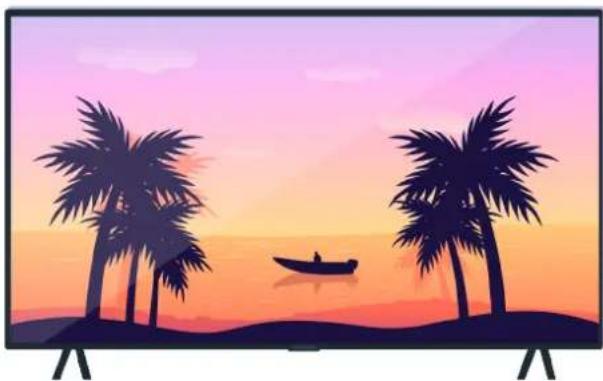
natural_image
Illustration of a beach scene with palm trees, a small boat, and sunset sky (no text or symbols)When a message appears, select OK and follow the on-screen instructions to complete the test.
text_image
Picture Test Complete CloseWhen a message appears, select Close and follow the on-screen instructions to complete the test.
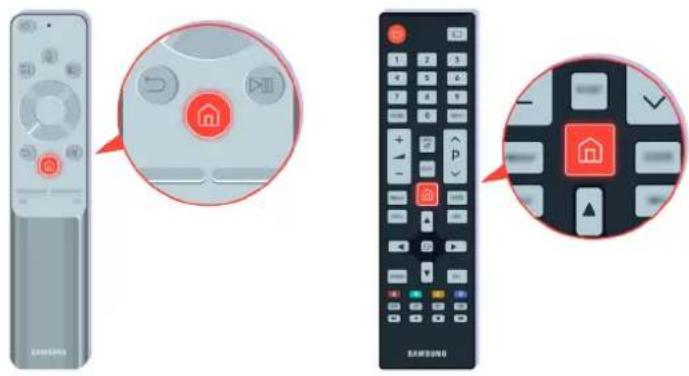
text_image
Diagram showing three views of a Samsung remote control: close-up, home control with play button, and closed-up with home control buttons.If the problem disappears during the test, check your TV signal. On the remote control, press the button.
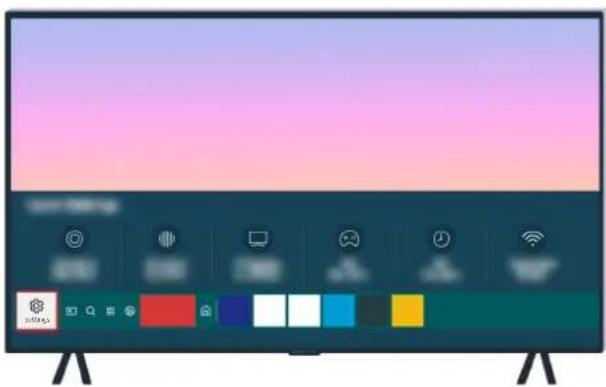
natural_image
Modern TV displaying with colorful UI elements on a desk (no visible text or symbols)Select > Settings > Support > Device Care > Self Diagnosis > Signal Information to check the signal strength.
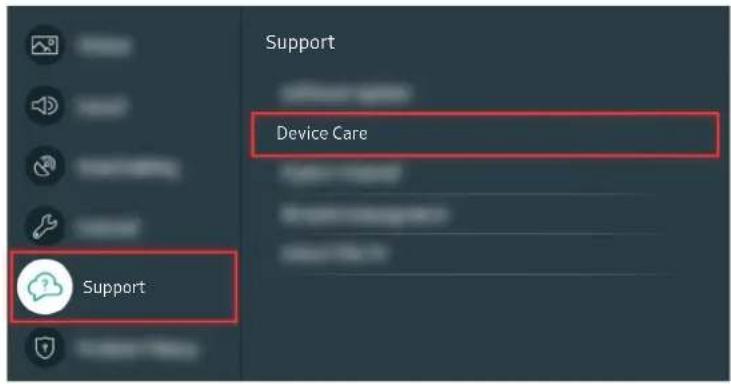
text_image
Support Device Care SupportSelect > Settings > Support > Device Care > Self Diagnosis > Signal Information to check the signal strength.
text_image
Signal InformationCheck whether the signal strength is too weak or not.
Related menu path
Settings > Support > Device Care > Self Diagnosis > Picture Test Try Now
Settings > Support > Device Care > Self Diagnosis > Signal Information Try Now
The TV does not Turn On
If the TV screen is black, it is often caused because the power cord is loose or the peripheral device is turned off.
When your TV does not turn on
The color and design of the TV and its accessories and the features may differ depending on the model or geographical area.
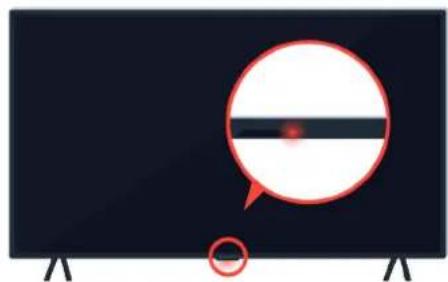
natural_image
Illustration of a monitor with a speech bubble and a red circle, no text or symbols present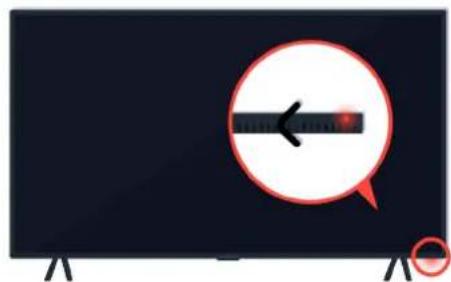
natural_image
Illustration of a monitor with a red circular arrow and a magnified view of the left side (no text or symbols)If your TV does not turn on, check whether the remote control sensor is on.
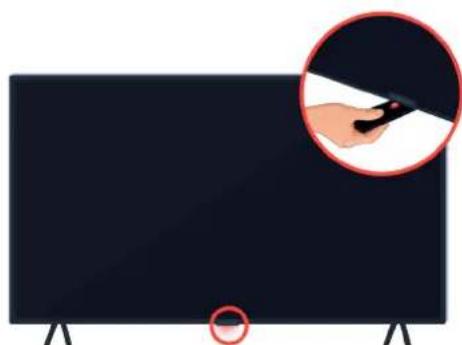
natural_image
Illustration of a black TV with a hand holding a pen, showing no text or symbols on the screen or background.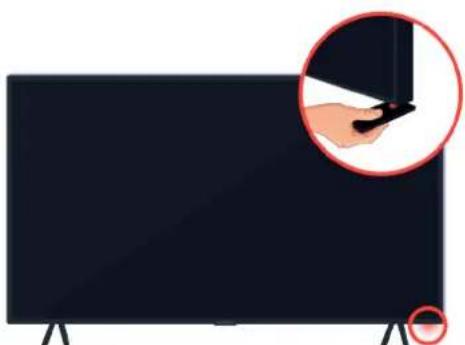
natural_image
Illustration of a black rectangular screen with a hand holding a small object, showing no text or symbols.By holding a reflective object like mirror under the TV, you can easily find the remote control sensor.
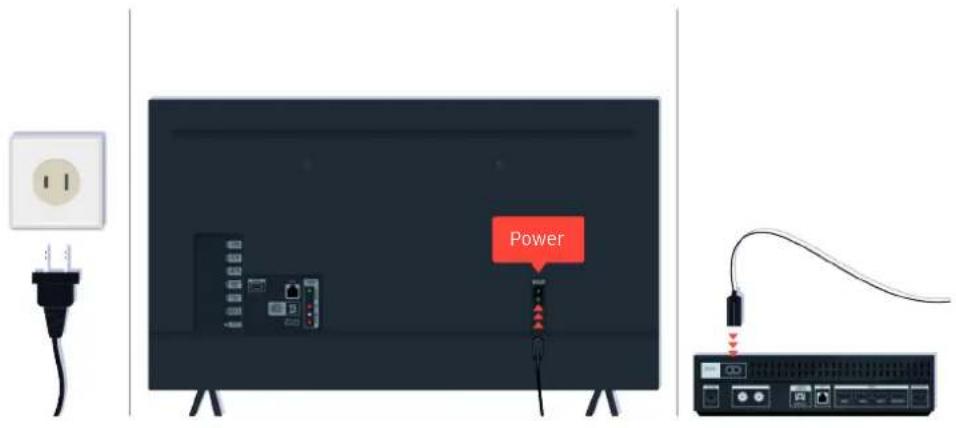
text_image
PowerIf the remote control sensor is not turned on, unplug the power cable and plug it back in.
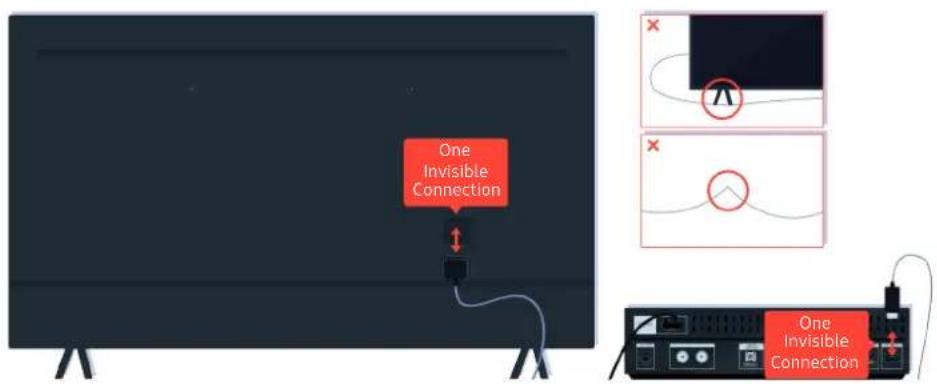
text_image
One Invisible Connection One Invisible ConnectionDisconnect and reconnect the One Invisible Connection cable between the TV and the One Connect (OC) Box. Make sure that the One Invisible Connection cable is not pinched or bent sharply.
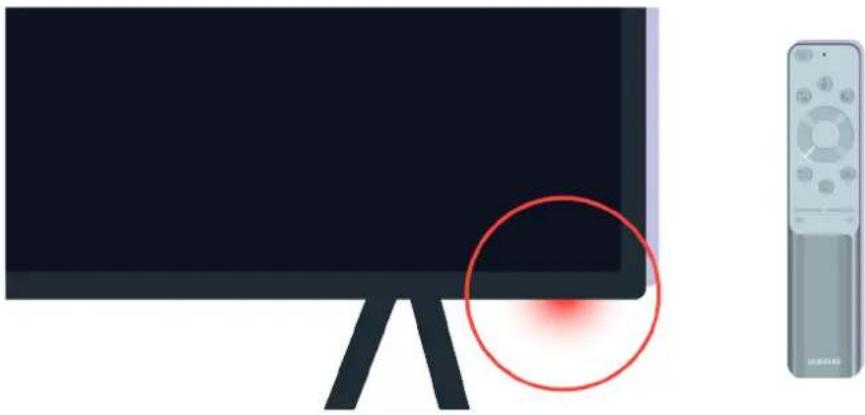
natural_image
Illustration of a monitor with a red circular highlight and a remote control unit nearby (no text or symbols)Check the remote control sensor again. If the LED is turned on, press the power button on your remote control to turn on your TV.
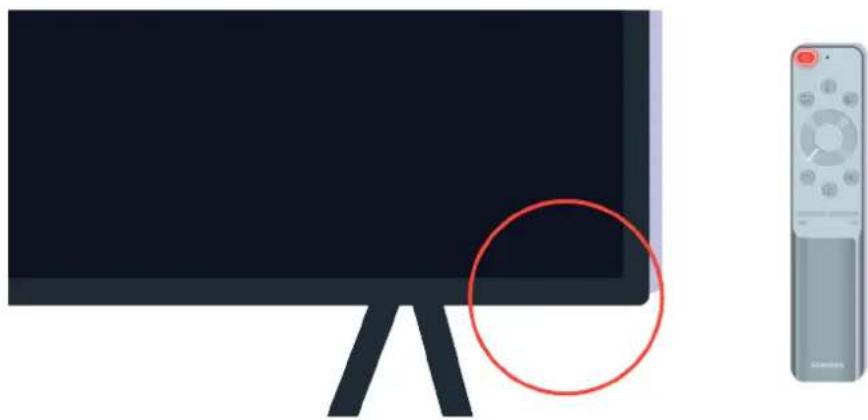
natural_image
Illustration of a monitor with a red circle highlighting its screen area, next to a remote control (no text or symbols present)If the remote control sensor turns off when you press the power button, your TV is correctly connected to the power supply.
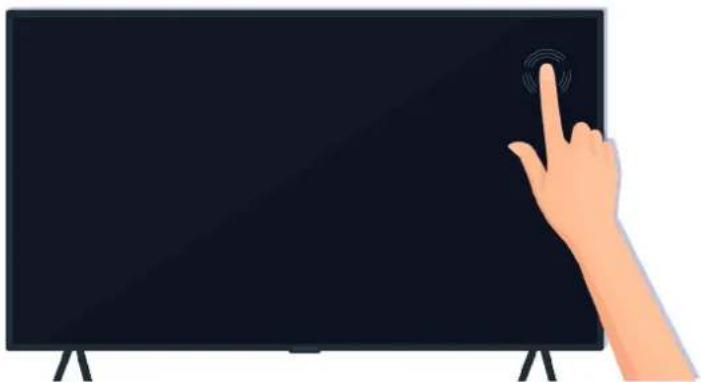
natural_image
Illustration of a hand interacting with a black screen displaying a circular icon (no text or symbols present)If the TV screen is still blank, softly tap it with your finger. If the part of the screen you tapped on blinks, your TV is correctly connected to the power supply.
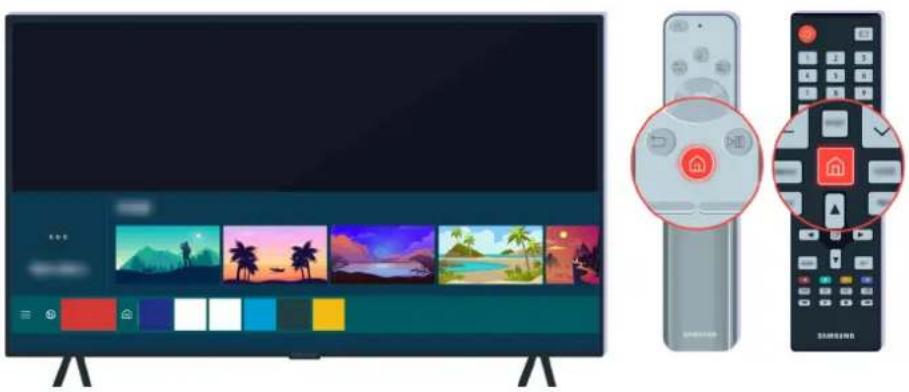
natural_image
Modern TV setup with a flat-screen display and two remote control devices, no visible text or symbols on the devices themselves.On the remote control, press the button. When the Home Screen appears, the TV is turned on but the connected external device does not work or any connection problem occurs.
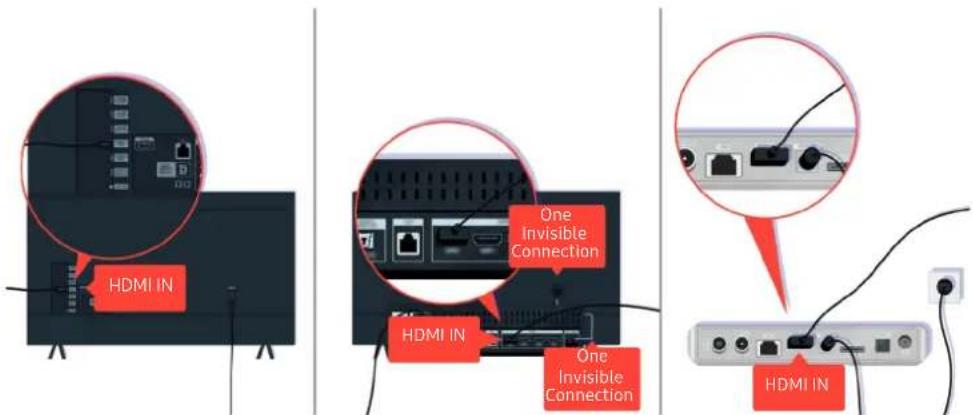
text_image
HDMI IN One Invisible Connection HDMI IN One Invisible Connection HDMI INCheck the connection of the HDMI cable to your TV or One Connect Box.
natural_image
Illustration of a network device with a green indicator light and a black plug attached to the right (no text or symbols)Make sure that the external device is turned on.
text_image
PowerIf it does not turn on, make sure the power cable is properly connected to the device and to the wall outlet.
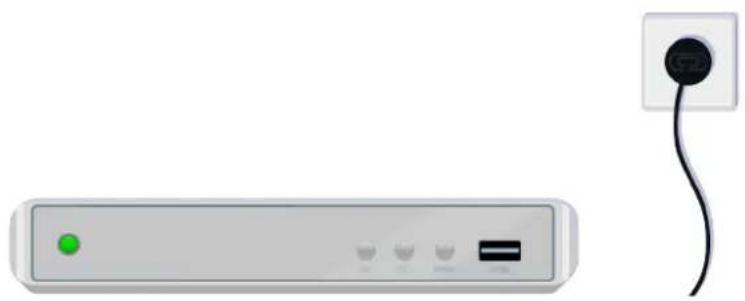
natural_image
Front view of a network device with a green indicator light and a black plug attached to the right (no text or symbols visible)If it does not turn on, make sure the power cable is properly connected to the device and to the wall outlet.
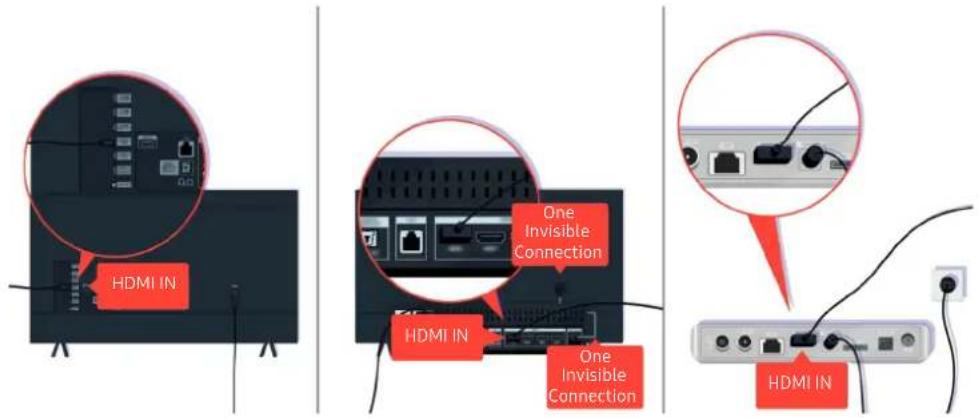
text_image
HDMI IN One Invisible Connection HDMI IN One Invisible Connection HDMI INCheck the connection of the HDMI cable to your TV or One Connect Box.
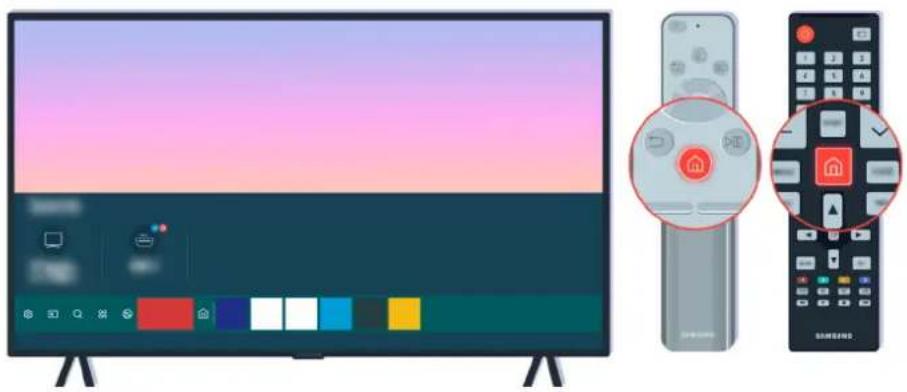
natural_image
Modern TV setup with a monitor, remote control, and home control icons (no text or symbols)Also make sure that the correct source is selected on the Home Screen (→ Source).
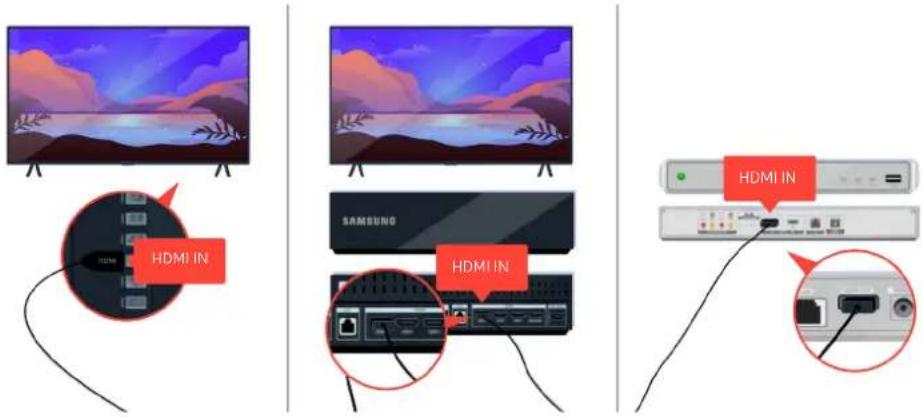
text_image
HDMI IN HDMI IN SAMSUNG HDMI IN HDMI INIf the same problem continues, try connecting another external device to the TV using an HDMI cable. If the display is correct, your external device may be faulty.
The Picture is Distorted, or No Sound Comes Out of the Sound Bar
No TV sound from the sound bar, or distorted TV picture are often caused by loose cable connections.
When the TV does not connect with an external device properly
The color and design of the TV and its accessories and the features may differ depending on the model or geographical area.
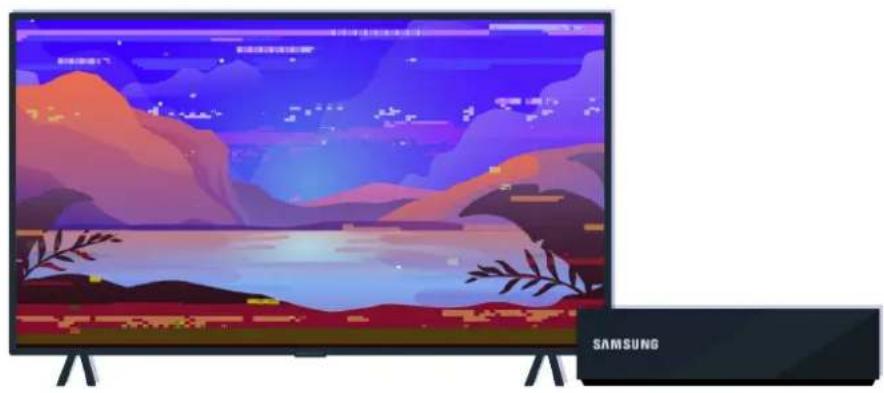
natural_image
Modern Samsung TV displaying a scenic landscape with mountains, lakes, and silhouettes (no text or symbols on screen)When the picture looks distorted,
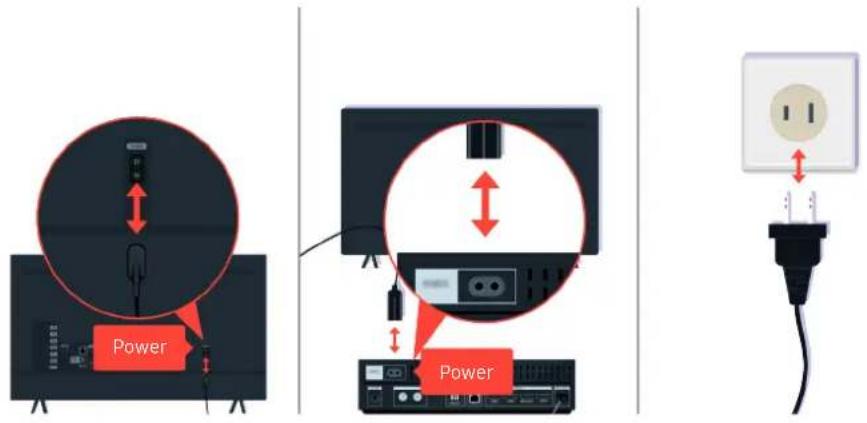
text_image
Power PowerFirst disconnect and reconnect the power cables and HDMI cables on the back of your TV or the One Connect (OC) Box, then unplug the power cord and plug it back into the wall outlet.
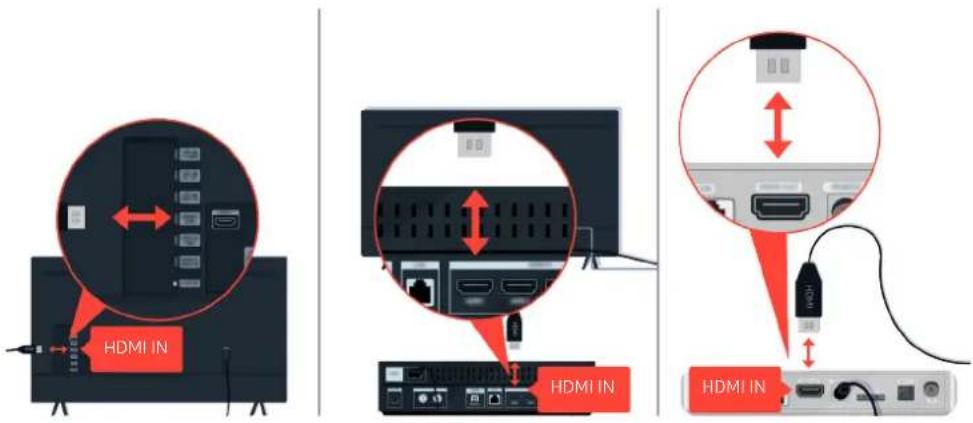
text_image
HDMI IN HDMI IN HDMI IN HDMI INFirst disconnect and reconnect the power cables and HDMI cables on the back of your TV or the One Connect (OC) Box, then unplug the power cord and plug it back into the wall outlet.
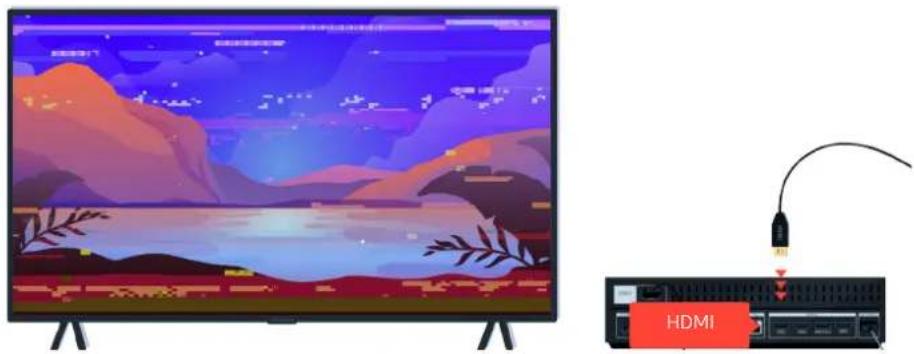
natural_image
Illustration of a TV displaying a scenic landscape with mountains and a lake, connected to an HDMI cable (no text or symbols on the devices themselves)If the external device support 4K UHD or 8K UHD videos, use a dedicated HDMI cable for each resolution.

natural_image
Simple illustration of a flat-screen TV with a small connected cable (no text or symbols)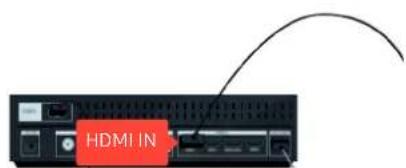
text_image
HDMI INFor better video quality, use an HDMI cable if your external device supports it.
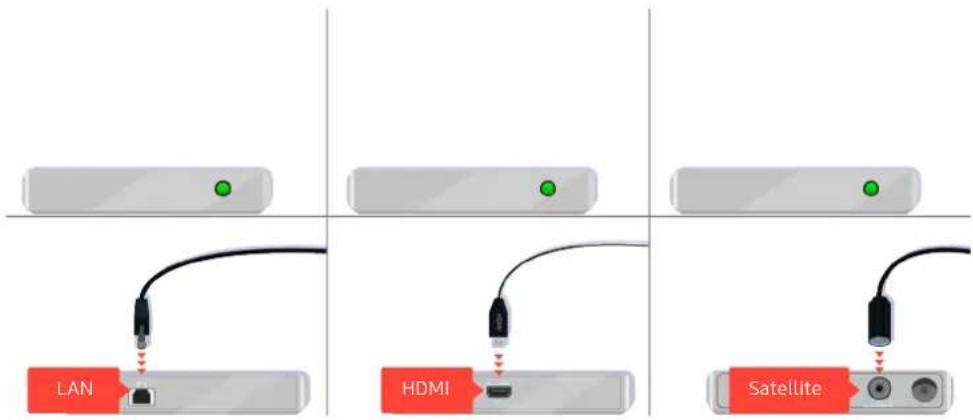
text_image
LAN HDMI SatelliteIf you are using a set-top box, check the cable connection. The cable you need to check depends on the type of set-top box.
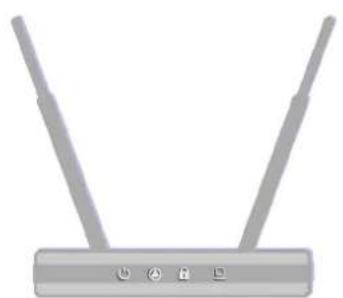
natural_image
Front view of a wireless router with two antennas and three ports (no text or symbols visible)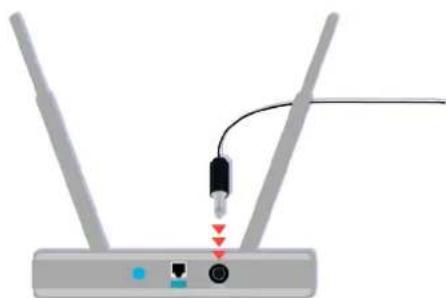
natural_image
Diagram of a wireless router with two antennas and an attached cable, showing signal ports and connection points (no text or labels)Make sure that your access point is connected to the Internet. If not, disconnecting and reconnecting its power cable may be required.
text_image
1080p
If the problem persists, check the video output settings in the settings menu of the external device, and ensure that your TV supports the video output mode.
FHD TVs support up to 1080p video output, and UHD TVs support up to 2160p video output.
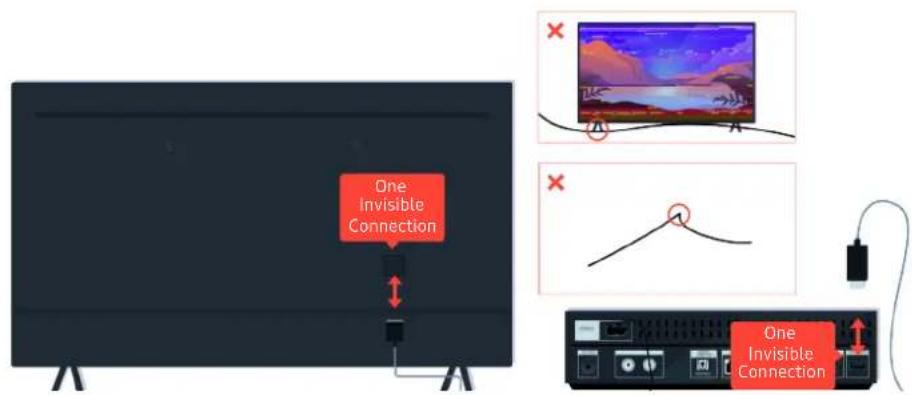
text_image
One Invisible Connection One Invisible ConnectionIf the problem persists, and if your TV uses the One Invisible Connection, disconnect and reconnect the One Invisible Connection to the TV and the One Connect (OC) Box. Ensure that the One Invisible Connection is not pinched or bent sharply.

text_image
HDMI (eARC) HDMIIf no sound comes out of your Sound Bar, and if it is connected to the TV with an HDMI cable, check the HDMI (eARC) connector on the back of the TV.
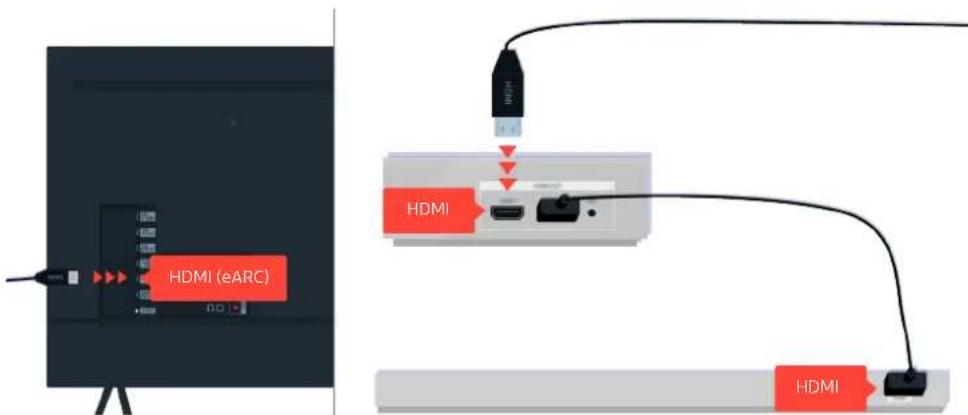
text_image
HDMI (eARC) HDMI HDMI HDMIIf your Sound Bar is connected to a receiver, and the receiver is connected to the TV using an HDMI cable, check the HDMI connector on the back of the TV. The cable must be connected to the HDMI (eARC) port on your TV.
Internet Access is not Available
When the TV has difficulties connecting to the Internet, these steps may help resolve the problem.
When the TV can't connect to the Internet
The color and design of the TV and its accessories and the features may differ depending on the model or geographical area.
natural_image
Modern flat-screen TV with colorful UI elements on the screen (no readable text or symbols)If your TV is not connected to the internet, check the network and the status of your access point.
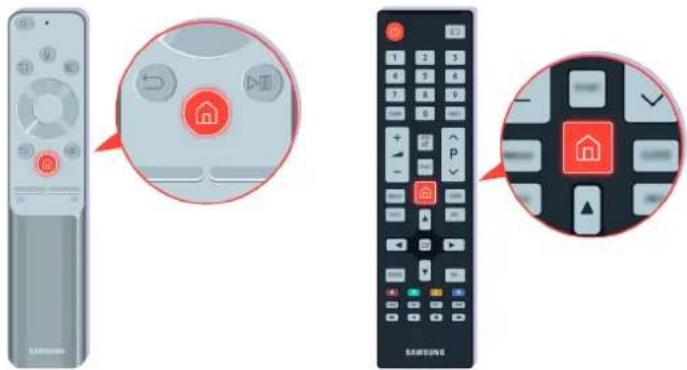
text_image
Diagram showing three views of a Samsung remote control: left with home control buttons, middle with home icons, and right with home control buttons.On the remote control, press the ⏻ button and move to ⚙ Settings using the directional button.
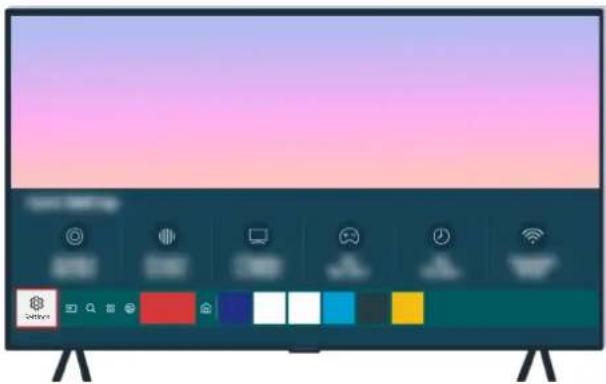
natural_image
Modern TV displaying with colorful UI elements on a desk (no readable text or symbols)Select > Settings > General > Network > Network Status to check the network status.
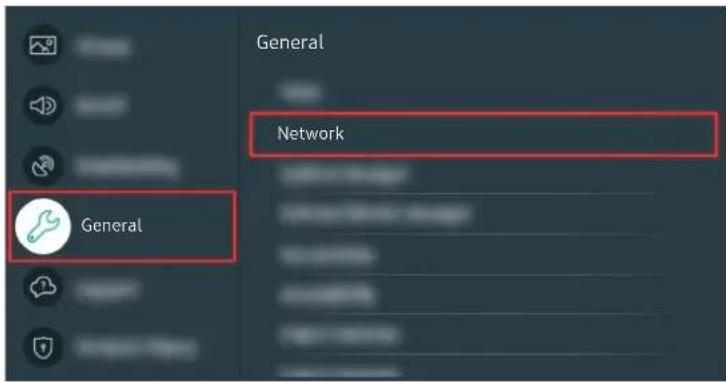
text_image
General Network GeneralSelect > Settings > General > Network > Network Status to check the network status.
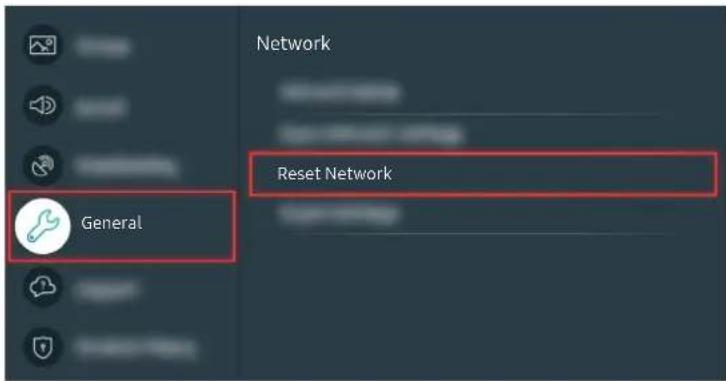
text_image
Network Reset Network GeneralIf the network isn't connected, a network reset may be required.
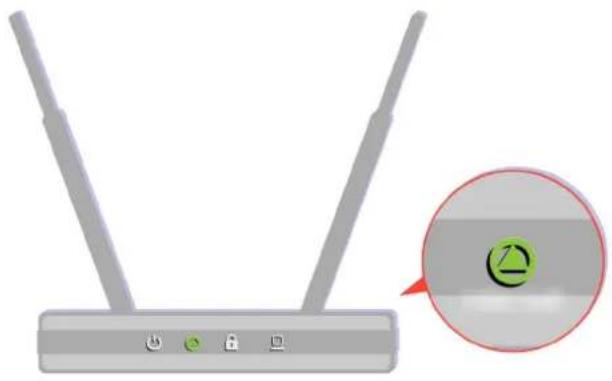
natural_image
Risik device with two antennas and a close-up circular icon showing a green symbol (no text or labels)Make sure that your access point is working properly. Check the LED indicators on your access point to make sure it is operating normally.
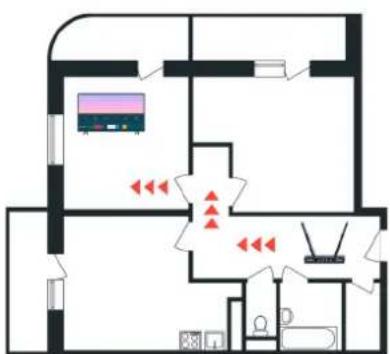
text_image
Floor plan diagram with labeled rooms and red directional arrows indicating sound or ventilation zonesIf you are using a wireless access point, check the access point location. If the access point is too far from the TV, move it closer.
natural_image
Illustration of a wireless router with two antennas and a cable (no text or symbols)Try rebooting the access point by disconnecting and reconnecting the power connector. It may take 1 to 2 minutes until the access point comes back online after a reboot.
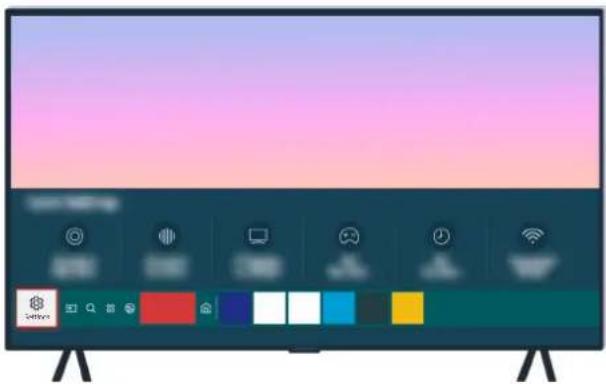
natural_image
Modern TV displaying with colorful UI elements on a desk (no readable text or symbols)If the same problem continues, select Ⓜ > ⚙️ Settings > General > Network > Network Status > IP Settings to change to a different DNS server. If a test occurs, cancel it and select IP Settings.
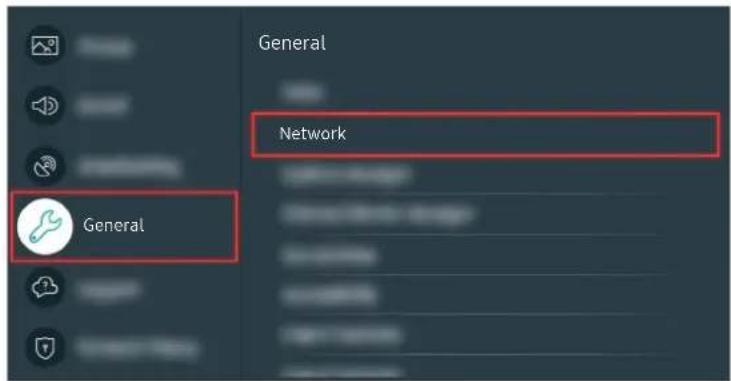
text_image
General Network GeneralIf the same problem continues, select 📋 > Settings > General > Network > Network Status > IP Settings to change to a different DNS server. If a test occurs, cancel it and select IP Settings.
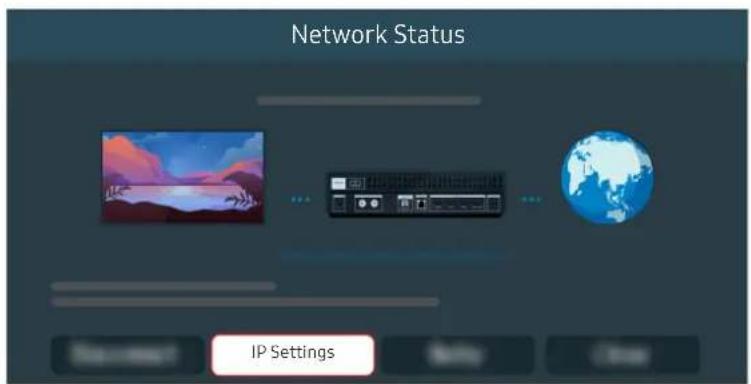
text_image
Network Status IP SettingsIf the same problem continues, select 📄 > Settings > General > Network > Network Status > IP Settings to change to a different DNS server. If a test occurs, cancel it and select IP Settings.
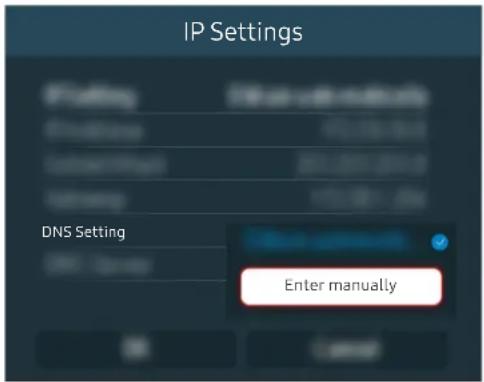
text_image
IP Settings Fidelity Fidelity DNS Setting Enter manuallySelect DNS Setting Enter manually.
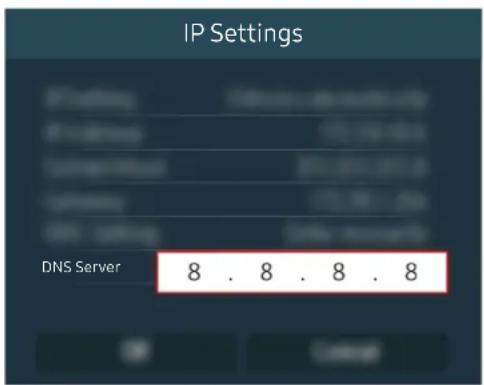
text_image
IP Settings DNS Server 8 . 8 . 8 . 8Select DNS Server, enter 8.8.8.8, then select OK.
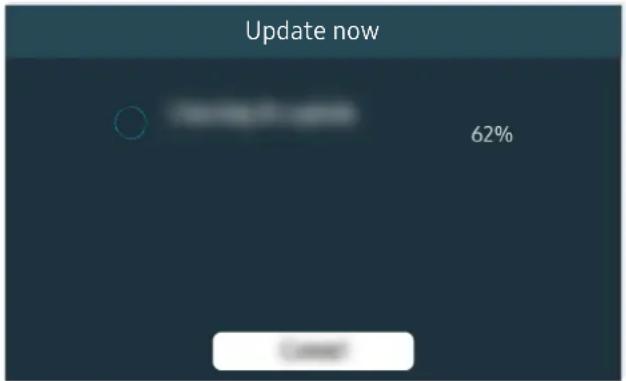
text_image
Update now 62%If the same problem continues, a software update or factory reset may be required.
Related menu path
Settings > General > Network > Network Status Try Now
Settings > General > Network > Reset Network Try Now
Settings > Support > Software Update Try Now
Settings General Reset
OW
There is No Sound or the Speakers are Making an Odd Sound
When the sound has an issue, you can simply check if the problem is caused by the product or the broadcast signals and cables.
When no sound comes out of the TV, or the sound is breaking up
The color and design of the TV and its accessories and the features may differ depending on the model or geographical area.
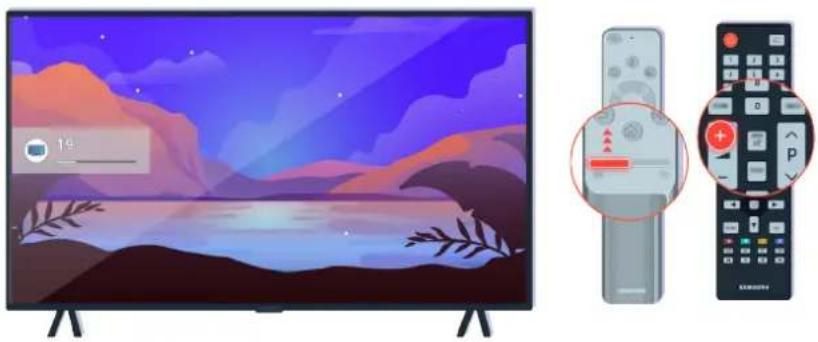
natural_image
Illustration of a smart TV with a home screen, remote control, and a hand gesture overlay (no text or symbols)If your TV does not produce any sound, press the Volume + button to increase the volume.
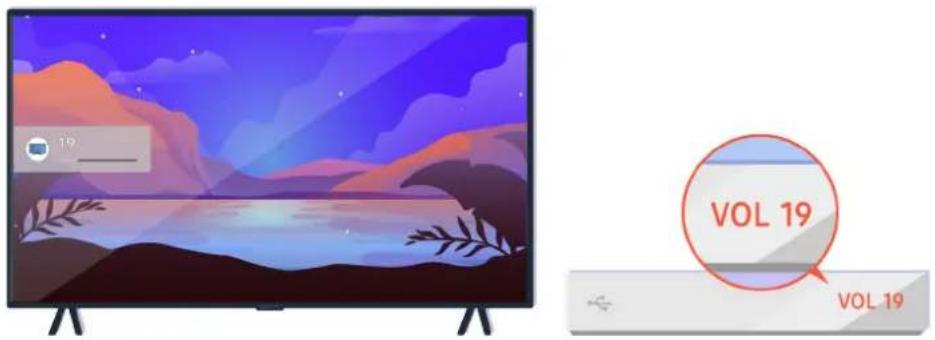
text_image
19 VOL 19 VOL 19If your TV is connected to an external device, check the volume of the external device.
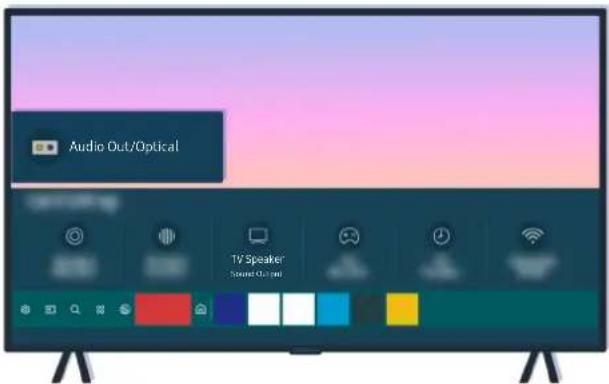
text_image
Audio Out/Optical TV Speaker Sound OutletCheck the volume on the screen. If a number for the TV volume is not displayed, select 📷 > Settings > Sound > Sound Output. Then, select TV Speaker.

text_image
Start Settings SettingsCheck the volume on the screen. If a number for the TV volume is not displayed, select 📂 > ⚙️ Settings > Sound > Sound Output. Then, select TV Speaker.
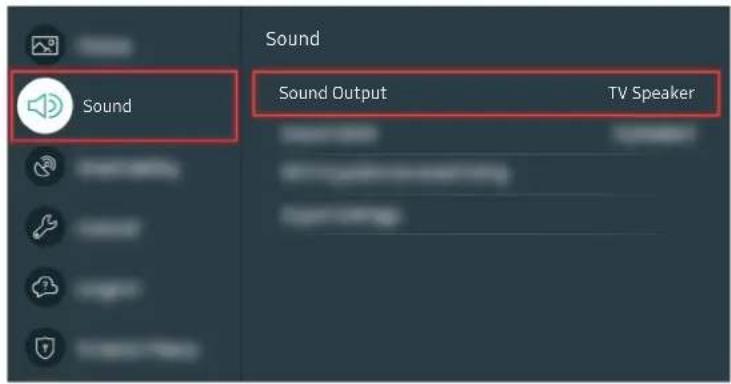
text_image
Sound Sound Output TV SpeakerCheck the volume on the screen. If a number for the TV volume is not displayed, select 📂 > ⚙️ Settings > Sound > Sound Output. Then, select TV Speaker.
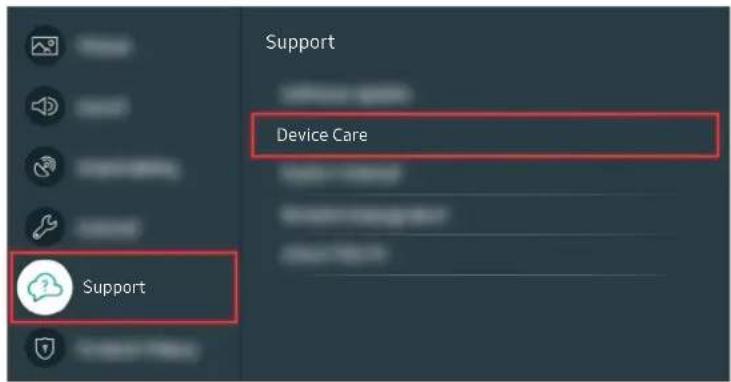
text_image
Support Device Care SupportTo check sound output, select Ⓜ > ⚙️ Settings > Support > Device Care > Self Diagnosis > Sound Test.
text_image
Update now 62%If the same problem continues, a software update or factory reset may be required.
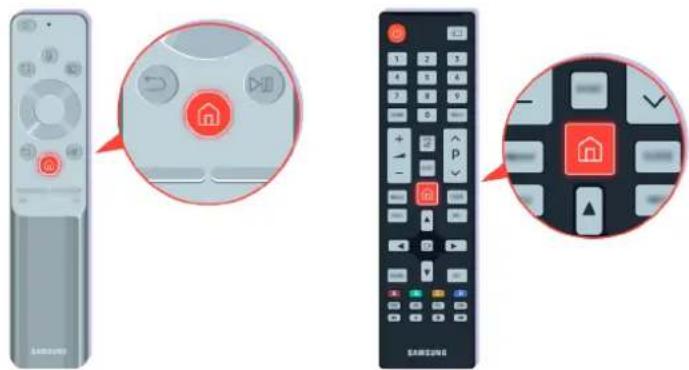
text_image
Diagram showing remote control with home icons and navigation buttons, including a close-up of the home control panel.If there is sound but it is not clear, run a diagnostic test. On the remote control, press the button.
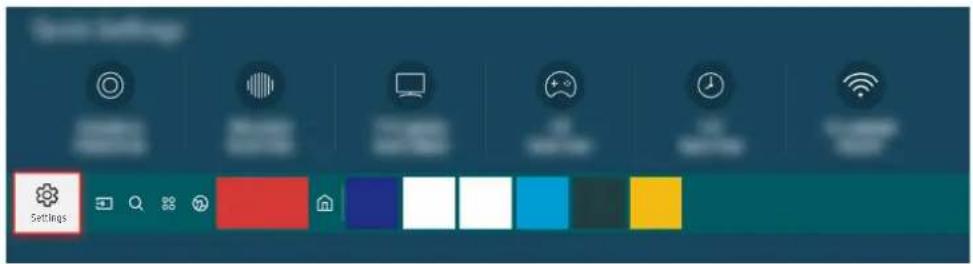
text_image
SettingsGo to > Settings > Support > Device Care > Self Diagnosis > Sound Test to check the sound.
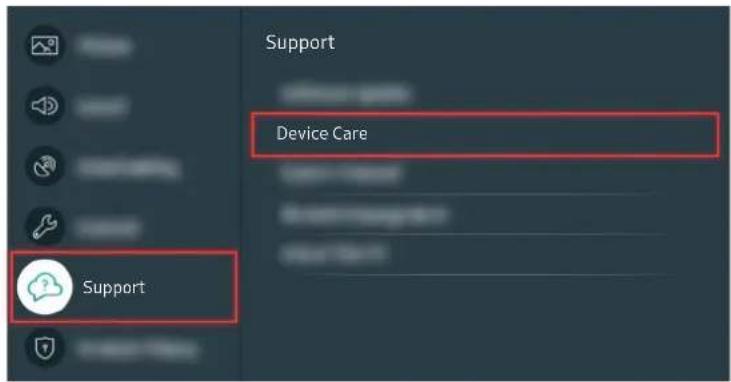
text_image
Support Device Care SupportGo to > Settings > Support > Device Care > Self Diagnosis > Sound Test to check the sound.
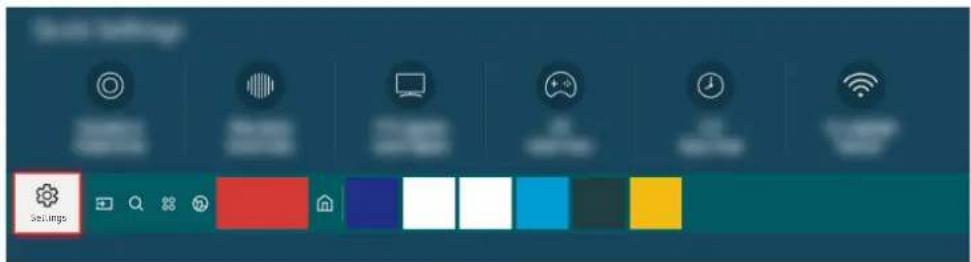
text_image
Status SettingsIf the test reveals a problem, select 📂 > ⚙️ Settings > Sound > Expert Settings > Reset Sound.
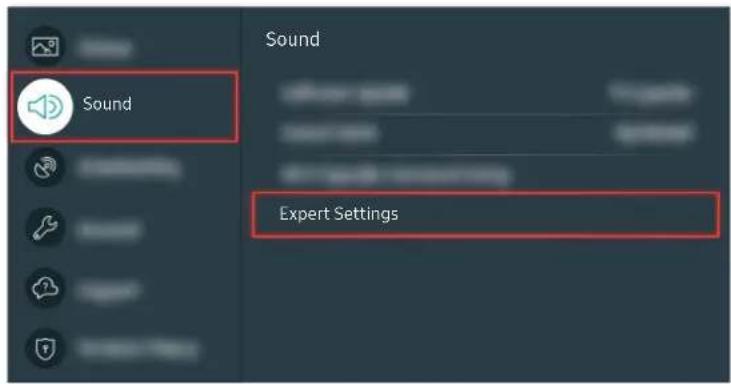
text_image
Sound Sound Expert SettingsIf the test reveals a problem, select 📄 > Settings > Sound > Expert Settings > Reset Sound.
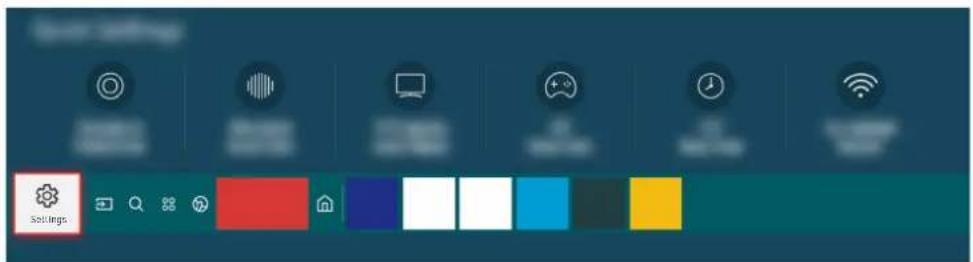
text_image
SettingsIf the test shows no problems, select Settings Support Device Care Self Diagnosis Signal Information.
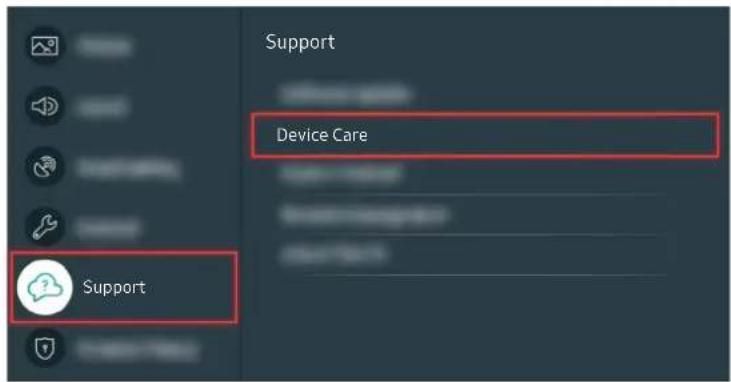
text_image
Support Device Care SupportIf the test shows no problems, select Settings Support Device Care Self Diagnosis Signal Information.
text_image
Signal InformationCheck whether the signal strength is too weak or not.
text_image
Update now 62%If the same problem continues, a software update or factory reset may be required.
Related menu path
Settings > Sound > Sound Output Try Now
Settings > Support > Device Care > Self Diagnosis > Sound Test Try Now
Settings > Sound > Expert Settings > Reset Sound Try Now
Settings > Support > Device Care > Self Diagnosis > Signal Information Try Now
Settings > Support > Software Update Try Now
Settings General Reset ow
The Remote Control does not Work
If the remote control is not working, the battery is weakened or the Samsung Smart Remote is not paired.
When the remote control does not work
The color and design of the TV and its accessories and the features may differ depending on the model or geographical area.
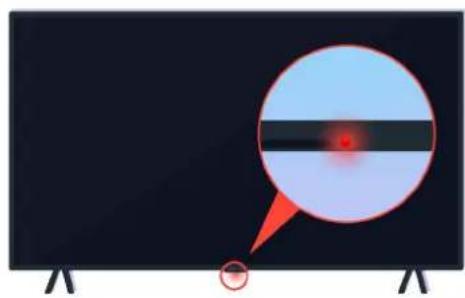
natural_image
Illustration of a screen with a magnified circular view showing a red light source and a small red circle at the bottom (no text or symbols)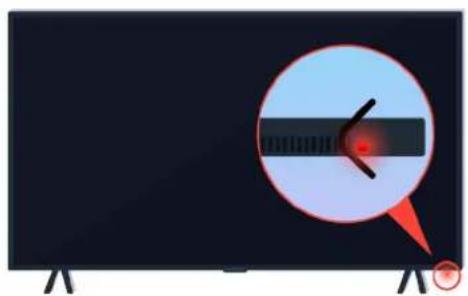
natural_image
Illustration of a monitor displaying a circular light source with a red laser beam, no text or symbols present.Verify that the infrared remote control signal is being transmitted and received.
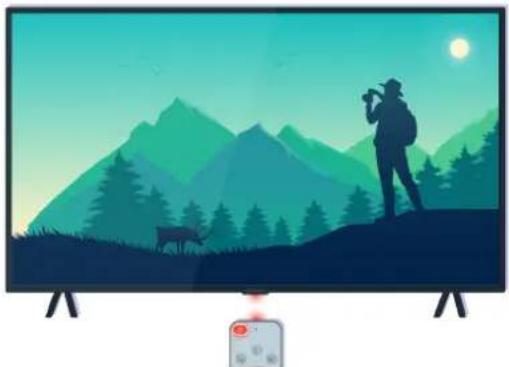
natural_image
Illustration of a person watching a scenic mountain landscape with a deer, sun, and tree (no text or symbols)Make sure the remote control sensor on the TV is blinking.
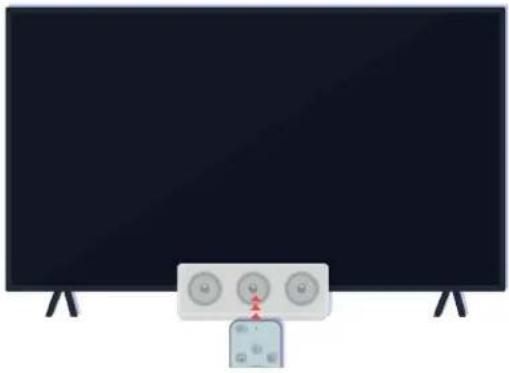
natural_image
Illustration of a black TV with three control buttons and a red arrow pointing to the right (no text or symbols)Remove any obstruction covering the receiver on your TV.
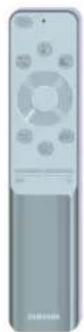
Make sure the remote control works properly.
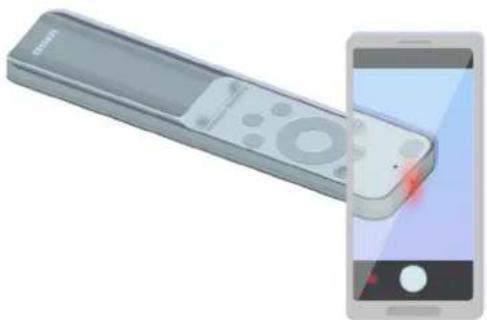
natural_image
Illustration of a remote control device and smartphone showing a close-up of its screen (no text or symbols visible)You can check whether the signal is being transmitted by pressing the power button and observing the front tip of the remote control through the camera on your smartphone.
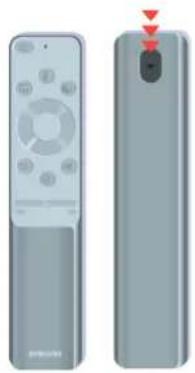
natural_image
Two remote control devices shown from front and side, one with a red warning triangle on the right (no text or symbols visible)If you don't see any infrared signal, replace the batteries of the remote control.

natural_image
Illustration of a remote control with two batteries and a speaker icon (no text or symbols)If you don't see any infrared signal, replace the batteries of the remote control.
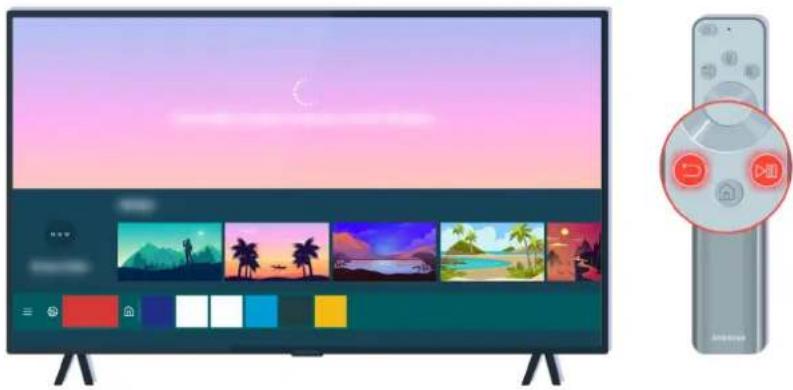
natural_image
Modern TV displaying with colorful landscape and color swatches, next to a remote control with a circular button (no text or symbols visible)Press the sand buttons simultaneously to display the pairing animation clip.
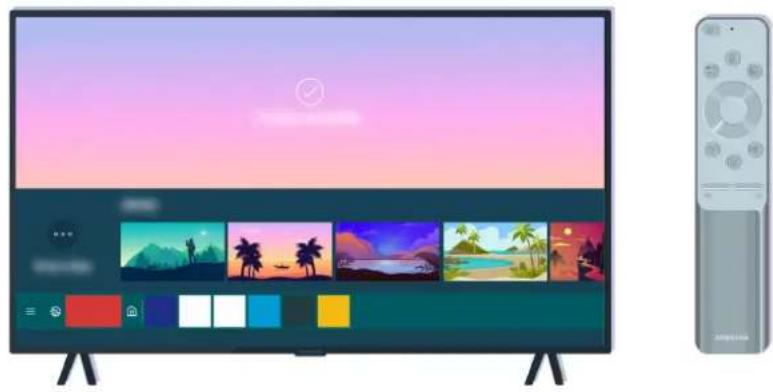
natural_image
Modern TV displaying with colorful landscape and color swatches, next to a remote control (no text or symbols visible)Follow the on-screen instructions to proceed with the pairing.
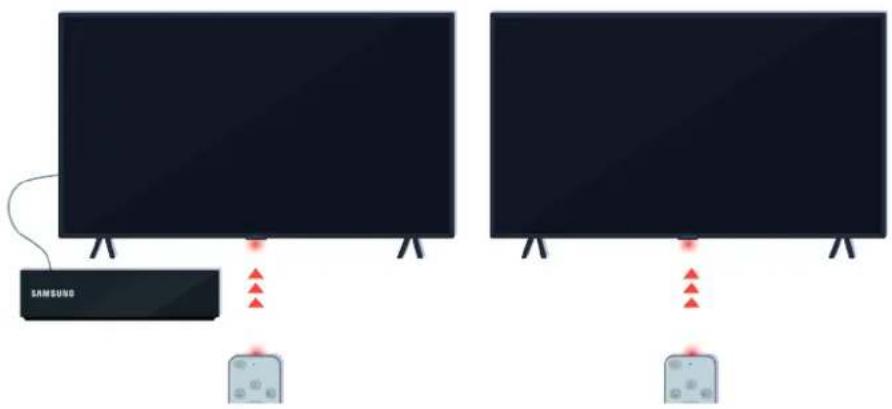
text_image
SAMSUNDThe remote control will work more effectively if you point it at the remote control sensor.
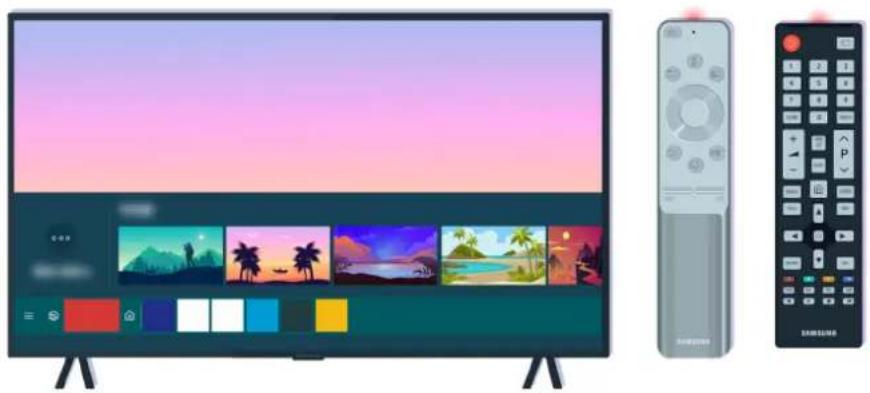
natural_image
Modern TV set with colorful landscape and color palette, next to a Samsung remote control (no text or symbols visible)If the same problem continues, try using the appropriate SAMSUNG remote control for your TV model.
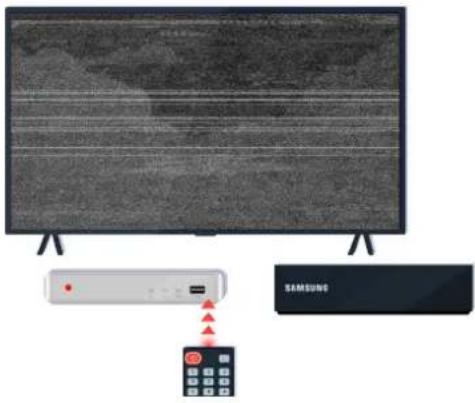
text_image
Diagram showing a Samsung air conditioner connected to a display screen, with a red indicator light and warning symbols.If you use an Multi-Brand Remote (MBR) or universal remote and your remote cannot operate an external device, move the external device closer to the One Connect Box.
Updating the Software
If you want to keep the TV in its best condition, or if you have an intermittent issue, please update it to the latest version.
Updating to the latest TV software
The color and design of the TV and its accessories and the features may differ depending on the model or geographical area.
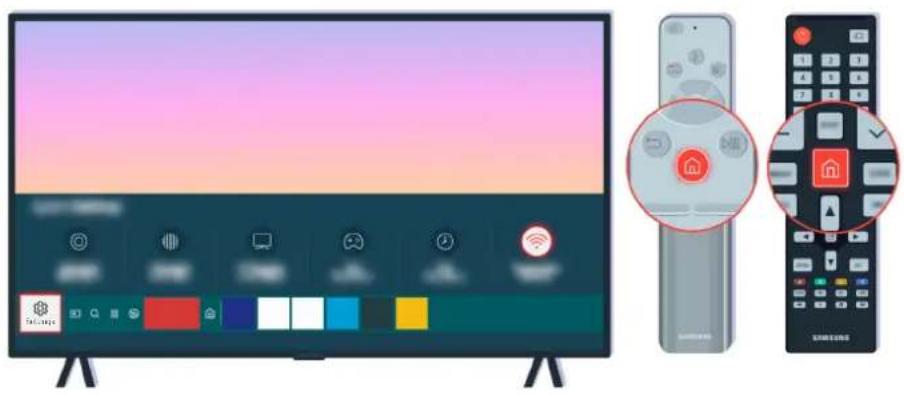
natural_image
Modern TV setup with a monitor, remote control, and home diagnostic icons (no text or symbols on main elements)If your TV is connected to the Internet, you can set it to receive periodic updates automatically. On the remote control, press the Ⓜ button and move to ⚙ Settings using the directional button.
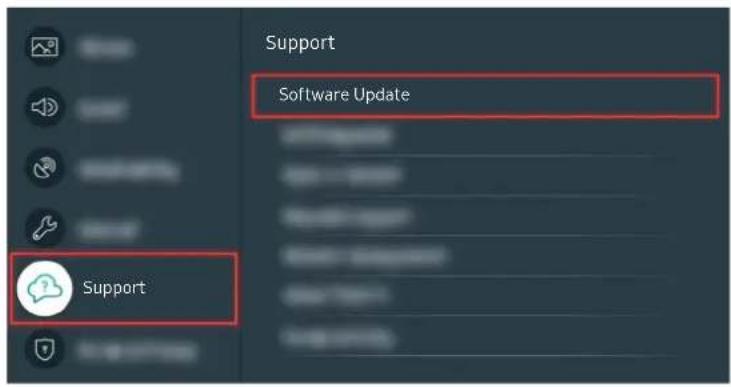
text_image
Support Software Update SupportTo enable automatic updates, select 📂 > Settings > Support > Software Update > Auto Update.
For more information in the The Terrace for business, refer to the provided user manual.
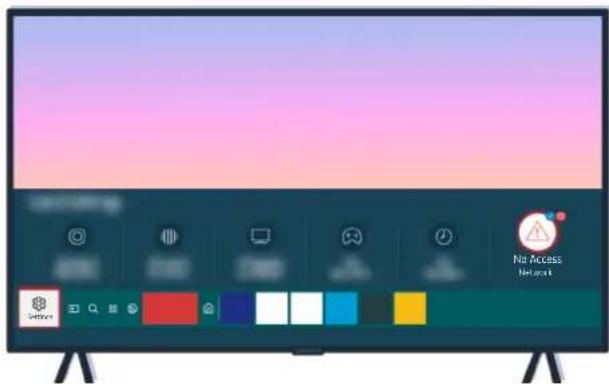
text_image
No Access NetworkIf your TV is not connected to the Internet, you can update the software using a USB drive.
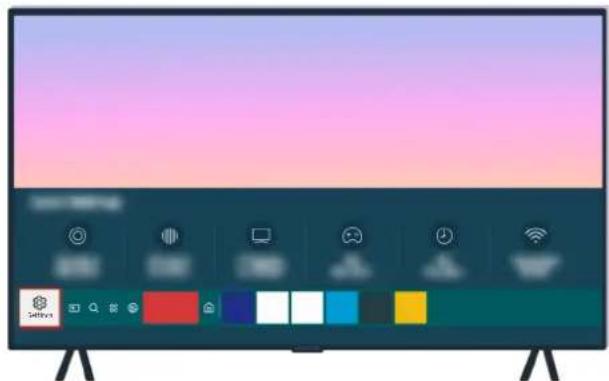
natural_image
Modern TV displaying with colorful UI elements on a desk (no readable text or symbols)Select > Settings > Support > About This TV and check the model code and software version.
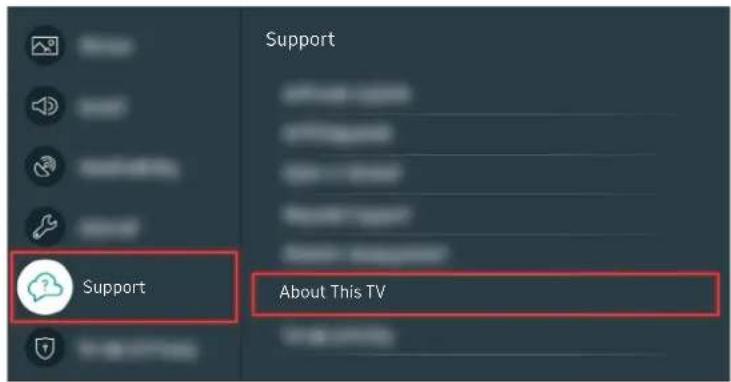
text_image
Support About This TVSelect > Settings > Support > About This TV and check the model code and software version.
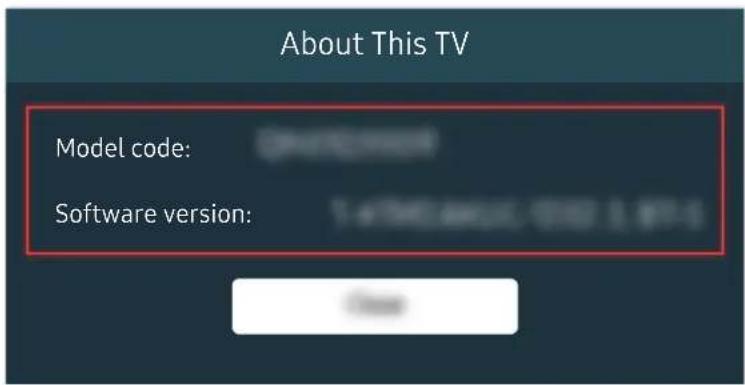
text_image
About This TV Model code: Software version:Select > Settings > Support > About This TV and check the model code and software version.
text_image
SAMSUNG QLED 8KUsing a computer, connect to www.samsung.com.
text_image
SAMSUNG
natural_image
Generic desktop computer tower icon (no text or symbols)Find your TV model and download the firmware file.
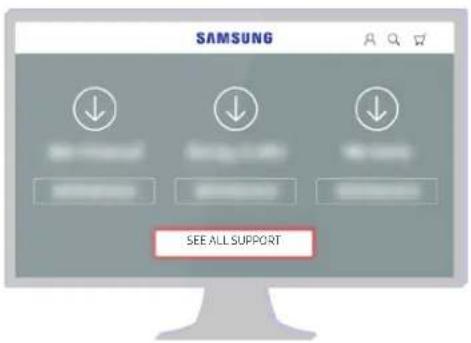
text_image
SAMSUNG SEE ALL SUPPORT
natural_image
Generic desktop computer tower icon (no text or symbols)Find your TV model and download the firmware file.
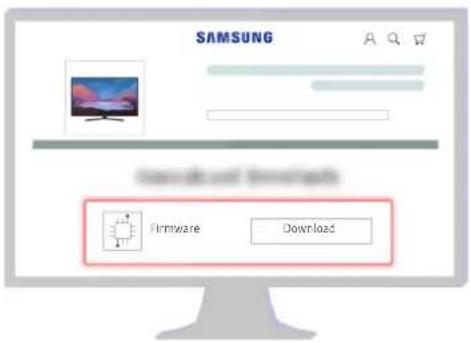
text_image
SAMSUNG Internet and Downloads Firmware Download
natural_image
Generic desktop computer tower icon with no visible text or symbolsClick Download to download the firmware.
natural_image
Illustration of a computer monitor with blue screen and grid pattern (no text or symbols)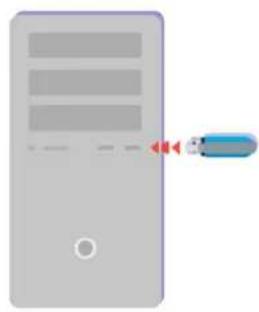
natural_image
Illustration of a desktop computer with a USB flash drive (no text or symbols)Unzip the downloaded file and store it in your USB drive top folder.
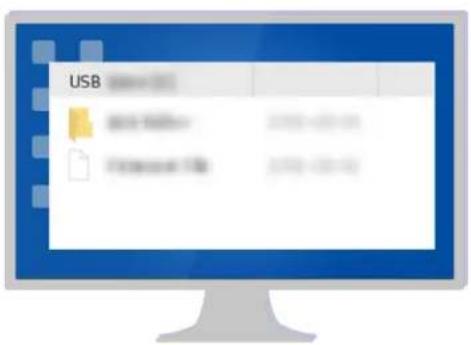
text_image
USB PDF PDF PDF
natural_image
Generic desktop computer tower icon (no text or symbols)Unzip the downloaded file and store it in your USB drive top folder.
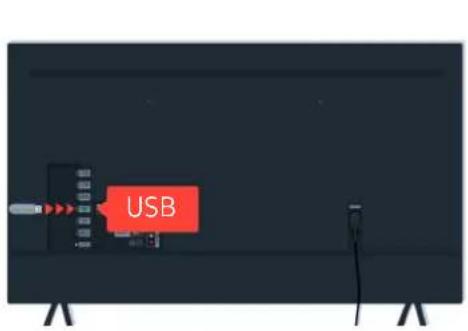
text_image
USB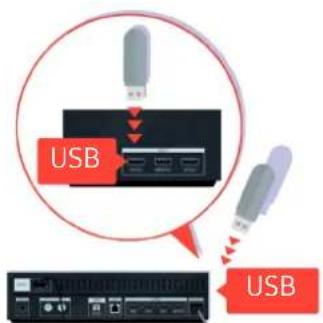
text_image
USB USBInsert the USB device into the USB slot on the back of your TV or the side of the One Connect Box.
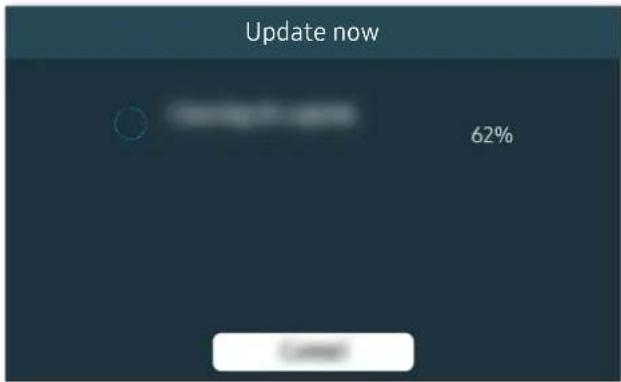
text_image
Update now 62%The firmware update begins automatically. Your TV will be automatically reset when the firmware update is completed. Do not turn off your TV while the firmware update is in progress.
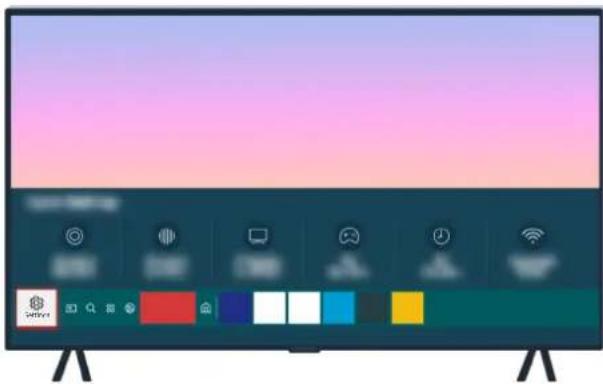
natural_image
Modern TV displaying with colorful UI elements on a desk (no readable text or symbols)After your TV has been reset, select Ⓜ > ⚙️ Settings > Support > About This TV and check the new firmware version.
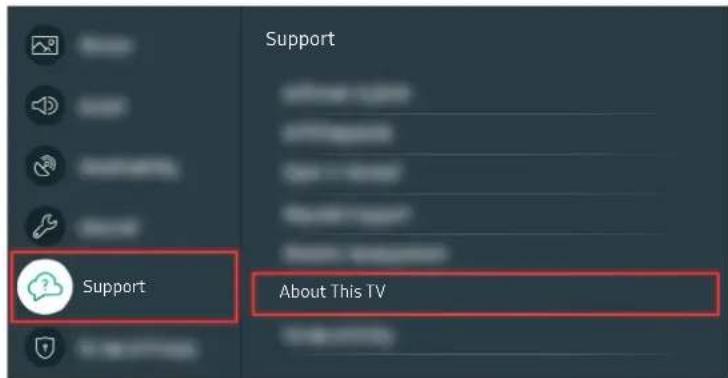
text_image
Support About This TVAfter your TV has been reset, select Ⓜ > ⚙️ Settings > Support > About This TV and check the new firmware version.
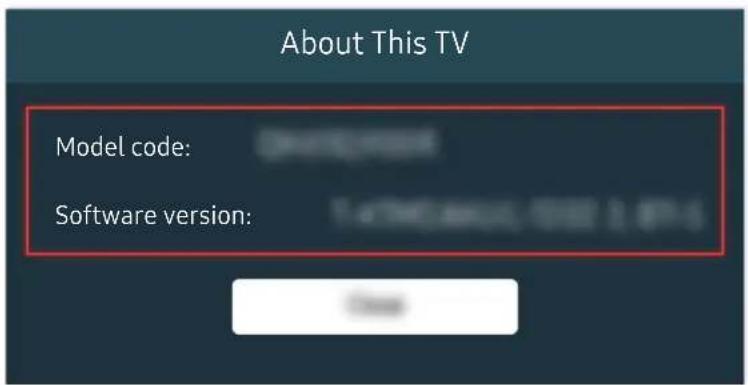
text_image
About This TV Model code: Software version:After your TV has been reset, select Ⓜ > ⚙ Settings > Support > About This TV and check the new firmware version.
Related menu path
Settings > Support > Software Update > Auto Update Try Now
For more information in the The Terrace for business, refer to the provided user manual.
Settings > Support > About This TV Try Now
Accessibility Guidance
Provides a menu and a remote control guide that aid the visually impaired.
Learn Menu Screen
Learn the menus on the TV screen. Once enabled, your TV will tell you the structure and features of the menus you select.
Using the Remote control
You can see the description of the buttons on the Samsung Smart Remote.
The Samsung Smart Remote may not be supported depending on the model or geographical area.
Orientation of the Samsung Smart Remote
Hold the remote control with the buttons facing towards you. The remote is slightly thinner towards the top and thicker towards the bottom.
Description of the Samsung Smart Remote
The images, buttons, and functions of the Samsung Smart Remote may differ with the model or geographical area.
From top to bottom and left to right:
- The or button is at the top left.
- There is a small LED(microphone) to the right of the or button, but it cannot be felt by hand.
- Below the LED is a round button which is the 📁 button.
- Of the two buttons below the button on the Samsung Smart Remote that comes with the QLED TV, TU8 Series, The Serif the left one is the button and the right one the button.
- Of the two buttons below the button on the Samsung Smart Remote that comes with The Sero, the left one is the button and the right one the button.
- Of the two buttons below the ⏻ button on the Samsung Smart Remote that comes with The Frame, the left one is the 12 button and the right one the button.
- If you press the button twice or press the button while viewing a program, the Record, Timeshift, Stop (when Record or Timeshift is running), Info, red, green, yellow, blue, and Move to the top (or Move to the bottom) options appear.
Select the Move to the top button to move the menu to the top.
This function may not be supported depending on the geographical area.
- Underneath these two buttons are a round button and a large outer circle button. The round button is the Select button, and the large outer circle button consists of 4 directional buttons (up / down / left / right).
- Underneath the directional button are three buttons, one on the left, one on the right, and one in the center. The one on the left is the button and the one on the right is the button. The round button in the middle is the button.
- If you press the ▶ button while watching a TV program, the screen you are watching stops and a control bar appears. You can select Rewind, Play, Pause, Fast Forward, Stop Timeshift, Record, Go to Live TV, or Info. You can press the up directional button to go to the playback screen and check the time that the actual broadcast program is running and the timeshift time.
You can use the Slow Rewind or Slow Forward functions when you select the Pause option.
To use Record or Timeshift, you must connect a USB device.
This function may not be supported depending on the model or geographical area.
- Underneath the button are two thin horizontal buttons. These buttons protrude higher above the surface than the other buttons on the remote control. The one on the left is the volume button and the one on the right is the channel button. Push up from beneath or down from above to use these as rocker buttons to change the channel or volume.
- Briefly press the (Volume) button to mute the sound.
- Press and hold the +/- (Volume) button to open the Accessibility Shortcuts menu.
- Briefly press the ^/√ (Channel) button to open the Guide.
- Press and hold the ^/∨ (Channel) button to open the Channel List.
This function may not be supported depending on the model or geographical area.
Using the accessibility menu
View how to running the Accessibility menu functions and description of its functions.
This function may not be supported depending on the model or geographical area.
Running the Accessibility Shortcuts menu
You can turn on or turn off the accessibility functions such as Voice Guide, Picture Off, Caption, High Contrast, Enlarge, Grayscale, Color Inversion, Learn TV Remote, Learn Menu Screen, Multi-output Audio, Sign Language Zoom, Slow Button Repeat, Accessibility Settings, and you can move to the Learn TV Remote and Learn Menu Screen pages.
• Samsung Smart Remote
On the Samsung Smart Remote, there are two thin horizontal rocker buttons next to each other located slightly below the middle of the remote. The one on the left is the volume button. Press and hold the volume button to open the Accessibility Shortcuts menu.
Even if the Voice Guide is set to Off or muted, when you press and hold the volume button, the voice guide for Accessibility Shortcuts is enabled.
Learn TV Remote and Learn Menu Screen are only available when Voice Guide is set to On.
Running the Accessibility menu functions using the General menu
> Settings General Accessibility
You can also go to the Accessibility menu from the TV settings menu. This provides more options, for example, to change the speed of Voice Guide.
The TV will not verbalize this menu unless Voice Guide is already turned on.
- Press the button.
- Press the left directional button until you reach Settings.
- Press the Select button to open the TV's Settings menu.
- Press the down directional button to reach General, and then press the Select button to open this menu.
- Use the directional buttons to go to the Accessibility menu, and then press the Select button to open this menu.
- The menu will appear with Voice Guide Settings as the first selection. Highlight Voice Guide Settings, and then press the Select button.
- A menu appears with the options to change Voice Guide and Volume, Speed, Pitch, TV Background Volume.
- Select the menu using the directional buttons, and then press the Select button.
Running the Accessibility menu functions using Bixby
To use Bixby, the TV must be set up and tuned and must be connected to the Internet. You can connect the TV to the Internet during the initial setup or do it later through the settings menu.
There are many commands you can say to control the TV. These can be used together with Voice Guide to give you voice input and voice output. You can use the Samsung Smart Remote but the TV must be connected to the Internet.
To speak a command, press and hold the 🔒 button (located near the top of the Samsung Smart Remote, directly below the small LED(microphone) and above the directional button) and say the command, and then release the 🔒 button. The TV will confirm the command.
For example you can:
- Turn Voice Guide on
Press the 🔒 button on the Samsung Smart Remote, and then say "Voice Guide on."
- Turn High Contrast on
Press the ⏻ button on the Samsung Smart Remote, and then say "High Contrast on."
Learning about the Accessibility menu functions
• Voice Guide Settings
This function works on every screen on the TV and when turned on verbally tells you what the TV's current settings are and verbally provides details about the program you are watching. For example, it tells you the selected volume and the current channel and gives you program information. It also reads out the program information from the Guide screen.
- Picture Off
Turn off the TV screen and provide only sound to reduce overall power consumption. When you press a button on the remote control other than Volume and Power while the screen is off, the TV screen turns back on.
- High Contrast
To display all menus with an opaque black background and a white font, providing maximum contrast.
If High Contrast is on, some Accessibility menus are not available.
- Grayscale
You can change the color of the TV screen to black and white to sharpen blurred edges caused by colors.
If Grayscale is on, some Accessibility menus are not available.
This function may not be supported depending on the model or geographical area.
- Color Inversion
You can invert the colors of the text and background displayed on the TV screen to make it easier to read the text.
If Color Inversion is on, some Accessibility menus are not available.
This function may not be supported depending on the model or geographical area.
- Enlarge
You can enlarge important elements on the menu such as the names of programs.
- Learn TV Remote
Learn the names and functions of the buttons on remote control. On this screen, pressing the power button (top left button) will turn off the TV, but when any other button is pressed the TV will say the button name and briefly tell what that button does. This teaching mode helps you to learn the location and operation of the buttons on the remote without affecting normal TV operation. Press the 📋 button twice to exit Learn TV Remote.
- Learn Menu Screen
Learn the menus on the TV screen. Once enabled, your TV will tell you the structure and features of the menus you select.
- Caption Settings
You can view the caption in programs that provide broadcast captions.
In programs that provide broadcast captions, the Position function is activated so that you can change the caption position.
When watching a channel on an external device such as set-top box and cable box, turn on the caption function on the device. For more information, contact your service provider.
- Multi-output Audio
You can turn on both the TV speaker and Bluetooth headphone designed for the hearing impaired at the same time. The hearing impaired can then set the volume of their Bluetooth headphone higher than the volume of the TV speaker without affecting the volume of the TV speaker, allowing both the hearing impaired and their families to listen to the TV at comfortable sound levels.
When you connect the Bluetooth headphone to the TV, Multi-output Audio is activated.
This function may not be supported depending on the model or geographical area.
• Sign Language Zoom Settings
You can zoom in the sign language screen when the program you are watching provides it.
- Remote Button Repeat Settings
You can configure the operation speed of the remote control buttons so that they slow down when you continually press and hold them.
Using the TV with Voice Guide on
Turn on Voice Guide that describes the menu options aloud to aid the visually impaired.
Changing channel
You can change the channel in three of ways. Every time you change channels, the new channel details will be announced. The ways to change the channel are below.
- Channel List ( > Live TV Channel List)
Press the button. The Smart Hub home screen appears. Use the left or right directional buttons to move to Live TV, press the up directional button to move to the top row, press the directional buttons to move to Channel List, and then press the Select button. When Channel List is displayed, use the up or down directional buttons to move to the desired channel, and then press the Select button.
- (Channel) button
Of the two buttons that protrude from the center of the Samsung Smart Remote, the right one is the^(Channel) button. Push up or pull down the^(Channel) button to change the channel.
- Number button
Use the button on the Samsung Smart Remote to open the virtual numeric pad, enter a number, and then select Done.
Using on-screen number entry via the Samsung Smart Remote
Use the virtual numeric pad to enter numbers e.g. to enter a channel number or to enter a PIN.
Press the button on the Samsung Smart Remote and the virtual numeric pad with 2 rows appears on screen. Voice Guide speaks "virtual numeric pad, 6" which indicates that the number strip is on screen and the focus is on the number 6. This strip has the following buttons:
- The top row has one option, Done.
- Press the button: On the bottom row: From the far left: More, 1, 2, 3, 4, 5, 6, 7, 8, 9, 0, -, Delete, Move to the top (Move to the bottom)
- Press the 123 button: On the bottom row: From the far left: 1, 2, 3, 4, 5, 6, 7, 8, 9, 0, -, Delete, Move to the top (Move to the bottom)
The options that you can select in the virtual numeric pad may vary depending on the viewing mode.
Use the left and right directional buttons to move along the row, and then press the Select button to choose the numeric pad. When you have finished selecting all the numbers you need (for example, 123), press the up directional button to move to the Done option, and then press the Select button to finish.
When entering a channel number, you can enter the number, and then select the Done option on the top row or you can enter the channel number and wait. After a short while, the channel will change and the virtual numeric pad will disappear from the screen.
Changing volume
Use the +(Volume) button on the left to change the volume. Every time you change the volume, the new volume level will be announced.
- Samsung Smart Remote
Of the two buttons that protrude from the center of the Samsung Smart Remote, the left one is the +/- (Volume) button. Push up or pull down the +(Volume) button to change the volume.
Using program information
When watching TV, press the Select button to view program information which then appears at the top of the screen. Voice Guide will say program subtitles or audio descriptions if they are available. To view more detailed program information, press and hold the Select button. Voice Guide will say more details such as a synopsis of the program.
Press the left or right directional button to see what you can watch next on the same channel. Press the up or down directional button to move to other channels and see which programs are currently being broadcast on them.
Press to go back or close the program details.
This function may not be supported depending on the geographical area.
Using the guide
See an overview of each channel's program lineup.
When you want to know the program information for each channel while watching a broadcast program, press the ^/√ (Channel) button on the Samsung Smart Remote. Use the directional buttons to view the program information.
> Live TV Guide
You can see the daily program schedules for each broadcaster and program information in the Guide. You can select programs to schedule for viewing or recording.
You can also open the Guide using Bixby. Press and hold the 🔒 button on your Samsung Smart Remote, and then say "Guide."
This function may not be supported depending on the model or geographical area.
The information in the Guide is for digital channels only. Analog channels are not supported.
If the Clock is not set, the Guide is not provided. Set the Clock first. ( Ⓜ > ⚙Settings > General > System Manager > Time Clock)
If you need to set the clock again, follow the instructions below.
- Press the button to open Smart Hub.
- Press the left directional button to move to Settings.
- Press the Select button to open the TV's Settings menu.
- Use the up and down directional buttons to move to the General menu, and then press the Select button.
- Use the up and down directional buttons to move to the System Manager menu, and then press the Select button.
- Select the Time menu, and then press the Select button.
- Select the Clock menu, and then press the Select button.
- Select the Clock Mode menu, press the Select button, and then select Auto or Manual.
If you select Manual, you can move to the Date or Time menu below to set the time or date.
When you open the Guide, a table grid of channels and programs is displayed. The top row displays Filter By : All then the day and times. Each row has a channel name on the left and programs on that channel on the right.
In the Guide, use the up and down directional buttons to move between channels and use the left and right directional buttons to move between programs at different times within a channel. You can also use the button to enter a channel number and go to that channel directly. You can use the button to move to the program currently broadcasting.
When you move the focus to a program, you will hear the detailed information about the selected program. When you move the focus to a different channel, you will hear the channel name and number, and the program details. If you move to a different day, you will hear the day announced for the first program you reach on that day. The day is not repeated, so if you are not sure what the day is, you can move forwards and backwards 24 hours and then the day will be announced.
To view a program on now
In the Guide, move to the program currently broadcasting, and then press the Select button to go to live TV on the selected channel and program.
Other options in the guide
In the Guide, move to a broadcast scheduled program, and then press the Select button. A pop-up menu listing the functions below appears.
Use the up and down directional buttons to move within this menu, and then press the Select button to choose an item. Press To close the menu and go back to the Guide.
For the program you are currently watching, press and hold the Select button.
- Record
You can record the program that you are currently watching or a program on another channel.
This function may not be supported depending on the model or geographical area.
- Stop
You can stop the recording function that is currently running.
This function may not be supported depending on the model or geographical area.
- Edit Recording Time
You can change the start and end times of scheduled program recordings.
This function may not be supported depending on the model or geographical area.
- Schedule Viewing
You can schedule the viewing of a broadcast scheduled program.
- Schedule Recording
You can schedule recording of a broadcast scheduled program.
This function may not be supported depending on the model or geographical area.
For more information on Schedule Recording, refer to "Recording."
- Cancel Scheduled Viewing / Cancel Scheduled Recording
You can cancel your scheduled viewings and recordings.
This function may not be supported depending on the model or geographical area.
- View Details
You can see the detailed information on the selected program. The information may differ with the broadcast signal. If the information is not provided with the program, nothing appears.
Press the Select button on the View Details option. This will open the details pop-up window for that program which will display a synopsis. The details pop-up window contains detailed information and the OK option. After reading the detailed information, press the Select button on the remote control to close the pop-up window.
Using Schedule Viewing
Configure the TV to show a specific channel or program at a specific time and date.
The Ⓧ icon appears next to programs that have been configured for a schedule viewing.
To set up a schedule viewing, you must first set the TV's clock ( Ⓜ > ⚙Settings > General > System Manager > Time > Clock).
Setting up a schedule viewing
You can set up a schedule viewing on two screens.
• The Guide Screen
On the Guide screen, select a program you would like to view, and then press and hold the Select button. Select Schedule Viewing on the pop-up menu that appears.
• The Program Info Screen
Press the Select button while watching the TV. The Program Info window appears. Select a broadcast scheduled program by using the left or right directional buttons, and then press the Select button. You can schedule watching the program by selecting Schedule Viewing.
Cancelling a scheduled viewing
You have two ways to cancel a scheduled viewing.
- Cancelling a scheduled viewing from the Guide
In the Guide (Live TV > Guide), move to the program you want to cancel scheduled viewing, and then press the Select button. Move to Cancel Scheduled Viewing, and then press the Select button. When a pop-up message asking you to cancel the selected scheduled viewing appears, select Yes. The selected scheduled viewing is canceled and the screen returns to the Guide screen.
- Cancelling a scheduled viewing from Smart Hub
- Press the 📋 button to open Smart Hub, and then press the left or right directional button to move to Live TV. Press the up directional button to move to the top row, and then press the left or right directional button to move to Schedule Manager or Recordings.
- Press the Select button to open Schedule Manager or Recordings.
If the TV supports the Recordings function, press the directional buttons to move to Schedules.
-
Use the down directional button to move to the list of programs scheduled to view.
-
Use the right directional button to move to the Delete option, and then press the Select button to delete the selected item.
This function may not be supported depending on the model or geographical area.
Using the Channel List
See how to list the channels available on your TV.
> Live TV Channel List
Using Channel List, you can change the channel or check programs on other digital channels while watching TV.
Press the 📋 button. The Smart Hub home screen appears. Use the left or right directional buttons to move to Live TV, press the up directional button to move to the top row, press the directional buttons to move to Channel List, and then press the Select button. This shows a list of the channels and the program currently on. The focus will be on the channel you are currently watching, showing channel name, channel number, and program title.
Use the up and down directional buttons to move within the channel list (or use the Channel) button to go up and down a page at a time). You can also use the button to enter a channel number and go to that channel directly.
Press the directional button in the Channel List to move to the Category List. Use the up and down directional buttons to move within this list. Press the Select button to choose a category you want from the Category List. The Category List contains All Channels, Favorites, Samsung TV Plus and Air or Cable. Use the up and down directional buttons to move to a channel you want to view, and then press the Select button.
This function may not be supported depending on the model or geographical area.
- All Channels
Displays the channels that have been automatically searched.
These are the channels your TV will receive either over the air if your TV is set to Air or over cable if your TV is set to Cable. See Air or Cable below.
- Favorites
Displays Favorites 1 to Favorites 5. Use the up and down directional buttons to move between the lists of favorites. Highlight the one you want, and then press the Select button. The channel list will now show only the channels in this list.
- Air or Cable
To select Air or Cable, move the focus to Air or Cable, and then press the Select button. Air is suitable for homes equipped with separate, over-the-air antennas. Cable is suitable for homes that subscribe to a local cable-service, but do not have a cable box. You do not need to use this function if your TV is connected to a cable box or satellite box.
This function may not be supported depending on the incoming broadcast signal.
- Channel Type
Sorts the list so that it includes channels of a selected type. However, Channel Type can only be used channels contain the type information.
This function may not be supported depending on the incoming broadcast signal.
- Samsung TV Plus
While the TV is connected to the Internet, you can watch popular programs or highlights for each theme through a virtual channel at any time. As with regular channels, the TV provides the daily program schedules for Samsung TV Plus.
This function may not be supported depending on the model or geographical area.
Recording
Recording a program to an external hard drive connected via USB.
This function may not be supported depending on the model or geographical area.
Read all precautions before using the recording feature. For more information, refer to "Before Using the Recording and Timeshift Functions."
Using the instant and schedule recording options from the guide screen:
To record a program that is on now, open the program guide, move to the program, and then press and hold the Select button. You will get a pop-up menu. Use the up and down directional buttons to move to Record. Press the Select button to record the program. You will be returned to the program guide. Recording automatically ends at the time when the program ends.
To stop recording, press the down directional button while the program being recorded is displayed. The control bar appears. Move the focus to Stop Recording, and then press the Select button. When a popup window appears, select Stop.
To record a program that is on later, move to the program in the Guide, and then press and hold the Select button. You will get a pop-up menu. Use the up and down directional button to move within this menu. Move to the Schedule Recording, and then press and hold the Select button. You will hear a message saying the program has been set to record and then you will be returned to the program guide.
The 🔔 icon is placed visually next to the program title to show it is set to record. To find out if a program is set to record or to cancel a scheduled recording, press the Select button on the program. If it is already set to record, then the option on the menu will be Cancel Scheduled Recording. You can press the Select button to cancel the scheduled recording or just press the Button to go back to the program guide without cancelling the recording.
Recording the program you are watching
To display a menu for recording a program or starting the Timeshift function, press the button twice or press the button while watching the program. You can select the following functions on the menu:
- Record
Immediately starts to record the program you are watching.
- Timeshift
Starts the Timeshift function.
- Stop
Stops the recording or the Timeshift function that is running.
- Info
Displays the details about the program you ware watching.
Scheduling recording from the program info window
Press the Select button while viewing a program to display the program info window. In the program info window, use the left and right directional buttons to select a broadcast scheduled program, and then press the Select button. To schedule a recording for the program, select Schedule Recording.
Changing the recording time
When recording a live program you can specify how long you want to record for.
Press the down directional button to display the control bar at the bottom. Press the left or right directional buttons to move to Edit Recording Time, and then press the Select button. A slider scale appears and you will hear the recording time currently set. Use the left and right directional buttons to change the time, and then press the Select button. You will hear a menu that gives information about the recording time. To return to the program you are watching, press the 📋 button on the remote.
The maximum recording time differs depending on the capacity of the USB device.
Viewing recorded programs
> Live TV Recordings Recordings
Open Smart Hub by pressing the button on the remote control. Use the left or right directional button to move the focus to Live TV. Press the up directional button to move to the top row, and then use the left or right directional button to move to Recordings.
To play a program, use the up and down directional buttons to move between program titles. Press the Select button to play the program or press the right directional button to move to a list of options. Use the up and down directional buttons to move between the options in this list. You can play, remove, or delete the program, or view the program details.
Select the Play option to play the program. The program will start. If you have watched part of this program before, you will get a pop-up menu on screen allowing you to Play (from start), Resume (from where you left off), or Cancel. Use the left and right directional buttons to move to the required option, and then press the Select button.
This function may not be supported depending on the model or geographical area.
Deleting a recorded program
To delete a recorded program, go to the list of Recordings. Use the up and down directional buttons to move to the recording you want to delete.
Press the right directional button to move to a list of 3 options. Press the down directional button to move to the Delete option, and then press the Select button.
You will be asked if you want to remove the selected item. Press the left directional button to move to the Delete button, and then press the Select button to delete the program title. The program will be deleted and you will be returned to the list of Recordings.
Using Smart Hub
Learn how to open Smart Hub to access apps, games, movies, and more.
Smart Hub
After pressing the ⓗ button on your remote control, you can surf the web and download apps with Smart Hub.
Some Smart Hub services are for pay services.
To use Smart Hub, the TV must be connected to the Internet.
Some Smart Hub features may not be supported depending on the service provider, language, or geographical area.
Smart Hub service outages can be caused by disruptions in your Internet service.
To use Smart Hub, you must agree to the Smart Hub service agreement and the collection and use of personal information. Without giving consent, you cannot use the additional features and services. You can view the entire text of the Terms & Privacy by navigating to Settings Terms & Privacy.
If you want to stop using Smart Hub, you can cancel the agreement. To cancel the Smart Hub service agreement, select Reset Smart Hub (图标 > Settings > Support > Device Care > Self Diagnosis > Reset Smart Hub).
Press the 📋 button on your remote. This will bring up a display with 2 rows. Try moving the focus to Live TV or another item on the bottom row. The options on the top row change depending on the item selected in the bottom row.
The buttons to the right of Live TV provide quick access to apps such as Netflix and Prime Video.
Use the left and right directional buttons to move between a menu or apps on a row and the up and down directional buttons to move between rows. Press the Select button to access a menu or apps.
When the Smart Hub home screen appears, use the left or right directional button to move the focus to Live TV or Samsung TV Plus. Press the up directional button to move to the top row. You will be on the Guide item. The items in this row may include Guide, Channel List, Schedule Manager, Recordings, and others.
Samsung TV Plus may not be supported depending on the model or geographical area.
Using the Smart Hub Home Screen
On the leftmost part of the Smart Hub home screen is the static menu listed below. You can quickly and easily use the listed menu items to access the main TV settings or external devices, search, and apps.
- Settings
When the focus is moved to Settings, a list of quick settings icons appears above the top of the menu. You can quickly set frequently used functions by clicking the icons. You can set e-Manual, Intelligent Mode, Picture Mode, Sound Mode, Sound Output, Game Mode, Audio Language, Caption, Sleep Timer, Network, Color Tone, Picture Clarity, Digital Output Audio Format, Device Care, and All Settings.
This function may not be supported depending on the model or geographical area.
- Source
You can select an external device connected to the TV.
For more information, refer to "Switching between external devices connected to the TV."
- Search
A virtual keyboard appears on the screen, and you can search for channels, programs, titles of movies, or apps provided by the Smart Hub service.
To use this feature, the TV must be connected to the Internet.
- Apps
You can enjoy a wide range of content including news, sports, weather, and games by installing the corresponding apps on your TV.
To use this feature, the TV must be connected to the Internet.
For more information, refer to "Using the Apps Service."
- Ambient Mode
You can enhance your living space with decorative content that matches the surroundings or view essential real-time information such as weather, time, and news on the TV screen when you are not watching TV.
To return to the TV mode, press the ⏻ button in Ambient Mode. To shut off the TV, press the ⏻ button.
If you use a remote control other than the Samsung Smart Remote, there may be restrictions to entering Ambient Mode.
This function may not be supported depending on the model.
For more information about the Ambient Mode, refer to "Using the Ambient Mode."
• Home
This menu appears first when you press the ⓤ button. Then you can quickly access Samsung Account, Notification or Privacy Choices.
- Samsung Account
Go to the Samsung Account screen to create a new account or sign out of your account.
For more information about the Samsung Account, refer to "Using a Samsung account."
- Notification
You can view a list of notifications for all events that occur on your TV. A notification appears on the screen when it is time to schedule viewing or schedule recording or when an event occurs on a registered device.
If you move the focus to Notification, and then press the Select button, a notification window appears on the right containing the following functions, Delete All and Settings.
- Privacy Choices
You can view and set the privacy policy for Smart Hub and various other services.
- Universal Guide
Universal Guide is an app that allows you to search for and enjoy various content such as TV shows, dramas, and movies in one place. Universal Guide can recommend content tailored to your preferences.
You can use this feature on your mobile device with the Samsung SmartThings app.
To enjoy the content from these apps on your TV, they must be installed on the TV.
When you watch some paid content, you may need to make a payment using their associated app.
Some content may be restricted depending on your network conditions and your subscriptions to paid channels.
Parental control is necessary when children use this service.
Images may look blurry depending on the service provider's circumstances.
This function may not be supported depending on the model or geographical area.
- Art
When you are not watching TV or when the TV is turned off, you can use the Art mode function to edit image content such as artworks or photos or to display the content.
This function is supported only in The Frame.
For more information, refer to the provided user manual.
- Portrait Mode
When you do not use The Sero, you can rotate its screen vertically to see content such as photos, images, and time display.
This function is supported only in The Sero.
For more information, refer to the provided user manual.
Launching the e-Manual
Open the user manual embedded in your TV.
Press the ⏻ button to open Smart Hub, press the left directional button to move to ⚙Settings, and then press the Select button.
Use the up and down directional buttons to move to Support, and then select Open e-Manual to open the e-Manual.
> Settings Support Open e-Manual
You can view the embedded e-Manual containing information about your TV's key features.
Alternatively, you can download a copy of the e-Manual from Samsung's website (http://www.samsung.com).
Words in blue (e.g., Internet) indicate a menu item.
The e-Manual contains 2 rows of menu icons. Use the up and down directional buttons to move between rows and the left and right directional buttons to move within a row. Press the Select button to open the section you want to read.
The e-Manual contains a section called "Learn TV Remote" in "Accessibility Guidance." This is particularly useful for people who cannot easily see the buttons on the control or who are not clear what each button does. When you are viewing this section of the e-Manual, pressing the buttons on the remote control will not affect the TV. Note that the "Accessibility Guidance" item is only available when Voice Guide (☐ > Settings > General > Accessibility > Voice Guide Settings Voice Guide) is enabled.
Using Bixby
A guide to using Bixby to control your TV.
To use Bixby, your TV must be connected to the Internet and you must use the microphone on your Samsung Smart Remote.
To use Bixby, press and hold the ⏻ button on the Samsung Smart Remote, say a command into the microphone on the remote, and then release the button to run Bixby.
The existing functional specifications may be changed if Bixby is updated.
This function is available only if Voice Assistant is set to Bixby. ( Ⓜ > ⚙Settings > General > Voice > Voice Assistant)
Running Bixby
Press and hold the ⏻ button on the Samsung Smart Remote. Bixby is activated in the listening mode, the Bixby icon appears at the bottom of the TV screen. Say a command, and then release the button. The TV provides feedback on how it understands the command, and then performs the commanded task.
If the TV does not understand the command, try again with more precise pronunciation.
This function may not be supported depending on the model or geographical area.
The supported language may differ depending on the geographical area.
You can find a detailed description of the voice commands at Explore Bixby. Press the 🔒 button. The Explore Now button appears at the bottom of the screen. Press the Select button to go to the Explore Bixby screen.