TOYOTA Mirai (2018) - Automotive

Mirai (2018) - Automotive TOYOTA - Free user manual and instructions

Find the device manual for free Mirai (2018) TOYOTA in PDF.

📄 292 pages English EN Download 💬 AI Question
Notice TOYOTA Mirai (2018) - page 2
Pick your language and provide your email: we'll send you a specifically translated version.

User questions about Mirai (2018) TOYOTA

0 question about this device. Answer the ones you know or ask your own.

Ask a new question about this device

The email remains private: it is only used to notify you if someone responds to your question.

No questions yet. Be the first to ask one.

Download the instructions for your Automotive in PDF format for free! Find your manual Mirai (2018) - TOYOTA and take your electronic device back in hand. On this page are published all the documents necessary for the use of your device. Mirai (2018) by TOYOTA.

USER MANUAL Mirai (2018) TOYOTA

About the following equipment, see the "Owner's Manual".

  • Intuitive parking assist
    • Vehicle customization settings

Introduction

This manual explains the operation of this system. Please read this manual carefully to ensure proper use. Keep this manual in your vehicle at all times.

The screens shown in this manual may differ from the actual screen of the system depending on availability of functions, Toyota Entune subscription status, and map data available at the time this manual was produced.

The screens in this manual will also differ if the screen theme settings have been changed. (Theme setting: →P.60)

Please be aware that the content of this manual may be different from this system in some cases, such as when the system's software is updated.

The Navigation System is one of the most technologically advanced vehicle accessories ever developed. The system receives satellite signals from the Global Positioning System (GPS) operated by the U.S. Department of Defense. Using these signals and other vehicle sensors, the system indicates your present position and assists in locating a desired destination.

The navigation system is designed to select efficient routes from your present starting location to your destination. The system is also designed to direct you to a destination that is unfamiliar to you in an efficient manner. The system uses AISIN AW maps. The calculated routes may not be the shortest nor the least traffic congested. Your own personal local knowledge or “short cut” may at times be faster than the calculated routes.

The navigation system's database includes Point of Interest categories to allow you to easily select destinations such as restaurants and hotels. If a destination is not in the database, you can enter the street address or a major intersection close to it and the system will guide you there.

The system will provide both a visual map and audio instructions. The audio instructions will announce the distance remaining and the direction to turn in when approaching an intersection. These voice instructions will help you keep your eyes on the road and are timed to provide enough time to allow you to maneuver, change lanes or slow down.

Please be aware that all current vehicle navigation systems have certain limitations that may affect their ability to perform properly. The accuracy of the vehicle's position depends on satellite conditions, road configuration, vehicle condition or other circumstances. For more information on the limitations of the system, refer to page 251.

TOYOTA MOTOR CORPORATION

IMPORTANT INFORMATION ABOUT THIS MANUAL

For safety reasons, this manual indicates items requiring particular attention with the following marks.

TOYOTA Mirai (2018) - IMPORTANT INFORMATION ABOUT THIS MANUAL - 1

WARNING

● This is a warning against anything which may cause injury to people if the warning is ignored. You are informed about what you must or must not do in order to reduce the risk of injury to yourself and others.

TOYOTA Mirai (2018) - WARNING - 1

NOTICE

This is a warning against anything which may cause damage to the vehicle or its equipment if the warning is ignored. You are informed about what you must or must not do in order to avoid or reduce the risk of damage to your vehicle and its equipment.

SYMBOLS USED IN ILLUSTRATIONS

TOYOTA Mirai (2018) - SYMBOLS USED IN ILLUSTRATIONS - 1

Safety symbol

The symbol of a circle with a slash through it means "Do not", "Do not do this" or "Do not let this happen".
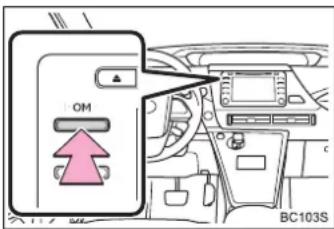
TOYOTA Mirai (2018) - Safety symbol - 1

text_image OM BC103S

Arrows indicating operations

→ Indicates the action (pushing, turning, etc.) used to operate switches and other devices.

HOW TO READ THIS MANUAL
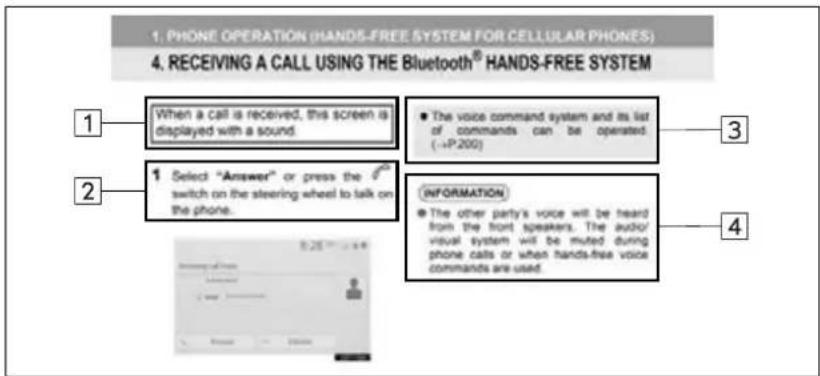
TOYOTA Mirai (2018) - Arrows indicating operations - 1

text_image 1. PHONE OPERATION (HANDS-FREE SYSTEM FOR CELLULAR PHONES) 4. RECEIVING A CALL USING THE Bluetooth® HANDS-FREE SYSTEM 1 When a call is received, this screen is displayed with a sound. 2 Select "Answer" or press the switch on the steering wheel to talk on the phone. 3 The voice command system and its list of commands can be operated (-+P.200) 4 INFORMATION 5 The other party's voice will be heard from the front speakers. The audio/visual system will be muted during phone calls or when hands-free voice commands are used.
No.Name Description
1Operational OutlinesAn outline of the operation is explained.
2Main Operations The steps of an operation are explained.
3Related Operations A main operation's supplementary operations are described.
4Information Useful information for the user is described.

SAFETY INSTRUCTION

To use this system in the safest possible manner, follow all the safety tips shown below.

This system is intended to assist in reaching the destination and, if used properly, can do so. The driver is solely responsible for the safe operation of your vehicle and the safety of your passengers.

Do not use any feature of this system to the extent it becomes a distraction and prevents safe driving. The first priority while driving should always be the safe operation of the vehicle. While driving, be sure to observe all traffic regulations.

Prior to the actual use of this system, learn how to use it and become thoroughly familiar with it. Read the entire manual to make sure you understand the system. Do not allow other people to use this system until they have read and understood the instructions in this manual.

For your safety, some functions may become inoperable when driving. Unavailable screen buttons are dimmed.

TOYOTA Mirai (2018) - SAFETY INSTRUCTION - 1

WARNING

For safety, the driver should not operate the system while he/she is driving. Insufficient attention to the road and traffic may cause an accident.

●While driving, be sure to obey the traffic regulations and maintain awareness of the road conditions. If a traffic sign on the road has been changed, route guidance may not have the updated information such as the direction of a one way street.

While driving, listen to the voice instructions as much as possible and glance at the screen briefly and only when it is safe. However, do not totally rely on voice guidance. Use it just for reference. If the system cannot determine the current position correctly, there is a possibility of incorrect, late, or non-voice guidance.

The data in the system may occasionally be incomplete. Road conditions, including driving restrictions (no left turns, street closures, etc.) frequently change. Therefore, before following any instructions from the system, look to see whether the instruction can be done safely and legally.

This system cannot warn about such things as the safety of an area, condition of streets, and availability of emergency services. If unsure about the safety of an area, do not drive into it. Under no circumstances is this system a substitute for the driver's personal judgement.

Use this system only in locations where it is legal to do so. Some states/provinces may have laws prohibiting the use of video and navigation screens next to the driver.

1 QUICK GUIDE

1. BASIC FUNCTION...... 12

BUTTONS OVERVIEW 12

"Menu" SCREEN.... 14

HOME SCREEN 16

2. QUICK REFERENCE...... 20

"Setup" SCREEN 20

ACCUMULATED BY NAVIGATION

SYSTEM (VEHICLES WITH

DCM) 250

6. TIPS FOR THE NAVIGATION

SYSTEM 251

GPS (GLOBAL POSITIONING

SYSTEM) 251

MAP DATABASE VERSION AND

COVERED AREA.... 253

9 Toyota Entune

1. Toyota Entune-OVERVIEW ..... 256

FUNCTIONAL OVERVIEW 256

TYPE A: FUNCTION ACHIEVED

BY USING A SMART PHONE OR

DCM....257

TYPE B: FUNCTION ACHIEVED

BY USING DCM AND

THE SYSTEM.... 261

TYPE C: FUNCTION ACHIEVED BY

USING DCM 264

2. Toyota Entune OPERATION ..... 267

Toyota Entune App Suite Connect ..... 267

3. SETUP 271

Toyota Entune App Suite Connect

SETTINGS.... 271

APPENDIX/INDEX

APPENDIX 274

ALPHABETICAL INDEX...... 288

1

QUICK GUIDE

1 BASIC FUNCTION

  1. BUTTONS OVERVIEW 12
  2. "Menu" SCREEN 14
  3. HOME SCREEN .... 16 STATUS DISPLAY.... 18

2 QUICK REFERENCE

  1. "Setup" SCREEN 20
text_image 1 2 3 4 HOME MENU AUDIO MAP POWER VOLUME SEEK >

No.Function Page
1Press to eject a disc. 75
2By touching the screen with your finger, you can control the selected functions.31, 32
3Insert a disc into this slot. The CD player turns on immediately. 75
4Press to play/pause.Press to turn mute on/off.80, 93, 96, 99, 102, 107
5Press to seek up or down for a radio station or to access a desired track/file.80, 93, 96, 99, 102
6Press to access the Bluetooth® hands-free system. 156
7*Press to display the application screen. 267
8Turn to change the radio station or skip to the next or previous track/ file.80, 93, 96, 99, 102
9Press to turn the audio/visual system on and off, and turn it to adjust the volume. Press and hold to restart the system.30, 74
10Press to display the map screen and repeat a voice guidance. 194
11Press to access the audio/visual system. 72, 74
12Press to display the “Menu” screen. 14
13Press to display the home screen. 16, 34
\*: This function is not made available in some countries or areas.

1. BASIC FUNCTION

2. "Menu" SCREEN

Press the "MENU" button to display the "Menu" screen. ![](images/d3d800f5e8a13eb2cb8065ce0cea876f89d61f6d0c05e0dd5347a35700ed99e1.jpg)
text_image Menu 1 2 3 4 5 4:34 Destination Audio Phone Apps Info Setup 8 7 6 Display
STANDING TVIS
No.Function Page
1Select to display the destination screen. 208
2Select to display the audio control screen. 72
3Select to display the hands-free operation screen. 156
4*1Displays the clock. —
5*2Select to display the application screen. 267
6Select to adjust the contrast and brightness of the screens, etc. 39
7Select to display the “Setup” screen. 20
8Select to display the information screen. 140
\*1: The clock is not displayed on the navigation system screen for this vehicle. The clock is displayed on the meter. ^*2 : This function is not made available in some countries or areas.

1. BASIC FUNCTION

3. HOME SCREEN

Press the "HOME" button to display the home screen. Multiple screens, such as the audio/visual system screen and hands-free screen, can be displayed simultaneously on the home screen. Selecting a screen will display it full screen. The home screen can be set to a three-way split screen or a two-way split screen. For details about changing the home screen settings: →P.34 When the hands-free screen is displayed, a Bluetooth ^® phone can be registered if one has not yet been registered ( P.42), and contacts can be registered to the 4 displayed buttons. ( P.165) ▶Three-way split screen ![](images/1a34f85d492aeeb4610086d32a07b165b64e080c4e5515ac85beef7317f652bc.jpg)
text_image Home **** **** **** Select & Hold to Add a Contact... USB Track name Artist name Track 9999 9.59 10:58 MART SENATE OFFICE 1.2 mi
▶Two-way split screen ![](images/0717a2c1a6a1b5a1a95c0c19a4b459c5fae1c88f32d455f05d25b59386984c44.jpg)
text_image Home 10:59 New York City Partly Cloudy 32°F As of 44 min. ago USB Track name Artist name Album name Track 4444 9:59

STATUS DISPLAY

The condition of the Bluetooth ^® connection, as well as the level of cellular phone reception, the amount of cellular phone battery charge left, etc., are displayed on the status display. ![](images/df19b52c754c538aeb083deede89a112e370bae2f213d9a020300a3de8ce3bd1.jpg)
text_image 8:18 History Favorites Contacts Keypad Select Device Message
CNT001@CT2US ICON Indicators Conditions
The condition of the Bluetooth® connection (Phone)(Gray) (Blue)No connection Feet GoodAn antenna for the Bluetooth® connection is built into the instrument panel. The condition of the Bluetooth® connection may deteriorate and the system may not function when a Bluetooth® phone is used in the following conditions and/or places:The cellular phone is obstructed by certain objects (such as when it is behind the seat or in the glove box or console box).The cellular phone is touching or is covered with metal materials.Leave the Bluetooth® phone in a place where the condition of the Bluetooth® connection is good.
ICON Indicators Conditions
TOYOTA Mirai (2018) - STATUS DISPLAY - 1The level of reception (Phone)PoorExcellentThe level of reception does not always correspond with the level displayed on the cellular phone. The level of reception may not be displayed depending on the phone you have.When the cellular phone is out of the service area or in a place inaccessible by radio waves, is displayed.“Rm” is displayed when receiving in a roaming area. While roaming, display “Rm” top-left on the icon.The receiving area may not be displayed depending on the type of phone you have.
The amount of battery charge left (Phone)[ABKY]TOYOTA Mirai (2018) - STATUS DISPLAY - 2EmptyFullThe amount displayed does not always correspond with the amount displayed on the Bluetooth® device.The amount of battery charge left may not be displayed depending on the type of the Bluetooth® device connected.This system does not have a charging function.
TOYOTA Mirai (2018) - STATUS DISPLAY - 31,2The condition of Wi-Fi® connection[730C]TOYOTA Mirai (2018) - STATUS DISPLAY - 4No connection TOYOTA Mirai (2018) - STATUS DISPLAY - 5When Wi-Fi® Hotspot is off, no item is displayed.
TOYOTA Mirai (2018) - STATUS DISPLAY - 6Data Communication Module (DCM)Indicate during data communication performed via DCM.
[27SX]klThe level of reception (DCM)[HHK2]TOYOTA Mirai (2018) - STATUS DISPLAY - 7PoorExcellentWhen the cellular phone is out of the service area or in a place inaccessible by radio waves, is displayed.
^*1 : Vehicles with DCM ^*2 : This function is not made available in some countries or areas.

2. QUICK REFERENCE

1. "Setup" SCREEN

Press the "MENU" button, then select "Setup" to display the "Setup" screen. The items shown on the "Setup" screen can be set. ![](images/2f0419b48632203ed2746918414597aea8e43537696957bf62ceef5694347093.jpg)
text_image Settings 9:25 1 2 3 4 5 Settings Time Bluetooth Language English Audio Customize Home Screen Phone Theme Setting V1 V2 Array ON Unit of Temperature 7 Settings 9:25 6 7 8 9 System Time Vehicle Language English Navigation Customize Home Screen Wk-F1 Theme Setting Excess Age Save None ON Unit of Temperature 7 Settings 9:25 10 11 System Time Navigation Language English Wk-F1 Customize Home Screen Drive Age Save Theme Setting Traffic Drop ON Out Of Services Unit of Temperature 7
No.Function Page
1Select to change the selected language, operation sound settings, etc.60
2Select to set Bluetooth® device and Bluetooth® system settings. 47
3Select to set audio settings. 111
4Select to set the phone sound, contacts, message settings, etc. 175
5Select to set the voice settings. 64
6Select to set vehicle information such as maintenance information. 65
7Select to set memory points (home, favorites entries, areas to avoid), or navigation details.234, 241
8*1, 2Select to set Wi-Fi® connection settings. 56
9*2Select to set Toyota Entune App Suite Connect settings. 271
10*2Select to set traffic information settings. 245
11*2Select to set data services settings. 144
^*1 : Vehicles with DCM ^*2 : This function is not made available in some countries or areas.

3. NAVIGATION OPERATION

1. REGISTERING HOME

1 Turn the power switch to ACCESSORY or ON mode. 2 Press the "MAP" button. ![](images/7d46c23de5d47cb85060cbc0aeee3a10b902d2c7eed7200d71a1442f3a9680bc.jpg)
text_image MAP BC104S
3 Select ![](images/daf8ef612c8f58f6cca869337c6e8df5a997149016589136d684e3b8be863a79.jpg) ![](images/e81c4044578cd22e7827a7203f0859671a1b08a8a17ebb7cf7ca4de7d758b849.jpg)
text_image 1:02 N The Shops National Place F 54 NW Achidians Ave NW Swee House Swee Transportation Swee Transportation P-PM-PC-1-P-1
4 Search for your home. There are different kinds of methods to search for your home. (→P.208) 5 Select "Enter". 6 Select "OK". Registration of home is complete. ▶Registering home in a different way →P.235 ▶ Editing the name, location, phone number and icon →P.235 ▶Setting home as the destination →P.25, 210, 216

3. NAVIGATION OPERATION

2. REGISTERING FAVORITE DESTINATIONS

1 Turn the power switch to ACCESSORY or ON mode. 2 Press the "MAP" button. ![](images/7bf649b45d328f8b8171747c348512992e574cf485a1992c6e0f7b2e7a6340aa.jpg)
text_image MAP BC104S
3 Select . ![](images/bdaaf5261caa4b7d6846ef03575fbdc4d7f4bcfe88f04285bc798ac5cf67603a.jpg)
text_image 1:02 New Street A National Place F 54 NW Residential Ave NW 100% 70% Floor 70% Floor 70% Floor 70% Floor 70% Floor 70% Floor 70% Floor 70% Floor 70% Floor 70% Floor 70% Floor 70% Floor 70% Floor 70% Floor 70% Floor 70% Floor 70% Floor 70% Floor 70% Floor 70% Floor 70% Floor
4 Select "New". 5 Search for a favorite destination. There are different kinds of methods to search for a destination. (→P.208) 6 Select "Enter". 7 Select "OK". Registration of favorite destinations is complete. ▶Registering favorite destinations in a different way →P.236 ▶ Editing the name, location, phone number and icon →P.237 ▶Setting favorite destinations as the destination →P.211, 216

3. NAVIGATION OPERATION

3. OPERATION FLOW: ROUTE GUIDANCE

1 Press the "MAP" button. ![](images/3c63c7b6e192b42c08e1655141f1c487b83b97b51e9db9349f36dbe26c342a10.jpg)
text_image MAP BC104S
2 Select ![](images/5aa31358a258d0029aba61b322574a27dea38bf5c30b6e423bfd9783baf3c476.jpg) ![](images/83de89eaa597c4ddcffed62294c54e0750e4e5c71e791ec0e89eb0645d464ff2.jpg)
text_image 1:04 14th St NW

3 Search for a destination.

There are different kinds of methods to search for a destination. (→P.208)

4 Select "Go".

5 Select "OK".

Selecting routes other than the one recommended. (→P.219) Guidance to the destination is displayed on the screen and can be heard via voice guidance.

3. NAVIGATION OPERATION

4. SETTING HOME AS THE DESTINATION

1 Turn the power switch to ACCES-SORY or ON mode. 2 Press the "MAP" button. ![](images/61414495be5be1f335edd49befb6ebaac60a0380ab5ddf2f37f8501658277085.jpg)
text_image MAP BC104S
3 Select ![](images/82ecec959d76e3e2b9af919fe036b141947a9930b6472320ee1606f0b82e35c5.jpg)
text_image EART CHARGOBER BELLINGTON 2:30 154 M Lamper CPD00001-1P01
Guidance to the destination is displayed on the screen and can be heard via voice guidance. ▶Setting home as the destination in a different way →P.210

4. FUNCTION INDEX

1. FUNCTION INDEX

▶Map
Displaying maps Page
Viewing the map screen 194
Displaying the current position 196
Viewing the current position vicinity map 198
Changing the scale 196
Changing the map orientation 197
Displaying map options operation 200
Displaying the estimated travel/arrival time to the destination 224
Selecting the map mode 200
Displaying traffic information 204
Searching for destinations Page
Searching for the destination 208
Changing the search area 210
▶Route guidance
Before starting or during route guidance Page
Starting route guide218
Displaying route options operation230
Viewing the route overview219
Adjusting route guidance volume64
Deleting the destination222
FavoritesPage
Registering favorites list entries236
Marking icons on the map238
▶Useful functions
Information Page
Displaying vehicle maintenance 65
Hands-free system (for cellular phone) Page
Registering/connecting a Bluetooth® phone 42
Placing a call using the Bluetooth® hands-free system 161
Receiving a call using the Bluetooth® hands-free system 166
Voice command system Page
Operating the system with your voice 126
Peripheral monitoring system Page
Viewing behind the rear of the vehicle 146

2

BASIC FUNCTION

1 BASIC INFORMATION BEFORE OPERATION

1. INITIAL SCREEN 30 2. TOUCH SCREEN GESTURES ..... 31 3. TOUCH SCREEN OPERATION .... 32 4. HOME SCREEN OPERATION ..... 34 5. ENTERING LETTERS AND NUMBERS/LIST SCREEN OPERATION.... 35 ENTERING LETTERS AND NUMBERS 35 LIST SCREEN 36 6. SCREEN ADJUSTMENT ...... 39 7. LINKING MULTI-INFORMATION DISPLAY AND THE SYSTEM ..... 41

2 CONNECTIVITY SETTINGS

1. REGISTERING/CONNECTING A Bluetooth® DEVICE .... 42

REGISTERING A Bluetooth® PHONE FOR THE FIRST TIME 42 REGISTERING A Bluetooth® AUDIO PLAYER FOR THE FIRST TIME .... 44 PROFILES...... 45

2. SETTING Bluetooth ^® DETAILS ... 47

Bluetooth® SETTINGS SCREEN.... 47 CONNECTING A Bluetooth® DEVICE .... 48 REGISTERING A Bluetooth® DEVICE 50 DELETING A Bluetooth® DEVICE ...... 50 EDITING THE Bluetooth® DEVICE INFORMATION .... 51 SETTING Bluetooth® SYSTEM .... 52

3. Wi-Fi ^® Hotspot...... 56

CONNECTING A DEVICE TO THE IN-VEHICLE ACCESS POINT .... 56 CHANGING THE Wi-Fi® SETTINGS ..... 56 Wi-Fi® FUNCTION OPERATING HINTS....59

3 OTHER SETTINGS

1. GENERAL SETTINGS .... 60 GENERAL SETTINGS SCREEN.... 60 2. VOICE SETTINGS.... 64 VOICE SETTINGS SCREEN.... 64 3. VEHICLE SETTINGS .... 65 MAINTENANCE.... 65 VALET MODE.... 68

1. BASIC INFORMATION BEFORE OPERATION

1. INITIAL SCREEN

When the power switch is turned to ACCESSORY or ON mode, the initial screen will be displayed and the system will begin operating. ● After a few seconds, the caution screen will be displayed. - After about 5 seconds or selecting "Continue", the caution screen switches to the next screen. ![](images/49e5ff36d276954de169dd612a2b2e9c40795abd25ca9ed064db1c6ad118dc05.jpg)

WARNING

\- When the vehicle is stopped with the fuel cell system operating, always apply the parking brake for safety.

MAINTENANCE INFORMATION

This system reminds users when to replace certain parts or components and shows dealer information (if registered) on the screen. When the vehicle reaches a previously set driving distance or date specified for a scheduled maintenance check, the maintenance reminder screen will be displayed when the system is turned on. - The screen goes off if the screen is not operated for several seconds. - To prevent the screen from being displayed again, select "Do Not Tell Me Again". - To register maintenance information: →P.65 - If is selected, the registered phone number can be called.

RESTARTING THE SYSTEM

When system response is extremely slow, the system can be restarted. 1 Press and hold the "POWER/VOLUME" knob for 3 seconds or more. ![](images/1ba879dbb4987ae1479a4022560d3f73a57235f39c0cf5ba533a5a5779030531.jpg)
text_image POWER VOLUME BC108S

1. BASIC INFORMATION BEFORE OPERATION

2. TOUCH SCREEN GESTURES

Operations are performed by touching the touch screen directly with your finger.
Operation method Outline Main use
TOYOTA Mirai (2018) - TOUCH SCREEN GESTURES - 1TouchQuickly touch and release once.Selecting an item on the screen
TOYOTA Mirai (2018) - TOUCH SCREEN GESTURES - 2Drag*Touch the screen with your finger, and move the screen to the desired position.•Scrolling the lists•Scrolling the map screen
TOYOTA Mirai (2018) - TOUCH SCREEN GESTURES - 3Flick*Quickly move the screen by flicking with your finger.•Scrolling the main screen page•Scrolling the map screen
TOYOTA Mirai (2018) - TOUCH SCREEN GESTURES - 4Pinch in/Pinch outSlide fingers toward each other or apart on the screen.•Changing the scale of the map.
\*: The above operations may not be performed on all screens.

INFORMATION

● Flick operations may not be performed smoothly at high altitudes.

1. BASIC INFORMATION BEFORE OPERATION

3. TOUCH SCREEN OPERATION

This system is operated mainly by the buttons on the screen. (Referred to as screen buttons in this manual.) \- When a screen button is touched, a beep sounds. (To set the beep sound: P.60) ![](images/8970b411be3f0769353d431b47fec13fceed547c4e47eb3e482f1e95f6985ad3.jpg)

NOTICE

● To prevent damaging the screen, lightly touch the screen buttons with your finger. - Do not use objects other than your finger to touch the screen. ● Wipe off fingerprints using a glass cleaning cloth. Do not use chemical cleaners to clean the screen, as they may damage the touch screen.

INFORMATION

- If the system does not respond to touching a screen button, move your finger away from the screen and then touch it again. ●Dimmed screen buttons cannot be operated. ●The displayed image may become darker and moving images may be slightly distorted when the screen is cold. ●In extremely cold conditions, the screen may not be displayed and the data input by a user may be deleted. Also, the screen buttons may be harder than usual to depress. - When you look at the screen through polarized material such as polarized sunglasses, the screen may be dark and hard to see. If so, look at the screen from different angles, adjust the screen settings on the display settings screen or take off your sunglasses. ●When is displayed on the screen, select ↩ to return to the previous screen.

CAPACITIVE TOUCH SCREEN BUTTONS

The operable areas of the capacitive touch screen buttons use capacitive touch sensors and may not operate properly in the following situations: ● If the screen is dirty or wet - If a source of strong electromagnetic waves is brought near the screen ● If a glove is worn during operation - If the screen is touched by a fingernail ● If a stylus is used to operate the buttons - If your palm touches the operable area of another button during operation \- If a button is touched quickly \- If the operable part of a capacitive touch screen button is touched by or covered with a metal object, such as the following, it may not operate properly: • Magnetic isolation cards \- Metallic foil, such as the inner packaging of a cigarette box • Metallic wallets or bags \- Coins • Discs, such as a CD or DVD \- If the operable part of a capacitive touch screen button is wiped, it may operate unintentionally. \- If the capacitive touch screen button is being touched when the power switch is changed to ACCESSORY or ON mode, the button may not operate properly. In this case, remove anything touching the button, turn the power switch to OFF and again to ACCESSORY or ON mode or restart the system by keeping pressing POWER/VOLUME button for more than 3 sec. See page 30 for restarting the system. \- Capacitive touch screen button sensor sensitivity can be adjusted. (→P.60)

1. BASIC INFORMATION BEFORE OPERATION

4. HOME SCREEN OPERATION

On the home screen, multiple screens, such as the audio/visual system screen and hands-free screen, can be displayed simultaneously. 1 Press the "HOME" button. 2 Check that the home screen is displayed. - Selecting a screen will display it full screen.

CUSTOMIZING THE HOME SCREEN

The displayed screens and their location on the home screen can be changed. 1 Press the "MENU" button. ![](images/94ccccf59f8a3462180f7de3d30316c8183d41b75ae283e53c90df16af9f9f0f.jpg)
text_image MENU BC105S
2 Select "Setup". 3 Select "General". 4 Select "Customize Home Screen". 5 Check that "Customize Home Screen" is displayed. ![](images/03e5aacedec8b368cab37d2591d8aad678a88b4e08dd6de0bc68be93b007b6a4.jpg)
text_image Customize Home Screen 5:18 What information would you like to display? Navi Audio Phone Weather Audio New Phone Change Layout 2
No.Function Page
1Select to change the displayed screen/location.34
2Select to change the home screen layout.34

CHANGING THE DISPLAYED SCREENS/LOCATION

1 Select the desired screen. 2 Select the desired location.

INFORMATION

\- When the selected screen is already being displayed and another area is selected for that screen, the screen that it is replacing will be displayed in the screen's original location.

CHANGING THE HOME SCREEN LAYOUT

1 Select "Change Layout". 2 Select the desired screen layout.

1. BASIC INFORMATION BEFORE OPERATION

5. ENTERING LETTERS AND NUMBERS/LIST SCREEN OPERATION

When searching by an address, name, etc., or entering data, letters and numbers can be entered via the screen. ENTERING LETTERS AND NUMBERS ![](images/1520f00015789ab1c650c9f74643aeb4eec317fd551b886a8530f5fdac019634.jpg)
text_image Edit Device Name 21:22 3 4 5 6 7 8 9 0 1 2 3 4 5 6 7 8 9 10 A B C D E F G H I J K L Z S T U V W X Y Z A B C D E F G H I J K L Change Type ABC Space 8 OK
No. Function
1Select to enter desired characters.
2Select to choose a predictive text candidate for entered text.
3*When this icon is displayed, select to enable the dictation function. (English only) (→P.129)
4Text field. Entered character(s) will be displayed.
5Select to erase one character. Select and hold to continue erasing characters.
6Select to move the cursor.
7Select to display a list of predictive text candidates when there is more than one. (→P.36)
8Select to make a space on cursor.
No. Function
9Select to change character types.
10Select to enter characters in lower case or in upper case.
\*: Vehicles with DCM - Keyboard layout can be changed. (→P.60)

CHANGING CHARACTER TYPE

1 Select "Change Type".

![](images/7902e6640f4d76c1a8db79e491b4af834ce58d69f394b03c12178d220da193e1.jpg)
text_image Edit Device Name 21:22 A And As Are 1 2 3 4 5 6 7 8 9 0 Q W E R T Y U I O P A S D F G H J K L Z X C V B N M - Change Type ABC Space OK

2 Select the desired character.

![](images/898548628dc721b5bbe94be056dfb11508e82440a292cb1939b0b0e77c4e8044.jpg)
text_image 4:38 Select keyboard type ABC 12.3 Other AAA Change Type ABC

INFORMATION

●Depending on the screen being displayed, it may not possible to change keyboard characters.

DISPLAYING PREDICTIVE TEXT CANDIDATES

When text is input, the system predicts the text that may complete the currently unconfirmed text and displays predictive replacement candidates that match the beginning of the text. 1 Input text. 2 Select the desired candidate. ![](images/cbb142c5758c7117a05fb3d1ae03d21853ea4de5f91cf392ca12ce05c4e985cf.jpg)
text_image Edit Device Name 21:22 A And As Ave 1 2 3 4 5 6 7 8 9 0 Q W E R T Y U I O P A S D F G H J K L Z X C V B N M - Change Type ABC Space OK
\- To select a candidate that is not displayed, select, and then select the desired predictive replacement candidate. ![](images/6c2cddd8bd005790090c98ff512f3884e2df93559ab95f2e9623a6f8fc19c5b6.jpg)
text_image Edit Device Name 21:26 A And As Are At An All About Also Any After Am Around Another Ago Against Change Type ABC

LIST SCREEN

The list screen may be displayed after entering characters.

DISPLAYING THE LIST

1 Enter characters and select "Search". ![](images/1dc88ba1d84392126ef25d10255b6bb19554279c3b2da10448ecfd70b562f334.jpg)
text_image POI Name 2:08 AM ← 861 March Change Type ABC Space Search
- Matching items from the database are listed even if the entered address or name is incomplete. - The list will be displayed automatically if the maximum number of characters is entered or matching items can be displayed on a single list screen. ![](images/9376d95be3b52a08399878869d249ae35717ede89b3dd595f6cd8ab5b926eae8.jpg)
text_image POI Name 2:09 AM 819 Marches AMERICAS BEST VALUE IN ▶ 746 ms PIGGOTT COMMUNITY HO ▶ 746 ms ALL AMERICA SALES 747 ms RADIO STATION KLCN-AM 748 ms Sort/Category/City

INFORMATION

●The number of matching items is shown on the right side of the screen. If the number of matching items is more than 999, the system displays “\*\*\*” on the screen.

SELECTING ALL ITEMS

Some lists contain "Select All". If "Select All" is selected, it is possible to select all items. 1 Select "Select All". ![](images/de79c076f7cf6bc26b133600bacbf1f33c45d63dbd479f027b1090add99ae8aa.jpg)
text_image Delete My Traffic Routes 4:19 Route 1 Route 2 Route 3 Route 4 Select All
"Unselect All": Unselect all items in the list.

LIST SCREEN OPERATION

When a list is displayed, use the appropriate screen button to scroll through the list. ![](images/56b4040f7a7f807f4f3018e846cc255d7ef4d289212230fef2804432ad26f102.jpg)
text_image POI Name 2:09 AM 3 819 AM AMERICAS BEST VALUE IN 746 PIGGOTT COMMUNITY HO 746 ALL AMERICA SALES 746 RADIO STATION KLCN - AM 746 Sort/Category/City 1 2 1

No. Function

1 Select to skip to the next or previous page. Select and hold to scroll through the displayed list. 2 Indicates the position of the displayed entries in the entire list. To scroll up/down pages, drag the bar. 3 To scroll up/down the list, flick the list up/down.

INFORMATION

- If appears to the right of an item name, the complete name is too long to display. - Select to scroll to the end of the name. - Select to move to the beginning of the name.

SORTING

The order of a list displayed on the screen can be sorted in the order of distance from the current location, date, category, etc. 1 Select "Sort". ![](images/7edae8d7393c7628dc9b92fa41008009555ea34a59d2255cbe177453df8a8362.jpg)
text_image Edit Favorite Entries 3:50 COLUMBIA UNIVERSITY MEDICINE MD-202 E, Hyattsville, MD OFFICE HOWARD JOHNSON-WASHINGTON Sort
2 Select the desired sorting criteria.

SEACHING A LIST

Items are displayed in the list with the most similar results of the search at the top. 1 Select ![](images/3ea0b6d4a2cfdf241746454bd6f0b427a0acbc41852883a4f0bd9ccc3d5b6d1b.jpg) ![](images/94f964588b7001442cd9774135108b805c1880b7c407bb8d3f0eac47a4588b36.jpg)
text_image 8:18 History Favorites Contacts Keypad Select Device Message
2 Input text. ![](images/cd1da1262c2ec3af71b1dfde88b3b24cc4cb2bfa85b1211feb6b3abd0dac3384.jpg)
text_image Search 11:04 AAA 1 2 3 -4 5 6 7 8 9 0 O W E R T Y U I O P A S D F G H J K L Z X C V B N M - Change Type ABC Space Search
3 Select "Search". \- The list is displayed.

1. BASIC INFORMATION BEFORE OPERATION

6. SCREEN ADJUSTMENT

The contrast and brightness of the screen display and the image of the camera display can be adjusted. The screen can also be turned off, and/or changed to either day or night mode. 1 Press the "MENU" button. ![](images/9eb264ab235605359729cacbac39d4560d2feb2e63cc0d230accf9fa1d948b01.jpg)
text_image M:NU BC105S
2 Select "Display". 3 Select the desired items to be set. ![](images/3e0bee6ba0f825668f040fed2036dbacf15f1ed6b615d50d4867265d6045f97b.jpg)
text_image Display 11:02 Screen Off 1 Day Mode 2 On 3 Adjust Contrast/Brightness 4 General Camera
No.Function Page
1Select to turn the screen off.To turn it on, press any button.
2Select to turn day mode on/off.39
3Select to adjust the screen display.40
4Select to adjust the camera display.

INFORMATION

\- When the screen is viewed through polarized sunglasses, a rainbow pattern may appear on the screen due to optical characteristics of the screen. If this is disturbing, please operate the screen without polarized sunglasses.

CHANGING BETWEEN DAY AND NIGHT MODE

Depending on the position of the head-light switch, the screen changes to day or night mode. This feature is available when the headlight is switched on. 1 Select "Day Mode".

INFORMATION

\- If the screen is set to day mode with the headlight switch turned on, this condition is memorized even with the fuel cell system turned off.

ADJUSTING THE CONTRAST/ BRIGHTNESS

The contrast and brightness of the screen can be adjusted according to the brightness of your surroundings. 1 Select "General" or "Camera". 2 Select the desired item. - "Display (General)" screen only: Select "<" or "> " to select the desired display.
Screen button Function
“Contrast” “+”Select to strengthen the contrast of the screen.
“Contrast” “-”Select to weaken the contrast of the screen.
“Brightness” “+”Select to brighten the screen.
“Brightness” “-”Select to darken the screen.

1. BASIC INFORMATION BEFORE OPERATION

7. LINKING MULTI-INFORMATION DISPLAY AND THE SYSTEM

The following functions of the system are linked with the multi-information display in the instrument cluster: - Navigation • Audio etc. These functions can be operated using multi-information display control switches on the steering wheel. For details, refer to "Owner's Manual".

2. CONNECTIVITY SETTINGS

1. REGISTERING/CONNECTING A Bluetooth® DEVICE

REGISTERING A Bluetooth® PHONE FOR THE FIRST TIME

To use the hands-free system, it is necessary to register a Bluetooth® phone with the system. Once the phone has been registered, it is possible to use the hands-free system. This operation cannot be performed while driving. For details about registering a Bluetooth® device: →P.50 1 Turn the Bluetooth ^® connection setting of your cellular phone on. - This function is Bluetooth® connection setting of your cellular phone is set to off. 2 Press the "MENU" button. ![](images/61e0146c690d4edae387807eb5ef6270f4128ef4221803f13ea2031329736a6d.jpg)
text_image M#NU BC105S
3 Select "Phone". \- Operations up to this point can also be performed by pressing the switch on the steering wheel or the "PHONE" button on the instrument panel. 4 Select "Yes" to register a phone. ![](images/025c3caf42a5ef47a6dc2c5b7e25221bef410c3dc2d4e2335339711a4aec515e.jpg)
text_image Setup 7:43 There are no Bluetooth devices registered. Would you like to add one now? Yes No
5 Select the desired Bluetooth ^® device. ![](images/f30ef39833fef34e43f02de534b0f1818aa9324496b83f1f37ff8ca2132fb0d0.jpg)
text_image Add Device 7:47 Please select your smart phone below. Step 1: ********** Step 2: ********** Step 3: ********** If you cannot find... t av a i la b l e w h -e
- If the desired Bluetooth® phone is not on the list, select "If you cannot find..." and follow the guidance on the screen to try again. 6 Register the Bluetooth ^® device using your Bluetooth ^® device. ![](images/1e9e22cfcf3c62c69a580f400369f1c6f2a874d8885882687dfb987299645389.jpg)
text_image Add Device 7:48 Please check the display on your smart phone. Step 1: Step 2: Step 3: Does the PMI "2008" match the PMI displayed on "**********" Bluetooth On ECONOSA PMI 2008
\- For details about operating the Bluetooth device, see the manual that comes with it. - A PIN-code is not required for SSP (Secure Simple Pairing) compatible Bluetooth® devices. Depending on the type of Bluetooth® device being connected, a message confirming registration may be displayed on the Bluetooth® device's screen. Respond and operate the Bluetooth® device according to the confirmation message. 7 Check that the following screen is displayed, indicating pairing was successful (a Bluetooth ^ link has been established but registration is not yet complete). ![](images/b02c9220c5f9a3946ade1bb6cee07bdb6b91105ef92ae9028dd9d68653952141.jpg)
text_image Add Device 7:48 Connecting... Step 1 Step 2: Step 3 13P0896-1/15
- At this stage, the Bluetooth functions are not yet available. 8 Check that "Connected" is displayed and registration is complete. ![](images/209b7bb8cb7603770502482a3e5c72041c8f7721942d78e854932eddaffbffc8.jpg)
text_image Add Device 7:49 Connected Step 1: Step 2: Step 3:
\- If an error message is displayed, follow the guidance on the screen to try again.

INFORMATION

\- If a cellular phone does not operate properly after being connected, turn the cellular phone off and on and then connect it again.

REGISTERING A Bluetooth® AUDIO PLAYER FOR THE FIRST TIME

To use the Bluetooth ^® Audio, it is necessary to register an audio player with the system. Once the player has been registered, it is possible to use the Bluetooth® Audio. This operation cannot be performed while driving. For details about registering a Bluetooth® device: →P.50 1 Turn the Bluetooth ^® connection setting of your audio player on. - This function is not available when the Bluetooth® connection setting of your audio player is set to off. 2 Press the "AUDIO" button. ![](images/b0470a6e21ff160b92311191ebcb772b234a1a1607b05065ddc1d94089f9c26a.jpg)
text_image AUDIO BC106S
3 Select "Source" on the audio screen or press "AUDIO" button again. 4 Select "Bluetooth". 5 Select "Yes" to register an audio player. 6 Follow the steps in "REGISTERING A Bluetooth® PHONE FOR THE FIRST TIME" from "STEP 5". (→P.42) PROFILES This system supports the following services.
Bluetooth® DeviceSpec. Function RequiredRecommended
Bluetooth® Phone/ Bluetooth® Audio PlayerBluetooth® Core SpecificationRegistering a Bluetooth® deviceVer. 2.0Ver. 4.1+ EDR
Bluetooth® DeviceProfile Function RequiredRecommended
HFP (Hands-Free Profile)Hands-free systemVer. 1.0 Ver. 1.7
Bluetooth® PhoneOPP (Object Push Profile)Transferring the contactsVer. 1.1 Ver. 1.2
PBAP (Phone Book Access profile)Ver. 1.0 Ver. 1.2
MAP (Message Access Profile)Bluetooth® phone messageVer. 1.0 Ver. 1.2
SPP (Serial Port Profile)Toyota Entune App Suite ConnectVer. 1.1 Ver. 1.2
Bluetooth® Audio PlayerA2DP (Advanced Audio Distribution Profile)Bluetooth® audio systemVer. 1.0 Ver. 1.3
AVRCP (Audio/Video Remote Control Profile)Ver. 1.0 Ver. 1.6
2 BASIC FUNCTION

INFORMATION

- This system is not guaranteed to operate with all Bluetooth ^ devices. - If your cellular phone does not support HFP, registering the Bluetooth ^ phone or using OPP, PBAP, MAP or SPP profiles individually will not be possible. - If the connected Bluetooth ^ device version is older than recommended or incompatible, the Bluetooth ^ device function may not work properly. - Refer to http://www.toyota.com/Entune/ in the United States, and http://www.toyota.ca/entune in Canada, to find approved Bluetooth ^ phones for this system. ![](images/e147671d476622840e40c8aa334aa75c5bed3c7b2a70f6edaa9dd1ab0bb91f74.jpg)

Bluetooth®

Bluetooth is a registered trademark of Bluetooth SIG, Inc.

2. CONNECTIVITY SETTINGS

2. SETTING Bluetooth® DETAILS

1 Press the "MENU" button. ![](images/38ecfa6241e64be168161b46692e0411f16f3aafb99165c32b1679ece57ffd1c.jpg)
text_image M:NU BC105S
2 Select "Setup". 3 Select "Bluetooth". 4 Select the desired item to be set. ![](images/bed70b9b1eef46dbf1793d2235cac3b3521f1021775369be527eb4d7e72de65a.jpg)
text_image Setup General Bluetooth Audio Phone Voice Registered Device Add New Device Remove Device Detailed Settings 7:53
Bluetooth® SETTINGS SCREEN ![](images/718e29e1852ec2f04351719c7a25c0970cb84b1d83055389d359941a23c00722.jpg)
text_image Setup 7:53 General Registered Device 1 Bluetooth Add New Devices 2 Audio Remove Device 3 Phone Detailed Settings 4 Voice IMPOSTUPDATES
No.Function Page
1Connecting a Bluetooth® device and editing the Bluetooth® device information48, 51
2Registering a Bluetooth® device50
3Deleting a Bluetooth® device50
4Setting the Bluetooth® system52

CONNECTING A Bluetooth® DEVICE

Up to 5 Bluetooth ^® devices (Phones (HFP) and audio players (AVP)) can be registered. If more than 1 Bluetooth ^® device has been registered, select which device to connect to. 1 Display the Bluetooth ® settings screen. (→P.47) 2 Select "Registered Device". 3 Select the device to be connected. ![](images/7f5f1b6c68cb3fb7fb11479b40662529e3dd1ac3d961754bd7423d4868fb0f67.jpg)
text_image Registered Device 8:04 ***************
● Supported profile icons will be displayed. : Phone : Audio player : Phone/Toyota Entune App Suite Connect ● The profile icon for a currently connected device will be displayed in color. - Selecting a profile icon which is not currently connected will switch the connection to the function. 4 Select the desired connection. ![](images/691241ef0fb303a5211df1a1d49e7f815d4d3e429920b3a517d91d4a1bad28ef.jpg)
text_image 8:05 Connect ***** Disconnect ***** □ Disconnect as a Phone ✓ Connect as an Audio Player Device Info
"Device Info": Select to confirm and change the Bluetooth® device information. (→P.51) ▶When another Bluetooth ^® device is connected - To disconnect the Bluetooth® device, select "Yes". 5 Check that a confirmation screen is displayed when the connection is complete. - If an error message is displayed, follow the guidance on the screen to try again.

INFORMATION

- It may take time if the device connection is carried out during Bluetooth® audio playback. - Depending on the type of Bluetooth® device being connected, it may be necessary to perform additional steps on the device. - When disconnecting a Bluetooth® device, it is recommended to disconnect using this system.

CONNECTING A Bluetooth ^® DEVICE IN A DIFFERENT WAY

▶From the phone top screen →P.158 ▶From the Bluetooth ^ audio control screen →P.106 ▶From the phone settings screen →P.175

AUTO CONNECTION MODE

To turn auto connection mode on, set "Bluetooth Power" to on. (→P.52) Leave the Bluetooth® device in a location where the connection can be established. - When the power switch is turned to ACCESSORY or ON mode, the system searches for a nearby registered device. - The system will connect with the registered device that was last connected, if it is nearby. When automatic connection priority is set to on and there is more than one registered Bluetooth® phone available, the system will automatically connect to the Bluetooth® phone with the highest priority. (→P.53)

CONNECTING MANUALLY

When the auto connection has failed on "Bluetooth Power" is turned off, it is necessary to connect the Bluetooth® device manually. 1 Press the "MENU" button. 2 Select "Setup". 3 Select "Bluetooth". 4 Follow the steps in "CONNECTING A Bluetooth® DEVICE" from "STEP 2". (→P.48)

RECONNECTING THE Bluetooth® PHONE

If a Bluetooth ^® phone is disconnected due to poor reception from the Bluetooth ^® network when the power switch is in ACCESSORY or ON mode, the system automatically reconnects the Bluetooth ^® phone.

REGISTERING A Bluetooth® DEVICE

Up to 5 Bluetooth ^® devices can be registered. Bluetooth ^® compatible phones (HFP) and audio players (AVP) can be registered simultaneously. This operation cannot be performed while driving. 1 Display the Bluetooth ^ settings screen. (→P.47) 2 Select "Add New Device". ▶When another Bluetooth ^® device is connected - To disconnect the Bluetooth® device, select "Yes". ▶When 5 Bluetooth ^® devices have already been registered - A registered device needs to be replaced. Select "Yes", and select the device to be replaced. 3 Follow the steps in "REGISTERING A Bluetooth® PHONE FOR THE FIRST TIME" from "STEP 5". (→P.42)

DELETING A Bluetooth® DEVICE

1 Display the Bluetooth ^ settings screen. (→P.47) 2 Select "Remove Device". 3 Select the desired device. ![](images/f849aed139b60dae2b6ab0536ff5d726943e09d9870b2d1c8e35267ea29a85a5.jpg)
text_image Remove Device 8:03 Select a device to remove: 0 ****** *
4 Select "Yes" when the confirmation screen appears. 5 Check that a confirmation screen is displayed when the operation is complete.

INFORMATION

\- When deleting a Bluetooth ^® phone, the contact data will be deleted at the same time.

EDITING THE Bluetooth® DEVICE INFORMATION

The Bluetooth® device's information can be displayed on the screen. The displayed information can be edited. 1 Display the Bluetooth ^ settings screen. (→P.47) 2 Select "Registered Device". 3 Select the desired device to be edited. 4 Select "Device Info". ![](images/7c65f15a8a451bfd6d4f8d31ac923127b2e571c5a9edce438f2e24b0de8a84b9.jpg)
text_image Connect ******** Disconnect ******** Disconnect as a Phone Connect as an Audio Player Device Info
5 Confirm and change the Bluetooth ^® device information. ![](images/55cace1a6a655991ac714e6b5e36ee819fa6521022c916aea3f0d97296d8527b.jpg)
text_image Device Information 8:05 Device Name ********___ Connect Audio Player From Vehicle Bluetooth Address ********___ Phone Number ********___ Supported Profiles: Default 1 2 3 4 6 11/09/2017-11-01 Device Information 8:06 Connect Audio Player From Vehicle Bluetooth Address ********___ Phone Number ********___ Supported Profiles: HFP, CPP, PBAP, AZDP, AWRCP, MAP Default 6 11/09/2017-11-01
No.Information
1The name of the Bluetooth® device.Can be changed to a desired name.(→P.52)
2Select to set the Bluetooth® audio player connection method. (→P.52)
3Device address is unique to the device and cannot be changed.
4Phone number of the Bluetooth® phone.
5Compatibility profile of the Bluetooth® device.
6Select to reset all setup items.

INFORMATION

- If 2 Bluetooth ^ devices have been registered with the same device name, the devices can be distinguished by referring to the device addresses. ● Depending on the type of phone, some information may not be displayed.

CHANGING A DEVICE NAME

1 Select "Device Name". 2 Enter the name and select "OK".

INFORMATION

●Even if the device name is changed, the name registered in your Bluetooth ^® device does not change.

SETTING AUDIO PLAYER CONNECTION METHOD

1 Select "Connect Audio Player From". 2 Select the desired connection method. ![](images/b32eb7e523efcb8f1a3361a3b58c3c036557975315134e55dbdc2aaeda23a93d.jpg)
text_image Device Information 8:06 Device Name ********** Cavon1 Audio Player From • Vehicle • Device Bluetooth Address ********** Default
"Vehicle": Select to connect the audio player from the vehicle's audio/visual system. "Device": Select to connect the vehicle's audio/visual system from the audio player. \- Depending on the audio player, the "Vehicle" or "Device" connection method may be best. As such, refer to the manual that comes with the audio player.

SETTING Bluetooth® SYSTEM

The Bluetooth® settings can be confirmed and changed. 1 Display the Bluetooth ^ settings screen. (→P.47) 2 Select "Detailed Settings". 3 Select the desired item to be set. ![](images/c24b205d3a72f7c22739805a669c69785605244b500beda256540756ad9b2f5c.jpg)
text_image Detailed Settings 8:07 — Bluetooth Power On 1 Preferred Device Settings 2 System Information 3 Default 4
No.Information Page
1Select to set Bluetooth®connection on/off.53
2Select to change the automatic connection priority of the registered Bluetooth®devices.53
3Select to edit the system information.54
4Select to reset all setup items.

CHANGING "Bluetooth Power"

1 Select "Bluetooth Power".

When "Bluetooth Power" is on: The Bluetooth ^® device is automatically connected when the power switch is turned to ACCESSORY or ON mode. When "Bluetooth Power" is off: The Bluetooth ^® device is disconnected, and the system will not connect to it next time.

INFORMATION

●While driving, the auto connection state can be changed from off to on, but cannot be changed from on to off.

SETTING AUTOMATIC CONNECTION PRIORITY

The automatic connection priority of the registered Bluetooth ^® devices can be changed. 1 Select "Preferred Device Settings". 2 Select the desired item to be set. ![](images/b7d606ca2a9f805f866d9d45f903bde967366be16e342bf8495a1d2be2a99525.jpg)
text_image Preferred Device Settings 8:07 Preferred Device Settings Preferred Phones (*.**) > 2 Preferred Audio Players (*.**) > 3 Default 4
No.Function Page
1Select to set automatic connection priority on/off.
2Select to change the automatic connection priority of the registered Bluetooth® phones.54
3Select to change the automatic connection priority of the registered Bluetooth® audio players.54
4Select to reset all setup items.

CHANGING Bluetooth® D E V AUTOMATIC CONNECTION PRIORITY

1 Select "Preferred Phones" or "Preferred Audio Players". 2 Select the desired Bluetooth® device and select "Move Up" or "Move Down" to change the preferred order. ![](images/721551c45b1de3cacc23b23180d235d08f07715acf5ebca0d464e9592a975801.jpg)
text_image Preferred Phones 8:08 Change the order of automatic connection. 1. ********** 2. ********** Move Up Move Down

INFORMATION

●A newly registered Bluetooth® device will automatically be given the highest automatic connection priority.

C EDITING THE SYSTEM INFORMATION

1 Select "System Information". 2 Select the desired item to be set. ![](images/6f26393dd9bd12ce7dfb5405ade977b6b69954149c5ad9137c2e314161e5c110.jpg)
text_image System Information 8:12 System Name ******** > 1 System PN Code 0000 > 2 Bluetooth Address ******** ** 3 Display Phone Status OFF 4 Display Audio Player Status OFF 5 Default 7 System Information 8:12 Bluetooth Address ******** * Display Phone Status OFF 6 Display Audio Player Status OFF 7 Supported Profiles: HFP, SPP, OPP, PBAP, AZOP, AVRCP, MAP Default 7
No.Function
1Displays system name. Can be changed to a desired name. (→P.55)
2PIN code used when the Bluetooth® device was registered. Can be changed to a desired code. (→P.55)
3Device address is unique to the device and cannot be changed.
4Select to set the connection status display of the phone on/off.
5Select to set the connection status display of the audio player on/off.
6Compatibility profile of the system.
7Select to reset all setup items.

EDITING THE SYSTEM NAME

1 Select "System Name". 2 Enter a name and select "OK".

EDITING THE PIN CODE

1 Select "System PIN Code". 2 Enter a PIN code and select "OK".

2. CONNECTIVITY SETTINGS

3. Wi-Fi® Hotspot

By connecting a device to the vehicle via Wi-Fi ^® , it can access the internet through the DCM. - To use this function, a Wi-Fi ^ Hotspot service subscription from Verizon Wireless is required. Contact your Toyota dealer for details. - This function is not made available in some countries or areas.

CONNECTING A DEVICE TO THE IN-VEHICLE ACCESS POINT

SEARCHING FOR AND CONNECTING A DEVICE TO THE VEHICLE ACCESS POINT

1 Enable the Wi-Fi ^ Hotspot function. (→P.56) 2 Disable the "Hide Access Point" function. (→P.56) 3 Search for the vehicle access point using the device you wish to connect. - For details about operating the device, refer to the documentation which came with it. 4 Operate the device to connect it to the vehicle access point. - To check the vehicle access point password, check "Password". (→P.58)

INFORMATION

●Hints for connecting to the vehicle via Wi-Fi® can be displayed. (→P.56)

CONNECTING A DEVICE TO THE IN-VEHICLE ACCESS POINT USING THE ACCESS POINT NAME (SSID)

1 Enable the Wi-Fi ^ Hotspot function. (→P.56) 2 Enable the "Hide Access Point" function. (→P.56) 3 Enter the access point name (SSID) into the device you wish to connect and connect it. - To check the vehicle access point password, check "Password". (→P.58) - The security settings on the device must be the same as that displayed for "Security". (→P.58) - For details about operating the device, refer to the documentation which came with it.

CHANGING THE Wi-Fi® SETTINGS

1 Press the "MENU" button. ![](images/e861230e2406fff5745cbf07d63e3ab1a2c77341a0758b8dc813abc18b7ead03.jpg)
text_image MLNU BC105S
2 Select "Setup". 3 Select "Wi-Fi".

4 Select the desired setting to change.

![](images/8b7f62447c9e8300725253981df49af39871281a1e23f67c899d7013161246a7.jpg)
text_image Setup 1:13 Wi-Fi Hotspot On New document. You can look for the wireless access point "**********" from your mobile devices. Password > How to Connect 2 3 Setup 1:13 Password > How to Connect 4 5 6 7 Navigation Hide Access Point Off Security WPA2 (AES) W-Fi Enter App Side Access Point Name > Channel > #W-PI-13-13-13
No.Function Page
1Select to enable/disable the Wi-Fi ^ Hotspot function.57
2Select to check/change the access point password.58
3Select to display hints for connecting to the vehicle via Wi-Fi ^ .
4Select to make the access point searchable/un-searchable.
5Select to check/change the security protocol of the access point (for authentication and encryption).58
6Select to change the access point name (SSID).58
7Select to change the Wi-Fi ^ connection channel (within the 2.4GHz frequency band).58

INFORMATION

\- If any settings have been changed, it will be necessary to reset the Wi-Fi® system to complete the changes. To reset the Wi-Fi® system, select "Yes" on the pop-up displayed after changing the settings.

ENABLING/DISABLING THE Wi-Fi® HOTSPOT FUNCTION

When the Wi-Fi ^ Hotspot function is enabled, the system checks for a valid Hotspot service subscription. If a Hotspot service subscription has not been started, start the Toyota Entune App Suite Connect application to activate the service subscription. (If the Toyota Entune App Suite Connect application has not been installed, install the application.) Contact your Toyota dealer for details about the Toyota Entune App Suite Connect application.

CHECKING/CHANGING THE PASSWORD

1 Select "Password". 2 Check that the following screen is displayed. ![](images/2106dfb16bea023d16907899436d205e013088a3ecfa7fb67c4ced2220441a4a.jpg)
text_image Password 1:13 Current password: ********** Show Characters Off 2 Change Password > 3
No. Function/information
1Displays the password
2Select to display/hide the entered password.
3Select to change the password.

CHANGING THE PASSWORD

1 Select "Change Password". 2 Enter the desired password and select "OK". ● The password must be at least 8 characters long. - The password with non-ASCII can not be used.

CHANGING THE SECURITY PROTOCOL

1 Select "Security". 2 Select the desired security protocol.

CHANGING THE ACCESS POINT NAME (SSID)

1 Select "Access Point Name". 2 Enter the desired access point name (SSID) and select "OK".

SELECTING A Wi-Fi® CONNECTION CHANNEL

1 Select "Channel". 2 Check that the following screen is displayed. ![](images/20dabcf6af8145baf47be743855e69264d31c4555ac890481751dd7db8d7d87c.jpg)
text_image Channel 1:13 Select Channel Auto 1 Select Mode 2
No. Function
1Select to change the channel selection to automatic/manual.
2When “Manual” is selected, select to change the channel.

CHANGING THE CHANNEL

1 Set "Select Channel" to "Manual". 2 Select "Channel Number". 3 Enter the desired channel number and select "OK". ● Channels 1 through 11 can be selected.

Wi-Fi® FUNCTION OPERATING HINTS

![](images/b067b9a27454da25180ac9aa40e13ab29595401e40d768dc45d0ef4a228d4e66.jpg)

WARNING

- Use Wi-Fi ^® devices only when safe and legal to do so. - Your audio unit is fitted with Wi-Fi ^ antennas. People with implantable cardiac pacemakers, cardiac resynchronization therapy-pacemakers or implantable cardioverter defibrillators should maintain a reasonable distance between themselves and the Wi-Fi ^ antennas. The radio waves may affect the operation of such devices. Before using Wi-Fi ^® devices, users of any electrical medical device other than implantable cardiac pacemakers, cardiac resynchronization therapy-pacemakers or implantable cardioverter defibrillators should consult the manufacturer of the device for information about its operation under the influence of radio waves. Radio waves could have unexpected effects on the operation of such medical devices.

INFORMATION

Wi-Fi ^® is a registered mark of the Wi-Fi Alliance ^® . - If a connected device is taken out of the Wi-Fi® connection area, the connection will be severed. - If the vehicle is driven out of the cellular communication coverage area, connecting to the internet via the Wi-Fi® Hotspot will not be possible. - If a Bluetooth ^ device is used while a device is connected using the Wi-Fi ^ Hotspot function, the communication speed may decrease. ● Depending on the environment in which the access point is used, the communication speed may be low or communication may not be possible.

CONDITIONS DISPLAYED WITH Wi-Fi® ICON

The condition of Wi-Fi ^® connection appears on the right upper side of the screen. ( P.18)

SPECIFICATIONS

● Communication standards IEEE 802.11b IEEE 802.11g IEEE 802.11n (2.4GHz) - Security WPA™ WPA2™ - WPA ^TM and WPA2 ^TM are trademark of Wi-Fi Alliance ^ .

3. OTHER SETTINGS

1. GENERAL SETTINGS

Settings are available for system time, operation sounds, etc. 1 Press the "MENU" button. ![](images/3e061e3cd686cbd0d86a55616e2e89ef4be7ea8f963561028553f2318d5471c4.jpg)
text_image MENU BC105S
2 Select "Setup". - If the general settings screen is not displayed, select "General". 3 Select the desired items to be set. GENERAL SETTINGS SCREEN ![](images/0a25fbd1bea180808f61befdefe14496a6dd5c20492e212527ebe7d06bcf25d1.jpg)
text_image Setup 4:37 Ground System Time Bluetooth Language English Audio Customize Home Screen Phone Theme Setting Voice Brep OFF Unit of Temperature F 1 2 3 4 5 6
![](images/22de6d9c11c05898749e250801f3f66fd87d68b8c03a377acad935917a4e47cb.jpg)
text_image Setup 4:37 Units of Measurement mile Bluetooth Auto Change to Screen OFF Audio Keyboard Layout QWERTY Phone Delete Keyboard History Voice Memotize Keyboard History On Animation On 7 8 9 10 11 12
![](images/ef273dd218e81d33093c5ae178a325b3cc190fa08c6caf2d738ea10f1415ce7a.jpg)
text_image Setup 4:37 General Driver Setting Bluetooth Delete Personal Data Audio Software Update Phone Software Update Setting Voice Gracemery Database Update Software Information 13 14 15 16 17 18
![](images/c870cf9fe35a28715860686e3e802cfd42ab7ca3010bf9b8d1f7be5b435f1ce7.jpg)
text_image Setup General Delete Personal Data Bluetooth Software Update Audio Software Update Setting Phone Gracemote Database Update Voice Software Information SW Sensitivity Level 2 19
No.Function
1Select to change the time zone and set the daylight saving time on/off. (→P.62)
2Select to change the language.
3Select to customize the home screen. (→P.34)
4Select to change the screen theme settings.
5Select to turn the beep sound on/ off.
6Select to change the unit of temperature.
7Select to change the unit of measure for distance.
8Select to set automatic screen changes from the audio control screen to the home screen to on/ off. When set to on, the screen will automatically return to the home screen from the audio control screen after 20 seconds.
9Select to change the keyboard layout.
10Select to delete the keyboard history.
11Select to set the memorize keyboard history on/off.
12Select to set the animations on/off.
No. Function
13Select to change the driver set- tings. (→P.62)
14Select to delete personal data. (→P.63)
15Select to update software versions. For details, contact your Toyota dealer.
16Select to set software update set- tings. (→P.63)
17Select to update “Gracenote ^® ” da- tabase versions. For details, con- tact your Toyota dealer.
18Select to display the software infor- mation. Notices related to third par- ty software used in this product are enlisted. (This includes instructions for obtaining such software, where applicable.)
19Select to change the capacitive touch screen button sensitivity to 1 (low), 2 (medium), or 3 (high).
2 BASIC FUNCTION

SYSTEM TIME SETTINGS

1 Display the general settings screen. (→P.60) 2 Select "System Time". 3 Select the desired items to be set. ![](images/63216863a1032fc2908528a1252a08c643b1465bc2721e6b52a5cb265a0a37d6.jpg)
text_image System Time Time Zone Esters 1 Daylight Saving Time On 2 The time settings on this screen are only for the multimedia system and will not affect any other vehicle clocks.

No. Function

![](images/f54f90b898545ed3d52d9b7f23178b93867e505302799b1b292c1f04d394c17a.jpg) Select to change the time zone. (→P.62) ![](images/3999a62e177db499cb568d1a12f1c37cac483bc0967157e88983e6e0a1e017e2.jpg) Select to set daylight saving time on/off.

TIME ZONE

A time zone can be selected and GMT can be set. 1 Select "Time Zone". 2 Select the desired time zone. - If "Other" is selected, the zone can be adjusted manually. Select "+" or "-" to adjust the time zone.

DRIVER SETTINGS

The driver settings feature will allow the system to link some preferences (such as audio presets, screen theme, language, etc.) to a paired Bluetooth ^® phone. 1 Display the general settings screen. (→P.60) 2 Select "Driver Setting". 3 Select "Enable This Feature". ![](images/e7ce52e30c35d80ad992406dce2bf11033b419a2b7a72c03038c9d536bdb8a19.jpg)
text_image Driver Setting 4:46 The Driver Setting feature will allow the system to link some preferences (such as audio presets, button colors, language, etc.) to a paired Bluetooth phone. Please note that by enabling this feature, you will need to make sure it connect to the correct phone in order to get your settings. Enable This Feature Manually Select Linked Settings
■MANUALLY SELECT LINKED SETTINGS 1 Select "Manually Select Linked Settings". 2 Select the desired phone. ![](images/c58aaeb79431def2e6075b97a752d0451217b14b373a5bd0377a1700f72771ef.jpg)
text_image Manually Select Linked Settings 4:46 Select which phone's linked settings to text. Please select that only the settings linked to that phone will be listed. The phone will not be connected. 1 masked** 2 masked** 3 masked**
● After a few seconds, loaded screen automatically switches to the home screen.

DELETING PERSONAL DATA SOFTWARE UPDATE

1 Display the general settings screen. (→P.60) 2 Select "Delete Personal Data". 3 Select "Delete". 4 Select "Yes" when the confirmation screen appears. \- Registered or changed personal settings will be deleted or returned to their default conditions. For example: - General settings - Navigation settings - Audio settings - Phone settings

SETTINGS

When the automatic update check function is enabled, if a software update is available from the Toyota En-tune center, a message will be displayed. 1 Display the general settings screen. (→P.60) 2 Select "Software Update Setting". 3 Select "Automatic Update Check" to enable/disable the automatic update check function. ![](images/8e04bb2fe9d6693ce373105de74281e45b73f910cb9d60ecf6e6d52bcbb34a38.jpg)
text_image Software Update Settings 4:46 Automatic Update Check OFF Default

INFORMATION

\- When software update information is displayed, contact your Toyota dealer.

3. OTHER SETTINGS

2. VOICE SETTINGS

Voice volume, etc. can be set. 1 Press the "MENU" button. ![](images/327d8a949a80e154b700eb457cf4b56b44f890b337c46e0cf397f693e801351d.jpg)
text_image MENU BC105S
2 Select "Setup". 3 Select "Voice". 4 Select the desired items to be set. VOICE SETTINGS SCREEN ![](images/2eb863e268bea0e2fdff29f031b300805ccbc48799def82ae2b482fcb1dcb5c3.jpg)
text_image Setup 4:46 General Voice Volume 4 Bluetooth Automatic Navigation Guidance On Audio Voice Guidance at All Modes On Phone Voice Recognition Promers High Voice Train Voice Recognition Voice Recognition Tutorial
![](images/0cd1ea0ca648a66d087633fcb7bfc0c1330b099b44afd414286bc698ec193fd6.jpg)
text_image Setup 4:46 General Train Voice Recognition Bluetooth Voice Recognition Tutorial Audio Guidance Tone Type Type 1 Phone Voice Prompt Interrupt OFF Voice Web Search Engine Default 7 8 9 10
No. Function
1Select to adjust the volume of voice guidance.
2Select to set the voice guidance during route guidance on/off.
3Select to set the voice guidance during audio/visual system use on/off.
4Select to set the voice recognition prompts.
5Select to train voice recognition. The voice command system adapt the user accent.
6Select to start the voice recognition tutorial.
7Select to set the beep sound of navigation guidance.
8Select to set the voice prompt interrupt on/off.
9Select to set the web search engine. The search engines are Toyota En-tune App Suite Connect applica-tions. (→P.267)
10Select to reset all setup items.

3. OTHER SETTINGS

3. VEHICLE SETTINGS

Settings are available for maintenance, vehicle customization, etc. 1 Press the "MENU" button. ![](images/aef67af4e2fd05899bb5b494340e638ee6a251848f37c4fc35a358190affa4bd.jpg)
text_image M:NU BC105S
2 Select "Setup". 3 Select "Vehicle". 4 Select the desired items to be set. ![](images/ee59249264323e750ce378b3dd5bdff4ae3b621e2d09e81a2e75f9f24e51af1b.jpg)
text_image Setup 9:25 Maintenance 1 Vehicle Customization 2 Navigation TOYOTA Park Assist 3 Entire App Satir Valent Mode 4 Traffic Data Servicers
No.Function Page
1Select to set maintenance.65
2Select to set vehicle customization.“Owner's Manual”
3Select to set intuitive parking assist.“Owner's Manual”
4Select to set valet mode.68

MAINTENANCE

When this system is turned on, the maintenance reminder screen displays when it is time to replace a part or certain components. (→P.30) 2 Select "Maintenance". 3 Select the desired item. 1 Display the vehicle settings screen. (→P.65) ![](images/f53c335892f13c11294b7e5755300ca1721a2d3956ecbf0b0f981b8280b2b5f7.jpg)
text_image Maintenance 9:30 Reminder Engine Oil Off-Pipe Rotation Trees Battery Brake Pad Wipers Contact Balance Oil Travel Pack Service Air Filter Personal Personal Personal Delete All Reset All Call Dealer Dealer Info
No. Function
1Select to set a reminder for a part or component.
2Select to add a reminder other than the provided ones.
3Select to cancel all reminders which have been entered.
4Select to reset all reminders which have expired.
5Select to call the registered dealer.
6Select to register/edit dealer information. (→P.66)
7The system is set to give maintenance information with the maintenance reminder screen. (→P.30)

INFORMATION

\- When the vehicle needs to be serviced, the screen button color will change to orange.

MAINTENANCE INFORMATION SETTING

1 Select the desired part or component screen button. - When the vehicle needs to be serviced, the screen button color will change to orange. 2 Set the conditions. ![](images/a0e8a26b8a489f59ea1c52a4d3a9fd527b71dfe30f75789b747b60c7bdae8291.jpg)
text_image Date 1 Mio/Y 10/ 10/ 2017 Distance 2 30000 mi Remaining 0 ms Delete Reset OK

No. Function

1 Select to enter the next maintenance date. 2 Select to enter the driving distance until the next maintenance check. 3 Select to cancel the conditions which have been entered. 4 Select to reset the conditions which have expired. 3 Select "OK" after entering the conditions.

INFORMATION

- For scheduled maintenance information, refer to "Scheduled Maintenance Guide" or "Owner's Manual Supplement". ● Depending on driving or road conditions, the actual date and distance that maintenance should be performed may differ from the stored date and distance in the system.

DEALER SETTING

Dealer information can be registered in the system. With dealer information registered, route guidance to the dealer is available. 1 Select "Set Dealer". 2 Select the desired item to search for the location. (→P.208) ● The editing dealer screen appears after setting the location. 3 Select the desired items to be edited. ![](images/e96328184b661c4c5455a38b3bfe8058a0b4998f7efa102f68c221211f5ab685.jpg)
text_image Dealer 21:34 Dealer 1 Contact 2 Location 3 Phone 4 Delete Dealer 5 Enter 6
No.Function Page
1Select to enter the name of a dealer.67
2Select to enter the name of a dealer member.67
3Select to set the location. 67
4Select to enter the phone number.67
5Select to delete the dealer information displayed on the screen.
6Select to set the displayed dealer as a destination.219

EDITING DEALER OR CONTACT NAME

1 Select "Dealer" or "Contact". 2 Enter the name and select "OK".

EDITING THE LOCATION

1 Select "Location". 2 Scroll the map to the desired point (→P.198) and select "Enter".

EDITING PHONE NUMBER

1 Select "Phone #". 2 Enter the phone number and select "OK".

VALET MODE

The security system can be set to on by entering a security code (4-digit number). When set to on, the system will become inoperative once the electrical power source is disconnected until the security code is entered.

SETTING THE VALET MODE

1 Display the vehicle settings screen. (→P.65) 2 Select "Valet Mode". 3 Enter the 4-digit personal code and select "OK". 4 Enter the same 4-digit personal code again and select "OK". - The system will request that you input the security code again to confirm that you remember it correctly. - When valet mode activates, the system stops and a security code (4-digit number) standby screen is displayed. (→P.68)

INFORMATION

\- If the 4-digit personal code is forgotten, please contact your Toyota dealer.

IF THE VALET MODE HAS BEEN ACTIVATED

1 Enter the 4-digit personal code and select "OK".

INFORMATION

\- If an incorrect security code (4-digit number) is entered 6 times, the system will not accept another security code (4-digit number) for 10 minutes.

3

AUDIO/VISUAL SYSTEM

1 BASIC OPERATION

1. QUICK REFERENCE 72 2. SOME BASICS.... 74 TURNING THE SYSTEM ON AND OFF 74 SELECTING AN AUDIO SOURCE ..... 74 DISC SLOT 75 USB/AUX PORT 76 SOUND SETTINGS 76 AUDIO SCREEN ADJUSTMENT...... 78 VOICE COMMAND SYSTEM 79

3

AUDIO/VISUAL SYSTEM

2 RADIO OPERATION

1. AM/FM/SiriusXM (SXM) RADIO.... 80

OVERVIEW 80 PRESETTING A STATION.... 82 CACHING A RADIO PROGRAM...... 82 SELECTING A STATION FROM THE LIST 84 RADIO OPTIONS 85 RADIO BROADCAST DATA SYSTEM 85 USING HD Radio™ TECHNOLOGY ..... 86 AVAILABLE HD Radio™ TECHNOLOGY 86 HD Radio™ TROUBLESHOOTING GUIDE.... 87 HOW TO SUBSCRIBE TO SiriusXM Satellite Radio.... 88 DISPLAYING THE RADIO ID.... 90 IF THE SATELLITE RADIO TUNER MALFUNCTIONS.... 91

2. INTERNET RADIO 92

LISTENING TO INTERNET RADIO ..... 92

3 MEDIA OPERATION

1. CD 93 OVERVIEW 93 2. USB MEMORY...... 96 OVERVIEW 96 3. iPod....99 OVERVIEW 99

4. Bluetooth ^® AUDIO.... 102

OVERVIEW.... 102 REGISTERING/CONNECTING A Bluetooth® DEVICE.... 106

5. AUX 107

OVERVIEW.... 107

4 AUDIO/VISUAL REMOTE CONTROLS

1. STEERING SWITCHES...... 109

5 SETUP

1. AUDIO SETTINGS 111

AUDIO SETTINGS SCREEN.... 111

6 TIPS FOR OPERATING THE AUDIO/VISUAL SYSTEM

1. OPERATING INFORMATION ..... 113

RADIO.... 113 CD PLAYER AND DISC 114 iPod.... 116 HIGH-RESOLUTION SOUND SOURCE 118 FILE INFORMATION 118 TERMS 121 ERROR MESSAGES.... 123

1. BASIC OPERATION

1. QUICK REFERENCE

The audio control screen can be reached by the following methods: ▶From the "AUDIO" button Press the "AUDIO" button. ▶From the "MENU" button Press the "MENU" button, then select "Audio". ![](images/48eb2928088e30223c7e699a096033cb43b6b3869ecac4f7725ba0c2407129d9.jpg)
text_image HOME MENU AUDIO MAP POWER VOLUME SEEK> BC100S Function Page
Using the radio 80, 92
Playing an audio CD or MP3/WMA/AAC disc 93
Playing a USB memory 96
Playing an iPod 99
Playing a Bluetooth® device 102
Using the AUX port 107
Using the steering wheel switches 109
Audio system settings 111

1. BASIC OPERATION

2. SOME BASICS

This section describes some of the basic features of the audio/visual system. Some information may not pertain to your system. Your audio/visual system works when the power switch is in ACCESSORY or ON mode. ![](images/3015fe0d70370271706cbf6dad5f3d7794b4d6d540fbac659fe9215eed630bd6.jpg)

NOTICE

To prevent the battery from being discharged, do not leave the audio/visual system on longer than necessary when the fuel cell system is not operating.

CERTIFICATION

CAUTION:

THIS PRODUCT IS A CLASS I LASER PRODUCT. USE OF CONTROLS OR ADJUSTMENTS OR PERFORMANCE OF PROCEDURES OTHER THAN THOSE SPECIFIED HEREIN MAY RESULT IN HAZARDOUS RADIATION EXPOSURE. DO NOT OPEN COVERS AND DO NOT REPAIR BY YOURSELF. REFER SERVICING TO QUALIFIED PERSONNEL.

TURNING THE SYSTEM ON AND OFF

![](images/49771d0096930c77fe7fc22001d25db78320e6befbc5b3627f6d97ee1731b2e8.jpg)
text_image Diagram of car interior showing dashboard and steering wheel with directional arrow and label BC113S
"POWER/VOLUME" knob: Press to turn the audio/visual system on and off. The system turns on in the last mode used. Turn this knob to adjust the volume.

SELECTING AN AUDIO SOURCE

1 Press the "AUDIO" button. ![](images/9c71ab471cb355e30ea83760d57c9ddf4a3d9ce17af85319b1ee1f1ab22efe32.jpg)
text_image AUDIO .BC106S
2 Select "Source" or press "AUDIO" button again. 3 Select the desired source.

INFORMATION

●Dimmed screen buttons cannot be operated. - When there are two pages, select > or to change the page.

REORDERING THE AUDIO SOURCE

1 Display the audio source selection screen. (→P.74) 2 Select "Reorder". 3 Select the desired audio source then or to reorder. 4 Select "OK".

DISC SLOT

INSERTING A DISC

1 Insert a disc into the disc slot. ![](images/c0551ce4aa94a462a6da2236593b16b75f1640c1be94adec8eb2cbb803883bef.jpg)
natural_image Line drawing of a CD or DVD disc mounted on a screen, with no visible text or symbols
● After insertion, the disc is automatically loaded.

EJECTING A DISC

1 Press the Button and remove the disc. ![](images/c2d01af23625ff40b0bd364f97f780b2404a34805d1362cd95bda49f182822b3.jpg)
text_image BC115S

NOTICE

● Never try to disassemble or oil any part of the CD player. Do not insert anything other than a disc into the slot.

INFORMATION

●The player is intended for use with 4.7 in. (12 cm) discs only. - When inserting a disc, gently insert the disc with the label facing up.

USB/AUX PORT

1 Open the console box. ![](images/c33d1a6a868480e36f5bfa7ddb62e1c24064e72532559ceb0b4d65c23cb7c14c.jpg)
natural_image Technical line drawing of a mechanical assembly with no visible text or symbols
2 Open the cover and connect a device. ![](images/77e868d2d2ba98a466bc9d621f12f6c7d4ab1ad2d840ee0996b94b798499bd3c.jpg)
text_image BC030S
\- Turn on the power of the device if it is not turned on.

INFORMATION

●The AUX port only supports audio input. - If a USB hub is plugged-in, two devices can be connected at a time. ●Even if a USB hub is used to connect more than two USB devices, only the first two connected devices will be recognized.

SOUND SETTINGS

1 Display the audio control screen. (→P.74) 2 Select "Sound". 3 Select the desired item to be set. ![](images/a5f9a45262debffe5ff2f13f6a8fde22d7244339b4ff527ace67dadc2f62d1db.jpg)
text_image CD 8:11 Source New Playing Track List Sound Trottle/Mid/Bass Fade/Balance Automatic Sound Levelize On 1 2 3
No.Function Page
1Select to set the treble/mid/bass.77
2Select to set the fader/balance.77
3Select to set the Automatic Sound Levelizer.78

TREBLE/MID/BASS

How good an audio program sounds is largely determined by the mix of the treble, mid and bass levels. In fact, different kinds of music and vocal programs usually sound better with different mixes of treble, mid and bass. 1 Select "Treble/Mid/Bass". 2 Select the desired screen button. ![](images/539df1412cb839f88e5ab7b6773e93172009c3447a85e6a90aded27a44174508.jpg)
text_image CD 8:11 Source Track/Match/Box Now Playing Track Mid Base Forder/Balance Automatic Sound Levelize On 1 2 3
No. Function
1Select "+" or "-" to adjust high-pitched tones.
2Select "+" or "-" to adjust mid-pitched tones.
3Select "+" or "-" to adjust low-pitched tones.

FADER/BALANCE

A good balance of the left and right stereo channels and of the front and rear sound levels is also important. Keep in mind that when listening to a stereo recording or broadcast, changing the right/left balance will increase the volume of 1 group of sounds while decreasing the volume of another. 1 Select "Fader/Balance". 2 Select the desired screen button. ![](images/f9f00afdb4a823d344c8316892a494a4d2e35702d28b99a146efbde5603f01e1.jpg)
text_image CD 8:12 Source Now Playing Track List Sound 1 Front 2 L 2 R 1 Rear

No. Function

1 Select to adjust the sound balance between the front and rear speakers. 2 Select to adjust the sound balance between the left and right speakers.

AUTOMATIC SOUND LEVELIZER (ASL)

The system adjusts to the optimum volume and tone quality according to vehicle speed to compensate for increased road noise, wind noise, or other noises while driving. 1 Select "Automatic Sound Levelizer". 2 Select to set the Automatic Sound Lev- elizer on/off.

AUDIO SCREEN ADJUSTMENT

SCREEN FORMAT SETTINGS

The screen format can be selected for USB video. 1 Press the "MENU" button. 2 Select "Setup". 3 Select "Audio". 4 Select "Common". 5 Select "Screen Format". 6 Select the desired item to be adjusted. ![](images/33cf75b6484b41e9caf5e6af5829d03c05cfaab7f2e15baf6bd5d2022a9ac966.jpg)
text_image Screen Format 8:15 USB Normal Sinechard Zoomed 1 2 3

No. Function

1 Select to display a 4:3 screen, with either side in black. 2 Select to enlarge the image horizontally and vertically to full screen. 3 same ratio horizontally and vertically.

SCREEN ADJUSTMENT

The contrast and brightness of the screen can be adjusted. 1 Press the "MENU" button. 2 Select "Setup". 3 Select "Audio". 4 Select "Common". 5 Select "Display". 6 Select the desired item to be adjusted.
Screen button Function
“Contrast” “+”Select to strengthen the contrast of the screen.
“Contrast” “-”Select to weaken the contrast of the screen.
“Brightness” “+”Select to brighten the screen.
“Brightness” “-”Select to darken the screen.

VOICE COMMAND SYSTEM

1 Press this switch to operate the voice command system. ![](images/a524cc3d150f6005bdbce86b193ba87de40f1b2fc12471a67e61f8e11e773f18.jpg)
text_image Diagram showing car interior with a highlighted directional arrow and label 'BC013S' in the corner
\- The voice command system and its list of commands can be operated. (→P.126)

2. RADIO OPERATION

1. AM/FM/SiriusXM (SXM) RADIO

OVERVIEW

The radio operation screen can be reached by the following methods: →P.74 CONTROL SCREEN ![](images/10bbdc2d3b5843f7802b499a1b06e1d4c274f055989203feae1b831e97e2b7f3.jpg)
text_image Radio 1 2 3 4 5 6 Source PreCTS Radio Replay Station List Options Sound FM 87.9 ****-HD1 1 87.9 2 98.1 3 002 4 1000 5 001 6 (Add New) 11 10 9 8 7
CONTROL PANEL ![](images/89b02b50c614bc16be1dfe682db0702c5216b179a83af04c6558aecb2244dc51.jpg)
text_image HOME MENU AUDIO MAP POWER VOLUME SEEK >
No.Function Page
1Select to display the audio source selection screen. —
2Select to display the preset station screen. 82
3Select to display the cache radio operation screen. 82
4Select to display a list of receivable stations. 84
5Select to display the radio options screen. 85
6Select to display the sound setting screen. 76
7Select to tune to preset stations/channels. 82
8Displays items on the channels registered to smart favorites.83, 112
9Displays the artist info and song title or album and genre. Select to change the displayed information.Displays messages when available.
10Displays cover art, station logo, etc. —
11Select to display HD) multicast channels available. 86
12With cache radio: Press to play/pause.Without cache radio: Press to turn mute on/off.
13Press to seek for stations in the relevant program type/channel category.Press and hold for continuous seek.
14Turn to step up/down frequencies/channels.Turn to move up/down the list. Also, the knob can be used to enter selections on the list screens by pressing it.
3 AUDIO/VISUAL SYSTEM

INFORMATION

● The radio automatically changes to stereo reception when a stereo broadcast is received. ● The radio automatically blends to an HD Radio signal in AM or FM where available.

PRESETTING A STATION

Radio mode has a mix preset function, which can store up to 36 stations (6 stations per page x 6 pages) from any of the AM, FM or SXM bands. 1 Tune in the desired station. 2 Select "(Add New)". ![](images/da3950b52747c945d7a0b5c96f33d0794361d7785637da7344945fd26bc1d3ec.jpg)
text_image Radio Source FM 87.9 ****-HDI * Presents Radio Replay Station List Options 1 87.9 2 98.1 3 002 →(5) Sound 4 1000 5 001 → 6 (Add Now)
● To change the preset station to a different one, select and hold the preset station. 3 Select "Yes" on the confirmation screen. 4 Select "OK" after setting the new pre-set station.

INFORMATION

●The number of preset radio stations displayed on the screen can be changed. (→P.112)

CACHING A RADIO PROGRAM

AM/FM and SXM radio program can be cached and played back in a time-shifted manner. 1 Select "Radio Replay". 2 Select the desired cache radio operation button. ![](images/67521e90c3c24e29fd6ca94bede2b1de16e26023ca2ba7a1a611c0d412b4718d.jpg)
text_image Radio 8:27 Source FM 87.7 Pensets Radio Player Station List Live Options Sound 1 2 3 4 5 6 7
No. Function
1Returns to the live radio broadcast
2Displays the replay offset from the current time
3Skips backward 2 minutes (AM/FM)Select to change the current/previous track (SXM)
4Fast rewinds continuously
5Pauses the playback (To restart, select ) ▶
6Fast forwards continuously
7Skips forward 2 minutes (AM/FM)Select to change the next track (SXM)

INFORMATION

●The system can store up to 20 minutes of AM/FM and less than 60 minutes of SXM. Cached data will be erased when the radio mode or station is changed or when the audio/visual system is turned off. ●AM/FM: If noise or silence occurs during the caching process, cache writing will continue, with the noise or silence recorded as is. In this case, the cached broadcast will contain the noise or silence when played back.

AUTOMATIC PLAYBACK OF THE CACHE

If the radio broadcast is interrupted by another audio output, such as an incoming phone call, the system will automatically cache the interrupted portion and perform time-shift playback when the interruption ends. This function is available when “Auto Pause” is set to on. (→P.85)

SMART FAVORITES (SXM)

Up to 20 channels can be registered as presets in the cache. Caches the latest less than 30 minutes for each channel. For channel registration: P.112 1 Select channels registered to smart favorites. 2 Select "Radio Replay".

INFORMATION

- When "SXM Tune Start" is turned on ( P.85), the current song is played from the beginning when you select the channel. ● is displayed on the channels registered to smart favorites. (→P.80)

SELECTING A STATION FROM THE LIST

1 Select "Station List". 2 Select "AM", "FM" or "SXM". ▶FM and SXM 3 Select the desired program genre. 4 Select the desired station.

INFORMATION

●The genre list is in the following order: - Classical - Country - EasyLis (Easy Listening) • Inform (Information) • Jazz - News - Oldies - Other - Pop Music - Religion • Rock • R&B (Rhythm and Blues) • Sports • Talk - Traffic (Not available when "HD Radio™" indicator is off.) - Alert (Emergency Alert)

REFRESHING THE STATION LIST

1 Select "Refresh".

"Cancel Refresh": Select to cancel the refresh. "Source": Select to change to another audio source while refreshing.

INFORMATION

●The audio/visual system sound is muted during refresh operation. - In some situations, it may take some time to update the station list.

RADIO OPTIONS

1 Select "Options". 2 Select the desired item. ![](images/5a0539fdb2c3e89e8f5d338db2500ca6e26e99574076d7d2cb76df16d66c486c.jpg)
text_image Radio 8:33 Source Auto Power 1 Off Poids SXM Tune Start 2 On Radio Replay HD Radio AM 3 On Station List HD Radio FM 4 On Options FM Info 5 On Sound Scan 6 Off
No. Function
1Select to turn automatic playback of the cache on/off.
2When “SXM Tune Start” is turned on, the current song is played from the beginning when you select the channel.
3Select to turn digital AM Radio mode on/off.
4Select to turn digital FM Radio mode on/off.
5Analog FM only: Select to display RBDS text messages.
6▶ AM/FMSelect to scan for receivable stations.▶ SXMSelect to seek for stations in the relevant program type/channel category.

RADIO BROADCAST DATA SYSTEM

This audio/visual system is equipped with Radio Broadcast Data Systems (RBDS). RBDS mode allows text messages to be received from radio stations that utilize RBDS transmitters. When RBDS is on, the radio can — only select stations of a particular program type, — display messages from radio sta- tions. RBDS features are available only when listening to an FM station that broadcasts RBDS information and the "FM Info" function is on. (→P.85)

USING HD Radio™ TECHNOLOGY

HD Radio™ Technology is the digital evolution of analog AM/FM radio. Your radio product has a special receiver which allows it to receive digital broadcasts (where available) in addition to the analog broadcasts it already receives. Digital broadcasts have better sound quality than analog broadcasts as digital broadcasts provide free, crystal clear audio with no static or distortion. For more information, and a guide to available radio stations and programming, refer to www.hdradio.com. HD Radio features included in Toyota radios: - Digital Sound - HD Radio broadcasts deliver crystal-clear, digital audio quality to listeners. - HD2/HD3 Channels- FM stations can provide additional digital only audio programming with expanded content and format choices on HD2/HD3 channels. - PSD- Program Service Data (PSD) gives you on-screen information such as artist name and song title. - Artist Experience- Images related to the broadcast are displayed on the radio screen, such as album cover art and station logos.

H ^D Radio®

HD Radio Technology manufactured under license from iBiquity Digital Corporation. U.S. and Foreign Patents. HD Radio™ and the HD, HD Radio, and "Arc" logos are proprietary trademarks of iBiquity Digital Corp.

AVAILABLE HD Radio™ TECHNOLOGY

MULTICAST

On the FM radio frequency most digital stations have “multiple” or supplemental programs on one FM station. 1 Select ![](images/46355e09d6bf1caae1644b2ea979fb0d13a128e573a074b59ed7b9ba240fe0ca.jpg) 2 Select the desired channel. \- Turning the "TUNE/SCROLL" knob can also select the desired multicast channel. HD Radio™ TROUBLESHOOTING GUIDE
Experience Cause Action
Mismatch of time alignment a user may hear a short period of programming re-played or an echo, stutter or skip.The radio stations analog and digital volume is not properly aligned or the station is in ballgame mode.None, radio broadcast issue. A user can contact the radio station.
Sound fades, blending in and out.Radio is shifting between analog and digital audio.Reception issue, may clear-up as the vehicle continues to be driven.Turning the indicator of the “HD RadioTM” button off can force radio in an analog audio.
Audio mute condition when an HD2/HD3 multicast channel had been playing.The radio does not have access to digital signals at the moment.This is normal behavior, wait until the digital signal returns. If out of the coverage area, seek a new station.
Audio mute delay when selecting an HD2/HD3 multi-cast channel preset.The digital multicast content is not available until HD RadioTM broadcast can be decoded and make the audio available. This takes up to 7 seconds.This is normal behavior, wait for the audio to become available.
Text information does not match the present song audio.Data service issue by the radio broadcaster.Broadcaster should be notified.Complete the form;https://hdradio.com/stations/feedback.
No text information shown for the present selected frequency.Data service issue by the radio broadcaster.Broadcaster should be notified.Complete the form;https://hdradio.com/stations/feedback.
3 AUDIO/VISUAL SYSTEM

HOW TO SUBSCRIBE TO SiriusXM Satellite Radio

To listen to a satellite radio broadcast in the vehicle, a subscription to the SiriusXM Satellite Radio service is necessary. A SiriusXM Satellite Radio is a tuner designed exclusively to receive broadcasts provided under a separate subscription. Availability is limited to the 48 contiguous U.S. states and some Canadian provinces.

HOW TO SUBSCRIBE

It is necessary to enter into a separate service agreement with SiriusXM Satellite Radio in order to receive satellite broadcast programming in the vehicle. Additional activation and service subscription fees apply that are not included in the purchase price of the vehicle and digital satellite tuner. - For complete information on subscription rates and terms, or to subscribe to SiriusXM Satellite Radio: ▶U.S.A. Refer to www.siriusxm.com or call 1-877-447-0011. ▶Canada Refer to www.siriusxm.ca or call 1-877-438-9677.

NOTICE

●SiriusXM Satellite Radio Services—Legal Disclaimers and Warnings \- Fees and Taxes—Subscription fee, taxes, one time activation fee, and other fees may apply. Subscription fee is consumer only. All fees and programming subject to change. Subscriptions subject to Customer Agreement available at www.siriusxm.com. (U.S.A.) or www.siriusxm.ca (Canada) SiriusXM service only available in the 48 contiguous United States and Canada. Explicit Language Notice—Channels with frequent explicit language are indicated with an "XL" preceding the channel name. Channel blocking is available for SiriusXM Satellite Radio receivers by notifying SiriusXM at; U.S.A. Customers: Visit www.siriusxm.com Or calling 1-877-447-0011 Canadian Customers: Visit www.siriusxm.ca Or calling 1-877-438-9677 ![](images/aa7c87c7bfbfd0eac8d428861c9b2efcf443349c85636f84a3080f2363468fcb.jpg)

NOTICE

It is prohibited to copy, decompile, disassemble, reverse engineer, hack, manipulate, or otherwise make available any technology or software incorporated in receivers compatible with the SiriusXM Satellite Radio System or that support the SXM website, the Online Service or any of its content. Furthermore, the AMBE® voice compression software included in this product is protected by intellectual property rights including patent rights, copyrights, and trade secrets of Digital Voice Systems, Inc. Note: this applies to SiriusXM Satellite Radio receivers only and not SXM Ready devices.

INFORMATION

●SiriusXM Radio Services—Descriptions - Radio and Entertainment SiriusXM offers more than 170 satellite radio channels of commercial-free music and premier sports, news, talk, and entertainment. SiriusXM is broadcast via satellites to millions of listeners across the continental United States. SiriusXM subscribers listen to SiriusXM on satellite radio receivers for the car, home, and portable use. More information about SiriusXM is available online at www.siriusxm.com (U.S.A.) or www.siriusxm.ca (Canada). - Infotainment and Data services SiriusXM offers a variety of advanced Infotainment and data services.

INFORMATION

●SiriusXM Radio Services—Subscription Instructions \- For SiriusXM Services requiring a subscription (such as SiriusXM Radio, and some Infotainment & data services), the following paragraph shall be included. Required SiriusXM Radio and some Infotainment & data services monthly subscriptions sold separately after trial period. Subscription fee is consumer only. All fees and programming subject to change. Subscriptions are subject to the Customer Agreement available at www.siriusxm.com (U.S.A.) or www.siriusxm.ca (Canada). SXM service only available in the 48 contiguous United States (U.S.A.) or 10 Canadian provinces (Canada). © 2011 Sirius XM Radio Inc. Sirius, XM and all related marks and logos are trademarks of Sirius XM Radio Inc. All other marks, channel names and logos are the property of their respective owners. For more information, program schedules, and to subscribe or extend subscription after complimentary trial period; more information is available at: USA Customers: Visit www.siriusxm.com or call 1-877-447-0011 Canadian Customers: Visit www.siriusxm.ca or call 1-877-438-9677

INFORMATION

●SiriusXM Satellite Radio is solely responsible for the quality, availability and content of the satellite radio services provided, which are subject to the terms and conditions of the SiriusXM Satellite Radio customer service agreement. - Customers should have their radio ID ready; the radio ID can be found by tuning to "Ch 000" on the radio. For details, see "DISPLAYING THE RADIO ID" below. ●All fees and programming are the responsibility of SiriusXM Satellite Radio and are subject to change.

SATELLITE TUNER TECHNOLOGY NOTICE

Toyota's satellite radio tuners are awarded Type Approval Certificates from Sirius XM Satellite Radio Inc. as proof of compatibility with the services offered by SiriusXM Satellite Radio.

INFORMATION

Satellite tuner The tuner supports only Audio Services (Music and Talk) and the accompanying Text Information of XM® Satellite Radio.

DISPLAYING THE RADIO ID

Each SiriusXM tuner is identified with a unique radio ID. The radio ID is required when activating an SiriusXM service or when reporting a problem. \- If "Ch 000" is selected using the "TUNE/SCROLL" knob, the ID code, which is 8 alphanumeric characters, will be displayed. If another channel is selected, the ID code will no longer be displayed. The channel (000) alternates between displaying the radio ID and the specific radio code.

IF THE SATELLITE RADIO TUNER MALFUNCTIONS

When problems occur with the SXM tuner, a message will appear on the screen. Referring to the table below to identify the problem, take the suggested corrective action.
Message Explanation
“Check Antenna”The SXM antenna is not connected. Check whether the SXM antenna cable is attached securely. Contact your Toyota dealer for assistance.
A short circuit occurs in the antenna or the surrounding antenna cable. Contact your Toyota dealer for assistance.
“No Signal”The SXM signal is too weak at the current location. Wait until your vehicle reaches a location with a stronger signal.
“Chan Unavailable”Selected CH is not available condition.Current receive CH is not available condition.
“Ch Unsubscribed”The channel you selected is no longer available. Wait for about 2 seconds until the radio returns to the previous channel or “Ch 001”. If it does not change automatically, select another channel.
3 AUDIO/VISUAL SYSTEM

INFORMATION

\- Contact the SiriusXM Listener Care Center at 1-877-447-0011 (U.S.A.) or 1-877-438-9677 (Canada).

2. RADIO OPERATION

2. INTERNET RADIO

LISTENING TO INTERNET RADIO

One of Toyota Entune App Suite Connect features is the ability to listen to internet radio. In order to use this service, a compatible phone and the system needs to be set up. For details: →P.267 1 Display the audio source selection screen. (→P.74) 2 Select the desired application screen button. ● The internet radio application screen is displayed. ● Perform operations according to the displayed application screen. - For the instrument panel operation method: P.74 - If a compatible phone is already registered, it will be connected automatically.

INFORMATION

●Other applications can be activated while listening to internet radio. ●Some parts of applications can be adjusted using the switches on the steering wheel. ●For additional information, refer to http://www.toyota.com/Entune/ or call 1-800-331-4331 in the United States, and http://www.toyota.ca/entune or call 1-888-869-6828 in Canada.

3. MEDIA OPERATION

1. CD

OVERVIEW

The CD operation screen can be reached by the following methods: →P.74 ▶Insert a disc →P.75 CONTROL SCREEN ![](images/52a9f2bee5a1451900be5eedb2922f185bdfbcdc03aee46e66ec99d61bc06e4d.jpg)
text_image Audio CD CD 8:36 1 Source 2 Noise Playing 3 Track List 4 Sound 5 6 7 8 9 MP3/WMA/AAC disc 10 11 12 CD 8:38 Source Noise Playing File List Browse Sound -4.00 -4.00 -4.00 -4.00 -4.00 -4.00 -4.00 -4.00 -4.00 -4.00 -4.00 -4.00 -4.00 -4.00 -4.00 -4.00 -4.00 -4
CONTROL PANEL ![](images/6f7e3c5d0cb26daa959b59a12a07a60d238c3f7f7793f7943cad928602735d63.jpg)
text_image 14 15 16 HOME MENU AUDIO MAP POWER VOLUME SEEK >
No.Function
1Select to display the audio source selection screen.
2Select to return to the top screen.
3Select to display a track list screen.
4Select to display the sound setting screen. (→P.76)
5Select to set repeat playback.• Each time is selected, the mode changes as follows:► Audio CDtrack repeat→off► MP3/WMA/AAC discfile repeat→folder repeat*→off*: When random playback is off.
6Select to change the track/file.Select and hold to fast rewind.
7Select to play/pause.
8Select to change the track/file.Select and hold to fast forward.
9Select to set random playback.Each time is selected, the mode changes as follows:Audio CDrandom (1 disc random)→offMP3/WMA/AAC disc1 folder random→all folder random→off
10Displays cover art
11Select to display a file list screen.
12Select to display a folder list.
13Select to change the folder.
14Press to eject the disc.
15Disc slot
16Press to play/pause.
17Press to change the track/file.Press and hold to fast forward/rewind.
18Turn to change the track/file.Turn to move up/down the list. Also, the knob can be used to enter selections on the list screens by pressing it.
3 AUDIO/VISUAL SYSTEM

INFORMATION

- If a disc contains CD-DA files and MP3/WMA/AAC files, only the CD-DA files can be played back. - If a CD-TEXT disc is inserted, the title of the disc and track will be displayed. - If the disc contains no CD-TEXT, only the track number would be displayed on the screen.

3. MEDIA OPERATION

2. USB MEMORY

OVERVIEW

The USB memory operation screen can be reached by the following methods: →P.74 ▶Connect a USB memory →P.76 CONTROL SCREEN ![](images/7e592c23eb2889ac89cb6eeee9cfda4ec2b57409dbedec1f6bdb6b0cbcd319e1.jpg)
text_image ▶USB audio 13 1 2 3 4 5 USB 8:41 12 ▶USB video 11 6 7 8 9 10 USB 8:46 15 Source New Playing Song List Browse Sound Full Screen 14 2.00 18 -0.00 12 HIV J1 J2 J3 J4 J5 J6 J7 J8 J9 J10
CONTROL PANEL ![](images/917cd68d73ffc710980bb21c000296917b8a43a7adc68f20a0d3867943f1328a.jpg)
text_image 16 HOME MENU AUDIO MAP POWER VOLUME SEEK >
No.Function
1Select to display the audio source selection screen.
2Select to return to the top screen.
3Select to display a song list screen.
4Select to display the play mode selection screen.
5Select to display the sound setting screen. (→P.76)
6Select to set repeat playback.Each time is selected, the mode changes as follows:file/track repeat→folder/album repeat*→off*: When random playback is off.
7Select to change the file/track.Select and hold to fast rewind.
8Select to play/pause.
9Select to change the file/track.Select and hold to fast forward.
10Select to set random playback.Each time is selected, the mode changes as follows:1 folder/album random→all folder/album random→off
11Select to change the folder/album.
12Displays cover art
13Select to change the artist.
14Select to display a full screen image.
15Select to change the folder.
16Press to play/pause.
17Press to change the file/track.Press and hold to fast forward/rewind.
18Turn to change the file/track.Turn to move up/down the list. Also, the knob can be used to enter selections on the list screens by pressing it.
3 AUDIO/VISUAL SYSTEM ![](images/66d43f2b57665f011e64bdbf0472671128243b30b545f42920bf1ab65cd34775.jpg)

WARNING

\- Do not operate the player's controls or connect the USB memory while driving. ![](images/aa151b31a751efa656fd68583f38e955565241641000b6db6d7e56f633f24164.jpg)

NOTICE

- Do not leave your portable player in the car. In particular, high temperatures inside the vehicle may damage the portable player. - Do not push down on or apply unnecessary pressure to the portable player while it is connected as this may damage the portable player or its terminal. - Do not insert foreign objects into the port as this may damage the portable player or its terminal.

INFORMATION

●The system can only output the sound while driving. - If tag information exists, the file names will be changed to track names.

3. MEDIA OPERATION

3. iPod

OVERVIEW

The iPod operation screen can be reached by the following methods: →P.74 ▶Connect an iPod →P.76 When the iPod connected to the system includes iPod video, the system can only output the sound by selecting the browse screen. CONTROL SCREEN ![](images/f8c70f4f8bb155026826f64ac5782f9fad8d0ec48a4fc4e778b915652dbe2de9.jpg)
text_image iPod 8:51 14 1 Source 2 Now Playing 3 Song List 4 Browse 5 Sound 6 7 8 9 10 13 12 11 0.17 -3.02 USB3172AI
CONTROL PANEL ![](images/1b786727f9ba65d13057049a4816d8e8f6431e58e9e66b6837a86018b377558b.jpg)
text_image HOME MENU AUDIO MAP POWER VOLUME SEEK > No. Function
1Select to display the audio source selection screen.
2Select to return to the top screen.
3Select to display a song list screen.
4Select to display the play mode selection screen.
5Select to display the sound setting screen. (→P.76)
6Select to set repeat playback.Each time is selected, the mode changes as follows: track repeat→album repeat*→off*: iOS device with Lightning connector
7Select to change the track.Select and hold to fast rewind.
8Select to play/pause.
9Select to change the track.Select and hold to fast forward.
10Select to set random playback.Each time is selected, the mode changes as follows: 1 album random→all album random→off
11Select to change the album.
12Displays cover art

No. Function

13 Select to change the artist. 14 Select to change the playlist. 15 Press to play/pause. 16 - Press to change the track. - Press and hold to fast forward/rewind. \- Turn to change the track. - Turn to move up/down the list. Also, the knob can be used to enter selections on the list screens by pressing it.

WARNING

\- Do not operate the player's controls or connect the iPod while driving.

NOTICE

- Do not leave your portable player in the car. In particular, high temperatures inside the vehicle may damage the portable player. - Do not push down on or apply unnecessary pressure to the portable player while it is connected as this may damage the portable player or its terminal. - Do not insert foreign objects into the port as this may damage the portable player or its terminal.

INFORMATION

- When an iPod is connected using a genuine iPod cable, the iPod starts charging its battery. - Depending on the iPod and the songs in the iPod, iPod cover art may be displayed. This function can be changed to on/off. (→P.111) It may take time to display iPod cover art, and the iPod may not be operated while the cover art display is in process. - When an iPod is connected and the audio source is changed to iPod mode, the iPod will resume playing from the same point it was last used. - Depending on the iPod that is connected to the system, certain functions may not be available. - Files/tracks selected by operating a connected iPod may not be recognized or displayed properly. - The system may not function properly if a conversion adapter is used to connect a device.

3. MEDIA OPERATION

4. Bluetooth® AUDIO

The Bluetooth ^® audio/visual system enables users to enjoy listening to music that is played on a portable player on the vehicle speakers via wireless communication. This audio/visual system supports Bluetooth ^® , a wireless data system capable of playing portable audio music without cables. If your device does not support Bluetooth ^® , the Bluetooth ^® audio/visual system will not function.

OVERVIEW

The Bluetooth ^® audio operation screen can be reached by the following methods: →P.74 ▶Connect a Bluetooth ^® audio device →P.106 Depending on the type of portable player connected, some functions may not be available and/or the screen may look differently than shown in this manual. CONTROL SCREEN ![](images/e07afd92b82e719009ca092b2f729fad493d251e6fa4f8b36a98852eebdb4823.jpg)
text_image Bluetooth Audio 8:58 1 Source 2 Now Playing 3 Song List 4 Browse 5 Connect 6 Sound Track 1 -3:19 7 8 9 10 11 12 13
CONTROL PANEL ![](images/96d38181588df4e65024d4e32486626b44aea5cbaa89b1a784334ade7c807e9c.jpg)
text_image HOME MENU AUDIO MAP POWER VOLUME SEEK >
No.Function
1Select to display the audio source selection screen.
2Select to return to the top screen.
3Select to display a song list screen.
4Select to display the play mode selection screen.
5Select to display the portable device connection screen. (→P.106)
6Select to display the sound setting screen. (→P.76)
7Select to set repeat playback.Each time is selected, the mode changes as follows:track repeat→album repeat*→off*: When random playback is off.
8Select to change the track.Select and hold to fast rewind.
9Select to play/pause.
10Select to change the track.Select and hold to fast forward.
11Select to set random playback.Each time is selected, the mode changes as follows:1 album random→all album random→off

No. Function

12 Select to change the album. 13 Displays cover art 14 Press to play/pause. • Press to change the track. \- Press and hold to fast forward/rewind. • Turn to change the track. \- Turn to move up/down the list. Also, the knob can be used to enter selections on the list screens by pressing it.

WARNING

\- Do not operate the player's controls or connect to the Bluetooth® audio/visual system while driving. \- Your audio unit is fitted with Bluetooth® antennas. People with implantable cardiac pacemakers, cardiac resynchronization therapy-pacemakers or implantable cardioverter defibrillators should maintain a reasonable distance between themselves and the Bluetooth® antennas. The radio waves may affect the operation of such devices. Before using Bluetooth® devices, users of any electrical medical device other than implantable cardiac pacemakers, cardiac resynchronization therapy-pacemakers or implantable cardioverter defibrillators should consult the manufacturer of the device for information about its operation under the influence of radio waves. Radio waves could have unexpected effects on the operation of such medical devices.

NOTICE

\- Do not leave your portable player in the vehicle. In particular, high temperatures inside the vehicle may damage the portable player.

INFORMATION

- Depending on the Bluetooth ^® device that is connected to the system, the music may start playing when selecting while it is paused. Conversely, the music may pause when selecting while it is playing. ●In the following conditions, the system may not function: - The Bluetooth ^ device is turned off. - The Bluetooth® device is not connected. - The Bluetooth® device has a low battery. \- When using the Bluetooth ^ audio and Wi-Fi ^ Hotspot functions at the same time, the following problems may occur: - It may take longer than normal to connect to the Bluetooth® device. • The sound may cut out. \- It may take time to connect the phone when Bluetooth® audio is being played. \- For operating the portable player, see the instruction manual that comes with it. \- If the Bluetooth ^ device is disconnected due to poor reception from the Bluetooth ^ network when the power switch is in ACCESSORY or ON mode, the system will automatically reconnect to the portable player. \- If the Bluetooth ^ device is disconnected on purpose, such as it was turned off, this does not happen. Reconnect the portable player manually. \- Bluetooth ^® device information is registered when the Bluetooth ^® device is connected to the Bluetooth ^® audio/visual system. When selling or disposing of the vehicle, remove the Bluetooth ^® audio information from the system. (→P.63)

REGISTERING/CONNECTING A Bluetooth® DEVICE

To use the Bluetooth ^® audio system, it is necessary to register a Bluetooth ^® device with the system. ▶Registering an additional device 1 Display the Bluetooth ^® audio control screen. (→P.102) 2 Select "Connect". 3 Select "Add Device" - When another Bluetooth device is connected, a confirmation screen will be displayed. To disconnect the Bluetooth device, select "Yes". 4 Follow the steps in "REGISTERING A Bluetooth® PHONE FOR THE FIRST TIME" from "STEP 5". (→P.42) ▶Selecting a registered device 1 Display the Bluetooth ^® audio control screen. (→P.102) 2 Select "Connect". 3 Select the desired device to be connected. 4 Check that a confirmation screen is displayed when the connection is complete. - If an error message is displayed, follow the guidance on the screen to try again.

3. MEDIA OPERATION

5. AUX

OVERVIEW

The AUX operation screen can be reached by the following methods: →P.74 ▶Connect a device to the AUX port →P.76 CONTROL SCREEN ![](images/1ad7361d673236fb8554ebc005ecc08f45da502e2fb73f81c542a557ebd1bb87.jpg)
text_image AUX 9:02 1 Source 2 Now Playing 3 Sound
CONTROL PANEL ![](images/3319ae8e357b1dfc466e64ad35861c9edb0932b0c4b68dec1fcf1998918cb425.jpg)
text_image 4 HOME MENU AUDIO MAP POWER VOLUME SEEK >

No. Function

1 Select to display the audio source selection screen. 2 Select to return to the top screen. 3 Select to display the sound setting screen. (→P.76) 4 Press to turn mute on/off.

WARNING

\- Do not connect portable audio device or operate the controls while driving.

NOTICE

- Do not leave portable audio device in the vehicle. The temperature inside the vehicle may become high, resulting in damage to the player. - Do not push down on or apply unnecessary pressure to the portable audio device while it is connected as this may damage the portable audio device or its terminal. - Do not insert foreign objects into the port as this may damage the portable audio device or its terminal.

4. AUDIO/VISUAL REMOTE CONTROLS

1. STEERING SWITCHES

Some parts of the audio/visual system can be adjusted using the switches on the steering wheel. ![](images/ff92172919973e6fa69179c45886596f92bf2561947a58d214e340f119414596.jpg)
text_image 1 2 3 BCQ17S
No.Switch
1“MODE” switch
2Seek switch
3Volume control switch
▶"MODE" switch
Mode Operation Function
AM, FM, SXM, AUXPress Change audio modes
Press and hold Mute* (Press and hold again to resume the sound.)
Audio CD/MP3/WMA/AAC disc, USB, iPod, Bluetooth®audio, APPSPress Change audio modes
Press and hold Pause (Press and hold again to resume the play mode.)
\*: If cashed radio is enabled, pressing and holding the "MODE" switch pauses the broadcast. (Press and hold again to play back the cashed radio program.) ▶Seek switch
Mode Operation Function
AM, FMPress Preset channel up/down
Press and holdSeek up/down(0.8 sec. or more)Seek up/down continuously while the switch is being pressed(1.5 sec. or more)
SXMPress Preset channel up/down
Press and holdSeek for stations in the relevant program type/channel category (0.8 sec. or more)Fast channel up/down (1.5 sec. or more)
Audio CD/MP3/WMA/AAC disc, USB, iPod, Bluetooth® audioPress Track/file up/down
Press and hold Fast forward/rewind
▶Volume control switch
Mode Operation Function
AllPress Volume up/down
Press and hold Volume up/down continuously

INFORMATION

\- In the APPS mode, some operation may be done on the screen depend on the selected APPS.

5. SETUP

1. AUDIO SETTINGS

Detailed audio settings can be programmed. 1 Press the "MENU" button. ![](images/c06ec9d9be71fc13c8e73613b32d159ef61dc7e99859b14eec924a3bc7c03627.jpg)
text_image M:NU BC105S
2 Select "Setup". 3 Select "Audio". 4 Select the desired items to be set. AUDIO SETTINGS SCREEN ![](images/920309e32cd0babc453857375b43a44a169aad95fa7bd140d9973d231ead57c6.jpg)
text_image Setup 9:03 General Ccommon Bluetooth Radio Audio Phone Voice 1 2
No. Function Page
1Select to set the common settings.111
2Select to set the radio settings.112

COMMON SETTINGS

1 Display the audio settings screen. 2 Select "Common". 3 Select the desired items to be set. ![](images/fccd014a924e1895770c1004ae257b857912fab1b67779ed6b0d1f6483cb82a3.jpg)
text_image Setup 9:05 General Common Bluetooth Display Cover Art On Audio Priority Display of Grocmate Off Phone Screen Format Normal Voice Display 1 2 3 4
No. Function
1Select to set the cover art display on/off.
2Select to set the display of information from the Gracenote database on/off.
3*Select to change the screen format for video output. (→P.78)
4*Select to display the image quality adjustment screen. (→P.79)
\*: Only in USB video mode.

RADIO SETTINGS

1 Display the audio settings screen. 2 Select "Radio". 3 Select the desired items to be set. ![](images/5080d36be35d554e408a7103d276d5c764ff18d64a64a1c12a7ba3e88527c33c.jpg)
text_image Setup 9:06 General Bluetooth Audio Phone Voice Radio Settings Manage Smart Favorites Number of Radio Presets 1 2
No. Function Page
1Select to register smart favorites.112
2Select to change the number of preset radio stations displayed on the screen.112

■REGISTERING MANAGE SMART FAVORITES

1 Select "Manage Smart Favorites". 2 Select the desired channel to be set. ● Displays the registered preset channels. ● Displays the registered preset channels. \- Up to 20 channels can be registered.

■ SETTING THE NUMBER OF RADIO PRESETS

1 Select "Number of Radio Presets". 2 Select the desired number of preset radio stations displayed on the screen.

6. TIPS FOR OPERATING THE AUDIO/VISUAL SYSTEM

1. OPERATING INFORMATION

![](images/db042d8c7719f0ab611c2f43a6b4cbd2292f19d08b2489d35c8cf0c8e1c880e4.jpg)

NOTICE

● To avoid damage to the audio/visual system: - Be careful not to spill beverages over the audio/visual system. - Do not put anything other than an appropriate disc into the disc slot.

INFORMATION

● The use of a cellular phone inside or near the vehicle may cause a noise from the speakers of the audio/visual system which you are listening to. However, this does not indicate a malfunction.

RADIO

Usually, a problem with radio reception does not mean there is a problem with the radio — it is just the normal result of conditions outside the vehicle. For example, nearby buildings and terrain can interfere with FM reception. Power lines or phone wires can interfere with AM signals. And of course, radio signals have a limited range. The farther the vehicle is from a station, the weaker its signal will be. In addition, reception conditions change constantly as the vehicle moves. Here, some common reception problems that probably do not indicate a problem with the radio are described.

FM

Fading and drifting stations: Generally, the effective range of FM is about 25 miles (40 km). Once outside this range, you may notice fading and drifting, which increase with the distance from the radio transmitter. They are often accompanied by distortion. Multi-path: FM signals are reflective, making it possible for 2 signals to reach the vehicle's antenna at the same time. If this happens, the signals will cancel each other out, causing a momentary flutter or loss of reception. Static and fluttering: These occur when signals are blocked by buildings, trees or other large objects. Increasing the bass level may reduce static and fluttering. Station swapping: If the FM signal being listened to is interrupted or weakened, and there is another strong station nearby on the FM band, the radio may tune in the second station until the original signal can be picked up again.

AM

Fading: AM broadcasts are reflected by the upper atmosphere — especially at night. These reflected signals can interfere with those received directly from the radio station, causing the radio station to sound alternately strong and weak. Station interference: When a reflected signal and a signal received directly from a radio station are very nearly the same frequency, they can interfere with each other, making it difficult to hear the broadcast. Static: AM is easily affected by external sources of electrical noise, such as high tension power lines, lightening or electrical motors. This results in static.

SiriusXM

- Cargo loaded on the roof luggage carrier, especially metal objects, may adversely affect the reception of SiriusXM Satellite Radio. - Alternation or modifications carried out without appropriate authorization may invalidate the user's right to operate the equipment.

CD PLAYER AND DISC

● This CD player is intended for use with 4.7 in. (12 cm). discs only. - Extremely high temperatures can keep the CD player from working. On hot days, use the air conditioning system to cool the inside of the vehicle before using the player. - Bumpy roads or other vibrations may make the CD player skip. - If moisture gets into the CD player, the discs may not be able to be played. Remove the discs from the player and wait until it dries. ![](images/9c87233c1cfdb9db1f7424954c25c5a8593494a4a40d3170608f2b4479e0b0d3.jpg)

WARNING

● This CD players use an invisible laser beam which could cause hazardous laser radiation exposure if directed outside the unit. Be sure to operate the player correctly.

CD PLAYER

Audio CDs ![](images/ce0da87a1778e051c139617248071cd280e5fceb8c258f1d846808c254388e21.jpg) ![](images/4bcc1223460a5d7521e16f8b4ddb393df1bd380b0783fa41a1005f7b06074cbf.jpg) ![](images/c4ba2734a038b0c41d1d1e4ceab8678580d8a7b2ab2aaf8e341a25228cae2023.jpg) ![](images/93ea572cfd9b1467c448303ddb59bc18bed34fdf476179d9ec92311842b6d71c.jpg) \- Use only discs marked as shown above. The following products may not be playable on your player: • S A C D - dts CD - Copy-protected CD - Video CD ▶ Special shaped discs ![](images/88d588be7dc50237bf8c39545a8dd8955d2c898a3b584e263a2237adda8b8a79.jpg)
natural_image Four metallic discs with different shapes and a no-smoking symbol (no text or labels)
▶Transparent/translucent discs ![](images/a49165038550f169cc9e008e2ede327be39e6e36858765f678eff3a020971c63.jpg)
natural_image Three optical discs and a CD with a prohibition symbol (no text or labels on discs)
▶Low quality discs ![](images/cbdfb71304ea23738db7dbed31299844bff0de441492c7e0c65d3a82906db3bb.jpg)
text_image US4057TC
▶Labeled discs ![](images/4d4e62fdfd78aaafdf16efc117920fa584537e7e9944d3403cd19749b5f4a209.jpg)
text_image US4058TC

NOTICE

Do not use special shaped, transparent/translucent, low quality or labeled discs such as those shown in the illustrations. The use of such discs may damage the player, or it may be impossible to eject the disc. This system is not designed for use of Dual Discs. Do not us because they may cause damage to the player. - Do not use discs with a protection ring. The use of such discs may damage the player, or it may be impossible to eject the disc. - Do not use printable discs. The use of such discs may damage the player, or it may be impossible to eject the disc. ![](images/fdf62cfc0fb7910143511ba11f222950fe9bf28fc1ee1aa1782e45d0466ab09d.jpg)
text_image Correct Wrong US4059TCa
- Handle discs carefully, especially when inserting them. Hold them on the edge and do not bend them. Avoid getting fingerprints on them, particularly on the shiny side. - Dirt, scratches, warping, pin holes or other disc damage could cause the player to skip or to repeat a section of a track. (To see a pin hole, hold the disc up to the light.) 3 a Dual Discs AUDIO/VISUAL SYSTEM \- Remove discs from the players when not in use. Store them in their plastic cases away from moisture, heat and direct sunlight. ![](images/63f1dbfb708de392def50b1dd54f38e56c970e4d9b79431d9c44258f1ac8d519.jpg)
natural_image Illustration of a hand holding a CD with directional arrows indicating rotation or movement (no text or symbols)
To clean a disc: Wipe it with a soft, lint-free cloth that has been dampened with water. Wipe in a straight line from the center to the edge of the disc (not in circles). Dry it with another soft, lint-free cloth. Do not use a conventional record cleaner or anti-static device.

CD-R/RW DISCS

- CD-R/CD-RW discs that have not been subject to the "finalizing process" (a process that allows discs to be played on a conventional CD player) cannot be played. - It may not be possible to play CD-R/CD-RW discs recorded on a music CD recorder or a personal computer because of disc characteristics, scratches or dirt on the disc, or dirt, condensation, etc. on the lens of the unit. - It may not be possible to play discs recorded on a personal computer depending on the application settings and the environment. Record with the correct format. (For details, contact the appropriate application manufacturers of the applications.) - CD-R/CD-RW discs may be damaged by direct exposure to sunlight, high temperatures or other storage conditions. The unit may be unable to play some damaged discs. - If you insert a CD-RW disc into the player, playback will begin more slowly than with a conventional CD or CD-R disc. - Recordings on CD-R/CD-RW cannot be played using the DDCD (Double Density CD) system.

iPod

Made for ![](images/1567d3cc7898abd029a85110dba56d5eea1f1e299fa19d761a7728c9202aa03a.jpg) iPod iPhone - "Made for iPod" and "Made for iPhone" mean that an electronic accessory has been designed to connect specifically to iPod or iPhone, respectively, and has been certified by the developer to meet Apple performance standards. - Apple is not responsible for the operation of this device or its compliance with safety and regulatory standards. Please note that the use of this accessory with iPod or iPhone, may affect wireless performance. - iPhone, iPod, iPod classic, iPod nano and iPod touch are trademarks of Apple Inc., registered in the U.S. and other countries. ● Lightning is a trademark of Apple Inc. - The Lightning connector works with iPhone 6s Plus, iPhone 6s, iPhone SE, iPhone 6 Plus, iPhone 6, iPhone 5s, iPhone 5c, iPhone 5, iPod touch (5th and 6th generation), and iPod nano (7th generation). - The 30-pin connector works with iPhone 4s, iPhone 4, iPhone 3GS, iPhone 3G, iPhone, iPod touch (1st through 4th generation), iPod classic, and iPod nano (1st through 6th generation). - USB works with iPhone 6s Plus, iPhone 6s, iPhone SE, iPhone 6 Plus, iPhone 6, iPhone 5s, iPhone 5c, iPhone 5, iPhone 4s, iPhone 4, iPhone 3GS, iPhone 3G, iPhone, iPod touch (1st through 6th generation), iPod classic, and iPod nano (1st through 7th generation). - Bluetooth® technology works with iPhone 6s Plus, iPhone 6s, iPhone SE, iPhone 6 Plus, iPhone 6, iPhone 5s, iPhone 5c, iPhone 5, iPhone 4s, iPhone 4, iPhone 3GS, iPhone 3G, iPhone, iPod touch (2nd through 6th generation), and iPod nano (7th generation).

COMPATIBLE MODELS

The following iPod ^® , iPod nano ^® , iPod classic ^® , iPod touch ^® and iPhone ^® devices can be used with this system.

Made for

- iPhone SE - iPhone 6s Plus - iPhone 6s - iPhone 6 Plus \- iPhone 6 \- iPhone 5s \- iPhone 5c \- iPhone 5 \- iPhone 4s \- iPhone 4 \- iPhone 3GS \- iPhone 3G \- iPod touch (6th generation) \- iPod touch (5th generation) \- iPod touch (4th generation) \- iPod touch (3rd generation) \- iPod touch (2nd generation) \- iPod touch (1st generation) \- iPod nano (7th generation) \- iPod nano (6th generation) \- iPod nano (5th generation) \- iPod nano (4th generation) This system only supports audio playback. Depending on difference between models or software versions etc., some models might be incompatible with this system. - iPhone • iPod classic - iPod with video \- iPod nano (3rd generation) \- iPod nano (2nd generation) \- iPod nano (1st generation)

HIGH-RESOLUTION SOUND SOURCE

This device supports high-resolution sound sources. The definition of high-resolution is based on the standards of groups such as the CTA (Consumer Technology Association). Supported formats and playable media are as follows.

■SUPPORTED FORMATS

WAV, FLAC, ALAC, OGG Vorbis

PLAYABLE MEDIA

USB

FILE INFORMATION

COMPATIBLE USB DEVICES
USB communication formatsUSB 2.0 HS (480 Mbps)
File formats FAT 16/32
Correspondence classMass storage class
COMPATIBLE COMPRESSED FILES
Item USBDISC
Compatible file formatMP3/WMA/AACMP3/WMA/AAC
WAV(LPCM)/FLAC/ALAC/OGG Vorbis
Compatible file format (video)*MP4/AVI/WMV
Folders in the deviceMaximum 3000Maximum 192
Files in the deviceMaximum 9999Maximum 255
Files per folderMaximum 255
\*: USB video only CORRESPONDING SAMPLING FREQUENCY
File type Frequency (kHz)
MP3 files: MPEG 1 LAYER 332/44.1/48
MP3 files: MPEG 2 LSF LAYER 316/22.05/24
WMA files: Ver. 7, 8, 9*1 (9.1/9.2)32/44.1/48
AAC files: MPEG4/AAC-LC11.025/12/16/22.05/24/32/44.1/48
WAV (LPCM) files*28/11.025/12/16/22.05/24/32/44.1/48/88.2/96/176.4/192
FLAC*28/11.025/12/16/22.05/24/32/44.1/48/88.2/96/176.4/192
ALAC*28/11.025/12/16/22.05/24/32/44.1/48/64/88.2/96
OGG Vorbis*28/11.025/16/22.05/32/44.1/48
\*1: Only compatible with Windows Media Audio Standard ^2 : Sound source of 48kHz or more is down-converted to 48kHz/24bit. CORRESPONDING BIT RATES\*1
File type Bit rate (kbps)
MP3 files: MPEG 1 LAYER 332 - 320
MP3 files: MPEG 2 LSF LAYER 38 - 160
WMA files: Ver. 7, 8 CBR48 - 192
WMA files: Ver. 9^*2 (9.1/9.2)CBR 48 - 320
AAC files: MPEG4/AAC-LC8 - 320
OGG Vorbis 32-500
\*1: Variable Bit Rate (VBR) compatible \*2: Only compatible with Windows Media Audio Standard
File typeQuantization bit rate (bit)
WAV (LPCM) files16/24FLAC
ALAC
COMPATIBLE CHANNEL MODES
File typeChannel mode
MP3 filesStereo, joint stereo, dual channel and monaural
WMA files2ch
AAC files1ch, 2ch (Dual channel is not supported)
WAV (LP-CM) /FLAC/ALAC/OGG Vorbis2ch
- MP3 (MPEG Audio Layer 3), WMA (Windows Media Audio) and AAC (Advanced Audio Coding) are audio compression standards. ● This system can play MP3/WMA/AAC files on CD-R/CD-RW discs and USB memory. - MP4, WMV and AVI files can use the following resolutions: 128x96, 160x120, 176x144 (QCIF), 320x240 (QVGA), 352x240 (SIF), 352x288 (CIF), 640x480 (VGA), 720x480 (NTSC), 720x576 (PAL) - This system can play disc recordings compatible with ISO 9660 level 1 and level 2 and with the Romeo and Joliet file system and UDF (2.01 or lower). - When naming an MP3/WMA/AAC file, add an appropriate file extension (.mp3/.wma/.m4a). - This system plays back files with .mp3/.wma/.m4a file extensions as MP3/WMA/AAC files respectively. To prevent noise and playback errors, use the appropriate file extension. - This system can play only the first session/border when using multi-session/border compatible discs. - MP3 files are compatible with the ID3 Tag Ver. 1.0, Ver. 1.1, Ver. 2.2 and Ver. 2.3 formats. This system cannot display disc title, track title and artist name in other formats. - WMA/AAC files can contain a WMA/AAC tag that is used in the same way as an ID3 tag. WMA/AAC tags carry information such as track title and artist name. ● The emphasis function is available only when playing MP3 files. ● This system can play back AAC files encoded by iTunes. - The sound quality of MP3/WMA files generally improves with higher bit rates. In order to achieve a reasonable level of sound quality, discs recorded with a bit rate of at least 128 kbps are recommended. - m3u playlists are not compatible with the audio player. - MP3i (MP3 interactive) and MP3PRO formats are not compatible with the audio player. - The player is compatible with VBR (Variable Bit Rate). - When playing back files recorded as VBR (Variable Bit Rate) files, the play time will not be correctly displayed if the fast forward or reverse operations are used. - It is not possible to check folders that do not include MP3/WMA/AAC files. - MP3/WMA/AAC files in folders up to 8 levels deep can be played. However, the start of playback may be delayed when using discs containing numerous levels of folders. For this reason, we recommend creating discs with no more than 2 levels of folders. ![](images/08cf6f210a98d4a4bcefe9c3fdb50a5b5c691902572b84e516a38134d905377d.jpg)
flowchart
graph TD
    A["001.mp3"] --> B["002.wma"]
    B --> C["Folder 1"]
    C --> D["003.mp3"]
    D --> E["Folder 2"]
    E --> F["004.mp3"]
    F --> G["005.wma"]
    G --> H["Folder 3"]
    H --> I["006.m4a"]
● The play order of the compact disc with the structure shown above is as follows: ![](images/f279c6a25d346047b1d299478901ec4ec2f9f5c12dd2d514b9995ada9c6c9131.jpg) \- The order changes depending on the personal computer and MP3/WMA/AAC encoding software you use.

TERMS

PACKET WRITE

\- This is a general term that describes the process of writing data on-demand to CD-R, etc., in the same way that data is written to floppy or hard discs.

ID3 TAG

\- This is a method of embedding track-related information in an MP3 file. This embedded information can include the track number, track title, the artist's name, the album title, the music genre, the year of production, comments, co other data. The contents can be freely edited using software with ID3 tag editing functions. Although the tags are restricted to a number of characters, the information can be viewed when the track is played back. 3 AUDIO/VISUAL SYSTEM er art and

WMA TAG

\- WMA files can contain a WMA tag that is used in the same way as an ID3 tag. WMA tags carry information such as track title and artist name.

ISO 9660 FORMAT

- This is the international standard for the formatting of CD-ROM folders and files. For the ISO 9660 format, there are 2 levels of regulations. - Level 1: The file name is in 8.3 format (8 character file names, with a 3 character file extension. File names must be composed of one-byte capital letters and numbers. The “\_” symbol may also be included.) \- Level 2: The file name can have up to 31 characters (including the separation mark "." and file extension). Each folder must contain fewer than 8 hierarchies.

MP3

\- MP3 is an audio compression standard determined by a working group (MPEG) of the ISO (International Standard Organization). MP3 compresses audio data to about 1/10 the size of that on conventional discs.

WMA

\- WMA (Windows Media Audio) is an audio compression format developed by Microsoft®. It compresses files into a size smaller than that of MP3 files. The decoding formats for WMA files are Ver. 7, 8 and 9. \- Trademark Acknowledgement Windows Media is either a registered trademark or trademark of Microsoft Corporation in the United States and/or other countries. This product is protected by certain intellectual property rights of Microsoft Corporation and third parties. Use or distribution of such technology outside of this product is prohibited without a license from Microsoft or an authorized Microsoft subsidiary and third parties.

AAC

\- AAC is short for Advanced Audio Coding and refers to an audio compression technology standard used with MPEG2 and MPEG4.

MPEG4

\- This product is licensed under the MPEG-4 patent portfolio license, AVC patent portfolio license and VC-1 patent portfolio license for the personal use of a consumer or other uses in which it does not receive remuneration to (i) encode video in compliance with the MPEG-4 Visual Standard, AVC Standard and VC-1 Standard ("MPEG-4/AVC/VC-1 Video") and/or (ii) decode MPEG-4/AVC/VC-1 Video that was encoded by a consumer engaged in a personal activity and/or was obtained from a video provider licensed to provide MPEG-4/AVC/VC-1 Video. No license is granted or shall be implied for any other use. Additional information may be obtained from MPEG LA, L.L.C. See http://www.mpegla.com. ERROR MESSAGES
Mode Message Explanation
CD“No music files found.”This indicates that no MP3/WMA/AAC files are included in the disc.
“Check Disc”It indicates that the disc is dirty, damaged, or it was inserted upside down.Clean the disc or insert it correctly. It indicates a disc which is not playable is inserted.
“DISC Error”There is a trouble inside the system.Eject the disc.
USB“USB Error”This indicates a problem in the USB memory or its connection.
“No music files found.”This indicates that no compatible files are included in the USB memory.
“No video files found.”
iPod“iPod Error”This indicates a problem in the iPod or its connection.
“No music files found.”This indicates that there is no music data in the iPod.
“Please check the iPod firmware version.”This indicates that the software version is not compatible. Perform the iPod firmware updates and try again.
“Unable to authorize the iPod.”This indicates that it failed to authorize the iPod.Please check your iPod.
Bluetooth®audio“Music tracks not supported. Please check your portable player.”This indicates a problem in the Bluetooth®device.
3 AUDIO/VISUAL SYSTEM

INFORMATION

\- If the malfunction is not rectified: Take your vehicle to your Toyota dealer. 6. TIPS FOR OPERATING THE AUDIO/VISUAL SYSTEM

4

VOICE COMMAND SYSTEM

1

VOICE COMMAND SYSTEM OPERATION

1. VOICE COMMAND SYSTEM..... 126 USING THE VOICE COMMAND SYSTEM.... 126 VOICE COMMAND SYSTEM OPERATION 127 2. NATURAL LANGUAGE UNDERSTANDING .... 130 3. COMMAND LIST 131 2

MOBILE ASSISTANT OPERATION

1. MOBILE ASSISTANT...... 137 CONNECTABLE DEVICES AND AVAILABLE FUNCTIONS .... 137 MOBILE ASSISTANT OPERATION .... 137

1. VOICE COMMAND SYSTEM OPERATION

1. VOICE COMMAND SYSTEM

The voice command system enables the radio, phone dialing, etc. to be operated using voice commands. Refer to the command list for samples of voice commands. (→P.131)

USING THE VOICE COMMAND SYSTEM

STEERING SWITCH ![](images/4aea4a19bf3d8acc2de2046c5741fe1ffb74eed83c6cf13698ac01d87e661b5d.jpg)
text_image 1 ω² BC117S

1 Talk switch

- Press the talk switch to start the voice command system. - To cancel voice command, press and hold the talk switch. MICROPHONE ![](images/29f6a3fa06ff1e9b4f3fc9aa63e2f055b89af4ae32bf58df72e7ded417ae201a.jpg)
natural_image Diagram of a car interior showing a directional arrow and control panel (no text or symbols)
- It is unnecessary to speak directly into the microphone when giving a command.

INFORMATION

●Voice commands may not be recognized if: - Spoken too quickly. - Spoken at a low or high volume. - The windows are open. - Passengers are talking while voice commands are spoken. - The fan speed of the air conditioning system is set at high. - The air conditioning vents are turned towards the microphone. ●In the following conditions, the system may not recognize the command properly and using voice commands may not be possible: \- The command is incorrect or unclear. Note that certain words, accents or speech patterns may be difficult for the system to recognize. \- There is excessive background noise, such as wind noise. ●Normally, it is necessary to wait for a beep before saying a command. To enable the ability to talk over prompts and say commands before the beep, enable the voice prompt interrupt function. (→P.64) ●This system may not operate immediately after the power switch is turned to ACCESSORY or ON mode.

VOICE COMMAND SYSTEM OPERATION

The voice command system is operated by saying commands which correspond to a supported function. To display examples of commands for supported functions, select a function button on the screen after starting the voice command system. 1 Press the talk switch. ● Voice guidance for the voice command system can be skipped by pressing the talk switch. 2 If this screen is displayed, select "OK" or press the talk switch. ![](images/1c318dc3fb551a926a8af6c4f742a40ea61680518237752683064a528901acb4.jpg)
text_image Getting Started with Voice Tutorials Voice Training You can train the system to better recognize your voice by completing the voice training. You can have more about what the system can do by watching the tutorial whole. In continue to voice recognition press "OK" or the talk switch on your closing whole. Do Not Tell Me Again OK
● For details about this screen: →P.129 3 After hearing a beep, say a supported command. - To display sample commands of the desired function, say the desired function or select the desired function button. To display more commands, select "More Commands". - Selecting "Help" or saying "Help" prompts the voice command system to offer examples of commands and operation methods. - Registered POIs, registered names in the contacts list etc., can be said in the place of the "<>" next to the commands. (→P.131) For example: Say "Find a restaurant", "Call John Smith" etc. - If a desired outcome is not shown, or if no selections are available, perform one of the following to return to the previous screen: - Say "Go back". - Select - To cancel voice recognition, select, × say "Cancel", or press and hold the talk switch. - To perform the voice command operation again, select "Start Over" or say "Start over". - To suspend voice command operation, select "Pause". To resume the voice command operation, select "Resume" or press the talk switch.

INFORMATION

- If the system does not respond or the confirmation screen does not disappear, press the talk switch and try again. - If a speech command cannot be recognized 3 consecutive times, the system suggest the way to increase the voice recognition performance. (→P.129) ● The amount of spoken feedback received from the system while using the voice command system (voice recognition prompts) can be changed on the voice settings screen. (→P.64) ●Some voice guidance can be canceled by setting voice prompts to off. Use this setting when it is desirable to say a command immediately after pressing the talk switch and hearing a beep.

INCREASING THE VOICE RECOGNITION PERFORMANCE

To increase voice recognition performance, use the "Tutorials" and "Voice Training" functions on the "Getting Started with Voice" screen. These functions are only available when the vehicle is not moving. The "Tutorials" and "Voice Training" functions can also be started on the voice settings screen. (→P.64) 1 Press the talk switch. 2 Select the desired item to be set. ![](images/9ee6b51b833c41a54dcd918baac52b64e1e74491cc3d8a24c0ee89974396ddc4.jpg)
text_image Getting Started with Voice 1 2 3 4 Do Not Tell Me Again OK
No. Function
1Select to display the voice command tutorials.
2Select to train the voice command system.The user will be asked to say 10 sample phrases. This will help the voice command system adapt to the user's accent.
3Select to prevent the screen from being displayed again.
4Select to proceed to the voice command screen.

DICTATION FUNCTION (ENGLISH ONLY)\*

Text messages can be written using the dictation function. To use the dictation function, a subscription to the Toyota Entune is necessary. Contact your Toyota dealer for details.

1 Select

![](images/0e6bd8b5d847ca332d3f437f6a37d9a185703f5723974967b6e609776bda2a99.jpg) ![](images/5a8328a5b7b9f7584b446a2cde577f36fa95bb7db2d3103fa933e074411e3763.jpg)
text_image Enter the character 1 2 3 4 5 6 7 8 9 0 Q W E R T Y U I O P A S D F G H J K L Z X C V B N M - Change Type ABC 11:03
2 Speak to the system. \- Words recognized through your speech will be displayed. To confirm the entered text, select "OK".

INFORMATION

●A keyboard screen will not be displayed when the vehicle is being driven. ● Text message reply with the dictation function may not be available depending on the type of cellular phone. \*: Vehicles with DCM

1. VOICE COMMAND SYSTEM OPERATION

2. NATURAL LANGUAGE UNDERSTANDING\*

Due to natural language speech recognition technology, this system recognizes commands when spoken naturally. (If a Toyota Entune subscription has been entered, the system will be able to connect to the Toyota Entune center and the range of naturally spoken English which can be recognized will be increased.) However, the system cannot recognize every variation of each command. In some situations, it is possible to omit the command for the procedure and directly state the desired operation. Not all voice commands are displayed in the function menu. To use this function, a subscription to the Toyota Entune is necessary. Contact your Toyota dealer for details. \*: Vehicles with DCM

1. VOICE COMMAND SYSTEM OPERATION

3. COMMAND LIST

Recognizable voice commands and their actions are shown below. - Frequently used commands are listed in the following tables. - For devices that are not installed to the vehicle, commands relating to that device may not be displayed on the screen. Also, depending on other conditions, such as compatibility, some commands may not be displayed on the screen. ● The functions available may vary according to the system installed. ● Voice command system language can be changed. (→P.60) ▶ Common
Command Action
“Help” Displays examples of some of the available commands
“Go back” Returns to the previous screen
“Cancel” Cancels the voice command system
“Start over” Returns to top menu screen
“Pause”Temporarily pauses a voice session until it is resumed by pressing the talk switch again
▶Top menu
Command Action
“Show command examples for”Displays the command list of the selected menu
“More commands” Displays more commonly used commands
“Voice settings” Displays voice setting screen
“Train my voice” Displays train voice recognition screen*
\*: Vehicle must be parked ▶Navigation
Command Action
“Get directions to"*1Enables setting a destination by saying the address*2, 3
“Find a”Displays a list ofnear the current position
“Find anear my destination”Displays a list ofnear the destination
“Find ain a city”*1Displays a list ofin a specified city and state*6
“Go home” Displays the route to home
“Go to favorite <1-10>”Sets the location registered to the corresponding favorite number as the destination
“Show recent destinations”Displays a list of recent destinations. Selecting a number from the list will start navigation to the selected recent destination.
“Cancel route” Cancels the route guidance
“Delete destinations” Displays a list of destination to delete*7
“Showicons”Displays the specified point of interest category*4 icons on the map
^*1 : English and French only \*2: Best recognition results occur when saying the full address without the zipcode \*3: When the language is set to French, the supported area is only Quebec Province in Canada \*4: For example; "Gas stations", "Restaurants", etc. ^*5 : Major national brands are always supported. Local brands are also supported with a subscription to the Toyota Entune. Contact your Toyota dealer for details. ^*6 : When the language is set to French, the supported area is only Quebec City in Canada ^*7 : Used when multiple destinations are set on a route ▶Phone
Command Action
"Call"* Places a call to the specified contact from the phone book
"Call"*Places a call to the specified phone type of the contact from the phone book
"Dial" Places a call to the specified phone number
"Redial"Places a call to the phone number of the latest outgoing call
"Call back" Places a call to the phone number of latest incoming call
"Show recent calls" Displays the call history screen
"Send a message to"Sends a text message to specified contact from the phone book
\*: If the system does not recognize the name of a contact, create a voice tag. (→P.184) The name of a contact can also be recognized by adding a voice tag. ▶While in a phone call
Command Action
"Send" Sends DTMF tones has specified
"Mute"Mutes the microphone (far side cannot hear the conversation)
"Unmute" Unmutes the microphone
▶While incoming message notification is displayed\*
Command Action
"Read message" Reads the incoming message over the vehicle speakers
"Ignore" Ignores the incoming message notification
"Reply" Initiates sending a reply to the incoming message
"Call"Places a call to the phone number of incoming message
\*: Full screen message notification must be turned on within the phone settings (→P.175) ▶ Radio
Command Action
“Tune toAM” Changes the radio to the specified AM frequency
“Tune toFM” Changes the radio to the specified FM frequency
“Play astation”Changes the radio to an FM station of the specified genre*1
“Tune to preset <1-36>" Changes the radio to the specified preset radio station
“Tune to asatellite station”Changes the radio to a satellite radio channel of the spec-ified genre*2
“Tune to"Changes the radio to the satellite radio channel with the specified name*2
“Tune to channelon XM”Changes the radio to a satellite radio channel of the spec-ified number*2
^*1 : A station list must be built first using the radio screen ( P.80) \*2: Requires a satellite radio subscription ▶Audio\*
Command Action
"Play playlist” Plays tracks from the selected playlist
"Play artist” Plays tracks from the selected artist
"Play song” Plays the selected track
"Play album” Plays tracks from the selected album
"Play genre” Plays tracks from the selected genre
"Play composer” Plays tracks from the selected composer
"Play podcast” Plays tracks from the selected podcast
"Play audiobook” Plays tracks from the selected audiobook
"Audio on" Turns the audio/visual system on
"Audio off" Turns the audio/visual system off
“Change the audio source to” Sets the source to the specified audio mode
\*: The audio device must be connected via a USB cable to use the functionality in this section

▶Information

Command Action
“Get the forecast” Displays weather information
“Get the forecast for** Displays weather for the specified city
“Show traffic” Displays traffic information
“Show traffic near here” Displays traffic information near your current location
“Get traffic along my route” Displays traffic information along your current route
“Show traffic on this street”Displays traffic information along road you are currently driving on
“Show traffic for saved route” Displays traffic information for a saved route
“Show predictive traffic” Displays the predictive traffic map
\*: Only major US cities are supported by voice

▶Apps

Command Action
“Launch”Activates the Toyota Entune App Suite Connect application

INFORMATION

\- When an application is opened and is in full screen mode, pressing the talk switch will start the voice command system and commands for the currently displayed application will be available.

2. MOBILE ASSISTANT OPERATION

1. MOBILE ASSISTANT

The Mobile Assistant function is a voice input assist function. Mobile Assist supports the Siri Eyes Free Mode and Google App. (Google App can be used only the corresponding device.) Instructions can be spoken into the vehicle microphone as if speaking a command to the phone. The content of the request is then interpreted by the phone and the result is output from the vehicle speakers. To operate the Mobile Assistant, a compatible device must be registered and connected to this system via Bluetooth®. (→P.42)

CONNECTABLE DEVICES AND AVAILABLE FUNCTIONS

Mobile Assist supports the Siri Eyes Free Mode and Google App. The available features and functions may vary based on the iOS/Android version installed on the connected device.

MOBILE ASSISTANT OPERATION

1 Press and hold the switch on the steering wheel until you hear the beeps. ![](images/3b85ff0d2a680a1bd50752586286d39f1145b0fbb4fe5b34aac3e9b33e20b3ac.jpg)
text_image Diagram showing car interior with a highlighted component and directional arrow, likely indicating a vehicle or system component.
2 Mobile Assistant can be used only when the following screen is displayed. ![](images/edff09c9d34ec22f4d3c0608bb362b714644ce5653d2c74ea380bab665a82485.jpg)
text_image Mobile Assistant 4:50 Cancel
● To cancel the Mobile Assistant, select "Cancel", or press and hold the switch on the steering wheel. ● To restart the Mobile Assistant for addi- tional commands, press the switch on the steering wheel. - Mobile Assistant can only be restarted after the system responds to a voice command. • After saying a command, the Mobile Assistant function will automatically end to complete the requested action. - The volume of the Mobile Assistant can be adjusted using the "POWER/VOLUME" knob or steering wheel volume control switches. The Mobile Assistant and phone call volumes are synchronized.

INFORMATION

●While a phone call is active, the Mobile Assistant cannot be used. - If using the navigation feature of the cellular phone, ensure the active audio source is Bluetooth® audio or iPod in order to hear turn by turn direction prompts. ●Wait for the listening beeps before using the Mobile Assistant. ●The Mobile Assistant may not recognize commands in the following situations: - Spoken too quickly. - Spoken at a low or high volume. - The windows are open. - Passengers are talking while the Mobile Assistant is being used. - The fan speed of the air conditioning system is set at high. - The air conditioning vents are turned toward the microphone.

5

INFORMATION

1 USEFUL INFORMATION

1. INFORMATION SCREEN.... 140 DISPLAYING INFORMATION SCREEN.... 140 2. RECEIVING WEATHER INFORMATION .... 141 DISPLAYING WEATHER SCREEN .... 141 WEATHER GUIDANCE SERVICE .... 143 3. DATA SERVICES SETTINGS..... 144 SETTING DOWNLOAD METHODS .... 144

1. USEFUL INFORMATION

1. INFORMATION SCREEN

Useful information, such as the traffic incidents, weather, etc., is available on the information screen.

DISPLAYING INFORMATION SCREEN

1 Press the "MENU" button. ![](images/d177c9988792c7c91385d207719b89e476b00b10a1b3957e5a283641ffeb5c70.jpg)
text_image MENU BC105S
2 Select "Info". 3 Select the desired item. ![](images/5236e9f8dd916882fabb0f159a5ddb1b6d9701c55e5590e20183578e46e2bb75.jpg)
text_image Information 9:25 Traffic Incident Weather Unlock-Get Maker 1 2 3
No.Function Page
1Select to display traffic information.204
2Select to display weather information.141
3*Select to display the vehicle alert history.
\*: Vehicles with DCM

1. USEFUL INFORMATION

2. RECEIVING WEATHER INFORMATION

Weather information can be received via HD Radio broadcast or DCM (Data Communication Module).

DISPLAYING WEATHER SCREEN

1 Press the "MENU" button. ![](images/56f809ed6ca703bdd23df52d366c10ee0d6316e2228a764837b88d64b6281196.jpg)
text_image M:NU BC105S
2 Select "Info". 3 Select "Weather". 4 Check that the weather screen is displayed. ![](images/137d724d0d7a9d4a10e475271466c3ad1b94145b2afdbf419c746f1541705b94.jpg)
text_image Weather 11:25 Current 1 Washington, DC 3 Day 2 Humidity 65% 6/12 Hour 3 Wind WNW Smooth Checket Location 4 Feels Like 50°F National/Local Over 527 Weather Map 6 And 25 min. age
No.Function
1Select to display the current weather information. (→P.142)
2Select to display a 3-day weather forecast for the currently displayed location.To view the details of a specific day, select the date.
3Select to display the weather information for the next 6 hours and 12 hours. (This button is not displayed when a location is selected from the “National Cities” list of “National/Local”).
4Select to display the weather of a desired location in the recently checked locations list.
5Select to change the displayed weather location.A location can be selected from two different lists: a list of national cities and a list of local cities. (→P.142)
6Select to display Doppler weather radar information over the map.
5 INFORMATION

INFORMATION

●This function is not made available in some countries or areas. ●The weather for current location might not show the closest city when it first displays. ●The weather information is updated every 5 to 90 minutes. The time elapsed since the last update is displayed at the bottom right corner of the screen. If the weather has been updated less than 5 minutes ago, "Now" will be displayed.

DISPLAYING WHEATHER INFORMATION FOR THE CURRENT LOCATION

1 Display the weather screen. ( P.141) 2 Select "Current". 3 Check the weather information for the current location. - By selecting "3 Day" or "6/12 Hour", different types of weather information for the current location will be displayed.

SELECTING A LOCATION

1 Display the weather screen. (→P.141) 2 Select "National/Local". 3 Select the desired item to be set. ![](images/98754437525e590262f0205a0d7d683a1cf27f512f23933f1516901a21412aec.jpg)
text_image Weather 11:26 Current National Cities 1 3 Day Local Cities 2 6/12 Hour Checked Location Natntons/Local Weather Map

No. Function

1 Select to display the list of National cities. When the list is displayed, select the desired area. 2 Select to display the list of local cities. 4 Select the desired location from the list. - After selecting a location, the current weather information will be displayed. By selecting "3 Day" or "6/12 Hour", the different type of weather information for the selected location is displayed.

WEATHER GUIDANCE SERVICE

When weather information for areas around the current position, destination, or along the set route is available, important information will be output through the speakers and a pop-up message asking if you would like to view the full weather information will be displayed. 1 Select "Yes" when the pop-up message appears. 2 Check that the weather information is displayed. - The time since the information was last updated is displayed. - When detailed audio weather information is available, an icon will be displayed on the weather map. Select the icon to listen to the weather information.

1. USEFUL INFORMATION

3. DATA SERVICES SETTINGS

SETTING DOWNLOAD METHODS

Data service information, which is comprised of traffic information and weather information, can be received via HD Radio broadcast or DCM (Data Communication Module). The receiving method can be set to both or only via HD Radio broadcast. 1 Press the "MENU" button. ![](images/6d0976c8400b7ca31405cf9ac26cccfbfb7be66c55e9ec597b276dc87ac7e4f7.jpg)
text_image MENU BC105S
2 Select "Setup". 3 Select "Data Services". 4 Select "Data Download Source". 5 Select the desired item to be set. ![](images/b61c939a1e4d3dbfe02b27e4e0e5ca40ae67eebfe52862a4ba3334fe51d4cd42.jpg)
text_image Setup 7:27 Data Download Source • HD Radio & DCM • HD Radio Only 1 2

No. Function

1 Select to receive data service information via both HD Radio broadcast and the DCM. When both methods are available, HD Radio broadcast will be selected. 2 Select to receive data only via HD Radio broadcast.

INFORMATION

● This function is not made available in some countries or areas.

6

PERIPHERAL MONITORING SYSTEM

1

REAR VIEW MONITOR SYSTEM

1. REAR VIEW MONITOR

SYSTEM 146 DRIVING PRECAUTIONS 146 SCREEN DESCRIPTION 148

2. REAR VIEW MONITOR

SYSTEM PRECAUTIONS...... 149 AREA DISPLAYED ON SCREEN...... 149 THE CAMERA 149 DIFFERENCES BETWEEN THE SCREEN AND THE ACTUAL ROAD 150 WHEN APPROACHING THREE-DIMENSIONAL OBJECTS.... 152

3. THINGS YOU SHOULD KNOW .. 154

IF YOU NOTICE ANY SYMPTOMS .... 154

1. REAR VIEW MONITOR SYSTEM

1. REAR VIEW MONITOR SYSTEM

The rear view monitor system assists the driver by displaying an image of the view behind the vehicle with fixed guide lines on the screen while backing up, for example while parking.

INFORMATION

●The screen illustrations used in this text are intended as examples, and may differ from the image that is actually displayed on the screen.

DRIVING PRECAUTIONS

The rear view monitor system is a supplemental device intended to assist the driver when backing up. When backing up, be sure to visually check all around the vehicle both directly and using the mirrors before proceeding. If you do not, you may hit another vehicle, and could possibly cause an accident. Pay attention to the following precautions when using the rear view monitor system. ![](images/c4ed6e119aa3d916c796b6fe7e19d15749a4807d3ce9aeb82aec075874ea6102.jpg)

WARNING

● Never depend on the rear view monitor system entirely when backing up. The image and the position of the guide lines displayed on the screen may differ from the actual state. Use caution, just as you would when backing up any vehicle. ●Be sure to back up slowly, depressing the brake pedal to control vehicle speed. The instructions given are only guide lines. When and how much to turn the steering wheel will vary according to traffic conditions, road surface conditions, vehicle condition, etc. when parking. It is necessary to be fully aware this before using the rear view monitor system. - When parking, be sure to check that the parking space will accommodate your vehicle before maneuvering into it. ●Do not use the rear view monitor system in the following cases: - On icy or slick road surfaces, or in snow - When using tire chains or emergency tires - When the trunk is not closed completely - On roads that are not flat or straight, such as curves or slopes ![](images/c54da89ee8ef419473fc3c80c49e1a836d40265cf730e95b95b4236de14388e0.jpg)

WARNING

In low temperatures, the screen may darken or the image may become faint. The image could distort when the vehicle is moving, or you may become unable to see the image on the screen. Be sure to visually check all around the vehicle both directly and using the mirrors before proceeding. - If the tire sizes are changed, the position of the fixed guide lines displayed on the screen may change. The camera uses a special lens. The distances between objects and pedestrians that appear in the image displayed on the screen will differ from the actual distances.(→P.150)

SCREEN DESCRIPTION

The rear view monitor system screen will be displayed if the shift position is shifted to the "R" position while the power switch is in ON mode. ![](images/1a14723653e875c9b6e9b00581fd00763c3e4cbb6b538036444cb4fef67ea9b9.jpg)
text_image 1 2 3 4
BF065C
No.Display Function
1Vehicle width guide lineDisplays a guide path when the vehicle is being backed straight up.The displayed width is wider than the actual vehicle width.
2Vehicle center guide lineThis line indicates the estimated vehicle center on the ground.
3Distance guide lineShows distance behind the vehicle.Displays a point approximately 1.5 ft. (0.5 m) (red) from the edge of the bumper.
4Distance guide lineShows distance behind the vehicle.Displays a point approximately 3 ft. (1 m) (blue) from the edge of the bumper.

CANCELING REAR VIEW MONITOR SYSTEM

The rear view monitor system is canceled when the shift lever is shifted into any position other than the "R" position.

1. REAR VIEW MONITOR SYSTEM

2. REAR VIEW MONITOR SYSTEM PRECAUTIONS

AREA DISPLAYED ON SCREEN

The rear view monitor system displays an image of the view from the bumper of the rear area of the vehicle. ![](images/d27416a120c713bb61fafa18fc965806a8f80a674e3b899e7322e071ec8ecec1.jpg)
text_image Displayed area Screen Corners of bumper BC019S
\- The image adjustment procedure for the rear view monitor system screen is the same as the procedure for adjusting the screen. (→P.39)

INFORMATION

●The area displayed on the screen may vary according to vehicle orientation conditions. - Objects which are close to either corner of the bumper or under the bumper cannot be displayed. ● The camera uses a special lens. The distance of the image that appears on the screen differs from the actual distance. ●Items which are located higher than the camera may not be displayed on the monitor.

THE CAMERA

The camera for the rear view monitor system is located as shown in the illustration. ![](images/1496ae9a71bbd39042a15aa8190925f2838645d61b95f263141b46846eb29260.jpg)
natural_image Diagram of a car's rearview side panel showing airflow direction and component insertion (no text or symbols)

USING THE CAMERA

If dirt or foreign matter (such as water droplets, snow, mud etc.) is adhering to the camera, it cannot transmit a clear image. In this case, flush it with a large quantity of water and wipe the camera lens clean with a soft and wet cloth. ![](images/d2c695a98539d4f79dfd7ddedc6df95703c209e74e8f5e5afe9054eed9ddd11f.jpg)

NOTICE

●The rear view monitor system may not operate properly in the following cases. \- If the back of the vehicle is hit, the position and mounting angle of the camera may change. \- As the camera has a water proof construction, do not detach, disassemble or modify it. This may cause incorrect operation. \- When cleaning the camera lens, flush the camera with a large quantity of water and wipe it with a soft and wet cloth. Strongly rubbing the camera lens may cause the camera lens to be scratched and unable to transmit a clear image. \- Do not allow organic solvent, car wax, window cleaner or a glass coating to adhere to the camera. If this happens, wipe it off as soon as possible. \- If the temperature changes rapidly, such as when hot water is poured on the vehicle in cold weather, the system may not operate normally. \- When washing the vehicle, do not apply intensive bursts of water to the camera or camera area. Doing so may result in the camera malfunctioning. \- Do not expose the camera to strong impact as this could cause a malfunction. If this happens, have the vehicle inspected by your Toyota dealer as soon as possible.

DIFFERENCES BETWEEN THE SCREEN AND THE ACTUAL ROAD

\- The distance guide lines and the vehicle width guide lines may not actually be parallel with the dividing lines of the parking space, even when they appear to be so. Be sure to check visually. \- The distances between the vehicle width guide lines and the left and right dividing lines of the parking space may not be equal, even when they appear to be so. Be sure to check visually. \- The distance guide lines give a distance guide for flat road surfaces. In any of the following situations, there is a margin of error between the fixed guide lines on the screen and the actual distance /course on the road.

WHEN THE GROUND BEHIND THE VEHICLE SLOPES UP SHARPLY

The distance guide lines will appear to be closer to the vehicle than the actual distance. Because of this, objects will appear to be farther away than they actually are. In the same way, there will be a margin of error between the guidelines and the actual distance/course on the road.

WHEN THE GROUND BEHIND THE VEHICLE SLOPES DOWN SHARPLY

The distance guide lines will appear to be farther from the vehicle than the actual distance. Because of this, objects will appear to be closer than they actually are. In the same way, there will be a margin of error between the guide lines and the actual distance/course on the road. ![](images/9d9db8c49c63ca688d96ad25f2069df375e1c48ef96704339205851300edc248.jpg)
natural_image Diagram showing a car on a road and its parking lot with two boxes, no text or symbols present.
![](images/607710939b61d55ed5b6f1f3081b28d5b21936591c781663be8dae396b3f2aa9.jpg)
natural_image Diagram showing a car approaching a road with a sensor and a vehicle on a paved surface (no text or symbols)

WHEN ANY PART OF THE VEHICLE SAGS

When any part of the vehicle sags due to the number of passengers or the distribution of the load, there is a margin of error between the fixed guide lines on the screen and the actual distance/course on the road. ![](images/abd63e036dcda0dcfe24f2ce18733ad9dac502485a52ecc282c0c52516a91b16.jpg)
text_image A margin of error BC023S

WHEN APPROACHING THREE-DIMENSIONAL OBJECTS

The distance guide lines are displayed according to flat surfaced objects (such as the road). It is not possible to determine the position of three-dimensional objects (such as vehicles) using the vehicle width guide lines and distance guide lines. When approaching a three-dimensional object that extends outward (such as the flatbed of a truck), be careful of the following.

VEHICLE WIDTH GUIDE LINES

Visually check the surroundings and the area behind the vehicle. In the case shown below, the truck appears to be outside of the vehicle width guide lines and the vehicle does not look as if hits the truck. However, the rear body of the truck may actually cross over the vehicle width guide lines. In reality if you back up as guided by the vehicle width guide lines, the vehicle may hit the truck. it ![](images/29ba5d7c3a20f9ca15960ce427c76c8d8e3b4a50daee0909a9218e4cab0d8b93.jpg)
natural_image Top-down and side-view diagrams of a car climbing a platform, showing structural components and a vehicle interior (no text or symbols)
▶ Vehicle width guide lines

DISTANCE GUIDE LINES

Visually check the surroundings and the area behind the vehicle. On the screen, it appears that a truck is parking at point B. However, in reality if you back up to point A, you will hit the truck. On the screen, it appears that A is closest and C is farthest away. However, in reality, the distance to A and C is the same, and B is farther than A and C. ![](images/bbb4a0854d3350e383b783cf3802c850aaba3ecfd8d3f2a7470be60c81096add.jpg)
text_image Positions of A, B and C C A B C B A BC035S

1. REAR VIEW MONITOR SYSTEM

3. THINGS YOU SHOULD KNOW

IF YOU NOTICE ANY SYMPTOMS

If you notice any of the following symptoms, refer to the likely cause and the solution, and re-check. If the symptom is not resolved by the solution, have the vehicle inspected by your Toyota dealer.
Symptom Likely cause Solution
The image is difficult to seeThe vehicle is in a dark areaThe temperature around the lens is either high or lowThe outside temperature is lowThere are water droplets on the cameraIt is raining or humidForeign matter (mud etc.) is adhering to the cameraSunlight or headlights are shining directly into the cameraThe vehicle is under fluorescent lights, sodium lights, mercury lights etc.Back up while visually checking the vehicle's surroundings. (Use the monitor again once conditions have been improved.)The procedure for adjusting the picture quality of the rear view monitor system is the same as the procedure for adjusting the screen. ( P.39)
The image is blurryDirt or foreign matter (such as water droplets, snow, mud etc.) is adhering to the camera.Flush the camera with a large quantity of water and wipe the camera lens clean with a soft and wet cloth.
The image is out of alignmentThe camera or surrounding area has received a strong impact.Have the vehicle inspected by your Toyota dealer.
The fixed guide lines are very far out of alignmentThe camera position is out of alignment.The vehicle is tilted (there is a heavy load on the vehicle, tire pressure is low due to a tire puncture, etc.)The vehicle is used on an incline.Have the vehicle inspected by your Toyota dealer.If this happens due to these causes, it does not indicate a malfunction.Back up while visually checking the vehicle's surroundings.

7

PHONE

1

PHONE OPERATION (HANDS-FREE SYSTEM FOR CELLULAR PHONES)

1. QUICK REFERENCE...... 156 2. SOME BASICS ...... 157 REGISTERING/CONNECTING A Bluetooth® PHONE 158 USING THE PHONE SWITCH/ MICROPHONE 158 VOICE COMMAND SYSTEM.... 159 ABOUT THE CONTACTS IN THE CONTACT LIST 160 WHEN SELLING OR DISPOSING OF THE VEHICLE.... 160 3. PLACING A CALL USING THE Bluetooth® HANDS-FREE SYSTEM.... 161 BY CALL HISTORY.... 161 BY FAVORITES LIST.... 162 BY CONTACTS LIST 162 BY KEYPAD 164 BY HOME SCREEN 165 4. RECEIVING A CALL USING THE Bluetooth® HANDS-FREE SYSTEM.... 166 INCOMING CALLS.... 166 5. TALKING ON THE Bluetooth® HANDS-FREE SYSTEM ...... 167 INCOMING CALL WAITING 169 6. Bluetooth ^ PHONE MESSAGE FUNCTION 170 DISPLAYING THE MESSAGE SCREEN 170 RECEIVING A MESSAGE 170 CHECKING RECEIVED MESSAGES 171 REPLYING TO A MESSAGE (DICTATION REPLY)...... 172 REPLYING TO A MESSAGE (QUICK REPLY).... 173 CALLING THE MESSAGE SENDER 174

2 SETUP

1. PHONE SETTINGS 175 PHONE SETTINGS SCREEN ..... 175 SOUND SETTINGS SCREEN 176 NOTIFICATION SETTINGS SCREEN 177 CONTACT/CALL HISTORY SETTINGS SCREEN.... 178 MESSAGE SETTINGS SCREEN ..... 185

3 WHAT TO DO IF...

1. TROUBLESHOOTING ...... 187

1. PHONE OPERATION (HANDS-FREE SYSTEM FOR CELLULAR PHONES)

1. QUICK REFERENCE

The phone top screen can be reached by the following methods: ▶From the "PHONE" button Press the "PHONE" button. ▶From the "MENU" button Press the "MENU" button, then select "Phone". ![](images/c6aeff46896e52c5e92a1adce52dd7b15ab342c5f7e20eb2adc6360668de1cc6.jpg)
text_image 8:14 History Favorites Contacts Keypad Select Device Message
Function Page
Bluetooth ^ hands-free sys-tem operationRegistering/connecting a Bluetooth ^ phone 42
Placing a call using the Bluetooth ^ hands-free system 161
Receiving a call using the Bluetooth ^ hands-free sys-tem166
Talking on the Bluetooth ^ hands-free system 167
Message function Using the Bluetooth ^ phone message function 170
Setting up a phonePhone settings 175
Bluetooth ^ settings 47

1. PHONE OPERATION (HANDS-FREE SYSTEM FOR CELLULAR PHONES)

2. SOME BASICS

The hands-free system enables calls to be made and received without having to take your hands off the steering wheel. This system supports Bluetooth ^® . Bluetooth ^® is a wireless data system that enables cellular phones to be used without being connected by a cable or placed in a cradle. The operating procedure of the phone is explained here. ![](images/dedf8bf9890ef9af760a7981bc6083c69f0c5cf0ffd328b423963add2b6b0c96.jpg)

WARNING

●While driving, do not operate a cellular phone. - Your audio unit is fitted with Bluetooth ^ antennas. People with implantable cardiac pacemakers, cardiac resynchronization therapy-pacemakers or implantable cardioverter defibrillators should maintain a reasonable distance between themselves and the Bluetooth ^ antennas. The radio waves may affect the operation of such devices. Before using Bluetooth® devices, users of any electrical medical device other than implantable cardiac pacemakers, cardiac resynchronization therapy-pacemakers or implantable cardioverter defibrillators should consult the manufacturer of the device for information about its operation under the influence of radio waves. Radio waves could have unexpected effects on the operation of such medical devices. ![](images/05bb82025a826aa83a00b246584fdca3089a6327ab58c54219876ef13e865dac.jpg)

NOTICE

\- Do not leave your cellular phone in the vehicle. The temperature inside may rise to a level that could damage the phone.

INFORMATION

- This system is not guaranteed to operate with all Bluetooth ^ devices. - If your cellular phone does not support Bluetooth®, this system cannot function. ●In the following conditions, the system may not function: • The cellular phone is turned off. - The current position is outside the communication area. - The cellular phone is not connected. • The cellular phone has a low battery. \- When using the hands-free system or Bluetooth® audio and Wi-Fi® Hot s pot functions at the same time, the following problems may occur: \- The Bluetooth ^® connection may be cut. \- Noise may be heard on the Bluetooth® audio playback. \- A noise may be heard during phone calls. 7 PHONE

REGISTERING/CONNECTING A Bluetooth® PHONE

To use the hands-free system for cellular phones, it is necessary to register a cellular phone with the system. (→P.42)

CONNECTING A Bluetooth® DEVICE

▶Registering an additional device 1 Display the phone top screen. (→P.156) 2 Select "Select Device". 3 Select "Add Device". - When another Bluetooth device is connected, a confirmation screen will be displayed. To disconnect the Bluetooth device, select "Yes". 4 Follow the steps in "REGISTERING A Bluetooth® PHONE FOR THE FIRST TIME" from "STEP 5". (→P.42) ▶Selecting a registered device 1 Display the phone top screen. (→P.156) 2 Select "Select Device". 3 Select the desired device to be connected. 4 Check that a confirmation screen is displayed when the connection is complete. - If an error message is displayed, follow the guidance on the screen to try again.

Bluetooth® PHONE CONDITION DISPLAY

The condition of the Bluetooth ^® phone appears on the upper right side of the screen. (→P.18)

USING THE PHONE SWITCH/MICROPHONE

STEERING SWITCH

By pressing the phone switch, a call can be received or ended without taking your hands off the steering wheel. ![](images/1207cf9fde39d5501f3429762bb027ca40a319a083cefd8c477fbb830ab13355.jpg)
text_image 1 2 3 BC026S
- Press the “+” side to increase the volume. - Press the “-” side to decrease the volume. 1 Volume control switch 2 Off hook switch 3 On hook switch

MICROPHONE

The microphone is used when talking on the phone. ![](images/6343011f62a0ed02768b199dbe72a878c5868f99a37b7fb9cadea665da2fd6ab.jpg)
natural_image Diagram of a car interior showing a directional arrow pointing to a digital display (no text or symbols present)

VOICE COMMAND SYSTEM

Press this switch to operate the voice command system. ![](images/902bc19e5bb377213ad5809e6dad622ade87483e5163b81f330c12e663490e48.jpg)
text_image Diagram showing a car interior with a highlighted component and directional arrow, likely indicating a vehicle or system component.
\- The voice command system and its list of commands can be operated. (→P.126)

INFORMATION

- The other party's voice will be heard from the front speakers. The audio/visual system will be muted during phone calls or when hands-free voice commands are used. ●Talk alternately with the other party on the phone. If both parties speak at the same time, the other party may not hear what has been said. (This is not a malfunction.) - Keep call volume down. Otherwise, the other party's voice may be audible outside the vehicle and voice echo may increase. When talking on the phone, speak clearly towards the microphone. ●The other party may not hear you clearly when: - Driving on an unpaved road. (Making excessive traffic noise.) - Driving at high speeds. • The windows are open. - The air conditioning vents are pointed towards the microphone. - The sound of the air conditioning fan is loud. - There is a negative effect on sound quality due to the phone and/or network being used.

ABOUT THE CONTACTS IN THE CONTACT LIST

\- The following data is stored for every registered phone. When another phone is connected, the following registered data cannot be read: - Contact data - Call history data - Favorites data - Image data - All phone settings - Message settings

INFORMATION

\- When a phone's registration is deleted, the above-mentioned data is also deleted.

WHEN SELLING OR DISPOSING OF THE VEHICLE

A lot of personal data is registered when the hands-free system is used. When selling or disposing of the vehicle, initialize the data. (→P.63) ● The following data in the system can be initialized: - Contact data - Call history data - Favorites data - Image data - All phone settings - Message settings

INFORMATION

\- Once initialized, the data and settings will be erased. Pay much attention when initializing the data.

1. PHONE OPERATION (HANDS-FREE SYSTEM FOR CELLULAR PHONES)

3. PLACING A CALL USING THE Bluetooth® HANDS-FREE SYSTEM

After a Bluetooth ^® phone has been registered, a call can be made using the hands-free system. There are several methods by which a call can be made, as described below.
How to make a call list Page
By call history 161
By favorites list 162
By contacts list* 162
By keypad* 164
By home screen165
By e-mail/SMS/MMS174
By POI call199
By voice command system126
\*: The operation cannot be performed while driving.

BY CALL HISTORY

Up to 30 of the latest call history items (missed, incoming and outgoing) can be selected. 1 Display the phone top screen. (→P.156) 2 Select "History" and select the desired contact. - When the unknown contact screen is displayed, select the number. ● The icons of call type are displayed. ![](images/7bf31ecfd1bbd8af9297e0663ebd4870f36482a827de10784203307dfc71f36a.jpg) : Missed call ![](images/381e7d3b86320cd82ee49d50f0bc835a465271a0e73d4746e739f8f5de1ceb43.jpg) : Incoming call ![](images/596a611b1bf8ec24216e1cec871ab873b982a10835672e90c83dfa6ba971f000.jpg) :Outgoing call 3 Check that the "Dialing..." screen is displayed.

INFORMATION

- When making a call to the same number continuously, only the most recent call is listed in call history. - When a phone number registered in the contact list is received, the name is displayed. ●Number-withheld calls are also memorized in the system. ●International phone calls may not be made depending on the type of cellular phone you have. The list should group together consecutive entries with the same phone number and same call type. For example, two calls from Kay Rowles's mobile would be displayed as follows: Kay Rowles (2)

BY FAVORITES LIST

Calls can be made using registered contacts which can be selected from a contact list. (→P.183) 1 Display the phone top screen. (→P.156) 2 Select "Favorites" and select the desired contact. 3 Select the desired number. 4 Check that the "Dialing..." screen is displayed.

BY CONTACTS LIST

Calls can be made by using contact data which is transferred from a registered cellular phone. (→P.163) Up to 5000 contacts (maximum of 4 phone numbers, e-mail addresses and addresses per contact) can be registered in the contact list. 1 Display the phone top screen. (→P.156) 2 Select "Contacts" and select the desired contact. 3 Select the desired number. ![](images/aa72423ea4de7eb310aa3eabbbe0f34b3904d8dbc35eeb60eafbd3933840e76d.jpg)
text_image Contact Details 9:10 ****** None Main 2 Add Favorite E-mail Addresses Addresses
"Add Favorite"/"Remove Favorite": Select to register/remove the contact in the favorites list.(→P.183, 184) "E-mail Addresses": Select to display all registered e-mail addresses for the contact. "Addresses": Select to display all registered addresses for the contact. 4 Check that the "Dialing..." screen is displayed.

WHEN THE CONTACT LIST IS EMPTY

FOR PBAP COMPATIBLE Bluetooth® PHONES

▶When "Automatic Transfer" is set to on (→P.178) - Contacts are transferred automatically. ▶When "Automatic Transfer" is set to off (→P.178) 1 Select the desired item. ![](images/5507d77d64e68e6cc21cb5fdb819ebe705e2a2cc53683ea217a6e20ad60bd451.jpg)
text_image The device ----------------------------------------- supports automatic contact transfer, but this feature is not enabled. Would you like to transfer your contacts? Always Once No 1 2 3
No.Function
1Select to transfer new contacts from a cellular phone, select “Always” and then enable “Automatic Transfer”.
2Select to transfer all the contacts from a connected cellular phone only once.
3Select to cancel transferring.
2 Check that a confirmation screen is displayed when the operation is complete.

FOR PBAP INCOMPATIBLE BUT OPP COMPATIBLE Bluetooth® PHONES

1 Select the desired item. ![](images/7f59cab0f039ca8d32afe1276eded8fe4c60db1c320f5fc58d050d846719223b.jpg)
text_image Would you like to transfer contacts or manually add contacts? Transfer Add Cancel 1 2 3
No.Function
1Select to transfer the contacts from the connected cellular phone.Transfer the contact data to the sys-tem using a Bluetooth® phone.
2Select to add a new contact manually.Follow the steps in “REGISTERING A NEW CONTACT TO THE CON-TACT LIST” from “STEP 2”.(→P.182)
3Select to cancel transferring.

INFORMATION

●Manual transfer operation cannot be performed while driving. - If your cellular phone is neither PBAP nor OPP compatible, the contacts cannot be transferred. - Depending on the type of Bluetooth® phone: - It may be necessary to perform additional steps on the phone when transferring contact data. - The registered image in the contact list may not transfer depending on the type of Bluetooth® phone connected.

BY KEYPAD

1 Display the phone top screen. (→P.156) 2 Select "Keypad" and enter the phone number. 3 Select or press the switch on the steering wheel. 4 Check that the "Dialing..." screen is displayed.

INFORMATION

\- Depending on the type of Bluetooth® phone being connected, it may be necessary to perform additional steps on the phone.

BY HOME SCREEN

1 Display the home screen. ( P.34) 2 Select the desired contact. 3 Check that the "Dialing..." screen is displayed.

REGISTERING A NEW CONTACT

1 Select and hold the screen button to add a contact. 2 Select the desired contact. 3 Select the desired number.

INFORMATION

- If there is no contact in the contacts list, the contacts cannot be registered at the home screen. ●The contact cannot be registered at the home screen while driving.

1. PHONE OPERATION (HANDS-FREE SYSTEM FOR CELLULAR PHONES)

4. RECEIVING A CALL USING THE Bluetooth® HANDS-FREE SYSTEM

INCOMING CALLS

When a call is received, this screen is displayed with a sound. 1 Select "Answer" or press the switch on the steering wheel to talk on the phone. ![](images/52afd356bb474d611c1b27b8d47d3fe97ec51b7d6b166c10a8d36f2ad8da422d.jpg)
text_image 8:28 Incoming call from: ****** ✓ Add: ******** Answer Decline
To refuse to receive the call: Select "Decline" or press the switch on the steering wheel. To adjust the volume of a received call: Turn the "POWER/VOLUME" knob, or use the volume control switch on the steering wheel.

INFORMATION

● The contact image picture can be displayed only when the vehicle is not moving. - During international phone calls, the other party's name or number may not be displayed correctly depending on the type of cellular phone you have. ● The incoming call display mode can be set. (→P.177) - The ringtone that has been set in the sound settings screen can be heard when there is an incoming call. Depending on the type of Bluetooth® phone, both the system and Bluetooth® phone may ring simultaneously when there is an incoming call. (→P.176)

1. PHONE OPERATION (HANDS-FREE SYSTEM FOR CELLULAR PHONES)

5. TALKING ON THE Bluetooth® HANDS-FREE SYSTEM

While talking on the phone, this screen is displayed. The operations outlined below can be performed on this screen. ![](images/85c81f1a0a568378189ae4474a32e1f6c895197f65115de0cfb5b10726f19a84.jpg)
text_image 0-9 1 2 3 4 5 6 7 8:32 00:00:03 Release Tunes Transmit Volume Mate Mate Navigation Hambet Mode End
No.Function Page
1Select to display the key-pad to send tones.167
2Select to send tones. This button only appears when a number that contains a (w) is dialed in hands-free mode.168
3Select to adjust your voice volume that the other party hears from their speaker.168
4Select to mute your voice to the other party.
5Select to mute the Navigation route guidance during a phone call.
6Select to change handset modes between hands-free and cellular phone.
7Select to hang up the phone.

INFORMATION

● Changing from hands-free call to cellular phone call is not possible while driving. - When cellular phone call is changed to hands-free call, the hands-free screen will be displayed and its functions can be operated on the screen. ● Changing between cellular phone call and hands-free call can be performed by operating the cellular phone directly. ● Transferring methods and operations will be different depending on the type of cellular phone you have. ● For the operation of the cellular phone, see the manual that comes with it.

SENDING TONES

BY KEYPAD

This operation cannot be performed while driving. 1 Select "0 - 9". 2 Enter the desired number.

BY SELECTING "Release Tones"

"Release Tones" appear when a continuous tone signal(s) containing a (w) is registered in the contact list. This operation can be performed while driving.

1 Select "Release Tones".

INFORMATION

A continuous tone signal is a character string that consists of numbers and the characters p or w. (e.g. 056133w0123p#1\*) - When the "p" pause tone is used, the tone data up until the next pause tone will be automatically sent after 2 seconds have elapsed. When the "w" pause tone is used, the tone data up until the next pause tone will be automatically sent after a user operation is performed. ● Release tones can be used when automated operation of a phone based service such as an answering machine or bank phone service is desired. A phone number with continuous tone signals can be registered in the contact list. ●Tone data after a "w" pause tone can be operated by voice command during a call.

TRANSMIT VOLUME SETTING

1 Select "Transmit Volume". 2 Select the desired level for the transmit volume. 3 Select to display previous screen.

INFORMATION

- The sound quality of the voice heard from the other party's speaker may be negatively impacted. ●“Transmit Volume” is dimmed when mute is on.

INCOMING CALL WAITING

When a call is interrupted by a third party while talking, the incoming call screen is displayed. 1 Select "Answer" or press the switch on the steering wheel to start talking with the other party. To refuse to receive the call: Select "Decline" or press the switch on the steering wheel.

CHANGING PARTIES

1 Press the on the steering wheel. ● Each time press the on the steering wheel is selected during an interrupted call, the party who is on hold will be switched.

INFORMATION

●This function may not be available depending on the type of cellular phone.

1. PHONE OPERATION (HANDS-FREE SYSTEM FOR CELLULAR PHONES)

6. Bluetooth® PHONE MESSAGE FUNCTION

Received messages can be forwarded from the connected Bluetooth® phone, enabling checking and replying using the system. Depending on the type of Bluetooth® phone connected, received messages may not be transferred to the system. If the phone does not support the message function, this function cannot be used.

DISPLAYING THE MESSAGE SCREEN

1 Display the phone top screen.(→P.156) 2 Select "Message". - A confirmation message appears when the "Automatic Message Transfer" function is set to off (→P.185), select "Yes". 3 Check that the message screen is displayed. "Phone": Select to change to phone mode. ● The account name is displayed on the left side of screen. - Account names are the names of the accounts that exist on the currently connected phone.
FunctionPage
Receiving a message170
Checking messages171
Replying to a message173
Calling the message sender174
Message settings185

RECEIVING A MESSAGE

When an e-mail/SMS/MMS is received, the incoming message screen pops up with sound and is ready to be operated on the screen. ![](images/ddbd9934abcf37862d05280ec61d3913f55664cc0c84f98ce18a0f154279a434.jpg)
text_image Incoming text message from: Made Read Ignore 1 2 3
No.Function
1Select to check the message.
2Select to not open the message.
3Select to call the message sender.

INFORMATION

●Depending on the cellular phone used for receiving messages, or its registration status with the system, some information may not be displayed. ●The pop-up screen is separately available for incoming e-mail and SMS/MMS messages under the following conditions: E-mail: - "Incoming E-mail Display" is set to "Full Screen". (→P.177) - “E-mail Notification Pop-up” is set to on. (→P.177) SMS/MMS: - "Incoming SMS/MMS Display" is set to "Full Screen". (→P.177) - "SMS/MMS Notification Pop-up" is set to on. (→P.177)

CHECKING RECEIVED MESSAGES

1 Display the message screen. (→P.170) 2 Select a desired account name. 3 Select the desired message from the list. 4 Check that the message is displayed. ![](images/5b714d8d9a83987566c1869c659d4d1536db2806fd3c2e6443d23e8197a4518a.jpg)
text_image SMS/MMS 8:41 From Oct 1 2 3 4 Play Reply
No. Function
1Select to call the message sender.
2Select to have messages read out.To cancel this function, select "Stop".When "Automatic Message Read-out" is set to on, messages will be automatically read out. (→P.185)
3Select to display the previous or next message.
4Select to reply the message.(→P.173)This function can be chosen the method to reply message with "Dictation" or "Quick Message".

INFORMATION

- Reading a text message is not available while driving. - Depending on the type of Bluetooth® phone being connected, it may be necessary to perform additional steps on the phone. - Messages are displayed in the appropriate connected Bluetooth ^ phone's registered mail address folder. Select the desired folder to be displayed. - Only received messages on the connected Bluetooth® phone can be displayed. ●The text of the message is not displayed while driving. - Turn the "POWER/VOLUME" knob, or use the volume control switch on the steering wheel to adjust the message read out volume. - E-mail only: Select "Mark Unread" or "Mark Read" to mark mail unread or read on the message screen. This function is available when "Update Message Read Status on Phone" is set to on. (→P.185)

REPLYING TO A MESSAGE (DICTATION REPLY)\*

1 Display the message screen.(→P.170) 2 Select the desired message from the list. 3 Select "Reply". 4 Select "Dictation". 5 When the "Say Your Message" screen is displayed, speak message that you want to send. 6 Select "Send" to send message. "Cancel": Select to cancel sending the message. "Retry": Select to retry speaking message that you want to send. ● While the message is being sent, a sending message screen is displayed. 7 Check that a confirmation screen is displayed when the operation is complete. - If an error message is displayed, follow the guidance on the screen to try again.

INFORMATION

\- Depending on the type of Bluetooth® phone, reply function is not available. \*: If equipped

REPLYING TO A MESSAGE (QUICK REPLY)

15 messages have already been stored. 1 Display the message screen. (→P.170) 2 Select the desired message from the list. 3 Select "Reply". 4 Select "Quick Message". 5 Select the desired message. : Select to edit the message. (→P.173) 6 Select "Send". "Cancel": Select to cancel sending the message. ● While the message is being sent, a sending message screen is displayed. 7 Check that a confirmation screen is displayed when the operation is complete. \- If an error message is displayed, follow the guidance on the screen to try again.

INFORMATION

\- Depending on the type of Bluetooth® phone, reply function is not available.

EDITING QUICK REPLY MESSAGES

This operation cannot be performed while driving. 1 Select corresponding to the desired message to edit. 2 Select "OK" when editing is completed.

INFORMATION

- To reset the edit quick reply messages, select "Default". - "Quick Message 1" ("I am driving and will arrive in approximately [##] minutes."). This message cannot be edited and will automatically fill in [##] with the navigation calculated estimated time of arrival on the confirm message screen. If there are waypoints set, [##] to the next waypoint will be shown. If there is no route currently set in the navigation system, "Quick Message 1" cannot be selected.

CALLING THE MESSAGE SENDER

Calls can be made to an e-mail/SMS/MMS message sender's phone number. This operation can be performed while driving.

CALLING FROM E-MAIL/SMS/MMS MESSAGE DISPLAY

1 Display the message screen. (→P.170) 2 Select the desired message. 3 Select, or press the switch on the steering wheel. - If there are 2 or more phone numbers, select the desired number. 4 Check that the "Dialing..." screen is displayed.

CALLING FROM A NUMBER WITH-IN A MESSAGE

Calls can be made to a number identified in a message's text area. This operation cannot be performed while driving. 1 Display the message screen. (→P.170) 2 Select the desired message. 3 Select the text area. ![](images/701905cb3e42a22b04281e64e612e608772b6f6c8375c7bedcf554fac030c4b1.jpg)
text_image SMS/MMS 8:41 — From:** Oct*****PM Play Reply
- Identified phone numbers contained in the message are displayed in blue text. 4 Select the desired number. 5 Check that the "Dialing..." screen is displayed.

INFORMATION

●A series of numbers may be recognized as a phone number. Additionally, some phone numbers may not be recognized, such as those for other countries.

CALLING FROM THE INCOMING MESSAGE SCREEN

→P.170

2. SETUP

1. PHONE SETTINGS

1 Press the "MENU" button. ![](images/da8add28f5e87b018ed505bf6fb6836dc7140c5279e7e69b6d6687c3a32aa39d.jpg)
text_image M:NU BC105S
2 Select "Setup". 3 Select "Phone". 4 Select the desired item to be set. PHONE SETTINGS SCREEN ![](images/f95838a13fcb9367c821cfe0e01cc17f334308bbceaa8d5e792faae0bbc4b406.jpg)
text_image Setup General Bluetooth Audio Phone Voice Current Phone Sounds Notifications Contacts/Call History Messaging 1 2 3 4 5
No.Information Page
1Connecting a Bluetooth® device and editing the Bluetooth® device information48
2*Sound settings 176
3*Notification settings 177
4*Contact/call history settings178
5*Messaging settings 185
\*: This operation cannot be performed while driving.

SOUND SETTINGS SCREEN

The call and ringtone volume can be adjusted. A ringtone can be selected. 1 Display the phone settings screen. (→P.175) 2 Select "Sounds". 3 Select the desired item to be set. ![](images/7af44c5d67eac22b81e2cbff676971325cfac835b67932db3aeac20d1e6d8d65.jpg)
text_image Sounds 8:57 Ringtone Tone 1 1 Ringtone Volume 0 2 In-call Volume 0 3 Incoming E-mail Tone Tone 1 4 Incoming SMS/MMS Tone Tone 1 5 Default 9
![](images/0aba21dc8006605018c01f621c2d24e944d83f4b2163c343e100b3a3ec01b174.jpg)
text_image Sounds 8:57 Incoming E-mail Tone Tone 1 Incoming SMS/MMS Tone Tone 1 Incoming SMS/MMS Volume B 6 Incoming E-mail Volume B 7 Message Rindout Volume B 8 Default 9

No. Function

1 Select to set the desired ringtone. 2 Select "-" or "+" to adjust the ring-tone volume. 3 Select "-" or "+" to adjust the default volume of the other party's voice. 4 Select to set the desired incoming e-mail tone. 5 Select to set the desired incoming SMS/MMS tone. 6 Select "-" or "+" to adjust the incoming SMS/MMS tone volume. 7 Select "-" or "+" to adjust the incoming e-mail tone volume. 8 Select "-" or "+" to adjust the message readout volume. 9 Select to reset all setup items.

INFORMATION

● Depending on the type of phone, certain functions may not be available.

NOTIFICATION SETTINGS SCREEN

1 Display the phone settings screen. (→P.175) 2 Select "Notifications". 3 Select the desired item to be set. ![](images/f95c10ad49d64b36ef3ca05e4ef80873c155ac055d9042af395442ecaa18f4e2.jpg)
text_image Notifications 8:58 Incoming Call Display Full Screens 1 SMS/MMS Notification Pop-up On 2 Incoming SMS/MMS Display Drop-down 3 E-mail Notification Pop-up On 4 Incoming E-mail Display Drop-down 5 Default 7
![](images/294f928076344ab6d80122706e227e11e8d89e7290d1d91fafa9b9f5ce189819.jpg) ![](images/3a1943337aac23ad5178d022d62deee016e12bc94c22f386ac94c17e18459fff.jpg)
text_image Notifications 8:59 SMS/MMS Notification Pop-up On Incoming SMS/MMS Display Drop-down E-mail Notification Pop-up On Incoming E-mail Display Dress-down Display Contacts/Call History Transfer Status Off Default 7 6

No. Function

1 Select to change the incoming call display. "Full Screen": When a call is ceived, the incoming call screen is displayed and can be operated on the screen. "Drop-down": A message is displayed at the top of the screen.

No. Function

2 Select to set the SMS/MMS notification popup on/off. 3 Select to change the incoming SMS/MMS display. "Full Screen": When an SMS/MMS message is received, the incoming SMS/MMS display screen is displayed and can be operated on the screen. "Drop-down": When an SMS/MMS message is received, a message is displayed at the top of the screen. 4 Select to set the e-mail notification popup on/off. 5 Select to change the incoming e-mail display. "Full Screen": When an e-mail is received, the incoming e-mail display screen is the displayed and can be operated on the screen. "Drop-down": When an e-mail is received, a message is displayed at the top of the screen. 6 Select to set display of the contact/history transfer completion message on/off. 7 Select to reset all setup items.

INFORMATION

● Depending on the phone, these functions may not be available. 7 PHONE

CONTACT/CALL HISTORY SETTINGS SCREEN

Contacts can be transferred from a Bluetooth® phone to this system. Contacts and favorites can be added, edited and deleted. Also, the call history can be deleted. 1 Display the phone settings screen. (→P.175) 2 Select "Contacts/Call History". 3 Select the desired item to be set. ![](images/04fc9a33235c01dbb68909ccc4fea09b73fc4f84cf3c1d710b65405c9f201501.jpg)
text_image Contacts/Call History 9:00 Automatic Transfer Transfer Contacts from Device Sort Contacts By First Name Add Favorite > 4 Remove Favorite > 5 Default 11
![](images/fb78f93a65f4920fdb622dccaebbc7d7d3ffa801d9ee00c869aab26f4dbc7e33.jpg)
text_image Contacts/Call History 9:00 — Clear Call History > 6 New Contact > 7 Edit Contact > 8 Delete Contacts > 9 Manage Voice Tags > 10 Default 11
No.Function Page
1For PBAP compatible Bluetooth® phones: Select to change the contact/ history transfer settings.179
2Select to update contacts from the connected phone or a USB memory.180
3Select to sort contacts by the first name or last name field.
4Select to add contacts to the favorites list.183
5Select to delete contacts from the favorites list.183
6Select to clear the call history.
7*Select to add new contacts to the contact list.182
8*Select to edit contacts in the contact list.182
9*Select to delete contacts from the contact list.182
10Select to set the voice tags.184
11Select to reset all setup items.
\*: For PBAP compatible Bluetooth® phones, this function is available when "Automatic Transfer" is set to off. (→P.178)

INFORMATION

●Depending on the type of phone, certain functions may not be available. - Contact data is managed independently for every registered phone. When one phone is connected, another phone's registered data cannot be read.

SETTING AUTOMATIC CONTACT/HISTORY TRANSFER

The automatic contact/history function is available for PBAP compatible Bluetooth® phones only. 1 Select "Automatic Transfer". 2 Select the desired item to be set. ![](images/2679ecd7ddf92c16a35620dbda6226ac38f7aec65e1640fe2bc95835e84a7db9.jpg)
text_image Automatic Transfer 9:02 Automatic Transfer On 1 Update Note 2 Display Contact Images On 3 Default 4
No. Function
1Select to set automatic contact/history transfer on/off.When set to on, the phone's contact data and history are automatically transferred.
2Select to update contacts from the connected phone. (→P.180)
3Select to set the transferred contact image display on/off.
4Select to reset all setup items.
7 PHONE

UPDATING CONTACTS FROM PHONE

1 Select "Update Now". - Contacts are transferred automatically. 2 Check that a confirmation screen is displayed when the operation is complete. ● This operation may be unnecessary depending on the type of cellular phone. - If another Bluetooth device is connected when transferring contact data, depending on the phone, the connected Bluetooth device may need to be disconnected. - Depending on the type of Bluetooth® phone being connected, it may be necessary to perform additional steps on the phone.

■ UPDATING THE CONTACTS IN A DIFFERENT WAY (FROM THE CALL HISTORY SCREEN)\*

1 Display the phone top screen. (→P.156) 2 Select "History" and select a contact not yet registered in the contact list. 3 Select "Update Contact". 4 Select the desired contact. 5 Select a phone type for the phone number. \*: For PBAP compatible Bluetooth ^® phones, this function is available when “Automatic Transfer” is set to off. (→P.179)

TRANSFERRING CONTACTS FROM DEVICE

FROM PHONE (OPP COMPATIBLE Bluetooth® PHONES ONLY)

1 Select "Transfer Contacts from Device". 2 Select "From Phone (Bluetooth)". ▶When the contact is not registered 3 Transfer the contact data to the system using a Bluetooth ^® phone. ● This operation may be unnecessary depending on the type of cellular phone. - To cancel this function, select "Cancel". 4 Check that a confirmation screen is displayed when the operation is complete. ▶When the contact is registered 3 Select "Replace Contacts" or "Add Contact". "Replace Contacts": Select to transfer the contact from the connected cellular phone and replace the current one. "Add Contact": Select to transfer the desired contact data from the connected cellular phone to add to the current one. 4 Transfer the contact data to the system using a Bluetooth® phone. ● This operation may be unnecessary depending on the type of cellular phone. - To cancel this function, select "Cancel". 5 Check that a confirmation screen is displayed when the operation is complete.

FROM USB DEVICE

Backed-up contact data ("vCard" formatted) can be transferred from USB device or Bluetooth® phone connected via USB to this system. 1 Connect a USB device. ( P.76) 2 Select "Transfer Contacts from Device". 3 Select "From USB". 4 Select "USB 1" or "USB 2" when the multiple USB devices are connected. - If a USB device is connected, skip this procedure. ▶When the contact is not registered 5 Select a desired file from vCard file list. 6 Check that a confirmation screen is displayed when the operation is complete. ▶When the contact is registered 5 Select "Replace Contacts" or "Add Contact". "Replace Contacts": Select to transfer the contact from the connected USB device or Bluetooth® phone and replace the current one. "Add Contact": Select to transfer the desired contact data from the connected USB device or Bluetooth® phone to add to the current one. 6 Select a desired file from vCard file list. 7 Check that a confirmation screen is displayed when the operation is complete.

INFORMATION

●Depending type of phone used and number of files, it may take time to display vCard file lists and download contacts. ●Downloading may not complete correctly in the following cases: - If the power switch is turned off during downloading. - If the USB device or Bluetooth ^ phone is removed before downloading is complete.

REGISTERING A NEW CONTACT TO THE CONTACT LIST

New contact data can be registered. Up to 4 numbers per person can be registered. For PBAP compatible Bluetooth® phones, this function is available when “Automatic Transfer” is set to off. (→P.178) 1 Select "New Contact". 2 Enter the name and select "OK". 3 Enter the phone number and select "OK". 4 Select the phone type for the phone number. 5 To add another number to this contact, select "Yes".

■ REGISTERING A NEW CONTACT IN A DIFFERENT WAY (FROM THE CALL HISTORY SCREEN)

1 Display the phone top screen. (→P.156) 2 Select "History" and select a contact not yet registered in the contact list. 3 Select "Add to Contacts". 4 Follow the steps in "REGISTERING A NEW CONTACT TO THE CONTACT LIST" from "STEP 2". (→P.182)

EDITING THE CONTACT DATA

For PBAP compatible Bluetooth ^ phones, this function is available when “Automatic Transfer” is set to off. (→P.178) 1 Select "Edit Contact". 2 Select the desired contact. 3 Select corresponding to the desired name or number. ▶For editing the name 4 Follow the steps in "REGISTERING A NEW CONTACT TO THE CONTACT LIST" from "STEP 2". (→P.182) ▶For editing the number 4 Follow the steps in "REGISTERING A NEW CONTACT TO THE CONTACT LIST" from "STEP 3". (→P.182)

DELETING THE CONTACT DATA

For PBAP compatible Bluetooth ^ phones, this function is available when "Automatic Transfer" is set to off. (→P.178) 1 Select "Delete Contacts". 2 Select the desired contact and select "Delete". 3 Select "Yes" when the confirmation screen appears.

INFORMATION

●Multiple data can be selected and deleted at the same time.

SETTING FAVORITES LIST

Up to 15 contacts (maximum of 4 numbers per contact) can be registered in the favorites list.

■REGISTERING THE CONTACTS IN THE FAVORITES LIST

1 Select "Add Favorite". 2 Select the desired contact to add to the favorites list. - Dimmed contacts are already stored as a favorite. - When 15 contacts have already been registered to the favorites list, a registered contact needs to be replaced. Select "Yes" when the confirmation screen appears and select the contact to be replaced. 3 Check that a confirmation screen is displayed when the operation is complete.

■ REGISTERING CONTACTS IN THE FAVORITES LIST IN A DIFFERENT WAY (FROM THE CONTACT DETAILS SCREEN)

1 Display the phone top screen. (→P.156) 2 Select "Contacts" and select the desired contact. 3 Select "Add Favorite". 4 Check that a confirmation screen is displayed when the operation is complete.

■ DELETING THE CONTACTS IN THE FAVORITES LIST

1 Select "Remove Favorite". 2 Select the desired contacts and select "Remove". 3 Select "Yes" when the confirmation screen appears. 4 Check that a confirmation screen is displayed when the operation is complete.

■ DELETING CONTACTS IN THE FAVORITES LIST IN A DIFFERENT WAY (FROM THE CONTACT DETAILS SCREEN)

1 Display the phone top screen. (→P.156) 2 Select "Favorites" or "Contacts" and select the desired contact to delete. 3 Select "Remove Favorite". 4 Select "Yes" when the confirmation screen appears. 5 Check that a confirmation screen is displayed when the operation is complete.

SETTING VOICE TAGS

Calls can be made by saying the voice tag of a registered contact in the contact list. (→P.126) 1 Select "Manage Voice Tags". 2 Select the desired item to be set. ![](images/8c5ca621010821de8b0d5bf93029b5e0cbd355f5f7bdc436aba67750e79d7ec4.jpg)
text_image Voice Tagt 9:13 1/50 free New 1 Edit 2 Delete 3
No.FunctionPage
1Select to register a new voice tag.184
2Select to edit a voice tag.185
3Select to delete a voice tag.185

REGISTERING A VOICE TAG

Up to 50 voice tags can be registered. 1 Select "New". 2 Select the desired contact to register a voice tag for. 3 Select “• REC” and record a voice tag. - When recording a voice tag, do so in a quiet area. "▶ Play": Select to play the voice tag. 4 Select "OK" when voice tag registration is complete.

EDITING A VOICE TAG

1 Select "Edit". 2 Select the desired contact to edit. 3 Follow the steps in "REGISTERING A VOICE TAG" from "STEP 3". (→P.184)

DELETING THE VOICE TAG

1 Select "Delete". 2 Select the desired contact and select "Delete". 3 Select "Yes" when the confirmation screen appears.

INFORMATION

●Multiple data can be selected and deleted at the same time. ● Voice tags are deleted when the set language of the system is changed. (→P.60)

MESSAGE SETTINGS SCREEN

1 Display the phone settings screen. (→P.175) 2 Select "Messaging". 3 Select the desired item to be set. ![](images/d95def5289812ac296a203f9a60b9ca234217d10c81f412dcdbffb38ae4aa599.jpg)
text_image Messaging 9:14 Automatic Message Transfer Automatic Message Readout Update Message Read Status on Phone Use Messaging Account Names from Phone Vehicle Signature Default 6 On On On Off Off 1 2 3 4 5
No.Function
1Select to set automatic message transfer on/off.
2Select to set automatic message readout on/off.
3Select to set updating message read status on phone on/off.
4Select to set display of messaging account names on the message screen on/off.When set to on, messaging account names used on the cellular phone will be displayed.
5Select to set adding the vehicle signature to outgoing messages on/off.The vehicle signature can be edited.(→P.186)
6Select to reset all setup items.
7 PHONE

INFORMATION

● Depending on the phone, these functions may not be available.

EDITING VEHICLE SIGNATURE

1 Select "Vehicle Signature". 2 Select "Edit Vehicle Signature". 3 Enter desired signature and select "OK". 4 Select "OK" on the preview screen. "Edit Again": Select to edit the signature again.

3. WHAT TO DO IF...

1. TROUBLESHOOTING

If there is a problem with the hands-free system or a Bluetooth® device, first check the table below. ▶ When using the hands-free system with a Bluetooth® device
Symptom Likely cause SolutionPage
Cellular phoneThis system
The hands-free system or Bluetooth® device does not work.The connected device may not be a compatible Bluetooth® cell phone.For a list of specific devices which operation has been confirmed on this system, check with your Toyota dealer or the following website: http://www.toyota.com/Entune/ in the United States, and http://www.toyota.ca/entune in Canada*
The Bluetooth® version of the connected cellular phone may be older than the specified version.Use a cellular phone with Bluetooth® version 2.0 or higher (recommended: Ver.4.1).*45
7 PHONE ▶When registering/connecting a cellular phone
Symptom Likely cause SolutionPage
Cellular phoneThis system
A cellular phone cannot be registered.An incorrect pass-code was entered on the cellular phone.Enter the correct pass-code on the cellular phone.*
The registration operation has not been completed on the cellular phone side.Complete the registration operation on the cellular phone (approve registration on the phone).*
Old registration information remains on either this system or the cellular phone.Delete the existing registration information from both this system and the cellular phone, then register the cellular phone you wish to connect to this system.*50
A Bluetooth® connection cannot be made.Another Bluetooth® device is already connected.Manually connect the cellular phone you wish to use to this system.48
Bluetooth® function is not enabled on the cellular phone.Enable the Bluetooth® function on the cellular phone.*
Automatic Bluetooth® connection on this system is set to off.Set automatic Bluetooth® connection on this system to on when the power switch is in ACCESSORY or ON mode.53
"The phone is not connected. Please check the phone."Bluetooth® function is not enabled on the cellular phone.Enable the Bluetooth® function on the cellular phone.*
Old registration information remains on either this system or the cellular phone.Delete the existing registration information from both this system and the cellular phone, then register the cellular phone you wish to connect to this system.*50
▶When making/receiving a call
Symptom Likely cause SolutionPage
Cellular phoneThis system
A call cannot be made/received.Your vehicle is out of the service area.Move to where no longer appears on the display.— 18
▶When using the phonebook
Symptom Likely cause SolutionPage
Cellular phoneThis system
Phonebook data can-not be transferred manually/automati-cally.The profile version of the connected cellular phone may not be compatible with transferring phonebook data.For a list of specific devices which operation has been confirmed on this system, check with your Toyota dealer or the following website: http://www.toyota.com/Entune/ in the United States, and http://www.toyota.ca/entune in Canada*
Automatic contact transfer function on this system is set to off.Set automatic contact transfer function on this system to on.178
Passcode has not been entered on the cellular phone.Enter the passcode on the cellular phone if requested (default pass-code: 1234).*
Transfer operation on the cellular phone has not completed.Complete transfer operation on the cellular phone (approve transfer operation on the phone).*
Phonebook data can-not be edited.Automatic contact transfer function on this system is set to on.Set automatic contact transfer function on this system to off.178
PHONE ▶When using the Bluetooth® message function
Symptom Likely cause SolutionPage
Cellular phoneThis system
Messages cannot be viewed.Message transfer is not enabled on the cellular phone.Enable message transfer on the cellular phone (approve message transfer on the phone).*
Automatic transfer function on this system is set to off.Set automatic transfer function on this system to on.— 185
New message notifications are not displayed.Notification of SMS/MMS/E-mail reception on this system is set to off.Set notification of SMS/MMS/E-mail reception on this system to on.* 177
Automatic message transfer function is not enabled on the cellular phone.Enable automatic transfer function on the cellular phone.*
▶ In other situations
Symptom Likely cause SolutionPage
Cellular phoneThis system
The Bluetooth® connection status is displayed at the top of the screen each time the power switch is turned to ACCESSORY or ON mode.Connection confirmation display on this system is set to on.To turn off the display, set connection confirmation display on this system to off.— 52
Even though all conceivable measures have been taken, the symptom status does not change.The cellular phone is not close enough to this system.Bring the cellular phone closer to this system.
Radio interference has occurred.Turn off Wi-Fi® devices or other devices that may emit radio waves.
The cellular phone is the most likely cause of the symptom.Turn the cellular phone off, remove and reinstall the battery pack, and then restart the cellular phone.*
Enable the cellular phone's Bluetooth® connection.*
Disable the Wi-Fi® connection of the cellular phone.*
Stop the cellular phone's security software and close all applications.*
Before using an application installed on the cellular phone, carefully check its source and how its operation might affect this system.*
PHONE \*: For details, refer to the owner's manual that came with the cellular phone.

8

1 BASIC OPERATION

1. QUICK REFERENCE...... 194

MAP SCREEN 194

2. MAP SCREEN OPERATION ..... 196

CURRENT POSITION DISPLAY ..... 196 MAP SCALE 196 ORIENTATION OF THE MAP 197 MAP SCROLL OPERATION.... 198 ADJUSTING LOCATION IN SMALL INCREMENTS.... 198 DISPLAYING INFORMATION ABOUT THE ICON WHERE THE CURSOR IS SET 199 STANDARD MAP ICONS 199

3. MAP OPTIONS OPERATION ..... 200

SWITCHING THE MAP MODE...... 200 SELECTING THE POI\* ICONS ...... 202 ROUTE TRACE 203

4. TRAFFIC INFORMATION ...... 204

DISPLAYING TRAFFIC INFORMATION ON THE MAP...... 207 OPERATION 208 SELECTING SEARCH AREA 210 SETTING HOME AS DESTINATION.... 210 SEARCHING BY KEYWORD...... 210 SEARCHING BY FAVORITES LIST .... 211 SEARCHING BY Destination Assist Connect 211 SEARCHING BY RECENT DESTINATIONS .... 211 SEARCHING BY EMERGENCY ...... 212 SEARCHING BY CONTACT...... 212 SEARCHING BY ADDRESS...... 212 SEARCHING BY POINT OF INTEREST ...... 213 ONE-TOUCH SETTING HOME/ FAVORITE AS A DESTINATION ..... 216

2. STARTING ROUTE

GUIDANCE.... 218 CONFIRM DESTINATION SCREEN ... 219 ROUTE OVERVIEW SCREEN ..... 219 A ROUTE FROM THE Toyota Entune CENTER (VEHICLES WITH DCM) 222

8

3 ROUTE GUIDANCE

1. ROUTE GUIDANCE SCREEN..... 223

SCREEN FOR ROUTE GUIDANCE ... 223 DURING FREEWAY DRIVING...... 225 WHEN APPROACHING AN INTERSECTION 227 TURN LIST SCREEN 227 TURN-BY-TURN ARROW SCREEN... 228

2. TYPICAL VOICE GUIDANCE

PROMPTS.... 229

3. ROUTE OPTIONS

OPERATION 230 REORDERING DESTINATIONS...... 230 SETTING ROUTE PREFERENCES ... 231 SELECTING ROUTE TYPE 231 DETOUR SETTING.... 232 ADJACENT ROAD 233

4 MEMORY POINTS

1. MEMORY POINTS SETTINGS .... 234

SETTING UP HOME 235 SETTING UP FAVORITES LIST ...... 236 SETTING UP AREAS TO AVOID...... 239

5 SETUP

1. DETAILED NAVIGATION

SETTINGS...... 241 SCREENS FOR NAVIGATION SETTINGS 241

2. TRAFFIC SETTINGS.... 245

SCREEN FOR TRAFFIC SETTINGS 245 AVOID TRAFFIC 246 MY TRAFFIC ROUTES 247

3. USE OF INFORMATION

ACCUMULATED BY NAVIGATION SYSTEM (VEHICLES WITH DCM)...... 250

6 TIPS FOR THE NAVIGATION SYSTEM

1. GPS (GLOBAL POSITIONING

SYSTEM).... 251 LIMITATIONS OF THE NAVIGATION SYSTEM 251

2. MAP DATABASE VERSION

AND COVERED AREA 253 MAP INFORMATION 253 TEMPORARY UPDATES OF THE MAP (VEHICLES WITH DCM) ...... 253

1. BASIC OPERATION

1. QUICK REFERENCE

MAP SCREEN

To display this screen, press the "MAP" button. ![](images/4fc8bb27e5a3a5f5c17ad1af19deeaf755d54d6c55d707fdb7ca7a6730ba3b09.jpg)
text_image Exit 8 1:53 3.4 mi 2 NE 3 4 5 Cheverly Community Park 6 7 8 9 10 4.7 mi 2:00 AM ET CPM601aCTTUS
No.Name Function Page
12D North-up, 2D heading-up or 3D heading-up symbolIndicates whether the map orientation is set to north-up or heading-up. The letter(s) under this symbol indicate the vehicle's heading direction (e.g. N for north). In 3D map, only a heading-up view is available.197
2Destination buttonSelect to display the destination screen. 208
3Map options buttonSelect to display the map options screen. 200
4Route options buttonSelect to display the route options screen. 230
5Mute buttonSelect to mute the voice guidance. When set to on, the indicator will illuminate.
No.NameFunctionPage
6Zoom in/out buttonSelect to magnify or reduce the map scale. When either button is selected, the map scale indicator bar appears at the bottom of the screen.196
7Micro city map buttonSelect to display the micro city map screen. 197
8Route information barDisplays the distance with the estimated travel time/arrival time to the destination. The route information bar fills from left to right as the vehicle progresses on the route.224
9Delete destination buttonSelect to delete destinations. —
10Speed limit iconIndicates the speed limit on the current road. The display of the speed limit icon can be set to on/off.200
11*Clock Displays the clock. —
\*: The clock is not displayed on the navigation system screen for this vehicle. The clock is displayed on the meter.

INFORMATION

\- When the vehicle is not receiving GPS signals, such as when driving in a tunnel, will be displayed at the bottom left corner of the screen. ![](images/332add47002103975213d83b4aa25efabdc0308e8aafe4ae48b12cf1bd4a851a.jpg)

1. BASIC OPERATION

2. MAP SCREEN OPERATION

CURRENT POSITION DISPLAY

1 Press the "MAP" button. ![](images/10532faab3d42f6158c0959d7379201bf3ac164c3d83727c9bca202f8878cbb4.jpg)
text_image MAP BC104S
2 Check that the current position map is displayed. \- To correct the current position manually:→P.243

INFORMATION

●While driving, the current position mark is fixed on the screen and the map moves. ●The current position is automatically set as the vehicle receives signals from the GPS (Global Positioning System). If the current position is not correct, it is automatically corrected after the vehicle receives signals from the GPS. ●After the battery disconnection, or on a new vehicle, the current position may not be correct. As soon as the system receives signals from the GPS, the correct current position is displayed.

MAP SCALE

1 Select or to change the scale of the map screen. ![](images/f9a0010c11517b4afcba292f134fc18c2937c66dfaed8079423032e6c3d9b32e.jpg)
text_image 1:05 N A B Brenton Gate Ct Nell 1:31 Nell 1:31 Nell Brenton Gate Ct Nell A 31 Nell 04/06/2017 12:00 AM 12:00 PM 12:00 PM 12:00 PM C 100000 100000 100000 100000 100000 100000 100000 100000 100000 100000 100000 100000 100000 100000 100000 9999999999999999999999999999999999999999999999999999999999999999999999999999999999999999999999999999 ←
● The scale indicator bar appears at the bottom of the screen. - Select and hold+or to continue changing the scale of the map screen. - The scale of the map screen can also be changed by selecting the scale bar directly. This function is not available while driving. ● Pinch outward on the screen to zoom in and pinch inward to zoom out. - In areas where the micro city map is avail- able the map scale changes from ![](images/aa87a13b449ec5ec95c67328a4db4d71ad30819b57c8699e1c4e388065e1c33b.jpg) ![](images/00b6418390abed5f27ce51705e55ee4df17ad65ead0370503f6f20fde5c10b97.jpg) when at the minimum range.

MICRO CITY MAP

For areas covered by the micro city map (some major cities), a micro city map on a scale of 75 ft. (25 m) can be selected. When the map is scaled down to 150 ft (50 m), changes to and can be selected to display the micro city map. 1 Select on the map screen. 2 Check that the micro city map is displayed. ![](images/12992d844c0eddcaf5b2d4199634f2c64e7d08ef53707338a4467e3b48736bc4.jpg)
text_image 1:06 1401 1450 5.51 N.W. Mappa 3x N.W. 14th St NW C:\2007\1-PC\8
● To return to the normal map display, select ![](images/169cdfeb1127550729aade42efe24af652ea2f30798553c10d96a28f12de9800.jpg) \- If the map or the current position is moved to the area which is not covered by the micro city map, the screen scale automatically changes to 150 ft. (50 m). \- On the micro city map, a one way street is displayed by \- Scrolling the micro city map is not available while driving. Building micro cities in the database were created and provided by HERE.

ORIENTATION OF THE MAP

The orientation of the map can be changed between 2D north-up, 2D heading-up and 3D heading-up by selecting the orientation symbol displayed at the top left of the screen. : North-up symbol Regardless of the direction of vehicle travel, north is always up. : Heading-up symbol The direction of vehicle travel is always up. : 3D Heading-up symbol The direction of vehicle travel is always up. \- The letter(s) under this symbol indicate the vehicle's heading direction (e.g. N for north).

MAP SCROLL OPERATION

The map can be scrolled to view loca- tions that are different than your cu- rent position. ![](images/ee9737f2bc0ac67701346161c5bb7402bfe007f589ee012f79a7bceb6fdb47a7.jpg)
text_image 400 ft 1 2 3 4
No. Information/Function
1Cursor mark
2Distance from the current position to the cursor mark.
3Select to register as a memory point. To change the icon, name, etc.:→P.236
4Select to set as a destination.(→P.218)
● The map screen can be scrolled by touching, dragging or flicking it. (→P.31) \- Press the "MAP" button to return to the current position.

ADJUSTING LOCATION IN SMALL INCREMENTS

The cursor location can be adjusted in small increments. 8 directional arrows may appear in the following cases. - When "Adjust Location" is selected on the map screen - When changing the location of memory points on the editing screen (→P.238, 240) - When adjusting the current position mark manually on the calibration screen (→P.244) 1 Select one of the 8 directional arrows to move the cursor to the desired point and then select "OK". ![](images/fe821ed5effa446af0983ef9ecc18e33aa19494276f30a1d28efbf02f36f3055.jpg)
text_image Adjust Location 1:12 System 500 Thomas 500 OK

DISPLAYING INFORMATION ABOUT THE ICON WHERE THE CURSOR IS SET

When the cursor is placed over an icon on the map screen, the name is displayed at the top of the screen. If "Info" is shown to the right of the name, detailed information can be displayed. 1 Place the cursor over an icon. 2 Select "Info". ![](images/79cd7ec0857d23afaa4d7995fe0c83f1179b46e3c03b0ff25f880cf23b066fdb.jpg)
text_image HES Info 1:15 400 ft 3.5 km/100km 6.5 km/100km 3.5 km/100km 6.5 km/100km 6.5 km/100km 6.5 km/100km 6.5 km/100km 6.5 km/100km 6.5 km/100km 6.5 km/100km 6.5 km/100km 6.5 km/100km 6.5 km/100km Serve Enter OK OK OK
● The information screen will be displayed. "Save": Select to register as a memory point. To change the icon, name, etc. (→P.236) "Go"/"Enter": Select to set as a destination. ![](images/39c605f925ad34cf2d4ec2fedf292f70d1552bde18bd9873dc3ccf88bb02eaad.jpg) Select to call the registered number. "Delete": Select to delete destination or memory point. "Edit": Select to display the edit memory point screen. STANDARD MAP ICONS
Icon Name:
Park
Business facility
Airport
Military
University
Hospital
Stadium
Shopping mall
Golf

1. BASIC OPERATION

3. MAP OPTIONS OPERATION

Information such as POI icons, route trace, speed limit, etc. can be displayed on the map screen. 1 Select on the map screen. (→P.194) 2 Select the desired items to be displayed. ![](images/2816f8af73668a1b7e02f29b1d4260849e19eb4f797c4e68aeedbd947680e811.jpg)
text_image Map Options Map Mode 1 ROI Zone 2 Speed Limit 3 Traffic Information 4 Route Trace 5 Map Data 6

SWITCHING THE MAP MODE

1 Select on the map screen. (→P.194) 2 Select "Map Mode". 3 Select the desired configuration button. ![](images/39995a083dd548a1fe46ab38978f956a9e2d017b1a6be7f1531f2ac2a7f33786.jpg)
text_image Map Mode 1:24 Map Only 1 Dual Map 2 Compact 3 Turn List 4 Fremacy Exit List 5 Intersection 6 Turn-by-TurnArrow 7
No. Function Page
1Select to display the desired map mode.200
2Select to select or change POI icons.202
3Select to display speed limit icon.
4*Select to display traffic information.207
5Select to display route trace.203
6Select to display the map version and coverage area.253
\*: This function is not available in some countries and areas. - To hide the map options screen, touch any part of the map screen.
No.FunctionPage
1Select to display the single map screen.
2Select to display the dual map screen.201
3Select to display the compass mode screen.201
4Select to display the turn list screen.227
5Select to display the freeway exit list screen.225
6Select to display the intersection guidance screen or the guidance screen on the freeway.227
7Select to display the turn-by-turn arrow screen.228
- Depending on the conditions, certain screen configuration buttons cannot be selected.

DUAL MAP

The map on the left is the main map. The right side map can be edited. 1 Select any point on the right side map. ![](images/e679623e47146faaf71c621cd4fdc46b4b39f7ff0188b6866b5de1b26d48839b.jpg)
text_image Exit 8 5.0 mi 1:24 0.9 mi 0 km 45 KPMN26-11-15
2 Select the desired item. ![](images/57311f4c5587d790acf7249aecd0699ba0307c40633d2d1b36ce2012596cb0de.jpg)
text_image Show on Right Map 1 2 3 4 1:26 OK
No.Function Page
1Select to change the orientation of the map.197
2Select to display POI icons.202
3*Select to show traffic information.204
4Select to change the map scale.196
\*: This function is not available in some countries and areas. 3 Select "OK".

COMPASS

Information about the destination, current position and a compass is displayed on the screen.

INFORMATION

●The destination mark is displayed in the direction of the destination. When driving, refer to the longitude and latitude coordinates, and the compass, to make sure that the vehicle is headed in the direction of the destination. - When the vehicle travels out of the coverage area, the guidance screen changes to the whole compass mode screen.

SELECTING THE POI ICONS

1 Select on the map screen. (→P.194) 2 Select "POI Icons". 3 Select the desired POI category and select "OK". ![](images/d4a8f56b35882958e023bc6257f0216adeed21def070b99738250aba27290b23.jpg)
text_image Select POI Icons 1:40 1 Clear 2 □ Gen (ALL) 3 ATMs □ Dining (ALL) 4 Parks & Beaches □ Groceries (ALL) 5 Hotels (ALL) 4 Other POIs 5 Acquired Mix OK
No.Information/Function Page
1Displays up to 5 selected POI icons on the map screen-
2Select to cancel the select-ed POI icons.-
3Displays up to 6 POI icons as favorite POI categories. If a POI category is select-ed to be displayed on the map, its icon will be dis-played above.243
4Select to display other POI categories if the desired POIs cannot be found on the screen.202
5Select to search for the nearest POIs.202

SELECTING OTHER POI ICONS TO BE DISPLAYED

1 Select "Other POIs". 2 Select the desired POI categories and select "OK". "List All Categories": Select to display all POI categories.

DISPLAYING THE LOCAL POI LIST

POIs that are within 20 miles (32 km) of the current position will be listed from among the selected categories. 1 Select "Around Me". 2 Select the desired POI. ![](images/58070b85bae6a97e57cf113c2b476a71170dd748edc5e781838331ff1eaf20f9.jpg)
text_image Around Me AU BON PAIN SUBWAY LUCKY'S CAFE TAYLOR GOURMET AU BON PAIN Sort/Search Area 1:42 0.0 ms 0.0 ms 0.1 ms 0.1 ms 0.1 ms
"Sort/Search Area": Select to sort (distance, name, category) POIs or search area. - Select "Near Here" to search for POIs near the current position. - Select "Along My Route" to search for POIs along the route. 3 Check that the selected POI is displayed on the map screen.

ROUTE TRACE

The traveled route can be stored and retraced on the map screen. This feature is available when the map scale is 30 miles (50 km) or less. 1 Select on the map screen. (→P.194) 2 Select "Route Trace". ● The route trace starts. 3 Check that the traveled line is displayed. ![](images/004b4fcd124a699a4d0fe9316c273c29a43351ce0ae8b450d1820fd19add0547.jpg)
text_image Exit B 3.4 mm Cash Park Chaweta Commuho, Pa 4.7 mm 2.00 mm ST 1:53 55

STOP RECORDING THE ROUTE TRACE

1 Select on the map screen. (→P.194) 2 Select "Route Trace" again. 3 A confirmation screen will be displayed. "Yes": Select to keep the recorded route trace. "No": Select to erase the recorded route trace.

INFORMATION

●The traveled route can be stored up to 124 miles (200 km).

1. BASIC OPERATION

4. TRAFFIC INFORMATION\*

Traffic data can be received via HD Radio broadcast or DCM (Data Communication Module) to display traffic information on the map screen. 1 Press the "MENU" button. ![](images/8a49c7a331fbb281080f51d670d078b5cb9d353c4aca1ba9f7b1796b63b31ddf.jpg)
text_image MENU BC105S
2 Select "Info". 3 Select "Traffic incidents". 4 Select the desired item. ▶When the route has not been set ![](images/9a9e42d7f247710aec7183946321d787b569d2d27bce8a498f3afd8470e7bac7.jpg)
text_image Traffic Incidents 1:54 Traffic Events on Current Road 1 Traffic Events Nearby 2 Predictive Traffic Map 3 My Traffic Routes 4
▶When the route has been set ![](images/8b0f71eb2b0d0206902e504443c85b0d3990a41d4a2c20ff32fba2cc9442a3e9.jpg)
text_image Traffic Incidents 1:53 Traffic Events on Current Route 5 Traffic Events Nearby 2 Predictive Traffic Map 3 My Traffic Routes 4
No.Function Page
1Select to display traffic information for the current road.205
2Select to display nearby traffic information.205
3Select to display a map with predictive traffic data.206
4Select to display traffic along the saved routes.206
5Select to display traffic information for the set route.205
\*: This function is not available in some countries and areas.

INFORMATION

- If a large amount of information is being received, it may take longer than normal for the information to be displayed on the screen. - If traffic information cannot be received because the vehicle is outside of HD Radio coverage area, it may still be able to be received using DCM. (→P.144)

DISPLAYING TRAFFIC INFORMATION

A list of current traffic information can be displayed along with information on the location of each incident. 1 Display the traffic incidents screen. (→P.204) 2 Select "Traffic Events on Current Road", "Traffic Events on Current Route" or "Traffic Events Nearby". 3 Select the desired traffic information. ▶When “Traffic Events Nearby” is selected, depending on whether the traffic flow information is enabled/disabled, the following will be displayed: When enabled: Traffic event and congestion information When disabled: Traffic event information only 4 Check that the traffic information is displayed. "Detail": Select to display detailed traffic information.

DISPLAYING PREDICTIVE TRAFFIC INFORMATION

A map with predictive traffic data can be displayed. 1 Display the traffic incidents screen. (→P.204) 2 Select "Predictive Traffic Map". 3 Scroll the map to the desired point and set the time of predictive traffic information. - The time of the predictive traffic information can be changed in 15-minute intervals up to +45 minutes. “<”: Moves the time forward 15 minutes. ">": Moves the time back 15 minutes.

MY TRAFFIC ROUTES

Traffic information along the saved routes can be displayed. To use this function, it is necessary to register a route. (→P.247) 1 Display the traffic incidents screen. (→P.204) 2 Select "My Traffic Routes". - If map data has been updated, a confirmation screen will be displayed. Select "OK" or "Do Not Tell Me Again". 3 Select the desired route. "Options": Select to add, edit or delete personal routes.(→P.247) - If routes have not been registered yet, a confirmation screen will be displayed. Select "Yes" to register the route. 4 Select the desired traffic information. 5 Check that the traffic information is displayed. "Detail": Select to display detailed traffic information.

DISPLAYING TRAFFIC INFORMATION ON THE MAP

1 Select on the map screen. 2 Select "Traffic Information". 3 Check that the traffic information is displayed.

INFORMATION

●The icons indicate traffic incidents such as construction, accidents, etc. Select an icon to hear more detail by voice. ●The arrows indicate the flow of traffic. The color changes depending on the speed.

2. DESTINATION SEARCH

1. DESTINATION SEARCH OPERATION

The destination screen enables to search for a destination. The destination screen can be reached by the following methods: ▶From the "MENU" button Press the "MENU" button, and then select "Destination". ▶From the "MAP" button Press the "MAP" button, and then select ![](images/ce93e21e5e692369d52befb6b7033aec49674dd32cf978a3a6cbb85b99ae5a37.jpg) To hide the destination screen, touch any part of the map screen. ![](images/5c8700b46d6d55076c63dae586443fa42e2e37c6f8423bd0e9989831e4ab487c.jpg)
text_image Destination Search Favorites Dist Assist Recent Emergency 2:01 Destination Contacts Address Point of interest 2:01 7 8 9
No.Function Page
1Select to set a destination by home. 210
2Select to search for a destination by entering keywords. 210
3Select to search for a destination from a registered entry in "Favorites". 211
4*Select to search for a destination via the Toyota Entune center. 211
5Select to search for a destination from recent set destinations. 211
6Select to search for a destination from emergency service points. 212
7Select to search for a destination from contact data which had been transferred to the system from a registered cellular phone.212
8Select to search for a destination by address. 212
9Select to search for a destination by point of interest. 213
\*: This function is not available in some countries and areas.

SELECTING SEARCH AREA

The selected state (province) can be changed to set a destination from a different state (province) by using "Address" or "Point of Interest". 1 Display the destination screen. (→P.208) 2 Select "Address" or "Point of Interest". 3 Select "Select State/Province" or "Change State/Province". - If a state (province) has not been selected yet, “Select State/Province” is displayed. 4 Select the desired state (province). ![](images/41261ceaa69782f439f159686dbdd68c25fd0f3dc77c688a782475eb2604e1f4.jpg)
text_image State/Province United States A Alabama Canada Alaska ABC DEF Mexico Arizona GHI JKL Arkansas MNO PQRS California TUV WXYZ Colorado 123000000000000000000000000000000000000000000000000000000000000000000000000000000000000 2:04
\- To change countries, select "United States", "Canada" or "Mexico".

SETTING HOME AS DESTINATION

To use this function, it is necessary to register a home location. ( P.235) 1 Display the destination screen. (→P.208) 2 Select ![](images/d91f8ceaf2dbf929d97d0aba2ee2cdfbf74af012d40dae68cede626d3fe8a1b6.jpg) \- The navigation system performs a search for the route and the route overview is displayed. (→P.219)

SEARCHING BY KEYWORD

The destination can be searched by entering various keywords. 1 Display the destination screen. (→P.208) 2 Select "Search". 3 Enter characters on the keyboard. 4 Select "Search". ▶When there is more than 1 result 5 Select the desired item from the list. ①: Select to display updated information about the selected entry. (vehicles with DCM)

INFORMATION

●To search for a facility name using multiple search words, put a space between each word. - Search results may differ depending on the Toyota Entune subscription status and communication status.

SEARCHING BY FAVORITES LIST

To use this function, it is necessary to register a point as a favorites list entry. ( P.236) 1 Display the destination screen. (→P.208) 2 Select "Favorites". 3 Select the desired favorites list entry.

SEARCHING BY Destination Assist Connect\*

A Destination Assist Connect operator can search for a destination. You can request a specific business, address, or ask for help locating your desired destination. (→P.263) 1 Display the destination screen. (→P.208) 2 Select "Dest Assist".

SEARCHING BY RECENT DESTINATIONS

1 Display the destination screen. (→P.208) 2 Select "Recent". 3 Select the desired destination. "Sort/Delete": Select to sort (date, name) or delete destination(s).

INFORMATION

● Up to 100 previously set destinations are displayed on the screen.

DELETING RECENT DESTINATIONS

1 Select "Sort/Delete". 2 Select "Delete Recent Destinations". 3 Select the desired recent destination(s) to be deleted. 4 Select "Yes" when the confirmation screen appears. "Sort/Delete All": Select to sort (date, name) destinations or delete all. \*: This function is not available in some countries and areas.

SEARCHING BY EMERGENCY

1 Display the destination screen. (→P.208) 2 Select "Emergency". 3 Select the desired emergency category. 4 Select the desired destination.

INFORMATION

●The navigation system does not guide in areas where route guidance is unavailable. (→P.252)

SEARCHING BY CONTACT

To use this function, it is necessary to have contact data which had been transferred to the system from a registered cellular phone. (→P.162) 1 Display the destination screen. (→P.208) 2 Select "Contacts". 3 Select the desired contact. 4 Select "Addresses". 5 Select the desired address. 6 Follow the steps in "SEARCHING BY KEYWORD" from "STEP 4". (→P.210)

INFORMATION

●This function may not be available depending on the type of cellular phone.

SEARCHING BY ADDRESS

There are 2 methods to search for a destination by address. 1 Display the destination screen. (→P.208) 2 Select "Address". 3 Select the desired search method. ![](images/632e42389722b474518578b386da25fa396f7452a454b1e60572e7c87027d04f.jpg)
text_image Address 2:08 1 Change State/Province Address Select a method to search for an address: 2 City Street Address
No.FunctionPage
1Select to change the search area.210
2Select to search by city.212
3Select to search by street address.213

SEARCHING BY CITY

1 Select "City". 2 Enter a city name and select "Search". "Last 5 Cities": Select the desired city name from the list of the last 5 cities. 3 Select the desired city name. 4 Enter a street name and select "Search". 5 Select the desired street name. 6 Enter a house number and select "Search". \- If multiple locations with the same address exist, the address list screen will be displayed. Select the desired address.

SEARCHING BY STREET ADDRESS

1 Select "Street Address". 2 Enter a house number and select "Search". 3 Enter a street name and select "Search". 4 Select the desired street name. 5 Enter a city name and select "Search". 6 Select the desired city name. \- If multiple locations with the same address exist, the address list screen will be displayed. Select the desired address.

INFORMATION

●A street name can be searched using only the body part of its name. For example: S WESTERN AVE \- A search can be performed by entering "S WESTERN AVE", "WESTERN AVE" or "WESTERN".

SEARCHING BY POINT OF INTEREST

There are 3 methods to search for a destination by Points of Interest. 1 Display the destination screen. (→P.208) 2 Select "Point of Interest". 3 Select the desired search method. ![](images/23bedbca0b9c83596063a892c1e5825676fe3e8e5f7c6ff773e4d76e141f49d4.jpg)
text_image Point of Interest 2:08 1 Change State/Province Advance Please select a method to search for a point of interest (PO) 2 Name 3 Category 4 Phone #
No.Function Page
1Select to change the search area.210
2Select to search by name. 214
3Select to search by category.215
4Select to search by phone number.216

SEARCHING BY NAME

1 Select "Name". 2 Enter a POI name and select "Search". 3 Select the desired POI. "Sort/Category/City": Select to sort (name, distance) the displayed entries, change the POI category, or enter a city name. \- When entering the name of a specific POI, and there are 2 or more sites with the same name, the list screen will be displayed. Select the desired POI.

INFORMATION

●To search for a facility name using multiple search words, put a space between each word. 1 Select "Sort/Category/City". 2 Select "Enter a city name". 3 Enter a city name and select "Search". "Any City": Select to cancel the city setting. 4 Select the desired city name. 5 Select the desired POI.

SELECTING FROM THE CATEGORIES

1 Select "Sort/Category/City". 2 Select "Change POI category". 3 Select the desired category. \- If there is more than 1 detailed item of the selected category, the detailed list will be displayed. "List All Categories": Select to display all POI categories. 4 Select the desired POI.

SEARCHING BY CATEGORY

1 Select "Category". 2 Select the desired search point. ![](images/479f1fff5dc3ea99c06e3ff8d5c6c3b6e7837e8107700e725e42db862ab52216.jpg)
text_image POI Category 2:11 Where would you like to search? Near Here 1 Along My Route 2 Near a City Center in Arkansas 3 Near a Destination 4
No. Function
1Select to search for POIs near your current position.
2Select to search for POIs along the set route.
3Select to search for POIs near a specific city center. (→P.215)
4Select to search for POIs near a destination.When more than 1 destination has been set, a list will be displayed on the screen. Select the desired destination.
3 Select the desired POI category. \- If there is more than 1 result for the selected category, a detailed list will be displayed. "List All Categories": Select to display all POI categories. "Favorite POI Categories": Select to use the 6 POIs that have been previously set.(→P.243) 4 Select the desired POI.

INFORMATION

●The names of POIs located within approximately 200 miles (320 km) from the selected search point can be displayed.

WHEN "Near a City Center in XX \*" IS SELECTED

1 Select "Near a City Center in XX". 2 Enter a city name and select "Search". "Last 5 Cities": Select the desired city name from the list of the last 5 cities. 3 Select the desired city name. 4 Select "OK" when the city center map screen is displayed. 5 Follow the steps in "SEARCHING BY CATEGORY" from "STEP 3". (→P.215) \*: XX represents the selected search area name.

INFORMATION

\- If the navigation system has never been used, selecting the city name from "Last 5 Cities" will not be available.

SEARCHING BY PHONE NUMBER

1 Select "Phone #". 2 Enter a phone number and select "OK". - If multiple locations with the same phone number exist, the list screen will be displayed.

INFORMATION

\- If there is no match for the entered phone number, a list of identical numbers with different area codes will be displayed.

ONE-TOUCH SETTING HOME/ FAVORITE AS A DESTINATION

To use this function, it is necessary to register a home and/or a favorite location. Up to 2 favorites can be registered as preset destinations. (→P.235,236) To set the home or a preset destination as the destination, select the corresponding button. 1 Turn the power switch to ACCESSORY or ON mode. 2 Press the "MAP" button. ![](images/7454caedc7a8c3c0b9e386f610e0e6e934e0fd1848558d47e59148eff828e320.jpg)
text_image MAP BC104S

3 Select the desired item.

![](images/9af663d85e1a11d9850fb7e478d41142b73c3553567754dbfc02e521b297d9ae.jpg)
text_image 2-30 1 2 Tune Promote

No. Function

1 Select to set the registered home as the destination. 2 Select to set a registered favorite as the destination. (Up to 2 favorites can be registered as preset destinations.) - The estimated time of arrival to the registered home and preset destinations from the current position will be displayed. - If the home or a preset destination has not been registered, "Save Home" or "Save Favorite" will be displayed, respectively. To register a home or preset destination, select the corresponding button.

INFORMATION

- When the destination is very close to the current position, "Nearby" will be displayed. ●The one-touch buttons for home and favorites will disappear after the vehicle has been driven for a while. ●The color of the estimated arrival time indicator may change depending on the traffic information received. ●This function is available when "Automatic Destination List Info" is set to on. (→P.241)

2. DESTINATION SEARCH

2. STARTING ROUTE GUIDANCE

When the destination is set, the confirm destination screen will be displayed. 1 Select "Go" on the confirm destination screen. ![](images/fddec0302bcb2df7e1dc5595d5389a94c74224992551af6b4535ac7d0134a43e.jpg)
text_image Confirm Destination N 40°44'54" W73°59'8" 1:31 Adjust Location ① Save /> Go
● For details about this screen: →P.219 2 Select "OK" on the route overview screen. ![](images/4b4c62066ef213de8ffaa3e6d75b7dbbf77f8188bac96e380c8cfe2de79c1b02.jpg)
text_image Quick Turn Dot Franklin 3 Routes Edit Route Total 8.4 mm 8.4 mm 17 mm OK Add Points: 100%
● For details about this screen: →P.219 ![](images/828991d58d14afb48b17f0d4c03cb1068ae5d473af5565f918c65d88af8b26f2.jpg)

WARNING

\- Be sure to obey traffic regulations and keep road conditions in mind while driving. If a traffic sign on the road has been changed, the route guidance may not indicate such changed information.

INFORMATION

●The route for returning may not be the same as that for going. ● The route guidance to the destination may not be the shortest route or a route without traffic congestion. - Route guidance may not be available if there is no road data for the specified location. - When setting the destination on a map with a scale more than 0.5 mile (800 m), the map scale changes to 0.5 miles (800 m) automatically. If this occurs, set the destination again. - If a destination that is not located on a road is set, the vehicle will be guided to the point on a road nearest to the destination. The road nearest to the selected point is set as the destination. CONFIRM DESTINATION SCREEN ![](images/5374bfc80f1b66599e1cda9cf93bee3bfb02647e9cacedb8d33de5176fde232a.jpg)
text_image Confirm Destination N 40°44'54" W73°59'6" 1 2 3 4 5 6 7 8 9 10 11 12 1 Adjust Location
No.Function
1Select to adjust the position in smaller increments. (→P.198)
2Select to search for the route. (→P.218)If a destination has already been set, “Go Directly” and “Add to Route” will be displayed.“Go Directly”: Select to delete the existing destination(s) and set a new one.“Add to Route”: Select to add a destination to the current route.
3Select to register as a memory point.
4Select to call the registered number.
5*Select to update information about the selected entry.
\*: This function is displayed only when there is information from the Toyota Entune center. (→P.210) ROUTE OVERVIEW SCREEN ![](images/653cb15973e1534b77271f030c73fa3f5d69ecf0d5bc2d3df9ffc3400196c042.jpg)
text_image Quick Turn List 3 9 1 4 3 Routes Ede Route 2 6 9 7 Total 8.4 ms 2 Two 8.4 ms 17 ms OK
No.Information/Function Page
1Current position —
2Destination point —
3Select to display a list of the turns required to reach the destination.221
4Select the desired route from 3 possible routes.220
5Select to change the route.221
6Type of route and its distance
7Distance of the entire route
8Select to start guidance.Select and hold to start demo mode. (→P.220)
9Displayed when the route displayed is from the Toyota Entune center.222
NAVIGATION SYSTEM

STARTING DEMO MODE

Before starting the route guidance, the demonstration of the route guidance can be viewed. 1 Select and hold "OK" on the route overview screen until a beep sounds. - Press the "HOME" or "MAP" button to end demo mode.

3 ROUTES SELECTION

1 Select "3 Routes". 2 Select the desired route. ![](images/2743c0a657351e03bd4fadc6ea730f65cdb94c9529cdb6751bd18278f51a34cb.jpg)
text_image 1:26 1 2 3 4 5
No. Information/Function
1Displayed when the route displayed is available from the Toyota Entune center. ( [IMAGE]
2Select to display the quickest route.
3Select to display the route that is the shortest distance to the set destination.
4Select to display the alternative route.
5Select to display the information about the 3 routes. (→P.220)

DISPLAYING 3 ROUTES INFORMATION

1 Select "Info". 2 Check that the 3 routes information screen is displayed. ![](images/71c7f75cbdc0c451de743ff798ec6e14eb0f201c3a894d5741f973226bf5d390.jpg)
text_image 3 Routes Information 2:35 Quick Short Alternate 1 21 mm 22 mm 27 mm 2 17 mm 17 mm 18 mm 3 5.5 mm 5.5 mm 5.5 mm 4 14 mm 14 mm 9.9 mm 5
No. Information
1Time necessary for the entire trip
2Distance of the entire trip
3Distance of the toll road
4Distance of the freeway
5Distance of the ferry trip

DISPLAYING TURN LIST

A list of turn information from the current position to the destination can be displayed. 1 Select "Turn List". 2 Check that the turn list is displayed. ![](images/da9129c16a6f100b0a40acee12d1e7726ebebdea2da81fa32c3f35efe69f4d32.jpg)
text_image Turn Last 2:37 New York Ax NE 0.1 mi New York Ax NE 0.3 mi Mt Direct RJ NE 0.0 mi Unanswered Road 1 Map 3 2 4
No. Information
1Current position
2Distance to the next turn
3Turn direction at the intersection
4Select to display the map of the selected point.

INFORMATION

\- Not all road names on the route may appear on the list. If a road changes its name without requiring a turn (such as on a street that runs through 2 or more cities), the name change will not appear on the list. The street names will be displayed in order from the starting point, along with the distance to the next turn or the destination.

EDITING ROUTE

Destinations can be added, reordered or deleted, and conditions for the route to the destination can be changed. 1 Select "Edit Route". 2 Select the desired item. ![](images/0f680d3ecc4e3a035f2b0c2cae44c6736ea4bfb4eea16bb5fb5ef1f72e04f28f.jpg)
text_image Edit Route 2:49 Destination Add Delete Recorder Preferences
No. Function Page
1Select to add destinations. 222
2Select to delete destinations.222
3Select to reorder destinations.230
4Select to set route preferences.231

ADDING DESTINATIONS

1 Select "Add". 2 Search for an additional destination in the same way as a destination search. (→P.208) \- Up to 5 destinations can be set. ▶When the vehicle is stopped 3 Select the "Add Destination Here" at the position in the route which you want to add the destination. ▶While driving 3 Select "Beginning" or "End".

DELETING DESTINATIONS

1 Select "Delete". 2 Select "Yes" when the confirmation screen appears. - If more than one destination has been set, select the destination(s) to be deleted. (The system will recalculate route(s) to the remaining set destination(s).)

A ROUTE FROM THE Toyota Entune CENTER\* (VEHICLES WITH DCM)

When starting route guidance or rerouting, a route can be provided automatically by the Toyota Entune center. This function is available when dynamic route setting is enabled. (→P.241)

3. ROUTE GUIDANCE

1. ROUTE GUIDANCE SCREEN

During the route guidance, various types of guidance screens can be displayed depending on conditions. SCREEN FOR ROUTE GUIDANCE ![](images/f09ccb77423d46ff6e6199e57a0b01e1cbd3fcc60676abe961ac847c30783069.jpg)
text_image Exit 8 1:24 5.6 mi 1 2 3 4 5 6 9 m 0.0000 1.0000
No. Information/Function
1Distance to the next turn and an arrow indicating the turning direction
2Guidance route
3Current position
4Select to mute the voice guidance.
5Route information (→P.224)
6Select to delete destination(s). If there is more than 1, the list of destinations will be displayed.

INFORMATION

- If the vehicle goes off the guidance route, the route will be recalculated. - For some areas, the roads have not been completely digitized in our database. For this reason, the route guidance may select a road that should not be traveled on. - When arriving at the set destination the destination name will be displayed on the upper part of the screen. - When the automatic zoom function is enabled, the map will automatically change to a detailed map as the vehicle approaches a guidance point. (→P.241)

DISTANCE AND TIME TO DESTINATION

When the vehicle is on the guidance route, the route information bar displays the distance with the estimated travel/arrival time to the destination. ▶When the set destination is 1 1 Select the route information bar to change the display of the route information bar between the estimated travel time and the estimated arrival time. ![](images/b64624126223bbdf76ae18190b9d44a33d8b7783ceea7eed448c07e9913667fd.jpg)
text_image Exit 8 1:24 5.6 ms 0.3 m 9 m OFFICELY LIST
▶When the set destinations are more than 1 1 Select the route information bar. 2 Check that the list of the distance and time is displayed. ![](images/57e01f7dc418b8f04176330f9c3ab74abc3017efd8340d0bb3b6983985796014.jpg)
text_image Time to Devt. 15 m 3:32 am:07 13 m 3:26 am:07 10 m 3:17 am:07 8.0 m 3:12 am:07 5.7 m 3:05 am:07 X: 2:54
"Arrival Time": Select to display the estimated arrival time. "Time to Dest.": Select to display the estimated travel time. \- By selecting one of the number buttons, the desired route information is displayed.

INFORMATION

\- When the vehicle is on the guidance route, the distance measured along the route is displayed. Travel time and arrival time are calculated based on the average speed of the specified speed limits and current traffic information. \- When the vehicle gets off the guidance route, the arrow facing the destination is displayed instead of the estimated travel/arrival time. ●The route information bar fills from left to right as the vehicle progresses along the route.

DURING FREEWAY DRIVING

During freeway driving, the freeway exit information screen will be displayed. ![](images/2a4740e383f37ca07d631e304539fa7cb71cfabf34e882f06d7e97998d0db1e0.jpg)
text_image Exit 8 5.6 mi East 3A/MD-202 North 2.4mi East 3B/MD-202 South 1.9mi East Columbia Park Rd Map 5.6 mi Cyclical 17:03
No./ IconInformation/Function
1Distance from the current position to the freeway exit/rest area
2Name of the freeway exit/rest area
3POIs that are close to a freeway exit
4Select to display the selected map of the exit vicinity.
5Select to display the nearest freeway exits/rest areas from the current position.
Select to scroll to farther freeway exits/rest areas.
Select to scroll to closer freeway exits/rest areas.

WHEN APPROACHING FREEWAY EXIT OR JUNCTION

When the vehicle approaches an exit or junction, the freeway guidance screen will be displayed. ![](images/c917b089c39b2e8bbb060d858f2825e9281c4376a94b2a02723f2c43f695d453.jpg)
text_image 1-95 North 300 ft 2 3 4 BIG48761708
No.Information/Function
1Next exit or junction name
2Distance from the current position to the exit or junction
3Select to hide the freeway guidance screen.To return to the freeway guidance screen, press the “MAP” button.
4Remaining distance bar to the guidance point

WHEN APPROACHING TOLLGATE

When the vehicle approaches a tollgate, the tollgate guidance screen will be displayed. ![](images/a42cc1296a6a161e7f47f8c92156ad4ce46e72053dc12568843901e0d16763e7.jpg)
text_image 3:09 $ 2 1 500 ft 1 McDolters, 17/18
No. Information/Function
1Distance from the current position to the tollgate
2Select to hide the tollgate guidance screen.To return to the tollgate guidance screen, press the “MAP” button.
3Remaining distance bar to the guidance point

WHEN APPROACHING JUNCTION

When the vehicle approaches a junction, the real freeway junction guidance screen with signage will be displayed. ![](images/653c221e8f6756b122e6b3a435fb7ea3712b6009c01a99990460a33171846e56.jpg)
text_image MD-295 North 0.4 mi
No. Information/Function
1Next junction or street name
2Select to hide the real freeway junction guidance screen.To return to the real freeway junction guidance screen, press the “MAP” button.
3Distance from the current position to the next junction
4Remaining distance bar to the guidance point

WHEN APPROACHING AN INTERSECTION

When the vehicle approaches an intersection where it is necessary to turn, the intersection guidance screen will be displayed. ![](images/14e4f42ff1dd20f7d21a6f8e741abc91d94ee043d5ee0c2306688b2061dada27.jpg)
text_image N Capitol St NW 1 4 3 2 500 ft Bloomberg, 17/61
No. Information/Function
1Next street name
2Distance to the intersection
3Select to hide the intersection guidance screen.To return to the intersection guidance screen, press the “MAP” button.
4Remaining distance bar to the guidance point

TURN LIST SCREEN

1 Select "Turn List" on the map mode screen. (→P.200) 2 Check that the turn list screen is displayed. ![](images/52d028d23e69794de186707d38fed9c5770e2a0487b543761cd82076fe479187.jpg)
text_image 1:28 MD-704 W 0.1mi MD-704 South/GE 0.2mi MD-704/M.L. Km... 5.6mi
No. Information/Function
1Turn direction
2Distance between turns
3Next street or destination name

TURN-BY-TURN ARROW SCREEN

On this screen, information about the next turn on the guidance route can be displayed. 1 Select "Turn-by-Turn Arrow" on the map mode screen. (→P.200) 2 Check that the turn-by-turn arrow screen is displayed. ![](images/27b5b2fe9f258e2fb9b00b8fb915c9ab7f639dc67a7b81eef68c1b18429b27bf.jpg)
text_image 1:31 Exit 8 MD-704/M.L.K... 2 3 5.6mi 6.9 mi 5 mi

No. Information/Function

1 Exit number or street name 2 Turn direction 3 Distance to the next turn

3. ROUTE GUIDANCE

2. TYPICAL VOICE GUIDANCE PROMPTS

As the vehicle approaches an intersection, or point, where maneuvering the vehicle is necessary, the system's voice guidance will provide various messages. ![](images/8d5a22278d7d747167bcd3300e252d750644893b8980c2e7ae32be7594e46938.jpg)

WARNING

\- Be sure to obey the traffic regulations and keep the road condition in mind especially when you are driving on IPD roads. The route guidance may not have the updated information such as the direction of a one way street.

INFORMATION

- If a voice guidance command cannot be heard, press the "MAP" button to hear it again. ●To adjust the voice guidance volume: →P.64 ● To mute the voice guidance: →P.223 ●Voice guidance may be made early or late. - If the system cannot determine the current position correctly, you may not hear voice guidance or may not see the magnified intersection on the screen.

3. ROUTE GUIDANCE

3. ROUTE OPTIONS OPERATION

1 Select on the map screen. (→P.194) 2 Select the desired item to be set. ![](images/d1dedc1fb6dbada63a71935a048e80c16202606f96df9ea0ae3b6aee62fbb5bd.jpg)
text_image Route Options Route Overview 1 Recorder 2 Route Type 3 Preference 4 Detour 5 Adjacent Road 6
No.Function Page
1Select to display the overview of the entire route.219
2Select to reorder destinations.230
3Select to change route type.231
4Select to set route preferences.231
5Select to set detours. 232
6Select to start from adjacent road.233
- To hide the route options screen, touch any part of the map screen. 3 Check that the route overview is displayed. (→P.219)

REORDERING DESTINATIONS

When more than 1 destination has been set, the arrival order of the destinations can be changed. 1 Select on the map screen. (→P.194) 2 Select "Reorder". 3 Select the desired destination and select "Move Up" or "Move Down" to change the arrival order. Then select "OK".

SETTING ROUTE PREFERENCES

The conditions to determine the route can be selected from various choices such as freeways, toll roads, ferries, etc. 1 Select on the map screen. (→P.194) 2 Select "Preference". 3 Select the desired route preferences and select "OK".

INFORMATION

●Even if the "Freeways" route preference is turned off, the route may not be able to avoid freeways in some cases. - If the calculated route includes a trip by ferry, the route guidance shows a sea route. After traveling by ferry, the current position may be incorrect. Upon reception of GPS signals, it is automatically corrected.

SELECTING ROUTE TYPE

1 Select on the map screen. (→P.194) 2 Select "Route Type". 3 Select the desired route type. ![](images/f6829c9a2417914c1694c90d128b2f27d23b96df71c4b1dd16a22a0f27ab2bf1.jpg)
text_image Route Type 3:46 Quick 1 Short 2 Alternate 3 Flexible Route 4
No. Function
1Select to select the quickest route.
2Select to select the route that is the shortest distance to the set destination.
3Select to select the alternative route.
4*Select to select the route from the Toyota Entune center.
\*: This function is not available in some countries and areas. - The entire route from the starting point to the destination is displayed. (→P.219) ● During driving, the route guidance starts after selecting the desired route type.

DETOUR SETTING

During the route guidance, the route can be changed to detour around a section of the route where a delay is caused by road repairs, an accident, etc. 1 Select on the map screen. (→P.194) 2 Select "Detour". 3 Select the desired detour distance. ![](images/a7fa479f87c35c73bf1474d5673b827053800448a39d14529cce2a2f35e1a39a.jpg)
text_image Detour 3:46 Inside 1 Inside 2 Smiles 3 Whole Route 4 Around Traffic 5
No.Function
1Select to detour within 1 mile of the current position.
2Select to detour within 3 miles of the current position.
3Select to detour within 5 miles of the current position.
4Select to detour on the entire route.
5*Select to make the system search for the route based on traffic congestion information received from traffic information. (→P.204)
\*: This function is not available in some countries and areas.

INFORMATION

●This picture shows an example of how the system would guide around a delay caused by a traffic jam. ![](images/5eb710791d0356e45a7473d5e515792936d93b196f46c83b6457773922386f93.jpg)
text_image 1 2 2 2
1 This position indicates the location of a traffic jam caused by road repairs, an accident, etc. 2 This route indicates the detour suggested by the system. \- When the vehicle is on a freeway, the detour distance selections are 5, 15 and 25 miles (or 5, 15 and 25 km if units are in km). ● The system may not be able to calculate a detour route depending on the selected distance and surrounding road conditions.

ADJACENT ROAD

When a freeway and a surface road run in parallel, the system may show the guidance route going on the freeway while driving on the surface road, or vice versa. If this happens, you can instantly choose the adjacent road for the route guidance. 1 Select on the map screen. (→P.194) 2 Select "Adjacent Road".

INFORMATION

\- When there is no adjacent road, this screen button will not be displayed.

4. MEMORY POINTS

1. MEMORY POINTS SETTINGS

Home, Favorites, areas to avoid can be set as memory points. The registered points can be used as the destinations. (→P.208) Registered areas to avoid, will be avoided when the system searches for a route. 1 Press the "MENU" button. ![](images/d05e88e341fceaa277e18d2587974ac78fe47cb1ccc0ce8a7313b8470eafd2c9.jpg)
text_image MENU BC105S
2 Select "Setup". 3 Select "Navigation". 4 Select the desired item to be set. ![](images/d33e8fe7abae32c5c6f2e965049f60d2d648e54586f62edb68a1d1e747cd415e.jpg)
text_image Setup 3:47 Home 1 Favorites 2 Areas to Avoid 3 Detailed New Settings 4 Data Services
No.Function Page
1Select to set home. 235
2Select to set the favorites list.236
3Select to set areas to avoid.239
4Select to set detailed navigation settings.241

INFORMATION

\- When "Useful Navi. Information Settings" is displayed on the screen: P.250

SETTING UP HOME

If home has been registered, that information can be recalled by selecting ![](images/95133c3b03362cbdfb098b1eb5791943326ad52d0df7fecf415e68e6ace8f918.jpg) on the destination screen. (→P.210) 1 Display the navigation settings screen. (→P.234) 2 Select "Home". 3 Select the desired item to be set. ![](images/104ead0cc33e0c5bb56719cbf819bc3f320731dd4d470cd1623c603f184f01bc.jpg)
text_image Home 3:48 Your home is not saved 1 Save Home 2 Edit 3 Delete
No. Function Page ![](images/9edf62f8aa8cc25db5331c4a069093e435f6ec2a2fa630bde0de5eaa01844c9c.jpg) Select to register home. 235 ![](images/d71b0e352dd6bf25d68768dac1d06fc0dee5dcfbc8ebd5c4ed4db506ecc77db7.jpg) Select to edit home. 235 ![](images/3918bc4daa28a0125dcaf2483f9066b65f7003dec1d284e4708061ae0d503352.jpg) Select to delete home. 235

REGISTERING HOME

1 Select "Save Home". 2 Select the desired item to search for the location. (→P.208). 3 Select "Enter" when the setting map screen appears. 4 Select "OK".

EDITING HOME

1 Select "Edit". 2 Select the desired item to be edited. ![](images/8d802e95e413f822b902c07a856cfdde111327ff6feed19c217288362d724967.jpg)
text_image Edit Home 3:49 Name 1 Show Name on Map Location Thorwood Rd Hyattsville, MD Lot: N 38°56'10" Long: W 76°53'42" Icon OK
No. Function Page
1Select to edit the home name.238
2Select to set display of the home name on/off.
3Select to edit location information.238
4Select to change the icon to be displayed on the map screen.238
3 Select "OK".

DELETING HOME

1 Select "Delete". 2 Select "Yes" when the confirmation screen appears.

SETTING UP FAVORITES LIST

Points on the map can be registered. 1 Display the navigation settings screen. (→P.234) 2 Select "Favorites". 3 Select the desired item. ![](images/872df8f7ef18bcea7b88f954b94ea0ead23d7cb76a74d33a1cbab84b6c1774f4.jpg)
text_image Favorites 3:49 96 of 100 Free ① New ② Edit ③ Delete
No.Function Page
1Select to register favorites list entry.236
2Select to edit favorites list entry.237
3Select to delete favorites list entry.238

REGISTERING FAVORITE LIST ENTRIES

1 Select "New". 2 Select the desired item to search for the location. (→P.208) 3 Select "Enter" when the setting map screen appears. 4 Select "OK" when the edit favorites entry screen appears. (→P.237)

INFORMATION

●Up to 100 favorites list entries can be registered.

EDITING FAVORITE LIST ENTRIES

The icon, name, location and/or phone number of a registered favorites list entry can be edited. 1 Select "Edit". 2 Select the desired favorites list entry. \- Each time a star icon is selected, its color will change. Colored star icons indicate that the favorite is registered to the corresponding preset destination button. Up to 2 entries can be registered as quick favorite destinations. (→P.216) 3 Select the desired item to be edited. ![](images/0ee66f111736faad7e2baa7c81a97c5d689154098b1994b2837bd76a76712ea6.jpg)
text_image Edit Favorites Entry 3:50 Name 1 Show Name on Map Location MD-202 E Hattsville, MD Lkt. N 38°55'43" Long: W 76°53'44" Phone # 4 Icon 5 OK
No.Function Page
1Select to edit the favorites list entry name.238
2Select to set display of the favorites list entry name on/off.
3Select to edit location information.238
4Select to edit the phone number.238
5Select to change the icon to be displayed on the map screen.238
4 Select "OK".

CHANGING THE NAME

1 Select "Name". 2 Enter a name and select "OK".

CHANGING THE LOCATION

1 Select "Location". 2 Scroll the map to the desired point ( P.198) and select "OK".

CHANGING PHONE NUMBER

1 Select "Phone #". 2 Enter the phone number and select "OK".

CHANGING THE ICON

1 Select "Icon". 2 Select the desired icon. ![](images/016b371b4e9f470c69c0cd80abfd47d8c594e752fa14fd2294de26f7e5e5465e.jpg)
text_image Favorites Entry Icon 3:51 Page 1 Page 2 With Sound
"Page 1"/"Page 2": Select to change pages. "With Sound": Select the desired icons with sound

▶When "With Sound" is selected

A sound for some favorites list entries can be set. When the vehicle approaches the location of the favorites list entry, the selected sound will be heard. 1 Select "With Sound". 2 Select the desired sound icon. : Select to play the sound.

INFORMATION

- When “Bell (with Direction)” is selected, select an arrow to adjust the direction and select “OK”. ●The bell sounds only when the vehicle approaches this point in the direction that has been set.

DELETING FAVORITE LIST ENTRIES

1 Select "Delete". 2 Select the desired item to be deleted. "Sort/Delete All": Select to sort (date, name, icon) or delete all favorite list entries. 3 Select "Yes" when the confirmation screen appears.

SETTING UP AREAS TO AVOID

Areas to be avoided because of traffic jams, construction work or other reasons can be registered as "Areas to Avoid". 1 Display the navigation settings screen. (→P.234) 2 Select "Areas to Avoid". 3 Select the desired item. ![](images/018bd56f49f97f0ea7cd89c55a97fef40d258068b93d2537a6c7822e2b0975ec.jpg)
text_image Areas to Avoid 3:54 9 of 10 Free 1 New 2 Edit 3 Delete
No. Function Page
1Select to register areas to avoid.239
2Select to edit areas to avoid.240
3Select to delete areas to avoid.240

REGISTERING AREAS TO AVOID

1 Select "New". 2 Select the desired item to search for the location. (→P.208) 3 Select "Enter" when the setting map screen appears. 4 Select either or to change the size of the area to be avoided and select "OK". ![](images/bfe77bc27dac2ee3aeb57de40080eae436296f0544fad01d85899c5f521bf4fd.jpg)
text_image Change Area Size 3:53 0.25m OK
5 Select "OK" when the area to avoid screen appears.

INFORMATION

- If a destination is entered in the area to avoid or the route calculation cannot be made without running through the area to avoid, a route passing through the area to be avoided may be shown. ●Up to 10 locations can be registered as points/areas to avoid.

EDITING AREAS TO AVOID

The name, location and/or area size of a registered area can be edited. 1 Select "Edit". 2 Select the desired area. 3 Select the desired item to be edited. ![](images/397a9769e908684be9412b1f66dac397e485d281a3b81398bfec18ace805a59f.jpg)
text_image Area to Avoid 3:54 Name 1 Show Name on Map Location 1-4955 Lat: N 38°57'36" Long: W 76°51'58" Size 4 0.25mi x 0.25mi 5 Active OK
No. Function Page
1Select to edit the name of the area to avoid.240
2Select to set display of the area to avoid name on/off.
3Select to edit area location. 240
4Select to edit area size. 240
5Select to set the area to avoid function on/off.
4 Select "OK".

CHANGING THE NAME

1 Select "Name". 2 Enter a name and select "OK".

CHANGING THE LOCATION

1 Select "Location". 2 Scroll the map to the desired point (→P.198) and select "OK".

CHANGING THE AREA SIZE

1 Select "Size". 2 Select either or to change the size of the area to be avoided and select "OK".

DELETING AREAS TO AVOID

1 Select "Delete". 2 Select the desired area to be deleted. 3 Select "Yes" when the confirmation screen appears.

5. SETUP

1. DETAILED NAVIGATION SETTINGS

Settings are available for pop-up information, favorite POI categories, etc. 1 Press the "MENU" button. ![](images/8fbb28d51bb12f104c1130747c116093d3aadd727ce14e38ef3e7f35efada376.jpg)
text_image M:NU BC105S
2 Select "Setup". 3 Select "Navigation". 4 Select "Detailed Navi. Settings". 5 Select the desired items to be set. SCREENS FOR NAVIGATION SETTINGS ![](images/58b3b30ba2e0be1def4d317a3a92fadbd953ea277217dea771b113777b056605.jpg)
text_image Detailed Navi. Settings 9:20 Unverified Roads Guidance Warning On 1 Guidance on Unverified Roads On 2 Guidance with Street Names On 3 Favorite POI Categories 4 Calibration 5 Automatic Destination List Info On 6
![](images/cd474cb073daaa0621b69062233968418e9dff60ef2f959f101a9fd9913ad8ab.jpg)
text_image Detailed Navi. Settings 10:24 Automatic Zoom Off 7 Map Color Customization 8 Dynamic Route On 9 Restore the default settings 10
No.Function Page
1Select to set unverified roads guidance warning on/off.
2Select to set IPD road (roads that are not completely digitized in our database) guidance on/off.
3Select to set the voice guidance for the next street name on/off.
4Select to set favorite POI categories that are used for POI selection to display on the map screen.243
5Select to adjust the current position mark manually or to adjust miscalculation of the distance caused by tire replacement.243
6Select to set automatic destination list info on/off. When set to on, the estimated time of arrival to the registered home and pre-set destinations from the current position will be displayed.
No.Function Page
7Select to set automatic zoom function on/off. When it is enabled, as the vehicle approaches a guidance point, the map will change to a detailed map automatically.
8Select to set the map display color.
9*Select to enable/disable routes sourced from the Toyota Entune center.222
10Select to reset all setup items.
\*: This function is not available in some countries and areas.

FAVORITE POI CATEGORIES (SELECT POI ICONS)

Up to 6 POI icons, which are used for selecting POIs on the map screen, can be selected as favorites. 1 Display the detailed navigation settings screen. (→P.241) 2 Select "Favorite POI Categories". 3 Select the desired category to be changed. ![](images/10b0b721e0020b7e54a66759df5b9cfe27e0c5da76273c07b30d9bdbb25b1a8d.jpg)
text_image Favorite POI Categories 21:16 Please select your or favorite POI categories. They will be used when choosing POIs for viewing or displaying on the way. Gas (ALL) ATMs Dining (ALL) Parks & Beaches Gesecaries (ALL) Hotels (ALL) Default OK
"Default": Select to set the default categories. 4 Select the desired POI category. "List All Categories": Select to display all POI categories. 5 Select the desired POI icon. 6 Select "OK".

CURRENT POSITION/TIRE CHANGE CALIBRATION

1 Display the detailed navigation settings screen. (→P.241) 2 Select "Calibration". 3 Select the desired item. "Position/Direction": →P.244 "Tire Change": →P.244 \- For additional information on the accuracy of a current position: →P.251

■ POSITION/DIRECTION CALIBRATION

When driving, the current position mark will be automatically corrected by GPS signals. If GPS reception is poor due to location, the current position mark can be adjusted manually. 1 Select "Position/Direction". 2 Scroll the map to the desired point (→P.198) and select "OK". 3 Select an arrow to adjust the direction of the current position mark and select "OK".

TIRE CHANGE CALIBRATION

The tire change calibration function will be used when replacing the tires. This function will adjust miscalculation caused by the circumference difference between the old and new tires. 1 Select "Tire Change". - The message appears and the quick distance calibration starts automatically.

INFORMATION

\- If this procedure is not performed when the tires are replaced, the current position mark may be incorrectly displayed.

5. SETUP

2. TRAFFIC SETTINGS\*

Traffic information such as traffic congestion or traffic incident warnings can be made available. 1 Press the "MENU" button. ![](images/d155ac479099aa5e2c6fa7de403f1a75c28c0b8661508554e8c83c19809b45ef.jpg)
text_image M:NU BC105S
2 Select "Setup". 3 Select "Traffic". 4 Select the desired items to be set. SCREEN FOR TRAFFIC SETTINGS ![](images/c369c4f029dcbedd8dbd3432d31e8eaab94f6aa5370219f43e5242e3591a81f7.jpg)
text_image Setup My Traffic Routes Manual Navigation Consider Traffic Info for ETA On Estee App Sater Show Free Flowing Traffic On Traffic Use Predictive Traffic On Data Services Traffic Incident Warning On Setup 3:58 1 2 3 4 5 6 7 3:58 Auto Traffic Manual Consider Traffic Info for ETA On Navigation Show Free Flowing Traffic On Estee App Sater Use Predictive Traffic On Traffic Traffic Incident Warning On Data Services Restore the default settings
No.Function
1Select to set specific routes (such as frequently used routes) on which you wish to receive traffic information. (→P.247)
2Select to set the avoid traffic function auto/manual. (→P.246)
3Select to set the usage of traffic information for the estimated arrival time on/off.
4Select to set the display of an arrow of free flowing traffic on/off.
5Select to set to on/off whether to consider the predictive traffic information (→P.206) with estimated arrival time and detoured route search.
6Select to set traffic incident voice warning on/off.
7Select to reset all setup items.
8 \*: This function is not available in some countries and areas.

AVOID TRAFFIC

1 Display the traffic setting screen. (→P.245) 2 Select "Avoid Traffic". 3 Select the desired item. ![](images/4a857eecad005c3567227ece2f30afe75159356a0ba5ada1a95201872b8baa1d.jpg)
text_image Setup 3:58 Auto Traffic Auto Navigation Manual Extrane Age Suts Off Traffic Consider Traffic Info to ESA On Data Services Show From Flowing Traffic On 1 2 3
No. Function
1Select to automatically change routes when congestion information of the guidance route has been received.
2Select to select manually whether or not to change routes when congestion information of the guidance route has been received. In this mode, a screen will appear to ask if you wish to reroute.
3Select to not reroute when congestion information for the guidance route has been received.

CHANGING THE ROUTE MANUALLY

When the navigation system calculates a new route, the following screen will be displayed. 1 Select the desired item. ![](images/c244abd1980658038966e6f21b817a23fe9a0fa554371541be7877a90d774459.jpg)
text_image Exit 938 1:47 Traffic information has been updated. Would you like to re-route to avoid stationary traffic? 1 Yes 2 View Map 3 No
No. Function
1Select to start route guidance using the new route.
2Select to confirm the new route and current route on the map.
3Select to continue the current route guidance.

MY TRAFFIC ROUTES

Specific routes (such as frequently used routes) on which you wish to receive traffic information can be registered as "My Traffic Routes". A route is set by defining a start point and end point, and can be adjusted by setting up to 2 preferred roads. 1 Display the traffic setting screen. (→P.245) 2 Select "My Traffic Routes". 3 Select the desired item. ![](images/7e5f269b60f0e591d3c8a937086c8f3766f3ae4b7f39e7447e9340d3d4f3da4b.jpg)
text_image My Traffic Routes 3:59 2 of 5 free 1 New 2 Edit 3 Delete AM 100ms, 1.5ms
No. Function Page
1Select to register personal routes.247
2Select to edit personal routes.248
3Select to delete personal routes.248

REGISTERING PERSONAL ROUTES

1 Select "New". 2 Select "Name". 3 Enter the name and select "OK". 4 Select "Start". 5 Select the desired item to search for the location. (→P.208) 6 Select "End". 7 Select the desired item to search for the location. (→P.208) 8 Select "OK". 9 Confirm the route overview displayed. ![](images/3c63bff6aee19e7a3283b378ca2d95ca00f095a979cef2a2a5d859913e85e699.jpg)
text_image Quick 4:04 1 3 Routes 2 Washington MD Alexandria Set Preferred Roads 10 ml Total 18 ms OK
No. Function Page
1Select the desired route from 3 possible routes.220
(2236)Select to modify the route.The routes can be adjusted by setting preferred roads.248
10Select "OK".

INFORMATION

●Up to 5 routes can be registered.

EDITING PERSONAL ROUTES

1 Select "Edit". 2 Select the desired traffic route. 3 Select the desired item to be edited. ![](images/5d9b1c25a89026da6a43898841c155194b101c2ee4cd69518b0ec41994f179c1.jpg)
text_image Edit My Traffic Routes 4:02 Name 1 Route 1 Start 2 St NW, Washington, DC End 3 Washington, DC ModifyView Route 4
No.Function Page
1Select to edit the name of the personal route.
2Select to edit start location.247
3Select to edit end location.
4Select to see and modify the entire route.248
4 Select "OK". 5 Follow the steps in "REGISTERING PERSONAL ROUTES" from "STEP 9". (→P.247)

DELETING PERSONAL ROUTES

1 Select "Delete". 2 Select the desired traffic route to be deleted and select "Delete". 3 Select "Yes" when the confirmation screen appears.

SETTING PREFERRED ROADS

"My Traffic Routes" can be adjusted by setting up to 2 preferred roads. 1 Select "Set Preferred Roads". ![](images/9923d38870a3fad0dce09f8619203aee7c09bf049f19618451a66ceda258da09.jpg)
text_image Quick 4:19 Eighthorn Cr Set Preferred Roads OK
2 Select the desired item. ![](images/d118f1aac4e91e924b9ab0563ee4ab5dd2564b4d63dd4fe0e3461aa330b270ec.jpg)
text_image Set Preferred Reads Add 1 Modify 2 Delete 3 4:05
No.Function Page
1Select to add preferred roads.249
2Select to modify preferred roads.249
3Select to delete preferred roads.249

■ADDING PREFERRED ROADS

1 Select "Add". 2 Scroll the map to the desired point ( P.198) and select "OK". 3 Select "OK" to use this road. "Next": Select to change road. ▶ Available only when 1 preferred road is set 4 Select "Add Here" for the desired location. ![](images/01f8d6738b02d9fd2fc4261d3f9caf30c2676599a777cb98aaea625aba5dce6c.jpg)
text_image Add Preferred Road 4:06 Top St NW, Washington, DC Add Here Motorway Add Here Upper Merborn, MD
- If a preferred road is already set, a second preferred road can be added anywhere between the start point, the end point and the existing preferred road.

MODIFYING PREFERRED ROADS

1 Select "Modify". 2 Select the desired preferred road to be modified if 2 preferred roads have been set. 3 Scroll the map to the desired point (→P.198) and select "OK". 4 Select "OK" to use this road. "Next": Select to change road.

DELETING PREFERRED ROADS

1 Select "Delete". 2 Select the desired preferred road to be deleted if 2 preferred roads have been set. 3 Select "Yes" when the confirmation screen appears.

5. SETUP

3. USE OF INFORMATION ACCUMULATED BY NAVIGATION SYSTEM\* (VEHICLES WITH DCM)

When enabled, information collected by the navigation system will be analyzed to give advice for safe driving. 1 Press the "MENU" button. ![](images/898953e3b09a983825207c80153783ac61d0a08e623a6d29447bc1373aaadf34.jpg)
text_image MENU BC105S
2 Select "Setup". 3 Select "Navigation". 4 Select "Useful Navi. Information Settings". 5 Select the desired items to be set. \*: This function may not be available immediately after purchase of the vehicle.

1. GPS (GLOBAL POSITIONING SYSTEM)

LIMITATIONS OF THE NAVIGATION SYSTEM

This navigation system calculates the current position using satellite signals, various vehicle signals, map data, etc. However, an accurate position may not be shown depending on satellite conditions, road configuration, vehicle condition or other circumstances. The Global Positioning System (GPS) developed and operated by the U.S. Department of Defense provides an accurate current position, normally using 4 or more satellites, and in some case 3 satellites. The GPS system has a certain level of inaccuracy. While the navigation system compensates for this most of the time, occasional positioning errors of up to 300 ft. (100 m) can and should be expected. Generally, position errors will be corrected within a few seconds. The GPS signal may be physically obstructed, leading to inaccurate vehicle position on the map screen. Tunnels, tall buildings, trucks, or even the placement of objects on the instrument panel may obstruct the GPS signals. The GPS satellites may not send signals due to repairs or improvements being made to them. Even when the navigation system is receiving clear GPS signals, the vehicle position may not be shown accurately or inappropriate route guidance may occur in some cases.

NOTICE

The installation of window tinting may obstruct the GPS signals. Most window tinting contains some metallic content that will interfere with GPS signal reception of the antenna in the instrument panel. We advise against the use of window tinting on vehicles equipped with navigation systems. ● Accurate current position may not be shown in the following cases: \- When driving on a small angled Y-shaped road. \- When driving on a winding road. \- When driving on a slippery road such as in sand, gravel, snow, etc. \- When driving on a long straight road. \- When freeway and surface streets run in parallel. • After moving by ferry or vehicle carrier. \- When a long route is searched during high speed driving. \- When driving without setting the current position calibration correctly. • After repeating a change of direction by going forward and backward, or turning on a turntable in a parking lot. \- When leaving a covered parking lot or parking garage. \- When a roof carrier is installed. \- When driving with tire chains installed. \- When the tires are worn. • After replacing a tire or tires. \- When using tires that are smaller or larger than the factory specifications. \- When the tire pressure in any of the 4 tires is not correct. \- If the vehicle cannot receive GPS signals, the current position can be adjusted manually. For information on setting the current position calibration: P.243 \- Inappropriate route guidance may occur in the following cases: \- When turning at an intersection off the designated route guidance. \- If you set more than 1 destination but skip any of them, auto reroute will display a route returning to the destination on the previous route. \- When turning at an intersection for which there is no route guidance. \- When passing through an intersection for which there is no route guidance. \- During auto reroute, the route guidance may not be available for the next turn to the right or left. \- During high speed driving, it may take a long time for auto reroute to operate. In auto reroute, a detour route may be shown. • After auto reroute, the route may not be changed. \- If an unnecessary U-turn is shown or announced. \- If a location has multiple names and the system announces 1 or more of them. \- When a route cannot be searched. \- If the route to your destination includes gravel, unpaved roads or alleys, the route guidance may not be shown. \- Your destination point might be shown on the opposite side of the street. \- When a portion of the route has regulations prohibiting the entry of the vehicle that vary by time or season or other reasons. \- The road and map data stored in the navigation system may not be complete or may not be the latest version. ● After replacing a tire: →P.244

INFORMATION

●This navigation system uses tire turning data and is designed to work with factory-specified tires for the vehicle. Installing tires that are larger or smaller than the originally equipped diameter may cause inaccurate display of the current position. The tire pressure also affects the diameter of the tires, so make sure that the tire pressure of all 4 tires is correct.

6. TIPS FOR THE NAVIGATION SYSTEM

2. MAP DATABASE VERSION AND COVERED AREA

MAP INFORMATION

Coverage areas and legal information can be displayed and map data can be updated. 1 Select on the map screen. (→P.194) 2 Select "Map Data". 3 Check that the map data screen is displayed. ![](images/ec1b3018abc17d4b8097f63951762ef5f06fbe31bd75fd2eb74285d5e244598f.jpg)
text_image Map Data 4:20 US 1 Map version: **** [****-****] 2 Map Coverage 3 Legal Info Map update service: Active 4 Expiration data: */*/*/* 5 Update Map
No. Information/Function
1Map version
2Select to display map coverage areas.
3Select to display legal information.
4Expiration date of temporary updates of the map and a route from the Toyota Entune center.When “***” is displayed for the expiration date, the validity period has not yet been set for the service. The validity period will be set automatically. Map updates are available even before the period is set.
5Select to update map.

INFORMATION

●For map data updates, contact your Toyota dealer.

TEMPORARY UPDATES OF THE MAP\* (VEHICLES WITH DCM)

If the map data has been provided from the Toyota Entune center for any of the following areas and the map data in the system is older than what has been provided, the displayed map will be updated temporarily: - Areas around the area displayed on the map screen (example: areas around current position) - Areas around destinations - Areas along the set route

INFORMATION

●The updated data will temporarily be saved in the system. - If temporary update data exceeds the available memory in the temporary map cache, the oldest data will be deleted. ●The temporary map data will disappear when the expiration date has passed. ●The updated data will temporarily be saved in the system. - If temporary update data exceeds the available memory in the temporary map cache, the oldest data will be deleted. ●The temporary map data will disappear when the expiration date has passed. 6. TIPS FOR THE NAVIGATION SYSTEM

9

Toyota Entune

1 Toyota Entune-OVERVIEW

1. FUNCTIONAL OVERVIEW...... 256 2. TYPE A: FUNCTION ACHIEVED BY USING A SMART PHONE OR DCM.... 257 BEFORE USING THE FUNCTION..... 259 PREPARATION BEFORE USING Toyota Entune App Suite Connect.... 260 3. TYPE B: FUNCTION ACHIEVED BY USING DCM AND THE SYSTEM.... 261 BEFORE USING THE FUNCTION..... 262 Service Connect 262 Destination Assist Connect.... 263 4. TYPE C: FUNCTION ACHIEVED BY USING DCM.... 264 Safety Connect 264 Remote Connect.... 266

2 Toyota Entune OPERATION

1. Toyota Entune App Suite Connect 267 USING Toyota Entune App Suite Connect 267 ENTERING KEYWORD OPERATION 270

3 SETUP

1. Toyota Entune App Suite Connect SETTINGS .... 271 Toyota Entune App Suite Connect SETTINGS SCREEN.... 271

1. Toyota Entune-OVERVIEW

1. FUNCTIONAL OVERVIEW

Toyota Entune is a service that includes Toyota Entune App Suite Connect, Destination Assist Connect, Service Connect, Dynamic Navigation, Wi-Fi ^® Hotspot, Safety Connect and Remote Connect. \- The functions included in Toyota Entune are classified into the following three types. Type A: Function achieved by using a smart phone or an embedded cellular device in the vehicle (DCM: Data Communication Module) Type B: Function achieved by using DCM and the system Type C: Function achieved by using DCM
Type Function Page
Type A Toyota Entune App Suite Connect 267
Type BDestination Assist Connect 263
Service Connect 262
Dynamic Navigation 210, 222, 253
Wi-Fi ^ Hotspot 56
Type CSafety Connect 264
Remote Connect266

INFORMATION

● These functions are not made available in some countries, areas, or on some models. ● Availability of functions of the Toyota Entune is dependent on network connection status.

1. Toyota Entune-OVERVIEW

2. TYPE A: FUNCTION ACHIEVED BY USING A SMART PHONE OR DCM

Of the functions included with Toyota Entune, the Toyota Entune App Suite Connect relies on the use of a smart phone or DCM. ▶ Using a smart phone - Toyota Entune App Suite Connect enables applicable apps installed on a smart phone to be displayed on and operated from the screen via a Bluetooth® and USB. ▶Via DCM - Toyota Entune App Suite Connect enables applicable apps installed on the system to be displayed on and operated from the screen. A few settings must be performed before Toyota Entune App Suite Connect can be used. (→P.260) ![](images/7db3a0922e50b92c7b115aab7cfb5fbb3e2e504c9e9b6c994770db9da2a74854.jpg)
flowchart
graph TD
    A["Device 1"] -->|DCM| B["Mobile Device"]
    C["Device 2"] -->|DCM| B
    D["Device 3"] -->|USB| E["Bluetooth®"]
    F["Device 4"] -->|USB| E
    style A fill:#f9f,stroke:#333
    style C fill:#f9f,stroke:#333
    style D fill:#ccf,stroke:#333
    style E fill:#cfc,stroke:#333
    style F fill:#fcc,stroke:#333
No.Name Function
1Content provider Provides contents to the application server.
2Application server Provides applications to the system or a smart phone.
3Smart phone*Using the Toyota Entune App Suite Connect, communication is relayed between the system, application server and contents provider.
4ApplicationsDisplay usable content from the content providers on the screen using the data connection of the connected smart phone or DCM.
5SystemContent received, via a smart phone or DCM, from content provider servers is displayed on the screen. The system is equipped with an application player to run applications.
\*: For known compatible phones, refer to http://www.toyota.com/Entune/ in the United States, and http://www.toyota.ca/entune in Canada.

BEFORE USING THE FUNCTION

The required operations to activate applications and connect a smart phone to the system, and the registration steps for the Toyota Entune App Suite Connect are explained in this section.

SUBSCRIPTION

- User registration is required to start using the Toyota Entune App Suite Connect function. (→P.260) - Toyota Entune App Suite Connect does not require an activation fee or monthly recurring fees. ● Services requiring a separate contract can also be used.\* \*: For details, refer to http://www.toyota.com/Entune/ or call 1-800-331-4331 in the United States, and http://www.toyota.ca/entune or call 1-888-869-6828 in Canada.

AVAILABILITY OF FUNCTION

● This function is not made available in some countries or areas.

INFORMATION

● Data usage fees may apply while using Toyota Entune App Suite Connect function. Confirm data usage fees before using this function. For details regarding operation of the Toyota Entune App Suite Connect and the applications, refer to http://www.toyota.com/Entune/ in the United States, and http://www.toyota.ca/entune in Canada. ●These functions are not made available in some countries or areas. Availability of functions of the Toyota Entune App Suite Connect service is dependent on network reception level.

INITIALIZING PERSONAL DATA

The personal data used in applications can be reset. (→P.63) - The following personal data can be deleted and returned to their default settings: - Downloaded contents • Radio stations that were listened to

INFORMATION

\- Once initialized, the data and settings will be erased. Pay much attention when initializing the data.

PREPARATION BEFORE USING Toyota Entune App Suite Connect

SETTINGS REQUIRED TO USE Toyota Entune App Suite Connect

Perform the settings in the following order. 1 User registration 2 Download the Toyota Entune App Suite Connect application to your smart phone or the system. 3 Register the smart phone with the system. In order to use Toyota Entune App Suite Connect, the following must first be performed: - User registration with the service (→P.260) - Download the Toyota Entune App Suite Connect application onto your smart phone or the system, and login to the application. (→P.260) - Register the smart phone, on which the Toyota Entune App SuiteConnect application was installed, with the system. (→P.260) - Register a Bluetooth® phone with the hands-free system. (→P42)

USER REGISTRATION

\- Perform user registration at http://www.toyota.com/Entune/ in the United States, and http://www.toyota.ca/entune in Canada, or register within the Toyota Entune App Suite Connect application after you download it onto your smart phone.

REGISTERING THE Toyota Entune App Suite Connect APPLICATION

1 Download the Toyota Entune App Suite Connect application to your smart phone or the system. 2 Run the Toyota Entune App Suite Connect application on your smart phone or the system. 3 Enter the information required into the Toyota Entune App Suite Connect application. Login to the application.

INFORMATION

●Applications can only be used when the Toyota Entune App Suite Connect application has been downloaded to your smart phone or the system, and the application is running. ●Toyota Entune App Suite Connect operational procedures can also be confirmed by visiting http://www.toyota.com/Entune/ in the United States, and http://www.toyota.ca/entune in Canada. - If a Toyota Entune App Suite Connect application is used while iPod audio/video is being played back, system operation may become unstable.

1. Toyota Entune-OVERVIEW

3. TYPE B: FUNCTION ACHIEVED BY USING DCM AND THE SYSTEM\*

The functionality of Destination Assist Connect, Service Connect, Dynamic Navigation, and Wi-Fi ^® Hotspot function is made possible through the shared work of the DCM and the system. These are subscription-based telematics services that use Global Positioning System (GPS) data and embedded cellular technology to provide safety and security as well as convenience features. These services are available by subscription on select, telematics hardware-equipped vehicles and supported by the Toyota Entune center, which operates 24 hours a day, 7 days a week. For details about: • Dynamic Navigation →P.210, 222, 253 • Wi - Hotspot function → P.56 \*: Vehicles with DCM

BEFORE USING THE FUNCTION

SUBSCRIPTION

\- After you have signed the Telematics Subscription Service Agreement and are enrolled, you can begin receiving services. A variety of subscription terms are available. Contact your Toyota dealer, or call 1-800-331-4331 in the United States, and 1-888-869-6828 in Canada, for further subscription details. (→P.259)

AVAILABILITY OF FUNCTIONS

● These functions are not made available in some countries or areas.

Service Connect

Service Connect uses DCM to collect and transmit vehicle data that allows Toyota to provide: ● Vehicle Health Report (VHR) (Safety Recalls, Service Campaigns, Current Vehicle Alerts, Required Maintenance, and Vehicle Condition Status) ● Maintenance Notifications ● Vehicle Alert Notifications For details about this service and how to register, refer to http://www.toyota.com/Entune/ in the United States, and http://www.toyo-ta.ca/entune in Canada.

AVAILABILITY OF FUNCTIONS

- This function is not made available in some countries, areas, or on some models. - Some Service Connect features may not be available on some models.

INFORMATION

● Availability of functions of the Service Connect is dependent on network reception level.

Destination Assist Connect

Destination Assist Connect provides you with live assistance for finding destinations via the Toyota Entune center. You can request either a specific business, address, or ask for help locating your desired destination by category, such as restaurants, gas stations, shopping centers or other Points of Interest (POI). After you tell the agent your choice of destination, its coordinates are sent wirelessly to your vehicle's navigation system.

INFORMATION

● The hands-free system can not be used while Destination Assist Connect is being used.

MAKE A CALL WITH Destination Assist Connect

▶From the "MENU" button 1 Press the "MENU" button. ![](images/c2f44d68e2819c6664d71f4481c604c5d2377f256e3624efa3a24c52d9b29e82.jpg)
text_image MFNU BC105S
2 Select "Destination". ▶From the "MAP" button 1 Press the "MAP" button. ![](images/29f381884166162b6fe2aca0719ef5601400a23e42cb4b73fe6183a0e0bb9b79.jpg)
text_image MAP BC104S
2 Select ![](images/3c1e2998e7751ff860ad07ec06c61532a48dab7dde4cd74e23b0db9f50be6c3e.jpg) 3 Select "Dest Assist". 4 When an agent comes on the line, tell the agent the address, business name, or the type of POI or service. \- To adjust the call volume, select “-” or “+”, or use the volume switch on the steering wheel during the call. ● To hang up the phone, select "End" or press the switch on the steering wheel. 5 After the agent helps you determine your location of choice, select the screen button of the desired action. "Save": Select to register as a memory point. "Go": Select to set as a destination. ![](images/341be24a5d3a15576dfdea29d2d5a73cfde2539de8349d431b70056e17915e3c.jpg) :Select to call the registered number.

Safety Connect

The functionality of Safety Connect is made possible by the use of a DCM. For details, refer to "Owner's Manual".

INFORMATION

●Free/Open Source Software Information This product contains Free/Open Source Software (FOSS). The license information and/or the source code of such FOSS can be found at the following URL. https://www.toyota.com/opensource/dcm ●Exposure to radio frequency signals: The Toyota Entune system installed in your vehicle includes a low power radio transmitter and receiver. The system receives and also sends out radio frequency (RF) signals. ●In August 1996, the Federal Communications Commission (FCC) adopted RF exposure guidelines with safety levels for mobile wireless phones. Those guidelines are consistent with the safety standards previously set by both U.S. and international standards bodies. • ANSI (American National Standards Institute) C95.1 [1992] • NCRP (National Council on Radiation Protection and Measurement) Report 86 [1986] • ICNIRP (International Commission on Non-Ionizing Radiation Protection) [1996] These standards are based on comprehensive and periodic evaluations of the relevant scientific literature. Over 120 scientists, engineers, and physicians from universities, government health agencies, and industry reviewed the available body of research to develop the ANSI Standard (C95.1). ● The design of Toyota Entune system complies with the FCC guidelines in addition to those standards. - Contact with the Toyota Entune center is dependent upon the telematics device being in operative condition, cellular connection availability, navigation map data, and GPS satellite signal reception, which can limit the ability to reach the Toyota Entune center or receive support. Enrollment and Telematics Subscription Service Agreement required. A variety of subscription terms are available; charges vary by subscription term selected. ●The Toyota Entune center offers support in multiple languages. - Select Safety Connect-subscribed vehicles are capable of communicating vehicle information. Please see the terms and conditions for additional details. Owners who do not wish to have their vehicle transmit this information can opt out at the time of enrollment or by calling 1-800-331-4331 in the United States, and 1-888-869-6828 in Canada, and following the prompts for Safety Connect. - For further details about the service, contact your Toyota dealer. ● Toyota Entune functions are not subject to section 255 of the Telecommunications Act and the system is not TTY compatible. \*: Vehicles with DCM

ACTIVATION OF FUNCTION(S)

\- Enrollment in Safety Connect (via your dealership) is required to activate all functions. FCC ID: JOYJ79 IC: 574B-J79

FCC/IC WARNING:

Changes or modifications not expressly approved by the manufacture could void the user's authority to operate the equipment. This device complies with Part 15 of the FCC Rules and Industry Canada license-exempt RSS standards. Operation is subject to the following two conditions: (1) this device may not cause harmful interference, and (2) this device must accept any interference, including interference that may cause undesired operation of the device. This equipment complies with IC RSS-102 radiation exposure limits set forth for uncontrolled environment. The antennas used for this transmitter must be installed to provide a separation distance of least 20cm from all persons.

FCC/IC AVERTISSEMENT:

L'utilisateur est averti que les changements ou modifications non expressément approuvés par le fabricant pourraient annuler l'autorité de l'utilisateur à utiliser l'équipement. Ce appareil est compatible avec la Partie 15 du règlement FCC et de la Licence de l'industrie canadienne et des normes exemptes de RSS. Opération soumise aux deux conditions suivantes : (1) ce appareil ne doit pas causer des interférences nuisibles, et (2) cet appareil doit accepté toutes les interférences, y compris les interférences qui peuvent entraîner un fonctionnement indésirable de l'appareil. Cet appareil est compatible aux limites d'exposition aux radiation IC RSS-102 définies pour un environnement non contrôlé. Les antennes utilisées pour cet émetteur doivent être installées à une distance d'au moins 20 cm de toutes les personnes.

Remote Connect

Remote Connect is a smart phone application that lets you view certain aspects of your vehicle. For details about the functions and services of this application, refer to http://www.toyota.com/Entune/ in the United States, and http://www.toyota.ca/entune in Canada.

SUBSCRIPTION

- After you sign the Telematics Subscription Service Agreement (see the Safety Connect section in "Owner's Manual"), download the Remote Connect app from your smart phone's app store, and register within the app (or enroll and complete registration at the dealer), you can begin using these services. - A variety of subscription terms are available. Contact your Toyota dealer, or call 1-800-331-4331 in the United States, and 1-888-869-6828 in Canada, for further subscription details.

AVAILABILITY OF FUNCTION

● This function is not made available in some countries, areas, or on some models. - Some Remote Connect features may not be available on some models.

INFORMATION

●Remote Connect should only be used by authorized users. ● Laws in some communities may require that the vehicle be within view of the user when operating Remote Connect. In some states, use of Remote Connect may violate state or local laws. Before using Remote Connect, check your state and local laws. ●Any malfunction of the vehicle should be repaired by your Toyota dealer. - Remote Connect is designed to work at temperatures above approximately -22 °F (-30 °C). This specification is related to the Remote Connect operation, but is dependent on the vehicle's operating temperature range which may be different. ●Content is subject to change without notice. Additional information can be found at http://www.toyota.com/Entune/ in the United States, and http://www.toyota.ca/entune in Canada.

2. Toyota Entune OPERATION

1. Toyota Entune App Suite Connect

USING Toyota Entune App Suite Connect

App Suite is a function that enables certain apps installed on a smart phone or the system to be displayed on and operated from the system screen. Before the Toyota Entune App Suite Connect can be used, some setup needs to be performed. (→P.260) For details about the functions and services provided by each application, refer to http://www.toyota.com/Entune/in the United States, and http://www.toyota.ca/entune in Canada. ▶From the "MENU" button 1 Press the "MENU" button. ![](images/08c66de3ea20477d159540ad12bd5f788ff1bdb78c140c657c9218a61a90066e.jpg)
text_image M:NU BC105S
2 Select "Apps". ▶From the "APPS" button 1 Press the "APPS" button. ![](images/3051742d865a5b18765774f6f7464c3b095d0ca6f53b6cfa45aaf327a53d27fa.jpg)
text_image APPS BC107S
2 Select "Apps". - If a specific application screen is displayed, select "Apps" again. 3 Select the desired application screen button. : Select to activate an application. "Update": Select to update the applications. (→P.268) "App Catalog": Select to change the order of the applications. (→P.268) 2 : Displays the number of new notifications for the application

UPDATING AN APPLICATION

When the App Suite is activated, an application may need to be updated. To update an application, it is necessary to download update data and install it.

DOWNLOADING UPDATE

If an update is available, "Update" can be selected. 1 Select "Update" on the application screen. (→P.267) 2 Check that downloading starts. "Download in Background": Select to operate other functions while downloading. "Cancel": Select to cancel updating. 3 Check that downloading is complete. "Later": Select to install later. When this screen button is selected, the screen will return to the last displayed screen. To install the update data: →P.268 "See Detail": Select to display detailed information on the update data. "Install": Select to install the update data. Follow the steps "INSTALLING THE UPDATE DATA" from "STEP 2". (→P.268)

INSTALLING THE UPDATE DATA

After the downloading is complete, "Update" will be changed to "Install". 1 Select "Install" on the application screen. (→P.267) 2 Select "Continue". "Later": Select to postpone the installation of the update data and go back to the previous screen. 3 Check that installing is started. "Install in Background": Select to operate other functions while installing. 4 Select "OK" after the installing is complete.

INFORMATION

● The Toyota Entune App Suite Connect function cannot be operated while installing.

REORDERING THE APPLICATIONS

Order of the applications can be changed. 1 Display the application screen. (→P.267) 2 Select "App Catalog". 3 Select the desired application to be moved. 4 Select “<<” or “>>” to move the application, and then select the done button.

IF A MESSAGE APPEARS ON THE SCREEN

When problems occur with starting the application player, a message will appear on the screen. Referring to the table below, identify the problem and take the suggested corrective action.
Message Display conditions Corrective action
“This feature is unavailable during an emergency call.”Safety Connect is being implemented.After the Safety Connect call is finished, perform the operation again.
“This feature is unavailable while transferring contacts.”Contacts are being transferred manually from the phonebook.When the transfer of contacts is complete, perform the operation again.
“Unable to connect to a Bluetooth phone. For troubleshooting assistance, please visit the Toyota website or contact your dealer.”The smart phone cannot be connected.Refer to http://www.toyota.com/Entune/ in the United States, and http://www.toyota.ca/entune in Canada, to confirm if the phone is compatible or not.
“This feature is unavailable during a handsfree call.”A hands-free call is in progress.After the hands-free call is finished, perform the operation.
“When it is safe and legal to do so, please ensure your Entune App Suite application is running and logged in on your phone” “To use the services, Entune APP Suite Connect application needs to be running on your phone. For more information, please visit toyota.com or call 1-800-331-4331 in the United States, and 1-888-869-6828 in Canada.”The Toyota Entune App Suite Connect application cannot be connected to Bluetooth® SPP.Refer to http://www.toyota.com/Entune/ in the United States, and http://www.toyota.ca/entune in Canada, to confirm if the phone is Bluetooth® SPP compatible or not, and then activate the Toyota Entune App Suite Connect application.
“Communication error. Please try again.”Communication was disconnected.After a few moments, retry the operation.
9 Toyota Entune

ENTERING KEYWORD OPERATION

A keyword can be entered to an application by the software keyboard or voice recognition function. For details about the functions and services provided by each application, refer to http://www.toyota.com/Entune/ in th United States, and http://www.toyo-ta.ca/entune in Canada. \- The keyboard layout can be changed. ( P.60)

ENTERING A KEYWORD USING THE SOFTWARE KEYBOARD

1 Display the application screen. (→P.267) 2 Select the desired application screen button. 3 Select the character entering space. 4 Enter a search term, and then select "OK". 5 Entering characters will be reflected on the character entering space. \- For details on operating the keyboard: P.35

ENTERING A KEYWORD USING THE VOICE RECOGNITION FUNCTION

1 Display the application screen. (→P.267) 2 Select the desired application screen button. 3 Press the talk switch. (→P.126) 4 Say the desired keyword. - Completion of the keyword will be detected automatically. 5 Search results will be displayed on the screen.

3. SETUP

1. Toyota Entune App Suite Connect SETTINGS

The settings of Toyota Entune App Suite Connect can be changed. 1 Press the "MENU" button. ![](images/8fa1d606a57046f56e57dbcd41bfd277b828e4f6e3a9f82ba9c5a91b0e002c0c.jpg)
text_image M:NU BC105S
2 Select "Setup". 3 Select "Entune App Suite". 4 Select the desired items to be set. Toyota Entune App Suite Connect SETTINGS SCREEN ![](images/e138b83f9e900fb453fa72284a45ec060860d0d0fafb98d09e469f71f29171cf.jpg)
text_image Setup 9:02 Data Usage Message 1 Voice Auto Detect iPhone App On Vehicle Connect USB in relaxed mode Off Extra App Sum App Catalog 6 5 Traffic Data Services Default App Suite USB Install
No.Function
1Select to set the pop up reminder for smart phone data usage. (→P.272)
2Select to detect iPhone app automatically on/off.
3Select to set the enhanced mode with connecting USB device on/off.
4Select to configure the Apps menu layout (e.g. app order, which applications are activated, etc.).This updates a setting file stored on the Toyota Entune center, this settings file can also be updated from the navigation system, smartphone app and by web portal.
5Select to install the Apps via a USB memory device. For details, contact your Toyota dealer.
6Select to reset all setup items.
9 Toyota Entune

DATA USE NOTIFICATION POP-UP SETTINGS

The data use notification pop-up, which indicates that the system will use an internet connection, can be enabled/disabled. 1 Display the Toyota Entune App Suite Connect settings screen. (→P.271) 2 Select "Data Usage Message". 3 Change the setting as desired. ![](images/a22c20977226f780102e8cdd3d8a8a11ee1eb260c8a4d17988eeac413acb6195.jpg)

APPENDIX/INDEX

APPENDIX 274 ALPHABETICAL INDEX 288

APPENDIX

Map database information and updates

END USER LICENSE AGREEMENT

END USER TERM

The content provided by HERE ("Data") is licensed, not sold. By opening this package, or installing, copying, or otherwise using the Data, you agree to be bound by the terms of this agreement. The Data is provided for your personal, internal use only and may not be resold. It is protected by copyright, and is subject to the following terms (this "End User License Agreement") and conditions which are agreed to by you, on the one hand, and HERE and its licensors (including their licensors and suppliers) on the other hand. For purposes of these terms, "HERE" shall mean (a) HERE North America, LLC with respect to Data for the Americas and/or the Asia Pacific region and (b) HERE Europe B.V. for Data for Europe, the Middle East and/or Africa. The Data includes certain information and related content provided under license to HERE from third parties and is subject to the applicable supplier terms and copyright notices set forth at the following URL:http://corporate.navteq.com/supplier\_terms.html.

TERMS AND CONDITIONS

License Limitations on Use: You agree that your license to use this Data is limited to and conditioned on use for solely personal, noncommercial purposes, and not for service bureau, timesharing or other similar purposes. Except as otherwise set forth herein, you agree not to otherwise reproduce, copy, modify, decompile, disassemble or reverse engineer any portion of this Data, and may not transfer or distribute it in any form, for any purpose, except to the extent permitted by mandatory laws. License Limitations on Transfer: Your limited license does not allow transfer or resale of the Data, except on the condition that you may transfer the Data and all accompanying materials on a permanent basis if: (a) you retain no copies of the Data; (b) the recipient agrees to the terms of this End \~User License Agreement; and (c) you transfer the Data in the exact same form as you purchased it by physically transferring the original media (e.g., the CD-ROM or DVD you purchased), all original packaging, all Manuals and other documentation. Specifically, Multidisc sets may only be transferred or sold as a complete set as provided to you and not as a subset thereof. Additional License Limitations: Except where you have been specifically licensed to do so by HERE in a separate written agreement, and without limiting the preceding paragraph, your license is conditioned on use of the Data as prescribed in this agreement, and you may not (a) use this Data with any products, systems, or applications installed or otherwise connected to or in communication with vehicles capable of vehicle navigation, positioning, dispatch, real time route guidance, fleet management or similar applications; or (b) with, or in communication with, including without limitation, cellular phones, palmtop and handheld computers, pagers, and personal digital assistants or PDAs. Warning: This Data may contain inaccurate or incomplete information due to the passage of time, changing circum-stances, sources used and the nature of collecting comprehensive geographic Data, any of which may lead to incorrect results.

APPENDIX

No Warranty: This Data is provided to you "as is", and you agree to use it at your own risk. HERE and its licensors (and their licensors and suppliers) make no guarantees, representations or warranties of any kind, express or implied, arising by law or otherwise, including but not limited to, content, quality, accuracy, completeness, effectiveness, reliability, fitness for a particular purpose, usefulness, use or results to be obtained from this Data, or that the Data or server will be uninterrupted or error free. Disclaimer of Warranty: HERE AND ITS LICENSORS (INCLUDING THEIR LICENSORS AND SUPPLIERS) DISCLAIM ANY WARRANTIES, EXPRESS OR IMPLIED, OF QUALITY, PERFORMANCE, MERCHANTABILITY, FITNESS FOR A PARTICULAR PURPOSE OR NON-INFRINGEMENT. Some States, Territories and Countries do not allow certain warranty exclusions, so to that extent the above exclusion may not apply to you. Disclaimer of Liability: HERE AND ITS LICENSORS (INCLUDING THEIR LICENSORS AND SUPPLIERS) SHALL NOT BE LIABLE TO YOU IN RESPECT OF ANY CLAIM, DEMAND OR ACTION, IRRESPECTIVE OF THE NATURE OF THE CAUSE OF THE CLAIM, DEMAND OR ACTION ALLEGING ANY LOSS, INJURY OR DAMAGES, DIRECT OR INDIRECT, WHICH MAY RESULT FROM THE USE OR POSSESSION OF THIS DATA; OR FOR ANY LOSS OF PROFIT, REVENUE, CONTRACTS OR SAVINGS, OR ANY OTHER DIRECT, INDIRECT, INCIDENTAL, SPECIAL OR CONSEQUENTIAL DAMAGES ARISING OUT OF YOUR USE OF OR INABILITY TO USE THIS DATA, ANY DEFECT IN THIS DATA, OR THE BREACH OF THESE TERMS OR CONDITIONS, WHETHER IN AN ACTION IN CONTRACT OR TORT OR BASED ON A WARRANTY, EVEN IF HERE OR ITS LICENSORS HAVE BEEN ADVISED OF THE POSSIBILITY OF SUCH DAMAGES. Some States, Territories and Countries do not allow certain liability exclusions or damages limitations, so to that extent the above may not apply to you. Export Control: You agree not to export from anywhere any part of the Data or any direct product thereof except in compliance with, and with all licenses and approvals required under, applicable export laws, rules and regulations, including but not limited to the laws, rules and regulations administered by the Office of Foreign Assets Control of the U.S. Department of Commerce and the Bureau of Industry and Security of the U.S. Department of Commerce. To the extent that any such export laws, rules or regulations prohibit HERE from complying with any of its obligations hereunder to deliver or distribute Data, such failure shall be excused and shall not constitute a breach of this Agreement. Entire Agreement: These terms and conditions constitute the entire agreement between HERE (and its licensors, including their licensors and suppliers) and you pertaining to the subject matter hereof, and supersedes in their entirety any and all written or oral agreements previously existing between us with respect to such subject matter. Severability: You and HERE agree that if any portion of this agreement is found illegal or unenforceable, that portion shall be severed and the remainder of the Agreement shall be given full force and effect. Governing Law: The above terms and conditions shall be governed by the laws of the State of Illinois (for Data for the Americas and/or the Asia Pacific region) or The Netherlands (for Data for Europe, the Middle East and Africa), without giving effect to (i) its conflict of laws provisions, or (ii) the United Nations Convention for Contracts for the International Sale of Goods, which is explicitly excluded. For any and all disputes, claims and actions arising from or in connection with the Data ("Claims"), you agree to submit to the personal jurisdiction of (a) the State of Illinois for Claims related to Data for the Americas and/or the Asia Pacific region provided to you hereunder, and (b) The Netherlands for Data for Europe, the Middle East and/or Africa provided to you hereunder.

APPENDIX

Government End Users: If the Data is being acquired by or on behalf of the United States government or any other entity seeking or applying rights similar to those customarily claimed by the United States government, this Data is a "commercial item" as that term is defined at 48 C.F.R. ("FAR") 2.101, is licensed in accordance with this End User License Agreement, and each copy of Data delivered or otherwise furnished shall be marked and embedded as appropriate with the following "Notice of Use", and be treated in accordance with such Notice:

NOTICE OF USE

CONTRACTOR (MANUFACTURER/ SUPPLIER) NAME:

HERE

CONTRACTOR (MANUFACTURER/SUPPLIER) ADDRESS: 425 West Randolph Street, Chicago, IL 60606. This Data is a commercial item as defined in FAR 2.101 and is subject to the End User License Agreement under which this Data was provided. © 1987-2017\* HERE. All rights reserved. \*original publication date If the Contracting Officer, federal government agency, or any federal official refuses to use the legend provided herein, the Contracting Officer, federal government agency, or any federal official must notify HERE prior to seeking additional or alternative rights in the Data. © 1987-2017\* HERE. All rights reserved. \*original publication date

END OF TERMS AND CONDITIONS EXHIBIT A END USER TERMS

A. General Terms. Prior to the delivery of any Data to a user, Licensee shall obtain the user's agreement to terms and conditions of use substantially similar to, but no less protective of TCS, its licensors or VISA than the following terms: \*1. Personal Use Only. You agree to use this information for solely personal, non-commercial purposes, and not for service bureau, time-sharing or other similar purposes. You may not modify the information or remove any copyright notices that appear on the information in any way. You may not decompile, disassemble or reverse engineer any portion of this information, and may not transfer or distribute it in any form, for any purpose. Without limiting the foregoing, except for the in vehicle navigation system this information appears in, you may not use this information with any products, systems, or applications installed or otherwise connected to or in communication with vehicles, capable of vehicle navigation positioning, dispatch, real time route guidance, fleet management or similar applications. 2. No Warranty. This information is provided to you "as is," and you agree to use it at your own risk. AISIN AW CO, LTD, Inc. and its licensors (and their licensors and suppliers, collectively, "AISIN") make no guarantees, representations or warranties of any kind, express or implied, arising by law or otherwise, including but not limited to, and AISIN expressly disclaims any warranties regarding, content, quality, accuracy, completeness, effectiveness, reliability, fitness for a particular purpose, non-infringement, usefulness, use or results to be obtained from this information, or that the information or server will be uninterrupted or error free. Some states, territories and countries do not allow certain warranty exclusions, so to that extent, the above exclusion may not apply to you. 3. Disclaimer of Liability, AISIN SHALL NOT BE LIABLE TO YOU FOR ANY CLAIM, DEMAND OR ACTION, IRRESPECTIVE OF ITS NATURE, ALLEGING ANY LOSS, INJURY OR DAMAGES, WHETHER DIRECT, INDIRECT, INCIDENTAL, SPECIAL OR CONSEQUENTIAL DAMAGES, INCLUDING ANY LOSS OF PROFIT, REVENUE OR CONTRACTS ARISING OUT OF YOUR POSSESSION, USE OF OR INABILITY TO USE THIS INFORMATION, ANY DEFECT IN THE INFORMATION, OR THE BREACH OF THESE TERMS OR CONDITIONS, WHETHER IN AN ACTION IN CONTRACT OR TORT OR BASED ON A WARRANTY, EVEN IF AISIN OR ITS LICENSORS HAVE BEEN ADVISED OF THE POSSIBILITY OF SUCH DAMAGES. Some states, territories and countries do not allow certain liability exclusions or damages limitations, so to that extent the above may not apply to you. 4. Indemnity. You agree to indemnify, defend and hold AISIN and its licensors (including their respective licensors, suppliers, assignees, subsidiaries, affiliated companies, and the respective officers, directors, employees, shareholders, agents and representatives of each of them) free and harmless from and against any liability, loss, injury (including injuries resulting in death), demand, action, cost, expense, or claim of any kind or character, including but not limited to attorney's fees, arising out of or in connection with any use or possession by you of this information."

APPENDIX

B. VISA. With respect to any VISA data, VISA specifically requires the following: 1. Licensee shall provide the Attribution to VISA with respect to the VISA data. 2. Licensee shall not allow data mining or downloading of the Information except in strictly limited quantities (a maximum of nine (9) locations per end-user search. An end-user search is a request by an end-user for a search of listings in a specific geographic area meeting certain criteria (for example, nearest listing to a waypoint or listings along a route segment). Any individual listing may be selected manually by the end-user for storage in a personal electronic address book or other form of memory in the navigation system. The personal electronic address book in the navigation system may be synchronized (not copied, reproduced, republished, uploaded, posted, transmitted, stored or distributed) with other devices operated by the end-user. 3. Licensee shall incorporate updates to the Data as soon as commercially feasible. 4. In addition to the general minimum terms included above, Licensee shall agree to require end-users to accept the following VISA-standard end user terms as a condition of access to the Data: i.) All materials are the copyrighted property of AISIN and/or TELECOMMUNICATION SYSTEMS, INC. and its licensors. No material from this site may be copied, reproduced, republished, uploaded, posted, transmitted, stored, or distributed in any way, except that end user may download one listing (a location's name and address) on an individual non-automated basis per visiting session to the Licensee site or application, into end user's personal electronic address book. A personal electronic address book may not be shared by end user with other end users, nor may it be copied, reproduced, republished, uploaded, posted, transmitted, stored or distributed in any way. Use of the personal electronic address book must be for end user's personal, noncommercial use only. ii.) End user may not use any material from AISIN's site or application for the purpose of compiling, enhancing, verifying, supplementing, or otherwise modifying VISA databases, lists, or directories of any kind, including, but not limited to, location databases, mailing lists, contact lists, marketing lists, geographic directories, or any other compilation or collation of information which is sold, rented, published, distributed, or in any manner supplied to a third party. Certain business data provided by Infogroup © 2016, All Rights Reserved. ![](images/9e38218d733fc3cda303831830257beddaf2524bf07b588601f02e816334dc0f.jpg)
text_image infogroup®

APPENDIX

Certification

▶For vehicles sold in the U.S.A. and Hawaii FCC ID:ACJ932AT1603

NOTE:

<§15.19(a)(3)> This device complies with part 15 of the FCC Rules. Operation is subject to the following two conditions: (1) This device may not cause harmful interference, and (2) this device must accept any interference received, including interference that may cause undesired operation.

FCC WARNING:

<§15.21> Changes or modifications not expressly approved by the party responsible for compliance could void the user's authority to operate the equipment.

CAUTION:

<§2.1091> Radio frequency radiation exposure information: This equipment complies with FCC radiation exposure limits set forth for an uncontrolled environment. This equipment should be installed and operated with minimum distance of 20cm between the radiator and your body. This transmitter must not be co-located or operated in conjunction with any other antenna or transmitter.

FCC Warning :

Any unauthorized changes or modifications to this equipment would void the user's authority to operate this device. ▶For vehicles sold in Canada

NOTE:

This device complies with Industry Canada licence-exempt RSS standard(s). Operation is subject to the following two conditions: (1) this device may not cause interference, and (2) this device must accept any interference, including interference that may cause undesired operation of the device. Le présent appareil est conforme aux CNR d'Industrie Canada applicables aux appareils radio exempts de licence. L'exploitation est autorisée aux deux conditions suivantes: (1) l'appareil ne doit pas produire de brouillage, et (2) l'utilisateur de l'appareil doit accepter tout brouillage radioélectrique subi, même si le brouillage est susceptible d'en compromettre le fonctionnement.

NOTE:

This radio transmitter (identify the device by certification number, or model number if Category II) has been approved by Industry Canada to operate with the antenna types listed below with the maximum permissible gain and required antenna impedance for each antenna type indicated. Antenna types not included in this list, having a gain greater than the maximum gain indicated for that type, are strictly prohibited for use with this device. Le présent émetteur radio (identifier le dispositif par son numéro de certification ou son numéro de modèle s'il fait partie du matériel de catégorie II) a été approuvé par Industrie Canada pour fonctionner avec les types d'antenne énumérés ci-dessous et ayant un gain admissible maximal et l'impédance requise pour chaque type d'antenne. Les types d'antenne non inclus dans cette liste, ou dont le gain est supérieur au gain maximal indiqué, sont strictement interdits pour l'exploitation de l'émetteur.

CAUTION:

This equipment complies with IC radiation exposure limits set forth for an uncontrolled environment and meets RSS-102 of the IC radio frequency (RF) Exposure rules. This equipment should be installed and operated keeping the radiator at least 20cm or more away from person's body. Cet équipement est conforme aux limites d'exposition aux rayonnements énoncé es pour un environnement non contrôlé et respecte les règles d'exposition aux fréquences radioélectriques (RF) CNR-102 de l'IC. Cet équipement doit être installé et utilisé en gardant une distance de 20 cm ou plus entre le radiateur et le corps humain.

APPENDIX

▶Gracenote \- Gracenote, the Gracenote logo and logotype, "Powered by Gracenote", MusicID, Playlist Plus and MediaVOCS are either registered trademarks or trademarks of Gracenote, Inc. in the United States and/or other countries ![](images/c18630122314cd3b63eea11c8d050619fa6a6f64b98ac63e5ef012a83ab4b2fc.jpg) gracenote

Gracenote ^® End User License Agreement - Music

This application or device contains software from Gracenote, Inc. of Emerville, California ("Gracenote"). The software from Gracenote (the "Gracenote Software") enables this application to perform disc and/or file identification and obtain music-related information, including name, artist, track, and title information ("Gracenote Data") from online servers or embedded databases (collectively, "Gracenote Servers") and to perform other functions. You may use Gracenote Data only by menus of the intended End-User functions of this application or device. This application or device may contain content belonging to Gracenote's providers. If so, all of the restrictions set forth herein with respect to Gracenote Data shall also apply to such content and such content providers shall be entitled to all of the benefits and protections set forth herein that are available to Gracenote. You agree that you will use Gracenote Data, the Gracenote Software, and Gracenote Servers for your own personal non-commercial use only. You agree not to assign, copy, transfer or transmit the Gracenote Software or any Gracenote Data to any third party. YOU AGREE NOT TO USE OR EXPLOIT GRACENOTE DATA. THE GRACENOTE SOFTWARE, OR GRACENOTE SERVERS. EXCEPT AS EXPRESSLY PERMITTED HEREIN. You agree that your non-exclusive license to use the Gracenote Data, the Gracenote Software, and Gracenote Servers will terminate if you violate these restrictions. If your license terminates, you agree to cease any and all use of the Gracenote Data, the Gracenote Software, and Gracenote Servers. Gracenote reserves all rights in Gracenote Data, the Gracenote Software, and the Gracenote Servers, including all ownership rights. Under no circumstances will Gracenote become liable for any payment to you for any information that you provide. You agree that Gracenote, Inc. may enforce its rights under this Agreement against you directly in its own name. The Gracenote service uses a unique identifier to track queries for statistical purposes. The purpose of a randomly assigned numeric identifier is to allow the Gracenote service to count queries without knowing anything about who you are. For more information, see the web page for the Gracenote Privacy Policy for the Gracenote service. The Gracenote Software and each item of Gracenote Data are licensed to you "AS IS." Gracenote makes no representations or warranties, express or implied, regarding the accuracy of any Gracenote Data from the Gracenote Servers. Gracenote reserves the right to delete data from the Gracenote Servers or to change data categories for any cause that Gracenote deems sufficient. No warranty is made that the Gracenote Software or Gracenote Servers are error-free or that functioning of Gracenote Software or Gracenote Servers will be uninterrupted. Gracenote is not obligated to provide you with new enhanced or additional data types or categories that Gracenote may provide in the future and is free to discontinue its services at any time. GRACENOTE DISCLAIMS ALL WARRANTIES EXPRESS OR IMPLIED, INCLUDING, BUT NOT LIMITED TO, IMPLIED WARRANTIES OF MERCHANTABILITY, FITNESS FOR A PARTICULAR PURPOSE, TITLE, AND NON-INFRINGEMENT. GRACENOTE DOES NOT WARRANT THE RESULTS THAT WILL BE OBTAINED BY YOUR USE OF THE GRACENOTE SOFTWARE OR ANY GRACENOTE SERVER. IN NO CASE WILL GRACENOTE BE LIABLE FOR ANY CONSEQUENTIAL OR INCIDENTAL DAMAGES OR FOR ANY LOST PROFITS OR LOST REVENUES. copyright © 2000 to present Gracenote

APPENDIX

▶For U.S. owners

iHeartMedia Disclaimers

Total Traffic and Weather Network, a division of TTWN Media Networks, LLC ("TTWN"), owns or holds the rights to the traffic, news, sports, weather, stocks and other data (the "TTWN Data") and network through which it is delivered, together the "TTN Service". Use of the TTN Service is subject to the terms of these Device End User Terms. THE TTWN SERVICE IS INFORMATIONAL ONLY. YOUR USE OF TTWN SERVICE IS AT YOUR SOLE RISK. TTWN DATA IS PROVIDED "AS IS", "WHERE IS", AND "WHERE AVAILABLE". TTWN AND ITS SUPPLIERS AND LICENSORS EXPRESSLY DISCLAIM ALL WARRANTIES WITH RESPECT TO THE TTWN SERVICE (INCLUDING, WITHOUT LIMITATION, THAT THE TTWN DATA WILL BE ERROR-FREE, THAT THE TTWN SERVICE WILL OPERATE WITHOUT INTERRUPTION OR THAT THE TTWN DATA WILL BE ACCURATE), EXPRESS, IMPLIED OR STATUTORY, INCLUDING, WITHOUT LIMITATION, THE IMPLIED WARRANTIES OF MERCHANTABILITY, NON-INFRINGEMENT, FITNESS FOR A PARTICULAR PURPOSE, OR THOSE ARISING FROM A COURSE OF DEALING OR USAGE OF TRADE. TTWN AND ITS SUPPLIERS AND LICENSORS WILL NOT BE LIABLE TO YOU UNDER ANY LEGAL THEORY, INCLUDING CONTRACT, TORT, NEGLIGENCE OR STRICT LIABILITY, FOR ANY DIRECT, INDIRECT, INCIDENTAL, SPECIAL, PUNITIVE, CONSEQUENTIAL OR EXEMPLARY DAMAGES, INCLUDING BUT NOT LIMITED TO, DAMAGES FOR LOSS OF PROFITS, GOODWILL, USE, DATA OR OTHER INTANGIBLE LOSSES (EVEN IF TTWN, ITS SUPPLIERS OR LICENSORS HAS BEEN ADVISED OF THE POSSIBILITY OF SUCH DAMAGES), RESULTING FROM OR ARISING OUT OF YOUR USE OF, OR YOUR INABILITY TO USE, THE TTWN SERVICE, THIS AGREEMENT, OR ANY OTHER MATTER RELATING TO THE TTWN SERVICE. SOME JURISDICTIONS DO NOT ALLOW THE EXCLUSION OF CERTAIN WARRANTIES OR THE LIMITATION OR EXCLUSION OF LIABILITY FOR INCIDENTAL OR CONSEQUENTIAL DAMAGES. ACOORDINGLY, SOME OF THE ABOVE LIMITATIONS MAY NOT APPLY TO YOU. ![](images/67fe7cecd4372e6710e6f0ca017115c1a736227dd554603519b6b7304d37c06a.jpg)
natural_image Completely black image with no visible content or text.
![](images/e96ccbbe81c170329873949accf370f5c406422cc048db46994177a2808a84f2.jpg)

ALPHABETICAL INDEX

A

AM/FM/SiriusXM (SXM) radio.... 80 Available HD Radio™ technology .....86 Caching a radio program....82 Displaying the radio ID 90 HD Radio™ troubleshooting guide......87 How to subscribe to SiriusXM Satellite Radio.... 88 If the satellite radio tuner malfunctions....91 Overview 80 Presetting a station.... 82 Radio broadcast data system....85 Radio options 85 Selecting a station from the list 84 Using HD Radio™ technology.... 86 Audio settings 111 Audio settings screen 111 Audio/visual remote controls.....109 Audio/visual system 71 AUX....107 Overview ......107

B

Basic function.... 12, 29 Basic information before operation .....30 Basic operation 72, 194 Bluetooth ^® audio.....102 Overview 102 Registering/connecting a Bluetooth® device 106 Bluetooth ^® phone message function.....170 Calling the message sender.....174 Checking received messages....171 Displaying the message screen......170 Receiving a message 170 Replying to a message (Dictation reply)....172 Replying to a message (Quick reply)....173 Buttons overview....12

C

CD 93 Overview....93 Command list 131 Connectivity settings 42

D

Data services settings ....144 Setting download methods .....144 Destination search ......208 Destination search operation .....208 One-touch setting home/favorite as a destination....216 Searching by address......212 Searching by contact 212 Searching by destination assist connect ....211 Searching by emergency......212 Searching by favorites list....211 Searching by keyword .....210 Searching by point of interest......213 Searching by recent destinations .....211 Selecting search area......210 Setting home as destination .....210 Detailed navigation settings .....241 Screens for navigation settings .....241

E

Entering letters and numbers/list screen operation 35 Entering letters and numbers .... 35 List screen.... 36

F

Function index 26 Functional overview 256

G

General settings.... 60 General settings screen 60 GPS (Global Positioning System)...... 251 Limitations of the navigation system ... 251

H

Home screen 16 Status display.... 18 Home screen operation 34

|

Information.... 139 Information screen 140 Displaying information screen 140 Initial screen.... 30 Internet radio....92 Listening to internet radio.... 92 iPod....99 Overview 99

L

Linking multi-information display and the system.... 41

M

Map database version and covered area 253 Map information.... 253 Temporary updates of the map (Vehicles with DCM) 253 Map options operation 200 Route trace.... 203 Selecting the POI icons ......202 Switching the map mode .....200 Map screen operation ....196 Adjusting location in small increments ....198 Current position display.... 196 Displaying information about the icon where the cursor is set .... 199 Map scale 196 Map scroll operation....198 Orientation of the map.... 197 Standard map icons 199 Media operation 93 Memory points 234 Memory points settings ......234 Setting up areas to avoid.... 239 Setting up favorites list ....236 Setting up home 235 "Menu" screen....14 Mobile assistant ....137 Connectable devices and available functions 137 Mobile assistant operation....137 Mobile assistant operation 137

ALPHABETICAL INDEX

N

Natural language understanding.....130 Navigation operation....22 Navigation system....193

0

Operating information 113 CD player and disc 114 Error messages ......123 File information.... 118 High-resolution sound source......118 iPod 116 Radio 113 Terms 121 Operation flow: Route guidance.... 24 Other settings.... 60

P

Peripheral monitoring system 145 Phone.... 155 Phone operation (Hands-free system for cellular phones)....156 Phone settings 175 Contact/call history settings screen.....178 Message settings screen....185 Notification settings screen 177 Phone settings screen.... 175 Sound settings screen.... 176 Placing a call using the Bluetooth® hands-free system....161 By call history 161 By contacts list 162 By favorites list 162 By home screen 165 By keypad.... 164

Q

Quick guide 11 Quick reference....20, 72, 156, 194 Map screen....194

R

Radio operation....80 Rear view monitor system....146 Driving precautions....146 Screen description....148 Rear view monitor system precautions ...149 Area displayed on screen 149 Differences between the screen and the actual road ....150 The camera 149 When approaching three-dimensional objects....152 Receiving a call using the Bluetooth® hands-free system ....166 Incoming calls....166 Receiving weather information....141 Displaying weather screen ....141 Weather guidance service ....143 Registering favorite destinations .....23 Registering home 22 Registering/connecting a Bluetooth ^® device .....42 Profiles......45 Registering a Bluetooth ^® audio player for the first time .....44 Registering a Bluetooth ^® phone for the first time ....42 Route guidance.... 223 Route guidance screen.... 223 During freeway driving 225 Screen for route guidance.... 223 Turn list screen.... 227 Turn-by-turn arrow screen.... 228 When approaching an intersection..... 227 Route options operation.... 230 Adjacent road.... 233 Detour setting.... 232 Reordering destinations 230 Selecting route type 231 Setting route preferences.... 231

s

Screen adjustment.... 39 Setting Bluetooth ^® details.... 47 Bluetooth® settings screen.... 47 Connecting a Bluetooth ^® device ..... 48 Deleting a Bluetooth ^® device ..... 50 Editing the Bluetooth ^® device information....51 Registering a Bluetooth® device .... 50 Setting Bluetooth® system 52 Setting home as the destination 25 Setup 111, 175, 241, 271 "Setup" screen 20 Some basics ....74, 157 About the contacts in the contact list 160 Audio screen adjustment.... 78 Disc slot....75 Registering/connecting a Bluetooth® phone....158 Selecting an audio source....74 Sound settings.... 76 Turning the system on and off.... 74 USB/AUX port 76 Using the phone switch/microphone ...158 Voice command system .....79, 159 When selling or disposing of the vehicle....160 Starting route guidance....218 A route from the Toyota Entune center (Vehicles with DCM) .....222 Confirm destination screen.... 219 Route overview screen....219 Steering switches....109

T

Talking on the Bluetooth ^® hands-free system....167 Incoming call waiting....169 Things you should know ....154 If you notice any symptoms....154 Tips for operating the audio/visual system....113 Tips for the navigation system ...... 251 Touch screen gestures 31 Touch screen operation ....32

ALPHABETICAL INDEX

Toyota Entune....255 Toyota Entune app suite connect .....267 Entering keyword operation......270 Using Toyota Entune app suite connect 267 Toyota Entune app suite connect settings 271 Toyota Entune app suite connect settings screen....271 Toyota Entune operation....267 Toyota Entune-overview 256 Traffic information 204 Displaying traffic information on the map.... 207 Traffic settings.... 245 Avoid traffic.... 246 My traffic routes.... 247 Screen for traffic settings.... 245 Troubleshooting 187 Typical voice guidance prompts......229

U

USB memory....96 Overview....96 Use of information accumulated by navigation system (Vehicles with DCM) 250 Useful information 140

v

Vehicle settings 65 Maintenance....65 Valet mode 68 Voice command system....125, 126 Using the voice command system.....126 Voice command system operation .....127 Voice command system operation......126 Voice settings....64 Voice settings screen ....64

W

What to do if....187 Wi-Fi ^® Hotspot 56 Changing the Wi-Fi® settings .....56 Connecting a device to the in-vehicle access point ....56 Wi-Fi® function operating hints......59
Table of contents Click a title to access it
Manual assistant
Powered by Anthropic
Waiting for your message
Product information

Brand : TOYOTA

Model : Mirai (2018)

Category : Automotive