
IdeaPad P500 - Laptop LENOVO - Free user manual and instructions
Find the device manual for free IdeaPad P500 LENOVO in PDF.


User questions about IdeaPad P500 LENOVO
0 question about this device. Answer the ones you know or ask your own.
Ask a new question about this device
Download the instructions for your Laptop in PDF format for free! Find your manual IdeaPad P500 - LENOVO and take your electronic device back in hand. On this page are published all the documents necessary for the use of your device. IdeaPad P500 by LENOVO.
USER MANUAL IdeaPad P500 LENOVO
Lenovo IdeaPad Z500/P500
User Guide v1.0
Notes
• Before using the product, be sure to read Lenovo Safety and General Information Guide first.
- Some instructions in this guide may assume that you are using Windows® 8. If you are using another Windows operating system, some operations may be slightly different. If you are using other operating systems, some operations may not apply to you.
- The features described in this guide are common to most models. Some features may not be available on your computer or your computer may include features that are not described in this user guide.
- The illustrations in this manual may differ from the actual product. Please refer to the actual product.
Regulatory Notice
- The Regulatory Notice provides information about the radio frequency and safety standards. Be sure to read it before using wireless devices on your computer.
- To refer to it, go to http://www.lenovo.com, click Support, and then click User's guides and manuals.
First Edition (July 2012)
© Copyright Lenovo 2012.
LIMITED AND RESTRICTED RIGHTS NOTICE: If data or software is delivered pursuant a General Services Administration "GSA" contract, use, reproduction, or disclosure is subject to restrictions set forth in Contract No. GS-35F-05925.
Contents
Chapter 1. Getting to know your computer .... 1
Top view 1
Left-side view 5
Right-side view 8
Front view 9
Bottom view 10
Chapter 2. Starting to use Windows 8....11
Configuring the operating system for the first time 11
Operating system interfaces 11
The Charms....12
Putting the computer to sleep or shutting it down....14
Connecting to wireless LAN 16
Help and support....17
Chapter 3. Lenovo OneKey Recovery system.... 18
Chapter 4. Troubleshooting .... 19
Frequently asked questions....19
Troubleshooting 21
Trademarks 24
Chapter 1. Getting to know your computer
Top view
text_image
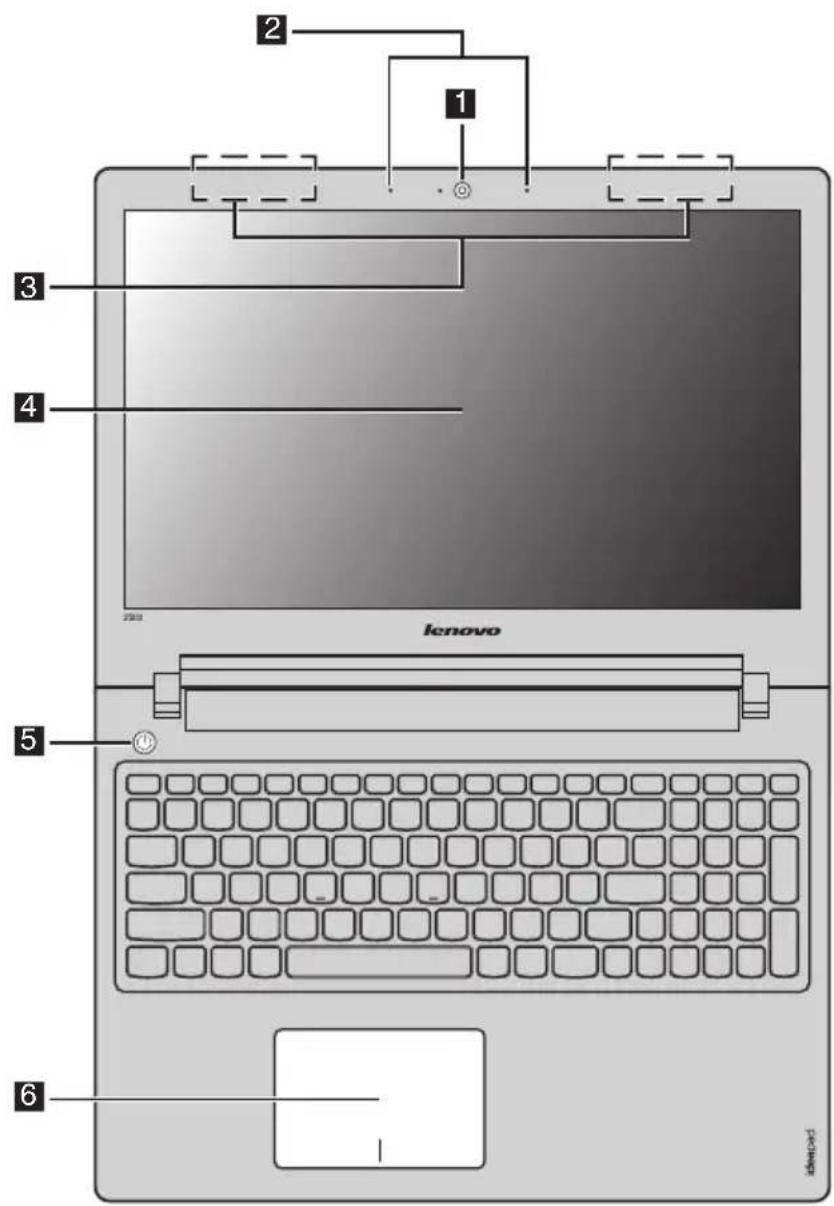
1 2 3 4 lenovo 5 6Note: The dashed areas indicate parts that are not visible externally.
- Attention:
- When closing the display panel, be careful not to leave pens or any other objects in between the display panel and the keyboard. Otherwise, the display panel may be damaged.
Chapter 1. Getting to know your computer
| 1 | Integrated camera | Use the camera for video communication or taking photos. |
| 2 | Built-in microphone | Captures sound which can be used for video conferencing, voice narration, or audio recording. |
| 3 | Wireless LAN antennas | Connect to the wireless LAN adapter to send and receive wireless radio. |
| 4 | Computer display | The computer display with LED backlight provides brilliant visual output. |
| 5 | Power button | Press this button to turn on the computer. |
| 6 | Touchpad | The touchpad functions as a conventional mouse. |
| Touchpad: To move the pointer on the screen, slide your fingertip over the pad in the direction in which you want the pointer to move.Touchpad buttons: The functions of the left/right side correspond to that of the left/right mouse button on a conventional mouse. |
Note: You can enable/disable the touchpad by pressing F6.
Hotkeys
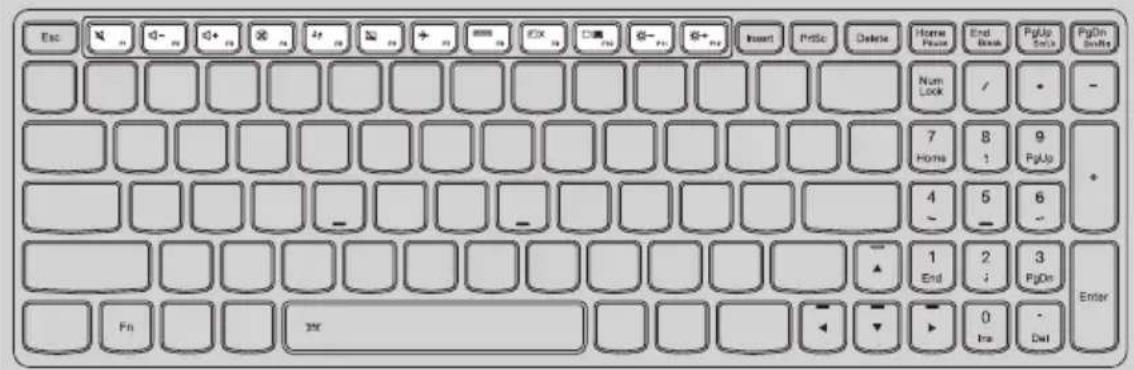
The hotkeys are located on the function key row on the keyboard. You can access certain system settings quickly by pressing the appropriate hotkey.
text_image
Esc Print Delete Home Press End Book PgUp Start PgOn Start New Lock / - 7 8 9 Home 1 PgUp + 4 5 6 - 1 2 3 End PgOn Enter Fn 30x 0 Ine Dat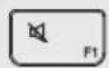
Mutes/unmutes the sound.

Enables/disables Airplane mode.
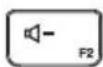
Decreases the volume level.
Displays all currently active apps.
Increases the volume level.
Turns on/off the backlight of the LCD screen.
Closes the currently active window.
Toggles the display between the computer and an external device.
Refreshes the desktop or the currently active window.
Decreases display brightness.
Enables/disables the touchpad.
Increases display brightness.
Chapter 1. Getting to know your computer
■ Function key combinations
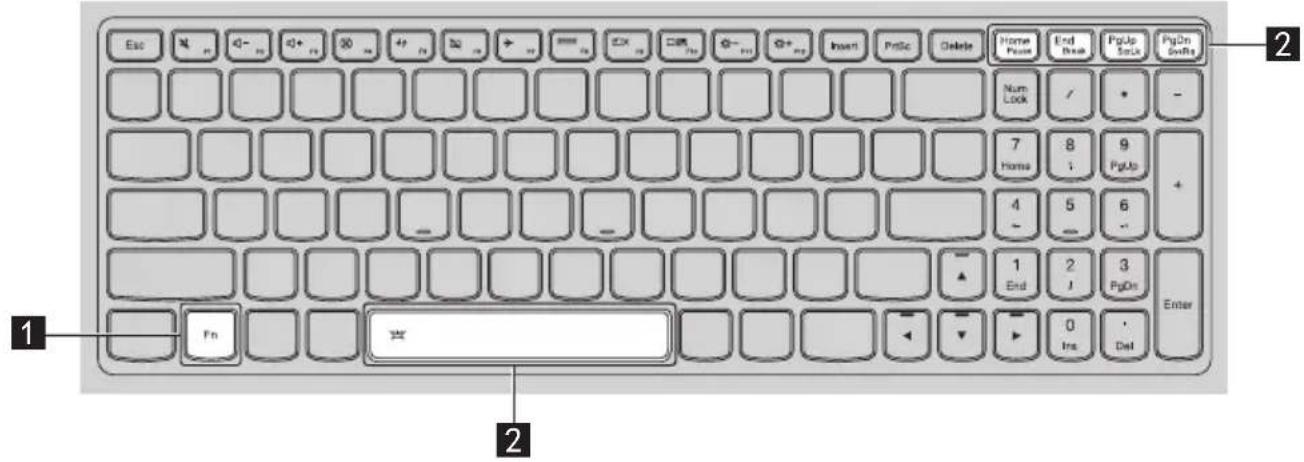
Through the use of the function keys, you can change operational features instantly. To use this function, press and hold Fn 1; then press one of the function keys 2.
text_image
Esc 4 0- 0+ 80 4+ 20 → OK OK OK Enter PrSc Delete Home Place End Book PgUp Snls PgOn SnRs Num Lock / + - 7 Home 8 1 9 PgUp + 4 - 5 6 - 1 End 2 J 3 PgOn Enter Fn EnterThe following describes the features of each function key.
Fn + PgUp: Enables/disables the scroll lock.
Fn + PgDn: Activates the system request.
Fn + Home: Activates the pause function.
Fn + End: Activates the break function.
Fn + Space (on select models): Enables/disables the keyboard backlight.
Left-side view

text_image
Diagram of a computer rear panel with labeled ports and buttons, showing numbered labels 8 and 9.1 AC power adapter Jack Connect the AC power adapter here.
2 Novo button When the computer is off, press this button to start the Lenovo Recovery system or the BIOS setup utility, or to enter the boot menu.
Note: For details, see "Lenovo OneKey Recovery system" on page 18.
3 Fan louvers Dissipate internal heat.
Note: Make sure that none of the fan louvers are blocked or else overheating of the computer may occur.
4 VGA port Connects to external display devices.
5 RJ-45 port This port connects the computer to an Ethernet network.
6 HDMI port Connects to devices with HDMI inputs, such as a TV or an external display.
7 USB port Connects to USB devices.
Note: For details, see "Connecting USB devices" on page 7.
8 Memory card slot Insert memory cards (not supplied) here.
Note: For details, see "Using memory cards (not supplied)" on page 7.
Chapter 1. Getting to know your computer
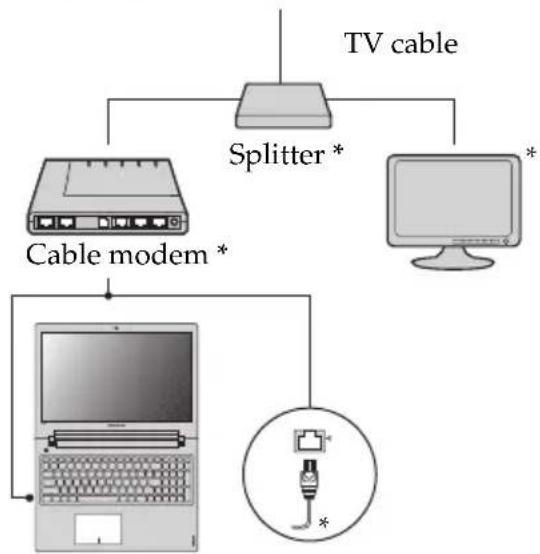
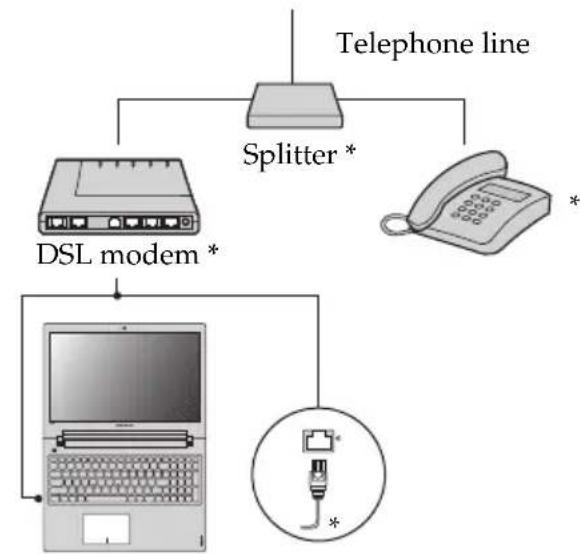
■ Connecting to wired LAN
Wired connections are a reliable and safe way to connect the computer to the Internet.
| Cable | • Cable Internet services use a cable modem connected to the residential cable TV line. |
| DSL | • DSL is a family of related technologies that bring high-speed network access to homes and small businesses over ordinary telephone lines. |
Hardware connection:
Cable DSL
flowchart
graph TD
    TV_cable["TV cable"] --> Splitter["Splitter *"]
    Splitter --> Cablemodem["Cable modem *"]
    Cablemodem --> Laptop["Laptop"]
    Laptop --> Cablemodem
    Cablemodem --> Cablemodem
    Cablemodem --> Cablemodem
    Cablemodem --> Cablemodem
    Cablemodem --> Cablemodem
    Cablemodem --> Cablemodem
flowchart
graph TD
    A["Telephone line"] --> B["Splitter *"]
    B --> C["DSL modem *"]
    C --> D["Laptop with network"]
    D --> E["Router with port 50217"]
    E --> F["Switch symbol *"]
    style A fill:#f9f,stroke:#333
    style B fill:#ccf,stroke:#333
    style C fill:#cfc,stroke:#333
    style D fill:#fcc,stroke:#333
    style E fill:#cff,stroke:#333
* Not supplied.
Note: The above diagrams are for reference only. Actual connection method may vary.
Software configuration
Consult your Internet Service Provider (ISP) for details on how to configure your computer.
■ Connecting USB devices
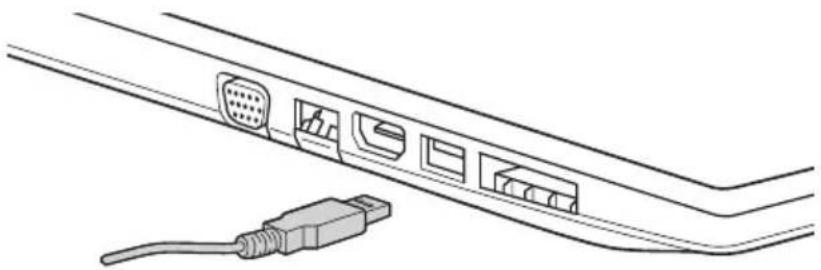
Your computer comes with two USB ports compatible with USB devices.
natural_image
Line drawing of a cable connector with multiple ports and an attached USB cable (no text or symbols)The first time you plug a USB device into a particular USB port on your computer, Windows automatically installs a driver for that device. After the driver has been installed, you can disconnect and reconnect the device without performing any additional steps.
Note: Typically, Windows detects a new device after connecting it, and then installs the driver automatically. However, some devices may require you to install the driver before connecting. Check the documentation provided by the device's manufacturer before connecting the device.
Before disconnecting a USB storage device, make sure your computer has finished transferring data by that device. Click the Safely Remove Hardware icon in the notification area of Windows to remove the device before disconnecting.
Note: If your USB device uses a power cord, connect the device to a power source before connecting it. Otherwise, the device may not be recognized.
■ Using memory cards (not supplied)
Your computer supports the following types of memory card:
- Secure Digital (SD) card
• MultiMediaCard (MMC)
Notes:
- Insert only one card in the slot at a time.
• This card reader does not support SDIO devices (e.g., SDIO Bluetooth, etc.).
Inserting a memory card
① Push the dummy card in until you hear a click.
② Gently pull the dummy card out of the memory card slot.
Note: The dummy card is used for preventing dust and small particles from entering the inside of your computer when the memory card slot is not in use. Retain the dummy card for future use.
③ Slide the memory card in until it clicks into place.
Removing a memory card
1 Push the memory card in until you hear a click.
② Gently pull the memory card out of the memory card slot.
Note: Before removing the memory card, disable it by using the Windows safely remove hardware and eject media utility to avoid data corruption.
Right-side view

text_image
Diagram of a device rear panel with labeled components and numbered parts1 Combo audio jack Connects to headsets.
Notes:
- The combo audio jack does not support conventional microphones.
- The recording function may not be supported if third-party headphones or headsets are connected, due to different industry standards.
2 USB port Connects to USB devices.
Note: For details, see "Connecting USB devices" on page 7.
3 Optical drive Reads/burns optical discs.
4 Kensington slot Attach a security lock (not supplied) here.
■ Attaching a security lock (not supplied)
You can attach a security lock to your computer to help prevent it from being removed without your permission. For details on installing the security lock, please refer to the instructions shipped with the security lock that you have purchased.
Notes:
• Before purchasing any security product, verify that it is compatible with this type of security keyhole.
- You are responsible for evaluating, selecting, and implementing the locking devices and security features. Lenovo offers no comment judgment or warranty regarding the function, quality or performance of locking devices and security features.
Front view

natural_image
Diagram of a cable or cable connector with a power button and indicator lights, no text or symbols present.1
1 System status indicators
| Symbol Indicator | Indicator status | Charge Status | Meaning | |
 | Power | On (solid white) | --- The computer is powered on. | |
| Blinking --- | The computer is in sleep mode and is connected to the AC power adapter. | |||
| Off --- The computer is powered off. | ||||
 | Battery | On (solid white) | Charging | The battery has more than 80% charge. |
| Discharging | The battery has more than 20% charge. | |||
| On (solid amber) | Discharging | The battery has between 5% and 20% charge. | ||
| Blinking slowly (white) | Charging | The battery has between 20% and 80% charge. When the battery reaches 80% charge, the light will stop blinking. However, charging will continue until the battery is fully charged. | ||
| Blinking slowly (amber) | Charging | The battery has less than 20% charge. When battery charge reaches 20%, the blinking color will change to white. | ||
| Blinking quickly (amber) | Charging/ Discharging | The battery has less than 5% charge. | ||
Bottom view
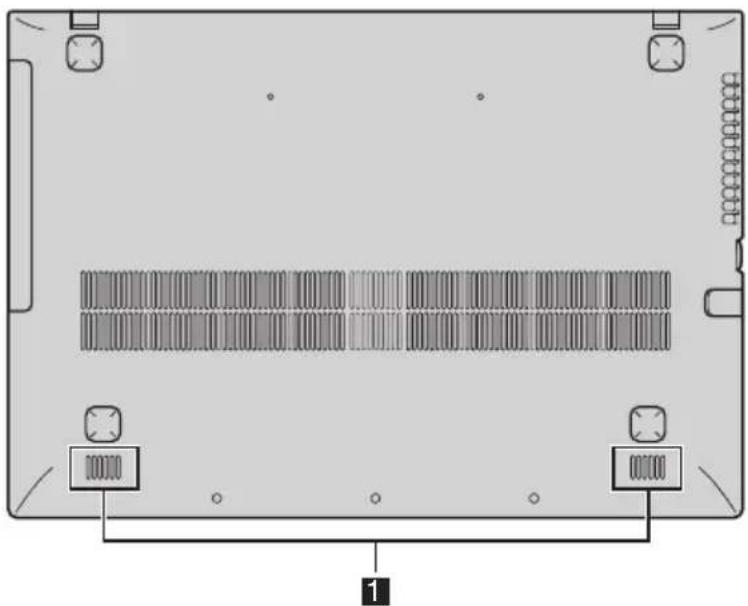
natural_image
Top-down view of a computer chassis back panel showing internal components and a labeled component (no text or symbols beyond basic diagram)1 Speakers
Provide audio output.
Chapter 2. Starting to use Windows 8
- Configuring the operating system for the first time
You may need to configure the operating system when it is first used. The configuration process may include the procedures below:
- Accepting the end user license agreement
- Configuring the Internet connection
- Registering the operating system
- Creating a user account
Operating system interfaces
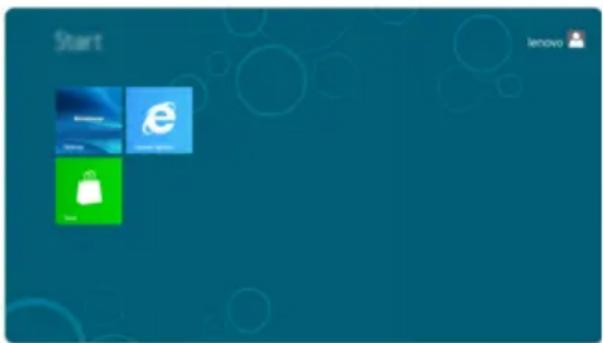
Windows 8 comes with two main user interfaces: the Start screen and the Windows desktop.
To switch from the Start screen to the Windows desktop, do one of the following:
- Select the Windows desktop tile on the Start screen.
- Press the Windows key + D.
To switch from desktop to Start screen, do one of the following:
- Select Start from the Charms.
- Move the pointer to the lower-left corner and then select the Start screen thumbnail when it is displayed.
Start screen Desktop
text_image
Start lenovo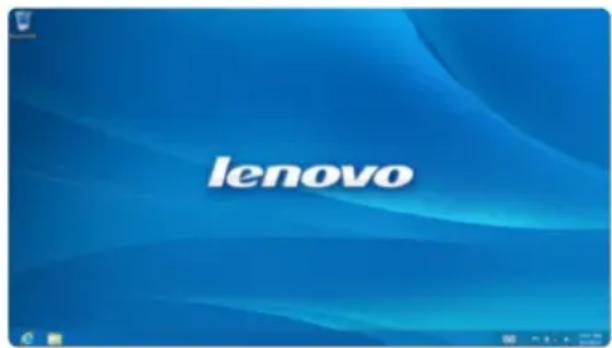
text_image
lenovoThe Charms
The five Charms provide new and faster ways to perform many basic tasks and are always available regardless of which app you are currently in.
To display the Charms, do one of the following:
- Move the pointer to the upper-right or lower-right corner until the Charms bar is displayed
- Press Windows key + C.

text_image
Start lenovo 10:13 Sunday June 5
Search charm
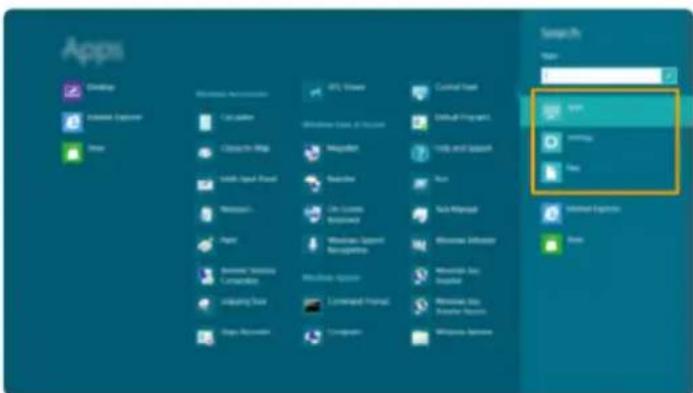
The Search charm is a powerful new way to find whatever you are looking for, including apps, settings and files.
text_image
Apps Click Access Explorer Save Application Options Calciton Couching Map Lock-Label Panel Microsoft Font Microsoft Windows Explorer WinRAR WinRAR Image WinRAR Image WinRAR Image WinRAR Image WinRAR Image WinRAR Image WinRAR Image WinRAR Image WinRAR Image WinRAR Image WinRAR Image WinRAR Image WinRAR Image WinRAR Image WinRAR Image WinRAR Image WinRAR Image WinRAR Image WinRAR Image WinRAR Image WinRAR Image WinRAR Image WinRAR Image WinRAR Image WinRAR Image WinRAR Graphs WinRAR Graphs WinRAR Graphs WinRAR Graphs WinRAR Graphs WinRAR Graphs WinRAR Graphs WinRAR Graphs WinRAR Graphs WinRAR Graphs WinRAR Graphs WinRAR Graphs WinRAR Graphs WinRAR Graphs WinRAR Graphs WinRAR Graphs WinRAR Graphs WinRAR Graphs WinRAR Graphs WinRAR Graphs WinRAR GraphS WinRAR GraphS WinRAR GraphS WinRAR GraphS WinRAR GraphS WinRAR GraphS WinRAR GraphS WinRAR GraphS WinRAR GraphS WinRAR GraphS WinRAR GraphS WinRAR GraphS WinRAR GraphS WinRAR GraphS WinRAR GraphS WinRAR GraphS WinRAR GraphS WinRAR GraphS WinRAR GraphS WinRAR GraphS WinRAR GraphT1 WinRAR GraphT2 WinRAR GraphT3 WinRAR GraphT4 WinRAR GraphT5 WinRAR GraphT6 WinRAR GraphT7 WinRAR GraphT8 WinRAR GraphT9 WinRAR GraphT10 WinRAR GraphT11 WinRAR GraphT12 WinRAR GraphT13 WinRAR GraphT14 WinRAR GraphT15 WinRAR GraphT16 WinRAR GraphT17 WinRAR GraphT18 WinRAR GraphT19 WinRAR GraphT20 WinRAR GraphT21 WinRAR GraphT22 WinRAR GraphT23 WinRAR GraphT24 WinRAR GraphT25 WinRAR GraphT26 WinRAR GraphT27 WinRAR GraphT28 WinRAR GraphT29 WinRAR GraphT30 WinRAR GraphT31 WinRAR GraphT32 WinRAR GraphT33 WinRAR GraphT34 WinRAR GraphT35 WinRAR GraphT36 WinRAR GraphT37 WinRAR GraphT38 WinRAR GraphT39 WinRAR GraphT40 WinRAR GraphT41 WinRAR GraphT42 WinRAR GraphT43 WinRAR GraphT44 WinRAR GraphT45 WinRAR GraphT46 WinRAR GraphT47 WinRAR GraphT48 WinRAR GraphT49 WinRAR GraphT50
Share charm
The Share charm lets you send links, photos, and more to your friends and social networks without leaving the app you are in.

Start charm
The Start charm is a fast way to go to the Start screen.

Devices charm
The Devices charm allows you to connect or send files to any external devices, such as digital cameras, TVs, or printers.

Settings charm
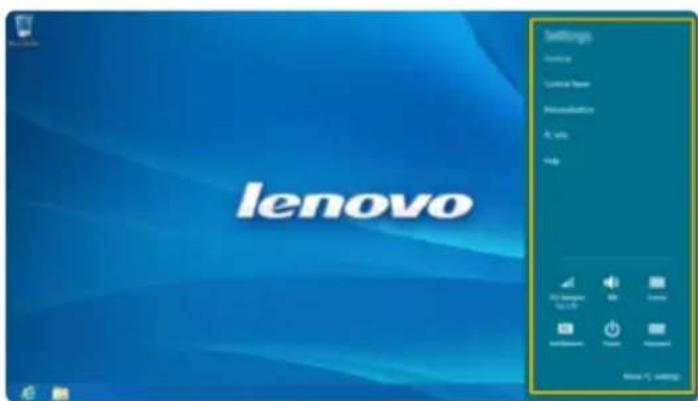
The Settings charm lets you perform basic tasks, such as setting the volume or shutting down the computer. Also, you can get to the Control Panel through the Settings charm when using the desktop screen.
text_image
lenovo Settings Configuration Control Panel Recommendation R. 50% Help Class: Windows 12.1.23 OK Cancel Default Help Next > C Settings- Putting the computer to sleep or shutting it down
When you have finished working with your computer, you can put it to sleep or shut it down.
- Putting your computer to sleep
If you will be away from your computer for a short time, put the computer to sleep.
When the computer is in sleep mode, you can quickly wake it to resume use, bypassing the startup process.
To put the computer to sleep, do one of the following:
- Close the display panel.
- Press the power button.
- Open the Charms and then select Settings → Power → Sleep.
Note: Wait until the power indicator light starts blinking (indicating that the computer is in sleep mode) before you move your computer. Moving your computer while the hard disk is spinning can damage the hard disk, causing loss of data.
To wake the computer, do one of the following:
- Press the power button.
- Press any key on the keyboard.
■ Shutting down the computer
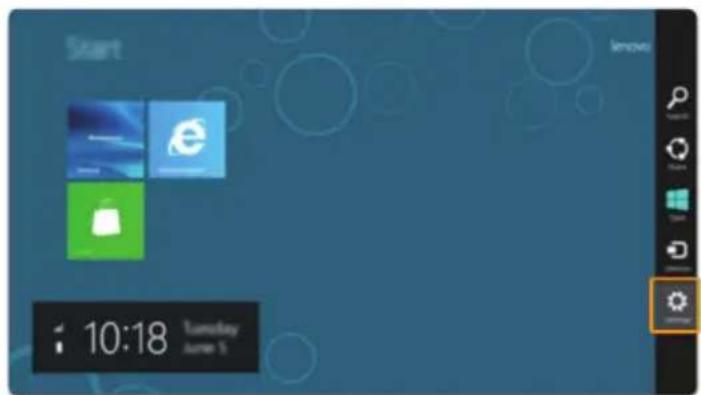
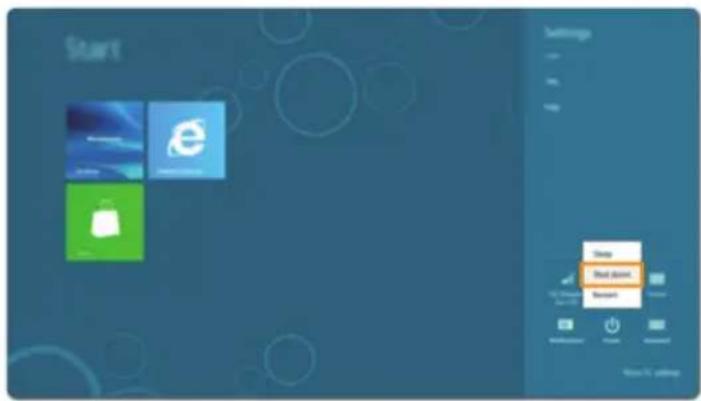
If you are not going to use your computer for a long time, shut it down. To shut down your computer:
① Open the Charms, and then select Settings

1
text_image
Start 10:18 Tuesday June 5② Select Power → Shutdown.
2
text_image
Start Send down Send down Send downConnecting to wireless LAN
Enabling wireless connection
To confirm that Airplane mode is disabled, go to the desktop and check the notification area. If you see the icon displayed on the lower right, then Airplane mode is on. Otherwise, wireless function is enabled.
Note: Airplane mode should be disabled by default.
If Airplane mode is on, do one of the following to enable the wireless function:
- Press F7 to disable Airplane mode.
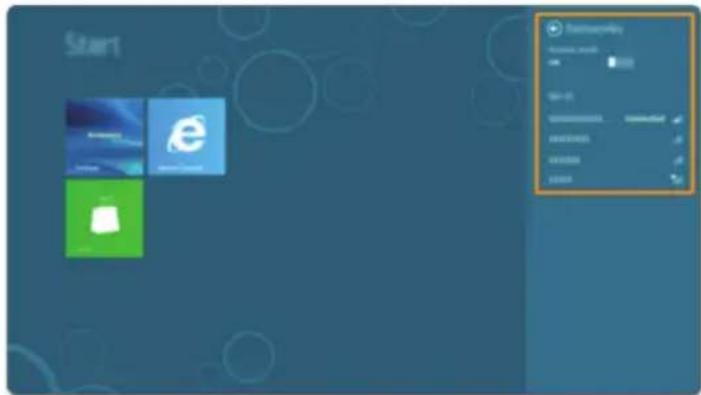
- Open the Charms and select Settings → to open the Network configuration page, and then toggle the Airplane mode switch to Off.
Connecting to a wireless LAN
After wireless has been enabled, the computer will automatically scan for available wireless networks and display them in the wireless LAN network list. To connect to a wireless network, click the network name in the list and then click Connect.
Note: Some networks require a network security key or passphrase for connection. To connect to one of those networks, ask the network administrator or the Internet service provider (ISP) for the security key or passphrase.
text_image
Start DaimlerVbox Windows 2017 WinRAR WinRAR WinRAR WinRAR WinRAR WinRAR WinRAR WinRAR WinRAR WinRAR WinRAR WinRAR WinRAR WinRAR WinRAR WinRAR WinRAR WinRAR WinRAR WinRAR WinRAR WinRAR WinRAR WinRAR WinRAR WinRAR WinRAR WinRAR WinRAR WinRAR WinRAR WinRAR WinRAR WinRAR
Help and support
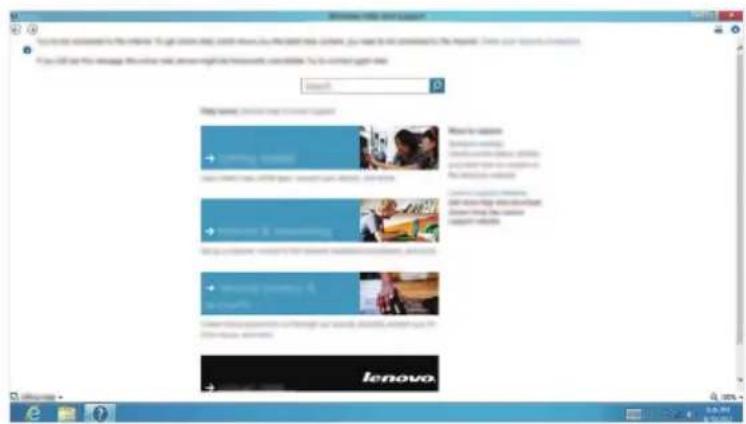
If you have any problems using the operating system, see the Windows Help and Support file. To open the Windows Help and Support file, do one of the following:
- Select Settings charm, then select Help.
- Press Windows key + F1.
text_image
Home Help You can be interested in the home. You can also need to use a new home system, you want to be interested in the home. Here you can't have a home. You can help me manage the home help, but we might find your home information. You can still get home. Home Help You can be interested in the home. You can also need to use a new home system, you want to be interested in the home. You can still get home. Home Help You can be interested in the home. You can also need to use a new home system, you want to be interested in the home. You can still get home. Home Help You can be interested in the home. You can also need to use a new home system, you want to be interested in the home. You can still get home. Home Help You can be interested in the home. You can also need to use a New Home System, you want to be interested in the home. You can still get home. Home Help You can be interested in the home. You can also need to use a New Home System, you want to be interested in the home. You can still get home. Home Help You can be interested in the home. You can also need to use a New Home System, you want to be interested in the home. You can still get home. Home Help You can be interested in the Home. You can also need to use a New Home System, you want to be interested in the home. You can still get home. Home Help You can be interested in the Home. You can also need to use a New Home System, you want to be interested in the home. You can still get home. Home Help You can be interested in the Home. You can also need to use a New Home System, you want to be interested in the home. You can still get Home. Home Help You can be interested in the Home. You can also need to use a New Home System, you want to be interested in the home. You can still get home. Home Help You can be interested in the Home. You can also need to use a New Home System, you want to be interested in the home. You can still get home. Home Help You can be interested in the Home. You can also need to use a New Home System, you want for a new home system, you want for a new home system. Home Help You can be interested in the Home. You can also need to use a New Home System, you want for a new home system. Home Help You can be interested in the Home. You can also need to use a New Home System, you want for a new home system. Home Help You can be interested in the Home. You can also need to use a New Home System, you want for a new home system. Home Help You can be interested in the Home. You can also need to use a New Home System, you want for a new home system. home help You can be interested in the Home. You can also need to use a New Home System, you want for a new home system. home help You can be interested in the Home. You can also need to use a New Home System, you want for a new home system. home help You can be interested in the Home. You can also need to use a New Home System, you want for a new home system. home help You can be interested in the Home. Your home help is required. You can help You can help You can help You can help You can help You can help You can help You can help You can help You can help You can help You can help You can help You can help You can help You can help You can help You can help You can help You can help You can help You can help You can help You can help You can help You can helpYou can read the Windows Help and Support file on your computer. You can also get online help and support by clicking on one of the two links listed under More to explore.
Chapter 3. Lenovo OneKey Recovery system
The Lenovo OneKey Recovery system is software designed to back up and restore your computer. You can use it to restore the system partition to its original status in case of a system failure. You can also create user backups for easy restoration as required.
Note: To utilize the features of the OneKey Recovery system, your hard disk already includes a hidden partition by default to store the system image file and the OneKey Recovery system program files. This default partition is hidden for security reasons, which explains why the available disk space is less than the stated capacity.
■ Backing up the system partition
You can back up the system partition to an image file. To back up the system partition:
1 Press the Novo button to start the Lenovo OneKey Recovery system.
② Click System Backup.
3 Select a back-up location and click Next to start the backup.
Notes:
- You can choose a back-up location on the local hard disk drive or an external storage device.
• The back-up process may take a while.
• The back-up process is only available when Windows can be started normally.
Restoring
You can choose to restore the system partition to its original status or to a previously created back-up point. To restore the system partition:
1 Press the Novo button to start the Lenovo OneKey Recovery system.
② Click System Recovery. The computer will restart to the recovery environment.
③ Follow the on-screen instructions to restore the system partition to its original status or to a previously created back-up point.
Notes:
- The recovery process is irreversible. Make sure to back up any data you wish to save on the system partition before starting the recovery process.
- The recovery process may take a while. So be sure to connect the AC adapter to your computer during the recovery process.
- The above instructions should be followed when Windows can be started normally.
If Windows cannot be started, then follow the steps below to start the Lenovo OneKey Recovery system:
1 Shut down the computer.
2 Press the Novo button. From the Novo button menu, select the Lenovo OneKey Recovery system and press Enter.
Chapter 4. Troubleshooting
Frequently asked questions
This section lists frequently asked questions by category.
■ Finding information
What safety precautions should I follow when using my computer?
The Lenovo Safety and General Information Guide which came with your computer contains safety precautions for using your computer. Read and follow all the precautions when using your computer.
Where can I find the hardware specifications for my computer?
You can find the hardware specifications for your computer on the printed flyers which came with your computer.
Where can I find warranty information?
For the warranty applicable to your computer, including the warranty period and type of warranty service, see the Lenovo limited warranty flyer that came with your computer.
- Drivers and preinstalled software
Where are the installation discs for Lenovo preinstalled (desktop) software?
Your computer did not come with any installation discs for Lenovo preinstalled software. If you need to reinstall any preinstalled software, you can find the installation program located on the D partition of your hard disk. If you cannot find the installation program there, you can also download it from the Lenovo consumer support website.
Where can I find drivers for the various hardware devices of my computer?
If your computer is preinstalled with a Windows operating system, Lenovo provides drivers for all the hardware devices that you need on the D partition of your hard disk. You can also download the latest device drivers from the Lenovo consumer support website.
■ Lenovo OneKey Recovery system
Where are the recovery discs?
Your computer did not come with any recovery discs. Use the Lenovo OneKey Recovery system if you need to restore the system to its original factory status.
What can I do if the back-up process fails?
If you can start the backup but it fails during the back-up process, try the following steps:
① Close all open programs, and then restart the back-up process.
② Check to see if the destination media is damaged. If it is, replace the damaged media. Otherwise, select another destination path and try again.
When do I need to restore the system to its original factory status?
Use this feature when the operating system fails to start. If you have any critical data on the computer that you want to save, back it up before starting the recovery process.
Chapter 4. Troubleshooting
BIOS setup utility
What is the BIOS setup utility?
The BIOS setup utility is a ROM-based software program. It displays basic computer information and provides options for setting boot devices, security, hardware mode, and other user preferences.
How can I start the BIOS setup utility?
To start the BIOS setup utility:
1 Shut down the computer.
② Press the Novo button and then select BIOS Setup.
How can I change the boot mode?
There are two boot modes: UEFI and Legacy. To change the boot mode, start the BIOS setup utility and set boot mode to UEFI or Legacy support on the boot menu.
When do I need to change the boot mode?
The default boot mode for your computer is UEFI mode. If you choose to install a legacy Windows operating system (that is, any operating system prior to Windows 8) on your computer, you must change the boot mode to Legacy support. A legacy Windows operating system cannot be installed until you change the boot mode.
Getting help
How can I contact the customer support center?
See "Chapter 3. Getting help and service" of the Lenovo Safety and General Information Guide.
Troubleshooting
Display problems
| When I turn on the computer, nothing appears on the screen. | ·If the screen is blank, make sure that:- The AC adapter is connected to the computer and the power cord is plugged into a working electrical outlet.- The computer power is on. (Press the power button again for confirmation.)·If these items are properly set, and the screen remains blank, have the computer serviced. |
| When I turn on the computer, only a white cursor appears on a blank screen. | ·Restore the system partition to its original status or a previously created back-up point using the OneKey Recovery system. If you still see only the cursor on the screen, have the computer serviced. |
| My screen goes blank while the computer is on. | ·Your screen saver or power management may be enabled.Do one of the following to exit from the screen saver or to resume from sleep mode:- Press any key on the keyboard.- Press the power button.- Press F9 to confirm whether the backlight for the LCD screen has been turned off. |
Password problems
| I forgot my password. | ·If you forget your user password, ask the system administrator to clear your user password.·If you forget your hard disk drive password, a Lenovo authorized servicer cannot reset your password or recover data from the hard disk. You must take your computer to a Lenovo authorized servicer or a marketing representative to have the hard disk drive replaced. Proof of purchase is required, and a fee will be charged for parts and service.·If you forget your supervisor password, a Lenovo authorized servicer cannot reset your password. You must take your computer to a Lenovo authorized servicer or a marketing representative to have the system board replaced. Proof of purchase is required, and a fee will be charged for parts and service. |
Sleep problems
| The critical low-battery error message appears, and the computer immediately turns off. | • The battery power is getting low. Connect the AC adapter to the computer. |
Chapter 4. Troubleshooting
The computer enters sleep mode immediately after Power-on self-test (POST).
- Make sure that:
- The battery is charged.
- The operating temperature is within the acceptable range. See "Chapter 2. Use and care Information" of Lenovo Safety and General Information Guide.
Note: If the battery is charged and the temperature is within range, have the computer serviced.
The computer does not return from sleep mode and the computer does not work.
- If your computer is in sleep mode, connect the AC adapter to the computer, then press any key or the power button.
- If the system still does not return from sleep mode, your system has stopped responding, and you cannot turn off the computer; reset the computer. Unsaved data may be lost. To reset the computer, press and hold the power button for 4 seconds or more. If the computer is still not reset, remove the AC adapter.
Computer screen problems
The screen is blank. • Do the following:
- If you are using the AC adapter, or using the battery, and the battery status indicator is on, press F12 to make the screen brighter.
- If the power indicator is in blinking, press the power button to resume from the sleep mode.
- If the problem persists, follow the solution in the following problem "The screen is unreadable or distorted."
- Press F9 to confirm whether the backlight for the LCD screen has been turned off.
The screen is unreadable or distorted.
- Make sure that:
- The display device driver is installed correctly.
- The screen resolution and color quality are correctly set.
- The monitor type is correct.
Incorrect characters appear on the screen.
- Did you install the operating system or programs correctly? If they are installed and configured correctly, have the computer serviced.
Sound problems
No sound can be heard from the speaker even when the volume is turned up.
- Make sure that:
- The Mute function is off.
- The headphone jack is not used.
- Speakers are selected as the playback device.
Battery problems
Your computer shuts down before the battery status indicator shows empty.
- Discharge and recharge the battery.
-or-
Your computer operates after the battery status indicator shows empty.
| The computer does not operate with a fully charged battery. | ·The surge protector in the battery might be active. Turn off the computer for one minute to reset the protector; then turn on the computer again. |
| A hard disk drive problem | |
| The hard disk drive does not work. | ·In the Boot menu in BIOS setup utility, make sure that the hard disk drive is included in the EFI/Boot device priority correctly. |
| A startup problem | |
| The Microsoft® Windows operating system does not start. | ·Use the OneKey Recovery system to restore the system partition to its original status or a previously created back-up point. For details about the OneKey Recovery system, see “Lenovo OneKey Recovery system” on page 18. |
| A backup problem | |
| Backup cannot be made. ·You are not currently using a Windows operating system. ·There is not enough space to store the backed-up data. You will need to free more space on the destination device. | |
| Other problems | |
| Your computer does not respond. | ·To turn off your computer, press and hold the power button for 4 seconds or more. If the computer still does not respond, remove the AC adapter. ·Your computer might lock when it enters sleep mode during a communication operation. Disable the sleep timer when you are working on the network. |
| The computer does not start from a device you want. | ·See the Boot menu of the BIOS setup utility. Make sure that the EFI/Boot device priority in the BIOS setup utility is set so that the computer starts from the device you want. ·Press the Novo button when the computer is powered off and select Boot Device Menu. Then select the device you want the computer to start from. |
| The connected external device does not work. | ·Do not connect or disconnect any external device cables other than USB while the computer power is on; otherwise, you might damage your computer. ·When using a high power consumption external devices such as an external USB optical disk drive, use external device power adapter. Otherwise, the device may not be recognized, or system shut down may result. |
Trademarks
The following terms are trademarks or registered trademarks of Lenovo in the United States, other countries, or both.
Lenovo
IdeaPad
Onekey
Microsoft and Windows are trademarks of Microsoft Corporation in the United States, other countries, or both.
lenovo
©Lenovo China 2012