WHU600 - Humidifier WOOD'S - Free user manual and instructions
Find the device manual for free WHU600 WOOD'S in PDF.
Download the instructions for your Humidifier in PDF format for free! Find your manual WHU600 - WOOD'S and take your electronic device back in hand. On this page are published all the documents necessary for the use of your device. WHU600 by WOOD'S.
USER MANUAL WHU600 WOOD'S
Visit woods.se for more information and updated instruction manuals. Register your product for additional services: www.warranty-woods.comVisit our website to: Get usage advice, updated brochures, troubleshoot and service information Register your product for additional services: www.warranty-woods.com
CUSTOMER CARE AND SERVICE
Always use original spare parts. When contacting our Authorised Service Centre, ensure that you have the following data available: Model number, receipt and serial number. Warning / Caution-Safety information. General information and tips. Environmental information. Subject to change without notice.CONTENTS: PAGE NO.
OPERATING INSTRUCTIONS English Swedish Norwegian Danish German French Spanish Dutch Polish Romanian Finnish Lithuanian Latvian Estonian Greek Icelandic Italian 6-12 13-19 20-26 27-33 34-40 41-47 48-54
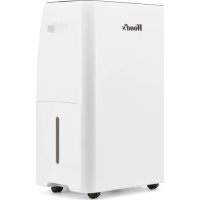
HUMIDIFER WHU600 In this users manual you will nd specic operating instructions for your Wood’s product. The product should only be used in accordance with the users manual. Please store this users manual in a safe place for future reference. Warning symbol If the precaution is not followed it may present a danger to health and/or property. Hint symbol Useful tips in order to get the most out of your product.
Thank you for choosing a Wood’s humi- dier. A Wood’s humidier will help you increase the humidity in your home or ofce and help you to keep a comfortable indoor climate all year around.
What is relative humidity? Relative humidity is the proportion of moisture or water vapour in the air in relation to the maximum possible level at the current temperature, expressed as a percentage. Common symptoms from insufcient humidity:
- Nasal congestion or runny nose
- Breathing difculties
- Dry complexion with aking skin
- Tiredness, drowsiness and poor concentration
- Respiratory infections and diseases, such as asthma.
- Dry throat and sore throat
- Dry eyes As we heat up the air in our homes, the relative humidity drops. The use of air conditioning units will also lower the humidity. A humidier adds water to air, increasing the relative humidity, creating a more comfortable indoor climate. For a comfortable and healthy indoor climate, maintain a humidity level between 50% and 60% RH.
1.3 Working Principle
An ultrasonic humidier uses an ultraso- nic high-frequency oscillator (transducer) to break up water into tiny water partic- les.The ventilation system blows out this water into the dry air where it evaporates to and increases the humidity. If you have problems with white dust when using your humidier, equip it with a Wood’s universal anti-scale lter. Ask your retailer for details. English7
2. SECURITY WARNINGS
Please read these security warnings carefully before installing and using the appliance. If the security regulations are not followed, it may void the product warranty and cause a risk for electric shock.
- Unplug the unit from its power supply before cleaning, watter lling, storage, maintenan- ce of its lter or when not in use.
- This appliance is not intended for use by persons (including children) with reduced physical, sensory or mental capabilities, or lack of experience and knowledge, unless they have been given supervision or instruc- tion concerning use of the appliance by a person responsible for their safety.
- The appliance shall be installed in accor- dance with national wiring regulations.
- Always place the humidier on a hard, at and level surface. Avoid exposure to direct sunlight and always keep it away from walls and heat sources such as stoves, radia- tors, etc. Warning: The appliance may not work correctly if it is not placed on a level surface.
- Do not insert or remove the electric plug on the appliance with wet hands.
- If the main cable is damaged it must be replaced by the manufacturer, its service agent, or similarly qualied persons in order to avoid a hazard.
- To reduce the risk of electric shock, do not remove any screws. The unit does not contain any user-serviceable parts. Please leave all maintenance work to qualied personnel.
- Fill the tank with fresh, distilled or deminera- lised water. Do not switch on the appliance when there is no water in the tank.
- Do not shake the appliance as this might cause water to spill over into the base unit.
- If you spill any liquid into the unit, it can cause serious damage. Immediately unplug it and consult your dealer.
- Never touch the water or components while the unit is in operation.
- Immediately unplug the unit and have it examined by your dealer if you sense a burning smell.
- Do not pour hot water into the tank, i.e. at a temperature in excess of 40°C.
- Do not immerse the appliance or the main cable or plug in water or other liquids.
- Never scrape the transducer with a hard tool. The humidier must be cleaned regularly. To do this, refer to the cleaning instructions in this manual.
- Always keep a safe distance from water sources.
- Ensure that the main cable does not touch any hot surface and that it does not over- hang a table edge.
- Never use this appliance in a room where aerosol products (sprays) are used or in a room or where oxygen is being administe- red.
- Do not cover the unit.
- When moving the appliance, lift it by the base unit and not by the water tank.
- The humidier is designed for indoor and domestic use only.
- The product exhaust water mist. Always keep a safe distance from surfaces or items sensitive to water damage.
- Do not to alter or reconstruct the appliance or its power cable in any way.
- Do not to alter or reconstruct the appliance or its power cable in any way. English8
- Gently unpack the product and remove all packing materials from the product.
- Make sure to keep the product box for future use, for example if the unit needs servicing.
- Before using the product for the rst time, let it stand in room temperature for half of an hour.
- Use clear water, temperature not exceeding 40°C
- Check the water basin, make sure it is clear and clean.
- Place the product in the room you want to humidify. Note that the product is not designed to humidify an entire apartment or house. The product will work best if used in a room with closed doors and windows and with minimal ventilation.
- Place the machine on a at surface. If it is placed on an uneven surface, it might not function properly.
- Check if the rated voltage meets the input voltage, and plug the unit into a power outlet.
4. OPERATING INSTRUCTIONS
4.1 Filling the water tank
1. Turn the child safety lock on the side
of the product to unlock the water tank. Unlocked Locked
2. Remove the water tank by removing
the top cover and pulling on the handle underneath the cover.
3. Turn the water tank upside down and
4. Fill the water tank with fresh, cold
water. Preferrably distilled or pre-boiled water.
5. Rescrew the plug and put the water
tank back. Put the top cover back and turn the child lock to x the water tank in place. NOTE: There is always some water left in the bottom of the unit when the water tank is removed. This is normal.
4.2 Using the humidier
Operate the humidier with the control panel on the unit or by using the remote control. Buttons, settings and functions are the same on both control panel and remote control.
Before you use the remote control make sure it is equipped with a CR2025 3V battery. The correct battery is included with the product. If the remote control doesn’t work properly, replace its battery with a new one and try again. English9
1. Mist generator (transducer)
Model: WHU600 Power supply: 220-240V 50/60Hz Heating power: 80W Humidify power: 30W Total power: 110W Water tank capacity: 5.5L Evaporation Rate: ≥300ml/H Noise level: ≤35dB(A) English *Technical changes and improvements may occur. All values are approximate and may vary due to external circumstances such as temperature, ventilation and humidity.10 ION TIMER Start or stop the humidier. When turned on, the humidier will start in AUTO-mode. Set fan speed: Press repeatedly to choose fan speed. First speed until fourth speed for each touch. Touch the fth time and it enters AUTO mode. In AUTO-mode, the fan speed will be set depending on your selec- ted humidity level. Set fan speed is shown as dashes on the right hand side of the display. Set desired humidity. Press repeatedly to choose desired humidity between 40% and 75%.Note that the humidier will operate only when set humidity level exceeds the ambient humidity level. When the set humidity level is higher than ambient humidity level the unit will stop and automatically restart when the humidity drops. Press once, it will increa- se by 5%RH. After setting expected humidity, LED display blinks for 5 seconds, then switch to show current temperature. If current humidity is lower than setting humidity, device will work in the third speed. If current humidity is higher than setting humidity, device will stop humidifying and stay in sleeping mode. (During sleep mode, ION and HEATING function are not available to select.) When current humidity is lower than setting humidity 2%RH, device will exit sleeping mode and humidify in previous setting. When setting reaches 75%RH, press again and it will change into AUTO mode and show “CO” on LED display. Press again, it will be back to 40%RH. (AUTO mode is not available to select under CONSTANT HUMIDITY function is on.) Activate the ionizer. The ionization is an air cleaning feature and will give you a better indoor air quality. The ION symbol is visible in the display when the function is activated. Press again to deactivate Activate the heater. When activated, the humidier will exhasut warm mist. By using the heater you will get a faster and more pleasant humidication effect. The heater symbol is visible in the display when the function is activated. Note that it may take up to 15 min before the mist is heated properly. Press again to deactivate the heating function. Set timer. When the humidier is operating, press the timer button to choose time for automatic shut off. Select between 1 to 12 hours. Set time is shown in the display, counting down with every hour passed. After set time has passed, the humidier will shut off. Press the TIMER button repeatedly until it says ”- H” to deactivate the timer function. When this symbol is visible there is not enough water in the water tank. The humidier stops. Rell the water tank to restart the humidier. Low water indication symbol
ATTENTION! Always switch off and unplug the unit before cleaning To ensure a long life span and problem free use of the product, It is important that it is cleaned regularly.
1. Use cold boiled water or distilled water.
2. Clean the transducer (see g B), water
tank and bottom container every week.
3. Change the water in water regularly.
4. Empty the water tank and dry the
bottom container basin before storage or when the unit is unused for a longer period of time.
5. Clean the whole unit and make sure
that all parts of the unit storage or when the unit is unused for a longer period of time.
5.2 How to clean the transducer:
1. Put a couple of drops of cleaning liquid
on the surface of the transducer (see g B), wait for 2-5 minutes.
2. Brush off the scale from the surface
using the included brush (visible when you remove the water tank).
3. Rinse the transducer with clean water.
4. Never use sharp or solid objects for
cleaning the transducer
5.3 How to clean the bottom container:
1. Clean the bottom container basin with
a soft cloth. If there is excess lm on any surfaces, soak the cloth with vine- gar and repeat the process.
2. If there is a lm in any of the depres-
sions along the container, drop a bit of vinegar into the depression and clean it out with a brush.
3. Rinse the water basin with clean water.
5.4 How to clean the lter system
1. The needs to be cleaned after the use
of approximately 1000 l water. Remem- ber to clean the lter regularly..
2. Remove the water tank and unscrew
3. Unscrew the lter from the plug.
4. Soak the lter in vinegar for about 10
5. Rinse the lter with fresh water.
Remove, clean and dry the lter before storage. Wrap it in protective packaging and keep it next to the humidier in a cool, dry and dark storage space. 5.5. Storage
1. If you are not going to use the humidi-
er for a long time, make sure that all its parts are dry.
2. Do not store the unit with water in the
water tank or in the bottom container.
3. Clean and dry the lter before storage.
4. Keep the humidier away from children
in a dry cool place.
6. WARRANTY & SERVICE
If your product needs service you should rst contact your retailer. 2 years limited product warranty against production faults. Proof of purchase is required for all warranty claims. The warranty is only valid if the product is used in accordance with the instructions and security warnings expressed in this manual. The warranty does not cover any damages caused by improper handling of the product. English12
If your product isn’t working properly, please follow the below trouble shooting guide. If nothing helps, you should contact your retailer for service. The following is not considered faulty operation:
1. If your water is very hard (containing high levels of minerals) the humidier may pro-
duce white dust. This is not a malfunction. The solution would be to clean the lter more often or use softer, pre-boiled or distilled water.
2. You may hear the gurgling sound of water from the product. this is normal.
3. The machine operates very quietly but it is not completely silent. Noise levels less
than 35 dB is considered normal.
8. RECYCLING & DISPOSAL
*This marking indicates that this product should not be disposed with other household wastes throughout the EU. To prevent possible harm to the environment or human health from uncontrolled waste disposal, recycle it responsibly to promote the sustainable reuse of material resources. To return your us device, please use the return and collection systems or contact the retailer where the product was purchased. They can take this product for environmental safe recycling.
TROUBLE CAUSE SOLUTION
The humidier doesn’t start Humidier is not properly plugged into the power outlet. Connect power cord to electrical outlet and press power button Power lamp is on but no mist No water in the water tank Fill water into water tank The water tank plug is too loose Tighten the plug The mist has a strange odour A new unit Take out water tank, unscrew the plug and leave it open for 12 hours It either has dirty water or the water has been stagnant too long Clean the water tank, ll it with clear, fresh water Power light is on, but the humidier doesn’t work. Too much water in the water basin Pour out some water from the water tank. Reinsert the water tank and make sure that it sits properly The volume of spray mist is too low Too much mineral scale in the bottom container basin Clean the transducer, water tank, and mist nozzle. It either has dirty water or the water has been stagnant too long Clean the water tank, ll it with clear, fresh water Abnormal noise Vibration in the water tank due to too low water level Fill the water tank with clear, fresh water Machine is on an unstable surface Move the unit to a stable at surface The mist is coming out of the area around the jets. There are gaps between the nozzle and water tank Dip the nozzle in water for a while, clean it with a damp cloth and put it back on the tank. English13