WS1650 - Weather Station ALECTO - Free user manual and instructions
Find the device manual for free WS1650 ALECTO in PDF.

| Features | Details |
|---|---|
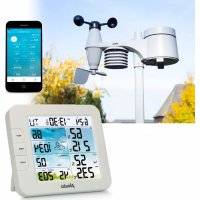
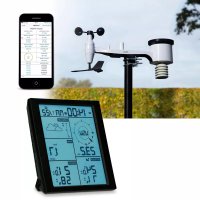
| Product type | Weather Station |
| Weather measurements | Indoor and outdoor temperature, humidity, atmospheric pressure |
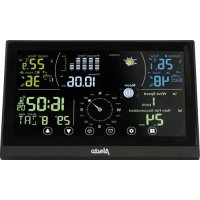
| Display | Backlit LCD screen |
| Temperature measurement range | -20°C to 60°C |
| Humidity measurement range | 1% to 99% |
| Power supply | Power adapter or batteries |
| Additional features | Weather forecast, comfort indicator, clock |
| Installation | Easy to install, requires a weather-protected location for the outdoor sensor |
| Maintenance | Regular cleaning of the screen, battery check |
| Safety | Use only with the supplied adapter, avoid exposure to water |
| Warranty | 2 years |
Frequently Asked Questions - WS1650 ALECTO
User questions about WS1650 ALECTO
0 question about this device. Answer the ones you know or ask your own.
Ask a new question about this device
Download the instructions for your Weather Station in PDF format for free! Find your manual WS1650 - ALECTO and take your electronic device back in hand. On this page are published all the documents necessary for the use of your device. WS1650 by ALECTO.
USER MANUAL WS1650 ALECTO
natural_image
Diagram of a device panel with labeled components (no text or symbols beyond labels)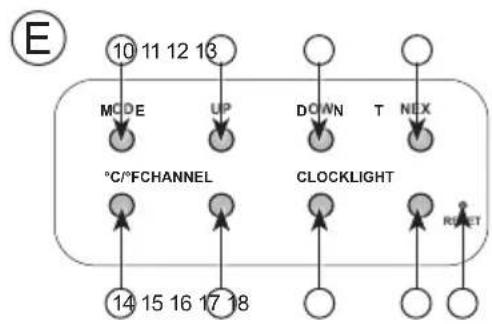
flowchart
graph TD
    A["10 11 12 13"] --> B["MODE"]
    A --> C["UP"]
    A --> D["DOWN"]
    A --> E["T"]
    A --> F["NEX"]
    G["14 15 16 17 18"] --> H["°C/°FCHANNEL"]
    I["Clocklight"] --> J["CLOCKLIGHT"]
    K["RESET"] --> L["Reset"]
text_image
D ⑥ ⑦ ⑨ ⑧ AAA 1.5V AAA 1.5V HH380 HH380 HH380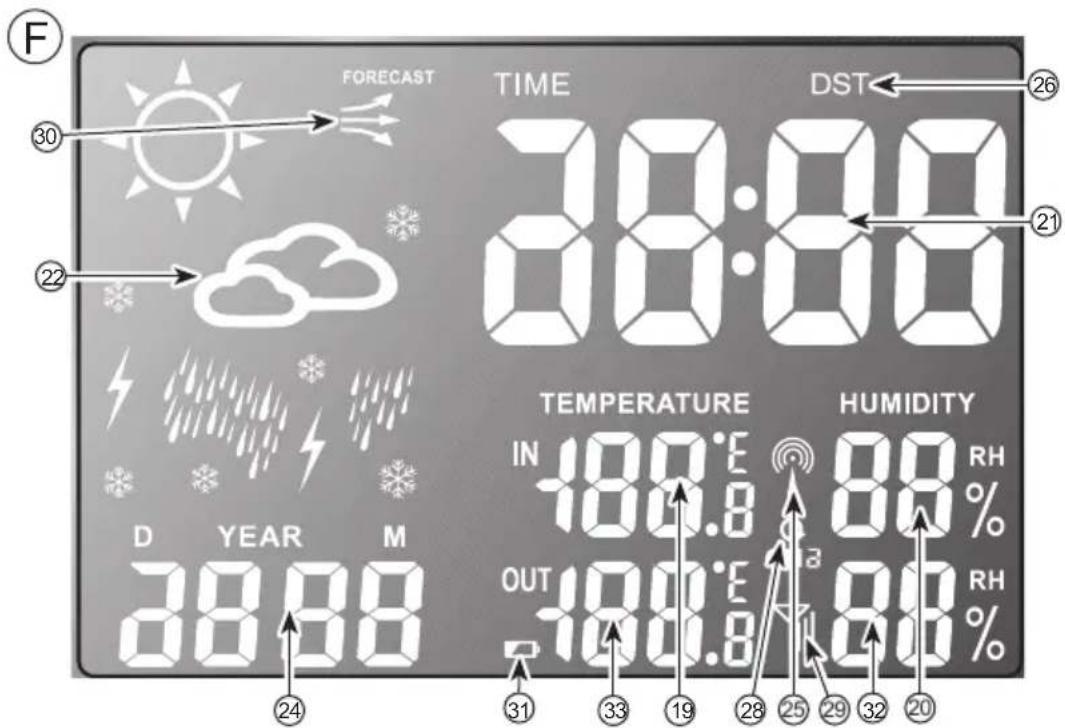
text_image
FORECAST TIME DST 30 21 22 30:00 08:00 TEMPERATURE HUMIDITY IN 180.8 RH -180.8 % RH OUT 180.8 RH 31 33 19 28 25 29 32 20 32 34Voeding binnenunit:
natural_image
Weather icon showing cloud, lightning, and raindrops on dark background (no text or symbols)storm
natural_image
Simple weather icon showing a cloud with snowflakes (no text or symbols)Sneeuw
natural_image
Simple weather icon showing a cloud with raindrops falling (no text or symbols)Regen

natural_image
Simple white cloud icon on black background (no text or symbols)
Bewolkt
Weergave in °C of °F:
0°C to 50°C (32°F to 122°F)
resolution: 0.1°C
measuring range air humidity:
20% to 95% rel. air humidity
resolution: 1%
power supply:
mains voltage, 230Volt
output 4,5 VDC, 200mA,

connection of outdoor units:
max. 3
clock:
DCF-77 Time signal, Quartz backup
Outdoor unit:
measuring range:
-20.0°C to 70°C (-4°F to 157.9°F)
resolution: 0.1°C
measuring range air humidity:
25% \~ 95% rel. air humidity
resolution: 1%
power supply:
2x 1,5V battery, format AAA, alkaline
transmit frequency / range:
433MHz / up to 30 meter.
data transmissie every 5 min.
Connect the supplied 4.5VDC power adaptor (A).
natural_image
Weather icon showing cloud, lightning, and raindrops on dark background (no text or symbols)Orage
natural_image
Simple weather icon showing a cloud with snowflakes, no text or symbols presentNeige
natural_image
Simple weather icon showing a cloud with raindrops falling (no text or symbols)Pluie

natural_image
Simple white cloud icon on black background (no text or symbols)Nuageux
measuring range air humidity:
20% to 95% rel. air humidity
resolution: 1%
power supply:
mains voltage, 230Volt
output 4,5 VDC, 200mA,

connection of outdoor units:
max. 3
clock:
DCF-77 Time signal, Quartz backup
Outdoor unit:
measuring range:
-20.0°C to 70°C (-4°F to 157.9°F)
resolution: 0.1°C
measuring range air humidity:
25% \~ 95% rel. air humidity
resolution: 1%
power supply:
2x 1,5V battery, format AAA, alkaline
transmit frequency / range:
433MHz / up to 30 meter.
data transmissie every 5 min.
natural_image
Simple white sun icon on black background with no text or symbolsSonnig
natural_image
Weather icon showing cloud, lightning, and raindrops (no text or symbols)Sturm
natural_image
Weather cloud icon with snowflake symbols (no text or labels)Schnee
natural_image
Simple weather icon showing a cloud with raindrops falling (no text or symbols)Regen

natural_image
Simple white cloud icon on black background (no text or symbols)Bewölkt
measuring range air humidity:
20% to 95% rel. air humidity
resolution: 1%
power supply:
mains voltage, 230Volt
output 4,5 VDC, 200mA,

connection of outdoor units:
max. 3
clock:
DCF-77 Time signal, Quartz backup
Outdoor unit:
measuring range:
-20.0°C to 70°C (-4°F to 157.9°F)
resolution: 0.1°C
measuring range air humidity:
25% \~ 95% rel. air humidity
resolution: 1%
power supply:
2x 1,5V battery, format AAA, alkaline
transmit frequency / range:
433MHz / up to 30 meter.
data transmissie every 5 min.
GB
INSTALLATION
Indoor unit power supply:
Connect the supplied 4.5VDC power adaptor (A).
As soon as the indoor unit starts up, the weather icons start flashing in the display.
- Press the UP and DOWN (11 and 12) buttons to select the icon for the actual weather conditions. See also 'WEATHER FORECAST'.
- Press the "CLOCK" (16) button to confirm your selection.
Now the reception icon for the outdoor units starts flashing, while the receiver for the outdoor units starts receiving.
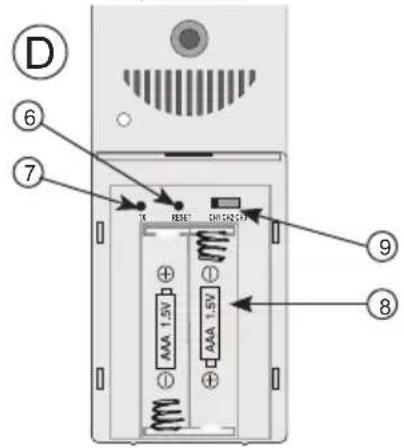
Outdoor unit power supply (D):
- Open the battery compartment by sliding the cover at the front downward.
- Insert 2 batteries, type AAA, 1.5 Volt, as indicated inside the battery compartment (D8). Batteries are not included.
- Press the TX (7) button to register the outdoor unit. Upon leaving the factory, the outdoor unit is set to channel 1 (9).
- Replace the battery cover onto the outdoor unit.
Now press and hold the Channel button (15) for 3 seconds to start the reception of the DCF-77 clock signal; the 📞icon (25) starts flashing. The number of arcs shown in the icon depends on how strong the signal reception is.
The receiver operates for 10 minutes and the unit then switches back to the reception of the outdoor unit.
Positioning tips:
- Never place the indoor unit in direct sunlight and keep it away from heat radiating objects (lights, heaters, etc.)
- For a strong reception of the radio controlled time signals, never place the indoor unit next to large metal surfaces or devices with strong electromagnetic fields.
- The outdoor unit is not waterproof. Always place this unit on a spot protected against rain and wind.
- The distance between the indoor and outdoor unit should be no more than 30 meters
Mounting:
In case of wall-mounting, the outdoor unit may be suspended from a single screw (see C5).
DISPLAYS (see fig. F)
General:
The actual indoor temperature with the humidity, the actual outdoor temperature with the humidity and the time are only displayed correctly after both the indoor and outdoor unit have been functional for several hours and have not been moved. The weather forecast will be displayed correctly after at least 24 hours.
Screen display:
The weather forecast in the display is represented by icons. The display can also show 4 main functions, namely: Indoor and outdoor temperature, indoor and outdoor humidity, date and time. You may use the "LIGHT" (17) button of the WS-1650 to enable the background lighting and the "MODE" (10) button to first show the "date" function and then the "year" function.
Upon receiving the DCF signal, the date will appear.
(DCF) time:
When the ⚪ symbol is illuminated in the centre of the time (25), the clock (21) is synchronised with the radio controlled atomic time signal sent by the ‘DCF77’ station. If this symbol is not illuminated, the time is displayed by the internal clock of the WS-1650. The DCF77 station is situated in Frankfurt, Germany. The reception of the DCF77 time is basically possible in the whole of Western Europe.
Temperature with humidity:
At (19) the indoor temperature is displayed. At (20) the indoor humidity is displayed in %. At (33) the outdoor temperature is displayed. At (32) the outdoor humidity is displayed in %
Press the °C/°F button (14) to switch the display between °Celsius and °Fahrenheit.
Weather forecast:
At (22) the weather forecast is displayed, represented by icons:
The WS-1650 calculates the weather for the coming 12-24 hours based on the temperature and humidity. The weather development is shown by the trend arrows (30).
After connecting the power adaptor or inserting the batteries, the actual weather condition must be set by selecting the correct icon. Choose the cloud in case of cloudy circumstances, the sun for sunny weather, etc.
TO ADJUST THE WEATHER ICONS:
Press and hold the NEXT (13) button for 3 seconds until the display starts flashing. Press the UP (11) or DOWN (12) button to adjust the weather icons to the actual weather conditions. Press the CLOCK (16) button to save your setting. The weather forecast is now set.
The weather forecast applies to an area of approx. 30-50km around the WS-1650. This weather forecast has an accuracy of 70-75%. Keep in mind a correct weather forecast display is not guaranteed.
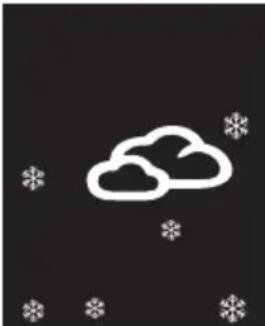
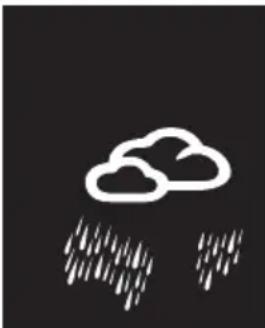
The WS-1650 uses the following weather forecasts:

natural_image
Simple white sun icon on black background with no text or symbolsSunny
natural_image
Weather icon showing cloud, lightning, and raindrops (no text or symbols)Storm

natural_image
Simple weather icon showing a cloud with snowflakes, no text or symbols presentSnow
natural_image
Simple weather icon showing a cloud with raindrops falling (no text or symbols)Rain

natural_image
Simple white cloud icon on black background (no text or symbols)Cloudy
Outdoor unit display:
Press CHANNEL (15) to switch the display between the channels (CH1/2/3). Select the channel on which the outdoor unit is set (9). When selecting (28), the data displayed per channel changes. This is only useful when using multiple outdoor units.
Other:
Display lighting:
When the indoor unit is powered by the power adaptor, the display lighting is enables continuously. Press the LIGHT (17) button to enable or disable the background lighting.
Battery alert:
When the battery indication (3) illuminates, the batteries in the outdoor unit with the concerned number must be replaced. Additionally, the LED on the outdoor unit starts flashing when the battery capacity is too low.
Reception of radio time signals:
The antenna symbol 📞(25) shows that the DC-77 receiver is enabled for reception. Upon start-up, the receiver will be enabled for 10 minutes. After that, the receiver switches on for time synchronization each day at 2am, 3am, 8am, 12pm, 2pm and 8pm.
You may also manually switch on the DC-77 receiver by pressing and holding the DOWN (12) button for 3 seconds.
During Daylight Saving Time DST appears (26)
To register outdoor units:
Now press and hold the CHANNEL (15) button for at least 3 seconds until the display icon ☎(29) starts flashing. Set the outdoor unit to the desired channel (9) and then press the TX (7) button behind the battery cover. The measured value with the channel number appears in the display of the indoor unit. Now press and hold the CHANNEL (15) button for at least 3 seconds to confirm the input. The outdoor unit is now registered.
Display in °C or °F:
Briefly press the °C/°F (14) button on the indoor unit to display the temperature in °Celsius or in °Fahrenheit.
OTHER FUNCTIONS
To manually set the clock:
Only follow these instructions when the WS-1650 doesn't receive the DCF77 signal.
-
Press and hold the CLOCK (16) button for at least 3 seconds until the year display starts flashing.
-
Use the UP and DOWN (11 and 12) buttons to adjust the following settings one after the other and confirm each setting by briefly pressing the CLOCK (16) button:
-
year
- month
- day
- hours
-
minutes
-
After pressing the CLOCK button for the last time, the time and date are set.
To manually activate the DCF-77 receiver:
With the WS-1650 in standby mode, press and hold the DOWN (12) button for 3 seconds to activate the radio receiver again for the reception of the atomic time. However, the receiver of the WS-1650 automatically checks whether the signal is being received. The daily synchronization with the DCF-77 station occurs at 2am, 3am, 8am, 12pm, 2pm and 8pm.
Around 2am and 3am the reception sensitivity is the highest.
EXPANSION
You may connect up to 3 outdoor units to the indoor unit. You can then read the temperature and humidity at 3 different locations on the indoor unit (e.g. in your greenhouse, in animal accommodations, in different bedrooms).
Additional outdoor units are available via the service department of Alecto: www.alecto.nl.
To register additional outdoor units:
- Insert 2 batteries into the new outdoor unit according to section INSTALLATION – Outdoor unit power supply.
- Slide the channel switch at the rear of the outdoor unit (9) to the desired position CH 1, 2 or 3, provided the position is not yet in use.
- Now press and hold the CHANNEL (15) button (indoor unit) for at least 3 seconds until the display icon Ⓜ29) starts flashing.
- For each outdoor unit, now press the TX (7) button behind the battery cover. The measured value with the channel number appears in the display of the indoor unit.
- Now press and hold the CHANNEL (15) button to confirm the input. The outdoor unit is now registered.
ATTENTION: Don't use the same channel twice; the outdoor units will interfere with each other.
BATTERY REPLACEMENT
Outdoor unit:
After replacing the batteries in the outdoor unit(s), the outdoor unit must again be registered on the indoor unit.
To do this, follow the instructions in the section ‘To register additional outdoor units’.
SYSTEEM FAILURE
In case of a possible system failure, the indoor and/or outdoor unit must be reset.
Press the RESET (6) button of the outdoor unit. The indication LED on the front panel will illuminate for 1 second to inform you.
The outdoor unit is now reset.
Use a paperclip to press the reset button of the indoor unit. This button is located behind the reset hole at the rear. RESET (18). The display will switch off and the indoor unit is restarted. All connection procedures must now be repeated.
If this doesn't solve the problem, please contact the Alecto service department: www.alecto.nl
ENVIRONMENT
At the end of its lifespan, this product should not be discarded as normal domestic waste, but is must be taken to a collection point for the recycling of electric and electronic equipment.
Don't throw away exhausted batteries, take them to your local depot for small chemical waste.
SPECIFICATIONS
Indoor unit:
measuring range:
0°C to 50°C (32°F to 122°F)
resolution: 0.1°C
measuring range air humidity:
20% to 95% rel. air humidity
resolution: 1%
power supply:
mains voltage, 230Volt
output 4,5 VDC, 200mA,

connection of outdoor units:
max. 3
clock:
DCF-77 Time signal, Quartz backup
Outdoor unit:
measuring range:
-20.0°C to 70°C (-4°F to 157.9°F)
resolution: 0.1°C
measuring range air humidity:
25% \~ 95% rel. air humidity
resolution: 1%
power supply:
2x 1,5V battery, format AAA, alkaline
transmit frequency / range:
433MHz / up to 30 meter.
data transmissie every 5 min.
VERKLARING VAN CONFORMITEIT
DECLARATION OF CONFORMITY
This equipment complies with the essential requirements and provisions as described in the European Directive 2014/53/EU.
The declaration of conformity is available at: http://DOC.hesdo.com/WS-1650-DoC.pdf
Frequency: 433.050-434.790 MHz Maximum Power: -13.2 dBm

text_image
Alecto®ServiceHelp


WWW.ALECTO.NL
SERVICE@ALECTO.NL