32PW9551 - TV PHILIPS - Free user manual and instructions
Find the device manual for free 32PW9551 PHILIPS in PDF.
Download the instructions for your TV in PDF format for free! Find your manual 32PW9551 - PHILIPS and take your electronic device back in hand. On this page are published all the documents necessary for the use of your device. 32PW9551 by PHILIPS.
USER MANUAL 32PW9551 PHILIPS
- GB: For details refer to page 22. DE : Ausführliche Informationen auf Seite 22. FR : Pour en savoir plus, reportez-vous à la page 22. IT : Per i dettagli vedere pagina 22. NL: Voor meer informatie, zie pagina 22. GR: Για λεπτομέρειες, ανατρέξτε στη σελίδα 22. Introduction Table of Contents General Safety information p. 1
- Getting started p. 2
- Remote Control keys For TV functions p. 3
- -4 For audio/video functions p. 5
- First Time Operation Quick Installation p. 6
- Before you start Language and country selection p. 7
- Installation Auto Store p. 8
- Manual Store p. 9
- Sort (rearrange channels’ sequence) p. 10
- Name (personalise channel) p. 11
- Fav. Program (quick access to channels) p. 12
- Operation Picture settings p. 13
- Sound settings p. 14
- Features settings - General p. 15
- Features settings - Timer p. 16
- Features settings - Parental Control p. 17
- Features settings - Demo p. 18
- Teletext p. 19
- Picture Formats p. 20
- Connecting to peripheral equipments Set-top box to TV p. 21
- DVI-Equipped Device to TV p. 21
- DVD Player/DVD Recorder to TV p. 21
- DVD Player/DVD Recorder/VCR to TV p. 22
- Video Camera/Game console to TV p. 22
- Practical Information Troubleshooting p. 23
- Glossary p. 24
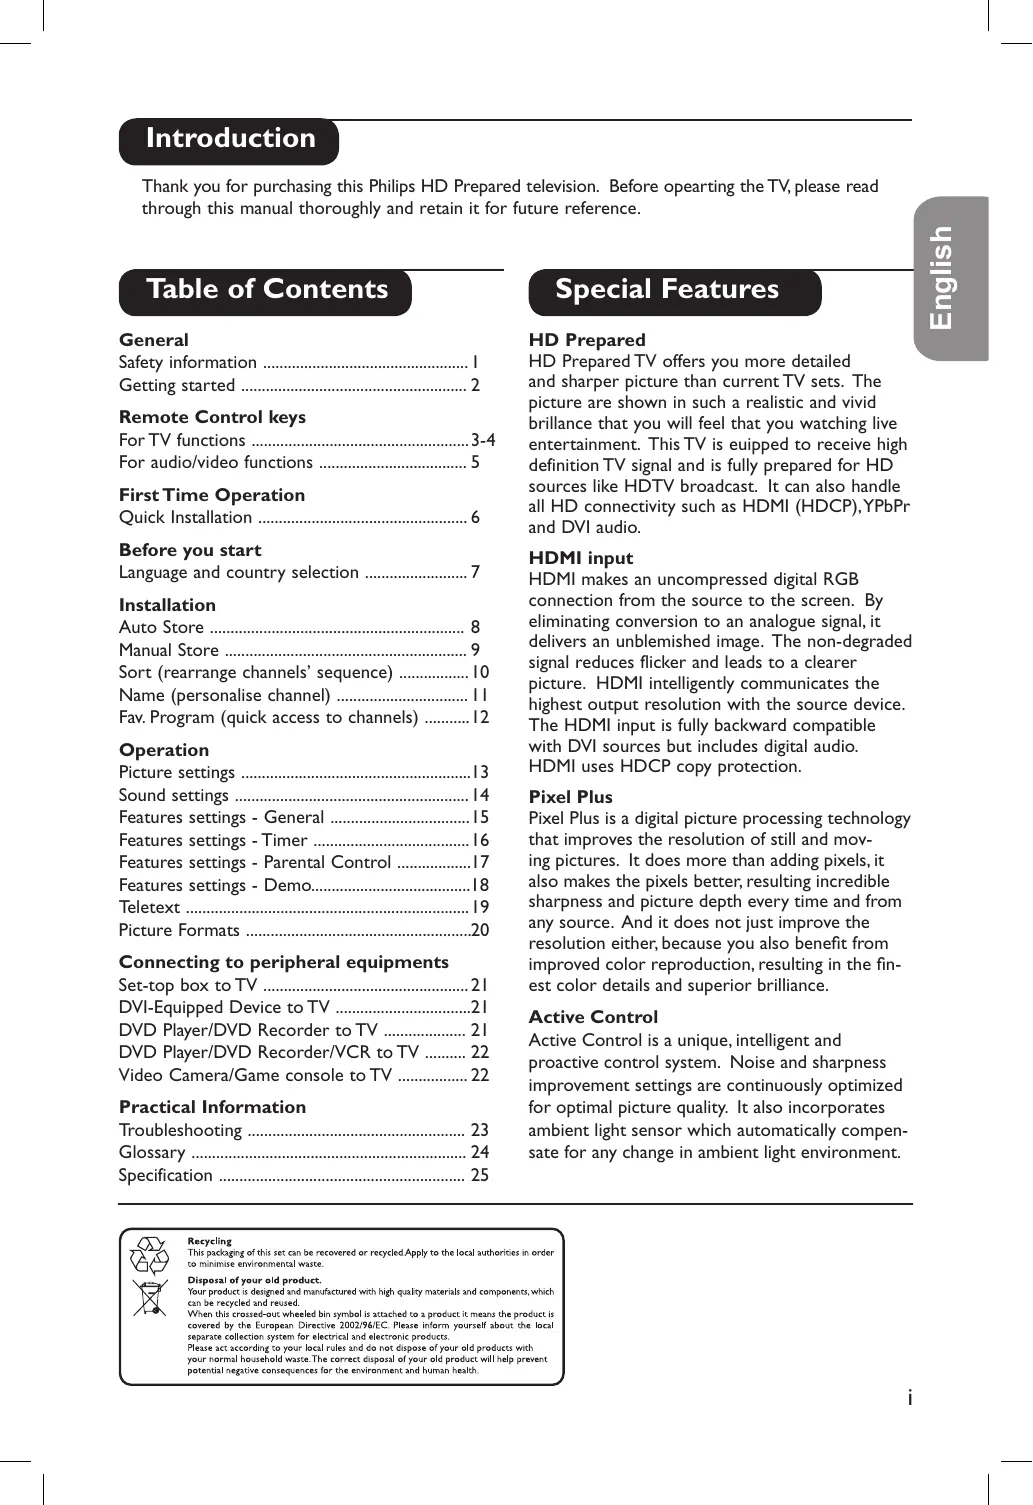
- Specification Special Features HD Prepared HD Prepared TV offers you more detailed and sharper picture than current TV sets. The picture are shown in such a realistic and vivid brillance that you will feel that you watching live entertainment. This TV is euipped to receive high definition TV signal and is fully prepared for HD sources like HDTV broadcast. It can also handle all HD connectivity such as HDMI (HDCP), YPbPr and DVI audio. HDMI input HDMI makes an uncompressed digital RGB connection from the source to the screen. By eliminating conversion to an analogue signal, it delivers an unblemished image. The non-degraded signal reduces flicker and leads to a clearer picture. HDMI intelligently communicates the highest output resolution with the source device. The HDMI input is fully backward compatible with DVI sources but includes digital audio. HDMI uses HDCP copy protection. Pixel Plus Pixel Plus is a digital picture processing technology that improves the resolution of still and moving pictures. It does more than adding pixels, it also makes the pixels better, resulting incredible sharpness and picture depth every time and from any source. And it does not just improve the resolution either, because you also benefit from improved color reproduction, resulting in the finest color details and superior brilliance. Active Control Active Control is a unique, intelligent and proactive control system. Noise and sharpness improvement settings are continuously optimized for optimal picture quality. It also incorporates ambient light sensor which automatically compensate for any change in ambient light environment. p. 25
English Thank you for purchasing this Philips HD Prepared television. Before opearting the TV, please read through this manual thoroughly and retain it for future reference. Safety Information Leave at least 10 cm around each side of the TV set to allow for proper ventilation. Place the set on a stable, level surface. Do not cover the ventilation slots of the TV with a cloth or other material. It may cause overheating. Plug the TV into a 220-240 V AC, 50 Hz supply. Do not connect too many applinaces to the same power socket as this may result in fire or electric shock. Do not touch any part of the TV, power or aerial cables during lightning storms. Do not expose your TV to rain or moisture. It will cause fire or shock hazard. Never attempt to repair a defective TV. Always consult a skilled service personnel. Do not place your TV set under direct sunlight or heat. Do not place naked flame sources, such as lighted candles on the top of the TV or near it. When cleaning the TV:
- Unplug the power cord from the mains.
- Do not use abrasive cleaning agents containing acetone, toulene or alcohol to clean the TV.
- Clean the TV with a slightly damp chamois leather or soft cloth. Disconnect mains plug when:
- The blue light below the TV screen flashes continuously.
- There is a bright white line across the screen.
- There is a lightning storm.
- The TV is left unattended for a prolong period of time.
Getting started The control keys on the TV The television set has a power key (;) to switch on/off the set. It is located at the front of the TV. In the absence of the remote control, you can use these keys, located either on the top or side of the TV to do some basic operations: “VOLUME” keys:
- press either one to adjust the sound level
- press the two keys together and hold will call up the menu (only for TVs without “Menu” key).
- when in a menu, press either one to select an item in the menu. “PROGRAM” keys:
- press either one to select channels. Switching on/off the TV set
- To switch on/off the TV set, press the power (;) key. When the set is switched on, a blue indicator will be lighted near the power button. If the screen is not activated within a few minutes, the TV is probably in standby mode.
- Press either one of the PROGRAM keys on the TV control or the P – or + key on the remote control to switch on the TV. Note: Do not leave your set on standby mode for a prolonged period of time. In standby mode, the TV consumes less than 1W. In order to be more environmental friendly, please switch off the set. Using the Remote Control
- Insert the two batteries (supplied) correctly, with the + and – aligned as marked on the unit. You are now ready to use your remote control. Note: The batteries supplied do not contain mercury or nicker cadmium. Always remember to dispose your used batteries in an environmental friendly way. Replace with the same type of batteries.
- Insert the aerial plug into the : socket at the back of the set.
- Insert the mains plug into a wall socket. Note: For details on connecting other peripheral equipment, please refer to the pages on connection in this manual.
CAUTION: To prevent battery leakage which may result in bodily injury, property damage or damage to the unit
- Make sure you insert the batteries using the correct polarities.
- Do not mix batteries (old and new or carbon and alkaline etc.)
- Remove batteries when the unit is not in use for a prolong period. Remote control keys for TV functions
Standby key Press once to switch the TV on or off temporarily (standby). When the TV is switched on, a blue indicator on the TV lights up. When the TV is in standby mode, the blue indicator becomes brighter. Note: For environmental and safety reason, it is recommended that the TV set is not left on standby mode when not in use. Switch off the TV with the power button or disconnect from the mains. Select audio/video equipment key Press this key to use the remote control to operate equipment such as VCR, DVD, SAT, AMP and CD. Refer to page 5 for details.
Display source List/Select an external source key Press this key once will display the external source list. Press repeatedly to select a channel to view the playback of a connected peripheral equipment.
4 ·¢ÊÆÆÆ Use to operate audio/video equipment. Refer to page 5 for details.
5 Unused key 6 Cursor key Press cursor up (above OK key), down (below OK key), left (on the left of OK key) or right (on the right of OK key) to move around the menu and select adjustments. Cursor up or down is also used to select the possible characters in the "Name" channel function and as adjustment keys for picture format with a " " symbol. Cursor left and right also selects the different picture format. Confirm key Press once to confirm selection in a menu or to display the program list.
Freeze picture key Press once to freeze the picture on the screen. Press again to resume movement. – Volume adjustment key 9 + Press + to increase and – to decrease audio volume of the TV. Mute key Press once to switch off sound and press again to resume sound. On screen information key Press once to display information such as channel number, channel name, sleeptimer status and sound mode. Active Control key Press once to switch on active control function. Press the second time to switch on Light Sensor. Press the third time to switch off. Press and hold for a few seconds to start the active control demo mode. Press the key again to switch off the demo mode. Split screen (video and text) key Press once to split the screen into half, left for video and right for teletext information. Note:Will not work for TV equipped with the conventional (4:3) screen and external channels EXT4 and EXT5.
Remote control keys for TV functions Pixel Plus demo mode on/off key Press once to switch on the Pixel Plus demo mode. The screen is split into two to show the picture quality with and without Pixel Plus. Press again to switch the demo mode off. 15 Unused key
Surround mode key Dolby Virtual* Surround mode In stereo transmission, press this key to toggle between Dolby Virtual and Stereo mode. Dolby Virtual is the optimal setting with Dolby surround signals. It enables you to experience a rear sound effect. Spatial mode In mono transmission, press this key to toggle between Spatial Sound and mono mode. When this mode is selected, you can experience a pseudo stereo effect. Teletext function key Refer to page 18 for details.
Timer menu key Press once to call up the Timer menu. Details and use of the Timer menu, please refer to page 16 of the manual.
Menu on/off key Press once to call up the main menu. Press again to remove menu from the screen. When you are in any menu, press this key will bring you back to the previous level. 20 + P – Channel selection key Press + to select a higher numbered channel or – to select a lower numbered channel.
Digit key Press to key in a channel number directly. For single digit channel number, press once. For two-digit channel number, press the second digit before the “–” disappears. Previous channel key Press this to call up the previous channel that you have watched. Dual sound key In Dual sound or stereo transmission, press this key to select alternate sound mode available. Picture format key Press this key repeatedly to select the picture format that you want. Details and use of the Picture format, please refer to page 20 of the manual. *Manufactured under license from Dolby Laboratories. “Dolby” and the double-D symbols are trademarks of Dolby Laboratories.
Smart Sound and Picture key Press to select pre-defined picture and sound settings. “Personal” refers to the personal preference settings selected in the sound and picture menu. Remote control keys for audio/video functions This remote control operates the following Philips equipment:VCR, DVD, SAT (RC6), AMP (+ TUNER) and CD. Press the key repeatedly to operate any of the equipment indicated on the display. Another equipment can be selected by pressing the key repeatedly within 2 seconds. The light indicator will blink slowly to indicate the equipment is active. While the equipment is active, you can operate it with the relevant keys described below. When no action is carried out within 60 seconds, the remote control goes back to TV mode. Standby key Press to switch the equipment on or off temporarily (standby).
Select audio/video equipment key Press repeatedly to operate any of the equipment indicated on the display. Another equipment can be selected by pressing the key repeatedly within 2 seconds. When the respective equipment indication lights up, it means that the remote control is set to control the equipment. 3 ·, ¢, Ê, Æ, ÆÆ, Basic operation keys
- Press to record (VCR) ¢ Press to rewind (VCR, CD), to search down (DVD, AMP) Ê Press to stop (VCR, DVD, CD) Æ Press to play (VCR, DVD, CD) ÆÆ Press to fast forward (VCR, CD), to search up (DVD, AMP) Press to pause (VCR, DVD, CD) Title/information key Press to select title (DVD), RDS display (AMP), information on screen (CD) Subtitle language/news/shuffle play key Press to select subtitle language (DVD), RDS news/TA (AMP), to shuffle play (CD). 6 Cursor key cursor up/down Press to select the next/previous disc (CD) cursor left/right Press to select the previous/following track (CD), search up/down (AMP). Menu key Press to switch on/off menu.
8 + P – Chapter/channel/track key Press to select chapter (DVD), channel (VCR), track (CD). 9 0 to 9 Digit key Press to enter digit. On screen information key Press to display information. Index/chapter/frequency Press to display tape index (VCR), select a chapter (DVD), select a frequency (AMP).
Switch on your new TV for the first time/Quick Installation When you switch on your new TV for the first time, you will be prompt to select the country and language desired for the TV’s quick installation of channels. If you accidentally switch off and on the TV, the quick installation will not work. You can still use the “Auto Store” function on page 8 to store your TV channels.
Connect the TV to the antenna input and switch on the TV. A country selection menu will appear. Press cursor up or down to select Country. Refer to the list of country available for selection, below. If your country is not in the list provided, select “- - -”. Languages available for selection Display on TV English Dansk Nederlands Suomi Français Deutsch EÏÏËÓıη Italiano Norsk Português Español
Countries available for selection Display on TV
Country Country Austria Belgium Switzerland Germany Denmark Spain France Finland Display on TV
Italy SLO Slovenia IRL Ireland
Norway Netherlands Portugal Sweden Czech Republic Hungary Crotia Poland Romania Once this is done, press the OK to move to the Language selection.
Press cursor up or down to select a desire language. Refer to the list of language available for selection, in the next column. English Danish Dutch Finnish French German Greek Italian Norwegian Portuguese Spanish Display on TV Svenska Hrvatski Česky Magyar Polski Romana Slovenský Slovenski Türkçe Language Swedish Croatian Czech Hungarian Polish Romanian Russsian Slovakian Slovenian Turkish Press the OK key to start quick installation. The installation process will take a few minutes, depending on the number of channels detected and stored. If you wish to keep the tuned channels, go to step 5. Otherwise, you can: a) Automatically search for channels: go to Auto Store (refer to page 8 for details). b) Manually search for channels: go to Manual Store (refer to page 9 for details). c) Rearrange the channel numbers: go to Sort (refer to page 10 for details). d) Name or rename the channel: go to Name (refer to page 11 for details).
Language Press the key repeatedly to remove the menu from the screen. Your TV is ready for viewing. Before you start-Language and country selection Before you start any installation or view your TV, you need to select the Language and Country option. This option is enables you to select a language which you want the text display on the screen to appear in and a country to assign a TV system to your set.
Press cursor right key to enter language selection option. Refer to the list of language available for selection, below. key to start. A main menu appears. Press cursor down key to select Install. Press the cursor right key to enter. Language is selected. Languages available for selection Display on TV English Dansk Nederlands Suomi Français Deutsch EÏÏËÓıη Italiano Norsk Português Español
Language English Danish Dutch Finnish French German Greek Italian Norwegian Portuguese Spanish Display on TV Svenska Hrvatski Česky Magyar Polski Romana Slovenský Slovenski Türkçe Language Swedish Croatian Czech Hungarian Polish Romanian Russsian Slovakian Slovenian Turkish Press cursor up or down key to select a language. Press the key to confirm selection. Press the cursor left key to leave language selection. Press cursor down key to select Country. Press cursor right key to enter country selection. Refer to the list of countries available for selection, below. If your country is not in the list provided, select “- - -”. Countries available for selection Display on TV
Country Country Austria Belgium Switzerland Germany Denmark Spain France Finland Display on TV
Italy SLO Slovenia IRL Ireland
Norway Netherlands Portugal Sweden Czech Republic Hungary Crotia Poland Romania
- Press cursor up or down key to select the country you are in. key to confirm selection.
- Press the cursor left to leave country selection.
Press the key repeatedly to remove the menu from the screen. Your TV is prepared for further installation in the next few pages.
Auto Store This function enables you to search and store all available TV channels automatically. After that, go to the “Sort and “Name” function to customise the stored TV channels. Before you start to use the “Auto Store” function, you need to select the language and country options as explained in page 7. 1 Press key to start. A main menu appears. 2 Press cursor down key to select Install and the cursor right key to enter.. If you wish to keep the tuned channels, go to step
6. Otherwise, the following options are possible
a) Manually search for channels : select Manual Store (refer to page 9 for details). b) Rearrange the channel numbers: select Sort (refer to page page 10 for details). c) Name or rename the channel: select Name (refer to page 11 for details).
Press cursor right key to start. The installation process will take a few minutes, depending on the number of channels detected and stored.
After all available channels are stored, the Install menu will appear on the screen. Press the key repeatedly to remove the menu from the screen. Your TV is ready for viewing. Manual Store This function enables you to search and store individual TV channel. Before you start to use the “Manual Store” function, you need to select the language and country options as explained in page 7.
Press key to start. A main menu appears. Press cursor down key to select Install. Press cursor right key to enter. Press cursor down key to select Manual Store. Press cursor right key to enter. The following items are available for selection and adjustment. Item Level 1 System Content Level 2 Europe France West Europe East Europe Search TV frequency Program No. TV channel number Fine Tune Tuning bar Store Yes Selection/adjustment Level 3 Detects of TV system automatically. Sets TV system to LL’ standard. Sets TV system to I standard. Sets TV system to BG standard. Sets TV system to DK standard. Search automatically or key in directly. Key in a channel number to the frequency detected. Fine adjustment to improve poor reception. Stores the settings done in the memory.
Press the key repeatedly to remove the menu from the screen. Your TV is ready for viewing.
- Press cursor right key to move to a higher level or start searching.
- Press cursor left key to move to a lower level.
- Press cursor up or down key to select item or adjustments in a level. to key in TV frequency
- Press the digit or channel number.
- Press key to confirm.
Sort (rearrange channels’ sequence) This function enables you to rearrange channels’ sequence according to your preference.
Press key to start. A main menu appears. Press cursor down key to select Sort.
Press cursor right key to enter. The current channel (e.g. 004) will be selected. A symbol ¬ appears next to it. If this is the channel you want to rearrange, go to step 5. Otherwise press cursor up or down key to select another channel.
Press the cursor up or down to select a channel that you want to change to (e.g. 001).
Press the cursor left key to confirm. The symbol È will change to ¬. This shows that the change has been done.
Press cursor up or down to select another channel to change. Repeat steps 5 to 7.
Press the key repeatedly to remove the menu from the screen. Your TV is ready for viewing. Press cursor down key to select Install. Press cursor right key to enter.
Press cursor right key to confirm that this is the channel you want to change from. The symbol ¬ will change to È. Name (to personalise channels) You can give a 5-character name to personalise the channels or edit existing channel names. This has to be selected from the alpha numeric characters available in the TV’s memory.
Press key to start. A main menu appears.
Press the cursor up or down to select a character. You can key up to maximum of 5 characters. The characters available for selection are A to Z, 0 to 9 and space.
To end, press the cursor left key until the square disppears.
Press cursor up and down to select another channel to name and repeat steps 5 and 7. Otherwise go to step 9.
Press the key repeatedly to remove the menu from the screen. Your TV is ready for viewing. Press cursor down key to select Install. Press cursor right key to enter. Press cursor down key to select Name. Press cursor right key to enter. The current channel will be selected. A symbol ¬ appears next to it. If this is the channel you want to name, go to step 5. Otherwise, press cursor up or down key to select another channel. Press cursor right key to confirm that this is the channel you want to name. A square for the first character space will appear for you to select character.
Fav. program (quick access to channels) After auto installation, all channels found are added into a favourite program list. Channels in this list can be quickly access via the channel selection keys on the remote control. You can delete or add back channels into this list using the Fav. Program function in the Install menu. The channels not in this list can only be call up via the digit 0 to 9 keys. A “X” symbol will appear in front of these channel numbers.
Press key to start. A main menu appears. Press the cursor up or down to select another channel to add/delete. When you have completed your list, go to the next step.
Press the key repeatedly to remove the menu from the screen. Your TV is ready for viewing. Press cursor down key to select Install. Press cursor right key to enter.
Press cursor right key to enter. The current channel will be selected.
Press cursor right key to delete the channel from the favourite program list. The “$” disappears, confirming that the channel has been deleted. To add channels to the list, do the same.
Picture settings This function enables you to select various settings to enhance your viewing pleasure.
Press key to start. A main menu appears. Picture is selected.
Press cursor right key to enter Picture settings. The settings available for selection/adjustment are: Brightness, Colour, Contrast, Sharpness, Colour Temp and Digi. Option.
Press cursor up or down key to select the picture settings to be changed.
Press cursor right key to start and cursor up or down to select or adjust. For Brightness, Colour, Contrast and Sharpness, only a slider bar will appear on the screen during adjustment. To return to the previous screen display, go to step 6. Repeat step 3 to 4 to adjust more settings. To end go to step 7.
For Digi Option and Colour Temp, press cursor right key to confirm.
Press cursor left key to end selection or adjustment.
Press the key repeatedly to remove the menu from the screen. Your TV is ready for viewing. Picture Brightness Colour Contrast Sharpness Colour Temp Digi. Option Pixel Plus 100 Hz Dig.Scan Double Lines
Sound settings This function enables you to select various settings to enhance your audio experience.
Press key to start. A main menu appears.
Press cursor down key to select Sound. Press cursor right key to enter sound settings. The settings available for selection/adjustment are: Equalizer, Balance, Delta Volume and AVL. Equalizer 120 HZ 500 HZ 1500 HZ 5 KHZ 10 KHZ
Equalizer: To select and adjust your preferred treble and bass level. Treble settings-5 KHZ/10 KHz Bass settings-120HZ/500 HZ Median setting-1500 HZ
Press cursor up or down key to select settings.
Press cursor right key to start and cursor up or down to select or adjust. For Equalizer, Balance and Delta Volume, a slider bar will appear on the screen for you to adjust. To return to the previous screen display, go to step 6. Repeat steps 3 to 4 to adjust more settings. To end go to step 7.
Press cursor left key to end selection or adjustment.
Press the key repeatedly to remove the menu from the screen. Your TV is ready for viewing. Balance: To adjust to balance the sound from the left and right speakers. Delta Volume: To compensate for volume discrepancies (within a set range) of individual channels. AVL (Auto Volume Leveller): To select “On” to prevent sudden increase in sound level between channels changing or commercial breaks.
Features settings - General The TV includes some special features to enhance your viewing pleasure. They are: Timer: Sets sleeptimer, change channels or switch on the TV, at a preset time. Child Lock: Locks all the control buttons on the TV. Can operate TV with the remote control only. Parental Cont(rol): Locks selected channels. Rotation: Adjusts picture tilting (only available in widescreen TVs). DNR(Dynamic Noise Reduction): Reduces picture interferences or “noise” in poor reception conditions. Dyn(Dynamic) Contrast: Enhances the contrast of details in lighter, average and darker areas. Active Control: Optimises picture quality by measuring and analyzing the incoming signal to automatically adjust picture quality settings. The “Light Sensor” setting uses a sensor to adjust the picture brightness depending on the room light conditions. Demo: Demonstrates the benefits of Pixel plus and Active Control.
Press key to start. A main menu appears.
Press cursor down key to select Features. Press cursor right key to enter features settings. Child Lock: Select “On” to lock all the control buttons and “Off” to unlock. Rotation: Press cursor up to tilt the picture to the right or press cursor down to tilt the picture to the left.
Press cursor up or down key to select settings.
Press cursor right key to start selection or adjustment. For Timer, Parental Cont. and Demo, go to page 16 to 18 for details. For Child Lock, Rotation, DNR, Dyn. Contrast and Active Control, press up or down cursor key to select settings. To return to the previous screen display, go to step 6. Repeat steps 3 to 4 to adjust more settings. To end go to step 7.
Press cursor right key to confirm.
Press the key repeatedly to remove the menu from the screen. Your TV is ready for viewing. DNR: Select Min, Med (optimum position), Max or Off. Dyn.Contrast: Select Min, Med (optimum position), Max or Off. Press cursor left key to end selection or adjustment. Active Control: Select “On” to optimise picture quality or “Light Sensor” to optimise with sensor capability.
Features settings - Timer This function enables you to set the time to:
- switch the TV to standby mode, from a list of preset time using the “Sleep” feature
Press key to start. A main menu appears.
Press cursor down key to select Features. Press cursor right key to enter features settings.
Press cursor right key to start selection or adjustment. Press cursor up or down key to select. For Time, Start Time, Stop Time and Program No. , key in the numbers with the digit keys. To return to the previous screen display, go to step 5. Repeat steps 3 to 4 to adjust more settings. To end go to step 6.
Press cursor right key to confirm.
Press cursor left key to end selection or adjustment.
Press the key repeatedly to remove the menu from the screen. Your TV is ready for viewing. Sleep Select from a list of preset time for the TV to switch to standby mode. Select “Off” to switch off function.
Switch channel Set timer to switch channel. Time: Set a reference time. Press the digit keys to input the time, hour first, follow by minutes. For single digit number, you need to input “0” first. Start /StopTime: Set a time to start/stop the countdown (based on the reference time). Press the digit keys to input the time, hour first, follow by minutes. For single digit number, you need to input “0” first. Program No.: The channel to switch to. Activate: Select “Once” for timer to activate once, “Daily” for timer to activate every day or “Off” to switch off timer. Display: Select “On” to display the reference time on the screen or “Off” to not display the reference time. Features settings - Parental control This function enables you to set the time to lock selected channels or all channels, change access code and to clear all the previously locked channels.
Press key to start. A main menu appears.
Press cursor down key to select Features. Press cursor right key to enter features settings. Lock Program*: Press cursor right to lock or unlock channels individually.
Press cursor down key to select Parental Cont. and press cursor right key to start. You need to key in your 4-digit access code. For the first time or if you have forgotten the code, enter 0711 twice. You will be prompted to key in a “New code”. Key in your preferred access code once and again to confirm. Change code: Key in a 4-digit code once to change and again to confirm. Clear All: Select “Yes” (to unlock all channels). Lock All*: Select “Yes”(to lock all channels).
Press cursor up or down to select settings and right key to enter.
Press cursor left key to end selection or adjustment.
Press the key repeatedly to remove the menu from the screen. Your TV is ready for viewing.
- Note: After a channel is locked by this setting, the next time you call up this channel, you need to key in the 4-digit access code to unlock it temporarily. To unlock permanently, use “Clear All”.
Features settings - Demo This function enables you to demonstrate via a split screen, the image performance of Pixel Plus or Active Control. For details of these features, please refer to the section on “Special Features” in the “Introduction” page. This function is only available in Widescreen mode (for widescreen TV) and 4:3 mode (for conventional TV).
Press cursor down key to select Demo and press cursor right key to enter demo selection.
Press cursor up or down to select Pixel+ Demo or Act. Ctrl. Demo. key to start. A main menu appears. Press cursor down key to select Features. Press cursor right key to enter features settings. 5 Press the cursor right key to enter and cursor down key to select “On”. Press the cursor right key to enter Demo mode. The screen will split into two.
Press the key repeatedly to remove the menu from the screen. The left side (Off) shows the picture before enhancement and the right side (On) shows the picture after enhancement. 7 To switch off the Demo mode: a) with the remote control press the (for Pixel+ Demo) or (for Active Control Demo) key on the remote control once. b) with the on screen menu Repeat steps 1 to 5 and select “No”. Teletext Teletext is an information system broadcast by certain channels. This TV has a 1200 pages memory that will store most broadcasted pages and subpages to reduce waiting time. The service is to be operated with specific keys on the remote control. Note: To start, you need to select a TV channel that carries the teletext service you wish to view. Teletext On/Superimpose/Off Press once to switch on the teletext service. Press again to superimpose the teletext page on the current broadcast TV programme in the channel. Press the third time to switch off the teletext service and return to the current TV programme. When the teletext service is first switched on, the index page appears providing the contents of the service. Each item has a corresponding 3 digit page number. Note: If the screen remain blank with the message “No teletext Service!”, this means that the channel selected does not broadcast teletext. Switch off Teletext and select another channel.
Fastext When in Teletext mode and Fastext is broadcast, a colour coded menu appears at the bottom of the page. Press the appropriate coloured key (red, green, yellow or blue) to access the page.
é + P – or 0 to 9 Select a page Press the + P – key to select a higher or lower page number. For faster access, enter the page number with the 0 to 9 keys. § Cursor up or down - Enlarge a page Press once will enlarge the top half of the page. Press the second time will enlarge the bottom half of the page. Press the third time will return to normal page size. Split screen (TV and teletext) Press once will split the screen into half. The left half displays the current TV programme while the right half diplays the Teletext page. Press again will return to the Teletext page. Note:Will not work for TV equipped with the conventional (4:3) screen. Hold teletext page Teletext pages that contain subpages will scroll automatically to the next subpage after a few seconds. Press once to hold the page. Press again to resume scrolling.
Favourite page Instead of the standard colour coded menu at the bottom of the screen, you can store 4 favourite pages using the 4 coloured keys. Press key once to change to favourite page mode. You will see “F” displayed at the bottom of the page. Key in the page number you want to store, eg. 200. Press and hold the colour key (eg. yellow) that you want to store the page in until page 200 appear in the yellow box. Repeat the operation with the other coloured keys. When you next enter Teletext mode, your favourite pages will appear in colour at the bottom of the page. To temporarily retrieve the standard items, press key. To clear your settings and return to the standard items, press the key for about 5 seconds.
Picture formats The picture you received from the broadcaster or playback from DVDs may be in widescreen or conventional modes. If your TV is equipped with widescreen, pictures in conventional mode will display with black bars on the right and left side. If your TV is equipped with a conventional (4:3) screen, pictures in widescreen modes will display black bars on the top and bottom. However, there are some functions built in the TV which will optimise your viewing pleasure regardless of whatever mode it is transmitted. If your TV is equipped with conventional (4:3) screen Press the key or cursor left or right key to select the different formats to suit your viewing pleasure. Screen Display Name of format Function 4:3 The picture is reproduced in the conventional format. Expand 4:3 The picture is enlarged vertically. This is used to cancel the black bars at the top and bottom of the picture. Compress 16:9 The picture is forced into the widescreen mode. If your TV is equipped with widescreen Press the key or cursor left or right key to select the different formats to suit your viewing pleasure. Screen Display
Name of format Function 4:3 The picture is reproduced in the conventional (4:3) format. Black bars are displayed on the left and right side. The symbol “ ” next to the name means that you can enlarge the picture progressively by pressing the cursor up or down key. Zoom 14:9 The picture is enlarged to 14:9 format. Thin black bars are displayed on the left and right side. The symbol “ ” next to the name means that you can move the picture up or down to a certain limit by pressing the cursor up or down key. Zoom 16:9 The picture is enlarged to 16:9 format. This mode is used to cancel the black bars at the top and bottom of the picture. The symbol “ ” next to the name means that you can move the picture up or down to a certain limit by pressing the cursor up or down key. Subtitle Zoom This mode displays 4: 3 format pictures using the full surface of the screen leaving the subtitles visible. The symbol “ ” next to the name means that you can move the picture up or down to a certain limit by pressing the cursor up or down key. Super Wide This mode displays 4: 3 format pictures using the full surface of the screen by enlarging the sides. The symbol “ ” next to the name means that you can move the picture up or down to a certain limit by pressing the cursor up or down key. Widescreen This mode restores the correct proportions of the picture transmitted in the widescreen mode. Connecting to peripheral equipment It is possible to connect a variety of additional equipment to this TV. The following pages explains how to connect peripheral equipment to the rear and side of the TV. The following explanation refer to the “How to make optimal connection” on the cover of this dfu. 1 Set-Top Box to TV HDMI A Connect the source cable from HD satellite transmission to input at the back of the set top box. B Connect the set-top box to the TV’s HDMI input using a HDMI cable. You can also connect to the TV’s YPbPr input using a YPbPr cable.
Connect red/white audio cables from the DVI AUDIO sockets on the TV into the audio output sockets on the DVI-Equipped device. Turn on the TV and DVD player/recorder. Press key on the remote control to tune to the video and audio source supplied by HDMI. 3 DVD Player/Recorder to TV HDMI Turn on the TV and the set-top box. Press key on the remote control to tune to the video and audio source supplied by HDMI.
Note: Refer to the set-top on how to direct the set-top box to its HDMI connector.
Supported HD format: 480p/576p/720p/1080i. It is strongly recommended that you use a HDMI certified cable for best performance.
RF cable A Connect RF cable from wall to input at the back of the set-top box. B Use second RF cable to connect the set-top box to the TV antenna input Set the output switch on set-top box to channel number 3 or 4 and tune TV to the same channel. Note:There is no HD reception from the antenna input. HD picture is only possible through HDMI or YpbPr input. 2 DVD-Equipped device to TV HDMI
Connect DVD player /recorder to the TV’s HDMI input using HDMI cable. Turn on the TV and DVD player/recorder. Press key on the remote control to tune to the video and audio source supplied by HDMI. Play a DVD disc to verify that connection is correct.
YPbPr Connect DVD player/recorder to the TV’s YPbPr input using YPbPr cable.
Connect a set of red/white audio cables into the audio output sockets on the DVD player/recorder and audio AV inputs on the TV.
Turn on the TV and DVD player/recorder. key on the remote control to Press tune to the video and audio source supplied by YPbPr. Play a DVD disc to verify that connection is correct. A Connect the DVI-Equipped device such as a HDTV receiver to the HDMI input on the TV using a HDMI to DVI cable.
Connecting to peripheral equipment 4 DVD Player/Recorder/VCR to TV Scart (EXT 1/2)
Connect DVD player /recorder/VCR to the TV using Scart. It is recommended to connect peripherals with RGB output to Ext 1 which supports both CVBS and RGB as Ext 2 supports CVBS and Y/C only. RGB provides better picture quality.
Turn on the TV and player/recorder. Press key on the remote control to tune to the video and audio source supplied by the Scart.
Play a DVD disc to verify that connection is correct. 5 Video Camera/Game console to TV S-Video A Connect S-Video cable to S-Video input at the side of the TV and the peripheral equipment. B Connect a set of red/white audio cables into
the audio output sockets on the equipment and audio AV inputs on TV. Turn on the TV and the equipment. Press key on the remote control until “SVHS Side” appears on the TV. Play the equipment to verify that connection is correct.
Composite Audio/Video Connect a yellow video cable to the Video input at the side of the TV and the peripheral equipment.
B Connect a set of red/white audio cables
into the audio output sockets on the equipment and audio AV inputs on TV. Note: For mono equipments, connect only the white audio cable from the equipment audio output to the white audio input at the side of the TV. C Turn on the TV and the equipment. Press key on the remote control until “EXT3” appears on the TV.
Press PLAY to verify that connection is correct. Troubleshooting Check this list of suggested solution before calling our service centre. You may be able to solve the problem yourself. If you face problem connecting the TV to a peripheral equipment, please refer to the user manual of that equipment or call their service centre. Charges for TV installation and adjustment are not covered under your warranty. Symptoms Possible cause Suggested solution Poor reception Your location is (“snowish” or near mountains “ghost” pictures or high building
- Fine Tune the TV reception. Follow the steps in “Manual Store” (p. 9).
- Select “On” in “DNR” (p. 15) No picture
- TV is not switched on.
- Check that the TV is switched on. If there is a blue indicator light, the TV is on standby. Press the key once to switch on the TV.
- Check that all the connection are properly connected.
- Choose the right “System” in the “Manual Store” section (p. 9).
- Your peripheral equipment may have different source output, check that the correct output source is selected. No picture from playback of peripheral equipment
- Press the key once to check the respective channel for peripheral equipment. Press repeatedly to select the channel. Black bars at the top or bottom or left and right of the screen Picture format not compatible with TV format Check for possible adjustment in the “Picture formats” section (p. 19). No sound
- Choose the right “System” in the “Manual Store” section (p. 9).
- Press the volume button on the remote control to adjust the volume.
- If there is a symbol on the top left hand corner of the screen, press the key on the remote control to switch on the sound. Unrecognised character on Teletext page
- Wrong country • Go to the Install menu to select the correct “Country” setting setting. (p. 7). Remote control • Wrong mode not working
- Press the key on the remote control repeatedly to remove any light indicator on the audio video equipment display panel.
- Check that the batteries sit in the remote control compartment properly, in the right orientation and has not wear out. Replace accordingly (p. 2). If you still cannot solve your problem, please note down the reference numbers for your TV set (located on the packaging or on the back of the set) before you call the service centre.
Glossary Terms Explanation 4:3 and 16:9 Refer to the ratio between the width and height of the TV picture or screen. In a conventional TV, the ratio is 4 to 3. Hence the term 4:3. Conventionally, most TVs are built in this ratio. Therefore, broadcaster also broadcast picture in this mode. However, there are also TVs which are built in a ratio of 16 by 9 (or widescreen) which resembles a movie theatre because movie pictures are made in this mode. New TV systems support both 4: 3 and 16:9 modes and can switch automatically between them. 100 Hz Digital Scan A conventional TV shows a picture by scanning 50 times per second (50 Hz). This frequency can be detected by the human eye in the form of a flickering picture. 100 hz sets show a picture by scanning 100 times per second eliminating the field flickering. Philips’ digital scan doubles the rate of line scanning, making it undetectable. The result is a more stable picture that is relaxing for your eyes. Audio Video (AV) A term often used when discussing a channel on a TV receiver or on a video equipment, which has been designed to accept audio-video signals. This channel automatically activates special circuitry within the TV to prevent picture distortion or skewing. It is also used for audio-video processors, which handle both types of signal. CVBS Stands for Composite Video Baseband Signal. In broadcast television, this refers to the video signal, including the colour information and syncs. HDMI Stands for High-Definition Multimedia Interface. HDMI makes an uncompressed digital RGB connection from the source to the screen. By eliminating conversion to an analog signal, it delivers an unblemished image. The non-degraded signal reduces flicker and leads to a clearer picture. HDMI intelligently communicates the highest output resolution with the source device. The HDMI input is fully backward compatible with DVI sources but includes digital audio. HDMI uses HDCP copy protection. HD Prepared Enjoy the exceptional picture quality of a true High Definition TV signal and be fully prepared for HD sources like HDTV broadcast, Blue-ray DVD or HDVD. HD prepared is a protected label that offers picture quality beyond that of progressive scan. It conforms to strict standards laid out by EICTA to offer a HD screen that displays the benefits of resolution and picture quality of a High Definition TV signal. It has a universal connection for both analog YPbPr and uncompressed Digital connection of DVI or HDMI, supporting HDCP. It can display 720p, and 1080i signals at 50 and 60Hz. RGB signals These are 3 Red, Green and Blue video signals which directly drive the red, green and blue emitters in the cathode ray tube. Using these signals provides better picture quality. System TV pictures are not broadcast in the same way in all contries. There are different standards. This is not to be confused with PAL or SECAM colour coding. PAL is used in most countries in Europe, SECAM in France, russia and most African countries.
Information for users in the UK Positioning the TV For the best results, choose a position where light does not fall directly on the screen, and at some distance away from radiators or other sources of heat. Leave a space of at least 5 cm all around the TV for ventilation, making sure that curtains, cupboards etc. cannot obstruct the air flow through the ventilation apertures.The TV is intended for use in a domestic environment only and should never be operated or stored in excessively hot or humid atmospheres. General Points Please take note of the section entitled 'Tips' at the end of this booklet. Interference The Department of Trade and Industry operates a Radio Interference Investigation Service to help TV licence holders improve reception of BBC and IBA programmes where they are being spoilt by interference. If your dealer cannot help, ask at a main Post Office for the booklet "How to Improve Television and Radio Reception". Mains connection Before connecting the TV to the mains, check that the mains supply voltage corresponds to the voltage printed on the type plate on the rear panel of the TV. If the mains voltage is different, consult your dealer. CANAL ................FREQ (MHz)
- .75 C p. 128
- .75 D p. 140
- .75 E p. 159
- .75 F p. 164
- .75 G p. 176
- .75 H p. 188
- .75 I p. 200
- .75 J p. 212
- .75 K p. 224
- .75 L p. 236
- .75 M p. 248
- .75 N p. 260
- .75 O p. 272
- .75 P p. 284
- .75 Q .75 ITALY CANALE p. 296
- FREQ (MHz) A p. 53
- .75 B p. 62
- .25 C p. 82
- .25 D p. 175
- .25 E p. 183
- .75 F p. 192
- .25 G p. 201
- .25 H p. 210
- .25 H1 .25 (not applicable outside the UK) Important Should it become necessary to replace the mains fuse, this must be replaced with a fuse of the same value as indicated on the plug. p. 217
1. Remove fuse cover and fuse.
2.The replacement fuse must comply with BS1362 and have the ASTA approval mark. If the fuse is lost, make contact with your retailer in order to verify the correct type.
3. Refit the fuse cover.
In order to maintain conformity to the EMC directive, the mains plug on this product must not be removed. Connecting the aerial The aerial should be connected to the socket marked : at the back of the set.An inferior aerial is likely to result in a poor, perhaps unstable picture with ghost images and lack of contrast. Make-shift loft or set-top aerials are often inadequate.Your dealer will know from experience the most suitable type for your locality. Should you wish to use the set in conjunction with other equipment, which connects to the aerial socket such as TV games, or a video camera it is recommended that these be connected via a combiner unit to avoid repeated connection and disconnection of the aerial plug. Fitting the stand (if provided) Use only the stand provided with the set, making sure that the fixings are properly tightened.A diagram showing how to assemble the stand is packed with the stand. Never use a make-shift stand, or legs fixed with woodscrews. www.philips.com
Specifications are subject to change without notice Trademarks are the property of Koninklijke Philips Electronics N.V. or their respective owners 2005 © Koninklijke Philips Electronics N.V. All rights reserved