10032063 - Pan Klarstein - Free user manual and instructions
Find the device manual for free 10032063 Klarstein in PDF.

Frequently Asked Questions - 10032063 Klarstein
User questions about 10032063 Klarstein
0 question about this device. Answer the ones you know or ask your own.
Ask a new question about this device
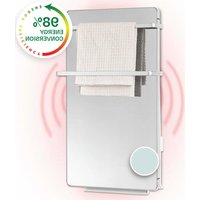
Download the instructions for your Pan in PDF format for free! Find your manual 10032063 - Klarstein and take your electronic device back in hand. On this page are published all the documents necessary for the use of your device. 10032063 by Klarstein.
USER MANUAL 10032063 Klarstein
text_image
Exploded view diagram of an electronic device with numbered components for identificationnatural_image
3D rendered mechanical component with a circular housing and central shaft (no text or symbols visible)natural_image
Two green cylindrical objects with 'A' and 'B' labels, placed horizontally on a blue background (no text or symbols on the objects)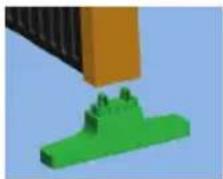
natural_image
3D rendered mechanical component with green base and orange handle, no visible text or symbolsnatural_image
Close-up of a metallic mechanical component with a lever and mounting base (no visible text or symbols)natural_image
Symbol of a trash bin crossed with no visible text or labelsCongratulations on purchasing this equipment. Please read this manual carefully and take care of the following hints on installation and use to avoid technical damages. Any failure caused by ignoring the items and cautions mentioned in the operation and installation instructions are not covered by our warranty and any liability.
CONTENTS
Technical Data 11
Safety Instructions 12
Product Description 14
Controls 15
Operation 16
Maintenance and Cleaning 17
Disposal Considerations 18
TECHNICAL DATA
| Item number 10032062 10032063 | ||
| Power supply 220 -240 V~ 50/60 Hz | ||
| Max. power consumption 1500 W 2000 W | ||
SAFETY INSTRUCTIONS
Please read these instructions carefully and keep for future reference.
In order to prevent the risks of a fire, an electrical shock, burns and other injuries, it is imperative to observe basic safety measures when using electrical appliances.
General safety instructions
- The specified voltage must match the mains voltage. Use an adequate wire cross-section.
- The appliance air inlet and outlet openings must not be obstructed in any way!
- Never move the heater during operating, always unplug heater when not in use.
- Never use the appliance if the appliance or cord is damaged. The appliance may only be opened up and repaired by authorized qualified personnel.
Special safety instructions
- Remove the unit from its packaging and check to make sure it is in good condition before using.
- Do not let children play with parts of the packing (such as plastic bags)
- Close supervision is necessary when the product is used by or near children or infirm persons. Do not allow children to use it as a toy.
- Do not operate any product with a damaged cord or plug, or after the product malfunctions, or is dropped or appears damaged in any way. Return the complete product to the place of purchase for inspection, repair or replacement.
- Before unplugging the power cord, be sure to turn the power off. When touching the unit, be sure your hands are dry to prevent electrical shock.
- Ensure the cord is fully extended before use and arrange it so that it is not in contact with any part of the heater.
- In use, some parts of the heater are hot. When moving, hold the heater only by the handle provided.
- Do not use the heater in areas such as garages where petrol, paint or other flammable substances are used or stored.
- Do not use near or point the heater to furniture, animals, curtains or other inflammable objects. Keep combustible materials such as furniture, bedding and any other combustible materials at least 1 metre from the front and sides, and from the rear of the heater.
- Do not place the cord under carpet or cover with throw rugs or furniture. Arrange the cord so that it cannot be tripped over.
- Do not place the heater on bedding or on thick and long pile carpet where the openings may be blocked.
- To reduce the risk of electric shock, do not immerse or expose the product or flexible cord to rain, moisture or any liquid other than those necessary for correct operation of the product.
-
This product should not be used in the immediate vicinity of water, such as bathtub, washbowls, bathroom swimming pool etc. where the likelihood of immersion or splashing could occur.
-
Switch off and unplug from outlet when not in use, before assembling or disassembling parts and before cleaning. Remove by grasping the plug - do not pull on the cord.
- A common cause of overheating is deposits of dust and fluff entering the heater. Ensure these deposits are removed regularly by unplugging the heater, allowing it to cool and cleaning as described in the Care, Cleaning and Storage section.
- Be sure that no other high current appliances are plugged into the same circuit with your heater as an overload can occur.
- Avoid the use of an extension cord as the extension cord may overheat and cause a risk of fire.
- Do not use the appliance for other than its intended use.
- Do not use outdoors. FOR INDOOR USE ONLY.
- Do not leave the appliance unattended when switched on.
- Do not place objects on the product or allow objects to obstruct the inlet or outlet openings, or operate in close proximity to walls or curtains, etc. Do not cover the unit when in operation.
- Do not locate the heater immediately below a socket-outlet.
- The use of attachments or accessories not recommended or sold by the product distributor may cause personal or property hazards or injuries.
• This product is intended for normal domestic/household use only. - Use this heater as described in this manual. Any other uses, not recommended by the manufacturer, may cause fire, electric shock, or injury to persons and may void the warranty
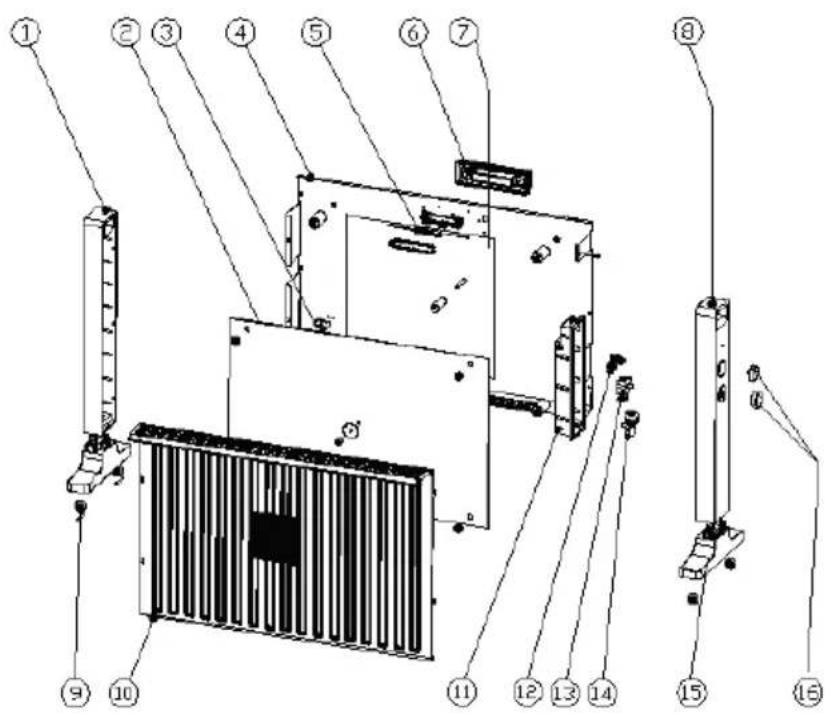
PRODUCT OVERVIEW
text_image
Exploded view diagram of an electronic device with numbered components for identification1 Left shell
2 Mica heating element
3 Line holder
4 Back cover
5 Thermostat element
6 Wall-mounted handle
7 Silver paper
8 Right shell
9 Castor
10 Protecting screening
11 Waterproof cover
12 Temperature adjusting switch
13 Optional switch
14 Tip-over switch
15 Base
16 Rotary knob
Control panel
INSTALLATION
Free standing
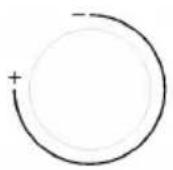
Open packaging to take out the body, confirm the product is in good condition Fix the wheels and base as the below pictures.

natural_image
3D rendered mechanical component with circular and cylindrical features (no text or symbols)Castor assembly
natural_image
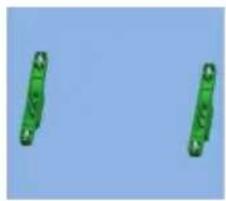
Two green plastic clips on a blue background (no text or symbols)Fix the castors to the base.
natural_image
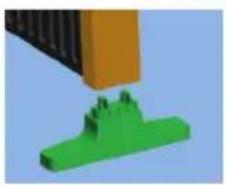
3D illustration of a green grassy tree emerging from a brown structure (no text or symbols)Fix the shell to base.
Wall mounting
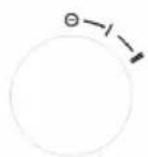
When you need to install it on the wall, please take away the holder Make sure the distance can meet the requirements as picture on the right.
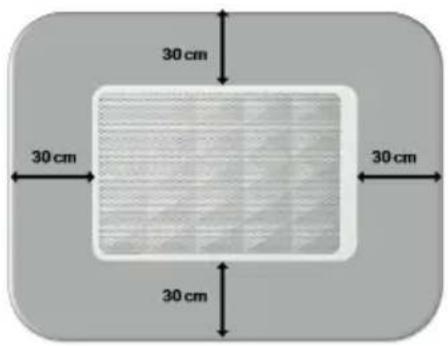
text_image
30 cm 30 cm 30 cm 30 cmDrill three holes - (A), (B), (C or D) - in the wall, and make the diameter of hole as 6 mm, depth as 30 mm. The distance can meet the requirements as Pic.
• Fix the rubber plug into the three holes
- Fix the screws into the rubber plugs (hole A & hole B). Make the length of outside screws as 5 mm, to hang the heater
• Install the bracket on the heater as picture on the right. Insert a screw into the hole of the bracket.
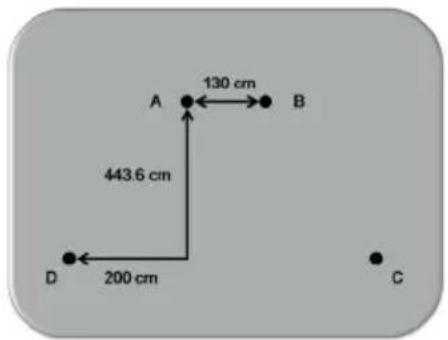
text_image
A 130 cm B 443.6 cm D 200 cm C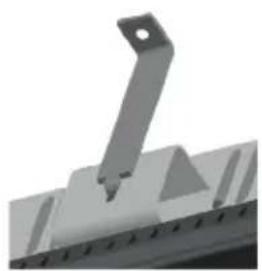
natural_image
Close-up of a mechanical component with a lever and base plate (no visible text or symbols)Fix the screw in to the rubber plug (hole C or hole D)
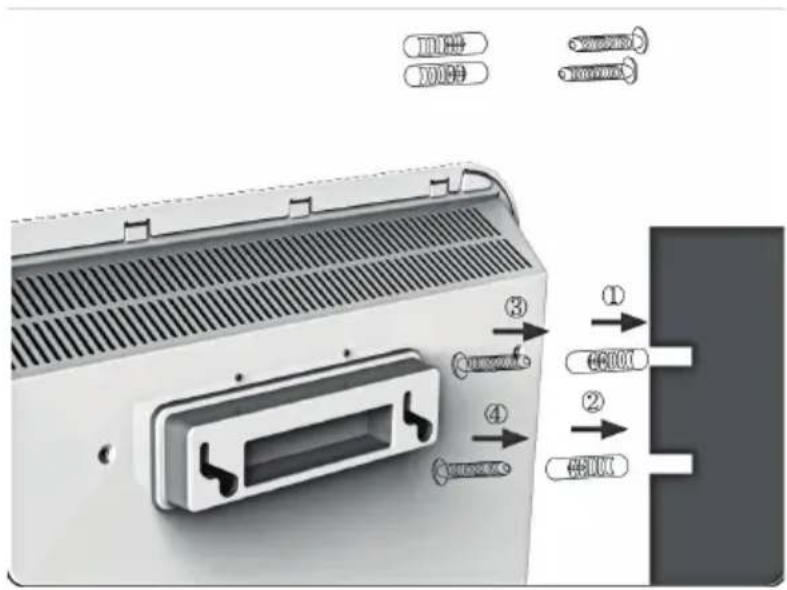
text_image
① ② ③ ④OPERATION
- In standby state, turn the power switch to "Low" or "High", and turn the temperature-setting switch to the max, the heater will start to work. When the power switch is "Low", the power is 750W (Item.1032062) or 1000 W (Item. 1032063).
- When "High" the power is 1500W (Item.1032062) or 2000 W (Item. 1032063).
- Turn the power switch to original position, the heater will stop.
DISPOSAL CONSIDERATIONS
natural_image
Symbol of a trash bin with crossed lines indicating no waste or plastic, and a solid black rectangle below (no text or labels)According to the European waste regulation 2012/19/EU this symbol on the product or on its packaging indicates that this product may not be treated as household waste. Instead it should be taken to the appropriate collection point for the recycling of electrical and electronic equipment. By ensuring this product is disposed of correctly, you will help prevent potential negative consequences for the environment and human health, which could otherwise be caused by inappropriate waste handling of this product. For more detailed information about recycling of this product, please contact your local council or your household waste disposal service.
Your product contains batteries covered by the European Directive. 2006/66/EC, which cannot be disposed of with normal household waste. Please check local rules on separate collection of batteries. The correct disposal of batteries helps prevent potentially negative consequences on the environment and human health.

Declaration of Conformity
Producer: Chal-Tec GmbH, Wallstraße 16, 10179 Berlin, Germany
This product is conform to the following European Directives:
2011/65/EU (RoHS)
2014/30/EU (EMC)
2014/35/EU (LVD)

bar
| Category | Value | |---|---| | Category 1 | 100 | | Category 2 | 100 | | Category 3 | 100 | | Category 4 | 100 | | Category 5 | 100 | | Category 6 | 100 | | Category 7 | 100 | | Category 8 | 100 | | Category 9 | 100 | | Category 10 | 100 | | Category 11 | 100 | | Category 12 | 100 | | Category 13 | 100 | | Category 14 | 100 | | Category 15 | 100 | | Category 16 | 100 | | Category 17 | 100 | | Category 18 | 100 | | Category 19 | 100 | | Category 20 | 100 | | Category 21 | 100 | | Category 22 | 100 | | Category 23 | 100 | | Category 24 | 100 | | Category 25 | 100 | | Category 26 | 100 | | Category 27 | 100 | | Category 28 | 100 | | Category 29 | 100 | | Category 30 | 100 | | Category 31 | 100 | | Category 32 | 100 | | Category 33 | 100 | | Category 34 | 100 | | Category 35 | 100 | | Category 36 | 100 | | Category 37 | 100 | | Category 38 | 100 | | Category 39 | 100 | | Category 40 | 100 | | Category 41 | 100 | | Category 42 | 100 | | Category 43 | 100 | | Category 44 | 100 | | Category 45 | 100 | | Category 46 | 100 | | Category 47 | 100 | | Category 48 | 100 | | Category 49 | 100 | | Category 50 | 100 | | Category 51 | 100 | | Category 52 | 100 | | Category 53 | 100 | | Category 54 | 100 | | Category 55 | 100 | | Category 56 | 100 | | Category 57 | 100 | | Category 58 | 100 | | Category 59 | 100 | | Category 60 | 100 | | Category 61 | 100 | | Category 62 | 100 | | Category 63 | 100 | | Category 64 | 100 | | Category 65 | 100 | | Category 66 | 100 | | Category 67 | 100 | | Category 68 | 100 | | Category 69 | 100 | | Category 70 | 100 | | Category 71 | 100 | | Category 72 | 100 | | Category 73 | 100 | | Category 74 | 100 | | Category 75 | 100 | | Category 76 | 100 | | Category 77 | 100 | | Category 78 | 100 | | Category 79 | 100 | | Category 80 | 100 | | Category 81 | 100 | | Category 82 | 100 | | Category 83 | 100 | | Category 84 | 100 | | Category 85 | 100 | | Category 86 | 100 | | Category 87 | 100 | | Category 88 | 100 | | Category 89 | 100 | | Category 90 | 100 | | Category 91 | 100 | | Category 92 | 100 | | Category 93 | 100 | | Category 94 | 100 | | Category 95 | 100 | | Category 96 | 100 | | Category 97 | 100 | | Category 98 | 100 | | Category 99 | 100 | | Total (Total) = [sum of bars] / [bar chart] + [line chart] = [bars] * (sum of bars + line chart) * (bars). The total bar is divided into two parts: 'Number of items' and 'Percentage'. The total bar is divided into two parts: 'Percentage' and 'Number of items'. The total bar is divided into two parts: 'Percentage' and 'Number of items'. The total bar is divided into two parts: 'Percentage' and 'Number of items'.KLARSTEIN NIEIJSRAK TEIN NIEIJSRAK KLAR KLARSTEIN NIEIJSRAK TEIN NIEIJSRAK KLAR KLARSTEIN NIEIJSRAK TEIN NIEIJSRAK KLAR KLARSTEIN NIEIJSRAK
Chère cliente, cher client,
text_image
Exploded view diagram of an electronic device with numbered components for identificationnatural_image
3D rendered mechanical component with a circular head and central shaft (no text or symbols)natural_image
Two green plastic clips on a blue background (no text or symbols)natural_image
3D rendered mechanical component with green base and orange handle, no visible text or symbolsnatural_image
Close-up of a mechanical lever or bracket component (no visible text or symbols)