
SC21F60JD - Vacuum Cleaner SAMSUNG - Free user manual and instructions
Find the device manual for free SC21F60JD SAMSUNG in PDF.

Frequently Asked Questions - SC21F60JD SAMSUNG
User questions about SC21F60JD SAMSUNG
0 question about this device. Answer the ones you know or ask your own.
Ask a new question about this device
Download the instructions for your Vacuum Cleaner in PDF format for free! Find your manual SC21F60JD - SAMSUNG and take your electronic device back in hand. On this page are published all the documents necessary for the use of your device. SC21F60JD by SAMSUNG.
USER MANUAL SC21F60JD SAMSUNG
natural_image
Technical illustration of a vacuum cleaner's internal components, showing step-by-step assembly (no text or symbols)natural_image
Illustration of two identical portable air purifiers with hands using a tool to adjust their surface (no text or symbols present)VORSICHT
natural_image
Illustration of a hand pressing down on a car interior with a circular indicator and downward arrow (no text or symbols)text_image
Diagram showing an electric vehicle charging plug with a control panel and power button, alongside a close-up of its electrical signal.text_image
Diagram showing a handheld device with control panel and signal waves, labeled in Chinese.natural_image
Diagram of a curved mechanical component with directional arrows indicating motion (no text or symbols)GEHÄUSE
natural_image
Top-down diagram of a car air conditioner unit with control knobs and vent slots (no text or symbols)natural_image
Illustration of a vacuum cleaner with a handle and lever, showing mechanical components (no text or symbols)text_image
Illustration showing two hand positions of a handheld device with control buttons, one pointing to the left panel and the other on the right.text_image
Diagram showing a hand pressing a button labeled '小' (small) with a tool, likely illustrating a diagnostic or testing procedure.
natural_image
Two cylindrical mechanical components with internal threading and fasteners, shown in line drawing style (no text or symbols)natural_image
Illustration of two hand-drawn sticks with steam, no text or symbols presentSaugaufsätze
natural_image
Diagram showing a mechanical component being inserted into a housing, with an arrow indicating the process (no text or symbols present)natural_image
Illustration showing a hand holding a device before and after assembly, with no visible text or symbols.natural_image
Diagram showing a mechanical assembly with an arrow indicating direction and a magnified inset showing a small object (no text or symbols present)Saugaufsätze
natural_image
Diagram showing a robotic arm interacting with a door panel, before and after close-up (no text or symbols present)text_image
Diagram illustrating the process of tool manipulation or disassembly, showing a hand holding a knife and a close-up of the blade being cut with directional arrows.text_image
Diagram illustrating a tool tip being inserted into a corner, with an arrow indicating the process.natural_image
Diagram showing a mechanical component being cut with arrows indicating direction, alongside a magnified view of the end joint detail (no text or symbols)Zweistufenbürste
natural_image
Illustration of a vacuum cleaner being inserted into a component (no text or symbols present)natural_image
Technical line drawing of a mechanical component with mounting holes and internal structure (no text or symbols)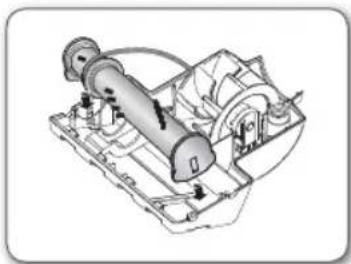
natural_image
Technical line drawing of a mechanical assembly with no visible text or symbols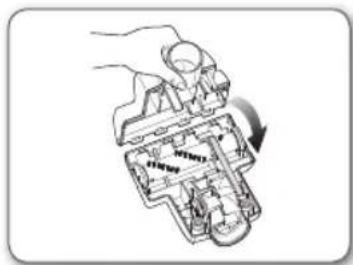
natural_image
Diagram of a mechanical assembly with a hand holding a tool, showing internal components and motion direction (no text or labels)natural_image
Line drawing of hands assembling a mechanical component into a tray (no text or symbols)
natural_image
Mechanical assembly diagram showing hands operating a component with a gear and shaft (no text or symbols)natural_image
Illustration of a hand using a vacuum cleaner to clean or adjust the component (no text or symbols visible)
natural_image
Illustration of a vacuum cleaner with a hand inserting a component into its air gap (no text or symbols present)natural_image
Illustration of a handheld device with two circular insets showing internal components (no text or symbols)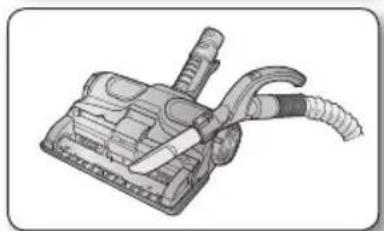
natural_image
Illustration of a vacuum cleaner with handle and blade (no text or symbols)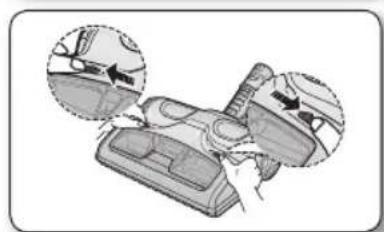
natural_image
Diagram showing a car interior with hand gestures and a close-up of the seat area (no text or symbols)natural_image
Interior view of a car showing engine compartment and fan assembly (no text or symbols)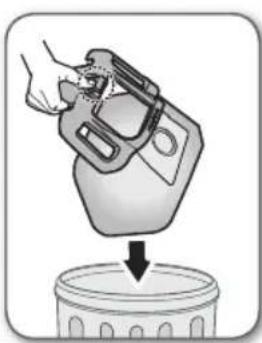
natural_image
Illustration of a hand pouring liquid into a container (no text or symbols)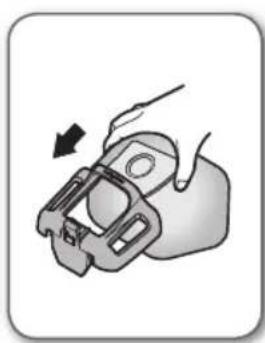
natural_image
Illustration of a mechanical clamp or bracket with a hand adjusting it (no text or symbols)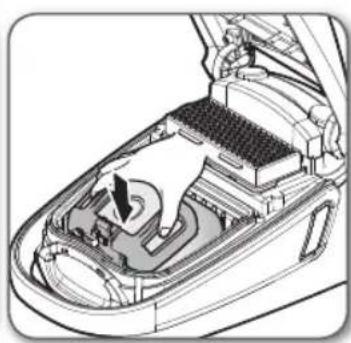
natural_image
Technical illustration of a car interior showing engine compartment and fan structure (no text or symbols)
natural_image
Technical diagram of a car interior showing internal components and a hand inserting a component (no text or symbols)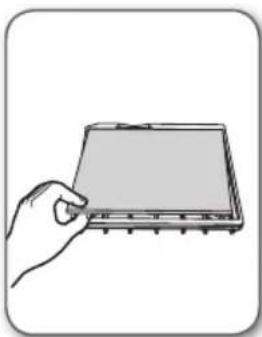
natural_image
Hand holding a rectangular electronic component (no visible text or symbols)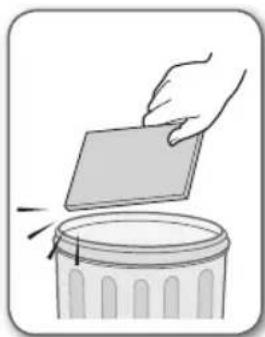
natural_image
Illustration of a hand placing a blank sheet into a trash can (no text or symbols)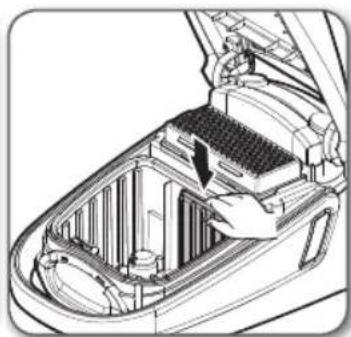
natural_image
Technical illustration of a car interior showing structural components and airflow direction (no text or symbols)
natural_image
Technical diagram of a car interior showing internal components and airflow paths (no text or symbols)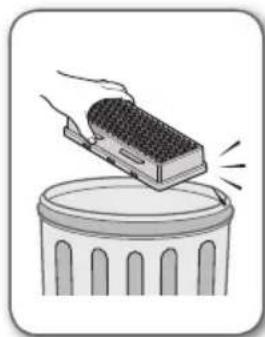
natural_image
Illustration of a hand using a tool to lift a block on a trash can (no text or symbols)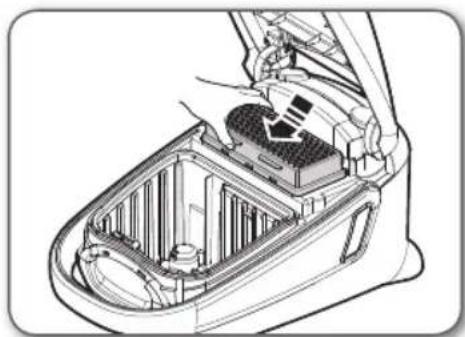
natural_image
Technical illustration of a car interior showing internal components and airflow path (no text or symbols)

natural_image
Two types of hairless spray gun components shown in exploded and assembled views (no text or symbols)BATTERIETYP: AAA

Fehlerbehebung
natural_image
Technical illustration of a robotic vacuum cleaner's internal mechanism, showing step-by-step assembly (no text or symbols)natural_image
Illustration of two identical robotic devices with tool tips, one emitting a power cord to the other (no text or symbols)
natural_image
Illustration of a hand placing a button into a device component with a circular indicator (no text or symbols)Type afstandsbediening (SC08F60J-, SC08F60Y-, SC21F60J-, SC21F60Y-serie)
SLANG (SC07F60J-, SC08F60J-, SC21F60J-serie)
1. Knop AAN/UIT ( ⏻
natural_image
Illustration of an electric vehicle charging plug with a control panel and power button (no text or symbols)text_image
Diagram showing a handheld device with control panel and signal waves, labeled in Chinese.natural_image
Diagram of a curved mechanical component with directional arrows indicating movement (no text or symbols)APPARAAT
natural_image
Top-down diagram of a car air conditioner unit with labeled ports and control buttons (no text or symbols beyond basic labels)natural_image
Illustration of a vacuum cleaner with a handle and lever, showing mechanical components (no text or symbols)text_image
Illustration showing two hand positions of a handheld device with control buttons, one pointing to the left panel and the other on the right.text_image
Diagram showing a hand pressing a button labeled '充电' (electricity) with a magnified view of the device's handle.
natural_image
Two cylindrical mechanical components with directional arrows indicating motion or force (no text or symbols)natural_image
Illustration of two hand-drawn sticks with steam, no text or symbols presentAccessoire
natural_image
Diagram showing a mechanical assembly step with an arrow indicating direction, alongside a magnified detail of the component (no text or symbols present)natural_image
Diagram showing a hand holding a small object before and after assembly, with no visible text or symbolsnatural_image
Diagram showing a mechanical component being adjusted to a car seatbelt, with an inset close-up highlighting the seatbelt detail (no text or symbols present)Accessoire
natural_image
Diagram showing a robotic arm interacting with a door panel, before and after close-up (no text or symbols)text_image
Diagram illustrating the process of a tool or device being processed, with an arrow indicating transformation from a single tool to a final assembly.text_image
Diagram illustrating the process of tool tip application, showing before and after states with directional arrows.natural_image
Diagram showing a tool interacting with a surface, with an arrow indicating direction and a magnified detail of the tool's edge detail (no text or symbols present)2-standenborstel

natural_image
Illustration of a vacuum cleaner being inserted into a rubber cover (no text or symbols present)natural_image
Technical line drawing of a mechanical component with no visible text or symbols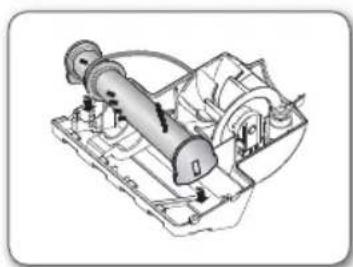
natural_image
Mechanical assembly diagram showing a motor and housing components (no text or labels)
natural_image
Diagram of a mechanical device with a hand operating it, showing internal components and a rotation arrow (no text or symbols)- De riem vervangen
natural_image
Line drawing of hands assembling a mechanical component into a tray (no text or symbols)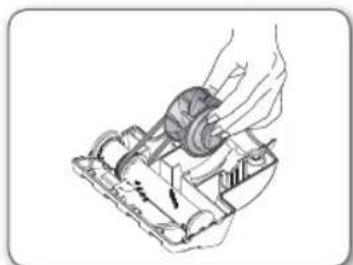
natural_image
Illustration of a hand using a tool to adjust or install a mechanical component (no text or symbols visible)natural_image
Illustration of a hand using a vacuum cleaner to clean or adjust the component (no text or symbols visible)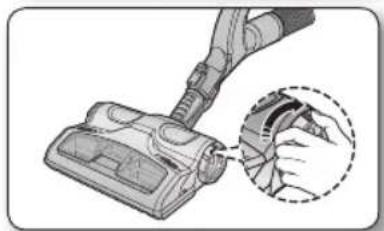
natural_image
Illustration of a vacuum cleaner with a hand inserting a component into its air gap (no text or symbols present)natural_image
Illustration of a car interior with hand positioning and two zoomed-in views showing the interior (no text or symbols)natural_image
Illustration of a vacuum cleaner with attached tubing (no text or symbols)natural_image
Diagram showing car interior components with arrows indicating movement or repair (no text or symbols)natural_image
Interior view of a car showing the hood and engine compartment with a directional arrow indicating rotation (no text or symbols)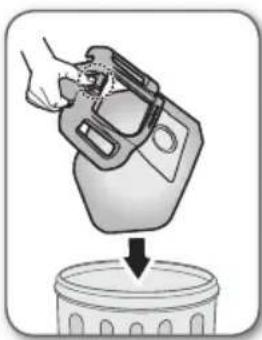
natural_image
Illustration of a hand pouring liquid into a container (no text or symbols)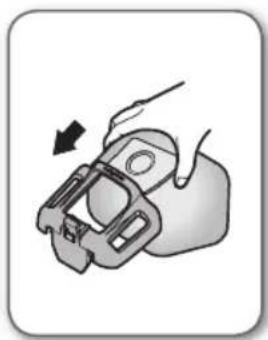
natural_image
Illustration of a hand holding a mechanical component with an arrow indicating motion (no text or symbols)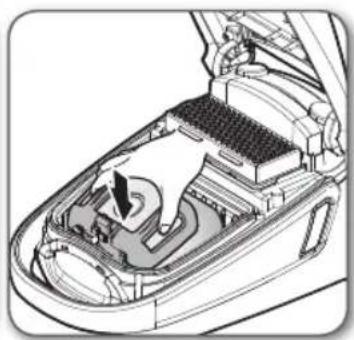
natural_image
Technical illustration of an open car interior showing internal components and airflow direction (no text or symbols)
natural_image
Technical diagram of a car interior showing internal components and a hand interacting with the lid (no text or symbols)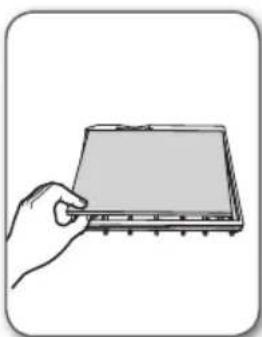
natural_image
Illustration of a hand holding a rectangular electronic device (no text or symbols visible)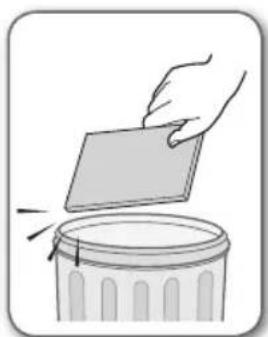
natural_image
Illustration of a hand placing a blank sheet into a trash can (no text or symbols)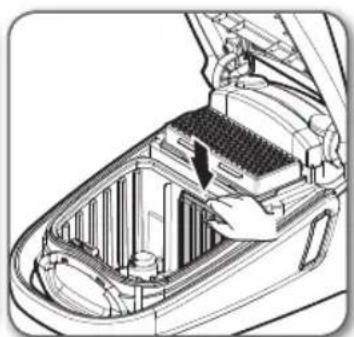
natural_image
Technical illustration of a car interior showing internal components and a hand inserting a component (no text or symbols visible)
natural_image
Technical illustration of a car interior showing internal components and airflow direction (no text or symbols)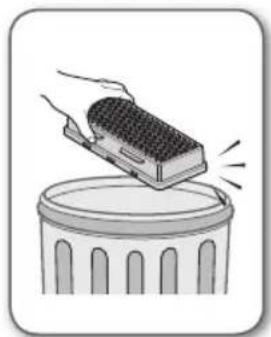
natural_image
Illustration of a hand placing a textured block onto a trash can (no text or symbols)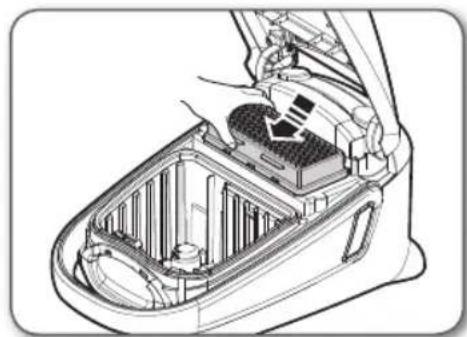
natural_image
Technical illustration of a car interior showing internal compartments and a handle (no text or symbols)

natural_image
Two types of hairless spray gun components shown in exploded and assembled views (no text or labels)BATTERIJ TYPE: AAA-formaat

problemen oplossen
natural_image
Technical illustration of a robotic vacuum cleaner's internal mechanism, showing step-by-step assembly (no text or symbols)natural_image
Illustration of two identical portable air purifiers with hands using power tools, showing a step-down view (no text or symbols)
MISE SOUS/HORS TENSION
natural_image
Illustration of a hand pressing down on a car interior with a circular indicator and downward arrow (no text or symbols)TUYAU (Série SC07F60J, SC08F60J, SC21F60J)
1. Bouton MARCHE/ARRÊT ( ⏻
natural_image
Electric vehicle charging plug with control panel and power button icon (no text or symbols)text_image
Diagram of a handheld electric vehicle with control panel and sensor interface, showing signal waves and function buttons(OFF (ARRÊT)→ ON (MARCHE)→ OFF (ARRÊT))

natural_image
Diagram of a curved mechanical component with directional arrows indicating motion (no text or symbols)CORPS DE L'ASPIRATEUR
natural_image
Top-down diagram of a refrigerator front panel with control buttons and indicator lights (no text or symbols)natural_image
Illustration of a vacuum cleaner with a handle and lever mechanism (no text or symbols)text_image
Illustration showing two hand positions of a handheld device with control buttons, one pointing to the left panel and the other on the right.text_image
Diagram showing a hand pressing a button on a device with a labeled control panel and a tool handle nearby.
natural_image
Two cylindrical mechanical components with internal fasteners, shown in line drawing style (no text or symbols)natural_image
Illustration of two elongated writing tools with lit sticks, no text or symbols presentAccessoires
natural_image
Diagram showing a mechanical assembly step with an arrow indicating direction, alongside a magnified detail of the component (no text or symbols present)natural_image
Diagram showing a hand holding a cable being compressed and then tilted, with no text or symbols present.natural_image
Diagram showing a mechanical component being adjusted to form a car seatbelt, with an inset close-up highlighting the seatbelt detail (no text or symbols present)Accessoires
natural_image
Diagram showing a robotic arm interacting with a door panel, before and after close-up (no text or symbols)text_image
Diagram illustrating the process of a tool or device being processed, with an arrow indicating transformation from a single tool to a final assembly.text_image
Diagram illustrating the process of tool tip application, showing before and after states with directional arrows.natural_image
Diagram showing a tool interacting with a surface, with an arrow indicating direction and a magnified detail of the tool's edge detail (no text or symbols present)Super Brosse 2 positions

text_image
Nettoyage de moquette Nettoyage de sol durnatural_image
Illustration of a vacuum cleaner being inserted into a cylindrical device (no text or symbols present)natural_image
Technical line drawing of a mechanical component with mounting holes and internal structure (no text or symbols)
natural_image
Technical line drawing of a mechanical assembly with no visible text or symbols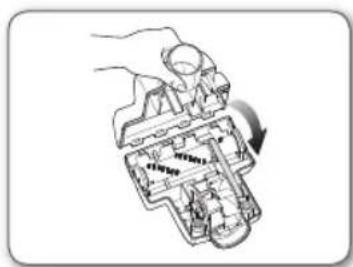
natural_image
Diagram of a mechanical assembly with a hand holding a tool, showing internal components and motion direction (no text or symbols)natural_image
Line drawing of hands holding a small object above a partially assembled container (no text or symbols)
natural_image
Illustration of a hand using a tool to adjust or install a mechanical component (no text or symbols visible)natural_image
Illustration of a hand using a vacuum cleaner to clean or adjust the component (no text or symbols visible)natural_image
Illustration of a vacuum cleaner with a hand inserting a component into its air gap (no text or symbols present)natural_image
Illustration of a car interior with hand positioning and two zoomed-in views showing the interior (no text or symbols)natural_image
Illustration of a vacuum cleaner with attached tubing (no text or symbols)natural_image
Illustration of a car interior with hand gestures and a magnified inset showing the interior details (no text or symbols)natural_image
Interior view of a car showing the hood and engine compartment with no visible text or symbols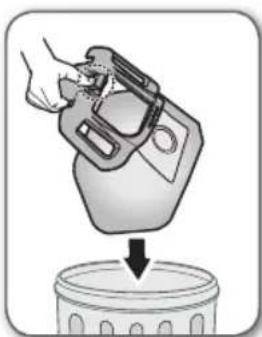
natural_image
Illustration of a hand pouring liquid into a trash bin (no text or symbols)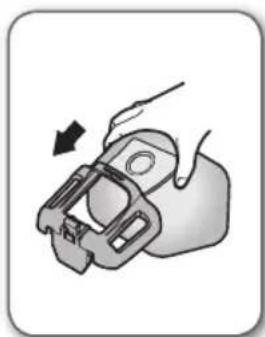
natural_image
Illustration of a hand holding a mechanical clamp or clip, with an arrow indicating motion direction (no text or symbols present)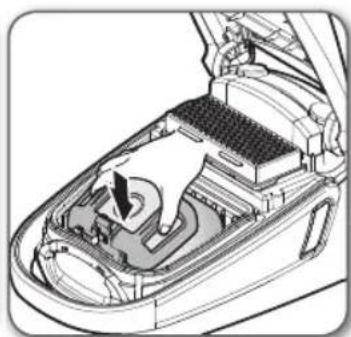
natural_image
Technical illustration of a car interior showing internal components and airflow direction (no text or symbols)
natural_image
Illustration of a hand holding a rectangular electronic component (no text or symbols visible)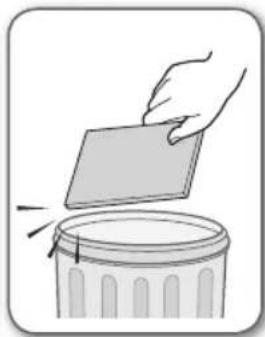
natural_image
Illustration of a hand placing a blank sheet into a trash can (no text or symbols)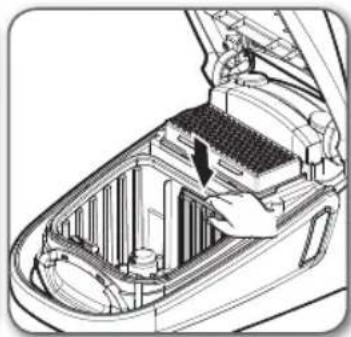
natural_image
Technical illustration of a car interior showing internal components and a hand interacting with the lid (no text or symbols present)
natural_image
Technical illustration of a car interior showing internal components and structural lines (no text or symbols)
natural_image
Illustration of a hand placing a textured block onto a trash can (no text or symbols)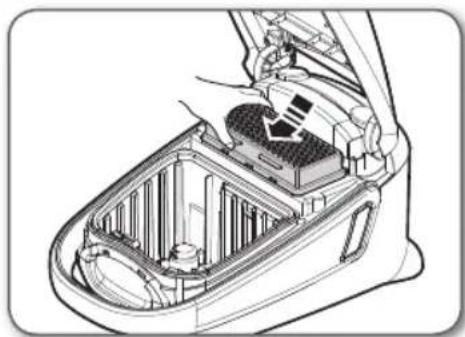
natural_image
Technical line drawing of a car interior showing internal components and ventilation duct (no text or symbols)

natural_image
Technical illustration of two types of hairless spray sprayers, showing exploded and assembled views (no text or symbols)TYPE DE PILE : type AAA

Dépannage
Vacuum Cleaner user manual
* Before operating this unit, please read the instructions carefully.
* For indoor use only.
English
imagine the possibilities
Thank you for purchasing a Samsung product.
safety information
SAFETY INFORMATION

- Before operating the appliance, please read this manual thoroughly and retain it for your reference.

- Because these following operating instructions cover various models, the characteristics of your vacuum cleaner may differ slightly from those described in this manual.
CAUTION/WARNING SYMBOLS USED
| WARNING | Indicates that a danger of death or serious injury exists. |
| CAUTION | Indicates that a risk of personal injury or material damage exists. |
OTHER SYMBOLS USED
 | Represents something you must NOT do. |
| [DT5S] | Represents something you must follow. |
 | Indicates that you must disconnect the power plug from the socket. |

- This vacuum cleaner is designed for domestic household use only.
Do not use this vacuum cleaner to clean building waste and debris.
Regularly keep the filters in clean conditions to prevent of collecting fine dust in them.
Do not use this vacuum cleaner with any of the filters removed.
Failure to meet these requirements could cause damage to the internal parts and void your warranty.
Notes on the energy label
- Declared energy efficiency and cleaning performance class on carpet or in places where the carpet is used can be met with the enclosed "Eco Carpet" brush.
- When the hard floor has joints and gaps, please use the enclosed "Eco Hard Floor" brush which is designed to meet the energy efficiency and cleaning performance class on hard floor with joints and gaps.
- The values provided on the energy label have been determined according to the prescribed measuring process (in accordance with EN60312 - 1).
Eco Hard Floor
Eco Carpet
IMPORTANT SAFEGUARDS
GENERAL
- Read all instructions carefully.
Before switching on, make sure that the voltage of your electricity supply is the same as that indicated on the rating plate on the bottom of the cleaner. - WARNING : Do not use the vacuum cleaner when rug or floor is wet. Do not use to suck up water.
- Close supervision is necessary when any appliance is used by or near children.
Do not allow the vacuum cleaner to be used as a toy.
Do not allow the vacuum cleaner to run unattended at any time.
Use the vacuum cleaner only for its intended use as described in these instructions. - Do not use the vacuum cleaner without a dust bin.
Empty the dust bin before it is full in order to maintain the best efficiency. - Do not use the vacuum cleaner to pick up matches, live ashes or cigarette butts. Keep the vacuum cleaner away from stoves and other heat sources.
Heat can deform and discolour the plastic parts of the unit. - Avoid picking up hard, sharp objects with the vacuum cleaner as they may damage the cleaner parts.
Do not stand on the hose assembly.
Do not put weight on the hose.
Do not block the suction or the exhaust port. - Switch the vacuum cleaner off on the body of the machine before unplugging from the electrical outlet.
Disconnect the plug from the electrical outlet before emptying the dust bin.
To avoid damage, please remove the plug by grasping the plug itself, not by pulling on the cord.
- This appliance can be used by children aged from 8 years and above and persons with reduced physical, sensory or mental capabilities or lack of experience and knowledge if they have been given supervision or instruction concerning use of the appliance in a safe way and understand the hazards involved. Children shall not play with the appliance.
Cleaning and user maintenance shall not be made by children without supervision.
- Children should be supervised to ensure that they do not play with the appliance.
- The plug must be removed from the socket outlet before cleaning or maintaining the appliance.
- The use of an extension cord is not recommended.
- If your vacuum cleaner is not operating correctly, switch off the power supply and consult an authorized service agent.
- If the supply cord is damaged, it must be replaced by the manufacturer or its service agent or a similarly qualified person in order to avoid a hazard.
- Don't carry the vacuum cleaner by holding the hose. Use the handle on the vacuum cleaner set.
- Unplug the cleaner when not in use. Turn off the power switch before unplugging.
- Do not use to suck up water.
- Do not immerse in water for cleaning.
- The hose should be checked regularly and must not be used if damaged.
- The vacuum cleaner handle contains electrical connections the handle is not a serviceable part.
- The current carrying hose handle contains electrical connections is not a serviceable part by user.
- Please contact the manufacturer or service center for a replacement.
UV BRUSH
- Since the UV rays from the UV Brush damage skin and eyes, never allow the rays to make contact with skin or eyes and do not let children or the elderly use the UV Brush. It may damage your eyesight.
- If the transparent window is broken and the UV rays are exposed directly, turn the power off and contact the service center.
- Do not use the UV Brush for purposes other than the sterilization of mattresses, bedclothes, beds, cushions and so on made from material.
The company will not be held liable for any loss due to accidents from using the UV Brush for purposes other than its original purpose as listed above.
- Do not sit on the UV Brush or drop it, and avoid imparting impacts on the product.
Failing to do so may result in injury or product damage.
- Do not touch the power terminals on the back of the UV Brush with a metal pin or rod.
This may result in electric shock or fire.
- When the UV lamp is out of order, never disassemble or modify the product yourself. Please contact the manufacturer or service center for a replacement.
- Since an internal discharge occurs within the UV Brush, never use the product near an inflammable spray or substance.
- Take care not to touch the UV lamp window after using the UV Brush for an extended period of time as the surface of the window may be hot.
- The UV Brush may start slowly at a low temperature due to the inherent characteristics of UV lamps.
Please keep the UV Brush indoors.
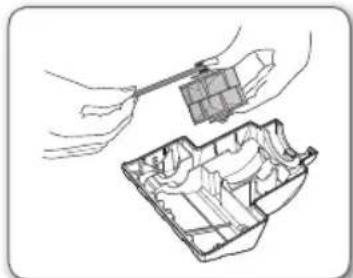
ASSEMBLING THE CLEANER
07
11 Using the UV brush (Option)
MAINTAIN TOOLS AND FILTER
12
12 Using accessory
14 Maintain floor tools
17 Dust full indicator
17 Changing the dust bag
17 Cleaning inlet filter
18 Cleaning outlet filter
18 Change the battery (remote-control type)
TROUBLESHOOTING
19
assembling the cleaner
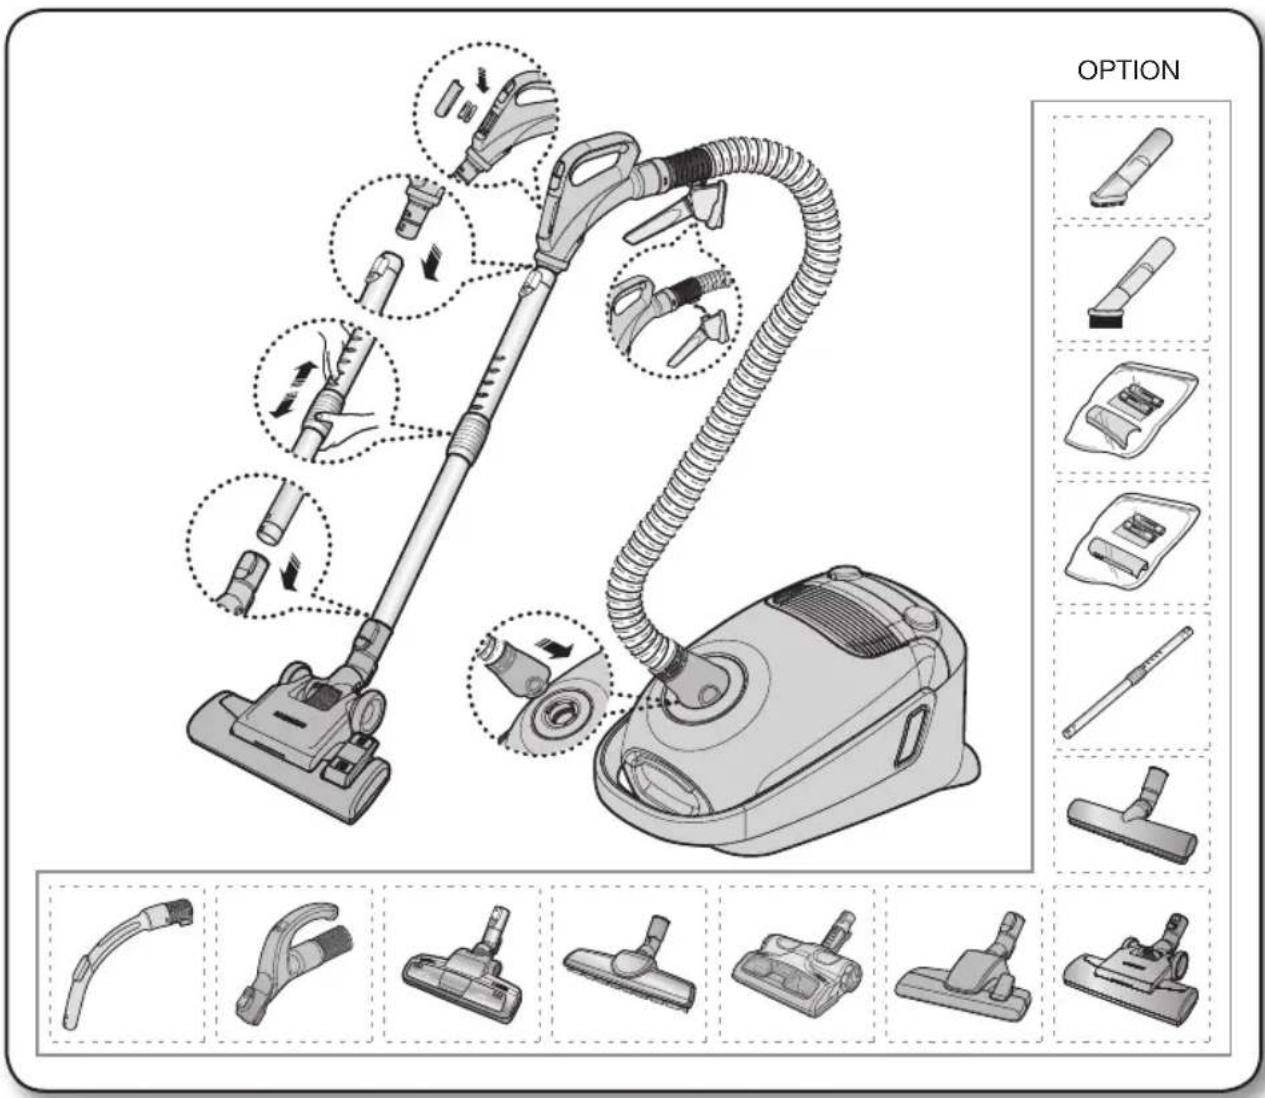
text_image
OPTION
- For storage, park the floor nozzle.
natural_image
Technical illustration of a vacuum cleaner's internal mechanism, showing step-by-step assembly and adjustment (no text or symbols)operating the cleaner
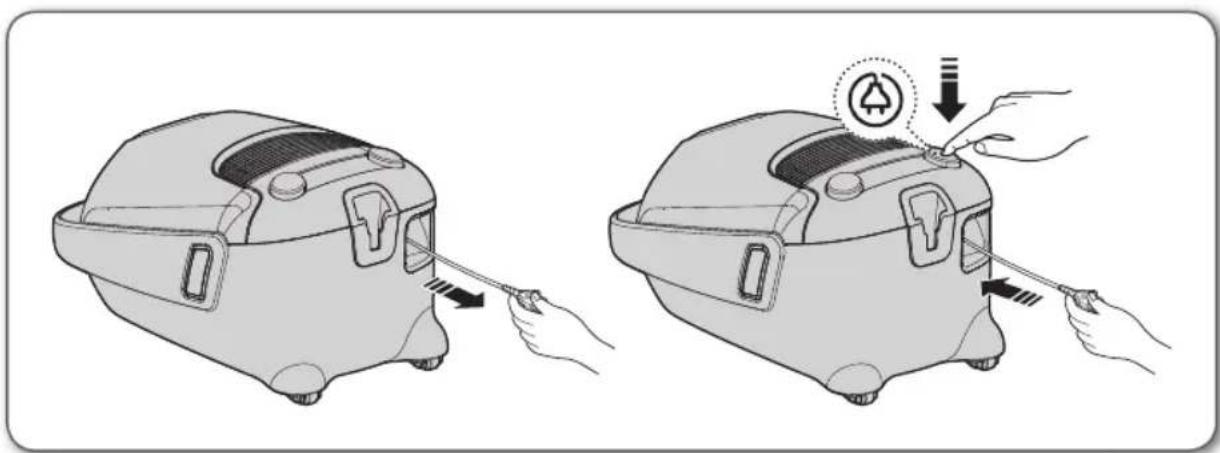
POWER CORD
natural_image
Illustration of two identical medical or cosmetic devices with hands using forceps to adjust their body (no text or symbols present)CAUTION
- When removing the plug from the electrical outlet, grasp the plug, not the cord.
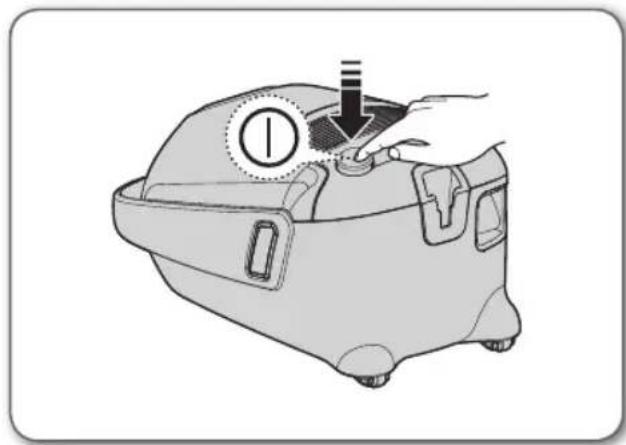
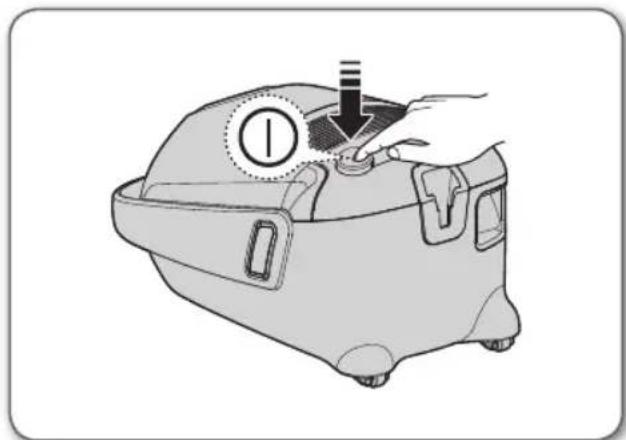
ON/OFF SWITCH
natural_image
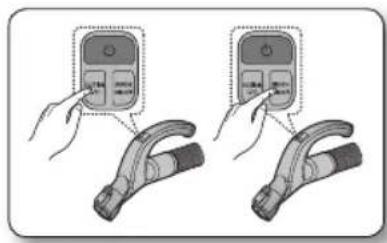
Illustration of a hand placing a button into a small container with a numbered label (no text or symbols on the object itself)Remote-control type (SC08F60J, SC08F60Y, SC21F60J, SC21F60Y Series)
HOSE (SC07F60J, SC08F60J, SC21F60J Series)
1. ON/OFF (⏻) Button
- Press the ON/OFF button to operate the vacuum cleaner. Press again to stop the vacuum cleaner.
- Press the (+) button to operate the vacuum to highsuction power. Press the (-) button to operate the vacuum to low suction power.
text_image
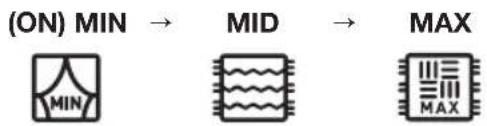
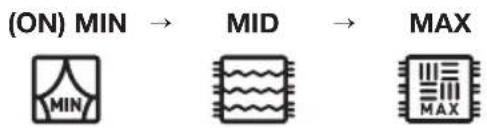
(ON) MIN → MID → MAX MIN MAX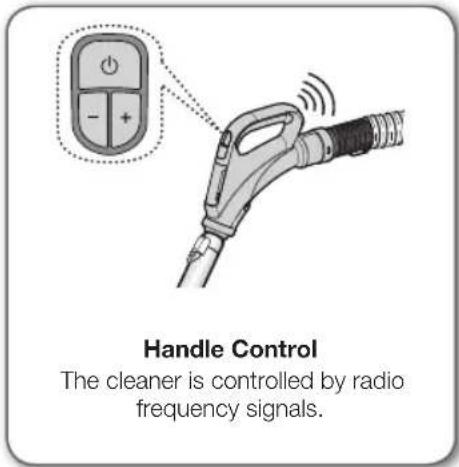
text_image
Handle Control The cleaner is controlled by radio frequency signals.
If no button is pressed for 30 minutes while cleaning, the safety device is activated and the power is cut off. In this case, press the [Power] button on the main unit or unplug and then plug the power cord in again.
HOSE (SC07F60Y, SC08F60Y, SC21F60Y Series)
1. ON/OFF (⏻) Button
- Press the ON/OFF button to operate the vacuum cleaner. Press again to stop the vacuum cleaner.
2. SUCTION (-/+) Button
- Press the [SUCTION (-/+)] button to increase or decrease the suction power. Each time you press the button, you gradually increase the suction power. After the suction power reaches its maximum, the next time you press the button, you return the suction power to its minimum.
text_image
(ON) MIN → MID → MAX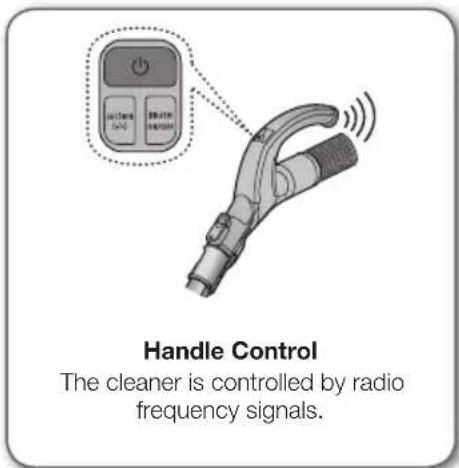
text_image
Handle Control The cleaner is controlled by radio frequency signals.3. BRUSH ON/OFF Button
- Press the [BRUSH ON/OFF] button to operate the UV Brush. Press again to stop the UV Brush.

If no button is pressed for 30 minutes while cleaning, the safety device is activated and the power is cut off. In this case, press the [Power] button on the main unit or unplug and then plug the power cord in again.
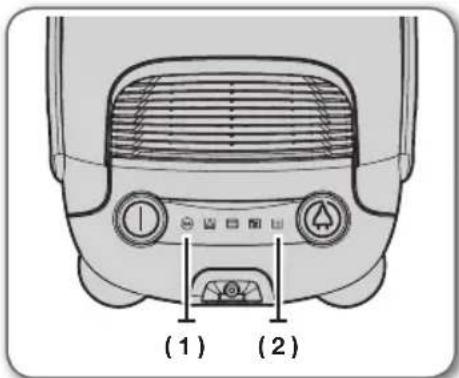
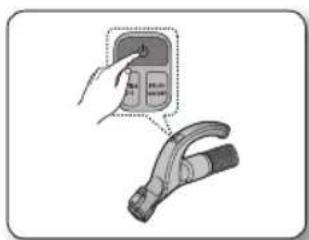
BODY
Press the power ON/OFF button repeatedly to start and to stop the vacuum cleaner. (OFF → ON → OFF)

If the remote handle control is not working, the cleaner can be operated using the ON/OFF button on the body of the machine.
text_image
(1) (2)| (1) The non lights up blue when the power source is connected. | |
| (2) | If the filter check indicator turns red, check and eliminate possible blockages in brushes, pipe, hoses, filters and if necessary. Empty and replace dust bag. |
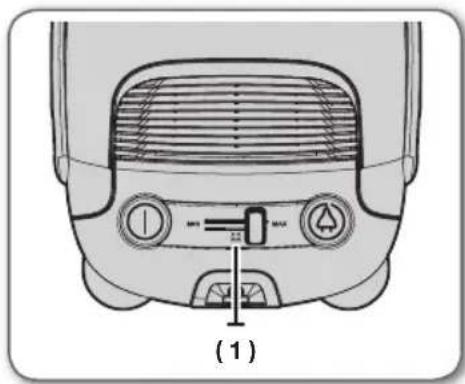
Body-control type (SC07F60W, SC08F60W, SC21F60W Series)
HOSE
To reduce suction for leaning draperies, small rugs, and other light fabrics, pull the tap air until the hole is open.
natural_image
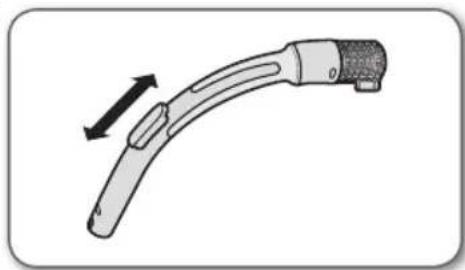
Diagram of a curved mechanical component with directional arrows indicating motion (no text or symbols)BODY
To control power level, just slide the power control right and left.
MIN = For delicate fabrics, e.g. net curtains.
MAX = For hard floors and heavily soiled carpets.
natural_image
Top-down view of a portable air conditioner unit with control knobs and indicator lights (no text or symbols)(1)  | If the filter check indicator turns red, check and eliminate possible blockages in brushes, pipe, hoses, filters and if necessary. Empty and replace dust bag. |
USING THE UV BRUSH (OPTION)
- Insert the brush into the hose handle.
- Insert the UV brush securely into the hose handle until you hear a "clicking" sound.

natural_image
Illustration of a vacuum cleaner with a handle and arrow indicating motion (no text or symbols)-
Press the [BRUSH ON/OFF] button to use UV Brush.
-
Press the [Suction -/+] button to start cleaning and choose the appropriate suction strength.
- Press the [BRUSH ON/OFF] button.
• UV sterilization cannot be activated by itself.
text_image
Illustration showing two hand gestures with a digital device, one pointing at the screen and the other holding the button.- When you have finished UV cleaning, press the [button.
- Press the [ button to stop the cleaner.
- For safety reasons, UV brushing only runs for 30 minutes and then stops operating. To resume the operation, press the [SUCTION (-/+)] button again.
text_image
Diagram showing a hand pressing a button on a device with a close-up view of the handle
The UV brush, which is inserted into the hose handle (not directly connected to the telescopic pipe), is dedicated for bedclothes.
maintain tools and filter
USING ACCESSORY
Pipe
- Adjust the length of the telescopic pipe by sliding the length control button located in the center of the telescopic pipe back and forth.
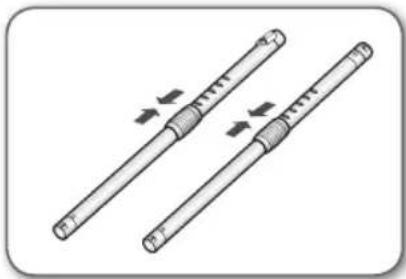
natural_image
Two cylindrical mechanical components with internal threading and fasteners, shown in line drawing style (no text or symbols)- To check for blockages, separate the telescopic pipe and adjust to shorten. This allows for easier removal of waste clogging the tube.
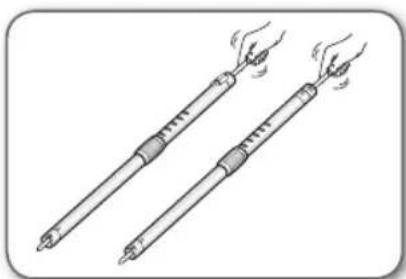
natural_image
Illustration of two elongated cylindrical objects with steam rising, no text or symbols presentAccessory
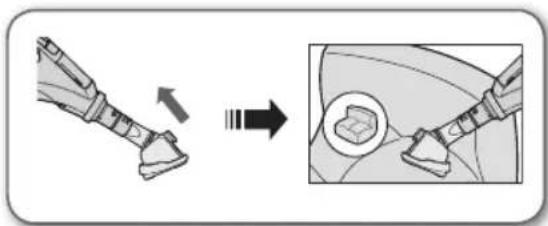
- To use the crevice tool, push the accessory on to the end of the hose handle in the opposite direction.
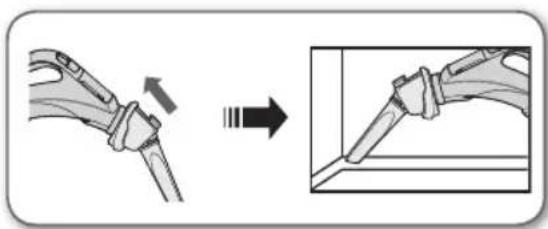
natural_image
Diagram showing a mechanical assembly step with an arrow indicating direction, alongside a magnified detail of the component (no text or symbols present)- Pull out the button, to use the dusting brush.
natural_image
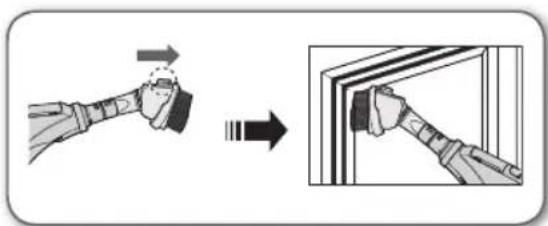
Illustration showing a hand gripping a device before and after assembly (no text or symbols)- To use the upholstery tool, push the accessory on to the end of the hose handle.
natural_image
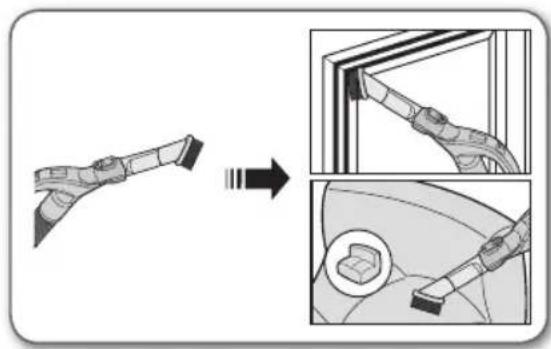
Diagram showing a mechanical assembly with an arrow indicating direction and a magnified inset showing a component (no text or symbols present)Accessory
- Push the accessory onto the end of the hose handle.
natural_image
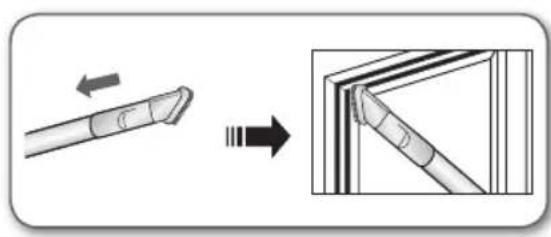
Diagram showing a mechanical assembly process with three views: before, after, and after (no text or symbols present)- Pull out the dusting brush to use the crevice tool.

text_image
Diagram illustrating the process of a tool or device being processed, with an arrow indicating transformation from a tool to a final state.- Push the accessory onto the end of the pipe.
natural_image
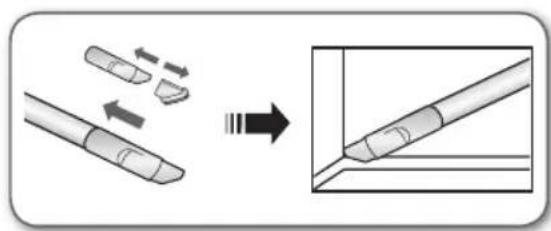
Diagram showing a tool interacting with a bracket and its resulting edge detail (no text or symbols)- Pull out the dusting brush to use the crevice tool.
natural_image
Diagram showing a mechanical component before and after assembly, with no visible text or symbols2-Step Brush
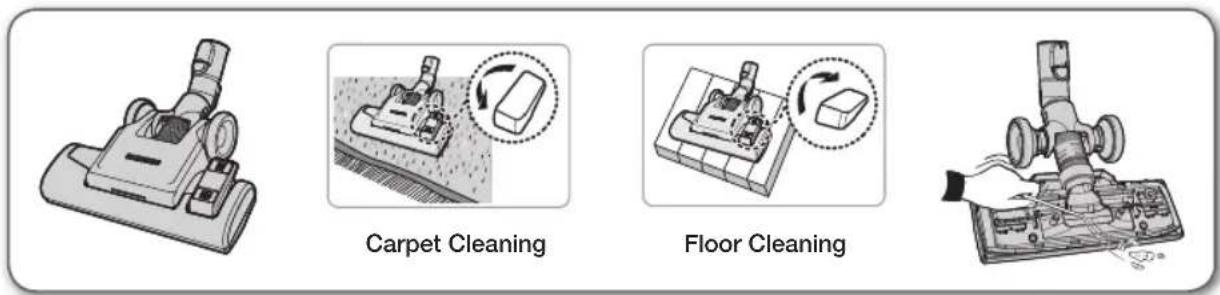
text_image
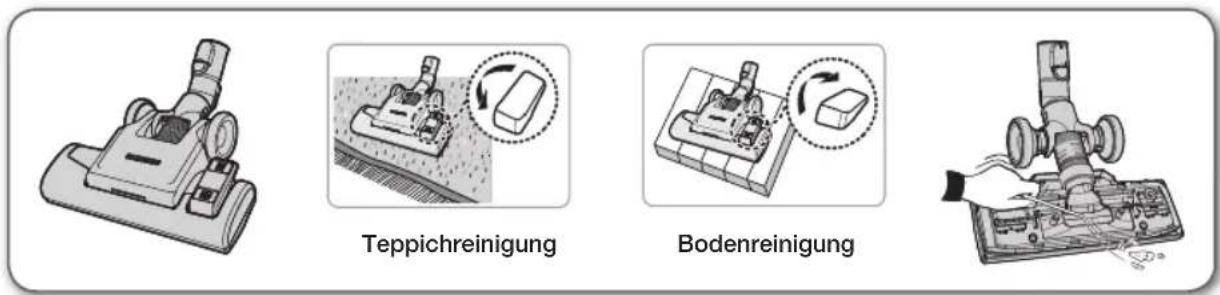
Carpet Cleaning Floor Cleaning- Adjust the inlet lever according to the floor surface.
- Remove waste matter completely if the inlet is blocked.
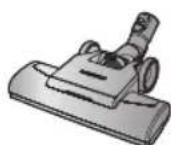
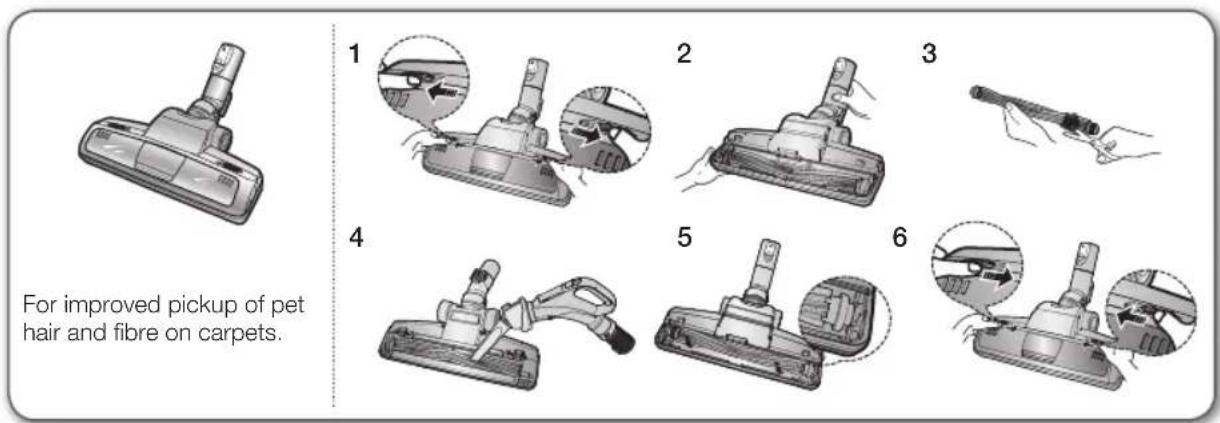
Power Pet Plus Brush (Option)
text_image
For improved pickup of pet hair and fibre on carpets.- Frequent vacuuming of hair or pet fur may cause a falling-off of the rotation due to matters tangled around.
- Push the Open button of the transparent screen cover to separate the cover.
- Remove the brushbar from the transparent screen.
- Remove waste matter such as dust and hair tangled around the brushbar using scissors.
- Remove dust inside the brush housing using a dry duster or crevice tool.
- Insert brushbar into rotating belt and assemble.
- Click the transparent screen cover back into place to reassemble.
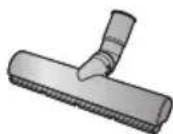
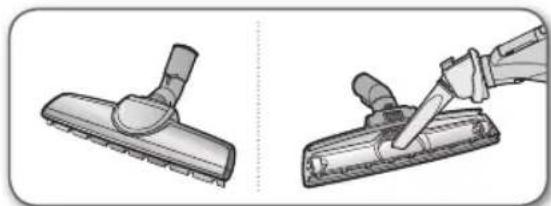
Parquet Master Brush (Option)
• Vacuum dust in wide area at once.
- Remove waste matter completely if the inlet is blocked.
natural_image
Illustration of two different manual vacuum cleaner steps: one with a brush and one with a tool, both without any text or symbols.14_ maintain tools and filter
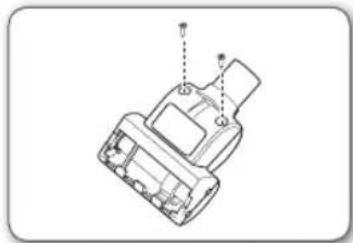
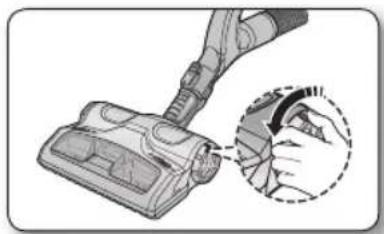
- To replace brushroll
-
If a clog is present or debris is visible, unscrew the two screws on the back of the Mini turbo brush to remove the faceplate and clear any obstructions.
-
Inspect condition of brushroll. Replace brushroll if brushes are worn down. To remove brushroll, pull up and out of end slots in nozzle housing. Insert ends of brushroll into same slots to replace.

Inspect belt to ensure that it is in good condition. If belt is broken or cracked, replace belt according to To Replace Belt instructions.
- Using at MAX. Press the MAX button to operate the vacuum at maximum intake.
natural_image
Technical line drawing of a mechanical component with no visible text or symbols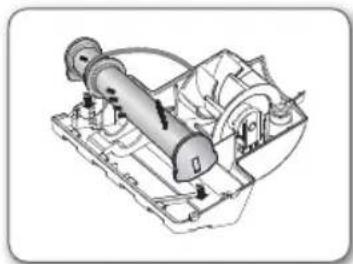
natural_image
Technical line drawing of a mechanical assembly with no visible text or symbols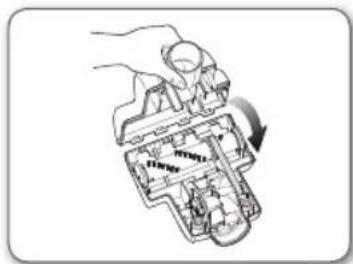
natural_image
Diagram of a mechanical assembly with a hand holding a component, showing internal components and motion direction (no text or labels)- To replace belt
-
Remove bottom plate. See figure in To Replace Brushroll instructions.
-
Loop one end of new belt around shaft of pulley.
-
Loop other end of belt around designated area for it on brushroll. Insert brushroll into slots in nozzle housing. See figure in To Replace Brushroll instructions.
-
Fit Mini turbo brush back together as described in To Replace Brushroll instructions.
natural_image
Illustration of hands using a tool to adjust a grid-patterned object into a 3D model (no text or symbols)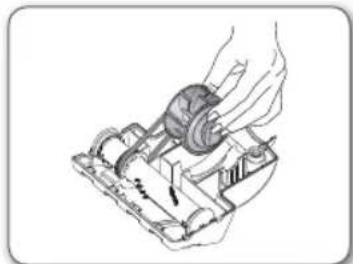
natural_image
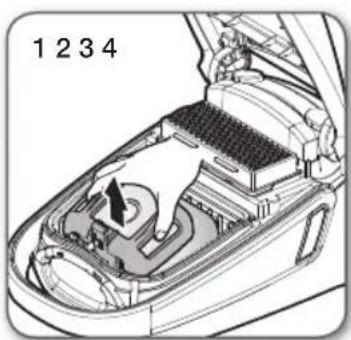
Illustration of a hand using a mechanical device to adjust or install a component (no text or symbols visible)When you notice that the dust bin is filled, use the [Dust Removal] button to empty the dust bin.
- To remove dust from the dust bin, move the [Dust Removal] button to the "Open" position.
- While the cleaner is operating (suction), use the [Dust Removal] button for this purpose.
- When done, move the [Dust Removal] button to the "Close" position.
- When the [Dust Removal] button is in the "Open" position, the suction power of the cleaner is reduced.
natural_image
Illustration of a hand using a vacuum cleaner to clean or adjust the component (no text or symbols visible)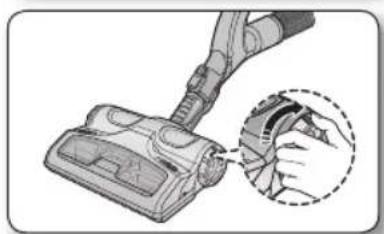
natural_image
Illustration of a hand using a vacuum cleaner to clean or adjust the air gap (no text or symbols present)- Frequent vacuuming of hair or pet fur may cause a falling-off of the rotation due to matters tangled around.
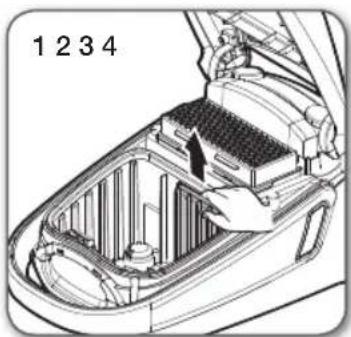
Cleaning the UV brush (Cleaning the drum) (Option)
You should check your vacuum cleaner's Brush roll regularly. Strings, hair and carpet fibers can wrap around the brush and hamper its ability to clean. To prevent this you should clean the brush.
-
Push the [Open Transparent Cover] button inward to remove the cover.
-
Use the crevice tool to remove impurities such as dust and hair from the brush roll.
-
When done, push the button outward to close the cover.
natural_image
Illustration of a hand holding a device with two views of the handle (no text or symbols visible)
natural_image
Illustration of a vacuum cleaner with attached tubing and blade (no text or symbols)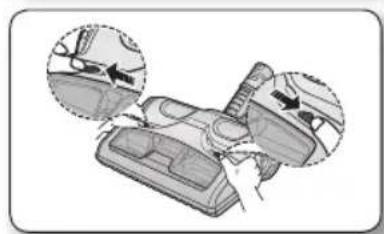
natural_image
Illustration of a cleaning or repair procedure on a device, showing hand positioning and tool path (no text or symbols)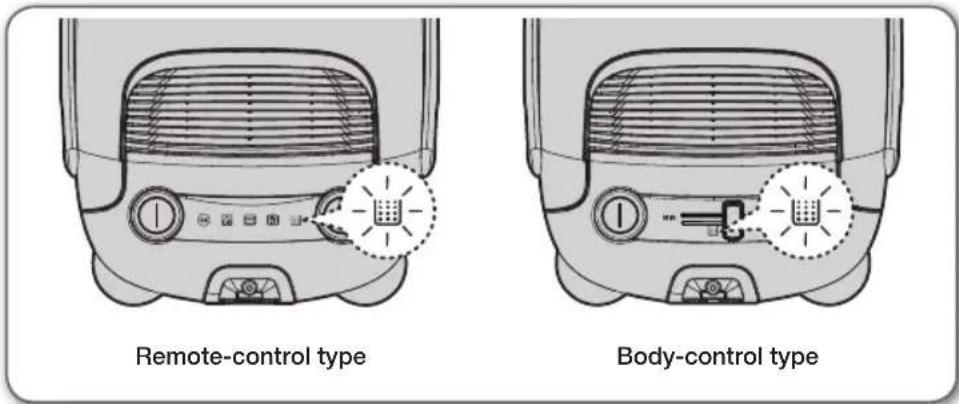
- Frequent vacuuming of hair or pet fur may cause a falling-off of the rotation due to matters tangled around. The lamp will turn red when suction is reduced. If the light comes on, please change the bag.
CHANGING THE DUST BAG

natural_image
Technical illustration of a car engine compartment showing internal components and airflow direction (no text or symbols)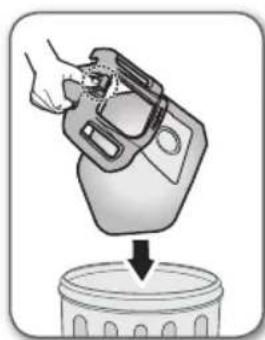
natural_image
Illustration of a hand pouring liquid into a container (no text or symbols)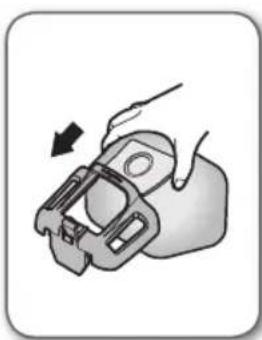
natural_image
Illustration of a hand holding a mechanical component with an arrow indicating motion (no text or symbols)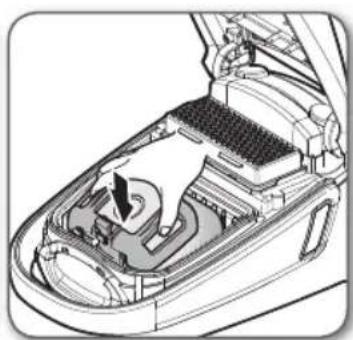
natural_image
Technical illustration of a car interior showing engine compartment and battery casing (no text or symbols)
You can purchase dust bags in the shops where you bought this vacuum cleaner or authorized SAMSUNG service center.
CLEANING INLET FILTER

natural_image
Interior view of a car showing the hood and engine compartment with a hand adjusting the component (no text or symbols visible)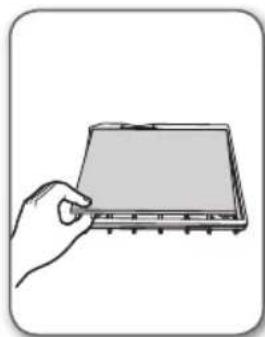
natural_image
Hand holding a rectangular electronic component (no visible text or symbols)
natural_image
Illustration of a hand placing a blank sheet into a trash bin (no text or symbols)
natural_image
Technical illustration of a car interior showing structural components and airflow direction (no text or symbols)
Don't throw away the filter.

natural_image
Technical diagram of a car interior showing internal components and airflow path (no text or symbols)
natural_image
Illustration of a hand placing a textured block onto a trash bin (no text or symbols)
natural_image
Technical illustration of a car interior showing internal compartments and a handle (no text or symbols)

- Please replace the filter 1\~2 times a year.
- When suction is noticeably reduced continuously or vacuum cleaner abnormally overheats, please clean the outlet filter. Note. Do not wash filter. If cleaning does not resolve the problem Please replace blocked out filter.
- Replacement filters are available at your local Samsung distributor.
CHANGE THE BATTERY (REMOTE-CONTROL TYPE)

- When the vacuum cleaner does not work, replace the batteries. If the problem persists, please contact our authorized dealer.
- Use 2 batteries of size AAA.

- Never disassemble or recharge the batteries.
- Never heat up the batteries or throw them into fire.
- Do not reverse (+), (-) poles.
- Dispose of the batteries property.
natural_image
Two types of hairless spray sprayers shown in exploded and assembled views (no text or labels)BATTERY TYPE : AAA Size

troubleshooting
| PROBLEM SOLUTION | |
| Motor does not start. | Check cable, pulg and socket.Leave to cool. |
| Suction force is gradually decreasing. | Check for blockage and remove. |
| Cord does not rewind fully. | Pull the cord out 2-3 m and push down the cord rewind button. |
| Vacuum cleaner does not pick up dirt. | Check hose and replace if required. |
| Low or decreasing suction. | Please check filter and, if required, clean as illustrated in the instructions. if filters are out of condition change them to new ones. |
| Body overheating. | Please check filters, if required clean as illustrated in the instruction. |
| Static electricity discharge. | Please decrease power suction.This can also occur when air in the room is very dry.Please ventilate the room to air humidity become a normal. |
This Vacuum cleaner is approved the following.
EMC Directive : 2004/108/EEC
Low Voltage Directive : 2006/95/EC
[English]
According to Commission Regulation (EU) No 665/2013 and No 666/2013
| A Supplier Samsung Electronics., Co. Ltd | |||||
| B Model | SC07F60WU SC07F60JV SC08F60WU SC08F60JV SC08F60YX | ||||
| C Energy Efficiency Class A B | |||||
| D Annual Energy Consumption (kWh/yr) | 28 | 34 | |||
| E Carpet Cleaning Performance Class | C | D | |||
| F Hardfloor Cleaning Performance Class | A | B | |||
| G Dust Re-Emission Class A A | |||||
| H Sound Power Level (dBA) 74 76 | |||||
| I Rated Input Power (W) 650 750 | |||||
| J Type | General purpose vacuum cleaner | ||||
1) Indicative annual energy consumption (kWh per year), based on 50 cleaning tasks.
Actual annual energy consumption will depend on how the appliance is used.
2) Measurements for power consumption and performance are based on methods in EN 60312 - 1 and EN 60704.
memo
![SAMSUNG SC21F60JD - [English] - 1](/content/2026/02/421849/images/cb5bd41cc41439a0d4222b51174a12aeaf2f598f17575e4e4636b1051ce6f217.jpg)