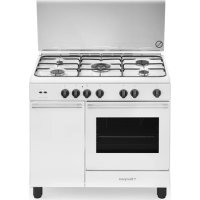
BO643MAN - Cooker BOMPANI - Free user manual and instructions
Find the device manual for free BO643MAN BOMPANI in PDF.

User questions about BO643MAN BOMPANI
0 question about this device. Answer the ones you know or ask your own.
Ask a new question about this device
Download the instructions for your Cooker in PDF format for free! Find your manual BO643MAN - BOMPANI and take your electronic device back in hand. On this page are published all the documents necessary for the use of your device. BO643MAN by BOMPANI.
USER MANUAL BO643MAN BOMPANI
Operating Instructions COOKER
Contents
Warnings 7
Technical data and specifications 23
Installation 24-25
Ventilation 24
Using the safety chain 24
Positioning 24
Gas connection 24
Adapting to different types of gas 25
Replacing the injectors 25
Minimum setting 25
Electrical connection 25
Electric ignition 25
Safety device 25
For the user 26-30
Ventilation 26
Igniting the burners 26
Igniting the gas oven 26
Igniting the gas grill 26
Safety device 26
Electrical switch-on 26
Using the gas hob 26
Using the electric hot-plates 26
Using the gas oven 26
Using the gas or electric grill 26
Using the multi-function electric oven 4 27
Using the static electric oven" 4 New " 27
Using the fan electric oven" 4 programs " ....27
Using the multi-function electric oven 6 programs 27
Using the multi-function electric oven 27
Using the rotisserie 28
Using the minute minder 28
Using the single-control cooking timer 28
Using the electronic timer 28
Using the "analogue" timer 28
Using the self-cleaning oven 29
Using oven accessories 29
Using the ceramic hob 29
Removing the oven door 29
Cleaning of the ceramic hob 29
Advice and precautions 30
European Directive 2012/19/EEC (WEEE) .... 30
European Regulation 1935/2004 30
Figures 68-70
YCTAHOBKA
NTbl
CopepkaHne
BHIMAHNE 8
TexHueckne daHHbIe
HxapaKTepeNCTHKN 31
YCTAHOBKA 32-34
LENOUKNBE3ONACHOCTN 32
BeHTnJIaunI NOMeIeHnI 32
Pa3MeIeHne 32
Пдклioуене К ra3opacpeДЛteЛьнOH
ceTN 32
HactpoIka Ha pa3JIuHbIe TIIbI ra3a 33
3aMeHa JIKJIepOB 33
PeryInpOBKa MHHMaJIbHOrO PJIaMeHN 33
IoiKJIIOUeHne K 3JIeKtPoCetn 33
3JIeKtpnueckoe 3aXnRaHne 34
PpeoXpaHHTeJIbHOe Ra3OKOHtpOJIbHOe
ycTPOHCTBO 34
HhOpMaunIy IJIy NtPeBHTeJei 34-40
BeHTNJIAIINIIOMeIeHHN 34
3aXnraHne ropeJok 34
BkJIoueHHe Ra3OBOI IyXOBKn 34
BkIoueHne ra3OBOrO rPnJr 34
PpeoXpaHHTeJIbHOe yCTPOIcTBO
ra3OKoHTpoJI 34
3JIeKtpnueckoe 3aXnHaHne 34
HcnoJIb3OBaHHe Ra3OBbIX RopeJIOK
paobouen NOBepxHOCTN JIHTbI 35
HcnoJb3OBaHHe 3JIeKTPnuecknx
KOHΦOPOK 35
HcnoJb3OBaHne ra3OBOI dyXOBKn 35
HcnoJIb3OBaHHe Ra3OBORO HJN
3JIeKTPnueckoTgPnJ 35
HcnoJIb3OBaHHe KOHBekUHOHHoI
3JIeKTPnueckoIyXOBKn 35
3JIeKTPnueckoIyXOBKn "4 New" 36
3JIKTPNUECKA DYXOBKA C NCTEMOH
BEHTNIJIaUN "4" 36
HcnoJIb3OBaHHe KOMOHNHOBaHHoH
HcIOJIb3OBaHHe IIOJIINΦYHKUHOHaJIbHOI
3JIeKTPnueckoIyXOBKn 36
HcnoJb3OBAHnE BepTeJa 36
DyXOBKn C TepMOperyJrTOpOM 36
HcnoJb3OBaHne TaHMepa 36
HcnoJIb3OBAHNe IPOrpaMMnpyIOIeRo
ycTPOHCTBa C uHΦpOBbIMuacAMN 36
HcnoJb3ObaHne IporpaMMnpyoIeTo
ycTPOHCTBa 6e3 yacOB 36
KAK NOJIb3OBATbcra "AHJIOFOBbIM" 37
HcnoJb3OBAHHe 3JIeKTPoHHOrO
IporpaMMpyuioeTo ycTpoHCTBa 37
HcnoJb3ObaHne cAmooUHuaoueHc
DyXOBKn 37
HcnoJb3ObaHne 3aunTHoro orpaXdeHH
paoboyen NOBepxHocTHIINTBI 37
KAKIIOJIb3OBATbcA“AHAJIOFOBbIM” 38
JIHTbICAMOHNIAIOHIECN DYXOBKOH 38
IIPIHADJIEXKHOCTN DYXOBKN 38
DEMOHTAX DBEPLI DYXOBKIN 38
NCHOJIb3OBAHNECTEKJIOKEPAMNUECKO
IOBEPXHOCTI JNTbl 39
CHCTKA CTEKJIOKEPAMUHECKO
IIOBEPXHOCTNI IINITbI 39
OBIIHE PEKOMEHDAUHNI INPEUYIPEKDEHHA
IIO TEXHHKE E30NACHOCTH N YXODY
3A PJIHTOJ 39
Директува 2012/19/EEC (WEEE) 39
EBPONEENCKN PEGJAMEHT No 1935-2004 .40
PncyHKn 68-70
GR ελληνικα
ERKATAA T A
Kouzivc
περιεχόμενα
PPOOXH 9
Texvika xapaKtnpOtiKa 41
EIGATAA TAH 42-43
AAYI△E∑A∑ΦAΛEIA∑ 42
AEPIEMO TOY XQPOY 42
TOnoOeTHsH 42
SYN△EESH 2TO △IKTYO YΓPAEPIOY 42
TIA THN ANTIKATAZTAH TQN MNEK
Tia to xpnoatn 44-49
AEPIEMO2TOYXQPOY 44
ANAMMA TON KAYETHPQN TON
EETION 44
TIA KAYETHPES TON EETION ME
△IATAEH A∑ΦAΛEIA∑ 44
ANAMMA TOY KAYSTHPA FOYPNOY 44
ANAMMA TOY KAYΣTHPA GRILL
(GRILL YΓPAEPIOY) 44
TIA KOYZINEZ ME HAEKTPIKH
ANAΦAΕΗ 44
PΩΣ XPHSIMOIOI OYNTAI OI EΣTIE Σ 44
\PiΩΣ XPHESIMONIOIEITAI O ΦOYPNOΣ
YΓPAEPIOY 45
ΠΟΣ XPHESIMONOIEITAI TO GRILL
YΓPAEPIOY 45
\PiΩΣ XPHΣIMOMOIOIEITAI TO HAEKTPIKO
GRILL O ΦOYPNOZ YΓPAEPIOY 45
HAEKTPIKO ΦOYPNO ΠΟΑΑΝΑΩN
AEITOYPTIΩN 4 45
HAEKTPIKOZ STATIKOZ FOYPNOZ".
4.New" 45
HAEKTPIKOZ AEPIZOMENOZ
ΦOaPNOZ"4 45
HHAEKTPIKO Σ FOYPNO
NOMANXPHEON 45
HAEKTPIKO ΦOYPNO ΠΟΑΑΝΑΩN
AEITOYPTION 46
IΩXPHESIMONIOIEITAI H SOYBAA 46
PΩΣ XPHESIMONIOEITAI O
XPONOIAKONTH 46
XPHSH TOY ANOY IPOPAMMATI
TIA TO TEAEIOMA TOY H IMATO 46
XPHSH TOY HAEKTPONIKOY
PPOPAMMATI 46
XPHSH TOY "ANANOFIGOY"
PPOPAMMATIETH/XPHEH 47
TIA NA AΦAIPEΣΕTE THN ΠΟΡΑ TOY
OOPNOY 47
EAPTMATA TOY FOYPNOY 47
TIA NA AΦAIPEΣΕTE THN ΠΟΡΑ TOY
FOYPNOY 47
XPHSH TON KEPAIKQN EETION 48
- The appliance and its accessible parts become hot during use. Care should be taken to avoid touching heating elements. Children less than 8 years of age shall be kept away unless continuously supervised.
- This appliance can be used by children aged from 8 years and above and persons with reduced physical, sensory or mental capabilities or lack of experience and knowledge if they have been given supervision or instruction concerning use of the appliance in a safe way and understand the hazards involved.
- Children shall not play with the appliance. Cleaning and user maintenance shall not be made by children without supervision.
- WARNING: Unattended cooking on a hob with fat or oil can be dangerous and may result in fire. NEVER try to extinguish a fire with water, but switch off the appliance and then cover flame e.g. with a lid or a fire blanket.
-
The internal surfaces of the compartment (where present) may become hot.
-
Remove any liquid from the lid before opening it.
- WARNING: Ensure that the appliance is switched off before replacing the lamp to avoid the possibility of electric shock.
- The appliance becomes very hot during use. Care should be taken not to touch the heating elements inside the oven.
- Accessible parts may be hot when the heating element is in use. Keep children well away.
- For direct connection to a power mains, a device that ensures disconnection from the mains must be installed, with a opening distance for the contacts that allows for a complete disconnection under conditions of category III electrical overload, in conformity with the installation instructions.
- Always disconnect the power supply before any work inside the oven or where live parts may be accessed.
- Never use the warming compartment for storing inflammable liquids or items which do not withstand heat, such as wood, paper, aerosol cans, matches, etc.
- Make frequent checks on the rubber connection hose, ensuring that it is well away from hot surfaces, that there are no sharp bends or kinks, and that it is in good condition. The hose must be replaced at the latest at the indicated date and must be secured at both ends using a standard hose clamp.
- If taps become stiff to operate over time, contact the After-Sales service.
- Wash enamelled or chrome-plated parts with soapy lukewarm water or non-abrasive detergents. A metal brush may be used to remove deposits from hob burners and flame caps. Dry thoroughly.
- Never use abrasives to clean enamelled or chrome-plated parts.
- Do not use too much water when washing the hob. Take care that no water or other substances enter the burner housing holes, as this may be dangerous.
- The spark plugs for electric ignition must be kept clean and dry; always check after use, particularly if there have been drips or overflows from pans.
- Never close glass lids until the hob burners or hotplates have cooled completely; it might shatter or crack.
-
Never knock enamelled parts or ignition spark plugs (where present).
-
The main or wall gas tap should be turned off when the cooker is not in use.
- Never move the cooker by means of the handle.
- Do not clean the glass doors of the oven with rough, abrasive materials or sharp metal scrapers, since they may scratch the surface and cause the glass to shatter.
- Do not use vapor jets to clean the appliance.
- The cooker does not have an installation stand.
- The appliance is not intended to be controlled by an external timer or a separate remote control device.
- CAUTION: The use of a gas cooking appliance results in the production of heat, moisture and products of combustion in the room in which it is installed. Ensure that the kitchen is well ventilated especially when the appliance is in use: keep natural ventilation holes open or install a mechanical ventilation device (mechanical extractor hood).
- CAUTION: This appliance is for cooking purposes only. It must not be used for other purposes, for example room heating.
No liability is accepted for injury or damage caused by poor installation or improper use of the cooker.
In case of malfunctions, particularly gas leaks or short-circuits, contact your engineer without delay.

pycckn
BHUMAHNE
- Pnp6op n ero doctynhble qactn cnHarpeBaOTcB BO BpempaobtI. CneNyET npoABnTb OCTopoXHOCTb. HeIb3a KacaTbcHarpeBaTeNbHbIX 3NeMeHTOB. DeTu B Bo3pacTe Do 8 JeTdoJxHbI HaxOHTbcr Ha pacCToHnn, IIN IOd npncMOTpOM B3POCJIbIX.
-Данhoe yctpoicTBO MOKET 6bITb NCNoIb3OBaHO DeTbMn B BO3pacte OT 8 JeT N JNuca ORpaHueHHbIMN φn3nueckmN, INJyMCTBeHHbIMN CnOCo6HoCTaMn ININ C HeIOCTaTOUHbIM ONbITOM IN 3HaHnAMyN, pRyUCOBn, YTO OHN HAXODrTcN IOd PnCMOTpOM ININ NOJyUHIn yKa3aHHe O TOM, KaK PpaBnIbHO IN 6e3ONaCHO NCNoIb3OBaTb Pnp6Op, YTO6bl NOHMATb PNCKN.
-Дети He Должны irpaTb c npnbopom.Чистka
Иоблухиване He Должны OCUшecTBЯТбС
Детьми Бe3 писмOTpa.
BHIMAHHE: octabTb 6e3 npncMOtpa
ropeyUo ropeKc c Knpamn N MacJamMo
6bItb OnachbIM MoKeT pNBecTN K NOka
HIKOgDA He nCnoB3OBaTb BODy dNra TyweHna
PiameHN / OrHa: HAdO BbIKNoCHtB yCTPOJCTBO
TuuNTb PiAmr: PO BO3MOxHOCTN HaKpbITb
Oyar Bo3RopAnHr OReynOpHbIM OdejIOM IJIi
OrHeynOpHO KnpkiKoJ.
-BHyTpEHnne NOBepXHocTn JaNka IJIa NocyDbI (ecnn IMeETc),MOryt CTaTB TOpAumN.
- YdaJIte BO3MOXHbIe XnKoCTn 13 KpbIuKInpepeD OTKpbITnem.
-BAJHO: npe3aMeHOn JAmnbl, BHyTpN dYxOBoro ⅢkaΦa, y6eINTbCRA YTO yCTPOINCTBO BBIKIOUHeHO N3 CETN, YTO6bl N36ExKaTb BO3MOXHOCTN IopaxEHN 3JIeKTPnueCKNM TOKOM.
-BoBpempa60tbpn6op cnIbHO HarpBaetc. Heo6xOIMO o6paatb BHImaHne Ha To, YTo6bI He kacaTbcra HarpBaTeIbHbIX 3JIeMeHTOB BHyTpN dYXOBKN.
-Дя BыINOLHeHЯ npAMOr NOKJIOneHЯ K Cetn HeO6XoDIMO NOIROTOBt b YcTPOJCTBO, KOToPoE 6yDet OBeCneuBaTb OTKJIOneHne OT cETn, pacCTOHaHne OTKpbITn KONTaKTOB B KOTOpOM DoJxHO N03BOJrTb N0NHe OE TKNIOUChHne B yCNoBnIx npeHapPjKeHne KaTeOpn III n B COOTBETCBN B npaBNJaMn yCTaHOBKn.
- Ipeen JIO60I OIEpaHHe IIO TexOcJyXHBaHHIO, UNCTKe HIN peMOHTy BHyTpN dYXOBKN N Be3De, TDe cyuieCTByeT ONaCHocTB COpNKOCHOBENr C HaxOJaIMMnCn IOd HApPjKeHHeM DeTaJIaMn, OTKJIOUaIe PINTy OT 3JIeKTPoCeTH.
-He HcnoJb3yIte OTdeJIeHHe pa3oIpeBa TapeJIOK HOTDeJIeHHe pa3MeIeHHra3OBORo 6aJIHOHa JIA XpaHeHHBocJIaMeHHOuXxCsR XnDKOCTeH JIN HeYcTOHNBbIX K DeIcTBHIO TemPiPyHbIMatepHaIOB, TaKHX KaK DepeBO, bymara, a3PO30JIH, XnDKOCTN I Ra3bI IOI DaBJIeHHEm, cNNUKN H T. D.
- YacTo npOBepaIte COcTOHHe IJIaHra, coeDHHJIOIIeTo IIHTy C HCTOCHNKOM IOJaHrA3a.ObpaTHTe BHNMaHne Ha To, UTObI OH bJI DOCTaTOUHO ydaJIeH OT HaPpeBaIOIIxCS CTeHOK.,MTObI He 6blIO CNbHbIX N3rNoB, nepeXaTHINJIN NOBpeXJeHn IIIaHra. Pn ObHApXeHnIOBpeXJeHn HaDo HEmdJIeHNO IPON3BeCTN3aMeHy IlaHra. B JIObOM cIyuae erO HeoBXoIMMO 3aMeHrTB YcTaHOBJIeHHbI cPoK. Oba KOHaIaHra DOJXHbI 6blTb 3aKePJIeHbI pN IOMO
H CTaHДapTHbIX rapaHTnpyuINX 6e3OJaCHOCTB 3aKHMOB.
-BcIyue,ecJINcoBpeMeHemKpaHIOJaUNra3a 6yJeT OKpbIBaTbcra TpyDom,peKOMeHNdyetc8 Bb3BaTb cIeuaJIncTaTexHHueckOcClyxkbI.
-Для OунctКн эмajироваHHbIX HJIN XpOMnpoBaHHbIX YacTeH ПЛNTbI PrHMeHЯITE TeNJIyOMblbHyIO BODU HJIN Hea6pa3HBHbIE MOHUNe CpeIcTBA.Для OунctKн IopeJIOK paOoue NOBepxHOCTH n pacceKaTeJIeN PJIaMeHN MOKHOHCIOJB3OBaTB MeTaJIINueCKYIO IIeTOUYДЯ ydaJIeHnHaKNII. AKKypaTHO BbICyUnBaIte OUnIeHHbIe NOBepxHOCTH.
-HeIpIMeHЯTe a6pa3HBHbIE MOIOIIHe cpeIcTBA IJIa YNCTKN 3MaJIINPOBaHHbIX HJIN XpOMnPOBaH-HbIX YacTei.
-ПичNTke cTapaHTecb He 3aJIHbATb BOdo pa-bOouyIO NOBepXHOCTb PINTbI. H36eaiTe nonaHa-HNRA BOblI JIN MOIOIErO cpeiCTBa B OTBepCTnI rOpEJOK.
-BcerTdaNoIepeKnBaHTeBuHcTOTe CBeUINJIaJIeKTPo3aJxHraHHa (ecJN HMeOTc) INPocuyuBaHTeHX NOCJIe KaXIOrO HcIOJb3OBaHHaJIHtBI,OCObeHHo ecJN BnpOceCCE pHrTOOBJeHHaIIHn H3 KAcTpOJb BbITEKaJa XnDkoCTb.
- EcJH nJIHTa yKOMnJIeKTOBaHa cTeKJrHHoH KpbIshKoH, HNKOrda He 3aKpbIbAaTe KpbIshKy Do Tex NOp, Noka He OCTbHyT ropeJKN IJN 3JIeKTPOKOHΦOpKn pa6OueH NOBepXHOCTH. KpbIshKa MoKeT TpeChyTB nJn pa3OHTbcra.
-He nOdBepraTe yDapaam 3MaJIHPOBaHHbIe YacTHnJIHTbI IN CBeuN 3JIeKTPo3aXHrAHHa (ecJIn eCTb).
-He6epntecb3a pyky dny nepehocanNTbl.
-Данньи npi6op He npedHa3NaeHдя
ИСПОЛБ3OBAHNЯ JIOДBMN C OрраHnueHHbIMN
ФИЗИЧЕСКИМ ИЛ N
CnocO6HocTЯM (ВКЛIOчaЯ DeTeи), Лбо
HEONbIThbIMN ИЛ ИЗнakOMbIMN C yCTpoIcTBOM,
3a ИСКЛIOчEHnEM CNYuAeB ПпIMeHнЯ npi6obpa
ПОД HAД3OpOM ИЛСLEДу INHCTpyKUЯМ Лиca,
OTBETCTBEHnHO 3a 6e3OJaCHOCtB. CpeIITb
ЧTOБы DeTи He nIgPAnC npi6obpom.
-ДячNTKINCTKJHbIXDBepeuDyXOBK CneIyETNcNoJIb3OBA Tbpy6bIeabpa3NBbIe MaTePnAblIINIOCTpbIEMeTaJIInueckneCKpe6Kn, TAK KaK OHI MOrTy NOpaPaNaTb NOBepxHOCTb IN pa3bntbCTekNO.
- He IncnoIb3OBAtB napOBbIe noInpOBuIKn Ipn YnCTKn yCTpoiCTBa.
-Дя yctaHOBKn ППТы NOДиМ He npeDyCMOTpeH.
-Прибор He npedHa3Hauen Дп BBeDEHnЯ 3KcPnyaTaCIO C NOMOUIBHeUHero TaMepa
IIN OTDeJIbHOI CNCTeMOI INCTaHcIOHHOynpabJeHn.
-BHIMAHHE:IcnoJb30BaHne ra3OBoINIITbI DnI rTOBKn PnIBOINT K O6pa3OEN3bIToUHO TEnla, BnJXHOCTN INPpOyKROpeHnB NOMEeHN, IDe OHa yCTaHOY6eINTecb, YTO KxOHHO NOMEeHnE XopoWoNPoBeTpNBaeTcA, OCObeHNO INPn BKIOueHHOIIINTe: He 3aKpbIBAIte eCTeCTBeHHbIEBEHTNJRAuONHbIE OTBepCTN, OTKpoJIteINu YCTaHOBtE YCTPOINCTBO MEXAHueCKOBHTNJLrNN (BbITJkKa).
-BHIMAHHE:3Ty pIITy MoXHO nCNoJIb3OBaTb TOnbKO dIpy npuroTOBLeHn IuI. He NcNoJIb3yIte ee dIy INbIX cIeNei, HAnPi dIra o6OrpeBa nomeueHn.
Φa6pHKa - H3ROTOBHTeJb He Hecet OTBeTCTBeHHOCTH 3a NOBpeXdeHn, HeHCnpaBHocTH n HeCCHACTHbIe CJlyuAn, Bbl3BaHHbIe HECO6JIIODeHHEmpeKOMeHdaun IOn yCTaHOBKe N 3KcIIyataun IIINTbI.
B cIyuae HeHcnpaBHOCTH NJIHTbI, ObHaPyKeHHaYTeuKN Ra3a HJIN IOBpeKDeHHaJIeKTPoPBOdkn HeMeJdJeHHO ObpaTNTecb B UeHTp Texo6CJIyXHBaHHaN H BbI3OBHTe CIIeUHaJIHCTa.

ελληνικα
PPOEOXH
-H 4uokekun kaa Ta eopqbaia Hepn TCS Zeotaivovtai kata tn diapkeia Tns xpnons. Povtiote va attoopuyete To ayyiyua twv avTiotacew. KpatnoTe Ta Taaia KaTu Etwv maKpiA aTTO n OoKEUn, EKTOS KAI AV ETTINpEITE OUVEXWc.
- Autn n ouokekun mtopei va xpnaiipointhetai aTIO
kTTaia nAIKiac 8 etuw kai avw kai a
ue eIomegaevc oWpatikec, aiOHTnpiakec n
diavontikec ikavotntecn EAAeivn EPTeipiac kai
yvwonc, u Tnv TPOUToEoN OTI EITnpoc
n Touc exouv dothei oDnyieC oxETiKa uTv
aoopaan xpnon tnc ouokekuncs kai katavoouv
touc KIVUVOU CTOU OUVETAYOVTAI.
-Ta Taaiaia 6ev npenti va naiouv u e tn ouokean. Kaapioaoc kai n ouvtnpon d ev npetie va Tpaayatottoiouvtai ato aiaia xwiic tiiBaeyn.
Technical data and specifications
- Thank you for choosing one of our quality products, capable of giving you the very best service. To make full use of its performance features, read the parts of this manual which refer to your appliance carefully. The Manufacturer declines all responsibility for injury or damage caused by poor installation or improper use of the appliance.
- To ensure its appliances are always at the state of the art, and/or to allow constant improvement in quality, the manufacturer reserves the right to make modifications without notice, although without creating difficulties for users.
-
When ordering spare parts, inform your dealer of the model number and serial number punched on your appliance's nameplate, visible inside the warming compartment (if present) or on the back of the cooker.
-
APPLIANCE COMPLYING WITH THE FOLLOWING DIRECTIVES:
- EEC 2009/142/CE Gas (30/11/2009)
- 2006/95/EC Low Voltage (12/12/2006) and subsequent amendments)
- EEC 2004/108 (radio-frequency interference) 15/12/2004
- European Regulation 1935/2004 (materials in contact with food)
- European Regulation 1275/2008
- EEC 40/2002
- EEC 92/75
-2012/19/EC (WEEE) - 2005/32/CE (Energy-using Products)
FOREWORD
- Refer only to the headings and sections covering accessories actually installed on your cooker.
Useful information concerning the energy consumption of electric ovens.
This information completes and expands on the figures provided on the technical data sticker supplied with the instruction manual.
| Oven 66 N static | Oven 66N fan | Oven 66 N multifunctions | |
| EU environmental quality mark No No | No | ||
| Time required to cook a normal load in conventional mode in minutes. | 43,2 ... 4 | 8 | |
| Time required to cook a normal load in fan mode in minutes. | ... 44,9 | 44.9 | |
| Power consumption in stand-by setting in Watts | ...... | ||
| Usable area of the dripping pan in cm2 | 1300 1143 | 1143 |
| Nominal external dimensions | Cookers 60x60 |
| Height at hob | cm. 86,5 |
| Height with lid raised | cm. 143 |
| Depth with door closed | cm. 60 |
| Depth with door open | cm. 104 |
| Width | cm. 60 |
| Usable dimensions | 60x60 static oven | 60x60 fan oven |
| Width | cm. 45 | cm. 41 |
| Depth | cm. 47 | cm. 38 |
| Height | cm. 34 | cm. 31 |
| Volume | l. 72 | l. 50 |
GAS BURNERS (injectors and flow-rates)
HEATING ELEMENT POWERS
| Gas | Burner | Injector low | flow-rate (kW) | nominal flow-rate (kW) |
| G20 | auxiliary | 77 | 0,40 | 1,00 |
| 20 | semi-rapid | 97 | 0,58 | 1,65 |
| mbar | rapid | 123 | 0,80 | 2,80 |
| oven | 130 | 1,00 | 3,00 | |
| grill | 99 | - | 1,85 | |
| ultra-rapid ec. | 145 | 1,70 | 4,00 | |
| G30 | auxiliary | 50 | 0,40 | 1,00 |
| 28-30 | semi-rapid | 65 | 0,58 | 1,65 |
| mbar | rapid | 83 | 0,80 | 2,80 |
| G31 | oven | 86 | 1,00 | 3,00 |
| 37 | grill | 68 | - | 1,85 |
| mbar | ultra-rapid ec. | 98 | 1,70 | 4,00 |
| G110 | auxiliary | 150 | 0,40 | 1,00 |
| 8 | semi-rapid | 185 | 0,58 | 1,65 |
| mbar | rapid | 265 | 0,80 | 2,80 |
| oven | 300 | 1,00 | 3,00 | |
| grill | 200 | - | 1,85 | |
| ultra-rapid ec. | 350 | 1,70 | 4,00 |
Cat.:seename plate on cover;Class 1 or 2.1
Type "X" cookers
ELECTRIC HOTPLATES
1,2 kW - High-Light hotplate
0 180 1,5 kW - Normal hotplate
1,8 kW - High-Light hotplate
2,0 kW - Rapid hotplate
210-120 2,1-0,7 kW-High-Light hotplate
265-170 2,2-1,4 kW-High-Light hotplate
bottom element 1.1 kW
top-bottom element 1.1 - 1.5 kW
circular element 2,0 kW
grill 2,0 kW
oven light 15 W
roaster motor 5 W
GB
Installation
EQUIPMENT
All models are equipped with safety device for oven and grill burners. Depending on the models, cooker may also have:
- Safety device for one or more hob burners
- Electric ignition on top burners
- Electric ignition on oven and grill burners
- Self-cleaning enamelled liners
- Oven thermostat (or tap)
Electric oven lighting - Rotisserie
- Grill burner
- Mechanical timer
- Pan retainers
- One or more electric plates
- Single-control end of cooking timer
- Electronic timer
For the LAYOUT OF HOB BURNERS see the models illustrated in figure 1 at the back of this manual.
For the ELECTRIC WIRING DIAGRAM see figure 2 at the back of this manual.
The electrical power is stated on the nameplate visible inside the warming compartment (if present) or on the back of the cooker. A copy of the nameplate is glued to the cover of this manual (for gas or gas-electric products only).
INSTALLATION
The appliance must be installed by qualified staff working in accordance with the regulations in force.
Before installing, ensure that the appliance is correctly preset for the local distribution conditions (gas type and pressure).
The presettings of this appliance are indicated on the nameplate shown on the cover. This appliance is not connected to a flue gas extractor device. It must be installed and connected in accordance with the regulations in force.
This appliance may only be installed and may only operate in rooms permanently ventilated in accordance with national regulations in force.
SAFETY CHAIN
! In order to prevent the appliance from overturning accidentally, for example in case of a children climbing onto the oven door, the safety chains MUST be installed !
The cooker is provided with safety chains that must be fixed with a screw (not supplied as accessory) on the wall behind the appliance, at the same height as the fixing point on the appliance.
Make sure that the chains are fixed in the back of the cooker, as shown in the fig. 17, in such way to be tight and parallel to the floor.! When the installation process is complete, the chains must be kept in tension!
VENTILATION
The rooms in which gas appliances are installed must be well ventilated in order to allow correct gas combustion and ventilation. The air flow necessary for combustion is at least 2m^3/h for each kW of rated power.
POSITIONING
Remove the packaging accessories, including the films covering the chrome plated and stainless steel parts, from the cooker.
Position the cooker in a dry, convenient and draft free place. Keep at an appropriate distance from walls which may be damaged by heat (wood, linoleum, paper, etc.).
The cooker may be installed alone or between two kitchen units; in this case, the sides of the units must withstand a temperature of 100 degrees C and they must not be higher than the cooker hob.
CONNECTING TO THE GAS SUPPLY
Before connecting the cooker, check that it is preset for the gas to be used. Otherwise, make the conversion as described in the section headed "Adapting to different gas types". The connection is on the right; if the pipe has to pass behind the cooker, it must be kept low down where the temperature is about 50 degrees C.
Rigid connection (see Figure 3, diagram D):
The connection to the mains gas supply may be made using a rigid metal pipe (D). Remove the hose connector and screw the rigid union onto the threaded connection of the gas train. The union for rigid connection is amongst the cooker accessories.
Connection using a rubber hose (see Figure 3, diagrams B and C):
Connect a rubber hose carrying the conformity mark currently in force to the hose connector. The hose must be replaced at the date indicated, and must be secured at both ends using standard hose clamps. It must be absolutely accessible to allow its condition to be checked along its entire length.
- Connection using a metal hose (see Figure 3, diagram D):
Make the connection using a hose which complies with national standards, screwing it onto the connector with a ring seal, which is delivered amongst the cooker accessories. - After installation, check that all connections are airtight.
- For operation with butane/propane, check that the gas pressure is as indicated on the nameplate.
IMPORTANT:
- Use only standard rubber hoses. For LPG, use a hose which complies with the national regulations in force.
- Avoid sharp bends in the pipe and keep it well away from hot
GB
Installation
surfaces.
References to the regulations covering the gas connection to the appliance: ISO 7-1.
ADAPTING TO DIFFERENT TYPES OF GAS
If the cooker is not already preset to operate with the type of gas available, it must be converted. Proceed as follows:
- Replace the injectors (see table on page 23);
- regulate the primary air flow;
- regulate the minimum settings.
N.B.: every time you change the type of gas, indicate the new type of gas on the serial number label.
REPLACING THE HOB BURNER INJECTORS (Fig. 4)
- Remove the grid, the burner caps (A), and the burners (B);
- Unscrew and remove the injector in the bottom of each injector holder (C);
- replace the injector in accordance with the table in page 23, using a 7mm socket wrench, tighten and screw right down;
- check that the system is gas-tight;
- replace the burners, the burner caps and the grid.
IMPORTANT:
- Never over-tighten the injectors;
- after replacing, check that all the injectors are airtight.
REPLACING THE OVEN BURNER INJECTOR (Fig. 5a)
- Loose the screw securing the oven bottom;
- remove the oven bottom (push back and raise);
- remove the oven burner, after taking out its fixing screw;
- replace the injector, using a 7 mm socket wrench.
REPLACING THE GRILL BURNER INJECTOR (Fig. 5b)
- Remove the burner after taking out the two screws which secure it;
- replace the injector using a 7 mm socket wrench.
IMPORTANT:
- Never over tighten the injectors;
- after replacing, check that all the injectors are airtight.
SETTING HOB BURNER MINIMUM LEVELS
If the cooker is to work on bottled gas (butane/propane), the tap by-pass must be screwed right down.
The cooker may be equipped with type A taps, with by-pass inside (accessed by inserting a small screwdriver into the rod) or type B taps, with by-pass on the outside on the right (accessed directly). See figure 6.
If the cooker is to work on natural gas, proceed as follows for both types of tap:
- Ignite the burner at maximum flame;
- pull off the knob, without using a lever against the control panel, which might be damaged;
- access the by-pass with a small screwdriver and back off by about 3 turns (turning the screwdriver anti-clockwise);
- turn the tap rod anti-clockwise again until it stops: the burner will be at maximum flame;
- screw the by-pass slowly back in, without pushing the screw-driver, until the flame has apparently shrunk to 1/4 of the maximum size, checking that it is sufficiently stable even in quite strong draughts.
SETTING OVEN BURNER MINIMUM LEVELS
If the cooker is to work on bottled gas (butane/propane), the thermostat by-pass must be screwed right down.
If the cooker is to work on natural gas, proceed as follows:
- Remove the oven bottom (push towards the back and raise);
- ignite the oven burner, turning the knob pointer to the maximum setting;
- shut the oven door;
- access the thermostat or tap by-pass (see fig. 7);
- back off the thermostat by-pass by about 3 turns;
- after 5 or 6 minutes, turn the knob pointer to the minimum setting;
- slowly retighten the by-pass, watching the flame decrease in size through the window in the closed oven door until the tongue of the flame is about 4mm long. Never keep the flame too low. It must be stable even when the oven door is opened or closed quickly;
- turn off the burner and replace the oven bottom.
CONNECTING TO THE ELECTRICAL MAINS
Before making the connection, check that:
- the mains voltage is as indicated on the nameplate;
- the earth connection is in good working order.
If the appliance power lead is not fitted with a plug, use an approved standard type, remembering that:
- the green-yellow wire must be used for the earth connection;
- the blue wire is the neutral;
- the brown wire is live;
- the lead must never touch hot surfaces over about 75 degrees C;
- replacement leads must be of type H05RR-F or H05V2V2-F of suitable size (see diagrams in fig. 2).
- if the appliance is supplied without lead, using type H05RR-F or H05V2V2-F cable of suitable size (see diagrams in fig. 2).
IMPORTANT:
The manufacturer declines all liability for damage due to failure to comply with the regulations and standards in force. Check that the appliance is correctly connected to the earth (see diagrams in fig. 2 at the back of the manual).
FOR COOKERS WITH ELECTRIC IGNITION
The correct gaps between the electrode and the burner are shown in figures 5a,5b.
If no spark is generated, do not keep on trying as this might damage the generator.
Possible causes of malfunctions:
- spark plug damp, dirty or broken;
- electrode-burner gap not correct;
- spark plug wire broken or without sheathing;
- spark discharging to earth (to other parts of the cooker);
- generator or microswitch damaged;
- air has built up in the pipes (particularly if the cooker has been out of use for a long time);
- air-gas mixture incorrect (poor fuel setting).
THE SAFETY DEVICE
The correct gap between the end of the thermocouple sensor and the burner is shown in figures 5a,5b.
To check that the valve is working properly, proceed as follows:
- ignite the burner and leave it to work for about 3 minutes;
- turn off the burner by returning the knob to off position ( );
- after 90 seconds for hob burners, 60 seconds for oven and grill burners, turn the knob pointer to the "on" position;
- release the knob in this position and move a burning match towards the burner; IT MUST NOT IGNITE.
Time needed to excite the magnet during ignition: 10 seconds approx.
Automatic tripping time, after flame has been turned off: not more than 90 seconds for hob burners; not more than 60 seconds for oven and grill burners.
IMPORTANT:
- Before doing any work inside the cooker, disconnect the mains plug and shut the gas tap.
-
Never use matches to check the gas circuit for leaks. If a specific control device is not available, foam or very soapy water can be used.
-
When re-closing the hob, check that the electrical wires of the spark plugs (if present) are not close to the injectors, so that they cannot run across them.
GB
For the user
HOW TO USE THE COOKER
VENTILATION
All gas cooking appliances produce heat and moisture in the rooms where they are installed. Take care to ensure that the kitchen is well ventilated; keep the ventilation openings unobstructed or install an extractor hood with fan. In case of intensive or prolonged use, additional ventilation may be required; open a window, or increase the extractor fan power.
IGNITING THE HOB BURNERS
- Press the knob and turn it anti-clockwise until it reaches the symbol on the control panel (maximum flame position);
- at the same time, move a burning match towards the burner head;
- to reduce the flame, turn the knob further in the same direction until its pointer is against the symbol (minimum flame position).
FOR HOB BURNERS EQUIPPED WITH SAFETY DEVICE
- Press the knob and turn it anti-clockwise until it reaches the symbol on the control panel (maximum flame position);
- move a burning match towards the burner, keeping the knob pressed right down for about 10 seconds;
- then release the knob and check that the burner remains on. Otherwise, repeat the operation.
IGNITING THE OVEN BURNER
- Open the oven door;
- press the knob and turn it anti-clockwise to the maximum flame position;
- move a burning match towards the hole in the centre of the oven bottom and press the knob right down (see fig. 8);
- look through the two holes in the sides of the bottom to check that the burner has ignited, keeping the knob pressed down;
- after about 10 seconds, release the knob and check that the burner remains on. Otherwise, repeat the operation.
IGNITING THE GRILL BURNER (GAS GRILL)
- Fit the control knob guard as shown in fig. 11;
- press the oven knob and turn it to the right until it reaches the stop;
- move a burning match towards the perforated burner pipe and press the knob right down (see fig. 9);
- check that the burner has ignited, keeping the knob pressed down;
- after about 10 seconds, release the knob and check that the burner remains on. Otherwise, repeat the operation.
SAFETY DEVICE
Burners equipped with this device have the advantage that they are protected if they accidentally go out. If this occurs, the supply of gas to the burner concerned is automatically cut off, preventing the hazards deriving from a leak of unburnt gas. The gas supply must be cut off within no more than 60 seconds for the oven and grill burners or 90 seconds for the hob burners.
FOR COOKERS WITH ELECTRIC IGNITION
All the above applies, except that the match is no longer required; a spark is obtained by pressing the button on the control panel once or more, or by pressing the knob of the burner to be ignited. If electronic ignition is difficult with some types of gas, set the knob on the low (small flame) setting.
- For cookers with electric ignition of the oven and grill burners, ensure the oven door is completely open when these burners are ignited;
- Do not operate the ignition device for more than 10 seconds when igniting the oven and grill burners. If the burner has not lit after these 10 seconds, stop using the device, leave the door open and wait one minute before trying again to ignite the burner. If the ignition device malfunctions again, light the burner with a match and call the after-sales service.
IMPORTANT:
- Difficulty in igniting burners is normal if the cooker has been out of use for some time. The air accumulated in the pipes will be expelled in a few seconds;
- Never allow too much unburnt gas to flow from the burners. If ignition is not achieved within a relatively short time, repeat the procedure after returning the knob to the off position ()
- when the oven and grill are lit for the first time, a smell may be noticed and smoke may come out of the oven. This is because of the surface treatment and oily residues on the burners.
HOW TO USE THE HOB BURNERS
Use pans of diameter suitable for the burner type. The flames must not project beyond the base of the pan. Recommended sizes:
-
for auxiliary burners = pans of at least 8 cm using the adjusting grid supplied with the cooker
-
for semi-rapid burners = pans of at least 14 cm
- for rapid and triple flame burners = pan of at least 22 cm.
N.B.: Never keep the knob at settings between the maximum flame symbol and the off position ().
FOR COOKERS EQUIPPED WITH ELECTRIC HOTPLATES
The different heat settings are obtained as follows:
- 1 = minimum setting for all hotplates;
- 6 = maximum setting for normal and rapid hotplates (with red disc);
- 0 = off.
Pans must never be smaller in diameter than the hotplates and their bottoms must be as flat as possible (see fig. 10).
IMPORTANT:
- Never leave hotplates on without pans, except when first used; leave for about 10 minutes to dry oil or moisture residues;
- if the hotplate is to be out of use for a long time, apply a little grease to its painted surface;
- do not allow spills to burn onto the hotplate, requiring the use of abrasive cleaners.
- After igniting the burner, leave the oven to heat up for about 10 minutes;
- place the food for cooking in an ordinary oven dish and place it on the chrome-plated shelf;
- place in the oven on the highest possible runners, and turn the knob pointer to the setting required;
- cooking can be observed through the window in the door with the oven light on. This will avoid opening and closing the door frequently, unless oil or fat has to be added to the dish.
N.B.: For cookers without thermostat:
- with the knob on the maximum setting = 280 degrees C
- with the knob on the minimum setting = 150 degrees C
- All other temperatures between 150 and 280 degrees C are obtained approximately by positioning the knob between the maximum and minimum settings.
Never leave the knob in positions between the maximum symbol
and the off setting ()
- fit the knob guard (see fig. 11);
- light the burner and wait a few minutes to give the burner time to warm up;
- place the foods on the chrome-plated shelf;
- insert on the highest runner;
- insert the drip tray on the bottom runner;
- gently close the oven door, resting it against the knob guard;
- after a few minutes, turn the food to expose the other side to the infrared radiation (the cooking time depends on the type of food and personal taste).
The table below "Food to be grilled" will serve as a guide.
N.B.: the first time the grill is used smoke will come out of the oven.
Before inserting foods for cooking, wait until any oil residues on the
GB
For the user
burner have completely burnt away. The grill must only be used at its full rated heat.
The appliance becomes very hot during use. Care should be taken not to touch the heating elements inside the oven.
ATTENTION: Accessible parts may be hot when the heating element is in use. Keep children well away.
| Food to be grilled Time minutes | ||
| 1st side | 2nd side | |
| Thin pieces of meat | 6 | 4 |
| Fairly thick pieces of meat | 8 | 5 |
| Thin fish or fish without scale | 10 | 8 |
| Fairly thick fish | 15 | 12 |
| Sausages | 12 | 10 |
| Toasted sandwiches | 5 | 2 |
| Small poultry | 20 | 15 |
HOW TO USE THE ELECTRIC GRILL WITH GAS OVEN
- ignite the grill heating element;
- place the foods on the chrome-plated shelf;
- insert on the highest runner;
- insert the drip tray on the bottom runner;
- gently close the oven door;
- after a few minutes, turn the food to expose the other side to the infrared radiation (the cooking time depends on the type of food and personal taste). To see table "Food to be grilled"
The grill element in the top of the oven is switched on by turning the thermostat knob clockwise to the grill symbol on the control panel.
The red light will come on to show the element is in operation.
MULTIFUNCTIONS ELECTRIC OVEN 4 POSITIONS
With different heating elements controlled using a selector switch and regulated by a thermostat, starting from the 0 (off) position, the knob can be turned clockwise to the following settings:
- symbol : oven lamp on (it will remain on even if the knob pointer is turned to the other settings).
- symbol conventional "static" oven cooking, the oven temperature is controlled using the thermostat knob.
- symbol ①ooking with fan oven, on one or two levels, the oven temperature is controlled using the thermostat knob.
symbol I. grill on;
N.B. - The yellow light switches on and off as the thermostat is tripped. Before placing food inside, allow the oven to heat up for at least 10 minutes.
STATIC ELECTRIC OVEN " 4 New "
With different heating elements controlled using a selector switch and regulated by a thermostat, starting from the 0 (off) position, the knob can be turned clockwise to the following settings:
- symbol :oven lamp on (it will remain on even if the knob pointer is turned to the other settings).
- symbol slow cooking using the bottom element; the oven temperature is regulated using the thermostat knob.
- symbol :conventional "static" oven cooking, the oven temperature is controlled using the thermostat knob.
-symblicn.
N.B. - The yellow light switches on and off as the thermostat is tripped.
Before placing food inside, allow the oven to heat up for at least 10 minutes.
ELECTRIC FAN OVEN WITH 4 COOKING PROGRAMS
With different heating elements controlled using a selector switch and regulated by a thermostat, starting from the 0 (off) position, the knob can be turned clockwise to the following settings:
- symbol uneven lamp on (it will remain on even if the knob pointer is turned to the other settings).
symbol : operation of fan.
- symbol : cooking with fan oven, on one or two levels, the oven temperature is controlled using the thermostat knob.
symbol grill on.
N.B. - The yellow light switches on and off as the thermostat is tripped. Before placing food inside, allow the oven to heat up for at least 10 minutes.
MULTIFUNCTION ELECTRIC OVEN WITH 6 COOKING PROGRAMS
With different heating elements controlled using a selector switch and regulated by a thermostat (from 50 to 250^ ), starting from the position 0 (off) the selector knob can be turned clockwise to the following positions:
symbol oven light and red warning light on
- symbol 米 米 oven light and red warning light on, operation of fan.
- symbol conventional "static" oven cooking, the oven temperature is controlled using the thermostat knob.
- symbol + cooking with fan oven, on one or two levels, the oven temperature is controlled using the thermostat knob.
- symbol grill on (on oven top element), the thermostat knob must be set at maximum temperature.
- symbol quick cooking using the fan oven, the oven temperature is controlled using the thermostat knob.
In all positions except zero (0) the red warning light and the oven light are on.
NOTE: The yellow warning light comes on according to thermostat variations. Before putting food in to be cooked, the oven should be pre-heated for at least 10 minutes.
MULTI-FUNCTION ELECTRIC OVEN
With different heating elements controlled using a selector switch and regulated by a thermostat, this oven offers various cooking methods. There are three principle sources of heat:
a) Forced heat diffusion (fan oven).
b) Spontaneous heat diffusion (static oven).
c)Infra-red rays (grill).
Starting from the 0 (off) position and turning the selector knob clockwise, the following settings are obtained:
- symbol 煮oven light and red warning light on, operation of fan.
- symbol □ conventional "static" oven cooking, the oven temperature is controlled using the thermostat knob.
- symbol cooking with fan oven, on one or two levels, the oven temperature is controlled using the thermostat knob.
- symbol on (on oven top element), the thermostat knob must be set at the maximum temperature.
- symbol infra-red cooking with fast grill, advised for long grilling: the thermostat knob must be set at the maximum temperature.
- symbol quick cooking using the fan oven, the oven temperature is controlled using the thermostat knob.
- symbol + slow cooking using fan oven, the oven temperature is controlled using the thermostat knob.
In all positions except zero (0) the red warning light and the oven light are on.
NOTE: The yellow warning light comes on according to thermostat variations. Before putting food in to be cooked, the oven should be pre-heated for at least 10 minutes.
HOW TO USE THE ELECTRIC GRILL WITH ELECTRIC OVEN
- For models with "Electric Oven" only, controlled by two knobs separately (selector-thermostat), grilling is permitted with the door closed, without using the front side. Temperatures above 180^ must not be used when grilling with the door closed.
GB
For the user
HOW TO USE THE ROTISSERIE
a)Grilling with the door open.
- fit the control knob guard as shown in figure 12.
- ignite the grill burner, or switch on the grill element;
- impale the meat for cooking on the spit and fix it in the centre of the two forks;
- insert the end of the spit into the motor drive socket;
- remove the handle from the spit;
- place the drip tray on the bottom runner of the oven;
- gently close the oven door, resting it against the knob guard;
- start the rotisserie motor by pressing the switch on the symbol.
- baste the meat from time to time. When cooked, screw the handle onto the spit and remove from the motor drive socket.
b) Grilling with the door closed.
- as above without using the knob protection as shown in fig.12
CAUTION: The spit forks may have sharp points. Handle with care.
HOW TO USE THE MINUTE MINDER (Fig. 13)
Set the cooking time considered necessary by turning the timer knob clockwise. An alarm will sound at the end of the preset time.
USE OF SINGLE-CONTROL END OF COOKING TIMER (WITHOUT CLOCK) (Fig. 14)
This allows the cooking time to be programmed. Operation:
- Move the knob to the desired cooking time (120 mins max. for the electric oven; 100 mins max. for the gas oven).
- Choose the temperature using the thermostat knob and move the selector knob to the required cooking method.
- When the programming knob is at the 0 position the oven will switch itself off. This is automatic.
- Move the thermostat knob back to symbol
- Move the selector knob to symbol 0.
N.B. If the timer is not used, the oven programming knob is to be set to the manual position .
USE OF THE ELECTRONIC TIMER (Fig. 15)
This allows the start time and cooking duration time to be programmed. If food does not need to be watched, this timer can be selected even when the user is absent. Soon after installation and at any electrical supply cut-outs the display flashes; the clock must then be synchronized again to allow programming. SETTING THE TIMER TO THE CURRENT TIME
- The current time is set by pressing the 2 buttons (COOKING TIME and STOP) and the "+" or "-" button at the same time. Any previous programmes are cancelled and the AUTO symbol flashes.
NOTE: when the AUTO symbol is flashing the oven cannot be used manually.
" AND " -" BUTTONS - Pressing the "+" or "-" buttons makes time go up or down at variable speed according to how long the button is pressed for.
MANUAL USE - Press the MANUAL button: the AUTO symbol goes out (if flashing or permanently on) the SAUCEPAN symbol lights up and the oven can be used by adjusting the thermostat knob and the selector switch according to the instructions given in the manual.
AUTOMATIC OPERATION WITH END OF COOKING AND DURATION TIMERS
- Let's use an example: it is 9:25 am; you want the oven to switch on at 11 am and switch off at 12 pm (cooking time 1 hour).
- Press the COOKING DURATION button and within 5 seconds press "+" button until it shows 01.00, adjust using "-" button if necessary. The AUTO and PAN symbols come on permanently.
- Press the END OF COOKING button and within 5 seconds press "+" button until it shows 12.00. The PAN symbol goes out but the AUTO symbol remains permanently on.
- Move the oven thermostat knob to the desired temperature, and the selector switch to the required cooking method; the red warning light comes on the oven light comes on and the timer is ready to start: at 11am the oven will come on automatically and the PAN
symbol will light up.
- When cooking is over (12 am) the AUTO symbol flashes, the PAN symbol goes out and a buzzer sounds; to turn off the buzzer press any button.
- Move the thermostat and selector knob to the OFF position. SEMI-AUTOMATIC OPERATION WITH COOKING DURATION SELECTION
- Let's take an example: it is 11:35 am and you want the oven to stay on for 25 minutes from now on.
- Press the COOKING DURATION button and within 5 seconds press the "+" button until it shows 00.25, adjusting the time with the "-" button if necessary. The AUTO and PAN symbols light up permanently.
- Turn the oven thermostat knob to the desired temperature and the selector switch to the required cooking method; the red warning light comes on, the oven light comes on and the oven starts to operate.
- After 25 minutes the oven and the PAN symbol go out. The AUTO symbol flashes and the buzzer tells you that cooking is over: to turn off the buzzer press any button.
- Then move the oven thermostat knob and the selector switch to the OFF position.
MINUTE MINDER
- Press the MINUTE MINDER button and choose the desired time using the "+" or "-" button.
- The BELL symbol lights up when the minute minder is in use.
- When the pre-set time is over, the buzzer sounds and the BELL symbol goes out.
BUZZER
- The buzzer sounds at the end of a programme and lasts for a maximum of 7 minutes.
- To turn it off, press any button.
- Pressing the "-" button without having previously selected a function the frequency of the signal changes. A selection from 3 possibilities can be made. The selected signal is audible as long as the "-" button is pressed.
STARTING AND CHECKING A PROGRAMME
- The programme starts after about 4 seconds of it being set.
- The set programme can be checked at any point by pushing the corresponding buttons.
PROGRAMMING ERRORS
- Example: at 12:15 pm a COOKING DURATION time of 30 minutes is set and a END OF COOKING is programmed in at 12:30 pm.
- The programme error can be rectified by changing the duration or the end of cooking time, or by pressing the MANUAL button and programming again.
- If there is a programming error the oven will not come on.
ANNULLING A PROGRAMME
- A programme can be cancelled by pressing the COOKING DURATION button and then the "-" button until the display shows 0.00.
IMPORTANT:
AT THE END OF EVERY PROGRAMMED COOKING OPERATION YOU ARE ADVISED TO PRESS THE BUTTON, OTHERWISE THE OVEN CANNOT BE OPERATED MANUALLY.
USING THE "ANALOGUE" CLOCK / USING THE CLOCK WITH MINUTE-MINDER AND AUTOMATIC SWITCH -OFF (Fig. 16)
PROGRAMMING THE CLOCK
Press the knob(A) and turn it to the left until it is on the right time. If the knob is turned to the right by mistake, a safety mechanism protects the clock's components.
PROGRAMMING THE COOKING TIME
Turn the knob(A) anti-clockwise, without pressing, until the hand (or dial pointer) is on the cooking time required. At the end of the set time, the oven switches off and the buzzer sounds continuously. To stop the buzzer, turn the knob(A) to the left, without pressing, until the hand is on the symbol of a bell with a line through it (or position the pointer in line with the bell).
MANUAL MODE COOKING (contact closed)
GB
For the user
Turn the knob(A) to the left, without pressing, until the hand is on the "I" symbol (or position the pointer in line with the hand symbol).
Move the hand (or dial pointer) to the symbol of a bell with a line through it, by turning the knob(A) to the right.
N.B.This clock is also available with minute-minder function only.
FOR COOKERS WITH SELF-CLEANING OVEN
The two side walls and the back are coated with a catalytic self-cleaning enamel.
Every 10-15 times it is used, leave the oven empty at full heat. The time required for cleaning depends on the condition of the oven. Some splashes tend to set hard and may clog the pores of the special coating, preventing oxidation and eliminating its self-cleaning properties. In this case, as soon as the oven has completely cooled apply very hot water to soften the deposits and use a soft brush, without detergent, to remove them. Then switch the oven back on at maximum heat for a few minutes.
(Important: never use metal brushes or abrasive substances).
HOW TO USE OVEN ACCESSORIES
- The oven shelf is designed to take normal oven dishes for cooking sweets or roasts, or is used without a pan for cooking foods under the grill.
- The drip pan under the grill is used to collect juices, which drip from the food that is cooked directly on the grill. The drip pan can also be used for cooking.
- Remember that cooking times may vary if food is cooked on two shelves at the same time.
- The oven is provided with a stop system to extract the racks and prevent them from coming out of the oven (1). As shown in the drawing, to extract them completely, simply lift the racks, holding them on the front part, and pull (2), see fig.18
REMOVING THE OVEN DOOR
The door can be removed to clean the oven in an easier way following this instructions:
1) Open the door completely.
2) Turn the two levers "B" bringing them from position 1 to position 2 (see fig.19).
3) Close the door slowly to a stop, grab it with both hands from side to side, close it further and pull it by lifting it upwards.
4) To replace the door you must follow the procedure in reverse order, insert the two hinges in their seats and open the door completely.
5) Turn the two levers "B" bringing them back in position 1.
6) Close the door normally.
HOW TO USE THE CERAMIC HOB
The hotplate power has a sequential control device which ensures excellent control of the cooking temperature.
The heat settings are from 1 to 6. The knob can be set in the required position by turning it to right or left.
On dual circuit plates, the knob only turns clockwise and the heat settings are from 1 to 6, for the central zones of the plates only. If the knob is turned forward another notch after the last heat setting, the other zones of the plates will switch on.
When one of the cooking zones is hot, the warning light E (see fig. 1) comes on; it will not go off until the temperature of all the hotplates has dropped below about 60 degrees C).
The four cooking zones are indicated by the outlines screen-printed on the hob. For good efficiency and appropriate energy consumption, only use saucepans and utensils with thick, perfectly flat bottoms (see fig.10). The diameter of the base of the pan must be at least as large as the outline marked on the hob. If the bottom of the pan does not cover the heating area, energy will be wasted. Preferably, it should be slightly larger in diameter.
Pan bottoms and the cooking surface must be clean and dry. Oth
erwise heat, and thus energy, will be wasted.
Note:
- Never cook directly on the hotplates.
- To save time, cooking with the hotplates may be started at full heat (knob on 6), turning down to the ideal temperature once the contents of the pan have heated up.
- All the hotplates are equipped with a temperature limiter which prevents them from overheating, even if a hotplate is operated at the highest setting with no pan, or if pans with uneven bottoms are used.
The table below will serve as a guide, bearing in mind that cooking times and temperatures may vary depending on the type and amount of foods cooked and personal taste.
| Knob setting | Cooking process |
| 1 - 2 Keeping foods warm, bechamel sauce, custard | |
| 2 - 3 Reheating foods | |
| 3 - 4 Pasta, vegetable soups, ragout | |
| 4 - 5 Boilings, roasting | |
| 5 - 6 Steamed vegetables, steaks, fish | |
| 6 Grilling, omelettes, lamb chops | |
CAUTION
- Do not look directly at the halogen hotplates while they are on, as the light emitted from the hotplates may be harmful to your eyes.
- The ceramic glass surface is very tough but it is not shatterproof and it may not be used to place objects upon it.
- It may be damaged if struck violently by sharp or very hard objects.
- If breakages, crazing or cracks appear on its surface, stop using it and contact the after-sales service immediately.
- Do not place aluminium foil or plastic film wrappings on the hob while it is still hot.
- Soon after installation, the hob may give off a burnt smell; this will disappear after the first few times it is used.
IMPORTANT:
Because of their height, children may fail to see the residual heat warning light. Take care that they do not touch the hob, even if the heating elements are switched off.
CLEANING OF THE CERAMIC HOB
The ceramic hob is much easier to clean than a hob with conventional hotplates. Light dirt can be removed with a sheet of damp kitchen paper.
To remove tougher dirt, use the same cleaning methods as for glass, with specific detergents. If a pan boils over onto the hob, use a spatula to remove the deposit formed.
Sugar or syrup must be removed immediately before it forms caramel on the glass. Any residues of aluminium foil or plastic film wrappings accidentally placed on the hob while it is still hot must also be removed at once.
Water marks and traces of scale can be removed with white wine vinegar. Always remember to rinse and dry the surface with kitchen paper after use.
Never use abrasive or corrosive detergents, such as oven sprays, greasers, rust-removers, powder polishing detergents or abrasive sponges. Do not allow grains of sand to be left on the hob when cleaning vegetables, for example, as they may scratch the surface. Do not slide pans with rough bottoms over the hob; they may mark or even scratch the glass.
GENERAL PRECAUTIONS
A number of fundamental precautions must be complied with when using household electrical appliances. In particular:
- The ceramic-glass hob has good mechanical strength and thus withstands small accidental knocks. If the knob is broken or cracked by a knock, do not use the appliance, disconnect the power supply and contact your dealer.
Advice in case of malfunctions
Before contacting your After-Sales Service, check that:
-
the plug is fitted properly into the mains socket;
-
the master pilot is on.
If the problem persists, consult a qualified, authorised technician capable of repairing the fault. If the oven light does not work, proceed as follows:
- Disconnect the power supply. Remove the protective glass on the back of the oven and replace the bulb.
No liability is accepted for injury or damage caused by poor installation or improper use of the cooker.
In case of malfunctions, particularly gas leaks or short-circuits, contact your engineer without delay.
EUROPEAN DIRECTIVE 2012/19/EEC (WEEE): INFORMATION FOR THE CONSUMER
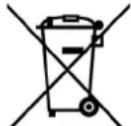
Fig. A
This information is strictly addressed to those who have a product showing the symbol below (Fig.A). This symbol is indicated on the technical data sticker (rating label) placed on the product itself. This symbol indicates that the appliance is considered as Waste Electrical and Electronic Equipment and complies with the European directive 2012/19/EC (WEEE).
Therefore this product is not to be treated as household waste. Instead it shall be handed over to the applicable collection point for the recycling of electrical and electronic equipment or it can be handed back to the retailer when you want to purchase a new equivalent product.
The consumer is responsible for a correct disposal of the product towards an appropriate collection point.
Otherwise the consumer can be exposed to a penalty sanction by laws in force for waste disposal.
Appropriate separate waste collection followed by recycling the product, the treatment and compatible environmental disposal contributes to avoid negative effects towards the environment and health and helps to recycle material which the product is composed of. For more detailed information regarding the available waste collection systems of this product please contact your local city office or contact the retailer where the product was purchased.
The manufacturers and importers will obey to their responsibility for recycling, treatment and compatible environmental disposal by participating directly and through a joint cooperative system.
EUROPEAN REGULATION NO 1935/2004 - MATERIALS IN CONTACT WITH FOOD. NOTICE TO USERS.

The symbol shown here, which appears on the packaging, indicates that the materials in this product which may come into contact with food are compliant with the requirements of European Regulation No 1935/2004.
Inside the oven chamber, food might come into contact with oven shelves, dripping pans, pastry trays, oven door glazing, rubber gaskets, rotisserie spits, and the sides of the oven itself.
On the hob, contact is possible with pan stands, burners and the hob skin.
In the food-warmer, contact may occur with the sides of the compartment.
RU
BctyIJIeHne TexHHueckHe daHHbIe I xapaKTePncTnKN
-HaHa pMa 6JiarOapHt Bac 3a BbIbOp H NOKyIky OndHO RaHHBbICOKKaueCTBeHHbIX H3deJIHH. MblrpoarHo HaedeemCRA TO B BaIIHX pykax Hn HnHnTb6yDyT yHKuONHPOBaTc MaKCHMaJIbHOH OTdaueH HnHnLyUHMn pe3yJBtATAMn, ONpaBdbBa BCE BaIH NOnDAHH. C3ToH nEJIbTO npeJlaRaem Bam BHIMATEJIbHO IPOHTaTB HAcTOniuee pyKOBOdCTBO H nPiH-DepXHBaTbCerTex erO YkaaHH, rPepeH nDeT O npHbopax H ChTeMax, KOTOpbIMn OchAaHeHa BaIIa IIHTa. FApNka -H3-rotOBHTeJIb CHMaeT C Ce6B BCaYIO OTBeTCTBEHHOCTh 3a IOBpeJeHH, HeNCnPabHOCTn H HeCuACTHbe CnyauH, Bm3BaHHbIE HecO6JIIOHeHHem PekOMeHaaH No YcTAIOBKe H KcIIpyTaHHIJIHTb.
TTO,TObBi BbIyckaTb IINTbB COOTBeCTBHN C CO BpeMeHHbIMn TexHOJOrHueCKHMn peHHeHMn H/INn DnIe NOCTOaHHo IOBbIeHn KaueCTBa Haunx H3JeHH, Fa6pHKa OCTaBJIeT 3a CO0B npaBO BHeCehn KaKnx-JHbO H3MeHeHH DaKe 6e3 npEaBPHTeHbHO TpeDynpExdHn, YTO, OHaKO, He BBiBaet Ipoblemn 3atpydHeHH nPn EKnlyaTaAHN.
- Ecln Bo3HKnHET Heo6xOdHMOcTb 3aKa3a 3aNuaCTe, HAO CTeJIaTb 3aIpc BaIeMy npOdaBuy, Tde CJeIyEt Yka3aTb HOpem MOeJIN HOMep cepHH IINTbI, "PpOHTAMNoBAHHBe Ha fapHCHOH OIO3HaBaTeJIbHO TabJIHKe. 3Ta TabJIHka MoKet 6blb pacNoJIOXeHa BHyTPn OTJeJIeHNpa3OrpeBa TapeJOK (ecJIHecTb) HIN HA 3aDHei CTopoHe IINTbI.
-ΠιΟΤΑ COOTΒΕΤΥEΤ HOPMaTHΒΑΜ
- CEE 2009/142/ (30/11/2009)
-2006/95/CE no Hn3KoMy HnprjKeHIO (12/12/2006 nnoCneJeUOJIe nonpaBkn) - CEE 2004/108 (po urovn[ radiopomex - 15/12/2004)
-EBPONEENCKNIPEIAMEHT No 1935/2004 (kontaktirovanie
s pijevmi produktami)
-EBPONEECKN PEGLAMEHT No 1275/2008
-CEE 40/2002
-CEE92/75
-2012/19/EEC (WEEE)
- 2005/32/CE (Energy-using Products)
TIORCHEHNE
B HactoHem pyKOBOCTBE IIpeCTaJIHOIT HHTePec TOJIbKO Te npaparpafoI nn pa3JeI, rDe roBOpHTbcO pnp6opax, KOTOpBMn Ochauheha Baia IInTa.
Дл ONреленя Даты Виуcka ппбора провьтse 9-3нчнь серньг Homep, уka3aHHь Ha cepe6pucto TnkeTKe, Ha pykoBoDCTBE NO 3KcPnyatauun Ha Camom pnpbope:
AABBCDDD
T30BbIE TOPEJKN (KHKJepbH MOnHOCTN)
KaT. cmOTPH a6pHHyIO TaJIHy KaHO
Klaacc 1 Hnn Xe 2-1
CTENHbTENJIN3OJIaUNX
JIETKTPNUECKNE KOHΦOPKN
145 1,2 KBT-High-Light KOHΦopKa
0180 1,5 KBT-ObuHaKoHΦopKa
1,8 KBT High-Light KOHΦopKa
2.0KBr- bictpa KOhfoPka
210-120 2,1-0,7 KBT-High-Light konfopka
265-170 2,2-1,4 KBT-High-Light KOHΦopKa
MOIIHOCTb 3JEKTPHUECKO DYXOBKN
cnpoTHBJIeHHe npda 1,1 kB
COIPOTHBJIeHHe CBOda 1,1-1,5 KBT
kpyROBOe cOnpOTHBJIeHHe dyXOBKn 2,0 KBT
TnJIb 2,0 KBT
OCBeHHeDyXOBKn 15BT
KOMILIEKTAUHA
IIINITbBCexMOeJIeYKOMIIIEKTOBaHbI INpeOxpaHtEJbHbIM yCTPOIcTBOM IJI ROPEJOK DyXOBKN IprnJI.KpOME TORO, B 3aBHCMOCTNOTMOeJIH, B KOMIIIEKTAUIOIINHTbBXOINT:
IpeoxpaHHTeJIbHoe ycTPOHCTBO Ra3OKHTPOJIA OHOH HnHECKOJIbKHX TOpCIOK pa6OueH IOBcpxHOCTN IINTbI
3NeKtpnueckoe 3aXHraHHe ropeJok pa6oueH IOBepxHOCTN
-3Jektpnueckoe 3aKnraHne ropeJOK dyXOBKn rpnJIA
CaMOOuHIIaIIOeec3MaJIbPOBaIIHoe NOKpbTHe cTeHOK dyXOBKn
- TepMoperyJrTop (HJI KpaH)ДЯ DxyOBKN
3JKeKTPnueckoeOCBeeHHeIyXOBKN
-BepTeJ
-TopeJkaIJIpyIJIa
-MexaHueckn TaImeP
-3aunTHoe orpaXdeHne paOoueN NOBepxHOCTN
OHa HHe HeCKoJIbKO 3IEKTPnueckHX KOHΦopOK
- PpOpaMMpyUoee yToCTBO dYXOBKn C uHΦpOBbMn YacAMN
IporpamMHy0uee yctpoHCTBO 6e3 qacOB
-3JNEKTPoHHoe nporpamMmpyuOee ycTPOHCTBO
PACIOJIOXEHNE TOPEJIOK HA PAOUEH IOBEPXHOCTH CMOTPN MOeHN Ha pHCyHKe 1 B KOHHe HAcTOIeRO pyKOBOIDCTBa
CXEMYIOJIKJIHOEHINK3JEKTPOCETNcmotpnHa pncyHke 2B KOHHe HAcToHrero pyKOBoIDCTBa.
3Jektpnueckma MoHoctb yka3aHa Ha OTO3HaBaTeJIbHOI TaJIuKHN.3Ta TaJIuKMA MOKeT bHTb PaCIOLOXeHa BHyTPN OTJeIeHn pa3OrpeBa TaPeJOK (ecJN eCTb) Hn Ha 3aDHeC CTPOHE IIHTb. OINH 3K3cMIJIp 3TOI TaJIuKHN HAKLeeh Ha 06IOKKe HAcToIeero pyKOBOdCTBa (TOJIbKO IJIra FA3OBBX INI KOM6HHPOBAHHbIX IIHT).
Pone3hble CbeHnB ObIaCTn 3HepronOTpe6JIeHn 3JIeKTPnuecknx dyXOBOK.
3TN CBeHn 3aBepHaOT n DOONHrOHT HOpMaIIO, npBHeHHyHO Ha HkNeKe C TexHueCKMm DaHHbIMN B pyKOBOCTBE NO 3KcNJyatauIN.
3AMEHAKKJIEPOB TOPEJKN DYXOBKN (pnc.5a)
- OtkpyTHe BnHT KpeJIeHnI dHa dyXOBKn.
-CHHMMTE DHO DYXOBKN (CDBHRAEero Ha3aI INIOHMMA)
CHMMHTe RopeJky IyXOBKn, PpeBapHTeJIbIIIO OTKpyTHB KpeIIN Hc e BnHT
3aMeHHTe KHKJep, HcnoJIb3yra TOpueBOH Tpy6uAtbI KJIouHa 7 MM.
3AMEHA KIKJEPOB IOPEJKIIN PPHJ (pnc.56)
CHMMHTe Ropejky, PpeBapHTeJbHO OTKpyTHB IBa KpePnIHe ee BnHTa
-3aMeHnTe JHKJIep, HcnoJIb3yra TOpueBOI Tpy6uATbI KJIou Ha 7 MM.
PEKOMEHDAUHH
- Hp ycTaHOBKe KHKJIepOB HNKoRda H3JIHIIHe He 3aTARHBaITe HX KJIIOYOM
IocJIe 3aMeHb BCEX XHKJIepOB IIPOBepbTe Hx Ra3OHHeINPOHHua EMOCTb.
PEYJHPOBKA MHHMAJIbHOFO IJIAMEHN FOPEJOK PABOeH NOBEPXHOCTH IINTbl
B cIyue, ecJIN PINTa FyHKUHOHpyeHa CxKHeHHOM rae (5/11), peRyJInPOuHb BnHT DoJIKeH 6bITb 3aKpyeH Do yIopa. IINTa MOKeT 6bITb OCHIIeHa KpaHAM TTHA «A», C yCTaHOBJEHHbIM BHYTPn peRyJInPOBOuHb IM BHTOM (peRyJInPOBaTb KOtOpbIM MOKHO npN NOMOHN MaJIeHbKOI OTBePTK Uepe3 CTepKeHb) HJN TTHA «B» C HApYKHBIM peRyJInPOBOuHbIM BnHTOM C nPaBOH CTopoHbI (ero MOXHO peryJInPOBaTb HeNOCpeCDTBeHHO), CMOTPN pnc. 6.EcJIN dJIyFyHKUHOHPOBaHHI PINTb NCIOJIb3yeTcH aTypaJIbHbI ra3,
TO He3aBHCNOOTINa KpHa DeIcTBoBaT CJeDyUHMMO6pa3OM- 3aKHTTE TOpEJKY H yCTaHOBHTE MaKCHMaJIbHOC IIJaM.
CHMMHTe pyKy peRyJrTOpa,NotHbYB eHa c6b,He HaKHMaj HA IepcndHIOI HaeJIb IIITb BO H36KxHHe CC IOBpeKdHH.
IIpH NOMOIMMaJIeHbKOI OTBepTKH OTKpyTHTe peRyJINPOBOHbI BnHT IIpH6JIH3NTcJIbHO Ha TPh OOBota (BpaAa OTBCPTKy IpoTHB YacOBOI CTpeJIKH).
-IOBepHnTe eue pa3 cTepeKHeb KpaHa npOTHB uacOBn CTpeJKN Do ero 6IOKnPOBKn. B 3TOM cJIyae 6yIDeMaKCHMaJIbHOe IIJaM
- OueHb MeJleHHO 3akpyTHTe peryJInpOBOuHb BnHT, He HaXHMaHa OTBepTKy, IO Tex IOP, POKa PImaHE Ye MHeBHTcra Ha 3/4. IIpn 3tOM ObpaTHe OCOboe BHHMaHHe Ha To, YTObI PImaM6blIO DOCTaTOUHO yCTOINHBbIM dAke IIpn YMepeHHOM IOTOKE BO3dyxa.
PERYINPOBKA MNHIMMAJIbHOI OIIAMEHN IOPEJKN DYXOBKN BcIyueae,ecn IIHTa FyHKUOHHPyeHa cKHXeHHOM ra3e (7/II), peYINPOUHBI BNHTIOJKeH 6bITb 3aKpyeH Do ynpa. Ecn IJIa FyHKUOHPOBaHNAI NcIOJIb3yETc HAtypaJIbHbIra3,TO He3aBHCHMO OT THIIa KpaHa peYJINPOBKA MHHMaJIbHOI OIIaMeHH BbIIOJHReTc CJeDyIOHM Obpa3OM:
-CHMMTeDHOdyxOBKN(CdBHraerOK3aHHeiCTeHKeI NOAHHMa).
-3aKHTe ropekky dyxOBKn H ycTaHOBHTe yka3aTeIb peryJn-poBOOHpyuKN BIOLOKeHHe MaKcMaJIbHorO IJaMeHN.
-3akpoTe DBepuDyXOBKN.
HaHnte peryIHPoBOuHbBnHT TepMOperyJrTopa HIN KpaHa (pnc.7)
-OTKpyTHTe peRyJINpOBOUHbI BHN TpH6JIN3HTeJIbHO Ha TPN O6opota.
Ucpe35-6MHHTyCTaHOBHTeYka3aTeJbpyIKH BIOJOKEHHMHHMaJIbHOrOIIJaMeHN.
MeJIeHNO 3aKpyTHTE peRyIINPOBOHbBHT,Ha6JIOaYMeHbIeHHe IJaMeHH uepe3 CTeKIO B IBepue DxyOBKn (DBePua3aKpbTa) Do Tex IOp. NOKA KOHYc IIJaMeHH He yMeHbIHTcdo4 MM. nPi6JIH3NTeJIbHO. He peKOMEHyEeTcCJIHIKKOM yMeHbIIaTbIIaM. OHO dOJIxHO 6bITb CTaBHbHM DaKe npn bIcTpOMOTKpbIBaHH H 3aKpbIBaHH IN DBePbI DxyOBKn.
-BbIKIOHTe ropeIky H yCTaHOBHTe IHO dyXOBKn Ha MeCTO.
IIOJKJIOUeyHNEKJIEKTPOCETN
PpeKdyeHmIOdkHouaTb HHTy K 3JIeKTPocetH, HeoXoHMO y6eHTbcra, YTO:
HaipraKeHHBcHHeCcH COOTBeCTByET npaMeTpam, yka3aHHbIM Ha a6pHIOHO OIO3HaBaTeJIbHO Ta6JHKe pO3eKa 3a3eMJIeHHA yHKIOHHpyeT
EcJIN NJIHTa YKOMIIJEKTOBAHa CeTeBbIM IHHypom 6e3 BNJKH, TO JIIOIKJIIOUeHn MOJHO HcNOJIb3OBaTb CTAHApTHyIO BJIky. IPhN 3TOM HeoXOHNMO YHNTbIBaTb CJeIyIOHee:
-JeJITo-3eJIeHbI IPOBOJIOJIKeH HcIIOJB3OBaTbcra JJIa3aEMJIeHHI
-罗ybo npoBOd JnHeITpaJH
-KOpHHeBbI npOBd IaHaHapJxKeHHcETN
- HYP He JIKeH CoPnKacatbCra Co CTeHKaMn NHTbI, HarpeBaIOIIIMMCs 60Jee 75^
-BcIyuae 3aMeHbI ceTeBOrO IIIHypa HcNoJIb3OBaTb IIIHyp TnHa HO5RR-F HINHO5V2V2-F IOxOJrero CeueHn (CMOTPH CXEmbl Ha pnc.2).
-ecnPiHTa NoCTaBHeHa 6e3 cTeBOrO uHpya, npNIOKIOUeHHNcnoJb3OBaTB uHyp Tnna HO5RR-F HIN HO5V2V2-F NOxOJaIIIErO ceueHHa (CMOTPN CXEmb Ha pnc.2).BHIMAHNE:
IPOH3BOIDHTeJIb He HecET OTBtCTBeHHOCTH 3a IOBPExKeHHN, Bbl3BaHHbIe HECOBIODeHHem BblweyKa3aHHbIX Tpe6OBAHHn I DeHCTByIOHIN XpABNJ IO TexHNIke 6eONacHOCTN PnIPoDKJIOUeHHN IIINTbI. O8a3aTeJIbHO pOBepbTe, YTO pPOBOd3a3cMJIeHHN IIINTbI IpaBnJIbHO COeHNCH C CcTbIO 3a3cMJIeHHN (CMOTPH CXEMbI Ha pnc.2).
RU
YCTAHOBKA HHΦOPMAUЯДЛЯ NOTPEBNTEJIEN
IJIHTbI, OCHAIIEHHBIE CNTTEMOJ 3JIeKTP03AJKIAGHNA ToHbI paCCToHHa MExy 3JIeKTPoDOM H RopeJIKOYka3aHbI Ha pnc.5a,56.
EcH Nckpa He Bb6nBactc, He yIOpCTBynte, T. K. MoKHO IIOBpeDHTb reHePApOp.CHeTeMa 3axHHaHHaMOKeT He cpa6aTbIBaTB IO CJeDyUOHNm IIpHnHaM:
BJaKaHa, HeHcPpaBHn HJ3aPra3HeHHa CBeHa.
- HenpaBnIbHO yCTaHOBJeHO paCCToHHe MeXy 3JekTpOdom I ropeIKoI.
- TOKONPOBODAHINIPOBOIDOK CBEH NOBpeKJEN IIN OROJeH
HCKPOBOI pa3pA IYXOANTB 3eMJIIO(BDpyHX YAcTAX NJIHTbI) - NOBpeKdEeHreHePAToP HJIMMKNPOBbIKIOuAteJIb.
-CKONJIeHHe BO3dYxa B Tpy6oNpOBOaX (OC6eHHo IocJIe JINTeJbHOrO NepHOa HEnCNoJb3OBaHHn PINTbI). - HenpaBnIbHO COCTaBHeHa Ra3OBo3DyHna CMEcb (HenpaBnIbHOe RopeHH)
IPEDOXPAHNTIELbHOE YCTPOINCTBOA3OKOHPTOJI
IpaBnJbHoe paccToHHne MeKdy KOHtAMN yBCTBHTeJIbHO 3JIeMeHTa TepMonapb H RopeJIKOINoKa3aHO Ha PHC.5a,56. JIOKHTPOJyHKUHOHPOBAHN KJAnaHa ra3OKOHPToJr DeHCTBOBAtb CJeDyIOHM Opa3OM:
-3aKHTe ropeJky H OCTaBbTe ee BKIOueHHOIN PnHOH3HTeJbHO Ha 3 MHHyTbl.
- BbIKIOHTe ropeKny H NOBepHnTe pyky peryJrTopa B noJIOKeHHe 3aKpbITo, oOb3HaueHHoe cHMBOJOM (
Yepe3 90 ckyH B Clyuae KOHTPOJRA RopeJIOK paBOueH IOBepXHOCTH Hyepe3 60 ckyH B Clyuae RopeJIOK dyXOBKN rPHJIA IOBepHyTb pykY B IIOJOKeHHe OTKpbITo
-OctabBte pyky B 3OM IOLOKeHHH IN PnHbIN3HTb 3aXKeHHyO CCINuKy K ROpeJIke: FOPEJKA HE DOJKHAA 3AXEUYBCr. Bo Bpem 3axHraHHN Tpe6yIOTCg PnHbIN3HTeJbHO 10 cKHyI JIAB BO36yKdEHMaMHTHa.
KJaanrtaOKoHTpOJIcpa6aTbBAeT aBTOMaTHueckn NocJe BIKIOHCHNIIaMeHH He 60JIce cHcpe3 90 cKeYHd JIra IopeJok paOouen IOBepxHocTH IIHTb H uepe3 60 ceKyHd JIra IopeJok dYxOBKn H prHJI
IPEdyIIPEXJDEHNE
- Ipeed JIO60I onepaunHn no uHCTKe HIN TeXOBcJyKHBAHNOOTKIOUaHTe IIHTy OT 3JIeKTPOCCTN H 3aKpbBaHTe KpaH NOdaHra3a.
- Pn IIOKJIUOCHH NIIHTB K HCTOuHHky IIOaun Ra3a He IPOBepaTe repMeTHNHOCTb CTbIKOB IIINOMOIINIJaMeHH. ECLNB Baaem paCIOpRAKeHH HET CIEcuaJIbHbIX IIPIb6OpOB JIA KOHTPOJRA Ra3OHePiPOHHaEMOCTH, MOXHO HcNOJIb3OBaTb NeHy IINKOHcHTpHPOBAHHyMbIbHyO BODY.
- YcTaHABINBAH Ma MecTo pa6OuYIO NOBepXHOCb IINTbI y6eHNTEcb, UTO 3JIeKtpnueckHe npoBOKn CBeuei (ecJH HMeIOTC) He cOpnPKacaiOTcC KHKJIepaMH H He NepeKpbBaIOT HX.
KAKNCIOb3OBATbIHTY
BEHTINJIAYI NOMEUEHHJ
3KJIyataaHra3OB0I IINTb COIOPOBQJaETCBIeJcHHeM TeNIOITb H BLaXHOCTNB NOMeHHH, TDe OHa ycTaHOBJeHa IIOTOMy, HeoXoHmO ObecneuHTb BEHTNJrAIO NOMEeHn I IOIDepXHBaTb OTkPbITbMH ecTeCTBeHHbIE BeHTNJrAIOHbIE OTBepCTHn IIN yCTaHOBHb BtTgKHO 3OH.T.B Clyae dIHTeJbHO r HHTEHCHBHO HOIOJB3OBAHn IINbI Bo3HNKaET HeoXoHMOCTb DOnIOJHNTeJbHO BEHTNJrAUN, KaK, HApHMeP, OTKpblb OKHO HIN YBCJHNTb MOHOCtB BBIHyKeHHoB BEHTNJrAUN BBITXHO 3OHTa.
BKIOUOHEHIEIPOEIOK PAOOUENIOBEPXHOCTN IINNTBI
-HaKMHTe HIOBepHHTe peryIHHPOBOUHyO pyky IpoTHB qacOBOH CTpeJIKN YcTaHOBHb OTMeTKy HAIpOTHB CHMBOJa 06o3HaueHHOR Ha nepeHHe NaHeJn PJIHTb (NOJIOKeHHeMaKCHMaJIbHO r OJIaMeHH).
-3aTeM NOHHeCHTe 3aXKeHHyIO cNHyKy K RopeJke.
IyMeHbHeHHIaMeHHIOBOpAHBaTe pyKy B TOMKeHaHpaBHeHH,ycTaHaBJIHBAor OTMeTKy HaNPOTHCB CHMBOJIA (IOIOXeHHe MHHMaJIbHOrO IaMeHH).
BKJIIOUeyHNE TOPEJOK PAOQUEH IOBEPXHOCTH, OCHAIIEHHbIX KJIAPAHOM FA3OKOHPOJIA
-HaxMMTe H NOBepHHTe peryIHPoBOHyO pyky npOTHB acBOON CTpeJIKH YcTaHOBHTE OTMeTKy HAIpOTHB CHMBOJIA 0603HaueHHOr Ha nepeHHe NaHeJn PJIHTbI (NOLOKeHHe MaKCHMaJIbHOr OJIaMeHH).
-3aTeM NOdHeCHTe 3aKxKeHHyO cHnUky K rOpEJIke H HaKMnTe Ha pyuKy Do yIopap H depXHTe ee IpnKaToB TeueHHnp6JN3HTeJIbHO 10cekyH.
OTNCTHTe pyuKy H y6eHNTecb, YTO Ropejka 3aXrJAcB. B npoTHB Hom cIyuae NOBTOPHTe BCE chauJa.
BKJIIOUOHEHNEFOPEJIKN DYXOBKN
-OTKpoTeDbepuydyXOBKN
HaKMHTe Ha pyky HIOBepHHTe ee IPOTHB yacOBn CTpeJKN DO NOLOXKeHH MaKCHMaJIbHOrI OJaMeHH.
-3aTeM IIOHHeCnTE 3aXKeHHyO CINHcy K cHTpaJIbHOMy OTBepCTHO Ha dHe dyXOBKn H aKMnTe Ha pyky do ynpa (pnc.8).
He OITyckar pyuK y6eHTecb TOM,TO TOpEJa 3aXJlaCb, HaJIIOaI PIIaMYepe3 DBA BOKOBbIX OTBepCTHn Ha IHe DYXOBKN
-ПибЛИЗNTeJIbHо uepe3 10 cekyHД OTIyCHTe pyuKу I npOBepbTe. He NOTyXJa JH ropeJka. B IIpoTHBIIOM cIyuae NO BTOpHTb BCE CHaJla.
IPINHAJIIEKHOCTN DYXOBKN
- Ha peWETky DnyxOBKN CTABTcR NMEIOUHecB INPOdaKe npOTHBN IIN PnIROTOBJIeHH CJaIKHX 6JIO, KApKOrO H3 McaH T.I Mco MoKHO paCNOJOXHTb PpMo HA peWETke, - TaKoi cNoocob Ha3bIBACTcR MCo HO rPJIe.
- PpOtnBHeB pa3Me7aETC NOI peWetKoN i CnyKNT DnC60paCTeKaIOUeRO COKA pNtroTAbNBAeMbIX npOdyKTOB Ha peWETke. PpOtnBHeH MoXHO NcNOJb3OBaTB NdJI rOTOBKn 6nO.
EcINBapkaIPOH3BOIDTCB DYXOBKE CCHCTEMOBEHTNJIaHH TO MOKHO OIOHBpeMeHHIO NOMEcHTb DBe peJETKN. IPN 3OM HJHKHO IMETB B BNy, YTO ECJIN IIPOyKTb OTJINaOTcR Mckdy CO00I IO KAueCTBy H KOJIuYeCTBy, TO, eCTeCTBeHHIO, H CpOKI FOTOBHOCTMHoYt 6bITb pa3HbIMH.
- DxyxOBoIuKaΦ OChaueH CnCTeMo KpeIJIeHrpeWetOK, YTO3BOJReT N3BNeUb Ix, He N3BNEKar Ix NOIHOCTbIO I3 DxyOBOIuKaΦa (1). TTo6bl NOnHOCTbIO N3BNeUb peWetKn DOCTaTOOHnpINODHrTB NOTAHyTB peWETKN BnepEi, KaK NOKa3aHO Ha pUCyHKe(2), cm. pnc. 18
DEMOHTAX DBEPLbI DYXOBKN
BBePca MoKet CHIMATbCn Dn8 60Jee yDObHou OChTKn DyXOBKn, BbINOJIHRA CNeDyUOuNE INCTpyKun:
1)Полноctью OTKpoite Дверу.
2)Повернite Два рьчara "В",пенияnxи n3 пооженя 1 В поожене 2 (сm. рис. 19).
3) MedenHno 3akpoTe DBepu yO ee octaHOBN. Bo3mnte ee cnpaBa n CneBa o6eMMpyKaMn, 3akpoTe ee eoONHTeBHO n CHIMITE ee, NOHNMA BBepx.
4)Для установки Дьерць Ha MecTo Heo6xOIMOBbINONH pnoceDpy DeMOHTaxa B O6paTHoN NocNeIOBaTeJIbHOCTN, BCTaNTb DBe netTN B COOTBeTCTByUOuNE rHe3Da N NOHOCtBu OTkpbl TB DBePuy.
5) NOBepHnTe Dba pbYuHaRa "B", cHOBa yCTaHaBJIbBA nx npOxKeHne 1.
3KpOte DBepu O6bUHbIM O6pa3OM.
RU
HHΦOPMAUJIЯДЛЯ NOTPEBNTEJIEN
NCSIOJIb3OBAHHe CTEKJIOKEPAMMHECKOINOBEPXHOCTNIITbI
MoHocTb 3eKtpnuecknx KOHOpok perynpyetcnoCteOBaTeBbIM yCTpoiCTBOM, ObecneHbAIOUM OTNHyOperynpoBky TemnepaTybl npiroTOBHeHra. Pa3NHyBe yPOBHn Tepla rpaDynpoBaHbI OT 1 Do 6. Pyka MoKeT 6bItb yCTaHOJIeHa Ha JeKaemyO OTMeTKy, NobopaHBAe eBnPaBO nn BnEBO.
Дя KOHΦOPOK C DOBHyIM KOHTypOM pyka BpaaetcT OTObKO NO YACOBONCTpeNKE; INTHECNBHOCTb TENNA rpaDynpoBaHa OT 1 Do 6 NIIbToJbKO DnEHTpAIBhIX 3OH KOHΦOpOK.
Pn nocneyuouem ueyke Bnepei noce nocne Hero dene HnBKNIOUATcOCTaHbIe 3OHbI KOHOpOK.
Ioka Onda H3 3neKtpnuecknx KOHcOpok ropay, CnHaNbHaJ lamna E (cmToPn pnc.1) BkNIOuHTcN He OTKnIOUHTcN Do Tex nop, Ioka TemnepaTypa BCex 30H npiroTOBNeHHe ONyCTNTcHnHex 60^
YeIbpe 30Hb npiroTOBnEHH O6O3HaueHb HaHeceHHbIMN Ha NOBepxHOCTn OTMeTkAMn. Ia HauBbcUeW OTdauN i cBaIahCnpOBaHOro pacXoJa 3NeKtpo3Heprnn Heo6xoJIMo NCIOB3OBAbToTBJKO KAcTpPOJIN NpINAJIeXHOCTn C TOJCTbIM n COBepWeHNOPOBbIM dHIuEM (CMOTPN PNC.10). DnAmETp dHnua eMKoCTn DOJIKeH 6bITb He MeHee HaHeceHHbx HA NOBepxHOCTn OTMeTOK.Ecnn dHniue EMKOCTn He NOKpbIBaet HarpeBaIOUyIO 3OHy, To 3Heprn paCXoDuYETc BnCyTu. JyUe BCero, ecnn dHniue HemHoro 6OJIbwe HARpeBaIOUe 3OHi.
Hnue emKocTe n pa6oHa NOBepxHOCTb DOJXHBI 6bITb YNCTbIMn cyxMn. HecO6JIIODeHne 3ToI peKOMeHdaUIN BJeHT 3a Co6oI notepu TEnJa u, CJeIOBaTeNbHO, 3Heprn.
PpmeuaHn:
- Hn B KOem Cnyae He rTOBntb 6NIOda HENOCpeDCTBeHHO Ha 3JIeKTPnuecknx KOHOpkax.
- YTO6bI COKpaTnTB Bpemn npiroTOBneHnHa n3JyauHOuXKoHOFOPkax MOxHO HaaytbpnpiroTOBHeHnHa MaKcMaJIbHOIOTMe 6, NOcNe yero CHOBa ycTaHOBnTB pyky B BbIbpaHoe dIpyrroTOBHeHn NIOJOKeHnE.
-Bce 3neKtpuueckne KOHΦopKn O6OpUdoBaHbI ORpaHnHTeNEM Tempeatpybl, npedOTbpaauooum INx nepepeB dxke B cnyae pa60tbl KOHΦopKn Ha MaKcMaJbHoN OTMeTKe 6e3 KaCTpOJIb IIN B Clyuae npImeHeHn EMKOCTe C HepOBHbIM dHnIeM.
Hnke npBBeHeOpEnTnpoBOHAr Ta6NuapeKIma npiroTOBHeHna pa3NHybIX 6nOd. He 3abBaIte, TTo 3TN npaMeTpblMOrY n3MeHrTBcR B 3aBNCIMOCtN OT KOJIueCTBa N TnA npiroTOBnREMO nnuIN INDnBuJaIbHorO BKyCa.
Ha nIte - c peWeTkAmn, KOHΦopKamn I MeTaJInecko nOBePxHOCTbIO nnITbl.
Braunke dpaarpa3orpeba nui-ceroTeHKamn.
GR
Eioaywyn
TεχviKa xapaktnpiOTiKa
-H etaipia mac, euxapiotovtac mac nou diaaleate eva ano ta apiota npoiovta mac, thee va exete ano autn tn ouakeun tvkaiutepn anodoon, onwc owot anaataite me autn tn vayopa aac. I' auto oac napakaie va diaabeote kai va akolouhoente npoektikac tic obnyiec tou npovtoc eyxepiidiou, laabavotac unpoyno movo ekivec tic napaypapouc nou apopouv ta aEsoouap kal ta opyava nou unapxouv otn ouokeun oc. O kataokeuaoTc dev ppei kaia eueuvn yia zneic nou th npokanouv oe avtikeeva n atota ano lavthetaevn eykataoataon n own
-Exo vt a c o a v oko n Tn npaywyn ouakeuw v nou npooapuoovtai oAo kalneiootepo otic movtepevcs texvikec, kal yia mia kauutepn noiotnta tou npoiovtoc, n etaipia pa eiuuaootai tou dikaiomegaatc va enipepei tpononoinoeic, akoua kai xwpic npoeidooninon, naVTWCxwpic va dnmuopynoe i npoBnaata oTo koivo.
- Tuaov avtaaaktka, n npayeaia poc to kataoeta naonnc npenla va ouvodvctai ano tov ap. tou movelau kal tov ap. mtpowou ou eivai tunwévoi naw tn v iavakiab avaywpiionc. H ivakiδa evai opatn aoiyovtc tov 0epu0aalo (av unapx) n piokei aotnv niow nLaupa tnc Kouzivac.
-H SYKEYH SYMMOPΦOYTAI ΣTIΣ EΗΟΔΗΓΙΕΣ:
- 2009/142/EOK (30/11/2009 - GAS)
- 2006/95/EK “Xαμηλή Táση” (12/12/2006 και ακόλουθες τροτιοτοιησεις)
- EOK 2004/108 (15/12/2004 - Paioopwika napaoita)
-EYPQNAIKOZ KANONI2MOZ 1935/2004 (Eπαρή με τρόφμα)
-EYPQNAIKOZ KANONIIMO1275/2008
- EOK 40/2002
- EOK 92/75
-2012/19/EEK (AITIOBAAHHE)
- 2005/32/EK (Energy-using Products)
EISAFG
- Ano To napov Exyepidio oac evdiapepouv mvo oi npaypaqoi kal ta Kepala Oxetikae Ta aEooap nou unapxouv otnv kouziva.
Nmuvtke nnpopopiec oxetik a Tnv KaTavalwon evpeyiaac Tov nektpikw foepvow.
Oi npopopiec autc oaknpovuv kai ouinnpovuv TIG nnpopoeic otnv etiketa texvikw xapaktipotikw Kal to 3iapaki odnyiw.
XPHSH TON KEPAMIKQN EETION
HIOXUC TWV EOTIWpuOJIeTAI ano ma diataEN nou EaopaiaIe i a apiOnn puOJn Tc eepokpaiaic mayepaoc.
Olaopetikc evtaeic 0epuotntac ivai diaaabuaeves acno to 1 ec6o. O diakontnc mnpoei va tonoetnei otyn eniuuntn thon npiotpovtacs tv npoc ta deia n npoc ta apotepa.
Tia TIC EOTIEG ME DIIA KUKWUa, O dIakontns yupva
DEIOATPOPA,OI dApopec EVTAeic 8epuotntac Kpuaiovtai aTO 1
Ew6 MVO YIA TIGKVTPKeC ZWECS TOW ETIWV.
To EIOevo KAIK ppoota, eTAto TnV TEAEutaia oKaAa, 0a avapei TIC UTOAOITIEC ZWECE TOW ETIW
Otavia ano tic oiec eiva zootn, n vdeikntknauxvia E (BaeE 1) avaai kal dve th a ohei av n thepokpaia oawv twv eotwve katei katw ano touc 60^ nepinou.
OI Teoepic Zwec mayepipatoc Kaobipovtai ano ta
TepiypaumaTou eivai oxediaoeva oTo nata. Ia va exTe
mu Kaan ano0onkai xamnK Katavalwn Evpeyiaac, evai
anapaittova xnoiunoiite anokkeiotika oekun twv onoiwv
o natoV eivai nauc kai vteawc enineboc.H diaeptpoc
tou natou Tou okeounc npentie va eivai toulambdaotov ion me Ta
TepiypaumaTou eivai oxediaoeva oTo nataw. Av O natoC Tou
okeouc dev kalunti th epaivovm zovn, exoume anwlaia
evepyiaac. O havakutepo va eivai elappwc myaletpoec.
O natoC Twv okeuwkai ol etie mayepipatoc npentie va eivai
kahepckai oteyvec. H un npnon autow twv ouubouw unpoei
va enipepei anwlaia eepotntac kai enoEvwsc evpeyiaac.
ZHMEIΩsH
1,2 kW - Plaque High-Light
0 180 1,5 kW - Plaque Normale
1,8 kW - Plaque High-Light
2.0 kW - Plaque Rapide
210-120 2,1-0,7 kW - Plaque High-Light
265-170 2,2-1,4 kW - Plaque High-Light
PUISSANCE ÉLECTRIQUE
resistance sole 1,1 kW
RECOMMANDATIONS IMPORTANTES:
FUNCTIONNEMENT MANUEL
ANNULATION D'UN PROGRAMME
=
= taxuc
= RAPIDE
=SNELL
SR = SEMIRAPIDO
=SEMI-RAPID
CPEH8
=ntuaXUc
= SEMIRAPIDE
=HALFSNELLEBR.
C = TRIPLA CORONA
ULTRA-RAPID
=CKOPOCTHA
=UTIEPTQXUC
T BRIPLE COUBONNE
KBOONBRANDER
B2 = PIASTR
0145
= HOTPLATE 0145
=3.7000000000000000000000000000000000000000000000000000
= eotiq 145
= PLAQUE 0145
=PLAATT 145

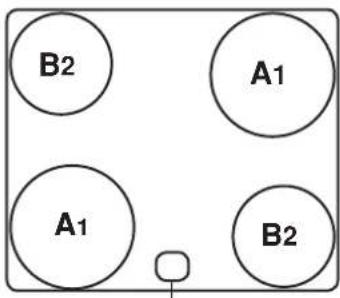
E
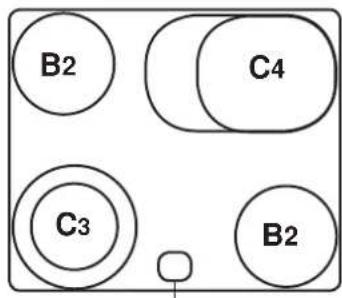
C4

E
E = SPIA CALORE RESIDUO
RESIDUAL HEAT WARNING LIGHT
=HJENKATOPIA JAMIOYKA
OCTATOHORTEIJA
=EVδεικικηλuxviaθερμοτητας
= VOYANT CHALEUR RESIDUELLE
=CONTROLELAMPJE RESTWARMTE
C3=PIASTRA 210-120
= HOTPLATE 210-120
210-120
=801q 210-120
= PLAQUE 210-120
=PLAATJE 210-120
C4=PIASTRA 265-170
= HOTPLATE 265-170
265-170
= 265 - 170
=PLAQUE 265-170
= PLAATJE 265-170

SCHEMA DI COLLEGAMENTO
CONNECTION DIAGRAM
CXEMAIIOKJIIOUeyHnKJIEKTPOCETH
HAEKTPIKO DIAPAMMA
SCHEMA DES BRANCHEMENTS
AANSLUITSCHEMA
230 V BIFASE / TWO-PHASE / TRYΦAARHIN / ΔΦAISOK/TWEEFSIG
400V MONOFASE+NEUTRO/SINGLE-PHASE+NEUTRAL/ODHOOPA3HBHHEHTPAJI
MONOΦA2IKO + OYΔETEPO/ENKELFASIG + NEURAAL / MONOPHASE + NEUTRO
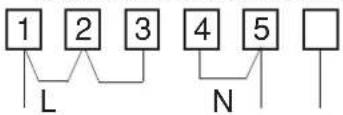
Sez. cavol
Wire gauge
Ceyehne kae
at. kawoiu
Doorsneede kabel
Section cable
3x6mm
230VTRIFASE/THREE-PHASE/TPIXΦA3UH/HTPIΦA2IKO/DRIEFASIG/
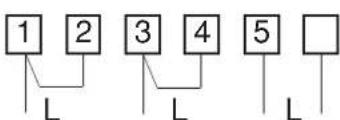
Sez, cavo
Wire gauge
Ceyenne Kaebn
AatKaawou
Doorsneede kabel
Section cable
4x4mm
400VTRIFASE+NEUTRO/THREE-PHASE+NEUTRAL/TPEXΦA3HbHHEITPAJIb
TPIΦAΣIKO + OYΔETEPDRIEFASIG + NEURAAL / TRIPHASE + NEUTRO
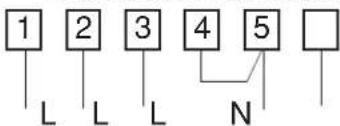
Sez. cavo
Wire gauge
Cetehne kae
AatKaawoiu:
Doorsneede kabel
Section cable
5x2.5mm
230V BIFASE/TWO-PHASE/duyXΦA3B1/△ΦA2IKO/TWEEFSIG
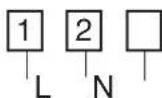
3,5kW 3x2,5mm
2.2-3.5kW 3x1.5r
0-2,2kW
2
2
3x1 mm²

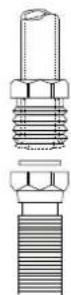
A
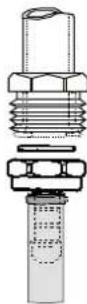
B
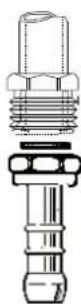
C
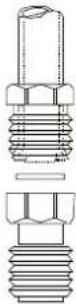
D

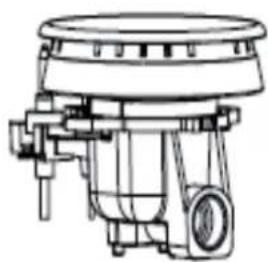
A
B
C