LBHOL 182 - Washing machine CANDY - Free user manual and instructions
Find the device manual for free LBHOL 182 CANDY in PDF.

User questions about LBHOL 182 CANDY
0 question about this device. Answer the ones you know or ask your own.
Ask a new question about this device
Download the instructions for your Washing machine in PDF format for free! Find your manual LBHOL 182 - CANDY and take your electronic device back in hand. On this page are published all the documents necessary for the use of your device. LBHOL 182 by CANDY.
USER MANUAL LBHOL 182 CANDY
natural_image
Line drawing of a single washing machine with front panel and side door (no text or symbols)RU
ПОЗДРАВЛЯЕМ!
natural_image
Line drawing of a two-wheeled washing machine with front panel and side door (no text or symbols)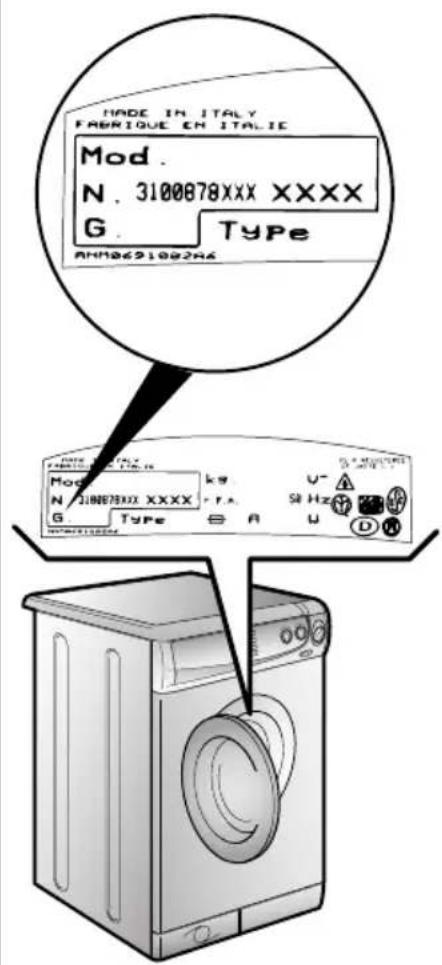
text_image
MADE IN ITALY FABRIQUE EN ITALIC Mod. N. 3100878XXX XXXX G. Type AN1062100246 Mod. N. 3100878XXX XXXX G. Type kg T.A. A U- Hz u D SОГЛАВЛЕНИЕ
Введение
natural_image
Illustration of a washing machine with a roof cover and side panels (no text or symbols)
text_image
A B EUROPE Dorunque tu sia.
text_image
SPEORE TRATTENERE A B C Amendor's Bryzidone Oral Amendor's Earls & Eosinics Body to Eosinics A B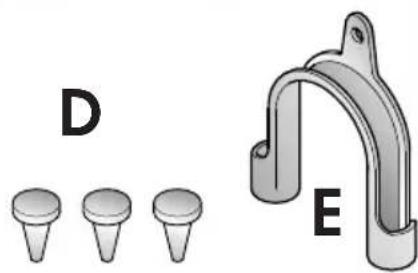
natural_image
Illustration of dental implant components labeled D and E, with no text or symbols beyond labelsПАРАГРАФ 2
ГАРАНТИЯ
natural_image
Hand inserting a plug into an electrical socket (no text or symbols visible)
natural_image
Mechanical component diagram showing a bolt and nut assembly with a curved arrow indicating rotation (no text or symbols)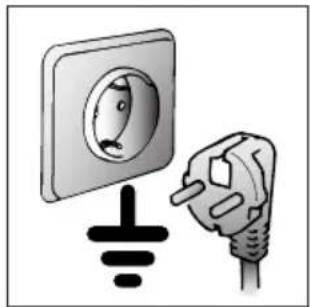
natural_image
Illustration of a plug inserted into an electrical socket (no text or symbols)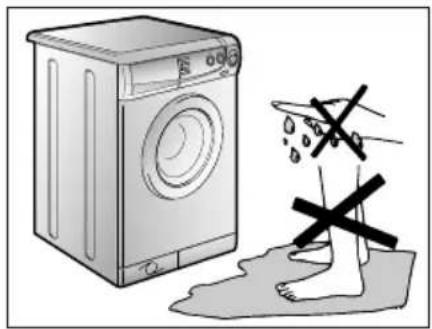
natural_image
Illustration of a washing machine next to a person's foot with a large 'X' symbol, no text or symbols present.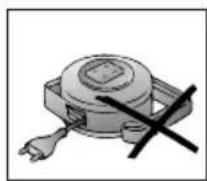
text_image
90°C
natural_image
Illustration of a washing machine with a black arrow pointing to the side panel (no text or symbols present)RU
text_image
Diagram showing two electrical socket installation methods with X marks indicating no need for one method.
natural_image
Illustration of a washing machine with a metal handle and wheels (no text or symbols)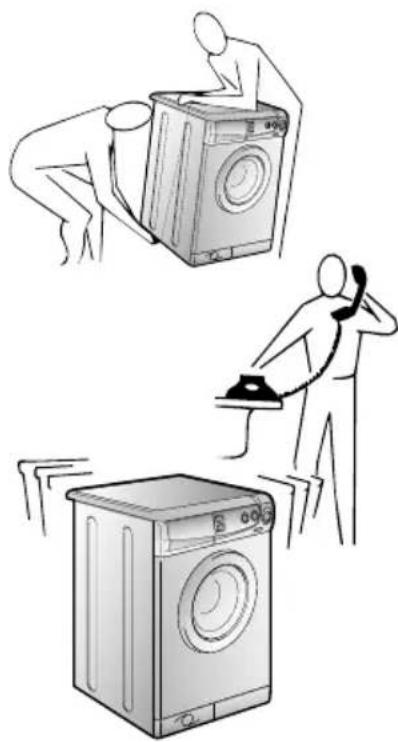
natural_image
Illustration of three household appliances: washing machine, handwashing device, and washing machine (no text or symbols)RU
ПАРАГРАФ 4
text_image
33 cm 85 cm 60 cmtext_image
Technical diagram showing a device with labeled parts and measurement indicators, including '1', '2', and '3'.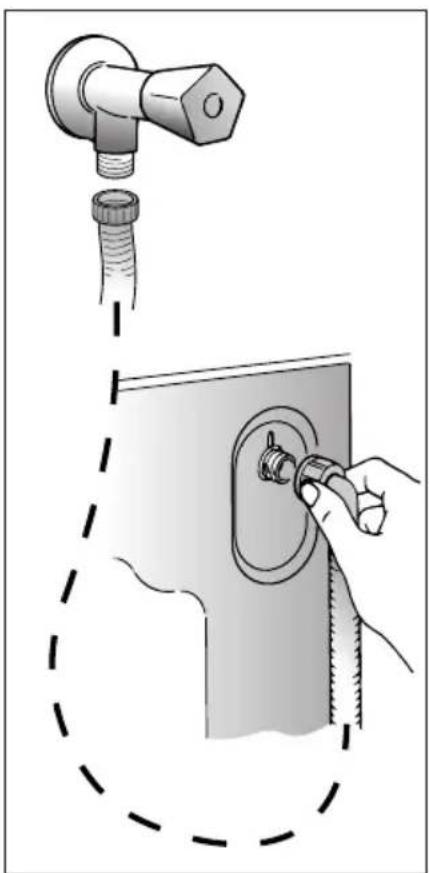
natural_image
Illustration of a hand adjusting a pipe fitting into a panel, with no text or symbols present.
text_image
max 100 cm +2,6 mt max min 4 cm min 50 cm max 85 cmRU
natural_image
Line drawing of a washing machine with control panel and buttons, showing front wheel and side-mounted buttons (no text or symbols)RU
ПАРАГРАФ 6

text_image
A D E F I L B C NОписание команд
text_image
I II cl *
ПАРАГРАФ 8
ВЫБОР
| I | II | △ | (THKS) |
| ● | ● | ● | |
| ● | ● | ● | |
| ● | ● | ● | |
| ● | ● | ● | |
| ● | |||
| ● | |||
| ● | ● | ||
| ● | ● | ||
| ● | ● | ||
| ● | |||
| ● | |||
| ● | ● | ||
| ● | ● | ||
| ● | ● | ||
| ● | |||
| ● | |||
| ● | |||
| ● | |||
natural_image
Technical diagram of a mechanical device with internal compartments and a warning symbol (no text or labels)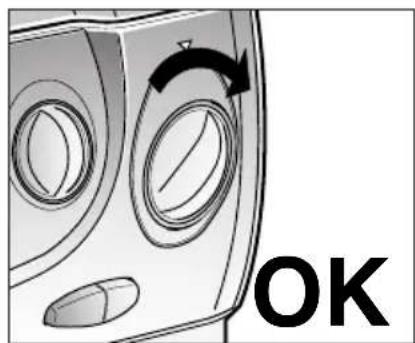
natural_image
Diagram of a door handle with circular vent and scroll, showing directional arrow and 'OK' text (no other symbols or labels)RU
natural_image
Illustration of a washing machine with a basket and bag above it, showing mechanical components (no text or symbols)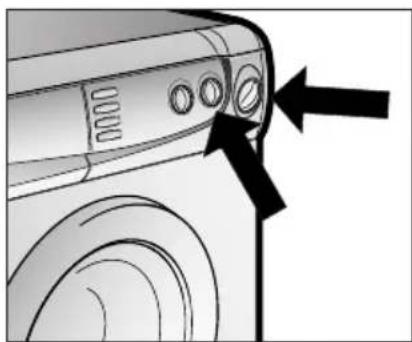
natural_image
Illustration of a washing machine front panel with control buttons and arrows pointing to the side (no text or symbols)RU
text_image
Diagram of a refrigerator with labeled warning symbols: 'II', 'cl', and a flower symbol
natural_image
Diagram of a mechanical component with a bolt and nut, showing a rotating arrow (no text or symbols)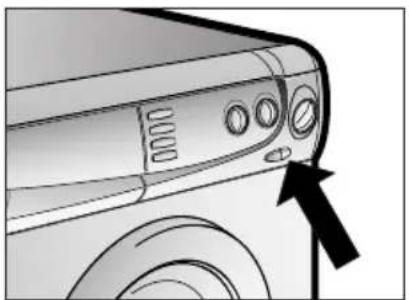
natural_image
Side profile illustration of a car front panel with control knobs and a black arrow pointing to the side (no text or symbols)
natural_image
Diagram of a washing machine with directional arrows indicating rotation (no text or symbols)ΠΑΡΑΓΡΑΦ 12
natural_image
Line drawing of a front-loading washing machine with front panel and side door (no text or symbols)
natural_image
Illustration of hands holding a mechanical device with a ruler inside, no text or symbols presentRU
Очистка фильтра
text_image
Technical diagram illustrating a mechanical assembly process with labeled steps and directional arrows indicating motion.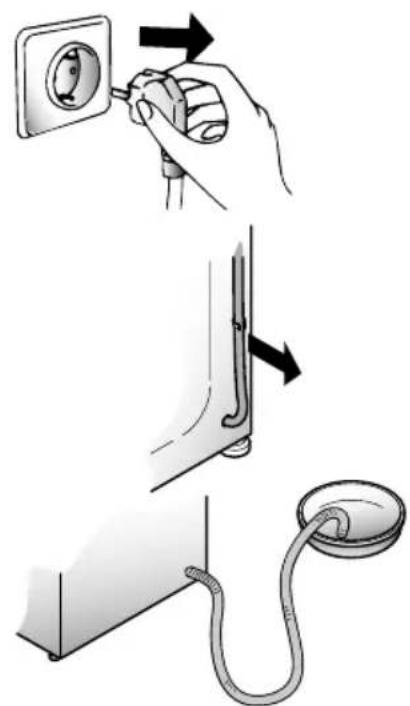
text_image
Diagram illustrating three steps of a medical or electrical procedure: inserting a socket into a wall, adjusting the valve, and connecting a cable to a sink.ПАРАГРАФ 13
With the purchase of this Candy household appliance, you have shown that you will not accept compromises: you want only the best.
Candy is happy to present their new washing machine, the result of years of research and market experience through direct contact with Consumers. You have chosen the quality, durability and high performance that this washing machine offers.
Candy is also able to offer a vast range of other household appliances: washing machines, dishwashers, washer-dryers, cookers, microwave ovens. Traditional ovens and hobs, refrigerators and freezers.
Ask your local retailer for the complete catalogue of Candy products.
Please read this booklet carefully as it provides important guide lines for safe installation, use and maintenance and some useful advise for best results when using your washing machine.
Keep this booklet in a safe place for further consultation.
When contacting Candy or a Customer Services Centre always refer to the Model, No., and G number (if applicable of the appliance see panel).

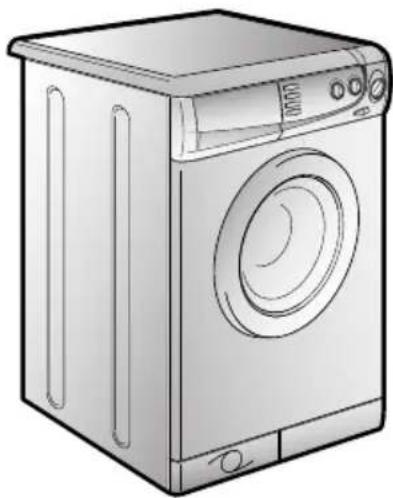
natural_image
Line drawing of a single white front-loading washing machine with front panel and side panels (no text or symbols)
text_image
MADE IN ITALY FABRIQUE EN ITALIC Mod. N. 3100878XXX XXXX G. Type ANH0621992HS Mode. N. 3100878XXX XXXX G. Type kg P.F.S. A U V- Hz W D S W S W S W S W S W S W S W S W S W S W S W S W S W S W S W S W S W S W S W S W S W S W S W S W S W S S WEN
INDEX PAGE
Introduction 26
General points on delivery 28
Guarantee 29
Safety Measures 30
Technical Data 32
Setting up and Installation 33
Control Description 36
Detergent drawer 39
Selection 40
The Product 41
Table of Programmes 42
Customer Awareness/Washing 44
Cleaning and routine maintenance 47
Faults Search 49
CHAPTER 1
GENERAL POINTS ON DELIVERY
On delivery, check that the following are included with the machine:
A) INSTRUCTION MANUAL
B) CUSTOMER SERVICE ADDRESSES
C) GUARANTEE CERTIFICATES
D) CAPS
E) BEND FOR OUTLET TUBE
KEEP THEM IN A SAFE PLACE
Check that the machine has not incurred damage during transport. If this is the case, contact your nearest Candy Centre.
natural_image
Line drawing of a washing machine with a roof cover and side panels (no text or symbols)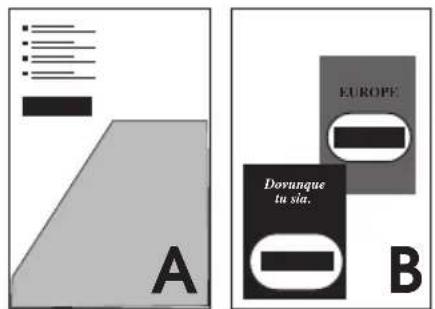
text_image
A B EUROPE Dorunque tu sla.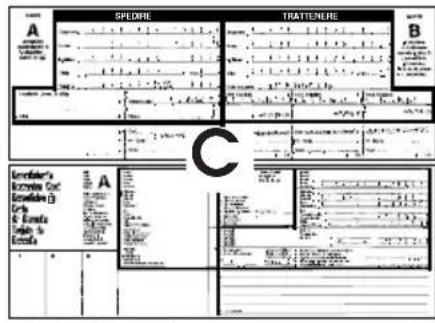
text_image
SPEDRE TRATTENERE A B C Endolateral's Recombinant Care Endolateral & Cervix & Fonds High in Erectals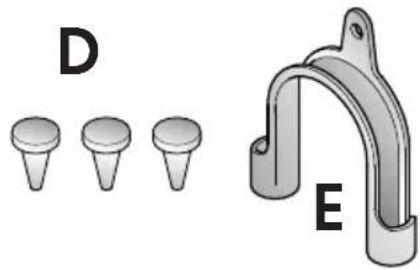
natural_image
Illustration of dental implants (D) and a mechanical bracket labeled E, with no text or symbols present.CHAPTER 2
GUARANTEE
The appliance is supplied with a guarantee certificate which allows free use of the Technical Assistance Service.
EN
CHAPTER 3
SAFETY MEASURES
IMPORTANT: FOR ALL CLEANING AND MAINTENANCE WORK
- Remove the plug
● Turn off the water inlet tap.
● All Candy appliances are earthed. Ensure that the main electricity circuit is earthed. Contact a qualified electrician if this is not the case.

This appliance complies with Directives 89/336/EEC, 73/23/EEC and following changes.
- Do not touch the appliance with wet or damp hands or feet.
- Do not use the appliance when bare-footed.
● Extreme care should be taken if extension leads are used in bathrooms or shower rooms. Avoid this where possible.
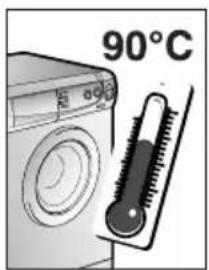
WARNING: DURING THE WASHING CYCLE, THE WATER CAN REACH A TEMPERATURE OF 90°C.
● Before opening the washing machine door, ensure that there is no water in the drum.

natural_image
Hand inserting a plug into an electrical socket (no text or symbols visible)
natural_image
Diagram of a mechanical component with a bolt and threaded shaft, showing a curved arrow indicating rotation (no text or symbols)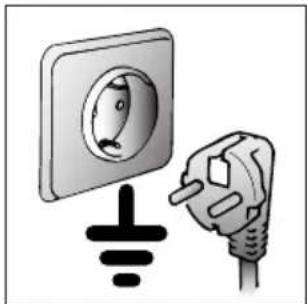
natural_image
Illustration of a plug inserted into an electrical socket (no text or symbols)
natural_image
Illustration of a washing machine next to a person standing on the floor with a large 'X' symbol, no text or symbols present.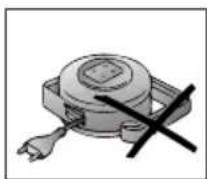

text_image
90°C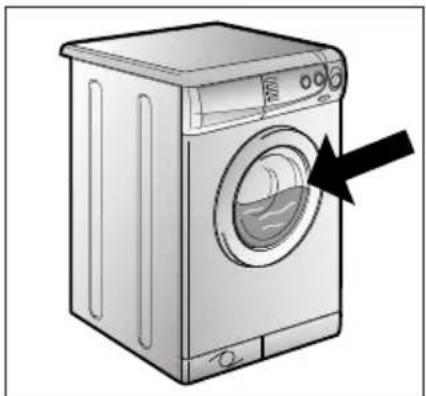
natural_image
Illustration of a washing machine with a black arrow pointing to the side panel (no text or symbols present)EN
- Do not use adaptors or multiple plugs.
- Do not allow the appliance to be used by children or the incompetent without due supervision.
- Do not pull the mains lead or the appliance itself to remove the plug from the socket.
- Do not leave the appliance exposed to atmospheric agents (rain, sun etc.)
● In the case of removal, never lift the appliance by the knobs or detersive drawer.
● During transportation do not lean the door against the trolley.
Important!
When the appliance location is on carpet floors, attention must be paid so as to ensure that there is no obstruction to the bottom vents.
● Lift the appliance in pairs as illustrated in the diagram.
- In the case of failure and/or incorrect operation, turn the washing machine off, close the water inlet tap and do not tamper with the appliance. Contact a Candy Technical Assistance Centre for any repairs and ask for original Candy spare parts. Avoidance of these norms may compromise the safety of the appliance.
● Should the supply cord (mains cable) be demaged, this is to be replaced by a specific cable available from the after sales service centre.

text_image
Diagram showing two electrical socket installation methods with X marks indicating no need for one method.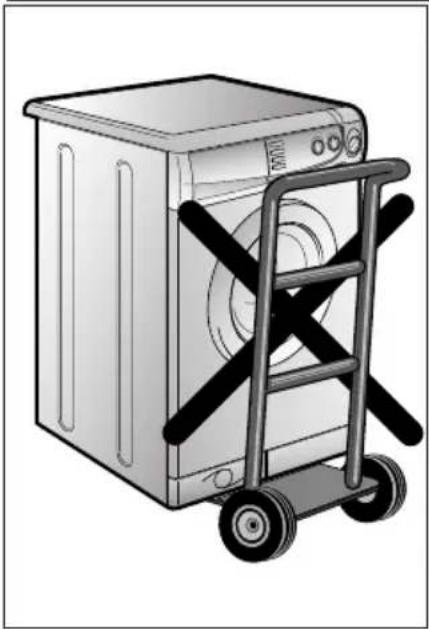
natural_image
Illustration of a washing machine with a metal handle and wheels (no text or symbols)
natural_image
Illustration of three household appliances: washing machine, handstand, and washing machine (no text or symbols)EN
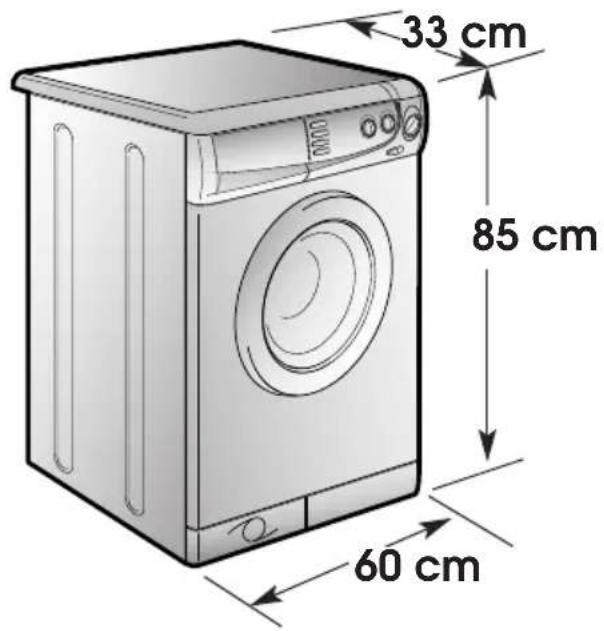
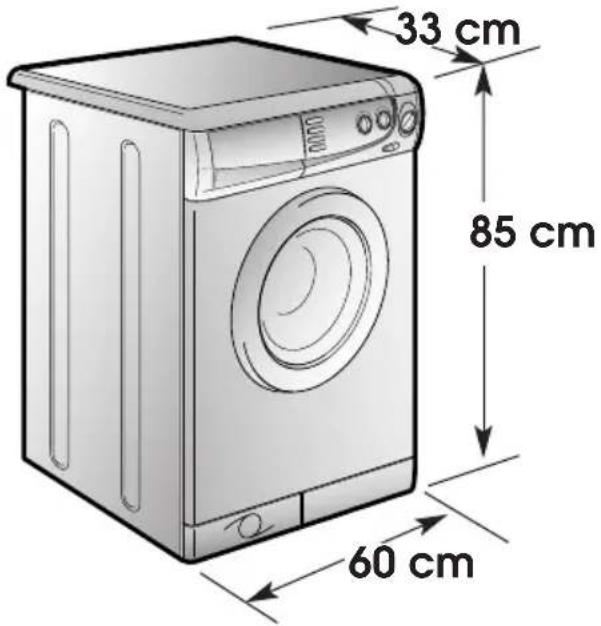
CHAPTER 4
text_image
33 cm 85 cm 60 cm| MAXIMUM WASH LOAD DRY | kg | 3,5 |
| NORMAL WATER LEVEL | I | 8÷15 |
| POWER INPUT | W | 1700 |
| ENERGY CONSUMPTION (PROG. 2) | kWh | 1,75 |
| POWER CURRENT FUSE AMP | A | 10 |
| SPIN | r.p.m. | 800 |
| WATER PRESSURE | MPa | min. 0,05 max. 0,8 |
| SUPPLY VOLTAGE | V | 230 |
CHAPTER 5
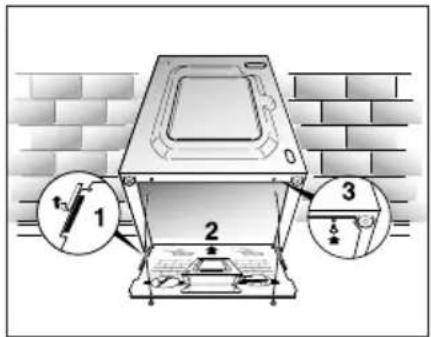
SETTING UP INSTALLATION
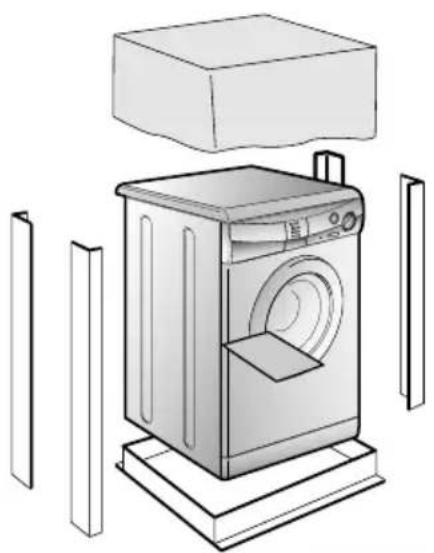
After taking the machine out of its packing, proceed as follows:
Work on the back side of the machine.
1) Unscrew the central rod A, the 2 side screws C and remove the bar D and the relevant spacer.
2) Unscrew the two rods B and remove them. Two spacers will fall inside the machine.
3) By tilting the machine, remove the above mentioned spacers.
4) Stop the holes using the plugs that you will find inside the bag containing the instruction booklet.
WARNING: DO NOT LEAVE THE PACKAGING IN THE REACH OF CHILDREN AS IT IS A POTENTIAL SOURCE OF DANGER.

text_image
C A C D B BEN
Fix the sheet of corrugated material on the bottom as shown in picture.
Connect the fill hose to the tap.
The appliance must be connected to the water mains using new hose-sets. The old hose-sets should not be reused.
IMPORTANT: DO NOT TURN THE TAP ON AT THIS TIME.
Position the washing machine next to the wall. Hook the outlet tube to the edge of the bath tub, paying attention that there are no bends or contractions along the tube.
It is better to connect the discharge hose to a fixed outlet of a diameter greater than that of the outlet tube and at a height of min. 50 cm. If is necessary to use the plastic sleeve supplied.
text_image
Technical diagram of a mechanical device with labeled parts and dimension annotations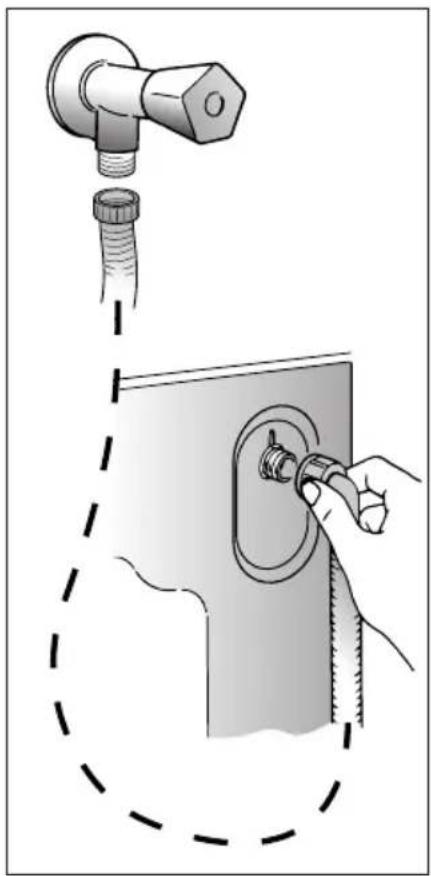
natural_image
Diagram showing a pipe fitting and a hand adjusting a component with a hose (no text or symbols present)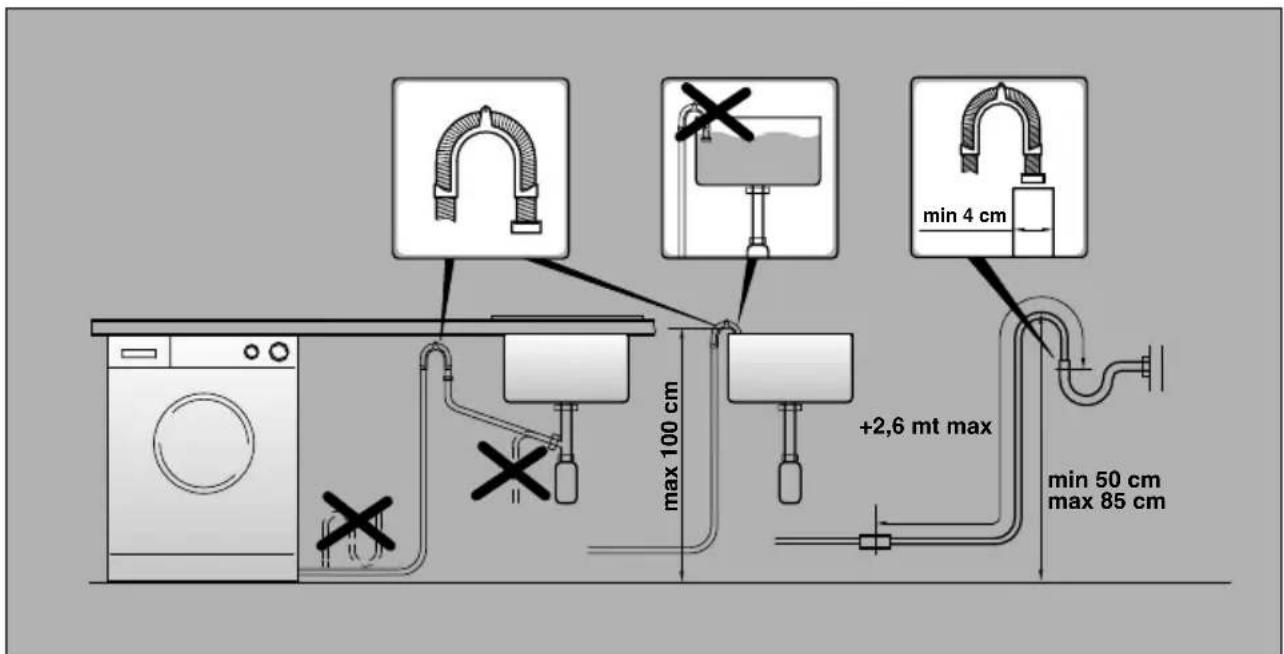
text_image
max 100 cm +2,6 mt max min 4 cm min 50 cm max 85 cmEN
Use front feet to level the machine with the floor.
a) Turn the nut clockwise to release the screw adjuster of the foot.
b) Rotate foot to raise or lower it until it stands firmly on the ground.
c) Lock the foot in position by turning the nut anti-clockwise until it comes up against the bottom of the machine.
Ensure that the Off/On button (C) is not pressed.
Ensure that all the knobs are on the "0" position and that the door is closed.
Insert the plug.
After installation, the appliance must be positioned so that the plug is accessible.
Press the START (C) button. The power on (N) light will light up. If this does not light up see faults search.

text_image
A B C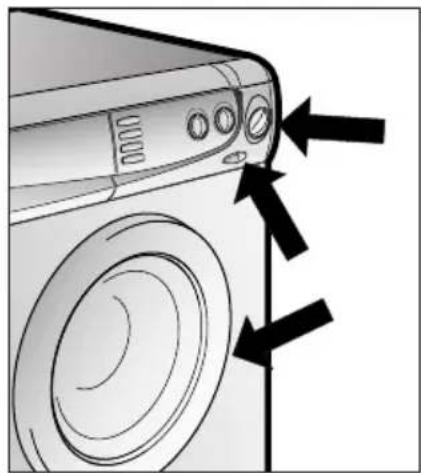
natural_image
Line drawing of a washing machine with control panel and directional arrows indicating components (no text or symbols)EN
CHAPTER 6
text_image
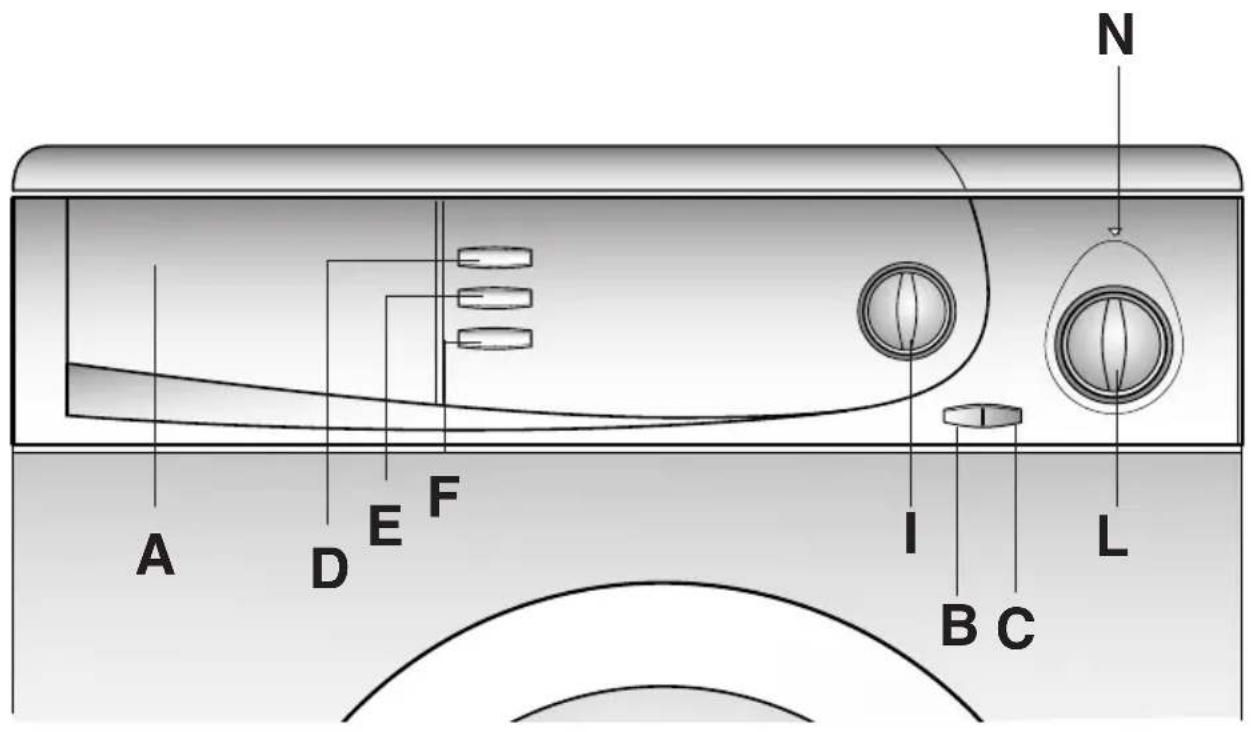
A D E F I L B C NCONTROLS
Detergent drawer
Door open button
Off/On button
800/400 button
Extra Rinse button
No spin button
Wash control temperature knob
Timer knob for wash programmes
Off/On indicator light
A
B
C
D
E
F
|
L
N
| DESCRIPTION OF CONTROL | ||
| DOOR OPEN BUTTONIMPORTANT:A SPECIAL SAFETY DEVICE PREVENTS THE DOOR FROM OPENING AT THE END OF THE WASH/SPIN CYCLE. AT THE END OF THE SPIN PHASE WAIT UP TO 2 MINUTES BEFORE OPENING THE DOOR. | B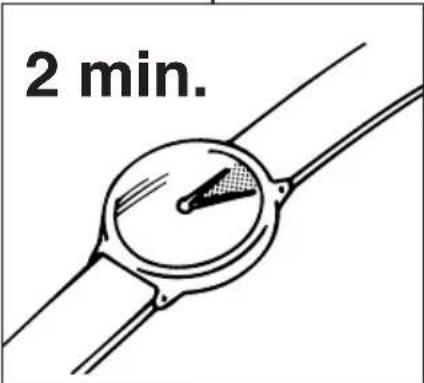 | |
| OFF/ON BUTTON | C | |
| BUTTON 800/400In the programmes for resistant fabrics the machine gradually increases the final spin speed from 400 r.p.m. to the maximum possible speed.The button reduces spin speed to 400 r.p.m. | D | 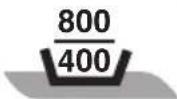 |
| EXTRA RINSE BUTTONBy pressing the “EXTRA RINSE” button, even the slightest residue of detersive is removed from fabrics. This is particularly important for people with delicate skins. | E |  |
| NO SPIN BUTTONBy pressing this button it is possible to eliminate the spin-drying on all programmes. This operation is suitable for programmes at 90°C and at 60°C in case of special treated fabrics (cottonova or permanent press) or for mixed delicate fabrics. | F |  |
| WASH TEMPERATURE CONTROL KNOB | I | T°C |
| ROTATES IN BOTH DIRECTIONS |  | |
| With this device it is possible to reduce, but no increase washing cycle temperature.The table of programmes indicate the maximum temperature advised for each type of wash. | ||
| WARNING: THIS TEMPERATURE MUST NEVER BE EXCEEDED | ||
| TIMER KNOB FOR WASH PROGRAMMES | L | |
| IMPORTANT: ALWAYS ROTATE THE KNOB IN A CLOCKWISE DIRECTION, NEVER IN AN ANTI-CLOCKWISE DIRECTION. DO NOT PRESS THE "ON" BUTTON (C) BEFORE SELECTING THE PROGRAMME |  | |
| The tables describe the washing programme on the basis of the number or symbol chosen. |  | |
| IMPORTANT: IF YOU NEED TO CHANGE A PROGRAMME THAT HAS ALREADY STARTED - SWITCH OFF THE MACHINE BY THE ON / OFF BUTTON AND THEN MOVE THE PROGRAMME DIAL TO THE CORRECT POSITION. IF YOU DO NOT PRESS "OFF" BEFOREHAND, THE DIAL WILL AUTOMATICALLY MOVE TO ITS INITIAL POSITION. | ||
| ON/OFF INDICATOR LIGHT | N | |
CHAPTER 7
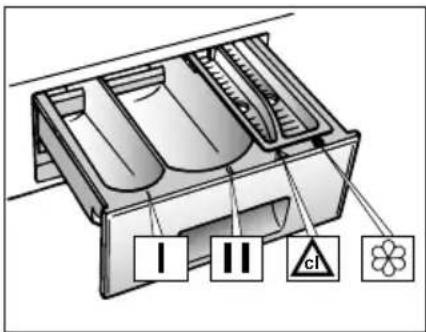
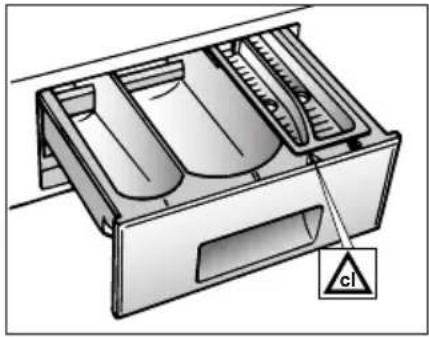
DETERGENT DRAWER
The detergent drawer is divided into 4 compartments:
- the first, labelled "I", is for prewash detergent or for 32 minute rapid programme detergent
- The second II for the main wash detergent
IMPORTANT:
REMEMBER THAT SOME DETERGENT ARE DIFFICULT TO REMOVE. IN THIS CASE WE ADVISE THE USE OF THE SPECIAL CONTAINER TO BE USED INSIDE THE DRUM.
- The third △ bleach compartment
IMPORTANT:
ONLY INTRODUCE LIQUID PRODUCTS IN THE THIRD AND FOURTH COMPARTMENTS.
- The fourth is for special additives, softeners, perfumes, starches, whiteners, etc.
text_image
I II cl *
CHAPTER 8
SELECTION
For the various types of fabrics and various degrees of dirt the washing machine has 3 different programme bands according to: wash cycle, temperature and length of cycle (see table of washing cycle programmes).
1 Resistants Fabrics
The programmes have been designed for a maximum wash and the rinses, with spin intervals, ensure perfect rinsing. The final spin gives more efficient removal of water.
2 Mixed and Synthetic Fabrics
The main wash and the rinse gives best results thanks to the rotation rhythms of the drum and to the water levels. A gentle spin will mean that the fabrics become less creased.
3. Delicate fabrics, wool & hand washing
This group of programmes have been specially designed to wash the most delicate fabrics
Use the Delicate programme for delicate fabrics
Use the Woollens programme only for machine washable wool
Use the HandWash programme for any machine washable handwash garments
When washing heavy rugs, bed spreads and other heavy articles, it is advisable not to spin.
To be machine-washed, woollen garments and other articles in wool must bear the "Machine Washable Label".
IMPORTANT:
When sorting articles ensure that:
- there are no metal objects in the washing (e.g.brooches, safety pins, pins, coins etc.).
- cushion covers are buttoned, zips and hooks are closed, loose belts and long tapes on dressing gowns are knotted.
- r unners from curtains are removed.
- attention is paid to garment labels.
- when sorting, any tough stains should be removed prior to washing using stain removers only recommended on label.


text_image
OKCHAPTER 10
TABLE OF PROGRAMMES
| FABRIC | PROGRAM FOR | WEIGHT MAX kg | SELECT PROG. | SELECT TEMP. °C |
| Resistant fabrics | ||||
| Cotton, linen | Whites & Prewash | 3.5 | 1 | Up to 90° |
| Cotton, mixed resistant | Whites normal | 3.5 | 2 | Up to 90° |
| Cotton, mixed | Fast coloureds*) | 3.5 | 3 | Up to 60° |
| Non fast coloureds | 3.5 | 4 | Up to 40° | |
| Cotton | Rinses | - | 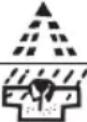 | - |
| Cotton, linen | Last rinse | - | - | |
| Long spin | - |  | - | |
| Mixed fabrics and synthetics | ||||
| Mixed, resistant | Mixed fabrics*) | 2 | 5 | Up to 60° |
| Cotton, mixed fabrics, synthetics | Coloureds | 2 | 6 | Up to 50° |
| Synthetics (nylon, perlon), mixed cotton | Acrylics | 2 | 7 | Up to 40° |
| Mixed, delicate synthetics | Rinses | - | 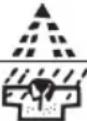 | - |
| Last rinse | - | - | ||
| Short spin | - | - | ||
| Very delicate fabrics | Delicate wash | 1.5 | 8 | Up to 40° |
| “MACHINE WASHABLE” woollens*) | 1 | 9 | Up to 40° | |
| Hand wash | 1 | 10 | Up to 30° | |
| Mixed, delicate synthetics, wool | Rinses | - |  | - |
| Last rinse | - | - | ||
| Short spin | - | - | ||
| For fabrics that should not be spun | rapid 32 minute | 2 |  | Up to 50° |
| Organic stains bleaching | 3.5 | - | ||
| Drain only | - | Z | - | |
CHARGE DETERGENT
| I | II |  | |
| - | |||
Please read these notes
When washing heavily soiled laundry it is recommended the load is reduced to 3 kg maximum.
In programmes shown in the wash guide, automatic bleaching is possible by pouring the liquid bleach into the detergent draw.
* Programmes according to CENELEC EN 60456.
1) The variable temperature selector allows a reduction in the wash temperature. For example, an intense cottons cycle can be washed in cold water simply by moving the dial to the tap symbol.
■ 32 Minute Rapid Programme
The 32 minute rapid programme allows a complete washing cycle to be carried out in approximately 30 minutes, with up to a maximum load of 2 kg and a the temperature of up to 50°C. The washing temperature can be reduced by using the control knob I.
When selecting the “32 minute rapid programme”, please note that we recommend you use only 20% of the recommended quantities shown on the detergent pack.
The detergent must be placed in the pre-wash compartment (marked I) in the detergent dispenser.
For mixed, synthetics and very delicate fabrics that are heavily soiled a prewash cycle may be selected using the 32 minute rapid programme (the detergent must be placed in the compartment marked I) before selecting the main wash programme.
CHAPTER 11
CUSTOMER AWARENESS
A guide environmentally friendly and economic use of your appliance.
MAXIMISE THE LOAD SIZE
Achieve the best use of energy, water, detergent and time by using the recommended maximum load size. Save up to 50% energy by washing a full load instead of 2 half loads.
DO YOU NEED TO PRE-WASH?
For heavily soiled laundry only! SAVE detergent, time, water and between 5 to 15% energy consumption by NOT selecting Prewash for slight to normally soiled laundry.
IS A HOT WASH REQUIRED?
Pretreat stains with stain remover or soak dried in stains in water before washing to reduce the necessity of a hot wash programme. Save up to 50% energy by using a 60°C wash programme.
WASHING
VARIABLE CAPACITY
This washing machine automatically adapts the level of the water to the type and quantity of washing. In this way it is also possible to obtain a "personalized" wash from an energy saving point of view. This system gives a decrease in energy consumption and a sensible reduction in washing times.
Let us suppose that the washing consists of HEAVILY SOILED COTTON (tough stains should be removed with the special cream). When only a limited number of articles have stains which require treatment with liquid bleaching agents, preliminary removal of stains can be carried out in the washing machine. Pour the bleach into the special compartment and set the knob (L) on the special programme "PRE-WASH STAIN REMOVAL"
When this phase has terminated add the rest of the washing and proceed with a normal wash on the most suitable programme.
It is advisable not to wash a load made up entirely of articles in towelling fabric which absorb a lot of water and become too heavy.
The maximum load for heavy fabrics is 3.5 kg, while, in the case of delicate fabrics, it is advisable not to exceed 2 kg (1 kg in the case of machine washable articles in "Pure New Wool") so as to avoid the formation of creases which may be difficult to iron. A net bag should be used for particularly delicate fabrics.
text_image
cl
natural_image
Close-up of a door handle with circular vented slots and an arrow indicating rotation (no text or symbols)EXAMPLE:
The advice of Candy is set out in the washing programme table:
● Ensure that article labels carry the indication 60°C.
- Open the door by pressing button (B).
● Load the drum with a maximum of 3,5 kg of dry washing.
- Close the door
IMPORTANT:
WHEN SETTING THE PROGRAMME ENSURE THAT THE ON/OFF BUTTON IS NOT TURNED ON.
Select programme 2:
Choose the programme by rotating the knob (L) in a CLOCKWISE DIRECTION and make the number of the programme coincide with the sign.
- Move the temperature knob (l) to maximum 60°C.
- Open the detergent drawer (A).

text_image
60° C 3,5 kg MAX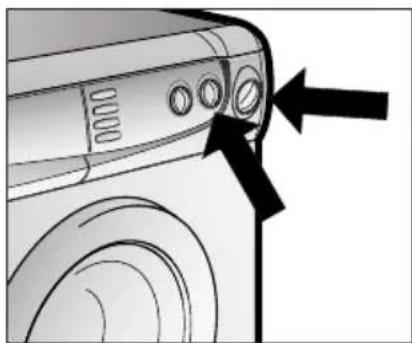
natural_image
Diagram of a washing machine front panel with control buttons and directional arrows indicating action (no text or symbols)EN
● Put 60 g in the second II wash compartment.
● Put 100 cc of bleach in the bleach compartment.
● Put 50 cc of the desired additive in the additives compartment
- Close the detergent drawer (A).
● Ensure that the water inlet tap is turned on.
● And that the discharge tube is in place.
- Press the "ON" button (C).
The light (N) will come on.
The washing machine will carry out the set programme.
- At the end of the programme, press the On/Off button (C). The light will go out.
- Open the door and remove the washed articles.
FOR ALL TYPES OF WASH CONSULT THE PROGRAMME TABLE AND FOLLOW THE OPERATIONS IN THE ORDER INDICATED.

text_image
Diagram of a refrigerator with labeled warning symbols: battery, climate check, and fan icon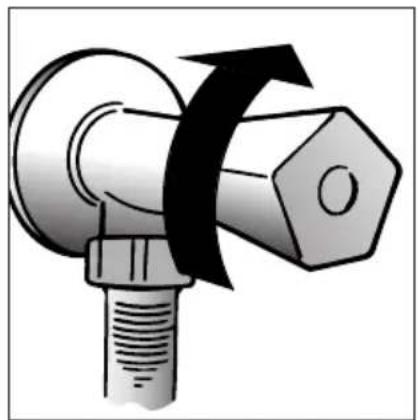
natural_image
Diagram of a mechanical component with a bolt and nut, showing a rotating arrow (no text or symbols)
natural_image
Side view of a car front panel with control knobs and a black arrow pointing to the side (no text or symbols)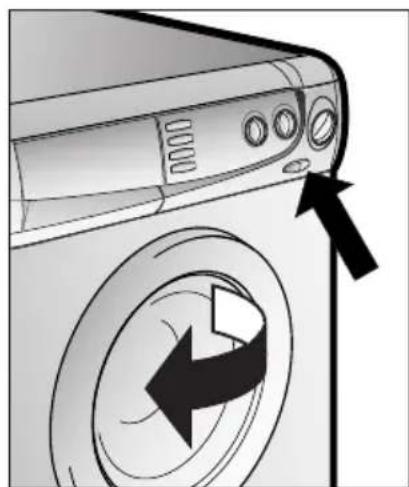
natural_image
Diagram of a washing machine with directional arrows indicating left and right motion (no text or symbols)CHAPTER 12
CLEANING AND ROUTINE MAINTENANCE
Do not use abrasives, spirits and/or diluents on the exterior of the appliance. It is sufficient to use a damp cloth.
The washing machine requires very little maintenance:
● Cleaning of drawer compartments.
- Filter cleaning
● Removals or long periods when the machine is left standing.
CLEANING OF DRAWER COMPARTMENTS
Although not strictly necessary, it is advisable to clean the detergent, bleach and additives compartments occasionally.
Remove the compartments by pulling gently.
Clean with water.
Put the compartments back into place
natural_image
Line drawing of a front-loading washing machine (no text or symbols)
natural_image
Illustration of hands using a tool to adjust or install a mechanical component (no text or symbols visible)EN
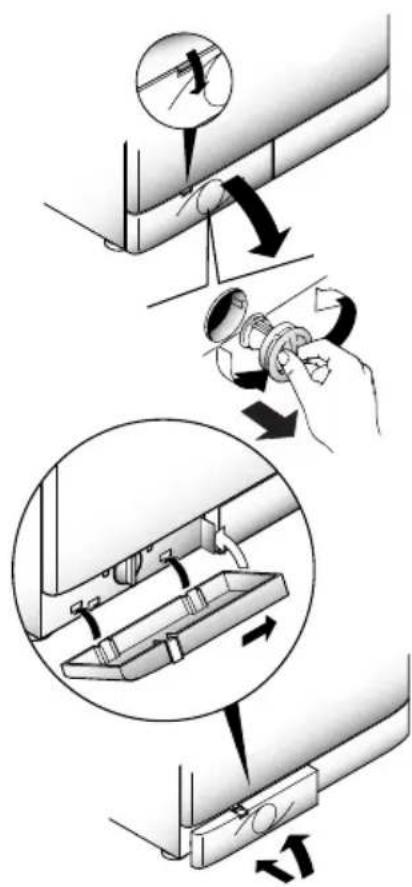
FILTER CLEANING
The washing-machine is equipped with a special filter to retain large foreign matter which could clog up the drain, such as coins, buttons, etc. These can, therefore, easily be recovered. The procedures for cleaning the filter are as follows:
● Ease off the base as shown in fig.
● Use the base as a tray to collect leftover water in filter.
● Turn the filter anticlockwise till it stops in vertical position.
- Remove and clean.
● After cleaning, replace by turning the notch on the end of the filter clockwise. Then follow all procedures described above in reverse order.
REMOVALS OR LONG PERIODS WHEN THE MACHINE IS LEFT STANDING
For eventual removals or when the machine is left standing for long periods in unheated rooms, the drain hose should be emptied of all remaining water.
The appliance must be switched off and unplugged. A bowl is needed. Detach the drainage hose from the clamp and lower it over the bowl until all the water is removed.
Repeat the same operation with the water inlet hose.
text_image
Technical diagram illustrating a mechanical assembly process with labeled steps and directional arrows indicating motion.
natural_image
Illustration of a medical procedure showing hand positioning, cable insertion, and endoscopic view (no text or symbols)CHAPTER 13
| FAULT | CAUSE | REMEDY |
| 1. Does not function on any programme | Mains plug not plugged in | Insert plug |
| Mains switch not on | Turn on mains switch | |
| No power | Check | |
| Electric circuit fuses failure | Check | |
| Load door open | Close load door | |
| 2. Does not load water | See cause 1 | Check |
| Inlet tap turned off | Turn on water inlet tap | |
| Timer not set correctly | Set timer on correct position | |
| 3. Does not discharge water | Discharge tube bent | Straighten discharge tube |
| Odd material blocking filter | Check filter | |
| 4. Water on floor around washing machine | Leak from the washer between the tap and inlet tube | Replace washer and tighten the tube on the tap |
| 5. Does not spin | The washing machine has not discharged water | Wait a few minutes until the machine discharges water |
| “No spin” setting (some models only) | Turn the programme dial onto spin setting | |
| 6. Strong vibrations during spin | Washing machine not perfectly level | Adjust special feet |
| Transport bracket not removed | Remove transport bracket | |
| Washing load not evenly distributed | Distribute the washing evenly | |
| Please note:It is normal for the programme selector dial to move only from one stage of washing programme to another and not show any movement in-between - so at certain periods, the dial will stay still.An electronic device is controlling the exact movement of the timer. | ||
If the fault should persist, contact a Candy Technical Assistance Centre. For prompt servicing, give the model of the washing machine, to be found on the label placed on the cabinet inside of the porthole or on the guarantee certificate.
Important
1 The use of environment friendly detersives without phosphates may produce the following effects:
- The discharge rinse water may result cloudier due to the presence of zeolites in suspension. This does not compromise the efficiency of the rinses.
- The presence of white powder (zeolites) on the washing at the end of the washing cycle. This does not remain incorporated in the fabric and does not alter the colour.
- The presence of foam in the last rinse water which is not necessarily a sign of inadequate rinsing.
- The non-ionic surface-active agents present in the composition of washing machine detersives are often difficult to remove from the washing itself and, even in small quantities, may produce visible signs of the formation of foam.
- Carrying out further rinses, in cases such as this, is not useful.
2 If your washing machine fails to function, carry out the above-mentioned checks before calling the Candy Technical Assistance Service.

GRATULACJE
natural_image
Line drawing of a front-loading washing machine (no text or symbols)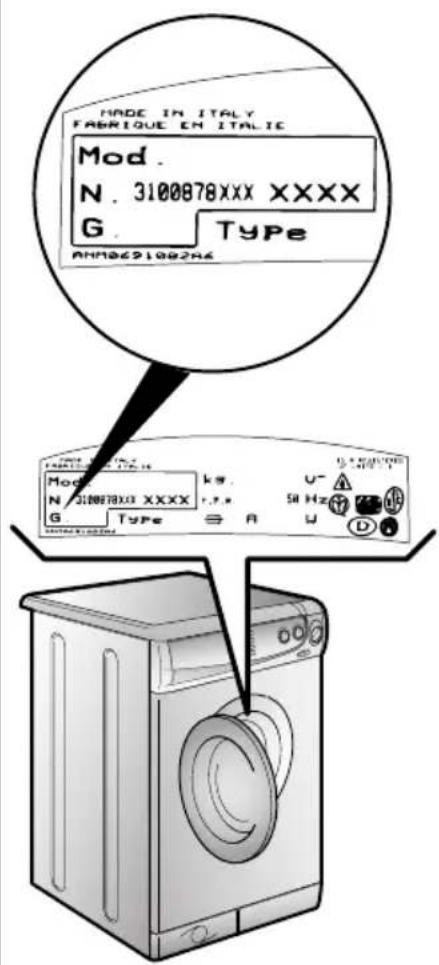
text_image
MADE IN ITALY FABRIQUE EN ITALIC Mod. N. 3100878XXX XXXX G. Type ANNA62100246 Model N 3100878XXX XXXX G. Type kg. r.p. A U- Si Hz D WPL
SPIS TREŚCI
Wstep
natural_image
Line drawing of a washing machine with its front panel and side panels, showing internal components (no text or symbols)
text_image
A EUROPE Dorunque tu sla. B
text_image
SPLORIE TRATTENURE A B C Erectile's Bryzeman's Card Bryzeman's Card Ertic Erectile's English to English A B C
natural_image
Illustration of dental crowns labeled D and E, with no text or symbols on the objects themselves.ROZDZIAŁ 2
GWARANCJA
natural_image
Hand inserting a plug into an electrical socket (no text or symbols visible)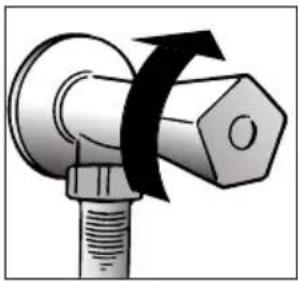
natural_image
Diagram of a mechanical component with a bolt and threaded shaft, showing a curved arrow indicating rotation (no text or symbols)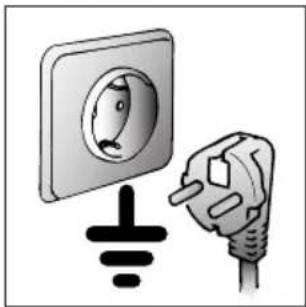
natural_image
Illustration of a hand holding a plug with a socket, next to a wall socket (no text or symbols)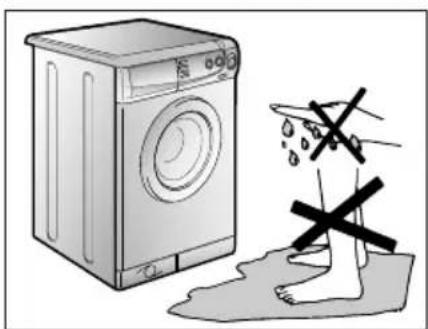
natural_image
Illustration of a washing machine next to a foot with a large 'X' symbol, indicating no text or symbols present.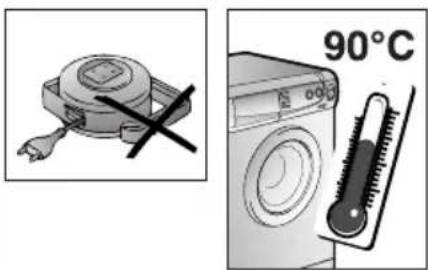
text_image
90°C
natural_image
Illustration of a washing machine with a black arrow pointing to the side panel (no text or symbols present)PL
text_image
Diagram showing two electrical socket installation methods with X marks indicating no need for one or both.
natural_image
Illustration of a washing machine with a metal handle and wheels (no text or symbols)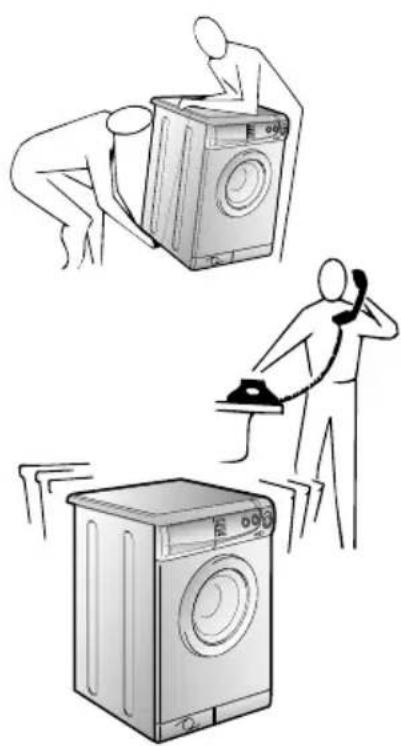
natural_image
Illustration of three household appliances: washing machine, handwashing device, and washing machine (no text or symbols)PL
ROZDZIAŁ 4
DANE TECHNICZNE

text_image
33 cm 85 cm 60 cm| MAX. CIĘŻAR PRANIA SUCHEGO | 3,5kg | |
| POZIOM NORMALNY WODY | I | 8÷15 |
| MAKSYMALNY POBÓR MOCY | W | 1700 |
| ZUŻYCIE ENERGII (PROG. 2) | kWh | 1,75 |
| BEZPIECZNIK OBWODU ZASILANIA | A | 10 |
| OBROTY WIRÓWKI | obr/min. 800 | |
| CIŚNIENIE WODY W SIECI | MPa min. 0,05max. 0,8 | |
| NAPECIE ZASILANIA | V 230 | |
ROZDZIAŁ 5
INSTALACJA PRALKI
text_image
Diagram of a device with labeled parts and measurement indicators, showing components like 1, 2, and 3 against a brick wall background.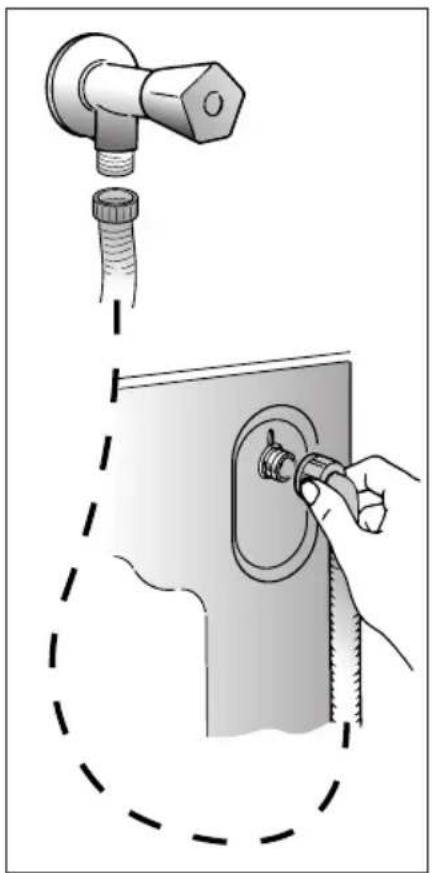
natural_image
Illustration of a hand adjusting a pipe fitting with a valve, showing mechanical components and a dashed outline (no text or symbols)
text_image
max 100 cm +2,6 mt max min 4 cm min 50 cm max 85 cmPL
natural_image
Line drawing of a washing machine with control panel and buttons, showing front wheel and side door (no text or symbols)PL
ROZDZIAŁ 6

text_image
N A D E F I L B CPANEL STEROWANIA
Szuflada na proszek
text_image
I II cl flor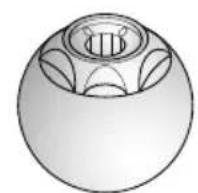
ROZDZIAŁ 8
WYBÓR PROGRAMÓW
| I | II | △ | ITTHXQ |
| ● | ● | ● | |
| ● | ● | ● | |
| ● | ● | ● | |
| ● | ● | ● | |
| ● | |||
| ● | |||
| ● | ● | ||
| ● | ● | ||
| ● | ● | ||
| ● | |||
| ● | |||
| ● | ● | ||
| ● | ● | ||
| ● | ● | ||
| ● | |||
| ● | |||
| ● | |||
| ● | |||
Uwagi:
natural_image
Diagram of a door handle with circular ventricles and an arrow indicating clockwise motion, labeled 'OK' (no text or symbols on the diagram itself)PL
PRZYKŁAD:
natural_image
Illustration of a washing machine front panel with control buttons and arrows indicating direction (no text or symbols)PL
text_image
Diagram of a refrigerator or air conditioner unit with labeled warning symbols: 'II', 'cl', and a fan symbol.
natural_image
Diagram of a mechanical component with a bolt and nut, showing a rotating arrow (no text or symbols)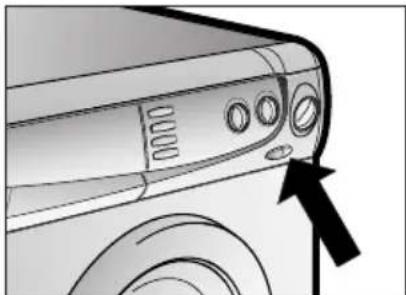
natural_image
Side view of a car front panel with control buttons and a black arrow pointing to the side (no text or symbols)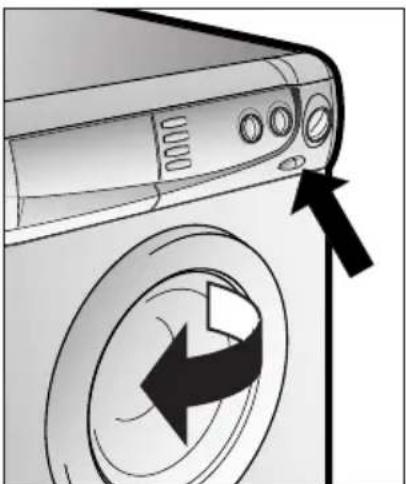
natural_image
Diagram of a washing machine with directional arrows indicating left and right motion (no text or symbols)ROZDZIAŁ 12
CZYSZCZENIE I KONSERWACJA PRALKI
natural_image
Line drawing of a front-loading washing machine with front panel and side door (no text or symbols)
natural_image
Illustration of hands holding a mechanical device with a handle and internal components (no text or symbols visible)PL
CZYSZCZENIE FILTRA
text_image
Technical diagram illustrating mechanical assembly steps with labeled components and directional arrows
natural_image
Illustration showing three steps of a wall installation: pinning, cable insertion, and cord placement (no text or symbols)ROZDZIAŁ 13
LOKALIZACJA USTEREK
The manufacturer declines all responsibility in the event of any printing mistakes in this booklet. The manufacturer also reserves the right to make appropriate modifications to its products without changing the essential characteristics.