PLA1273 - Food processor Sheffield - Free user manual and instructions
Find the device manual for free PLA1273 Sheffield in PDF.

| Product Type | Food Processor |
| Brand | Sheffield |
| Model | PLA1273 |
| Dimensions (W x D x H) | 30 cm x 25 cm x 40 cm |
| Weight | 5 kg |
| Power Supply | 220-240 V ~ 50/60 Hz |
| Power Consumption | 800 W |
| Bowl Capacity | 2.5 L |
| Feed Tube Diameter | 7 cm |
| Main Functions | Chopping, slicing, shredding, kneading, blending, whisking |
| Speed Settings | 2 speeds + pulse |
| Included Accessories | Stainless steel chopping blade, slicing disc, shredding disc, kneading hook, whisk |
| Material | BPA-free plastic bowl, stainless steel blades |
| Safety Features | Overload protection, non-slip feet, lid lock safety switch |
| Cleaning | Removable parts dishwasher safe, wipe motor base with damp cloth |
| Warranty | 2 years |
| Spare Parts Availability | Replacement bowls, blades and discs available separately |
| Cord Length | 1.2 m |
Frequently Asked Questions - PLA1273 Sheffield
User questions about PLA1273 Sheffield
0 question about this device. Answer the ones you know or ask your own.
Ask a new question about this device
Download the instructions for your Food processor in PDF format for free! Find your manual PLA1273 - Sheffield and take your electronic device back in hand. On this page are published all the documents necessary for the use of your device. PLA1273 by Sheffield.
USER MANUAL PLA1273 Sheffield
living well, everyday
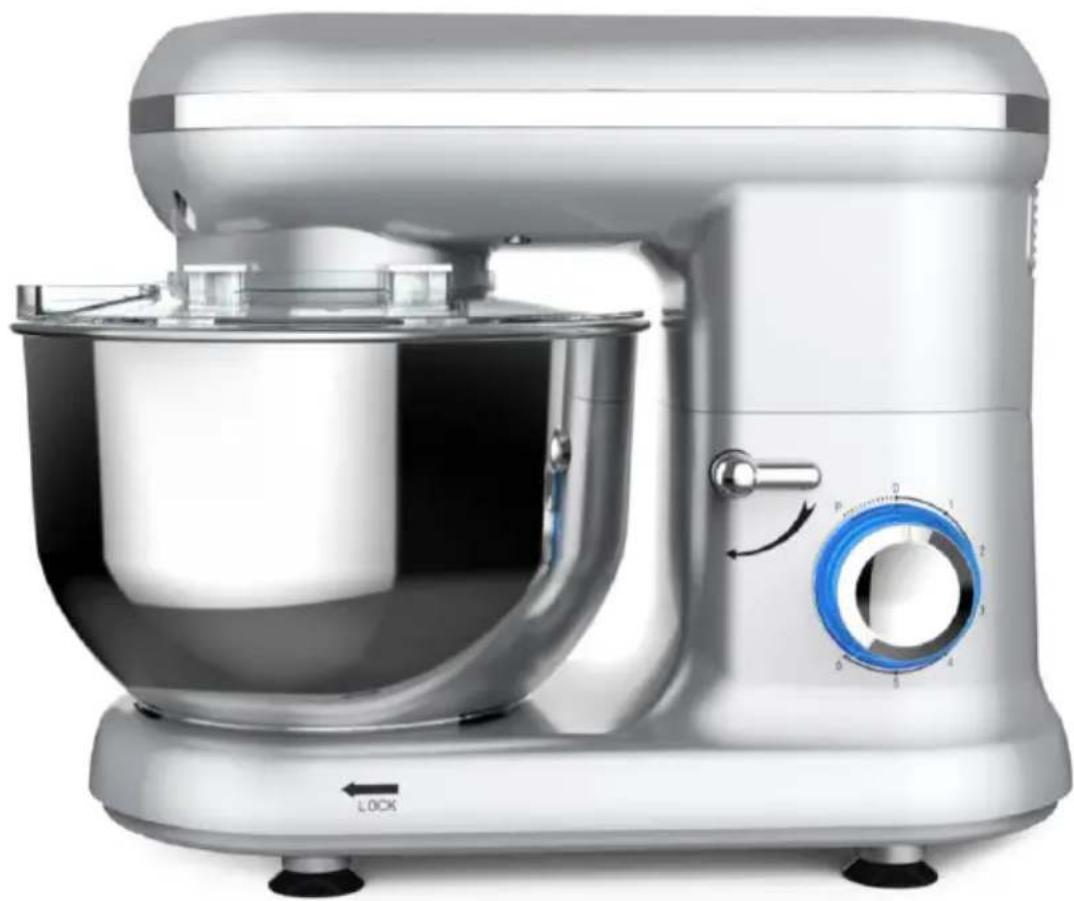
natural_image
Modern stainless steel kitchen mixer with control knob and lock mechanism (no text or symbols on the device itself)STAND MIXER
CONTENTS
02 Welcome
03 Package Contents
03 Technical Specifications
04 Important Safety instructions
07 Assembly and parts
09 Instructions
10 Other Useful Information
11 Troubleshooting
12 Cleaning and Maintenance
WELCOME
Congratulations on choosing to buy a Sheffield product.
All products brought to you by Sheffield are manufactured to the highest standards of performance and safety, and, as part of our philosophy of customer service and satisfaction, are backed by our comprehensive 24 Month warranty.
We hope you will enjoy using your purchase for many years to come.
PACKAGE CONTENTS
1 x Bench Top Mixer
1 x Mixing Bowl
1 x Dough Hook Attachment
1 x Beater Attachment
1 x Whisk Attachment
1 x See-through Splash Cover
1 x Instruction Manual
1 x Warranty Card
Confirm all parts before disposing of carton. Safely dispose of all plastic bags and other packaging components. They may be potentially dangerous to children.
TECHNICAL SPECIFICATION
Model: PLA1273
Rated voltage: 220-240V\~50-60Hz
Rated Power: 800W
Max. Power: 1260W
Protection class: II
Bowl Capacity: 5.5L
Max RPM: 200rpm (unloaded)
Max. Operating Time: 6 min
Speeds: 6 + Pulse
Weight: 4.7 kg
Dimensions H x W x D: 298 x 385 x 234mm
IMPORTANT SAFETY INSTRUCTIONS READ CAREFULLY AND KEEP FOR FUTURE REFERENCE
Carefully read this manual before using this appliance.
- Ensure that you know how the appliance functions and how to operate it.
- Maintain the appliance in accordance with the instructions to ensure that it functions properly.
- Keep this manual with the appliance. If the appliance is to be used by a third party, this instruction manual must be supplied with it.
- The safety instructions do not by themselves eliminate any danger completely and proper accident prevention measures must always be used.
- No liability can be accepted for any damage caused by non-compliance with these instructions or any other improper use or mishandling.
Do not use this appliance if it has been dropped or damaged in any way, or if the supply cord is damaged.
Intended Use
- Indoor domestic use only: this appliance is intended for indoor domestic use only. Do not use it outdoors. Do not use in moving vehicles or boats.
- Intended Purpose: Do not use the appliance for anything other than its intended purpose, and only use it as described in this manual
- Accessories: Do not use any accessories with the appliance that are not supplied or specifically recommended.
When using electric appliances always observe safety regulations where applicable to reduce the risk of fire, electric shock and personal injury. Always check that the power supply corresponds to the voltage on the rating plate.
This appliance is intended to be used in household and similar applications such as:
– staff kitchen areas in shops, offices and other working environments;
- farm houses;
– by clients in hotels, motels and other residential type environments;
- bed and breakfast type environments.
Supply Cord and Plug
Always unplug from mains supply when not in use. Do not abuse or damage the power cord. If the supply cord is damaged, it must be replaced by the manufacturer or its service agent or a similarly qualified person in order to avoid a hazard. Do not let the supply cord touch hot surfaces.
When cleaning or putting the Mixer away, switch off the appliance and always pull out the plug from the socket (pull on the plug, not the cable)
Double Insulation Safety
This appliance is double insulated for your protection. Do not attempt to repair a double insulated appliance. Return to the supplier or qualified technician for repair.
Use and Environment
Do not leave unattended while in use. Do not use outdoors. Do not use directly below a socket outlet. This appliance is not intended to be operated by means of an external timer or separate remote-control system.
This appliance is designed exclusively for private, domestic use and is not suitable for commercial or industrial use. Only use the appliance on a stable, level, heat-resistant surface.
Do not use this appliance for any purpose other than those stated in this manual.
NOTE: Do not move the appliance whilst it is in use.
WARNING: Do not insert anything into the rotating hooks while the machine is working.
Supervision
This appliance is not intended for use by persons (including children) with reduced physical, sensory or mental capabilities, or lack of experience and knowledge, unless they have been given supervision or instruction concerning use of the appliance by a person responsible for their safety. Children should be supervised to ensure that they do not play with the appliance.
Damaged or Dropped
Always inspect your appliance before use. Check parts are correctly attached. Do not use this appliance if it has been damaged, dropped, left outdoors or dropped in water. Return it to an authorised service dealer for examination and repair.
Water
Do not immerse the appliance or its supply cord in water. Do not use with wet hands or use in damp situations.
Warning
Do not operate the machine continuously for more than 6 minutes.
After use, the machine should be turned off and left to cool down for 10 minutes. Operate the appliance only when the accessory/tool is attached according to these instructions and is in the operating position.
There is a risk of injury from the rotating tools!
While the appliance is operating, keep fingers clear of the mixing bowl. Do not change tools until the appliance is at a standstill and has been unplugged. When switched off, the drive will continue running briefly.
ASSEMBLY AND PARTS
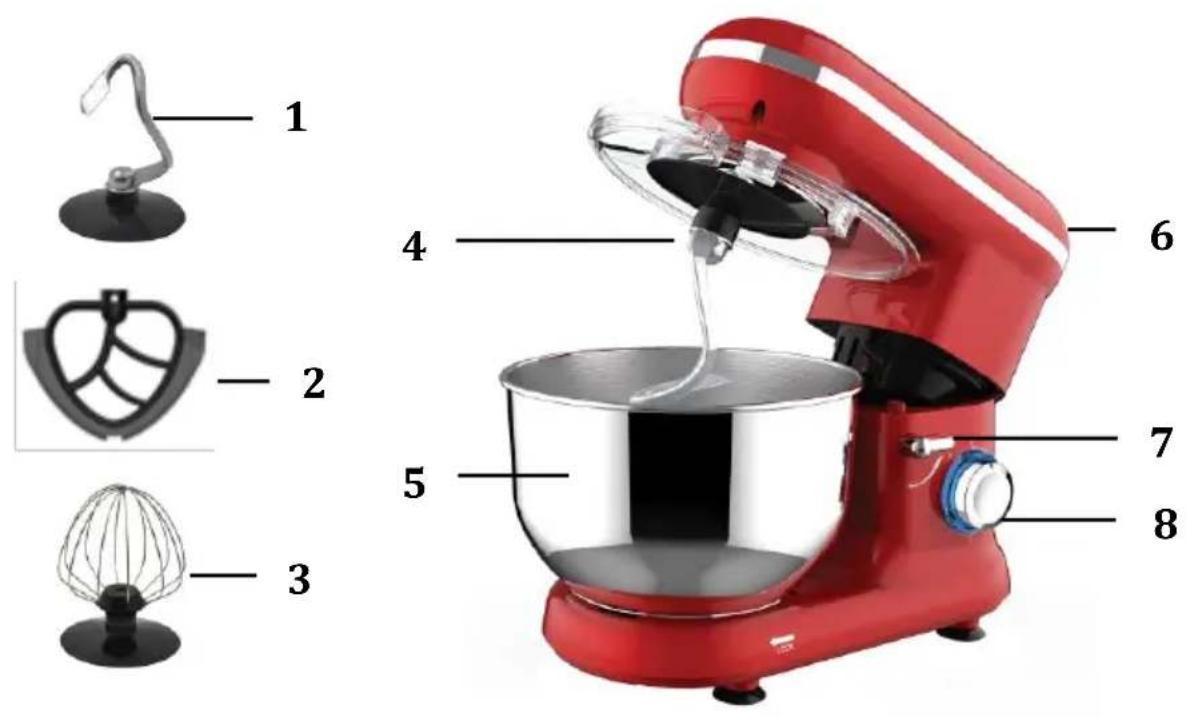
text_image
Labeled diagram of a red kitchen mixer with eight component parts shown in separate views.- Dough Hook
- Beater
- Whisk
-
Attachment Shaft
-
Mixing Bowl
- Mixer Head
- Tilt Button
- Speed Control
Before First Use
After unpacking, ensure that the contents are complete and check for any transit damage in order to avoid any danger. Do not use it if in any doubt, but contact our customer service.
In order to protect against damage during transit, your appliance is packaged.
- Remove the appliance carefully from its sales packaging.
- Remove all packaging elements.
- Keep all packaging away from Children. Danger of suffocation.
- Clean the appliance and all accessories to remove all packaging dust according to the instructions in the chapter "CLEANING AND MAINTENANCE"
Attaching the Mixing Bowl
- Place one hand on top of the Mixer Head and with the other hand press the tilt button downward as per the arrow. Lift the Mixer Head up until it stops and then release the "Tilt" button and the Mixer Head will lock into the elevated position.
-
Fit the bowl so that it aligns with the grooves on the Mixer Stand.
-
To lock the mixing bowl, turn it clockwise following "LOCK" on the Mixer Stand. Make sure that the mixing bowl is securely locked in place.
Inserting Dough Hook/Beater/Whisk
- Align the chosen attachment so that grooves on attachment align with the Attachment Shaft located under the Mixer Head.
With some pressure, push the attachment towards the Mixer Head lifting the Attachment Shaft spring upwards. Twist the attachment in an anti-clockwise direction.
Make sure that the attachment is securely locked in place.
NOTE: It is important that the Dough Hook, Beater or Whisk attachment is securely locked into place on the Attachment Shaft or your Bench Top Mixer will not operate correctly.
Removing the Dough Hook/Beater/Whisk
- Lift up the Mixer Head and then hold onto the assembled attachment. With some pressure, push the attachment towards the Mixer Head lifting the Attachment Shaft spring upwards. Twist the attachment in a clockwise direction.
Pull the attachment away from the Attachment Shaft to remove it from the Mixer Head.
INSTRUCTIONS
Using Your Bench Top Mixer
- Ensure the Speed Control Dial is set to the "OFF" position.
- Place one hand on top of the Mixer Head and with the other hand press the tilt button downward as per the arrow. Lift the Mixer Head up until it stops. Release the "Tilt" button and the Mixer Head will lock into the elevated position.
- Attach and securely lock the Mixing Bowl in place.
- Insert the Dough Hook, Beater or Whisk depending on which attachment the recipe requires.
- Add ingredients into the Mixing Bowl. Do not overfill the bowl. It is recommended not to mix more than 1.2 kg (700g dough+500g water) each time.
- Place one hand on top of the Mixer Head and with the other hand press the tilt button downward as per the arrow. Press the Mixer Head down until it is in the horizontal position and the Dough Hook, Beater or Whisk attachment is inside the Mixing Bowl. Release the "Tilt" button.
- Insert the power cord into a suitable 220-240V power outlet and switch the power outlet on. The Speed Control Dial will illuminate and "flash" Blue.
- To commence mixing, turn the Speed Control Dial in a clockwise direction. The Speed Control Dial will illuminate blue. Always begin mixing at a lower speed setting to prevent splattering Increase the speed that is suited to the mixing task. The speed setting can be adjusted during operation by turning the Speed Control Dial. Use the Mixing Guide in the next section as a reference.
- Use the Pulse Function when you require a quick burst of power or for quick mixing tasks. Turn the Speed Control Dial in an anti-clockwise direction and hold it in this position. Hold the dial for no more than 30 seconds at one time. When the dial is released, it will return to the "OFF" position automatically.
- Occasionally stop the mixer during the operation and scrape any food mixture down the sides of the mixing bowl with spatula.
- NOTE: Always turn the Speed Control Dial to the "OFF" position if you need to scrape down the mixing bowl during use.
- When mixing is complete, turn the Speed Control Dial to the "OFF" position. Switch the appliance off at the power outlet and remove the power cord from the outlet.
OTHER USEFUL INFORMATION
Mixing Guide
| Speed | Activity | Attachment | Mixture |
| 1 – 3 | Kneading | Dough Hook | Recipes that call for LOW speedPizza & PastaDough, BreadDough, Scones |
| 3 – 4 | Light Mixing | Beater | Recipes that call for MEDIUM speedCake & BiscuitButter & SugarEggIcing |
| 5 – 6 | Aerating and Whisking | Whisk | Egg Whites & CreamNOTE: min QTY is 3 Eggs |
| Pulse | Quick Burst | Whisk | Interval (e.g. for mixing under sponge, egg white) |
NOTE: MAX operation time: With heavy mixtures, do not operate the machine for more than six minutes, and then allow it to cool down for a further ten minutes.
NOTE: Always begin mixing at a low speeds, then increase to a high speed to prevent splattering.
TROUBLESHOOTING
| Problem | Solution |
| Unsure which attachment to use. | Refer to the Recipe that you are using.Use the dough hook only for the preparation of yeast/ bread dough.Use the whisk for aerating egg whites.Use the beater for all mixing tasks. |
| Unsure of which speed setting to use | Refer to the Recipe that you are using.Use above the Mixing Guide to help select correct mixing speed when preparing recipes.Begin mixing at lowest speed, then increase to higher speed to prevent splattering. |
| Over-mixing has occurred | Mix for the recommended time in the recipe to avoid over-mixing. |
| Egg whites are not whipping | Be sure the whisk attachment and mixing bowl are completely clean and dry before use as even a small amount of fat will affect the whipping performance.Ensure minimum mixing quantities are adhered to. |
| Bread dough is not combining | Some brands of flour absorb more liquid than others so additional amounts of liquid may need to be added if the bread is not combining.DO NOT use high speed to knead dough. |
| If batter is too firm and some ingredients on sides of bowl | Add more liquid to your batter or use a spatula to scrape any food mixture down the sides of the mixing bowl. |
| Mixture is curdling after the eggs have been added. | Add eggs one at a time, beating well after each addition.Make sure eggs are at room temperature. |
| Sugar crystals still visible after creaming | Continue to cream until sugar has dissolved, or use caster sugar. |
| Lumps in batter or dough | Sift the flour and sugar before mixing. |
CLEANING and MAINTENANCE
This appliance requires little maintenance. It contains no user-serviceable parts. Any servicing requiring disassembly other than cleaning must be performed by a qualified appliance repair technician.
- Clean the appliance after each use.
Before Cleaning
- When not in use or before cleaning, always disconnect the appliance from the mains supply.
- Never immerse the motor unit in water or any other fluid, do not rinse it under the tap. Use only a moist cloth to clean the motor unit.
- Care should be taken when handling the sharp cutting blades, emptying the bowl and during cleaning.
Care and Cleaning
CAUTION: Never immerse the motor base, plug or cord in water or any other liquid.
• Always clean the product immediately after each use.
- Wipe the outside of the appliance with a moist cloth.
- Thoroughly wash parts in warm, soapy water (a soft nylon brush may be helpful) then rinse and dry with a dry towel.
- Make sure all parts are clean and dry.
Note: Parts are not dishwasher safe
NOTICE: Never use rough scouring pads or abrasive cleansers on any plastic or metal parts as the surface may be damaged.
Store in a Safe Place
When not in use store your appliance and all its accessories and instruction manual in a safe and dry place
Damaged or Dropped
Always inspect your appliance before use. Check the power supply cord and plug regularly for cuts or damage. Do not use this appliance if it has been damaged, dropped, left outdoors or dropped in water.