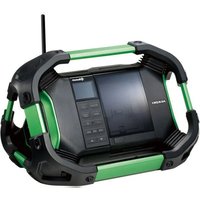
KH530B - Radio HITACHI - Free user manual and instructions
Find the device manual for free KH530B HITACHI in PDF.

| Product Type | AM/FM Radio |
| Brand | Hitachi |
| Model | KH530B |
| Dimensions (approx.) | 250 x 150 x 80 mm |
| Weight (approx.) | 1.2 kg |
| Power Supply | 4 x AA batteries (not included) or AC adapter (6V, sold separately) |
| Frequency Bands | AM (520-1710 kHz) and FM (88-108 MHz) |
| Controls | Power/Volume knob, Tuning knob, Band selector, Tone control |
| Audio Output | Built-in speaker; 3.5mm headphone jack |
| Antenna | Telescopic FM antenna; built-in ferrite AM antenna |
| Display | Analog tuning dial with frequency markings |
| Cleaning Instructions | Wipe with a soft, dry cloth. Do not use liquids or abrasive cleaners. |
| Safety Precautions | Keep away from water and moisture. Do not disassemble. Use only specified power sources. |
| Spare Parts Availability | Contact Hitachi service centers for replacement parts (antenna, knobs, etc.) |
| Repair Information | Refer to user manual or authorized repair centers. Do not attempt internal repairs. |
| Included Accessories | User manual, warranty card (batteries and AC adapter not included) |
Frequently Asked Questions - KH530B HITACHI
User questions about KH530B HITACHI
0 question about this device. Answer the ones you know or ask your own.
Ask a new question about this device
Download the instructions for your Radio in PDF format for free! Find your manual KH530B - HITACHI and take your electronic device back in hand. On this page are published all the documents necessary for the use of your device. KH530B by HITACHI.
USER MANUAL KH530B HITACHI
Safety Warnings....7
Unpacking....9
Product Overview....10
Front View 10
Rear View....10
Top View 11
Side View 11
Power Source 12
Mains Power....12
Battery Power 13
Battery Life (Approx. hours)....13
Knowing when to Replace the Batteries....13
Connections 14
Using Earphones 14
Basic Operation 15
Powering ON/OFF 15
Selecting Modes....15
Adjusting the Volume....15
Automatically Setting the Clock....15
Setting the Time and Date 15
Factory Reset....16
Software Version....17
DAB Operation....18
Full Scan....18
Manual Tuning....18
Presetting Stations....19
Recalling a Preset Station....19
Prune Invalid....19
DAB Display Modes 20
FM Operation 22
Switching from DAB to FM Mode....22
Auto Scan....22
Manual Scan....22
Scan Setting 22
Audio Setting....23
Presetting Stations....23
Recalling a Stored Station....23
FM Display Modes....24
Maintenance 25
Hints and Tips....25
Specifications....26
SOME DOS AND DON'TS ON THE SAFE USE OF EQUIPMENT
This equipment has been designed and manufactured to meet international safety standards but, like any electrical equipment, care must be taken if you are to obtain the best results and safety is to be assured.

DO read the operating instructions before you attempt to use the equipment.
DO ensure that all electrical connections (including the mains plug, extension leads and interconnections between the pieces of equipment) are properly made and in accordance with the manufacturer's instructions. Switch off and withdraw the mains plug before making or changing connections.
DO consult your dealer if you are ever in doubt about the installation, operation or safety of your equipment.
DO be careful with glass panels or doors on equipment.
DO route the mains lead so that it is not likely to be walked on, crushed, chafed, or subjected to excessive wear and tear or heat.

DON'T remove any fixed cover as this may expose dangerous voltages.
DON'T obstruct the ventilation openings of the equipment with items such as newspapers, tablecloths, curtains, etc. Overheating will cause damage and shorten the life of the equipment.
DON'T allow electrical equipment to be exposed to dripping or splashing, or objects filled with liquids, such as vases, to be placed on the equipment.
DON'T place hot objects or naked flame sources such as lighted candles or nightlights on, or close to equipment. High temperatures can melt plastic and lead to fires.
DON'T use makeshift stands and NEVER fix legs with wood screws - to ensure complete safety always fit the manufacturer's approved stand or legs with the fixings provided according to the instructions.
DON'T use equipment such as personal stereos or radios so that you are distracted from the requirements of traffic safety.
DON'T listen to headphones at high volume, as such use can permanently damage your hearing.
DON'T leave equipment switched on when it is unattended unless it is specifically stated that is designed for unattended operation or has a stand-by mode. Switch off using the switch on the equipment and make sure that your family knows how to do this. Special arrangements may need to be made for infirm or handicapped people.
DON'T continue to operate the equipment if you are in any doubt about it working normally, or if it is damaged in any way – switch off, withdraw the mains plug and consult your dealer.

ABOVE ALL
- NEVER let anyone especially children push anything into holes, slots or any other opening in the case – this could result in a fatal electric shock;
- NEVER guess or take chances with electrical equipment of any kind;
- it is better to be safe than sorry!
natural_image
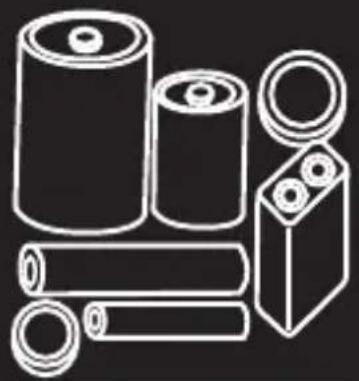
Illustration of various electronic components including batteries, coils, and a battery pack (no text or symbols)BATTERY
SAFETY
GUIDELINES
Used correctly, domestic batteries are a safe and dependable source of portable power. Problems can occur if they are misused or abused – resulting in leakage or, in extreme cases, fire or explosion. Here are some simple guidelines to safe battery use designed to eliminate any such problems.
natural_image
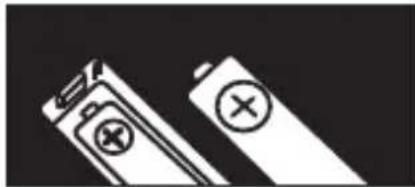
Two batteries with different charging symbol icons, one open and one closed, against a black background (no text or labels)Take care to fit your batteries correctly, observing the plus and minus marks on the battery and appliance. Incorrect fitting can cause leakage or, in extreme cases, fire or even an explosion.
natural_image
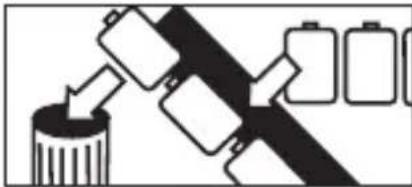
Diagram showing battery arrangement with arrows indicating flow from a cylindrical container to two batteries (no text or symbols)Replace the whole set of batteries at one time, taking care not to mix old and new batteries or batteries of different types, since this can result in leakage or, in extreme cases, fire or even an explosion.
natural_image
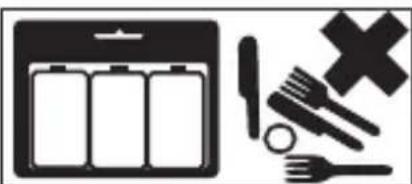
Icon set showing a battery, battery pack, crossed-out fork, and cross symbol (no text or labels)Store unused batteries in their packaging and away from metal objects which may cause a short-circuit resulting in leakage or, in extreme cases, fire or even an explosion.

natural_image
Abstract geometric pattern with diagonal stripes and irregular shapes on a black background (no text or symbols)Remove dead batteries from equipment and all batteries from equipment you know you are not going to use for a long time. Otherwise the batteries may leak and cause damage.
natural_image
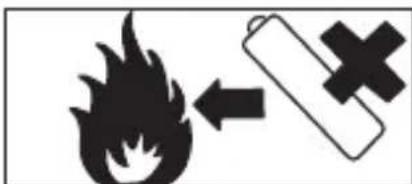
Warning symbol with flame and battery icon (no text or numbers)Never dispose of batteries in fire as this can cause them to explode. Please recycle dead batteries; do not put with the normal household waste.

natural_image
Abstract black-and-white graphic with a gauge, gear, cross, and house symbols (no text or readable labels)Never attempt to recharge ordinary batteries, either in a charger or by applying heat to them. They may leak, cause fire or even explode. There are special rechargeable batteries which are clearly marked as such.

natural_image
Illustration of a hand holding a device with a rectangular component (no text or symbols)Supervise children if they are replacing batteries themselves in order to ensure these guidelines are followed.

natural_image
Illustration of a stylized human mouth with a pill and a cross symbol (no text or labels)Remember that small button cell batteries such as used in some hearing aids, toys, games and other appliances, are easily swallowed by young children and this can be dangerous.

natural_image
Abstract black-and-white graphic with white hand icons and curved lines, no text or symbols presentKeep loose button cells away from young children.
natural_image
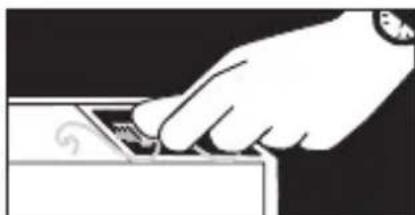
Hand inserting a small object into a device (no text or symbols visible)Make sure battery compartments are secure.

natural_image
Diagram of a human torso with a downward arrow and a coin, accompanied by a cross symbol (no text or labels)Seek medical advice if you believe a cell has been swallowed.
Safety Warnings
- Read all the instructions carefully before using the unit and keep them for future reference.
- Retain the manual. If you pass the unit onto a third party make sure to include this manual.
- Check that the voltage marked on the rating label matches your mains voltage.
Damage
- Please inspect the unit for damage after unpacking.
- Do not continue to operate the unit if you are in any doubt about it working normally, or if it is damaged in any way - switch off, withdraw the mains adapter and consult your dealer.
Location of Unit
- The unit must be placed on a flat stable surface and should not be subjected to vibrations.
- Do not place the unit on sloped or unstable surfaces as the unit may fall off or tip over.
- The mains socket must be located near the unit and should be easily accessible.
Temperature
- Avoid extreme degrees of temperature, either hot or cold. Place the unit well away from heat sources such as radiators or gas/electric fires.
- Avoid exposure to direct sunlight and other sources of heat.
Naked Flames
- Never place any type of candle or naked flame on the top of or near the unit.
Moisture
- To reduce the risk of fire, electric shock or product damage, do not expose this unit to rain, moisture, dripping or splashing. No objects filled with liquids, such as vases, should be placed on the unit. Do not operate the unit with wet hands, near water or other liquid.
- If you spill any liquid into the unit, it can cause serious damage. Switch it off at the mains immediately. Withdraw the mains adapter and consult your dealer.
Ventilation
- To prevent the risk of electric shock or fire hazard due to overheating, ensure that curtains and other materials do not obstruct the ventilation vents.
- Do not install or place this unit in a bookcase, built-in cabinet or in another confined space. Ensure the unit is well ventilated.
Safety
- Always disconnect the unit from the mains supply before connecting/disconnecting other devices or moving the unit.
• Unplug the unit from the mains socket a before lightning storm.
Mains Cable
- Make sure the unit is not resting on top of the mains cable, as the weight of the unit may damage the mains cable and create a safety hazard.
- If the mains cable is damaged it must be replaced by the manufacturer, its service agent, or similarly qualified persons in order to avoid a hazard.
Interference
- Do not place the unit on or near appliances which may cause electromagnetic interference. If you do, it may adversely affect the operating performance of the unit, and cause a distorted picture or sound.
Batteries
- Batteries used in the unit are easily swallowed by young children and this is dangerous.
- Keep loose batteries away from young children and make sure that the battery holder tray is secure in the unit. Seek medical advice if you believe a cell has been swallowed.
- Please dispose of batteries correctly by following the guidance in this manual.
Supervision
• Children should be supervised to ensure that they do not play with the unit.
- Never let anyone especially children push anything into the holes, slots or any other openings in the case - this could result in a fatal electric shock.

text_image
CAUTION RISK OF ELECTRIC SHOCK DO NOT OPEN
The lightning flash with arrowhead symbol, within an equilateral triangle, is intended to alert the user to the presence of uninsulated “dangerous voltage” within the unit’s enclosure that may be of sufficient magnitude to constitute a risk of electric shock.

The exclamation point within an equilateral triangle is intended to alert the user to the presence of important operating and maintenance (servicing) instructions in the manual accompanying the unit.
Service
- To reduce the risk of electric shock, do not remove screws. The unit does not contain any user-serviceable parts. Please leave all maintenance work to qualified personnel.
- Do not open any fixed covers as this may expose dangerous voltages.
Maintenance
- Ensure to unplug the unit from the power supply before cleaning.
- Do not use any type of abrasive pad or abrasive cleaning solutions as these may damage the unit's surface.
• Do not use liquids to clean the unit.
Thank you for purchasing your new Hitachi Radio.
We recommend that you spend some time reading this instruction manual in order that you fully understand all the operational features it offers. You will also find some hints and tips to help you resolve any issues.
Read all the safety instructions carefully before use and keep this instruction manual for future reference.
Unpacking
Remove all packaging from the unit. Retain the packaging. If you dispose of it please do so according to local regulations.
The following items are included:
natural_image
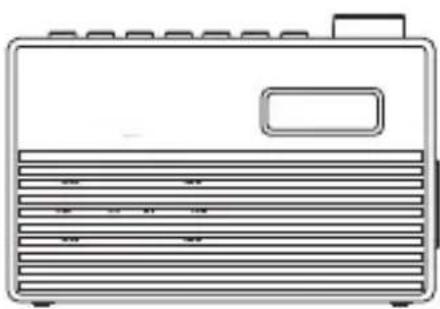
Line drawing of a portable electronic device with ventilation slots and a rectangular button (no text or symbols)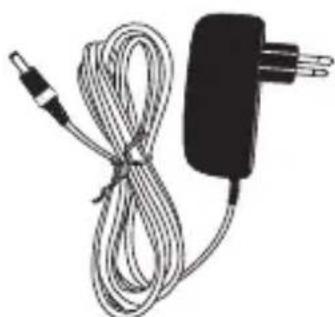
natural_image
Coiled cable and power adapter with a black plug (no text or symbols visible)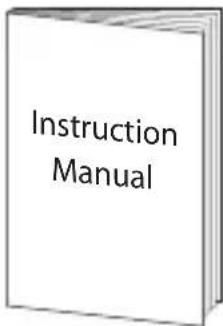
text_image
Instruction ManualMains Adapter Instruction ManualMain Unit
Product Overview
Front View


text_image
1 2- Display
- Speaker
Rear View

text_image
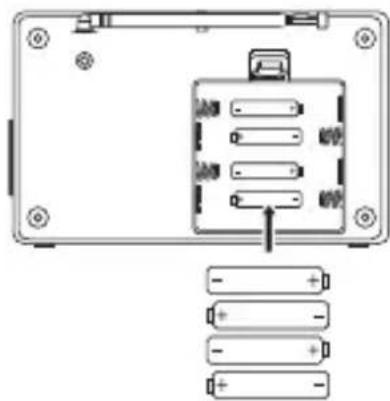
1 OPEN 2- Aerial 2. Battery Compartment
Top View

text_image
STANDST PRESET SELECT MODE TUNCH MENU/INFO -VOL+ 1 2 3 4 5 6 7- STANDBY Button
- PRESET Button
- SELECT Button
-
MODE Button
-
TUN/CH Button
- MENU/INFO Button
- -VOL+ Button
Side View
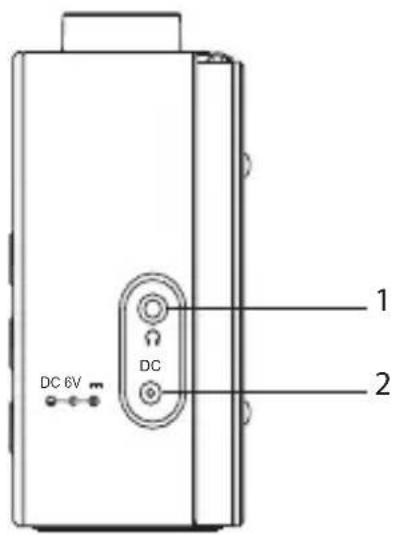
text_image
DC 6V DC 1 2-
Earphones Socket
-
DC 6V -Socket +
Power Source
Mains Power
-
Connecting the unit to any other power source may cause damage the unit. Unwind the mains adapter cable to its full length. Connect the end of the cable to the DC 6V —— ⊙—⊕ Socket at the right side of the unit and then connect the mains adapter to the mains socket. Make sure the mains adapter is firmly inserted into the mains socket. The unit is now ready to use.
-
To switch the unit off completely, unplug the mains plug from the mains socket.

text_image
DC 6V DCBattery Power
Insert 4 X 1.5V AA batteries (not included) correctly by following the polarity (+ or -) indications in the battery compartment.
natural_image
Diagram of a device rear panel with internal components and battery bank connections (no text or symbols)Battery Life (Approx. hours)
| When Using DAB FM | ||
| Alkaline (Size AA) 8 8 |
Knowing when to Replace the Batteries
- When the batteries become weak, the sound becomes weak and distorted. The display backlight becomes unstable when a button is pressed. The display will show "Battery Low".
- When the batteries are completely exhausted, the power is turned off.

Handling the Batteries
- Improper or incorrect use of batteries may cause corrosion or battery leakage, which could cause personal injury or damage to property.
- Install the batteries correctly by following the polarity (+ and -) indications in the battery compartment.
• Use only the types of batteries which are indicated in this manual. - Do not install new batteries with used ones and do not mix different types of batteries.
- Do not dispose of the used batteries as domestic waste. Dispose of them in accordance with local regulations.
- If you are not going to use the unit for a long time, remove the batteries to avoid damage from battery leakage and corrosion.
- Due to the short battery life span of some alkaline batteries, it is recommended to use rechargeable batteries. You will need to purchase a charger to charge the rechargeable batteries. This saves cost and is more environmental-friendly.
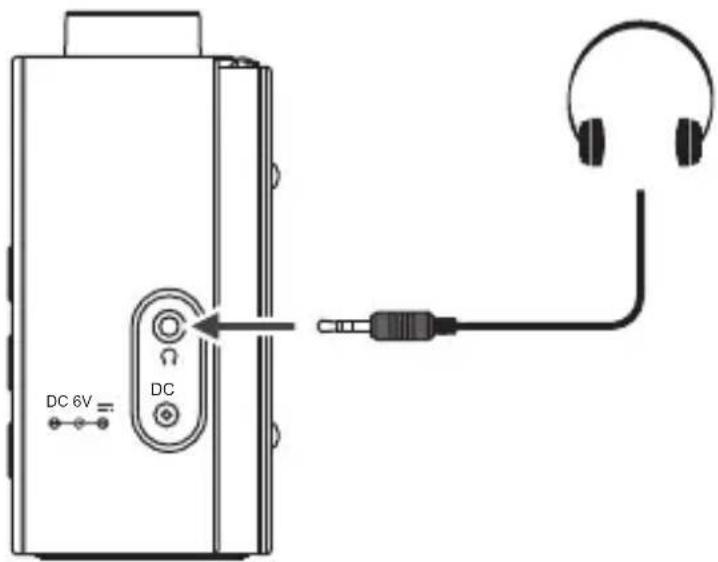
Connections
Using Earphones
Turn down the volume before connecting earphones. Slowly raise the volume with the earphones on until you reach your desired level.
text_image
DC 6V DC
Long-term exposure to loud music may cause hearing damage. It is best to avoid extreme volume when using earphones, especially for extended periods of time.
Powering ON/OFF
After connecting the mains adapter to the unit and the mains socket, the unit will enter Standby mode.
- Press the STANDBY button to switch on the unit.
- Press the STANDBY button again to switch the unit back to Standby mode.
- Disconnect the power cable of the mains adapter from the mains socket if you want to switch the unit off completely.
While using battery power,
- Press the STANDBY button to switch on the unit.
- Press the STANDBY button again to switch off the unit.
Selecting Modes
Press MODE button repeatedly to switch between modes (DAB or FM).
Adjusting the Volume
Turn the -VOL+ dial to adjust the the volume.
Automatically Setting the Clock
The clock will be updated automatically if you can receive DAB/FM signal in your location.
In order to synchronise to the current local time, you must leave it on the DAB/FM station for a period of time.
Setting the Time and Date
- Switch on the radio, press and hold MENU/INFO to display the menu.
-
Press ▼TUN/CH ▲ buttons to select
, and then press SELECT to confirm. Press ▼TUN/CH ▲ buttons to select -
Press the ▼UN/CH buttons to select the option below:
| Set time/date | Press ▼TUN/CH buttons to adjust the time and date, then press SELECT to confirm. |
| Auto update | Press ▼TUN/CH buttons to select Update from Any, DAB, FM or No Update then press SELECT to confirm. |
| Set date format | Press ▼TUN/CH buttons to select MM-DD-YYYY or DD-MM-YYYY, then press SELECT to confirm. |
- Press MENU/INFO to exit the menu.
Factory Reset
When you move the unit to another part of the country, your pre-tuned and stored DAB/FM stations may no longer be available and you might need to reset the unit back to its original factory settings. To perform a factory reset, please do the following:
- Press and hold MENU/INFO and then press TUN/CH buttons to select
. Press SELECT to confirm. - Press ▼TUN/CH ▲ buttons to select
and then press SELECT to confirm. - The display will show "Factory Reset?". Press ▼TUN/CH ▲ buttons to select
. - Press SELECT button to start the system reset, "Restarting..." will show on the display. After the reset is complete, the unit will enter Standby mode.

After the factory reset, all the tuned stations, DAB & FM preset stations will be erased.
Software Version
- Press and hold MENU/INFO and then press TUN/CH buttons to select
. Press SELECT to confirm. - Press ▼TUN/CH ▲buttons to select
, then press SELECT to confirm. - The software version will show on the display.
- Press MENU/INFO to exit.

DAB Operation
If the unit is connected to the mains power for the first time, the unit will show "Welcome! Digital Radio" and then "00:00:00 Time is not set". Press the STANDBY button to switch on the unit and perform auto scan. During the scan the display will show "Scanning..." together with a slide bar that indicates the progress of the scan and the number of stations that have been found so far.
Once the scan has finished, the unit will select the first alphanumerically found station. To explore the found stations, press ▼TUN/CH and then SELECT to confirm selection.
Full Scan
The full scan will search for the entire DAB Band III channels. After the scan has finished, the first alphanumerically found station will be automatically selected.

Full scan will not replace the DAB stations in memory. If you want to remove all the previously scanned stations, factory reset is required.
- To activate full scan, press and hold MENU/INFO then ▼TUN/CH ▲ to select
. Press the SELECT button to confirm. The display will show "Scanning..." and a progressing slide bar. - All the stations that have been found will be stored automatically. To explore and listen to the found stations, press TUN/CH and then SELECT to confirm selection.
Manual Tuning
Manual tuning can help add stations that were missed by full scan.
- Press and hold MENU/INFO and then ▼TUN/CH ▲ to select
. Press SELECT to confirm. - Press ▼UN/CH to scroll through the DAB channels, which are numbered from 5A to 13F.
- Press SELECT to select the station that you would like to listen to.
Presetting Stations
You can store up to 10 of your favourite DAB stations to the memory. This will enable you to access your favourite stations quickly and easily.
- To store a preset, you must first be listening to the station that you would like to save. Press and hold PRESET. The display will show "Preset Store <#:(Empty)>".
- Press TUN/CH to select the desired preset station number and then press SELECT to confirm.
- The station will be stored and the screen will show "Preset # stored".
Recalling a Preset Station
- Once you have saved a station, you can recall it by pressing the PRESET button.
- Press VUN/CH to select the desired preset station number
- Press SELECT to confirm.
- If you choose a preset station number that has not been allocated a station, "Preset Empty" will be displayed.
Prune Invalid
You may remove all unavailable stations from the list.
-
During DAB mode, press and hold MENU/INFO button, and then press ▼TUN/CH ▲ buttons to select
. Press SELECT to confirm. -
Press ▼TUN/CH ▲buttons to select
to confirm delete. Or select to cancel.
DAB Display Modes
Every time you press MENU/INFO, the display will show the following display modes.
Scrolling text
This is a scrolling message giving real-time information, e.g. song titles, news headlines, etc.
Signal Strength
This show a slide bar to indicate the signal strength, the stronger the signal, the longer the bar will be from left to right.
Programme Type
This describes the "style" or "genre" of the programme that is belong broadcast.
Ensemble
This display the name of the multiplex that contains the station you are listening to. A multiplex is a collection of radio stations that are bundled and transmitted on one frequency. There are national and local multiplexes. Local ones contain stations that are specific to that area.
Frequency
This display the frequency of the present station, such as "11C 220.352MHz".
Signal Error
This displays a number showing the error rate. If the number is 0, it means the signal received is error free and the signal strength is strong. If the error rate is high, it is recommended to re-orient the aerial or re-position the unit.
Bitrate and codec
This shows the radio mode and the digital audio bit rate being received.
Power Used
This shows the power source (Mains Power or Battery) of the unit.
Time
This display the current time provided automatically by the broadcaster.
Date
This display the current date provided automatically by the broadcaster.

flowchart
graph TD
    A["Scrolling text"] --> B["Signal Strength"]
    B --> C["Programme Type"]
    C --> D["Ensemble"]
    D --> E["Frequency"]
    E --> F["Signal Error"]
    F --> G["Bitrate and codec"]
    G --> H["Power Used"]
    H --> I["Time"]
    I --> J["Date"]
    K["GB"] --> A
Switching from DAB to FM Mode
To switch the unit from DAB to FM mode, press MODE once.

Auto Scan
To search for an FM station, press ▼TUN/CH ▲ and then press SELECT to start the forward or reverse scanning. "Scanning..." will show on the display. Once a station has been found, the scanning will stop automatically.
Manual Scan
To search for FM stations manually, press ▼TUN/CH repeatedly until your desired frequency is reached.

With FM radio, it may be necessary to fine tune each station by pressing ▲ TUN/CH▼ repeatedly. Each press will adjust the frequency by 0.05 MHz. If reception is still poor, adjust the position of the aerial or try moving the radio to another location.
Scan Setting
This is a scanning option to scan all stations, or just scan stations with strong signal.
- Press and hold MENU/INFO and then press YUN/CH to select
. Press SELECT to confirm. - Press ▼TUN/CH ▲ to select
or . Press SELECT to confirm.
Audio Setting
FM is able to search for Stereo or Mono stations.
- Press and hold MENU/INFO and then press TUN/CH to select
- Press ▼TUN/CH ▲ to select
or . Press SELECT to confirm.

The unit will automatically switch between stereo and mono when
Presetting Stations
You can store up to 10 of your favourite stations to the memory. This will enable you to access your favourite stations quickly and easily.
- To store a preset, you must first be listening to the station that you would like to save. Press and hold PRESET. The display will show "Preset Store <#: (Empty)>".
- Press TUN/CH to select the desired preset station number and then press SELECT to confirm.
- The station will be stored and the screen will show "Preset # Saved".
Recalling a Stored Station
- Once you have saved a station, you can recall it by pressing PRESET.
- Press YUN/CH to select the desired preset station number
- Press SELECT to confirm.
- If you choose a preset station number that has not been allocated a station, "Preset Empty" will be displayed.
FM Display Modes
Every time you press MENU/INFO, the display will show the following display modes.
Radio Text
This is a scrolling message information about the current programme.
Programme Type
This describes the "Style" or "genre" of programme that is being broadcast.
Frequency
This display the frequency of the present station, such as "87.50 MHz".
Station Name
This display the station name.
Audio Info
This displays if the station being received is in mono or stereo.
Power Used
This shows the power source (Mains Power or Battery) of the unit.
Time
This displays the current time provided automatically by the broadcaster.
Date
This displays the current date provided automatically by the broadcaster.

flowchart
graph TD
    A["Radio Text"] --> B["Programme Type"]
    B --> C["Frequency(Station Name)"]
    C --> D["Audio Info"]
    D --> E["Power Used"]
    E --> F["Time"]
    F --> G["Date"]
Maintenance

Ensure to unplug the unit from the mains socket before cleaning.
• To clean the unit, wipe the case with a slightly moist, lint-free cloth.
- Do not use any cleaning fluids containing alcohol, ammonia or abrasives.
• Do not spray an aerosol at or near the unit.
Hints and Tips
| Problem Solution | |
| No Sound Adjust the volume. | |
| Static Sound Signal reception is too low. Adjust the aerial or move the unit to a stronger signal location. | |
| Sound is distorted Volume is too high. Adjust the volume. | |
| FM station not found Weak signal. Search manually. | |
| DAB station not found No | DAB coverage in your area or poor reception. Adjust the position of the aerial. |
| The display is blank This may occur if the broadcaster changes the label of a service or removes a label while tuned. The unit will try to re-tune or perform a scan. | |

If any anomalies are encountered, unplug the unit from the mains socket and reconnect again.
Specifications

| Model KH530B | |
| Mains Adapter Input AC | 100–240V ~50/60Hz, 0.3AOutput DC 6V 0.5A |
| Battery DC 1.5V x 4, AA size | |
| Speaker Output Power 1.0 W RMS | |
| Radio Frequency FM 87.5 | - 108 MHzDAB 174 – 240 MHz |
| Dimension 156 mm (W) x | 52 mm (D) x 107 mm (H) |
| Net Weight 0.34 kg | |
Features and specifications are subject to change without prior notice.
Notes for battery disposal
The batteries used with this product contain chemicals that are harmful to the environment. To preserve our environment, dispose of used batteries according to your local laws or regulations. Do not dispose of batteries with normal household waste.
For more information, please contact the local authority or your retailer where you purchased the product.

natural_image
Symbol of a trash bin crossed with a diagonal line, no text or numbers presentThe above mark is in compliance with the Waste Electrical and Electronic Equipment Directive 2002/96/EC (WEEE). The mark indicates the requirement NOT to dispose the equipment including any spent or discarded batteries as unsorted municipal waste, but use the return and collection systems available. If the batteries or accumulators included with this equipment display the chemical symbol Hg, Cd or Pb, then it means that the battery has a heavy metal content of more than 0.0005% Mercury, or more than 0.002% Cadmium or more than, 0.004% Lead.
In the unlikely event of a problem developing, please contact the store where you purchased your equipment.
We continually strive to improve our products; specifications may change without prior notice.
For advice on where to purchase accessories, please contact the store where you purchased your equipment.
All trademarks are the property of their respective owners and all rights are acknowledged.
Manufacturer: Hitachi Europe Ltd., Whitebrook Park, Lower
Cookham Road, Maidenhead, Berkshire SL6 8YA U.K.