
FC-16 C - Kabellose Fernbedienung Neewer - Kostenlose Bedienungsanleitung
Finden Sie kostenlos die Bedienungsanleitung des Geräts FC-16 C Neewer als PDF.


| Produkttyp | 2,4 GHz Funkauslöser-Set (Sender + Empfänger) |
| Marke | Neewer |
| Modell | FC-16 C |
| Kanäle | 16 |
| Frequenzbereich | 2408–2480 MHz |
| Sync-Geschwindigkeit | 1/200 s |
| Effektive Auslöseentfernung | 25 m |
| Stromversorgung Sender | 2× AAA-Batterien (nicht im Lieferumfang) |
| Stromversorgung Empfänger | 2× AAA-Batterien (nicht im Lieferumfang) |
| Abmessungen Sender | 88 × 39 × 35 mm |
| Abmessungen Empfänger | 88 × 39 × 35 mm |
| Gewicht Sender | 50 g |
| Gewicht Empfänger | 50 g |
| Funktionen | Drahtlose Blitzauslösung (Studioblitz, Speedlite), Fernauslöser für Kamera (Normalaufnahme, Langzeitbelichtung, Verzögerungsaufnahme) |
| Anschlüsse Sender | Heißschuh, 2,5 mm Klinke (PC-Sync) |
| Anschlüsse Empfänger | Kalt-/Heißschuh, 1/4″-20 Gewindebohrung, 2,5 mm Klinke (Sync-Buchse, Auslösekabelanschluss) |
| Kompatible Kameras (abhängig vom Kabel) | Canon, Nikon, Sony (siehe Kabelmodelle C1, C3, N1, N3, S2) |
| Lieferumfang (je nach Version) | 1× Sender, 1× Empfänger, 1× Blitzsynchronkabel, 1× 3,5 auf 6,35 mm Adapter, 1–2× Auslösekabel (C1/C3, N1/N3 oder S2) |
| Besondere Merkmale | LED-Anzeigen für Signalstatus, Halb-/Vollauslösung am Sender, 16 Kanäle zur Vermeidung von Interferenzen |
| Sicherheitshinweise | Nicht in feuchter/hoher Temperatur oder brennbarer Umgebung verwenden, nicht mit Flüssigkeiten reinigen, nicht zerlegen oder modifizieren, Batterien korrekt polen, alte/neue Batterien nicht mischen, bei Nichtgebrauch ausschalten oder Batterien entfernen |
| Reinigung | Mit trockenem Tuch abwischen, keine Flüssigkeiten verwenden |
| Reparatur | Nicht selbst reparieren, nur durch autorisiertes Fachpersonal |
Häufig gestellte Fragen - FC-16 C Neewer
Benutzerfragen zu FC-16 C Neewer
0 Frage zu diesem Gerät. Beantworten Sie die, die Sie kennen, oder stellen Sie Ihre eigene.
Eine neue Frage zu diesem Gerät stellen
Laden Sie die Anleitung für Ihr Kabellose Fernbedienung kostenlos im PDF-Format! Finden Sie Ihr Handbuch FC-16 C - Neewer und nehmen Sie Ihr elektronisches Gerät wieder in die Hand. Auf dieser Seite sind alle Dokumente veröffentlicht, die für die Verwendung Ihres Geräts notwendig sind. FC-16 C von der Marke Neewer.
BEDIENUNGSANLEITUNG FC-16 C Neewer
NEEWER®
www.neewer.com

natural_image
Two black NEEWER flashlights with visible ports and buttons, shown from different angles (no text or symbols on the devices themselves)FC-16
2.4GHz Trigger
USER GUIDE
Description
Page
Introduction.... 1
Safety Note 2
Content of Carton.... 3
Name of Parts 4-5
Install Battery 6
Set Channel 7-8
Operate Radio Trigger 9-12
Wirelessly Trigger StudioFlash.... 9
Wirelessly Trigger Speedlite 10
Wirelessly Control Shutter Release.... 11-12
Technical Data.... 13
Models of Shutter release cable 14-16
Troubleshooting.... 17
Introduction
- A versatile, reliable kit that includes one 16 channel 2.4GHz radio transmitter and one 16 channel 2.4GHz radio receiver
- Remotely trigger speedlite, studio flash, and camera's shutter from up to 25m effective trigger distance
- The 2.4GHz frequency signal can pass through and around obstructions, and offer you flexibility trigger flash from any direction.
• 16 channels give you ability to avoid interference from other users.
• Flash Sync Speed up to 1/200 sec - LED indicators confirm communication between radio transmitter and radio receiver.
- Release shutter to take long exposure photography, Macro photography or wildlife photography
- Has a dual-function shutter release with half-press and full-press capabilities.
- Compatible with most major manufacturers' shoe-mount flashes with manual power control.
- Receiver can be mounted on any 1/4"-20 threaded stud or standard cold shoe.
• Each unit runs on two AAA batteries.
1.Safety Note
In order to protect camera from damage, avoid personal injury, please read these safety notes carefully before you use product. Please keep this user manual handy for your reference.
Do not use in high temperature, moisture or flammable environment.
Do not expose in direct sun for a long time.
Do not apply any fluids to the product.
Do not disassemble or modify.
Do not fall on hard object.
Do not attempt to service the unit on your own.
Do not mix different type of batteries; Do not mix new and old battery.
Do not install battery in reserve.
Before battery exhaust, take out battery to avoid damage to the product.
When the battery is in contact with the skin or clothing, rinse immediately with water.
Always keep out of reach of children.
2. Content of Carton
Sony version
1pc transmitter
1pc receiver
1pc Flash Sync Cable
1pc 3.5 to 6.35mm adapter
1pc S2 Sony shutter release cable
Nikon version
1pc transmitter
1pc receiver
1pc Flash Sync Cable
1pc 3.5 to 6.35mm adapter
1pc N1 Nikon shutter release cable
1pc N3 Nikon shutter release cable
Canon version
1pc transmitter
1pc receiver
1pc Flash Sync Cable
1pc 3.5 to 6.35mm adapter
1pc C1 Canon shutter release cable
1pc C3 Canon shutter release cable
3.Name of Parts—Transmitter

Receiver

4. Install Battery
Open the battery compartment, then insert 2 new AAA alkaline batteries or 2 AAA 1.2V rechargeable battery. Make sure that the polarity is correct: the "+" and "-" markings on the batteries and in the compartment must match.
Note: Lower battery power will result in no flash or missing flash. When batteries are in lower power, please replace them with new ones as soon as possible. When not use transmitter and receiver, please turn Function Switch to "OFF" or take out the batteries to reduce power consumption.

natural_image
Interior view of a mobile phone showing two batteries and a labeled receiver (no text or symbols on the main components)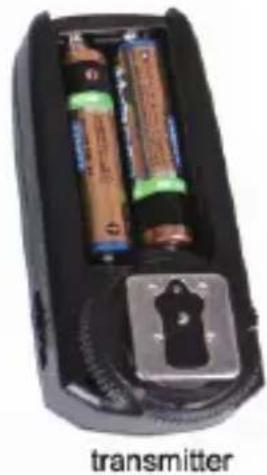
natural_image
Interior view of a black handheld device showing two batteries and a labeled transmitter (text is minimal and not part of the device body)The package itself doesn't include AAA batteries. Please purchase them separately.
5. Setting channel
Receiver and transmitter each has 4 encoding switch, and 16 channels in total. Note: The transmitter and receiver must be set at the same frequency channel!
| Channel Number | Corresponding Codes | Channel Diagram |
| 0 | 1 2 3 4 |  |
| 1 | on 2 3 4 |  |
| 2 | 1 on 3 4 | 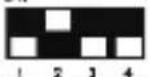 |
| 3 | on on 3 4 | 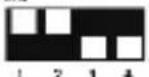 |
| 4 | 1 2 on 4 | 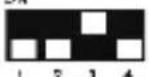 |
| 5 | on 2 on 4 |  |
| 6 | 1 on on 4 | 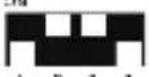 |
| 7 | on on on 4 |  |
5. Setting channel
On the radio transmitter, the encode switch from left to right is 1,2,3,4.
When push the button to "ON", every code represent a value.
button 1 represent digit 1, button 2 represents digit 2, button 3 represent digit 4, button 4 represent digit 8.
When push the button to OFF (number -side) the digit is 0. You can calculate the total value according to the key's state. For example, when all the 4 buttons are set to "ON" side, the total value is 1 + 2 + 4 + 8 = 15 .
"15" is the channel code.
| Channel Number | Corresponding Codes | Channel Diagram |
| 8 | 1 2 3 on |  |
| 9 | on 2 3 on |  |
| 10 | 1 on 3 on |  |
| 11 | on on 3 on |  |
| 12 | 1 2 on on |  |
| 13 | on 2 on on | 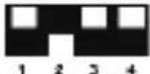 |
| 14 | 1 on on on |  |
| 15 | on on on on | 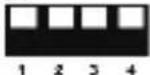 |
6. Operate Radio Trigger
6-1 Wirelessly Trigger Studio Flash
- Set radio receiver and transmitter at the same channel.
- Tum Function Switch to "Flash" mode on transmitter and receiver.
- When camera is power off, slip transmitter's mounting foot fully into the camera's hot shoe adapter. Rotate locking ring clockwise. Switch on camera.
- When studio flash is switch off, directly insert one end of sync cord into sync jack of receiver, and insert the other end of sync cord into sync jack of studio flash. Switch on studio flash.
- Press camera shutter button, and the studio flash will be triggered simultaneously.

6. Operate Radio Trigger
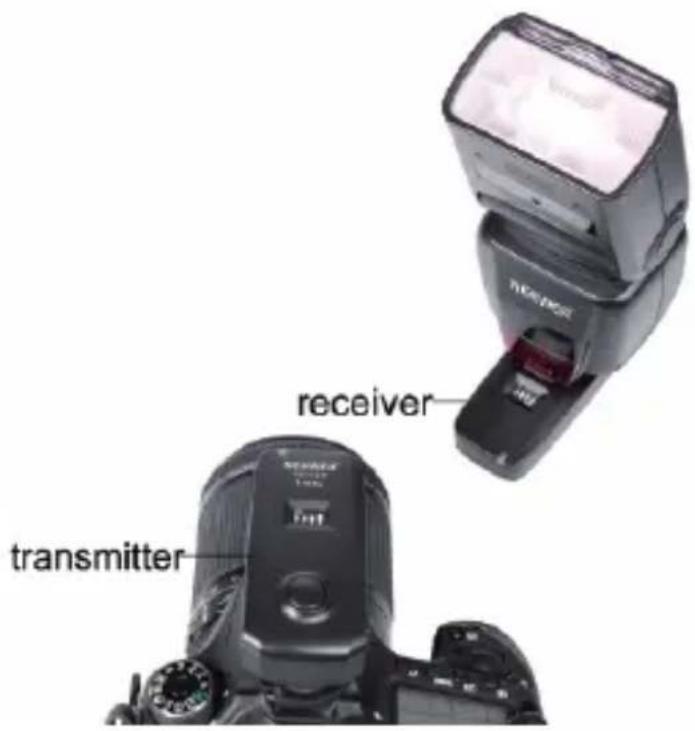
6-2 Wirelessly Trigger Speedlite
- Set radio receiver and transmitter at the same channel.
- Turn Function Switch to "Flash" mode on transmitter and receiver.
- When camera is OFF, slip transmitter's mounting foot fully into the camera's hot shoe adapter. Rotate locking ring clockwise. Switch on camera.
- When speedlite is OFF, slip the speedlite mounting foot fully into receiver's hot shoe adapter. Switch on speedlite.
- Press camera shutter button, and the speedlite will be triggered simultaneously.
6. Operate Radio Trigger
6-3 Wirelessly Control Shutter Release
- Set radio receiver and transmitter at the same channel.
- Turn Function Switch to "Camera" mode on transmitter and receiver.
- When camera is OFF, slip receiver's mounting foot fully into the camera's hot shoe adapter.
- Insert one end of the shutter release cable into camera, and another end into "Shutter release cable connection port" of the receiver. Switch on camera.
- Press triggering button, to control camera's shutter speed.
• Including the following 3 setting operations (6-3-1/6-3-2/6-3-3)

6. Operate Radio Trigger
6-3-1 Normal shutter shooting
Slide the Function Switch to "Camera" on both the transmitter and receiver. Set the transmitter and receiver to the same channel. Half press "triggering button", "Transmitter signal indicator" and "receiver signal indicator" turns on green, camera automatically focus. Fully press "triggering button", "Transmitter signal indicator" and "receiver signal indicator" turns on red, camera shoot.
6-3-2 Long-exposure setting (with camera set to "bulb" mode)
Slide the Function Switch to "Camera" on both the transmitter and receiver. Set the transmitter and receiver to the same channel. Long press "triggering button" about 3 seconds, then release "trigger button", "transmitter signal indicator" turns from red to off, "receiver signal indicator" remains in red and camera remains long-exposure. Press "triggering button" again, camera stops exposure and "signal indicator" of both receive and transmitter turn off.
6-3-3 Delay shooting
Turn Function Switch to "Delay" mode on transmitter. The function switch remains in "Camera" mode in receiver. Half press "triggering button", "transmitter signal indicator" and "receiver signal indicator" turns on green, camera automatically focus. Full press "triggering button", "transmitter signal indicator" and "receiver signal indicator" blinks in red. Camera will shoot after 5 seconds blinking.
7.Technical Data
| Trigger frequency | 2408-2480MHz |
| Trigger channel | 16 |
| Connection of receiver | (Cold shoe with 1/4"-20 screw hole) (Hot shoe mount) (2.5mm jack) |
| Connection of transmitter | (hot shoe) (2.5mm jack) |
| Sync speed | 1/200s |
| Effective trigger distance | 25m |
| Battery | (transmitter : two AAA battery) (Receiver : two AAA battery) |
| Weight | (transmitter : 50g) (Receiver : 50g) |
| Size | (transmitter : 88x39x35mm) (Receiver : 88x39x35mm) |
8. Models of Shutter release cable
| Models of Shutter release cable | Models of Cameras | |
| C1 |  | Canon EOS1100D(Rebel T3), 1000D(Rebel XS),700D,650D(T4i), 600D(Rebel T3i), 60 Da, 60D,550D(Rebel T2i), 500D(Rebel T1i),450D(Rebel XSi), 100DPentaxK200, K110D Super, K110D, K100D,K20D, K10D, K-7, K-5,Kr, Kx, *istDS2, *istDS, *istD, *ist, *MZ-6, MZ-L |
| C3 |  | Canon EOS1D Mark IV, 1D(s) Mark III, 1D Mark III, 5D Mark III, 5DMark II, 1D(s) Mark II, 1D Mark II(N), 1D Mark II, 50D,40D, 30D, 20D, 10D,7D, 6D, 5D,1D X, 1D C, 1Ds, 1D, 1VEOS 3, D2000 |
8.Models of Shutter release cable
| Models of Shutter release cable | Models of Cameras |
N1 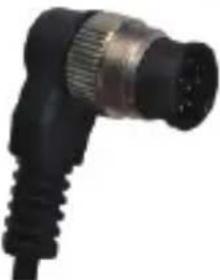 | NikonD800E, D800, D700, D300s, D300, D200,D4, D3S, D3X, D3, D2Xs, D2X, D1X, D2Hs, D2H, D1H, D1,F100, N90s, F90X, F5, F6, F90Fuji S5 Pro, S3 Pro |
N3  | NikonD7100, D7000, D5100, D5000, D3200, D3100, D600, D90 |
8.Models of Shutter release cable
| Models of Shutter release cable | Models of Cameras | |
| S2 | 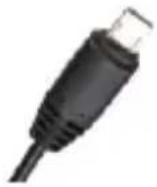 | SonyA7, A7II, A7R, A7RII, A7S, A7SII, A7M2, A3000, A5000, A6000, A6300, A6500, HX300, RX1R, RX10, RX100II, A58, NEX-3NL |
FC-16 for Canon includes two camera shutter release cable C1 & C3. FC-16 for Nikon includes two camera shutter release cable N1 & N3. FC-16 for Sony includes one camera shutter release cable S2.
9.Troubleshooting
| FAQ | Solution |
| Unable to trigger the flash or camera shutter | Make sure battery is properly installed.Make sure position of Function switch is in the same and right modeMake sure transmitter and receiver are at the same frequency channel.Make sure connective cable is inserted in the right socket. |
| Camera shoots but not focus | Make sure the lens is in AF auto focus mode |
| Trigger distance is limited or misfires | Replace batteries |
FCC Statement
this device complies with part 15 of the FCC rules. Operation is subject to the following two conditions:
(1) this device may not cause harmful interference, and (2) this device must accept any interference received, including interference that may cause undesired operation.
Changes or modifications not expressly approved by the party responsible for compliance could void the user's authority to operate the equipment.
NOTE: This equipment has been tested and found to comply with the limits for a Class B digital device, pursuant to part 15 of the FCC Rules. These limits are designed to provide reasonable protection against harmful interference in a residential installation. This equipment generates uses and can radiate radio frequency energy and, if not installed and used in accordance with the instructions, may cause harmful interference to radio communications. However, there is no guarantee that interference will not occur in a particular installation. If this equipment does cause harmful interference to radio or television reception, which can be determined by turning the equipment off and on, the user is encouraged to try to correct the interference by one or more of the following measures:
--Reorient or relocate the receiving antenna.
--Increase the separation between the equipment and receiver.
--Connect the equipment into an outlet on a circuit different from that to which the receiver is connected.
--Consult the dealer or an experienced radio/TV technician for help.
The device has been evaluated to meet general RF exposure requirement. The device can be used in portable exposure condition without restriction.
- NEEWER®
- FC-16
- 2.4GHz Trigger
- USER GUIDE
- Description
- Page
- Introduction
- 1.Safety Note
- Content of Carton
- Sony version
- Nikon version
- Canon version
- 3.Name of Parts—Transmitter
- Receiver
- Install Battery
- Setting channel
- Operate Radio Trigger
- 6-1 Wirelessly Trigger Studio Flash
- 6-2 Wirelessly Trigger Speedlite
- 6-3 Wirelessly Control Shutter Release
- 6-3-1 Normal shutter shooting
- 6-3-2 Long-exposure setting (with camera set to "bulb" mode)
- 6-3-3 Delay shooting
- Models of Shutter release cable
- 8.Models of Shutter release cable
- FCC Statement
Marke : Neewer
Modell : FC-16 C
Kategorie : Kabellose Fernbedienung