
RAK-VH10PCAST - Klimaanlage HITACHI - Kostenlose Bedienungsanleitung
Finden Sie kostenlos die Bedienungsanleitung des Geräts RAK-VH10PCAST HITACHI als PDF.

| Produkttyp | Split-Klimaanlage (Innengerät) |
| Marke | Hitachi |
| Modell | RAK-VH10PCAST |
| Abmessungen Innengerät (B × H × T) | 780 mm × 280 mm × 230 mm |
| Abmessungen Außengerät (B × H × T) | 750 mm × 570 mm × 280 mm |
| Kühlbetrieb | Ja |
| Heizbetrieb | Ja |
| Entfeuchtungsbetrieb | Ja |
| Lüfterbetrieb | Ja |
| Silent-Modus | Ja |
| Powerful-Modus | Ja |
| Frost-Wash-Reinigung | Ja (automatische Reinigung durch Vereisung und Abtauen) |
| Sleep-Timer | Ja (AIR SLEEP Timer, 1-10 Stunden) |
| Timer (Ein/Aus) | Ja (ON/OFF Timer, 1-12 Stunden) |
| Auto Swing (horizontal) | Ja |
| Kältemittel | R32 |
| Luftfilter | Vorfilter (waschbar), optionaler Luftreinigungsfilter |
| Fernbedienung | Ja (IR, Reichweite ca. 7 m) |
| Stromversorgung | 230 V / 50 Hz |
| Betriebstemperaturbereich Kühlen | 21 °C bis 43 °C Außentemperatur |
Häufig gestellte Fragen - RAK-VH10PCAST HITACHI
Benutzerfragen zu RAK-VH10PCAST HITACHI
0 Frage zu diesem Gerät. Beantworten Sie die, die Sie kennen, oder stellen Sie Ihre eigene.
Eine neue Frage zu diesem Gerät stellen
Laden Sie die Anleitung für Ihr Klimaanlage kostenlos im PDF-Format! Finden Sie Ihr Handbuch RAK-VH10PCAST - HITACHI und nehmen Sie Ihr elektronisches Gerät wieder in die Hand. Auf dieser Seite sind alle Dokumente veröffentlicht, die für die Verwendung Ihres Geräts notwendig sind. RAK-VH10PCAST von der Marke HITACHI.
BEDIENUNGSANLEITUNG RAK-VH10PCAST HITACHI
OPERATION MANUAL
HITACHI
airHome 600 series
ROOM AIR CONDITIONER
SPLIT TYPE
UH SERIES
VH
MODELS
RAKS-VH1DPCAS/RACRAB106MOPCAST
RAK-VH13PCAST/RAC-VH13PCAST
natural_image
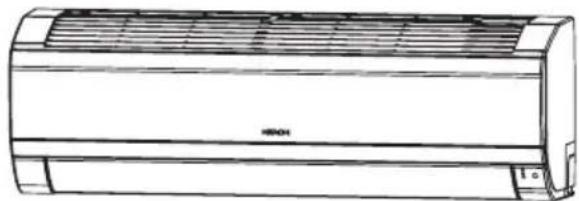
Line drawing of a large air conditioner unit (no text or symbols)INDOOR UNIT
RAK-VH10PCAST RAS-UH10CMT
RAKASH-UBFICAMT
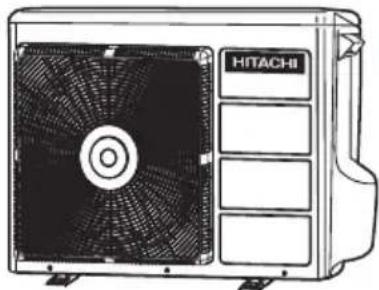
OUTDOOR UNIT
natural_image
Line drawing of a Hitachi air conditioner unit with fan blades and control panel (no text or symbols on the device itself)RAR-M0A6
RAC-VH10PCAST
RACVH-13PCAST
EN INSTRUCTION MANUAL
TH คู่มิจการใช้งาน
Access the full version of the User Operation Manual by scanning the code.
https://docs.hitachiaircon.com/ BAS-UH-CMT-BAC-UH-CMT BAK-VH-PCAST-BAC-VH-PCAST

Cooling & Heating
SAFETY PRECAUTION
- Please read the "Safety Precaution" carefully before operating the unit to ensure correct usage of the unit.
- Pay special attention to signs of "Warning" and "Caution". The "Warning" section contains matters which, if not observed strictly, may cause death or serious injury. The "Caution" section contains matters which may result in serious consequences if not observed properly. Please observe all instructions strictly to ensure safety.
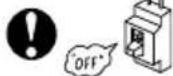
• The sign indicate the following meanings.

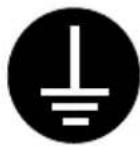
Make sure to connect earth line.

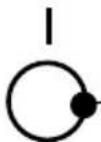
The sign in the figure indicates prohibition.

Indicates the instructions that must be followed.
- Please keep this manual after reading.
| EXPLANATION OF SYMBOLS DISPLAYED ON UNIT | |||||
 | WARNING | This symbol shows that this equipment uses a flammable refrigerant.If the refrigerant is leaked, together with an external ignition source, there is a possibility of ignition. | CAUTION | This symbol shows that a service personnel should be handling this equipment with reference to the Installation Manual. | |
 | CAUTION | This symbol shows that the Operation Instructions should be read carefully. | CAUTION | This symbol shows that there is information included in the Operation Manual and/or Installation Manual | |
PRECAUTIONS DURING INSTALLATION
A
WARNING

- Do not reconstruct the unit.
Water leakage, fault, short circuit or fire may occur if you reconstruct the unit by yourself. - Please ask your sales agent or qualified technician for the installation of your unit. Water leakage, short circuit or fire may occur if you install the unit by yourself.
- Please use earth line.
Do not place the earth line near water or gas pipes, lightning-conductor, or the earth line of telephone. Improper installation of earth line may cause electric shock. - Be sure to use the specified piping set for R32. Otherwise, this may result in broken copper pipes or faults.
A
CAUTION
- A circuit breaker should be installed depending on the mounting site of the unit. Without a circuit breaker, the danger of electric shock exists.
- Do not install the unit near a location where there is flammable gas. The outdoor unit may catch fire if flammable gas leaks around it.
- Please ensure smooth flow of water when installing the drain hose.

PRECAUTIONS DURING SHIFTING OR MAINTENANCE
A
WARNING
- Should abnormal situation arises (like burning smell), please stop operating the unit and turn off the circuit breaker. Contact your agent. Fault, short circuit or fire may occur if you continue to operate the unit under abnormal situation.


- Please contact your agent for maintenance. Improper self maintenance may cause electric shock and fire.
- Please contact your agent if you need to remove and reinstall the unit. Electric shock or fire may occur if you remove and reinstall the unit yourself improperly.
- If the supply cord is damaged, it must be replaced by the special cord obtainable at authorized service/parts centers.
- If the air conditioner is not cool, one possible cause could be due to refrigerant leakage, so consult your dealer. The refrigerant gas used in the air conditioner is harmless. But if refrigerant gas leaks into the room, harmful products are generated when in contact with fire from appliances such as a stove heater. When there is refrigerant gas accumulation in the room, immediately stop the air conditioner. Open the windows for ventilation and contact your agent.
PRECAUTIONS DURING OPERATION
!
WARNING
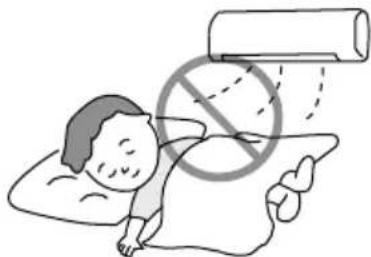
- Avoid an extended period of direct air flow for your health.
- Do not insert a finger, a rod or other objects into the air outlet or inlet. As the fan is rotating at a high speed, it will cause injury. Before cleaning, be sure to stop the operation and turn the breaker OFF.
- Do not use any conductor as fuse wire, this could cause fatal accident.

PRECAUTIONS DURING OPERATION
- The product shall be operated under the manufacturer specification and not for any other intended use.
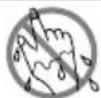
- Do not attempt to operate the unit with wet hands, this could cause fatal accident.
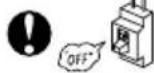
● During thunder storm, disconnect and turn off the circuit breaker.
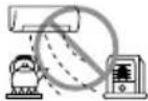
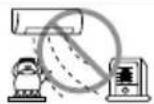
- Do not direct the cool air coming out from the air-conditioner panel to face household heating apparatus as this may affect the working of apparatus such as the electric kettle, oven etc.
- Please ensure that outdoor mounting frame is always stable, firm and without defect. If not, the outdoor unit may collapse and cause danger.

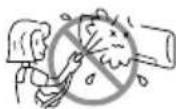
- Do not splash or direct water to the body of the unit when cleaning it as this may cause short circuit.
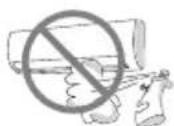
- Do not use any aerosol or hair sprays near the indoor unit. This chemical can adhere on heat exchanger fin and blocked the evaporation water flow to drain pan. The water will drop on tangential fan and cause water splashing out from indoor unit.
- Please switch off the unit and turn off the circuit breaker during cleaning, the high-speed fan inside the unit may cause danger.
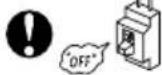
● Turn off the circuit breaker if the unit is not to be operated for a long period.

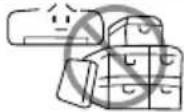
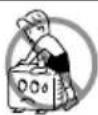
- Do not climb on the outdoor unit or put objects on it.
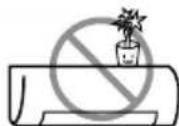
- Do not put water container (like vase) on the indoor unit to avoid water dripping into the unit. Dripping water will damage the insulator inside the unit and causes short-circuit.


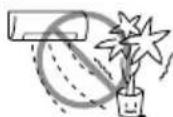
- Do not place plants directly under the air flow as it is bad for the plants.
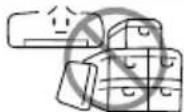
- When operating the unit with the door and windows opened, (the room humidity is always above 80% ) and with the air deflector facing down or moving automatically for a long period of time, water will condense on the air deflector and drips down occasionally. This will wet your furniture. Therefore, do not operate under such condition for a long time.
- If the amount of heat in the room is above the cooling or heating capability of the unit (for example: more people entering the room, using heating equipments and etc.), the preset room temperature cannot be achieved.
- This appliance is not intended for use by persons (including children) who are physically handicapped sensory or mental or lack of experience and knowledge. Unless supervised or instructed on the use of electrical appliances by persons responsible for their safety.
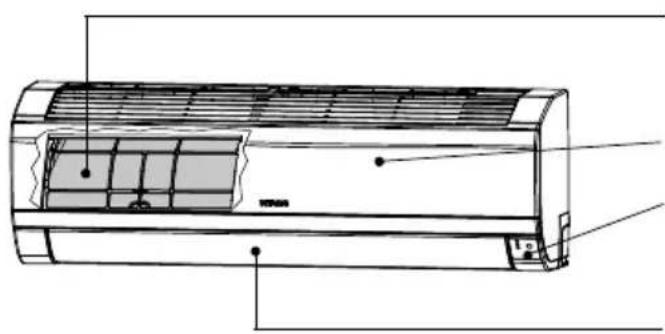
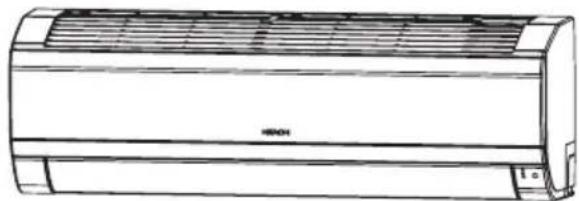
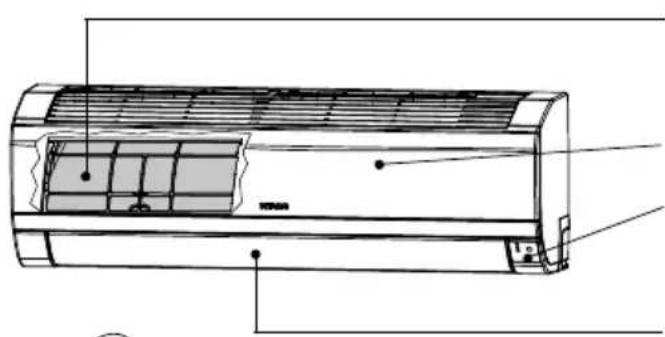
INDOOR UNIT
natural_image
Technical line drawing of a wall-mounted air conditioner unit (no text or symbols)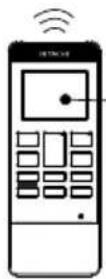
Pre-filter
To prevent dust from coming into the indoor unit. (Refer page 21)
Front panel
Indoor unit indicators
Light indicator showing the operating condition. (Refer page 5)
Horizontal deflector • Vertical deflector (Air Outlet)
(Refer page 15)
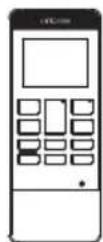
Remote controller
Send out operation signal to the indoor unit. So as to operate the whole unit. (Refer page 6)
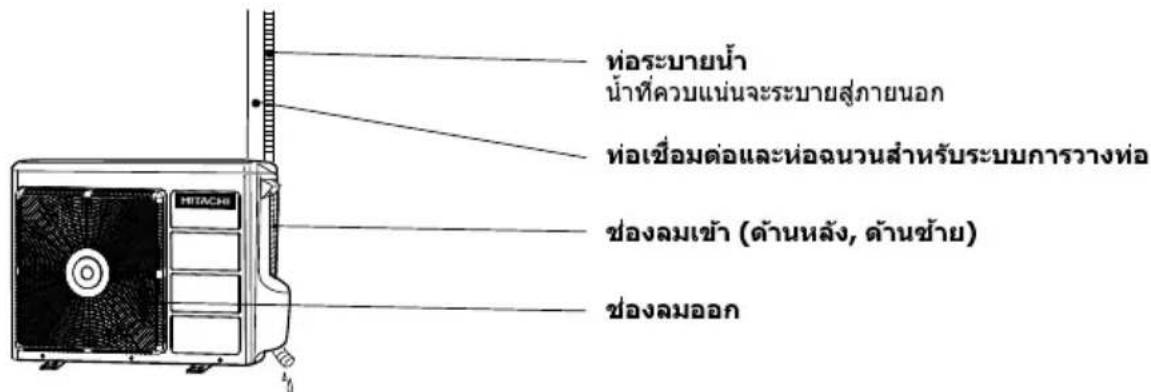
OUTDOOR UNIT
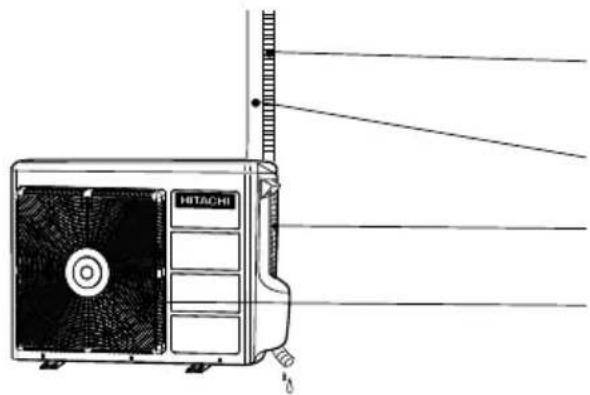
Drain pipe
Condensed water drain to outside.
Connecting cord and insulation pipe for piping
Air inlet (Back, Left side)
Air outlet
MODEL NAME AND DIMENSIONS
| MODEL | WIDTH (mm) | HEIGHT (mm) | DEPTH (mm) |
| RAK-VHACPGAST,RAK-VH13GCAST | 780 | 280 | 230 |
| RAC-VHACPGAST,RAK-VH13GCAST | 750 | 570 | 280 |
INDOOR UNIT INDICATORS
OPERATION LAMP
This lamp lights during operation.
FROST WASH LAMP
This lamp lights when the Frost Wash function is in operation.
This lamp blinks to suggest operating manual FROST WASH operation after 200 hours of air conditioner cumulative usage. Please refer to page 16 for the details of Frost Wash operation.
TIMER LAMP
This lamp lights when the timer is working.


Temporary Switch


F.Wash


TEMPORARY SWITCH button
TEMPORARY SWITCH
Use this switch to start and stop when the remote controller does not work.
- By pressing the temporary switch, the operation is done in automatic mode.
- When the operation is done using the temporary switch after the power source is turned off and turn on again, the operation is done in automatic mode.
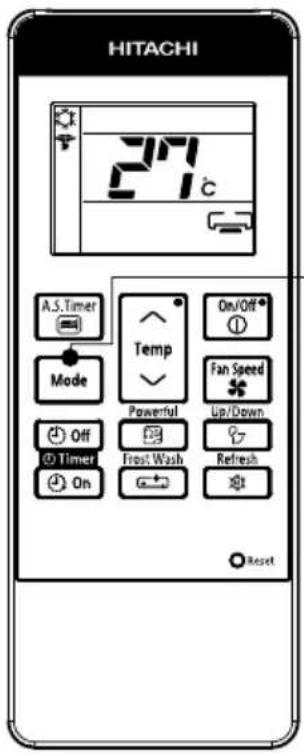
REMOTE CONTROLLER
This controls the operation of the indoor unit. Signal range to reach indoor unit is about 7 meters. If inverter lamp is used, the range of control may be shorter.
This unit can be fixed on a wall using the fixture provided. Before fixing it, make sure the indoor unit can be controlled from the remote controller.
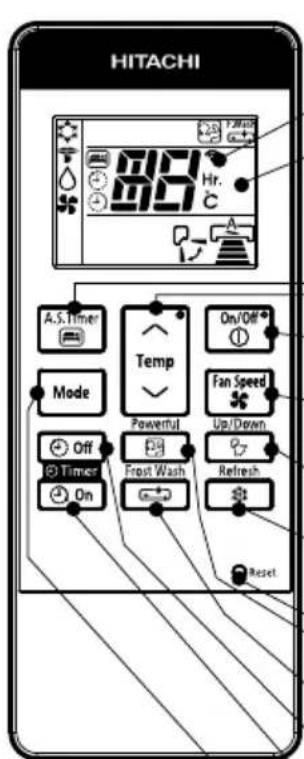
● Transmission sign
The transmission sign blinks when a signal is sent.
- Display
This indicates the room temperature selected, timer status, function and intensity of circulation selected.
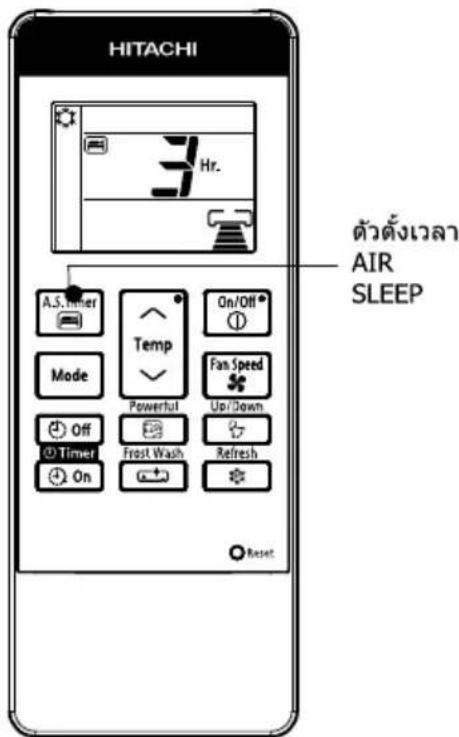
● AIR SLEEP TIMER button controller (pg 6 \~17).Please
Use this button to set the air sleep timer mode include the cover page for remote
TEMPERATURE button controller as well.
Use this button to raise or lower the temperature setting. (Keep pressed, and the value will change more quickly.)
START/STOP button
Press this button to start or to stop operation.
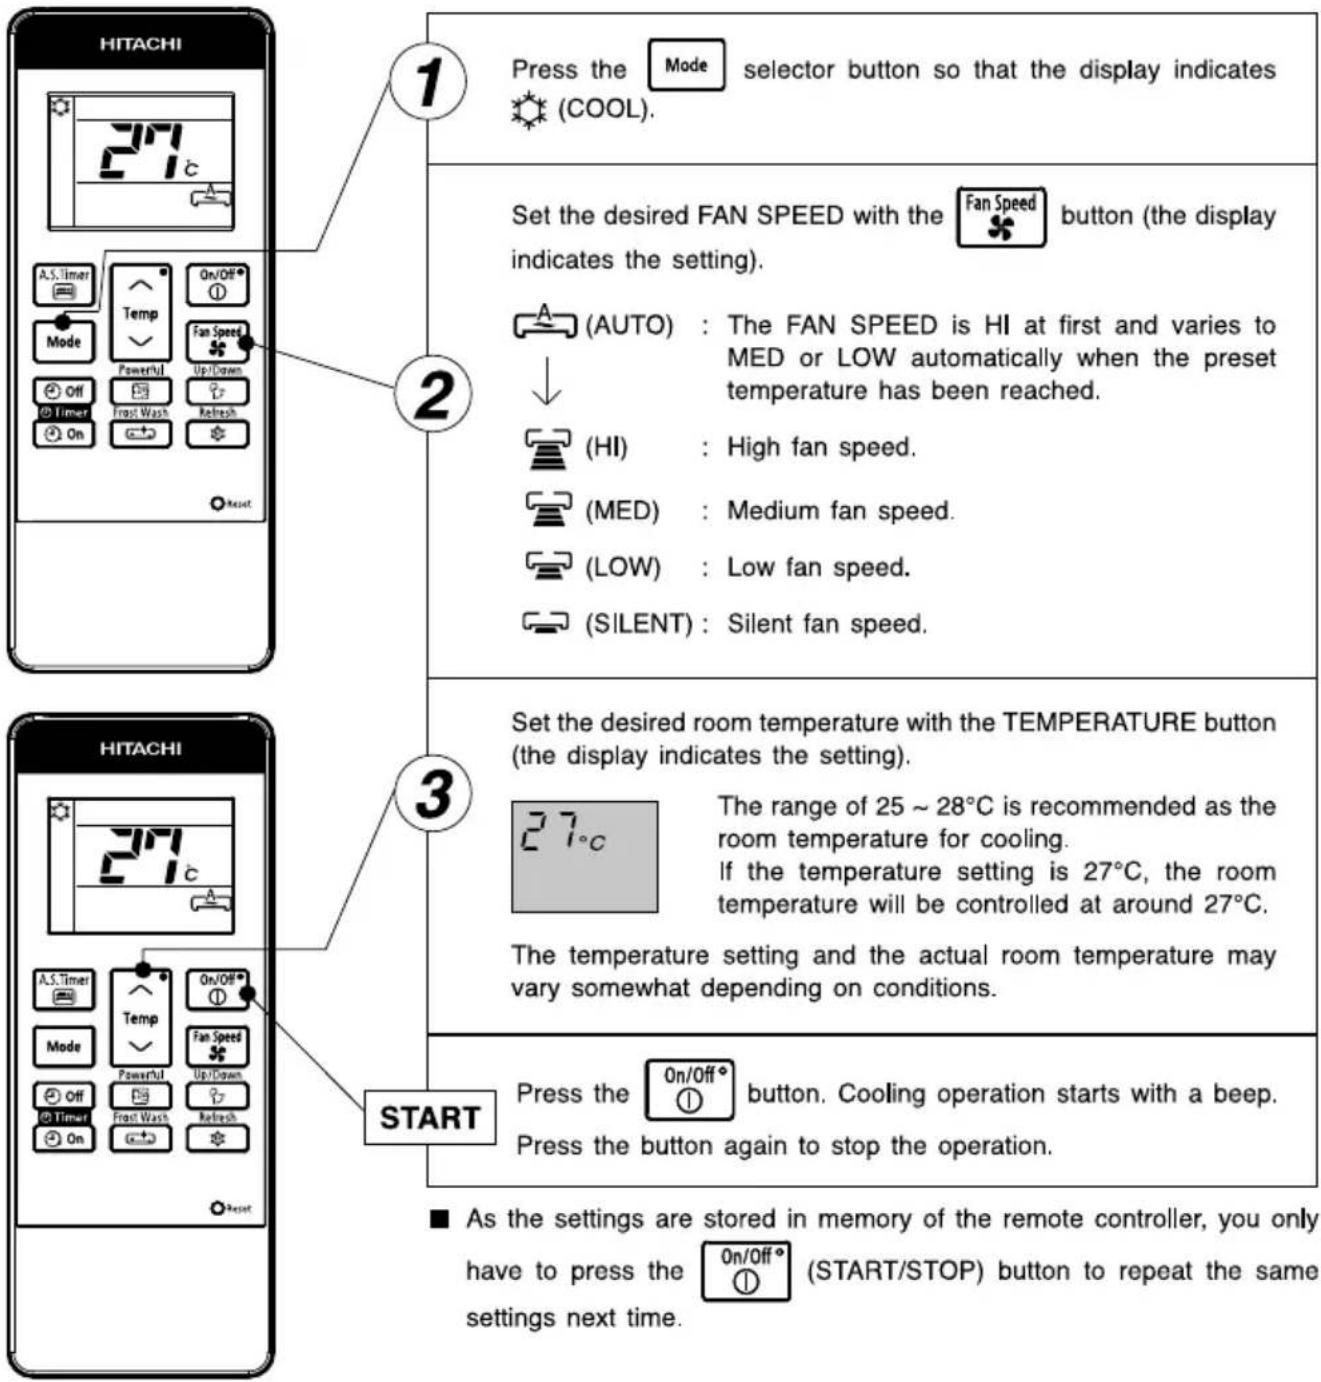
FAN SPEED selector button
This determines the fan speed. Each time you press this button, the intensity of circulation will change from (AUTO) → (HI)
→ (MED) → (LOW) → (SILENT).
AUTO SWING button
Controls the angle of the horizontal air deflector.
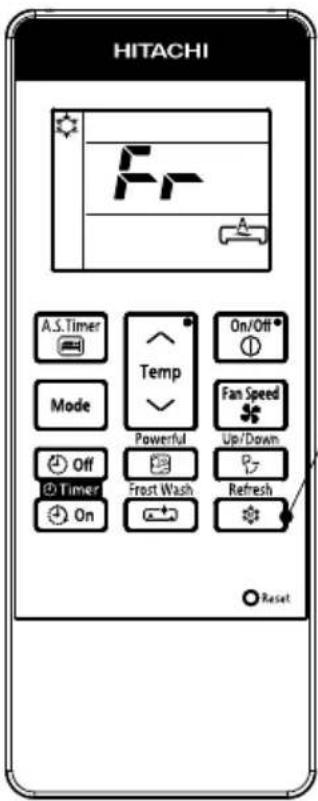
REFRESH button
Use this button to refresh the room condition.
RESET button
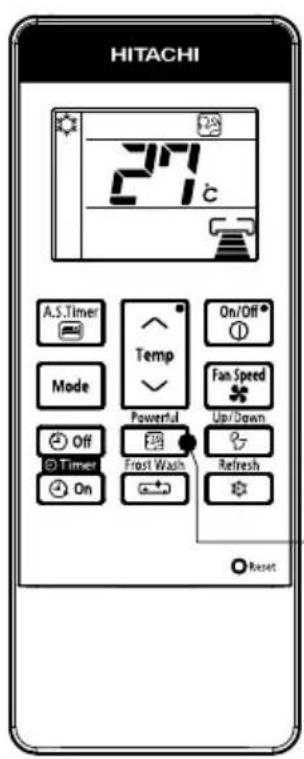
ONE TOUCH POWERFUL button
Use this button to deliver faster and more comfortable air-conditioning or start operation.
FROST WASH button
During OFF mode, press this button to set the Frost Wash operation.
OFF-TIMER button
Select to turn OFF time.
ON-TIMER button
Select to turn ON time.
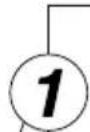
MODE selector button
Use this button to select MODE. Each time you press this button the MODE selection will change from ⚙ (COOLING) → ⚠ (SILENT) → ⌙ (DEHUMIDIFY) → ⚣ (FAN).
However, during OFF mode SILENT will be skipped.
| On/Off1 | START/STOP |
| Mode | MODE SELECT |
| COOLINGSILENTDEHUMIDIFYFAN | |
| Fan Speed♣ | FAN SPEED |
| AUTO SILENTLOWMEDIUMHIGH | |
| Powerful23 | ONE TOUCH POWERFUL |
| Up/Down? | AUTO SWING(HORIZONTAL) |
| TIMER SELECTOROFF TIMERON TIMER | |
| A.S.Timer3 | AIR SLEEP TIMER |
| Frost Wash4 | FROST WASH |
| Refresh5 | REFRESH |
Precautions for Use
- Do not put the remote controller in the following places.
• In direct sunlight.
• In the vicinity of a heater.
- Handle the remote controller carefully. Do not drop it on the floor, and protect it from water.
- Once the outdoor unit stops, it will not restart for about 3 minutes (unless you turn the power switch off and on or unplug the power cord and plug it in again).
This is to protect the device and does not indicate a failure.
Use the device for cooling when the outdoor temperature is 21 \~ 43°C.
If indoors humidity is very high (over 80%), some dew may form on the air outlet grille of the indoor unit.
NOTE
HI fan speed mode selected
When unit has been operating for a long period of time and the difference between remote controller setting temperature and actual room temperature is continuously large, the fan speed may increase causing higher air blow sound.
During the time, cooling capacity will be maximized. If the air blow sound causes any discomfort, please select "AUTO" or other than "HI" fan speed.
During Cooling mode, press the Mode selector button so that the display indicates (SILENT) along with the (COOL) symbol. Silent operation starts with a beep. The FAN SPEED will be automatically changed to SILENT.
CANCELLATION of SILENT Operation
| Cancel Condition | Operation mode after cancel | |
 | Key press | Stop operation |
 | Key press | Selected mode operation |
 | Key press | COOLING operation in previous setting |
 | Key press | POWERFUL operation |
NOTE:
Under SILENT mode operation and quiet environment, phenomena like flowing noise of refrigerant in the refrigerating cycle may occur, but this is normal for the operation.
Use the device for dehumidifying when the room temperature is over 16^ C. When it is under 15^ C, the dehumidifying function will not work.
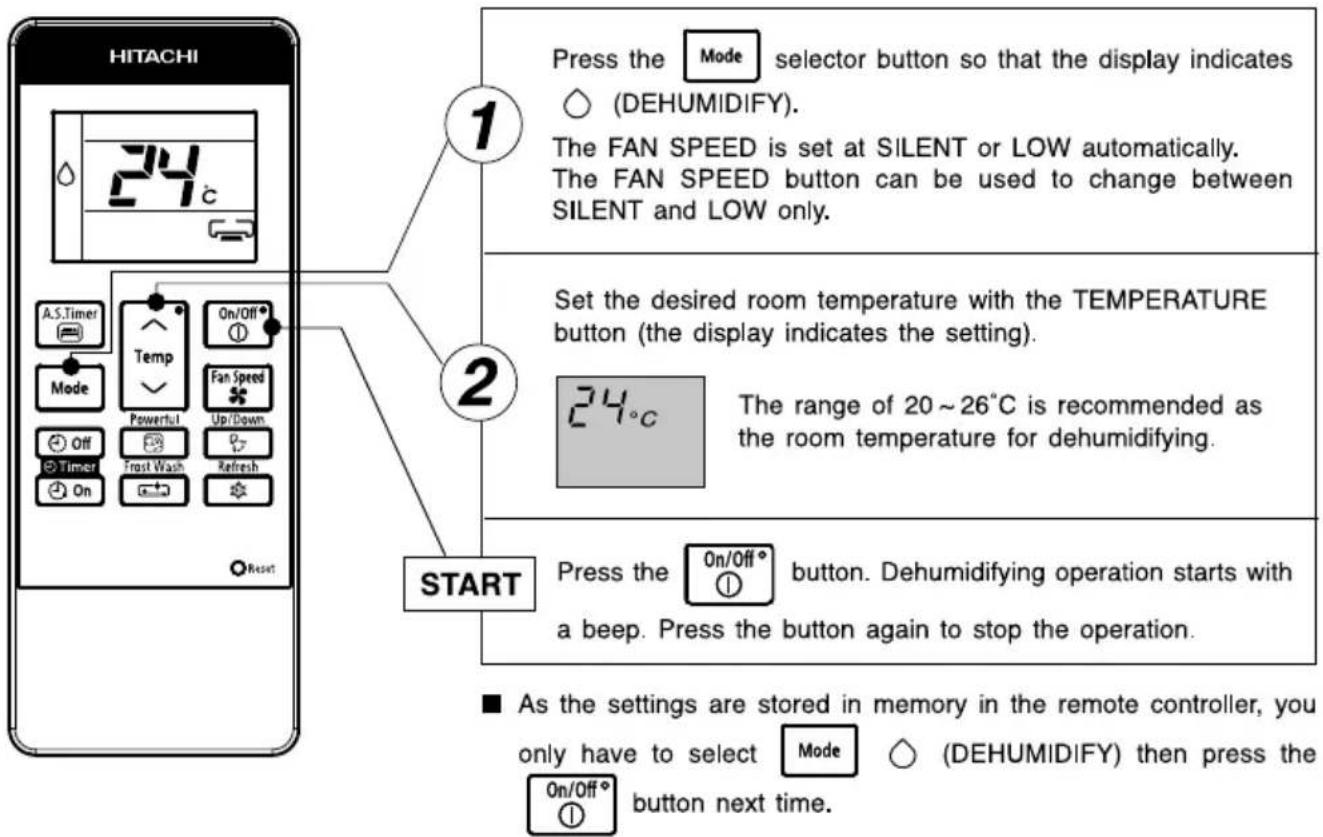
■ Dehumidifying Function
When the room temperature is higher than the temperature setting: The device will dehumidify the room and reducing the room temperature to the preset level. When the room temperature is lower than the temperature setting: Dehumidifying will be performed at the temperature setting slightly lower than the current room temperature, regardless of the temperature setting. The function will stop (the indoor unit will stop emitting air) as soon as the room temperature becomes lower than the setting temperature. You might feel a bit colder in dehumidifying operation.
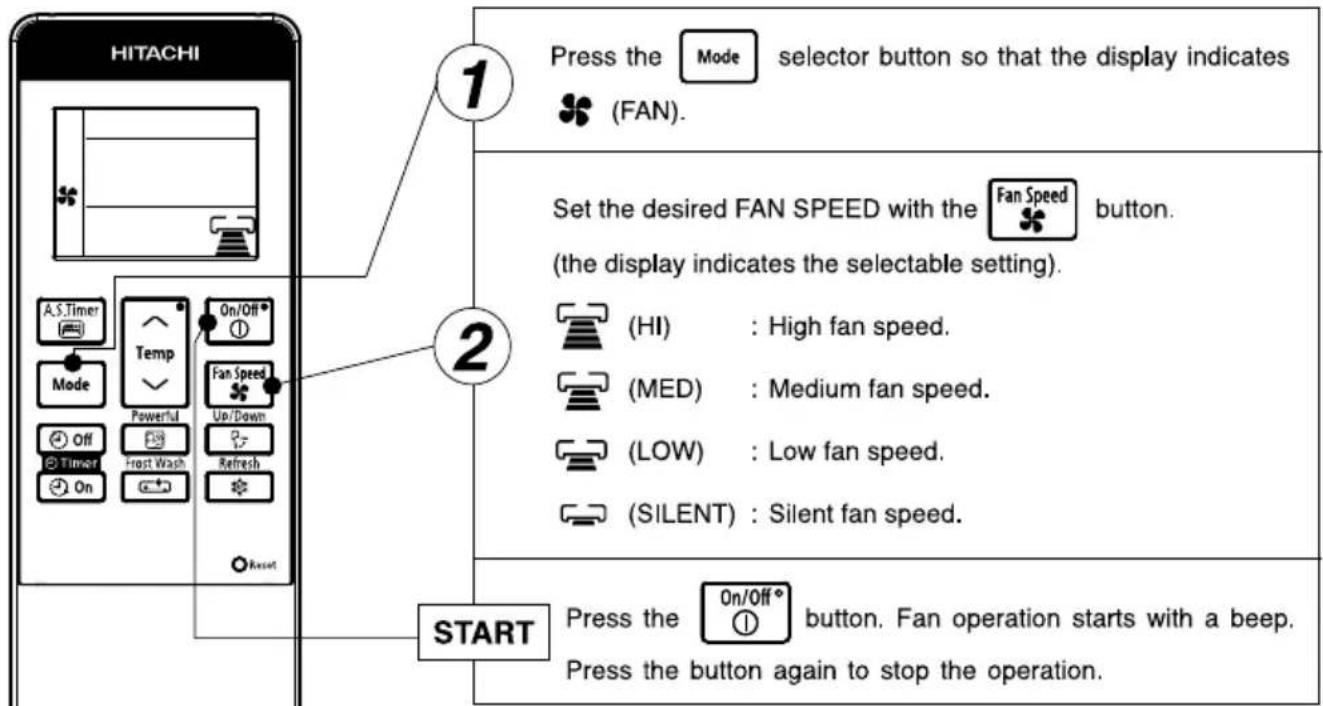
In Fan operation mode the device is function as an air circulator.
flowchart
graph TD
    A["HITACHI"] --> B["1"]
    B --> C["Press the Mode selector button so that the display indicates (FAN)."]
    B --> D["Set the desired FAN SPEED with the Fan Speed button. (the display indicates the selectable setting)."]
    D --> E["(HI) : High fan speed."]
    D --> F["(MED) : Medium fan speed."]
    D --> G["(LOW) : Low fan speed."]
    D --> H["(SILENT) : Silent fan speed."]
    A --> I["START"]
    I --> J["Press the On/Off button. Fan operation starts with a beep. Press the button again to stop the operation."]
As the settings are stored in memory in the remote controller, you
only have to select button next time.


(FAN) then press the

FAN Function
During FAN operation, compressor does not run and there is no cooling operation with only indoor fan running.


Press the
Powerful
图
button.
- Operation start with a signal received sound "beep".
- Unit will be forced operate in (COOL) with SUPER COOL fan speed for 60 minutes. Indicator appear during this period. (Operation lamp at indoor unit is blinking).
- After 60 minutes, operation lamp stop blinking and indicator will disappear while unit will be in (COOL) mode.
● Air blow sound will be slightly high due to forced operation.
CANCELLATION of POWERFUL Operation
| If feeling so cold,cancel this powerfulmode as mentioned in"CANCELLATION ofPOWERFUL operation". |
| Cancel Condition | Operation mode after cancel | |
 | Key press | Stop operation |
 | Key press | Selected mode operation(COOLING) → (SILENT)(FAN) ← (DEHUMIDIFY) |
 | Key press | AIR SLEEP TIMER operation |
Press 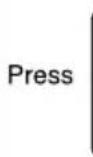 | orTemp orKKG6 60 minutes time is up | COOLING operation in previous setting |
Press the

button, and the display changes as shown below.
| Mode | Indication |
| Air Sleep Timer | 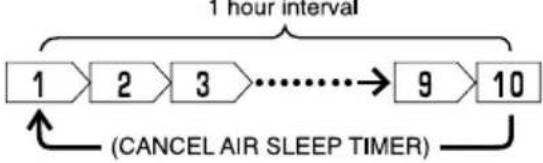 |
Air Sleep Timer: The device will continue working for the designated number of hours and then turn off.
Point the signal window of the remote controller toward the indoor unit, and press the AIR SLEEP TIMER button.
The timer information will be displayed on the remote controller. The TIMER lamp lights with a beep from the indoor unit.
Explanation of the air sleep timer
The device will control the FAN SPEED and room temperature automatically so as to be quiet and good for people's health.
You can set the sleep timer to turn off after 1,2,3 --> 9 or 10 hours. The FAN SPEED and room temperature will be controlled as shown below.
Operation with the air sleep timer
| Function | Operation |
Cooling Silent Silent andDehumidifying“◇” andDehumidifying“◇” | The room temperature will be controlled 2°C above the setting temperature and the FAN SPEED will be set to LOWEST 1 hour after the setting of the air sleep timer. 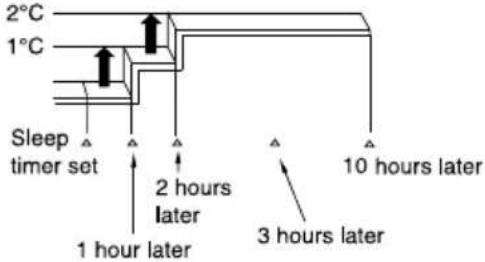 |
To slightly reduce air blow temperature of air conditioner and room humidity if unit has been operating for a long period of time for the day.
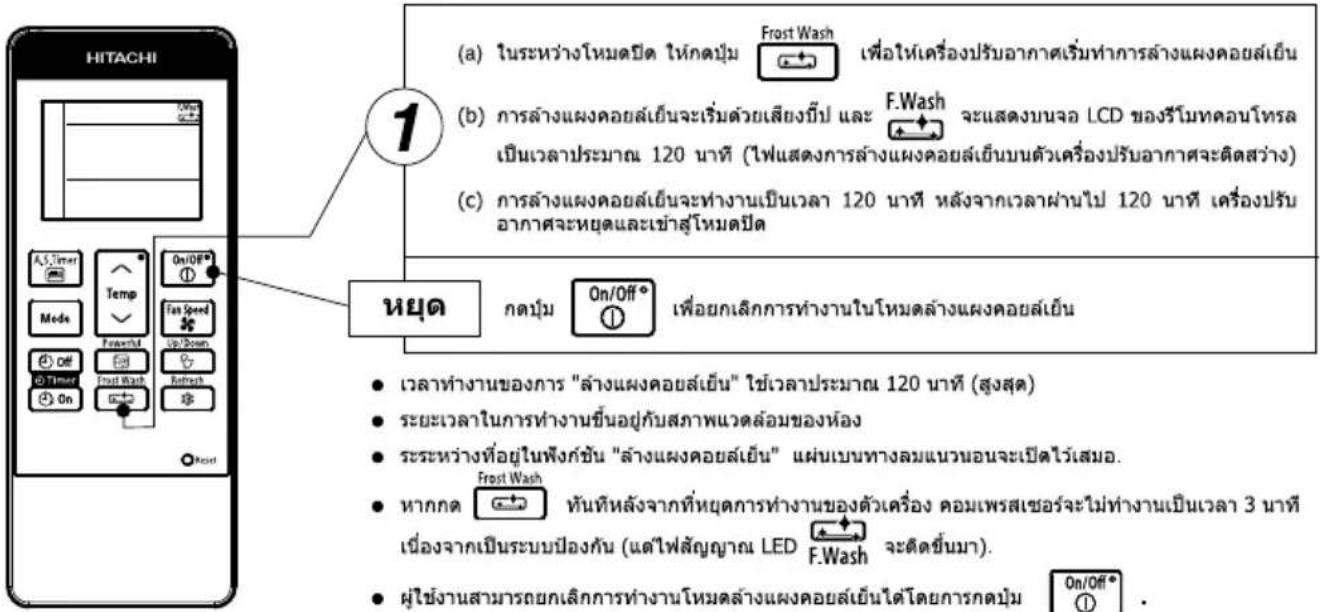
1
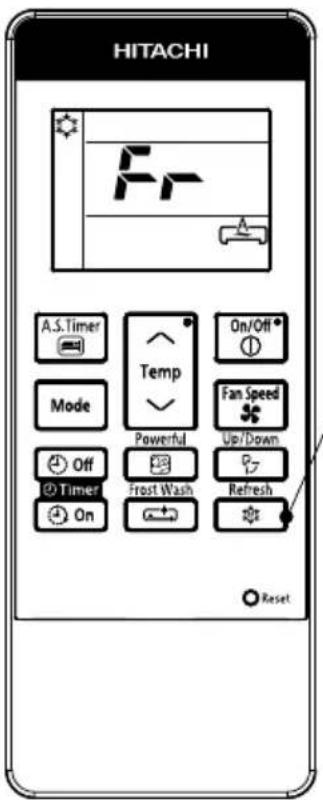
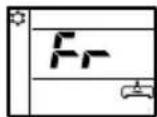
(a) During COOLING or SILENT operation, press the to start REFRESH operation. (b) REFRESH operation starts with a beep and "Fr" is displayed on the remote controller LCD for about 10 second.
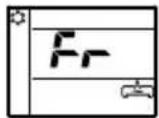
(c) REFRESH operation will be in operation for 60 minutes. After 60 minutes the air blow temperature will return back gradually to previous condition.
(d) If the Refresh button is pressed again, REFRESH operation will be reset, step (b) and step (c) will be repeated.
CANCELLATION of REFRESH Operation
| Cancel Condition | Operation mode after cancel | |
 | Key press | Stop operation |
 | Key press | Selected mode operation(COOLING) → (SILENT)(FAN) ← (DEHUMIDIFY) |
 | Key press | AIR SLEEP TIMER operation in COOLING operation of previous setting |
| Press |  or or | COOLING operation in previous setting |
| Press |  or or | |
| Press |  | |
 | Key press | POWERFUL operation |
 | Key press | OFF Timer/ON Timer operation in COOLING operation of previous setting |
NOTE
The effectiveness of Refresh operation may not be significant in the following situation:
a) Cooling operation operates for a short time.
b) Unit is operated under high load condition such as to cool a big room, room which is directly expose to sunlight and high outside temperature.
c) Temperature setting by the remote controller is lower than recommended temperature for cooling operation (refer page 7)
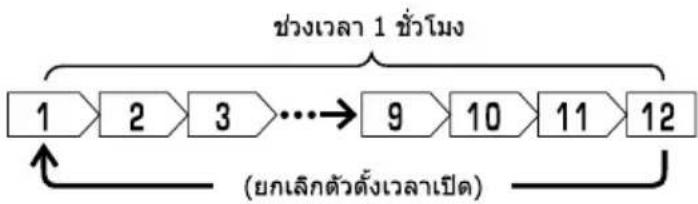
■ ON Timer and OFF Timer are available.
OFF Timer Reservation
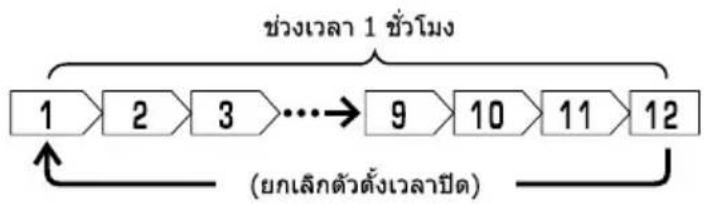
OFF TIMER setting
- Select the OFF TIMER by pressing the ⏻ Off (OFF TIMER) Button.
- Setting time will change according to the below sequence when you press the button.
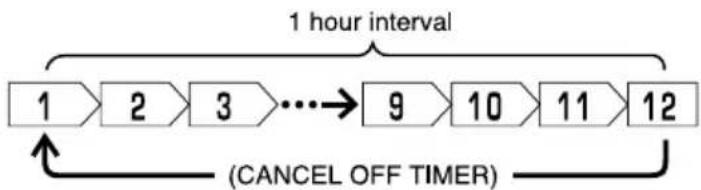
flowchart
graph LR
    A["1 hour interval"] --> B["2"]
    B --> C["3"]
    C --> D["..."]
    D --> E["9"]
    E --> F["10"]
    F --> G["11"]
    G --> H["12"]
    H --> I["(CANCEL OFF TIMER)"]
    I --> A
- After the OFF TIMER is set, the hour display will be counting down as time passes.
■ Operation stop at setting time
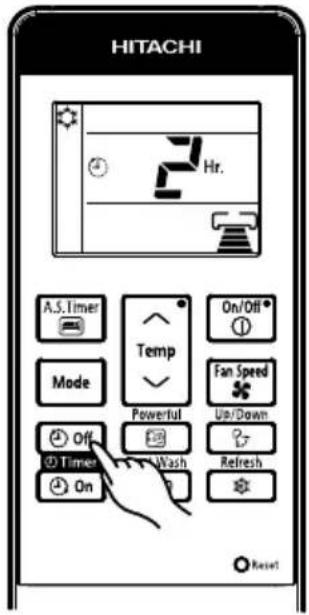
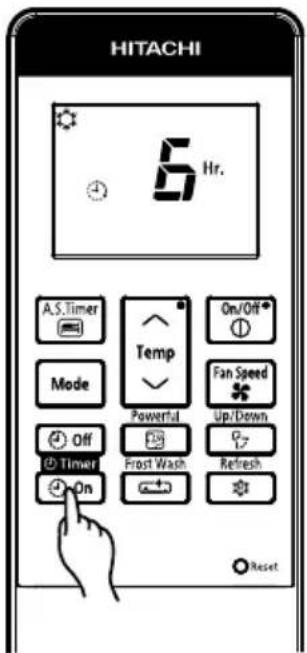
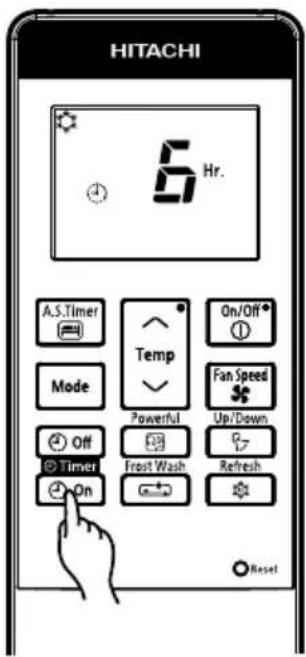
ON Timer Reservation
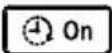
ON TIMER setting
- Select the ON TIMER by pressing the ON TIMER) Button.
- Setting time will change according to the below sequence.
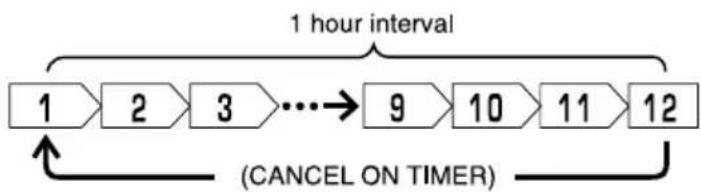
flowchart
graph LR
    A["1 hour interval"] --> B["2"]
    B --> C["3"]
    C --> D["..."]
    D --> E["9"]
    E --> F["10"]
    F --> G["11"]
    G --> H["12"]
    H --> I["(CANCEL ON TIMER)"]
    I --> A
- After the ON TIMER is set, the hour display will be counting down as time passes.
■ Operation will start for setting temperature at setting time.

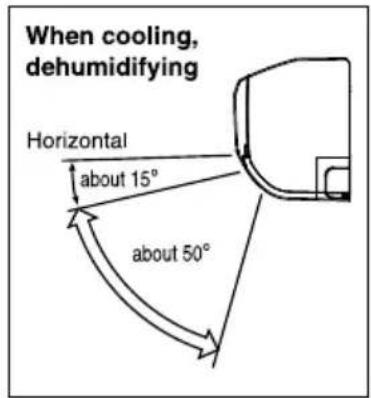
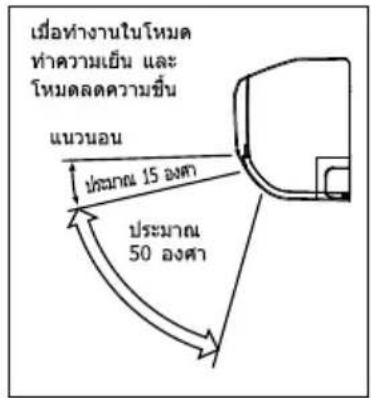
Adjustment of the conditioned air in the upward and downward directions.
The horizontal air deflector is automatically set to the proper angle suitable for each operation. The deflector can be swung up and down continuously and also set to the desired angle using the “Up/Down (AUTO SWING (HORIZONTAL))” button.
- If the “Up/Down” (AUTO SWING (HORIZONTAL))” button
is pressed once, the horizontal air deflector swings up and down. If the button is pressed again, the deflector stops in its current position. Several seconds (about 6 seconds) may be required before the deflector starts to move. - Use the horizontal air deflector within the adjusting range shown on the right.
- When the operation is stopped, the horizontal air deflector moves and stops at the position where the air outlet closes.
CAUTION
- In "Cooling" operation, do not keep the horizontal air deflector swinging for a long time. Some dew may form on the horizontal air deflector and dew may drop.

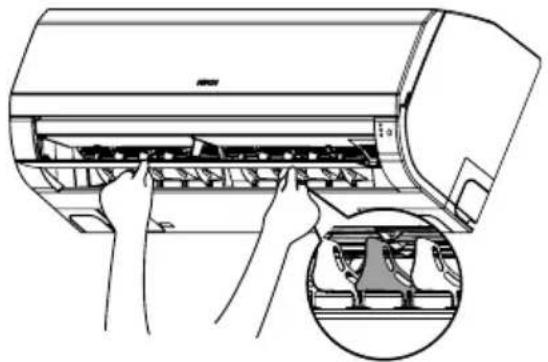
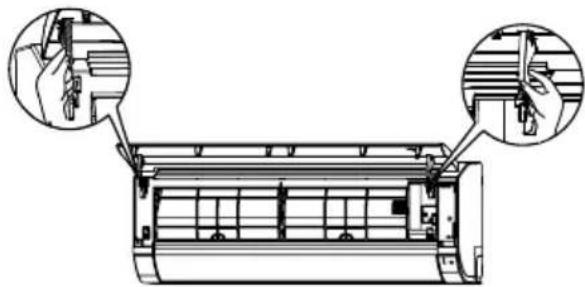
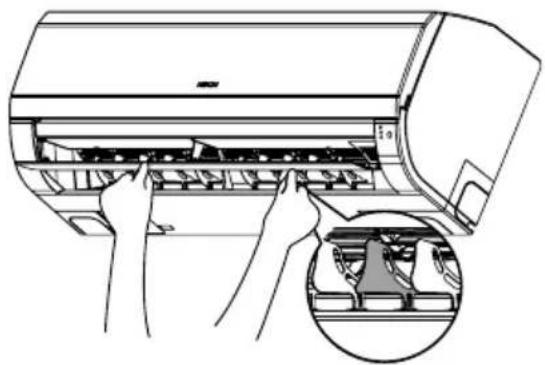
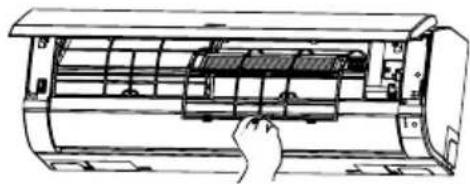
Adjustment of the conditioned air to the left and right.
Hold the second vertical air deflector of each set of vertical air deflectors from right as shown in the figure and adjust the conditioned air to the left or right.
natural_image
Illustration of hands installing or adjusting a machine panel with a magnified inset showing internal components (no text or symbols)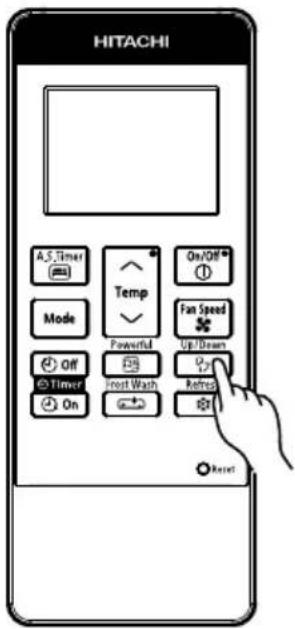

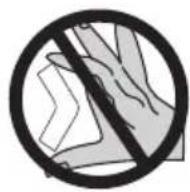
WARNING
Do not insert a finger, a rod or other objects into the air outlet or inlet as the fan is rotating at a high speed, it will cause injury. Before any cleaning or adjusting the deflectors, be sure to switch OFF the operation.
FROST WASH OPERATION (GENERAL INFORMATION)
Cleaning function by frosting the indoor exchanger and allowing melted water to wash away dust particles collected on surface of exchanger. This function only applicable during OFF mode.
Note
● Operate FROST WASH when under the following conditions
| Outdoor temperature | 21°C ~ 43°C |
| Indoor temperature | 21°C ~ 32°C |
| Indoor Humidity | 30% ~ 70% |
● During FROST WASH operation, there could be sound generated during frosting and defrosting of heat exchanger.
● FROST WASH operation is only available when unit is in standby mode.
● During FROST WASH, F.Wash LED Indicator will lit up.
- If air conditioner cumulative operation time has passed, F.Wash LED indicator will blink as reminder to user to operate FROST WASH function. (Blinking remain for max. 4 min. after stopping operation)
● FROST WASH is recommended to be operated every 2 weeks. Not operate FROST WASH would cause accumulation of dust or particles which would be difficult to be removed. In this case, manual servicing will be recommended.
- Failure to operate FROST WASH regularly, heat exchanger would be difficult to be cleaned up. If operate FROST WASH when much dust has accumulated on heat exchanger, fallen dust would cause the clogging of the drain flow path.
CAUTION
● During "FROST WASH" operation, please do not open the door and windows. Water will condense on unit surface and drip down.
● During "FROST WASH" operation, please do not open and remove the Front Panel. It may cause injury or malfunction.
FROST WASH (MANUAL OPERATION)

flowchart
graph LR
    A["Operation start"] --> B["Operation stop"]
    B --> C["Frost Wash"]
    D[""FROST WASH" operation About 120 min (max)"] --> E["Defrost period"]
    E --> F["Heat exchanger drying period"]
    F --> G["Automatically stop"]
    H["Normal operation (EX. Cooling operation)"] --> I["Unit stop"]
    I --> J["Fan period"]
    J --> K["Room dehumidification period"]
    K --> L["FROST period"]
    L --> M["Operation end"]
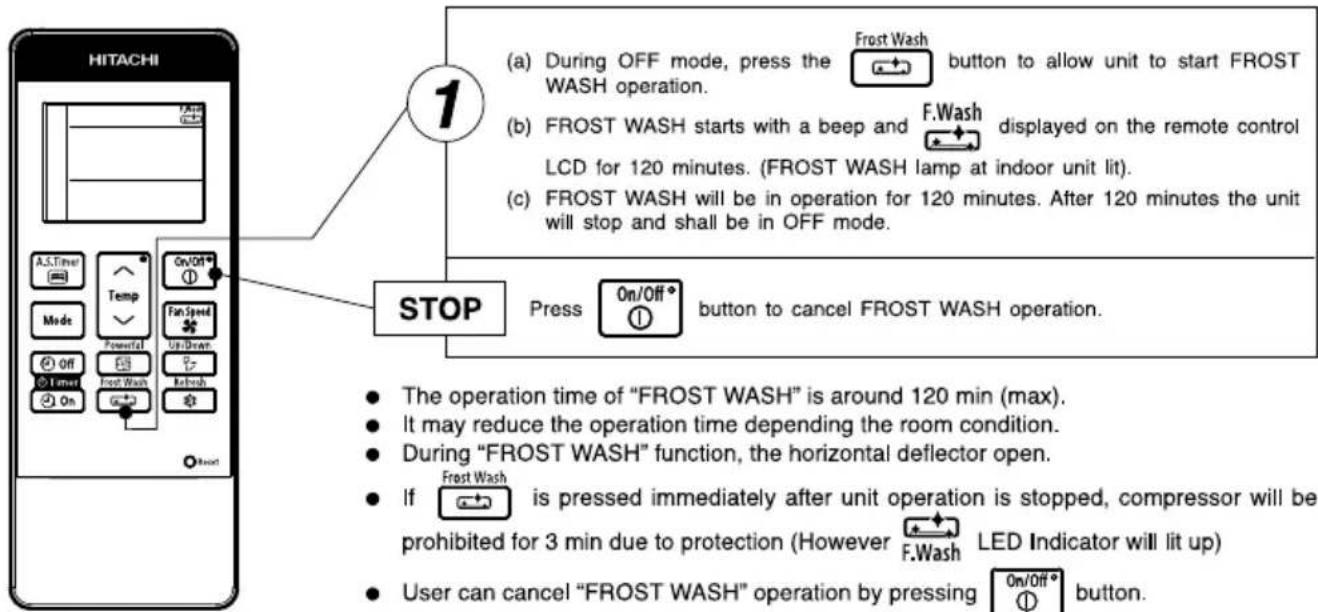
● The operation time of "FROST WASH" is around 120 min (max).
- It may reduce the operation time depending the room condition.
● During "FROST WASH" function, the horizontal deflector open.
- If [icon] is pressed immediately after unit operation is stopped, compressor will be prohibited for 3 min due to protection (However F.Wash LED Indicator will lit up)
- User can cancel "FROST WASH" operation by pressing 0n/0ft button.
- "Manual FROST WASH operation starts" operation is prohibited to run for 60 min after the last "FROST WASH (FROST period)" operation.
When using the remote control, if there is no response from the air conditioner unit and or the remote control has fading and dim displays, the batteries in the remote control device need to be removed and replaced with new ones
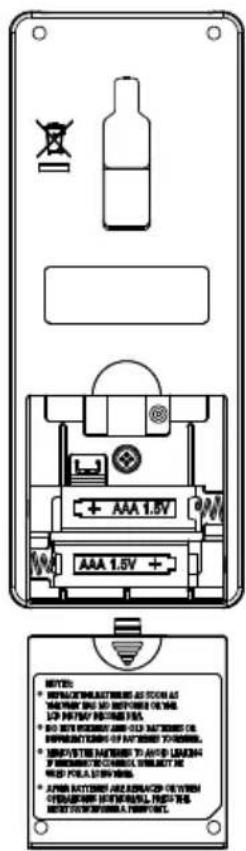
1 Remove the cover as shown in the figure and take out the old batteries.

2 Install the new batteries. The direction of the batteries should match the marks in the case.
CAUTION
- Do not use new and old batteries, or different kinds of batteries together.
- Take out the batteries when you do not use the remote controller for 2 or 3 months.
- Use high quality and high performance AAA batteries to avoid short operating life and electrolyte leakages.
- After batteries are replaced or when an operation is abnormal, press the reset button with a pen point.
Suitable Room Temperature
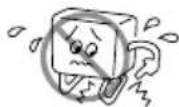
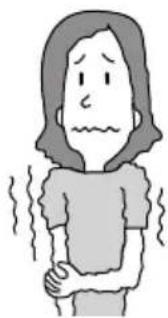
natural_image
Simple line drawing of a person with sweat or fever, showing intense discomfort (no text or symbols)Warning
Freezing temperature is bad for health and a waste of electric power.
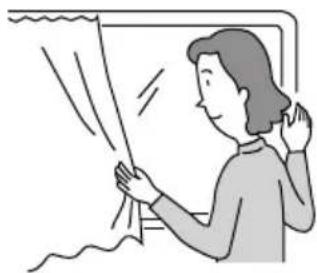
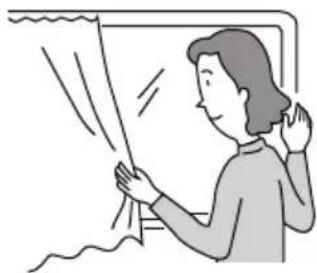
Install curtain or blinds
natural_image
Illustration of a person standing near a window with curtains, no text or symbols presentIt is possible to reduce heat entering the room through windows.
Ventilation

Caution
Do not close the room for a long period of time. Occasionally open the door and windows
to allow the entrance of fresh air.
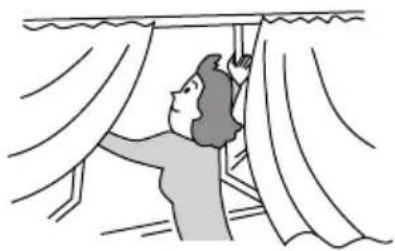
natural_image
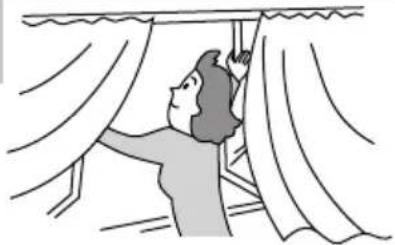
Illustration of a person hanging from a window with curtains (no text or symbols)Effective Usage Of Timer
At night, please use the "OFF or ON timer or SLEEP timer operation mode", together with your wake up time in the morning. This will enable you to enjoy a comfortable room temperature. Please use the timer effectively.

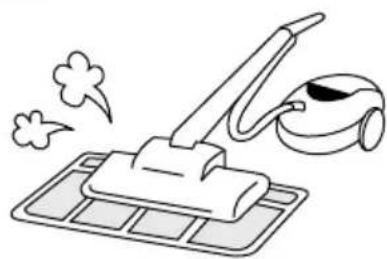
Do Not Forget To Clean The Pre-Filter
Dusty air filter will reduce the air volume and the cooling efficiency. To prevent from wasting electric energy, please clean the filter every 2 weeks.
natural_image
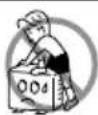
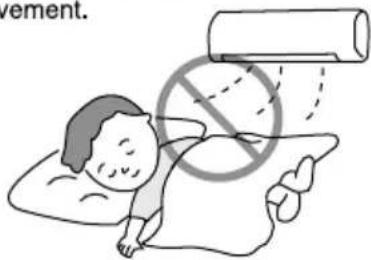
Simple line drawing of a cleaning machine with smoke and a brush (no text or symbols)Please Adjust Suitable Temperature For Baby And Children
Please pay attention to the room temperature and air flow direction when operating the unit for baby, children and old folks who have difficulty in movement.
Please combine this page (18 +19)
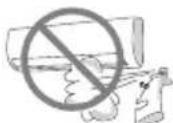
The Air Conditioner And The Heat Source In The Room

Caution
If the amount of heat in the room is above the cooling capability of the air conditioner (for example: more people entering the room, using heating equipments and etc.), the preset room temperature cannot be achieved.

natural_image
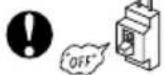
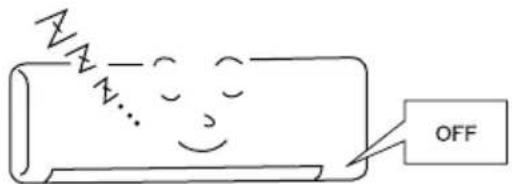
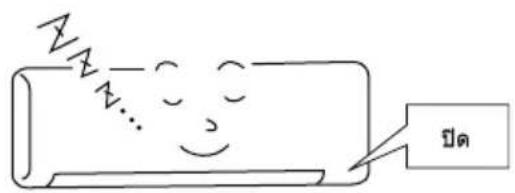
Simple line drawing of a fire extinguisher emitting smoke from a cylindrical container (no text or symbols)Not Operating For A Long Time
When the indoor unit is not to be used for a long period of time, please switch off the power from the mains. If the power from mains remains "ON", the indoor unit still consumes about 2.5W in the operation control circuit even if it is in "OFF" mode.
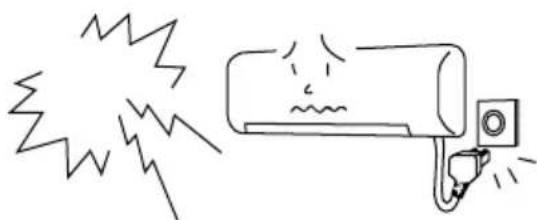
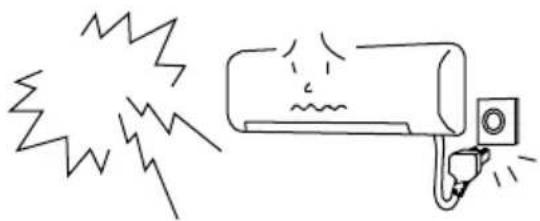
When Lightning Occurs

Warning
To protect the whole unit during lightning, please stop operating the unit and remove the plug from the socket.
natural_image
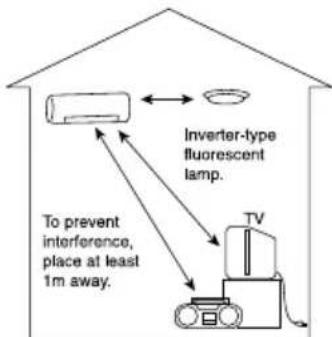
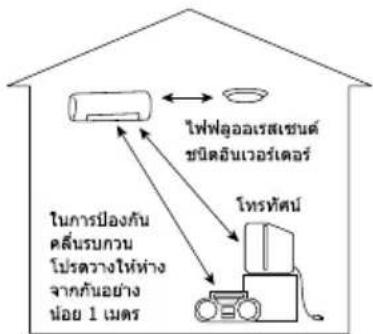
Simple line drawing of an air conditioner with exhaust smoke and a warning label (no text or symbols)Interference From Electrical Products

Caution
To avoid noise interference, please place the indoor unit and its remote controller at least 1m away from electrical products.
CAUTION
Before cleaning, stop operation and switch off the power supply.

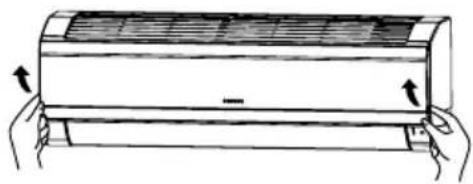
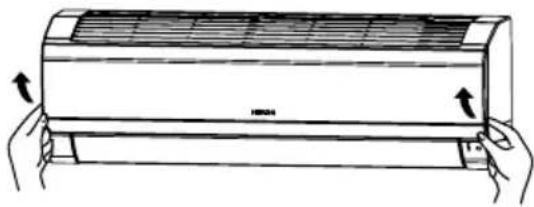
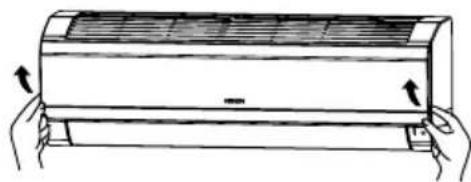
Open the front panel
- Pull up the front panel by holding it at both sides with both hands.
natural_image
Illustration of a hand holding a large air conditioner unit with airflow arrows (no text or symbols)
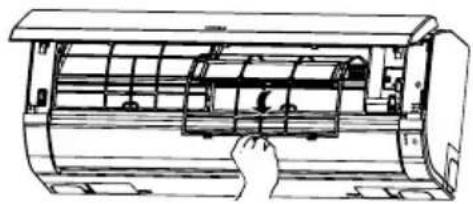
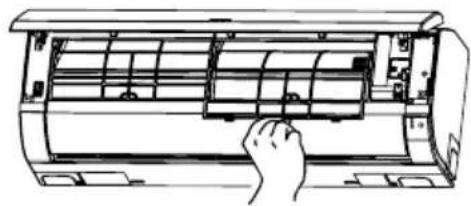
Remove the Pre-filter
- Push upward to release the claws and pull out the Pre-filter.
natural_image
Line drawing of a hand inserting a component into a cylindrical device (no text or symbols)
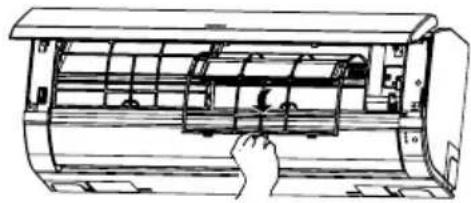
Attaching the air purifying filters
- Attach the air purifying filters to the C-case by gently compress its both sides and release after insertion into filter frame. - Bring the C-case to the back side of the pre-filter. Insert it claws on left and right to the C-case fixing slot securely. Honeycomb surface shall be on the front side and flat surface shall be on the back side when insert (only for the purifying filter with a flat surface).

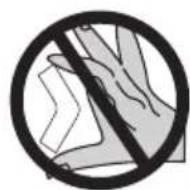
CAUTION
Do not bend the air purifying filter as it may cause damage to the structure.
Please do not smell direct from source of filter.
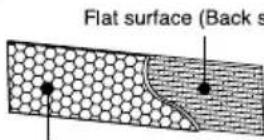
Honeycomb surface (Front side)
natural_image
Line drawing of a car air conditioner unit with a hand inserting a fan (no text or symbols)
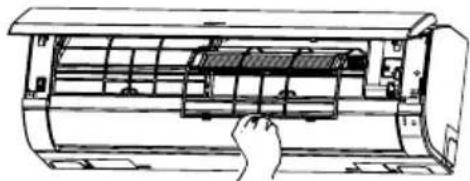
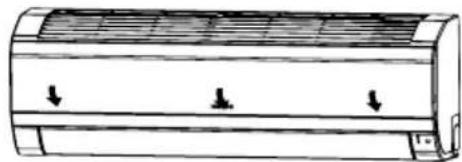
Attach the Pre-filters
- Attach the Pre-filters by ensuring that the surface written "FRONT" is facing front.
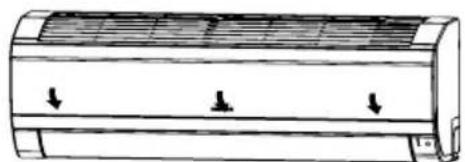
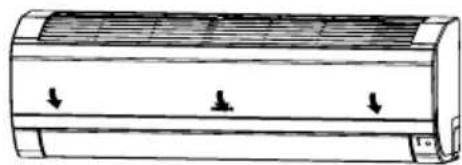
● After attaching the Pre-filters, push the front panel at three arrow portions as shown in figure and close it.
natural_image
Diagram of a cylindrical air vent with three downward arrows indicating airflow or pressure direction (no text or symbols)NOTE
- In case of removing the air purifying filters, please follow the above procedures.
- The cooling capacity is slightly weakened and the cooling speed becomes slower when the air purifying filters are used. So, set the fan speed to "HIGH" when using it in this condition.
- Air purifying filters are not washable. It is recommended to use vacuum to clean it. It can be used for 1 year time. Type number for this air purifying filter is
. Please use this number for ordering when you want to renew it.
CAUTION
Before cleaning, stop operation and switch off the power supply.
1. PRE-FILTER
Clean the Pre-filter, as it removes dust inside the room. In case the Pre-filter is full of dust, the air flow will decrease and the cooling capacity will be reduced. Further, noise may occur. Be sure to clean the Pre-filter following the procedure below.
PROCEDURE

Open the front panel and remove the Pre-filter
● Gently lift and remove the air purifying filters from the air purifying filter frame.
natural_image
Illustration of a hand holding a rectangular air conditioner unit with cooling fins and airflow arrows (no text or symbols)
Vacuum dust from the Pre-filter and air purifying filter using vacuum cleaner. If there is too much dust, rinse under running tap water and gently brush it with soft bristle brush. Allow filters to dry in shade.
natural_image
Line drawing of a hand inserting a fan into an air conditioner unit (no text or symbols)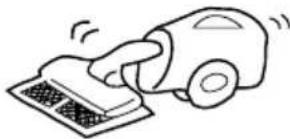
natural_image
Simple line drawing of a hand using a car to press or install a textured surface (no text or symbols)
- Re-insert the air purifying filter to the filter frame. Set the Pre-filter with "FRONT" mark facing front, and slot them into the original state.
● After attaching the Pre-filters, push the front panel at three arrow portions as shown in figure and close it.
natural_image
Line drawing of a cylindrical air conditioner unit with three downward arrows indicating airflow or cooling zones (no text or symbols)CAUTION
- Do not wash with hot water at more than 40°C. The Pre-filters may shrink.
- When washing it, shake off moisture completely and dry it in the shade; do not expose it directly to the sun. The Pre-filters may shrink.
- Do not use detergent on the Pre-filter as some detergent may deteriorate the Pre-filter electrostatic performance.
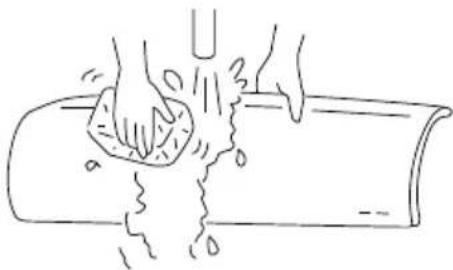
2. CLEANING OF FRONT PANEL
- Remove the front panel and wash with clean water. Wash it with a soft sponge.
After using neutral detergent, wash thoroughly with clean water. - When front panel is not removed, wipe it with a soft dry cloth. Wipe the remote controller thoroughly with a soft dry cloth.
● Wipe the water thoroughly.
If water remains at indicators or signal receiver of indoor unit, it causes trouble.
Method of removing the front panel.
Be sure to hold the front panel with both hands to detach and attach it.
natural_image
Line drawing of hands washing a cylindrical object with liquid, no text or symbols present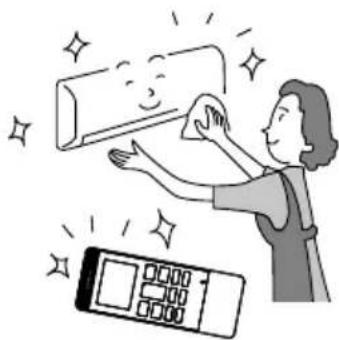
natural_image
Illustration of a person cleaning a wall with a digital timer and sparkle effects (no text or symbols)Removing the Front Panel
- Push the end of the right-side arm outward to release the right tab.
- Move the left-side arm outward to release the left tab and then pull the panel towards you.
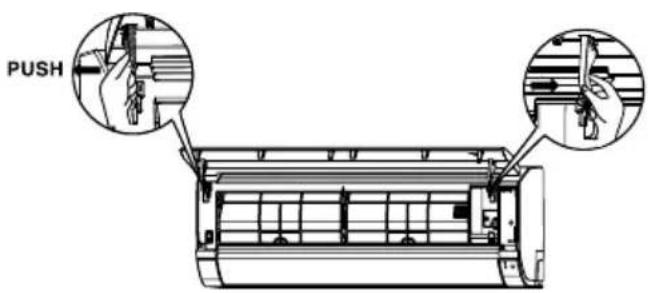
Attaching the Front Panel
natural_image
Technical line drawing of an air conditioner unit with two close-up insets showing hand positioning (no text or symbols)- Insert the shaft of the left arm along the step on the unit into the hole.
- Securely insert the shaft of the right arm along the step on the unit into the hole.
- Make sure that the front panel is securely attached an then close the front panel.
CAUTION
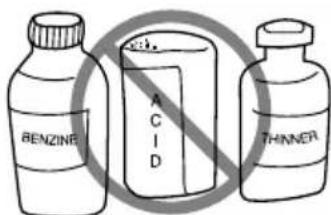
- Never use hot water (above 40°C), benzine, gasoline, acid, thinner or a brush, because they will damage the plastic surface and the coating.
CAUTION
- Please use earth line.
Do not place the earth line near water or gas pipes, lightning-conductor, or the earth line of telephone. Improper installation of earth line may cause electric shock.
- A circuit breaker should be installed depending on the mounting site of the unit. Without a circuit breaker, the danger of electric shock exists.
IMPORTANT
The wires in this mains lead are coloured in accordance with the following code:
Green-and-yellow : Earth
Blue : Neutral
Brown : Live
As the colours of the wires in the mains lead of this appliance may not correspond with the coloured markings identifying the terminals in your plug, proceed as follows:
The wire which is coloured green-and-yellow must be connected to the terminal in the plug which is marked with the letter E or by the earth symbol ⏻ or coloured green or green-and-yellow.
The wire which is coloured blue must be connected to the terminal which is marked with the letter N or coloured black.
The wire which is coloured brown must be connected to the terminal which is marked with the letter L or coloured red.
NOTE
If the supply cord is damaged, it must be replaced by the special cord obtainable at authorized service/parts centers.
CAUTION
Cleaning and maintenance must be carried out only by qualified service personnel. Before cleaning, stop operation and switch off the power supply.
REGULAR INSPECTION
PLEASE CHECK THE FOLLOWING POINTS BY QUALIFIED SERVICE PERSONNEL EITHER EVERY HALF YEARLY OR YEARLY. CONTACT YOUR SALES AGENT OR SERVICE SHOP.
| 1 |  | Is the earth line disconnected or broken? |
| 2 |  | Is the mounting frame seriously affected by rust and is the outdoor unit tilted or unstable? |
| 3 |  | Is the plug of power line firmly plugged into the socket?(Please ensure no loose contact between them). |
WHEN ASKING FOR SERVICE, CHECK THE FOLLOWING POINTS
| CONDITION | CHECK THE FOLLOWING POINTS |
| When it does not operate | Is the fuse all right?Is the voltage extremely high or low?Is the circuit breaker “ON”? |
| When it does not cool well | Was the air filter cleaned?Does sunlight fall directly on the outdoor unit?Is the air flow of the outdoor unit obstructed?Are the doors or windows opened, or is there any source of heat in the room?Is the set temperature suitable? |

natural_image
Cartoon illustration of a smiling man in a suit pointing upward with both hands (no text or symbols)Notes
- In quiet or stop operation, the following phenomena may occasionally occur, but they are not abnormal for the operation.
(1) Slight flowing noise of refrigerant in the refrigerating cycle.
(2) Slight rubbing noise from the fan casing which is cooled and then gradually warmed as operation stops.
- The odor will possibly be emitted from the room air conditioner because the various odor, emitted by smoke, foodstuffs, cosmetics and so on, sticks to it. So the air filter and the evaporator regularly must be cleaned to reduce the odor.
- Please contact your sales agent immediately if the air conditioner still fails to operate normally after the above inspections. Inform your agent for the model of your unit, serial number, date of installation. Please also inform him regarding the fault.
● Power supply shall be connected at the rated voltage, otherwise the unit will be broken or could not reach the specified capacity.
Please note:
On switching on the equipment, particularly when the room light is dimmed, a slight brightness fluctuation may occur. This is of no consequence.
The conditions of the local Power Supply Companies are to be observed.
Note
- Avoid to use the room air conditioner for cooling operation when the outside temperature is below 21°C (70°F).
The recommended maximum and minimum operating temperatures of the hot and cold sides should be as below:
Move to the above page
| Minimum | Maximum | ||
| Indoor | Dry bulb °C | 21 | 32 |
| Wet bulb °C | 15 | 23 | |
| Outdoor | Dry bulb °C | 21 | 43 |
| Wet bulb °C | 15 | 26 |
MEMO
คู่มิจ
การใช้งาน
airHome 600 series
เครื่องปรับอากาศสำหรับห้อง
แบบแยกส่วน
\$u UH
VH
ชื่อรุ่น
RAS-UH10CMT/RAC-UH10CMT
RAS-UH13CMT/RAC-UH13CMT
RAK-VH10PCAST / RAC-VH10PCAST
RAK-VH13PCAST / RAC-VH13PCAST
HITACHI
natural_image
Line drawing of a wall-mounted air conditioner unit (no text or symbols)เครื่องภายใน
RAK-VH10PCAST RAS-UH10CMT
RAKRXSI-UBP13A9T
เครื่องภาษานอก
natural_image
Line drawing of a Hitachi air conditioner unit with fan blades and control panel (no text or symbols)RAR-M0A6
RAC-VH10PCAST RAC-UH10CMT
RACRVH-18PCAST
EN INSTRUCTION MANUAL
TH คู่มิจการใช้งาน
Access the full version of the User Operation Manual by scanning the code.
https://docs.hitachiaircon.com/ BAS-UH-CMT-BAC-UH-CMT BAK-VH-PCAST-BAC-VH-PCAST

Cooling & Heating
ข้อควรระวังเพื่อความปลอดภัย
- โปรดอ่าน "ข้อควรระวังเพื่อความปลอดภัย" โดยละเอียดก่อนการใช้งานเครื่องปรับอากาศ เพื่อให้แน่ใจว่าใช้งานเครื่องปรับอากาศได้อย่างถูกต้อง
- โปรดใส่ใจเป็นพิเศษกับสัญลักษณ์ " ๑ ค่าเตือน" และ " ๒ ข้อควรระวัง" ส่วน "ค่าเตือน" ประกอบด้วยเนื้อหาการใช้งานที่หาก ไม่ปฏิบัติตามอย่างเคร่งครัด อาจเป็นสาเหตุให้เสียขีวิตหรือได้รับบาดเจ็บรุนแรงไต้ ส่วน "ข้อควรระวัง" ประกอบด้วยเนื้อหาการใช้งานที่หากไม่ ปฏิบัติตามอย่างเหมาะสม อาจเป็นสาเหตุให้เกิดผลร้ายแรงไต้ โปรดปฏิบัติตามค่าแนะนําอย่างเคร่งครัดเพื่อความปลอดภัย
- สัญลักษณ์ต่างๆ แสดงความหมายต่อไปนี้
| ตรวจสอบให้แน่วามีการเชื่อมต่อสายดิน | สัญลักษณในรูปแสดงถึงข้อห้ามต่างๆ |
| แสดงถึงคําแนะนําที่ต้องปฏิบัติตาม |
- โปรดเก็บคู่มือนีไว้หลังจากการอ่าน
| ค่าอธิบายสัญลักษณ์ที่แสดงบนอุปกรณ์ | |||||
| คําเดือน | สัญลักษณ์นี้แสดงว่าอุปกรณ์นี้ใช่สารทําความเย็นที่ติดไฟได้หากสารทําความเย็นรั่ว อาจเกิดการระเบิดได่หากมีแห่งจุดระเบิดภายนอก | ข้อควรระวัง | สัญลักษณ์นี้แสดงว่าช่างบริการควรจัดการกับอุปกรณ์นี้โดยอ่างอิงข้อมูลในคู่มือการติดตั้ง | ||
| ข้อควรระวัง | สัญลักษณ์นี้แสดงว่าควรอ่านคําแนะนําในการใช่งานโดยละเอียด | ข้อควรระวัง | สัญลักษณ์นี้แสดงว่าปีข้อมูลอยู่ในคู่มือการใช้งานและ/หรือคู่มือการติดตั้ง | ||
| ข้อควรระวังระหว่างทําการติดตั้ง | |
| ค่าเดือน | ห้ามรื่อเครื่องปรับอากาศเพื่อประกอบใหม่อาจทําให้เกิดน้ํารัว การทํางานผิดพลาด ไฟฟ้าลัดวงจร หรือเพลิงใหม่ หากรื่อ เครื่องปรับอากาศเพื่อประกอบใหม่ด้วยตนเอง |
| โปรดสอบถามตัวแทนจําหน่ายของคุณ หรือช่างเทคนิคที่มีความชํานาญในการติดตั้งเครื่องปรับอากาศของคุณ อาจทําให้เกิดน้ํารัวไฟฟ้าลัดวงจร หรือเพลิงใหม่ หากติดตั้งเครื่องปรับอากาศด้วยตนเอง | |
| โปรดใช้สายดินห้ามติดตั้งสายดินไวไกลกับท่อนําหรือท่อแกส สายล่อฟ้า หรือสายดินของโทรศัพท์การติดตั้งสายดินที่ไม่เหมาะสมอาจทําให้เกิดไฟฟ้าชื่อด | |
| โปรดใช้ชุดระบบท่อเฉพาะรุ่น R32 มิฉะนั้น อาจทําให้เกิดการชํารุดของท่อทองแดงหรือปัญหาด่างๆ | |
| ข้อควรระวัง | ควรติดตั้งตัวตัดวงจรโดยขึ้นอยู่กับสถานที่ติดตั้งเครื่องปรับอากาศ หากไม่มีตัวตัดวงจร อาจเกิดอันตรายจากไฟฟ้าชื่อดใด |
| ห้ามติดตั้งตัวเครื่องไกลกับสถานที่ที่มีแกัสไวไฟ ตัวเครื่องภายนอกอาคารอาจติดไฟ หากมีการรั่วของแกสไวไพรอบๆ ตัวเครื่อง | |
| โปรดตรวจสอบให้แน่ใจว่ามีการระบายนําที่ดีเมื่อทําการติดตั้งท่อระบายนํา | |
| ข้อควรระวังระหว่างการเปลี่ยนเครื่องหรือบํารุงรักษา | |
| ตําเดือน | หากมิสถานการณ์ที่ไม่ปกติเกิดขึ้น (เช่น กลิ่นใหม่) โปรดหยุดการทํางานของเครื่องและปิดตัวตัดวงจร ติดต่อตัวแทนจําหน่ายของคุณ อาจทําให้เกิดการทํางานผิดพลาด ไฟฟ้าลัดวงจร หรือเพลิงใหม่ หากคุณยังคงใช้งานเครื่องปรับอากาศภายในสถานการณ์ไม่ปกติต่อไป |
| โปรดติดต่อตัวแทนจําหน่ายของคุณสําหรับการปารุงรักษา การปารุงรักษาด้วยตนเองที่ไม่เหมาะสม อาจทําให้เกิดไฟฟ้าข้อตและเพลิงใหม่ | |
| โปรดติดต่อตัวแทนจําหน่าย หากคุณต้องการรื่อถอนหรือติดตั้งเครื่องใหม่ อาจทําให้ไฟฟ้าข้อตหรือเพลิงใหม่ หากคุณเรื่อกอนและติดตั้งเครื่องใหม่ด้วยตนเองอย่างไม่เหมาะสม | |
| หากสายไฟฟ้ารุด ต้องเปลี่ยนเป็นสายไฟฟิเศษที่ได้รับจากศูนย์บริการ/อะไรหล่ที่ได้รับอนุญาตเท่านั่น | |
| ถ้าเครื่องปรับอากาศไม่เย็น สาเหตุที่เป็นไปได้อย่างหนึ่งตือสารทําความเย็นร่วง โปรดติดต่อตัวแทนจําหน่ายของคุณกําชทําความเย็นที่ใช้ในเครื่องปรับอากาศไม่เป็นอันตราย แต่หากกําชทําความเย็นร่วงเขามาในห้อง จะทําให้เกิดสารที่เป็นอันตรายเมื่อลัมผัสกับไฟจากเครื่องใช่ เช่น เตาแกสเมื่อกําชทําความเย็นสะสมอยู่ในห้อง ให้หยุดใช้เครื่องปรับอากาศทันที่ เปิดหน้าต่างเพื่อระบายอากาศ และติดต่อตัวแทนจําหน่ายของคุณ | |
| ข้อควรระวังในการใช้งาน | ||
| ค่าเตือน | เพื่อสุขภาพของคุณ ควรหลีกเลี่ยงการรับลมโดยตรงเป็นระยะเวลานานห้ามแห่งนิ้ว ท่อนไม่หรือวัตถุ๊นๆ เซ้าไปในช่องระบายอากาศเข้า ออก เมืองจากพัตลมจะหมุนที่รอบความเร็วสูง ซึ่งอาจก่อให้เกิดการมาดเจ็บได้ ก่อนการทําความสะอาดหรือปรับแต่งแผงกันใดๆ ให้แน่ใจว่าได้ปิดสวิตชแล้วห้ามใช้ตัวนําไฟฟ้าใดๆ แทนสายฟิวส์ การทําเช่นนี้อาจก่อให้เกิดอุบัติเหตุร้ายแรงถึงขึ้นเสียชีวิต | |
ข้อควรระวังระหว่างการใช้งาน
- ควรใช้งานผลิตภัณฑ์ภายใต้ข้อกำหนดของผู้ผลิต และต้องไม่ใช้งานเพื่อจุดประสงค์อื่นๆ
- ห้ามใช้งานเครื่องปรับอากาศขณะมือเปียก การท่าเช่นนี้อาจก่อให้เกิดอุบัติเหตุร้ายแรงถึงขั้นเสียชีวิต
- ในขณะที่มีพายุฝนฟ้าคะนอง ให้ตัดการเชื่อมต่อและปิดตัวตัดวงจร
- อย่างสมเย็นที่ออกจากแฝงสมเครื่องปรับอากาศหันเข้าหาอุปกรณ์เท่าความร้อนในครัวเรือน เนื่องจากอาจส่งผลกระทบต่อการทํางานของอุปกรณ์นั่นๆ ได้ เช่น ภาด้มน้ำด้วยไฟฟ้า เตาอบ เป็นต้น
- โปรดตรวจสอบให้แน่ใจว่าโครงของชาตั้งภายนอกมีความมั่นคง ไม่ชยับเขยื้อน และไม่ข่ารุด หากไม่เป็นดังนี้ ตัวเครื่องภายนอกอาคารอาจสัมและทำให้เกิดอันตรายได้

- อย่าสาตน้ำหรือนีตน้ำใส่ตัวเครื่องปรับอากาศโดยตรงเมื่อทำความสะอาด เนื่องจากอาจ ทำให้เกิดไฟฟ้าลัดวงจร
- ห้ามใช้กระป้องฉิตพ่นหรือสเปรย์ฉิตผมใกล้กับตัวเครื่องปรับอากาศภายในห้องสารเคมีนี้อาจดิดบนฟันแลกเปลี่ยนความร้อน และปิดกันทางระบายของน้ำที่ระเหยไปยังลาดรองน้ำที่ง น้ำจะหยดลงบนพัตลมกรงกระอกและจะทำให้น้ำกระเช็นออกจากเครื่องปรับอากาศภายในห้อง
- โปรดปิดสวิตชัดตัวเครื่องและปิดตัวตัวดวงจรระหว่างการทําความสะอาด พัดลมความเร็วสูง ภายในตัวเครื่องอาจทําให้เกิดอันตรายได้
- ปิดตัวตัดวงจร หากไม่มีการใช้งานเครื่องปรับอากาศเป็นระยะเวลานาน
- ห้ามปืนตัวเครื่องภายนอกอาคาร หรือวางลิ่งของไว้ด้านบนตัวเครื่อง
- ห้ามวางภาชนะใส่น้ํา (เช่น แจกัน) บนตัวเครื่องภายนอกอาคารเพื่อหลีกเลี่ยงไม่ให้น้ําหยดลงบนตัวเครื่อง น้ําที่หยดลงบนเครื่องอาจท่าใหฉวนภายในเครื่องช่ารุดและก่อให้เกิดไฟฟ้าลัดวงจร
- ห้าวางต้นไม้วไว้ได้ทางลมโดยตรง เนื่องจากอาจเป็นอันตรายต่อต้นไม่ได้
- เมื่อใช้งานเครื่องปรับอากาศโดยที่เปิดประดูและหน้าต่างทั้งไว้ (ความชิ้นภายในห้องจะสูงกว่า 80% ตลอดเวลา) และโดยที่แผ่นเบนทางลมคว่าหน้าลง หรือเคลื่อนที่โดยอัตโนมัติเป็นระยะเวลานาน้ําจะควบแน่นบนแผ่นเบนทางลมและหยุดลงมาเป็นครั้งควร ซึ่งจะทำให้เฟอร์นิเจอร์ของคุณเปียกขึ้น ดังนั้น อย่าใช้งานเครื่องภายใต้สภาพตั้งกล่าวเป็นเวลานาน
- หากปริมาณความร้อนในห้องเกินกว่าความสามารถในการทําความเย็นของเครื่อง (ตัวอย่างเช่น: มีคนอยู่ในห้องจำนวนมาก การใช้อุปกรณ์ทําความร้อน เป็นต้น) เครื่องปรับอากาศอาจไม่สามารถทําอุณหภูมิตามที่ตั้งค่าไวล่วงหน้า
- เครื่องใช้ไฟฟ้านี้ไม่มีเจตนาให้ใช้โดยบุคคล (รวมถึงเด็ก) ที่ด้อยความสามารถทางร่างกาย ทางประสาทสัมผัสหรือจัดใจ หรือขาดประสบการณ์และความรู้ เว้นแต่ว่าจะได้รับการควบคุมดูแลหรือการสอนเกี่ยวกับการใช้เครื่องใช้ไฟฟ้าโดยบุคคลที่รับผิดชอบต่อความปลอดภัยของบุคคลเหล่านั้น
ตัวเครื่องปรับอากาศ
natural_image
Technical line drawing of a wall-mounted air conditioner unit (no text or symbols)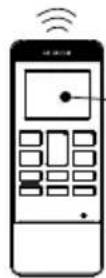
แผ่นกรองเบื้องต้น
เพื่อป้องกันผุ่นละอองเข้าสู่ตัวเครื่องปรับอากาศ
(ดูหน้า 47)
แพงหน้ากากด้านหน้า
ไฟสัญญาบนตัวเครื่องปรับอากาศ
ไฟลัญญาณแสดงสถานภาพการท่างาน
(ดูหน้า 31)
แผ่นเบนทางลมแนวนอน • แผ่นเบนทางลมแนวตั้ง (ช่องลมออก)
(ดูหน้า 41)
รีโมคอนโทรล
ส่งสัญญาณการทำงานไปยังตัวเครื่องปรับอากาศ
เพื่อใช้งานฟังก์ชันทั้งหมดของเครื่อง
(ดูหน้า 32)
ตัวเครื่องภายนอกอาคาร
ชื่อรุนและขนาด
| รุ่น | ความกว้าง (มม.) | ความสูง (มม.) | ความหนา (มม.) |
| RAK-VH10PCAST, RAK-VH13PCASTRAS-UH10CMT, RAS-UH13CMT | 780 | 280 | 230 |
| RAC-VH10PCAST, RAC-VH13PCASTRAC-UH10CMT, RAC-UH13CMT | 750 | 570 | 280 |
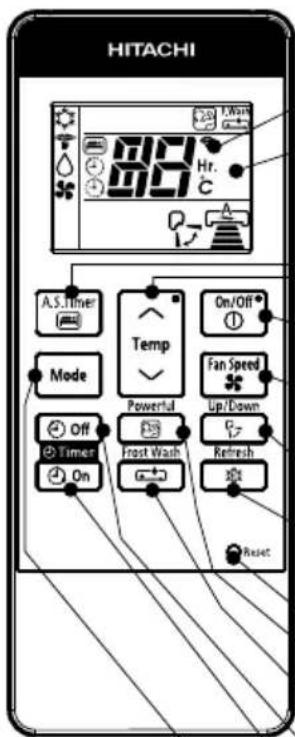
ไฟสัญญาณบนตัวเครื่องปรับอากาศ
ไฟแสดงการทำงาน
ไฟนี้จะติดในระหว่างที่ทำงาน
ไฟล้างแผงคอย์เย็น
ไฟนี้จะดิดเมื่อฟังก์ชันล้างแผงคอยล์เย็น (Frost Wash) ทำงาน
ไฟนี้จะกะพริบเพื่อแนะน่าให้เปิดใช้การล้างแผง คอยล์เย็นเองหลังจากเครื่องปรับอากาศมีการท่างาน สะสมครบ 200 ชั่วโมง
โปรดดูรายละเอียดการทำงานของระบบล้างแผง คอยล์เย็นในหน้า 42
ไฟตัวดั้งเวลา
ไฟนี้จะติดเมื่อตัวตั้งเวลาท่างาน


Temporary Switch


F.Wash


ปุ่มสวิตช์ข้าวคราว
สวัตซ์ข้าวคราว
ใช้สวิตช์นี้เพื่อเริ่มและหยุดการทํางานเมื่อรีโมทคอนโทรลไม่ทํางาน
- เมื่อกตสวิตช์ชั่วคราว เครื่องจะท่างานในโหมดอัดโนมัติ
- เมื่อเครื่องทำงานโดยใช้สวิตชั่วคราวหลังจากปิดและเปิดแหล่งจ่ายไฟอีกครั้ง เครื่องจะทำงานในหมดอัดโนมัติ
รีโมคอนโทรล
อุปกรณ์จะควบคุมการทํางานของตัวเครื่องปรับอากาศ ระยะของสัญญาณถึงตัวเครื่องปรับอากาศประมาณ 7 เมตร หากมีการใช้งานไฟอินเวอร์เตอร์ ระยะของสัญญาณอาจไกลกว่านี้
อุปกรณ์สามารถยืดติดกับผนังโดยใช้ตัวติดตั้งที่ให้มา ก่อนทำการติดตั้ง ตรวจสอบให้แน่ใจว่าตัวเครื่องปรับอากาศสามารถควบคุมได้จากรีโมทคอนโทรล
- สัญลักษณ์การส่งศัญญาณ
สัญลักษณ์การส่งสัญญาณจะกระทรวง เมื่อมีการส่งสัญญาณ - หน้าจอ
หน้าจะจะแสดงอุณหภูมิห้องที่เลือก สถานะตัวตั้งเวลา ฟังก์ชัน และระดับความเร็วในการหมุนของพัดลมที่เลือก - ปุ่มตัวตั้งเวลา AIR SLEEP
ใช้ปุมนี้เพื่อตั้งค่าโหมดตัวตั้งเวลา AIR SLEEP - ปัมลุณหภูมิ
กดปุมนี้เพื่อเพิ่มหรือลดค่าอุณหภูมิ (กดค้างไว้และค่าจะเปลี่ยนเร็วยิ่งขึ้น) - ปุ่มเริ่ม/หยุด
กดปุมนี้เพื่อเริ่มหรือหยุดท่างาน - ปุ่มตัวเลือกความเร็วพัดลม
ปุ่มนี้จะกำหนดความเร็วพัตลม ทุกครั้งที่คุณกดปุ่มนี้ ระดับความเร็วในการหมุนของพัตลมจะเปลี่ยนจาก (AUTO) → (HI) → (MED) → (LOW) → (SILENT). - ปุ่มสวิงอัตโนมัติ (แนวนอน)
ควบคุมองศาของแผ่นเบนทางลมแนวนอน - ปุ่มรีเพราะ
ใช้ปุมนี้เพื่อบรับสภาวะในห้องให้สดขึ้น - ปุ่มรีเชิด
- ปุ่มการท่างานแบบเต็มประสิทธิภาพด้วยสัมผัสเดียว
ใช้ปุ่มนี้เพื่อให้การปรับอากาศที่รวดเร็วและสบายมากยิ่งขึ้น หรือเริ่มการทำงาน - ปุ่มล้างแพงคอลัยเย็น
ระหว่างที่อยู่ในโหมดปิด ให้กดปุ่มนี้เพื่อตั้งค่าการล้างแผงคอยล์เย็น - ปุ่มตัวตั้งเวลาปิด
เลือกเพื่อตั้งเวลาปิด
ปุ่มตัวตั้งเวลาเปิด
เลือกเพื่อตั้งเวลาเปิด - ปุ่มเลือกโหมด
ใช้ปุ่มนี้เพื่อเลือกโหมด ทุกครั้งที่คุณกดปุ่มนี้ การเลือกโหมดจะเปลี่ยนจาก (ทําความเย็น) → (เจ็บ) → ◇ (ลดความชั้น) → (พัดลม). อย่างไรก็ตาม ระหว่างที่อยู่ในโหมดปิด โหมดเจ็บจะถูกข้ามไป
| On/Off1 | เริ่ม / หยุด |
| Mode | ปุ่มเลือกโหมด |
| โหมดทําความเย็นแบบเจียบลดความขึ้นพัดลม | |
| Fan Speed♣ | ความเร็วของพัดลม |
| อัตโนมัติแบบเจียบต่ํากลางสูง | |
| Powerful☎ | ปุ่มการทํางานแบบเดิมประสิทธิภาพด้วยสัมผัสเดียว |
| Up/Down☎ | สวิงอัตโนมัติ (แนวนอน) |
| OffTimer On | ตัวเลือกการตั้งเวลาตัวตั้งเวลาปีตตัวตั้งเวลาปีต |
| A.S.Timer☎ | ตัวตั้งเวลา AIR SLEEP |
| Frost Wash☎ | ละลายน้ําแข็ง |
| Refresh♣ | รีเฟรช |
ข้อควรระวังในการใช้
- อย่างรีโมทคอนโทรลในที่ต่อไปนี้
- ที่ที่โดนแสงแคดโดยตรง
- อยู่ใกล้กับเครื่องทำความร้อน
- หยิบจับรีโมทคอนโทรลด้วยความระมัดระวัง อย่าทําหล่นและระวังไม่ให้เปียกกน้ำ
- เมื่อตัวเครื่องภายนอกอาคารหยุดทํางาน เครื่องจะไม่รัสตาร์ดเป็นเวลาประมาณ 3 นาที (ยกเว้นคุณจะปิดสวิตชั่วแล้วเปิดใหม่ หรือทอดปลักออกแล้วเสียบใหม่) ที่เป็นเช่นนี้เพื่อป้องกันตัวเครื่อง ไม่ได้เป็นการทํางานขัดข้องแต่ประการใด
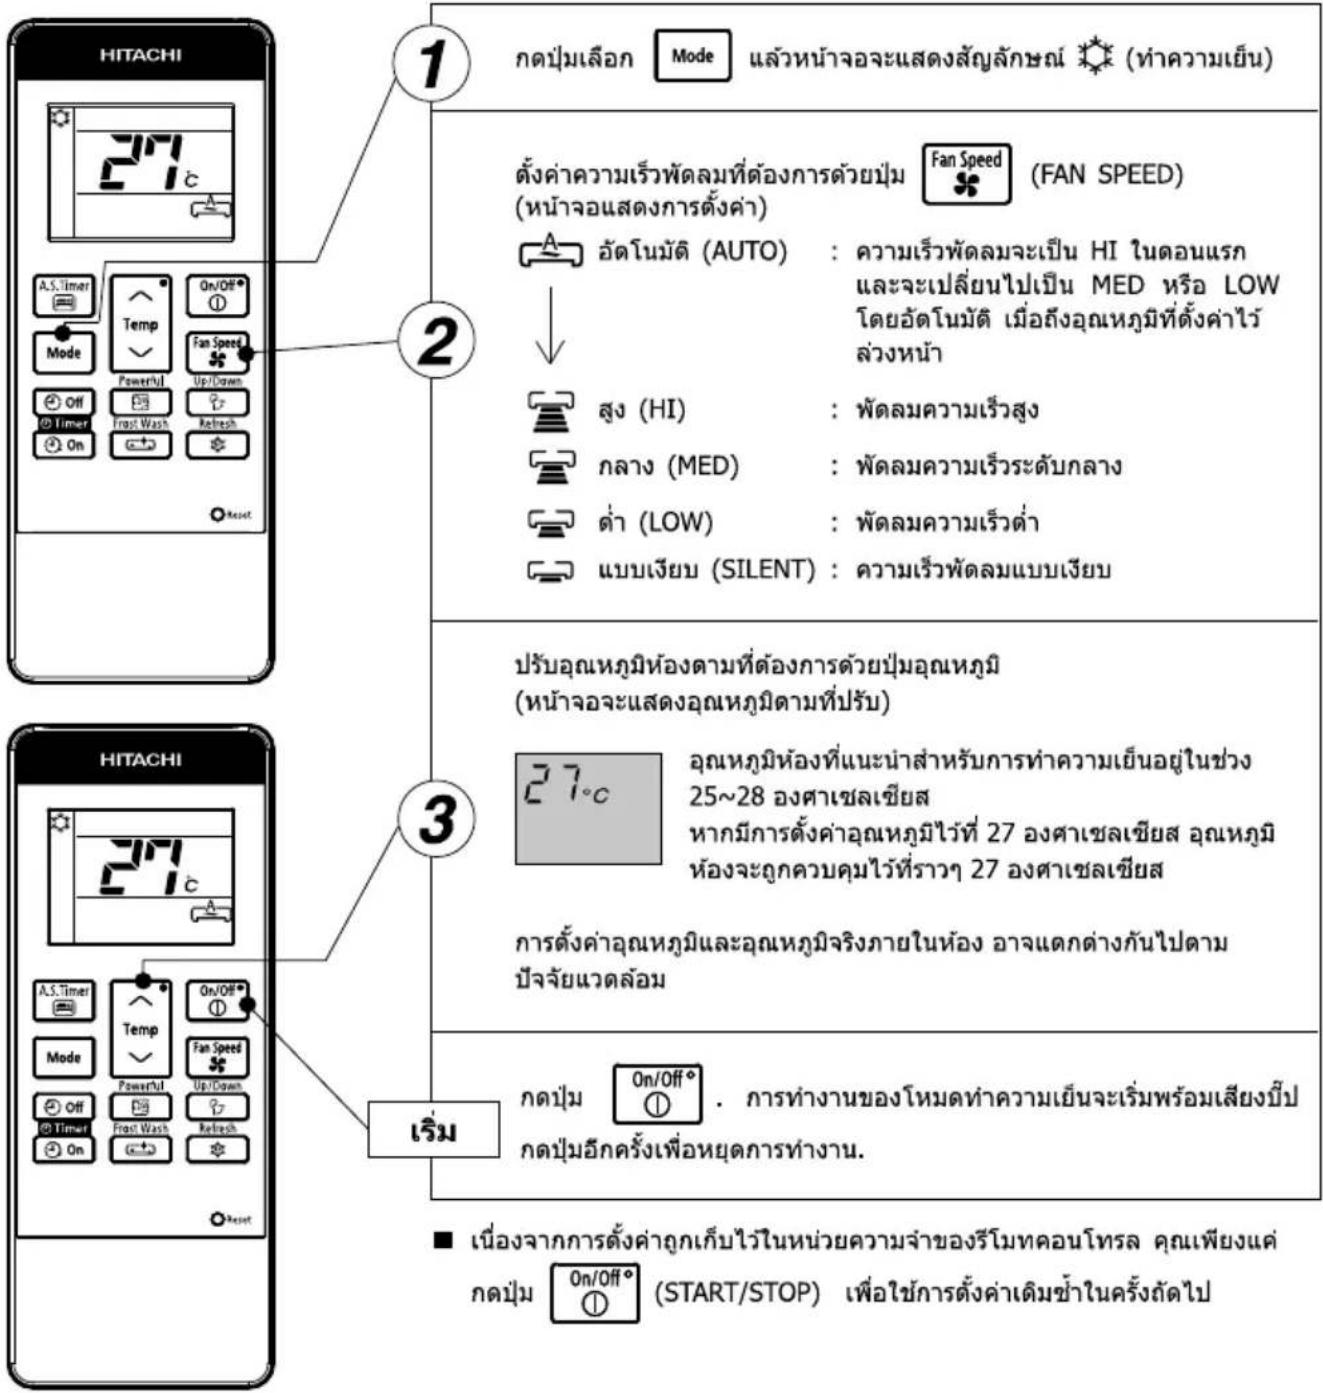
ใช้โหมดทำความเย็นเมื่ออุณหภูมิภายนอกอยู่ที่ 21\~43 องศาเซลเซียส หากในห้องมีความชิ้นสูงมาก (สูงกว่า 80%) อาจทำให้เกิดหยดนําบนตะแกรงช่องลมออกของตัวเครื่องปรับอากาศ
หมายเหตุ
ต้องเลือกใหมดความเร็วฟัดลมสูง HI
เมื่อเครื่องปรับอากาศทํางานมาเป็นเวลานาน และอุณหภูมิที่ตั้งค่าไว้ในรีโมทคอนโทรลและอุณหภูมิห้องจริงต่างกันมากขึ้นเรื่อยๆ พัดลมอาจเพิ่มความเร็วขึ้น ทำให้เกิดเสียงเป้าลมที่ตั้งขึ้น
ในระหว่างนี้ เครื่องจะต้องทำความเย็นเต็มกำลัง ถ้าเสียงเป้าลมตั่งเกินไป โปรดเลือกความเร็วพัดลม "อัตโนมัติ" หรือตัวเลือกไตๆ นอกเหนือจาก "HI"

1
ระหว่างที่อยู่ในโหมดทำความเย็น ให้กดปุ่มเลือก Mode แล้วหน้าจะจะ แสดงสัญลักษณ์ (เจียบ) พร้อมด้วยสัญลักษณ์ (ทำความเย็น) โหมดเจียบจะเริ่มทํางานพร้อมเสียงปีป. ความเร็วพัดลมจะเปลี่ยนเป็นแบบเจียบโดยอัดโนมัติ
การยกเลิกการทำงานในโหมดเจียบ
| ยกเล็กการทํางาน | โหมดการทํางานหลังจากการยกเล็ก | |
| กดปุ่ม |  | หยุดการทํางาน |
| กดปุ่ม |  | การทํางานในโหมดที่เลือก(ตท่าความเย็น)→(แบบเจียบ)↑(พัดลม)←◇(ลดความชั้น) |
| กดปุ่ม |  | การทํางานในโหมดท่าความเย็นของการตั้งค่าก่อนหน้านี้ |
| กดปุ่ม |  | การทํางานแบบเด็มประสิทธิภาพ |
หมายเหตุ:
ขณะที่เครื่องทํางานในโหมดเจียบภายใต้สภาพแวดล้อมที่เจียบสงบ คุณอาจไตยินเสียงน้ํายาท่าความเย็นไหลเวียนไปตาม รอบการทําความเย็น แต่นี้ถือเป็นการทํางานตามปกติ
ใช้โหมดลดความชั้นเมื่ออุณหภูมิห้องสูงกว่า 16 องศาเซลเซียส เมื่ออุณหภูมิห้องต่ํากว่า 15 องศาเซลเซียส ฟังก์ขันการลดความชั้นจะไม่ทํางาน
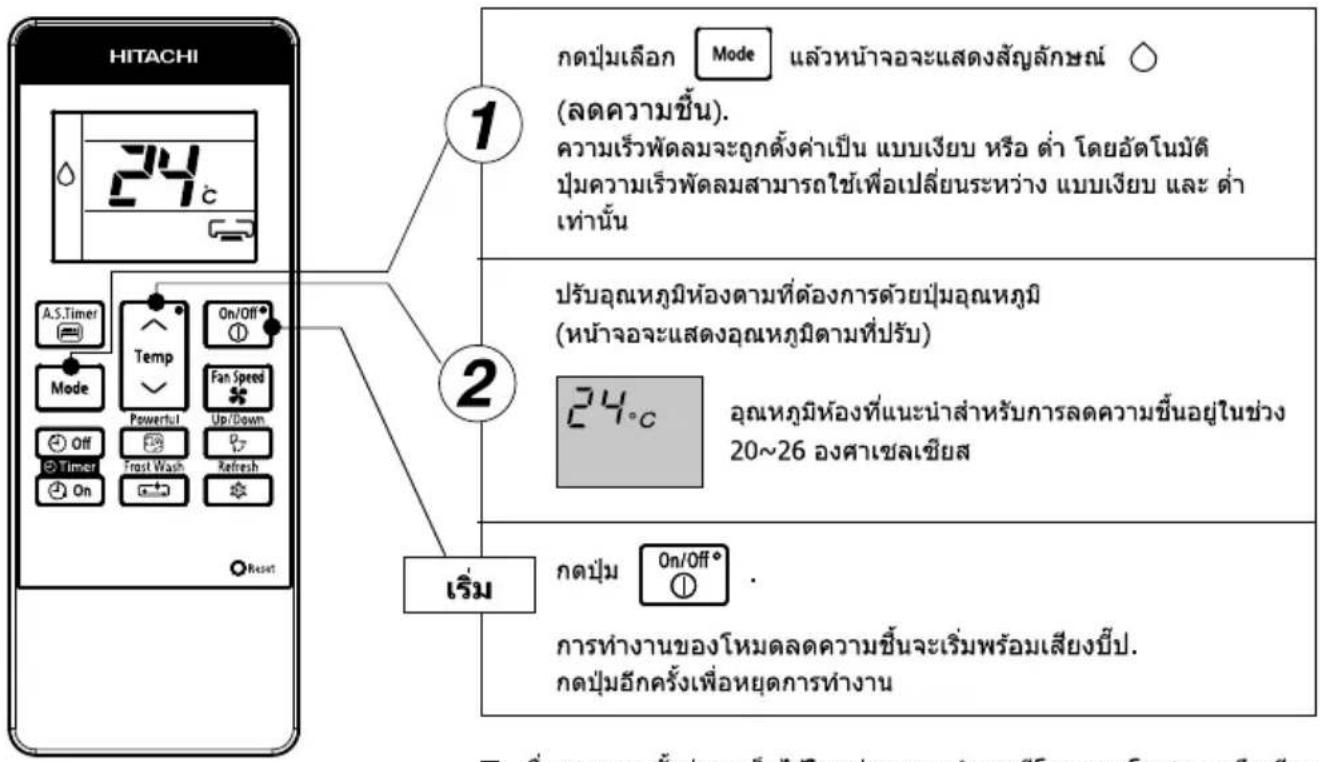
■ เมื่องจากการตั้งค่าลูกเก็บไว้ในหน่วยความจำของรีโมทตอนโทรล คุณจึงเพียง แค่เลือก Mode ◇ (ลดความชิ้น) แล้วกดปุ่ม On/Off° ① ในครั้งถัดไป
ฟังก์ชันลดความชั้น
เล็กน้อยเมื่อมีการทํางานในโหมดลดความชั้นเมื่ออุณหภูมิห้องสูงกว่าการตั้งค่าอุณหภูมิ: อุปกรณ์จะลดความชั้นภายในห้อง ซึ่งจะลดอุณหภูมิห้องให้อยู่ในระดับ ที่ตั้งค่าไวล่วงหน้า เมื่ออุณหภูมิห้องต่ํากว่าการตั้งค่าอุณหภูมิ: การลดความชั้นจะทํางานที่การตั้งค่าอุณหภูมิที่ต่ํากว่าอุณหภูมิห้องในปัจจุบันเล็ก น้อย โดยไม่คําเน็งถึงการตั้งค่าอุณหภูมิ พังก์ชันจะหยุดทํางาน (ตัวเครื่องปรับอากาศจะหยุดปล่อยอากาศ) ทันที่ที่อุณหภูมิ ห้องเริ่มต่ํากว่าอุณหภูมิที่ตั้งค่า คุณอาจรู้สึกเย็นกว่าเติมเล็กน้อยเมื่อมีการทํางานในโหมดลดความชั้น
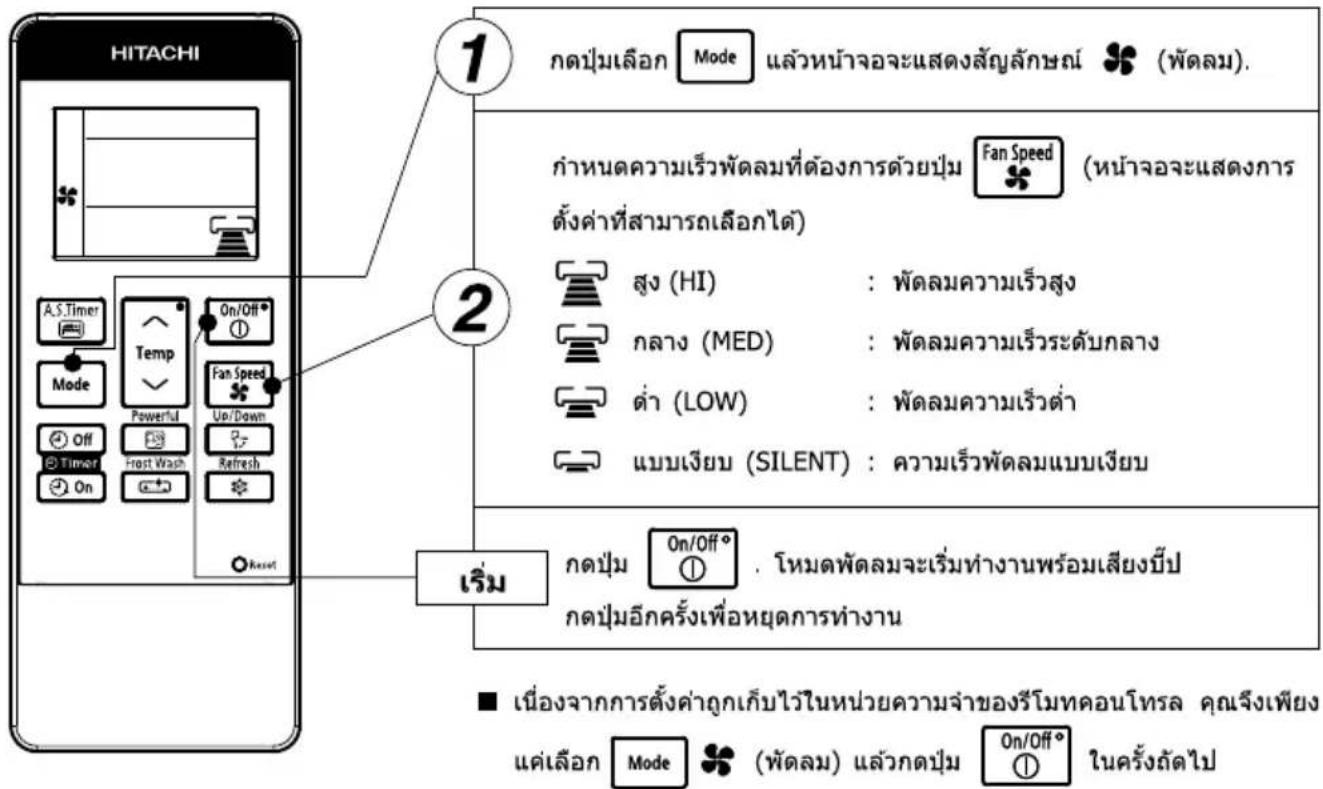
เมื่อท่างานในโหมดพัดลม อุปกรณ์จะทําหน้าที่เป็นระบบไหลเวียนอากาศ
■ฟังก์ชั้นของพัดลม
ขณะที่ทำงานในโหมดพัดลม คอมเพราะเซอร์จะไม่ทำงานและพัดลมของเครื่องปรับอากาศจะทำงานโดยไม่เปิดใช้โหมดทำความเย็น

กดปุ่ม
Powerful

- จะเริ่มทำงานพร้อมกับเสียงการรับสัญญาณตั้ง "บีป"
- เครื่องจะถูกบังดับให้ทํางานในโหมด (ท่าความเย็น) ด้วยความเร็ว พัดลมเย็นพิเศษเป็นเวลา 60 นาทีไฟลัญญาณ จะปรากฏขึ้นในช่วง เวลานี้ (ไฟการทํางานบนตัวเครื่องปรับอากาศจะกะพรับ)
- หลังจาก 60 นาที ไฟการทางานจะหยุดกะพริบ และไฟลัญญาณ จะตับขณะที่ตัวเครื่องกลับไปสู่การตั้งค่าในโหมด (หาความเย็น)
- เลียงการเป้าลมจะตั้งขึ้นเล็กน้อยเนื่องจากการทำงานแบบบังคับ
การยกเลิกการท่างานของโหมดการท่างานแบบเต็มประสิทธิภาพ
| หากรู้สึกหนาว ให้ยกเลิก โหมดการทํางานแบบเต็ม ประสิทธิภาพนี้ ตามที่กล่าวไว้ ใน "การยกเลิกการทํางานของ โหมดการทํางานแบบ เต็มประสิทธิภาพ" |
| ยกเล็กการทํางาน | โหมดการทํางานหลังจากการยกเลิก |
| กดปุ่มOn/Off ^ | หยุดการทํางาน |
| กดปุ่มMode | การทํางานในโหมดที่เลือก(ดทําความเย็น) (แบบเจียบ) (พัดลม) (ลดความชื่น) |
| กดปุ่มA.S.Timer | การทํางานในโหมด AIR SLEEP |
| กดปุ่มFan Speedหรือกดปุ่ม へ^\ Temp\ Powerful\ หมายเวลา 60 นาที | การทํางานในโหมดทําความเย็นของการตั้งค่าก่อนหน้านี้ |
กดปุ่ม

แล้วหน้าจะจะมีการเปลี่ยนแปลงตั้งที่แสดงในภาพ.
| โหมด | การแสดงไฟลัญญาณ |
| ตัวตั้งเวลานอนหลับ |
ตัวตั้งเวลา AIR SLEEP: เครื่องจะท่างานต่อไปตามชั่วโมงที่กําหนด แล้วจึงปิด
ชี้ตัวสังสัญญาณของรีโมทคอนโทรลาไปที่ตัวเครื่องปรับอากาศ แล้วกด ปุ่มตัวตั้งเวลา AIR SLEEP
ข้อมูลของตัวตั้งเวลาจะแสดงบนรีโมทคอนโทรล
คุณจะเห็นแสงไฟของตัวตั้งเวลาพร้อมกับเสียงบีปที่ตัวเครื่องปรับอากาศ
คำอธิบายตัวตั้งเวลา AIR SLEEP
อุปกรณ์จะควบคุมความเร็วพัดลมและอุณหภูมิภายในห้องโดยอัตโนมัติ เพื่อให้เครื่องทํางานได้อย่างเว็บสนิทและส่งผลดีต่อสุขภาพ
คุณสามารถตั้งค่าตัวตั้งเวลานอนหลับให้ปิดหลังผ่านไป 1,2,3 --> 9 หรือ 10 ขั่วโมง ความเร็วพัดลมและ อุณหภูมิห้องจะถูกควบคุมตังที่แสดงในภาพ
การทำงานในโหมดตัวตั้งเวลา AIR SLEEP
| ฟังก์ชัน | การท่างาน |
| โหมดทําความเย็น“ ”,แบบเจียบ“ ”และโหมดลดความขึ้น“ ◇ ” | อุณหภูมิห้องจะถูกควบคุมให้สูงกว่าอุณหภูมิที่ตั้งไว้ 2°Cและความเร็วฟัดลมจะใช่การตั้งค่าความเร็วต่ําสุดเป็นเวลา1 ชั่วโมงหลังจากตั้งค่าตัวตั้งเวลานอนหลับ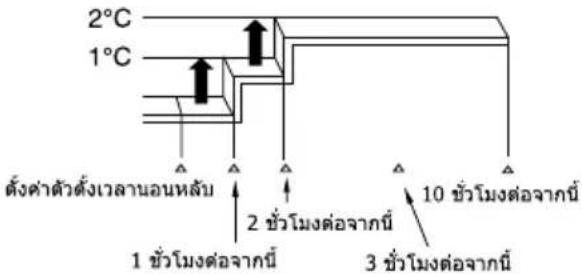 |
หากต้องการลดอุณหภูมิลมเป่าของเครื่องปรับอากาศและความชั้นของห้องลงเล็กน้อย ถ้าเครื่องปรับอากาศทํางานมาเป็นเวลานานแล้ว
1
(a) ในระหว่างการทำความเย็นหรือการทำงานแบบเจียบ กดปุ่ม
เพื่อให้เครื่องปรับอากาศเริ่มทำงานใน Holmesตรีเพราะ
(b) การทํางานในโหมดรีเพราะจะเริ่มด้วยเสียงนี้ป และ "Fr" จะแสดงบนจอ LCD ของรีโมทคอนโทรลเป็นเวลาประมาณ 10 วินาที
Refresh
(c) การรีเพราะจะทำงานเป็นเวลา 60 นาที หลังผ่านไป 60 นาที อุณหภูมิลมเป่าจะต่อยๆ กลับสู่สภาวะก่อนหน้า
(d) หากตปุ่ม Refresh อีกครั้ง การท่างานในโหมดรีเฟรจะถูกรีเซ็ดขั้นตอน (b) และ (c) จะเกิดข้า
การยกเลิกการทำงานในโหมดรีเพราะ
| ยกเลิกการทํางาน | โหมดการทํางานหลังจากการยกเลิก | |
| กดปุ่ม |  | หยุดการทํางาน |
| กดปุ่ม | Mode | การทํางานในโหมดที่เลือก(ต่ําความเย็น) → [TW44](แบบเจียบ)[T772](พัดลม) ← ◇ (ลดความชิ้น) |
| กดปุ่ม |  | [4030] ทํางานของตัวตั้งเวลา AIR SLEEP ในโหมด ทําความเย็นของการตั้งค่าก่อนหน้า |
| กดปุ่ม |  หรือ หรือ |  |
| กดปุ่ม | 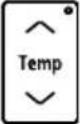 หรือ หรือ | [BTX7] การทํางานในโหมดทําความเย็นของการ ตั้งค่าก่อนหน้านี้ |
| กดปุ่ม |  หรือ หรือ | [WT48] |
| กดปุ่ม |  |  การทํางานแบบเต็มประสิทธิภาพ การทํางานแบบเต็มประสิทธิภาพ |
| กดปุ่ม |  | การทํางานของตัวตั้งเวลาปิด/เปิด ในโหมดทําความเย็นของการตั้งค่าก่อนหน้า |
หมายเหตุ
ประสิทธิภาพของการทำงานในโหมดรีเฟรchiวจไม่เห็นขัดในสถานการณ์ต่อไปนี้:
a) โหมดทำความเย็นทำงานเป็นเวลาสั้นๆ
b) เครื่องปรับอากาศทํางานในสภาวะโหลดสูง เช่น ใช่ท่าความเย็นห้องขนาดใหญ่ ห้องที่ได้รับแสงอาทิตย์โดยตรง และ
ลุณหภูมิภายนอกสูง
c) การตั้งค่าอุณหภูมิตัวยรีโมทคอนโทรลต่ากว่าอุณหภูมิที่แนะน่าสำหรับการทํางานในโหมดทำความเย็น (ดูหน้า 33)
■ มีตัวตั้งเวลาเปิดและตัวตั้งเวลาปิดให้ใช้งาน
การสำรองตัวตั้งเวลาปิด
Off การตั้งค่าเวลาปิด
- เลือก เวลาปิด โดยการกดปุ่ม Off (ตัวตั้งเวลาปิด)
- การตั้งค่าเวลาจะเปลี่ยนไปตามลำดับด้านล่าง เมื่อคุณกดปุ่ม
flowchart
graph LR
    A["1"] --> B["2"]
    B --> C["3"]
    C --> D["..."]
    D --> E["9"]
    E --> F["10"]
    F --> G["11"]
    G --> H["12"]
    H --> I[(ยกเล็กตัวตั้งเวลาปีด)
- หลังจากที่ตั้งค่าตัวตั้งเวลาปิดแล้ว ชั่วโมงจะแสดงแบบนับกอยหลังเมื่อเวลาผ่านไป
■ การทํางานจะหยุดเมื่อถึงเวลาที่ตั้งค่า

การสำรองตัวตั้งเวลาเปิด
On การตั้งค่าเวลาเปิด
- เลือกตัวตั้งเวลาเปิดโดยการกดปุ่ม On (ตัวตั้งเวลาเปิด)
● การตั้งค่าเวลาจะเปลี่ยนไปตามลำดับด้านล่าง
flowchart
graph LR
    A["1"] --> B["2"] --> C["3"] --> D["..."]
    D --> E["9"] --> F["10"] --> G["11"] --> H["12"]
    I["zhàng leik dàndìng leik leid"] --> J[(yǒng leik dàndìng leik leid)
หลังจากที่ตั้งค่าตัวตั้งเวลาเปิดแล้ว ชั่วโมงจะแสดงแบบนับถอยหลังเมื่อเวลาผ่านไป
■ โดยจะเริ่มท่างานตามอุณหภูมิที่ตั้งค่าไว้ในเวลาที่ตั้งค่า

การปรับทิศทางกระแสลมที่ปรับอากาศขึ้นและลง
แผ่นเบนทางลมแนวนอนจะถูกตั้งค่าในองศาที่เหมาะสมสำหรับการ ทํางานแต่ละโหมด แผ่นเบนทางลมสามารถสวิงขึ้นและลงโดยต่อเนื่อง Up/Down
และยังสามารถปรับให้อยู่ในองศาที่ต้องการไต่โดยใช้ปุ่ม " (สวิงอัดโนมัติ (แนวนอน))"
- หากกดปุ่ม “ Up/Down (สวิงอัดโนมัติ (แนวนอน))” หนึ่งครั้ง แผ่นเบนทางลมแนวนอนจะสวิงขึ้นและลง หากกดปุ่มอีกครั้ง แผ่น เบนทางลมจะหยุดอยู่ในตําแหน่งนั้น อาจต้องใช้วลาหลายวินาที (ประมาณ 6 วินาที) ก่อนที่แผ่นเบนทางลมจะเริ่มเคลื่อนไหว
- ใช้แผ่นเบนทางลมแนวนonomyในระยะการปรับระดับที่แสดงทาง ด้านขวา
- เมื่อการทํางานหยุดลง แผนเบนทางลมแนวนอนจะเคลื่อนไหว และหยุดในตําแหน่งที่ช่องลมออกปิด

A ข้อควรระวัง
- เมื่ออยู่ในการทำงานของโหมด "ทำความเย็น" อย่าให้แผ่นเบนทางลมแนวนอนสวิงติดต่อกันเป็นเวลานาน หยดน้ําบางส่วนจะก่อตัวบนแผ่นเบนทางลมแนวนอน และอาจหยดลงมาได้

การปรับทิศทางกระแสลมที่ปรับอากาศไปทางช้ายและขวา
ยืดแผ่นเบนทางลมแนวตั้งตัวที่สองของชุดแผ่นเบนทางลมแนวตั้งแต่ละ ชุดจากด้านขวาตั้งภาพประกอบ แล้วปรับกระแสลมที่ปรับอากาศไปทาง ช้ายและขวา
natural_image
Illustration of hands installing or adjusting a wall-mounted air conditioner unit, showing internal components and a magnified inset (no text or symbols)
คำเดือน
ห้ามแหนยนิ้ว ท่อนไม้หรือวัตถุอื่นๆ เข้าไปในช่องระบายอากาศเข้า ออก เมืองจากพัดลมจะหมุนที่รอบความเร็วสูง ซึ่งอาจก่อ ให้เกิดการบาดเจ็บได้ ก่อนการทำความสะอาดหรือปรับแต่งแผงกั้นใดๆ ให้นแน่ใจว่าไตปิดสวิตช์แล้ว
การทำงานในโหมดล้างแผงคอยล์เย็น (ข้อมูลหัวไป)
ฟังก์ชั่นจะ第一时间商量สะอาดโดยการทำให้คร้องภายในเย็นจนเกิดน้ําแข็งเกาะ และปล่อยให้น้ําแข็งละลายเป็นน้ําเพื่อชะล้างผุ่นที่เกาะอยู่ฟังก์ชั่น FROST WASH จะ ทำงานในโหมด OFF เท่านั้น
หมายเหตุ
- ให้เปิด Holmesละลายนําแข็งเมื่ออุ่งภายใต้ สภาวะตั้งต่อไปนี้
| อุณหภูมิภายนอก | 21°C ~ 43°C |
| อุณหภูมิภายใน | 21°C ~ 32°C |
| ความชื่นภายใน | 30% ~ 70% |
- ระหว่างที่โหมดล้างแผงคอยล์เย็นทําเงาน อาจมีเสียงที่เกิดขึ้นระหว่างการจับตัวเป็นน้ำแข็งและการละลายน้ำแข็งของส่วนแลกเปลี่ยน
- โหมดล้างแพงคอยล์เย็นจะทํางานเมื่อตัวเครื่องอยู่ในโหมดสแตนต์บายเท่านั้น
- ระหว่างการล้างแผงคอยล์เย็น F.Wash ไฟลัญญาณ LED จะติดขึ้นมา
- หากผ่านเวลาการทํางานสะสมของเครื่องปรับอากาศแล้ว สัญญาณไฟ LED F.Wash จะกระทรวงบเดือนให้ผู้ใช้เปิดใช้งานฟังก์ขันล่างแผงคอยล์เย็น (ไฟจะกระทรวงนานสูงสุด 4 นาทีหลังจากที่หยุดทํางาน)
- แนะนําให้ใช้งาน FROST WASH ทุก 2 สัปดาห์ การไม่ใช้งาน FROST WASH จะทำให้เกิดการสะสมของผู้น ซึ่งยากต่อการกําจัด หากเกิดกรณีนี่แนะนําให้ทํา FROST WASH ด้วยตัวเอง
- หากไม่เปิดใช้ฟังกั่นล้างแผงคอยส์เย็นเป็นประจํา จะทําให้ทําความสะอาดส่วนแลกเปลี่ยนความร้อนได้ยาก หากเปิดใช้การล้างแผงคอยส์เย็นเมื่อมีผู้น สะสมเป็นจํานวนมากที่ส่วนแลกเปลี่ยนความร้อน ผู้นที่ร่วงลงมาจะทําให้เกิดการอุตดันที่ท่อระบาย
ข้อควรระวัง
- ระหว่างที่มีการทํางานในโหมด "ละลายน้ําแข็ง" โปรดอย่าเปิดประดูและหน้าต่างน้ําจะเกิดการควบแน่นบนฟื้นผิวของยูนิตแล้วท่าให้เกิดน้ําหยด
- ระหว่างที่มีการทํางานในโหมด "ละลายน้ําแข็ง" โปรดอย่าเปิดและถอดแผงด้านหน้าอาจทำให้ได้รับบาดเจ็บหรือเกิดความผิดปกติได้
โหมดล้างแพงคอยล์เย็น (โหมดการทำงานเอง)

flowchart
graph LR
    A["การทํางานในโหมด "ละลายน้ําแข็ง" ประมาณ 120 นาที (สูงสุด)"] --> B["ช่วงเวลาละลายน้ําแข่ง"]
    B --> C["ช่วงเวลาเป้าส่วนแลกเปลี่ยนความร่อน"]
    C --> D["หยุดโดยอัตโนมัติ"]
    E["เริ่มทํางาน"] --> F["หยุดทํางาน"]
    F --> G["Frost Wash"]
หยุด
- ผู้ใช้งานสามารถยกเลิกการทํางานใหม่ล้างแผงคอยลี่เย็นไต้โดยการกดปุ่ม On/Off® - การเริ่มทํางานในหมดละลายน้ําแข็งเอง จะไม่ทํางานเป็นเวลา 60 นาทีหลังจากที่มีการทํางานในโหมด "ละลายน้ําแข็ง (ช่วงเวลาทํา่น้ําแข็ง)" ครั้งล่าสุด.
จำเป็นต้องถอดแบตเตอร์ออกจากรีโมทคอนโทรลและเปลี่ยนแบตเตอรี่ใหม่ เมื่อใช้งานรีโมทคอนโทรลแต่ไม่มีการตอบ สนองจากเครื่องปรับอากาศ หรือหน้าจอของรีโมทคอนโทรลชีดจางหรือจอมีดลง

1 เปิดฬาครอบแบตเตอร์ตามที่แสดงในภาพ จากนั้นกอด แบตเตอร์เก่าออก

2 ใส่แบตเตอร์ใหม่ ควรใส่แบตเตอร์ตามทิศทางที่มีเครื่องหมายระบุไว้ใน ช่องใส่แบตเตอร์
ข้อควรระวัง
- อย่าใช้แบตเตอรี่ใหม่ร่วมกับแบตเตอรี่เก่า หรือใช้แบตเตอรี่ ต่างชนิดกัน
- ถอดแบตเตอร์ออกจากรีโมทคอนโทรลเมื่อไม่ได้ใช้งานเป็นเวลา 2 หรือ 3 เดือน
- ควรใช้แบตเตอรี่ชนิด AAA ที่มีคุณภาพและประสิทธิภาพสูง เพื่อยัดอายุการใช้งานหรือป้องกันการร่วงไหลของสารนําไฟฟ้า
- หลังจากเปลี่ยนแบตเตอร์ใหม่หรือเมื่อการทํางานผิดปกติ ให้ใช้ปลายปากภาคปุ่มรีเช็ด
อุณหภูมิห้องที่เหมาะสม
natural_image
Simple line drawing of a person with sweat or fever (no text or symbols)ค่าเดือน
อุณหภูมิเย็นจัดนั้นไม่ติด่อ สุขภาพ และเสียพลังงาน ไฟฟ้าโดยใช่เหตุ
ติดตั้งผ้าม่านหรือม่านบังตา
natural_image
Illustration of a person opening a window with curtains, no text or symbols presentผ้าม่านช่วยลด ความร้อนที่ผ่าน เข้ามาในห้องได้
การระบายอากาศ
ข้อควรระวัง
อย่าปิดห้องเป็นเวลานาน ให้เปิดประตูและหน้าต่าง เป็นครั้งคราวเพื่อให้อากาศถ่ายเทเข้ามาในห้อง
natural_image
Illustration of a person hanging from a window with curtains (no text or symbols)การใช้งานตัวตั้งเวลาอย่างมีประสิทธิภาพ
ในตอนกลางคืน โปรดใช้ "โหมดการทํางานของตัวตั้งเวลาเปิดปิด หรือตัวตั้งเวลานอนหลับ" ให้สอดคล้องกับเวลาดื่นนอนของคุณ ในตอนเข้า การตําเนินการตั้งกล่าวจะช่วยให้คุณผ่อนคลายไปกับอุณเหภูมิห้องที่แสนสบายโปรดใช้ตัวตั้งเวลาให้เป็นประโยชน์

อย่าลีมล้างแผ่นกรองเบื้องต้น
แผ่นกรองอากาศที่มีผ่านจับจะลดความแรงของลม และประสิทธิภาพการทำความเย็น เพื่อป้องกันไม่ ให้สิ้นเปลืองพลังงานไฟฟ้า โปรดทำความสะอาด แผ่นกรองทุกฯ 2 สัปดาห์

natural_image
Illustration of a cleaning machine with a brush and a vacuum cleaner (no text or symbols)โปรดปรับอุณหภูมิให้เหมาะสม กับเด็กเล็กและเด็กโด
โปรดให้ความสำคัญกับอุณหภูมิห้องและทิศทางการไหลของอากาศเมื่อใช้งานเครื่องปรับอากาศสำหรับเด็กเล็ก เด็กโด และผู้สูงอายุที่เคลื่อนไหว ไม่สะดวก
natural_image
Illustration of a person lying on their back with a large pill bag and a no-smoking symbol overlay (no text or symbols present)Please combine this page (44 + 45)
เครื่องปรับอากาศและแหล่งความร้อนภายในห้อง

ข้อควรระวัง
หากปริมาณความร้อนในห้องเกินกว่าความสามารถในการ ทําความเย็นของเครื่องปรับอากาศ (ตัวอย่างเช่น: มีดนอยู่ ในห้องจำนวนมาก การใช้อุปกรณ์ทําความร้อน เป็นต้น) เครื่องปรับอากาศอาจไม่สามารถทําอุณเหภูมิตามที่ตั้งค่าไว้ ล่วงหน้า

natural_image
Simple line drawing of a steam cooker emitting exhaust smoke next to a cylindrical container (no text or symbols)ไม่ได้ใช้งานเป็นเวลานาน
เมื่อไม่ได้ใช้งานเครื่องปรับอากาศเป็นเวลานาน โปรดปิดสวัตซ์จากแหล่งจ่ายไฟหลัก หากยัง "เปิด" แหล่งจ่ายไฟหลักอยู่ เครื่องปรับอากาศจะยังคงใช้ไฟฟ้าประมาณ 2.5 วัดต์ในวงจรควบคุมการทํางาน แม้ว่าเครื่องจะอยู่ในโหมด "ปิด" แล้วก็ตาม
เมื่อเกิดฟ้าผ่า

คำเตือน
เพื่อป้องกันไม่ให้ตัวเครื่องเสียหายในระหว่างฟ้าผ่า โปรด หยุดใช้งานตัวเครื่องและถอดปลั้งออกจากเต้าเสียบ
natural_image
Simple line drawing of a car with exhaust plume and sensor, no text or symbols presentคลื่นระบบ facebookเครื่องใช้ไฟฟ้า

ข้อควรระวัง
เพื่อหลักเสี่ยงเสียงแทรกรบกวน โปรดติดตั้งเครื่องปรับ อากาศและวางรีโมทคอนโทรลให้น่างจากเครื่องใช้ไฟฟ้า อย่างน้อย 1 เมตร
flowchart
graph TD
    A["air duct"] --> B["airplane"]
    A --> C["robot"]
    A --> D["drone"]
    B --> E["飞机"]
    C --> F["飞机"]
    D --> G["飞机"]
    style A fill:#f9f,stroke:#333
    style B fill:#ccf,stroke:#333
    style C fill:#cfc,stroke:#333
    style D fill:#fcc,stroke:#333
ข้อควรระวัง
ก่อนการทำความสะอาด ควรหยุดการทำงานของเครื่องและปิดสวิตช์แหล่งจ่ายไฟ
1 เปิดแผงด้านหน้า
- ยกแผงด้านหน้าชื่นโดยการใช้ทั้งสองมือจับทั้งสองผิ่ง
2 ต่อต์แผ่นกรองเบื้องต้นออก - ดันขึ้นเพื่อปลอดีอุด แล้วดึง
- ดันขึ้นเพื่อปลดล็อด แล้วดึงแผ่นกรองเบื้องต้นออกมา
3 การใส่แผ่นกรองสำหรับฟอกอากาศให้บริสุทธิ์
- ใส่แผ่นกรองสำหรับฟอกอากาศให้บริสุทธิ์ลงในกรอบ C โดยค่อยๆ กดทั้งสองข้าง แล้วปล่อยหลังจากที่ใส่เข้าไปในกรอบแผ่นกรองแล้ว
- นํากรอบ C ไปที่ด้านหลังของแผนกรองเบื้องต้น สอดเชี่ยว ลงทางด้านช้ายและด้านขวาของช่องยิดกรอบ C ให้แน่นหนา พื้นผิวรังฝั่งจะอยู่ที่ด้านหน้าและพื้นผิวเรียบจะอยู่ด้านหลังเมื่อ ใส่ (เฉพาะสำหรับกรองที่บริสุทธิ์ด้วยพื้นผิวเรียบหนึ่ง)
natural_image
Illustration of hands holding a cylindrical air conditioner unit with cooling fins (no text or symbols)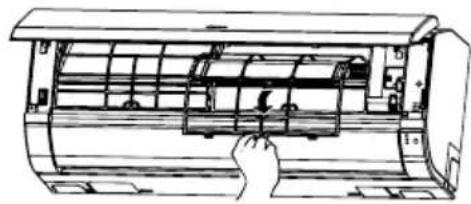
natural_image
Line drawing of a hand inserting a component into an air conditioner unit (no text or symbols)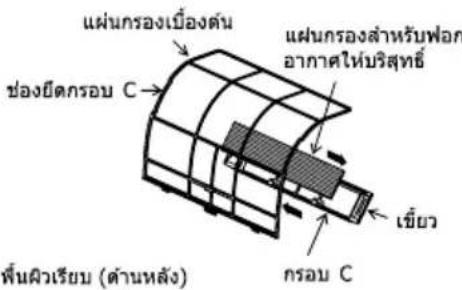
ข้อควรระวัง
อย่างแผนกรองสำหรับฟอกอากาศ ให้บริสุทธิ์ เนื่องจากอาจทำให้โครง ของแผนกรองช่ารุดไต้ โปรดอย่างสูตดมอากาศจากแผนกรอง โดยตรง
พื้นผิวรังผิ่ง (ต้านหน้า)
natural_image
Line drawing of a car air conditioner unit with a hand adjusting the panel (no text or symbols)4 ใส่แผ่นกรองเบื้องต้น
- ใส่แผ่นกรองเบื้องต้นโดยตรวจสอบให้แน่ใจว่าหงษยด้านที่เขียนว่า "FRONT" ขึ้น
- หลังจากใสแผนกรองเบื้องต้นแล้ว ให้กดแพงหน้ากาก ด้านหน้าที่ตําแหน่งลูกศรหั้งสามส่วน ตามที่แสดงในภาพ แล้วปิด แพงหน้ากากด้านหน้า
natural_image
Diagram of a cylindrical air conditioner unit with three downward arrows indicating cooling or ventilation direction (no text or symbols present)หมายเหตุ
- กรณีที่ถอดแผ่นกรองสำหรับฟอกอากาศให้บริสุทธิ์ โปรดท่าตามขั้นตอนด้านบน
- ความสามารถในการทําความเย็นจะลดลงเล็กน้อย และความเร็วในการทําความเย็นจะชําลง เมื่อมีการใช้แผ่นกรองสำหรับฟอกอากาศให้บริสุทธิ์ ดังนั้น ให้ตั้งค่าความเร็วพัดลมไว้ที่ "HIGH" (สูง) ในกรณีที่ใช้แผ่นกรองสำหรับฟอกอากาศให้บริสุทธิ์
- ห้ามล้างแผ่นกรองสำหรับฟอกอากาศให้บริสุทธิ์ ขอแนะนําให้ใช้เครื่องดูดฝุ่นในการทำความสะอาด อาจใช้งานได้อึง 1 ปี หมายเลขรุ่นของแผ่นกรองสำหรับฟอกอากาศให้บริสุทธิ์นี้คือ
โปรดใช้หมายเลขนี้สำหรับการสั่งซื้อเมื่อต้องการเปลี่ยนใหม่
ข้อควรระวัง
ก่อนการทำความสะอาด ควรหยุดการทำงานของเครื่องและปิดสวิตช์แหล่งจ่ายไฟ
1. แผ่นกรองเบื้องต้น
ท่าความสะอาดแผ่นกรองเบื้องต้น เนื่องจาจะช่วยลดผืนภายในห้อง ในกรณีที่มีฝุ่นจับทั่วทั้งแผ่นกรองเบื้องต้น การไหลของลมจะลดลง และประสิทธิภาพในการท่าความเย็นจะลดต่าง นอกจากนี้ อาจเกิดเสียงตั้ง อย่าลิมท่าความสะอาดแผ่นกรองเบื้องต้นโดยท่าตามขันตอนด้านล่าง
ขั้นตอน
1 เปิดแผงหน้ากากต้านหน้าและถอดแผนกรองเบื้องต้นออก
- ค่อยๆ ยกและตอดแผ่นกรองสำหรับฟอกอากาศให้บริสุทธิ์จากกรอบแผ่นกรองสำหรับฟอกอากาศให้บริสุทธิ์

natural_image
Illustration of two hands holding a rectangular air conditioner unit with airflow arrows (no text or symbols)2 ดูดฝุ่นจากเครื่องกรองเบื้องต้นและเครื่องกรองปรับอากาศ ใช้เครื่องดูดฝุ่นหากมีฝุ่นจํานวนมาก ล้างกรองเบื้องต้นด้วยน้ําที่เปิดไหลฝ่านและค่อยๆถุด้วยแปรงขน นุ่ม แล้วปล่อยให้แห้ง
natural_image
Line drawing of a hand inserting a component into a cylindrical device (no text or symbols)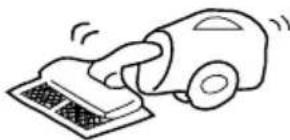
natural_image
Simple line drawing of a hand using a vacuum cleaner to clean or store items (no text or symbols)3 - ใสแผ่นกรองสำหรับฟอกอากาศให้บริสุทธิ์กลับเข้าไปในกรอบแผ่นกรองใหม่ หงยาแผ่นกรองเบื้องต้นด้านที่มีค่าว่า "FRONT" ขึ้น แล้วสอดเข้าไปยังตําแหน่งเดิม - หลังจากใสแผ่นกรองเบื้องต้นแล้ว ให้กดแผงหน้ากากต้านหน้าที่ตําแหน่งลูกศรทั้งสามส่วน ตามที่แสดงในภาพ แล้วปิดแผงหน้ากากต้านหน้า
natural_image
Diagram of a cylindrical air conditioner unit with three downward arrows indicating cooling or ventilation direction (no text or symbols present)ข้อควรระวัง
- ห้ามล้างด้วยน้ำร้อนที่มีอุณหภูมิมากกว่า 40°C เพราะแผ่นกรองเบื้องต้นอาจหดได้
- เมื่อล้างทําความสะอาด ให้สะบัดความชั้นออกให้หมด และตกให้แห้งในที่ร่ม อย่าตากไว้กลางแดนโดยตรง แผนกรอง เบื่องดันอาจหดตัว
- อย่าใช้น้ํายาทําความสะอาดบนแผ่นกรองเบื้องต้น เนื่องจากน้ํายาทําความสะอาดบางชนิดอาจทําให้ประสิทธิภาพในการยัดหยุ่นของแผ่นกรองเบื้องต้นเสี่อมสภาพ
ข้อควรระวัง
- โปรดใช้สายดิน
ห้ามติดตั้งสายดินไวไกลกับท่อน้ำหรือท่อแกส สายล่อฟ้า หรือสายดินของโทรศัพท์ การดิดตั้งสายดินที่ไปเหมาะสมอาจทำให้เกิดไฟฟ้าข้อต - ควรติดตั้งตัวตัดดวงจรโดยขึ้นอยู่กับสถานที่ติดตั้งเครื่องปรับอากาศ หากไม่มีตัวตัดดวงจร อาจเกิดอันตรายจากไฟฟ้าชื่อใด
ข้อสำคัญ
สายไฟในสายไฟน่าจะมีสิตามรหัสตังต่อไปนี้:
เขียวและเหลือง : สายดิน
น้ำเงิน : สายเส้นศูนย์
นําตาล : สายที่มีไฟ
เนื่องจากสีของสายไฟในสายไฟน่าของเครื่องปรับอากาศอาจไม่ตรงกับเครื่องหมายสีที่ระบุข้าวปลายสายไฟในปลักของคุณ โปรดตําเนินการดังนี้:
สายที่มีสีเขียวและเหลืองต้องต่อเข้ากับขั้วปลายสายไฟในปลักที่กำหนด้วยตัวอักษร E หรือสัญลักษณ์สายดิน หรือสีเขียว หรือสีเขียวและเหลือง
สายที่มีสิน้ําเงินต้องต่อเข้ากับชั่วปลายสายไฟในปลักที่กํากับด้วยตัวอักษร N หรือสัญลักษณ์สายเส้นศูนย์ หรือสีตํา สายที่มีสําน้ําตาลต้องต่อเข้ากับชั่วปลายสายไฟในปลักที่กํากับด้วยตัวอักษร L หรือสัญลักษณ์สายที่มีไฟ หรือสีแดง
หมายเหตุ
หากสายไฟข่ารุด ต้องเปลี่ยนเป็นสายไฟพิเศษที่ได้รับจากศูนย์บริการ/อะไรหล่ที่ได้รับอนุญาตเท่านั้น
ข้อควรระวัง
ต้องทำความสะอาดและปารุงรักษาเครื่องโดยผู้ให้บริการที่มีความเชี่ยวชาญเท่านั้น ก่อนการทำความสะอาด ควรหยุดการทำงานของเครื่องและปิดสวิตช์แหล่งจ่ายไฟ
การตรวจสอบอย่างสมำเสมอ
โปรดตรวจสอบจุดต่างๆ ต่อไปนี้โดยผู้ให้บริการที่มีความเชี่ยวชาญทุกๆ ครั่งปีหรือหนึ่งปี โปรดติดต่อ ตัวแทนจำหน่ายของคุณหรือศูนย์บริการ
| 1 | 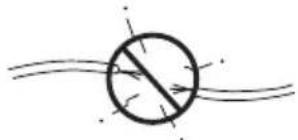 | สายดินหลุดหรือข่ารุดหรือไม่ |
| 2 | 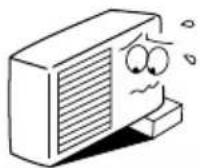 | โครงของชาตั้งไตรับผลกระทบร้ายแรงจากสนิมหรือไม่ ตัวเครื่อง ภายนอกอาคารเอียงหรือไม่มั่นคงหรือไม่ |
| 3 |  | ปลักไฟเสียบอยู่กับเต้ารับสนิทต์หรือไม่ (ระวังอย่าให้ปลักหลวง) |
เมื่อขอรับบริการ ให้ตรวจสอบจุดต่างๆ ต่อไปนี้
| สภาพการท่างาน | ตรวจสอบจุดต่างๆ ต่อไปนี้ |
 | ● ฟิวส์ใช้งานได้ปกติหรือไม่● แรงดันไฟฟ้าสูงมากหรือต่ํามากหรือไม่● ตัวตัดวงจร "เปิด" อยู่หรือไม่ |
 | ● ทำความสะอาดแผ่นกรองอากาศแล้วหรือไม่● แสงอาทิตย์สองถึงตัวเครื่องภายนอกอาคารโดยตรงหรือไม่● มีสิ่งก็ดขวางการไหลของลมของตัวเครื่องภายนอกอาคารหรือไม่● เปิดประตูหรือหน้าต่างไว้หรือไม่ หรือมีแหล่งความร้อนภายในห้องหรือไม่● ตั้งค่าอุณหภูมิอย่างเหมาะสมหรือไม่ |

natural_image
Illustration of a smiling man in a suit giving two thumbs up (no text or symbols)หมายเหตุ
- ในการทํางานที่เจียบหรือหยุดการทํางาน อาจเกิดเหตุการณ์ดังต่อไปนี้เป็นครั้งคราว แต่ไม่ ถือเป็นการทํางานที่ผิดปกติ
(1) เสียงตั้งเล็กน้อยจากการไหลเวียนของสารทำความเย็นในระบบหมุนวนการทำความเย็น
(2)เสียงตั้งเล็กน้อยจากการเสียดสีของโครงพัดลมเมื่อไตรับความเย็นจนถึงระดับหนึ่งแล้วค่อยๆ อุ่นขึ้นเมื่อการทํางานหยุดลง
- อาจจะมีกลิ่นออกมาจากเครื่องปรับอากาศภายในห้อง เนื่องจากกลิ่นต่างๆ ที่ออกมาจาก ควัน อาหาร เครื่องสำอาง และอิกมากมาย ไปติดกับเครื่อง จึงควรทำความสะอาดแผ่น กรองและตัวทำ Rareเหย่อย่างสม่ำเสมอเพื่อลดกลิ่น
- โปรดติดต่อตัวแทนจำหน่ายโดยทันที่ หากเครื่องปรับอากาศยังคงไม่สามารถทํางานไตโดยปกติหลังจากทหารตรวจสอบตามด้านบนแล้ว แจ้งรุ่นของเครื่องปรับอากาศ หมายเลขการผลิต วันที่ทําการติดตั้งแก่ตัวแทนจำหน่ายของคุณ โปรดแจ้งให้ตัวแทนทราบถึงปัญหาที่เกิดขึ้นด้วย
- ควรเชื่อมต่อแหล่งจ่ายไฟตามแรงด้านไฟฟ้าที่กำหนด มิจะนั้นเครื่องอาจช่ารุดเสียหาย หรืออาจท่างานได้ไม่เต็มประสิทธิภาพ ตามที่ระบุ
โปรดทราบ:
เมื่อเปิดสวิตช์เครื่อง โดยเฉพาะเมื่อไฟในห้องสลัว อาจมีการเปลี่ยนแปลงของความสว่างเกิดขึ้นเล็กน้อย ซึ่งไม่ใช่เรื่องที่ต้องกังวล
โปรดปฏิบัติตามเงื่อนไขของบริษัทจ่ายไฟฟ้าในห้องถิ่น
หมายเหตุ
- หลีกเลี่ยงการใช้งานเครื่องปรับอากาศภายในห้องสำหรับการทํางานในโหมดทำความเย็นเมื่ออุณหภูมิภายนอกต่ํากว่า 21องศาเซลเซียส (70 องศาฟ่าเรนไฮต) อุณหภูมิสำหรับการใช้งานสูงสุดและต่ําสุดที่แนะนําหั้งด้านร้อนและเย็นควรเป็นไปตามด้านล่าง:
| ตําสุด | สูงสุด | ||
| ภายในห้อง | อุณหภูมิกระเบาะแห้ง °C | 21 | 32 |
| อุณหภูมิกระเบาะเปียก °C | 15 | 23 | |
| นอกอาคาร | อุณหภูมิกระเบาะแห้ง °C | 21 | 43 |
| อุณหภูมิกระเบาะเปียก °C | 15 | 26 |
Move to the above page
บันทึกย่อ
- OPERATION MANUAL
- HITACHI
- ROOM AIR CONDITIONER
- MODELS
- SAFETY PRECAUTION
- PRECAUTIONS DURING INSTALLATION
- A
- PRECAUTIONS DURING SHIFTING OR MAINTENANCE
- PRECAUTIONS DURING OPERATION
- !
- INDOOR UNIT
- Pre-filter
- Front panel
- Indoor unit indicators
- Horizontal deflector • Vertical deflector (Air Outlet)
- Remote controller
- OUTDOOR UNIT
- Drain pipe
- Connecting cord and insulation pipe for piping
- OPERATION LAMP
- FROST WASH LAMP
- TIMER LAMP
- TEMPORARY SWITCH
- ● Transmission sign
- - Display
- ● AIR SLEEP TIMER button controller (pg 6 \~17).Please
- TEMPERATURE button controller as well.
- START/STOP button
- FAN SPEED selector button
- AUTO SWING button
- REFRESH button
- RESET button
- ONE TOUCH POWERFUL button
- FROST WASH button
- OFF-TIMER button
- ON-TIMER button
- MODE selector button
- Precautions for Use
- NOTE
- HI fan speed mode selected
- NOTE:
- ■ Dehumidifying Function
- FAN Function
- Press the
- Explanation of the air sleep timer
- 1
- OFF Timer Reservation
- OFF TIMER setting
- ON Timer Reservation
- ON TIMER setting
- CAUTION
- WARNING
- FROST WASH OPERATION (GENERAL INFORMATION)
- FROST WASH (MANUAL OPERATION)
- Suitable Room Temperature
- Install curtain or blinds
- Ventilation
- Effective Usage Of Timer
- Do Not Forget To Clean The Pre-Filter
- Please Adjust Suitable Temperature For Baby And Children
- The Air Conditioner And The Heat Source In The Room
- Not Operating For A Long Time
- When Lightning Occurs
- Interference From Electrical Products
- Open the front panel
- Remove the Pre-filter
- Attaching the air purifying filters
- Attach the Pre-filters
- PRE-FILTER
- PROCEDURE
- CLEANING OF FRONT PANEL
- IMPORTANT
- REGULAR INSPECTION
- WHEN ASKING FOR SERVICE, CHECK THE FOLLOWING POINTS
- Notes
- MEMO
- คู่มิจ
- การใช้งาน
- ข้อควรระวังเพื่อความปลอดภัย
- ข้อควรระวังระหว่างการใช้งาน
- ตัวเครื่องปรับอากาศ
- ตัวเครื่องภายนอกอาคาร
- ชื่อรุนและขนาด
- ไฟสัญญาณบนตัวเครื่องปรับอากาศ
- ไฟแสดงการทำงาน
- ไฟล้างแผงคอย์เย็น
- ไฟตัวดั้งเวลา
- สวัตซ์ข้าวคราว
- รีโมคอนโทรล
- ข้อควรระวังในการใช้
- หมายเหตุ
- ต้องเลือกใหมดความเร็วฟัดลมสูง HI
- หมายเหตุ:
- ฟังก์ชันลดความชั้น
- ■ฟังก์ชั้นของพัดลม
- กดปุ่ม
- คำอธิบายตัวตั้งเวลา AIR SLEEP
- การทำงานในโหมดตัวตั้งเวลา AIR SLEEP
- การสำรองตัวตั้งเวลาปิด
- Off การตั้งค่าเวลาปิด
- การสำรองตัวตั้งเวลาเปิด
- On การตั้งค่าเวลาเปิด
- A ข้อควรระวัง
- คำเดือน
- การทำงานในโหมดล้างแผงคอยล์เย็น (ข้อมูลหัวไป)
- ข้อควรระวัง
- โหมดล้างแพงคอยล์เย็น (โหมดการทำงานเอง)
- หยุด
- อุณหภูมิห้องที่เหมาะสม
- ค่าเดือน
- ติดตั้งผ้าม่านหรือม่านบังตา
- การระบายอากาศ
- การใช้งานตัวตั้งเวลาอย่างมีประสิทธิภาพ
- อย่าลีมล้างแผ่นกรองเบื้องต้น
- โปรดปรับอุณหภูมิให้เหมาะสม กับเด็กเล็กและเด็กโด
- เครื่องปรับอากาศและแหล่งความร้อนภายในห้อง
- ไม่ได้ใช้งานเป็นเวลานาน
- เมื่อเกิดฟ้าผ่า
- คำเตือน
- คลื่นระบบ facebookเครื่องใช้ไฟฟ้า
- เปิดแผงด้านหน้า
- ต่อต์แผ่นกรองเบื้องต้นออก - ดันขึ้นเพื่อปลอดีอุด แล้วดึง
- การใส่แผ่นกรองสำหรับฟอกอากาศให้บริสุทธิ์
- ใส่แผ่นกรองเบื้องต้น
- แผ่นกรองเบื้องต้น
- ขั้นตอน
- ข้อสำคัญ
- การตรวจสอบอย่างสมำเสมอ
- เมื่อขอรับบริการ ให้ตรวจสอบจุดต่างๆ ต่อไปนี้
- บันทึกย่อ
Marke : HITACHI
Modell : RAK-VH10PCAST
Kategorie : Klimaanlage