
GLCMKZ09BER09 - Ofen Galanz - Kostenlose Bedienungsanleitung
Finden Sie kostenlos die Bedienungsanleitung des Geräts GLCMKZ09BER09 Galanz als PDF.


| Produkttyp | Retro-Mikrowellenofen |
| Marke | Galanz |
| Modell | GLCMKZ09BER09 (auch erhältlich als BKR09, RDR09, GNR09, WER09) |
| Farbe | Beige (BER09) |
| Abmessungen (H × B × T) | ca. 27,3 × 48,3 × 37,8 cm |
| Gewicht | ca. 11,6 kg |
| Garraumvolumen | 25,5 l (0,9 Kubikfuß) |
| Stromversorgung | 120 V, 60 Hz, 20 A (separater Stromkreis empfohlen) |
| Leistungsaufnahme (Mikrowelle) | 1400 W |
| Mikrowellenleistung (Ausgang) | 900 W |
| Betriebsfrequenz | 2450 MHz |
| Bedienung | Drehregler und Tasten für Einstellungen, digitales Display |
| Hauptfunktionen | Mikrowellenkochen, automatische Garprogramme (Popcorn, Kartoffel, Gemüse, Haferflocken, Maiskolben, Reis), automatische Aufwärmprogramme (Getränk, Teller, Tiefkühlgericht, Pizza, Suppe, Chili, Pasta, Mac and Cheese, Kartoffelpüree), Auftauen nach Zeit oder Gewicht, Schnellstart (+30 Sek.), Timer, Kindersicherung |
| Leistungsstufen | 10 Stufen (0 %–100 %) |
| Auftaumodus | Nach Zeit oder Gewicht (Fleisch, Geflügel, Meeresfrüchte) |
| Innenbeleuchtung | Ja (Glühlampe, austauschbar durch Kundendienst) |
| Drehteller | Glas-Drehteller, abnehmbar und spülmaschinengeeignet |
| Kindersicherung | Ja, durch langes Drücken der STOP/CANCEL-Taste aktivierbar |
| Reinigung und Pflege | Innen- und Außenflächen mit feuchtem Tuch und mildem Reinigungsmittel reinigen; keine Scheuermittel; Drehteller in warmem Seifenwasser oder Spülmaschine |
| Sicherheit | Türverriegelungssystem, Erdungsstecker, Überhitzungsschutz (bei leerem Betrieb vermeiden) |
| Ersatzteile und Reparatur | Ersatzteile (z. B. Drehteller, Glühlampe) über Kundendienst erhältlich; Reparatur nur durch qualifiziertes Personal |
| Garantie | 1 Jahr auf Material- und Verarbeitungsfehler (Kundendienst: 800‑562‑0738) |
| Lieferumfang | Mikrowellenofen, Glas-Drehteller, Rollenring, Bedienungsanleitung |
| Zubehör | Kein weiteres Zubehör im Lieferumfang |
Häufig gestellte Fragen - GLCMKZ09BER09 Galanz
Benutzerfragen zu GLCMKZ09BER09 Galanz
0 Frage zu diesem Gerät. Beantworten Sie die, die Sie kennen, oder stellen Sie Ihre eigene.
Eine neue Frage zu diesem Gerät stellen
Laden Sie die Anleitung für Ihr Ofen kostenlos im PDF-Format! Finden Sie Ihr Handbuch GLCMKZ09BER09 - Galanz und nehmen Sie Ihr elektronisches Gerät wieder in die Hand. Auf dieser Seite sind alle Dokumente veröffentlicht, die für die Verwendung Ihres Geräts notwendig sind. GLCMKZ09BER09 von der Marke Galanz.
BEDIENUNGSANLEITUNG GLCMKZ09BER09 Galanz
Galanz
Model# GLCMKZ09BKR09
GLCMKZ09RDR09
GLCMKZ09GNR09
GLCMKZ09BER09
GLCMKZ09WER09
Retro Microwave Oven User Manual
natural_image
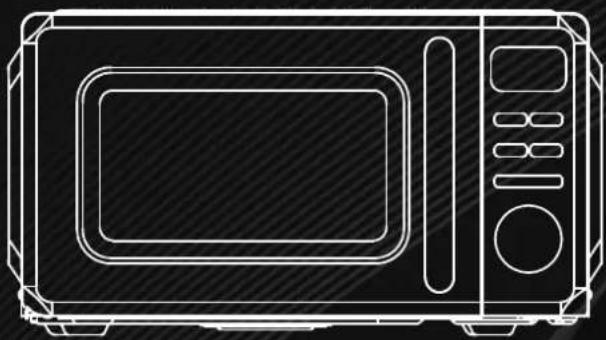
Line drawing of a microwave oven with control panel and door (no text or symbols)Thank you for purchasing a Galanz product. Please read this manual carefully for correct usage and safety, and keep for future reference. For service, support and warranty information, call 800-562-0738.
@2021Galanz Americas Limited Company.
CONTENTS
Important Safety Instructions .... 1
Precautions to Avoid Possible Exposure to Excessive Microwave Energy.... 1
GALIFORNIA PROPOSITION 65 WARNING ....1
Warning....1
Grounding Instructions 3
Installation Guide 4
Cooking Utensils Guide 5
Specifications....6
Product Diagram 7
Control Panel 8
Operation Instructions 9
Setting the Clock 9
Timer Function....10
Express Cooking....10
Microwave Cooking 11
Time Defrost....12
Weight Defrost 13
Child Lock 14
Auto Cook Menus 15
+30 Sec Function....16
Auto Reheat Menus 17
Cleaning And Care 19
Product Warranty 20
IMPORTANT SAFETY INSTRUCTIONS
PRECAUTIONS TO AVOID POSSIBLE EXPOSURE TO EXCESSIVE MICROWAVE ENERGY
■ Do not attempt to operate this oven with the door open since open-door operation can result in harmful exposure to microwave energy. It is important not to defeat or tamper with the safety interlocks.
■ Do not place any object between the oven front face and the door or allow soil or cleaner residue to accumulate on sealing surfaces.
■ Do not operate the oven if it is damaged. It is very important that the oven door close properly and that there is no damage to the a) Door (including any dents),
b) Hinges and latches (broken or loosened),
c) Door seals and sealing surfaces.
■ The oven should not be adjusted or repaired by anyone except qualified service personnel.
GALIFORNIA PROPOSITION 65 WARNING

WARNING
Cancer and Reproductive Harm-WWW.P65Warnings.ca.gov.

WARNING
To reduce the risk of burns, electric shock, fire, injury to persons or exposure to excessive microwave energy:
- Read all instructions before using the appliance.
■ Read and follow the specific "PRECAUTIONS TO AVOID POSSIBLE EXPOSURE TO EXCESSIVE MICROWAVE ENERGY" on page 1.
■ This appliance must be grounded. Connect only to properly grounded outlet. See "GROUNDING INSTRUCTIONS" on page 3.
■ Do not operate the oven when empty. Install or locate this appliance only in accordance with the provided installation instructions.
■ Some products such as whole eggs and sealed containers -for example, closed glass jars- are able to explode and should not be heated in this oven.
■ Use this appliance only for its intended use as described in this manual. Do not use corrosive chemicals or vapors in this appliance. This type of oven is specifically designed to heat, cook, or dry food. It is not designed for industrial or laboratory use.
■ As with any appliance, close supervision is necessary when used by children.
■ To reduce the risk of fire in the oven cavity:
—Do not overcook food. Carefully attend appliance when paper, plastic, or other combustible materials are placed inside the oven to facilitate cooking.
Remove wire twist-ties from paper or plastic bags before placing bag in oven.
—If materials inside the oven should ignite, keep oven door closed, turn oven off, and disconnect the power cord or shut off power at
SAVE THESE INSTRUCTIONS
IMPORTANT SAFETY INSTRUCTIONS
the fuse or circuit breaker panel.
■ Do not use the cavity for storage purposes. Do not leave paper products, cooking utensils or food in the cavity when not in use.
■ Liquids, such as water, coffee, or tea are able to be overheated beyond the boiling point without appearing to be boiling due to surface tension of the liquid. Visible bubbling or boiling when the container is removed from the microwave oven is not always present. THIS COULD RESULT IN VERY HOT LIQUIDS SUDDENLY BOILING OVER WHEN A SPOON OR OTHER UTENSIL IS INSERTED INTO THE LIQUID. To reduce the risk of injury to person:
—Do not overheat the liquid
—Stir the liquid both before and halfway through heating it.
—Do not use straight-sided containers with narrow necks.
—After heating, allow the container to stand in the microwave oven for a short time before removing the container.
—Use extreme care when inserting a spoon or other utensil into the container.
■ Do not heat oil or fat for deep-frying. It is difficult to control the temperature of oil in microwave oven.
■ Do not cover or block any openings on the appliance.
■ Do not operate this appliance if it has a damaged cord or a plug, if it is not working properly or if it has been damaged or dropped.
■ Do not immerse cord or plug in water. Keep cord away from heated surface. Do not let cord hang over edge of table or counter.
This appliance should be serviced only by qualified service personnel, contact nearest authorized service facility for examination, repair, or adjustment.
■ When cleaning surfaces of door and oven that comes together on closing the door, use only mild, nonabrasive soaps, or detergents applied with a sponge or soft cloth.
SAVE THESE INSTRUCTIONS
■ Oversized food or oversized metal utensils should not be inserted in a microwave/toaster oven as they may create a fire or risk of electric shock.
■ Do not store or use this appliance outdoors. Do not use this product near water, for example, near a kitchen sink, in a wet basement, near a swimming pool, or similar locations.
■ Do not clean with metal scouring pads. Pieces can burn off the pad and touch electrical parts involving a risk of electric shock.
- Do not store any materials, other than manufacturer's recommended accessories, in this oven when not in use.
■ Do not cover racks or any other part of the oven with metal foil. This will cause overheating of the oven.
■ This equipment has been tested and found to comply with Part 18 of the FCC Rules. Operation is subject to the following two conditions: (1) This device may not cause harmful interference, and (2) this device must accept any interference received, including interference that may cause undesired operation.
CAUTION: Changes or modifications not expressly approved by the party responsible for compliance could void the user's authority to operate the product.
This equipment generates, uses and can radiate radio frequency energy and, if not installed and used in accordance with the instructions, may cause harmful interference to radio communications. There is no guarantee that interference will not occur in a particular installation. If this equipment does cause harmful interference to radio or television reception, which can be determined by turning the equipment off and on, the user is encouraged to try to
IMPORTANT SAFETY INSTRUCTIONS
correct the interference by one or more of the following measures:
—Reorient or relocate the receiving antenna.
—Increase the separation between the equipment and receiver.
—Connect the equipment into an outlet on a circuit different from that to which the receiver is connected.
—Consult the dealer or an experienced radio/TV technician for help.
GROUNDING INSTRUCTIONS
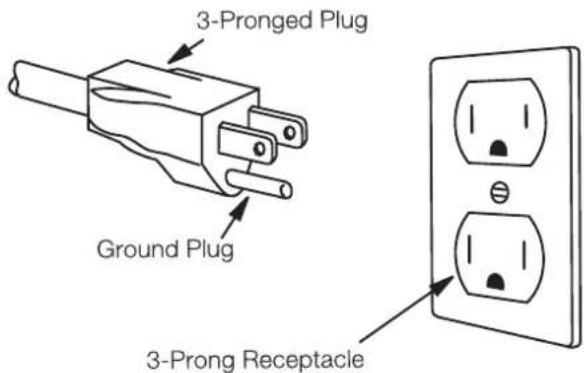
This appliance must be grounded. In the event of an electrical short circuit, grounding reduces risk of electric shock by providing an escape wire for the electric current. This appliance is equipped with a cord having a grounding wire with a grounding plug. The plug must be plugged into an outlet that is properly installed and grounded.
Consult a qualified electrician or serviceman if the grounding instructions are not completely understood, or if doubt exists as to whether the appliance is properly grounded, and if it is necessary to use an extension cord, use only a 3-wire extension cord that has a 3-blade grounding plug and a 3-slot receptacle that will accept the plug on the appliance. The marked rating of the extension cord shall be equal to or greater than the electrical rating of the appliance.
SAVE THESE INSTRUCTIONS
IMPORTANT SAFETY INSTRUCTIONS
Electrical Requirements
The electrical requirements are a 120 volt 60 Hz, AC only, 20 amp. It is recommended that a separate circuit serving only the oven be provided. The oven is equipped with a 3-prong grounding plug. It must be plugged into a wall outlet properly installed and ground.
Power Cord
—A short power supply cord is provided to reduce the risks resulting from becoming entangled in or tripping over a longer cord.
—Longer cord sets or extension cords are available and may be used if care is exercised in their use.
—If long cord or extension cord is used:
a) The marked electrical rating of the cord set or extension cord should be at least as reat as the electrical rating of the appliance. b) The extension cord must be a grounding-type 3-wire cord, and the longer cord should be arranged so that it will not drape over the counter top or table top where it can be pulled on by children or tripped over accidentally.
INSTALLATION GUIDE
■ Make sure that all the packing materials are removed from the inside of the door.
■ This microwave oven must be placed on a flat, stable surface.
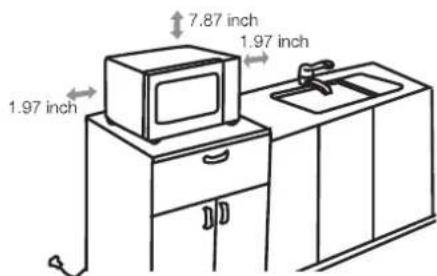
For correct operation, the oven must have sufficient airflow. Allow minimum 7.87 inch of free space necessary above the top surface of the oven and 1.97 inch at both sides. Do not cover or block any openings on the appliance. Do not remove feet.
■ The appliance shall be only used on a countertop over 3 feet (914mm) above the floor.
■ Do not place the oven where heat, moisture, or high humidity are generated, or near combustible materials.
■ Make sure that the power cord is undamaged and does not run under the oven or over any hot or sharp surface.
■ The socket must be readily accessible so the microwave oven can be easily unplugged in an emergency.
SAVE THESE INSTRUCTIONS
IMPORTANT SAFETY INSTRUCTIONS
COOKING UTENSILS GUIDE

This section lists which utensils can be used in this microwave, which have limited use for short periods, and which should not be used in this microwave.
RECOMMENDED

Microwave browning dish — Use to brown the exterior of small items such as steaks, chops, or pancakes. Follow the directions provided with your browning dish.
Microwaveable plastic wrap — Use to retain steam. Leave a small opening for some steam to escape and avoid placing it directly on the food.
Paper towels and napkins — Use for short-term heating and covering; these absorb excess moisture and prevent spattering. Do not use recycled paper towels, which may contain metal and could ignite.
Glass and glass-ceramic bowls and dishes — Use for heating or cooking.
Paper plates and cups — Use for short-term heating at low temperatures. Do not use recycled paper, which contain metal and could ignite.
Wax paper — Use as a cover to prevent spattering.
Thermometers — Use only those labeled "Microwave Safe" and follow all directions.
Check the food in several places. Conventional thermometers may be used on microwave food once the food has been removed from the oven.
LIMITED USE

Aluminum foil — Use narrow strips of foil to prevent overcooking of exposed areas.
Using too much foil can damage your oven, so be careful. You should keep distance of 1 inch (2.54cm) between aluminum foil and cavity.
Ceramic, porcelain, and stoneware— Use these if they are labeled "Microwave Safe". If they are not labeled, test them to make sure they can be used safely.
Plastic — Use only if labeled "Microwave Safe". Other plastics can melt.
NOT RECOMMENDED

Glass jars and bottles — Regular glass is too thin to be used in a microwave. It can shatter and cause damage and injury.
Paper bags — These are a fire hazard, except for popcorn bags bagsesidue on food.
Styrofoam plates and cups — These can melt and leave an unhealthy residue on food.
Plastic storage and food containers — Containers such as margarine tubs can melt in the microwave.
Metal utensils — These can damage your oven. Remove all metal before cooking.
Note:
Should you wish to check if a dish is safe for microwaving, place the empty dish in the oven and microwave on HIGH for 30 seconds. A dish which becomes very hot should not be used.
SAVE THESE INSTRUCTIONS
SPECIFICATIONS
| Power supply | 120V/60Hz |
| Power Consumption (Microwave) | 1400W |
| Rated Microwave Power Output | 900W |
| Operating Frequency | 2450MHz |
| Outside Dimensions(H x W x D ) | 10 3/4 X 19 X 14 7/8 inches |
| Oven Capacity | 0.9 Cu.Ft. |
| Net Weight | Approx. 25.57lbs |
PRODUCT DIAGRAM

① Door Safety Lock System
2 Oven Window
3 Shaft
4 Roller Ring
5 Control Panel
6 Wave Guide (Please do not remove the mica plate covering the wave guide)
7 Glass Tray
CONTROL PANEL

■ DISPLAY
Cooking time, power, indicators and clock time are displayed.
AUTO/COOK/REHEAT
Press to set auto cooking and reheating programs.
■ DEFROST/TIME/WEIGHT
Press once to defrost food based on time. Press twice to defrost food based on weight.
■ POWER LEVEL
Press to select cooking power level.
■ CLOCK/TIMER
Press to set clock time. Press to set timer function.
■ STOP/CANCEL
Press once to temporarily stop cooking, or twice to cancel cooking altogether. It is also used to set child lock.
■ TIME/WEIGHT/PROG/LEVEL (dial)
Turn to set time and food weight. Turn to select the type of defrosting and auto cooking food.
■ START/+30 SEC
Press start cooking and defrosting programs. Press to set express cooking program.
OPERATION INSTRUCTIONS
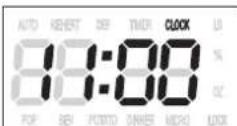
■ When the oven first plugged in, a beep will sound and the display will show "12:00" and "CLOCK".
■ In the process of setting, broken about 30 seconds the oven will return to standby mode.
During cooking, if press STOP/CANCEL button once, the program will be paused, then press START/+30 SEC button to resume. But if press STOP/CANCEL button twice, the program will be cancelled.
■ After cooking end, the display will show End and beep will sound until user press any button or open the door.
In the process of operation, press a valid button, the buzzer rings once, but if press a invalid button, the buzzer rings twice.
Setting the Clock

This is a 12-hour or 24-hour clock. You can choose to set the clock time in 12-hour or 24-hour cycle by pressing CLOCK/TIMER in standby mode.
Example: Set a 12-hour clock at 11:58.
| In standby mode, press and hold CLOCK/TIMER for 3 seconds to select 24-hour clock (press the pad again to select 12-hour clock). | 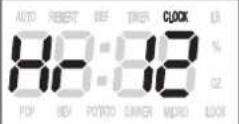 |
| CLOCK / TIMER ×2 |
| 2 Turn the dial until the correct hour is displayed. | |
| 3 Press CLOCK/TIMER to confirm the hour. | |
| CLOCK / TIMER |
| 4 Turn the dial until the correct minute is displayed. | |
| 5 Press CLOCK/TIMER to confirm the minute and finish setting. | AUTO ROSET 07 TIMER 000x U |
| CLOCK / TIMER | 81:98 POP REF POTATO DINNER NOVO LOCK |
NOTE: During cooking, you can check the current time by pressing CLOCK/TIMER button.
OPERATION INSTRUCTIONS
Timer Function

You can use the timer feature to count down a specific amount of time whether it's for cooking or for anything else.
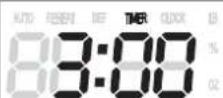
Example: How to set the timer for 3 minutes and 50 seconds.
1 In standby mode or during cooking, press CLOCK/TIMER button once.
CLOCK / TIMER

2 Turn the dial to set desired time. The longest time is 95 minutes.

POP REV POTATO OWNER MICRO LOX
3 Press the dial to confirm and start.


POP USB/ PTRIO INNER MICRO BOX
NOTE: Timer countdown can be seen for 5 seconds by touching CLOCK/TIMER, if press STOP/CANCEL during these 5 seconds, the timer will be canceled.
Express Cooking

Use this feature to program the oven to microwave food at 100% power conveniently.
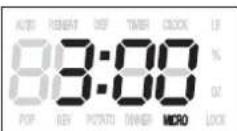
First way: Set the cooking time by pressing the dial. Example: Set the cooking time for 3 minutes.
1 Instandby mode, press the dial 6 times to enter the time.(each press for 30 seconds)


2 The oven starts working automatically at full power.
NOTE: During cooking, you can add the cooking time by pressing START/+30 SEC button. Each press to increase 30 seconds, and up to 30 minutes.
OPERATION INSTRUCTIONS
Second way: Set the cooking time by turning the dial.
Example: Set the cooking time for 3 minutes.
| 1 In standby mode, turn the dial clockwise to enter time |  |
 | |
| 2 Press the dial and the oven starts working. The oven starts working automatically at full power. | |
NOTE: The longest cooking time is 30 minutes.
Microwave Cooking

This feature allows you to choose the power level and cooking time of microwave function. The longest cooking time is 95 minutes.
Example: Cook at 60% power level for 3 minutes and 50 seconds.
| 1 Press POWER LEVEL button5 times to select the 60% power level. |  |
| POWER LEVEL × 5 |
| 2 Turn the dial to enter the time.The longest time is 95 minutes. | |
 |
OPERATION INSTRUCTIONS

Power Level Chart:
| Power Level | Display | Power Level | Display |
| 100% | P100 | 40% | P-40 |
| 90% | P-90 | 30% | P-30 |
| 80% | P-80 | 20% | P-20 |
| 70% | P-70 | 10% | P-10 |
| 60% | P-60 | 0% | P-00 |
| 50% | P-50 |
NOTE:
If you want to set 100% power level, you can turn the dial to enter cooking time directly and then press the dial to start.
Time Defrost

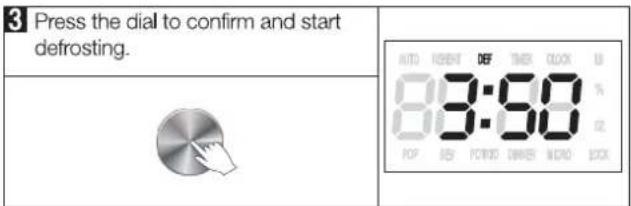
The defrosting power is adjusted automatically once the cooking time is programmed.
Example: Defrost food for 3 minutes and 50 seconds.


NOTE:
During defrosting, the system will pause to remind user to turn food over, and then press the dial to resume the defrosting.
OPERATION INSTRUCTIONS
Weight Defrost

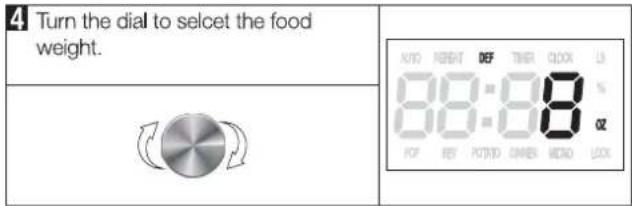
The defrosting time and power level are automatically set once the food category and weight are selected.
Example: Defrost 8oz poultry.



Defrost food code description:
| Code | Food | Weight Range |
| dEF1 | Meat | 4 oz ~ 48 oz |
| dEF2 | Poultry | 4 oz ~ 48 oz |
| dEF3 | Sea food | 4 oz ~ 32 oz |
OPERATION INSTRUCTIONS
NOTE:
■ During defrosting, the system will pause to remind user to turn food over, and then press the dial to resume the defrosting.
■ Weight must be in pounds and ounces. If label gives weight in pounds only, change the fraction of a pound to ounces using the following chart.
Converting fractions of a pound to ounces:
| Fractions of a pound | Ounces | Fractions of a pound | Ounces | |
| Less than .03 | 0 | .54 to .59 | 9 | |
| .03 to .09 | 1 | .60 to .65 | 10 | |
| .10 to .15 | 2 | .66 to .71 | 11 | |
| .16 to .21 | 3 | .72 to .78 | 12 | |
| .22 to .27 | 4 | .79 to .84 | 13 | |
| .28 to .34 | 5 | .85 to .90 | 14 | |
| .35 to .40 | 6 | .91 to .97 | 15 | |
| .41 to .46 | 7 | above .97 | go to next even | |
| .47 to .53 | 8 | |||
Child Lock

The child proof lock prevents unsupervised operation by little children.
Example1: Set the child lock.
| 1 In standby mode, suppose thedisplayer is showing 11:00. | |

Press and hold the
STOP/CANCEL for 3 seconds, a beep sounds and lock indicator lights
STOP/CANCEL

Example 2: To cancel the child lock.
| 1 In standby mode, suppose the displayer is showing 11:00. | |

Press and hold the
STOP/CANCEL for 3 seconds, a beep and lock indicator turns off.
STOP/CANCEL
OPERATION INSTRUCTIONS
Auto Cook Menus

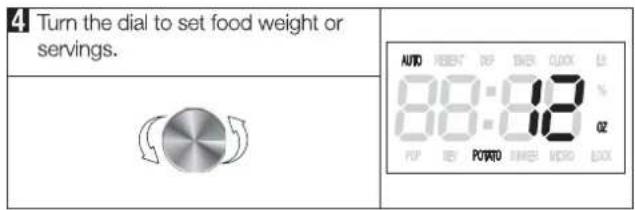
For the following foods, you do not need to input cooking power and time. It is sufficient to indicate the type of food that you want to cook as well as the weight or servings of this food.
Example1: Cook potato for 12 oz.



OPERATION INSTRUCTIONS
Auto Cook Menus

| Code | Menu | Note |
| AC-1 | Popcorn (3.5 oz) | ■ For popcorn, the default cooking time is 2 minutes and 50 seconds. You can adjust the cooking time by turning TIME/WEIGHT/PROG/LEVEL dial. The longest time is 5 minutes. ■ The result of auto cooking depends on factors such as fluctuation of voltage, the shape and size of food, your personal preference as to the doneness of certain foods and even how well you happen to place food in the oven. If you find the result at any rate not quite satisfactory, please adjust the cooking time a little bit accordingly. |
| AC-2 | Potato (8-24 oz) | |
| AC-3 | Fresh Vegetable (8-20 oz) | |
| AC-4 | Frozen Vegetable (8-20 oz) | |
| AC-5 | Oatmeal (1-3 servings) | |
| AC-6 | Corn On The Cob (1-4 roots) | |
| AC-7 | Rice (8 oz, 12 oz, 16 oz) |

+30 Sec Function
In standby mode, you can touch the dial to start the microwave oven immediately.
During microwave cooking, you can add cooking time by touching the dial repeatedly. The longest cooking time is 95 minutes.
During quick start cooking, you can add cooking time by touching the dial repeatedly. The longest cooing time is 30 minutes.
Example: During microwave cooking, add the cooking time by 2 minutes by utilizing the dial.
1 During cooking, suppose the display is showing 3:50.

2 Press the dial 4 times.

NOTE:
■Below programs cannot use the dial during cooking.
— AUTO COOK
— AUTO REHEAT
— TIME / WEIGHT DEFROST
OPERATION INSTRUCTIONS
Auto Reheat Menus

For the following foods, you do not need to input cooking power and time. It is sufficient to indicate the type of food that you want to cook as well as the weight or servings of this food.
Example1: Cook dinner plate for 12 oz.


OPERATION INSTRUCTIONS
Auto Reheat Menus

| Code | Menu | Note |
| AH-1 | Beverage (8 oz, 10 oz, 12 oz) | The result of auto cooking depends on factors such as fluctuation of voltage, the shape and size of food, your personal preference as to the doneness of certain foods and even how well you happen to place food in the oven. If you find the result at any rate not quite satisfactory, please adjust the cooking time a little bit accordingly. |
| AH-2 | Dinner Plate (8-24 oz) | |
| AH-3 | Frozen Entree (8-24 oz) | |
| AH-4 | Pizza (1-2 slices) | |
| AH-5 | Soup/Sauce (8-24 oz) | |
| AH-6 | Chili (8-24 oz) | |
| AH-7 | Pasta (8-24 oz) | |
| AH-8 | Mac and Cheese (8-24 oz) | |
| AH-9 | Mashed Potatoes (8-24 oz) | |
| AH-10 | Rice (8-24 oz) |
CLEANING AND CARE
Turn off the oven and unplug the power cord from the wall when cleaning.
natural_image
Line drawing of a hand holding an electrical outlet with two outlets (no text or symbols)Keep the inside of the oven clean. When food splatters or spilled liquids adhere to oven walls, wipe with a damp cloth. Mild detergents may be used if the oven gets very dirty. Avoid using spray or other harsh cleaners. They may stain, streak or dull the door surface.

The outside of the oven should be cleaned with a damp cloth. To prevent damage to the operating parts inside the oven, water should not be allowed to seep into the ventilation openings.
Wipe the door and window on both sides, the door seals and adjacent parts frequently with a damp cloth to remove any spills or spatters. Do not use abrasive cleaner.
Do not allow the control panel to become wet. Clean with a soft, damp cloth. When cleaning the control panel, leave oven door open to prevent oven from accidentally turning on.

natural_image
Line drawing of a microwave oven with a sheet of paper hanging from the side (no text or symbols)If steam accumulates inside or around the outside of the oven door, wipe with a soft cloth. This may occur when the microwave oven is operated under high humidity condition. And it is normal.
It is occasionally necessary to remove the glass tray for cleaning. Wash the tray in warm sudsy water or in a dishwasher.

natural_image
Simple line drawing of a droplet falling into a circular opening with bubbles and droplets (no text or symbols)If the light bulb burns out, please contact customer service to have it replaced.
The oven should be cleaned regularly and any food deposits should be removed. Failure to maintain the oven in a clean condition could lead to deterioration of surface that could adversely affect the life of the unit and could possibly result in a hazardous situation.
Please do not dispose of this appliance into the domestic rubbish bin; it should be disposed to the particular disposal center provided by the municipalities.
PRODUCT WARRANTY
This warranty applies to products sold by Galanz Americas in the U.S. This warranty is in lieu of any other warranty and expressly applies to the individual product only.
Galanz product is warranted for one year following purchase for defects in material and workmanship. Please save your receipt as proof of purchase is required to make a warranty claim. During this period, we will provide the purchase cost of this product, a replacement or the equivalent, or repair per our discretion.
The warranty cannot be transferred through resale, including the resale through a 3rd party unauthorized retailer and is only bestowed up on the original consumer purchaser upon purchase from an authorized retailer.
■ This warranty does not cover and excludes damage or defects caused by:
—Consumer misuse
—Abuse
—Neglect including the failure to clean and/or provide adequate regular maintenance as outlined in the user manual
—Commercial use
—Subjecting the product to any voltage outside the specified range —Loss of parts
The affixing of any attachments not provided with the product —Accident
—Use in a manner not intended and outlined in the user manual.
■ Any subsequent damages caused by the above listed exclusions will not be covered and any claims determined to meet the above exclusions will be denied. All liability is limited to the purchase price and does not include any:
—Retail offered extended warranties
—Tax
—Other charges(including postage to send required materials)
—Incidental and/or consequential damages associated with the product in question.
Every implied warranty, including any statutory warranty of merchantability or fitness for a particular purpose is disclaimed except to the extent prohibited by law, in which case such warranty is limited to the duration of this written warranty. This warranty gives you specific legal rights. You may have other legal rights that vary depending on where you live. Some states do not allow limitations on implied warranties or special, incidental, or consequential damaged, so the above limitations may not apply to you.
If you have a claim under this warranty, please call our Customer Service number: 800-562-0738.
For faster service, please have the model number, serial number, and receipt ready for the operator to assist you.
WARRANTY REGISTRATION
Please mail this warranty card to the address below within 30 days of purchase. Galanz Americas, 55 Challenger Road, Suite 503, Ridgefield Park, NJ 07660
PLEASE PRINT CLEARLY.
Name
Address____
City____ State____ ZIP____
Phone ____ Email ____
Model Number ____ Serial Number ____
Purchase Location ____
You must attach a copy of your purchase receipt to validate your registration.
Galanz
©2021 Galanz Americas Limited Company

- Galanz
- CONTENTS
- Important Safety Instructions .... 1
- Operation Instructions 9
- Cleaning And Care 19
- Product Warranty 20
- IMPORTANT SAFETY INSTRUCTIONS
- PRECAUTIONS TO AVOID POSSIBLE EXPOSURE TO EXCESSIVE MICROWAVE ENERGY
- GALIFORNIA PROPOSITION 65 WARNING
- WARNING
- SAVE THESE INSTRUCTIONS
- GROUNDING INSTRUCTIONS
- Electrical Requirements
- Power Cord
- INSTALLATION GUIDE
- COOKING UTENSILS GUIDE
- RECOMMENDED
- LIMITED USE
- NOT RECOMMENDED
- Note:
- SPECIFICATIONS
- PRODUCT DIAGRAM
- CONTROL PANEL
- ■ DISPLAY
- AUTO/COOK/REHEAT
- ■ DEFROST/TIME/WEIGHT
- ■ POWER LEVEL
- ■ CLOCK/TIMER
- ■ STOP/CANCEL
- ■ TIME/WEIGHT/PROG/LEVEL (dial)
- ■ START/+30 SEC
- OPERATION INSTRUCTIONS
- Setting the Clock
- Timer Function
- Express Cooking
- Microwave Cooking
- Time Defrost
- Example: Defrost food for 3 minutes and 50 seconds.
- Weight Defrost
- Child Lock
- Auto Cook Menus
- +30 Sec Function
- Auto Reheat Menus
- CLEANING AND CARE
- PRODUCT WARRANTY
- ■ This warranty does not cover and excludes damage or defects caused by:
- WARRANTY REGISTRATION
- PLEASE PRINT CLEARLY.
Marke : Galanz
Modell : GLCMKZ09BER09
Kategorie : Ofen