
AirZeta TZAZTN01 - Ventilator TERMOZETA - Kostenlose Bedienungsanleitung
Finden Sie kostenlos die Bedienungsanleitung des Geräts AirZeta TZAZTN01 TERMOZETA als PDF.


| Produkttyp | Standventilator mit Akku (kabellos) |
| Marke | Termozeta |
| Modell | AirZeta TZAZTN01 |
| Stromversorgung | 220‑240V~ 50/60Hz, 30W |
| Akku | Wiederaufladbar, Betrieb ohne Netz möglich |
| Leistungsaufnahme (max.) | 29,23 W |
| Geschwindigkeitsstufen | 12 |
| Oszillationswinkel | 30°, 60°, 90°, 120° |
| Timer | 0‑12 Stunden (0,5‑Std. bis 6h, dann 1‑Std.) |
| Betriebsarten | Normal, Natur, Schlaf (Nachtmodus) |
| Fernbedienung | Ja, im Lieferumfang enthalten |
| Display | LED‑Digitalanzeige |
| Batterieanzeige | Ja, am Bedienfeld |
| Maximale Luftstrom | 25,52 m³/min |
| Schallleistungspegel | 55,5 dB(A) |
| Maximale Luftgeschwindigkeit | 4,58 m/s |
| Standby‑Verbrauch | 0,46 W |
| Servicewert | 1,01 (m³/min)/W |
| Reinigung | Mit weichem, feuchtem Tuch; Gitter abnehmbar |
| Zubehör | Fernbedienung, Bedienungsanleitung, Schraubenschlüssel, Schrauben |
Häufig gestellte Fragen - AirZeta TZAZTN01 TERMOZETA
Benutzerfragen zu AirZeta TZAZTN01 TERMOZETA
0 Frage zu diesem Gerät. Beantworten Sie die, die Sie kennen, oder stellen Sie Ihre eigene.
Eine neue Frage zu diesem Gerät stellen
Laden Sie die Anleitung für Ihr Ventilator kostenlos im PDF-Format! Finden Sie Ihr Handbuch AirZeta TZAZTN01 - TERMOZETA und nehmen Sie Ihr elektronisches Gerät wieder in die Hand. Auf dieser Seite sind alle Dokumente veröffentlicht, die für die Verwendung Ihres Geräts notwendig sind. AirZeta TZAZTN01 von der Marke TERMOZETA.
BEDIENUNGSANLEITUNG AirZeta TZAZTN01 TERMOZETA
TERMOZETA®
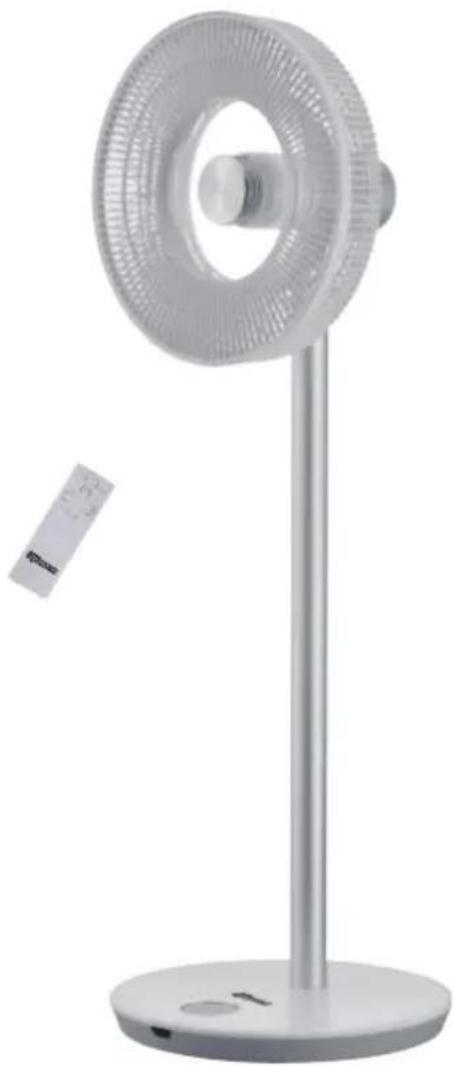
VENTILATORE A PIANTANA AIRZETA TITANIUM CORDLESS Cod. TZAZTN01
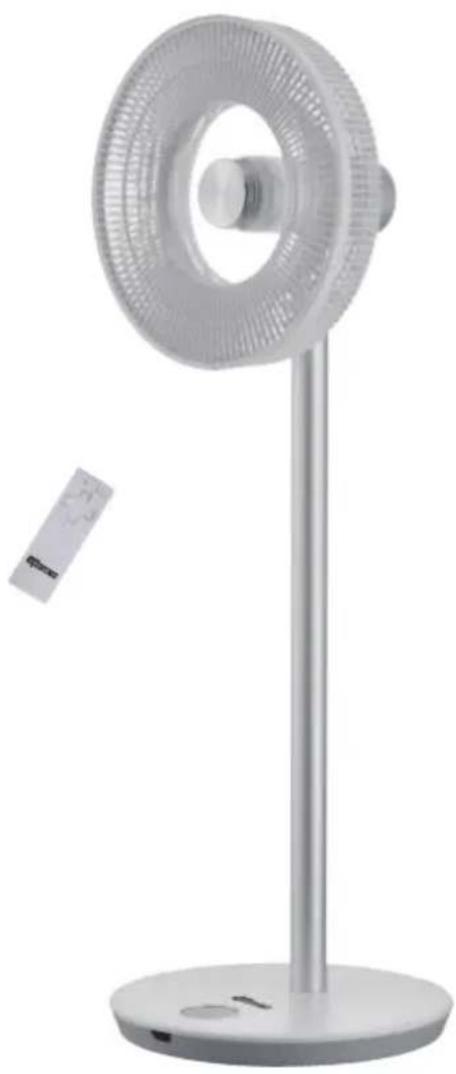
natural_image
Modern office desk fan with circular vent and stand (no visible text or symbols)MANUALE D'ISTRUZIONI
Vi ringraziamo per la preferenza accordata avendo scelto un prodotto TERMOZETA.
Vi preghiamo di leggere attentamente le informazioni contenute in questo manuale, in quanto Vi aiuteranno a sfruttare al meglio le caratteristiche di questo prodotto.
Il presente libretto è parte integrante dell'apparecchio e deve essere letto attentamente prima dell'utilizzo perché fornisce importanti indicazioni riguardanti la sicurezza di installazione, d'uso e di manutenzione. Conservare quindi con cura
Cordialmente
Lange Distribution S.r.l.
Leggere attentamente questo manuale d'istruzioni poichè all'interno vi sono importanti informazioni sulla sicurezza, l'uso e la manutenzione dell'elettrodomestico. Conservare il manuale per consultazioni future.
AVVERTENZE GENERALI
- Attenzione: Questo apparecchio può essere utilizzato da bambini dagli 8 anni in su e da persone con ridotte capacità fisiche, sensoriali o mentali o con mancanza di esperienza o conoscenza se a loro è stata assicurata un' adeguata sorveglianza oppure se hanno ricevuto istruzioni circa l'uso in sicurezza dell'apparecchio e hanno compreso i pericoli correlati. I bambini non devono giocare con l'apparecchio. Le operazioni di pulizia e manutenzione non devono essere effettuate da bambini a meno che non abbiano più di 8 anni e siano sorvegliati.
- Dopo aver tolto l'imballaggio, assicurarsi dell'integrità dell'apparecchio; in caso di dubbio non utilizzarlo e rivolgersi a personale qualificato.
- Gli elementi dell'imballaggio (sacchetti di plastica, polistirolo espanso, chiodi etc) non devono essere lasciati alla portata di mano di bambini in quanto potenziali fonti di pericolo; smaltirli secondo le norme vigenti.
- Questo apparecchio dovrà essere utilizzato solo per l'uso domestico, come ventilatore, secondo le modalità riportate nel presente manuale. Ogni altro uso è da considerarsi improprio e pericoloso. Il costruttore non potrà essere ritenuto responsabile di eventuali danni derivanti da uso improprio, erroneo o irresponsabile e/o da riparazioni effettuate da personale non qualificato.
- Non mettere oggetti pesanti sui cavi o fonti di calore vicino ad essi. I cavi potrebbero danneggiarsi.
- Questo prodotto è previsto per l'esclusivo uso domestico in ambienti interni. Non utilizzare all'esterno. Evitare il contatto del prodotto con elementi atmosferici.
- Prima di procedere alla pulizia e manutenzione, disconnettere il
prodotto dall'alimentazione elettrica.
-
Non utilizzare nelle vicinanze dell'apparecchio nebulizzatori spray (per es. insetticidi, spray per capelli, ecc.) il cui utilizzo potrebbe creare danni all'involucro.
-
Nel caso si verificassero situazioni anomale, spegnere immediatamente l'apparecchio e contattare il rivenditore o il Servizio Assistenza.
-
Non utilizzare questo apparecchio collegato a programmatori, temporizzatori, sistemi di comando a distanza separati, timer o qualsiasi altro dispositivo che possa accenderlo automaticamente.
-
Non utilizzare prese di corrente volanti oppure cavi danneggiati.
-
Non lasciare il prodotto in funzione senza alcun controllo e supervisione.
-
Ricordarsi di staccare il prodotto dalla alimentazione elettrica quando non viene utilizzato.
-
Quando si stacca la spina tenerla saldamente per evitare shock elettrico, cortocircuito o incendio.
-
Non fissare interruttori di sicurezza con nastro adesivo, per pericolo di incendio
-
E' assolutamente vietato smontare o riparare l'apparecchio per pericolo di shock elettrico; se necessario rivolgersi al rivenditore od ad un Centro Assistenza.
-
Non usare l'apparecchio nelle vicinanze di una vasca da bagno. doccia, piscina.
-
Non usare l'apparecchio vicino ad elementi e sostanze infiammabili.
-
Non inserire alcun oggetto nelle fessure dell'apparecchio.
-
Prima di collegare il prodotto alla rete elettrica accertarsi che la tensione sia corretta secondo quanto riportato sulla targa dati elettrici del prodotto e che l'impianto sia conforme alle norme vigenti.
-
Non toccare la connessione all'alimentazione con mani umide.
- Non usare il prodotto per scopi diversi da quelli per cui è stato costruito. Non fare un uso errato dell'apparecchio.
- Se il cavo flessibile esterno di alimentazione è danneggiato, deve essere sostituito da personale tecnico qualificato al fine di evitare incidenti.
- Assicurarsi che il cavo di alimentazione non sia in contatto con superfici calde o taglienti, e che non sia avvolto attorno al prodotti durante il funzionamento.
- Non utilizzare l'apparecchio con il cavo danneggiato.
- Il montaggio deve essere effettuata secondo le istruzioni del costruttore. Un errato montaggio può causare danni a persone, animali o cose, nei confronti dei quali il costruttore non può essere considerato responsabile.
- Non lasciare il ventilatore senza sorveglianza quando in uso.
- Per evitare surriscaldamenti pericolosi si raccomanda di svolgere in tutta la sua lunghezza il cavo di alimentazione.
- Non lasciare l'apparecchio inutilmente inserito. Staccare la spina dalla rete di alimentazione quando l'apparecchio non è utilizzato. Mantenere una adeguata distanza da pareti, oggetti, ecc.
- Non immergere mai l'apparecchio in acqua o in altri liquidi.
- Non toccare l'apparecchio con mani e/o piedi bagnati o umidi. Non usare l'apparecchio a piedi nudi.
- Non lasciare esposto l'apparecchio ad agenti atmosferici (pioggia, sole, etc.). Non utilizzare all'esterno.
- Mantenere una adeguata distanza da pareti, oggetti, ecc.
- Non spostare il prodotto quando in funzione.
- In generale è sconsigliabile l'uso di adattatori, prese multiple e/o prolunghe. Qualora il loro uso si rendesse indispensabile è necessario utilizzare solamente adattatori e prolunghe conformi alle vigenti norme di sicurezza
-
Non spostare l'apparecchio durante il funzionamento.
-
Scollegare sempre l'apparecchio dalla presa di corrente prima di assemblare, smontare e prima di pulire l'apparecchio
- Non tirare il cavo per spostare l'apparecchio.
- Non tirare il cavo d'alimentazione o l'apparecchio stesso per disinserire la spina dalla presa di corrente.
- La presa di corrente deve essere facilmente accessibile in modo da poter disinserire con facilità la spina
- Posizionare l'apparecchio lontano da:
-Fonti di calore e fiamme libere
-Contenitori di liquidi in generale
-Tessuti o tende, o qualunque materiale che possano ostruire la griglia di aspirazione; - La superficie di appoggio deve essere stabile, non in pendenza (in quanto l'apparecchio potrebbe ribaltarsi) e liscia.
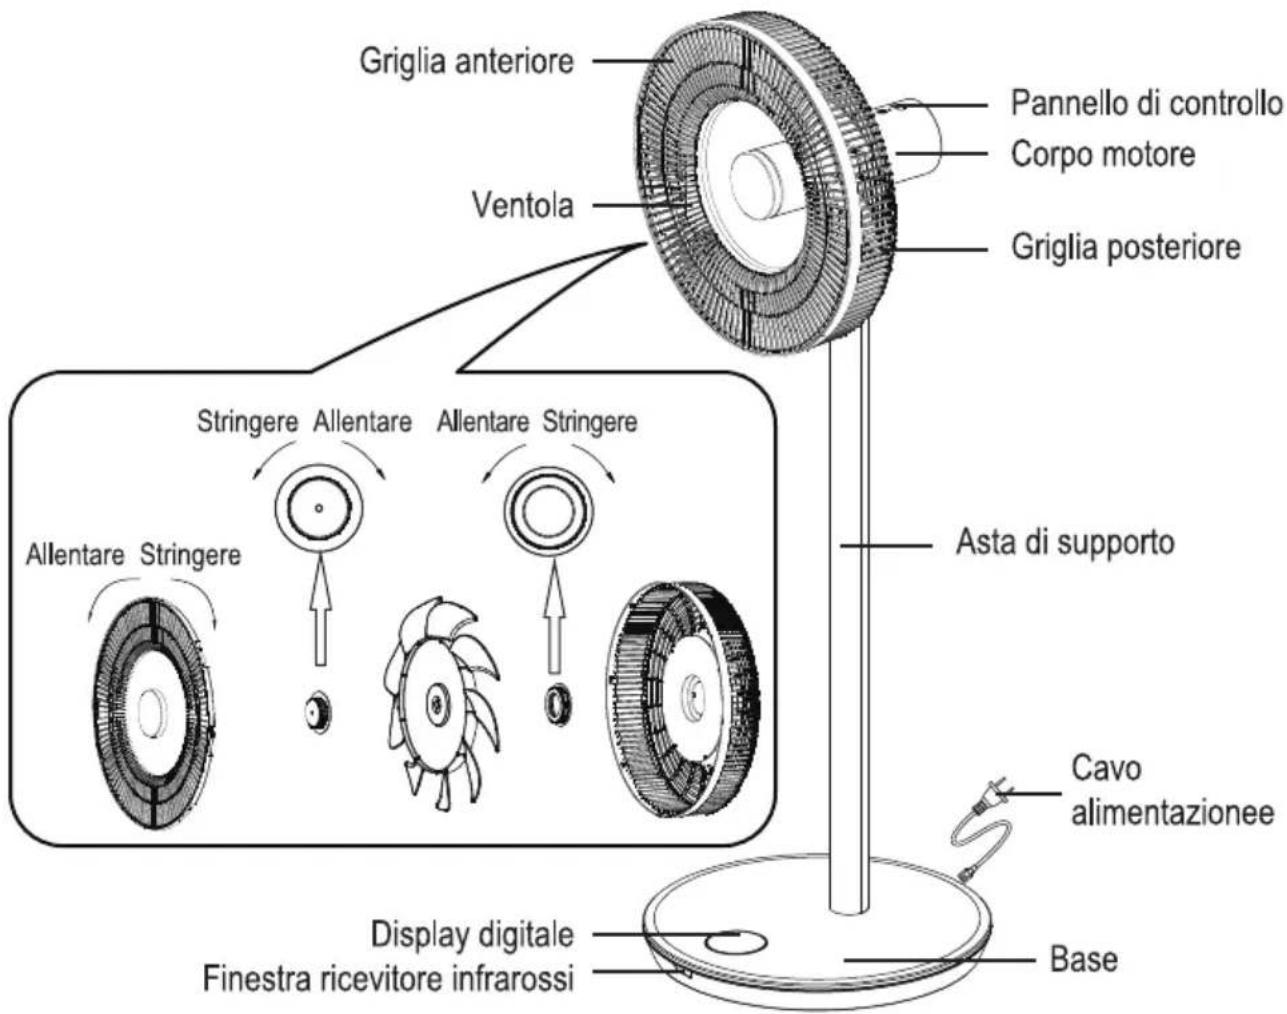
DESCRIZIONE DEL PRODOTTO
| 1 |  | Cavo di alimentazione |
| 2 |  | Base della piantana |
| 3 | [ZKSY] | Telecomando |
| 4 | 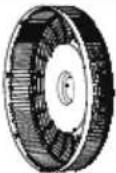 | Griglia posteriore |
| 5 | [877] | Ghiera di fissaggio della griglia |
| 6 | 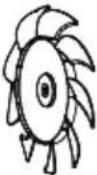 | Ventola |
| 7 | [984] | Dado della ventola |
| 8 | [zCWW] | Griglia anteriore |
| 9 |  | Asta |
| 10 | 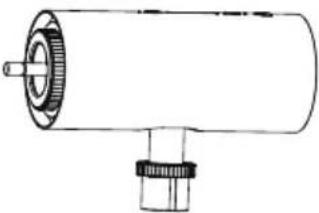 | Testa del ventilatore |
| 11 | Chiave a L | |
| 12 | good | Vite M6 |
| 13 | [XXHW] | Vite |
| 14 | 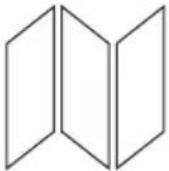 | Istruzioni d'uso |
DESCRIZIONE DEL PRODOTTO
Descrizione delle parti
Pannello di controllo
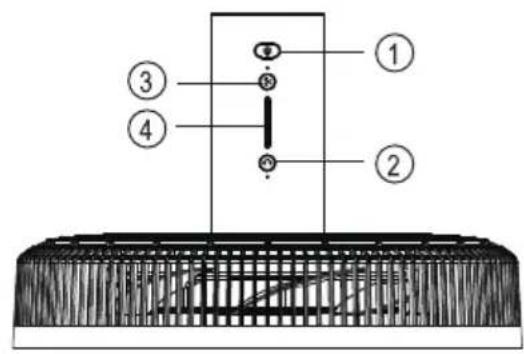
- ON/OFF
- Oscillazione
- Velocità
- Spia luminosa
Display
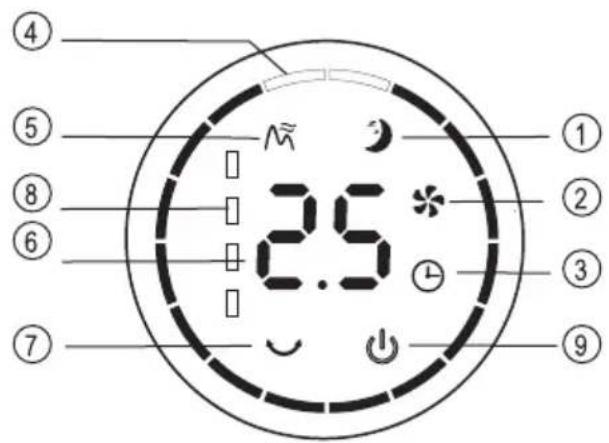
- Notte moda
- Normale moda
- Timer
- Angolo di oscillazione
- Naturale moda
- Timer / Velocità
- Oscillazione
- Indicatore del livello di carica della batteria
- ON/OFF
Telecomando
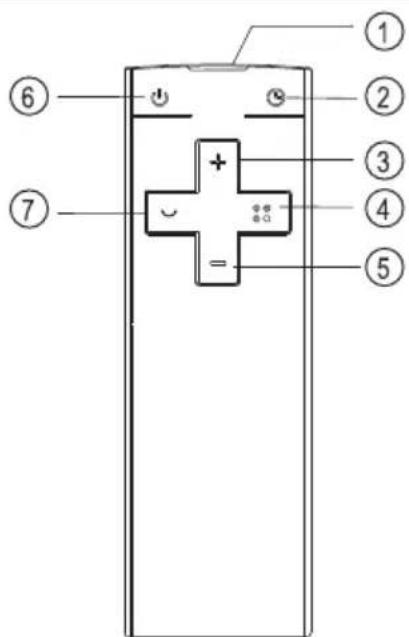
- Finestrella del telecomando
- Timer
- Valore superiore (+)
- Selezione modalità
- Valore inferiore (-)
- ON/OFF
- Oscillazione
INSTALLAZIONE
Montaggio
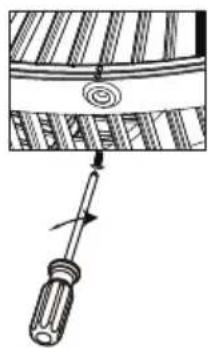
Montaggio della griglia frontale
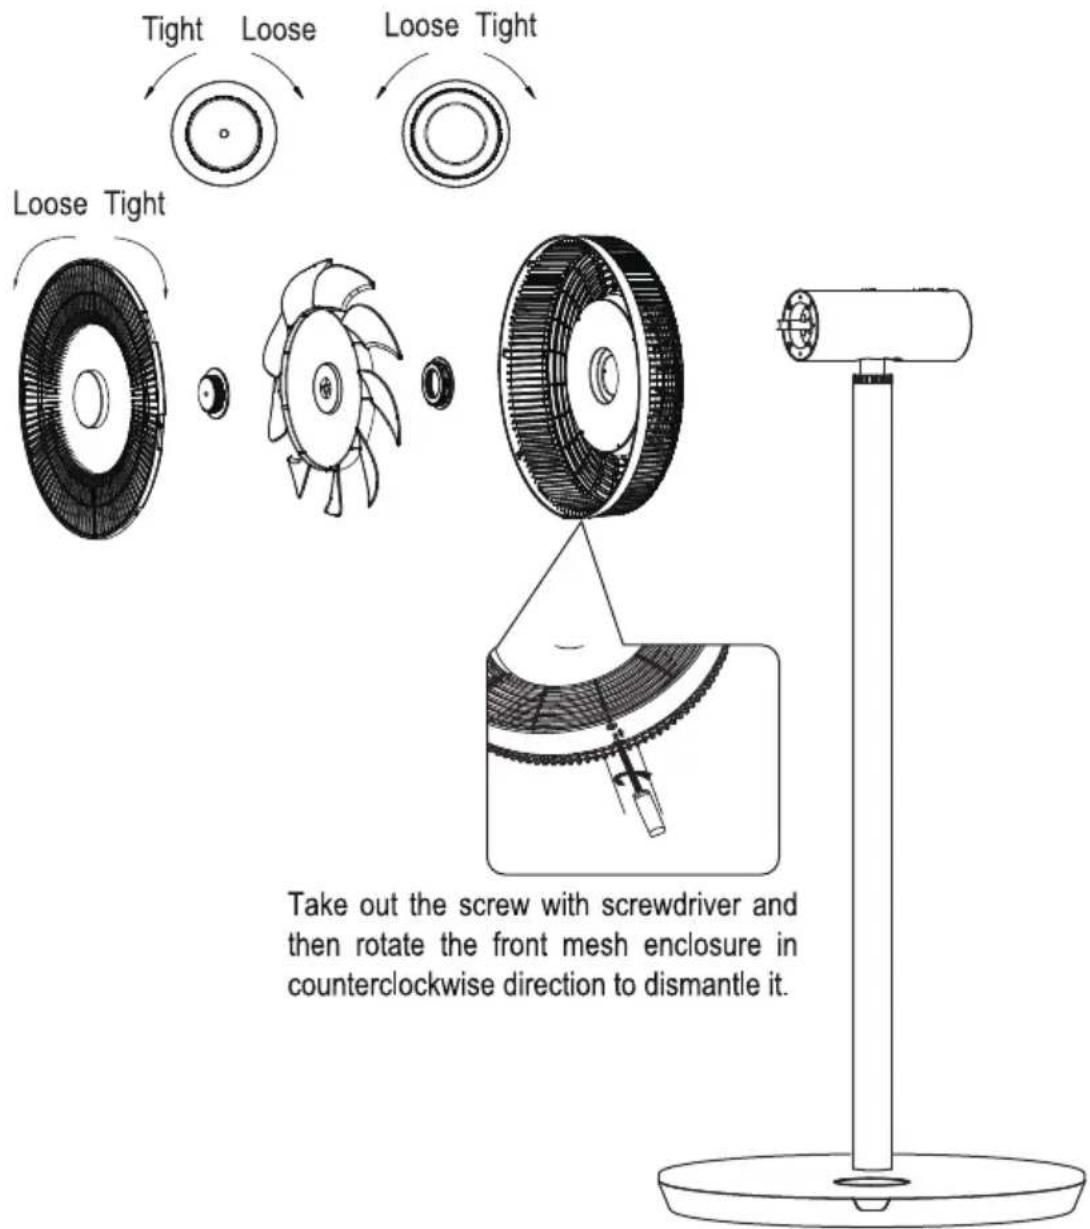
Montare la griglia frontale posizionandola come da figura. Far ruotare la griglia in senso orario in modo da farla stattare in posizione. Avvitare la vite per completare il montaggio.
natural_image
Diagram of a screwdriver with a spiral head and directional arrow, no text or symbols presentInstallazione della base
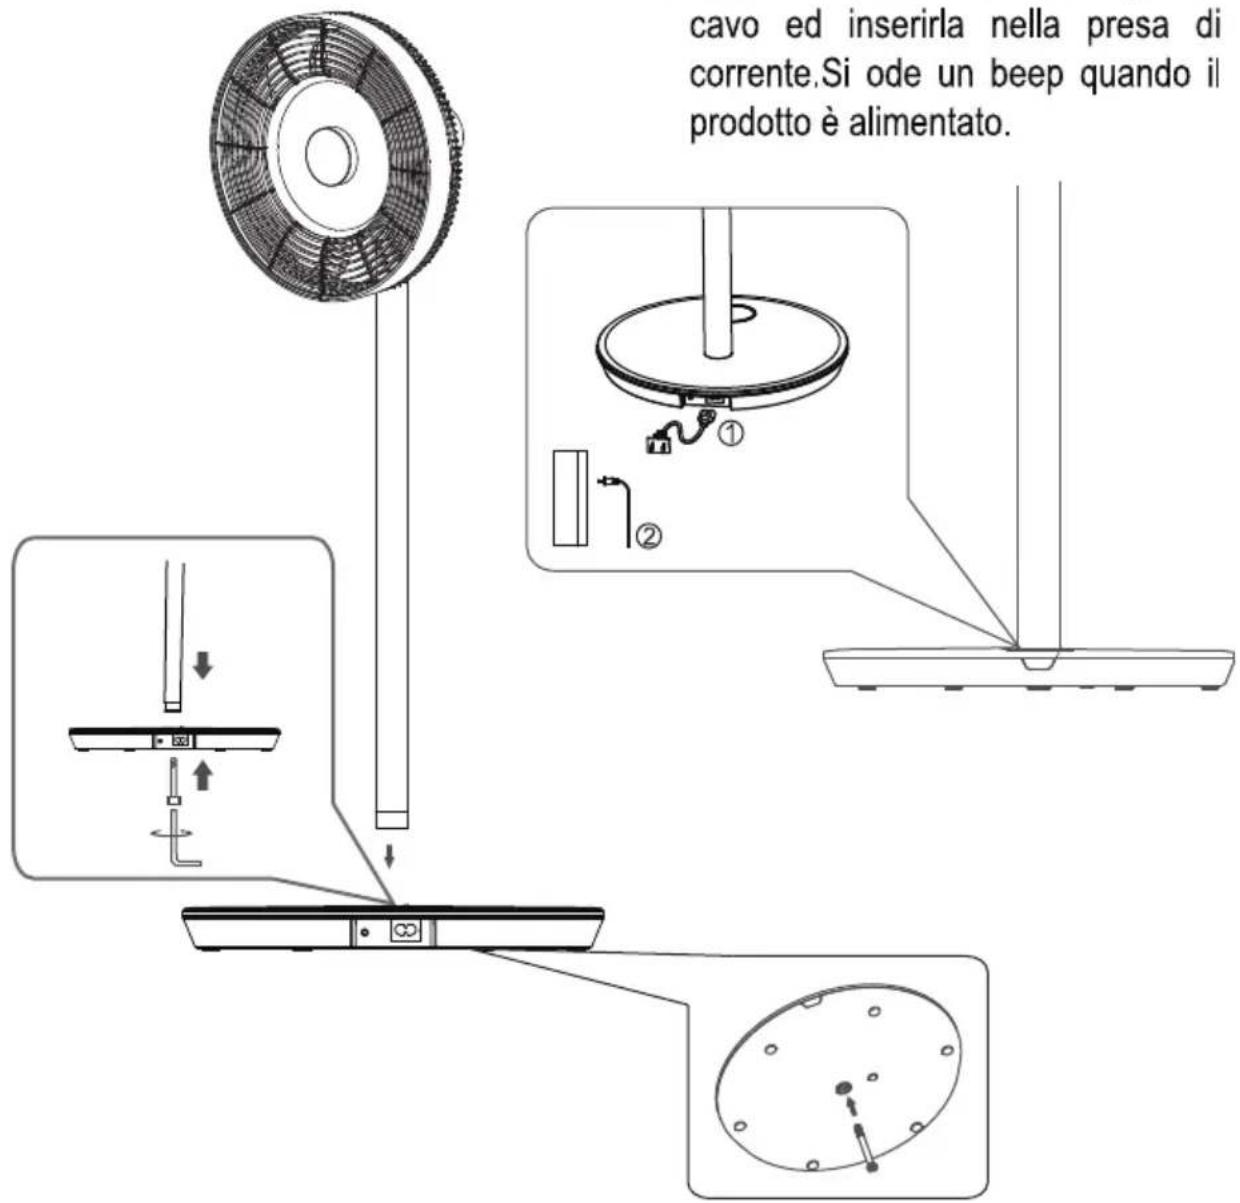
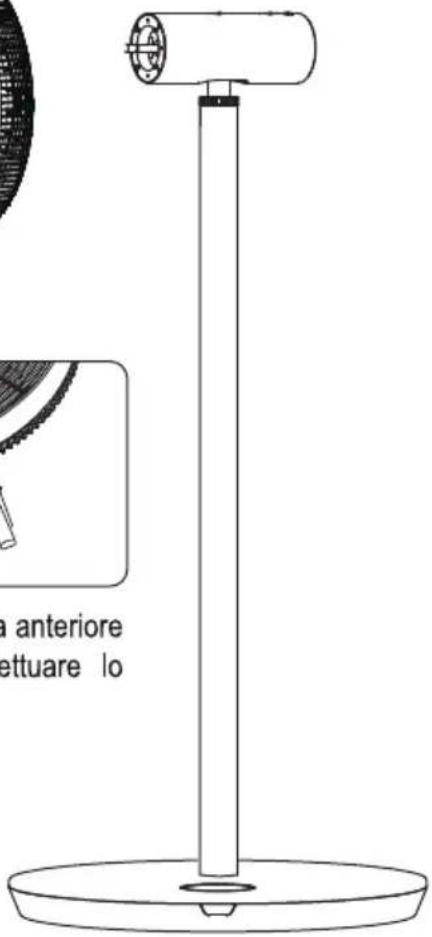
Posizionare l'asta di supporto sulla base e fissarla con la vite M6 in dotazione come da figura.
Montaggio del cavo di alimentazione
-
Inserire la spina del cavo di alimentazione nella prese della base.
-
Inserire la presa dall'altro capo del cavo ed inserirla nella presa di corrente. Si ode un beep quando il prodotto è alimentato.
USO DEL PRODOTTO
Montaggio del corpo motore
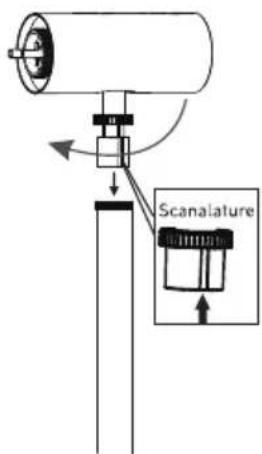
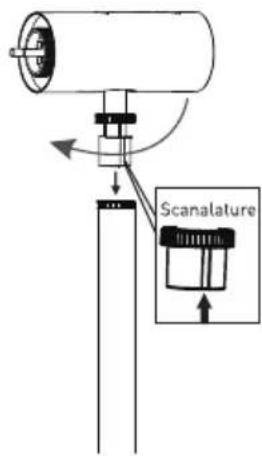
- Inserire il corpo motore facendo attenzione a far combaciare le guide con le scanalature previste, nell'asta di sostegno
- Stringere il dado posto sull'asta del prodotto per terminare il montaggio dopo eri assicurati che il corpo motore sia fissato saldamente sull'asta.
ON/OFF/Selezione delle velocità
ON/OFF
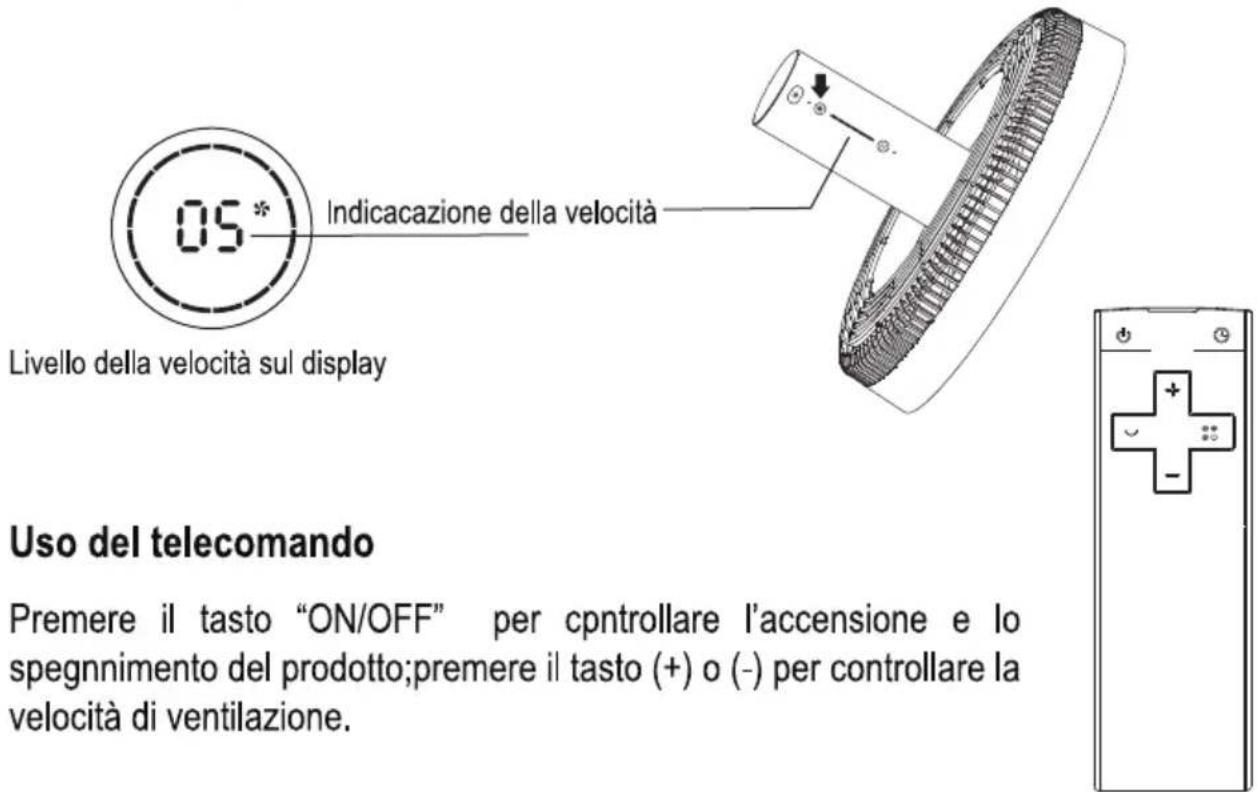
Premere il tasto ON/OFF posto sul corpo motore. Il prodotto emette un "Beep" che indica che il prodotto è acceso, l'indicatore di livello di velocità si accende ed il prodotto inizia a funzionare. Premendo di nuovo il tasto il ventilator si spegne.
Selezione dei livelli di velocità
Ci sono 12 livelli di velocità preimpostati. Continuando a premere il pulsante "Speed"la velocità varia dal livello 1 al livello 12 in modo ciroolare.Il livello della velocità impostata è visualizzata sul corpo motore.Inotre una luce si accende cambiando la velocità mentre il display visualizza il livello impostato.
Regolazione dell'angolo di oscillazione
Oscillazione
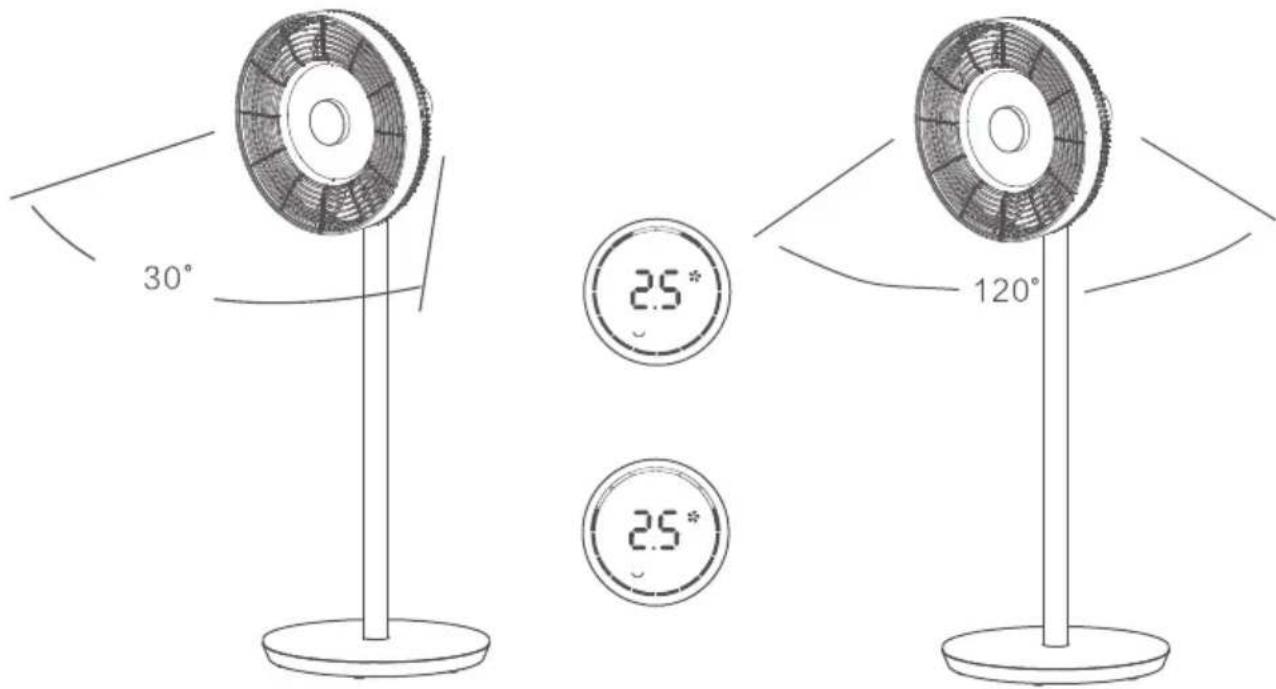
Premere il tasto "Swing" posto sul corpo motore. Il prodotto emette un beep ed entra in modo oscillazione. L'angolo preimpostato è di 30°, la luce corrispondente si accende ed un arco sul display visualizza ed il prodotto inizia ad oscillare. Premendo a lungo questo tasto la funzione si interrompe.
Impostare l'angolo di oscillazione
Premere il tasto "Swing, si ode un "Beep" ed il ventilator entra in modalità oscillazione. La corona verde del display si converte in un arco. Premendo questo tasto l'angolo di oscillazione può essere di 30°, 60°, 90° e 120° in sequenza e l'arco verde visualizza l'angolo impostato. Premendo a lungo il tasto l'oscillazione si interrompe.
Uso del telecomando
Premere il tasto "Swing" del telecomando per controllare l'oscillazione e interromperla. L'angolo di oscillazione è quello impostato con il tatsto "Swing" posto sul corpo del motore.
Temporizzazione
Selezione del tempo di spegnimento
Premere il tasto "Timing" posto sul corpo motore. Quando la luce della temporizzazione si accende viene emesso un "beep" e si può impostare il tempo di spegnimento del ventilatore. Il display digitale mostra il tempo impostato Ad ogni pressione del tasto il
tempo può variare da 0 a 12 ore in modo circolare. Per un tempo selezionato fino a 6ore, il display mostra il tempo con intervallic di mezz'ora. (0/0.5/1......). Oltre le 6 ore il display mostra il tempocon intervalli di un ora. (6/7/8). Se si seleziona il tempo "0", la funzione "Timing" si interrompe.
Uso del telecomando
Premere il tasto "Timing" del telecomando e aumentare o diminuire il tempo attraverso la selezione dei tasti "+" o "-". Premendo il tasto "Timing" di nuovo o comunque dopo 6 secondi senza alcuna selezione, viene confermato il tempo.
In timing state, it will display the speed gear and remaining time circularly by fits and starts.
Selezione modalità ventilazione
Premere il tasto "Mode" del telecomando per selezionare le modalità di ventilazione Naturale, Notturna e Normale.
Modalità funzionamento a batteria. (dove previsto)
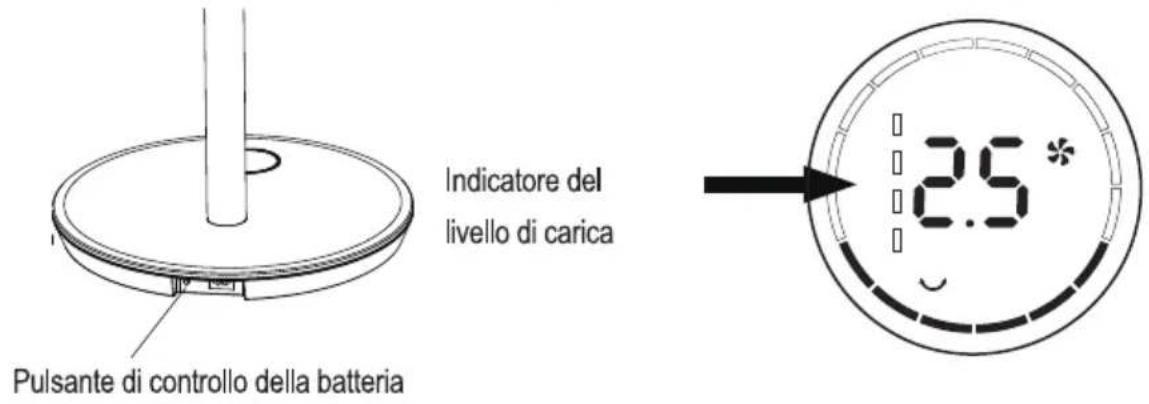
Disconnettere il cavo di alimentazione dalla presa di corrente, premere il tasto di controllo delle batterie posto sulla base del prodotto e si ode un "Beep".
Premere il tasto ON/OFF posto sul corpo motore per accendere il ventilatore.
USO DEL PRODOTTO
Pulizia
- Prima di operare sul prodotto assicurarsi che la spina sia scollegata dalla presa di corrente.
- Smontare la griglia svitando la vite di sicurezza e ruotare la griglia in senso antiorario per sbloccarla.
- Pulire le superfici con un panno umido morbido. Non spazzolare con prodotti duri e non utilizzare detergent corrosivi.
Spostamento
Prima di spostare il prodotto assicurarsi che il prodotto sia scollegato dall'alimentazione elettrica.
Stringere Allentare Allentare Stringere
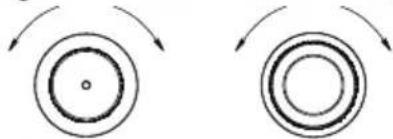
natural_image
Two circular diagrams with curved arrows indicating rotation or direction (no text or symbols)Allentare Stringere
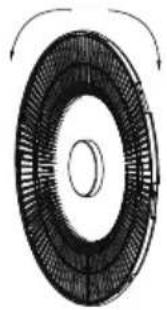
natural_image
Diagram of a circular fan or impeller with internal structure and curved arrows indicating rotation (no text or symbols)[NO TEXT]
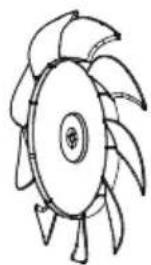
natural_image
Line drawing of a mechanical impeller or blade assembly (no text or symbols)0
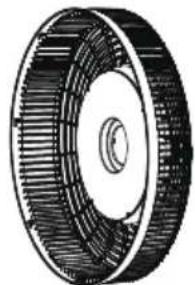
natural_image
Technical illustration of a mechanical component with concentric rings and central bore (no text or symbols)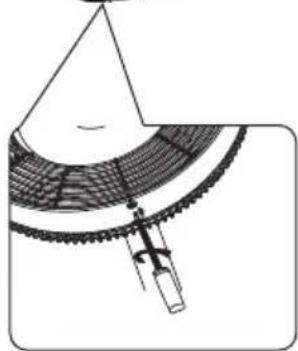
natural_image
Technical line drawing of a mechanical component with gear and shaft (no text or symbols)Svitare la vite e ruotare la griglia anteriore in senso antiorarario per effettuare lo smontaggio.
DATI TECNICI
Voltaggio: 220-240V\~ 50-60Hz
Potenza assorbita: 30W
| Informazioni teniche | |||
| Portata massima d'aria | F | 25,52 | m^3 /min |
| Potenza Assorbita del ventilatore | P | 29,23 | W |
| Valori di esercizio | SV | 1,01 | (m^3/min)/W |
| Consumo elettrico in modo attesa | Psb | 0,46 | W |
| Livello di potenza sonora del ventilatore | Lwa | 55,5 | dB(A) |
| Velocità massima dell'aria | C | 4,58 | m/s |
| Norme di misura per il valore di esercizio | IEC 60879:1986 (corr.1992) | ||
| Referente per ulteriori informazioniC | Daniele Fontana | ||
TERMOZETA®
DC PEDESTAL FAN AIRZETA TITANIUM CORDLESS Cod. TZAZTN01
natural_image
Modern office desk fan with adjustable armrest and stand (no visible text or symbols)INSTRUCTION MANUAL
SAFETY WARNINGS
- The appliance can be used by children aged from 8 years and above and persons with reduced physical, sensory or mental capability or lack of experience and knowledge if they have been given supervision or instruction concerning use of the appliance in a safe way and understand the hazards involved. Children shall not play with the appliance. Cleaning and user maintenance shall not be made by children without supervision.
- After removing the packing materials, check the integrity of the appliance; if You are unsure, do not use it and ask for professional help. The packing materials (plastic bags, polystyrene foams, nails, etc) must be kept out the reach of children because they are potential source of danger.
- This appliance is intended for home use only, and it is suitable for domestic ventilation according to the methods shown in this manual. Any other use in considered inappropriate and therefore dangerous. The manufacturer cannot be held responsible for eventual damages caused by inappropriate, improper or irresponsible use and/or for repairs made to the product by unauthorised personnel.
- Don't connect the fan to the power supply until the fan is fully assembled.
- Before connecting the appliance check the electrical data shown in the rating label, correspond to the main supply electrical data.
- Unplug the fan before any adjustment or cleaning procedures.
- Never operate the fan if it has damaged or worn parts. It should be returned to the manufacturer, its Service Agent or similar qualified person for repair.
- Always use on a stable level surface.
- Never immerse the product in water or other liquids.
- Don't put any heavy object on power cable. Keep the cable far
from heat source. The cable could be damaged.
- Do not spray anything inside the fan.
- Do not use the fan near flammable materials or substances.
- To reduce the risk of electric shock, do not remove any screw from the product.
- Do not insert fingers or other objects through the guards fan.
- Do not children use or operate the fan.
- If power cord is damaged, the appliance must not be used. It must be returned to the manufacturer, its Service agent or similar qualified person in order to avoid hazard.
- Children should be supervised to ensure that they do not play with the appliance.
- Do not pull the mains cable or the appliance itself when disconnecting the plug from the socket.
- Do not let cord hang over edge of table, or touch hot surface.
- Be sure that every part of the fan is correctly assembled following the instructions given in this manual. Incorrect assembly can be dangerous and be source of hazards for persons, animals and object. The supplier cannot be considered responsible is case in incorrect assembly of the product.
- Never use the product for purposes different. This appliance is for Household use only.
- Don't leave the product unattended when it is operating.
- To avoid over heating, it is recommended to fully unwrap the power cable when the product is operating.
- Do not use the appliance after a possible irregular working. In this case, switch it off and do not break it open
- Unplug the appliance when not in use, before assembly or disassembly, and before cleaning the product.
- Position the product to a reasonable distance from walls, doors, windows or any object that could cause an un-proper operation.
-
Do not touch the appliance with wet hands or feet or barefood.
-
Do not expose the appliance to atmospheric agents such as rain, wind, snow, hail. Do not use outdoors.
- Do not move the appliance when it is operating.
- Don't unplug the product pulling the power cable or the product itself.
- Don't pull the power cable to move the product.
- Don't position the product just near the power outlet.
- In general, the use adaptors multiple plugs and/or extensions is not recommended; if they are necessary, use only simple or multiple adaptors and extensions in accordance with the applicable Safety Standards
- Always unplug the appliance before you assembling, disassembly, cleaning or adjusting any part of the product.
- Never pull the power cable or the product itself to unplug the product from the socket.
- Do not place the appliance near an open flame, cookers or any other heating appliance.
- Keep the fan far away from curtains, or materials that could obstruct the air intake grille
- Make sure that the power cable is not touching rough, hot or moving surfaces and not twisted or :-wrapped around the appliance.
- Do not use the appliance with a timer or a programmer or with a system that can switch on the appliance automatically, to avoid risk of fire, since a fire risk exists if the heater is covered or positioned incorrectly.
- Do not leave the device exposed to the weather (sun, rain, etc.).
- The power socket must be easy to reach so the plug can be removed quickly in case of emergency.
- Position the appliance on a horizontal, flat surface or table; do not stand on a inclined plane (the appliance could fall down).
INTRODUCTION OF PARTS
| 1 | 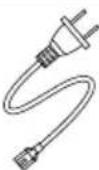 | Power cord |
| 2 |  | Main shaft base |
| 3 | 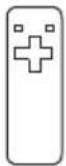 | Remote control |
| 4 | 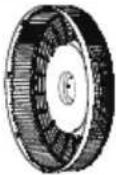 | Back grill |
| 5 | ### | Grill Nut |
| 6 | 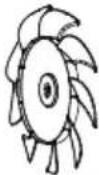 | Blade |
| 7 | ### | Blade nut |
| 8 | 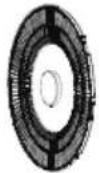 | Front grill |
| 9 |  | Connecting rod |
| 10 |  | Fan head |
| 11 | ### | Wrench |
| 12 | [XX58] | M6 screw |
| 13 |  | Screw |
| 14 |  | Instruction manual |
INTRODUCTION OF PRODUCT
Introduction of Parts
Control panel
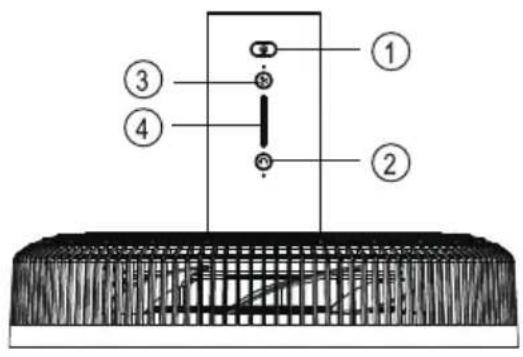
- ON/OFF
- Swing
- Speed
- Indicating light
Display
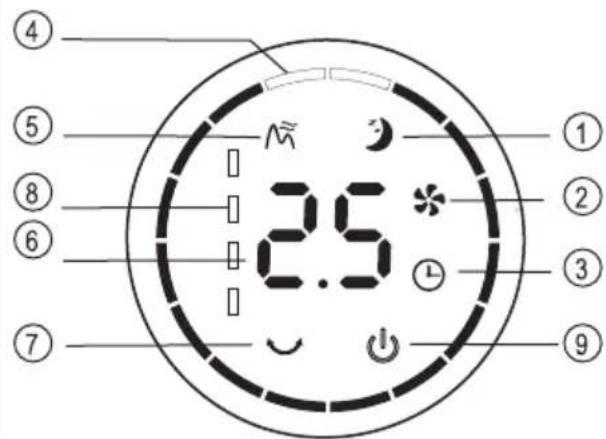
- Sleep mode
- Normal mode
- Timer
- Swing angle
- Natural mode
- Timer / Speed
- Swing
- Battery indication
- ON/OFF
Remote control
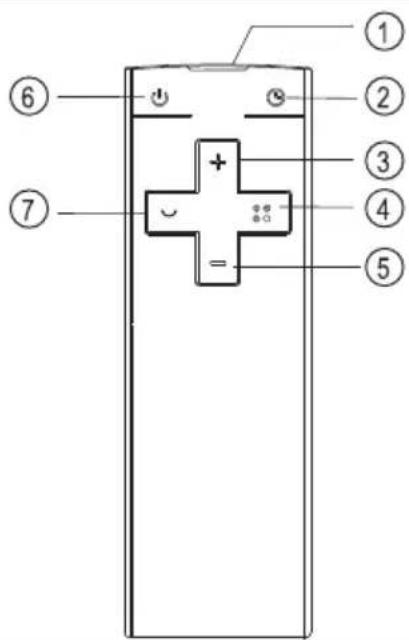
- Window of remote control
- Timer
- Increase speed gear
- Mode
- Decrease speed gear
- ON/OFF
- Swing
INSTALLATION OF PRODUCT
Installation
Installation of mesh enclosure
Install the front mesh enclosure as per specific position (as indicated in picture), and then rotate it in clockwise direction to make the positioning point vertical, finally tighten the screws to finish installation.
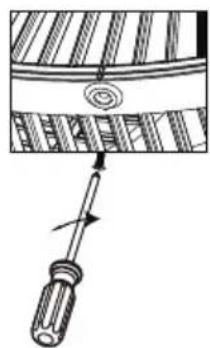
natural_image
Diagram of a screwdriver inserted into a component, showing motion direction (no text or symbols)Installation of base
Put the "connecting rod of fan" downwards vertically, inset it into the position of "main shaftbase", put the M6 screw through the screw hole at the base center and then tighten the screw in clockwise direction with M6 Allen wrench.
Installation of power supply
-
Insert the "8-shape power line" port into the 8-shape socket of product base.
-
Insert the power plug at the other end into socket; the power is on when there is a "beep" sound.
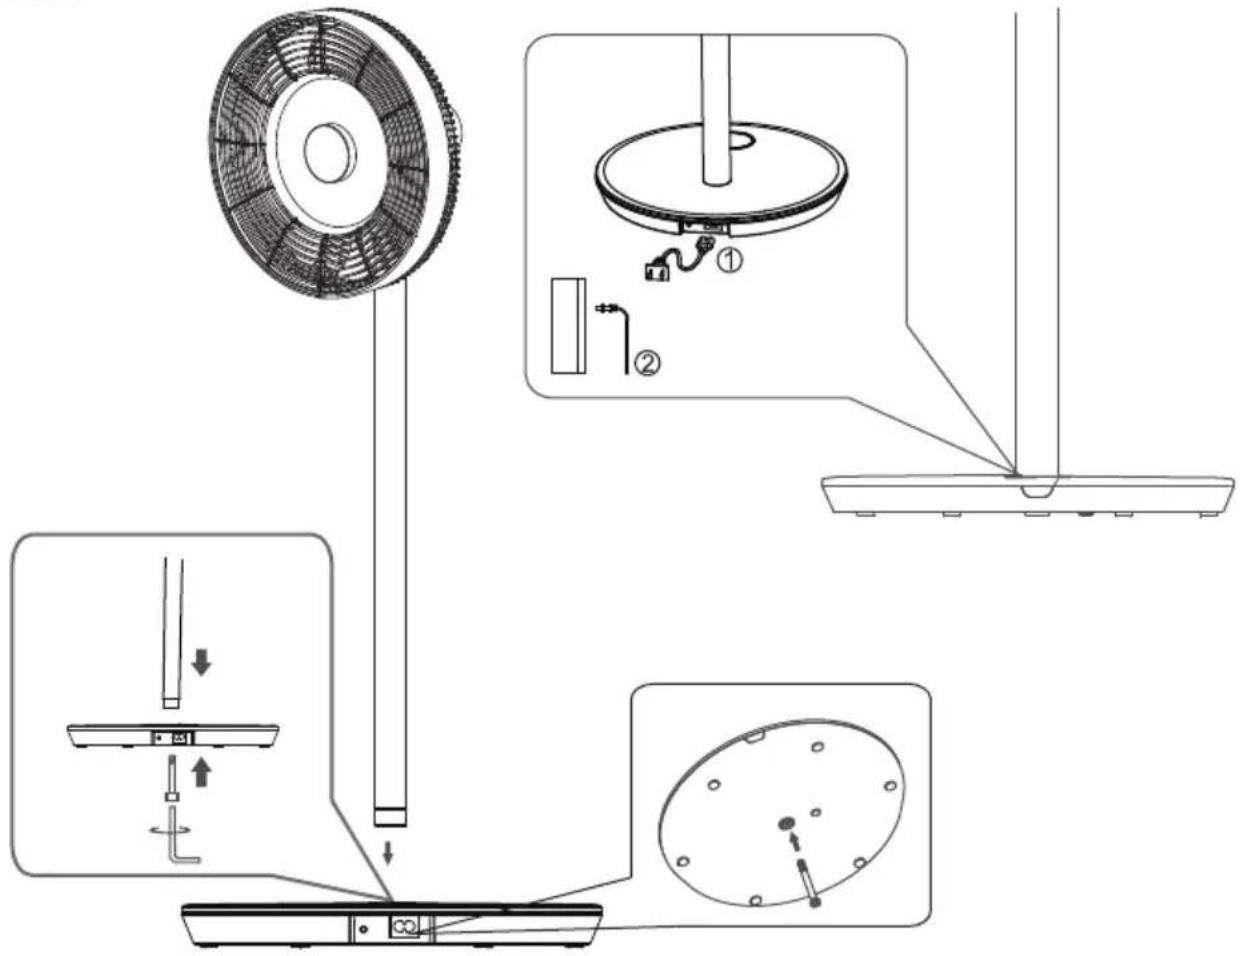
USE OF PRODUCT
Installation of fan head
- Insert "fan head" (as per corresponding limit switch) into "connecting rod".
- Tighten "nut of main rod" and finish installation of fan head after confirming that there is no waggling of "fan head".
ON/OFF/Speed adjustment
ON/OFF
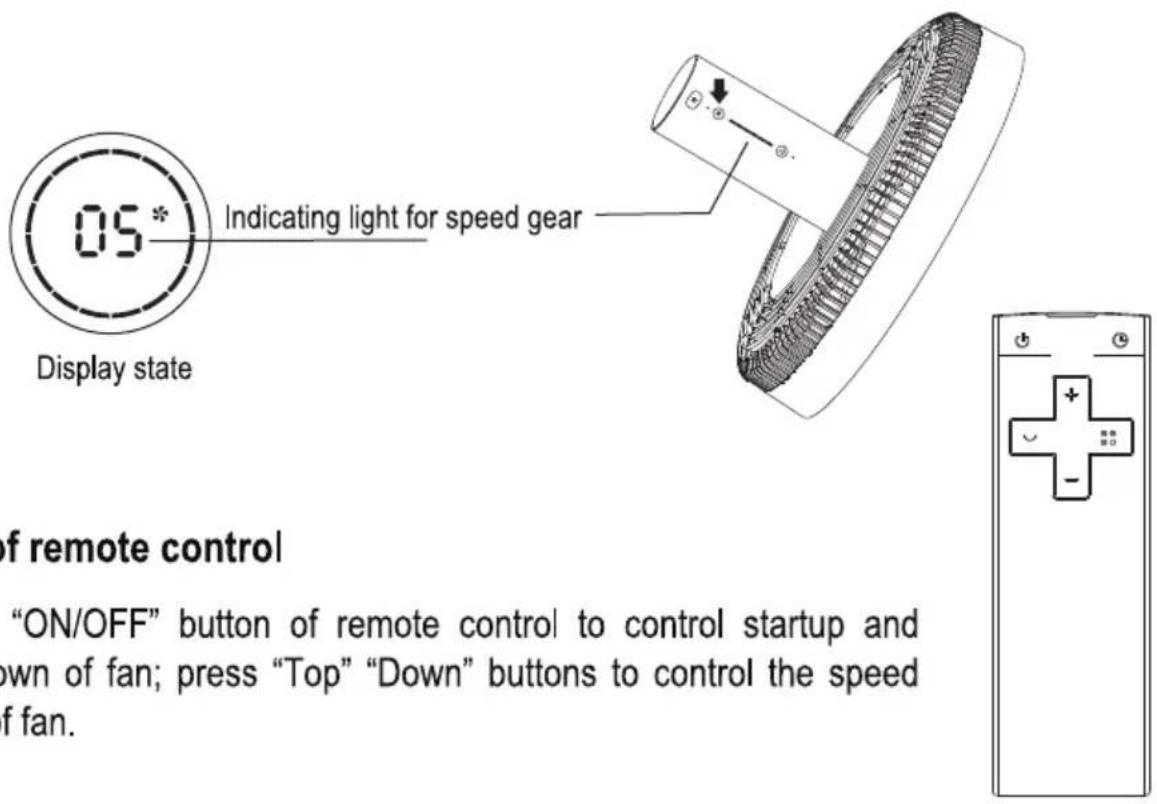
Press the ON/OFF button at fan head, if there is a "beep" sound, it indicates that the fan is started, the speed gear indicating light is on, the fan icon in digital display is on and the fan starts to work, and the fan will shut down by pressing the button again.
Select speed gear
There are 12-gear speeds preset in the fan for selection. Continuously press "Speed" button to select the speed from 1 to 12 gears circularly. There is gear indicating light at the fan head; one more indicating light will be on by adding each gear and the digital display will display the gear from 1 to 12 simultaneously.
Use of remote control
Press "ON/OFF" button of remote control to control startup and shutdown of fan; press "Top" "Down" buttons to control the speed gear of fan.
Swing/Angle Adjustment
Swing
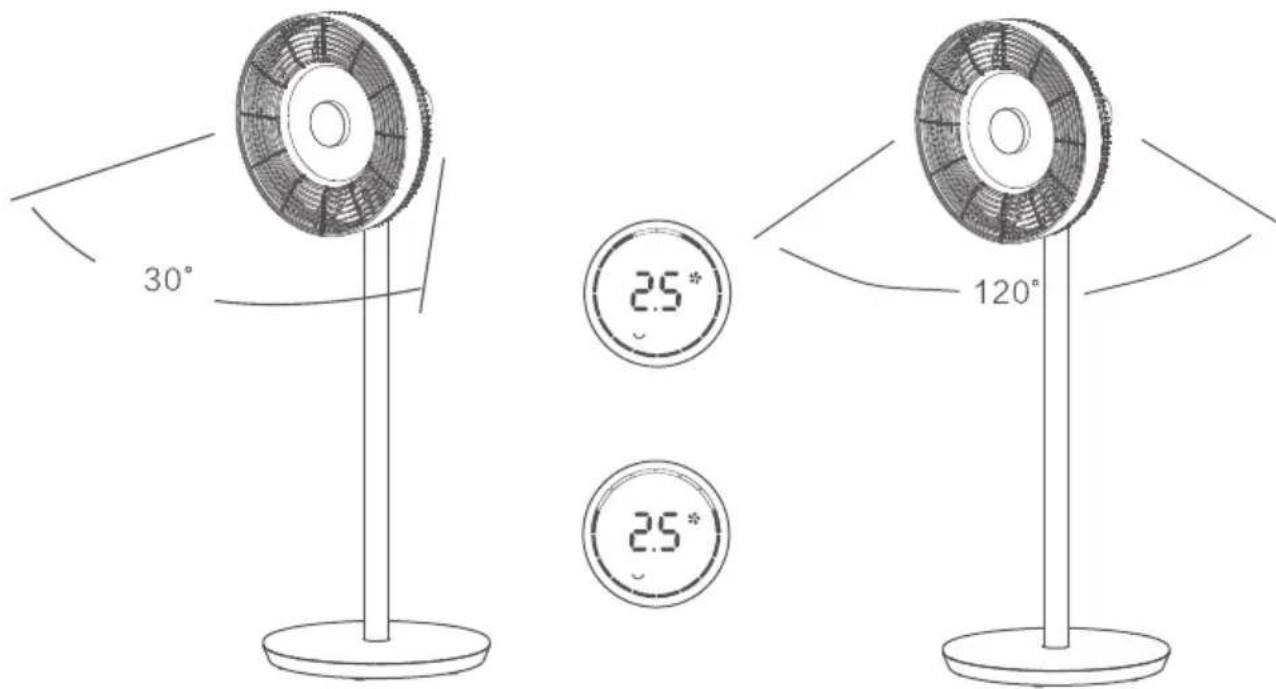
Press "Swing" button at fan head. If there is a "beep" sound, the fan enters into swing state. The defaultangle is 30o, and the swing indicating light is on, the green circle of digital display skips into arc and the fan starts to swing. Long press this button to stop swing state.
Set swing angle
Press "Swing" button, if there is a "beep" sound, the fan enters into swing state. The green circle of display converts into arc. Press this button once can enter into angle cycle of 30o, 60o, 90o, 120o in sequence and the green circles of the corresponding arcare on. Long press "Swing" button to stop swing mode.
Use of remote control
Press "Swing" button of remote control to control swing and stop swing of fan. The way for setting angle adjustment is consist with that of head buttons function.
Timing
Set timed shutdown
Press "Timing" button at head. When the indicating light of timing is on after "beep" sound, you can set timed shutdown to fan. At this moment, the digital display shows the timing time; continuously press this button to select the time from 0 to 12 hours
circularly. The display for 0\~6 hours timing is 0.5 hour increase (0/0.5/1.0...) while the display for above 6 hours is 1 hour increase (6/7/8...). If you select "0" of the timing time, it will close timing function.
Use of remote control
Press "Timing" button on remote control and increase or decrease timing time via "+" or "-" buttons. Press "Timing" button again or no operation for 6 seconds will automatically confirm the current set time.
Set blowing mode
Press "Mode" button of remote control continuously to select "Natural wind-Sleep wind-Normal wind" states circularly. The fan can automatically and intelligently adjust the blowing state of "Natural wind" and "Sleep wind".
Power supply mode of battery (only some customized models have such function)
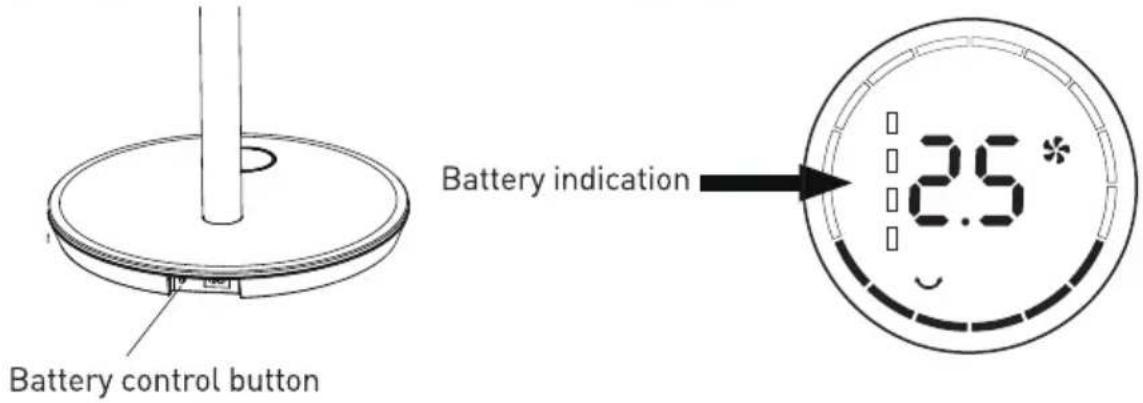
Pull out the AC socket of power line, press battery control button on "Base"; it indicates that the battery is connected with electricity after a sound of "beep". Press ON/OFF button on fan head or remote control to start the fan.
CLEANING AND STORAGE
Cleaning
- Before cleaning, you must shut down the fan and pull out the 8-shape power line;
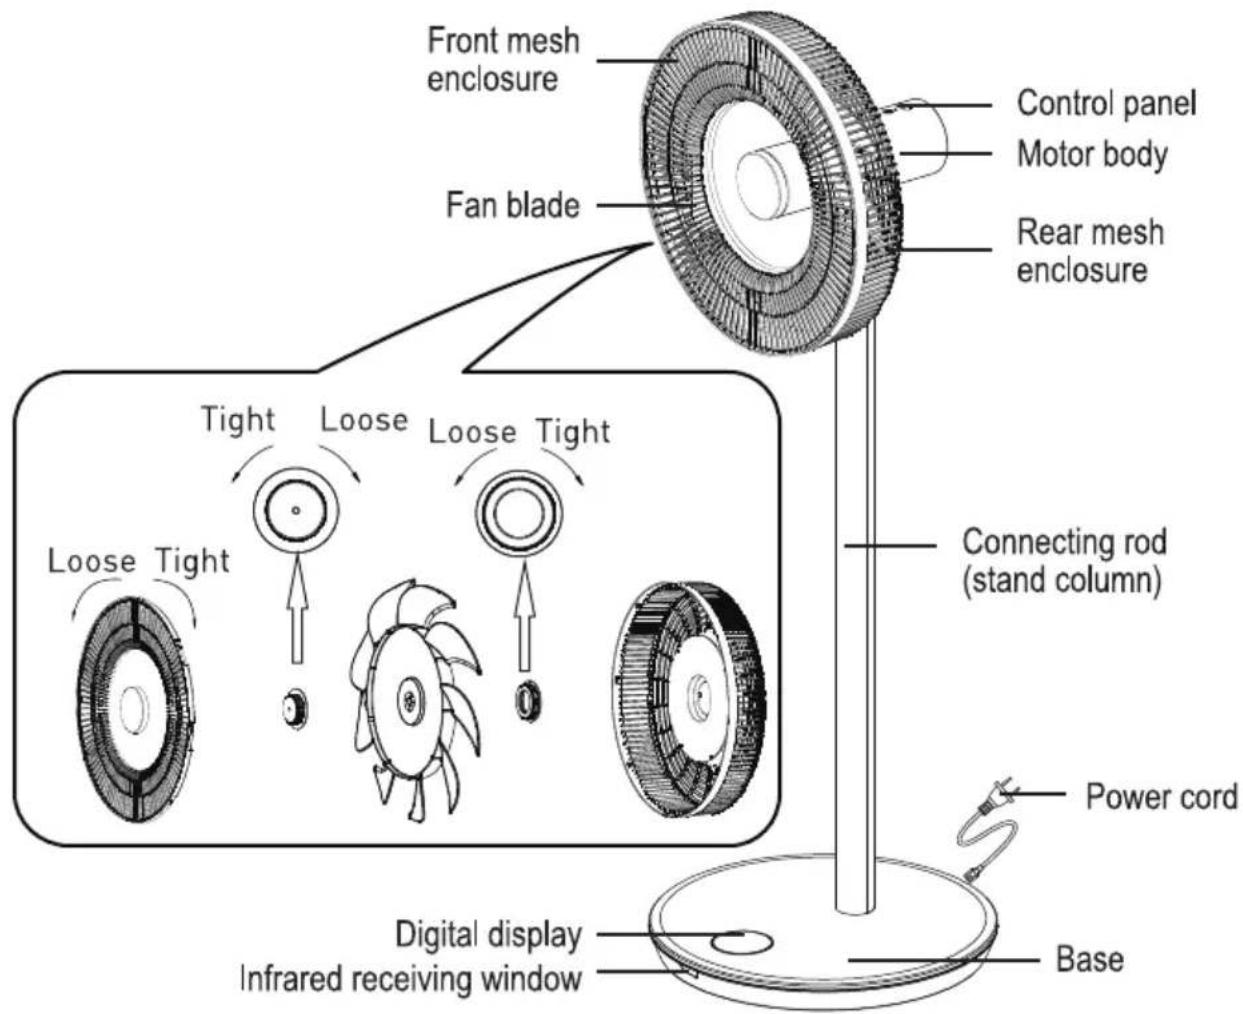
- Dismantle the front and rear mesh enclosures and fan blades with tool (tighten the front mesh enclosure in clockwise direction while loosen it in anticlockwise direction);
- Wipe the fan surface with humid cloth. Don't brush it with hard things such as steel wool or with corrosive detergent such as disinfectant to avoid surface scratch and damage.
Movement
Before movement, please make sure to cut off power of fan in operation.
SPECIFICATION
PRODUCT: DC PEDESTAL FAN
MODEL: TZAZTN01
POWER: 30W
VOLTAGE: 220-240V\~50-60Hz
| Information requirements | |||
| Maximum air flow | F | 25,52 | m^3 /min |
| Fan power input | P | 29,23 | W |
| Service value | SV | 1,01 | (m^3/min)/W |
| Standby power consumption | Psb | 0,46 | W |
| Fan sound power level | Lwa | 55,5 | dB(A) |
| Maximum air velocity | C | 4,58 | m/s |
| Measuring standard of service value | IEC 60879:1986 (corr.1992) | ||
| Contact details for obtaining more information | Daniele Fontana | ||
INFORMAZIONE AGLI UTENTI
Ai sensi del deoreto legislativo 14 marzo 2014,n.49"Attuazione della direttiva 2012/19/UE sui rifiuti di apparecchiature elettriche ed elettroniche(RAAE)".
- Il simbolo del cassonetto barrato sull'apparecchiatura indica che il prodotto alla fine della propria vita deve essere raccolto separatamente dagli altri rifiuti.
- L'utente dovrà, pertanto, conferire l'apparecchiatura giunta a fine vita agli idonei centri di raccolta differenziata del rifiuti elettronici ed elettrotecnici, oppure riconsegnarla al rivenditore al momento dell'acquisto di una nuova apparecchiatura di tipo equivalente, in ragione di uno a uno.
- L'adeguata raccolta differenziata per l'avvio successivo dell'apparecchiatura dismessa al riciclaggio, al trattamento e allo smaltimento ambientalmente compatibile contribuisce ad evitare possibili effetti negativi sull'ambiente e sulla salute e favorisce il riciclo dei materiali di cui è composta l'apparecchiatura.
- Lo smaltimento abusivo del prodotto da parte dell'utente comporta l'applicazione delle sanzioni amministrative previste della normativa vigente.
Lange Distribution S.r.l. si riserva il diritto di apportare modifiche estetiche e/o tecniche senza preavviso al fine di migliorare i propri prodotti.
Termozeta is an international trademark. Copyright © 1995. All rights reserved.
Lange Distribution S.r.l. -Via Treviso,35-20127 Milano-Italy
DISPOSAL
Used electric household devices
- If you do not want to use your electrical appliance any longer, return it free of charge to a recycling depot for used electric appliances.
- Used electric devices do not belong in the household garbage (see symbol).
Further disposal instructions
- Return the electrical appliance in such a condition that its later re-use or recycling is not adversely affected. Batteries must be removed in advance and the destruction of parts which contain fluids must be avoided.
- Electrical appliances can contain harmful substances. Improper handling or damage to the appliance can lead to health problems or water or ground contamination, when the appliance is recycled later.
Lange Distribution S.r.l. reserves the right to introduce technical and/or aesthetic changes to its products intended to improve performances. Termozeta is an international trademark. Copyright © 1995. All rights reserved. Lange Distribution S.r.l. -Via Treviso,35-20127 Milano-Italy
Importato da Lange Distribution S.r.l.
Via Treviso, 35
20127, Milano
Tel:+39 02.28506-1
Prodotto in Cina
CE

- TERMOZETA®
- VENTILATORE A PIANTANA AIRZETA TITANIUM CORDLESS Cod. TZAZTN01
- AVVERTENZE GENERALI
- DESCRIZIONE DEL PRODOTTO
- Pannello di controllo
- Display
- Telecomando
- INSTALLAZIONE
- Montaggio
- Montaggio della griglia frontale
- Installazione della base
- Montaggio del cavo di alimentazione
- USO DEL PRODOTTO
- Montaggio del corpo motore
- ON/OFF/Selezione delle velocità
- ON/OFF
- Selezione dei livelli di velocità
- Regolazione dell'angolo di oscillazione
- Oscillazione
- Impostare l'angolo di oscillazione
- Uso del telecomando
- Temporizzazione
- Selezione del tempo di spegnimento
- Selezione modalità ventilazione
- Modalità funzionamento a batteria. (dove previsto)
- Pulizia
- Spostamento
- DATI TECNICI
- DC PEDESTAL FAN AIRZETA TITANIUM CORDLESS Cod. TZAZTN01
- SAFETY WARNINGS
- INTRODUCTION OF PARTS
- INTRODUCTION OF PRODUCT
- Control panel
- Remote control
- INSTALLATION OF PRODUCT
- Installation
- Installation of mesh enclosure
- Installation of base
- Installation of power supply
- USE OF PRODUCT
- Installation of fan head
- ON/OFF/Speed adjustment
- Select speed gear
- Use of remote control
- Swing/Angle Adjustment
- Swing
- Set swing angle
- Timing
- Set timed shutdown
- Set blowing mode
- Power supply mode of battery (only some customized models have such function)
- CLEANING AND STORAGE
- Cleaning
- Movement
- SPECIFICATION
- INFORMAZIONE AGLI UTENTI
- DISPOSAL
- Used electric household devices
- Further disposal instructions
Marke : TERMOZETA
Modell : AirZeta TZAZTN01
Kategorie : Ventilator