GeForce GT 1030 Low Profile D4 - Grafikkarte GIGABYTE - Kostenlose Bedienungsanleitung
Finden Sie kostenlos die Bedienungsanleitung des Geräts GeForce GT 1030 Low Profile D4 GIGABYTE als PDF.


Benutzerfragen zu GeForce GT 1030 Low Profile D4 GIGABYTE
0 Frage zu diesem Gerät. Beantworten Sie die, die Sie kennen, oder stellen Sie Ihre eigene.
Eine neue Frage zu diesem Gerät stellen
Laden Sie die Anleitung für Ihr Grafikkarte kostenlos im PDF-Format! Finden Sie Ihr Handbuch GeForce GT 1030 Low Profile D4 - GIGABYTE und nehmen Sie Ihr elektronisches Gerät wieder in die Hand. Auf dieser Seite sind alle Dokumente veröffentlicht, die für die Verwendung Ihres Geräts notwendig sind. GeForce GT 1030 Low Profile D4 von der Marke GIGABYTE.
BEDIENUNGSANLEITUNG GeForce GT 1030 Low Profile D4 GIGABYTE
NVIDIA® Graphics Accelerator
User's Manual
Rev. 106
Copyright
© 2012 GIGABYTE TECHNOLOGY CO., LTD
Copyright by GIGA-BYTE TECHNOLOGY CO., LTD. ("GBT"). No part of this manual may be reproduced or transmitted in any form without the expressed, written permission of GBT.
Travista
Table of Contents
- Introduction ...... 1
1.1. Minimum System Requirements.... 1 - Hardware Installation 3
2.1.SLI Technology 4 - Software Installation .... 5
3.1. Driver and Utility Installation 5
3.1.1. Driver and XTREME ENGINE Installation 5
3.1.2. GIGABYTE XTREME ENGINE 10 - Troubleshooting Tips 13
1. Introduction
1.1. Minimum System Requirements
- Hardware
- Motherboard with one or above PCI-Express x 16 slot
- 2GB system memory (4GB recommended)
- Optical drive for software installation (CD-ROM or DVD-ROM drive)
- Operating System
- Windows ^® 10
- Windows ^® 8
- Windows ^® 7
※ Expansion cards contain very delicate Integrated Circuit (IC) chips. To protect them against damage from stac electricity, you should follow some precautions whenever you work on your computer.
- Turn o your computer and unplug power supply.
- Use a grounded wrist strap before handling computer components. If you do not have one, touch both of your hands to a safely grounded object or to a metal object, such as the power supply case.
- Place components on a grounded anstac pad or on the bag that came with the components whenever the components are separated from the system.
The card contains sensitive electric components, which can be easily damaged by stac electricity, so the card should be le in its original packing unl it is installed. Unpacking and installaon should be done on a grounded an-stac mat. The operator should be wearing an an-stac wristband, grounded at the same point as the an-stac mat. Inspect the card carton for obvious damage. Shipping and handling may cause damage to your card. Be sure there are no shipping and handling damages on the card before proceeding.
DO NOT APPLY POWER TO YOUR SYSTEM IF THE GRAPHICS CARD IS DAMAGED.
In order to ensure that your graphics card can work correctly, please use official GIGABYTE BIOS only. Using non-official GIGABYTE BIOS might call problem(s) on the graphics card.
2. Hardware Installation
Now that you have prepared your computer, you are ready to install your graphics card.
Step 1.
Locate the PCI Express x16 slot. If necessary, remove the cover from this slot; then align your graphics card with the PCI Express x16 slot, and press it in firmly until the card is fully seated.
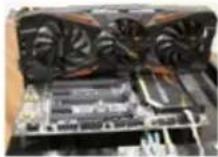
■ Make sure that the gold edge connector of the graphics card is securely inserted.
Step 2.
Replace the screw to fasten the card in place, and replace the computer cover.

natural_image
Close-up of a mechanical component with visible parts and wiring, no text or symbols presentIf there are power connectors on your card, remember to connect the power cable to them, or the system will not boot. Do not touch the card when it's operating to prevent
2.1. SLI Technology
How NVIDIA®SLI™ (Scalable Link Interface) technology works:
If you are planning on using this graphics card as part of an SLI system, the following are required:
- An SLI cered motherboard with two or above PCI-E x16 slots and correct chipset driver
● A two-way SLI bridge connector
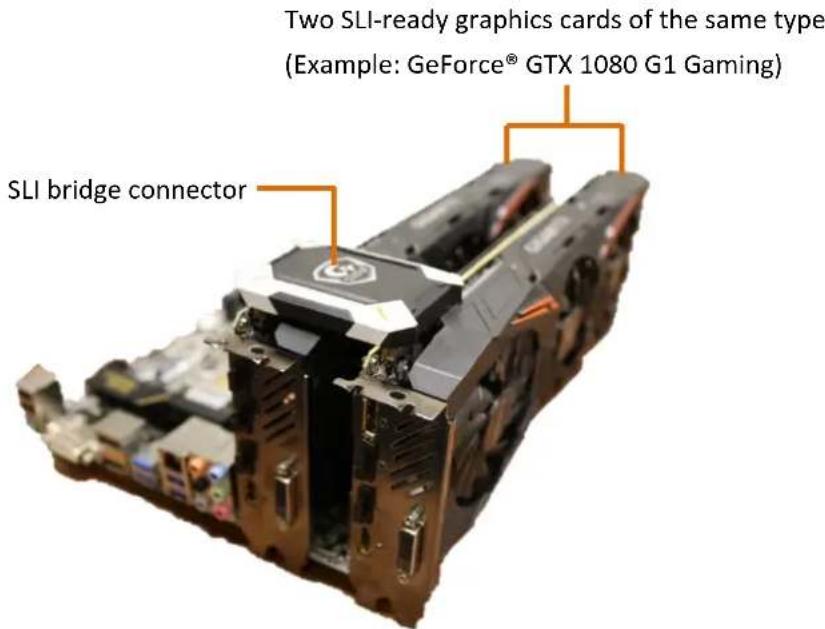
In an SLI conguraon, two SLI-ready graphics cards of the same model and the same manufacturers are connected together via SLI bridge connector in a system that provides two or above PCI Express x16 slots to scale graphics performance. The picture below shows that two graphics cards are linked in parallel in an SLI conguraon.
2-Way SLI Conguraon:
text_image
Two SLI-ready graphics cards of the same type (Example: GeForce® GTX 1080 G1 Gaming) SLI bridge connector3. Software Installation
Noce the following guidelines before installing the drivers:
- First make sure your system has installed DirectX 11 or later version.
- Make sure your system has installed the appropriate motherboard drivers (For the motherboard drivers, please contact the motherboard manufacturer.)
※ Noce : The photos in this manual are for reference only and may not match what you exactly see on your screen
3.1. Driver and Utility Installaon
3.1.1. Driver and XTREME ENGINE Installation
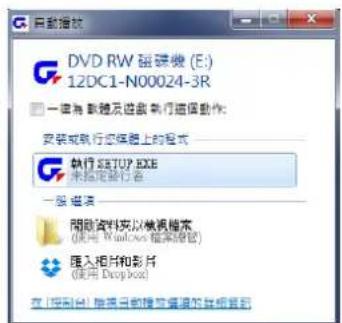
Aer installing the operang system, insert the driver disk into your opcal drive. The driver Autorun screen is automacally displayed which looks like that shown in the screen shot on the right. (If the driver Autorun screen does not appear automacally, go to My Computer, double-click the opcal drive and execute the setup.exe program.)
text_image
自卸播放 DVD RW 磁磁装 (E:) 12DC1-N00024-3R 一键为 新建及进度执行器操作 安装或执行您提供的上框式 执行SETUP.EXE 未指定执行者 一级 播放 隐藏资料夹以帧源模块 (使用 Windows 播放模块) 插入相片和影片 (使用 Desktop) 存 在 [按副本] 帮助自动播放播放的其他选项Step 1:
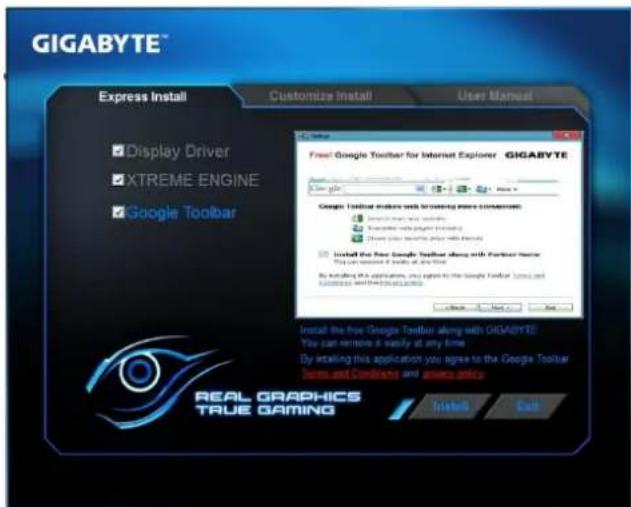
Choose Express Install to install driver and XTREME ENGINE at once, or Customize Install to install them separately.
Then click the Install item.
text_image
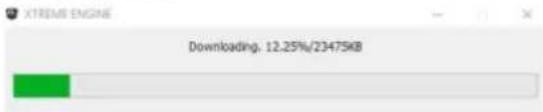
GIGABYTE® Express Install Customize Install User Manual Display Driver XTREME ENGINE Google Toolbar Free! Google Toolbar for Internet Explorer GIGABYTE Google Toolbar makes with creating more accessible: Search engine and security Transfer engine power to the system Close computer access via Open Access Install the Free Google Toolbar along with Framework Server Pre-Use version 8 levels of all time By installing this application, you agree to the Google Toolbar (see) and constructs with the Web Applications. Install the Free Google Toolbar along with GIGABYTE You can restore a timely at any time By installing this application you agree to the Google Toolbar System and Conditions and access price Install CallIf choosing Express Install, the window of XTREME ENGINE installation would appear first as the following picture.
text_image
XTREME ENGINE Downloading: 12.25%/23475KBStep 2:
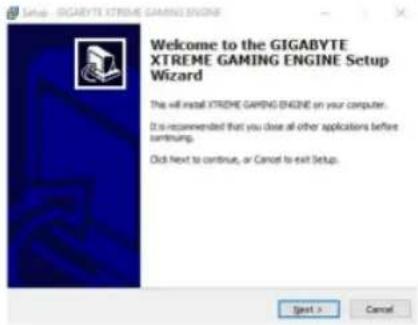
Click the Next button.
text_image
Welcome to the GIGABYTE XTREME GAMING ENGINE Setup Wizard The will install XTREME GAMING (ENGINE) on your computer. It is recommended that you close all other applications before continuing. Click next to continue, or Cancel to exit Setup.Step 4:
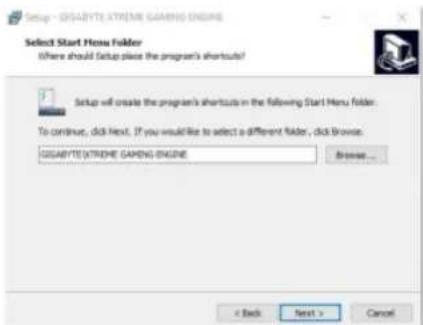
Click Browse to choose where you'd like to place the shortcuts in Start Menu. And then click Next.
text_image
Setup - ESABYTE EXTREME GAMENG ENGINE Select Start Menu Folder Where should Setup place the program's shortcuts? Setup will create the program's shortcuts in the following Start Menu Folder: To continue, click Next. If you would like to select a different folder, click Browse. ESABYTE EXTREME GAMENG ENGINE Browse... < Back Next > CancelStep 5:
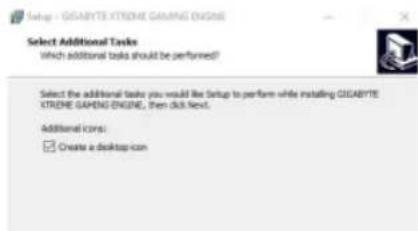
Check the box if you'd like to create a desktop icon, and then click Next.
text_image
Debug - GIGABYTE XTRME GAMING ENGINE Select Additional Tasks Which additional tasks should be performed? Select the additional tasks you would like Setup to perform while installing GIGABYTE XTRME GAMING ENGINE, then click Next. Additional icons: ✓ Create a desktop iconStep 7:
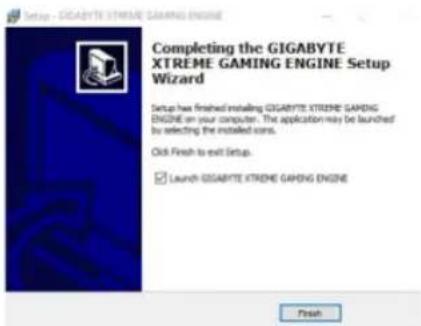
Click the Finish button to complete XTREME ENGINE installation.
text_image
Setup - OGABYTE XTREME GAMING ENGINE Completing the GIGABYTE XTREME GAMING ENGINE Setup Wizard Setup has finished installing OGABYTE XTREME GAMING ENGINE on your computer. The application may be launched by selecting the installed cons. Click Finish to exit Setup. Launch OGABYTE XTREME GAMING ENGINE FinishStep 8:
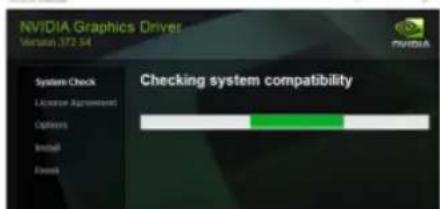
After installing XTREME ENGINE, the window of NVIDIA Driver would appear.
text_image
NVIDIA Graphics Drives Veratura: 372.54 System Check License Agreement Options Install Forest Checking system compatibilityStep 10:
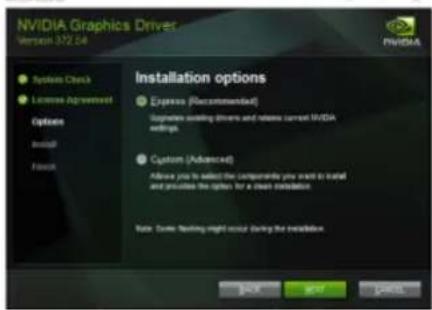
Check Express
(Recommended) and then click the NEXT button.
text_image
NVIDIA Graphics Driver Version 372.54 System Check License Agreement Options Install Finish Installation options Express (Recommodated) Supplies adding drivers and releases current NVIDIA software. Customs (Advanced) Allow you to select the component you want to install and provide the option for a clean installation. Note: Some testing might occur during the installation. BACK START CancelStep 11:
Installation begins.

text_image
GEARS OF WAR GEARS OF WAR 4 GAME CODE GIVEAWAY SELECT MEMBERS OF GIVEECE EXPRIEANCE 10 GEFORCE3.1.2. GIGABYTE XTREME ENGINE
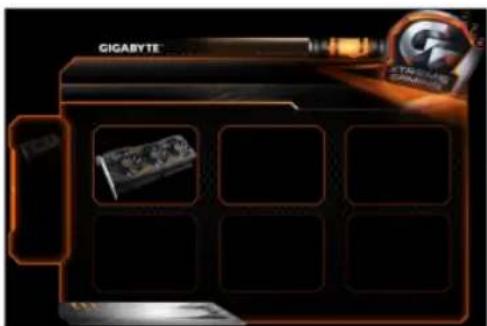
Users could adjust clock speeds, voltage, fan performance, and LED etc. according to their own preference through this intuitive interface.
text_image
GIGABYTE STOCKS GRAPES※ The interface and functionality of the software is subject to each model.
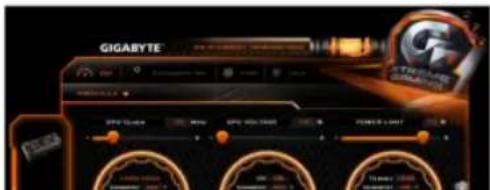
OC
Click on +/- , drag the control button or enter numbers to adjust GPU clock, memory clock, GPU voltage, power limit, and temperature.
text_image
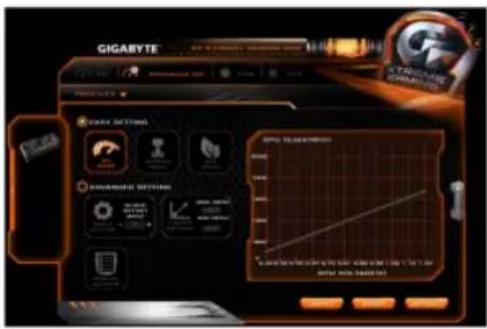
GIGABYTE SPRING SPRING SPRING SPRING SPRING SPRING SPRING SPRING SPRING SPRING SPRING SPRING SPRING SPRING SPRING SPRING SPRING SPRING SPRING SPRING SPRING SPRING SPRING SPRING SPRING SPRING SPRING SPRING SPRING SPRING SPRING SPRING SPRING SPRINGADVANCED OC
Easy Setting:
• OC mode
High performance over clocking mode
• Gaming mode
Default setting
gaming mode
• ECO mode
Energy saving,
silent ECO mode
Advanced Setting:
Users could click on +/-, enter numbers, or move the white dots on the line chart to adjust GPU clock and voltage.
text_image
GIGARYTE EASY SETTINGS AVIANDER SETTINGS SPY SELECTION SPY SELECTION SPY SELECTION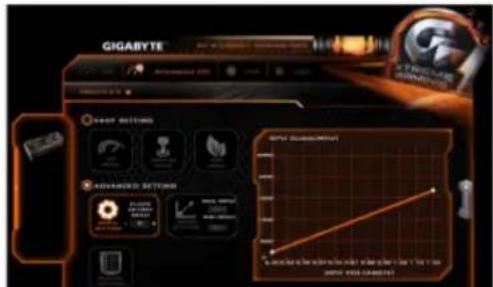
text_image
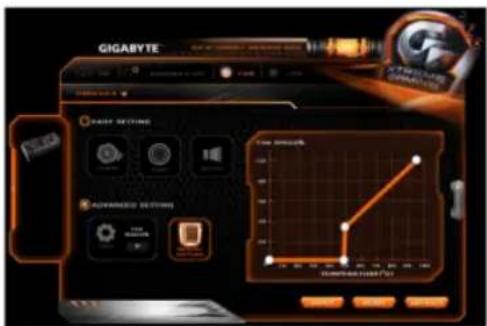
GIGABYTE Deep Settings Advanced Settings 40% (Standard/Normal) Is not to be a new version of the world's first 12 months in the year.Advanced Setting:
Users could enter numbers or move the white dots on the line chart to adjust fan speed and temperature.
text_image
GIGABYTE Advanced Settings Advanced Settings Temperature/Temp Temperature/TempLED
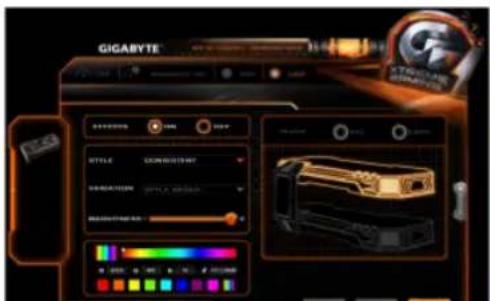
Users could choose different styles, brightness, colors; they could also turn off the LED effects through this software.
If more than one graphics cards are installed, users could
text_image
GIGABYTE STYLE EXAMETER GIGABYTEM RICH COOKING 0 10 20 30 40 50 60 70 80 90 100 110 120 130 140 150 160 170 180 190 200 210 220 230 240 250 260 270 280 290 300 310 320 330 340 350 360 370 380 390 400 410 420 430 440 450 460 470 480 490 500 510 520 530 540 550 560 570 580 590 600 610 620 630 640 650 660 670 680 690 700 710 720 730 740 750 760 770 780 790 800 810 820 830 840 850 860 870 880 890 900 910 920 930 940 950 960 970 980 990 X-TOURATE GIGABYTE4. Troubleshooting Tips
The following troublesomeong ps may help if you experience problems.
Contact your dealer or GIGABYTE for more advanced troublesomeong informaon.
- Check whether the card is seated properly in the PCI Express x16 slot.
- Ensure that the display cable is securely fastened to the card's display connector.
● Make sure that the monitor and computer are plugged in and receiving power. - If necessary, disable any built-in graphics capabilities on your motherboard. For more informaon, consult your computer's manual or manufacturer.
(NOTE: Some manufacturers do not allow the built-in graphics to be disabled or to become the secondary display.)
● Make sure you selected the appropriate display device and graphics card when you install the graphics driver.
- Restart your computer.
Press
- If you are not able to nd the desired monitor color/resoluon sengs: The color and screen resoluon opons available for selecon depend on the graphics card being installed.
※ If necessary, adjust your monitor's seng using monitor's adjust panel to make the screen looks focused, crisp, and sharp.
5. Appendix
5.1. Regulatory Statements
Regulatory Noces
This document must not be copied without our written permission, and the contents there of must not be imparted to a third party nor be used for any unauthorized purpose. Contravenon will be prosecuted. We believe that the informaon contained herein was accurate in all respects at the me of prinng. GIGABYTE cannot, however, assume any responsibility for errors or omissions in this text. Also note that the informaon in this document is subject to change without noce and should not be construed as a commitment by GIGABYTE.
Our Commitment to Preserving the Environment
In addition to high-eciency performance, all GIGABYTE VGA Cards full European Union regulaons for RoHS (Restricon of Certain Hazardous Substances in Electrical and Electronic Equipment) and WEEE (Waste Electrical and Electronic Equipment) environmental direcves, as well as most major worldwide safety requirements. To prevent releasing harmful substances into the environment and to maximize the use of our natural resources, GIGABYTE provides the following informaon on how you can responsibly recycle or reuse most of the materials in your "end of life" product:
- Restricon of Hazardous Substances (RoHS) Directive Statement
GIGABYTE products have not intended to add hazardous substances (Cd, Pb, Hg, Cr+6, PBDE and PBB). The parts and components have been carefully selected to meet RoHS requirement. Moreover, we at GIGABYTE are connuing our eorts to develop products that do not use internaonally banned toxic chemicals.
● Waste Electrical & Electronic Equipment (WEEE) Directive Statement
GIGABYTE will fulfil the naonal laws as interpreted from the 2002/96/EC WEEE (Waste Electrical and Electronic Equipment) direcve. The WEEE Direcve species the treatment, collecon, recycling and disposal of electric and electronic devices and their components. Under the Direcve, used equipment must be marked, collected separately, and disposed of properly.
● WEEE Symbol Statement

The symbol shown on the left is on the product or on its packaging, which indicates that this product must not be disposed of with other waste. Instead, the device should be taken to the waste collection centers for activation of the treatment, collection, recycling and disposal procedure. The separate collection and recycling of your waste
equipment at the time of disposal will help to conserve natural resources and ensure that it is recycled in a manner that protects human health and the environment. For more information about where you can drop off your waste equipment for recycling, please contact your local government office, your household waste disposal service or where you purchased the product for details of environmentally safe recycling.
When your electrical or electronic equipment is no longer useful to you, "take it back" to your local or regional waste collection administration for recycling.
If you need further assistance in recycling, reusing in your "end of life" product, you may contact us at the Customer Care number listed in your product's user's manual and we will be glad to help you with your effort.
Finally, we suggest that you practice other environmentally friendly actions by understanding and using the energy-saving features of this product (where applicable), recycling the inner and outer packaging (including shipping containers) this product was delivered in, and by disposing of or recycling used batteries properly. With your help, we can reduce the amount of natural resources needed to produce electrical and electronic equipment, minimize the use of landfills for the disposal of "end of life" products, and generally improve our quality of life by ensuring that potentially hazardous substances are not released into the environment and are disposed of properly.
● China Restriction of Hazardous Substances Table
The following table is supplied in compliance with China's Restriction of Hazardous Substances (China RoHS) requirements:

关于符合中国(电子信息产品污染控制管理办法)的声明
Management Methods on Control of Pollution from Electronic Information Products
(China RoHS Declaration)
产品中有毒有害物质或元素的名称及含量
| 部件名称(Parts) | 有毒有害物质或元素(Hazardous Substances) | |||||
| 铅(Pb) | 汞(Hg) | 镉(Cd) | 六价铬(Cr(VI)) | 多溴联苯(PBB) | 多溴二苯醚(PBDE) | |
| PCB板PCB | ○ | ○ | ○ | ○ | ○ | ○ |
| 结构件及风扇Mechanical parts and Fan | × | ○ | ○ | ○ | ○ | ○ |
| 芯片及其他主动零件Chip and other Active components | × | ○ | ○ | ○ | ○ | ○ |
| 连接器Connectors | × | ○ | ○ | ○ | ○ | ○ |
| 被动电子元器件Passive Components | × | ○ | ○ | ○ | ○ | ○ |
| 线材Cables | ○ | ○ | ○ | ○ | ○ | ○ |
Contact Us
● GIGA-BYTE TECHNOLOGY CO., LTD.
Address: No.6, Baoqiang Rd., Xindian Dist., New Taipei City 231, Taiwan
TEL: +886-2-8912-4888
FAX: +886-2-8912-4003
Tech. and Non-Tech. Support
(Sales/Markeng):
hp://ggts.gigabyte.com.tw
WEB address (Chinese):
hp://www.gigabyte.tw
G.B.T. INC. - U.S.A.
TEL: +1-626-854-9338
FAX: +1-626-854-9339
Tech. Support:
hp://rma.gigabyte-usa.com
Web address: hp://www.gigabyte.us
● G.B.T. INC (USA) - Mexico
Tel: +1-626-854-9338 x 215 (Soporte de
habla hispano)
FAX: +1-626-854-9339
Correo: soporte@gigabyte-usa.com
Tech. Support:
hp://rma.gigabyte-usa.com
Web address: hp://latam.giga-byte.com/
● Giga-Byte SINGAPORE PTE. LTD. - Singapore
WEB address : hp://www.gigabyte.sg
- Thailand
WEB address : hp://th.giga-byte.com
Vietnam
WEB address : hp://www.gigabyte.vn
● GIGABYTE TECHNOLOGY (INDIA) LIMITED - India
WEB address : hp://www.gigabyte.in
● NINGBO G.B.T. TECH. TRADING CO., LTD. - China
WEB address : hp://www.gigabyte.cn
- Shanghai
TEL: +86-21-63410999
FAX: +86-21-63410100
Beijing
TEL: +86-10-62102838
FAX: +86-10-62102848
♦ Wuhan
TEL: +86-27-87851312
FAX: +86-27-87851330
◆ GuangZhou
TEL: +86-20-87540700
FAX: +86-20-87544306
♦ Chengdu
TEL: +86-28-85236930
FAX: +86-28-85256822
♦ Xian
TEL: +86-29-85531943
FAX: +86-29-85510930
♦ Shenyang
TEL: +86-24-83992901
FAX: +86-24-83992909
Saudi Arabia
WEB address :
hp://www.gigabyte.com.sa
● Gigabyte Technology Pty. Ltd. - Australia
WEB address :
hp://www.gigabyte.com.au
● G.B.T. TECHNOLOGY TRADING GMBH - Germany
WEB address : hp://www.gigabyte.de
● G.B.T. TECH. CO., LTD. - U.K.
WEB address :
hp://www.giga-byte.co.uk
● Giga-Byte Technology B.V. - The Netherlands
WEB address : hp://www.giga-byte.nl
● GIGABYTE TECHNOLOGY FRANCE - France
WEB address : hp://www.gigabyte.fr
- Sweden
WEB address : hp://www.giga-byte.se
Italy
WEB address : hp://www.giga-byte.it
- Spain
WEB address : hp://www.giga-byte.es
- Greece
WEB address : hp://www.giga-byte.gr
- Czech Republic
WEB address : hp://www.gigabyte.cz
Hungary
WEB address : hp://www.giga-byte.hu
- Turkey
WEB address :
hp://www.gigabyte.com.tr
Russia
WEB address : hp://www.gigabyte.ru
- Poland
WEB address : hp://www.gigabyte.pl
- Ukraine
WEB address :
hp://www.giga-byte.com.ua
Romania
WEB address :
hp://www.gigabyte.com.ro
Serbia
WEB address : hp://www.gigabyte.co.yu
- Kazakhstan
WEB address : hp://www.giga-byte.kz
You may go to the GIGABYTE website, select your language in the language list at the boom le corner of the website.
GIGABYTE Global Service System
To submit a technical or non-technical (Sales/Markeng) queson, please link to: hp://ggts.gigabyte.com.tw
Then select your language to enter the system.