
GEKW 27000 B - Ofen GRUNDIG - Kostenlose Bedienungsanleitung
Finden Sie kostenlos die Bedienungsanleitung des Geräts GEKW 27000 B GRUNDIG als PDF.


| Produkttyp | Kombi-Mikrowellen-Einbaubackofen |
| Marke | Grundig |
| Modell | GEKW 27000 B |
| Abmessungen (H x B x T) | 455 x 594 x 567 mm |
| Einbaumaße (H x B x T) | 450 oder 460 x 560 x min. 550 mm |
| Gewicht | ca. 35 kg |
| Spannung/Frequenz | 220-240 V ~ 50 Hz |
| Gesamtleistungsaufnahme | 2,7 kW |
| Sicherung | min. 16 A |
| Mikrowellenleistung | max. 800 W |
| Mikrowellenfrequenz | 2465 MHz |
| Grillleistung | 2,0 kW |
| Backofenvolumen | 40 Liter (Netto) |
| Backofenfunktionen | Heißluft, Ober-/Unterhitze, Grill, Umluftgrill, Eco-Heißluft, Warmhalten |
| Mikrowellenbetriebsarten | Mikrowelle, Mikrowelle+Heißluft, Mikrowelle+Grill, Mikrowelle+Grill+Umluft, Auftauen |
| Steuerung | Touch-Tasten, LED-Display, Drehregler |
| Zubehör | Standardblech, Backblech, Rost |
| Reinigung | Handwäsche mit mildem Reinigungsmittel; keine Dampfreiniger |
| Innenbeleuchtung | 15/25 W Glühlampe |
| Sicherheit | Kindersicherung (Tastensperre), Türverriegelung, Überhitzungsschutz |
| Energieeffizienzklasse | A+ (basierend auf Eco-Heißluft) |
| Garantie | 2 Jahre (gesetzlich) |
Häufig gestellte Fragen - GEKW 27000 B GRUNDIG
Benutzerfragen zu GEKW 27000 B GRUNDIG
0 Frage zu diesem Gerät. Beantworten Sie die, die Sie kennen, oder stellen Sie Ihre eigene.
Eine neue Frage zu diesem Gerät stellen
Laden Sie die Anleitung für Ihr Ofen kostenlos im PDF-Format! Finden Sie Ihr Handbuch GEKW 27000 B - GRUNDIG und nehmen Sie Ihr elektronisches Gerät wieder in die Hand. Auf dieser Seite sind alle Dokumente veröffentlicht, die für die Verwendung Ihres Geräts notwendig sind. GEKW 27000 B von der Marke GRUNDIG.
BEDIENUNGSANLEITUNG GEKW 27000 B GRUNDIG
GRUNDIG
Built-in Oven
User Manual
natural_image
Simple line drawing of a steaming cupcake (no text or symbols)GEKW 27000 B
EN
285.4501.77/R.AD/10.08.2021/4-1
7786689009
Please read this user manual first!
Dear Customer,
Thank you for purchasing this Grundig product. We hope that you get the best results from your product which has been manufactured with high quality and state-of-the-art technology. Therefore, please read this entire user manual and all other accompanying documents carefully before using the product and keep it as a reference for future use. If you handover the product to someone else, give the user manual as well. Follow all warnings and information in the user manual.
Remember that this user manual is also applicable for several other models. Differences between models will be identified in the manual.
Explanation of symbols
Throughout this user manual the following symbols are used:

Important information or useful hints about usage.
Warning of hazardous situations with regard to life and property.
Warning of electric shock.
Warning of risk of fire.
Warning of hot surfaces.
CE
Arçelik A.Ş.
Karaağaç caddesi No:2-6 34445 Sütlüce/Istanbul/TURKEY
Made in TURKEY
TABLE OF CONTENTS
1 Important instructions and warnings for safety and environment 4
General safety....4
Electrical safety....5
Product safety......6
Safety instructions for microwave 8
Intended use....13
Safety for children 13
Disposing of the old product.....14
Package information......15
2 General information 16
Overview....16
Package contents....17
Technical specifications....18
3 Installation 19
Before installation....19
Installation and connection .....22
Future Transportation......23
4 Preparation 24
Tips for saving energy 24
Initial use 24
Day time 24
First cleaning of the appliance ....25
Initial heating....25
5 How to operate the microwave27
General information on microwave cooking....27
How to use the microwave oven ..34
Operating modes for Microwave. 39
Cooking times table....40
Ready meals functions....41
6 How to operate the oven 48
General information on baking, roasting and grilling .....48
How to operate the electric oven.49
Operating modes 51
How to operate the oven control unit....53
Using the keylock 55
Using the clock as an alarm ..... 55
Cooking times table....56
Ready meals functions....58
Settings menu....60
How to operate the grill ......61
Cooking times table for grilling..61
7 Maintenance and care 62
General information 62
Cleaning microwave oven part ....62
Cleaning the control panel......63
Cleaning the oven....63
Replacing the oven lamp......63
8 Troubleshooting 65
1 Important instructions and warnings for safety and environment
This section contains safety instructions that will help protect from risk of personal injury or property damage. Failure to follow these instructions shall void any warranty.
General safety
- This appliance can be used by children aged from 8 years and above and persons with reduced physical, sensory or mental capabilities or lack of experience and knowledge if they have been given supervision or instruction concerning use of the appliance in a safe way and understand the hazards involved. Children shall not play with the appliance. Cleaning and user maintenance shall not be made by children without supervision.
- The appliance is not to be used by persons (including children) with reduced
physical, sensory or mental capabilities, or lack of experience and knowledge, unless they have been given supervision or instruction.
Children should be supervised and ensure they do not play with the appliance
- If the product is handed over to someone else for personal use or second-hand use purposes, the user manual, product labels and other relevant documents and parts should be also given.
• Installation and repair procedures must always be performed by Authorised Service Agents. The manufacturer shall not be held responsible for damages arising from procedures carried out by unauthorised persons which may also void the warranty. Before
installation, read the instructions carefully.
- Do not operate the product if it is defective or has any visible damage.
- Ensure that the product function knobs are switched off after every use.
Electrical safety
- If the product has a failure, it should not be operated unless it is repaired by the Authorized Service Agent. There is the risk of electric shock!
- Only connect the product to a grounded outlet/line with the voltage and protection as specified in the "Technical specifications". Have the grounding installation made by a qualified electrician while using the product with or without a transformer. Our company shall not be liable for any problems arising due to the product not being earthed in accordance with the local regulations.
- Never wash the product by spreading or pouring water
onto it! There is the risk of electric shock!
- ever touch the plug with wet hands! Never unplug by pulling on the cable, always pull out by grabbing the plug.
- The product must be unplugged during installation, maintenance, cleaning and repairing procedures.
- If the power connection cable for the product is damaged, it must be replaced by the manufacturer, its service agent or similar qualified persons in order to avoid a hazard.
- The appliance must be installed so that it can be completely disconnected from the network. The separation must be provided either by a mains plug, or a switch built into the fixed electrical installation, according to construction regulations.
- Rear surface of the oven gets hot when it is in use. Make sure that the electrical connection does
not contact the rear surface; otherwise, connections can get damaged.
- Do not trap the mains cable between the oven door and frame and do not route it over hot surfaces. Otherwise, cable insulation may melt and cause fire as a result of short circuit.
- Any work on electrical equipment and systems should only be carried out by authorized and qualified persons.
- In case of any damage, switch off the product and disconnect it from the mains. To do this, turn off the fuse at home.
- Make sure that fuse rating is compatible with the product.
Product safety
- WARNING: The appliance and its accessible parts become hot during use. Care should be taken to avoid touching heating elements. Children less than 8 years of age shall be
kept away unless continuously supervised.
- Never use the product when your judgment or coordination is impaired by the use of alcohol and/or drugs.
- Be careful when using alcoholic drinks in your dishes. Alcohol evaporates at high temperatures and may cause fire since it can ignite when it comes into contact with hot surfaces.
- Do not place any flammable materials close to the product as the sides may become hot during use.
- During use the appliance becomes hot. Care should be taken to avoid touching heating elements inside the oven.
- Keep all ventilation slots clear of obstructions.
- Do not heat closed tins and glass jars in the oven. The pressure that would build-up in the tin/jar may cause it to burst.
- Do not place baking trays, dishes or aluminium foil directly onto the bottom of
the oven. The heat accumulation might damage the bottom of the oven.
- Do not use harsh abrasive cleaners or sharp metal scrapers to clean the oven door glass since they can scratch the surface, which may result in shattering of the glass.
- Do not use steam cleaners to clean the appliance as this may cause an electric shock.
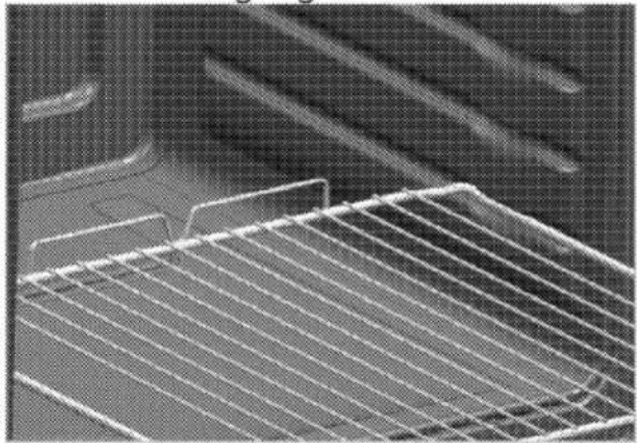
- Placing the wire shelf and tray onto the wire racks properly
It is important to place the wire shelf and/or tray onto the rack properly. Slide the wire shelf or tray between 2 rails and make sure that it is balanced before placing food on it (Please see the following figure).
natural_image
Close-up of a white metal grate with horizontal slats, placed on a dark surface (no text or symbols visible)- Do not use the product if the front door glass removed or cracked.
- Oven handle is not towel dryer. Do not hang up towel, gloves, or similar textile products when the grill function is at open door.
• Always use heat resistant oven gloves when putting in or removing dishes into/from the hot oven.
- WARNING: Ensure that the appliance is switched off before replacing the lamp to avoid the possibility of electric shock.
For the reliability of the fire of the product;
• Make sure the plug is fitting to socket as well for not cause to spark.
- Do not use damaged or cutted or extension cable except the original cable.
• Make sure that not whether liquid or moisture on the socket is plugged to product.
Safety instructions for microwave
- The appliance is intended to be used in household and similar applications as:
• staff kitchen areas in shops, offices and other working environments;
- farm houses;
- by clients in hotels, motels and other residential environments;
• bed and breakfast type environments.
- Only allow children to use the oven without supervision when adequate instructions have been given so that the child is able to use the microwave oven in a safe way and understands the hazards of improper use.
- When the appliance is operated in the combination mode, children should only use the oven under adult supervision due to the temperature generated.
- The exposed parts of the product will become hot
while and after the product is in use.
- Check the oven for any damage, such as misaligned or bent door, damaged door seals and sealing surface, broken or loose door hinges and latches and dents inside the cavity or on the door. If there is any damage, do not operate the oven and contact by the Authorised Service Agent.
- If the door or door seals are damaged, the oven must not be operated until it has been repaired by a competent person or Authorised Service Agent.
- Before operating your oven ensure that the door has been closed properly. A safety mechanism in the door lock prevents your appliance from operating when the door is open, halting the cooking operation if you open the door. You should not interfere with the door locking system or attempt to override this system. If the door locking system is
overridden, risk of exposure to microwaves arises if the appliance is operated with an open door.
- Do not place any kind of object between the front of the oven and the door. You should not operate your oven if objects such as paper towels or napkins prevent it from being closed properly.
- Radio Interference Place the oven no less than 2 metres from TVs, radios, wireless modems, access points and aerials. Otherwise it may cause interference.
- Do not cook your meals with the cooking time and microwave power set excessively high. Excessive cooking may desiccate, burn or inflame some parts of the meal.
- Never use aluminum folio or aluminum utensils for microwave cooking. Sparks will damage the appliance.
- Do not use metal objects closer than 3 cm to the oven door while cooking with microwave.
- Do not place corrosive chemicals or materials containing corrosive vapor into the oven.
When there is interference, it may be reduced or eliminated by taking the following measures:
-
Clean door and sealing surface of the oven.
-
Reorient the receiving antenna of radio or television.
-
Relocate the microwave oven with respect to the receiver.
-
Move the microwave oven away from the receiver.
-
Plug the microwave oven into a different outlet so that microwave oven and receiver are on different branch circuits.
- Place the oven away from other heating appliances and avoid using in damp or steamy environments.
- It is hazardous for anyone other than a competent person or the Authorised Service Agent to carry out any service or repair operation that involves the removal of a cover which
gives protection against exposure to microwave energy.
- This product is a Group 2 Class B ISM equipment. The definition of Group 2 which contains all ISM (Industrial, Scientific and Medical) equipment in which radio-frequency energy is intentionally generated and/or used in the form of electromagnetic radiation for the treatment of material, and spark erosion equipment. For Class B equipment is equipment suitable for use in domestic establishments and in establishments directly connected to a low voltage power supply network which supplies buildings used for domestic purpose.
- The microwave oven is intended for heating food and beverages. Drying of food or clothing and heating or warming pads, slippers, sponges, damp cloth and similar may lead
to risk of injury, ignition or fire.
- Your oven has not been designed for drying any living beings. - Do not operate your oven when it is empty. This may damage the oven. Should you wish to test the oven, place a glass of water inside. The water will absorb the microwave energy and the oven will suffer no damage.
- Only use utensils that are suitable for use in microwave ovens.
Do not use earthenware containers for microwave cooking. Moisture in the earthenware may expand and cause cracking of your container.
To reduce the risk of fire in the oven cavity:
- When heating food in plastic or paper containers, keep an eye on the oven due to the possibility of ignition. If smoke is observed, switch off or unplug the appliance and keep the door closed in order to stifle any flames.
- Remove wire twist-ties from paper or plastic bags before placing bag in oven.
- Do not use the cavity for storage purposes. Do not leave paper products, cooking utensils or food in the cavity when not in use.
- The minimum height of free space necessary above the top surface of the oven.
- If you use materials like paper, wood or plastic for cooking in your microwave, do not leave the oven unattended. Paper, wood and similar materials may ignite, while plastic materials may melt. Do not use containers made of such materials for fan oven, grilling and mixed cooking operations.
- The contents of feeding bottles and baby food jars shall be stirred or shaken and the temperature checked before consumption, in order to avoid burns.
• Liquids and other foods must not be heated in
sealed containers since they are liable to explode.
- Microwave heating of beverages can result in delayed eruptive boiling, therefore care must be taken when handling the container.
- Eggs in their shell and whole hard-boiled eggs should not be heated in microwave ovens since they may exploed, even after microwave heating has ended.
- Do not use your oven to heat carbonated drinks or foods stored in airtight containers like tin cans. This will cause pressure to build up inside the oven that may result in damage or explosion when the door is opened.
- Do not use your microwave oven for cooking or reheating unwhisked eggs, whether shelled or not. Ensure that you pierce the skins of potatoes, apples, chesnut or similar fruits and vegetables before cooking.
- Do not use porcelain containing metal (silver, gold, etc.). Ensure that you remove all metal twist-ties from food packages. Pieces of metal inside the oven can cause arcing that may result in serious damage.
- Do not use your oven for frying with oil since you will be unable to regulate the temperature of the oil.
Do not use the microwave to warm cooking oil or drinks with high alcohol volume only.
- Do not place the oven where heat, moisture, or high humidity are generated, or near combustible materials.
- Do not use the interior of your oven for storage purposes.
- Should the contents of the oven catch fire or should you notice any smoke, keep the oven door closed. Switch off the oven and remove the plug from the socket, or else remove or switch off the fuses for your home.
- Do not lean on the oven door when it is open, or let children swing on it. This will warp the oven door and prevent it from closing properly.
- Put a metal teaspoon or glass rod in the container when heating up liquids. This will prevent delay of boiling of the liquid, thus prevent sudden overflowing when the container is moved.
- Do not use the oven, if:
- The door is not closed properly;
- The door hinges are damaged;
- The contact surfaces between the door and the front side of the oven are damaged;
- The door window is damaged;
- An electrical arch occurs within the oven although there are no metal object in the cooking segment.
- It is very important not to select long durations or extremely high power levels while cooking a small amount of food in order to avoid overheating
or burning the meal. For example, a slice of bread may burn after 3 minutes if a very high power level is selected.
- Do not use the oven for frying as it is not possible to control the temperature of oil heated in microwave.
- Contact surfaces of the door (front side of the inner segment and inner side of the doors), must be kept clean to ensure proper operation of the oven.
Intended use
- This product is designed for domestic use. Commercial use will void the guarantee.
- This appliance is for cooking purposes only. It must not be used for other purposes, for example room heating.
- This appliance is not intended for use at mobile homes, recreational vehicles and similar places.
- Use your oven indoors. Do not use it in gardens, on balconies or in other outdoor settings.
- This product should not be used for warming the plates under the grill, drying towels, dish cloths etc. by hanging them on the oven door handles. This product should also not be used for room heating purposes.
- All openings in the wall behind the appliance and in the floor under the appliance shall be sealed.
- Do not obstruct the flow of ventilation air.
- The manufacturer shall not be liable for any damage caused by improper use or handling errors.
- The oven can be used for defrosting, baking, roasting and grilling food.
Safety for children
- WARNING: Accessible parts may become hot during use. Young children should be kept away.
- The packaging materials will be dangerous for children. Keep the packaging materials away from children. Please dispose of all parts of the
packaging according to environmental standards.
- Electrical products are dangerous to children. Keep children away from the product when it is operating and do not allow them to play with the product.
- When the appliance is operated in combination mode, children should only use the oven under adult supervision due to temperature generated.
- The exposed parts of the product will become hot while and after the product is in use.
- Do not place any items above the appliance that children may reach for.
- When the door is open, do not load any heavy object on it and do not allow children to sit on it. It may overturn or door hinges may get damaged.
Disposing of the old product Compliance with the WEEE Directive and Disposing of the Waste Product:
This product complies with EU WEEE Directive (2012/19/EU). This product bears a classification symbol for waste electrical and electronic equipment (WEEE).
This product has been manufactured with high quality parts and materials which can be reused and are suitable for recycling. Do not dispose of the waste product with normal domestic and other wastes at the end of its service life. Take it to the collection center for the recycling of electrical and electronic equipment. Please consult your local authorities to learn about these collection centers.
Compliance with RoHS Directive:
The product you have purchased complies with EU RoHS Directive (2011/65/EU). It does not contain harmful
and prohibited materials specified in the Directive.
Package information
- Packaging materials of the product are manufactured from recyclable materials in accordance with our National Environment Regulations. Do not
dispose of the packaging materials together with the domestic or other wastes. Take them to the packaging material collection points designated by the local authorities.
2 General information
Overview
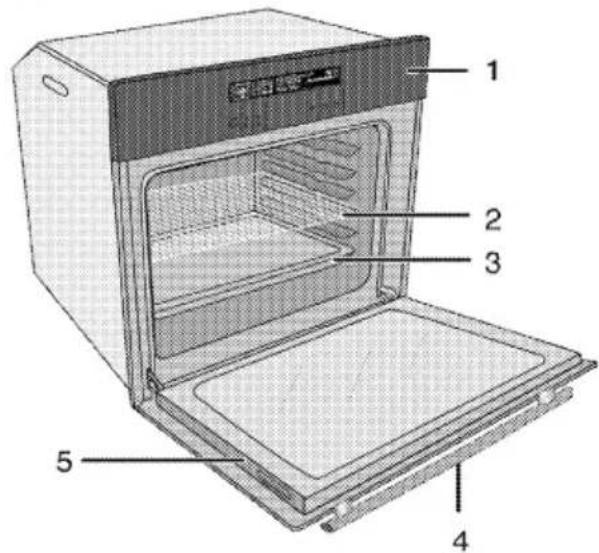
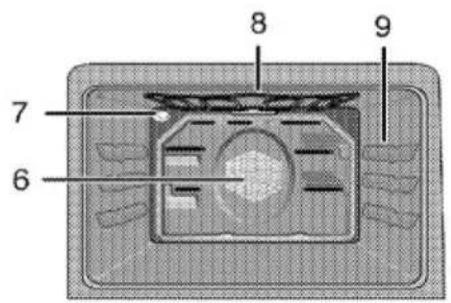
1 Control panel
2 Wire shelf
3 Tray
4 Handle
5 Front door
6 Fan motor (behind steel plate)
7 Lamp
8 Top heating element
9 Shelf positions
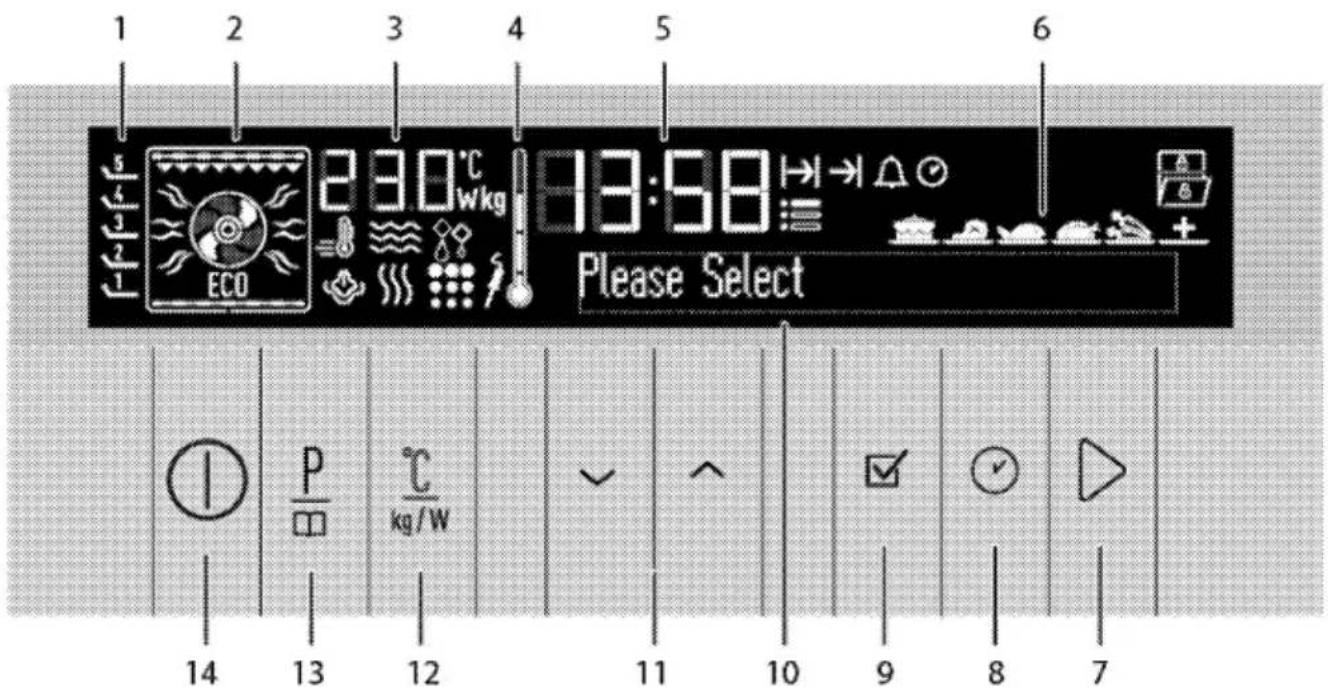
1 Shelf positions
2 Function display
3 Temperature/weight/microwave power indicator field
4 Oven Inner Temperature symbol
5 Current time indicator field
6 Convenience food selection display
7 Start/stop cooking key
8 Time and settings key
9 OK key
10 Text display
11 Up/down keys [Menu step]
12 Temperature/weight/booster/power setting key
13 Program selection key
14 ON/OFF key
Package contents

Accessories supplied can vary depending on the product model. Not every accessory described in the user manual may exist on your product.
- User manual
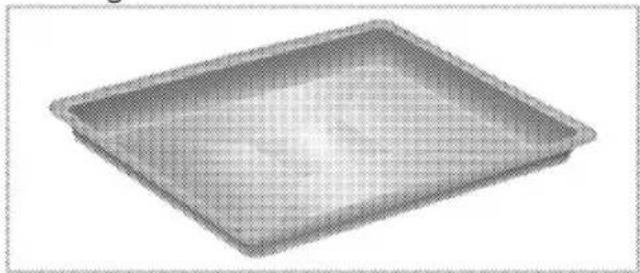
- Standard tray
Used for pastries, frozen foods and big roasts.
natural_image
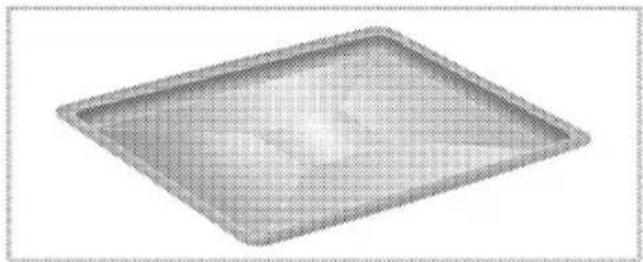
3D rendering of a rectangular tray or baking pan with no visible text or symbols- Pastry tray
Used for pastries such as cookies and biscuits.
natural_image
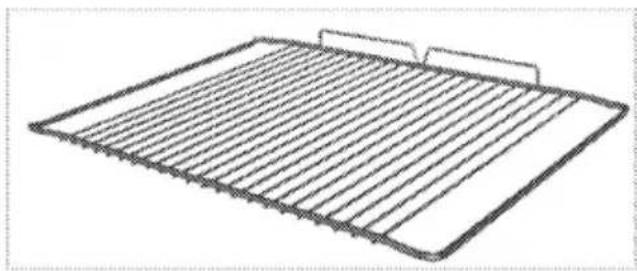
3D rendering of a rectangular metal tray with grid pattern (no text or symbols)- Wire Shelf
Used for roasting and for placing the food to be baked, roasted or cooked in casserole dishes to the desired rack.
natural_image
Line drawing of a grid-patterned rectangular object with two side handles (no text or symbols)Technical specifications
| GENERAL | |
| Voltage / frequency | 220-240 V ~ 50 Hz |
| Total power consumption | 2.7 kW |
| Fuse | min. 16 A |
| Cable type / section | H05VV-FG 3 x 1,5 mm ^2 |
| Cable length | max. 2 m |
| OVEN/GRILL | |
| External dimensions (height / width / depth) | 455 mm/594 mm/567 mm |
| Installation dimensions (height / width / depth) | **450 or 460 mm/560 mm/min. 550 mm |
| Main oven | Multifunction oven |
| Inner lamp | 15/25 W |
| Grill power consumption | 2.0 kW |
| MICROWAVE | |
| Net volume | 40 lt |
| Microwave power | Max. 800 W |
| Microwave frequency | 2465 MHz |
Basics: Information on the energy label of electrical ovens is given in accordance with the EN 60350-1 / IEC 60350-1 standard. Those values are determined under standard load with bottom-top heater or fan assisted heating (if any) functions. Energy efficiency class is determined in accordance with the following prioritization depending on whether the relevant functions exist on the product or not. 1-Cooking with eco-fan, 2-Turbo slow cooking, 3-Turbo cooking, 4-Fan assisted bottom/top heating, 5-Top and bottom heating.
**
See. Installation, page 19.
Technical specifications may be changed without prior notice to improve the quality of the product.

Figures in this manual are schematic and may not exactly match your product.

Values stated on the product labels or in the documentation accompanying it are obtained in laboratory conditions in accordance with relevant standards. Depending on operational and environmental conditions of the product, these values may vary.

Installation
Product must be installed by a qualified person in accordance with the regulations in force. The manufacturer shall not be held responsible for damages arising from procedures carried out by unauthorized persons which may also void the warranty.

Preparation of location and electrical installation for the product is under customer's responsibility.
DANGER:
The product must be installed in accordance with all local electrical regulations.
DANGER:
Prior to installation, visually check if the product has any defects on it. If so, do not have it installed. Damaged products cause risks for your safety.
Before installation
The appliance is intended for installation in commercially available kitchen cabinets. A safety distance must be left between the
appliance and the kitchen walls and furniture. See figure (values in mm).
- Surfaces, synthetic laminates and adhesives used must be heat resistant (100 °C minimum).
- Kitchen cabinets must be set level and fixed.
- If there is a drawer beneath the oven, a shelf must be installed between oven and drawer.
- Carry the appliance with at least two persons.

Do not install the appliance next to refrigerators or freezers. The heat emitted by the appliance will lead to an increased energy consumption of cooling appliances.

The door and/or handle must not be used for lifting or moving the appliance.

If the appliance has wire handles, push the handles back into the side walls after moving the appliance.
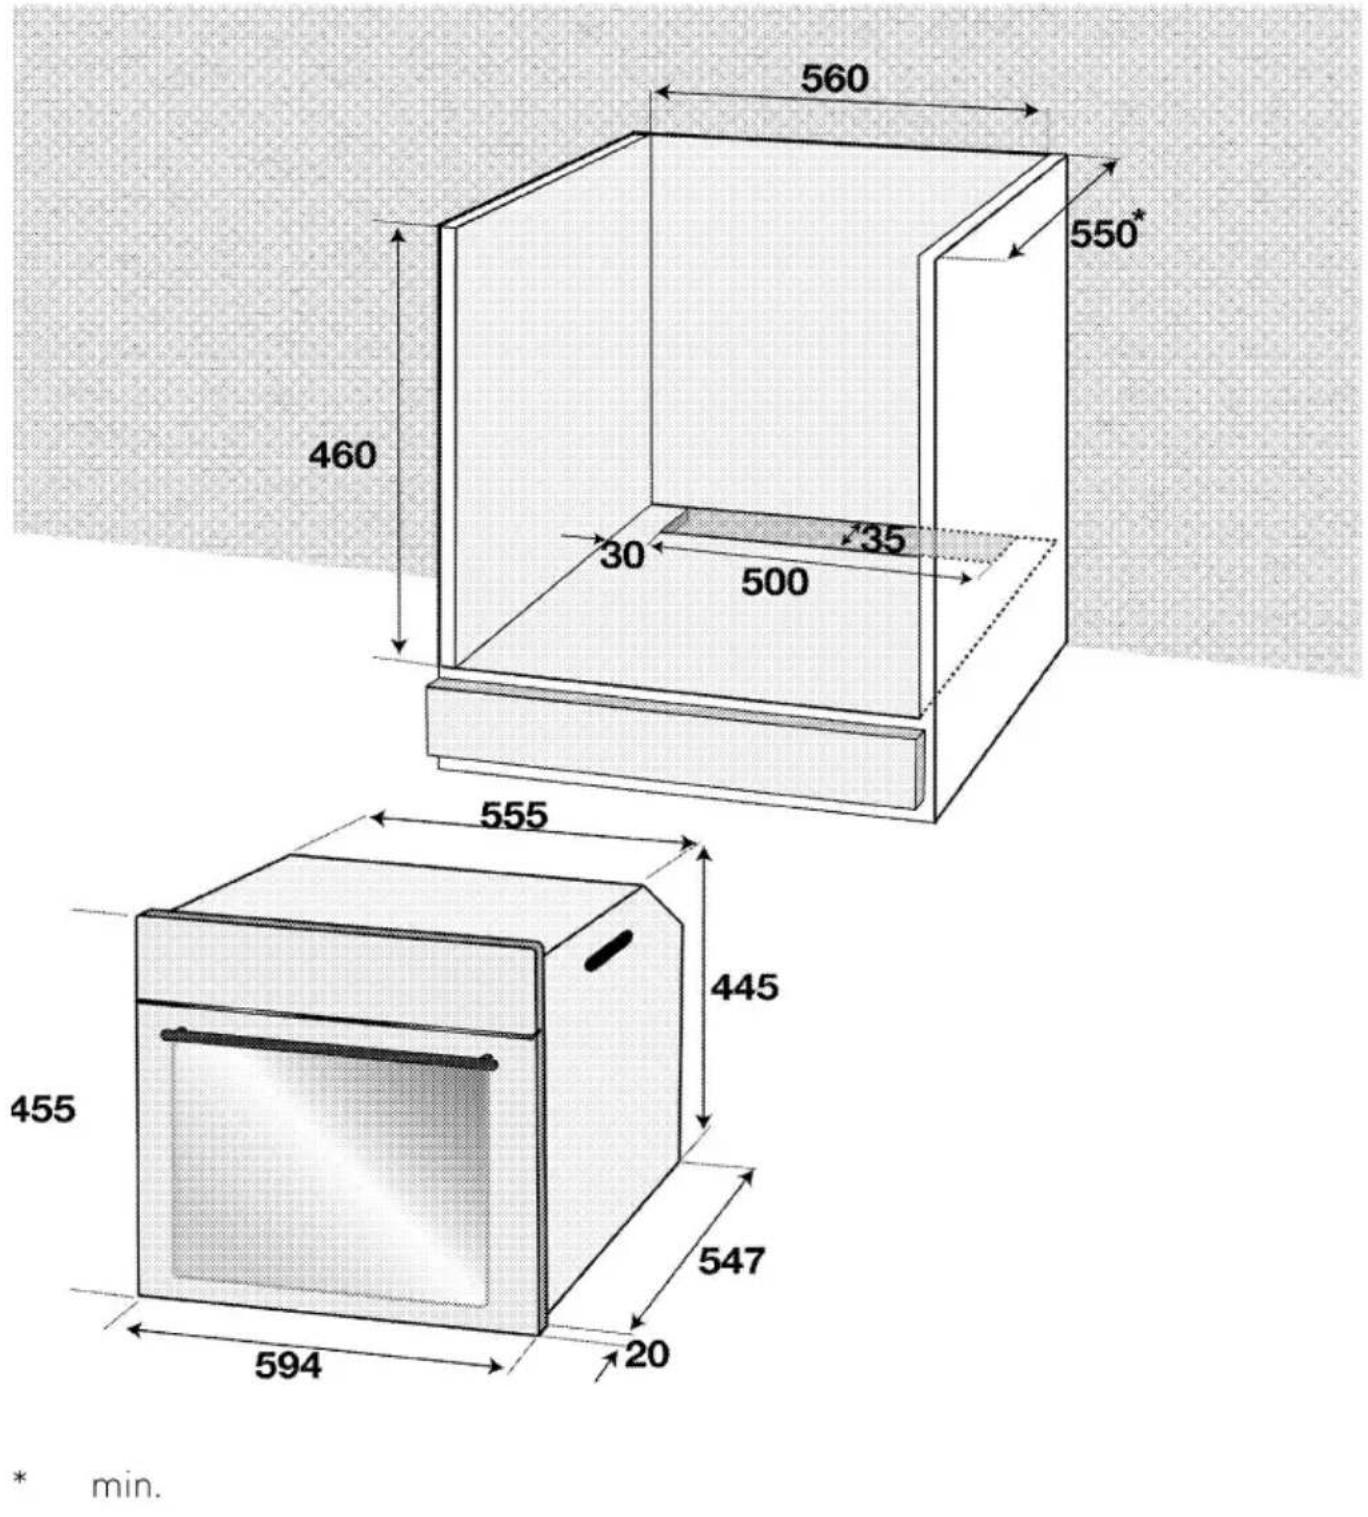
* min.
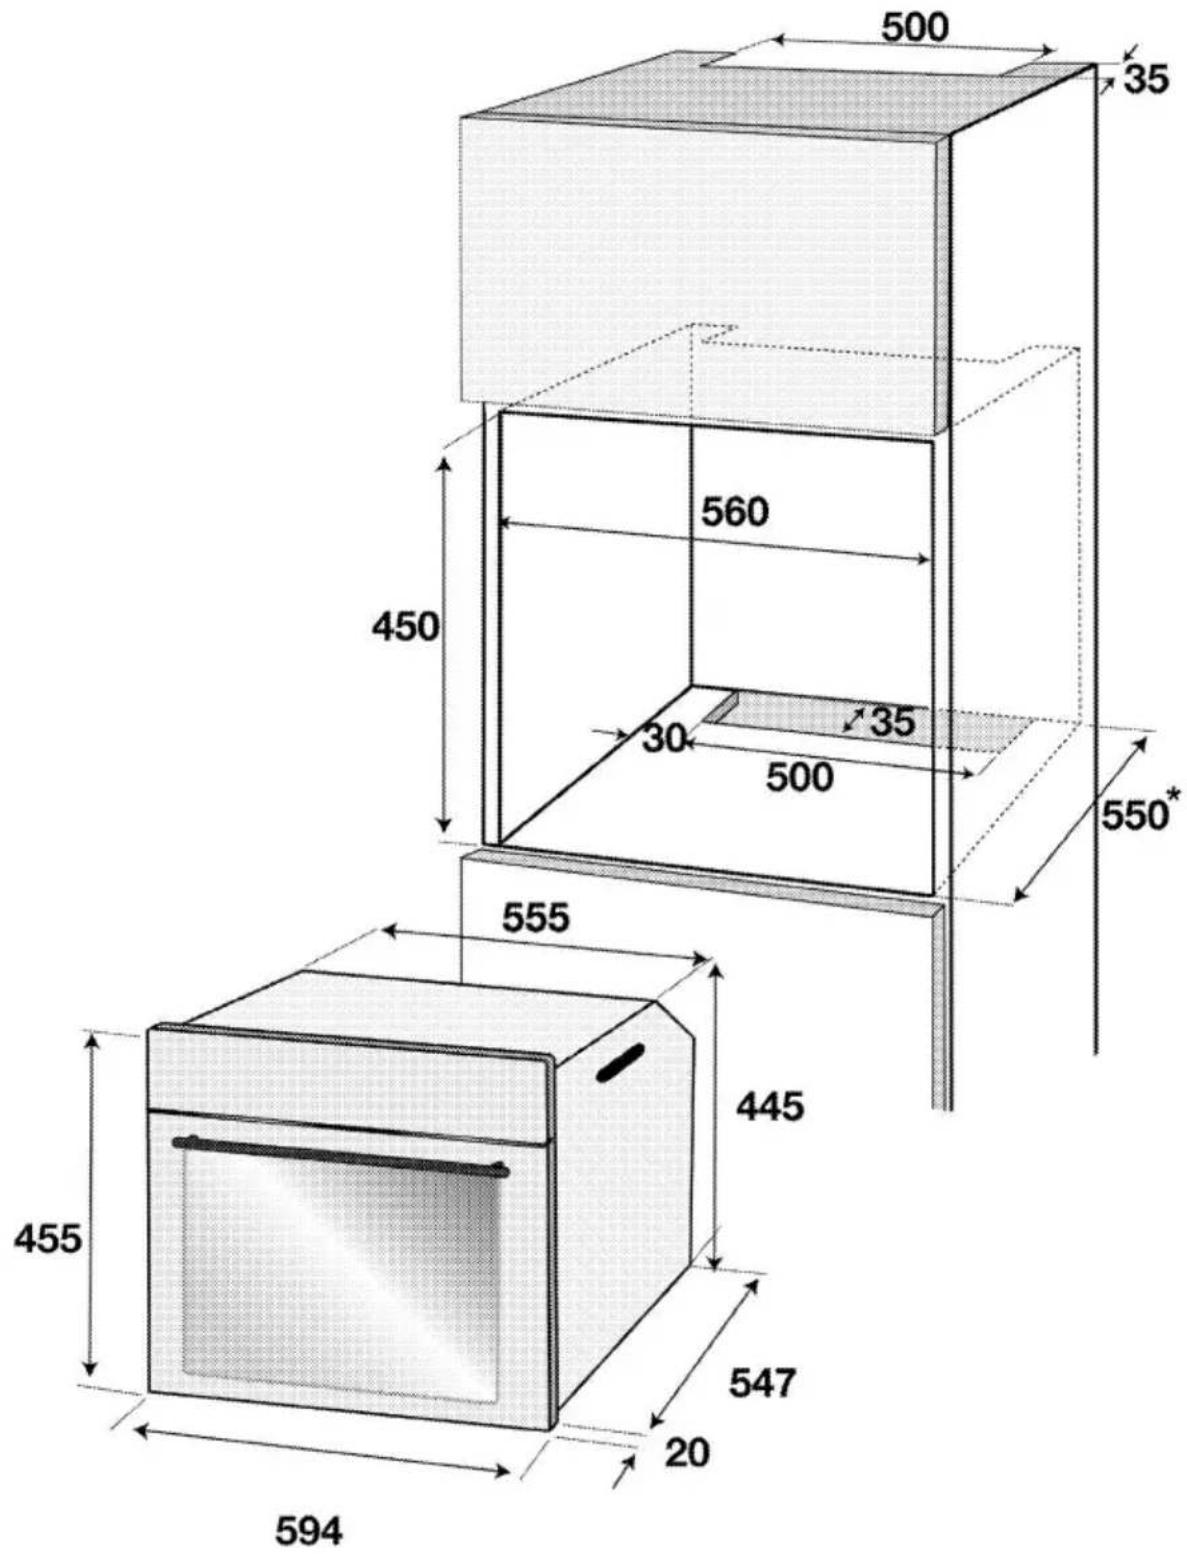
* min.
Installation and connection
- Product can only be installed and connected in accordance with the statutory installation rules.
Electrical connection
Connect the product to a grounded outlet/line protected by a fuse of suitable capacity as stated in the "Technical specifications" table. Have the grounding installation made by a qualified electrician while using the product with or without a transformer. Our company shall not be liable for any damages that will arise due to using the product without a grounding installation in accordance with the local regulations.
DANGER:
The product must be connected to the mains supply only by an authorised and qualified person. The product's warranty period starts only after correct installation. Manufacturer shall not be held responsible for damages arising from procedures carried out by unauthorised persons.
DANGER:
The power cable must not be clamped, bent or trapped or come into contact with hot parts of the product. A damaged power cable must be replaced by a qualified electrician. Otherwise, there is risk of electric shock, short circuit or fire!
- Connection must comply with national regulations.
- The mains supply data must correspond to the data specified on the type label of the product. Open the front door to see the type label.
- Power cable of your product must comply with the values in "Technical specifications" table.
DANGER:
Before starting any work on the electrical installation, disconnect the product from the mains supply. There is the risk of electric shock!

Power cable plug must be within easy reach after installation (do not route it above the hob).
Plug the power cable into the socket.
Installing the product
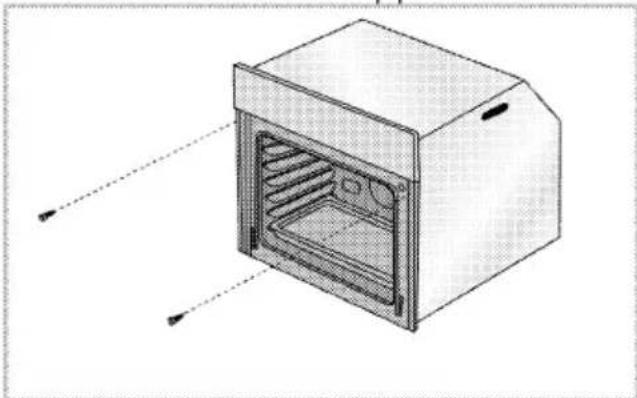
- Slide the oven into the cabinet, align and secure it while making sure that the power cable is not broken and/or trapped.
natural_image
Technical illustration of a 3D oven with internal grating and ventilation slots (no text or symbols)Secure the oven with 2 screws as illustrated.
For products with cooling fan
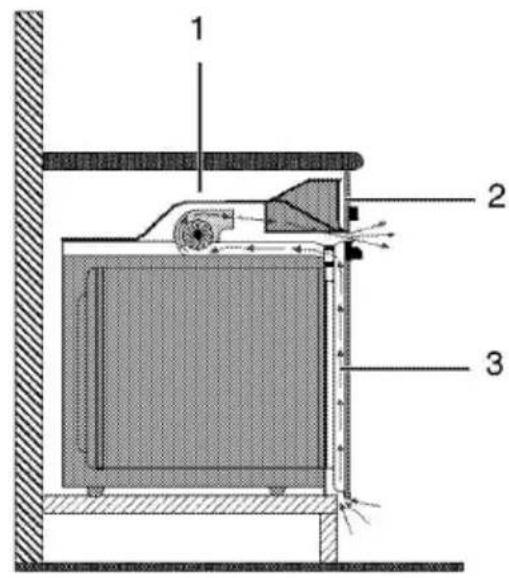
1 Cooling fan
2 Control panel
3 Door
The built-in cooling fan cools both the built-in cabinet and the front of the product.

Cooling fan continues to operate for about 20-30 minutes after the oven is switched off.
Final check
- Plug in the power cable and switch on the product's fuse.
- Check the functions.
Future Transportation
- Keep the product's original carton and transport the product in it. Follow the instructions on the carton. If you
do not have the original carton, pack the product in bubble wrap or thick cardboard and tape it securely.
- To prevent the wire grill and tray inside the oven from damaging the oven door, place a strip of cardboard onto the inside of the oven door that lines up with the position of the trays. Tape the oven door to the side walls.
- Do not use the door or handle to lift or move the product.

Do not place any objects onto the product and move it in upright position.
In microwave parts:
- Pack the glass tray and tape it side walls to avoid it from breakage.
- Tape the front door to the main body.
- Wrap the front glass, door and panel by nylon with bubbles to avoid any impact.

Check the general appearance of your product for any damages that might have occurred during transportation.
4 Preparation
Tips for saving energy
The following information will help you to use your appliance in an ecological way, and to save energy:
- Use dark coloured or enamel coated cookware in the oven since the heat transmission will be better.
- While cooking your dishes, perform a preheating operation if it is advised in the user manual or cooking instructions.
- Do not open the door of the oven frequently during cooking.
-
Try to cook more than one dish in the oven at the same time whenever possible. You can cook by placing two cooking vessels onto the wire shelf.
-
Cook more than one dish one after another. The oven will already be hot.
- You can save energy by switching off your oven a few minutes before the end of the cooking time. Do not open the oven door.
- Defrost frozen dishes before cooking them.
Initial use
Day time

Before you can use the oven, the time must be set. If the time is not set, oven will not operate.
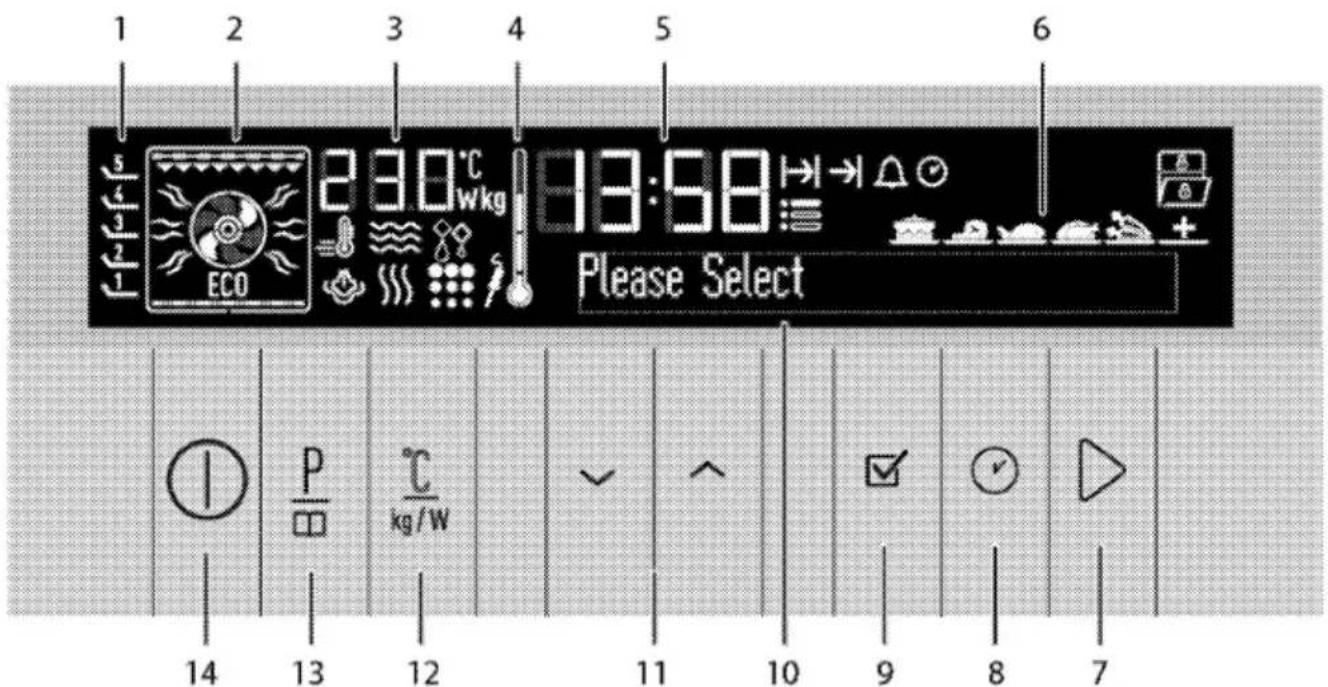
1 Shelf positions
2 Function display
3 Temperature/weight/microwave power indicator field
4 Oven Inner Temperature symbol
5 Current time indicator field
6 Convenience food selection display
7 Start/stop cooking key
8 Time and settings key
9 OK key
10 Text display
11 Up/down keys (Menu step)
12 Temperature/weight/booster/power setting key
13 Program selection key
14 ON/OFF key
Language setting
Language can only be set when the oven is switched off.
- Plug in the power cable and switch on the product's fuse.
- When you switch on the oven for the first time, "Language: English" appears on the Text display
- Touch ∨√ keys to select the desired language.
- Touch ☑ to confirm the setting.
» It returns to the stand-by display.
Set the time
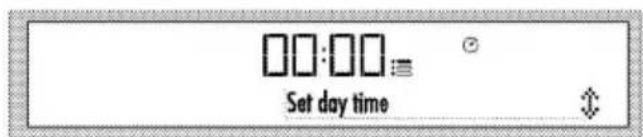
- After selecting the language, "Time setting" appears on the Text display and :≡ symbol flash. Set the hour with ∨√ keys.
- Touch ☑ to confirm the hour.
- Minute field and: symbol flash on the display. Touch ∨√ keys to set the minute. Touch ☑ to confirm the minute.
» It returns to the stand-by display. Only the current time appears on the display.
14:05

In case of power outage or when the product is unplugged and plugged in again, time setting menu is displayed again. However, the set time is preserved in power outages shorter than 20 minutes. In such cases, you can continue by confirming the time value.
First cleaning of the appliance

The surface might get damaged by some detergents or cleaning materials.
Do not use aggressive detergents, cleaning powders/creams or any sharp objects during cleaning. Do not use harsh abrasive cleaners or sharp metal scrapers to clean the oven door glass since they can scratch the surface, which may result in shattering of the glass.
- Remove all packaging materials.
- Wipe the surfaces of the appliance with a damp cloth or sponge and dry with a cloth.
Initial heating
Heat up the product for about 30 minutes and then switch it off. Thus, any production residues or layers will be burnt off and removed.
WARNING
Hot surfaces cause burns! Product may be hot when it is in use. Never touch the hot burners, inner sections of the oven, heaters and etc. Keep children away. Always use heat resistant oven gloves when putting in or removing dishes into/from the hot oven.
Electric oven
- Take all baking trays and the wire grill out of the oven.
- Close the oven door.
- Select the highest grill power; See .
- Operate the oven for about 30 minutes.
- Turn off your oven; See
Grill oven
- Take all baking trays and the wire grill out of the oven.
- Close the oven door.
- Select the highest grill power; see How to operate the grill, page 61.
- Operate the grill about 30 minutes.
- Turn off your grill; see How to operate the grill, page 61

Smoke and smell may emit for a couple of hours during the initial operation. This is quite normal. Ensure that the room is well ventilated to remove the smoke and smell. Avoid directly inhaling the smoke and the smell that emits.
5 How to operate the microwave
General information on microwave cooking
To prevent overflowing when heating water and other liquids in your microwave oven:
- Do not use closed containers, or containers with narrow openings.
- Do not overheat.
-
Before placing the container in the microwave, stir the contents with a teaspoon and then open the door and restir when it is half done. Do not leave the teaspoon inside while the oven is operating.
-
When heating liquids such as soups and sauces, these may unexpectedly bubble up and overflow before they even come to the boil. Do not leave your oven unattended when heating such liquids.
- After warming baby food or drink inside a feeding bottle, shake and test the temperature before giving to your baby. Before heating, remove the cap and mouthpiece from the bottle.
- Remove food from any plastic packaging before cooking or defrosting. Under certain exceptional circumstances, you may be required to cover food with a special nylon clinging film.
- Do not use your product for making popcorn unless you have specially designed bags for use in microwave ovens.
- Chocolate sweets with low liquid content and flour-based foods should be heated with caution.
- Eggs in their shell and whole hardboiled eggs should not be heated in microwave ovens since they may explode even after microwave heating has ended.
The advantages of microwaving
- In conventional ovens, the heat emitted by electrical heaters or gas burners penetrate into the food item from outside. Therefore, a huge amount of energy is consumed in order to heat the air inside, oven components and the cooking utensils.
In a microwave oven, heat is generated by food item itself and heat flow is from inside to outside. There is no heat loss in the medium, on the oven inner walls or utensils (if they are microwave compatible). In other words, only the food is heated.
- Microwave ovens considerably reduce cooking times. Time needed in microwave cooking is almost half or a third less than the conventional ovens. A lot depends on the density, heat
and amount of the ingredients to be cooked.
- You can preserve the natural taste of foods by cooking them in their own juices without adding a lot of spices, or with no spices at all.
- Microwave ovens save energy. Energy is only used when you are cooking. There is no wasted energy with a microwave.
- You need not worry if you forget to let meat thaw. Microwave ovens thaw out frozen foods in a short time so you can start cooking immediately. Bu sayede bakteri gelişme tehlikesi azalır.
- Foods preserve their nutrition value thanks to shorter cooking times.
- Cleaning is also easier compared to conventional ovens. Microwaving in theory
- Microwaves are a form of energy similar to radio and television waves. The magnetron tube inside your microwave oven produces microwave energy. Microwave energy diffuses in all directions inside the oven, reflected from the side walls and thus penetrates into the food evenly. The microwaves cause rapid vibration in the molecules of the food. This vibration creates the heat that cooks the food.
- The microwaves do not pass through the metal walls of your oven. Microwaves can pass
through materials such as ceramic, glass or paper.
Why do foods get heated
Most of the foods contain water and water molecules vibrate when they are subjected to microwaves.
Friction between molecules produces the heat that increases the temperature of the food, thaws them if frozen, cooks them or keeps them warm. As a result of the heat buildup inside the food
- Foods can be cooked with very little or no oil;
- Thawing or cooking in a microwave is much faster than a conventional oven;
• Vitamins, minerals and nutrition elements in the foods are preserved; - Natural color and aroma of the food do not change.
Containers suitable for microwaving
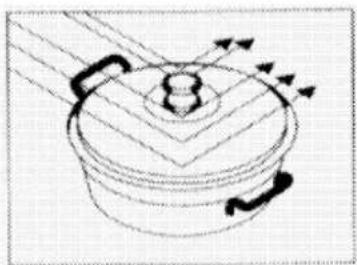
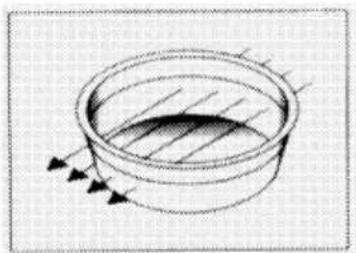
Microwaves pass through porcelain, glass, cardboard or plastic but not the metals. Therefore metal utensils or utensils with metal parts cannot be used in microwave oven.
Microwaves are reflected by metal...
natural_image
Simple line drawing of a cooking pot with arrows indicating direction (no text or symbols)... but they pass through glass or porcelain...
natural_image
Simple line drawing of a circular container with internal striped pattern and directional arrows (no text or symbols)... and absorbed by the foods.
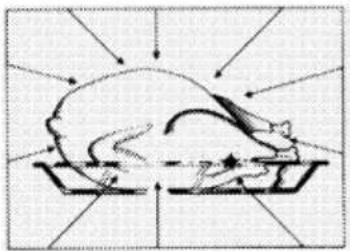
natural_image
Illustration of a pig on a tray with directional arrows indicating flow or movement (no text or symbols)
CAUTION
Fire risk!
Never place metal or metal-covered containers in your microwave oven.
CAUTION
Do not use your oven when empty and without tray. This can damage the oven.
- Microwaves cannot penetrate metal. Microwaves will reflect off any metal objects in the oven causing dangerous electric arcing. Most heatproof non-metallic containers are suitable for use in a microwave oven. However, certain containers may contain materials that are unsuitable for microwaving. You can apply the following test to determine whether a container is suitable for microwaving or not:
- Place the container you wish to test empty in the oven along
with another container filled with water.
- Operate the oven at high power for one minute. If the water has been heated and the container you are testing is cold, then it is suitable for microwaving.
- On the other hand, if the water remains cold and the neighboring container heats up, this means that the microwaves have been absorbed by the container and therefore subject container is unsuitable for microwaving.
Glass containers
- Avoid using containers made of very thin glass or lead crystal. Heatproof glass containers are suitable for use in microwave ovens. On the other hand, in the microwave oven avoid using brittle glass containers such as water and wine glasses that may break as their contents heat up.
Plastic containers
- Do not use pots and dishes made of plastic or melamine for long duration microwaving; the same applies for bags used for storing frozen food. This is because very hot food will sooner or later cause the plastic containers to melt or distort. Use such containers only for short duration microwaving.
Cooking bags
• Cooking bags are suitable for use in microwave ovens,
provided that these are designed for cooking. Do not forget to pierce them to enable the steam inside to escape. Never use normal plastic bags for cooking purposes since they will melt and break up.
Paper
- You should not use any kind of paper for long-duration cooking. This will cause the paper to catch fire. Paper dishes are suitable for oily and dry foods that require short-duration cooking.
Do not use recycled paper. Such paper may contain fragments that can cause arcing.
Wooden and wicker containers
- As microwave causes drying of wooden structure and crisp it,
large wooden containers should not be used.
Porcelain containers
- Generally speaking, containers made of such materials are suitable for use in a microwave oven, but you should test them to be sure.
Metal containers
- Metal containers reflect the microwaves away from the food. Therefore, avoid using such containers.
DANGER:
Certain cookware containing high levels of iron or lead are unsuitable for use as cooking containers. Make sure that you test your cookware in terms of suitability for microwaving.
| Cookware | Microwave | Grill | Convection | Combination modes |
| Heat-Resistant Glass | Yes | Yes | Yes | Yes |
| Non Heat- Resistant Glass | No | No | No | No |
| Heat-Resistant Ceramics | Yes | Yes | Yes | Yes |
| Microwave-Safe Plastic Plate | Yes | No | No | No |
| Kitchen Paper | Yes | No | No | No |
| Metal Tray | Yes* | Yes | Yes | Yes* |
| Metal Rack | No | Yes | Yes | No |
| Aluminum Foil & Foil Container | No | Yes | Yes | No |
| * Only use metal tray given with oven. | ||||
Positioning food
- You will obtain optimal results by arranging the food evenly in
the container. This method can be applied in many ways for satisfactory results.
- You can cook a large number of identical pieces (for example potatoes). If you arrange them in an evenly spaced circle around the oven they will cook better. Avoid placing one piece on another.
- Since the microwaves act more powerfully on the outer layers of food, when cooking pieces of food with different shapes and thicknesses, place the thick parts in the centre of the tray. This will ensure that these parts are cooked first.
- Place fish and other food that is not flat with their tails at the edge of the tray.
- You can place very finely carved pieces of meat on top of each other. Thicker items such as sausages and meat slices should be placed close together.
- Heat gravy and sauces in a separate dish. Narrow, deep dishes are better for this purpose than wide, shallow ones. Containers should be no more than two thirds full when you heat gravy, sauces or soups.
- If you are cooking fish whole, pierce them so that their skins do not burst.
- When using clinging film, bags or baking paper, pierce or leave an opening to enable steam to escape.
- Small pieces of food will cook quicker than large pieces, and evenly shaped pieces will cook
quicker than other pieces. For the best results cut food evenly into pieces of equal size.
Food height
- With food that is quite thick (generally roasts), the lower part will cook faster. This means that it is sometimes necessary to turn such items over several times.
- Thick or dense items can be placed in a higher position, enabling the microwaves to act on the bottom and middle parts of the item.
Cooking suggestions
Factors affecting microwaving time :
- Microwaving time depends on a number of factors. The temperature of the ingredients used in a recipe can considerably affect the amount of cooking time required. Thus, a cake made with ice-cold butter, milk and eggs will take considerably longer to cook than one made with ingredients at room temperature.
- Particularly when it comes to bread, cakes and cream sauces, you are recommended with certain recipes to remove the food from the oven before it is fully cooked. Such foods if left covered outside the oven will continue to cook as heat flows from the outer to the inner layers of the food.
If you leave items on the oven until they are fully done, you risk
burning the outer layer. With time you will become a better judge of how long items require to be cooked and left to stand.
- Do not leave items to cook unattended. Your microwave oven is automatically lit up when it is in operation, enabling you to keep an eye on the condition of the items being cooked.
Defrosting:
- The defrosting time may depend on the shape of the packet. Shallow, rectangular packets defrost more quickly than deep containers.
- Separate the items as they start to defrost. They will then defrost more readily.
- The more food you cook, the longer it will take. Twice the amount of food will take roughly twice as long. If it takes four minutes to cook one potato, it will take on average seven minutes to cook two potatoes.
The amount of microwaves that your oven produces remains constant however much food you place inside it. This means that the more food you place inside, the longer it will take to do.
Liquid content
- Liquid content affects cooking time because microwaves are sensitive to moisture. Foods with natural liquid content (such as vegetables, fish, and poultry)
will cook quickly and easily. When cooking dry items such as rice and pulses you are recommended to add water.
- Remember that moisture is eliminated in a microwave oven, so that when cooking drier items such as certain vegetables you should first wet them with a little water or cover them so that they retain their moisture.
- When cooking foods with very little water content (thawing bread, making pop-corns) evaporation takes place rapidly. In such cases oven operates as if it is empty and foods can get burnt. And oven or the utensils can get damaged. Therefore, make sure that you just set the required cooking time and never leave the oven unattended during cooking.
Steam
- The moisture within the food may sometimes cause the oven to steam up when it is operating. This is normal.
Sugar
- When making foods with very high sugar content like puddings and tarts, follow the recommendations in your microwave recipe books.
If you exceed the recommended cooking time, this may result in the food burning or damage to your oven.
Food density
- Light, porous items such as bread and cakes will take less time than heavy, dense items such as roasts and stews. Exercise caution when microwaving porous items since they do not have hard, dry surfaces.
Bones and fat content
- Bones conduct heat and fat cooks faster than meat. When cooking pieces of meat containing bones or fat, ensure that they are cooked evenly and not overcooked.
Food colour
- Meat or poultry that has been cooked for fifteen minutes or more will brown gently in its own fat. To give food that has been prepared quickly a more appetizing and roast complexion, you can cover it with barbecue or soy sauce. If you only use a little of this sauce it will not affect the essential flavor of the food.
Reducing the internal pressure in food
- Many kinds of foods are covered in skins. Steam builds up inside as they are cooked which may cause them to burst. To avoid this, the skin should be pierced with a fork or knife. You should apply this procedure with potatoes, chicken livers, mussels, egg yolks, sausages
and certain kinds of fruit and vegetable.
Turning and stirring items while cooking
- It is important to stir items when you are microwaving them. In conventional cooking food is stirred to mix it. In microwave cooking, however, food is stirred to achieve equal heat distribution. Always stir from the outside towards the middle because the outside heats up before the middle.
- With bulky and elongated items like roasts and whole poultry, you should turn them over to ensure that the top and bottom are equally cooked. Indeed, you may have to turn sliced meat and chicken over.
- Turning items over and stirring whilst cooking are important to ensure that all sides are equally well done.
Different cooking times
- To begin with, always try out the minimum cooking time and check whether the item is done. The cooking times given in this manual are approximate values. Cooking times may vary according to the dimensions and types of the food and containers.
Standing time
- Leave the food to stand for a while after removing from the oven. When defrosting, cooking and reheating, leaving the items
to stand for a while invariably produces better results. This is because the heat will spread evenly around the food.
Inside the microwave oven, food will continue to cook even after the oven has been turned off. The standing period will raise the heat of the food by between 3°C and 8°C. This process is maintained not by the microwave oven but by the heat within the food. The standing time may vary according to the kind of food. Sometimes this period is as short as the time taken to remove the food from the oven and serve it. This period may extend to as long as ten minutes with large items.
- Remove food from its plastic packaging before cooking or defrosting. Under certain exceptional circumstances it may be necessary to cover you food with a special clinging, nylon film.
- It is especially recommended with items like meat, chicken, bread, cakes and cream sauce to remove them from the oven before they are fully cooked and leave them to stand until fully cooked.
How to use the microwave oven

Before you can use the oven, the time must be set. If the time is not set, oven will not operate.
Your microwave oven operates in 3 different principles, namely, only microwave, only oven function, and combined mode.
| Operating mode | Description |
| Microwave | When the oven operates in microwave mode only, it creates heat directly inside the meal. You may use the microwave for warming meals or drinks, thawing or cooking. In microwave, meals are cooked but not roasted. |
| Oven function | Only the oven heaters cooks the meal by heating it up. You may use the oven for all kinds of cooking and also for thawing. Meals are both cooked and roasted in the oven function. |
| Combined mode | In the combined mode, both the oven heaters and the microwave operate concurrently. Meals are cooked and roasted in a shorter time in the combined mode. |
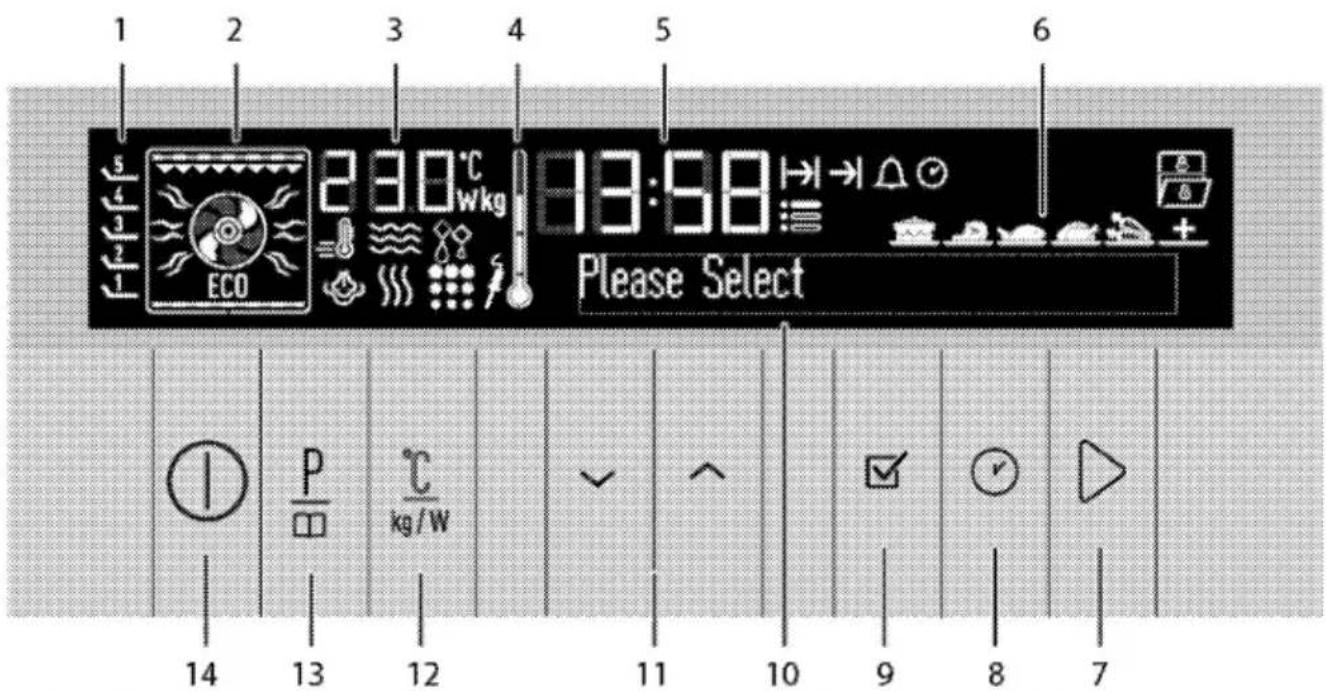
1 Shelf positions
2 Function display
3 Temperature/weight/microwave power indicator field
4 Oven Inner Temperature symbol
5 Current time indicator field
6 Convenience food selection display
7 Start/stop cooking key
8 Time and settings key
9 OK key
10 Text display
11 Up/down keys (Menu step)
12 Temperature/weight/booster/power setting key
13 Program selection key
14 ON/OFF key
Display symbols:

Microwave symbol
Rapid heating (Booster) symbol
Cooking time symbol
End of cooking time symbol
Alarm symbol
Current time symbol
Settings symbol
Defrost symbol
Keylock symbol
Door open symbol
Meat probe symbol *
Pyro symbol *

Steam symbol *
Varies depending on the product model.
Oven returns to stand-by display after it is switched on and the current time is set. Only the current time appears on the display.
Only the ⏻ and ⚙ keys are functional when the display is in this status. You can perform all actions in the Settings menu. See Settings menu, page 60.

If you touch Ⓐ key briefly in this screen, "Keep pressed for 1 second" warning appears in the text field. Touch the Ⓐ key for longer than 1 second to switch on the oven.
14:05
Keep pressed for 1 second

Operating microwave mod
- Touch Ⓐ key to switch on the oven.
- Initial operation screen appears when the oven is turned on.
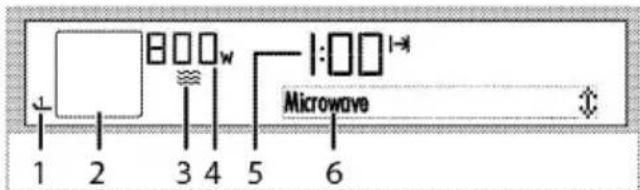
1 Shelf positions
2 Function display
3 Microwave symbol
4 Microwave power / Temperature/weight/microwave power indicator field
5 Cooking Time Field: Indicates the set cooking time.
6 Text display
This screen contains mikrowave mod with the microwave pover level, recommended tray position and cook time.
- If you want to change the microvawe power level, touch once to reach the power level display.
Wsymbol flashes at the same time.

-
Touch √/√ until the desired power level appears in the Power level field. Touch ☑ to set the level when the desired value appears on the display.
-
For cooking time, touch ⏻ key for once to scroll to the "Cook time" on the text display. |→| symbol flashes at the same time.
-
Touch √√ keys to set the desired cooking time and confirm the setting by touching the ☑ key. Once the Cook Time is set, |→| will be displayed continuously.
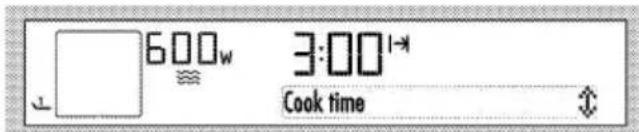
- If cook time and power level values are suitable, touch ▷ key to start cooking. Cooking starts and "Cooking" appears on the display.


If the oven door is opened during cooking, "Door open" warning, symbol appears on the display and microwave cooking is canceled.
Cooking stops when the oven door is opened. You must touch ▷ again to resume cooking after closing the oven door.

If you touch ▷ key briefly in this screen, "Keep pressed for 1 second" warning appears in the text field. Touch the ▷ key for longer than 1 second to start cooking.
» The oven will be operate on the level set, until the end of the cooking time you selected. The oven lamp is lit during the cooking process.
-
After the cooking is completed, "Good appetite" appears on the display and alarm signal is heard.
-
To stop the alarm signal, just touch any key.
Operating combi mode
- Touch Ⓐ key to switch on the oven.
- Touch ∧ or ∨ keys to select the desired combi mode (function).
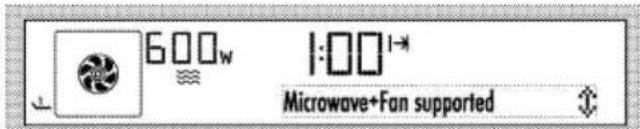
- If you want to change the microvawe power level, touch ℃kg once to reach the power level display.
Wsymbol flashes at the same time.
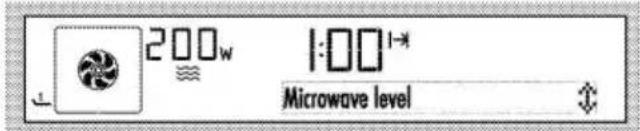
- Touch ∨/∨ until the desired power level appears in the Power level field. Touch ☑ to set the level when the desired value appears on the display.
- If you want to change the temperature for oven function on combi mode, touch ℃kg once to reach the temperature display. ℃symbol flashes at the same time.

- Touch ∨/√ until the desired temperature appears in the Temperature Indicator field. Touch ☑ to set the temperature when the desired value appears on the display.
-
For cooking time, touch ⬇ key for once to scroll to the "Cook time" on the text display. |→| symbol flashes at the same time.
-
Touch √√ keys to set the desired cooking time and confirm the setting by touching the ☑ key. Once the Cook Time is set, I→I will be displayed continuously.

- If cook time, power level and temperature values are suitable, touch ▷ key to start cooking. Cooking starts and "Cooking" appears on the display.
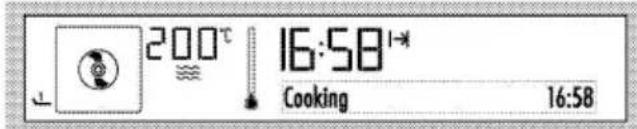

If the oven door is opened during cooking, "Door open" warning, symbol appears on the display and microwave cooking is canceled.

If you touch ▷ key briefly in this screen, "Keep pressed for 1 second" warning appears in the text field. Touch the ▷ key for longer than 1 second to start cooking.
» The oven will be heated up to the preset temperature and will maintain this temperature until the end of the cooking time you selected. At the same time the oven will be operate on the microwave power level is set. The oven lamp is lit during the cooking process.
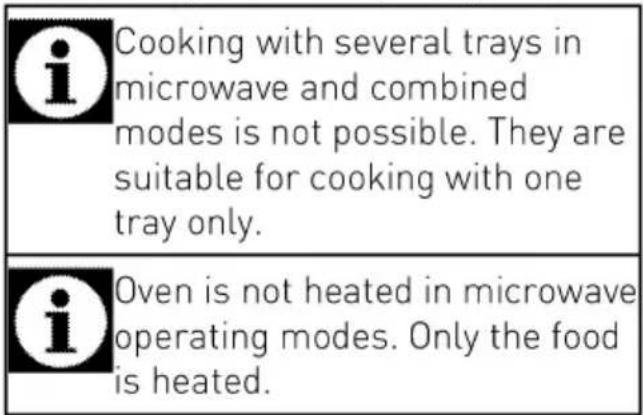
| iDuring cooking, microwave level and cook time can be changed. |
| iOven clock displays cooking time on the basis of minutes and seconds in microwave and operation modes. Time is displayed in hours and minutes for oven functions. |
| iYou can stop cooking in microwave and combined modes by pressing ▷ key for 1 second. To resume cooking, press the ▷ key again for 1 second. |
| iWhen cooking in low temperatures only by using microwave or combined modes, a smell may remain after you take the food out since the cooking continues even if the oven is cold. In this case, operate your oven in fan assisted cooking mode at 230 °C for 20 minutes. |
Switching off the electric oven
Touch ① key to switch off the oven.
natural_image
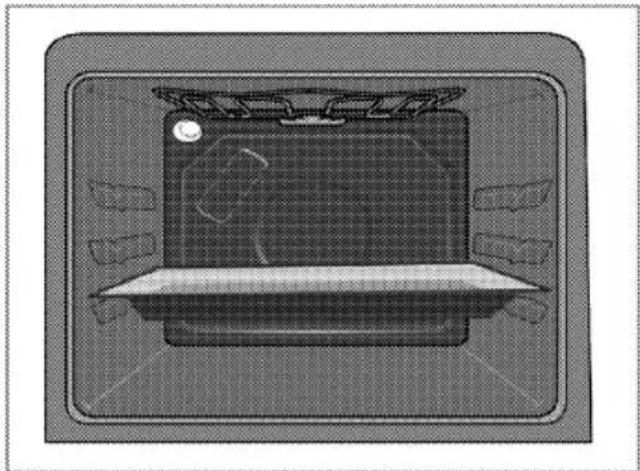
Top-down view of a computer monitor with ventilation grille and drive slots (no text or symbols visible)1st rack of the oven is the bottom rack. Use only 1st rack in microwave cooking.
| i | Due to safety reasons, maximum time that can be set for "Cook time" is limited with 12 minutes at highest power level. On other power levels, this time reach to 90 minutes. |
| i | While making any adjustment, related symbols will flash on the display. |
| i | Program will be cancelled in case of power failure. You must reprogram the oven. |
| i | Current time cannot be set while the oven is operating in any function, or if semi-automatic or full automatic programming is made on the oven. |
| i | Even if the oven is switched off, oven lamp lights up when the oven door is opened. |
Operating modes for Microwave
The order of operating modes shown here may be different from the arrangement on your product.
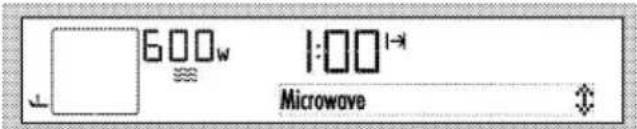
Microwave
Only the microwave operates. It may be used to warm meals and drinks, as well as cooking. Meals are cooked without roasting.
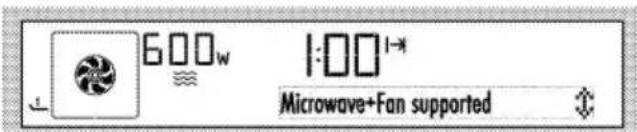
Microwave+Fan supported
Oven's rear heater also operates together with the microwave. Hot air heated by the rear heater is evenly distributed throughout the oven rapidly by means of the fan. You can cook your meals in a short time and roast at the same time.
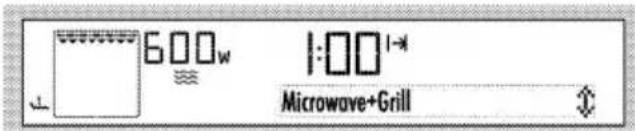
Microwave+Grill
Microwave and large grill at the ceiling of the oven is in operation. It is suitable for grilling large amount of meat.
Microwave+Grill
- Put big or medium-sized portions in correct rack position under the grill heater for grilling.
- Set the temperature to maximum level.
- Turn the food after half of the grilling time.
Microwave+Grill+Fan
Microwave and hot air heated by the full grill is distributed very fast in the oven by means of the fan. It is suitable for grilling large amount of meat.
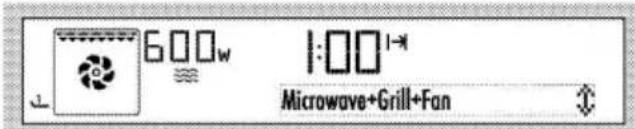
- Put big or medium-sized portions in correct rack position under the grill heater for grilling.
- Set the temperature to maximum level.
- Turn the food after half of the grilling time.
Microwave+Defrost
Microwave and only the fan (in the rear wall) is in operation.
Suitable for thawing frozen granular food slowly at room temperature and cooling down the cooked food.
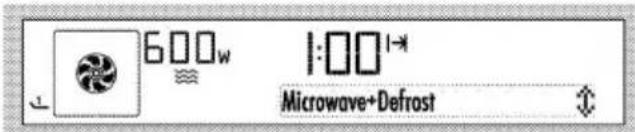
Cooking times table

The timings in this chart are meant as a guide. Timings may vary due to temperature of food, thickness, type and your own preference of cooking.

1st rack of the oven is the bottom rack. Use only 1st rack in microwave cooking.
| Dish | Cooking mode | Weight (gr) | Temperature (°C) | Microwave power (W) | Cooking time (approx. in min.) |
| Chicken baguette | Microwave+Fan supported | 1000 | 210 | 600 | 25 |
| Whole chicken | Microwave+Fan supported | 1500 | 15 min. 230 then 200 | 600 | 35 |
| Frozen pizza | Microwave+Fan supported | 450 | 230 | 200 | 8 |
| Turkey, thigh (boned) | Microwave+Grill+Fan | 1000 | 230 | 300 | 30 |
| Fresh large potatoes | Microwave+Fan supported | 1000 | 180 | 600 | 25 |
| Potatoes graten * | Microwave+Fan supported | 1250 | 180 | 600 | 25 |
| Dalyan meatball | Microwave+Fan supported | 1800 | 5 min. 230 then 170 | 300 | 20 |
| Whole fish | Microwave+Grill+Fan | 1000 | 250 | 600 | 10 |
| Sticks of fish pane | Microwave+Fan supported | 600 | 230 | 300 | 12 |
| Dumplings with tomato and potato | Microwave+Fan supported | 1500 | 210 | 200 | 35 |
| Convenience food (Chickpea with meat) | Microwave | 400 | 600 | 3.5 | |
| Pilaf | Microwave | 400 | 600 | 4 | |
| Please make preheating before cooking in combi mode. Preheating should be made by oven operating modes.* It is suggested to add planed kashar cheese onto it during the final 5 minutes of cooking. | |||||
Defrost
| Dish | Weight (gr) | Microwave power (W) | Dissolution time (min.) (approximately) | Waiting time (min.) | Suggestions |
| All red meat | 250 | 200 | 6 | 10 | Turn over after half of the time |
| 500 | 200 | 12 | 10 | Turn over after half of the time | |
| Ground meat | 100 | 100 | 8 | 10 | |
| 250 | 200 | 5 | 10 | ||
| 500 | 200 | 6 | 10 | Turn over after half of the time | |
| Whole chicken | 1500 | 200 | 25 | 10 | Turn over after half of the time |
| Tavuk but | 750 | 300 | 7 | 10 | |
| Chicken baguette | 500 | 300 | 5 | 10 | |
| 100 | 600 | 6 | 10 | ||
| Whole fish | 250 | 200 | 7 | 5 | Turn over after half of the time |
| 500 | 200 | 10 | 5 | Turn over after half of the time | |
| Sausage | 300 | 200 | 5 | 5 |
Ready meals functions Selecting the ready meals functions
Ready Meals menu contains meal programmes that are prepared for you by professional cooks specially and stored in the memory of the control unit.
To select the Ready Meals functions:
- Touch Ⓐ key to switch on the oven.
Initial operation screen appears when the oven is turned on.

If you touch Ⓘ key briefly in this screen, "Keep pressed for 1 second" warning appears in the text field. Touch the Ⓘ key for longer than 1 second to switch on/off the oven.
- Touch two times ☐ key to select the Microwave Ready Meals function display. In this step, "Lamb en cocotte" and the ≈ symbol appears on the display.

-
Touch ∨√ keys to select the desired meal.
-
Touch ▷ key to start cooking.

If you touch ▷ key briefly in this screen, "Keep pressed for 1 second" warning appears in the text field. Touch the ▷ key for longer than 1 second to start cooking.

If the desired meal is not required Quick heating, firstly your dish into the oven and then touch ▷ key to start cooking.
- If the desired meal required quick heating, "Preheating" appears on the display.
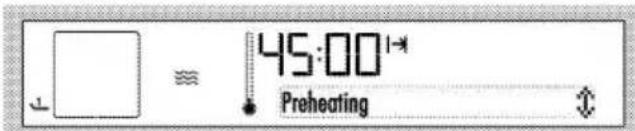
- After finishing the Quick heating, "Place the tray" appears on the display.
- Put your dish into the oven and close the oven door.
Cooking start and "Cooking" appears on the display.
- After the cooking is completed, "Good appetite..." appears on the display and alarm signal is heard.

To stop the alarm signal, just press any key.

"Back" appearing on the display while navigating in the meal menu allows you to return to the upper menu. Touch key to switch to the initial function display.
LAMB EN COCOTTE
INGREDIENTS
• 150 g of lamb meat cubes
- 100 g of onion
• 20 g of red peppers
• 20 g of green peppers
• 40 g of fresh potatoes
• 20 g of eggplants
• 100 g of tomatoes
• 2 cloves of garlic
• 12 table spoon of tomato paste
• 1 table spoon of olive oil
- 10 g of butter
- Salt
- Black pepper
PREPARATION
- Dice the onion, red pepper, green pepper, potato, eggplant and tomato coarsely.
• Chop the garlic coarsely. - Blend chopped vegetables, lamb meat cubes and other ingredients well within a bowl.
- Pour the mixture into a lidded glass dish, and add butter in pieces.
- Lid the bowl.
- Place the lidded glass dish on the plate on 1st shelf of the preheated oven and cook the meal.
- It is recommended to serve the meal after resting it for 10 minutes after cooking.
BEEF WELLINGTON
INGREDIENTS
• 40 g of diced, fine-chopped onion
• 2 pcs of diced, fine-chopped mushrooms
• Fine-chopped 1 clove of garlic
- 70 ml of cream
- Salt
- Black pepper
• 150 g of beef tenderloin fillet
• 1 pc of flaked pastry
• 1 scrambled egg
• 1 table spoon of olive oil
PREPARATION
- Heat the pan, pour 1 tablespoon of olive oil into a pan heated enough. Seal each surfaces of the fillet, which was flavored with salt and black pepper, on the pan (make sure the meat is not cooked completely). Cool the meat completely.
- Fry onion, mushroom and garlic in another pan. When the water released by the mushrooms has boiled away, add cream and cook the mixture until it is thickened. Cool the mixture completely.
- Flour the flaked pastry which is kept for 1 hour at ambient temperature and roll out a little bit with rolling pin.
- Spread half of the cooled mixture in the middle of the rolled-out flaked pastry with the help of a spoon, place the fillet onto it and fold the pastry around the fillet, (brush egg on the seam side so that the flaked pastry stick to each other).
- Place the food on the plate, seam side down.
- Brush beaten egg yolks all over the top.
- Place the plate on the 1st shelf of the preheated oven and cook the meal.
SEA BASS
INGREDIENTS
• 2 whole sea basses of 300 gr, each (600 g)
- 90 gr of julienne-cut onion (at the thickness of 3 to 4 mm)
- 1 middle-sized potato (ringed at the thickness of 1 to 4 mm)
• 1 fresh sprig of thyme leaves
• 1 fresh sprig of dill
• 1 clove of finely chopped garlic
• 1 lemon peel grater
• 1 bay leaf
• 10 ml of lemon juice
- Butter
• 10 ml of olive oil
- Salt, black pepper
PREPARATION
- Rub the fish with salt, black pepper and butter.
- Mix potato, onion, fresh thyme leaves, fresh dill, garlic, lemon peel grater, bay leaf, lemon juice and olive oil within a bowl.
- Oil the cake tray.
- Place half of the onions in the middle of the oiled tray and line up the potatoes around the onions.
- Stuff the fish with the other half of the onions and then place them onto potato and onions.
- Place the plate on 1st shelf of the preheated oven and cook the meal.
SLICED MEATBALL WITH VEGETABLES
INGREDIENTS
• 1 middle-sized onion
• 1 small sized red pepper
• 1 small sized green pepper
• 1 small sized yellow pepper
• 1 small sized eggplant
• 1 small sized courgette
• 2 middle-sized tomatoes
- 25 g of butter
• 0.5 kg of minced meat
• 175 g of bread crumbs
• 1 table spoon of tomato paste
• 1 egg
- 30 ml of cream
• 1 desert spoon of red pepper flakes
- Salt
- Black pepper
PREPARATION
- Melt the butter in a saucepan. Add the finely diced onion and eggplants to the oil and fry.
- Add the finely diced red, green and yellow peppers to the mixture and fry a little more.
- Add the finely diced courgettes and tomatoes to the final mixture and fry (make sure all the vegetables do not get too soft), allow the mixture to cool down completely.
- Knead the minced meat, egg and cream well in another bowl.
- Add the cooled vegetable mixture, salt, black pepper, red pepper flakes and bread crumbs to the minced meat mixture and knead all ingredients well until they reach meatball stiffness.
- Place oily paper on the standard tray and place the minced meat which is given cylindrical shape onto the tray.
- Place the plate on 1st shelf of the preheated oven and cook the meal.
- It is recommended to serve the meatball by slicing after resting it on the tray for 5 minutes after cooking.
BEETROOT SALAD WITH GOAT CHEESE
INGREDIENTS
• 10 beetroots of 50 gr, each
- 2 oranges
- 2 lemons
• 90 ml of balsamic vinegar
• 100 ml of olive oil
• 1 vanilla bean
- Salt
- Black pepper
• 3 fresh sprigs of thyme
• 2 cloves of garlic
• 2 bunches of rockets
• 10 small sized vine tomatoes (cherry)
• 100 g of goat cheese
PREPARATION
- Mix balsamic vinegar, orange peels, lemon peels, kernel of vanilla bean, olive oil, finely chopped garlic and fresh thyme (marinating liquid).
- Marinate all beetroots with their peels on in the marinating liquid.
- Line up all marinated beetroots on a glass dish with lid, together with marinating liquid and close the lid.
-
Place the lidded glass dish on the plate on 1st shelf of the preheated oven and cook the beetroots.
• Take the cooked meal off the oven and let it cool. -
Peel and slice the cooled beetroots with the help of a knife.
- Blend coarsely chopped rockets, dimidiated cherry tomatoes, slices of oranges with peeled skin and sliced beetroots.
- Add the cooked and cooled marinating liquid, salt, black pepper and sliced goat cheese pieces to the mixture, mix it and then serve.
POTATO GRATIN
INGREDIENTS
• 200 g of fresh potatoes
• 100 ml of cream
• 1 small handful of nutmeg powder
- Salt
- Black pepper
• 1 clove of finely chopped garlic
• 1 bay leaf
• 1 fresh sprig of thyme
• 1 tea spoon of butter
PREPARATION
- Chop potatoes in very fine slices (1-2 mm) and leave in water for 30 minutes.
- Boil cream, nutmeg powder, salt, black pepper, finely-chopped garlic, bay leaf and thymes.
- Spread butter within a glass bowl and line up the potatoes as 2 lines. Pour the half of the mixture onto it as extremely hot. Line up potatoes as another 2 lines and pour the remaining mixture onto it as extremely hot.
-
Place the glass dish on the plate on 1st shelf of the preheated oven and cook the meal.
-
Place a glass lid reversed on the meal that is taken off the oven (this applies pressure on the meal and make it flat-shaped) and allow it to rest.
- Slice potato gratin that is completely cooled.
- Heat the pan, pour 1 tablespoon of olive oil into the pan heated enough and heat/fry each surfaces of sliced potato gratin.
• It is recommended to serve hot.
HOT CAKE WITH CHOCOLATE SAUCE
INGREDIENTS
• 2 table spoons of flour
• 2 table spoons of sugar
• 2 table spoons of milk
• 1 table spoon of oil
• 1 table spoon of cocoa
• 1 egg
INGREDIENTS FOR CHOCOLATE SAUCE
- 50 g of cream
• 50 g of bitter chocolate
PREPARATION
- Blend flour, cocoa and sugar well within a bowl.
- Add milk, oil and egg to the mixture and stir it well.
• Fill the soufflé dish with the cake mixture up to the half. - Place the soufflé dish on the tray and cook it on the non-preheated oven.
- Boil the cream in a separate bowl and take it off the stove. Add the shredded bitter chocolate to the cream and stir
until the chocolate melts (chocolate sauce).
- Pour the chocolate sauce onto hot cake and serve it.
FLAKED PASTRY ROLLS WITH CINNAMON AND GRAPES
INGREDIENTS
• 6 pcs of flaked pastry
• 1 egg yolk
STUFFING INGREDIENTS
- 100 ml of water
- 100 g of sugar
• 1 tea spoon of raisin
• 1 water glass of powdered nut
• 12 water glass of coconut
• 1 tea spoon of cinnamon
PREPARATION
- Boil water and sugar in a saucepan. Take the mixture off the stove. Add powdered nut, coconut and cinnamon and mix, then allow the mixture to cool down completely (stuffing).
- Flour the flaked pastry which is rested at ambient temperature for 1 hour and roll out a little bit with rolling pin.
- Spread the stuffing ingredients onto the rolled-out pastry with the help of a spoon and scatter raisins on it.
- Roll the pastry and cut into pieces as 3 cm.
- Place oily paper onto the cake tray and line up the rolls on the tray with spaces between them, spread egg yolk on the cut surface.
- Place the plate on 1st shelf of the preheated oven and cook the meal.
- It is recommended to serve warm.
STUFFED GRAPE LEAVES WITH OLIVE OIL
INGREDIENTS
• 500 g of vine leaf in salt
• 12 tea glass of olive oil
- Hot water
- Half lemon juice
STUFFING INGREDIENTS:
• 4 onions
• 1 tea glass of olive oil
• 2 table spoons of pine nut
• 2 water glasses of rice
• 1 table spoon of dried mint
• 1 dessert spoon of black pepper
• 1 desert spoon of cinnamon
• 5-6 g of granulated sugar
• 2 table spoon of currant
• 1 water glass of chopped parsley
• 1 desert spoon of salt
PREPARATION
- Fry the onion with olive oil, add rice to the mixture and fry a little more. Add all other stuffing ingredients to the mixture and rest them.
• Line up the rolled vine leaves as single line in a sufficiently large lidded glass bowl. - Add the olive oil, lemon juice and hot water mixture in a way that the mixture will not exceed the upper surface of the vine leaves.
- Lid the bowl.
- Place the lidded glass bowl with a tray on the 1st shelf of
the preheated oven and cook the meal.
- It is recommended to serve the stuffed vine leaves after resting them at the ambient temperature for 1 hour and then at the refrigerator.
CHICKEN DRUMSTICK
INGREDIENTS
• 3 pcs of chicken drumstick
• 3 middle-sized potato (ringed as 1-cm thickness)
• 2 julienned onion (at a thickness of 3 to 4 mm)
• 2 cubed chopped tomato
• INGREDIENTS FOR MARINATING LIQUID
• 1 clove of garlic
• 12 tea spoon of black pepper
• 1 tea spoon of salt
• 50 ml of red vine vinegar
• 1 table spoon of granulated sugar
• 1 table spoon of molasses
• 1 table spoon of honey
• 1 lemon's juice
• 2 fresh sprigs of thyme leaves
• 3 ml of hot pepper sauce
• 1 tea spoon of red pepper
• 200 ml of olive oil
- Smash the garlic and mix all marinating ingredients.
- Mix chicken drumsticks with half of marinating liquid and mix the other half with tomatoes, potatoes and onions and marinate the mixture for 2 hours.
• Line up the chicken drumsticks in the middle of the standard
- PREPARATION
tray. Place potatoes around chicken drumsticks, and onions and tomatoes between chicken drumsticks.
• Cook the meal by placing the tray on a shelf of the preheated oven.
- Rest the meal for 5 minutes after cooking and then service.
6 How to operate the oven
General information on baking, roasting and grilling
WARNING
Hot surfaces cause burns!
Product may be hot when it is in use. Never touch the hot burners, inner sections of the oven, heaters and etc. Keep children away.
Always use heat resistant oven gloves when putting in or removing dishes into/from the hot oven.
DANGER:
Be careful when opening the oven door as steam may escape.
Exiting steam can scald your hands, face and/or eyes.
Tips for baking
- Use non-sticky coated appropriate metal plates or aluminum vessels or heat-resistant silicone moulds.
- Make best use of the space on the rack.
- Place the baking mould in the middle of the shelf.
- Select the correct rack position before turning the oven or grill on. Do not change the rack position when the oven is hot.
- Keep the oven door closed.
Tips for roasting
- Treating whole chicken, turkey and large piece of meat with dressings such as lemon juice and black pepper before
cooking will increase the cooking performance.
- It takes about 15 to 30 minutes longer to roast meat with bones when compared to roasting the same size of meat without bones.
• Each centimeter of meat thickness requires approximately 4 to 5 minutes of cooking time. - Let meat rest in the oven for about 10 minutes after the cooking time is over. The juice is better distributed all over the roast and does not run out when the meat is cut.
- Fish should be placed on the middle or lower rack in a heat-resistant plate.
Tips for grilling
When meat, fish and poultry are grilled, they quickly get brown, have a nice crust and do not get dry. Flat pieces, meat skewers and sausages are particularly suited for grilling as are vegetables with high water content such as tomatoes and onions.
- Distribute the pieces to be grilled on the wire shelf or in the baking tray with wire shelf in such a way that the space covered does not exceed the size of the heater.
- Slide the wire shelf or baking tray with grill into the desired
level in the oven. If you are grilling on the wire shelf, slide the baking tray to the lower rack to collect fats. Add some water in the tray for easy cleaning.
Foods that are not suitable for grilling carry the risk of fire. Only grill food which is suitable for intensive grilling heat. Do not place the food too far in the back of the grill. This is the hottest area and fatty food may catch fire.
How to operate the electric oven

Before you can use the oven, the time must be set. If the time is not set, oven will not operate.
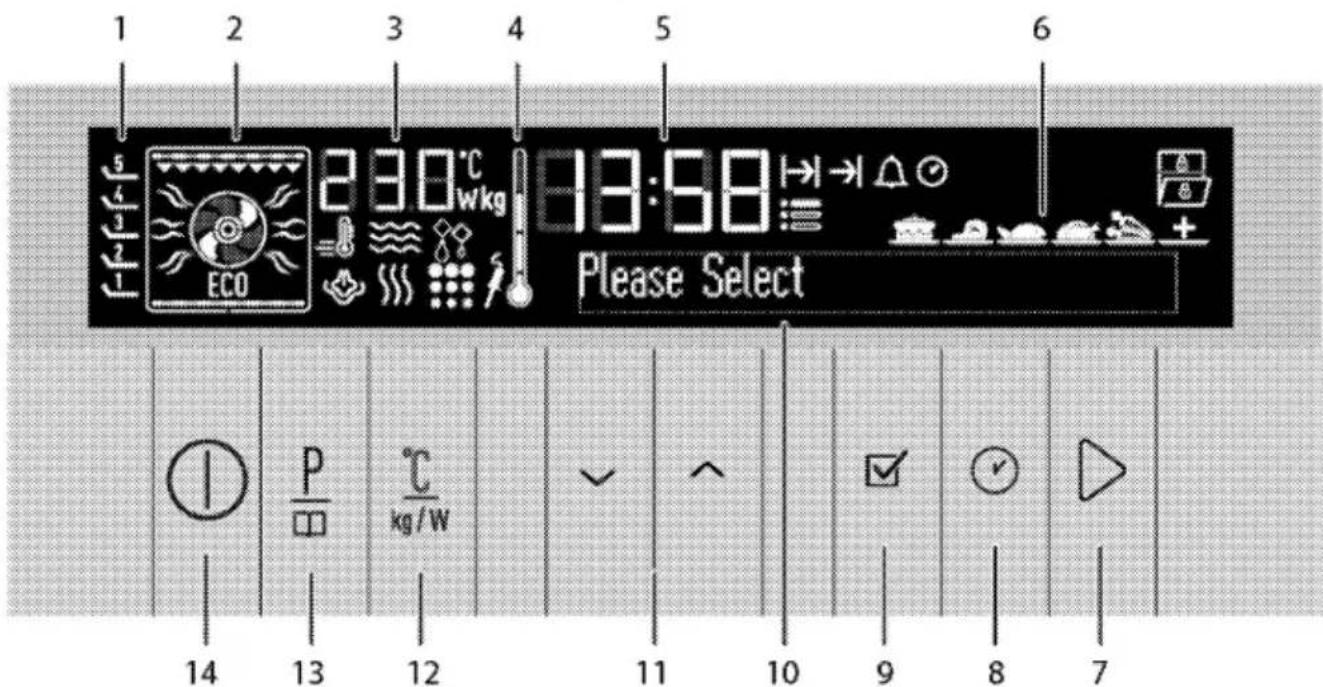
1 Shelf positions
2 Function display
3 Temperature/weight/microwave power indicator field
4 Oven Inner Temperature symbol
5 Current time indicator field
6 Convenience food selection display
7 Start/stop cooking key
8 Time and settings key
9 OK key
10 Text display
11 Up/down keys (Menu step)
12 Temperature/weight/booster/power setting key
13 Program selection key
14 ON/OFF key
Display symbols:

Microwave symbol Rapid heating (Booster) symbol Cooking time symbol End of cooking time symbol Alarm symbol Current time symbol Settings symbol Defrost symbol Keylock symbol Door open symbol Meat probe symbol * Pyro symbol * Steam symbol *
* Varies depending on the product model. Oven returns to stand-by display after it is switched on and the current time is set. Only the current time appears on the display. Only the ⏻ and ⏱ keys are functional when the display is in this status. You can perform all actions in the Settings menu. See Settings menu, page 60.
If you touch Ⓐ key briefly in this screen, "Keep pressed for 1 second" warning appears in the text field. Touch the Ⓐ key for longer than 1 second to switch on the oven.
14:05
Keep pressed for 1 second

Select temperature and operating mode
- Touch Ⓐ key to switch on the oven.
- Initial operation screen appears when the oven is turned on.
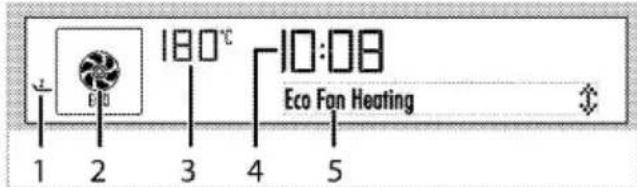
1 Shelf positions
2 Function display
3 Temperature/weight/microwave power indicator field
4 Current time indicator field
5 Text display
This screen contains the recommended temperature under temperature/weight indicator and the active heaters and
recommended tray position in the function display.
- Touch ∧ or ∨ keys to select the desired operating mode (function).
After the function is selected, "Temperature", "Cook time" and "Booster" (rapid heating) can be set.
- If you want to change the temperature, touch ℃kg once to reach the temperature display.

-
Touch √√ until the desired temperature appears in the Temperature/weight/microwave power indicator field. Touch ☑ to set the temperature when the desired value appears on the display.
-
If cooking function and temperature values are suitable, touch ▷ key to start cooking. Cooking starts and "Cooking" appears on the display.
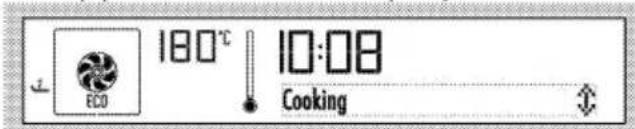

If the oven door is opened during cooking, "Door open" warning and symbol appears on the display.

If you touch ▷ key briefly in this screen, "Keep pressed for 1 second" warning appears in the text field. Touch the ▷ key for longer than 1 second to start cooking.
Switching off the electric oven
Touch ① key to switch off the oven.
Function table
Function table indicates the functions that can be used in the oven and their respective maximum and minimum temperatures.

Functions vary depending on the product model.

Due to safety reasons, maximum time that can be set for "Cook time" is limited with 6 hours at all positions apart from "Warm Keeping" and "Low Temp. Cooking" functions.

While making any adjustment, related symbols will flash on the display.

Program will be cancelled in case of power failure. You must reprogram the oven.
Current time cannot be set while the oven is operating in any function, or if semi-automatic or full automatic programming is made on the oven.

Even if the oven is switched off, oven lamp lights up when the oven door is opened.
| Function | Recommended temperature (°C) | Temperature range (°C) |
| Fan heating | 180 | 40-280 |
| Full grill | 280 | 40-280 |
| Low grill | 280 | 40-280 |
| Eco fan | 180 | 160-220 |
| Warm keeping | 60 | 40-100 |
| * Functions vary depending on the product model. | ||
Operating modes
The order of operating modes shown here may be different from the arrangement on your product.
Fan heating
Warm air heated by the rear heater is evenly distributed throughout the oven rapidly by means of the fan. It is suitable for cooking your meals in different rack levels and preheating is not required in most cases. Suitable for cooking with multi trays.
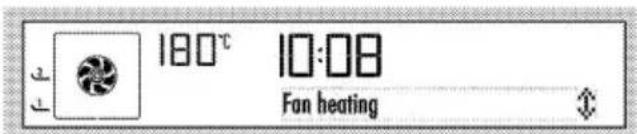
Full grill
Large grill at the ceiling of the oven is in operation. It is suitable for grilling large amount of meat.
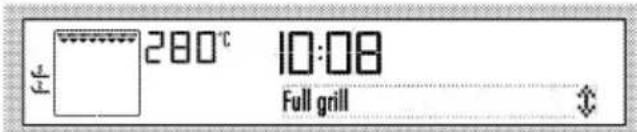
Full grill
- Put big or medium-sized portions in correct rack position under the grill heater for grilling.
- Set the temperature to maximum level.
- Turn the food after half of the grilling time.
Low Grill
Small grill at the ceiling of the oven is in operation. Suitable for grilling and gratin dishes.
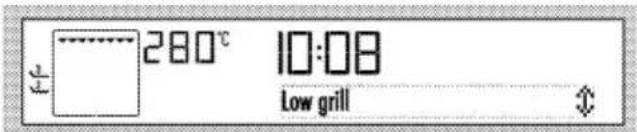
- Put small or medium-sized portions in correct rack position under the grill heater for grilling.
- Set the temperature to maximum level.
- Turn the food after half of the grilling time.
Eco Fan Heating
To save power, you can use this function instead of the cooking operations that you would perform by using Fan Heating at 160-220 °C temperature range. However, the cooking time will increase a little bit. Cooking times related to this function are indicated in "Eco Fan Heating" table.
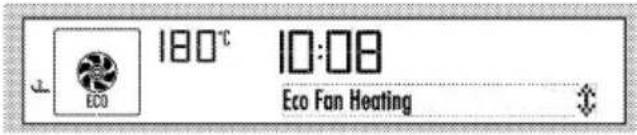
Warm keeping
Used for keeping food at a temperature ready for serving for a long period of time.
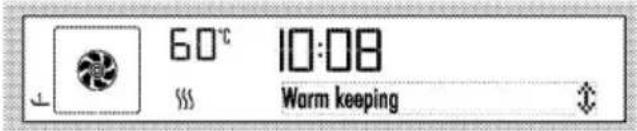
How to operate the oven control unit
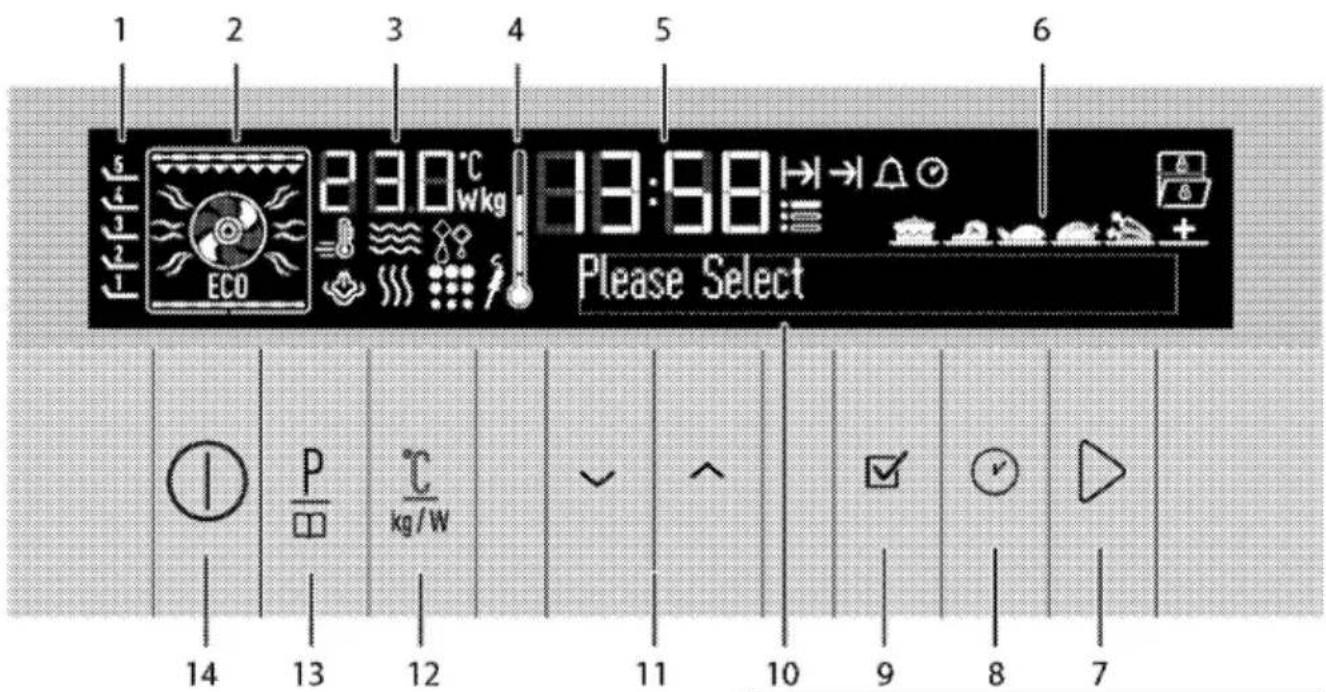
1 Shelf positions
2 Function display
3 Temperature/weight/microwave power indicator field
4 Oven Inner Temperature symbol
5 Current time indicator field
6 Convenience food selection display
7 Start/stop cooking key
8 Time and settings key
9 OK key
10 Text display
11 Up/down keys (Menu step)
12 Temperature/weight/booster/power setting key
13 Program selection key
14 ON/OFF key
Enable semi-automatic operation
In this operation mode, you may adjust the time period during which the oven will operate (cook time).
- Touch Ⓐ key to switch on the oven.
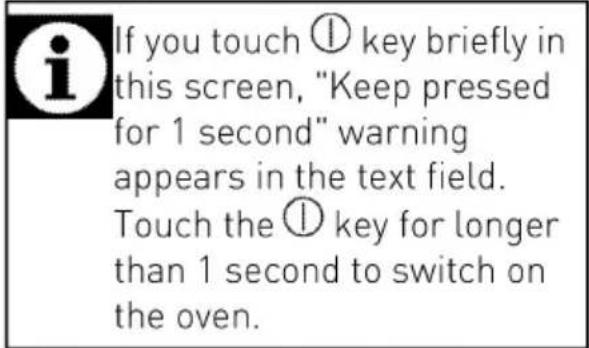
-
Touch ∧ or ∨ keys to select the desired operating mode (function).
-
If you want to change the temperature, touch ℃kg once to reach the temperature display.

-
Touch √/√ until the desired temperature appears in the Temperature/weight/microwave power indicator field. Touch ☑ to set the temperature when the desired value appears on the display.
-
For cooking time, press ⏻ key for once to scroll to the "Cook time" on the text display. |→| symbol flashes at the same time.
- Touch ↗/√ keys to set the desired cooking time and confirm the setting by touching the ☑ key. Once the Cook Time is set, |→| will be displayed continuously.

- Put your dish into the oven and close the door.
- If cooking function, temperature and time values are suitable, touch ▷ key to start cooking. Cooking starts and "Cooking" appears on the display.

If you touch ▷ key briefly in this screen, "Keep pressed for 1 second" warning appears in the text field. Touch the ▷ key for longer than 1 second to start cooking.
» The oven will be heated up to the preset temperature and will maintain this temperature until the end of the cooking time you selected. The oven lamp is lit during the cooking process.
All segments of the inner oven temperature symbol (4) will turn on when the oven reaches the set temperature.
- After the cooking is completed, "Good appetite... Press ▷ to
continue" appears on the display and alarm signal is heard.
- To stop the alarm signal, just touch any key. Oven will continue operating at the selected mode if you touch ▷ key. Alarm stops.
11.Oven is switched off automatically and the current time is displayed if you do not touch the ▷ key.
Setting the booster (Quick heating)
Use Booster (rapid pre-heating) function to make the oven reach the desired temperature faster.

Booster can not be selected in Defrost, Slow cooking, Warm keeping and Low temperature cooking functions. Booster settings will be cancelled in case of power outage.
Select the desired cooking function and then:
- Touch the ℃kg key twice. "Booster passive" appears on the display.

- Touch the key for once. "Booster active" warning and symbol appear on the display. Touch to confirm the setting.
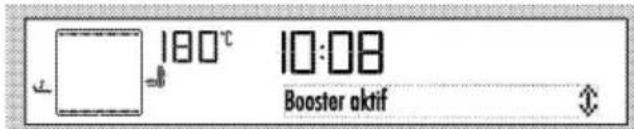
- If cooking function and temperature values are suitable, touch ▷ key to start cooking.
Cooking starts and "Cooking" appears on the display.
» ≡ symbol disappears as soon as the oven reaches the desired temperature and oven resumes operating in the function it was in before the Booster function.
4. To cancel Booster function, touch the ℃kg key with short intervals until "Booster active" appears on the display.
5. Touch the √ key for once.
"Booster passive" warning
appears and ≡ symbol
disappears on the display. Touch
☑ to confirm the setting.
180℃
10:08
Booster pasif

Using the keylock
You can prevent oven from being intervened with by activating the Keylock function.

Keylock can be used either when the oven is operating or not. Oven can be switched off by touching the ① key even when the keylock is activated while the oven is operating.
Activating the keylock
- Touch ⚙ key with short intervals until "Keylock passive" appears on the display. ≡ symbol flashes on the display.
- Touch key for once to activate the keylock. After activating the keylock, "Key lock active" will
appear on the display. Then, the symbol will appear.
- Touch ☑ to confirm the setting.
14:05
Key lock active


» After activating the keylock, "Keylock active" warning and symbol will appear on the display when you press any key (except ∨√ keys).

Oven keys are not functional when the Keylock function is activated. Keylock will not be cancelled in case of power outage.
Deactivating the keylock
- Touch √ key twice to deactivate the keylock. "Key lock passive" appears on the display.
- Touch ☑ to confirm the setting.
14:05
Key lock passive

» Key lock is deactivated and the symbol on the display disappears.
Using the clock as an alarm
You can use the clock of the product for any warning or reminder apart from the cooking programme. The alarm clock has no influence on the functions of the oven. It is only used as a warning. For example, this is useful when you want to turn food in the oven at a certain point of time. Alarm clock will give a signal once the time you set is over.

Maximum alarm time can be 23 hours and 59 minutes.
To set the alarm:
Alarm


- Touch ⬇ key with short intervals until ⚠ symbol appears on the display.
- Touch √√ keys to set the desired time and confirm the setting by touching the ☑ key. △ symbol remains lit after setting the alarm time.
- After the alarm time is finished, will start flashing and an alarm signal is heard.
- Press any key to stop the alarm.
To cancel the alarm:
- Touch ⬇ key with short intervals until △ symbol appears on the display.
- Touch the √ key until "00:00" appears on the display and confirm the setting by touching the ☑ key.
» Alarm is cancelled and △ symbol disappears.
Cooking times table
The values specified have been determined in the lab. The values suitable for you may be different from these values.
Baking and roasting

1^st rack of the oven is the bottom rack.
| Dish | Cooking level number | Accessory to use | Operating mode | Rack position | Temperature (°C) | Cooking time (approx. in min.) |
| Cakes in tray | One level | Standard tray* | 1 | 175 | 30 ... 40 | |
| Cakes in mould | One level | Cake mold on wire grill** | 1 | 175 | 50 ... 60 | |
| Small cakes | One level | Standard tray* | 1 | 150 | 35 ... 45 | |
| Sponge cake | One level | Round springform pan with a diameter of 26 cm on wire grill** | 1 | 150 | 25 ... 35 | |
| Walnut cookies | One level | Pastry tray* | 1 | 175 | 25 ... 30 | |
| 2 levels | 1-Pastry tray*3-Standard tray* | 1 - 3 | 170 ... 180 | 35 ... 45 | ||
| Dough pastry | One level | Standard tray* | 1 | 200 | 35 ... 45 | |
| 2 levels | 1-Pastry tray*3-Standard tray* | 1 - 3 | 200 | 45 ... 55 | ||
| Rich pastry | One level2 levels | Standard tray*1-Pastry tray*3-Standard tray* | 11 - 3 | 190190 | 25 ... 3535 ... 45 | |
| Leaven | One level | Standard tray* | 1 | 200 | 35 ... 45 | |
| Lasagna | One level | Glass/metal rectangular pan on wire grill** | 1 | 200 | 30 ... 40 | |
| Beef steak (whole) / Roast | One level | Standard tray* | 1 | 25 min., 250/max, then 180 ... 190 | 100 ... 120 | |
| Leg of Lamb (casserole) | One level | Standard tray* | 1 | 25 min at 220 and then 180 ... 190 | 70 ... 90 | |
| Roasted chicken | One level | Standard tray* | 1 | 15 min., 250/max, then 190 | 55 ... 65 | |
| Turkey (Sliced) | One level | Standard tray* | 1 | 25 min., 250/max, then 190 | 150 ... 210 | |
| Fish | One level | Standard tray* | 1 | 200 | 20 ... 30 | |
| It is suggested to perform preheating for all foods.* These accessories may not supplied with the product.** These accessories are not supplied with the product. They are commercially available accessories. | ||||||
Eco Fan Heating

Do not change the cooking temperature after cooking starts in Eco Fan Heating mode.

Do not open the door in Eco Fan Heating mode.
| Dish | Cooking level number | Accessory to use | Operating mode | Rack position | Temperature (°C) | Cooking time (approx. in min.) | |
| Small cakes | One level | Standard tray* | 1 | 160 | 20 ... 30 | ||
| Walnut cookies | One level | Standard tray* | 1 | 200 | 30 ... 35 | ||
| Dough pastry | One level | Standard tray* | 1 | 200 | 40 ... 45 | ||
| Rich pastry | One level | Standard tray* | 1 | 200 | 40 ... 45 | ||
* These accessories may not supplied with the product.
Tips for baking cake
- If the cake is too dry, increase the temperature by 10^ C and decrease the cooking time.
- If the cake is wet, use less liquid or lower the temperature by 10^ C.
- If the cake is too dark on top, place it on a lower rack, lower
the temperature and increase the cooking time.
- If cooked well on the inside but sticky on the outside use less liquid, lower the temperature and increase the cooking time.
Tips for baking pastry
- If the pastry is too dry, increase the temperature by 10°C and
decrease the cooking time. Dampen the layers of dough with a sauce composed of milk, oil, egg and yoghurt.
- If the pastry takes too long to bake, pay care that the thickness of the pastry you have prepared does not exceed the depth of the tray.
- If the upper side of the pastry gets browned, but the lower part is not cooked, make sure that the amount of sauce you have used for the pastry is not too much at the bottom of the pastry. Try to scatter the sauce equally between the dough layers and on the top of pastry for an even browning.
Cook the pastry in accordance with the mode and temperature given in the cooking table. If the bottom part is still not browned enough, place it on one lower rack next time.
Tips for cooking vegetables
- If the vegetable dish runs out of juice and gets too dry, cook it in a pan with a lid instead of a tray. Closed vessels will preserve the juice of the dish.
- If a vegetable dish does not get cooked, boil the vegetables beforehand or prepare them like canned food and put in the oven.
Ready meals functions Selecting the ready meals functions
Ready Meals menu contains meal programmes that are prepared for you by professional cooks specially and stored in the memory of the control unit.
In this menu, temperature, rack position, weight and cooking functions are set automatically. You can change the weight and cooking time according to your meal and your taste.
To select the Ready Meals functions:
- Touch ① key to switch on the oven.
Initial operation screen appears when the oven is turned on.

If you touch Ⓘ key briefly in this screen, "Keep pressed for 1 second" warning appears in the text field. Touch the Ⓘ key for longer than 1 second to switch on/off the oven.
- Touch ☐ key to select the Ready Meals function display. In this step, "Cakes&breads&tarts" and the 🚙 symbol appears on the display.
14:05
Cakes&breads&tarts
\$
-
Touch √√ keys to select the desired Ready Meals function main menu (Cakes&breads&tarts , Meat , Fish , Meat Poultry , Light meals , Special +).
-
Touch the ☑ key to confirm the Main Meal menu you have selected.
- Touch √√ keys to select the desired meal (Cookies, Cake, Small cake, etc).

- Put your dish into the oven.
- Touch ▷ key to start cooking. "Cooking" appears on the display.

If you touch ▷ key briefly in this screen, "Keep pressed for 1 second" warning appears in the text field. Touch the ▷ key for longer than 1 second to start cooking.
- After the cooking is completed, "Good appetite..." appears on the display and alarm signal is heard.

To stop the alarm signal, just press any key.

"Back" appearing on the display while navigating in the meal menu allows you to return to the upper menu. Touch key to switch to the initial function display.
Before starting to cook in the Ready Meals menu, you can set the weight depending on the meal type you have selected. To do this:
- Touch key after selecting the desired meal. "Weight" appears and the kg symbol flashes on the display.

- Touch √√ keys to set the weight and confirm by touching the ☑ key.

Oven will change the temperature and the cooking time automatically on basis of the weight change.

You can only change the weight for meals for which a weight is indicated.
- Touch ▷ key to start cooking.
Ready Meals menu:
May vary depending on the models
| Cakes&breads&tarts | Meat | Fish | Meat poultry | Special meals | Special |
| Cookies | Meat loaf (lamb) | Fish fillet | Chicken baguette | Casserole | Fermenting |
| Cakes in cooking paper | Dalyan meatball | Baked anchovy | Chicken, fillet | Quiches | Home-made Yoghurt |
| Cheese cake | Roast beef | Haddockmerlans | Macaronicheese | Dried apple | |
| Brownie | Salmon fillet | Lasagna | Fried chestnut | ||
| Sponge cake | Moussaka | ||||
| Apple strudel | |||||
| Apple pie | |||||
| Cinnamon rolls |
Settings menu
Brightness setting
Brightness can only be set when the oven is switched off.
- Touch ⬇ key with short intervals until "Brightness" appears on the display. ≡ symbol flashes on the display.
14:05
Brightness
5:
-
There are 5 brightness levels, namely 1, 2, 3, 4 and 4. Touch ∨√ keys to select the desired level.
-
Touch ☑ to confirm the setting.

Brightness level decreases to save power when the oven is switched off. It restores to the set level again when the oven is switched on.
» It returns to the stand-by display. Only the current time appears on the display.
Voice Level setting
Voice level can only be set when the oven is switched off.
- Touch ⬇ key with short intervals until "Voice Level" appears on the display. ≡ symbol flashes on the display.
14:05
Volume
2
- There are 2 voice levels, namely 1 and 2. Touch ∨√ keys to select the desired level.
- Touch ☑ to confirm the setting. » It returns to the stand-by display. Only the current time appears on the display.
Language setting
Language can only be set when the oven is switched off.
- Touch ⏻ key with short intervals until "Language" appears on the display. ≡ symbol flashes on the display.
14:05.
Language:English
[Symbol]
- Touch √√ keys to select the desired language.
- Touch ☑ to confirm the setting. » It returns to the stand-by display. Only the current time appears on the display.
Current time setting
Current time can only be set when the oven is switched off. If you want to change the time that was set during initial setup:
- Touch ⏻ key with short intervals until "Day time" appears on the display. Hour field and ≡ symbol flash on the display. Touch √√ keys to set the hour.
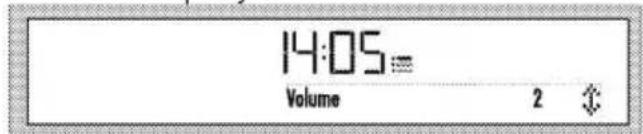
00:00=
Set day time
↓
- Touch ☑ to confirm the hour.
- Minute field and :≡ symbol flash on the display. Touch ∨√ keys to set the minute. Touch ☑ to confirm the minute.
» It returns to the stand-by display. Only the current time appears on the display.
14:05
How to operate the grill
WARNING
Close oven door during grilling. Hot surfaces may cause burns!
Switching on the grill
- Touch Ⓐ key to switch on the oven.
-
Touch ∨/∨ to select the desired grill function.
After the function is selected, "Temperature", "Cook time", "Cook end time" and "Booster" (rapid heating) can be set. -
If you want to change the temperature, touch ℃kg once to reach the temperature display.
- Touch √√ until the desired temperature appears in the Temperature/weight/microwave power indicator field. Touch ☑ to set the temperature when the desired value appears on the display.
- If cooking function, temperature and time values are suitable, touch ▷ key to start cooking. Cooking starts and "Cooking" appears on the display.
Switching off the grill
- Touch Ⓐ key to switch off the oven.
Foods that are not suitable for grilling carry the risk of fire. Only grill food which is suitable for intensive grilling heat. Do not place the food too far in the back of the grill. This is the hottest area and fatty food may catch fire.
Cooking times table for grilling
Grilling with electric grill
| Food | Insertion level | Grilling time (approx.) |
| Fish | 2...3 | 20...25 min. |
| Sliced chicken | 2...3 | 25...35 min. |
| Lamb chops | 2...3 | 20...25 min. |
| Roast beef | 2...3 | 25...30 min. |
| Veal chops | 2...3 | 25...30 min. |
| Toast bread | 3 | 1...2 min. |
| depending on thickness | ||
7 Maintenance and care
General information
Service life of the product will extend and the possibility of problems will decrease if the product is cleaned at regular intervals.
DANGER:
Disconnect the product from mains supply before starting maintenance and cleaning works.
There is the risk of electric shock!
DANGER:
Allow the product to cool down before you clean it. Hot surfaces may cause burns!
- Clean the product thoroughly after each use. In this way it will be possible to remove cooking residues more easily, thus avoiding these from burning the next time the appliance is used.
- No special cleaning agents are required for cleaning the product. Use warm water with washing liquid, a soft cloth or sponge to clean the product and wipe it with a dry cloth.
- Always ensure any excess liquid is thoroughly wiped off after cleaning and any spillage is immediately wiped dry.
- Do not use cleaning agents that contain acid or chloride to clean the stainless or inox surfaces and the handle. Use a soft cloth with a liquid detergent (not
abrasive) to wipe those parts clean, paying attention to sweep in one direction.

The surface might get damaged by some detergents or cleaning materials.
Do not use aggressive detergents, cleaning powders/creams or any sharp objects during cleaning. Do not use harsh abrasive cleaners or sharp metal scrapers to clean the oven door glass since they can scratch the surface, which may result in shattering of the glass.

Do not use steam cleaners to clean the appliance as this may cause an electric shock.
Cleaning microwave oven part
- If steam accumulates inside or around the outside of the oven door, wipe with a soft cloth. This may occur when the microwave oven is operated under high humidity condition. And it is normal.
- It is occasionally necessary to remove the glass tray for cleaning. Wash the tray in warm sudsy water or in a dishwasher.
- The roller ring and oven floor should be cleaned regularly to avoid excessive noise. Simply wipe the bottom surface of the oven with mild detergent. The roller ring may be washed in mild sudsy water or dishwasher.
After removing the roller ring from cavity floor for cleaning, be sure to replace in the proper position.
- Remove odors from your oven by combining a cup of water with the juice and skin of one lemon in a deep microwaveable bowl and microwave for 5 minutes. Wipe thoroughly and dry with a soft cloth.
- When it becomes necessary to replace the oven light, please consult an Authorized Service Agent to have it replaced.
- The oven should be cleaned regularly and any food deposits should be removed. Failure to maintain the oven in a clean condition could lead to deterioration of the surface that could adversely affect the life of the product and possibly result in a hazardous situation.
- Please do not dispose this product together with the domestic wastes. It should be disposed to the particular disposal center provided by the municipalities.
Be careful not to damage the door seal when cleaning the oven door. Do not operate the oven with damaged door seal.
Cleaning the control panel
Clean the control panel and control knobs with a damp cloth and wipe them dry.

Do not remove the control buttons/knobs to clean the control panel. Control panel may get damaged!
Cleaning the oven
Clean oven door
To clean the oven door, use warm water with washing liquid, a soft cloth or sponge to clean the product and wipe it with a dry cloth.

Don't use any harsh abrasive cleaners or sharp metal scrapers for cleaning the oven door. They could scratch the surface and destroy the glass.
Replacing the oven lamp
DANGER:
Before replacing the oven lamp, make sure that the product is disconnected from mains and cooled down in order to avoid the risk of an electrical shock. Hot surfaces may cause burns!

In this oven, an incandescent lamp with a power of less than 40 W, a height of less than 60 mm, a diameter of less than 30 mm or a halogen lamp with socket type G9, a power of less than 60 W is used. The lamps are suitable for operation at temperatures above 300 °C. Oven lamps can be obtained from Authorised Service Agents or technician with licence.

Position of lamp might vary from the figure.
| iThe lamp used in this appliance is not suitable for household room illumination. The intended purpose of this lamp is to assist the user to see foodstuffs. |
| iThe lamps used in this appliance have to withstand extreme physical conditions such as temperatures above 50 °C. |
If your oven is equipped with a round lamp:
- Disconnect the product from mains.
- Turn the glass cover counter clockwise to remove it.
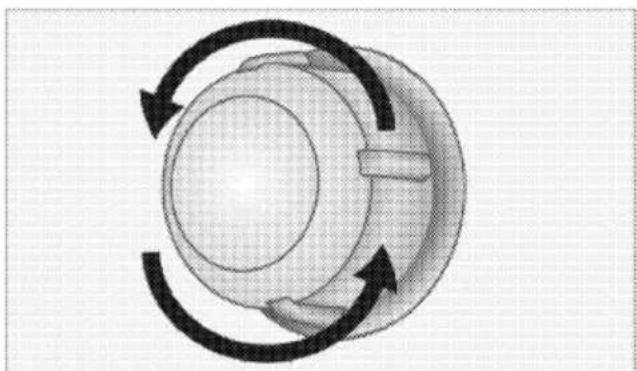
natural_image
Diagram of a mechanical component with three circular arrows indicating rotational or feedback motion (no text or symbols)- If your oven lamp is of type (A) shown in the figure below, remove it by rotating as shown and replace it. If it is of type (B), pull and remove it as shown in the figure and replace it.
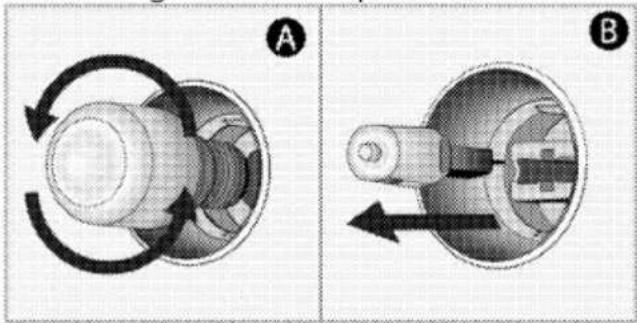
natural_image
Two mechanical diagrams labeled A and B showing a rotating component with directional arrows, no text or symbols present.- Install the glass cover.
8 Troubleshooting
Oven emits steam when it is in use
- It is normal that steam escapes during operation. This is not a fault.
Product emits metal noises while heating and cooling.
- When the metal parts are heated, they may expand and cause noise. This is not a fault.
Product does not operate.
- The mains fuse is defective or has tripped. Check fuses in the fuse box. If necessary, replace or reset them.
- Product is not plugged into the (grounded) socket. Check the plug connection.
- Buttons/knobs/keys on the control panel do not function. Keylock may be enabled. Please disable it. (See.)
Oven light does not work.
- Oven lamp is defective. Replace oven lamp.
- Power is cut. Check if there is power. Check the fuses in the fuse box. If necessary, replace or reset the fuses.
Oven does not heat.
- Function and/or Temperature are not set. Set the function and the temperature with the Function and/or Temperature knob/key.
- Power is cut. Check if there is power. Check the fuses in the fuse box. If necessary, replace or reset the fuses.
There is no response when I keep the keys/buttons pressed for a long time
- Do not operate the oven. Switch off the circuit breaker and unplug the appliance. Call the Authorised Service Agent.
Microwave does not operate.
- Product is not plugged into the socket properly →→→ Insert the plug into the socket.
- Door is not closed properly. Door should "click" while closing.
- There can be an obstacle between the door and the front section of the oven. Remove the obstacle and close the door properly.
Some strange noises are heard when the microwave is in operation.
- There is an electrical arc inside the oven resulting from a foreign metal object. Remove the metal object from the oven cavity.
- Oven accessories contact the oven walls. Avoid the contact with the oven door.
- There are loose cutlery items or cooking utensils inside the oven. Remove the cutlery item or cooking utensil from the oven cavity.
Food is not heated or heated too slow.
- Correct operation time and/or power level are not selected. Select the suitable cooking power and time for your food.
- Amount of the food can be larger than normal or it may be colder than the normal level. Set additional cooking time. Check regularly to prevent the food from burning.
- There are loose cutlery items or cooking utensils inside the oven. Remove the cutlery item or cooking utensil from the oven cavity.
Food is too hot, dry or burnt.
- Correct operation time and/or power level are not selected. Check whether you have selected the suitable cooking power and time for your food. Call Authorised Service Agent if your oven is damaged.
Some noises are heard after the cooking time is over.
- Cooling fan may be in operation. This is not a fault. Cooling fan continues to operate after the oven is switched off. Fan will stop automatically when the temperature decreases to a certain level.

Consult the Authorised Service Agent or the dealer where you have purchased the product if you can not remedy the trouble although you have implemented the instructions in this section. Never attempt to repair a defective product yourself.
- GRUNDIG
- Built-in Oven
- Please read this user manual first!
- Explanation of symbols
- TABLE OF CONTENTS
- Important instructions and warnings for safety and environment 4
- General information 16
- Installation 19
- Preparation 24
- How to operate the microwave27
- How to operate the oven 48
- Maintenance and care 62
- Troubleshooting 65
- Important instructions and warnings for safety and environment
- General safety
- Electrical safety
- Product safety
- Safety instructions for microwave
- Intended use
- Safety for children
- Disposing of the old product Compliance with the WEEE Directive and Disposing of the Waste Product:
- Compliance with RoHS Directive:
- Package information
- General information
- Package contents
- Installation
- DANGER:
- Before installation
- Installation and connection
- Electrical connection
- Installing the product
- For products with cooling fan
- Final check
- Future Transportation
- Preparation
- Tips for saving energy
- Initial use
- Day time
- Language setting
- Set the time
- First cleaning of the appliance
- Initial heating
- WARNING
- Electric oven
- Grill oven
- How to operate the microwave
- General information on microwave cooking
- The advantages of microwaving
- Why do foods get heated
- Containers suitable for microwaving
- CAUTION
- Glass containers
- Plastic containers
- Cooking bags
- Paper
- Porcelain containers
- Metal containers
- Positioning food
- Food height
- Cooking suggestions
- Defrosting:
- Liquid content
- Steam
- Sugar
- Food density
- Bones and fat content
- Food colour
- Reducing the internal pressure in food
- Turning and stirring items while cooking
- Different cooking times
- Standing time
- How to use the microwave oven
- Display symbols:
- Operating microwave mod
- Operating combi mode
- Switching off the electric oven
- Operating modes for Microwave
- Microwave
- Microwave+Fan supported
- Microwave+Grill
- Microwave+Grill+Fan
- Microwave+Defrost
- Cooking times table
- Ready meals functions Selecting the ready meals functions
- LAMB EN COCOTTE
- INGREDIENTS
- PREPARATION
- BEEF WELLINGTON
- SEA BASS
- SLICED MEATBALL WITH VEGETABLES
- BEETROOT SALAD WITH GOAT CHEESE
- POTATO GRATIN
- HOT CAKE WITH CHOCOLATE SAUCE
- INGREDIENTS FOR CHOCOLATE SAUCE
- FLAKED PASTRY ROLLS WITH CINNAMON AND GRAPES
- STUFFING INGREDIENTS
- STUFFED GRAPE LEAVES WITH OLIVE OIL
- STUFFING INGREDIENTS:
- CHICKEN DRUMSTICK
- - PREPARATION
- How to operate the oven
- General information on baking, roasting and grilling
- Tips for baking
- Tips for roasting
- Tips for grilling
- How to operate the electric oven
- Select temperature and operating mode
- Function table
- Operating modes
- Fan heating
- Full grill
- Low Grill
- Eco Fan Heating
- Warm keeping
- How to operate the oven control unit
- Enable semi-automatic operation
- Setting the booster (Quick heating)
- Using the keylock
- Activating the keylock
- Deactivating the keylock
- Using the clock as an alarm
- To set the alarm:
- To cancel the alarm:
- Baking and roasting
- Tips for baking cake
- Tips for baking pastry
- Tips for cooking vegetables
- Ready Meals menu:
- Settings menu
- Brightness setting
- Voice Level setting
- Current time setting
- How to operate the grill
- Switching on the grill
- Switching off the grill
- Cooking times table for grilling
- Maintenance and care
- General information
- Cleaning microwave oven part
- Cleaning the control panel
- Cleaning the oven
- Clean oven door
- Replacing the oven lamp
- If your oven is equipped with a round lamp:
- Troubleshooting
- Oven emits steam when it is in use
- Product emits metal noises while heating and cooling.
- Product does not operate.
- Oven light does not work.
- Oven does not heat.
- There is no response when I keep the keys/buttons pressed for a long time
- Microwave does not operate.
- Some strange noises are heard when the microwave is in operation.
- Food is not heated or heated too slow.
- Food is too hot, dry or burnt.
- Some noises are heard after the cooking time is over.
Marke : GRUNDIG
Modell : GEKW 27000 B
Kategorie : Ofen