
MH-6549QS - Mikrowellen LG - Kostenlose Bedienungsanleitung
Finden Sie kostenlos die Bedienungsanleitung des Geräts MH-6549QS LG als PDF.


Benutzerfragen zu MH-6549QS LG
0 Frage zu diesem Gerät. Beantworten Sie die, die Sie kennen, oder stellen Sie Ihre eigene.
Eine neue Frage zu diesem Gerät stellen
Laden Sie die Anleitung für Ihr Mikrowellen kostenlos im PDF-Format! Finden Sie Ihr Handbuch MH-6549QS - LG und nehmen Sie Ihr elektronisches Gerät wieder in die Hand. Auf dieser Seite sind alle Dokumente veröffentlicht, die für die Verwendung Ihres Geräts notwendig sind. MH-6549QS von der Marke LG.
BEDIENUNGSANLEITUNG MH-6549QS LG
India's No.1
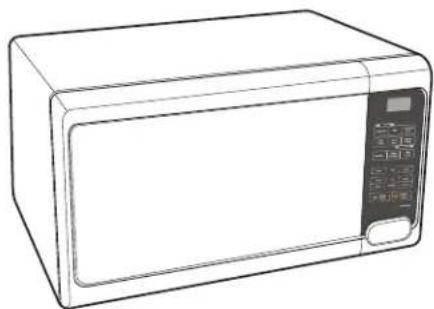
MICROWAVE OVEN
natural_image
Line drawing of a microwave oven with control panel and door (no text or symbols)
text_image
LG 24 x 7 CALL CENTER 1800-180-9999 5757554 CALL (Toll Free) SMS (Send SMS) www.lg.com CLER serviceindia@lge.com
LG
Life's Good
Owner's Manual
Please read this manual carefully and thoroughly before operating this unit.
MH-6549QS
(ANTI BACTERIA)
Contents / विषय सूची
Contents / विषय सूची ____ 2
Precautions / सावधानीयाँ 3 \~ 4
Unpacking & Installing / खोलना व स्थापित करना ____ 5 \~ 6
Child Lock / चाईल्ड लाक 7
Micro Power Cooking / मायक्रो पावर में पकाना 8
Setting the Clock / घड़ी को निर्धारित करना ____ 9
Two Stage Cooking / ट्रु स्टेज कुकींग ____ 10
Quick Start / तुरन्त शुरुआत 11
Grill Cooking / ग्रिल कुकिंग 12
Combination Cooking / काम्बिनेशन कुर्किंग 13
Various Cook Functions / विभिन्न कुक कार्यप्रणालियां ____ 14
Health Plus / हैल्थ फ्लस 15 \~ 17
Soup / सूप 18 \~ 20
Continental Menu / कॉन्टीनेंटल मीनू 21\~22
Indian Cuisine / भारतीय व्यंजन 23 \~ 25
Sweet Corner / स्वीट कॉर्नर ____ 26 \~ 27
Chatpat Corner / चटपट कॉर्नर 28 \~ 29
Breakfast / ब्रेकफास्ट 30 \~ 31
Child's Favourite / बच्चों की मनपसंद ____ 32 \~ 33
Utility Corner / सुविधा कॉर्नर 34 \~ 35
Increase or Decrease Cooking / कम या ज्यादा पकाना 36
Important safety instructions / महत्वपुण सुरक्षापयोगी
Read carefully and keep for future reference / ध्यान से पढ़े और भविष्य के लिए रखे ____ 37 \~ 38
Technical Specifications & Two Recipes for Starter / तकनीकी जानकारी / नवसिखुए के लिए दो व्यंजन ____ 39
Precautions to avoid possible exposure to excessive microwave energy. सावधानी अत्याधिक सूक्ष्म तरंग ऊर्जा की सम्भावित नष्ट से बचाने के लिए ।
Precautions सावधानियाँ
You cannot operate your oven with the door open due to the safety interlocks built into the door mechanism. These safety interlocks automatically switch off any cooking activity when the door is opened; which in the case of a microwave oven could result in harmful exposure to microwave energy. It is important not to tamper with the safety interlocks.
डोअर प्रणाली मे इंटरलॉक होने की वजह से आप दरवाजा खुला रख के नही चला सकते । ये सेफ्टी इंटरलॉक जब दरवाजा खुला होता है तब स्वयं अपने आप पकने की प्रक्रिया बन्द करते है । नही तो इससे मायक्रोवेव का अधिक स्पर्श मे आ सकते है । इसलिए आप सेफ्टी इंटरलॉक के साथ छेड़खानी ना करे ।
Do not place any object between the oven front face and the door or allow food or cleaner residue to accumulate on sealing surfaces. अवन के प्रंट सतह और डोर के बीच कोई वस्तु न रखे और न ही मैल या सफाई करने का कोई भी बची हुई वस्तु न जमने दे ।
Do not operate your oven if it is damaged. It is particularly important that the oven door closes properly and that there is no damage to the: (1) door(bent), (2) hinges and latches (broken or loosened), (3) door seals and sealing surfaces. अवन का प्रयोग न करे यदि (1) दरवाजा मुड़ा हो (2) हिज या लैच ढीला हो (3) डोर के बद होने वाले सतह क्षित्रस्त हो।
Your oven should not be adjusted or repaired by anyone except qualified service personnel. अवन की एड़जस्टमेंट या मरम्मत कुशल सर्विंस व्यक्ति से ही कराए ।
Warning/ चेतावनी
Please ensure cooking times are correctly set as over cooking may result in the FOOD catching fire and subsequent damage to your oven. यह ध्यान रखे की पकाने का समय सही से निर्धारित किया जाए । जैसा कि ज्यादा पकाना आहार का आग पकड़ सकता है और साथ ही साथ आपके अवन को नष्ट कर सकता है ।
When heating liquids, e.g. soups, sauces and beverages in your microwave oven, overheating the liquid beyond boiling point can occur without evidence of bubbling. This could result in a sudden boil over of the hot liquid. To prevent this possibility the following steps should be taken:
आपके अवन में तरल पदार्थ गर्म करते समय अमर को अधिक गर्म हो जाता है और बदल नही दिखाई देते है ।
1 Avoid using straight sided containers with narrow necks./पतले गले वाले और सरल बाजू वाले बर्तनोंका प्रयोग ना करे ।
2 Do not overheat./ज्यादा गरम नही करे ।
3 Stir the liquid before placing the container in the oven and again halfway through the heating time./बत्तन रखने से पहले उसमे तरल पदार्थ की घुमाईए और आधा पकने का समय होने के बाद किर उसे घुमाए ।
4 After heating, allow to stand in the oven for a short time, stir or shake them again carefully and check the temperature of them before consumption to avoid burns (especially, contents of feeding bottles and baby food jars). Be careful when handling the container. / गर्म करने के बाद थोडे समय के लिए चैसे ही रखे, उसे घुमाए या हिलाए और उसका तपमान खाने से पहले देख ले ।
5 Clean the oven interior with a damp cloth after use./प्रयोग के बाद अवन की अन्दरोनी सतह साफ करे।
6 Never operate the oven without Glass Tray & Roller rest / metal container as it may cause sparking./अवन का ग्लास टें और रोलर रेस्ट के बिना प्रयोग ना करे जिससे स्पार्किंग हो सकती है ।
Warning/ चेतावनी
Always allow food to stand after being cooked by microwaves and check the temperature of them before consumption. Especially contents of feeding bottles and baby food jars.
सूक्ष्म तरंगों ब्वारा भोजन पकाये जाने के बाद कुछ समय के लिए ढककर अवश्य छोड़ दें । भोजन खाने से पहले उसके तापमान की जाँच आवश्य करलें । बच्चों के भोजन व दूध में विशेष सावधानी बरतें ।
Precautions सावधानियाँ
How the Microwave Oven Works / मायक्रोवेव अवन कैसे काम करता है ।
Microwaves are a form of energy similar to radio and television waves and ordinary daylight. Normally, microwaves spread outwards as they travel through the atmosphere and disappear without effect. Microwave ovens, however, have a magnetron which is designed to make use of the energy in microwaves. Electricity, supplied to the magnetron tube, is used to created microwave energy. सूक्ष्म तरंगे एक प्रकार की ऊर्जा हैं जो रेडियो तरंगों और सामान्य प्रकार तरंगों के समान गती होती है । सामान्यत: ये सूक्ष्म तरंगे वायुमण्डल में चालीत होते समय बाहरी ओर फैलती है और बिना कोई प्रभाव डाले स्वत: ही समाप्त हो जाती है । परन्तु माझ्कोवेव अवनों में मैम्नेट्रोन इसप्रकार लगाया गया है कि वह सूक्ष्म तरंगों की ऊर्जा का प्रयोग कर सके । मैम्नेट्रोन को दी गई विद्युत जब मैन्गेट्रोन नली में दी जाती है । तो वे सूक्ष्म तरंग उर्जा को पैदा करती है ।
These microwaves enter the cooking area through openings inside the oven. A turntable or tray is located at the bottom of the oven. Microwaves cannot pass through metal walls of the oven, but they can penetrate such materials as glass, porcelain and paper, the materials out of which microwave-safe cooking dishes are constructed. यह सूक्ष्मतरंगे पकाने के क्षेत्र में अवन के अंदरूनी छुते हुए हिस्से से प्रवेश करती हैं । एक घूमती हुई तशतरी अवन के नीचे के हिस्से पर स्तीथ रहती हैं । सूक्ष्म तरंगे अवन की धातृ दिवारों से बाहर नही आती, लेकीन वह घुस जाती हैं । शीशे, चिनी मिड्टी के पात्र और कागज जैसे पदाथों में; और वह पदार्थ सूक्ष्मतरंग सुरक्षित पकानेव ली य्यंजन के लिए बनते हैं ।
Microwaves do not heat cookware, though cooking vessels will eventually get hot from the heat generated by the food. सूक्षमतरंगे उन गृहउपयोगी बरतनों को गरम नहीं करती हैं, जो पकाने वाले पात्र कभी कभी गरम होते हैं । जो की आहार द्वारा गरम हो जाते हैं ।
A very safe appliance एक बहुत सुरक्षित उपकरण
Your microwave oven is one of the safest of all home appliances. When the door is opened, the oven automatically stops producing microwaves. Microwave energy is converted completely to heat when it enters food, leaving no "left over" energy to harm you when you eat your food. आपका सूक्ष्म तरंग अवन सबसे ज्यादा सुरक्षित है आपके सब गृह उपकरण की अपेक्षा । जब दरवाजा खुला है अवन अपने आप सूक्ष्म तरंग बनाना बंद कर देगा । सूक्ष्म तरंग ऊर्जा पूरी तरह से गर्माहट में बदल जाती है जब आहार से जाती है, और नही छोडती कोई भी ऊर्जा हानी के लिए जब आप आहार खायें ।
By following the basic steps on these two pages you will be able to quickly check that your oven is operating correctly. Please pay particular attention to the guidance on where to install your oven. When unpacking your oven make sure you remove all accessories and packing. Check to make sure that your oven has not been damaged during delivery.
निचे दिए हुए दो पन्नो से आप निर्धरीत कर सकते है की आपका अवन सहीं चल रहा है या नही। आपका अवन आप कहा स्थापित कर रहे है इसके उपर आप ध्यान दे। आपका अवन अवरण से खोलते समय आप सभी असेसरीज और पैर्कींग निकाले। ये आप निर्धरीत करे की आपका अवन डिलिवरी में क्षितिग्रस्त नही हुआ है।
Unpacking & Installing खोलना और स्थापित करना

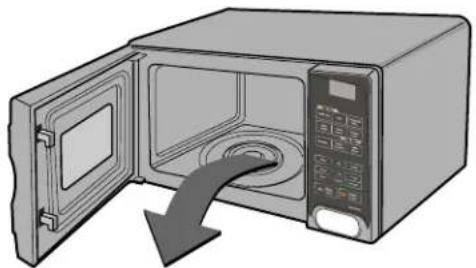
Unpack your oven and place it on a flat level surface. अपना अवन खोलकर एक समतल रथान पर रखे ले ।
natural_image
Illustration of a microwave oven with open door and closed lid, showing internal airflow direction (no text or symbols)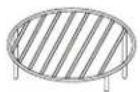
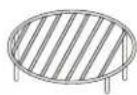
GRILL RACK / ग्रिल रैक

ROTATING RING / रोटेटिंग रिंग
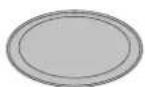
GLASS TRAY / काँच की ट्रे

METAL TRAY / मैटल ट्रे

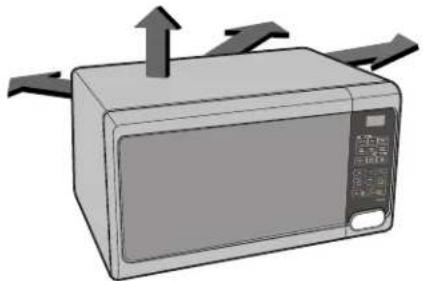
Place the oven in the level location of your choice with more than 85cm height but make sure there is at least 30cm of space on the top and 0cm at the rear for proper ventilation. The front of the oven should be at 0cm on the edge of the surface to prevent tipping.
An exhaust outlet is located on top or side of the oven. Blocking the outlet can damage the oven.
अवन को अपने मनपसन्द स्थान पर 85 सेमी. की ऊँचाई पर रखे लेकिन यह ध्यान रखे कि कम से कम 30 सेमी. का स्थान ऊपर से और 10 सेमी. का स्थान पीछे से ट्रूटना ..... के लिए आवश्यक हैं। अवन का आगे का हिस्सा कम से कम 8 सेमी. समतल के किनारे से दूर होना चाहिए ताकि वह टकराने से बच संके।
एक बाहरी वायु शून्य के लिए ऊपर और किनारे पर अवन से है बाहरी वायु शून्य को रोकना अवन को नष्ट कर सकता है ।
natural_image
Illustration of a microwave oven with airflow arrows indicating air flow (no text or symbols)THIS OVEN SHOULD NOT BE USED FOR COMMERCIAL CATERING PURPOSES यह तंदूर केन्द्रीय व्यवसायिक उद्देश्य के लिए नहीं हैं ।

Plug your oven into a standard household socket. Make sure your oven is the only appliance connected to the socket. If your oven does not operate properly, unplug its electrical socket and then plug it back in.
अपने तंदूर को मानक गृह गती से जोड दे। इस बात का ध्यान रखे कि आपका तंदूर ही केवल वह उपकरण है जो गति से जुडा हुआ है। अगर आपका तंदूर सही दंग से काम नही कर रहा हैं तो पहले विद्युत गती के निकाल ले और फिर वापस उसे उसमे लगाये।

Open your oven door by pulling the DOOR HANDLE Place the ROTATING RING inside the oven and place the GLASS TRAY on top.
अपने तंदूर के दस्वाजे को दस्वाजे पर लगे हुए हत्थे के द्वारा खाँचे । घूमनेवाले वलय को तंदूर के भीतर रखे और काँच की तरतरी को ऊपर रखे ।

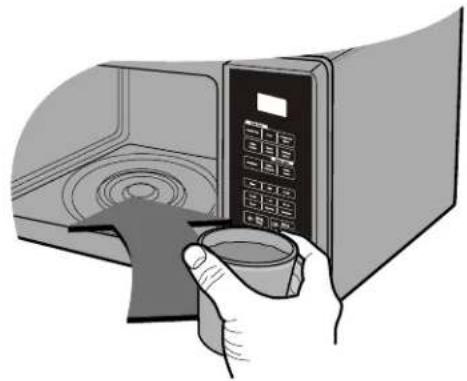
Fill a microwave safe container with 300 ml (1/2 pint) of water. Place on the GLASS TRAY and close the oven door. If you have any
doubts about what type of container to use please refer to page 26.
सूक्ष्म तरंग सुरक्षित पात्र के ३०० मिली. पानी भर ले उसे काँच की तरत्तरी पर बरते पर तंदूर की दसवाजा बन्द कर । अगर आपको कोई शंका है पात्र के प्रकार मेतो कृपया पृष्ठ २६ पर देखे ।
natural_image
Illustration of a hand holding a cup inside a microwave oven with a digital control panel (no text or symbols visible)
Fill a microwave safe container with
Press the START
button one time to set 30 seconds of cooking time.
When you press the button, you will hear a BEEP and your oven will start automatically.
शुरूआत बताये की को एक बार दबा दे और ३० सेकन्ड के लिए निघरित करें जब आप बताये की दबायेंगे तो एक आवाज सुनेगे और आपका तंदूर अपनेआप काम करना शुरू कर देगा ।

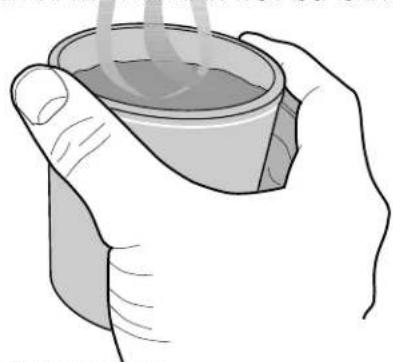
The DISPLAY will count down from 30 seconds. When it reaches 0 it will sound BEEPS. Open the oven door and test the temperature of the water. If your oven is the water should be warm. Be careful when removing the may be hot.
प्रदर्शनि में ३० सेकन्ड गिनने शुरू हो जायेंग जब यह ० तक पहुचेगा तो एक ध्वनि आयेणी । तदूर का दसवाजा खोले और पानी का तापमान जाँच ले । अगर आपका तंदूर काम कर रहा है तो पानी गर्म होगा । सावधानी बरते जब आप उस पात्र को हटा रहे हो वह शायद गर्म हो सकता है ।
natural_image
Illustration of a hand holding a cup with steam rising from the cup (no text or symbols)YOUR OVEN IS NOW INSTALLED आपका तंदूर अब स्थापित हो गया है ।
Child Lock
चाईल्ड लॉक

Your oven has a safety feature that prevents accidental running of the oven. Once the child lock is set, you will be unable to use any functions and no cooking can take place.
आपके अवन में सुरक्षा के उपाय हैं जो कि अनावश्यक उपयोग से अवन को रोकते हैं । एक बार चाईल्ड लॉक निधरित करने से आप कोई कार्य नहीं कर सकते हैं और कोई पकाने की क्रिया भी नही होगी ।
However your child can still open the oven door.
जबकि आपका बच्चा अवन का दरवाजा फिर भी खोल सकता है ।
Press STOP/CLEAR.
दबायें स्टॉप / किलअर

Stop Clear
Press and hold STOP/CLEAR until "L" appears on the display and BEEP sounds. जबतक "L" प्रदर्शक पर न आये और ध्वनि न आये तब तक स्टॉप / किलअर दबाकर रूक जाईये ।
The CHILD LOCK is now set. चाईल्ड लॉक निर्धारित हो गया है।
The time will disappear on the display if you have set the clock. समय प्रदर्शिक से गायब हो जायेगा अगर आपने घडी पर समय निधरित किया है ।

Stop Clear
"L" remains on the display to let you know that CHILD LOCK is set. (If you press any button).
"L" प्रदर्शकि पर आता रहेगा इससे आप जान जायंगे की चाईल्ड लॉक निर्धारित है । (आप चाहे कईमि बठन चबाए)


To cancel CHILD LOCK press and hold STOP/CLEAR until "L" disappears. You will hear BEEP when it's released.
चाईल्ड लॉक हटाने के लिए स्टॉप/क्लिअर दबाकर रूक जाईये जबतक "L" गायब न हो जायें । आप ध्वनि सुनेंगे जब यह हट जायेगा ।

Start Q-Start
Micro Power Cooking मायक्रो पावर में पकाना
In the following example I will show you how to cook some food on 80% power for 5 minutes and 30 seconds. इन दिये गये उदाहरणों में मैं आपको कुछ आहार 80% क्षमता पर 5 मिनट 30 सेकण्ड के लिए पकाना बतार्जंगा ।

Your oven has five microwave Power settings. आपके ओवन में पांच सूक्ष्म तरंग क्षमता का निर्धारण है ।
After cooking is over, End Reminder Beep Sounds per 1 minute for 5 minutes until the oven door is opened.
जब पकाना पूरा हो जायेगा अन्त का ध्यान दिलानेवाला ध्वनि सुनाई देगा । मिनट पर 5 मिनट के लिए जब तक अवन का दरवाजा नही खुलेगा ।
| Power/क्षमता | % | Power Outputक्षमता प्राप्त |
| HIGH (MAX)उच्च (अधिक) | 100% | P-HI |
| MEDIUM HIGHमध्यम उच्च | 80% | P-80 |
| MEDIUM/ मध्यम | 60% | P-60 |
| DEFROST [ ** ] MEDIUM LOWनम मध्यम निम्न | 40% | P-40 |
| LOW/निम्न | 20% | P-20 |
Make sure that you have correctly installed your oven as described earlier in this book.
इस बात पर ध्यान दें कि आपने आपका अवन स्थापित कर दिया हैं जैसा इस किताब में पहले दिखा दिया गया हैं ।
Press STOP.
स्टॉप दबायें ।
Press MICRO Twice to select 80% power.
80% पबार को चुनके लिये MICRO को दो बार दबाए।
"P-80" appears on the display.
P-80 प्रदर्शक पर दिखेगा ।
Press 1 MIN five times.
1 MIN पाँचवार दवाइए ।
Press 10 SEC three times.
10 SEC तीनबार दबाइए ।

text_image
Stop Clear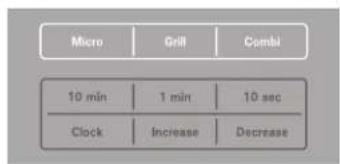
text_image
Micro Grill Combi 10 min 1 min 10 sec Clock Increase Decrease
text_image
10 min | 1 min | 10 sec Clock | Increase | DecreasePress START.
स्टार्ट दवायें ।

text_image
Start Q-StartYou can set either 12 hour clock or 24 hour clock. In the following example I will show you how to set the time for 14:35 when using the 24 clock. Make sure that you have removed all packaging from your oven. आप 12 घघटे या 24 घघटे की घड़ी निर्धारित कर सकते है। इस दिये गये उदाहरण में में आपको 24 घण्टे की घड़ी में 14:35 के समय को किस तरह निर्धारित करते है दिखार्जगा। यह बात ध्यान दीजिए कि आपने अपने अवन को पुरी तरह से खोल दिया है।
Setting the Clock घड़ी को निर्धारित करना

When your oven is plugged in for the first time or when power resumes after a power cut, a '0' will be shown in the display; you will have to reset the clock.
जब आपका अवन पहली बार प्लग किया जाता है या पाँवर कट के बाद चालू होता है '0' डिस्प्ले में दिखाई देता है । फिर आपको अवन की घड़ी फिस्से सेट करनी पडेगी ।
If the clock (or display) shows any strange looking symbols, unplug your oven from the electrical socket and plug it back in and reset the clock.
जब घडी (या डिस्प्ले) अलग चिन्ह दिखाता है । आपका अयन सांकेट से निकाले और फिर से उसे प्लग करके घड़ी को सेट करे ।
Note: The clock is designed to operate at a supply frequency of 50 Hz only and any variation of frequency is likely to result in error.
Make sure that you have correctly installed your oven as described earlier in this book.
यह बात ध्यान में रखिये की आपने अवन को सही से लगाया है जैसे इस किताब में पहले बताया गया हैं ।
Press STOP/CLEAR.
दबायें रूकना / सही है

text_image
Stop ClearPress CLOCK once. घडी एक बार द्वायें ।
(If you want to use 12 hour clock, Press CLOCK once more. If you want to change different option after setting clock, you have to unplug and plug it back in.)
अगर आप 12 घण्टे की घडी उपयोग करना चाहते है तो, तो घडी को एक बार और दबार्यें अगर आप एक बार घडी निर्धारित करने के बाद विकल्प्य बदलना चाहते हैं तो गती से निकाल कर दुबारा जोड दें।
text_image
Micro Girdi Cambi 10 min 1 min 10 sec Clock Increase DecreasePress 10 MIN fifteen times.
10 MIN 15 बार दबाए।
Press 1 MIN three times
1 MIN 3 बार दवाए।
Press 10 SEC five times.
10 SEC 5 बार दबाए।
text_image
Micro Grill Cambi 10 min 1 min 10 sec Clock Increase DecreasePress START. The clock starts counting.
स्टार्ट दबायें । घड़ी गिनना शुरू करेगी ।
text_image
Start Q-StartTwo Stage Cooking टु स्टेज कुकिंग
In the following example I will show you how to cook some food in two stages. निचे दिये हुये उदाहरणमे में आपको बताता हूँ कि अन्न दो स्टेज में कैसे पकाया जाता है ।

During two stage cooking the oven door can be opened and food checked. Close the oven door and press START and the cooking stage will continue.
टु स्टेज कुकिंग के दौरान आप दरवाजा खोल के अन्न की जाँच कर सकते हैं । अवन का दरवाजा बंद करें और START दबाइयें । इसके बाद कुकिंग स्टेज फिरसे चालू हो जायेगी ।
Press STOP STOP दबाइयें
Set the power and the cooking time for stage1. Press MICROonce to select HIGH power. पाँवर और पकाने का समय स्टेज 1 के लिए सेट करें | MICRO एक बार दबाइयं | Press 10 MIN once. 10 MIN एक बार दबाइयं | Press 1 MIN once. 1 MIN एक बार दबाइयं
Set the power and the cooking time for stage2. Press MICROfour times to select 40% power. पाँवर और पकाने का समय स्टेज 2 के लिए सेंट करें । MICRO चार बार दबाके 40% पावर सेंट करें । Press 10 MIN three times. 10 MIN एक बार दबाइयें Press 1 MIN five times. 1 MIN एक बार दबाइयें ।
Press START. START दबाइये.

text_image
Stop Clear
text_image
Micro Grill Combi 10 min 1 min 10 sec Clock Increase Decrease
text_image
Micro Grill Combi 10 min 1 min 10 sec Clock Increase Decrease
text_image
Start Q-StartIn the following example I will show you how to set 2 minutes of cooking on high power. दिये गये उदाहरण में आपको दिखाऊंगा कि किस तरह 2 मिनट निर्धारणा किया जाता हैं पकाने के लिए उच्च क्षमता पर ।
Quick Start तुरन्त शुरूआत

The QUICK STARTfeature allows you to set 30 seconds intervals of HIGH power cooking with a touch of theSTART button.
तुरन्त शुरुआत आपको यह आराम देता है कि आप 30 सेकण्ड के अन्तराल उच्च क्षमता मे पका सकते है शुरुआत बटन की दबाने से ।
Press STOP/CLEAR स्टॉप / किलअर दबायें ।
Press START four times to select 2 minutes on HIGH power. Your oven will start before you have finished the fourth press. दबायें शुरूआत को चार बार उच्च क्षमता पर २ मिनट को युनिट के लिए । आप का अवन काम करना शुरू कर देगा, पहले ही जब तक आप चौथी बार दबा रहे होगे ।
During QUICKSTART cooking, you can extend the cooking by repeatedly pressing the START button. पकाने के दौरान तुर्स्ता शुरु करे, आप पकाने के क्रिया को अगर आप बारबार स्टार्ट द्वाने से ।

text_image
Start Q-Start
text_image
Start Q-StartGrill Cooking ग्रिल कुकिंग
In the following example I will show you how to use the grill to cook some food for 12 minutes and 30 seconds. दिये गये उदाहरण में में आपको दिखार्क्ना कि सकींचे के प्रयोग के द्वारा आहार को पकाना 12 मिनट 30 सेकण्ड के लिए ।

This model is fitted with a SHEATH GRILL, This feature will allow you to brown and crisp food quickly.
ये माँडेल शीथ प्रिल के साथ हैं । इससे आपको जल्द से ब्राऊन और क्रिस्पी पदार्थ मिल सकते हैं ।
Press STOP. स्टॉप द्वायें.
Press GRILL. GRILL द्वाए ।
Set the cooking time. कृकिंग टाईम सेट करे ।
Press 10 MIN once. / '10 MIN' एक बार दबाए।
Press 1 MIN twice. / '1 MIN' दो बार दबाए।
Press 10 SEC three times. / '10 SEC' तीन बार दबाए।
Press START. स्टार्ट दबाये.

text_image
Stop Clear
text_image
Micro Grill Combi
text_image
10 min 1 min 10 sec Clock Increase Decrease
text_image
Start Q-StartIn the following example I will show you how to programme your oven with micro power 40% and combi for a cooking time of 25 minutes. दिये गये उदाहरण में मैं आपको दिखार्का कि केसे अवन को निर्धारित किया जाता है, सूक्ष्म क्षमता 20% और मिलाप के लिए 25 मिनट में पकाना ।
Combination Cooking कॉम्बिनेशन में पकाना

Your oven has a combination cooking feature which allows you to cook food with heater and microwave at the same time. This generally means it takes less time to cook your food. आपके अवन में मिला जुला विकल्प है जिससे आप गर्ग और सूक्ष्म तरंग से एक समय में पका सकते हैं । साधारणत: यह कह सकते हैं कि यह कम समय में आहार को पका सकता हैं ।
The quartz heater grills the surface of the food while microwave heats inside. Moreover, preheating your oven is not necessary. क्वार्टज हीटर अन्न के सतह को पकाता है तभी मायक्रोवेव अंदर से गर्म करता है । अवन प्री-हिट करना जरुरी नही है ।
You can set three kinds of micro power level (20%, 40% and 60%) in combi
mode,
आप तीन बार माईक्रो पावर स्तर (20%, /40% ओर 60%) चुन सकते हें।
Press STOP/CLEAR.
स्टॉप / विलअर दवायें
Press COMBI/ COMBI बटन दबाए।
Press MICRO two times to select 40% Power. 40% पबार करने लिए के लिए MICRO बटन 2 बार दबाए।
Press 10 MIN 2 times/ 10 मिनट 2 बार दवाए।
Press 1 MIN 5 times/ 1 गिनट 5 बार दबाए।
Press S' X1.
स्टार्ट दभाप
Be careful when removing your food because the container will be hot! सावधानी बर्तें, जब आप आहार निकाल रहे हो, क्योंकि पात्र गरम हो सकता हैं ।

text_image
Stop Clear
text_image
Micro Grill Combl
text_image
Micro Grill Combi
text_image
10 min | 1 min | 10 sec Clock | Increase | Decrease
text_image
Start Q-StartVarious Cook Functions
विभिन्न कुक कार्यप्रणालियां
Please follow the given steps to operate cook functions (Health Plus, Soup, Indian Cuisine, Sweet Corner, Continental Menu, Chatpat Corner, Breakfast, Child Favourite & Utility Corner) in your Microwave.
कृषया अपने माइक्रोर्वें की विभिन्न कार्यप्रणालियों (Health Plus, Soup, Indian Cuisine, Sweet Corner, Continental Menu, Chatpat Comer, Breakfast, Child Favourite & Utility Comer) को बलाने के लिए नीचे दिये गये चरणों का अनुसरण करें।
| COOK MODE | (Health Plus (HP), Soup (So), Indian Cuisine (IC), Sweet Corner (SC), Continental Menu (Co), Chatpat Comer (CC), Breakfast )bF), Child Favourite (CF) | Utility Corner (UC) |
| STEP-1 | Press Stop/Clear Press Stop/Clear | |
| STEP-2 | Press HP, So, IC, SC, Co, CC, bF & CFto select Categoryfrom (1-5) or (1-4) as required | Press UCto select Categoryfrom UC (1-5); FE (1-3) |
| STEP-3 | Press Increase/Decreaseto set Weight (if required) | Press Increase/Decreaseto set Weight (if required) |
| STEP-4 | Press Start Press Start |
| COOK MODE | (Health Plus (HP), Soup (So), Indian Cuisine (IC), Sweet Corner (SC), Continental Menu (Co), Chatpat Corner (CC), Breakfast )bF), Child Favourite (CF) | Utility Corner (UC) |
| STEP-1 | Stop/Clear दबाएं Stop/Clear दबाएं | |
| STEP-2 | (1-5) या (1-4) श्रेणी केव्यंजन चुनने के लिएHP, So, IC, SC, Co, CC, bF या CF दबाएं। | UC (1-5); FE (1-3) श्रेणी केव्यंजन चुनने के लिएUC दबाएं |
| STEP-3 | वजन निर्मारित करने के लिए वजन निर्मारित करने के लिएIncrease/Decrease दबाएं (यदि आवश्यकता हो)। | Increase/Decrease दबाएं (तवि आवश्यकता हो)। |
| STEP-4 | Start दबाएं Start दबाएं |
Note / टिपणी :
While cooking you can extend the cooking time at any point by pressing Increase/decrease key. There is no need to stop the cooking process.
जब आप भोजन पका रहे हॉं, तो केवल increase/decrease बटन दबा कर ही समय में परिवर्तन किया जा सकता है । भोजन पकाने की प्रक्रिया को रोकने की कोई आवश्यकता नहीं है ।
Health Plus
हैल्थ प्लस
| Category | Weight Limit | Utensil | Instructions | ||||
| HP-1 | Kala Chana | 0.1~0.3kg | Microwave safe bowl | ||||
| Soaked Black Chana | 0.1 kg | 0.2 kg | 0.3 kg | ||||
| Water | 100 ml | 200 ml | 250 ml | ||||
| Oil | 1 tbsp | 2 tbsp | 3 tbsp | ||||
| Onion Chopped | 1/2 cup | 1 cup | 11⁄2 cup | ||||
| Salt, Chat Masala, Red Chilli Powder, Hara Dhania | As per your taste | ||||||
| Method: 1. Soak Chana for 4 hours, in a Microwave Safe bowl take soaked chana with 100 ml water, cover it.2. Select black Chana menu and adjust weight and press start to cook.3. When beep, strain the water from it. In a Microwave Safe bowl take Chana, add oil, Chapped onion, Chat masala, Red Chilli Powder, Hara Dhania and press start to cook, serve hot. | |||||||
| HP-2 | Karela Sabji | 0.3kg | Microwave safe bowl | Chopped Karela | 0.3 kg | ||
| Oil | 2 tbsp | ||||||
| Water | As required | ||||||
| Rai, Jeera, Hing & Haldi | For tepering | ||||||
| Salt, Sugar, Garam Masala, Dhania, Jeera Powder | As per your taste | ||||||
| Grated Coconut & Hara Dhania | For garnishing | ||||||
| Method: 1. In a Microwave Safe bowl take Oil add Rai, Jeera, Hing & Haldi, select menu and press start.2. When beep add Chopped Karela. Press start to continue cooking.3. When beep add some water, salt, sugar, masala, dhania-jeera powder.4. Press start, stand for five minutes after cook ends.5. Garnish with Coconut & Dhania, Serve Hot | |||||||
Health Plus
हैल्थ प्लस
| Category | Weight Limit | Utensil | Instructions | ||||
| HP-3 | Moong Dal | 0.2 kg | Microwave safe bowl | ||||
| Moong Dal soaked in water (for 1 hour) | 0.2 kg | ||||||
| Water | 200 ml | ||||||
| Oil | 2 tbsp | ||||||
| Jeera | 1 tsp | ||||||
| Hari Mirch | 2-3 nos. | ||||||
| Curry Leaves | 5-6 nos. | ||||||
| Salt, Dhania-Jeera Powder, Haldi,Hing, Kasuri Methi, Lemon Juice,Hara Dhania | As per your taste | ||||||
| Method:1. Take 200 gms dal in Microwave Safe bowl, add Water,Haldi & Hing.2. Select menu press start to cook.3. When beep take another bowl add oil, jeera, hari mirch,curry leaves & press start.4. When beep add dal, salt, dhania jeera powder, haradhania, kasuri methi (optional) lemon juice & press startto cook. | Vitghi:1. mādākōvev sōfā bāutal me 200 graam dātal lel eir pānai, hāndī tāthāhīan gālae!2. gēniū, chunakr pakaṇe ke liniā rātae i dehāe!3. 'bēiāp' suuārāi dete nā pā dūsra bāutal lel eir teel, jiaira, hāri mīrī, kārī pata āaate lāthā sātae i dehāe!4. 'bēiāp' suuārāi dete nā pā dātal, nāmuk, bhniqya jia rā pataakr, hārā bhniqya, kātūrī mehī (veiklīyīk) tāthā nābū rās dale and prakāne ke liniā rātae i dehāe! | ||||||
| HP-4 | Lemon Chicken | 0.1~0.3kg | Microwave safe bowl | ||||
| Boneless Chicken | 0.1 kg | 0.2 kg | 0.3 kg | ||||
| Lemon Juice | 1 tbsp | 2 tbsp | 3 tbsp | ||||
| Salt | To taste | ||||||
| Honey | 1 tsp | 2 tsp | 3 tsp | ||||
| Kali Mirch Powder | 1/4 tsp | 1/2 tsp | 1 tsp | ||||
| Olive Oil | 1 tbsp | 11⁄4 tbsp | 2 tbsp | ||||
| Method:1. Marinate chicken with kali mirch powder, salt, lemon juice keep for one hour in refrigerator.2. In Microwave Safe bowl take olive oil, marinated chicken and mix well select menu & press start.2. When beep turn the chicken pieces, press start. Stand for 5 mins mix honey and serve hot. | Vitghi:1. kālāti mīrīb yāutār, nāmuk tāthā nābū rās me chikn kon ko saan lel eir eir ek chandte ke liniā rāfikarstor me rǎe!2. maādākōvev sefe kāutal me jieutun ka teel lel, sanhe hui chikn kon daalckar aehmi terh imilā lae! Mānū chunakr rātae i dehāe!3. 'bēiāp' suuārāi dete nā pā dātal ke duokāo kon pahtat de, sātae i dehāe 5 minnt atak rukc rsh e! shahd mīlār kar garm-garm paros! | ||||||
Health Plus
हैल्थ प्लस
| Category | Weight Limit | Utensil | Instructions | ||||
| HP-5 | Machi Kali Mirch | 0.1~0.3kg | Microwave safe bowl | ||||
| Pomfret (fish category) | 0.1 kg | 0.2 kg | 0.3 kg | ||||
| Salt, Lemon Juice & Kali Mirch Powder | To marinate as per your taste | ||||||
| Oil, Chopped Onion, Chopped Tomatoes, Chopped Garlic | As required | ||||||
| Method: 1. Take Pomfret Slices as per weight either of (0.1 Kg/0.2 Kg/0.3Kg) and marinate with salt, lemon juice, and kali mirch powder (as per taste) for one hour.2. Select menu, weight and in Microwave Safe bowl put oil, chopped onion, chopped tomatoes, chopped garlic, press start.3. When beep, open door and add marinated fish, salt to taste and some water.4. Press Start and after cooking, give stand time for five minutes. | |||||||
Soup सूप
| Category | Weight Limit | Utensil | Instructions |
| So-1 | Tomato Soup | 0.2 kg | Microwave Safe Glass Bowl |
| Category | Weight Limit | Utensil | Instructions | ||
| So-3 | Sweet Corn Soup | 0.3 kg | Microwave Safe Glass Bowl | ||
| For 1 Sweet Corn Soup | |||||
| Sweet Corn | 0.2 kg | ||||
| Water | 1 cup | ||||
| Oil | 1 tbsp | ||||
| Corn flour | 1 tbsp | ||||
| Salt, Sugar and Kali Mirch, Chopped Onion and Green Chilli | As per your taste | ||||
| Method:1. Grind sweet corn with some water and put in MWS Glass Bowl. Select menu & weight. Press start.2. In another bowl put oil, green chilli and onion & press start.3. Add corn mixture in it. Mix cornflour with 1/2 cup water and mix with it. Add some water, salt, sugar, kali mirch and press start. | Vitibi:1. स्वीट कॉर्न को कुळ पानी के साथ पीसे और माइक्रोवेद सैफ न्लास बाउल मे रखे। मौनु और वजन निर्घारित करके स्टार्ट दबाएं।2. एक दूसरे बाउल मे तेल, हरी मिर्च और पाज झाले और स्टार्ट दबाएं।3. फिर इसमें स्वीट कॉर्न के पिसे हुए मिश्रण को डालें। आधा कप पानी झालकर अच्छी तरह मिला लें। धोडा पानी, नमक, चीनी तथा काली गिर्च डालकर स्टार्ट दबाएं। | ||||
| So-4 | Mushroom Soup | 0.3 kg | Microwave Safe Glass Bowl | ||
| For 2 Mushroom Soup | |||||
| Mushroom | 120 gms | ||||
| Potato | 1 No. | ||||
| Cabbage | 50 gms | ||||
| Onion | 1 small | ||||
| Tomato | 2 tbsp | ||||
| Salt, Sugar, Pepper (Black) | As per your taste | ||||
| Oil | 2 tbsp | ||||
| Method:From Stock (Boiled Vegetables)1. In MWS glass bowl put potato in small pieces, chopped cabbage and onion and put it in Microwave with addition of 2 cup of water. Then select menu and press start.2. When beep, take the bowl out and grind the stock. After grinding the stock, strain the whole stock and add water as per your requirement. Now, put the bowl with this Stock, at a side.3. Now, take another bowl, add oil, chopped mushroom and put in Microwave and press start4. When beep, add stock (from the above said bowl) into this Bowl then add salt, black pepper and sugar as per as your taste. And 2 tbsp tomato sauce and press start. Serve hot garnish with grated cheese. | Vitibi:स्टांक (उबली हुई सभियों) से1. माइक्रोवेद सैफ ग्लाता बाउल में आतु के छोटें-छोटे टुकड़े, कटी हुई बन्दगोभी और पाज डालकर दो कप पानी के साथ ओवन में रखे दें।2. बीप आने पर, बाउल को बाहर निकाले और स्टॉक को पीस लें। फिर पूरे स्टॉक को निवोड़े और अपनी आवश्यकतानुसार पानी डाले और बाउल को स्टॉक संहित अलग रखे दें।3. अब एक दूसरे बाउल में तेल, कटे हुए मशसम डालें और ओवन में रखकर स्टार्ट दबाएं।4. बीप आने पर, उपरोक्त बाउल से स्टॉक को इस बाउल में डालें और किर नमक, काली गिर्च और स्वादानुसार चीनी और टमाटर की सौस झालकर स्टार्ट दबाए। गर्म-गर्म परोसे और कसे हुए चीजू से सजाए। | ||||
Soup सूप
| Category | Weight Limit | Utensil | Instructions | |
| So-5 | Chicken Tortilla Soup | 0.3 kg | Microwave Safe Glass Bowl | |
| Chicken pieces (Boneless)250 gms | ||||
| Ginger Garlic paste1 tsp | ||||
| Water4 cups | ||||
| Salt, Pepper Powder, Green ChilliesAs per your taste | ||||
| Oil2 tbsp | ||||
| Tortilla pieces10-15 Nos. | ||||
| Method: In MWO bowl put water and chicken pieces. Cover and keep it in Microwave. Select menu and press start to cook. When it gives a beep, remove. In another bowl add oil and ginger garlic paste.Press start. When it gives a beep add Chicken stalk, salt, pepper powder, green chilli and 1 cup water. Press start. Serve with tortilla pieces. | ||||
Continental Menu कॉन्टीनेन्टल मीनू
| Category | Weight Limit | Utensil | Instructions | ||||
| Co-1 | Pasta | 0.1~0.3kg | Microwave safe glass flat dish & High Rack | ||||
| Penne Pasta | 0.1 kg | 0.2 kg | 0.3 kg | ||||
| Butter | 1 tbsp | 2 tbsp | 3 tbsp | ||||
| Onion Chopped | 1 tbsp | 2 tbsp | 3 tbsp | ||||
| Garlic Chopped | 1 tsp | 2 tsp | 3 tsp | ||||
| Chopped Palak leaves | 50 gm | 75 gm | 100 gm | ||||
| Hot Water | 200 ml | 400 ml | 600 ml | ||||
| Cream | 1⁄2 cup | 1 cup | 11⁄2 cup | ||||
| Grated Cheese | 2 tbsp | 3 tbsp | 4 tbsp | ||||
| Nutmeg Powder | 1 pinch | ||||||
| Oregano | 1⁄4 tsp | 1⁄2 tsp | 3⁄4 tsp | ||||
| Salt & Pepper | As per your taste | ||||||
| Method: 1. In MWS bowl take pasta with hot water. Select menu & weight press start.2. Drain water from pasta. In MWS bowl add butter, Onion, garlic & Palak, mix well pres start.3. Add cream, cheese, nutmeg powder, oregano, salt & pepper and boiled pasta add some hot water, mix well & sprinkle grated cheese keep the vessel on high rack press start. | |||||||
| Co-2 | Veg O Gratin | 0.2kg | Microwave safe glass bowl | Mix Vegetables - Gajar, Cauliflower, French Beans (cut into small pieces), Sweet Corns, Green peas etc. | 0.2 kg | ||
| Maida | 2 tbsp | ||||||
| Butter | 2 tsp | ||||||
| Milk | 2 cup | ||||||
| Hot Water | 1⁄2 cup | ||||||
| Grated Cheese | 4 tbsp | ||||||
| Salt, Sugar & Pepper As per your taste | |||||||
| Method: 1. In MWS bowl take butter, vegetable & maida, mix well, select menu & weight press start.2. When beep add milk, hot water, salt, sugar & pepper, mix well & press start.3. When beep mix well and spread grated cheese on it and press start. | |||||||
Continental Menu कॉन्टीनेन्टल मीनू
| Category | Weight Limit | Utensil | Instructions | ||||
| Co-3 | Macaroni | 0.1~0.3kg | Microwave safe glass bowl | ||||
| Macaroni | 0.1 kg | 0.2 kg | 0.3 kg | ||||
| Hot Water | 200 ml | 400 ml | 600 ml | ||||
| Butter | 1 tbsp | 2 tbsp | 3 tbsp | ||||
| Spring Onion Chopped | 1 tbsp | 2 tbsp | 3 tbsp | ||||
| Garlic Chopped | 1 tsp | 2 tsp | 3 tsp | ||||
| Mushrooms Chopped | 3 Nos. | 4 Nos. | 5 Nos. | ||||
| Tomato Sauce | 1 tbsp | 2 tbsp | 3 tbsp | ||||
| Chilli Sauce | 1 tsp | 2 tsp | 3 tsp | ||||
| Salt, Sugar, Pepper & Oregano | As per your taste | ||||||
| Method: 1. In MWS bowl take Macaroni with hot water. Select menu & weight press start.2. Drain water from it. In MWS bowl add all the ingredients with boiled Macaroni, mix well & press start. | |||||||
| Co-4 | Baked Mushrooms | 0.1~0.3kg | Microwave safe flat glass dish & High Rack | ||||
| For | 0.1 kg | 0.2 kg | 0.3 kg | ||||
| Mushrooms | 50 gm | 100 gm | 150 gm | ||||
| White Sauce | 50 gm | 100 gm | 150 gm | ||||
| Cheese (grated), Salt, Kali Mirch | |||||||
| Butter | 1 tbsp | 11⁄2 tbsp | 2 tbsp | ||||
| Method: 1. In MWS glass flat dish put all the ingredients except cheese, mix well. Select menu & weight, press start.2. When beep keep high rack in the oven. Spread grated cheese on the top of the mixture. Place the dish on the rack. Press Start. | |||||||
Indian Cuisine भारतीय व्यंजन
| Category | Weight Limit | Utensil | Instructions | ||||
| IC-1 | Gajar ka Halwa | 0.5 kg | Microwave Safe Glass Bowl | ||||
| For | 0.5 kg | ||||||
| Grated Gajar | 400 gms | ||||||
| Ghee | 2 tbsp | ||||||
| Milk Powder | 5 tbsp | ||||||
| Khoya | 6 tbsp | ||||||
| Sugar | 5 tbsp | ||||||
| Elaichi Powder and Dry Fruits | As per your taste | ||||||
| Method: 1. In MWS glass bowl take all the ingredients and mix well. Place the bowl in Idii Steamer. Select menu and weight, press start. | |||||||
| IC-2 | Mix Veg | 0.1~0.3 kg | Microwave safe bowl | ||||
| For | 0.1 kg 0.2 kg 0.3 kg | ||||||
| Oil | 1 tbs | 2 tbs | 2 tbs | ||||
| Onion, Garlic, Carrot, Capsicum, Cabbage | 100 gm | 200 gm | 300 gm | ||||
| Salt, Red Chilli Powder | To taste | To taste | To taste | ||||
| Corn Flour | 2 tsp | 3 tsp | 4 tsp | ||||
| Water | 11⁄2 cup | 11⁄2 cup | 11⁄2 cup | ||||
| Soya Sauce | 1 tsp | 2 tsp | 3 tsp | ||||
| Tomato Sauce | 1 tsp | 2 tsp | 3 tsp | ||||
| Vinegar | 3/4 tsp | 3/4 tsp | 3/4 tsp | ||||
| Brown Sugar | 1/2 tsp | 1/2 tsp | 1/2 tsp | ||||
| Ajinomoto | 1 pinch | 1 pinch | 1 pinch | ||||
| Method: 1. In a MW safe bowl mix all the vegetables and keep aside. 2. In another bowl add oil, all other ingredients. Mix it well and press Start by selecting the desired weight. When beep sounds, stir the bowl. 3. Now add vegetables to the gravy and continue cooking it again. | |||||||
Indian Cuisine भारतीय व्यंजन
| Category | Weight Limit | Utensil | Instructions | ||||
| IC-3 | Veg Biryani | 0.1~0.3kg | Microwave safe bowl | ||||
| Basmati Rice (soaked for 1 hour) | 0.1 kg | 0.2 kg | 0.3 kg | ||||
| Water | 200 ml | 400 ml | 600 ml | ||||
| Ghee | 1 tbsp | 2 tbsp | 3 tbsp | ||||
| Laung, Elaichi, Dalchini, Black Pepper, Tej Patta, Salt & Sugar | To taste | ||||||
| Mix Vegetables - (Gobhi, Mutter, Gajar, French Beans etc.) | 1⁄2 Cup | 1 Cup | 11⁄2 Cup | ||||
| Method: 1. In Microwave Safe Bowl put oil add laung, Dlachini, Elaichi, Tej patta and Kali Mirch, add mix vegetables and soaked rice select menu and press Start.2. When beep add water & salt mix well cover it press start, stand in 5 minutes after cook ends. Serve hot with raita & salad. | |||||||
| IC-4 | Chilli Chicken | 0.1~0.3kg | Microwave safe bowl | ||||
| Boneless Chicken | 0.1 kg | 0.2 kg | 0.3 kg | ||||
| Oil | 1 tbsp | 11⁄2 tbsp | 2 tbsp | ||||
| Shimla Mirch | 1⁄2 no. | 1 no. | 1 no. | ||||
| Chilli Sauce | 1⁄2 tbsp | 1⁄2 tbsp | 3⁄4 tbsp | ||||
| Soya Sauce | 1⁄2 tbsp | 1⁄2 tbsp | 1 tbsp | ||||
| Vinegar | 1⁄2 tbsp | 1⁄2 tbsp | 1 tbsp | ||||
| Salt, Sugar & Kali Mirch | As per your taste | ||||||
| Method: 1. In Microwave Safe Bowl take oil, bone less chicken pieces, chopped ginger garlic, soya sauce & cover it, select menu and press start.2. When beeps add chopped onion, chopped capsicum, chopped green chilli, vinegar, salt, sugar, kali mirch and 2 tsp cornflour dissolved with 1/4 cup cold water place it in Microwave without cover and press start. | |||||||
Indian Cuisine भारतीय व्यंजन
| Category | Weight Limit | Utensil | Instructions | ||||
| IC-5 | Kadhai Paneer | 0.1~0.3kg | Microwave safe bowl | ||||
| Paneer | 0.1 kg | 0.2 kg | 0.3 kg | ||||
| Onion Paste | 3 tbsp | 4 tbsp | 5 tbsp | ||||
| Tomato Puree | 1 12 tbsp | 2 tbsp | 3 tbsp | ||||
| Ginger-Garlic Paste, Salt & Sugar | To taste | ||||||
| Red Chilli Powder, Halid Kasuri Methi, Garam Masala | To taste | ||||||
| Butter | 1 12 tbsp | 2 tbsp | 3 tbsp | ||||
| Fresh Cream | 1 tbsp | 1 12 tbsp | 2 tbsp | ||||
| Method: 1. In Microwave Safe Bowl take oil, onion paste, ginger garlic paste, mix well and press start.2. When beep, add tomato puree, butter, fresh cream, haldi, red chilli powder, garam masala, kasuri methi, salt, sugar and paneer cubes, mix well and press start, garnish with hara dhania and serve hot. | |||||||
| Vitghi: 1. माइक्रोबेव सेफ बाउल में तेल, प्याज, अदरक और लहसुन पेस्ट झालकर अच्ची तरह मिलाये और स्टार्ट दबाएं।2. बीप सुनाई देने पर टोमेटो पूरी, मक्क्यन, ताजा क्रीम, हल्पी. लात मिर्च पाउडर, गर्म मसाला, कसूरी मैथी, नमक, शकर और पनीर के टुक्षे डाले, अच्ची तरह मिलाये और स्टार्ट दबाएं। हरा धनिया के साथ सजाएं और गर्म-गर्म परोसें। | |||||||
Sweet Corner स्वीट कॉर्नर
| Category | Weight Limit | Utensil | Instructions | ||||
| SC-1 | Shahi Tukda | 0.1~0.3kg | Microwave safe glass bowl & High Rack | ||||
| Bread Slices | 1 slice | 2 slices | 3 slices | ||||
| Milkmaid | 50 ml | 100 ml | 150 ml | ||||
| Milk | 25 ml | 50 ml | 100 ml | ||||
| Sugar | 1 tbsp | 2 tbsp | 3 tbsp | ||||
| Badam, Pista Pieces | 2 tbsp | 3 tbsp | 4 tbsp | ||||
| Kesar-Elaichi Powder | As per your taste | ||||||
| Method: 1. Arrange bread slices on high rack. Select menu & press start.2. When beep turn slices press start.3. Mix Milkmaid, milk, sugar, dry fruits and kesar elaic hi powder in Microwave Safe Flat Dish. Pour the mixture on slices and press start. Serve hot. | |||||||
| SC-2 | Kalakand | 0.1~0.3kg | Microwave safe bowl | ||||
| Grated Paneer | 0.1 kg | 0.2 kg | 0.3 kg | ||||
| Milkmaid | 50 gms | 100 gms | 200 gms | ||||
| Milk Powder | 1 tbsp | 2 tbsp | 3 tbsp | ||||
| Cornflour | 1/2 tsp | 1 tsp | 1 tsp | ||||
| Elaichi Powder | 1/2 tsp | 1 tsp | 1 tsp | ||||
| Method: 1. In Microwave Safe Bowl take grated paneer, milkmaid,milk powder, cornfloor, Elaichi powder, kesar. Mix well select menu and press start.2. When beep. Mix it again and press start.3. Garnish with dry fruits when set cut into pieces. | |||||||
Sweet Corner स्वीट कॉर्नर
| Category | Weight Limit | Utensil | Instructions | ||||
| SC-3 | Kheer | 0.1~0.3kg | Microwave safe bowl | ||||
| Semiya (roasted) | 0.1 kg | 0.2 kg | 0.3 kg | ||||
| Hot Milk | 100 ml | 200 ml | 300 ml | ||||
| Sugar | 75 gms | 150 gms | 200 gms | ||||
| Badam, Pista Pieces | 2 tbsp | 3 tbsp | 4 tbsp | ||||
| Kesar & Elaichi Powder | 2 tbsp | 3 tbsp | 4 tbsp | ||||
| Method: 1. In Microwave Safe Bowl take semiya, add hot milk, sugar,mix well. Select menu. Press start.2. When beep add Badam Pista pieces, Kesar Elaichi Powder mix well and press start. Stand for 5 mins, serve hot or chilled. | |||||||
| SC-4 | BesanLadoo | 0.1~0.3kg | Microwave safe bowl | ||||
| Besan | 0.1 kg | 0.2 kg | 0.3 kg | ||||
| Ghee | 3 tbsp | 5 tbsp | 7 tbsp | ||||
| Powder Sugar | 50 gm | 100 gm | 150 gm | ||||
| Elaichi Powder | 1/2 tsp | 1 tsp | 1 tsp | ||||
| Method: 1. In Microwave Safe Bowl take Beasn and ghee. Select menu and press start.2. When beep. Stir it press start.3. Allow to cool. Add powdered sugar and elaichi powder.Mix it well and make a ladoo. | |||||||
| SC-5 | Burli Burli | 0.3kg | Microwave safe bowl | ||||
| 0.3 kg | |||||||
| Khoya 250 gm | |||||||
| Powder Sugar | 250 gm | ||||||
| Milk Powder | 2 tbsp | ||||||
| Elaichi Powder | 1/2 tsp | ||||||
| Method: 1. Mix all ingredients and MWO Safe glass bowl.2. Select Menu and press Start.3. When Beep, Mix all ingredients, again.press start. | |||||||
Chatpat Corner चटपट कॉर्नर
| Category | Weight Limit | Utensil | Instructions | ||
| CC-1 | Apple Tomato Chutney | 0.3 kg | Microwave Safe Glass Bowl | ||
| Apple pieces | 100 gms | ||||
| Tomato pieces | 100 gms | ||||
| Green chillies, Salt, Sugar | As per your taste | ||||
| Oil | 2 tbsp | ||||
| For Tempering: Rai, Jeera, Hing etc. | |||||
| Method: 1. In a MWS bowl put apple, tomato and keep it in Microwave. Select menu and press start to cook. When it gives a beep, remove and grind it in a mixer. In another bowl add oil and tempering and press start. When it gives a beep, add ground mixture and press start. Garnish with chopped coriander. | ###: 1. माइक्रोवेव न्लारा बाउल में सेब तथा टमाटर डालें और उरो ओवन में रख दें। मीनु चुनकर पकने के लिए स्टार्ट दबाएं। बीप सुनाई देने पर, बाहर निकालकर गिकशर में पीस ले। एक अन्य बाउल में तेल और तड़का सामग्री डालकर स्टार्ट दबाएं। बीप सुनाई देने पर, पिसा हुआ निश्रण डाले और स्टार्ट दबाएं। कटे हुए हरे धनिया से सजाएं। | ||||
| CC-2 | Lemon Pickle | 0.3 kg | Microwave Safe Glass Bowl | ||
| Lemon pieces | 150 gms | ||||
| Sugar | 150 gms | ||||
| Chilli powder, Salt | As per your taste | ||||
| For Tempering: Rai, Jeera, Hing etc. | |||||
| Method: 1. Cut lemon and remove seeds. In MWS bowl add lemon pieces, sugar, salt and chilli powder. Select menu and press start. Store it in a bottle after it cools. | ###: 1. नीडुओ को काटकर उनके बीजों को निकाल दें। माइक्रोवेव सेफ बाउल में नीबू के टुकडे, चीनी, नमक और मिच्च पाउडर ढाले और ओवन में रखकर गीनु बुने और स्टार्ट दबाएं। चंडा हो जाने पर उते बोतल में भरकर रख दें। | ||||
| CC-3 | Mix Veg. Pickle | 0.3 kg | Microwave Safe Glass Bowl | ||
| Mix Vegetable (Cauliflower, Carrot, Radish, Shalgam, Green peas) | 250 gms | ||||
| Lemon juice | 2 tbsp | ||||
| Salt, Chilli powder, Salt, Sugar, Pickle Masala | As per your taste | ||||
| Oil | 2 tbsp | ||||
| For tempering: Rai, Jeera, Hing etc. | |||||
| Method: 1. In a MWS bowl put vegetables cut in long strips. Cover and keep it in Microwave. Select menu and press start to cook. When it gives a beep, remove. In another bowl add oil and tempering and press start. When it gives a beep add masala, sugar, salt. Add vegetables to this when it cools. Mix well and store it in a fridge. | ###: 1. माइक्रोवेव सेफ बाउल में लम्बी पटियों में कटी हुई सभियों को ढालें और ढककर ओवन में रख दें। मीनु चुनकर पकने के लिए स्टार्ट दबाएं। बीप सुनाई देने पर, बाहर निकाल ले। एक अन्य बाउल में तेल और तड़का सामग्री डालकर स्टार्ट दबाएं। बीप सुनाई देने पर गसाला, चीनी, नमक ढाले। किर ठंडा होने पर इसमे पकी हुई सभियों को ढाल दें। अच्छी तरह मिलाएं और क्रिज में रख दें। | ||||
Chatpat Corner चटपट कॉर्नर
| Category | Weight Limit | Utensil | Instructions | ||
| CC-4 | Pizza Sauce | 0.3 kg | Microwave Safe Glass Bowl | ||
| Tomato | 200 gms | ||||
| Onions | 1 No. | ||||
| Salt, Sugar, Ajwain, Oregano, Basil leaves | As per your taste | ||||
| Garlic pods | 7-8 | ||||
| Oil | 2 tbsp | ||||
| Method: 1. In a MWS bowl put oil, tomato, onion, garlic pods and keep it in Microwave. Select menu & press start to cook. When it gives a beep, remove and grind it in a mixer. Now add salt, sugar, ajwain, basil leaves. Keep it in Microwave and press start. When it gives a beep, the sauce is ready. | विधि: 1. माइक्रोयेव ग्लास बाउल में तेल, टमाटर, प्याज, लहसुन की फलिया डालकर ओवन के अन्दर रख्दे। मीनू चुनकर पकने के लिए स्टार्ट दबाए। बीप सुनाई देने पर, बाहर निकाले और मिबशर में पीसा लें। अब उसमें नमक, चीनी, अजवाइन, तुल्ती के पत्ते डालें और ओवन में रखकर स्टार्ट दबाए। बीप सुनाई देने पर सौस तैयार हो जायेगी। | ||||
Breakfast ब्रेकफास्ट
| Category Weight Limit Utensil Instructions | |||||||
| bF-1 | Sprouts | 0.1~0.3kg | Microwave safe glass bowl | ||||
| Moong Sprout | 0.1 kg | 0.2 kg | 0.3 kg | ||||
| Water | 150 ml | 200 ml | 300 ml | ||||
| Salt, Chat Masala, Hara Dhania | As per your lasle | ||||||
| Chopped Onion | 2 tbsp | 3 tbsp | 4 tbsp | ||||
| Chopped Tomato | 2 tbsp | 3 tbsp | 4 tbsp | ||||
| Method: 1. In Microwave Safe Bowl add sprouts, water and salt select menu & press start.2. When cooking ends, take it out and strain add chopped onion, chopped tomatoes, hara dhania, chat masala and serve. | |||||||
| Poha Microwave ~ 0.3 kgbF-2 | safe bowl | Poha | 0.1 kg | 0.2 kg | 0.3 kg | ||
| Oil | 1 tbsp | 2 tbsp | 3 tbsp | ||||
| Onion Chopped | 1/2 cup | 1 cup | 1 cup | ||||
| Green Chilli | 2 nos. | 3 nos. | 4 nos. | ||||
| Rai, Jeera, Hing, Haldi Curry Leaves | For Tempering (Tadka) | ||||||
| Grated Coconut and Hara Dhania | For Gamishing | ||||||
| Method: 1. In Microwave Safe Bowl put oil, rai, jeera, green chilli, curry leaves, select menu & press start.2. When beep add chopped onion, haldi powder & hing, press start.3. When beep add washed poha, salt & sugar to taste mix well and press start. Garnish with cobobnut and hara dhania serve hot. | |||||||
Breakfast ब्रेकफास्ट
| Category Weight Limit Utensil Instructions | ||||||
| Upma Microwave - 0.3 kgbF-3 | safe bowl | Suji | 0.1 kg | 0.2 kg | 0.3 kg | |
| Oil | 2 tbsp | 3 tbsp | 4 tbsp | |||
| Water | 200 ml | 400 ml | 600 ml | |||
| Salt & Sugar | To taste | |||||
| Onion | 1 no. | 2 nos. | 2 nos. | |||
| Green Chilli | 2 nos. | 3 nos. | 3 nos. | |||
| Rai, Jeera, Hing, Curry Leaves, Urad Dal | As per your taste | |||||
| Method: 1. In Microwave Safe Bowl put oil, jeera, rai, urad dal, han mirch, curry leaves and suji, select Menu then press Start.2. When beep, add onion, stir well and keep inside and press Start.3. When beep, add water, sugar & salt to taste, lemon juice mix well and keep inside press Start to cook stand for 5 minutes. Gamish with hara dhania and bhujiya. | ||||||
| Veg. Cutlet | 0.3 kgbF-4 | High Rack | Boiled Vegetables - Potato, Cauliflower, Carrots, Green Peas | 0.3 kg | ||
| Comflour | 2 to 3 tablespoon | |||||
| Bread Crumbs | 112 tbsp | |||||
| Ginger Garlic Paste | 12 tsp | |||||
| Chilli Paste | 1 tsp | |||||
| Garam Masala | 12 tsp | |||||
| Lemon Juice, Salt, Sugar | As per your taste | |||||
| Method: 1. Mix Boiled vegetables, ginger garlic paste, garam masala, dhania jeera powder, salt red chilli powder, bread crumbs & hara dhania together, apply little oil to your palms and shape as desired like tikki balls, cutlet rolls brush with little oil.2. Keep cutlets on High Rack. Select menu & press start.Keep on turning at beeps.3. Serve with chutney & salad. | ||||||
Child's Favourite बच्चों की मनपसन्द
| Category Weight Limit Utensil Instructions | ||||||
| CF-1 | Veg Sandwich | 0.1~0.3kg | High Rack | |||
| Bread Slices | 0.1 kg | 0.2 kg | ||||
| Butter | 1 tbsp | 2 tbsp | ||||
| Source/Spread | 1 12 tbsp | 3 tbsp | ||||
| Chopped Vegetables - Onion, Tomato, Capsicum | 2 tbsp | 4 tbsp | ||||
| Grated Cheese | 2 tbsp | 4 tbsp | ||||
| Salt & Kali Mirch | As per your taste | |||||
| Method: 1. Apply butter on bread slice (both slices).2. Keep bread slices on high rack select menu & start.3. When beep spread sauce on one side and layer with chopped vegetables. sprinkle cheese on the top pressstart (use high rack) stand for 2 mints. | विधि : 1. बैड के दोनों तरफ नक्वण लगाएं।2. अब ब्रेड वी रसाइतों की हाई रैक पर रखें. मीनू चुने और रस्टार्ट दबाएं।3. बीप स्तुनाई देने पर ब्रेड के एक तरफ संस लगाएं और एक पत़ कटीहुई साजियों की लगा दें और सबसे ऊपर बीज़ जिड्क कें, स्टार्ट दबाएं,2 मिनट तक रके रहें। | |||||
| Pizza | 0.3kgCF-2 | High Rack | ||||
| Pizza Base | 1 No. | |||||
| Grated Cheese | 1/2 cup | |||||
| Vegetable Mixture (toppings) | 3 tbsp | |||||
| Pizza Sauce | As per your taste | |||||
| Method: 1. On high rack, place Pizza base & select Menu andpress start.2. When beep, remove the pizza base from the overand apply pizza sauce on it. Spread the vegetablemixture and grated cheese.3. Again place pizza with the above toppings on thehigh rack and press start. | विधि : 1. हाई रैक के ऋपर मीजा बेस रखें और मीजू चुनकर स्टार्ट दबाएं।2. बीग सुनाई देने पर पीजा बेस ओवन से बाहर निकालकर उसकेउपर पीजा शारा लगाएं। किर राजियों का मिश्रण और करा हुआचीजू फैलाएं।3. किर पीजा को उपरोका टॉपिंग्स के साथ हाई रैक पर रखें औरस्टार्ट दबाएं। | |||||
Child's Favourite
बच्यों की मनपसन्द
| Category Weight Limit Utensil Instructions | ||||||
| Garlic Bread | 0.3 kgCF-3 | High Rack | ||||
| For | 300 gms | |||||
| Bread slices | 6 Nos. | |||||
| Butter | 3 tbsp | |||||
| Garlic Paste | 3 tbsp | |||||
| Pepper powder, Oregano & Salt | To taste | |||||
| Method:1. Mix garlic paste, pepper powder, Oregano and Salt with butter. Mix well and apply above said mixture on both sides of bread slices and place on High Rack. Select menu and weight & press start.2. When it gives a beep, turn it and press start again. | ||||||
| Noodles Microwave~ 0.3 kgCF-4 | safe bowl | |||||
| Noodles | 0.1 kg | 0.2 kg | 0.3 kg | |||
| Water | 100 ml | 200 ml | 300 ml | |||
| Oil | 1 tsp | 2 tsp | 3 tsp | |||
| Vinegar | 1/2 tsp | 1 tsp | 1 tsp | |||
| Soya Sauce | 1/2 tsp | 1 tsp | 1 tsp | |||
| Chili Sauce | 1/2 tsp | 1 tsp | 1 tsp | |||
| Mix Vegetables -Cabbage, Capsicum.Carrot, French Beans etc. | 1/2 cup | 1/2 cup | 1 cup | |||
| Salt, Sugar, Kali Mirch Powder | As per your taste | |||||
| Method:1. In Microwave Safe Bowl take noodles, water, oil, select menu & press start.2. When beep, strain noodles & pure cold water over it. In Microwave Safe Bowl put some oil and finely chopped vegetables, add vinegar, soyasauce, chilli sauce, MSG salt & paper to taste press start.3. When beep, add noodles and mix well press start serve hot. | ||||||
Utility Corner सुविधा कॉर्नर
| Category | Weight Limit | Utensil | Instructions | |
| UC-1 | Keep warm | . | Microwave safe bowl | Method: 1.Any cooked food with cover (Rice, Dal, Sabzi, Halwa, Upma etc.)Select menu & press start |
| ###: 1. दका हुआ कोई मी व्यंजन (चावल, दाल, सब्जी, हलवा, उपमा इत्यादि) मीनू चुनें और स्टार्ट दबाएं। | ||||
| UC-2 | Steam clean | 0.3 kg | Microwave safe bowl | Method: 1.Take water in bowl, add vinegar & lemon juice in it, select menu & press start.2.When over wipe with soft and clean napkin after taking out power plug. |
| ###: 1. बाउल में पानी लेकर उसमें सिरका और नीबू रस डाले, मीनू चुनें और स्टार्ट दबाएं।2. मुलायम और साफ तौलिये से ही पोढे। | ||||
| UC-3 | Defrost Veg | 0.3 kg --0.5 kg | Microwave safe bowl | Veg - (Paneer, Green Peas, Corn etc.)Method: 1.Take In Microwave Safe Bowl, select menu and press start.2.When beep turn the food. |
| ###: 1. माइक्रोवेव सेफ बाउल में लेकर मीनू चुनें और स्टार्ट दबाएं।2. 'बीप' सुनाई देने पर खाने को पलट दें। | ||||
| UC-4 | Defrost Non veg | 0.5 – 1.0 kg | Microwave safe bowl | Non-Veg - (Chicken, Mutton etc.)Method: 1.Take in Microwave Safe Bowl, select menu and press start.2.When beep turn the food. |
| ###: 1. माइक्रोवेव सेफ बाउल में लेकर मीनू चुनें और स्टार्ट दबाएं।2. 'बीप' सुनाई देने पर खाने को पलट दें। | ||||
| UC-5 | Dehumidification | 0.3 kg Namikin, Biscuits, Bhujia | PaportandWaters etc.safe bowl | Method: 1.In MWS bowl add the food to be denumidified. Select menu and press start. |
| ###: 1.खाना रुखाने के लिए उरो माइक्रोवेव रोफ बाउल में रखें। मीनू चुनकर स्टार्ट दबाएं। | ||||
Fermentation
फरमेनटेशन
| Category Weight Limit Utensil Instructions | ||||
| FE-1 | Yoghurt | 0.25 kg | Microwave Safe Glass Bowl | |
| Milk 250 ml | ||||
| Curd 1 tbsp | ||||
| Sugar 1/2 tbsp | ||||
| Colour and Essence 1/2 tsp | ||||
| Method: 1. Put lukewarm milk in MWS bowl. Add curd, sugar, colour, essence to it. Stir it very well. Select menu and press start. On beep, stir well. विति: 1. माइक्रोवेव सैफ बाउल में गुनगुना दृष्ट तौ। फिर उसमें दहीं, चौनी, रंग और इन डाले। अच्छी तरह हिलाए। मीनू तुनकर स्टार्ट दबाएं। बीप सुनाई देने पर, अच्छी तरह हिलाए। | ||||
| Masala Paneer | 0.5 kgFE-2 | Microwave Safe Glass Bowl | ||
| Milk 500 ml | ||||
| Curd 2 tbsp | ||||
| Coriander 1 tbsp | ||||
| Jeera 1 tsp | ||||
| Method: 1. In MWS bowl add milk. Select menu and press start. When it gives a beep, remove and add curd, coriander and jeera. Put in microwave. Press start. When it gives a beep, remove and strain and press in a muslin cloth. विति: 1. माइक्रोवेव सैफ बाउल में दृष्ट ले। मीनू तुनकर स्टार्ट दबाएं। बीप सुनाई देने पर बाहर निकाले और दहीं, वनिया और जीश डाले। ओवन मे रखकर स्टार्ट दबाएं। बीप पुनाई देने पर बाहर निकाले और निबोडकर निलन के कपळे रो दबाएं। | ||||
| Yeast dough | 0.3 kgFE-3 | Microwave Safe Glass Bowl | ||
| Malda 250 ml | ||||
| Yeast 1 tbsp | ||||
| Salt 1/2 tsp | ||||
| Sugar 1 tsp | ||||
| Water As required | ||||
| Method: 1. In MWS bowl add maida, yeast, salt and sugar. Mix well, add water and make a soft dough. Select menu and press start. When it gives a beep, rest for 3 minutes. Now remove विति: 1. माइक्रोवेव सैफ बाउल में गैदा, ईस्ट, नगक और बीनी ढालकर अच्छी तरह मिलाएं तथा पानी मिलाकर मुलायम ड़क बना ले। मीनू तुनकर स्टार्ट दबाएं। बीप तुनाई देने के ३ मिपट बाद बाहर पिकाल ले। | ||||
Increase or Decrease Cooking
ज्यादा या कम पकाना
In the following example I will show you how to change the preset INDIAN CUISINE programmes for longer or shorter cooking time.
निचे दिये उदाहरण मे ऑटो कुक प्रणाली मे कुकींग टाईम कम या ज्यादा कैसे करेंगे ये देखिए ।

When cooking with other programmes, you can extend the cooking time at any point using the INCREASE/DECREASE button.
There is no need to stop the cooking process.
अन्य प्रोग्रामों द्वारा व्यंजन पकाते समय किसी भी स्थिति में पकाने का समय INCREASE/
DECREASE का प्रयोग करके बढ़ा या घटा सकते हैं। पकाने की प्रक्रिया को रोकने की आवश्यकता नहीं है।
Press STOP.
स्टाँप दबार्य ।

text_image
Stop ClearSet the required INDIAN CUISINE programme.
जो चाहिए वो ऑटो कुक प्रोग्राम सेट किजीए ।
Select weight of food.
अन्न का वजन चुनिए ।
Press START.
स्टार्ट दबाईए ।

text_image
Start Q-StartPress INCREASE INCREASE
एक बार दबाए ।
The cooking time will increase by 10 seconds for each press of the key. कुर्कींग टाईम हर प्रेस से 10 सेकंद से बढ़ोगे ।
Press DECREASE once. / DECREASE एक बार द्वाए।
The cooking time will decrease by 10 seconds for each press of the key. कुकींग टाईम 10 सेकंड से हर एक प्रेस से कम हो जायेगा ।
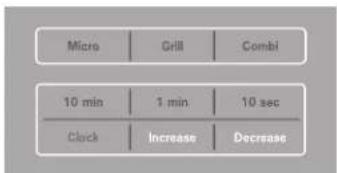
text_image
Micro Grill Combi 10 min 1 min 10 sec Clock Increase DecreaseWARNING/चेतावनी
Please ensure cooking times are correctly set as over cooking may result in FIRE and subsequent DAMAGE to the OVEN. आप ये निर्धारीत करे की पकाने का समय आपने सही सेटकिया है नहीं तो ज्यादा गर्म होने से आण या अवन को क्षिति पहूँच सकली हैं ।
Important safety instructions Read carefully and keep for future reference महत्वपूर्ण सुरक्षा सुचनाये ध्यान से पढ़े और आपके माहिती में रखे ।
1 Do not attempt to tamper with, or make any adjustments or repairs to the door, control panel, safety interlock switches or any other part of the oven. It is hazardous for anyone to carry out any service or repair operation which involves the removal of any cover which gives protection against exposure to microwave energy. Repairs should only be undertaken by a qualified service technician.
कभी भी डोर, कंटोल पैनल, सुरक्षा इंटरलाक स्विच या अवन के किसी पार्ट से छेड़छाङ न करें । मरम्मत के लिए कुशल तकनीशियन ही बुलाएं ।
2 Do not operate the oven when empty. It is best to leave a glass of water in the oven when not in use. The water will safely absorb all microwave energy, if the oven is accidentally started.
कभी भी अवन खाली न चलाएँ, यह बेहतर होगा कि एक ग्लास पानी हमेशा अवन में रखे ताकि दुर्घटनावश खाली चलने पर पानी सारी ऊर्जा सोखे लेगा ।
3 Do not use the oven for the purpose of dehumidification. It can be the cause of serious damage of safety.(ex. Operating the microwave oven with the wet newspapers, clothes, toys, pet or portable electric devices, etc.)
अडिह्युमिडीफिकेशन के हेतू अयन का प्रयोग ना करे । इससे सुरक्षितता को खतरा हो सकता है ।
4 Do not cook food wrapped in paper towels, unless your cook book contains instructions, for the food you are cooking.
कागज मे लिपटा हुआ भोजन न पकार्ई जब तक कृकिंग पुस्तिका में ऐसा कोई निर्देश न हो ।
5 Do not use newspaper in place of paper towels for cooking.
पकाने के लिए कागजी तौलिया के बजाए अखबार का प्रयोग न करें ।
6 Do not use wooden containers. They may heat-up and char. Do not use ceramic containers which have metallic (e.g. gold or silver) inlays. Always remove metal twist ties. Metal objects in the oven may arc, which can cause serious damage.
पकाने के लिए लकड़ी के बर्तन प्रयोग न करें, वे गर्म हो सकते हैं और जल सकते हैं । धातु के बर्तन और काकरी जिसमें धातु की परत हो प्रयोग न करें । हमेशा धातु की तारे निकाल कर ही अवन में खबे क्योंकि धातु से आर्किंग हो सकती हैं ।
7 Do not operate the oven with a kitchen towel, a napkin or any other obstruction between the door and the front edges of the oven, which may cause microwave energy leakage.
कीचन टाँवल, नैपकीन और अन्य वस्तु आप अवन के फंट सतह और दस्वाजे के बीच रख के ना चलाए जिससो मायक्रोवेव लिकेज हो सकता है ।
8 Do not use recycled paper products since they may contain impurities which may cause sparks and/or fires when used in cooking.
रिसाइकल करे हुए कागज का प्रयोग न करें क्यौंकि इसमें मिलावट होने का खतरा है, जिससे खाना पकाते समय चिन्गारी या आग लगने का खतरा हो सकता हैं ।
9 Do not rinse the turntable by placing it in water just after cooking. This may cause breakage or damage.
खाना पकाने के तुरंत बाद ग्लास ट्रे पानी में न डाले । इससे यह टूट सकती हैं ।
10 Small amounts of food require shorter cooking or heating time. If normal times are allowed they may overheat and burn.
थोड़े भोजन के लिए कम समय चाहिए । साधारण समय से यह अधिक गर्म हो सकते हैं और जल सकते हैं ।
11 Be certain to place the oven so the front of the door is 8 cm or more behind the edge of the surface on which it is placed, to avoid accidental tipping of the appliance.
यह निश्चित कर ले कि डोर अगली सतह से 8 सेमी पीछे हो कि उपकरण पलटे नहीं।
12 Before cooking, pierce the skin of potatoes, apples or any such fruit or vegetable.
पकाने से पहले आलु, सेब जैसी चीजों को पिअर्स करे ।
13 Do not cook eggs in their shell. Pressure will build up inside the egg which will burst.
अंडे को छिल्के में मत पकाएँ। ऐसे पकाने से छिलके के अन्दर दबाव बढ़ सकता है और अंडा फट सकता हैं।
14 Do not attempt deep fat frying in your oven.
अवन में डीप फ्राई करने का प्रयत्न न करें ।
15 Remove the plastic wrapping from food before cooking or defrosting. Note though that in some cases food should be covered with plastic film, for heating or cooking.
खाना पकाने या डिफ्रास्ट करने से पहले प्लास्टिक रैपिंग उतार लें । कुछ खाने में कवर करके जैसे कुर्किंग पुस्तिका में बताया गया है प्रयोग कर सकते हैं ।
16 If the oven door or door seals are damaged, the oven must not be operated until it has been repaired by a qualified service technician.
यदि अवन का दरवाजा क्षितिग्रस्त है तो उसे प्रयोग तब तक न करें जब तक किसी कुशल कारीगर से मरम्मत न करा लैं ।
17 If smoke is observed, switch off or disconnect the oven from the power supply and keep the oven door closed in order to stifle any flames.
यदि अवन में धृँआ दिखाई देतो दरवाजा बन्द रखे, बन्द कके पावर सप्लाई से अवन हटा लें ।
18 When food is heated or cooked in disposable containers of plastic, paper or other combustible materials, check the oven frequently due to the possibility of
the food container is deteriorating.
जब खाना प्लास्टिक के फेकने वाले बर्तन में पकाया जाता हैं या गर्म किया जाता हैं तो उसे लगातार चैक करें कि बर्तन खराब तो नहीं हो रहा ।
19 Only allow children to use the oven without supervision when adequate instructions have been given so that the child is able to use the oven in a safe way and understands the hazards of improper use. बच्चों को बिना निगरानी के अवन तभी प्रयोग करने दै जब उन्हे अवन सुरक्षित तरीके से प्रयोग पता हो और गलत तरीके से प्रयोग करने के खतरे भी पता हो।
20 Liquids or other foods must not be heated in sealed containers since they are liable to explode. तरल पदार्थ या अन्न बंद कंटेनर में ना पकाए जिससे वो एक्स्प्लोड हो सकता है ।
21 Do not operate the oven, if the door seals and adjacent parts of the microwave oven are faulty, until the oven has been repaired by a qualified service technician. यदि अवन का दरवाजा क्षितिग्रस्त है तो उसे प्रयोग तब तक न करें जब तक किसी कुशल कारीगर से मरम्मत न कराले।
22 Check the utensils are suitable for use in microwave ovens before use. 23 Do not touch the oven door, outer cabinet, rear cabinet, oven cavity, accessories and dishes during grill mode and auto cook operations, unless wearing thick oven gloves, as they will become hot. Before clearing make sure they are not hot. ये आप देख ले की अवन प्रयोग के लिए चुने हूए बर्तन सही है या नही। अवन डोअर, आऊटर कँकिनेट, रेअर कँबिनेट, अवन कँविटी, ऑसेसारिज और डिशेस अवन ग्रील मोड में हो तब ना हूए जब आपने जाडे म्लोव्स नही डाले हो क्योकी ये चीजे गर्म होती है। क्लिअर करने से पहले ये आप देख ले की ये गर्म नही है।
Technical Specifications / Two Recipes for starter तकनीकी जानकारी / नवसिखुए के लिए दो व्यंजन
Warning
This appliance must be earthed/यह यन्त्र अर्थ किया जाना चाहिए
The wires in this mains lead are colored in accordance with the following codes/पावर कॉर्ड का रंग निम्न निर्देशानुसार होता है-
BLUE \~ Neutral BROWN \~ Live GREEN & YELLOW \~ Earth
As the colours of the wires in the mains lead of this appliance may not correspond with the coloured markings identifying the terminals in your plug proceed as follows:/वायरिंग करने का निर्देश :
The wire which is colored BLUE must be connected to the terminal which is marked with the letter N or Colored BLACK.
BLUE/BLACK संग के वायर का कनेवशन प्लग के 'N' पिन से
The wire which is colored BROWN must be connected to the terminal which is marked with the letter L or colored RED.
BROWN/RED रंग के वायर का कनेकशन प्लग के 'L' पिन से
The wire which is colored GREEN & YELLOW or GREEN must be connected to the terminal which is marked with the letter E or ± . GREEN/YELLOW or GREEN रूग के वायर का कनेक्षान प्लग के 'E' ± से
Technical Specification/तकनीकी जानकारी
| MH-6549QS | |
| Power Input/पावर इनपुट | 230 V AC 50Hz |
| Output/आजटपुट | 900 W (IEC60705 rating standard) |
| Microwave Frequency/माइक्रोवेव फिकवेसी | 2450 MHz |
| Outside Dimension/बाहरी माप | 515 mm(W) X 310 mm(H) X 435 mm(D) |
| Power Consumption/पावर कंजम्पशन | |
| Microwave/माइलोवेव | 1350 Watts |
| Grill/गिल | 1250 Watts |
| Combination/कॉन्बीनेशन | 2650 Watts |
Two recipes for starter / नवसिखुप के जिए सो चंजन
NOTE: The time variation during Cooking of recipe depends upon the ingredients, method adopted & type of food category. बंजान बनाने के दौर्दान, समय परिवर्तन खाने के तत्व या अंशा, बनाने की विषि और खाने की श्रेपी पर निर्मर करता है।
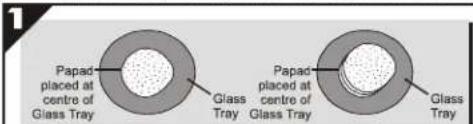
text_image
Papad placed at centre of Glass Tray Glass Tray Papad placed at centre of Glass Tray Glass Tray1. ROASTED PAPAD
Procedure
Papad:
-
Place the raw papad at the centre of Glass Tray, as shown in the picture above.
-
Select Micro-100% Power Level and Cook time.
-
After Papad cooking give standing time of 30-45 seconds.
To Cook Multiple Papads :
*Place Multiple papads over one another, as shown in the picture above.
Crispy Papad :
-
Press Quick Start without papad.
-
Sprinkle little water or oil over the papad.
-
After beep, place the papad at the centre and press Start.
*Note : The cooking time may vary –
a. As per the composition of the papad material.
b. As per the Quantity of papad used.
1. भुने हुए पापड़
विधे
पापड़ :
-
ग्लास ट्रे के बीच में कच्चा पापड़ु रखे, जैरा कि उपरोक्ता चित्र नें दशाया गय है।
-
माइको-100% पावर स्तर और एकाने का समय निधारित करें।
-
पापड़ पक जाने के वाद 30-45 सैकेड तक रखा रहने दें।
अधिक पापड़ पकाने के लिए :
*बहूत सारे पापड़ एक दूसरे के ऊगर रखें जैरी कि उपरोका चित्र में दर्शाया गया है किस्पी पापल :
-
पापड़ रखने से गहले विक स्टार्ट दनारं।
-
पापड़ के कपर थोड़ा पानी या तेल छिङ्कें।
-
नीप के बाद, ग्लास ट्रे के बीच में पामड़ रखे, जैसा कि उपरोका वित्र में दर्शांचा गया है।
*नोट : पकाने के समय में अन्तर सकता है =
a. पापर की सामग्री की बनावट के अनुसार।
b. सईर्तेमाल किये गए पापळकी की मात्रा के अनुसार।
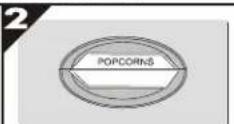
- POP CORN : Place the pop com bag to the glass tray properly as instructed on packing. Use Quick Start to set 3\~4 minutes. Remove the bag after popping sound has stopped. Take care that bag corners do not touch sides while rotating.
Note : Attend piping process carefully. Do not overheat as cause flash fire.
- पाप कर्ष : निक्षिर न पद्ये गरा निर्देशानुसार पौध कर्षि का वैग कर्ष की की ट्रै एर ठाँक से रखें। 3-4 मित्ट सैंट कर्षने के जिप विका स्टार्ट की प्रयोग करें. भुनने की आवाज समात होने के बाद दैन की हुटा ले ध्याण स्थें क्षि दैग के की बुमाति सामय साइड से न छुपें। नोट : भुनने की प्रक्रिया को ध्याणपूर्देक देखे। आयवकता ते आविक पर्ण न करे कर्याकि इसी आग लग साकली हे।

LG Electronics
P/No: MFL06477231