
MH2045HB - Mikrowellen LG - Kostenlose Bedienungsanleitung
Finden Sie kostenlos die Bedienungsanleitung des Geräts MH2045HB LG als PDF.


Benutzerfragen zu MH2045HB LG
0 Frage zu diesem Gerät. Beantworten Sie die, die Sie kennen, oder stellen Sie Ihre eigene.
Eine neue Frage zu diesem Gerät stellen
Laden Sie die Anleitung für Ihr Mikrowellen kostenlos im PDF-Format! Finden Sie Ihr Handbuch MH2045HB - LG und nehmen Sie Ihr elektronisches Gerät wieder in die Hand. Auf dieser Seite sind alle Dokumente veröffentlicht, die für die Verwendung Ihres Geräts notwendig sind. MH2045HB von der Marke LG.
BEDIENUNGSANLEITUNG MH2045HB LG
OWNER'S MANUAL
MICROWAVE OVEN
Please read this manual carefully before operating your set and retain it for future reference.
MH2045HB
Contents / विषय सूची 2
Important Safety Instructions / महत्वपूर्ण सुरक्षा निर्देश 4\~9
Safety Precautions / सुरक्षा सावधानियाँ 10
Unpacking & Installing / खोलना व स्थापित करना 11\~13
Method To Use Accessories As Per Mode /मोड के अनुसार एक्सेसरीज़ प्रयोग करने की विधि — 13
Child Lock / चाइल्ड लॉक 14
Micro Power Cooking / माइक्रो पावर में पकाना 15
Micro Power Level / माइक्रो पावर स्तर 16
Add 30 Secs / एड 30 सेकेन्डस 17
Grill Cooking / ग्रिल कुकिंग 18
Combination Cooking / कॉम्बीनेशन कुकिंग 19
Energy Saving/ऊर्जा की बचत 20
Various Cook Functions / विभिन्न कुक कार्यप्रणालियाँ 21
Indian Cuisine /इन्डियन क्युज़ीन 22\~25
Sweet Corner /स्वीट कॉर्नर 26\~28
Chatpat Corner /चटपट कॉर्नर 29\~30
Breakfast / ब्रेकफास्ट 31\~32
Snacks / स्नैकस 33\~36
Child's Favourite / चाइल्डुस फेवरिट 37\~39
Health Plus / हैल्थ फ्लस 40\~42
Utility Corner / यूटीलिटी कॉर्नर 43\~44
List of Ingredients / सामग्री की लिस्ट 45\~48
To Clean Your Oven / आपके ओवन की सफाई 49
Question & Answers / प्रश्न और उत्तर 50
Two Recipes for Starter / नवसिखिए के लिए दो व्यंजन 51
Indian Rasoi
24 Hours
How the Microwave Function Works / माइक्रोवेव प्रणाली किस तरह कार्य करती है
Microwaves are a form of energy similar to radio, television waves, and ordinary daylight. Normally, microwaves spread outwards as they travel through the atmosphere and disappear without effect. This oven, however, has a magnetron that is designed to make use of the energy in microwaves. Electricity, supplied to the magnetron tube, is used to create microwave energy.
रेडियो, टेलीविज्ञन तरंगों और दिन के सामान्य प्रकाश की तरह ही माइक्रोवेव भी ऊर्जा का ही एक रूप है। आमतौर पर माइक्रोवेव की ये ऊर्जा तरंगे बाहर की तरफ ही प्रसारित होती हैं क्योंकि वे वातावरण में चालित होती हैं और अंततः प्रभावहीन हो कर गायब हो जाती हैं। इस ओवन में एक मैग्नेट्रॉन होता है जो कि माइक्रोवेस में समाहित ऊर्जा को उपयोग में लाने का कार्य करता है। मैग्नेट्रॉन ट्यूब में प्रवाहित विद्युत, माइक्रोवेव ऊर्जा का निर्माण करती है।
These microwaves enter the cooking area through openings inside the oven. A tray is located inside the oven. Microwaves cannot pass through metal walls of the oven, but they can penetrate such materials as glass, porcelain and paper, the materials out of which microwave-safe cooking dishes are constructed.
ये माइक्रोवेब्स ओवन के माध्यम से कुकिंग एरिया में अन्दर की तरफ प्रयोग में लाये जाते हैं। ओवन के भीतर एक ट्रे होती हैं जो मुख्य उपयोग में आती है। माइक्रोवेब्स ओवन के चारों ओर की धातु से बनी दीवारों को पार नहीं कर पाती हैं परन्तु वे अपने आसपास की वस्तुएं जैसे ग्लास, पोरसलीन और कागज़ सहित सुरक्षा को ध्यान में रख कर बनाये गए अन्य धातु के बरतनों में प्रवाहित हो जाती हौ।
Microwaves do not heat cookware, though cooking vessels will eventually get hot from the heat generated by the food.
मूलरूप से माइक्रोवेस खाने के बर्तनों को गर्म नहीं करता बल्कि ये बर्तन गर्म हुए भोजन की गरमाहट से आखिरकार गर्म हो ही जाते हौं
A very safe appliance / अति-सरु क्षित उपकरण
Your Microwave oven, is one of the safest of all home appliances. When the door is opened, the oven automatically stops producing microwaves. Microwave energy is converted completely to heat when it enters food, leaving no "left over" energy to harm you when you eat your food.
माइक्रोवेव ओवन आपके सभी घरेलू उपकरणों में से सबसे अधिक सुरक्षित होता है। जब द्वार खुला होता है तब ओवन अपने आप ही माइक्रोवेव्स भ्रेजना बंद कर देता है। जब ये माइक्रोवेव खाने के सामान में प्रवाहित होती हैं तो वे पूरी तरह से ऊष्णता में परिवर्तित हो जाती हैं और इस भोजन को जब आप ग्रहण कर्ते हैं तो “बाकी बची” ऊर्जा से आपके स्वार्थ्य पर कोई भी हानिकारक प्रभाव नहीं पड़ता।
IMPORTANT SAFETY INSTRUCTIONS/ READ CAREFULLY AND KEEP FOR FUTURE REFERENCE
महत्वपूर्ण सुरक्षा निर्देश/
ध्यान से पढ़े और भविष्य के संदर्भ के लिए रखें
Read and follow all instructions before using your oven to prevent the risk of fire, electric shock, personal injury, or damage when using the oven. This guide does not cover all possible conditions that may occur. Always contact your service agent or manufacturer about problems that you do not understand.
कृपया आगे के सन्द्भाँं पर नजर डालें। ओवन का इस्तेमाल करते समय आग लगने या विद्युत का झटका लगने, व्यक्तिगत तौर पर दुर्घटना और क्षति से बचने के लिए उपयोग में लाने के पूर्व सभी निर्देश पढ़े और उनका पालन करें। यह दिशा-निर्देश सभी संभावित दशाओं का वर्णन नहीं करती जो ओवन पर कार्य करते समय हो सकती हैं। किसी भी ऐसी समस्या के दौरान जब आप स्थिति को समझाने में असमर्थ हों, आप सदैव अपने सर्विस एजेंट या निर्माता से संपर्क करें।

WARNING / चेतावनी
This is the safety alert symbol. This symbol alerts you to potential hazards that can kill or hurt you and others. All safety messages will follow the safety alert symbol and either the word "WARNING" or "CAUTION". These word means:
यह सुरक्षा—सचेतक चिन्ह हैं। यह चिन्ह आपको संभावित सभी खतरों के प्रति सचेत करता है जो कि आपकी या दूसरों की जान ले सकते हैं या उनको घायल कर सकते हैं। सभी सुरक्षा संदेश सुरक्षा सचेतक चिन्हों या "वार्निंग" या "कॉशन" कै बाद लिखे हुए हैं। इन शब्दों का अर्थ है:

WARNING / चेतावनी
This symbol will alert you to hazards or unsafe practices which could cause serious body harm or death.
यह चिन्ह आपको खतरों या असुरक्षित तरीके से कार्य करते समय होने वाली शारीरिक दुर्घटनाओं या मृत्यु आदि की आशंकाओं से सचेत करता है।

CAUTION / सावधानी
This symbol will alert you to hazards or unsafe practices which could cause body injury or property damage.
यह चिन्ह आपको खतरों या असुरक्षित तरीके से कार्य करते समय होने वाली शारीरिक दुर्घटनाओं या संपति संबंधी अन्य किसी क्षति की आशंकाओं से सचेत करता है।

WARNING / चेतावनी
1 Do not attempt to tamper with, or make any adjustments or repairs to the door, door seals, control panel, safety interlock switches or any other part of the oven which would involve the removal of any cover protecting against exposure to microwave energy. Do not operate the oven if the door seals and adjacent parts of the microwave oven are faulty. Repairs should only be undertaken by a qualified service technician. ओवन के द्वार, द्वार की सील, कंट्रोल पैनल, सेफ्टी इंटरलॉक स्विचेस या उसका कोई अन्य हिस्सा जो कि माइक्रोवेव ऊर्जा को बाहर निकलने से रोककर सुरक्षित करता हो, से छेड़छाङ्ड न करें न ही किसी प्रकार का जोड़तोड़ या सुधार करें। द्वार या उससे जुड़े किसी हिस्से में कोई खराबी आने की दशा में ओवन का उपयोग न करें। इसकी मरम्मत का काम सिर्फ सर्विस टेक्नीशियन के माध्यम से ही करवाएं।
- Unlike other appliances, the microwave oven is a high-voltage and a high electrical-current equipment. Improper use or repair could result in harmful exposure to excessive microwave energy or in electric shock. अन्य उपकरणों की तुलना में माइक्रोवेव ओवन एक उच्च क्षमता का उच्च विद्युत तरंग वाला उपकरण है। इसका गलत तरीके से इस्तेमाल या मरम्मत करने से अत्यधिक मात्रा की माइक्रोवेव ऊर्जा का हानिकारक प्रभाव या विद्युत के झटके का खतरा हो सकता है।
2 Do not use the oven for the purpose of dehumidification. (ex. Operating the microwave oven with wet newspapers, clothes, toys, electric devices, pet or child etc.) डि-ह्यूमिडिफिकेशन के लिए इसका इस्तेमाल न करें । (जैसे गीले अखबार, खिलौनों, कपड़े, विद्युत उपकरणों, पालतू पशु या बच्चों के साथ ओवन को न चलायें)
- It can be the cause of serious damage to safety such as a fire, a burn or a sudden death due to an electric shock. यह आग, जलना या विद्युत के झटके से होने वाली अकस्मात् मृत्यु जैसी गंभीर सुरक्षा—क्षति का कारण भी बन सकता है।

WARNING / चेतावनी
3 The appliance is not intended for use by young children or elderly persons. Only allow elderly and children (8 years and above) to use the oven without supervision when adequate instructions have been given so that the child is able to use the oven in a safe way and understands the hazards of improper use.
इस उपकरण को छोटे बच्चों या वृद्ध लोगों के प्रयोग करने के उद्देश्य से नहीं बनाया गया है। वृद्धों और बड़े बच्चों (8 वर्ष या अधिक उम्र) को ही इसे चलाने दें वह भी सिफ्र पर्याप्त जानकारी और दिशा-निर्देश देने के बाद ही ताकि वे इसे गलत तरीके से इस्तेमाल करने के खतरों के प्रति सतर्क होकर इसे सुरक्षापूर्वक उपयोग में ला सर्के ।
- Improper use may cause damage such as a fire, electric shock or burn.
अनुचित उपयोग से क्षति हो सकती है, जैसेकि आग लगना, बिजली का झटका लगना या जलना।
4 Accessible parts may become hot during use. Young children should be kept away.
इसके इस्तेमाल के दौरान स्पर्श में आने लायक इसके सभी हिस्से गर्म हो सकते हैं। छोटे बच्चों को दूर रखना आवश्यक है।
• They may get a burn.
इससे जलने का खतरा है।

WARNING / चेतावनी
5 Liquids or other foods must not be heated in sealed containers since they are liable to explode. Remove the plastic wrapping from food before cooking or defrosting. Note though that in some cases food should be covered with plastic film, for heating or cooking.
बंद बर्तनों में तरल या अन्य भोजन इसके अन्दर गर्म न किएं जाएं क्योंकि उनमे विस्फोट हो सकता है। खाना बनाते समय या डी-फ्रॉस्ट करते समय बर्तन का मुंह बंद करने वाली प्लास्टिक की झिल्ली आदि अवश्य निकाल लें। कुछ मामलों में गरम करने या बनाने के लिए खाने को प्लास्टिक की झिल्ली से बंद करके इसमें रखा जाना चाहिए।
• They could burst.
उसमें विस्फोट हो सकता है।

WARNING / चेतावनी
6 Do not operate your oven if it is damaged. It is particularly important that the oven door closes properly and that there is no damage to the: (1) door(bent), (2) hinges and latches (broken or loosened), (3) door seals and sealing surfaces.
ओवन यदि क्षतिग्रस्त है तो इसको न चलाएं। यह विशेष रूप से महत्वपूर्ण है कि ओवन के द्वार ठीक से बंद हों और इनमें से कोई (1) द्वार (मुड़े), (2) कब्जे और चिटकनी (टूटी या ढीली), (3) द्वार सील और सीलिंग तल क्षतिग्रस्त न हो।
- It could result in harmful exposure to excessive microwave energy.
इसकी वजह से आप अत्यधिक माइकोवेव उर्जा के सम्पर्क में आ सकते है।
7 Be certain to use proper accessories on each operation mode, refer to the Page 13.
ओवन के किसी भी तरह के उपयोग के दौरान पृष्ठ 13 के निर्देश के अनुसार उचित उपकरणों का इस्तेमाल करें।
- Improper use could result in damage to your oven and accessories, or could make spark and a fire.
इसके गलत तरीके से इस्तेमाल से ओवन और आपके उपकरणों का नुकसान या विद्युत स्पार्क या आग लगने का खतरा हो सकता है।
8 The children should not allow to play with accessories or hang down from the door handle.
बच्चों को इसकी एक्सेसरीज से खेलने या इसके दरवाजे पर लटकने से मना किया जाना चाहिए।
• They may get hurt.
उन्हें चोट लगने का खतरा है।
9 It is hazardous for anyone other than a competent person to carry out any service or repair operation that involves the removal of a cover which gives protection against exposure to microwave energy.
किसी भी व्यक्ति को जो कि ओवन का तकनीक विशेषज़ा न हो, ओवन में किसी भी प्रकार की मरम्मत या किसी भी तरह का जोड़तोड़ करने से मनाही होनी चाहिए ताकि माइक्रोवेव ऊर्जा से बचाने के लिए लगे हुए कवर अपनी जगह से न हिलें।

CAUTION / सावधानी
1 You cannot operate your oven with the door open due to the safety interlocks built into the door mechanism. It is important not to tamper with the safety interlocks.
इसके दरवाजों पर लगे सेफ्टी इंटरलॉक्स के कारण आप इसके द्वार खोल कर इसको नहीं चला सकते। ये बहुत जरुरी है कि सेफ्टी इंटरलॉक्स के साथ किसी तरह की छेड़छाड़ न की जाए।
- It could result in harmful exposure to excessive microwave energy. (Safety interlocks automatically switch off any cooking activity when the door is opened.)
इसमें पैदा होने वाली अत्यधिक माइक्रोवेव ऊर्जा के कारण ये खतरे की वजह भी बन सकते हैं। (जब ओवन के द्वार खुले होते हैं तो सेफटी इंटरलॉक्स अपने आप निष्क्रिय हो कर खाना बनाने या गरम करने का कार्य बंद कर देते हैं।)
2 Do not place any object (such as kitchen towels, napkins, etc.) between the oven front face and the door or allow food or cleaner residue to accumulate on sealing surfaces.
ओवन के द्वार और प्रवेश द्वार के सामने कोई सामान (जैसे किचन टॉँवल या नैपकिन इत्यादि) न रखें न ही किसी तरह के खाने या सफाई करने वाले सामान के अवशेष यहां रहने दें।
- It could result in harmful exposure to excessive microwave energy.
ऐसा करना अत्यधिक ऊर्जा के प्रवाह से खतरा पैदा कर सकता हैं।
3 Please ensure cooking times are correctly set, small amounts of food require shorter cooking or heating time.
कुंकिंग टाइम को निश्चित समय के लिए सही सेट करें। कम मात्रा वाले भोजन को पकाने के लिए कम समय लंगता है।
● Over cooking may result in the food catching fire and subsequent damage to your oven.
आवश्यकता से अधिक समय तक कुकिंग से आग लग सकती है और आपके ओवन को क्षति पहुंच सकती है।
4 When heating liquids, e.g. soups, sauces and beverages in your microwave oven,
* Avoid using straight sided containers with narrow necks.
* Do not overheat.
* Stir the liquid before placing the container in the oven and again halfway through the heating time.
* After heating, let it stand in the oven for a short time; stir or shake it again carefully and check the temperature of it before consuming to avoid burns (especially, contents of feeding bottles and baby food jars).
सूप, साँसेज और पेय पदार्थों को जब माइक्रोवेव ओवन में गर्म करने के लिए रखें,
* छोटी गर्दन वाले सीधे खड़ें पात्र इसमें रखने से बचें।
* आवश्यकता से अधिक समय तक हीटिंग न करें।
* तरल पदार्थ के भगोने को इसमें रखने से पहले हिलाएं और हीटिंग के दौरान आधे समय के बाद फिर से बाहर निकाल कर हिला लैं, फिर अन्दर रखें।
* हीटिंग के बाद कुछ समय आप उसे अन्दर ही रहने दें फिर इस भोजन को ग्रहण करने से पहले इसे सावधानीपूर्वक हिला लें, या चमचे से चला लें ताकि आप इसकी उष्णता का अनुमान कर इसे खा/पी सकें और आपका मुंह जलने से बच सके (विशेष तौर पर बच्चे को खाना खिलाने वाला पात्रा या दूध पिलाने वाली बोतल)।
- Be careful when handling the container. Microwave heating of beverages can result in delayed eruptive boiling without evidence of bubbling. This could result in hot liquids suddenly boiling over.
भगोने को इससे निकालते समय पकड़ने में सावधानी रखें। माइक्रोवेव में पेय पदाथाँं को गर्म होने पर कई बार वे देर से और बिना बुलबुले दिए अचानक उबल जाते हैं। इससे जलने का खृतरा पैदा हो सकता है।
5 An exhaust outlet is located on the top, bottom or side of the oven. Don't block the outlet.
इसकी ऊपरी सतह पर, बगल में या नीचे एक एग्जॉस्ट द्वार होता है। इस द्वार को सदा खुला रखें।
- It could result in damage to your oven and poor cooking results.
इससे आपके ओवन को क्षति पहुंच सकती है और खाना भी ठीक से नहीं पकेगा।
6 Do not operate the oven when empty. It is best to leave a glass of water in the oven when not in use.
The water will safely absorb all microwave energy, if the oven is accidentally started.
ओवन खाली होने की दशा में चालू न करें। ये बेहतर होगा कि जब ओवन का इस्तेमाल न हो रहा हो तो एक ग्लास पानी भरकर इसमें रखें। इससे जब भी कभी गलती से ओवन चालू हो जाए तो ये पानी इसकी सारी गर्मी को अपने अन्दर अवशोषित कर लेगा और दुर्घटना का खतरा नही रहेगा।
- Improper use could result in damage to your oven.
गलत तरीके से ओवन का इस्तेमाल करने से ओवन को नुकसान पहुंच सकता है।
7 Do not cook food wrapped in paper towels, unless your cook book contains instructions for the food you are cooking. And do not use newspaper in place of paper towels for cooking.
पेपर टॉवल से लिपटा कर खाना न बनाएं न गरम करें जब तक कि आपकी भोजन निर्माण की पुस्तक में कुछ इस तरह का विशेष निर्देश न दिया गया हो। और इस दशा में भी पेपर टॉवल की जगह घरेलू अखबार इस्तेमाल न करें ।
- Improper use can cause an explosion or a fire.
गलत तरीके से ओवन का इस्तेमाल करने से आग लग सकती है।
8 Do not use wooden containers and ceramic containers that have metallic (e.g. gold or silver) inlays.
Always remove metal twist ties. Check that the utensils are suitable for use in microwave ovens before use.
सिरेमिक और लकडी के बने भगोने जिनमे अंदरूनी सतह धातु की बनी हो, इसमें न रखें। ये पहले देख लें कि आपके बर्तन इसमें इस्तेमाल हो सकते हैं या नहीं।
- They may heat-up and char. Metal objects in particular may arc in the oven, which can cause serious damage.
वे गरम हो सकते हैं और जल भी सकते हैं। खासतौर पर धातु के पदाथों में चिंगारियां आ सकती हैं जिससे गंभीर क्षति हो सकती है।
9 Do not use recycled paper products.
रीसायकल पेपर के बने हुए उत्पाद प्रयोग में न लाएं।
- They may contain impurities which may cause sparks and/or fires when used in cooking.
उनमे अशुद्ध तत्व हो सकते हैं जो कि खाना बनाते समय चिंगारियों या आग लगने की वजह बन सकते हैं।
10 Do not rinse the tray and rack by placing it in water just after cooking. This may cause breakage or damage.
खाना बनाने के तुरंत बाद ओवन की ट्रै को धोने के लिए पानी में न डालें क्योंकि इससे प्लेट के टूटने या क्षतिग्रस्त होने का खृतरा हौ सकता है।
- Improper use could result in damage to your oven.
गलत तरीके से ओवन का इस्तेमाल करने से ओवन को नुकसान पहुंच सकता हैं।
11 Be certain to place the oven so the front of the door is 8 cm or more behind the edge of the surface on which it is placed, to avoid accidental tipping of the appliance.
सुनिश्चित करें कि आप ओवन को हमेशा इस तरह रखेंगे कि इसका सामने का द्वार सतह के किनारों से आठ सैंटीमीटर या अधिक पीछे रहे।
- Improper use could result in bodily injury and oven damage.
गलत तरीके से इस्तेमाल करने से शारीरिक दुर्घटना और ओवन की टूट-फूट का भी खतरा हो सकता है।
12 Before cooking, pierce the skin of potatoes, apples or any such fruit or vegetables.
पकाने से पहले आलू या सेब या इस तरह के अन्य छाल दार फल या सब्जियों में छेद कर लें।
• They could burst.
वे अन्दर विस्फोट कर सकते हैं।
13 Do not cook eggs in their shell. Eggs in their shell and whole hardboiled eggs should not be heated in microwave ovens since they may explode, even after microwave heating has ended.
अंडे को छिलके के साथ इसके भीतर न पकाएं। छिलके सहित अंडा और उबला हुआ पूरा अंडा माइक्रोवेव में गर्ग नहीं किया जाना चाहिए उसमे विस्फोट हो सकता है, तब भी जबकि माइक्रोवेव की हीटिंग समाप्त हो गई हो।
● Pressure will build up inside the egg which will burst.
अंडे के अन्दर दबाव बनेगा और फिर बढ़ते-बढ़ते वो फट जाएगा।
14 Do not attempt deep fat frying in your oven.
ओवन के अन्दर अधिक तेल में खाध पदार्थ तलने की कोशिश कभी न करें।
● This could result in a sudden boil over of the hot liquid.
ऐसा करने से अन्दर गर्म हुआ तरल पदार्थ उबल कर बाहर फैल सकता है।
15 If smoke is observed, switch off or disconnect the oven from the power supply and keep the oven door closed in order to stifle any flames.
अगर धुंआ महसूस हो तो स्विच ऑफ करें या पॉवर सप्लाई बंद कर दें और ओवन के दरवाज़े कुछ देर बंद ही रहने देँ ताकि लपटें अन्दर ही शांत हो सकें।
- It can cause serious damage such as a fire or electric shock.
यह आग लगने या विद्युत के झ्टके जैसे गंभीर नुकसान पहुंचा सकता है।
16 When food is heated or cooked in disposable containers made of plastic, paper or other combustible materials, keep an eye on the oven and check it frequently.
जब डिस्पोजेबल बर्तनों में, जो कि प्लास्टिक, कागज़ या दुसरे ज्वलनशील पदाथाँ से बने हों, खाना गरम किया जाए या पकाया जाए, तब ओवन पर नजर रखिये और इसकी प्रीकर्वेंसी की जांच करते सहें।
- Your food may be poured due to the possibility of container deterioration, which also can cause a fire.
आपका खाना भी गिर कर फैल सकता है इसके भगोने के टूट जाने से और इससे भी आग लग सकती है।
17 The temperature of accessible surfaces may be high when the appliance is operating. Do not touch the oven door, outer cabinet, rear cabinet, oven cavity during micro mode, grill mode, convection mode, combination mode & auto cook operations (features are model specific). Before clearing utensils make sure they are not hot.
For accessories & dishes touch them using hand gloves. Adult should supervise their children during every mode of operation as temperature may be high.
उपकरण के संचालन के समय पास की सतह का तापमान बहुत अधिक हो सकता है। माइक्रो मोड, ग्रिल मोड, कन्वैक्शन मोड, कॉँम्बीनेशन मोड और ऑटो कुक के संचालन (फीचर मोडल विशेष के अनुसार) के दौरान ओवन के द्वार, बाहरी सतह, पिछली सतह, ओवन केविटी को न छुएं। बर्तनों को ओवन से निकालने से पहले सूनिश्चित कर लें कि वे गर्म न हों। सहायक उपकरणों और डिश को हाथ के दस्ताने पहन कर ही छुएं। प्रत्येक मोड के संचालन के दौरान वयस्कों को अपने बच्चों की निगरानी रखनी चाहिए क्योंकि तापमान बहुत अधिक हो सकता है।
- As they will become hot, there is the danger of a burn unless wearing thick culinary gloves.
क्योंकि वे गर्म होने के बाद जलने का खतरा पैदा कर सकते हैं और इसके लिए किचन के मोटे दस्ताने पहनना चाहिए।
18 The oven should be cleaned regularly and any food deposits should be removed.
ओवन को नियमित रूप से साफ करना चाहिए और उनके अन्दर किसी भी तरह के भोजन के अंश न छूटें, इसका ध्यान रखना चाहिए।
● Failure to maintain the oven in a clean condition could lead to deterioration of the surface.
This could adversely affect the life of the appliance and possibly result in a hazardous situation.
ओवन की सफाई का ध्यान न रखने से इसकी सतह खराब हो सकती है। यह ओवन की लाइफ को कम कर सकता है एवं कुछ हानि भी हो सकती हैं।
19 If there are heating elements, the appliance becomes hot during use. Care should be taken to avoid touching the heating elements inside the oven.
अगर ओवन में हीटिंग पदार्थ हों तो गरम करते समय उपकरण भी गर्म हो जाता है। ओवन के अन्दर रखे इस तरह के हीटिंग पदार्थों को छूने से बचना चाहिए।
• There is danger of a burn.
इसमें जलने का खतरा हो सकता हैं।
20 Follow exact directions given by each manufacturer for their popcorn product. Do not leave the oven unattended while the corn is being popped. If corn fails to pop after the suggested times, discontinue cooking. Never use a brown paper bag for popping corn. Never attempt to pop leftover kernels.
पॉपकाँर्न के प्रोडक्टर्स के दिए गए सटीक निर्देशों का पालन करना चाहिए। जब इसके अन्दर पॉपकॉर्नस बनाए जा रहे हों तो इसकी अनदेखी न करें। अगर तय समय के भीतर भी कॉर्नस न फूल सकें तो हीटिंग बेंद कर इन्हें बाहर निकाल लेना चाहिए। ओवन में कॉर्नस को फुलाने के लिए कभी भी भूरा कागज का बैग इस्तेमाल में ना लाएं। ओवन में बचे हुए कॉर्नस के टुकड़ों को दुबारा उसमें गर्म न करें।
- Overcooking could result in the corn catching a fire. अधिक पकाने से कॉर्नस में आग लग सकती है।
21 Do not use harsh abrasive cleaners or sharp metal scrapers to clean the oven door glass. ओवन के दरवाजे को साफ करने के लिए खुरदरे सफाई एजेन्ट या धातु की वस्तु का इस्तेमाल न करें
- They can scratch the surface, which may result in the glass shattering. इससे सतह पर खरोंच लग सकती है, व काँच भी टूट सकता है।
22 This oven should not be used for commercial catering purposes. यह ओवन व्यावसायिक कैटरिंग के प्रयोग में नहीं लाया जाना चाहिए।
- Improper use could result in damage to your oven. इसके गलत इस्तेमाल से इसमें खराबी आ सकती है।
23 The connection may be achieved by having the plug accessible or by incorporating a switch in the fixed wiring in accordance with the wiring rules. वायरिंग के नियमों का पालन करते हुए फिक्स्ड वायरिंग में प्लग या सिवच से जोड़ कर इसका कनेक्शन लगाना चाहिए।
- Using improper plug or switch can cause an electric shock or a fire गलत प्लग या स्विच लगाने से विद्युत का झटका या आग लग सकती है।
24 The microwave oven shall be used freestanding. माइक्रोवेव ओवन को अलग रख कर इस्तेमाल में लाया जाना चाहिए।
25 This appliance can be used by children aged from 8 years and above and persons with reduced physical, sensory or mental capabilities or lack of experience and knowledge if they have been given supervision or instruction concerning use of the appliance in a safe way and understand the hazards involved. यह उपकरण 8 वर्ष या अधिक उम्र के बच्चों द्वारा इस्तेमाल किया जा सकता है, और कम शारीरिक, समझ व दिमागी क्षमता वाले व्यकिति को उपकरण से सम्बन्धित निर्देशों को ठीक प्रकार से सुपरवाइज करके बिना किसी रुकावट के चलाया जा सकता है।
26 Children should be supervised to ensure that they do not play with the appliance. Cleaning and user maintenance shall not be made by children unless they are aged from 8 years and above and supervised. बच्चे के लिए सुनिश्चित करें कि ये उपकरण के साथ नहीं खेलें तथा सफाई व मेन्टीनेन्स 8 वर्ष या उससे अधिक उम्र के बच्चों को सुपरवाइज करके ही ऑपरेट करवाना चाहिए।
27 Oven Lamp power rating is 35 W / 25 W. ओवन लैम्प की पावर रेटिंग 35 W / 25 Wहै।
28 If the supply cord is damaged, it must be replaced by the manufacturer, LG Service technician or similarly qualified person in order to avoid a hazard. अगर पावर कोर्ड खराब है तो वो एक निर्माता द्वारा या LG सर्विस तकनीशियन या इसी तरह के किसी कुशल व्यक्ति द्वारा ही बदली जानी चाहिए।
29 The appliance is not intended to be operate by means of an external timer or separate remote-control system. उपकरण को किसी भी बाहरी टाईमर व अलग रिमोट कन्ट्रोल सिस्टम से आपरेट करने के लिए नहीं बनाया गया है।
30 AJINOMOTO (MONO SODIUM GLUTAMATE) is only a flavor enhancer and shall not be added to food for infants below 12 months of age. अजीनोमोटो (मोनो सोडियम ग्लूटामेट) केवल स्वाद बढ़ाता है, 12 माह से कम उम्र के बच्चों के खाने में इसका इस्तेमाल न करें।
Use exclusive 230 V socket with earth.
अर्थिंग के साथ 230 वोल्ट सॉकेट का इस्तेमाल करें।
Do not bend power cord forcefully or break.
पावर कार्ड को ताकत के साथ न झुकाएं या तोड़े।
Do not pull out power cord.
पावर कार्ड को खीचे नहीं।
Do not use several power plug in one socket at the same time.
एक ही सॉकेट में एक ही समय कई पावर कार्ड्स का इस्तेमाल न करें।
Do not plug in or pull out power cord with wet hand.
गीले हाथों से पावर कार्ड को न तो लगाएं न ही हटाएं।
Do not spray water inside and outside of microwave oven.
माइक्रोवेव ओवन के भीतर और बाहर पानी के छींटें न मारें।
♦ Plug out power cord during cleaning or maintenance of oven.
मरम्मत और सफाई के समय पावर कार्ड निकालना न भूलें।
Do not heat up the food more than necessary.
खाने को जरुरत से ज्यादा गरम न करें।
Do not use microwave oven other than cooking or sterilization such as
cloth drying etc.
खाना बनाने या गरम करने के सिवा ओवन का कोई और इस्तेमाल न करें जैसे कपड़े सुखाना, आदि।
Do not insert pin or steel wire etc. into inside/out side of case.
इसके भीतर/बाहर कहीं भी कोई पिन या लोहे का तार आदि न घुसाएं।
Please be careful during taking the food since high temp. water or soup
may overflow to cause burn.
खाने को बाहर निकालते समय कृपया सावधानी बरतें क्योंकि गरम पानी अथवा सूप आदि तरल पदार्थ उबल
कर या छलक कर आपको जला सकते हैं।
Do not plug in power cord when socket hole is loose or plug is damaged.
जब प्लग खराब हो या पावर सॉकेट ढीला हो तो इसे ठीक करने से पहले इसमें पावर कार्ड न लगाएं।
Do not use oven while some foreign material is attached on the door.
जब भी ओवन के दरवाजे पर कोई चीज़ अड़ी या रखी हो, ओवन को चालू न करें।
Do not place the water container on the oven.
ओवन पर पानी का बर्तन कभी न रखें।
Do not place heavy things on the oven & do not cover the set with cloth while
using.
इस्तेमाल करते समय ओवन के ऊपर कभी भी भारी वस्तुएं न रखें न ही इसे कपड़े से ढकें।
Do not install the oven in the damp space or water sputtering area.
गीले या पानी के बहाव वाले क्षेत्र में ओवन को कभी न रखें।
Do not let children hang onto oven door.
बच्चों को ओवन के दरवाजों पर लटकने से रोकें।
Do not heat the unpeeled fruit or bottle with lid.
ढ़क्कन वाली बोतल और बिना छिला फल कभी इसके अन्दर रख कर गर्म न करें।
Do not hold food or accessories as soon as cooking is over.
गर्म हो जाने या खाना बन जाने के तुरंत बाद ओवन से खाना या बर्तन बाहर न निकालें।
♦ Plug out power cord if oven is not used for long duration.
अगर ओवन को अधिक देर तक इस्तेमाल में न लाना हो तो खाली समय में इसकी पावर कोर्ड को सॉकेट से
निकाल कर रखें।
Install microwave oven in the well ventilated, flat place.
माइक्रोवेव ओवन को अच्छी हवादार और समतल जगह पर रखें।
There is danger of blast if covered bottle, sealed food, egg, and chestnut etc.
are cooked inside oven.
ओवन के भीतर ढक्कन लगी बोतल, अंडा, सील्ड खाध्य पदार्थ या चेस्टनट रख कर उसे चलाने से विस्फोट हो सकता है।
By following the basic steps on these three pages you will be able to quickly check that your oven is operating correctly. Please pay particular attention to the guidance on where to install your oven. When unpacking your oven make sure you remove all accessories and packing. Check to make sure that your oven has not been damaged during delivery.
निम्नलिखित तीन पृष्ठों पर दिए गए शुरुआती तरीकों का चरण दर चरण इस्तेमाल करके जल्दी ही आपको पता चल जाएगा कि आपका ओवन ठीक से चल रहा है। कृपया विशेष ध्यान दें कि ओवन को कहां रखें। इसकी पैकिंग खोलते समय इस बात का ध्यान रखें कि आप इसके पैकिंग व एक्सेसरीज़ को पूरी तरह से निकाल चुके है। यह भी सुनिश्चित कर लें कि आपका ओवन डिलिवरी के समय क्षतिग्रस्त नहीं हुआ है।

Unpack your oven and place it on a flat level surface.
अपने ओवन को खोलकर एक समतल स्थान पर रख लें।
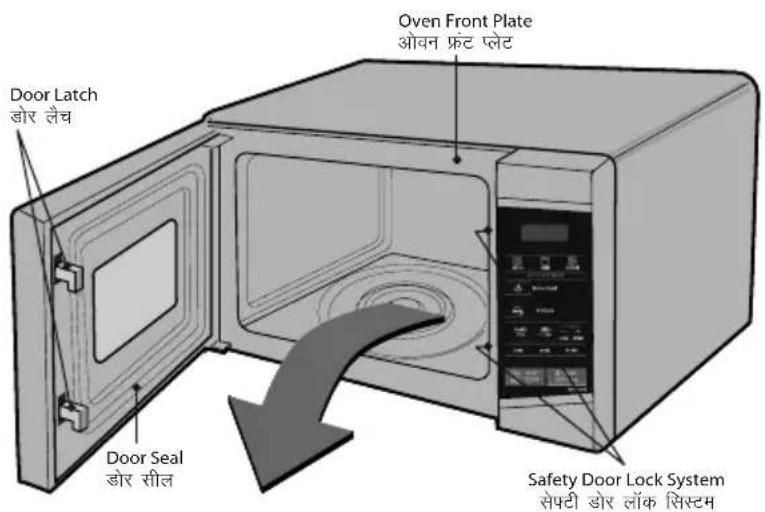
text_image
Door Latch डोर लैच Door Seal डोर सील Oven Front Plate ओवन फ्रट प्लेट Safety Door Lock System सेफटी डोर लॉक सिस्टमCooking accessories
कुकिंग एक्सेसरीज़
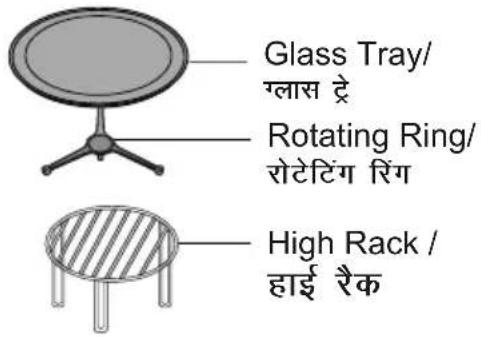
text_image
Glass Tray/ र्लास द्रै Rotating Ring/ रोटेटिंग रिंग High Rack / हाई रैकDisclaimer : This is only graphical representation of actual product यह मात्र उत्पाद की रेखांकित आकृति है

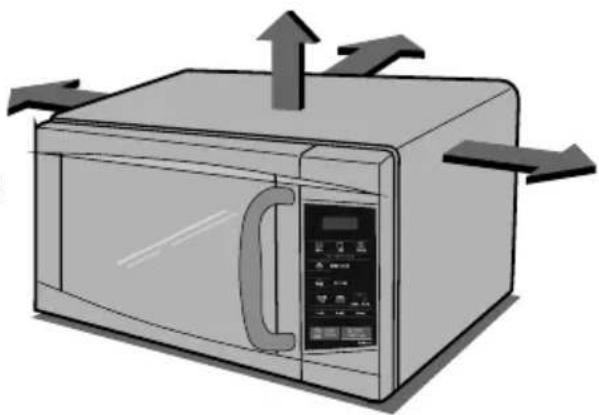
Place the oven in the level location of your choice with more than 85 cm height but make sure there
is at least 20 cm of space on the top and 10 cm at the rear for proper ventilation. The front of the oven should be at least 8 cm from the edge of the surface to prevent tipping. An exhaust outlet is located on top or side of the oven. Blocking the outlet can damage the oven.
natural_image
Illustration of a microwave oven with airflow arrows indicating airflow direction (no text or symbols)आवे न का` अपन` मनपसन्द स्थान पर 85 समें।. की ऊचँ समतल स्थान पर रख` लौकन यह ध्यान रह कि कम से 20 सेमी. का स्थान ऊपर से 10 सेमी. का स्थान पीछे से छूटना आवश्यक है। अवन का आगे का हिस्सा कम से कम 8 सेमी. समतल के किनारे से दूर होना चाहिए ताकि वह टकराने से बच सके। इसके ऊपर या किनारे पर एक एग्जॉस्ट द्वार होता है इसका रास्ता रोकने से ओवन खराब हो सकता है।
THE OVEN SHOULD NOT BE USED FOR COMMERCIAL CATERING PURPOSES. यह ओवन व्यवसायिक उद्देश्य के लिए नहीं है।
UNPACKING & INSTALLING
खोलना और स्थापित करना

Plug your oven into a standard household socket. Make sure your oven is the only appliance connected to the socket. If your oven does not operate properly, unplug it from the electrical socket and then plug it back in.
अपने ओवन को एक अच्छे सॉकेट के साथ प्लग करें और इस बात को सुनिश्चित करें कि इस सॉकेट में और कोई विद्युत उपकरण का तार न जोड़ा गया हो। यदि आपका ओवन ढंग से काम न कर रहा हो तो इसे सॉकेट से निकाल कर दुबारा लगाएं।

Open your oven door by pressing the Push Button
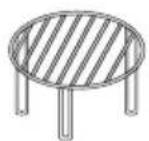
Place the ROTATING RING inside the oven and place the GLASS TRAY on it.
अपने ओवन के डोर को पुश बटन दबाकर खोलें। रोटेटिंग रिंग को ओवन के अन्दर रखें और ग्लास ट्रे को इसके ऊपर रखें।

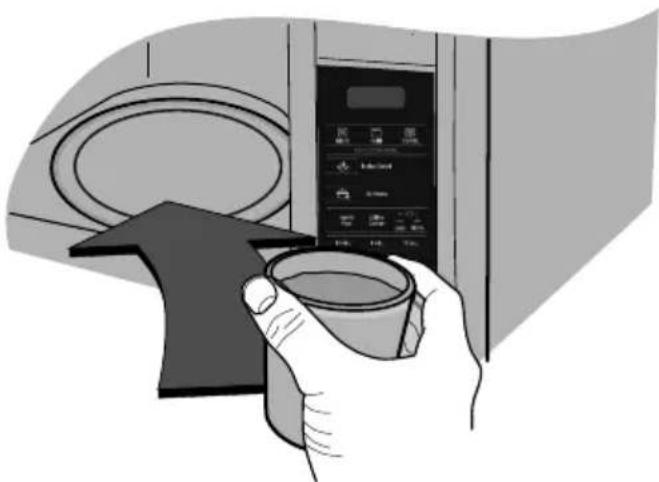
Fill a microwave safe container with 300 mL of water. Place on the GLASS TRAY and close the oven door.
माइक्रोवेव सेफ कन्टेनर में 300 मिली. पानी भर लें। उसे ग्लास ट्रे के ऊपर रखकर ओवन का दरवाजा बन्द कर दें।
natural_image
Illustration of a hand holding a cup inside a microwave oven, with no visible text or symbols.
Press the START/Add 30 Secs button one time to set 30 seconds of cooking time. When you press the button, you will hear a BEEP and your oven will start automatically.
START/Add 30 Secs बटन को एक बार दबा दें और 30 सेकन्ड के लिए निर्धारित करें जब आप बटन दबायेगें तो एक बीप सुनेगें और आपका ओवन अपने आप काम करना शुरू कर देगा।


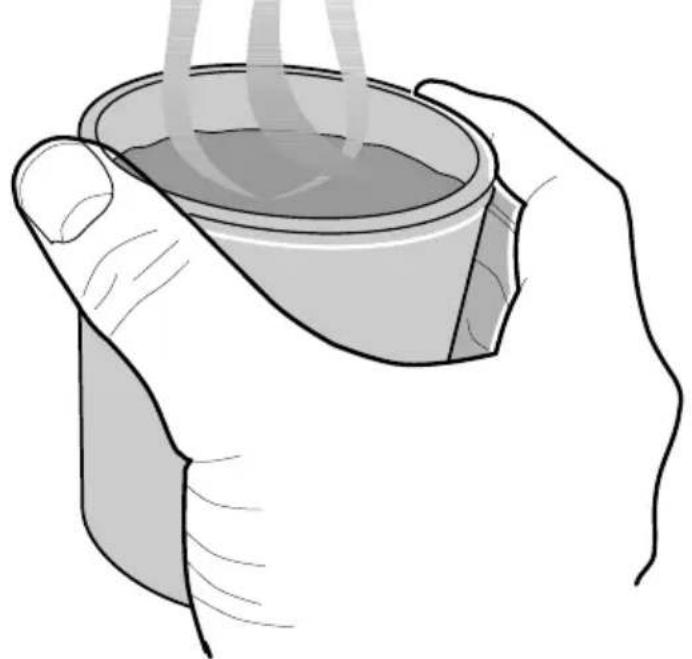
The DISPLAY will count down from 30 seconds. When it reaches 0 it will Beep. Open the oven door and test the temperature of the water. If your oven is operating the water should be warm. Be careful when removing the container it may be hot.
डिस्प्ले में 30 सेकंड गिनने शुरू हो जार्येंगे। जब यह 0 पर पहुंचेगा तो एक बीप आयेगी। ओवन का दरवाजा खोलें और पानी का तापमान जाँच लें। अगर आपका ओवन ठीक से काम कर रहा है तो पानी गर्म होगा बर्तन को बाहर निकालते समय सावधान रहें यह गर्म हो सकता है।
natural_image
Illustration of two hands holding a cup with steam rising from the cup (no text or symbols)YOUR OVEN IS NOW INSTALLED
आपका ओवन अब स्थापित हो गया हैं।
If oven gets overheated the display will be turned off for safety purpose, give it sometime to cool and then operate.
ओवन अधिक गरम होने पर डिस्प्ले सुरक्षा की वजह से बंद हो जाएगा, इसे कुछ देर ठंडा करके फिर काम करें।
Method To Use Accessories As per Mode
मोड के अनुसार एक्सेसरीज़ प्रयोग करने की विधि
| Microwave | Grill | Grill combi | |
 HIGH RACK / हाई रैक HIGH RACK / हाई रैक |  |  |  |
natural_image
Simple line drawing of a cartoon character with a helmet and antennae (no text or symbols)Your oven has a safety feature that prevents accidental running of the oven. Once the child lock is set, you will be unable to use any functions and no cooking can take place.
आपके ओवन में सुरक्षा के उपाय हैं जोकि अनावश्यक उपयोग से ओवन को रोकते हैं। एक बार चाइल्ड लॉक निर्धारित करने से आप कोई कार्य नहीं कर सकते हैं और कोई पकाने कि कि , या भी नहीं होगी।
However your child can still open the oven door.
जबकि आपका बच्चा ओवन का दरवाजा फिर भी खोल सकता है।
Press STOP/Clear.
STOP/Clear द्वायें।

ENERGY SAVING
STOP
CLEAR
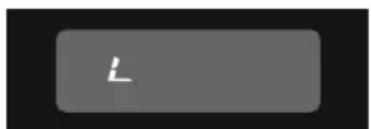
Press and hold STOP/Clear until "L" appears on the display and gives Beep sound.
जब तक "L" डिसप्ले पर न आये और ध्वनि न आये, तब तक STOP/Clear द्बाकर रखें।
The CHILD LOCK is now set. चाइल्ड लॉक निर्धारित हो गया है।

ENERGY SAVING
STOP
CLEAR
"L" remains on the display to let you know that CHILD LOCK is set. (If you press any button).
"L" डिसप्ले पर आता रहेगा, इससे आप जान जायेंगे कि चाइल्ड लॉक निर्धारित है। (यदि आप कोई भी बटन दबाते हैं)
text_image
LTo cancel CHILD LOCK press and hold STOP/Clear until "L" disappears.
You will hear BEEP when it's released.
चाइल्ड लॉक हटाने के लिए STOP/Clear दबाकर रूक जाइये, जब तक "L" गायब न हा` जाय। जब यह हट जायेगा तो आप बीप की ध्वनि सुनेंगे।

ENERGY SAVING
STOP
CLEAR
In the following example I will show you how to cook some food on 80% power for 5 minutes and 30 seconds.
निम्नलिखित उदाहरणों में मैं आपको बताऊँगा कि कुछ आहार 80% क्षमता पर 5 मिनट 30 संकेंड में कैसे पकायें।

natural_image
Simple line drawing of a cartoon character with antenna and motion lines (no text or symbols)Your oven has five Microwave Power setting. As shown in Next Page.
आपके ओवन में पाँच माइक्रोवेव पावर लेवल है। जैसा अगले पेज पर दिखाया गया है।
After cooking is over, end reminder beep sounds per 1 minute until the oven door opened.
जब पकाने की क्रि या पूरी हो जायेगी तो अन्तिम याद दिलाने वाली बीप की ध्वनि सुनाई देगी। यह ध्वनि प्रत्येक मिनट के अन्तराल पर तब तक बजती रहेगी जब तक ओवन का दरवाजा नही खुलेगा।
2 STAGE TIMED COOKING
For Two Stage cooking, repeat cooking steps 2 to 3 before touching the START pad for additional Time and Power you want to add.
2 स्टेज कुकिंग के लिए START दबाने से पहले निम्नलिखित स्टेप
2 से 3 को दोहराए। जिसके उपरान्त आप अतिरिक्त पावर और समय चुन पाएँ।
Press .STOP/Clear
STOP/Clear दबाइये।
10 SEC तीन बार दबाइए।

ENERGY SAVING
STOP CLEAR
Press MICRO Twice to select 80% power.
80% पावर को चुनने के लिए MICRO को दो बार द्वाएं।
560 appears on the display
560 डिसप्ले पर दिखेगा।

Micro

Grill

Combi.
Press 1 min. five times.
1 min. पाँच बार दबाइए।
Press 10 sec. three times.
10 sec. तीन बार दबाइए।
10 min.
1 min.
10 sec.
Press START/Add 30 Secs.
START/Add 30 Secs दबाइये।

START
Add 30 secs.
Your microwave oven is equipped with 5 power levels to give you maximum flexibility and control over cooking. The table below shows the examples of food and their recommended cooking power levels for use with this microwave oven.
आपके ओवन में आवश्यकतानुसार खाना पकाने के लिए 5 पावर स्तर हैं। नीचे दी गयी सूची के उदाहरणों में आहार व उनको पकाने के लिए जितना उपयुक्त पावर स्तर चाहिए, बताया गया है।

natural_image
Simple line drawing of a cartoon character with a helmet and antennae (no text or symbols)| POWER LEVEL USEOUTPUTपावर लेवलउपयोगआउटपुट | ||
| HIGHउच्च (अधिक) | 100%(700W) | * Boil Water / पानी उबालना* Brown minced meat / ब्रा उन बीफ का कीमा* Cook poultry pieces, fish, vegetables / मुर्गे, मछली और सब्जियों के टुकड़ों को पकाना* Cook tender cuts of meat / कटा हुआ कोमल मांस |
| MEDIUM HIGHमध्यम उच्च | 80%(560W) | * All reheating / पूर्णतया दुबारा गर्म करना* Cook mushrooms and shellfish / मशरूम और शेलफिश पकाना* Cook foods containing cheese and egg / पनीर और अंडे-युक्त भोजनों का निमार्ण । |
| MEDIUMमध्यम | 60%(420W) | * Bake cakes and scones / बेक हुए केक और रकोन्स* Prepare egg / अंडों को तैयार करना* Cook custard / करस्टर्ड बनाना* Prepare rice, soup / चावल और सूष बनाना |
| DEFROST/MEDIUM LOW (**)डिफ्रास्ट/मध्यम निम्न | 40%(280W) | * All thawing / पूर्ण शाविंग* Melt butter and chocolate / मकखन और चॉकलेट* Cook less tender cuts of meat / कुछ कम कोमल मांस को पकाना |
| LOWनिम्न | 20%(140W) | * Soften butter & cheese / मकखन आरे चीज़ को नरम करना* Soften ice cream / आइसक्रीम को नरम करना* Raise yeast dough / आटे में खमीर उठाना |
In the following example I will show you how to set 2 minutes of cooking on high power. निम्नलिखित उदाहरण में में आपको दिखाऊँगा कि उच्च क्षमता स्तर पर पकाने के लिए 2 मिनट कैसे निर्धारित करते हैं।

natural_image
Simple line drawing of a cartoon robot with a smiling face and antenna (no text or symbols)The START/Add 30 Secs feature allows you to set 30 seconds interval of HIGH power cooking with a touch of this button.
START/Add 30 Secs आपको यह आराम देता है कि आप इस बटन को द्वाकर 30 सेकेन्ड के अन्तराल में उच्च क्षमता में भोजन पका सकते है।
Press STOP/Clear.
STOP/Clear दबायें।

ENERGY SAVING
STOP CLEAR
Press START/Add 30 Secs four times to select 2 minutes on HIGH power. Your oven will start before you have finished the fourth press.
उच्च क्षमता के लिए START/Add 30 Secs बटन को चार बार दबाएं और 2 मिनट का चयन करें। आपका ओवन काम करना शुरू कर देगा, पहले ही जब आप चौथी बार दबा रहे होगे।

START
Add 30 secs.
While using Add 30 Secs feature, you can extend the cooking by repeatedly pressing the START/Add 30 Secs button.
Add 30 Secs फीचर इस्तेमाल करने के दौरान आप बार-बार START/Add 30 Secs बटन दबाकर खाना पकाने का समय बढ़ा सकते हैं।

START
Add 30 secs.
In the following example I will show you how to use the grill mode to cook some food for 12 minutes and 30 seconds.
निम्नलिखित उदाहरण में में आपको दिखाऊँगा कि 12 मिनट और 30 सेकेंड में कुछ खाना पकाने के लिए ग्रिल का प्रयोग कैसे करते हैं।

natural_image
Simple line drawing of a cartoon robot with a helmet and antennae (no text or symbols)This model is fitted with a QUARTZ GRILL, so preheating is not needed.
This feature will allow you to brown and crisp food quickly.
ये मॉडल क्वार्टज प्रिल के साथ हैं इसलिए उनको प्रीहीटिंग जरुरी नहीं है। इससे आपको जल्दी से ब्राऊन और क्रिस्पी पदार्थ मिल सकते हैं।
Press STOP/Clear.
STOP/Clear द्वायें।

ENERGY SAVING
STOP
CLEAR
Press GRILL.
GRILL दबायें।

Micro

Grill

Combi.
Set the cooking time. / खाना पकाने का समय निर्धारित करें।
Press 10 min once. / 10 min एक बार दबाएं।
Press 1 min twice. / 1 min दो बार दबाएं।
Press 10 sec three times. / 10 sec तीन बार दबाएं।
10 min.
1 min.
10 sec.
Press START/Add 30 Secs.
START/Add 30 Secs दबाएं।

START
Add 30 secs.
In the following example I will show you how to programme your oven with combi mode Co-3 for a cooking time of 15 minutes and 30 Seconds.
निम्न उदाहरण में दर्शाया गया है कि पकाने के समय 15 मिनट 30 सैकन्ड़ के लिए कॉम्बी मोड (Co-3) के साथ अपने ओवन को कैसे सैट करें।

natural_image
Simple line drawing of a cartoon robot with antennae and motion lines (no text or symbols)Your oven has a grill + micro cooking feature which allows you to cook food with heater and microwave at the same time (or alternately). This generally means it takes less time to cook your food.
आपके आवन में ग्रिल + माइक्रो कुकिंग की सुविधा है जिससे आप हीटर और माइक्रोवेव से एक साथ (या अलग—अलग) खाना पका सकते हैं। इसका सामान्यतः यह अर्थ है कि इससे खाना पकाने में कम समय लगता है।
The quartz heater grills the surface of the food while microwave heats inside. Moreover, preheating your oven is not necessary.
क्वार्टज हीटर खाने की ऊपरी सतह को भूनता है जबकि माइक्रोवेव अन्दर से गर्म करता है । अधिकतर ओवन को पहले से गर्म करने की आवश्यकता नहीं होती ।
Press Stop/Clear. . Stop/Clear दबाएं।

ENERGY SAVING
STOP CLEAR
Press COMBI. three times. / COMBI तीन बार दबाएं | "Co-3" appears on the display. / डिसले पर "Co-3" दिखाई देता है।
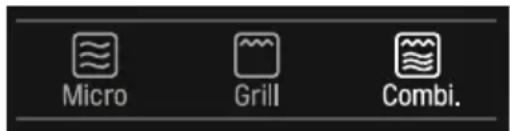
text_image
Micro Grill Combi.Set the cooking time. / खाना पकाने का समय निर्धारित करें।
Press 10 min one times. / 10 min एक बार दबाएं।
Press 1 min five times. / 1 min पाँच बार दबाएं।
Press 10 sec three times. / 10 sec तीन बार दबाएं।
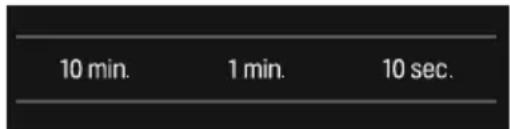
text_image
10 min. 1 min. 10 sec.Press START/Add 30 Secs. START/Add 30 Secs दबाएं।
While cooking you can use +/- keys to increase/decrease cooking time.
खाना पकाने के दौरान पकाने का समय बढ़ाने/घटाने के लिए +/- का प्रयोग कर सकते हैं।
Be careful when removing your food because the container will be hot!
खाना निकालते समय सावधानी बरते क्योकि उस समय बर्तन गर्म होगा !
Combi. Cooking Mode / काँस्बी कुकिंग मोड
| CATEGORY |
| Co-1 |
| Co-2 |
| Co-3 |
natural_image
Simple line drawing of a cartoon character with a helmet and antennae (no text or symbols)The ENERGY SAVING feature allows you to save energy through display off during stand-by status, or after 5 minutes with door open or closing, display will off automatically.
एनर्जी सेव फीचर की सुविधा से आप स्टैण्ड—बाई की अवस्था में डिसप्ले ऑफ करके एनर्जी की बैचत कर सकते हैं या 5 मिनट बाद दरवाजा खोलने या बन्द करने पर डिसप्ले स्वयं ही ऑफ हो जाता है।
Press STOP/Clear (ENERGY SAVING).
"O" appears on the display.
STOP/Clear (ENERGY SAVING) दबाएं।
डिसप्ले पर "O" दिखाई देता है।

ENERGY SAVING
STOP
CLEAR
Press STOP/Clear (ENERGY SAVING) or
after 5 minutes with door open or closing, display off.
STOP/Clear (ENERGY SAVING) दबाएं या
5 मिनट बाद दरवाजा खोलने या बन्द करने पर डिसप्ले ऑफ
हो जाता है।

ENERGY SAVING
STOP
CLEAR
During ENERGY SAVING status, if you press any key, display on.
ENERGY SAVING की स्थिति के दौरान यदि आप किसी भी बटन को
दबाते हैं तो डिसप्ले ऑन हो जाता है।
Please follow the given steps to operate cook functions (Indian Rasoi, 24 Hours, Health Plus, Utility Corner,) in your Microwave.
कृपया अपने माइक्रोवेव की विभिन्न कार्यप्रणालियां (Indian Rasoi, 24 Hours, Health Plus,
Utility Corner,) को चलाने के लिए नीचे दिये गये चरणों का अनुसरण करें ।
| COOK MODE | Indian Rasoi | 24 Hours | Health Plus Utility Corner | |
| STEP-1 | Press STOP/Clear | Press STOP/Clear | Press STOP/Clear | Press STOP/Clear |
| STEP-2 | Keep pressing Indian Rasoi button to select any menu (IC-1 to IC-8), (SC-1 to SC-7), (CC-1 to CC-4) | Keep pressing 24 Hours button to select any menu (bF-1 to bF-5), (Sn-1 to Sn-7), (CF-1 to CF-7) | Keep pressing Health Plus button to select any menu (HP-1 to HP-6) | Keep pressing Utility Corner button to select any menu (UC-1 to UC-5, FE-1 to FE-3) |
| STEP-3* | Press “+” button to select weight. | Press “+” button to select weight. | Press “+” button to select weight. | Press “+” button to select weight. |
| STEP-4 | Press START/Add 30 Secs | Press START/Add 30 Secs | Press START/Add 30 Secs | Press START/Add 30 Secs |
| कृकमोड | Indian Rasoi | 24 Hours | Health Plus Utility Corner | |
| स्टैप-1 | STOP/Clear दबाएं | STOP/Clear दबाएं | STOP/Clear दबाएं | STOP/Clear दबाएं |
| स्टैप-2 | (IC-1 to IC-8),(SC-1 to SC-7),(CC-1 to CC-4)में से कोई भी मेन्यूचुनने के लिए IndianRasoi बटन को दबातेरहें। | (bF-1 to bF-5),(Sn-1to Sn-7),(CF-1 toCF-7) में से कोई भीमेन्यू चुनने के लिए24 Hours बटन कोदबाते रहें। | (HP-1 to HP-6) में सेकोई भी मेन्यू चुननेके लिए Health Plusबटन को दबाते रहें। | (UC-1 to UC-5,FE-1 to FE-3) में से कोईभी मेन्यू चुनने के लिएUtility Corner बटन कोदबाते रहें। |
| स्टैप-3* | वजन चुनने के लिए“+” बटन को दबाएं | वजन चुनने के लिए“+” बटन को दबाएं | वजन चुनने के लिए“+” बटन को दबाएं | वजन चुनने के लिए“+” बटन को दबाएं |
| स्टैप-4 | START/Add 30 Secs दबाएं | START/Add 30 Secs दबाएं | START/Add 30 Secs दबाएं | START/Add 30 Secs दबाएं |
*Note : If the recipe is single weight like IC-1 (Gajar ka Halwa)-0.3 kg, do not press "+" button, directly press start.
*नोट : अगर व्यंजन IC-1 "गाजर का हलवा" में 0.3 kg जैसी एकल वजनी है तो "+" बटन को ना द्बाएं, सीधे स्टार्ट द्बाएं।
| Menu | Weight Limit | Utensil Instructions | |||||
| IC-1 | Gajar Ka Halwa | 0.3 kg | Microwave Safe (MWS) Glass Bowl & Microwave Safe (MWS) bowl | For | 0.3 kg | ||
| Grated Gajar | 300 g | ||||||
| Ghee | 2 tbsp | ||||||
| Milk Powder | 5 tbsp | ||||||
| Khoa | 6 tbsp | ||||||
| Sugar | 5 tbsp | ||||||
| Elaichi Powder and Dry Fruits | As per taste | ||||||
| Method: 1. In MWS glass bowl take all the ingredients and mix well. Add 12 cup water to bowl. Put the MWS glass bowl inside the MWS bowl. Cover. Select menu & press start.総総: 1. माइक्रोवेव सोफ न्लास बाउल में रामी सागत्रियों को लेकर अच्छी तरह मिला लें। बाउल में 12 कप मानी डालें। माइक्रोवेव सोफ बाउल के अन्दर माइक्रोवेव सेफ न्लास बाउल रख ठककर मेन्यू चुनें और स्टार्ट दबाएं। | |||||||
| IC-2 | Mix Veg | 0.1 ~ 0.3 kg | Microwave safe (MWS) bowl | For | 0.1 kg | 0.2 kg | 0.3 kg |
| Mix Veg. (Carrot, Cauliflower, peas, beans, potato) | 100 g (Total) | 200 g (Total) | 300 g (Total) | ||||
| Oil | 14 tbsp | 12 tbsp | 1 tbsp | ||||
| Onion (chopped) | 12 cup | 1 cup | 112 cup | ||||
| Tomato (chopped) | 14 cup | 1 cup | 112 cup | ||||
| Salt, Cumin powder, Garam masala, Red Chilli powder, Coriander powder | As per taste | ||||||
| Method: 1. In a MWS bowl add oil, onion, tomato and all spices. Mix well, select menu and weight and press start.2. When beeps, remove and mix well. Add vegetable and some water. Cover and press start.3. When beeps, mix well. Cover and press start. Garnish with coriander leaves総総: 1. माइक्रोवेव सेफ बाउल में तेल, प्याज, टमाटर तथा सभी मसाले डालें। अच्छी तरह मिलाएं, मेन्यू एवं वजन चुनकर स्टार्ट दबाएं।2. बीप सुनाई देने पर बाहर निकाले और अच्छी तरह मिलाएं। सभी सब्जियां और कुछ पानी डालकर ढक दें और स्टार्ट दबाएं।3. बीप सुनाई देने पर अच्छी तरह मिलाएं और ढककर स्टार्ट दबाएं। धनिये की पत्तियों से सजाएं। | |||||||
| IC-3 | Veg Biryani | 0.1 ~ 0.3 kg | Microwave safe (MWS) bowl | For | 0.1 kg | 0.2 kg | 0.3 kg |
| Basmati Rice (soaked for 1 hour) | 100 g | 200 g | 300 g | ||||
| Water | 200 mL | 400 mL | 600 mL | ||||
| Oil | 1 tbsp | 2 tbsp | 3 tbsp | ||||
| Cloves, Elaichi, Cinnamon, Pepper corns, Bay leaf, Salt, Garam masala & Red chilli powder | As per taste | ||||||
| Mix Vegetables - (Gobhi, Mutter, Gajar, French Beans etc.) | 12 cup | 1 cup | 112 cups | ||||
| Method: 1. In MWS bowl put oil add cloves, cinnamon, elaichi, bay leaf and pepper corns, add mix vegetables, select menu and weight and press Start.2. When beeps, add rice, water, salt and all spices. Mix well, cover it and pres start. Stand in 5 minutes after cook ends. Serve hot with raita and salad.総総: 1. माइक्रोवेव सेफ बाउल में तेल, लॉग, दालचीनी, इलायची, तेज पत्ता और साबुत काली मिर्च झाले और फिर मिश्रित सब्जियां झालें। मेन्यू और वजन चुनकर स्टार्ट दबाएं।2. बीप सुनाई देने पर चावल, पानी, नमक और सभी मसाले डालकर अच्छी तरह मिलाएं तथा ढककर स्टार्ट दबाएं। प्रकने के बाद 5 मिनट तक अन्दर रहने दें। रायता और सलाद के साथ गर्म—गर्म परोरों। | |||||||
| Menu | Weight Limit | Utensil Instructions | ||
| IC-4 | Dal Tadka | 0.3 kg | Microwave safe (MWS) bowl | For 0.3 kg |
| Dal (soaked for 2 hours) 300 g | ||||
| Water 600 mL | ||||
| Oil 21⁄2 tbsp | ||||
| Rai, Roasted cumin, Kasuri methi, Cumin powder, Coriander leaves, Asafoetida, Coriander powder, Turmeric, Green Chilli, Curry leaves | ||||
| Salt As per taste | ||||
| Method: 1. Take dal in MWS bowl, add water, turmeric and asafoetida.2. Select menu and press start to cook.3. When beeps, take another bowl add oil, roasted cumin, green chilli, curry leaves, add dal, salt, coriander powder, cumin powder, coriander leaves, kasuri methi (optional), water (if required). Press start.4. When beeps, mix well and again press start. | ||||
| Vitghi: 1. Maážkrovev šeře bājul měn dālal lěn ār pāni, hālādī tāhā āiāng āaṭlěl 12. Meñyú chunckar pakaṇe ke lìlēr sṛtārī dābārī 13. Bieip suuārī dāne par duāsara bājul lě, uāramen būnā āuā ār jārā, hārī mǐrch, kārī pātā lě, nāmuk, ānīnyā pājudār, jārā pājudār, hārā ānīnyā, kārsūrī měrthi (věkālīpik), pānā (yādī āavshyak hō) 1 sṛtārī dābārī 14. Bieip suuārī dāne par aclhā ār rāh āmīlākār fīr sā sṛtārī dābārī 1 | ||||
| IC-5 | Idli | 4 | Microwave safe (MWS) bowl & Microwave safe (MWS) idli stand | For 4 Nos. |
| Rice 100 g | ||||
| Urad 4 tbsp | ||||
| Soyabean 4 tbsp | ||||
| Water As required | ||||
| Salt As per taste | ||||
| Method: 1. Wash and soak rice, urad dal and soybeans granules for 4 hours.2. Grind, mix and ferment for 8 to 10 hours. Grind the mixture to paste consistency.3. Grease MWS idli stand with oil. Put idli batter in it. Add 1⁄2 cup water in the MWS bowl. Keep the idli stand in bowl and cover. Select menu and press start to cook. Allow to stand for 3 minutes.Note: After preparing the batter, you can use it for making 4 idli.4 indicates the number of idli that can be prepared. | ||||
| Vitghi: 1. chāval, unzidād dālal ār sāyabān kē daanā kā chākār 4 chāndte ke lìlēr mīgāo kār rāxī dā 12. Pīlās, mīlārā ār 8 sā 10 chāndte tāk zāmār bānārī 1 mīshān kā o peṣrāt bānārī tāk lāngātār pīlās 13. Maážkrovev šeře iǎdālī sṛtādī pār tāel lāngārī 1 iǎdālī kā chāol lāwsk e ānndr rāxī 1 maážkrovev šeře bājul měn 1⁄2 kāp pānā āaṭlěl 1 iǎdālī sṛtādī kāo maážkrovev šeře bājul měn rāxākār āck dā 1 mēn yī nīrārī kār e ār pakaṇe ke lìlēr sṛtārī dābārī 1 3 mīnnt tāk rāxā rāhā 1 | ||||
| Menu | Weight Limit | Utensil Instructions | |||||
| IC-6 | Sambhar | 0.2 kg | Microwave safe (MWS) bowl | For | 0.2 kg | ||
| Arhar Dal (Soaked for 2 hrs) | 200 g | ||||||
| Oil | 2 tbsp | ||||||
| Onion chopped | 1 medium | ||||||
| Tomato chopped | 1 medium | ||||||
| Mixed Vegetables chopped - Drumsticks, ghiya, Brinjals, Red Pumpkin | 1 cup | ||||||
| Boiled Water | 400 mL | ||||||
| Tamarind pulp, Green Chilli, Sambhar Masala, Salt, Jaggery, Rai, Asafoetida Curry leaves, Coriander powder, Turmeric, Red chilli powder | As per taste | ||||||
| Method:1. Soak dal for 2 hours, In MWS bowl take dal, turmeric, onion, green chilli, tomato, mix vegetables and boiled water. Select menu and press start.2. When beeps, in another MWS bowl take oil, rai, asafoetida, curry leaves, coriander powder, red chilli powder. Press start.3. When beeps, mash dal very well and add to tadka. Add tamarind pulp sambhar masala, jaggery and some water (if required). Press start. Stand for 5 mins. Garnish with coconut and coriander leaves and serve with Idli. | |||||||
| Vitighi:1. दाल को 2 घण्टे भिगोए। माइक्रवेव सोफ बाउल में दाल, हल्दी, प्याज, हरी गिर्च, टमाटर लें। मिश्चित संब्जियों और उबले डुए पानी को लें। मेन्यू चुने और स्टार्ट दबाएं।2. बीप सुनाई देने पर एक दूसरे माइक्रवेव सोफ बाउल में तेल लें। उस्में राई, हीग, करी पत्ता, धनिया पाउडर, लाल मिर्च पाउडर डालें। स्टार्ट दबाएं।3. बीप सुनाई देने पर दाल को अच्छी तरह कुचलें और उस्में तडका लगा लें। फिर इमली, सौमर मसाला, गुड और आवश्यकतानुसार पानी मिलाएं। स्टार्ट दबाएं। 5 मिनट तक पकने दें। नारियल और हरा धनिया से साजाएं और इडली के साथ परोसें। | |||||||
| IC-7 | Kadhai Paneer | 0.1~0.3 kg | Microwave safe (MWS) bowl | For | 0.1 kg | 0.2 kg | 0.3 kg |
| Paneer | 100 kg | 200 kg | 300 kg | ||||
| Capsicum & Onion (sliced) | 12 cup | 1 cup | 112 cup | ||||
| Onion Paste | 3 tbsp | 4 tbsp | 5 tbsp | ||||
| Tomato Puree | 2 tbsp | 3 tbsp | 4 tbsp | ||||
| Ginger-Garlic Paste, Salt | As per taste | ||||||
| Red Chilli Powder, Turmeric, Kasuri Methi, Garam Masala | As per taste | ||||||
| Butter | 112 tbsp | 2 tbsp | 3 tbsp | ||||
| Fresh Cream | 1 tbsp | 2 tbsp | 3 tbsp | ||||
| Oil | 12 tbsp | 1 tbsp | 2 tbsp | ||||
| Method:1. In MWS bowl, add oil, onion paste, ginger-garlic paste, sliced capsicum and onion. Mix well, cover. Select menu and weight and press start.2. When beep, add tomato puree, butter, fresh cream, turmeric, red chili powder, garam masala, kasuri methi, salt and paneer cubes, mix well and press start, garnish with hara dhania and serve hot. | |||||||
| Vitighi:1. माइक्रवेव सेफ बाउल में तेल, प्याज पेस्ट, अदरक—लहसुन पेस्ट, शिमला मिर्च और प्याज की स्लाइस डालें, अच्छी तरह मिलाकर ढक दें। मेन्यू एवं वजन चुनकर स्टार्ट दबाएं।2. बीप सुनाई देने पर टोमेटो प्यूरी, मक्खन, ताजा क्रीम, हल्दी, लाल मिर्च पाउडर, गर्मं मसाला, करूरी मैथी, नमक और पनीर के टुकड़े डालें, अच्छी तरह मिलायें और स्टार्ट दबाएं। हरा धनिया के साथ सजाएं और गर्मं-गर्म परोसें। | |||||||
| IC-8 | Butter Chicken | 0.3~0.5kg | Microwave safe (MWS) bowl | For | 0.3kg | 0.4kg | 0.5kg |
| Chicken (boneless) | 300g | 400g | 500g | ||||
| Ginger garlic paste | 2tbsp | 212 tbsp | 3tbsp | ||||
| Tomato puree | 12 cup | 1cup | 1cup | ||||
| Chopped onions | 1no. | 1no. | 2nos. | ||||
| Garam masala, Coriander powder, Cumin powder, Kasuri methi, Red chilli powder, Salt | As per taste | ||||||
| Cashewnut paste | 2tbsp | 212 tbsp | 3tbsp | ||||
| Fresh cream | 1cup | 112 cup | 112 cup | ||||
| Butter | 2tbsp | 3tbsp | 312 tbsp | ||||
| Oil | 2tbsp | 212 tbsp | 212 tbsp | ||||
| Slit green chillies | 3nos. | 4nos. | 5nos. | ||||
| Method:1.In a MWS bowl add oil, ginger garlic paste, chopped onions, garam masala coriander powder, cumin powder and salt. Mix well. Select menu and weigh and press start.When beeps, mix well, add tomato puree, red chilli powder, kasuri methi, chicken pieces. Mix well and cover. Press start.When beeps, mix well, add cashewnut paste, cream and butter. Mix well and cover. Press start.Garnish with slit chillies. | |||||||
| Vitighi:1. Maädikrovev sefak bataulmele talel, abdarck lathsunpeet, kretia huray pyaaj, garm mssalla, dhaniyama pataudar, jirira pataudar and rnamk daalkar acchli ttrah mllalanl. I mehny eay vajn chunkar start debaanl.2. Bieip suuaii dene par, achlci ttrah mllalakr tomeetopur, laal mierh pataudar, kusuri meohi and rchnk ke duukdea daalel. Aachlci ttrah mllalakr daek dand oer sxtart debaanl.3. Bieip suuaii dene par, achlci ttrah mllalanl and kajpupst, kriim and mckbn daalen and acchli ttrah mllalakr daek dand oer sxtart debaanl.4. Lmshai me kretia hura michai ro rajjau. | |||||||
| SC-1 | ShahiTukda | 0.1~0.3kg | Microwave safe(MWS) flat glassdish & High Rack | For | 0.1 kg | 0.2 kg | 0.3 kg |
| Bread Slices | 1 slice | 2 slices | 3 slices | ||||
| Milkmaid | 50 mL | 100 mL | 150 mL | ||||
| Milk | 50 mL | 100 mL | 125 mL | ||||
| Sugar | 1 tbsp | 2 tbsp | 3 tbsp | ||||
| Badam, Pista Pieces | 2 tbsp | 3 tbsp | 4 tbsp | ||||
| Kesar, Elaichi Powder | As per taste | ||||||
| Method: 1. Arrange bread slices on high rack. Select menu and weight and press start.2. When beeps, turn slices press start.3. When beeps, mix milkmaid, milk, sugar, dry fruits, kesar and elaichi powder in MWS flat glass dish. Pour the mixture on slices and press start. Serve ho | |||||||
| विधि: 1. हाई रैक पर बैड स्लाइसिज को व्यवस्थित करे। मेन्यू और वजन चुर्ने और स्टार्ट दबाएं।2. बीप सुनाई देने पर स्लाइसिज को पलट दें और स्टार्ट दबाए।3. बीप सुनाई देने पर मिल्कमेड, दृध, चीनी, सूखे मेचे, केसर और इलायची पाउडर को माइक्रोवेव सेफ फ्लैट ग्लासा डिश में अच्छी तरह मिलाएं। इस मिश्रण को स्लाइसिज के ऊपर डालें और स्टार्ट दबाएं। गर्म-गर्म परोसे। | |||||||
| SC-2 | Kalakand | 0.1~0.3kg | Microwave safe(MWS) bowl | For | 0.1 kg | 0.2 kg | 0.3 kg |
| Grated Paneer | 100 g | 200 g | 300 g | ||||
| Milkmaid | 50 mL | 100 mL | 200 mL | ||||
| Milk Powder | 2 tbsp | 3 tbsp | 4 tbsp | ||||
| Cornflour | 1/2 tsp | 1 tsp | 1 tsp | ||||
| Elaichi Powder | 1/2 tsp | 1 tsp | 1 tsp | ||||
| Method: 1. In MWS bowl take grated paneer, milkmaid, milk powder, cornflour, elaichi powder. Mix well, select menu and weight press start.2. When beeps, mix it again and press start.3. When set cut into pieces. Garnish with dry fruits. | |||||||
| विधि: 1. माइक्रावेव सेफ बाउल में कसा हुआ पनीर, मिल्कमेड, मिल्क पाउडर, कॉर्नफलोर और इलायची पाउडर लें। अच्छी तरह मिलाएं, मेन्यू और वजन चुर्ने और स्टार्ट दबाएं।2. बीप सुनाई देने पर इसे दुबारा मिलाएं और स्टार्ट दबाएं।3. जम जाने के बाद इसे दुकड़ों में काटें। सूखे मेवों के साथ सजाएं | |||||||
| SC-3 | Kheer | 0.1~0.3kg | Microwave safe(MWS) glass bowl | For | 0.1 kg | 0.2 kg | 0.3 kg |
| Milk | 100 mL | 200 mL | 300 mL | ||||
| Milkmaid | 150 mL | 200 mL | 300 mL | ||||
| Seviyan (roasted) | 20 g | 40 g | 60 g | ||||
| Badam, Pista pieces | 2 tbsp | 3 tbsp | 4 tbsp | ||||
| Kesar, Elaichi powder | 2 tbsp | 3 tbsp | 4 tbsp | ||||
| Method: 1. In MWS glass bowl add milk, milkmaid and mix well. Select menu and weight and press start.2. When beeps, add badam, pista pieces, kesar, elaichi powder and seviyan. Mix well and press start.3. When beeps, mix it well. Add more milk (if required) and press start. Stand for 5 minutes. Serve hot or chilled.Note: The bowl should be filled at 1/4 level of the total volume. | |||||||
| विधि: 1. माइक्रावेव सेफ ग्लास बाउल में दूध और मिल्कमेड डालकर अच्छी तरह मिलाएं। मेन्यू एवं वजन चुनकर स्टार्ट दबाएं।2. बीप सुनाई देने पर बादाम पिस्ता के टुकड़े, केसर इलायची पाउडर और संवियां डालें, अच्छी तरह मिलाकर स्टार्ट दबाएं।3. बीप सुनाई देने पर इसे अच्छी तरह गिलाएं। (यदि आवश्यकता हो तो) और दूध डाल लें तथा स्टार्ट दबाएं। 5 मिनट तक रखा रहने दें। गर्म या ठबा परोसे।नोट: बाउल कुल आयतन के 1/4 स्तर तक ही भरा जाना चाहिए। | |||||||
| SC-4 | Suji Halwa | 0.1~0.3kg | Microwave safe (MWS) glass bowl | For | 0.1 kg | 0.2 kg | 0.3 kg |
| Suji | 100 g | 200 g | 300 g | ||||
| Ghee (melted) | 2 tbsp | 3 tbsp | 4 tbsp | ||||
| Water | 300 mL | 600 mL | 900 mL | ||||
| Sugar | 100 g | 200 g | 300 g | ||||
| Cashewnuts, Kishmish, Kesar, Elaichi powder | As per taste | ||||||
| Method: 1. In MWS glass bowl take suji, add ghee mix it together, select menu and press start.2. When beeps, mix well. Allow to cool. Add water ( 12 of mentioned amount) and sugar. Press start.3. When beeps, mix well and add remaining water, cashewnuts, kishmish, kesar and elaichi powder. Press start. Stand for 5 minutes. Serve hot. | |||||||
| ###: 1. Ma#k#o#e#v s#e#g#l#as b#aw##l m#e #s#j#i le, ##i ##alckr e#k sa#h m#llal#i | me#ny#u#nckr s#t#ar#d#b#a# |2. ##p su#n#i de#ne p#r ##s#o# h#llal#i | t#z#a ho#ne de | p#an#i ( 14 d#i g#y#i ma#tr#a ke a#nu#ar) #ar ch#ni k#o m#llal#i | ##r s#t#ar#d#b#a# | t#z#a ho#ne de |3. ##p su#n#i de#ne p#r b#na h#u#a p#an#i, k#aj#, k#inshm#sh, ke#sr ##la#y#ci p#aw#r ##alckr a#ch#i t#rh gmlal#i ##r s#t#ar#d#b#a# | 5 m#int r#k# | garm-garm pror# | | |||||||
| SC-5 | Besan Ladoo | 0.1~0.3kg | Microwave safe (MWS) glass bowl | For | 0.1 kg | 0.2 kg | 0.3 kg |
| Besan | 100 g | 200 g | 300 g | ||||
| Ghee (melted) | 3 tbsp | 5 tbsp | 7 tbsp | ||||
| Powder Sugar | 50 g | 100 g | 150 g | ||||
| Elaichi Powder | 1/2 tsp | 1 tsp | 1 tsp | ||||
| Method: 1. In MWS glass bowl take besan and ghee. Select menu and weight and press start.2. When beeps, stir it and press start.3. When beeps, stir again and press start.4. Allow to cool. Add powdered sugar and elaichi powder. Mix it well and make a laddo of same size.Note: For binding the laddo use ghee. | |||||||
| ###: 1. Ma#k#o#e#v s#e#g#l#as b#aw##l m#e ##s#n #ar ##i le | me#ny#u#nckr s#t#ar#d#b#a# |2. ##p su#n#i de#ne p#r ##s#o# h#llal#i | ##r s#t#ar#d#b#a# |3. ##p su#n#i de#ne p#r ##s#u#ar# h#llal#i ##r s#t#ar#d#b#a# |4. t#z#a ho#ne de | b#ra ##r ##la#y#ci paw#r ##alle | a#ch#i t#rh mllal#i ##r s#m#an #akar ke l#z#y#b#an# |###: l#z#y#b#an# ke lllie ##i ka ##st#malal k## | | |||||||
| SC-6 | Payasam | 0.1~0.3kg | Microwave safe (MWS) bowl | For | 0.1 kg | 0.2 kg | 0.3 kg |
| Broken Rice (soaked for 2 hour) | 100 g | 200 g | 300 g | ||||
| Milk & Water | 300 mL | 500 mL | 700 mL | ||||
| Sugar | 75 g | 150 g | 200 g | ||||
| Kesar, Elaichi powder, Dry fruits | As per taste | ||||||
| Ghee | 1 tbsp | 1 12 tbsp | 2 tbsp | ||||
| Method: 1. In a MWS bowl take ghee, soaked rice, milk, water and sugar and cover it.2. Select menu and weight and press start.3. When beeps, add more milk, dry fruits, kesar, elaichi powder. Mix well and press start. Stand for 5 minutes. Sprinkle kewada jal on it. Serve hot o chilled. | |||||||
| ###: 1. Ma#k#o#e#v s#e#g#l#as b#aw##l m#e ##i, ##i ge ##u#n c#avll, ##dh, p#an#i ##r ##i#ni ##alckr ##k de |2. me#ny#u#nckr s#t#ar#d#b#a# |3. ##p su#n#i de#ne p#r ##u#n ##r ##dh, ##u#h ##e, ##er, ##lay#ci paw#r ##alle | a#ch#i t#rh mllal#k r#st#ar#d#b#a# | 5 m#int r#k r#z#a ##hne de | ##s#ke ##prr k#ev#za jal ##iz##k | garm# y#a ##z#a kcrke p#or# | | |||||||
| SC-7 | Sandesh | 0.2 ~ 0.4 kg | Microwave safe (MWS) bowl | For | 0.2 kg | 0.3 kg | 0.4 kg |
| Paneer (grated) | 200 g | 300 g | 400 g | ||||
| Milkmaid | 50 g | 75 g | 100 g | ||||
| Rose water | 1 tbsp | 112 tbsp | 2 tbsp | ||||
| Elaichi seeds | 12 tsp | 1 tsp | 112 tsp | ||||
| Chopped pista | A few | ||||||
| Khoa (mashed) | 100 g | 150 g | 200 g | ||||
| Method:1. In a MWS bowl add grated paneer, khoa, rose water and milkmaid. Mix well2. Select menu and weight and press start.3. When beeps, stir well and press start.4. Allow to cool. Hang in Muslin cloth for 20 minutes if it too wet. Make balls of the mixture and roll them in elaichi powder and chopped pista. Refrigerate till set. | |||||||
| ###:1. माइक्रोवेव सोफ बाउल में करसा हुआ पनीर, खोवा, गुलाब जल और गिल्कमेड डालकर अच्छी तरह मिला ले।2. मेन्यू एवं वजन चुनकर स्टार्ट दबाएं।3. बीप सुनाई देने पर अच्छी तरह चलाएं और स्टार्ट दबाएं।4. 20तंडा होने दें। यदि अधिक गीला है तो इसे मस्तिन कपड़े में रखकर गिनट तक रहने दें। मिश्रण के गोले बना लें और उन्ह इलायची पाउडर और कटे हुए पिस्ते में क लें। जमने तक रेफ्रिजरेटर में रखें। | |||||||
| Menu | Weight Limit | Utensil Instructions | |||
| CC-1 | Apple Tomato Chutney | 0.3 kg | Microwave Safe (MWS) Glass Bowl | For | 0.3 kg |
| Apple pieces | 200 g | ||||
| Tomato pieces | 100 g | ||||
| Green chillies, Salt, Sugar | As per taste | ||||
| Oil | 2 tbsp | ||||
| For Tempering: Rai, Cumin, Asafoetida etc. | As required | ||||
| Method: 1. In a MWS glass bowl put apple, tomato, salt, sugar and green chillies and keep it in microwave. Select menu and press start to cook. When it gives a beep, remove and grind it in a mixer. In another MWS glass bowl add oil and tempering and press start. add ground mixture and mix well. Garnish with chopped coriander. | |||||
| ###: 1. Maइक्रोवेव सेफ र्लास बाउल में सेब, टमाटर, नमक, धीनी और हरी मिर्च डालें और उसे ओवन में रख दें। मेन्यू चुनकर पकने के लिए स्टार्ट दबाएं। बीप सुनाई देने पर, बाहनिकालकर मिक्सर में पीस लें। एक अन्य माइक्रोवेव सेफ र्लास बाउल में तेल और तसामग्री डालकर स्टार्ट दबाएं। पिसा हुआ मिश्रण डालकर स्टार्ट दबाएं। कटे हुए हरे घनिया से सजाएं। | |||||
| CC-2 | Lemon Pickle | 0.3 kg | Microwave Safe (MWS) Glass Bowl | For | 0.3 kg |
| Lemon pieces | 300 g | ||||
| Sugar | 150 g | ||||
| Chilli powder, Salt | As per taste | ||||
| For Tempering: Rai, Cumin, Asafoetida etc. | As required | ||||
| Method: 1. Cut lemon and remove seeds. In MWS glass bowl add lemon pieces, sugar salt and chilli powder. Select menu and press start. Store it in a bottle after cools. | |||||
| ###: 1. नीबुओं को काटकर उनके बीजों को निकाल दें। माइक्रोवेव रोफ र्लास बाउल में नीबू के टुकडे, चीनी, नमक और मिर्च पाउडर डालें और ओवन में रखकर मेन्यू चुनें और रस्तादबाएं। तंडा हो जाने पर उरो बोतल में भरकर रख दें। | |||||
| CC-3 | Mix Veg Pickle | 0.3 kg | Microwave Safe (MWS) Glass Bowl | For | 0.3 kg |
| Mix Vegetable (Cauliflower, Carrot, Radish, Shalgam, Green peas) | 300 g | ||||
| Lemon juice | 2 tbsp | ||||
| Salt, Chilli powder, Sugar, Pickle Masala | As per taste | ||||
| Oil | 2 tbsp | ||||
| For tempering: Rai, Cumin, asafoetida etc. | As required | ||||
| Method: 1. In a MWS glass bowl put vegetables cut in long strips. Cover and keep it in microwave. Select menu and press start to cook. When it gives a beep remove. In another glass bowl add oil, tempering, chilli powder and press start. When it gives a beep add masala, sugar, salt. Add vegetables to this when it cools. Mix well and store it in a fridge. | |||||
| ###: 1. माइक्रावेव सेफ र्लास बाउल में लची पडियों में कटी हुई संभियों को डालें और ढककर ओवन में रख दें। मेन्यू चुनकर पकने के लिए स्टार्ट दबाएं। बीप सुनाई देने पर, बाहनिकाल लें। एक अन्य प्लास बाउल में तेल, तडका सामग्री और चिली पाउडर डालक स्टार्ट दबाएं। बीप सुनाई देने पर मसाला, चीनी, नमक डालें। फिर तंडा होने पर इसपकी हुई संभियों को डाल दें। अच्छी तरह मिलाएं और फ्रिज में रख दें। | |||||
| CC-4 | Tomato Sauce | 0.5 kg | Microwave Safe (MWS) Glass Bowl | For | 0.5 kg |
| Tomato | 500 g | ||||
| Onion | 1 No. | ||||
| Chilli powder, Salt, Sugar | As per taste | ||||
| Chopped ginger and garlic | 2 tbsp | ||||
| Garam masala | 1 tsp | ||||
| Method: 1. In a MWS glass bowl put tomato pieces, chopped ginger and garlic, add some water, cover and keep it in a microwave. Select menu and press start to cook. When it gives a beep, remove and grind it in a mixer. Strain it. Keep in microwave and press start. When beeps, add salt, sugar, garam masala the mixture and mix well andpress start. | |||||
| Vighi: 1. माइक्रोपेव रैफ ग्लास बाउल में कटे हुए टमाटर, कटी हुई अदरक और लहसुन डालें, थोड़ा पानी डालें, ढककर ओवन में रख दें। मेन्यू चुनकर पकने के लिए स्टार्ट दबाए। सुनाई देने पर, बाहर निकालकर गिक्सार में पीसा लें। छान लें। माइक्रोपेव में रखकर दबाएं। बीप सुनाई देने पर मिश्रण में नमक, चीनी और गर्म मसाला डालकर अच्छी तमिलाएं। दुबारा ओवन में रखें और स्टार्ट दबाएं। | |||||
| Menu | Weight Limit | Utensil Instructions | |||||
| bF-1 | Sprouts | 0.1~0.3kg | Microwave safe (MWS) bowl | For | 0.1 kg 0.2 kg 0.3 kg | ||
| Moong Sprout | 100 g | 200 g | 300 g | ||||
| Water | 150 mL | 200 mL | 300 mL | ||||
| Salt, Chaat masala, Coriander leaves | As per taste | ||||||
| Chopped onion | 2 tbsp | 3 tbsp | 4 tbsp | ||||
| Chopped tomato | 2 tbsp | 3 tbsp | 4 tbsp | ||||
| Method:1. In MWS bowl add sprouts, water and salt. Select menu and weight and press start.2. When cooking ends, take it out and strain add chopped onion, chopped tomatoes, coriander leaves, chaat masala and serve. | |||||||
| Vitighi:1. mājākṛoḥev sōfā bāuāl lān mēn sāraaṭī, pānaiār nāmāk āaṭlēl 1. mēnyū eāvān vājān chūnākār sātārādābae1.2. pāk jānaqān pār unhān bāuār nīkaalākār āaṭn lāe 1. kātiā hūyā pāyaān eāvān tāmaātār, hārā dānāniyaār cātāmāsāla āaṭlēl 1. | |||||||
| bF-2 | Poha | 0.1~0.3kg | Microwave safe (MWS) glass bowl | For | 0.1 kg | 0.2 kg | 0.3 kg |
| Poha | 100 g | 200 g | 300 g | ||||
| Oil | 1 tbsp | 2 tbsp | 3 tbsp | ||||
| Onion Chopped | 1/2 cup | 1 cup | 1 cup | ||||
| Green Chilli | 2 nos. | 3 nos. | 4 nos. | ||||
| Rai, Cumin, Asafoetida, Turmeric, Curry leaves, Salt, Sugar | As per taste | ||||||
| Grated coconut and Coriander leaves | For garnishing | ||||||
| Method:1. In MWS glass bowl put oil, rai, cumin, green chilli, curry leaves. Select men and weight and press start.2. When beep add chopped onion, turmeric powder and asafoetida. Press start.3. When beep add washed poha, salt and sugar, mix well and press start. Garnish with coconut and coriander leaves serve hot. | |||||||
| Vitighi:1. mājākṛoḥev sōfā gāuāl lān mēn tāle, rāiā, jāiār, hāri mīrā, kāri pātā āaṭlēl 1. mēnyū eāvān vājān chūnākār sātārādābae1.2. bāiāp suuārādī deñe pār kātiā hūyā pāyaān, hālādī pāuārādī eāvān sātārādābae1.3. bāiāp aānāne pār yuāl lāuā pāoha, nāmāk āaīr shākār āaṭlākār achāmi tārāh mīlālāe 1. | |||||||
| Grated coconut and Coriander leaves | For garnishing | ||||||
| Method:1. In MWS glass bowl put oil, rai, cumin, green chilli, curry leaves. Select men and weight and press start.2. When beep add chopped onion, turmeric powder and asafoetida. Press start.3. When beep add washed poha, salt and sugar, mix well, and press start. Garnish with coconut and coriander leaves serve hot. | |||||||
| Vitighi:1. mājākṛoḥev sōfā gāuāl lān mēn tāle, rāiā, jāiār, hāri mīrā, kāri pātā āaṭlēl 1. mēn yuān vājān vājān chūnākār sātārādābae1.2. bāiāp suuārādī deñe pār kātiā hūyā pāyaān, hālādī pāuārādī eāvān sātārādābae1.3. bāiāp aabnāne pār yuāl lāuā pāoha, nāmāk āaīr shākār āaṭlākār achāmi tārāh mīlālāe 1. | |||||||
| Grated coconut and Coriander leaves | For garnishing | ||||||
| Method:1. In MWA glass bowl put oil, rai, cumin, green chilli, curry leaves. Select men and weight and press start.2. When beep add chopped onion, turmeric powder and asafoetida. Press start.3. When beep add washed poha, salt and sugar, mix well, and press start. Garnish with coconut and coriander leaves serve hot. | |||||||
| Vitighi:1. mājǎkṛoḥev sōfā gāuāl lān mēn tāle, rāiā, jāiār, hāri mīrā, kāri pātā āaṭlēl 1. mēn yuān vājān vājān chūnākār sātārādābae1.2. bīaip suuārādī deñe pār, achāmi tārāh mīlālāe 1. mēn yuān vājān vājān chūnākār sātārādābae1.3. bīaip suuārādī deñe pār, achāmi tārāh mīlālāe 1. mēn yuān vājān vājān chūnākār sātārādābae1.4. bīaip suuārādī deñe pār, achāmi tārāh mīlālāe 1. mēn yuān vājān vājān chūnākār sātārādābae1.5. bīaip suuārādī deñe pār, achāmi tārāh mīlālāe 1. mēn yuān vājān vājān chūnākār sātārādābae1.6. bīaip suuārādī deñe pār, achāmi tārāh mīlālāe 1. mēn yuān vājān vājān chūnākār sātārādābae1.7. bīaip suuārādī deñe pār, achāmi tārāh mīlālāe 1. mēn yuān vājān vājān chūnākār sātārādābae1.8. bīaip suuārādī deñe pār, achāmi tārāh mīlālāe 1. mēn yuān vājān vājān chūnākār sātārādābae1.9. bīaip suuārādī deñe pār, achāmi tārāh mīlālāe 1. mēn yuān vājān vājān chūnākār sātārādābae1.10. bīaip suuārādī deñe pār, achāmi tārāh mīlālāe 1. mēn yuān vājān vājān chūnākār sātārādābae1.11. bīaip suuārādī deñe pār, achāmi tārāh mīlālāe 1. mēn yuān vājān vājān chūnākār sātārādābae1.12. bīaip suuārādī deñe pār, achāmi tārāh mīlālāe 1. mēn yuān vājān vājān chūnākār sātārādābae1.13. bīaip suuārādī deñe pār, achāmi tārāh mīlālāe 1. mēn yuān vājān vājān chūnākār sātārādābae1.14. bīaip suuārādī deñe pār, achāmi tārāh mīlālāe 1. mēn yuān vājān vājān chūnākār sātārādābae1.15. bīaip suuārādī deñe pār, achāmi tārāh mīlālāe 1. mēn yuān vājān vājān chūnākār sātārādābae1.16. bīaip suuārādī deñe pār, achāmi tārāh mīlālāe 1. mēn yuān vājān vājān chūnākār sātārādābae1.17. bīaip suuārādī deñe pār, achāmi tārāh mīlālāe 1. mēn yuān vājān vājān chūnākār sātārādābae1.18. bīaip suuārādī deñe pār, achāmi tārāh mīlālāe 1. mēn yuān vājān vājān chūnākār sātārādābae1.19. bīaip suuārādī deñe pār, achāmi tārāh mīlālāe 1. mēn yuān vājān vājān chūnākār sātārādābae1.20. bīaip suuārādī deñe pār, achāmi tārāh mīlālāe 1. mēn yuān vājān vājān chūnākār sātārādābae1.21. bīaip suuārādī deñe pār, achāmi tārāh mīlālāe 1. mēn yuān vājān vājān chūnākār sātārādābae1.22. bīaip suuārādī deñe pār, achāmi tārāh mīlālāe 1. mēn yuān vājān vājān chūnākār sātārādābae1.23. bīaip suuārādī deñe pār, achāmi tārāh mīlālāe 1. mēn yuān vājān vājān chūnākār sātārādābae1.24. bīaip suuārādī deñe pār, achāmi tārāh mīlālāe 1. mēn yuān vājān vājān chūnākār sātārādābae1.25. bīaip suuārādī deñe pār, achāmi tārāh mīlālāe 1. mēn yuān vājān vājān chūnākār sātārādābae1.26. bīaip suuārādī deñe pār, achāmi tārāh mīlālāe 1. mēn yuān vājān vājān chūnākār sātārādābae1.27. bīaip suuārādī deñe pār, achāmi tārāh mīlālāe 1. mēn yuān vājān vājān chūnākār sātārādābae1.28. bīaip suuārādī deñe pār, achāmi tārāh mīlālāe 1. mēn yuān vājān vājān chūnākār sātārādābae1.29. bīaip suuārādī deñe pār, achāmi tārāh mīlālāe 1. mēn yuān vājān vājān chūnākār sātārādābae1.30. bīaip suuārādī deñe pār, achāmi tārāh mīlālāe 1. mēn yuān vājān vājān chūnākār sātārādābae1.31. bīaip suuārādī deñe pār, achāmi tārāh mīlālāe 1. mēn yuān vājān vājān chūnākār sātārādābae1.32. bīaip suuārādī deñe pār, achāmi tārāh mīlālāe 1. mēn yuān vājān vājān chūnākār sātārādābae1.33. bīaip suuārādī deñe pār, achāmi tārāh mīlālāe 1. mēn yuān vājān vājān chūnākār sātārādābae1.34. bīaip suuārādī deñe pār, achāmi tārāh mīlālāe 1. mēn yuān vājān vājān chūnākār sātārādābae1.35. bīaip suuārādī deñe pār, achāmi tārāh mīlālāe 1. mēn yuān vājān vājān chūnākār sātārādābae1.36. bīaip suuārādī deñe pār, achāmi tārāh mīlālāe 1. mēn yuān vājān vājān chūnākār sātārādābae1.37. bīaip suuārādī deñe pār, achāmi tārāh mīlālāe 1. mēn yuān vājān vājān chūnākār sātārādābae1.38. bīaip suuārādī deñe pār, achāmi tārāh mīlālāe 1. mēn yuān vājān vājān chūnākār sātārādābae1.39. bīaip suuārādī deñe pār, achāmi tārāh mīlālāe 1. mēn yuān vājān vājān chūnākār sātārādābae1.40. bīaip suuārādī deñe pār, achāmi tārāh mīlālāe 1. mēn yuān vājān vājān chūnākār sātārādābae1.41. bīaip suuārādī deñe pār, achāmi tārāh mīlālāe 1. mēn yuān vājān vājān chūnākār sātārādābae1.42. bīaip suuārādī deñe pār, achāmi tārāh mīlālāe 1. mēn yuān vājān vājān chūnākār sātārādābae1.43. bīaip suuārādī deñe pār, achāmi tārāh mīlālāe 1. mēn yuān vājān vājān chūnākār sātārādābae1.44. bīaip suuārādī deñe pār, achāmi tārāh mīlālāe 1. mēn yuān vājān vājān chūnākār sātārādābae1.45. bīaip suuārādī deñe pār, achāmi tārāh mīlālāe 1. mēn yuān vājān vājān chūnākār sātārādābae1.46. bīaip suuārādī deñe pār, achāmi tārāh mīlālāe 1. mēn yuān vājān vājān chūnākār sātārādābae1.47. bīaip suuārādī deñe pār, achāmi tārāh mīlālāe 1. mēn yuān vājān vājān chūnākār sātārādābae1.48. bīaip suuārādī deñe pār, achāmi tārāh mīlālāe 1. mēn yuān vājān vājān chūnākār sātārādābae1.49. bīaip suuārādī deñe pār, achāmi tārāh mīlālāe 1. mēn yuān vājān vājān chūnākār sātārādābae1.50. bīaip suuārādī deñe pār, achāmi tārāh mīlālāe 1. mēn yuān vājān vājān chūnākār sātārādābae1.51. bīaip suuārādī deñe pār, achāmi tārāh mīlālāe 1. mēn yuān vājān vājān chūnākār sātārādābae1.52. bīaip suuārādī deñe pār, achāmi tārāh mīlālāe 1. mēn yuān vājān vājān chūnākār sātārādābae1.53. bīaip suuārādī deñe pār, achāmi tārāh mīlālāe 1. mēn yuān vājān vājān chūnākār sātārādābae1.54. bīaip suuārādī deñe pār, achāmi tārāh mīlālāe 1. mēn yuān vājān vājān chūnākār sātārādābae1.55. bīaip suuārādī deñe pār, achāmi tārāh mīlālāe 1. mēn yuān vājān vājān chūnākār sātārādābae1.56. bīaip suuārādī deñe pār, achāmi tārāh mīlālāe 1. mēn yuān vājān vājān chūnākār sātārādābae1.57. bīaip suuārādī deñe pār, achāmi tārāh mīlālāe 1. mēn yuān vājān vājān chūnākār sātārādābae1.58. bīaip suuārādī deñe pār, achāmi tārāh mīlālāe 1. mēn yuān vājān vājān chūnākār sātārādābae1.59. bīaip suuārādī deñe pār, achāmi tārāh mīlālāe 1. mēn yuān vājān vājān chūnākār sātārādābae1.60. bīaip suuārādī deñe pār, achāmi tārāh mīlālāe 1. mēn yuān vājān vājān chūnākār sātārādābae1.61. bīaip suuārādī deñe pār, achāmi tārāh mīlālāe 1. mēn yuān vājān vājān chūnākār sātārādābae1.62. bīaip suuārādī deñe pār, achāmi tārāh mīlālā | |||||||
| bF-4 | Veg Cutlet | 0.3 kg | High rack | For 0.3 kg | |||
| Boiled Vegetables-(Potato, Cauliflower, Carrots, green peas) | 300 g | ||||||
| Cornflour | 2 tbsp - 3 tbsp | ||||||
| Bread crumbs | 2 tbsp | ||||||
| Ginger garlic paste | 1 12 tsp | ||||||
| Chilli paste | 1 12 tsp | ||||||
| Salt, garam masala | As per taste | ||||||
| Lemon juice | As per taste | ||||||
| Method: 1. Mix all the ingredients except bread crumbs together. Shape them into flat cutlets. Brush the cutlets with oil.2. Coat with bread crumbs. Keep on the high rack.3. Select menu and press start.4. When beeps, turn over and press start. | |||||||
| ###: 1. #e#d k###s ke ablava s###i saamgr##y##k o e ### s### mllal le# | f#ir ##ssse chp#te k##t#n# la# | k##l##s p#r b#sh se te#l ng#a le# |2. ##p#r se #e#d k###s ko lng#a de # | ha#e r##k ke ##p#r r## d# |3. me##u cu#nckr st#ar# d#ba# |4. ##p su#nai# de## par, p#l#t de# #er st#ar# d#ba# | | |||||||
| bF-5 | Ven Pongal | 0.1~0.3 kg | Microwave safe (MWS) bowl | For | 0.1 kg | 0.2 kg | 0.3 kg |
| Rice (soaked for 1 hour) | 50 g | 100 g | 150 g | ||||
| Moong dal (soaked for 2 hours) | 50 g | 100 g | 150 g | ||||
| Water | 200 mL | 400 mL | 600 mL | ||||
| Ghee | 12 tbsp | 1 tbsp | 1 12 tbsp | ||||
| Cashewnuts, Pepper, Cumin, Salt | As per taste | ||||||
| Method: 1. In a MWS bowl add soaked rice, moong dal, water, salt and few drops of ghee. Select menu and weight and press start.2 When beeps, stir well and add more water (if required). Press start.3. When beeps, stir well and remove. In another MWS bowl add ghee, cashewnuts, cumin and pepper. Press start.4. Pour over cooked pongal and serve. | |||||||
| ###: 1. ma#kr#ve# se#f ba#ul m#e #e#g ##ur da#al, ma#g da#al, pa#ni, n#mck #or k## ##u#nckr st#ar# d#ba# | me##u #vajn ##unckr st#ar# d#ba# |2. ##p su#nai# de## par a### t#h# h#llal# # #ar y#di #avshyck ho to k## #or pa#ni da#l # | st#ar# d#ba# |3. ##p su#nai# de## par a### t#h# h#llalckr ba#hr n##kal le# | du#s#re ma#kr#ve# se#f ba#l m#e ##o, ka#u ##ia# #ar ka#l i minch ##alckr st#ar# d#ba# |4. ##p ##u# p#g#l ke ##p#r da#l# #ar p#o#s # | | |||||||
| Sn-1 | Pav Bhaji | 0.1~0.3kg | Microwave safe (MWS) glass bowl & High rack | For | 0.1 kg | 0.2 kg | 0.3 kg |
| Mix veg (chopped) - Potato, Cauliflower, Capsicum, Green peas | 100 g | 200 g | 300 g | ||||
| Oil | 1 tbsp | 2 tbsp | 2 tbsp | ||||
| Chopped onion | 1 No. | 2 Nos. | 2 Nos. | ||||
| Chopped tomato | 1 No. | 2 No. | 3 Nos. | ||||
| Water | As required | ||||||
| Pav bhaji masala | 1 tsp | 112 tsp | 2 tsp | ||||
| Garlic paste | 1 tsp | 112 tsp | 2 tsp | ||||
| Red chilli powder, Salt, Lemon juice, Butter | As per taste | ||||||
| Hara dhania | For garnishing | ||||||
| Method:1. In a MWS glass bowl take oil, garlic paste, chopped onion, chopped tomato and vegetables. Mix well and select menu and weight and press start.2. When beeps, add water, red chilli powder, pav bhaji masala, salt. Mix well.3. Press start.4. When beeps, remove mash it well, add butter and lemon juice. Garnish with coriander leaves keep aside.5.For grilling pav-bhaji buns: Cut each bun in centre, apply butter, arrange on high rack.6. Press start.7. Serve with bhaji. | |||||||
| विधि:1. माइक्रोवेव सेफ र्लास बाउल में तेल, लहसुन पेस्ट, कटे हुए प्याज, टमाटर और सब्जियां लें। अच्छी तरह मिलाएं और मेन्यू एवं वजन चुनकर स्टार्ट दबाएं।2. बीप सुनाई देने पर पानी, लाल मिर्य पाउडर, पावभाजी मसाला, नमक डालकर अच्छी तरह मिलाएं।3. स्टार्ट दबाएं।4. बीप सुनाई देने पर बाहर निकाल कर अच्छी तरह मरालें। मकखन और नीबू रस डालें। हरे धनिये की पत्तियों से सजाएं।5. पावभाजी बन्स सेकने के लिएः पावभाजी बन को बीच से कार्टे, थोड़ा मकखन लगाएं, हाई रैक के ऊपर व्यवस्थित करके।6. स्टार्ट दबाएं।7. भाजी के साथ परोसें। | |||||||
| Sn-2 | French Toast | 0.3kg | Microwave safe (MWS) flat glass dish + High rack | For | 0.3 kg | ||
| Bread slices | 3 nos. | ||||||
| Egg | 2 nos. | ||||||
| Milk | 75 mL | ||||||
| Sugar | 4 tbsp | ||||||
| Cinnamon powder | A pinch | ||||||
| Method:1. Combine egg, milk and sugar. Dip bread slice in mixture. Turn until v coated and let the bread soak for at least one minute.2. Place bread on greased MWS flat glass dish and keep the dish on rack. Select menu and press start.3. When beeps, turn over the slices. Press start.4. Sprinkle with cinnamon powder. Serve. | |||||||
| विधि:1. अण्डा, दूध और चीनी को मिला लें। ब्रैड स्लाइस को इस मिश्रण में डुबाएं। मोटी पर्त जगने तक पलटते रहें और ब्रैड को कम से कम एक मिन्ट तक इला रहने दें।2. ब्रैड को चिकनी माइक्रोवेव सेफ फ्लैट ग्लास डिश पर रखें और डिश को रैक के ऊपर रख दें। मेन्यू, चुनकर स्टार्ट दबाएं।3. बीप तुनाई देने पर स्लाइसिंज को पलट दें। स्टार्ट दबाएं।4. दालयीनी पाउडर छिड़कर परोसें। | |||||||
| Sn-3 | Hara Bhara Kababs | 0.2 kg | High rack | For | 0.2 kg | ||
| Potatoes (boiled & grated) | 200 g | ||||||
| Peas (boiled & mashed) | 1⁄2 cup | ||||||
| Palak leaves (boiled) | 1 cup | ||||||
| Coriander leaves | A few sprig | ||||||
| Chopped onion | 1 no. | ||||||
| Salt, red chilli powder, chaat masala, garam masala | As per taste | ||||||
| Oil | For greasing | ||||||
| Method: 1. Mix all the ingredients together and make a mixture. Make flat kababs out of it.2. Grease the high rack. Select menu and press start.3. When beeps, turn over the kababs and again press start. Serve with coriander chutney or tomato sauce. | |||||||
| ###: 1. सभी सामग्रियों को एक साथ मिलाकर मिश्रण बना लें। फिर इस मिश्रण से चपटे कबाव तैयार कर लें।2. हाई रैक को चिकना कर लें। मेन्यू चुनकर स्टार्ट दबाएं।3. बीप सुनाई देने पर कबाबों को पलटकर दुबारा से स्टार्ट दबाएं। धनिये की चटनी या टॉमेटो सॉस के साथ परोसें। | |||||||
| Sn-4 | Dhokla | 0.1~0.3 kg | Microwave safe (MWS) flat glass dish | For | 0.1 kg | 0.2 kg | 0.3 kg |
| Besan | 50 g | 75 g | 100 g | ||||
| Warm water | 50 mL | 75 mL | 100 mL | ||||
| Curd | 2 tbsp | 3 tbsp | 4 tbsp | ||||
| Green chilli & ginger paste | 1 tsp | 11⁄2 tsp | 2 tsp | ||||
| Salt, Sugar | As per taste | ||||||
| Fruit salt / Mitha Soda | 1/8 tsp | 1⁄4 tsp | 1⁄4 tsp | ||||
| Oil,Rai,Curry leaves, Water | For tempering | ||||||
| Grated coconut | For garnishing | ||||||
| Yellow colour / Haldi | As required | ||||||
| Method: 1. Mix besan, curd, sugar, salt, water, green chilli-ginger paste, yellow color, fruit salt together. Mix well. Keep for 5-10 minutes.2. Pour the mixture in MWS flat glass dish. Select menu and weight ar press start.3. Add tempering to the dhokla and cover. Stand for 5 minutes. Garnish with grated coconut and serve.Note: • For tempering in MWS bowl add oil, rai, curry leaves and microwave 100% for 2 minutes. Add water to the tempering.• Mix 2 tsp sugar to water and dissolve before adding to the tempering. | |||||||
| ###: 1. बेसन, दही, चीनी, नमक, पानी, हरी मिर्य-अदरक पेस्ट, पीला रंग, और फूट साल्ट के साथ अव्छी तरह मिला लें। 5-10 मिनट तक रखें।2. मिश्रण को माइक्रोवेव सेफ फ्लैट ग्लास डिश में डालें। मेन्यू और वजन चुनकर स्टार्ट दबाएं।3. तड़के को छोकला में डालकर ढक दें। 5 मिनट तक रखा रहने दें। कसे हुए नारियल से सजाकर परोसें। | |||||||
| नोट: • तड़के के लिए माइक्रोवेव सेफ बाउल में तेल, राई, करी पत्ता डालें और 2 मिनट के लिए माइक्रोवेव में रख दें। तड़के में पानी डालें।• तड़के में डालने से पहले पानी में 2 वम्भव वीनी डालकर घोल लें। | |||||||
| Menu | Weight Limit | Utensil Instructions | ||||
| Sn-5 | Khandvi | 0.3 kg | Microwave safe (MWS) bowl | For | 0.3 kg | |
| Besan | 100 g | |||||
| Water | 1 cup | |||||
| Curd | 1 cup | |||||
| Salt | As per taste | |||||
| Green chilli & ginger paste | As per taste | |||||
| Chopped coriander leaves | A few sprig | |||||
| Rai seeds (spluttered) | 12 tsp | |||||
| Grated coconut | As required | |||||
| Method: 1. In a MWS bowl mix besan, water, curd, salt and green chilli and ginger paste together. Mix well. Cover.2. Select menu and press start.3. When beeps, stir well and press start.4. When beeps, stir again and press start.5. Spread the batter on a greased smooth flat kitchen slab or a transparent film on the slab. Allow to cool, cut into lengthwise strips.6. Roll the strips, garnish with spluttered rai, coriander leaves and gratea coconut and serve. | ||||||
| विधि: 1. माइक्रोवेव सैफ बाउल में बेसन, पानी, दही, नमक, हरी मिर्च और अदरक पेस्ट को एक साथ मिलाकर ढक दें।2. मेन्यू चुनकर स्टार्ट दबाएं।3. बीप सुनाई देने पर अच्छी तरह हिलाकर स्टार्ट दबाएं।4. बीप सुनाई देने पर दुबारा अच्छी तरह हिलाकर स्टार्ट दबाएं।5. तैयार मैश्रण को चपटै किचन स्लेब पर या स्लैब पर पारदर्शक पतली फिल्म के ऊपर तेल लगाकर फौला दें। ठंडा होने दें और लम्बी पट्टियों में कारें।6. पट्टियों को लपेटें, राई, धनिया की पत्तियों और करो हुए नारियल से सजाएं और परोरों। | ||||||
| Sn-6 | Tokri Chaat | 0.1~0.3 kg | Metal muffin case & High rack | For | 0.1 kg | 0.2 kg |
| Bread slices | 2 nos. | 4 nos. | ||||
| For filling | ||||||
| Moong sprouts, pomegranate, cucumber, onion, boiled potato, chopped mango | 1 cup | 1 12 cup | ||||
| Salt, chaat masala, Tamarind chutney, lemon juice | As per taste | |||||
| Method: 1. In a bowl mix all the ingredients for filling and keep aside.2. On a rolling board keep the bread slice and with the help of a rolling pin roll out the bread thinly. Take muffin cases and arrange the bread slices in them.3. Place the muffin case on high rack. Select menu and weight and press start.4. Remove, allow to cool. Put the ingredients for filling inside the tokri and serve. | ||||||
| विधि: 1. भरने के लिए एक बाउल में सभी सामग्रियों को एक साथ मिलाकर एक तरफ रख दें।2. रोलिंग बोर्ड पर ब्रैड स्लाइसिज को रखें और रोलिंग पिन की मदद से पतली-पतली रोटियां बेल लें। मफिन केस लेकर उन ब्रैड स्लाइसिज को उसमें व्यवस्थित कर दें3. फिर मफिन केश को हाई रैक के ऊपर रखें। मेन्यू एवं वजन चुनकर स्टार्ट दबाएं।4. बाहर निकालकर ठंडा होने दें। भरने के लिए सामग्री को टोकरी के अन्दर रखें और परोरों। | ||||||
| Menu | Weight Limit | Utensil Instructions | |||||
| Sn-7 | Spicy Baby Corn | 0.1 ~ 0.3 kg | Microwave safe (MWS) bowl | For | 0.1 kg | 0.2 kg | 0.3 kg |
| Baby corn (cut lengthwise) | 100 g | 200 g | 300 g | ||||
| Lemon juice | As per taste | ||||||
| Sugar, Salt | As per taste | ||||||
| Oil | 1 tsp | 112 tsp | 2 tsp | ||||
| For paste | |||||||
| Chopped coriander leaves | 1 cup | 112 cup | 2 cups | ||||
| Chopped ginger | 12 tsp | 1 tsp | 112 tsp | ||||
| Garlic cloves | 1 no. | 2 nos. | 3 nos. | ||||
| Chopped green chillies | 1 no. | 2 nos. | 3 nos. | ||||
| Chopped onion | 12 cup | 1 cup | 1 cup | ||||
| Cumin seeds | As required | ||||||
| Method:1. Grind chopped coriander leaves, ginger, garlic cloves, green chillies, onion and cumin seeds together to prepare the paste.2. In a MWS bowl add oil, baby corns, sugar, salt and paste. Mix well. Cover. Select menu and weight and press start.3. Allow to stand for 3 minutes. | |||||||
| Vitghi:1. कटी हुई धनिया की पत्तियां, अदरक, लहसुन, हरी गिर्च, प्याज और जीरा एक साथ पीसकर पेस्ट तैयार कर लें।2. माइक्रोवेव सोफ बाउल में तेल, बेबी कॉर्नी, चीनी, नमक और पेस्ट डालकर अच्छी तरह मिला लें। ढककर मेन्यू और वजन चुनें और स्टार्ट दबाएं।3. 3 मिनट तक रखा रहने दें। | |||||||
| CF-1 | Omelette | 0.2~0.4kg | Microwave safe (MWS) flat glass dish | For | 0.2 kg | 0.3 kg | 0.4 kg |
| Egg | 2 Nos. | 3 Nos. | 4 Nos. | ||||
| Oil | 12 tbsp | 1 tbsp | 1 tbsp | ||||
| Chopped onion, Tomato, Coriander leaves | 12 cup | 1 cup | 1 cup | ||||
| Salt, Pepper | As per taste | ||||||
| Method: 1. Beat the egg well and add salt, pepper, tomato and onion.2. Transfer to a greased MWS flat glass dish. Cover. Select menu and weigh and press start.3. When beeps, add coriander leaves. Cover. Press start. Allow to stand for 3 minutes. Serve hot. | |||||||
| Vitighi : 1. अण्डों को अच्छी तरह फैटकर उसमें नमक, काली मिर्च, टमाटर और प्याज डालें।2. मिश्रण को माइक्रोवेव सोफ फ्लैट ग्लारा डिश में डालें। मेन्यू एवं वजन चुनकर स्टार्ट दबाएं।3. बीप सुनाई देने पर, अण्डों के मिश्रण में हरा धनिया को डालें। ढककर स्टार्ट दबाएं। 3 मिनाट तक रखा रहने दें। | |||||||
| CF-2 | Veg Sandwich | 0.1~0.3kg | High rack | For | 0.1 kg | 0.2 kg | 0.3 kg |
| Bread slices | 100g (2 slices) | 200g (4 slices) | 300g (6 slices) | ||||
| Butter | 1 tbsp | 2 tbsp | 4 tbsp | ||||
| Sauce / spread | 112 tbsp | 3 tbsp | 4 tbsp | ||||
| Chopped vegetables (onion, tomato, capsicum) | 2 tbsp | 4 tbsp | 6 tbsp | ||||
| Grated cheese | 2 tbsp | 4 tbsp | 6 tbsp | ||||
| Salt & pepper | As per taste | ||||||
| Method: 1. On a bread slice apply butter, layer with sauce, spread chopped vegetables sprinkle grated cheese. Cover it with the other bread slice.2. Keep the sandwich on high rack. Select menu and weight and press start.3. When beeps, change the side of the sandwich and again press start. | |||||||
| Vitighi : 1. ब्रेड रताइस पर मक्खन लगाएं, सॉस की पर्त बनाएं, कटी हुई सब्जियां फैलाएं और कसा हुआ चीज छिङ्कॉं। फिर दूसरी ब्रेड स्लाइस से ढक दें।2. अब इस तैयार सेंडविच को हाई रैक के ऊपर रखे। मेन्यू एवं वजन चुनकर स्टार्ट दबाएं।3. बीप सुनाई देने पर, सेंडविच को पलट दें और दुबारा से स्टार्ट दबाएं। | |||||||
| CF-3 | Pizza | 0.3kg | High rack | For 0.3 kg | |||
| Pizza base | 1 big pizza base | ||||||
| Grated cheese | 1/2 cup | ||||||
| Vegetable mixture (topping) | 3 tbsp | ||||||
| Pizza sauce | As per taste | ||||||
| Method: 1. On high rack, place pizza base and select menu and press start.2. When beep, remove the pizza base from the over and apply pizza sauce on it. Spread the vegetable mixture and grated cheese.3. Again place pizza with the above topping on the high rack and press start. | |||||||
| Vitighi : 1. हाई रैक के ऊपर पीजा बेस रखे और मेन्यू चुनकर स्टार्ट दबाएं।2. बीप सुनाई देने पर पीजा बेस ओवन से बाहर निकालकर उसके ऊपर पीजा सॉस लगाएं। फिर साजियों का मिश्रण और कसा हुआ चीज फैलाएं।3. फिर पीजा को उपरोक्त टॉपिंस के साथ हाई रैक पर सखें और स्टार्ट दबाएं। | |||||||
| 0.2 kg | High rackCF-4 Veg Burger | 0.2 kg | |||||
| Burger buns for tikkis | 2 nos. | ||||||
| Potatoes (boiled) | 200 g | ||||||
| Boiled peas | 1⁄2 cup | ||||||
| Chopped ginger | 2 tsp | ||||||
| Green chillies | 2 nos. | ||||||
| Chopped coriander leaves | 3 tbsp | ||||||
| Salt, red chilli powder, garam masala,chaat masala | As per taste | ||||||
| Cornflour | For binding | ||||||
| Tomato slices | 2 nos. | ||||||
| Onion slices | 4 nos. | ||||||
| Cheese slices | 2 nos. | ||||||
| Butter | 2 tsp | ||||||
| Tomato sauce | 2 tbsp | ||||||
| Method: 1. In a bowl mix all the ingredients for tikkis and prepare round and flat tikkis of it.2. Slit the buns into two halves. Apply the butter inside the buns.3. Keep the tikkis on the high rack. Select menu and press start.4. When beeps, turn over the tikkis and press start.5. When beeps, remove the tikkis. Now apply tomato sauce on one half of the bun. Keep the cheese slice, then keep tikki and then tomato and then onion and cheese slices and cover with the second half of the bun.6. Now keep the burger on high rack & press start. | |||||||
| Vitighi: 1. 約िक्यों के लिए सभी सामग्री एक बाउल में लेकर अच्छी तरह मिला लें और उससे गोल तथा चपटी टिक्यों तैयार कर लें।2. बन्सा को दो अर्द्भागों में फाड़ लें। बन्सा में अन्दर की तरफ मकखन लगाएं।3. फिर टिक्यों को हाई रैक के ऊपर रखें। मेन्यू और वजन चुनकर र्टार्ट दबाएं।4. बीप सुनाई देने पर टिक्यों को पलटकर स्टार्ट दबाएं।5. बीप सुनाई देने पर टिक्यों को बाहर निकालें। अब बन के एक अर्द्भ भाग पर टोमेटो सॉस लगाकर चीज स्लाइस रखें। फिर टिक्यी रखकर टोमेटो, प्याज और चीज़ा स्लाइस रखें तथा बन के दूसरे अर्द्भ भाग से ढक दें।6. अब बर्गर को हाई रैक के ऊपर रखें और स्टार्ट दबाएं। | |||||||
| CF-5 | Cake | 0.1 kg | Microwave safe (MWS) glass bowl | For | 0.1 kg | ||
| Maida / refined wheat flour | 100 g | ||||||
| Powdered sugar | 75 g | ||||||
| Butter | 75 g | ||||||
| Egg | 2 nos. | ||||||
| Baking powder | 1 tsp | ||||||
| Vanilla essence | 1 tsp | ||||||
| Method: 1. Sieve maida, baking powder.2. In a bowl add powdered sugar and butter and beat well. Beat egg well. Add essence. Add maida, mix, beat well.3. For spoon dropping consistency add milk or water. Pour in MWS glass bow Select menu and press start.4. Stand for 5-10 minutes. | |||||||
| Vitighi: 1. मैदा और बेकिंग पाउडर को छान लें।2. बाउल में बूरा और मकखन लेकर अच्छी तरह फॉट लें। अंडों को अर्द्भी तरह फॉटकर एसेंस मिलाएं। फिर उसमें मैदा डालकर मिलाएं और अच्छी तरह फॉटें।3. चम्मच से गिरते हुए मिश्रण के लिए दूध या पानी डालें। माइक्रोपेव सेफ ग्लास बाउल में डालें। मेन्यू चुनकर स्टार्ट दबाएं।4. 5-10 मिनट तक रखा रहने दें। | |||||||
| Menu | Weight Limit | Utensil Instructions | |||||
| CF-6 | Chocolate Balls | 0.3 kg | Microwave safe (MWS) glass bowl | For | 0.3 kg | ||
| Milkmaid | 1 cup | ||||||
| Marie biscuit powder | 1 cup | ||||||
| Milk powder | 12 cup | ||||||
| Bournvita | 12 cup | ||||||
| Grated coconut | 12 cup | ||||||
| Method: 1. In a MWS glass bowl add milkmaid, marie biscuit powder, milk powde bournvita. Select menu and press start.2. Allow to cool. Make balls out of the mixture. Roll out the balls in the grated coconut.3. Keep in refrigerator for half an hour. | |||||||
| ###: 1. माइक्रोवेव सेफ ग्लास बाउल में मिल्कमेड, मारी बिर्सिकट पाउडर, मिल्क पाउडर, बॉर्नविटा झाले। मेन्यु चुनकर स्टार्ट दबाएं।2. ठंडा होने दें। तैयार मिश्रण से छोटे-छोटे गोले तैयार करें। फिर उन गोलों को कसे हुप नारियल में लपेटें।3. आधा घंटे के लिए रेफ्रिजरेटर में रख दें। | |||||||
| CF-7 | Garlic Bread | 0.1~0.3 kg | High Rack | For | 0.1 kg | 0.2 kg | 0.3 kg |
| Bread slices (French Bread) | 2 pcs | 3 pcs | 4 pcs | ||||
| Butter | 3 tbsp | 4 tbsp | 5 tbsp | ||||
| Garlic paste | 1 tbsp | 112 tbsp | 2 tbsp | ||||
| Grated cheese | 2 tbsp | 3 tbsp | 4 tbsp | ||||
| Salt, pepper, Oregano, chilli flakes | As per taste | ||||||
| Method: 1. Mix butter, garlic paste, salt, pepper and oregano together. Apply this mixture to both sides of bread slices. Keep the bread slices on high rack.2. Select menu and weight and press start.3. When beeps, turn over the slices. Sprinkle the grated cheese and press start.Note: Use French bread to make garlic bread. | |||||||
| ###: 1. मकखन, लहसुन की पेर्ट, नमक, काली मिर्च तथा ऑरेगानो को एक साथ मिला लें। इस मिश्रण को ब्रैड स्लाइसिंज के दोनों तरफ लगा दें। ब्रैड स्लाइसिंज को हाई रैक के उरखें।2. मेन्यू एवं बजन चुनकर स्टार्ट दबाएं।3. बीप सुनाई देने पर ब्रैड स्लाइसिंज को पलटें, कसा हुआ चीज छिडकें और स्टार्ट दबाएं। | |||||||
| HP-1 | Kala Chana | 0.1~0.3kg | Microwave safe (MWS) bowl | For | 0.1 kg | 0.2 kg | 0.3 kg |
| Soaked kala chana (overnight) | 100 g | 200 g | 300 g | ||||
| Water | 200 mL | 400 mL | 600 mL | ||||
| Oil | 1 tbsp | 2 tbsp | 3 tbsp | ||||
| Chopped onion | 1/2 cup | 1 cup | 112 cup | ||||
| Salt, Chaat masala, Red chilli powder, Coriander leaves | As per taste | ||||||
| Method:1. Soak chana overnight, in a MWS bowl take soaked chana with water cover it.2. Select menu and weight and press start to cook.3. When beeps, strain the water from it. In a MWS bowl, add oil, chopped onio chaat masala, red chilli powder, coriander leaves and press start to cook.4. When beeps, add boiled chana, mix well and press start. | |||||||
| VII:1. चने को रातभर भिगोएं। माइक्रोवेव सैफ बाउल में भीगे हुए चने पानी के साथ लें औरद्य ढक दें।2. मेन्यू एवं वजन चुनकर पकाने के लिए स्टार्ट दबाएं।3. बीप सुनाई देने पर इसमें से पानी निकाल दें। माइक्रोवेव सैफ बाउल में तेल, कटी हुई प्याज, चाट मसाला, लाल मिर्च, हरा धनिया डाले और पकाने के लिए स्टार्ट दबाएं।4. बीप सुनाई देने पर उबले हुए चने डालकर अच्छी तरह मिलाएं और स्टार्ट दबाएं। | |||||||
| HP-2 | Karela Sabzi | 0.3kg | Microwave safe (MWS) glass bowl +High rack+Microwave safe (MWS) flat glass dish | For | 0.3 kg | ||
| Chopped karela | 300 g | ||||||
| Oil | 2 tbsp | ||||||
| Chopped onion | 1 cup | ||||||
| Water | As required | ||||||
| Rai, Cumin, Asafoetida, Turmeric | For tempering | ||||||
| Salt, Sugar, Garam masala, Coriander powder, Cumin powder | As per taste | ||||||
| Grated coconut, Coriander leaves | For garnishing | ||||||
| Method:1. In a MWS glass bowl add oil, rai, cumin, asafoetida, turmeric and chopped onion. Select menu and press start.2. When beeps, add chopped karela, some water, salt, sugar, garam masala, coriander powder, cumin powder and cover. Press start.3. When beeps, transfer sabzi to a MWS glass flat dish, stir well. Place on high rack and press start.Note: Before cooking, scrap and rub the karela with salt and keep aside for 2-3 hours. | |||||||
| VII:1. माइक्रोवेव सैफ ग्लास बाउल में तेल लें और राई, जीरा, हींग, हल्दी तथा कटी हुई प्याज डालें। मेन्यू एवं वजन चुनकर स्टार्ट दबाएं।2. बीप सुनाई देने पर कटा हुआ करेला, कुछ पानी, नमक, चीनी, गरम मसाला, धनिया—जीरा पाउडर डालकर ढक दें। स्टार्ट दबाएं।3. बीप सुनाई देने पर सब्जी को माइक्रोवेव सैफ ग्लास फ्लैट डिश पर विर्श्पापित कर दें। अच्छी तरह हिलाएं। हाई रैक के ऊपर रख कर स्टार्ट दबाएं।नोट: पकाने से पहले, करेलों को खुरचकर नमक के साथ रगढ़े और 2-3 घंटे के लिए अलग रख दें। | |||||||
| Menu | Weight Limit | Utensil Instructions | ||||
| HP-3 | Lemon Chicken | 0.1~0.3kg | Microwave safe (MWS) bowl | For | 0.1 kg | 0.2 kg |
| Boneless chicken | 100 g | 200 g | ||||
| Soya sauce | 12 tbsp | 1 tbsp | ||||
| Cornflour | 12 tbsp | 1 tbsp | ||||
| Water | 12 cup | 12 cup | ||||
| Salt, Pepper, Sugar | As per taste | |||||
| Garlic paste | 1 tbsp | 112 tbsp | ||||
| Lemon juice | 2 tsp | 3 tsp | ||||
| Oil | 12 tbsp | 1 tbsp | ||||
| Method:1. Mix boneless chicken, soysauce, salt and pepper, garlic paste and lemon juice in a bowl. Refrigerate for 12 hour.2. In a MWS bowl add oil, marinated chicken pieces, sugar, corn flour mixed with water. Cover. Select menu and weight and press start.3. When beeps, mix well. Cover and press start. Allow to stand for 3 minutes. | ||||||
| Tolgi:1. B###n###s ###knn, s###yaa s###ss, n###k, m###ch, l###hssn p###st t#thaa n###b# rss e##k##r a###c##i t###h gnlla lel ! #####n###r me##n #e ##p##t #e ##l##r r##d #e !1. ma#####ve## s###f b####l me## teel, m####a la#ge h##u## ch###### k## d##k##, #####ni, pa###i ke s##ah ###gaa h##ha k###n##l##r daalckar d##k de #e ! me###y##r v##n chun##k## r##an##d d##b##i 3. ##ip suu###de ne par a###c##i t###h mllal## er## d##k##r st##an##d d##b##i 3 minnt t##k r##h##de #e ! | ||||||
| HP-4 | Machi Kali Mirch | 0.1~0.3kg | Microwave safe (MWS) bowl | For | 0.1 kg | 0.2 kg |
| Pomfret fish | 100 g | 200 g | ||||
| Salt, Lemon juice, Pepper | To marinate as per taste | |||||
| Oil, Chopped onion, Chopped tomatoes, Chopped garlic | As required | |||||
| Method:1. Take pomfret slices as per weight either of (0.1 kg/ 0.2 kg/ 0.3kg) amarinate with salt, lemon juice, and pepper for one hour.2. In MWS bowl put oil, chopped onion, chopped tomatoes, chopped garlic.Select menu and weight and press start.3. When beeps, open door and add marinated fish and some water. Cover and press start.Give standing time for 5 minutes. | ||||||
| Tolgi:1. Po#####m##t m#####lke k## d##k##v j##n###u#s#ar (0.1 kg/ 0.2 kg/ 0.3kg) lelekr n###k, n###b# rss o##r ka###i m###ch k## sa#ch m###re#t k##r lel #e##r e##k ##p##t #e ##l##r r##d #e !1. ma#####ve## s###f b####l me## teel, k##di ##u## p##aj, k## te ##u## t##m##r o##r l###hssu## daal## t#thaa me###y##r v##n chun##k## r##an##d d##b##i 3. ##ip suu###de ne par d###vajaa z#####le## #e## m###re#t k## ##u## m#####l## daal## i daal## i daal## i daal## i daal## i daal## i daal## i daal## i daal## i daal## i daal## i daal## i daal## i daal## i daal## i daal## i daal## i daal## i daal## i daal## i daal## i daal## i daal## i daal## i daal## i daal##i | ||||||
| HP-5 | Ghiya Raita | 0.1~0.3kg | Microwave safe (MWS) bowl | For | 0.1 kg | 0.2 kg |
| Grated ghiya | 100 g | 200 g | ||||
| Water | 50 mL | 75 mL | ||||
| Salt | As per taste | |||||
| Curd | 3 tbsp | 4 tbsp | ||||
| Salt, Sugar, Mustard powder & Green chilli | As per taste | |||||
| Method:1. In a MWS bowl add grated ghiya, sprinkle water and salt. Select menu and weight and press start to cook.2. Strain ghiya and take it in MWS bowl and add curd, water, mustard powder salt, sugar, green chilli. Serve chilled. | ||||||
| Tolgi:1. ma#####ve## s###f b####l me## k###a ##u##a ##j##le ##thaa p###i o##r n###k c#####k #e ##n##y##r u##k##r p####ne k## l##r s##an##d d##b##i 1. ##iyay a k## n##o##### #e## ma#####ve## s###f b####l me## r## #e## d##h##, m#######p####r, n###k, ##i-ni, ##ri m###ch #a#le ! nd#a k##ke p####es! | ||||||
| Menu | Weight Limit | Utensil Instructions | |||||
| HP-6 | Nutrinuggets | 0.1~0.3kg | Microwave safe (MWS) bowl | For | 0.1 kg | 0.2 kg | 0.3 kg |
| Soaked and boiled nutrinuggets | 50 g | 100 g | 150 g | ||||
| Potato | 50 g | 100 g | 150 g | ||||
| Oil | 1 tbsp | 112 tbsp | 2 tbsp | ||||
| Cumin | As per taste | ||||||
| Chopped onion | 1/2 cup | 1 cup | 112 cup | ||||
| Tomato puree | 2 tbsp | 3 tbsp | 4 tbsp | ||||
| Salt, Garam masala, Red chilli powder, Turmeric, Coriander powder | As per taste | ||||||
| Water | 112 cup | 2 cup | 212 cup | ||||
| Chopped coriander leaves | For garnishing | ||||||
| Method:1. In a MWS bowl add oil, cumin, onion. Select menu and weight and press start. Mix well.2. When beeps, add tomato puree, nutrinuggets, potato, salt, red chilli powder turmeric, coriander leaves and add 112 the amount of water mentioned per weight (For eg. For 200g, add 1 cup of water). Cover and press start. Mix well.3. When beeps, add the remaining amount of water and press start. Mix well. Allow to stand for 3 minutes. Garnish with coriander leaves and serve hot with roti. | |||||||
| Tribili:1. माइक्रोवेव सेफ बाउल में तेल, जीरा और प्याज डालें। मेन्पू एवं वजन चुनकर स्टार्ट दबाएं। अच्छी तरह मिलाएं।2. बीप सुनाई देने पर, टोमेटो प्पूरी, न्यूट्रीनगेट्स, आलू नमक, लाल मिर्च पाउडर, हल्दी और धनिया पाउडर डालकर वजनानुसार निर्घारित पानी का आधा पानी डालें (उदाहरणार्थ 200 ग्राम के लिए 1 कप पानी) | ढककर स्टार्ट दबाएं। अच्छी तरह मिलाएं।3. बीप सुनाई देने पर, बचा हुआ पानी डालकर स्टार्ट दबाएं। अच्छी तरह मिलाएं। 3 मिनट तक रखा रहने दें। हरे धनिये से सजाकर रोटी के साथ गरम-गरम परोसें। | |||||||
| UC-1 | Keep Warm | 0.3 kg | Microwave safe (MWS) bowl | Method: 1. Any cooked food with cover (Rice, Dal, Sabzi, Halwa, Upma etc.) Select menu and press start.विधि: 1. ढका हुआ कोई भी व्यंजन (चाबल, दाल, साबजी, हलवा, उपमा इत्यादि) मेन्यू चुनें और स्टार्ट दबाएं। | |||
| UC-2 | Steam Clean | 0.3 kg | Microwave safe (MWS) bowl | Method: 1. Take water in bowl, add vinegar and lemon juice in it, select menu and press start.2. When beeps, wipe with soft and clean napkin. Press start.3. When over wipe with soft and clean napkin after taking out power plug.विधि: 1. बाउल में पानी लेकर उस्में सिरका और नीबू रस डालें, मेन्यू चुनें और स्टार्ट दबाएं।2. बीप सुनाई देने पर मुलायम और साफ तौलिये से पोळकर स्टार्ट दबाएं।3. समाप्त होने पर पावर प्लग बाहर निकालकर मुलायम और साफ तौलिये से ही पोळें | |||
| UC-3 | Defrost Veg | 0.1-0.5kg | Microwave safe (MWS) bowl | Veg - (Paneer, Green Peas, Corn etc.)Method: 1. Take in MWS bowl, select menu and weight and press start.2. When beeps, turn the food. Press start.विधि: 1. माइक्रोवेव सेफ बाउल में लेकर मेन्यू एवं वजन चुनें और स्टार्ट दबाएं।2. बीप सुनाई देने पर खाने को पलट दें। स्टार्ट दबाएं। | |||
| UC-4 | Defrost Non-Veg | 0.5 ~ 1.0 kg | Microwave safe (MWS) bowl | Non-Veg - (Chicken, Mutton etc.)Method: 1. Take in MWS bowl, select menu and weight and press start.2. When beeps, turn the food. Press start.विधि: 1. माइक्रोवेव सेफ बाउल में लेकर मेन्यू एवं वजन चुनें और स्टार्ट धबाएं।2. बीप सुनाई देने पर खाने को पलट दें। स्टार्ट दबाएं। | |||
| UC-5 | De-humidification | 0.1-0.3kg | Microwave safe (MWS) bowl | Namkin, Biscuits, Bhujia, Papad and Wafers etc.Method: 1. In MWS bowl add the food to be dehumidified. Select menu and weight and press start.विधि: 1. खाना सुखाने के लिए उसे माइक्रोवेव सेफ बाउल में रखें। मेन्यू और वजन चुनकर स्टार्ट दबाएं। | |||
| Menu | Weight Limit | Utensil Instructions | |||
| FE-1 | FlavouredYoghurt | 0.6 kg | Microwave safe(MWS) glass bowl | For | 0.6 kg |
| Curd | 200 mL | ||||
| Milkmaid | 100 mL | ||||
| Fresh cream | 200 mL | ||||
| Flavours (Vanilla, Strawberry,Pineapple essence) | As per choice (1⁄2 tsp) | ||||
| Method:1. In a MWS glass bowl mix all the ingredients. Beat well till smooth.2. Select menu and press start.3. When cooking ends, take out and allow to come to room temperature.Keep in freezer for 1 hour.Note:In case you use strawberry essence, add a pinch of pink food colour toadd colour to the yoghurt. For pineapple yoghurt, add pineapple slices at thetime of serving. | |||||
| विधि:1. माइक्रोवेव रोफ स्लारा बाउल में सारी सामग्री मिलाकर इतना फैंटें कि मिश्रण सामरूप होजाए।2. मेन्यू चुनकर स्टार्ट दबाएं।3. पकने के बाद बाहर निकालकर कमरे के तापमान तक ठंडा होने दें।फिर 1 घंटे के लिए फ्रीजर में रख्य दें।नोट:यदि आप स्ट्रॉबेरी एसेंस इस्तेमाल कर रह हैं, तो योगर्ट को रंग देने के लिए एचुटकी खाने वाला पिंक कलर डालें। पाइनएपिल योगर्ट के लिए परोरकपाइनएपिल की स्लाइस डालें। | |||||
| FE-2 | MasalaPaneer | 0.5 kg | Microwave SafeGlass Bowl(MWS) | For | 0.5 kg |
| Milk | 500 mL | ||||
| Curd | 2 tbsp | ||||
| Coriander | 1 tbsp | ||||
| Cumin | 1 tsp | ||||
| Method:1. In MWS glass bowl add milk. Select menu and press start. When it gives abeep, remove and add curd, coriander and cumin. Put in microwave. Pressstart. When it gives a beep, remove and strain and press in a muslin cloth. | |||||
| विधि:1. माइक्रोवेव सेफ स्लास बाउल में दूध लें। मेन्यू चुनकर स्टार्ट दबाएं। बीप सुनाई देने परबाहर निकालें और दही, धनिया और जीरा डालें। ओवन में रख्यकर स्टार्ट दबाएं। बीपसुनाई देने पर बाहर निकालें और छानकर मर्सिलन के कपड़े से दबाएं। | |||||
| FE-3 | Yeast Dough | 0.25 kg | Microwave SafeGlass Bowl(MWS) | For | 0.25 kg |
| Maida | 250 g | ||||
| Yeast | 1 tbsp | ||||
| Salt | 1/2 tsp | ||||
| Sugar | 1 tsp | ||||
| Water | As required | ||||
| Method:1. In MWS glass bowl add maida, yeast, salt and sugar. Mix well, add water amake a soft dough. Select menu and press start. When it gives a beep, restfor 3 minutes. Now remove | |||||
| विधि:1. माइक्रोवेव सेफ ग्लास बाउल में मैदा, ईस्ट, नमक और चीनी डालकर अच्छी तरह मिलाएंतथा पानी मिलाकर मुलायम आटा गूथ लें। मेन्यू चुनकर स्टार्ट दबाएं। बीप सुनाई देने3 गिनट बाद बाहर निकाल लें। | |||||
Spices
| English Name | Hindi Name | |
| Ajinomoto* (Flavour enhancer) Asafoetida Hing हींग Basil Tulsi तुलसी Bay Leaf Tej Patta तेजपत्ता Cardamom, black Moti Elaichi मोटी इलाइची Cardamom, green Choti Elaichi छोटी इलाइची Carom seeds Ajwain अजवाईन Cinnamon Dalchini दालचीनी Cloves Laung लौंग Coriander Seeds Sabut Dhania साबुत धनिया Cumin seeds Jeera जीरा Dry Mango Powder Amchur अमचूर Dry red chilli Sukhi Sabut Lal Mirch सूखी साबुत लाल मिर्च सौफ Fennel Saunf Kasuri Methi कसूरी मेथी Fenugreek leaves, dried Methidana मेथी दाना Mustard seeds Sarson, Rai सरसों, राई Nutmeg Jaiphal जायफल Oregano Oregano ऑरीगैनो Pepper Kali Mirch काली मिर्च Pomegranate seeds, dried Anardana Anandana Poppy seeds Khus Khus खस खस Red Chilli Lal Mirch लाल मिर्च Salt Namak नमक Turmeric Haldi हल्पी | Ajinomoto | अजीनोमोटो* (स्वाद्वर्धक) |
Vegetables
| English Name | Hindi Name | |
| AmaranthBaby cornBittergourd KarelaBottlegourd GhiyaBrinjal/EggplantBroccoliCabbageCapsicum | ChavliBaby cornकरेलाघीयाBaiganHari Phool GobhiPata Gobhi/Bandh GobhiShimla Mirch | चावलीबेबीकॉर्नबैंगनहरी फूलगोभीपत्ता गोभी / बन्द गोभीशिमला मिर्च |
* Ajinomoto : It shall not be added to the food for infants below 12 months
* अजीनोमोटो : 12 माह से कम उम्र के बच्यों के खाने में इसका इस्तेमाल न करें।
| Cauliflower Phool GobhiCarrot Gajar गाजरCelery Ajmod अजमोदCluster Beans Gavar Ki Fali गवार की फलीCoriander leaves Hara Dhania हरा धनियाCucumber Kheera खीराCurry leaves Curry Patta करी पत्ताDrumsticks Drumsticks झमस्टिकFrench beansGarlic Lehsun Ginger Adrak Lady Finger Bhindi Lemon Nimbu Lemon Grass Lime Nimbu Mint Pudina Mushroom Kukurmutta Olives Onion Parsley Potato Peas Radish Mooli Red Pumpkin Spinach Spring Onion Tomato Turnip Chenopodium leaves Zucchini | फूल गोभी लहसुन अदरक भिन्डी नीबू लेमन ग्रास नीबू पुदीना कुकुरमूता Jaitun Pyaz Ajmoda Aloo Hari Matar मूली Lal Kaddu Palak Hari Pyaz Tamatar Shalgam Bathua Torai | फ्रान्स बिन्स जैतून प्याज अजमोदा आलू हरी मटर लाल कद्दू पालक हरी प्याज टमाटर शलगम बथुआ तोरी |
Fruits
| English Name | Hindi Name | |
| Apple Seb सेबCoconut Nariyal नारियलGrapes Angoor अंगूरMango Aam आमPineapple Anannas अनन्नासPomegranate Anaar अनारRaw Banana Kacha Kela | कच्चा केला | |
Cereals
| English Name | Hindi Name | |
| Flattened Rice PohaOats JaeiPuffed Rice MurmuraRefined wheat Flour MaidaRice ChawalSago SabudanaSemolina SujiWhole wheat brokenWheat Four (whole) | पोहाजेईमुरमुरामैदाचावलसाबूदानासूजीDaliyaGehun ka Atta | दलियागेहू का आटा |
Pulses
| English Name | Hindi Name | |
| Bengal Gram DalBengal Gram flourBlack Gram Dal Urad DalGreen Gram Dal(Dehusked)Kidney Beans RajmaLentils,(Dehusked)Red Gram DalSoyabean | Chana DalBesanउड़द दालMoong Dal (Dhuli)राजमाजामा Daral (Dhuli)Arhar/Tuvar DalSoyabean | चना दालबेसनमूँग दाल (धुली)मसूर दाल (धुली)अरहर/ तूवर दालसोयाबीन |
List of Ingredients/सामग्री की लिस्ट
Dry Fruits
| English Name | Hindi Name | |
| Almonds Badam बादाम Cashewnuts Kaju काजू प Pistachio Pista पिस्ता Raisins Kishmish किशमिश Walnuts Akhrot अखरोट | ||
Fats & oils
| English Name | Hindi Name | |
| Butter Makhan मकखन | ||
| Ghee | Ghee | घी |
| Oil | Tel | तेल |
| Olive Oil | Jaitun Ka Tel | जैतून का तेल |
| Mustard Oil | Sarson Ka Tel | सरसों का तेल |
Miscellaneous
| English Name | Hindi Name | ||
| Bread crumbs | Bread crumbs | ब्रेड क्रम्बस | |
| Cornflour | Cornflour | कॉर्नपलोर | |
| Coffee | Coffee | कॉफी | |
| Cottage cheese | Paneer पनीर | ||
| Curd | Dahi | दही | |
| Eggs | Ande | अण्डें | |
| Honey | Shahed | शहद | |
| Jaggery Gud | गुड़ | ||
| Khoa | Khoa | खोआ | |
| Milk | Doodh | दूध | |
| Powdered Sugar | Bura | बूरा | |
| Sugar | Cheeni चीनी | ||
| Tamarind | Imli | इमली | |
| Tea | Chai | चाय | |
| Saffron | Kesar | केसर | |
| Sprouts | Ankur | अंकुर | |
| Vinegar | Sirka सिरका | ||
To Clean Your Oven / अपने ओवन को साफ करना
1 Keep the inside of the oven clean
Food spatters or spilled liquids stick to oven walls and between the seal and door surfaces. It is best to wipe up spillovers with a damp cloth right away. Crumbs and spillovers will absorb microwave energy and lengthen cooking times. Use a damp cloth to wipe out crumbs that fall between the door and the frame. It is important to keep this area clean to assure a tight seal. Remove greasy spatters with a soapy cloth then rinse and dry. Do not use harsh detergent or abrasive cleaners. The multicook tawa (model specific) can be washed by hand or in the dishwasher.
ओवन के भीतरी हिस्से को साफः रखें
खाने के टुकड़े या तरल पदार्थों के छीटे दीवारों पर और सील तथा दरवाजों के बीच की सतह पर चिपक जाते हैं। एक गीले कपड़े से इसको तुरंत साफ करना आवश्यक है। ये खाने के छोटे टुकड़े और तरल पदार्थों की बूंदे माइक्रोवेव की ऊर्जा को अवशोषित कर लेते हैं और इस तरह खाना बनने का समय लंबा हो सकता है। दरवाजे और खांचों के बीच गिरे हुए इन खाने के टुकड़ों को गीले कपड़े से साफ करें। टाईट सील के लिए यह सफाई रखनी बहुत जरुरी है। तैलीय छीटों को हटाने के लिए साबुन से भीगा हुआ कपड़ा इस्तेमाल करें और उसके बाद उसे धो कर सुखा लें। कठोर डिटरजेंट का इस्तेमाल न करें। मल्टीकुक तवा (माँडल विशेष) को हार्थों से या डिशवाशर में धोया जा सकता है।
2 Keep the outside of the oven clean
Clean the outside of your oven with soap and water then with clean water and dry with a soft cloth or paper towel. To prevent damage to the operating parts inside the oven, the water should not be allowed to seep into the ventilation openings. To clean control panel, open the door to prevent the oven from accidentally starting, and wipe a damp cloth followed immediately by a dry cloth. Press STOP/Clear after cleaning.
ओवन का बाहरी हिस्सा साफः रखेंं
साबुन और साफ़ पानी से इसके बाहरी हिस्सों को साफ़ करें और मुलायम कपड़े या पेपर टॉवल से इसे पाँछ कर सुखाएं। ओवन के भीतर इसके काम करने वाले हिस्सों को टूट-फूट से बचाने के लिए पानी को हवा आने वाले रास्तों पर जमा न होने दें। कंट्रोल पैनल को साफ़ करने के लिए दरवाजा खुला ही रखें ताकि कहीं गलती से ओवन चालू न हो जाए। फिर इसे एक गीले कपड़े से साफ़ करके सूखे कपड़े से पाँछ दें। सफाई के बाद STOP/Clear बटन दबाएं।
3 If steam accumulates inside or around the outside of the oven door, wipe the panels with a soft cloth. This may occur when the oven is operated under high humidity conditions and in no way indicates a malfunction of the unit.
अगर दरवाज़ों के बाहर या भीतर भाप इकड्धी हो जाए तो एक मुलायम कपड़े से पैनल को पोँछ दें। बहुत नमी हो जाने पर ओवन के संचालन के कारण ऐसा हो सकता है यह कोई ओवन की खराबी नहीं है।
4 The door and door seals should be kept clean. Use only warm, soapy water, rinse then dry thoroughly. DO NOT USE ABRASIVE MATERIALS, SUCH AS CLEANING POWDER OR STEEL AND PLASTIC PADS. Metal parts will be easier to maintain if wiped frequently with a damp cloth.
दरवाज़े और उनकी सील साफ रखी जानी चाहिए। गर्म साबुन वाला पानी लेकर पूरी तरह से धोएं और फिर सुखाएं। स्टील और प्लास्टिक के नुकीले पैड्स और कलीनिंग पाउडर का इस्तेमाल ना करें। गीले कपड़े से नियमित रूप से पाँळने से आप धातु के हिस्सों को ठीक रख सकते हैं।
5 Do not use steam cleaners.
स्टीम कलीनर्सं का प्रयोग न करें।
6 Unplug your oven from the electrical socket when you clean control panel with wet cloth or spray water on control glass to clean. If it is not unplugged, this product can be operated by touching the START/Add 30 Secs button.
गीले कपड़े से कंट्रोल पैनल को साफ करते समय या कंट्रोल ग्लास को साफ करने के लिए स्प्रे करते समय अपने ओवन को बिजली के सॉकेट से अलग करें। अगर आप ऐसा नहीं करते हैं तो START/Add 30 Secs बटन को छूने मात्र से यह स्टार्ट हो सकता है।
QUESTIONS & ANSWERS / प्रश्न और उत्तर
| FAQ | Answer |
| What's wrong when the oven light will not glow? | There may be several reasons why the oven light will not glow. Either the light bulb has blown or the electric circuit has failed. |
| Does microwave energy pass through the viewing screen in the door? | No. The holes, or ports, are made to allow light to pass; they do not let microwave energy through. |
| Why does the BEEP tone sound when a button on the control panel is touched? | The BEEP tone sounds to assure that the setting is being properly entered. |
| Will the microwave function be damaged if it operates empty? | Yes. Never run it empty. |
| Why do eggs sometimes pop? | When baking, frying, or poaching eggs, the yolk may pop due to steam build up inside the yolk membrane. To prevent this, simply pierce the yolk before cooking. Never microwave eggs in the shell. |
| Why is standing time recommended after microwave cooking is over? | After microwave cooking is finished, food keeps on cooking during standing time. This standing time finishes cooking evenly throughout the food. The amount of standing time depends on the density of the food. |
| Why doesn't my oven always cook as fast as the cooking guide says? | Check your cooking guide again to make sure you've followed directions correctly, and to see what might cause variations in cooking time. Cooking guide times and heat settings are suggestions, chosen to help prevent overcooking, the most common problem in getting used to this oven. Variations in the size, shape, weight and dimensions of the food require longer cooking time. Use your own judgment along with the cooking guide suggestions to test food conditions, just as you would do with a conventional cooker. |
| आमतौर पर पूछे जाने वाले सवाल जवाब | |
| तब क्या करें जब ओवन की बती न जले? आवे न | की बती के न जलने के कई कारण हो सकते हैं जसै' कि यातो बल्ब खराब हो गया है या कनवे शन में काई' गडब़ डी आ गई |
| क्या दरवाजे के पारदर्शी स्क्रीन से माइक्रोवेव ऊर्जा बाहर आ सकती है? | नहीं। उनसे प्रकाश तो बाहर आ सकता है माइक्रोवेव ऊर्जा नहीं। |
| जब भी कंट्रोल पैनल का कोई बटन छुआ जाता है तो बीप की ध्वनि क्यों आती है? | बीप की ध्वनि से आपको यह पता चलता है की सेंटिंग सही चल रही है। |
| अगर गलती से ओवन को खाली ही चला दिया जाए तो क्या इसमें गड्बड़ी आ सकती है? | हाँ, इसलिए इसे कभी भी खाली नहीं चलाइये। |
| कभी कभी अंडे क्यों तड़क कर फट जाते हैं? | जब भी अंडे को भूना, तला या पकाया (पोच) जाता है तब अन्दर भाप बनने से इसका यौक फट सकता है। इससे बचने के लिए इसको बनाने से पहले इसके योक में एक छेद कर देना चाहिए। माइक्रोवेव के भीतर कभी भी अंडों को शैल के साथ न रखें। |
| माइक्रोवेव कुकिंग हो जाने के बाद कुछ रुकने को क्यों कहा जाता है? | माइक्रोवेव कुकिंग के खत्म हो जाने के बाद भी खाना अन्दर ही अन्दर पकता रहता है तो थोड़ा रुक जाने पर वह पकने का कार्य तब तक समाप्त हो जाता है। इस समापन में लगने वाला समय अन्दर रखे खाने की गहनता पर निर्भर करता है। |
| कुकिंग गाइड में जैसा लिखा होता है उतनी तेजी सै ओवन में खाना क्यों नहीं पकता? | ध्यान से दुबारा अपनी कुकिंग गाइड को पढ़ें कि कहीं उसके कदम दर कदम निर्देशों के पालन में आपसे कोई भूल तो नहीं हुई? और इस तरह देखें कि और क्या कारण हो सकते हैं जिससे आपको अधिक समय लग गया। इसमें लिखे गए समय की सीमा का उद्देश्य आपके खाने को अधिक पक जाने से बचाना है। खाने के रूप रंग और आकार में विविधता से इसके निर्माण में भी उसी अनुसार समय कम या अधिक लगता है। आप अपनी समझ के मुताबिक पकने वाले समय का सही अनुमान करें जैसा कि आप अपने पारंपरिक प्रेशर कुकर के साथ करती हैं। |
Two recipes for starter / नवसिखुए के लिए दो व्यंजन
NOTE : The time variation during Cooking of recipe depends upon the ingredients, method adopted & type of food category. व्यंजन बनाने के दौरान, समय परिवर्तन खाने के तत्व या अंश, बनाने की विधि और खाने की श्रेणी पर निर्भर करता है।
1
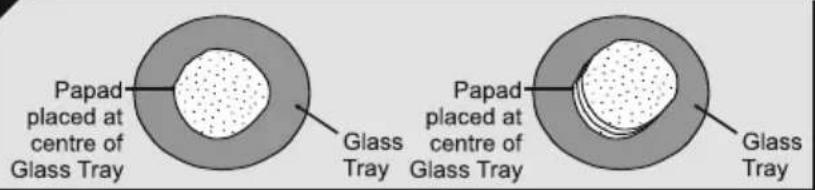
text_image
Papad placed at centre of Glass Tray Glass Tray Papad placed at centre of Glass Tray Glass Tray1. ROASTED PAPAD
Procedure :
Papad:
- Place the raw papad at the centre of Glass Tray, as shown in the picture above.
- Select Micro-100% Power Level and Cook time. Press START/Add 30 Secs
- After Papad cooking give standing time of 30-45 seconds.
To Cook Multiple Papads :
*Place Multiple papads over one another, as shown in the picture above.
Crispy Papad :
- Press START/Add 30 Secs once without papad.
- Sprinkle little water or oil over the papad.
- After beep, place the papad at the centre and press START/Add 30 Secs.
*Note : The cooking time may vary –
a. As per the composition of the papad material.
b. As per the Quantity of papad used.
1. भुने हुए पापड़ विधि
पापड :
- ग्लास ट्रे के बीच में कच्चा पापड़ रखें, जैसा कि उपरोक्त चित्र में दर्शाया गया है।
- माइक्रो-100% पावर स्तर और पकाने का समय निर्धारित करें | START/Add 30 Secs द्बाएं |
- पापड़ पक जाने के बाद 30-45 सैर्केड तक रखा रहने दें।
अधिक पापड़ पकाने के लिए :
*बहुत सारे पापड़ एक दूसरे के ऊपर रखें, जैसा कि उपरोक्त चित्र में दर्शाया गया है।
क्रिस्पी पापड :
- पापड़ रखने से पहले START/Add 30 Secs एक बार द्वाए।
- पापड़ के ऊपर थोड़ा पानी या तेल छिड़कें।
- बीप के बाद, ग्लास ट्रे के बीच में पापड़ रखें, जैसा कि उपरोक्ता वित्र में दर्शाया गया है, और START/Add 30 Secs द्वाएं।
*नोट : पकाने के समय में अन्तर हो सकता है -
a. पापड़ की सामग्री की बनावट के अनुसार।
b. इस्तेमाल किये गए पापड़ की मात्रा कै अनुसार।
2
- POP CORN : Place the pop corn bag to the glass tray properly as instructed on packing. Use START/Add 30 Secs to set 3\~4 minutes. Remove the bag after popping sound has stopped. Take care that bag corners do not touch sides while rotating.
Note : Attend popping process carefully. Do not overheat as cause flash fire.
- पाँप कॉर्न : पैकिंग पर दिये गए निर्देशानुसार पाँप कॉर्न का बैंग कॉँच की ट्रै पर ठीक से रखें। 3\~4 मिनट सैट करने के लिए START/Add 30 Secs का प्रयोग करें। भुनने की आवाज समाप्त होने के बाद बैंग को हटा लें। ध्यान रखें कि बैंग के कोने घुमाते समय साइड से न छुएं।
नोट : भुनने की प्रक्रिया को ध्यानपूर्वक देखें । आवश्यकता से अधिक गर्म न करें क्यांकि इससे आग लग सकती है ।

LG
Life's Good
MFL06477282 (00)
LG 24 x 7 CUSTOMER CARE

1800-315-9999
1800-180-9999
(Toll Free)

5757554
3757554
(Send SMS)

www.lg.com/in/support
m = 311


www.facebook.com/lghomeappliances
www.twitter.com/LGIndiaTweets
To know more about LG, visit www.lg.com/in
For Corporate/Institutional enquiries.
please write to corp.enquiries@lge.com