V63CL - Videokonferenzsystem Edis - Kostenlose Bedienungsanleitung
Finden Sie kostenlos die Bedienungsanleitung des Geräts V63CL Edis als PDF.


Benutzerfragen zu V63CL Edis
0 Frage zu diesem Gerät. Beantworten Sie die, die Sie kennen, oder stellen Sie Ihre eigene.
Eine neue Frage zu diesem Gerät stellen
Laden Sie die Anleitung für Ihr Videokonferenzsystem kostenlos im PDF-Format! Finden Sie Ihr Handbuch V63CL - Edis und nehmen Sie Ihr elektronisches Gerät wieder in die Hand. Auf dieser Seite sind alle Dokumente veröffentlicht, die für die Verwendung Ihres Geräts notwendig sind. V63CL von der Marke Edis.
BEDIENUNGSANLEITUNG V63CL Edis
Video Conference Camera Quick Start
1 Appearance and Interface
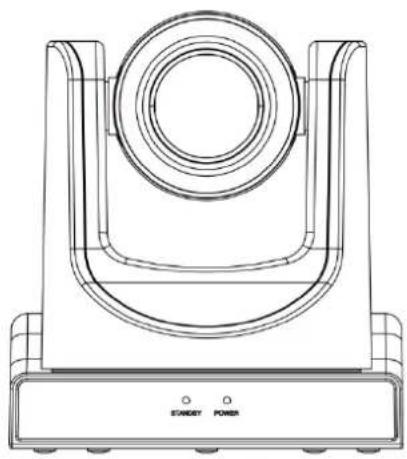
natural_image
Technical line drawing of a mechanical component with no visible text or symbols2 Packing List
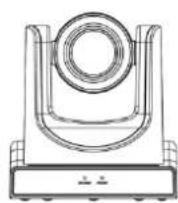
Camera x 1
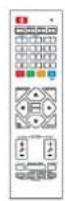
Remote Control x 1
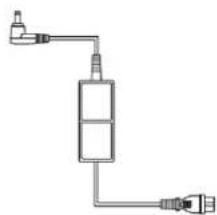
natural_image
Pure electrical circuit lines without any symbolsAC Power Adaptor x 1
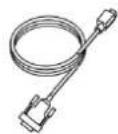
RS232 Cable x 1
Quick Start x 1
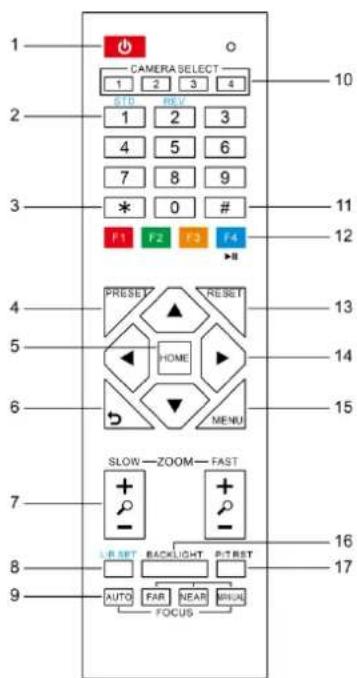
3 Remote Control
text_image
CAMERA SELECT 1 2 3 4 STD REV 1 2 3 4 5 6 7 8 9 * 0 # F1 F2 F3 F4 PRESET RESET HOME MENU SLOW—ZOOM—FAST RESET BACKLIGHT PTRST AUTO FAR NEAR RUN FOCUS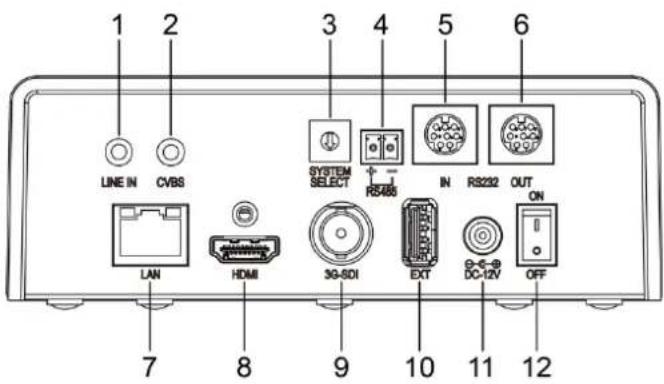
text_image
1 2 LINE IN CVBS 3 4 SYSTEM SELECT RS488 IN RS222 OUT LAN HDMI 3G-SDI EXT DC-12V OFF 7 8 9 10 11 12| No. | Name | No. | Name |
| 1 | LINE IN Interface | 7 | Network Interface |
| 2 | CVBS Interface | 8 | HDMI Interface |
| 3 | System Select Switch | 9 | 3G-SDI Interface |
| 4 | RS485 Interface | 10 | USB 2.0 Interface |
| 5 | RS232 IN Interface | 11 | DC 12V Interface |
| 6 | RS232 OUT Interface | 12 | Power Switch |
*Video Format
| 0 | 1080P/60 | 6 | 1080P/30 | C | -- |
| 1 | 1080P/50 | 7 | 1080P/25 | D | 576I |
| 2 | 1080I/60 | 8 | 720P/30 | E | 480I |
| 3 | 1080I/50 | 9 | 720P/25 | F | -- |
| 4 | 720P/60 | A | -- | ||
| 5 | 720P/50 | B | -- |

- After switching the video format, you need to restart the camera before taking effect!
- 720P/30 and 720P/25 only take effect when HDMI output.
| No. | Name | Function Description |
| 1 | Standby Key | Enter into standby mode by pressed it |
| 2 | Number Key | Preset setting or transfer preset |
| 3 | *Key | Equipped with other keys for using |
| 4 | Preset Key | Preset: Setting preset + Number key (0-9) |
| 5 | PTZ Control key | The PTZ will back to the middle position |
| 6 | Return Key | Return back the last level menu |
| 7 | Zoom Button | Making the lens wide angle/narrow angle slowly or quickly |
| 8 | Left/Right Setting Key | Standard: Simultaneously pressLeft/Right setting key + 1Reverse: Simultaneously pressLeft/Right setting key + 2 |
| 9 | Focus Key | auto/manual/far-end/near-end focus |
| 10 | Selection Key | Select the camera need to control |
| 11 | #Key | Need to equipped with other key |
| 12 | IR Remote Control Key | [*+ # +F1/F2/F3/F4]: NO.1/2/3/4 address |
| 13 | Reset Key | Delete preset |
| 14 | PTZ control key | PTZ moved according to the arrow indicates |
| 15 | Menu Key | Enter or exit OSD Menu after pressed it |
| 16 | Backlight Key | Turn on/off backlight consumption (loop) |
| 17 | PTZ reset key | PTZ starts to self-test after pressed it |
| No. | Name | Function Description |
| 1 | Standby Key | Enter into standby mode by pressed it |
| 2 | Number Key | Preset setting or transfer preset |
| 3 | *Key | Equipped with other keys for using |
| 4 | Preset Key | Preset: Setting preset + Number key (0-9) |
| 5 | PTZ Control key | The PTZ will back to the middle position |
| 6 | Return Key | Return back the last level menu |
| 7 | Zoom Button | Making the lens wide angle/narrow angle slowly or quickly |
| 8 | Left/Right Setting Key | Standard: Simultaneously pressLeft/Right setting key + 1Reverse: Simultaneously pressLeft/Right setting key + 2 |
| 9 | Focus Key | auto/manual/far-end/near-end focus |
| 10 | Selection Key | Select the camera need to control |
| 11 | #Key | Need to equipped with other key |
| 12 | IR Remote Control Key | [*+ # +F1/F2/F3/F4]: NO.1/2/3/4 address |
| 13 | Reset Key | Delete preset |
| 14 | PTZ control key | PTZ moved according to the arrow indicates |
| 15 | Menu Key | Enter or exit OSD Menu after pressed it |
| 16 | Backlight Key | Turn on/off backlight consumption (loop) |
| 17 | PTZ reset key | PTZ starts to self-test after pressed it |
4 RS232 Interface
| Interface diagram | No. | Function | No. | Function |
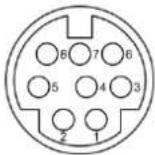 | 1 | DTR | 5 | RXD |
| 2 | DSR | 6 | GND | |
| 3 | TXD | 7 | IR OUT | |
| 4 | GND | 8 | NC |
5 Safety Precautions
Electrical safety
The installation and use of this product must strictly comply with local electrical safety standards.
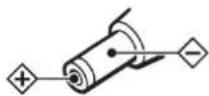
Power polarity
This product uses DC+12V power, please pay attention to the power polarity.
Careful installation
Do not grab the camera head to move the camera.
Do not rotate head of camera by hand, it may cause mechanical problems.
Do not unauthorized disassemble
This product has no parts which can be repaired by the user. The damage caused by the user's own disassembly is not covered by warranty.
Notice
- Electromagnetic fields at specific frequencies may affect the image of the machine.
- Do not hot-plug the power supply during the use of the IP Camera.
6 Troubleshooting
Image
• The monitor shows no image
1) Check that the camera power supply is connected, the voltage is normal, and the power indicator light is always on.
2) Turn off the power switch to check whether the camera is self-testing.
3) Check the cable of video platform and TV whether correct connection.
● Sometimes without the image
Check the cable of video platform and TV whether correct connection.
● Image have jitter when the camera lens at max multiple.
1) Check whether the camera installed position be stabled.
2) Check whether have vibrating machinery or object near the camera.
- There is no image in IE Browser
Please visit VLC website (http://www.videolan.org/vlc) download and install VLC media player, after it installed, visit IP Camera will have normal image display.
● Unable to access IP Camera through IE browser
1) Using PC to access the network to test whether the network access can work properly, first of all, the network fault caused by the PC virus can be eliminated, until the PC and IP Camera can communicate with each other Ping.
2) Disconnect the network, connect IP Camera and PC separately, and reset the IP address of PC.
3) Check IP address, subnet mask, and gateway settings for IP Camera.
4) Check whether the MAC address is conflicts.
5) Check whether the Web port is occupied by another device.
- Forget IP address or website login password. Please remember (The default IP address: 192.168.100.88; default user name: admin; Default password: admin).
Control
- Remote control can not control
1) Check and replace the new battery for the remote controller.
2) Check whether the camera working mode is correct. - Series port can not control
1) Check whether the camera protocol, address such is the same.
2) Check whether the control line is connected well.
7 Toxic and Harmful Substances
| Part Name | Toxic or harmful substances or elements | |||||
| (Pb) | (Hg) | (Cd) | (CrVI) | (PBB) | (PBDE) | |
| Metal | x | O | O | O | O | O |
| Plastic | O | O | O | O | O | O |
| Glass | x | O | O | O | O | O |
| Circuit board | x | O | O | O | O | O |
| Power | x | O | O | O | O | O |
| Attached | x | O | O | O | O | O |
This form is compiled in accordance with SJ/T 11364.
O: Indicates that the content of the hazardous substance in all homogenized materials of the component is subject to the limit specified in GB/T 26572.
x: Said the hazardous substance in at least one of the components homogenized material content in excess of the GB/T 26572 limit requirements, and there are no mature alternatives.
8 Warranty Card
If failure caused by non-human causes occurs within one year from the date of purchase of the machine, you may enjoy the warranty service of the product. Any of the following circumstances is not covered by the warranty:
● Without disassemble, modification such as fault causes.
- Use of an environment does not conform to requirements of the product.
- Irresistible factors, such as fire, earthquake, lightning strike, etc.
● Warranty card does not match the product number or it is altered.
| User Name | |
| User Address/Post Code | |
| Contact Number | |
| Product Model | |
| Product Series | |
| Purchasing Date | |
| Invoice No. | |
| Sales Department |