Titan - Smartphone ToughGear - Kostenlose Bedienungsanleitung
Finden Sie kostenlos die Bedienungsanleitung des Geräts Titan ToughGear als PDF.


Benutzerfragen zu Titan ToughGear
0 Frage zu diesem Gerät. Beantworten Sie die, die Sie kennen, oder stellen Sie Ihre eigene.
Eine neue Frage zu diesem Gerät stellen
Laden Sie die Anleitung für Ihr Smartphone kostenlos im PDF-Format! Finden Sie Ihr Handbuch Titan - ToughGear und nehmen Sie Ihr elektronisches Gerät wieder in die Hand. Auf dieser Seite sind alle Dokumente veröffentlicht, die für die Verwendung Ihres Geräts notwendig sind. Titan von der Marke ToughGear.
BEDIENUNGSANLEITUNG Titan ToughGear
TOUGHGEAR
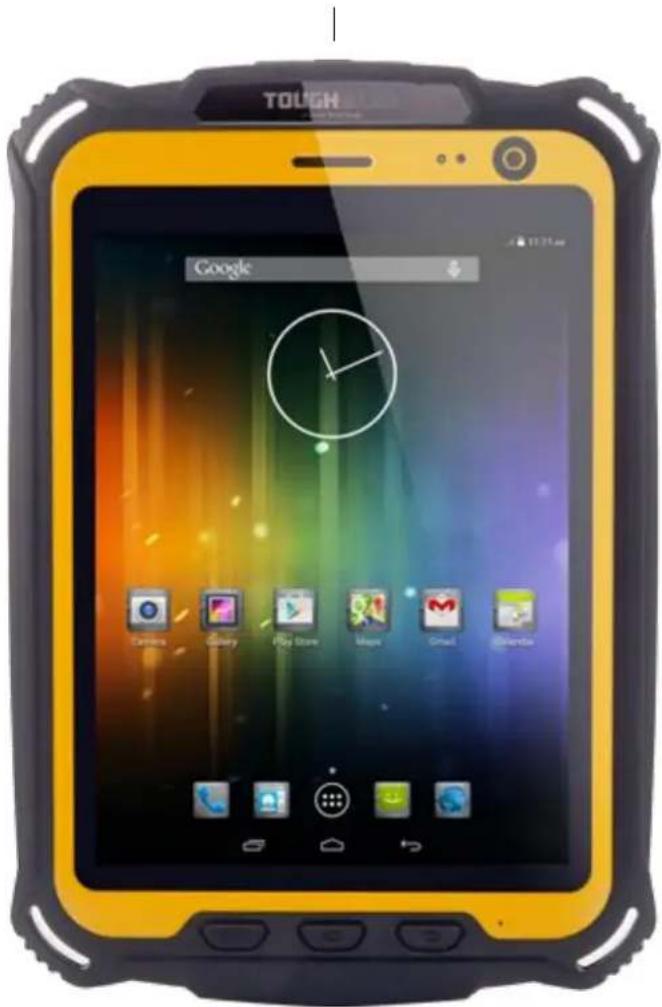
SMART TABLET TITAN
USER MANUAL
text_image
TOUGH Google Camilla Gistry Play Store Maps Gmail ShelterTable of Contents
SAFETY PRECAUTION 5
- Getting Started....6
1.1 Install/Remove the SIM Card 7
- Battery
2.1 Battery Charging 8
2.2 Battery Use 9
-
Power on/off the Tablet 9
-
Understand the Basics 10
4.1 Home screen 10
4.2 Gestures 10
4.3 Locking the screen 10
4.4 Unlocking the screen 11
4.5 Notification Panel 11
4.6 Shortcuts and widgets 11
4.7 Connecting your tablet with a computer....11
-
Phone, People and Messaging 12
-
Connectivity 13
6.1 Wi-Fi 13
6.2 GPRS/3G 13
- Applications....17
- Settings....18
- Other Information .... 19
12.1 Rugged Feature....19
12.2 SAR Information....19
Congratulations on being a ToughGear Club member!
This is user manual for ToughGear Smart Tablet Titan. For a detailed User Manual of another model or a different language, please visit www.tgear.net/manuals.
The manufacturer reserves the rights to change or modify any information or specifications contained in this manual without prior notice or obligation.
This section includes important notes for safety and effective operation. Please read the safety precautions carefully to ensure the correct use of your device.
- If conditions permit, please stop the car to make/answer calls while driving.
- Although the tablet is a rugged device, avoid dropping, crushing, bending or hitting your tablet.
- In some places with special requirements, such as hospitals or health care places, please note restrictions on the use of tablet, and turn off the device when required.
- Do not switch on your tablet when it is prohibited to use phones or when the device may cause interference or danger.
- Only qualified personnel are allowed to repair or disassemble the device.
- Do not carry your tablet in any area with risk of potential explosion, such as gas or fuel stations or any places storing or transferring chemicals.
- Some electronic equipment may produce electromagnetic interference or shields to the cell phone signal, such as an electronic vehicle system; if necessary, please consult the equipment's manufacturer before using them.
- Keep your device and its accessories away from young children. Do not allow children to use your tablet without guidance.
- Avoid battery short-circuit. Do not dismantle or modify the battery, or put the battery in any high-radiation or high temperature environment.
- The operating temperature of this tablet is between -20^ and 40^ .
The charging temperature is between 0^ C and 45^ C.
Before immersing the tablet in water, make sure all compartments, ports and screws are securely tightened.
1. Getting Started
text_image
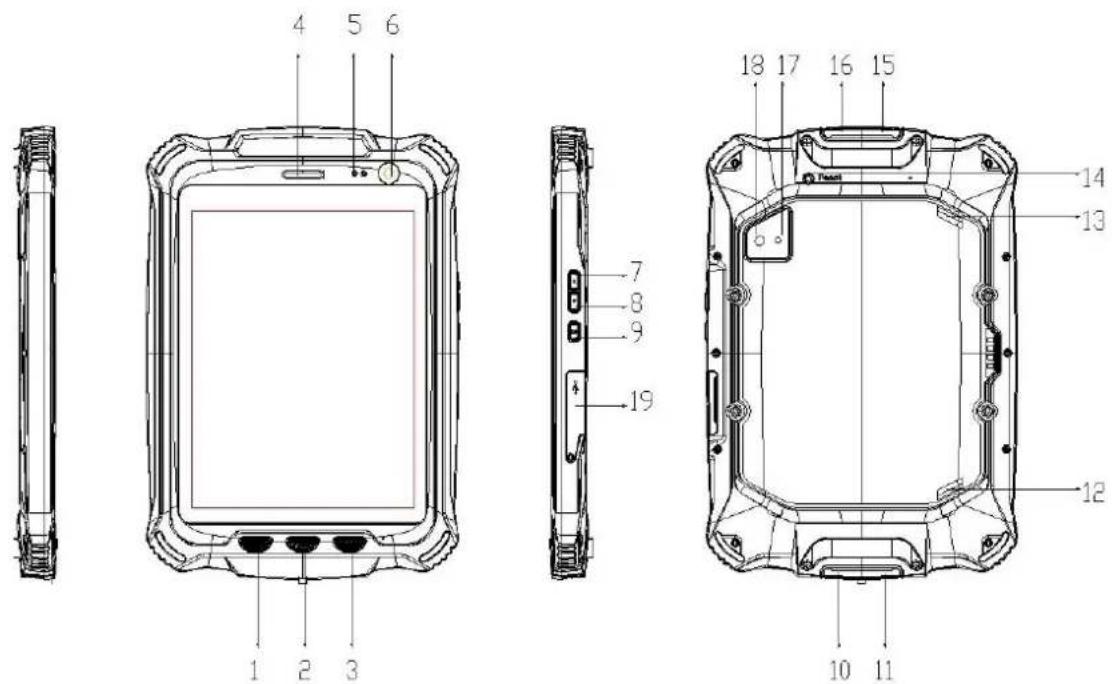
4 5 6 1 2 3 7 8 9 19 18 17 16 15 14 13 12 10 11- Menu key
- Home key
- Back key
- Earpiece
- Proximity sensor
- Front camera
- Volume up key
- Volume down key
- Power On/Off Button
- Earphone jack
- OUT port
- Speaker
- Speaker
- Reset key
- SIM card slot
- TF card slot
- Flashlight
- Rear camera
- Micro USB and HDMI port
Note:
Reset Key: Pressing reset key will immediately shut down the tablet.
Then, press power button to restart the tablet.
-
Open the SIM card and memory card port on top of the tablet. The left one is the SIM card slot, and the right one is the TF or Micro SD card slot.
-
Insert the cards: Insert the SIM card and memory card into the slots as shown on the image above.
- Remove the cards: Remove the SIM card and memory card with the tweezer that comes with the package.
2. Battery
The battery is integrated in the body of the tablet.
2.1 Battery Charging
- Connect the USB cable that came with your package to the charger.
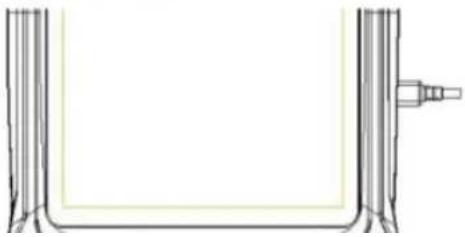
- Open the USB port cover. Connect the USB cable to the USB port of your tablet.
- Insert the other end of the cable into the wall charger and insert into an electrical socket.
- When charging is complete, remove the cable from the device and then remove the wall charger.
natural_image
Pure technical line drawing of a U-shaped component with a small protrusion (no text or symbols)2.2 Battery Use
Battery performance is influenced by many factors, including your carrier network configuration, signal strength, the temperature while using the device; the functions you choose and use, accessories and voice, data or other application mode.
If the battery has not been used for a long period of time or the power is very low, it may take some time to show it is charging.
Over time, the battery will not hold a charge for as long as it did when it was new. When the battery life becomes noticeably shorter than usual after being charged properly, replace the battery with a new one of the same type.
Warning: Any kind of battery short circuit may cause explosion, fire or personal injury and other serious consequence!
Tips: Remember to turn off your GPS, Wi-Fi and Bluetooth when you do not need them. This can help you extend the life of your battery.
3. Power on/off the Tablet
4. Understand the Basics
4.1 Home screen
When you power on the tablet, the Home screen appears.
The Home screen is your starting point to access all the features on your tablet. It displays application icons, widgets, shortcuts, and other functions. You can customize the Home screen with different wallpaper and organize applications in a way you want.
4.2 Gestures
Tap: Touch using your fingertip to select an item, confirm a selection, or open an application.
Double Tap: To zoom-in or zoom-out. For example, to zoom-in or out of a photo, tap twice when viewing a photo or browsing on the internet.
Tap and hold: Tap and hold the screen, icon or input box to get more operation options available.
4.4 Unlocking the screen
Press the Power button to wake up the screen. Then follow the instruction on the screen and swipe to unlock the screen.
4.5 Notification Panel
On the home screen, swipe down from top of the screen to show the notification panel.
Your tablet will notify you when there is a new event (call, message, application update, application notification, etc.) Touch related bar of notification will direct you to the related application.
You can also access Settings (including Airplane mode, Wi-Fi, Bluetooth, GPS, Data Connection, Brightness, etc.) from notification panel.
4.6 Shortcuts and widgets
Create shortcuts and widgets: Press and hold the APPS, and drag on the desk to create shortcuts or widgets.
Delete the shortcuts and widgets: To delete an object, tap and hold the object, then drag it towards the trash bin or "Remove" section on the screen. When the object turns red let go of it and the selected object will be deleted.
4.7 Connecting your tablet with a computer
When your tablet is connected with the computer via the USB cable, it can be used as a Media Device (MTP). When connecting your device to your computer, please enable the tablet to be used as an USB storage. Then you can easily transfer music and pictures between your tablet and PC in Media Device MTP mode.
Note: If using a MAC you will need to download drivers from the following link: http://www.android.com/filetransfer/
5. Phone, People and Messaging
From Home screen or the Application list, tap Phone, People, and Messaging to make a call, manage contacts and manage messages.
Dial pad: Tap the number on the dial pad to make a call.
Call history: It stores your call history. You can view calls by 'All', 'Incoming', 'Outgoing' and 'Unanswered'.
Frequently called contacts: Tap the specific contact/number from the frequently called numbers list to make a call.
Answering a call: When you receive a call, the incoming call screen will show the phone number and information about the caller that you have entered in People. Touch and drag the phone icon to the green spot to answer the call.
Reject a call: Touch and drag the phone icon to the red spot to reject a call.
End a call: During a call, touch the red button on the screen to end a call. People: You can add, search, delete, call or send message to a contact stored in the People application.
Messaging: SMS and MMS contents are stored in Messaging. You can
6. Connectivity
6.1 Wi-Fi
- Connect to Wi-Fi through Settings → Wi-Fi. Turn Wi-Fi on to see available networks.
- Touch a Wi-Fi network to connect. If the network is secured, enter the password and then connect.
- If you have connected to a network before, the device will be automatically connected to the network when you enter the zone of that network again.
6.2 GPRS/3G
- In Settings → WIRELESS & NETWORKS, touch 'More' → Mobile networks and touch 3G service to check the network connection.
-
In Mobile networks → Data connection, touch the desired network operator to enable data connection.
-
Open the content to be shared. It can be website content, contacts, photos, videos, etc.
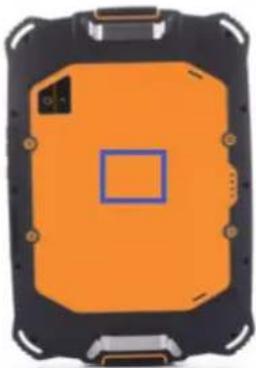
- Place both NFC enabled devices back to back, and then touch to beam the content. The application determines what gets beamed. Extended use of NFC functions requires support of Apps or other hardware (e.g. NFC tags).
- The NFC area of ToughGear Titan is marked on the photo below.
natural_image
Orange and black electronic device casing with a blue square logo on the front panel (no text or symbols visible)6.5 On-The-Go
8. Entertainment
8.1 Camera
Touch " 🔍 " to take a photo, or " 🔍 " to take a video. To switch
between front and rear cameras, touch "☐". Touch anywhere on the screen to set the focus. For advanced camera features, please visit the Android manual on the Google website.
8.2 Gallery
View your pictures and videos in the Gallery. In the view of a picture, you can edit or share the picture via Messaging, Email, Bluetooth, etc.
8.3 Music
Add music: Connect the tablet to your computer with a USB cable (with the memory card inserted). → Open the tablet USB storage on your computer. → Copy the music from your computer to a folder you have created under the root directory of the memory card. → Safely eject the tablet storage and remove the tablet from the computer.
-
Gmail: You can manage your Emails in the Gmail application.
-
Synchronizing information: You can synchronize contacts, email, tasks, and other information on your tablet with Google accounts.
9.2 Maps
- Google Maps help you find your location or search for other locations. Location service has to be enabled in Settings before you can use Maps.
- Touch Settings→ Location, and turn on the location services.
- To use the navigation feature, the Mode function will have to be set to High Accuracy or Device only.
9.3 Play Store
- Play Store is the place which you can download and install applications on your tablet.
- When you open Play Store for the first time, the Terms of Service window will appear. You have to accept it in order to continue.
- Search application: You can browse application by category, or type
10. Applications
Here is a brief introduction of some pre-installed applications.
Browser: Access Internet web pages and surf Internet.
Calculator: Solve arithmetic problems.
Calendar: View month and date. You can add and edit you event here.
Clock: Set Alarm, and stopwatch.
Flashlight: It can be used as torch light.
FM Radio: FM Radio receiver.
Sound Recorder: Record and play the sound.
11. Settings
This is a brief introduction of some other Settings.
SIM management: The tablet supports a standard SIM card. You can manage the SIM card here.
Audio profiles: Set the preferred profiles from General, Silent, Meeting, Outdoor, or customize it.
Display: Manage Wallpaper, Brightness of the screen, Font size, Sleep time of the screen.
Storage: Keep track of the storage of the tablet and memory card.
Apps: Manage installed apps. Tap the app to Uninstall, Clear data, Move to Tablet storage, Move to Internal storage, or Clear cache. Appropriate management can help you free up your tablet memory.
Language & input: Select preferred language and input method.
Backup & reset: Back up data, or put the tablet to Factory data reset. Factory data reset will erase all data on your tablet.
Date & time: adjust date and time on the tablet.
12. Other Information
12.1 Rugged Feature
ToughGear Titan is IP67 certified. This device is designed to be shockproof (the device can stand the shock of a free fall from 0.5 meters in height), waterproof and dustproof under normal use. However, please don't hit, drop the device or immerse the device in water intentionally. Brutal manipulation may bring damages to the performance of your device, and it will be no longer under warranty if the device is not properly used.
Make sure all covers and screws are fitted. The USB/Headphone port and SIM/Memory card or Battery compartment must be securely locked in order to meet the certified level of protection. Your careful usage can extend the life of the device.
12.2 SAR Information
This device meets international guidelines for exposure to radio waves. Please contact your vendor or ToughGear for details.