Cube 725 - Hi-Fi-System Teradek - Kostenlose Bedienungsanleitung
Finden Sie kostenlos die Bedienungsanleitung des Geräts Cube 725 Teradek als PDF.


Benutzerfragen zu Cube 725 Teradek
0 Frage zu diesem Gerät. Beantworten Sie die, die Sie kennen, oder stellen Sie Ihre eigene.
Eine neue Frage zu diesem Gerät stellen
Laden Sie die Anleitung für Ihr Hi-Fi-System kostenlos im PDF-Format! Finden Sie Ihr Handbuch Cube 725 - Teradek und nehmen Sie Ihr elektronisches Gerät wieder in die Hand. Auf dieser Seite sind alle Dokumente veröffentlicht, die für die Verwendung Ihres Geräts notwendig sind. Cube 725 von der Marke Teradek.
BEDIENUNGSANLEITUNG Cube 725 Teradek


text_image
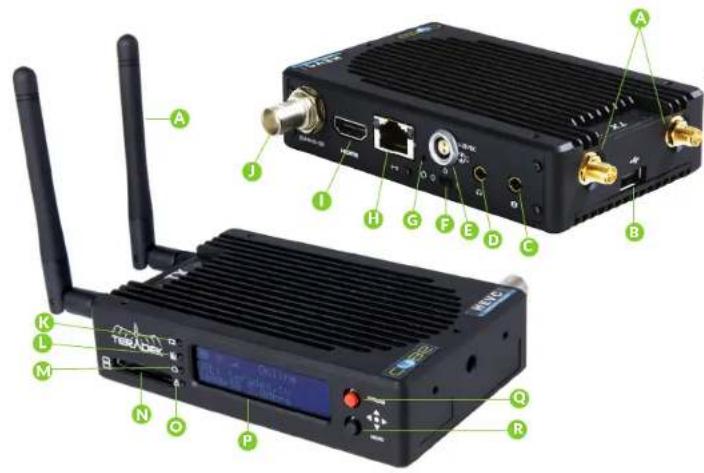
A B C D E F G H I J K L M N O P Q R TeradataA: Wi-Fi antennas
B:USB port
C: Mic/Line stereo input/output
D. Headphone/IFB input/output
E: Power input
FPower switch
G:Reset button
H:10/100/1000 Ethernet
1: HDMI input/output
J: SD/HD/3G-SDI input/output
K: Video input status
L:Codec status
M: Broadcast status
N: SD/MMC card slot
0: Fault/Error
P: OLED display
Q: Stream joystick
R: Menu joystick
Stream Joystick:
(button press): Access quick menu actions, exit menu screens
Menu Joystick:
▲,▼,◀,▶: Select menu items, change status screen on main display, select characters
- (button press): Confirm selection, open selected menu
Reset Button:
Hold for 3-6 seconds: Reset all network settings
Hold for 10+ seconds: Perform complete factory reset
Teradek regularly releases new firmware versions to improve performance, add new features, or to fix vulnerabilities. Visit https://www.teradek.com to update your device with the latest firmware.
PHYSICAL CONNECTIONS
1 Connect power to Cube using the included A/C adapter or one of the available accessory power cables (see Teradek.com).
2 Connect the SDI or HDMI output from your video source to one of Cube's video input connectors (I or J).

CONNECT TO CUBE
Cube has a built-in web interface for configuring stream destinations, encoder parameters, and other settings. The interface can be accessed by connecting via Wi-Fi or wired Ethernet.

CONNECT VIA WIFI
1 Connect to Cube's Wi-Fi network: Teranet-XXXXX (serial number of the device).
2 Open a web browser and navigate to http://172.16.11.
3 Cube's Wi-Fi can be configured to join your network via the web UI or front panel.
CONNECT VIA ETHERNET
1 Plug an Ethernet cable into Cube's 10/100/1000 Ethernet port and connect it to an Ethernet switch or router.
2 Connect your computer to the same network. Cube's IP address is displayed on the front panel's Ethernet Status menu. Access it by pressing down on the Menu joystick to cycle through status screens.
3 Open a web browser and navigate to Cube's IP address.
STREAM TO THE INTERNET
1 Open Cube's web UI, then select the Video Stream Output menu if it is not already displayed.
2 Select Internet Streaming as the Stream Mode and choose a platform - Facebook, Ustream, Livestream, YouTube, Twitch - or select manual RTMP.
3 Enter your credentials and choose a channel/event, or enter the RTMP destination info and press apply.
4 Select your desired Audio/Video bitrate and resolution under the Encoder menu.
5 Go Live by clicking the Broadcast button 📋 or use the front panel Stream Joystick

HEVC AND H.264
Cube 700 series devices support 1080p, 60fps encoding using both HEVC and H.264 codecs. HEVC provides the most efficient encoding for both low bitrate and high quality applications, while H.264 supports a wider variety of streaming platforms and is one of the most common video codecs worldwide.
On the encoder, the codec can be switched between HEVC and H.264 from the Encoder Settings and Video Stream Output settings pages on the web UI, or from the Video Setup menu on the front panel.

NEED MORE HELP?
1 Support: http://support.teradek.com → Contains tips, information and all the latest firmware & software updates. TERADEK SUPPORT STAFF: support@teradek.com or call 888 941-2111 ext2 (Mon Fri 9am to 6pm PST)

RECORDING
Cube encoders support broadcast recording to an SD Card or external USB drive. To enable recording:
1 Insert a compatible SD card into the SD card slot (E), or a USB drive into the USB port (Q).
2 When prompted, select Yes to enable recording.
3 Select the record trigger you would like to use. Recordings can be triggered by SDI/HDMI record flags from compatible cameras, broadcast start/stop, or manually. Once enabled, recordings are saved to the selected storage media when triggered. For best results, use Class 6 or higher SD cards.
You can also enable or disable recording from the web UI.
RECORDING CONSIDERATIONS
- Recordings can be manually triggered via the front panel, or by the broadcast state in Internet Streaming mode. Each time a broadcast starts, a new recording is created.
- If a broadcast is interrupted for connectivity reasons, recording continues.
- If a recorded file exceeds your storage media's file size limits, a new file will be created and recording continues.
- Recording resolution and quality matches your configured Broadcast settings.

DECODER SETUP
Ensure that the Cube encoder and decoder are on the same network. To configure:
1 Connect to the Cube encoder (see previous sections) and open the web UI.
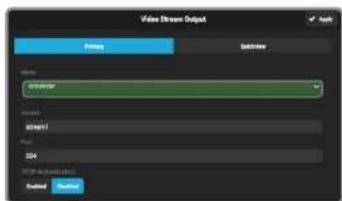
2 Open the Video Stream Output menu, then select RTP/RTSP as the streaming mode.
Click Apply.
4 Connect to the Cube decoder (see previous sections) and open the web UI.
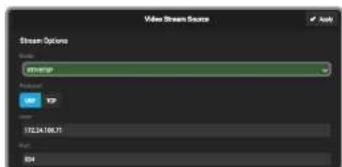
5 Open the Video Stream Source menu, then select RTP/RTSP as the streaming mode.
6 Enter the host (Encoder) IP address, port and stream name (stream 1), then select Apply.
text_image
Video Stream Output Preview Refresh View: Universal Stream1 Stream2 324 FTP-Information Finish HelpEncoder web UI
text_image
Video Stream Source Stream Options Stream: stream# File Path 102.24.166.71 Page: 834Decoder web UI
BONDING

Cube can increase your broadcast's bandwidth and reliability by bonding multiple Internet connections. An active Core subscription is required to take advantage of this feature. Visit http://core.teradek.com to learn more and to create an account.
Ethernet, Wi-Fi, USB cellular modems, or cellular-capable IOS devices running the TeraLink app can be used simultaneously. Refer to Supported Connections for more details.
BONDING WITH TERALINK AND CORE

flowchart
graph LR
    A["Wireless Device"] --> B["Mobile Phone"]
    B --> C["WiFi"]
    C --> D["Cloud"]
    D --> E["Shared Link"]
    E --> F["PC Monitor"]
    F --> G["CON"]
    G --> H["Laptop"]
1 Connect to Cube (see previous sections) and open the web UI.
2 Open the Cloud Services menu and select Core.
3 Install the TeraLink app on a cellular capable iOS device and connect to the Cube's Wi-Fi network, then open the TeraLink app and link your iOS device.
4 Other available network connections on the Cube (USB modem or Ethernet) do not require configuration through the TeraLink app, they are configured through the Cube's web UI.
SUPPORTED CONNECTIONS
- Ethernet
• 3G/4G USB modem - Wi-Fi (AP mode) - Up to 4 cellular-capable iOS devices using the TeraLink App
- Wi-Fi (Client mode) - Connect to an existing wireless network or mobile hotspot
BONDING WITH BOND MODULE
For increased broadcast reliability, Cube can be converted into a cellular bonding device with a Bond Module. Bond allows Cube to stream over up to four additional (five total) 3G/4G/LTE connections. For more information on Bond, visit teradek.com.
MONITOR WITH AN iOS DEVICE

Download VUER from the iTunes App Store.
2 Connect your iOS device to the same network as Cube, then launch VUER.
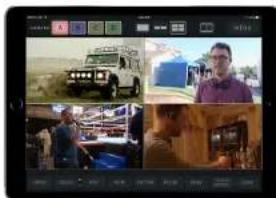
3 From the VUER app, tap CAMERA on the upper, left hand corner, choose your device(s), then tap Done. VUER can monitor up to four devices simultaneously (iPad Air and newer).
text_image
Screenshot of a video editing interface displaying four video thumbnails: a vintage off-road vehicle, a person in a blue shirt, a group photo with people, and a small house.Teradek regularly releases new firmware versions to improve performance, add new features, or to fix vulnerabilities. Visit https://www.teradek.com to update your device with the latest firmware.
NEED MORE HELP?
1 Support: http://support.teradek.com → Contains tips, information and all the latest firmware & software updates. TERADEK SUPPORT STAFF: support@teradek.com or call 888 941-2111 ext2 (Mon Fri 9am to 6pm PST)