Plus - 3D-Drucker Craftbot - Kostenlose Bedienungsanleitung
Finden Sie kostenlos die Bedienungsanleitung des Geräts Plus Craftbot als PDF.


| Produkttyp | 3D-Drucker |
| Marke | Craftbot |
| Modell | Plus |
| Bauvolumen | ca. 400 x 400 x 390 mm |
| Gewicht | 14 kg |
| Stromversorgung | AC 100-240 V, 50/60 Hz |
| Leistungsaufnahme | ca. 500 W |
| Materialunterstützung | PLA, ABS (Vorschlag) |
| Schichtauflösung | 0,05 - 0,4 mm |
| Düsendurchmesser | 0,4 mm (Standard) |
| Druckbetttemperatur | bis zu 120 °C |
| Software | CraftWare |
| Anschlüsse | USB, USB-Stick |
| Dateiformate | STL, OBJ, G-Code |
| Lieferumfang | 3D-Drucker, Filamentführungsrohr, Spulenhalter, Inbusschlüssel (5x), USB-Stick, Netzkabel, USB-Kabel |
| Sicherheitshinweise | Netzschalter ausschalten vor Wartung; Bedienungsanleitung lesen |
| Wartung | Regelmäßige Reinigung der Bauplatte und Extruderdüse |
| Garantie | Siehe Bedienungsanleitung |
Häufig gestellte Fragen - Plus Craftbot
Benutzerfragen zu Plus Craftbot
0 Frage zu diesem Gerät. Beantworten Sie die, die Sie kennen, oder stellen Sie Ihre eigene.
Eine neue Frage zu diesem Gerät stellen
Laden Sie die Anleitung für Ihr 3D-Drucker kostenlos im PDF-Format! Finden Sie Ihr Handbuch Plus - Craftbot und nehmen Sie Ihr elektronisches Gerät wieder in die Hand. Auf dieser Seite sind alle Dokumente veröffentlicht, die für die Verwendung Ihres Geräts notwendig sind. Plus von der Marke Craftbot.
BEDIENUNGSANLEITUNG Plus Craftbot
QUICK START GUIDE
Thank you for purchasing a CraftUnique product and welcome to the world of 3D crafting! You are just a few steps away from having your first 3D object printed by your brand new CraftBot.
1. UNPACKING
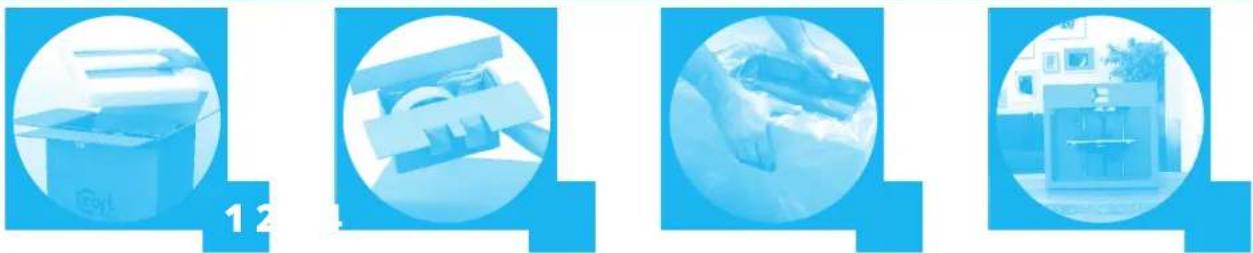
Step #1
You've already found the Quick Start Guide. Excellent! Now remove the large sheet resting under the foam. Under the sheet you will find your CraftBot attachable accessories in a cardboard cradle resting in the cavity of the CraftBot 3D printer.
Step #2
Remove this cradle from the box with care and place it in a safe out-of-the-way place.
Step #3
The printer is wrapped in a tight fitting plastic protective cover. Open up the covering. Firmly grasp the frame of the CraftBot and lift it out of the box without touching the fragile inner parts. CraftBot weights 14 kg (almost 31 lbs) – seek assistance if needed!
Step #4
Place the printer on a stable and level surface with sufficient space around.
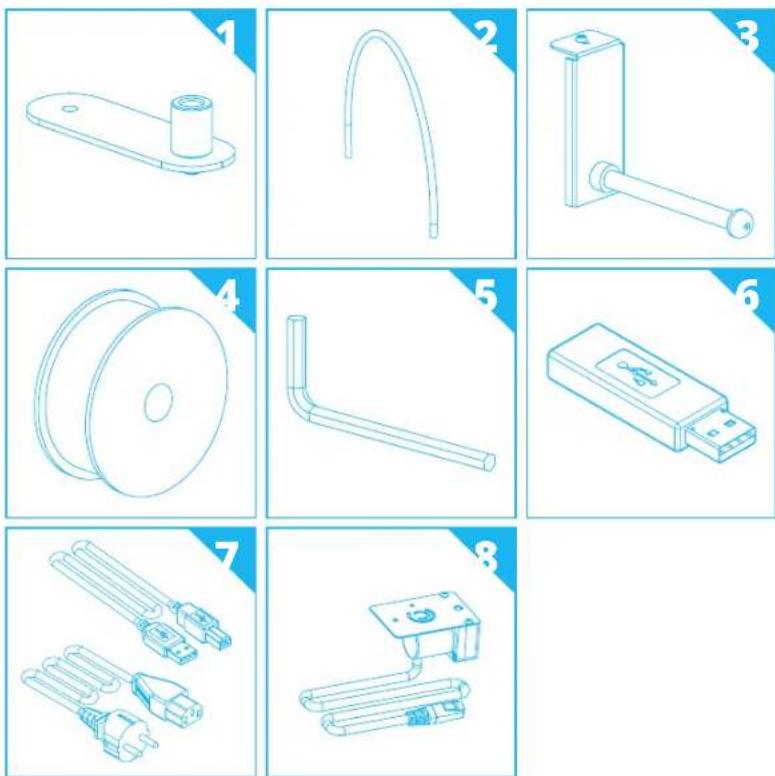
II. ACCESSORY CHECK
It's time to unpack additional parts. Below you can see the contents of the box. First of all, check the list to make sure nothing is missing!
- Filament guide tube holder
- Filament guide tube
- Filament spool holder
- Filament spool
- Hex wrenches (5x)
- USB Flash storage
- USB A-B cable and AC power cable
- Filament monitoring system (FMS)*
III. ASSEMBLING

natural_image
Technical line drawing of a mechanical enclosure with internal components and mounting holes (no text or symbols)Step #1
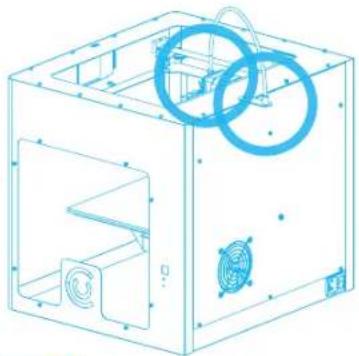
Install the filament guide tube holder/FMS *
Use a hex wrench to install the guide tube holder/FMS* onto the top of the CraftBot. Keep in mind that the spool holder must be installed directly next to It. (Connect the FMS to the machine*)
Step #2
Install the filament guide tube
One end goes into the guide tube holder/FMS. Push the other end into the hole on the top of the extruder.

natural_image
Isometric line drawing of a 3D printer or enclosure with two circular components and ventilation fans (no text or symbols)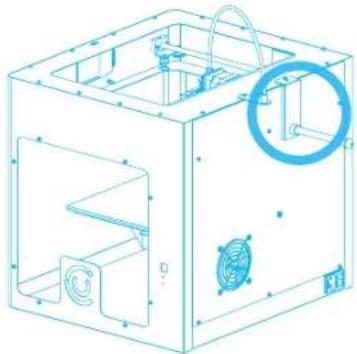
natural_image
Technical line drawing of a 3D printer or enclosure with internal components and mounting holes (no text or symbols)Step #3
Install the filament spool holder
Use a hex wrench to install it somewhere close to the filament guide tube holder. (Keep in mind leave some space for FMS* connector.)
Step #4
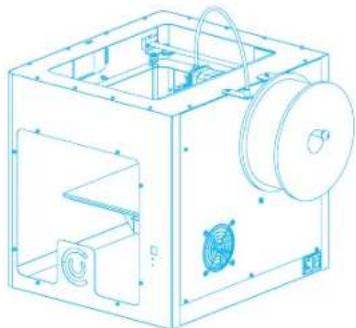
Mount the filament spool
Now get the spool from the box containing the PLA filament. Fit the spool onto its holder so that the lead end keeps its course when the filament is fed into the guide tube holder.
natural_image
Isometric line drawing of a mechanical device with internal components and mounting holes (no text or symbols)Step #5
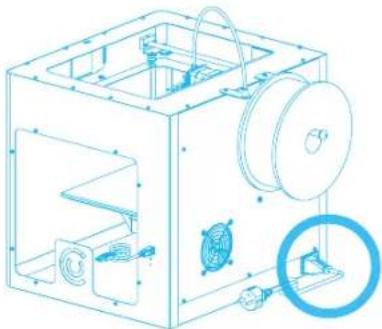
Attach the power cord
Ensure that the power switch on the back of the CraftBot is set to the OFF position. Insert the AC power cord into the power input (on the back) and switch ON your 3D printer!
natural_image
Technical line drawing of a 3D printer or enclosure with internal components and a magnified inset showing a mechanical part (no text or symbols present)WARNING!
For safety reasons please read the User Manual before using CraftBot for the first time. You can find it on the enclosed pendrive or you can download it from www.craftbot.com and www.craftbotusa.com.
*FMS - The Filament monitoring system is optional, not included in the basic set.
IV. CONVERTING 3D OBJECTS INTO A PRINTABLE FORMAT
Files created by 3D design programs contain all the information on what to print, but you need a slicer program to add information on how to do it (the sequence, inserting supports etc.)
Although your CraftBot 3D printer can handle the output of almost all slicer programs, we warmly recommend using our own software called CraftWare for several reasons.
- It is fast. Really fast.
- You can arrange multiple objects on the build platform.
• It has an advanced, user-friendly visualizer.
THIS IS HOW TO TURN YOUR 3D OBJECT FILE TYPES INTO A PRINTABLE FORMAT WITH CRAFTWARE:
- Download (www.craftunique.com/craftware), install and open the program.
- Import an object by clicking the "ADD" button on the top.
- Generate the gcode by clicking on the „SLICE" button.
- Save the gcode on a USB drive or directly to CraftBot if your laptop is connected via USB cable.
You can find a detailed guide to CraftWare at www.craftbot.com / www.craftbotusa.com.
Your CraftBot is ready and waiting.
Happy 3D printing!