
RZ-15LA31 - Fernseher LG - Kostenlose Bedienungsanleitung
Finden Sie kostenlos die Bedienungsanleitung des Geräts RZ-15LA31 LG als PDF.


| Produkttyp | LCD-Farbfernseher |
| Bildschirmdiagonale | 15 Zoll (ca. 38 cm) |
| Stromversorgung | DC 12 V über AC-DC-Adapter; AC 220-240 V, 50/60 Hz |
| Leistungsaufnahme | ca. 45 W (typisch) |
| Gewicht | ca. 3,5 kg |
| Abmessungen (mit Fuß) | ca. 380 x 320 x 180 mm (B x H x T) |
| Fernbedienung | IR-Fernbedienung mit Batterien (2x AAA) |
| Programmspeicher | 100 Programme (0-99) |
| Antennenanschluss | 75 Ω Koax |
| Videomodi | TV, AV1 (Scart), AV2 (Cinch), S-Video, PC (VGA) |
| Tuner | PAL/SECAM (B/G, D/K, I, L) |
| Tonausgabe | Stereo, NICAM (optional), Mono, Dual |
| Bildmodi | Dynamisch, Standard, Mild, Spiel, Benutzer |
| Tonmodi | Flach, Musik, Film, Sprache, Benutzer |
| Bild-in-Bild (PIP) | Ja (nur im PC-Modus) |
| Videotext | Ja (SIMPLE, TOP, FASTEXT) |
| Kindersicherung | Ja (Tastensperre) |
| Schlaf-Timer | Ja (10/20/30/60/90/120/180/240 Min.) |
| Kopfhöreranschluss | Ja (3,5 mm Klinke) |
| Reinigung | Bildschirm und Gehäuse mit weichem, trockenem Tuch reinigen; bei Bedarf leicht feuchtes Tuch; keine Flüssig- oder Aerosolreiniger |
| Sicherheitshinweise | Nie das Gehäuse öffnen; vor Reinigung Netzstecker ziehen; vor Feuchtigkeit und Regen schützen |
Häufig gestellte Fragen - RZ-15LA31 LG
Benutzerfragen zu RZ-15LA31 LG
0 Frage zu diesem Gerät. Beantworten Sie die, die Sie kennen, oder stellen Sie Ihre eigene.
Eine neue Frage zu diesem Gerät stellen
Laden Sie die Anleitung für Ihr Fernseher kostenlos im PDF-Format! Finden Sie Ihr Handbuch RZ-15LA31 - LG und nehmen Sie Ihr elektronisches Gerät wieder in die Hand. Auf dieser Seite sind alle Dokumente veröffentlicht, die für die Verwendung Ihres Geräts notwendig sind. RZ-15LA31 von der Marke LG.
BEDIENUNGSANLEITUNG RZ-15LA31 LG

text_image
LGLCD
Colour Television
OWNER'S MANUAL
Please read this manual carefully before operating your set.
Retain it for future reference.
Record model number and serial number of the set.
See the label attached on the back cover and quote this information to your dealer when you require service.
Model number :
Serial number :
FOR THE GUARANTEE TERMS & CONDITIONS,
PLEASE REFER TO BACK COVER OF THIS MANUAL
P/NO: 3828V (ML012A, 061U TX)
(37) 24A/B, 3840VA0016C, 373-026F)
Contents
Installation 3
Location and function of controls 4
Remote control handset
Battery installation
Side panel
Basic operation 7
On and off / Programme selection
Volume adjustment / Quick view
Mute function / Auto Demonstration
On screen language selection (option)
On screen menus 8
Menu selection
Setting up TV stations 9
Auto programme tuning
Manual programme tuning
Fine Tuning
Programme edit
Calling the programme table
Picture adjustment 14
PSM (Picture Status Memory)
DRP (Digital Reality Picture)
Picture adjustment
Sound adjustment 15
SSM (Sound Status Memory)
Sound adjustment / Stereo/Dual reception
NICAM reception (option) / Sound output selection
Other functions 17
TV, AV and PC modes
Auto AV switching / Child lock
Auto sleep / Sleep timer
Teletext (option) 19
Switch on/off
SIMPLE text / TOP text (option)
FASTEXT / Special teletext functions
Connection of external equipment 22
Aerial socket
Euro scarl socket
Audio/Video in sockets
S-Video/Audio in sockets (S-Video) (option)
Headphone socket
Connection of PC 24
PC in socket (D-Sub jack)
Menu selection
PC Setup
PIP operation 27
PIP operation / On and off
Input mode selection for sub picture
Programme selection for sub picture
Sub picture size
Sub picture position change
Troubleshooting check list 29
Installation
Power
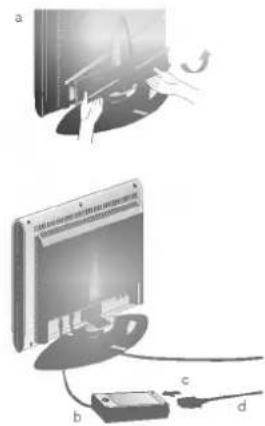
This set operates on a DC supply provided by the AC-DC adaptor, the voltage is as indicated on the label on the back cover. Use only the AC-DC adaptor supplied with the set and never apply an AC mains to the set directly. The AC-DC adaptor operates on an AC mains supply, the voltage is as indicated on the label of the AC-DC adaptor.
a. Open the back panel cover.
b. Connect the DC plug of the AC-DC adaptor to the 12V socket of the set.
c. Connect the AC-DC adaptor and it's power cord.
d. Connect the power cord to an AC mains.
e. Close the back panel cover
In the event of thunderstorms or powercuts, please pull out the mains plug of the AC-DC adaptor and the aerial plug. Do not allow anything to rest upon or roll over the power cord, and do not place the set where the power cord is subject to damage.
Warning
To prevent fire or shock hazard, do not expose the set to rain or moisture. Do not rub or strike the Active Matrix LCD with anything hard as this may scratch, mar, or damage the Active Matrix LCD permanently.
Wiring (in U.K. only)
This set is supplied with a BS 1363 approved 13 amp mains plug, fused at 10 amp. When replacing the fuse always use a 10 amp BS 1362, BSI or ASTA approved type. Never use this plug with the fuse cover omitted. To obtain a replacement fuse cover contact your dealer or "LG Electronics U.K. Ltd."
If the type of plug supplied is not suitable for the mains sockets in your home, then the plug should be removed and a suitable type fitted. Please refer to the wiring instructions below:
Warning (in U.K. only)
A mains plug removed from the mains lead of this set must be destroyed. A mains plug with bared wires is hazardous if inserted in a mains socket.
Do not connect either wire to the earth pin, marked with the letter E or with the earth symbol ± or coloured green or green and yellow. If any other plug is fitted, use a 5 amp fuse, either in the plug, or at the distribution board.
Important (in U.K. only)
The wires in this mains lead are coloured in accordance with the following codes:
BLUE: NEUTRAL BROWN: LIVE
As the colours of the wires in the mains lead of this set may not correspond with the coloured marking identifying the terminals in your plug, proceed as follows:
The wire which is coloured blue must be connected to the terminal which is marked with the letter N or coloured black. The wire which is coloured brown must be connected to the terminal which is marked with the letter L or coloured red.
Service
Never remove the back cover of the set as this can expose you to high voltage and other hazards. If the set does not operate properly, unplug it and call your dealer.
Aerial
Connect the aerial cable to the socket marked 175 Ω on the back. For the best reception an outdoor aerial should be used.
Location
Position your set so that no bright light or sunlight falls directly onto the screen. Care should be taken not to expose the set to any unnecessary vibration, moisture, dust or heat. Also ensure that the set is placed in a position to allow a free flow of air. Do not cover the ventilation openings on the back cover.
This standing angle can be adjusted as shown in pictures.
Cleaning
Unplug the set before cleaning the face of the LCD Screen. Dust the set by wiping the screen and the cabinet with a soft, clean cloth. If the screen requires additional cleaning, use a clean, damp cloth. Do not use liquid cleaners or aerosol cleaners.
natural_image
Illustration of a computer monitor with cable and connector, no text or symbols present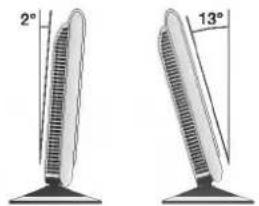
text_image
2° 13°Location and function of controls
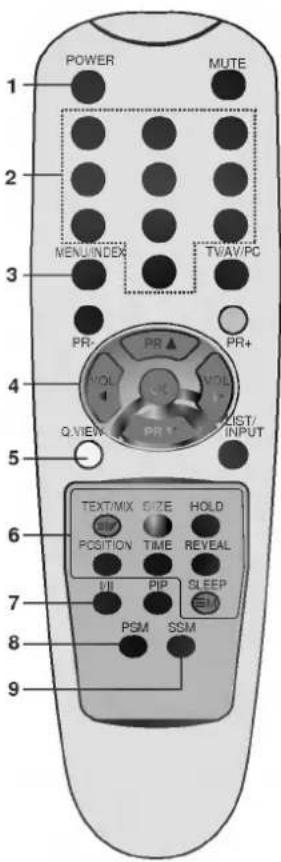
All the functions can be controlled with the remote control handset. Some functions can also be adjusted with the buttons on the side panel of the set.
text_image
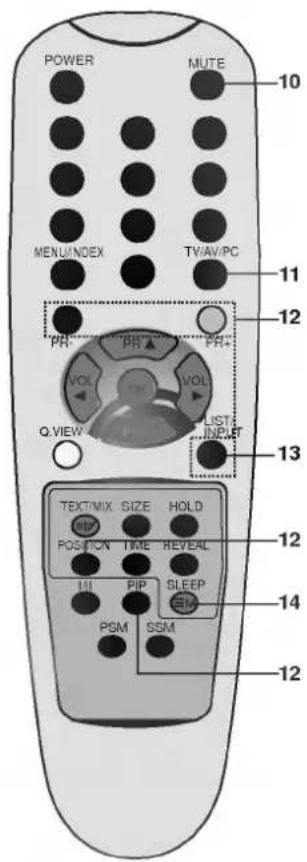
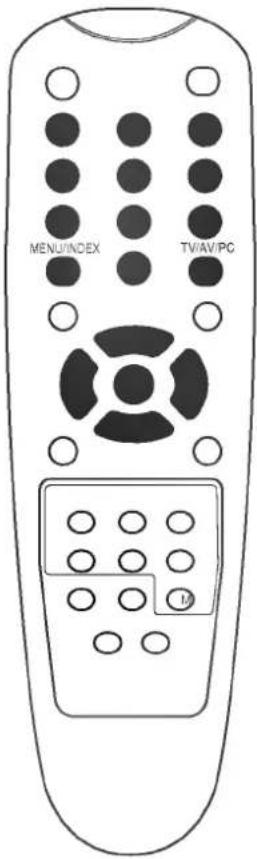
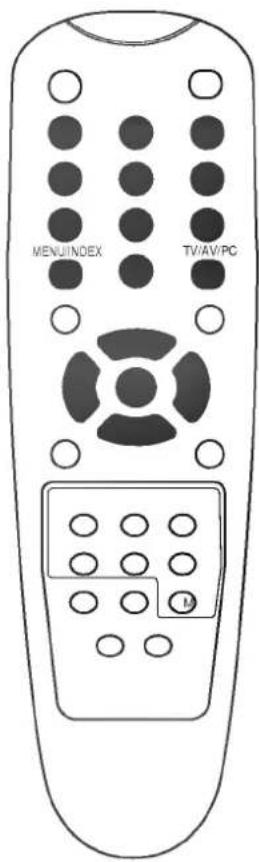
POWER MUTE MENU/INDE TVAV/PC PR- PR+ NOL NOL Q.VIEW PR RIST/ INPUT TEXT/MIX SIZE HOLD POSITION TIME REVEAL VII PIP SLEEP PGM SSMRemote control handset
Before you use the remote control handset, please install the batteries. See the next page.
- POWER switches the set on from standby or off to standby.
-
NUMBER BUTTONS switches the set on from standby and selects a programme.
-
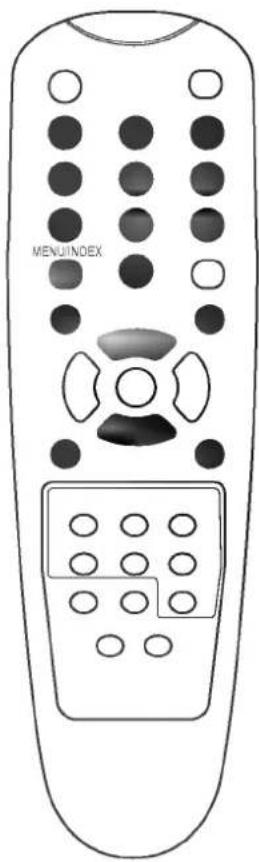
MENU (or INDEX) selects a menu. selects an index page in the teletext mode (only TELETEXT models).
-
▲ / ▼ (Programme Up/Down) selects a programme or a menu item. switches the set on from standby. ◀ / ▶ (Volume Up/Down) adjusts the volume. adjusts menu settings. OK accepts your selection or displays the current mode.
-
Q.VIEW returns to the previously viewed programme.
-
TELETEXT BUTTONS (option) These buttons are used for teletext. For further details, see the 'Teletext' section.
-
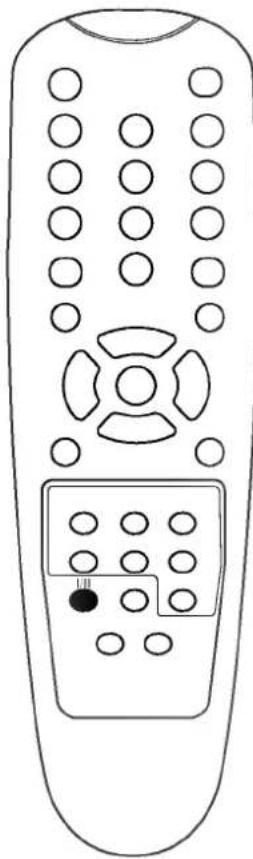
I/II selects the language during dual language broadcast. selects the sound output (option).
-
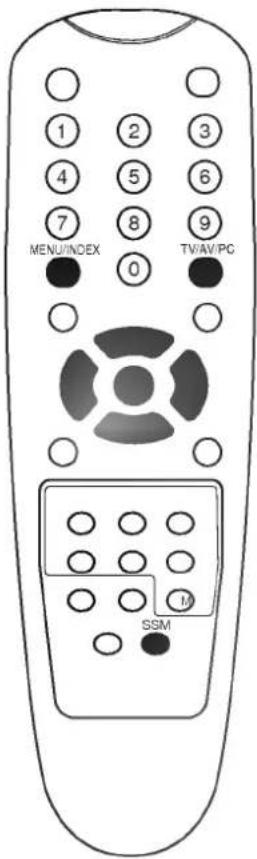
PSM (Picture Status Memory) recalls your preferred picture setting.
-
SSM (Sound Status Memory) recalls your preferred sound setting.
Location and function of controls
10. MUTE
switches the sound on or off.
11. TV/AV/PC
selects TV, AV or PC monitor mode. clears the menu from the screen. switches the set on from standby.
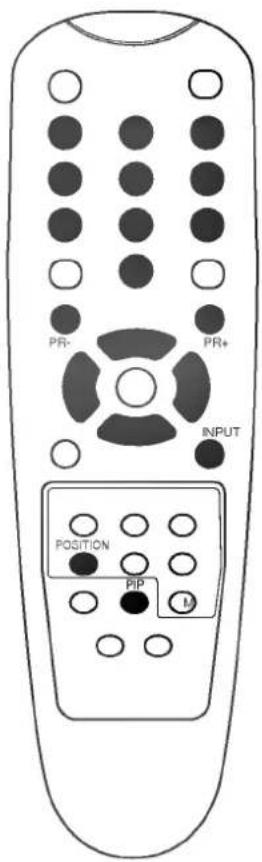
12. PIP BUTTONS (option) (PC mode only) PIP
switches the sub picture on or off.
PR +/-
selects a programme for the sub picture.
INPUT
selects the input mode for the sub picture.
POSITION
relocates the sub picture in up/down or left/right direction.
13. LIST
displays the programme table.
14. SLEEP
sets the sleep timer.
Note : In teletext mode, the PR+/-, Q.VIEW and LIST buttons are used for teletext functions.
Battery installation
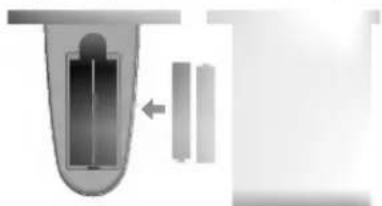
The remote control handset is powered by two AAA type batteries. To load the batteries, turn the remote control handset over and open the battery compartment. Install two batteries as indicated by the polarity symbols (⊕ and ⊖) marked inside the compartment.
natural_image
Diagram showing a mechanical component with internal channels and a directional arrow, no text or symbols presentNote : To avoid damage from possible battery leakage, remove the batteries if you do not plan to use the remote control handset for an extended period of time.
text_image
POWER MENU/INDEX MUTE TV/AV/PC 10 11 12 PR- VOL Q.VIEW PR- VOL UST. INPUT 13 TEXT/MIX SIZE HOLD POSITION TIME REVEAL PIP SLEEP EM PSM SSM 14 12Location and function of controls
Side panel
text_image
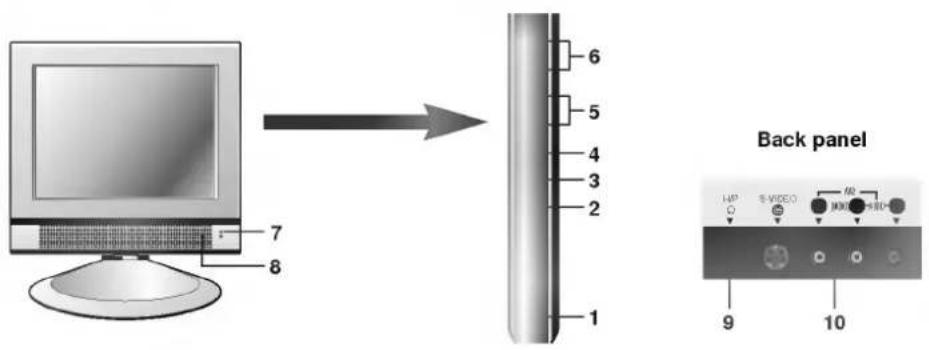
7 8 6 5 4 3 2 1 Back panel HP 3+VIDEO 60 1000+HSD 9 10- MAIN POWER (ON/OFF) switches the set on or off.
- TV/AV/PC selects TV, AV or PC monitor mode. clears the menu from the screen. switches the set on from standby.
- MENU selects a menu.
- OK accepts your selection or displays the current mode.
- ◀ / ▶ (Volume Up/Down) adjusts the volume. adjusts menu settings.
-
▲ / ▼ (Programme Up/Down) selects a programme or a menu item. switches the set on from standby.
-
POWER/STANDBY INDICATOR (Φ) illuminates brightly when the set is in standby mode. dims when the set is switched on.
- REMOTE CONTROL SENSOR
- HEADPHONE SOCKET Connect the headphone plug to this socket.
- AUDIO/VIDEO IN SOCKETS (AV2) Connect the audio/video out sockets of external equipment to these sockets.
S-VIDEO/AUDIO IN SOCKETS (S-Video)
Connect the video out socket of an S-VIDEO VCR to the S-VIDEO socket. Connects the audio out sockets of the S-VIDEO VCR to the audio sockets as in AV2.
Basic operation
On and off
- Press the main power button to switch the set on.
- If the set is in standby mode, press the POWER, ▲ / ▼, TV/AV/PC or NUMBER buttons on the remote control handset to switch it on fully.
- Press the POWER button on the remote control handset. The set reverts to standby mode.
- Press the main power button again to switch the set off.
Note : If, while the set is switched on, the mains plug is disconnected the set will switch to standby or power on when the mains plug is replaced in the mains power socket.
Programme selection
You can select a programme number with the ▲ / ▼ or NUMBER buttons.
Volume adjustment
Press the ◀ / ▶ button to adjust the volume.
Quick view
Press the Q.VIEW button to view the last programme you were watching.
Mute function
Press the MUTE button. The sound is switched off and the display appears.
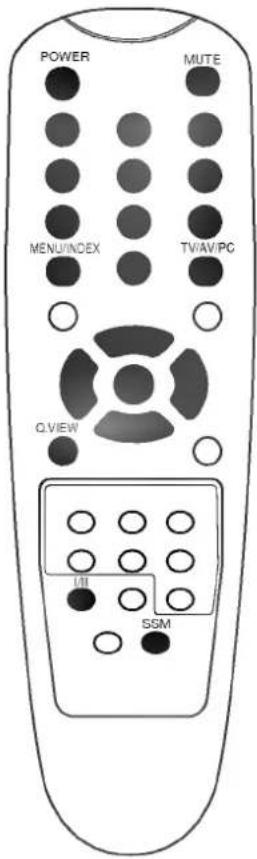
You can cancel it by pressing the MUTE, ◀ / ▶, SSM, I/II button.
Auto Demonstration
To review all the menus programmed in the set, press the OK button of the side panel control for about 10 seconds. To stop auto demonstration, press any button of the side panel control and POWER button of the remote control.
On screen language selection (option)
The menu can be displayed on the screen in desired language. First select your language.
- Press the MENU button to select the Station menu.
- Press the ▶ button and then ▲ / ▼ button to select Language.
- Press the ▶ button and then ▲ / ▼ button to select your desired language.
All the on screen displays will appear in the selected language. Press the OK or ◀ button to select the Station menu. - Press the TV/AV/PC button to return to normal TV viewing.
text_image
POWER MUTE MENU/INDEX TV/AV/PC Q.VIEW I/O SSMOn screen menus
Menu selection
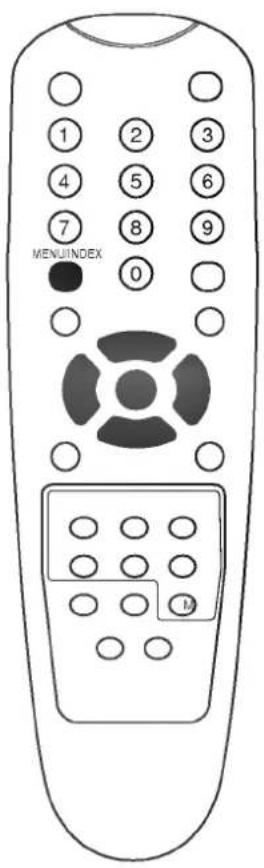
- Repeatedly press the MENU button to display each menu.
- Press the ▶ button and then ▲ / ▼ button to select a menu item.
- Press the ▶ button to display the sub menu or the pull-down menu.
- Change the setting of an item in the sub or pull-down menu with ▶ / ▶ or ▲ / ▼. You can move to the higher level menu by pressing the OK or ▶ button and to move to the lower level menu by pressing the ▶ button.
text_image
MENUINDEX 0Note :
a. In the AV/PC mode, the Station menu is not displayed.
b. In the teletext mode, menus are not displayed.
c. On some models, the Language will not display.
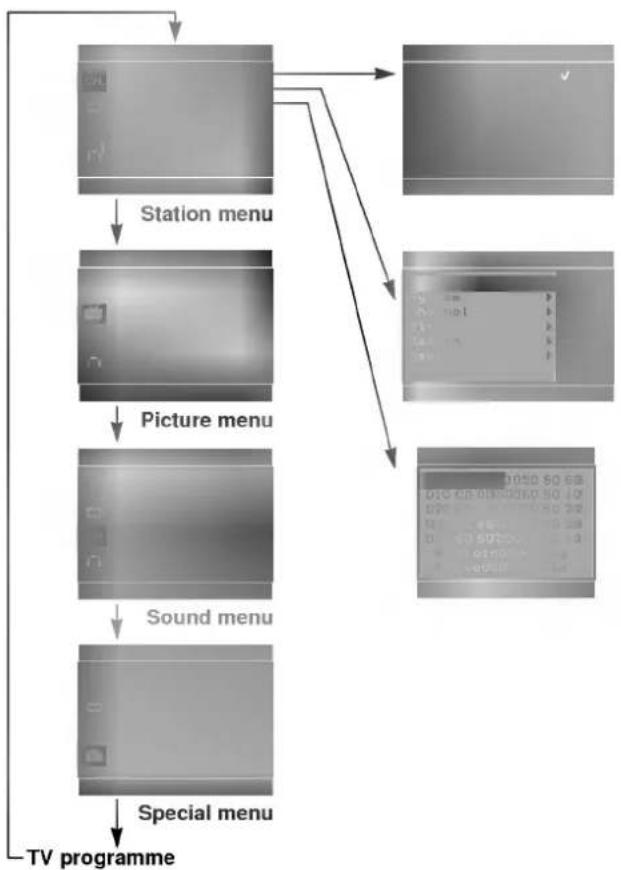
flowchart
graph TD
    A["Station menu"] --> B["Picture menu"]
    B --> C["Sound menu"]
    C --> D["Special menu"]
    D --> E["TV programme"]
Setting up TV stations
Up to 100 TV stations can be stored by programme numbers (0 to 99). Once you have preset the stations, you will be able to use the ▲ /▼ or NUMBER buttons to scan the stations you have programmed. Stations can be tuned using automatic or manual modes.
Auto programme tuning
All stations that can be received are stored by this method. It is recommended that you use auto programme during installation of this set.
- Repeatedly press the MENU button to select the Station menu.
- Press the ▶ button and then ▲ / ▼ button to select Auto programme.
- Press the ▶ button to display the Auto programme menu.

- Press the ▶ button. Select a TV system with the ▲ / ▼ button on the System pull-down menu;
L : SECAM L/L' (France) BG : PAL B/G, SECAM B/G (Europe/East Europe) I : PAL I/II (U.K./Ireland) DK : PAL D/K, SECAM D/K (East Europe)
- Press the OK or ◀ button.
- Press the ▲ / ▼ button to select Storage from.
- Press the ▶ button. Select the beginning programme number with the ◀ / ▶ button or NUMBER buttons on the Storage from pull-down menu. Any number under 10 is entered with a numeric '0' in front of it, i.e. '05' for 5.
- Press the OK button.
- Press the ▲ / ▼ button to select Start.
- Press the ▶ button to begin auto programming

natural_image
Plain gray gradient background with no text, symbols, or discernible objectsAll receivable stations are stored. The station name is stored for stations which broadcast VPS (Video Programme Service), PDC (Programme Delivery Control) or TELETEXT data. If no station name can be assigned to a station, the channel number is assigned and stored as C (V/UHF 01-69) or S (Cable 01-47), followed by a number.
To stop auto programming, press the MENU button. When auto programming is completed, the Programme edit menu appears on the screen. See the 'Programme edit' section to edit the stored programme.
- Press the TV/AV/PC button to return to normal TV viewing.

Station Menu
text_image
MENU/INDEX TV/AV/PC MSetting up TV stations
Station Menu

text_image
MENUINDEX TV/AV/PCManual programme tuning
Manual programme lets you manually tune and arrange the stations in whatever order you desire. Also you can assign a station name with five characters to each programme number.
- Repeatedly press the MENU button to select the Station menu.
- Press the ▶ button and then ▲ / ▼ button to select Manual programme.
- Press the ▶ button to display the Manual programme menu.
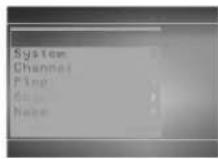
-
Press the ▲ / ▼ button to select Storage.
-
Press the ▶ button to select the programme number. Select the desired programme number (0 to 99) with the ◀ / ▶ button or NUMBER buttons on the Storage pull-down menu. Any number under 10 is entered with a numeric '0' in front of it, i.e. '05' for 5.
-
Press the OK button.
-
Press the ▲ / ▼ button to select System.
-
Press the ▶ button. Select a TV system with the ▲ / ▼ button on the System pull-down menu;
L : SECAM L/L' (France)
BG : PAL B/G, SECAM B/G (Europe/East Europe)
I : PAL I/II (U.K./Ireland)
DK : PAL D/K. SECAM D/K (East Europe)
-
Press the OK or ◀ button.
-
Press the ▲ / ▼ button to select Channel.
-
Press the ▶ button. Press the ▲ / ▼ button to select V/UHF or Cable on the Channel pull-down menu. If possible, select the channel number directly with the number buttons. Any number under 10 is entered with a numeric '0' in front of it, i.e. '05' for 5.
-
Press the OK or ◀ button.
-
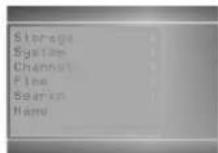
Press the ▲ / ▼ button to select Search.
-
Press the ▶ button. Press the ◀ / ▶ button to commence searching on the Search pull-down menu. If a station is found the search will stop.
-
Press the OK button to store it. The display Stored will appear.
-
To store another station, repeat steps 4 to 15.
-
Press the TV/AV/PC button to return to normal TV viewing.
Setting up TV stations
Assigning a station name
- Repeat the 'Manual programme tuning' steps 1 to 3.
- Press the ▲ / ▼ button to select Name.
- Press the ▶ button on the Name pull-down menu.
- Press the ▲ button. You can use a blank, +, -, the numeric 0 to 9 and the alphabet A to Z.
With the ▼ button you can select in the opposite direction. - Select the position by pressing the ◀ / ▶ button and then make your choice of the second character, and so on.
- Press the OK button.
- Press the TV/AV/PC button to return to normal TV viewing.

Station Menu
Fine tuning
Normally fine tuning is only necessary if reception is poor.
-
Repeat the 'Manual programme tuning' steps 1 to 3.
-
Press the ▲ / ▼ button to select Fine.
-
Press the ▶ button.
-
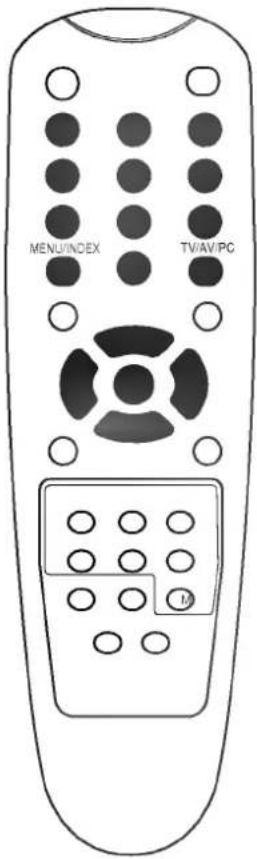
Press the ◀ / ▶ button to fine tune for the best picture and sound on the Fine pull-down menu.
-
Press the OK button.
-
Press the TV/AV/PC button to return to normal TV viewing. The finely tuned programme will be indicated by a yellow number during programme selection.
text_image
MENU/INDEX TV/AV/PC MSetting up TV stations
Station Menu

text_image
MENUINDEX TV/AV/PCProgramme edit
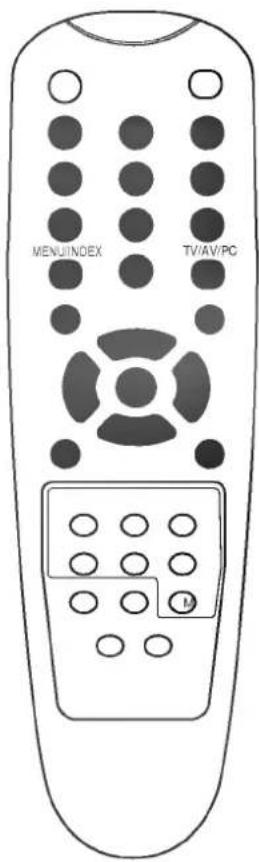
This function enables you to delete or skip the stored programmes. Also you can move some stations to other programme numbers or insert a blank station data into the selected programme number.
-
Repeatedly press the MENU button to select the Station menu.
-
Press the ▶ button and then ▲ / ▼ button to select Programme edit.
-
Press the ▶ button to display the Programme edit menu.
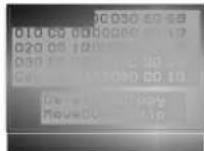
Deleting a programme
-
Select a programme to be deleted with the ▲ / ▼ or ◀ / ▶ button.
-
Press the RED button twice.
The selected programme is deleted, all the following programmes are shifted up one position.
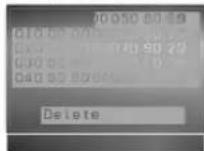
Copying a programme
-
Select a programme to be copied with the ▲ / ▼ or ◀ / ▶ button.
-
Press the GREEN button.
All the following programmes are shifted down one position.
Moving a programme
-
Select a programme to be moved with the ▲ / ▼ or ◀ / ▶ button.
-
Press the YELLOW button
-
Move the programme to the desired programme number with the ▲ / ▼ or ◀ / ▶ button.
-
Press the YELLOW button again to release this function.
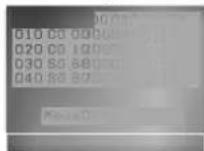
Skipping a programme number
-
Select a programme number to be skipped with the ▲ /▼ or ◀ /▶ button.
-
Press the BLUE button. The skipped programme turns to blue.
-
Press the BLUE button again to release the skipped programme. When a programme number is skipped it means that you will be unable to select it using the ▲ / ▼ button during normal TV viewing. If you want to select the skipped programme, directly enter the programme number with the NUMBER buttons or select it in the programme edit or table menu.
Press the TV/AV/PC button to return to normal TV viewing.
Setting up TV stations
Calling the programme table
You can check the programmes stored in the memory by displaying the programme table.
Displaying programme table
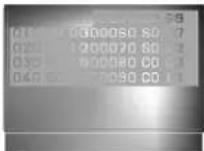
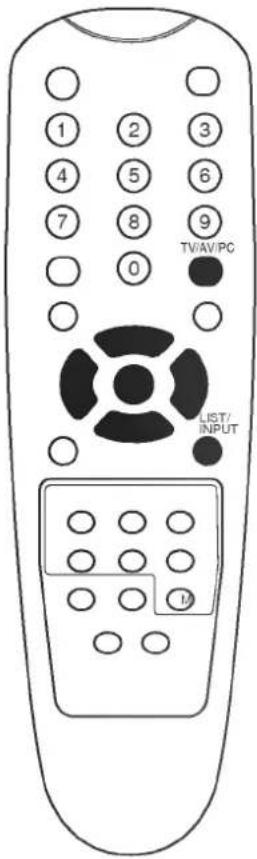
Press the LIST button to display the Programme table menu. The programme table appears on the screen. One programme table contains ten programmes as below.
Note :
a. You may find some blue programmes. They have been set up to be skipped by auto programming or in the programme edit mode.
b. Some programmes with the channel number shown in the programme table indicate there is no station name assigned.
Selecting a programme in the programme table
Select a programme with the ▲ / ▼ or ◀ / ▶ button.
Then press the OK button.
The set switches to the chosen programme number.
Paging through a programme table
There are 10 programme table pages in which contain 100 programmes.
Pressing the ▲ / ▼ or ◀ / ▶ button repeatedly turns the pages.
Press the TV/AV/PC button to return to normal TV viewing.
text_image
1 2 3 4 5 6 7 8 9 0 TV/AV/PC LIST/ INPUT MPicture adjustment
Picture Menu
text_image
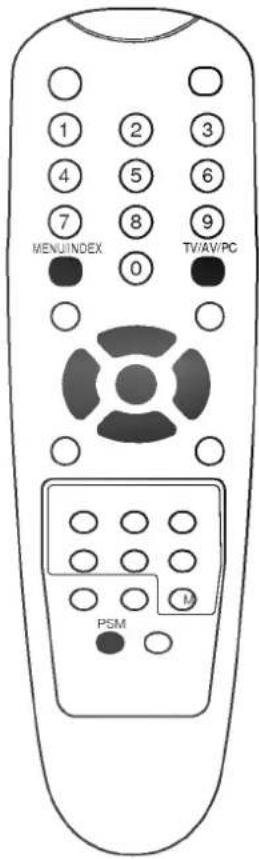
MENUINDEX 0 TV/AV/PC PSM M2PSM (Picture Status Memory)
- Repeatedly press the MENU button to select the Picture menu.
- Press the ▶ button and then ▲ / ▼ button to select PSM.
- Press the ▶ button and then ▲ / ▼ button to select a picture setting on the PSM pull-down menu.
natural_image
Plain gray surface with no visible text, symbols, or markings- Press the OK or ◀ button.
- Press the TV/AV/PC button to return to normal TV viewing.
You can also recall a desired picture (Dynamic, Standard, Mild,
You can also recall a desired picture (Dynamic, Standard, Mild,
Game or User) with PSM button on the remote control. The picture
Dynamic, Standard, Mild and Game are programmed for optimum picture reproduction at the factory and cannot be changed.
DRP (Digital Reality Picture)
DRP improves image outlines in dark screens.
- Repeatedly press the MENU button to select the Picture menu.
- Press the ▶ button and then ▲ / ▼ button to select DRP.
- Press the ▶ button and then ▲ / ▼ button to select Dynamic or Mild on the DRP pull-down menu.
- Press the OK or ◀ button.
- Press the TV/AV/PC button to return to normal TV viewing.
Picture adjustment
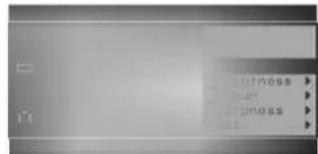
You can adjust picture contrast, brightness, colour intensity, sharpness and tint (NTSC AV only) to the levels you prefer.
- Repeatedly press the MENU button to select the Picture menu.
- Press the ▶ button and then ▲ / ▼ button to select User.
text_image
Blended Down Upress Exit- Press the ▶ button and then ▲ / ▼ button to select the desired picture item on the User pull-down menu.
- Press the ▶ button.

- Press the ◀/▶ button to make appropriate adjustments on the each sub menu.
You can also select other User items directly with ▲ /▼ button and adjust them with ◀ /▶ button.
- Press the OK button to store it for the picture User.
- Press the TV/AV/PC button to return to normal TV viewing.
Sound adjustment
SSM (Sound Status Memory)
You can select your preferred sound setting; Flat, Music, Movie or Speech and you can also adjust the sound frequency of the equalizer.
- Repeatedly press the MENU button to select the Sound menu.
- Press the ▶ button and then ▲ / ▼ button to select SSM.
- Press the ▶ button and then ▲ / ▼ button to select a sound setting on the SSM pull-down menu.
natural_image
Plain metallic surface with no visible text, symbols, or markingsSound Frequency Adjustment
a. Press the ▶ button in User to display the User sub menu.
b. Select a sound band by pressing the ◀ / ▶ button.
c. Make appropriate sound level with the ▲ / ▼ button.
d. Press the OK button to store it for the sound User.
The display Stored appears.
Press the TV/AV/PC button to return to normal TV viewing.
You can also recall a desired sound setting (Flat, Music, Movie, Speech or User) with SSM button on the remote control. The sound settings Flat, Music, Movie and Speech are programmed for optimum sound reproduction at the factory and cannot be changed.
Note : If you press the SSM button after making appropriate adjustment on the User sub menu, the display User automatically appears even though you have already set a factory preset setting; Flat, Music, Movie or Speech.
Sound adjustment
You can adjust balance, AVL (Auto Volume Leveler). AVL automatically keeps on an equal volume level even if you change programmes.
- Repeatedly press the MENU button to select the Sound menu.
- Press the ▶ button and then ▲ / ▼ button to select the desired sound item; Balance or AVL.
- Make desired adjustment with the ◀ / ▶, ▲ / ▼ or OK button on each pull-down menu.
natural_image
Blank grayscale image with no visible text, symbols, or discernible features- Press the TV/AV/PC button to return to normal TV viewing.
Sound Menu
text_image
MENU/INDEX 0 TV/AV/PG SSMSound adjustment
Stereo/Dual reception
When a programme is selected, the sound information for the station appears after the programme number and station name disappear.
Broadcast
On Screen Display
Mono
MONO
Stereo
STEREO
Dual
DUAL I
natural_image
Line drawing of a remote control with circular buttons and a black button (no text or symbols)Mono sound selection
In stereo reception if the stereo signal is weak, you can switch to mono by pressing the I/II button twice. In mono reception the depth of sound is improved. To switch back to stereo, press the I/II button twice again.
Language selection for dual language broadcast
If a programme is received in two languages (dual language), you can switch to DUAL I, DUAL II or DUAL I+II by pressing the I/II button repeatedly.
DUAL I sends the primary broadcast language to the loudspeakers.
DUAL II sends the secondary broadcast language to the loudspeakers.
DUAL I+II sends a separate language to each loudspeaker.
NICAM reception (option)
If your set is equipped with the receiver for NICAM reception, the high quality NICAM (Near Instantaneous Companding Audio Multiplex) digital sound can be received.
Sound output can be selected according to the type of received broadcast as follows by pressing the I/II button repeatedly.
- When NICAM mono is received, you can select NICAM MONO or FM MONO.
- When NICAM stereo is received, you can select NICAM STEREO or FM MONO. If the stereo signal is weak, switch to FM mono.
- When NICAM dual is received, you can select NICAM DUAL I, NICAM DUAL II or NICAM DUAL I+II or MONO. When FM mono is selected the display MONO appears on the screen.
Sound output selection
In AV mode, you can select output sound for the left and right loud-speakers.
Repeatedly press the I/II button to select the sound output.
L+R : Audio signal from audio L input is sent to left loud-speaker and audio signal from audio R input is sent to right loud-speaker.
L+L : Audio signal from audio L input is sent to left and right loud-speakers.
R+R : Audio signal from audio R input is sent to left and right loud-speakers.
Other functions
TV, AV and PC modes
Inputs can be set for TV, AV or PC mode. AV mode is used when a video cassette recorder (VCR), or other equipment is connected to the set.
Note : When a VCR is connected via the aerial socket the set is used in TV mode. See the 'Connection of external equipment' section.
- Repeatedly press the MENU button to select the Special menu.
- Press the ▶ button and then ▲ / ▼ button to select Input.
- Press the ▶ button and then ▲ / ▼ button to select TV, AV 1, AV 2, S-Video or PC.
natural_image
Blank grayscale image with no visible text, symbols, or discernible featuresThe three AV and PC modes are :
AV 1 : VCR connected to the Euro scart socket of the set
AV 2 : VCR connected to the AV 2 of the set
S-Video : S-VIDEO VCR connected to the S-VIDEO socket of the set
PC : PERSONAL COMPUTER connected to the PC socket of the set
- Press the TV/AV/PC button to return to normal TV viewing.
Alternatively you can select the TV or AV mode by pressing the TV/AV/PC button.
In AV mode, to return to TV mode, press the ▲ / ▼ or NUMBER buttons.
Auto AV switching
If your VCR outputs an AV switching signal via the Scart lead the set will auto switch to AV 1 mode on start of playback, but if you want to keep on watching in TV mode, press the ▲ / ▼ or NUMBER buttons. Press the TV/AV/PC button to return to AV modes.
Child lock
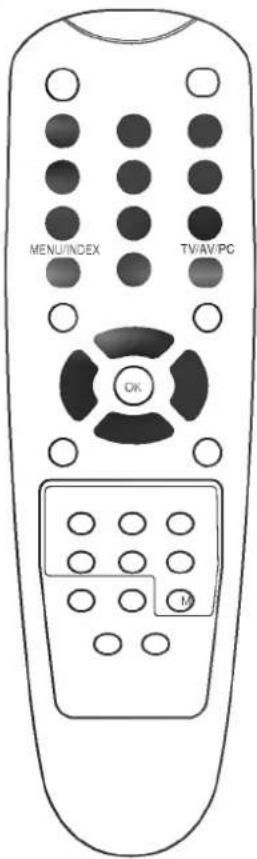
The TV can be set so that the remote control handset is needed to control it. This feature can be used to prevent unauthorized viewing.
- Repeatedly press the MENU button to select the Special menu.
- Press the ▶ button and then ▲ / ▼ button to select Child lock.
- Press the ▶ button and then ▲ / ▼ button to select On or Off on the Child lock pull-down menu.
- Press the TV/AV/PC button to return to normal TV viewing.
With the lock on, the display Child lock on appears on the screen if any button on the front panel is pressed while viewing the TV.
Note : The display Child lock on will not appear on the screen if any button on the front panel is pressed while displaying the menus.
Special Menu
text_image
MENU/INDEX TV/AV/PC OK MOther functions
Special Menu

text_image
MENUINDEX 0 TV/AV/PC OK SLEEPAuto sleep
If you select On on the Auto sleep pull-down menu, the set will automatically switch itself to standby mode approximately ten minutes after a TV station stops broadcasting.
- Repeatedly press the MENU button to select the Special menu.
- Press the ▶ button and then ▲ / ▼ button to select Auto sleep.
- Press the ▶ button and then ▲ / ▼ button to select On or Off on the Auto sleep pull-down menu.
- Press the TV/AV/PC button to return to normal TV viewing.
Sleep timer
You don't have to remember to switch the set off before you go to sleep. The sleep timer automatically switches the set to standby after the preset time elapses.
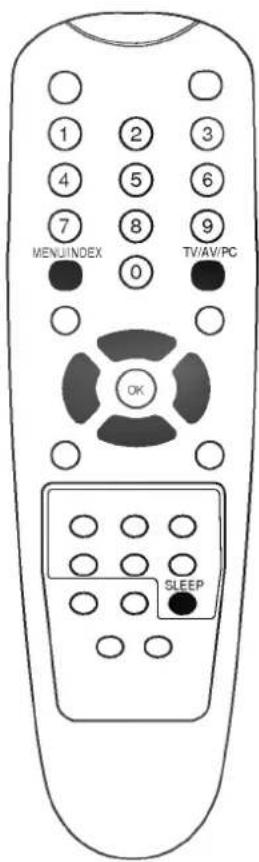
Press the SLEEP button to select the number of minutes. The display ⏻ --- will appear on the screen, followed by 10, 20, 30, 60, 90, 120, 180 and 240. The timer begins to count down from the number of minutes selected.
Note :
a. To view the remaining sleep time, press the SLEEP button once.
b. To cancel the sleep time, repeatedly press the SLEEP button until the display ⬆ ⋯ appears.
c. When you switch the set off, the set releases the preset sleep time.
Teletext (option)
Teletext (or TOP text) is an optional function, therefore only a set with the teletext system can receive the teletext broadcast.
Teletext is a free service broadcast by most TV stations which gives up-to-the-minute information on news, weather, television programmes, share prices and many other topics.
The teletext decoder of this TV can support the SIMPLE, TOP and FASTEXT systems. SIMPLE (standard teletext) consists of a number of pages which are selected by directly entering the corresponding page number. TOP and FASTEXT are more modern methods allowing quick and easy selection of teletext information.
Switch on/off
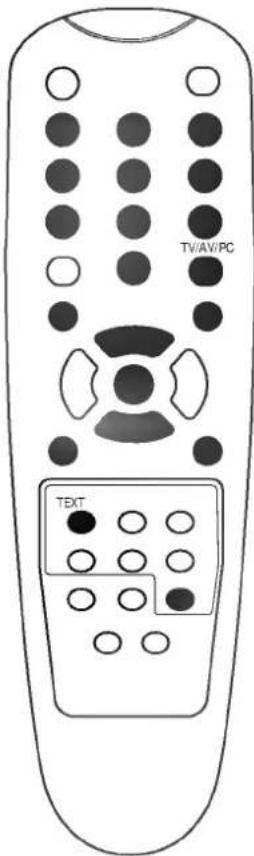
Press the TEXT button to switch to teletext. The initial page or last page appears on the screen.
Two page numbers, TV station name, date and time are displayed on the screen headline. The first page number indicates your selection, while the second shows the current page displayed.
Press the TV/AV/PC button to switch off teletext. The previous mode reappears.
SIMPLE text
Page selection
- Enter the desired page number as a three digit number with the NUMBER buttons. If during selection you press a wrong number, you must complete the three digit number and then re-enter the correct page number.
- The ▲ / ▼ button can be used to select the preceding or following page.
Programming a colour button in LIST mode
If the TV is in SIMPLE text, TOP text or FASTEXT mode, press the button to switch to LIST mode.
Four teletext page numbers of your choice can be colour coded and easily selected by pressing the corresponding coloured button on the remote control handset.
- Press a coloured button.
- Using the NUMBER buttons, select the page you wish to programme.
- Press the OK button. Then the selected page is stored as the selected page number by blinking once. From now on, you can select this page with the same coloured button.
- The three other coloured buttons are programmed in this way.
Note : In PIP of the PC mode, select the sub picture size is PIP (S), PIP (M) or PIP (L).
In PIP (S) of the PC mode, the text on the screen may be unstable.
text_image
TV/AV/PC TEXTTeletext (option)
TOP text (option)
The user guide displays four fields-red, green, yellow and blue at the bottom of the screen. The yellow field denotes the next group and the blue field indicates the next block.
Block / group / page selection
- With the blue button you can progress from block to block.
- Use the yellow button to proceed to the next group with automatic overflow to the next block.
- With the green button you can proceed to the next existing page with automatic overflow to the next group. Alternatively the ▲ button can be used.
- The red button permits to return to previous selection. Alternatively the ▼ button can be used.
Direct page selection
Corresponding to the SIMPLE teletext mode, you can select a page by entering it as a three digit number using the NUMBER buttons in TOP mode.
FASTEXT
The teletext pages are colour coded along the bottom of the screen and are selected by pressing the corresponding coloured button.
Page selection
- Press the ⏻ button to select the index page.
- You can select the pages which are colour coded along the bottom line with the same coloured buttons.
- Corresponding to the SIMPLE teletext mode, you can select a page by entering its three digit page number with the NUMBER buttons in FASTEXT mode.
- The ▲ / ▼ button can be used to select the preceding or following page.
text_image
MENUINDEXTeletext (option)
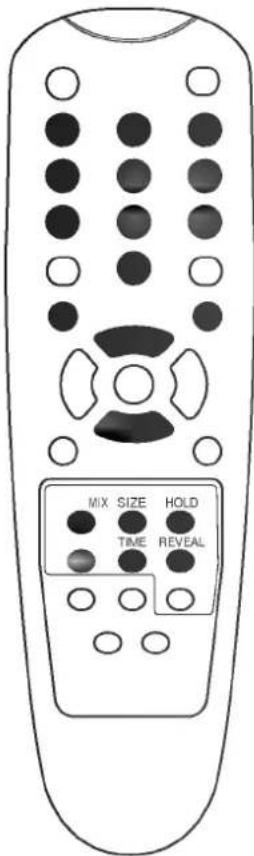
Special teletext functions
REVEAL
Press this button to display concealed information, such as solutions of riddles or puzzles. Press this button again to remove the information from the display.
SIZE
Selects double height text. Press this button to enlarge the top half of the page. Press this button again to enlarge the bottom half of the page. Press this button again to return to the normal display.
EX UPDATE
Displays the TV picture on the screen while waiting for the new teletext page. The display ⏻ will appear at the top left hand corner of the screen. When the updated page is available then display ⏻ will change to the page number. Press this button to view the updated teletext page.
HOLD
Stops the automatic page change which will occur if a tele-text page consists of 2 or more sub pages. The number of sub pages and the sub page displayed is, usually, shown on the screen below the time. When this button is pressed the stop symbol is displayed at the top left-hand corner of the screen and the automatic page change is inhibited. To continue press this button again.
MIX
Displays the teletext pages superimposed on the TV picture. To switch the TV picture off press this button again.
TIME
When viewing a TV programme, press this button to display the time at the top right hand corner of the screen. Press this button again to remove the display. In the teletext mode, press this button to select a sub page number. The sub page number is displayed at the bottom of the screen. To hold or change the sub page, press the RED/GREEN, ▲ / ▼ or NUMBER buttons. Press again to exit this function.
text_image
MIX SIZE HOLD TIME REVEALConnection of external equipment
text_image
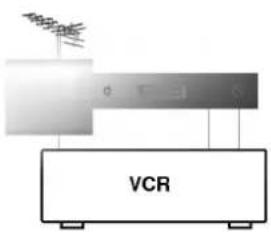
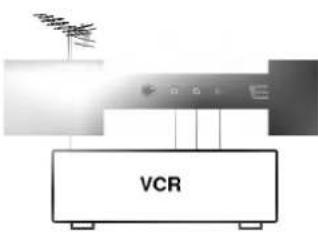
VCRYou can connect additional equipment, such as VCRs, camcorders etc. to your set. Examples are shown below.
Aerial socket
- Connect the RF out socket of the VCR to the aerial socket of the set.
- Connect the aerial cable to the RF aerial in socket of the VCR.
- Store the VCR channel on a desired programme number using the 'Manual programme tuning' section.
- Select the programme number where the VCR channel is stored.
- Press the PLAY button on the VCR.
text_image
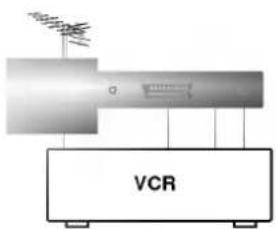
VCREuro scart socket
- Connect the Euro scart socket of the VCR to the Euro scart socket of the set.
- Press the PLAY button on the VCR. If your VCR outputs an AV switching signal via the Scart lead the set will auto switch to AV1 mode on start of playback, but if you want to keep on watching in TV mode, press the ▲ /▼ or NUM-BER buttons.
Otherwise press the TV/AV/PC button on the remote control handset to select AV 1. The VCR playback picture appears on the screen.
You can also record programmes received by the TV on video tape.
Note : Use the Euro scart cable socket length is 5.5cm under to connect it to the set correctly.
text_image
VCRAudio/Video in sockets
- Connect the audio/video out sockets of the VCR to audio/video in sockets of the set.
- Press the TV/AV/PC button to select AV 2.
- Press the PLAY button on the VCR. The VCR playback picture appears on the screen.
Note : If you have a mono VCR, connect the audio cable from the VCR to the AUDIO L/MONO socket of the set.
Connection of external equipment
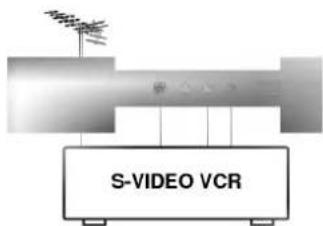
S-Video/Audio in sockets (S-Video) (option)
When connecting an S-VIDEO VCR to the S-VIDEO socket, the picture quality will be further improved.
- Connect the S-Video socket of the VCR to the S-VIDEO socket of the set.
- Connect the audio cable from the S-VIDEO VCR to the AUDIO sockets of the set.
- Select S-Video by pressing the TV/AV/PC button repeatedly.
- Press the PLAY button on the VCR. The VCR playback picture appears on the screen.
text_image
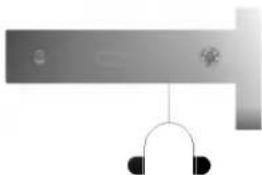
S-VIDEO VCRHeadphone socket
Insert the headphone plug to the headphone socket of the set. You can listen to the sound through the headphone and TV's speaker. To adjust the headphone volume, press the ◀ / ▶ button. If you press the MUTE button, the sound from the headphone and TV's speaker are switched off.
natural_image
Pure graphical representation of a device with headphones and a screen (no text or symbols)Connection of PC
text_image
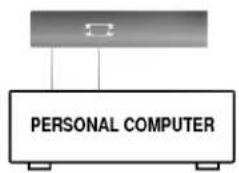
PERSONAL COMPUTERPC in socket (D-Sub jack)
- Connect the signal cable from the monitor output socket of the PERSONAL COMPUTER to the PC input socket of the set.
- Connect the audio cable from the PC to the PC SOUND sockets of the set.
- Press the TV/AV/PC button to select PC.
- Switch on the PC, and the PC screen appears on the set. The set can be operated as the PC monitor.
Note : If you have an Apple macintosh, connect the VGA desktop block (not supplied) from the 3 row 15 pin to 2 row 15 pin with the signal cable and connect the VGA desktop block to the Macintosh.
Displayable Monitor Specification
| MODE | Resolution | Horizontal Frequency(KHz) | Vertical Frequency(Hz) |
| VGA | 640x350 | 31.4KHz | 70Hz |
| 640x350 | 37.8KHz | 85Hz | |
| 640x400 | 31.4KHz | 70Hz | |
| 640x400 | 37.8KHz | 85Hz | |
| 640x480 | 31.5KHz | 60Hz | |
| 640x480 | 35KHz | 66Hz | |
| 640x480 | 37.9KHz | 72Hz | |
| 640x480 | 37.5KHz | 75Hz | |
| 640x480 | 43.3KHz | 85Hz | |
| SVGA (MAC) | 800x600 | 35.2KHz | 56Hz |
| 800x600 | 37.9KHz | 60Hz | |
| 800x600 | 48.1KHz | 72Hz | |
| 800x600 | 46.9KHz | 75Hz | |
| 800x600 | 53.7KHz | 85Hz | |
| 832x624 | 49.7KHz | 75Hz | |
| XGA | 1024x768 | 48.4KHz | 60Hz |
| 1024x768 | 56.5KHz | 70Hz | |
| 1024x768 | 60.2KHz | 75Hz | |
| 1024x768 | 68.7KHz | 85Hz |
(Synchronization input form : separate)
Note :
a. If the set is cold, there may be a small "flicker" when the set is switched on. This is normal, there is nothing wrong with the set.
b. If possible, use the VESA 1,024x768@60Hz video mode to obtain the best image quality for your LCD monitor. If used under the other resolutions, some scaled or processed pictures may appear on the screen. If used to PC vertical frequency 85Hz, some noise can be seen when PIP is on. In this case, set the PC vertical frequency to 60Hz. The set has been pre-adjusted to the mode VESA 1,024x768@60Hz.
c. Some dot defects may appear on the screen, like Red, Green or Blue spots. However, this will have no impact or effect on the monitor performance.
d. Do not press the LCD screen with your finger for a long time as this may produce some temporary distortion effects on the screen.
e. When the PC screen appears on the set, a message may appear on the screen, and the message will differ according to the Window system version (Win98, 2000). If a message appears click "Next" until the message finishes.
f. If the message "out of Range" appears on the screen, adjust the PC as in the 'Displayable Monitor Specification' section.
DPM (Display Power Management) mode
When the PC is in the power saving mode, automatically the monitor goes into DPM mode to save the energy.
Connection of PC
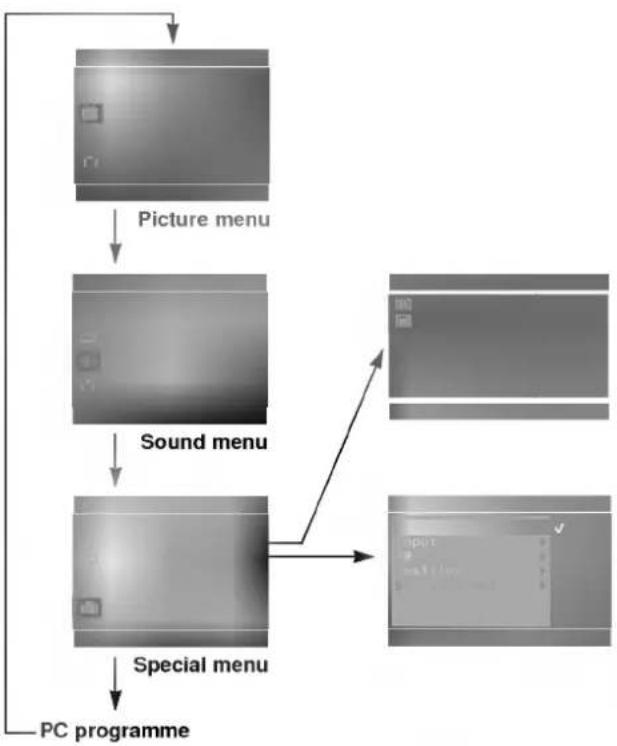
Menu selection
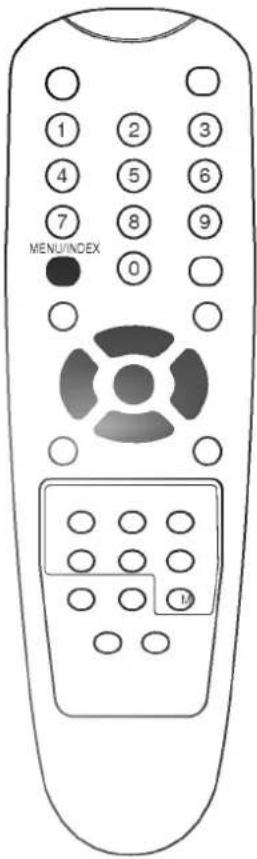
- Repeatedly press the MENU button to display each menu.
- Press the ▶ button and then ▲ / ▼ button to select a menu item.
- Press the ▶ button to display the sub menu or the pull-down menu.
- Change the setting of an item in the sub or pull-down menu with ▶ / ▶ or ▲ / ▼.
You can move to the higher level menu by pressing the OK or ▶ button and to move to the lower level menu by pressing the ▶ button.
a. See 'Picture adjustment' section to adjust the picture.
b. See 'Sound adjustment' section to adjust the sound.
c. See 'TV, AV and PC modes' section to select TV, AV 1, AV 2, S-Video or PC.
Note
flowchart
graph TD
    A["Picture menu"] --> B["Sound menu"]
    B --> C["Special menu"]
    C --> D["PC programme"]
text_image
MENU/INDEX MConnection of PC
Special Menu
PC Setup
You can adjust horizontal/vertical position, clock, clock phase, autoconfigure and reset as you prefer.
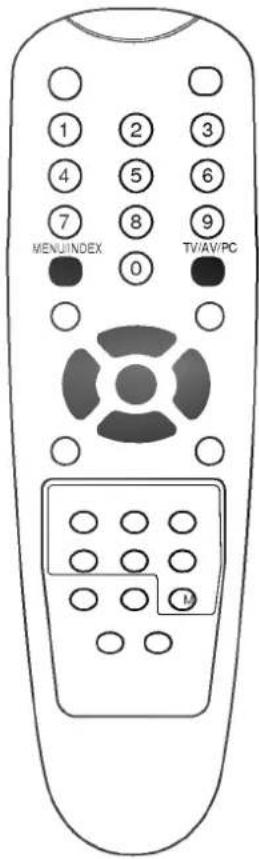
- Repeatedly press the MENU button to select the Special menu.
- Press the ▶ button and then ▲ / ▼ button to select Setup.
- Press the ▶ button and then ▲ / ▼ button to select the desired picture item.
text_image
MENUINDEX 0 TV/AV/PC M
natural_image
Gray gradient background with no visible text, symbols, or identifiable objects- Press the ◀ / ▶ button to make appropriate adjustments.
(H-Position) / (V-Position)
This function is to adjust picture to left/right and up/down as you prefer.
Clock
This function is to minimize any vertical bars or stripes visible on the screen background. And the horizontal screen size will also change.
Clock phase
This function allows you to remove any horizontal noise and clear or sharpen the image of characters.
Auto-configure
This function is for the automatic adjustment of the screen position, clock and clock phase. The displayed image will disappear for a few seconds while the Auto-configuration is in process.
Note : Some signal from some graphics boards may not function properly. If the results are unsatisfactory, adjust your monitor's position, clock and clock phase manually.
Reset
This function allows you to return to the good picture reproduction programmed at the factory and cannot be changed.
- Press the OK button to store it for the PC monitor picture.
- Repeatedly press the TV/AV/PC button to return to normal TV viewing.
Note : If you turn on the PIP, you can not get in PC Setup. If you need to adjust PC Setup, please turn off the PIP first.
PIP operation
PIP operation
PIP (Picture in Picture) displays a picture within a picture in the PC mode.
- Repeatedly press the MENU button to select the Special menu.
- Press the ▶ button and then ▲ / ▼ button to select PIP.
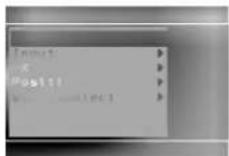
- Press the ▶ button to display the PIP menu.
- Press the ▲ / ▼ button to select PIP
- Press the ▶ button to select the desired sub picture size.
You can also recall a desired sub picture size (Off, PIP (S), PIP (M), or PIP (L)) with PIP button on the remote control.
- Press the OK or ◀ button.
- Press the ▲ / ▼ button to select Input
-
Press the ▶ button and then ▲ / ▼ button to select TV, AV 1, AV 2 or S-Video.
-
Press the OK or ◀ button.
-
Press the ▲ / ▼ button to select PR.
-
Press the ▶ button to select the programme number. Select the desired programme number (0 to 99) with the ◀ / ▶ button or NUMBER buttons on the PR pull-down menu. Any number under 10 is entered with a numeric '0' in front of it, i.e. '05' for 5.
-
Press the OK button.
-
Press the ▲ / ▼ button to select Sound select.
-
Press the ▶ button and then ▲ / ▼ button to select PC or PIP on the Sound select pull-down menu.
-
Press the OK or ◀ button
-
Press the ▲ / ▼ button to select Position.
-
Press the ▶ button.
-
Press the ▲ / ▼ or ◀ / ▶ button until desired position is achieved. The sub picture moves up/down or left/right.
-
Press the TV/AV/PC button to return to normal TV viewing.
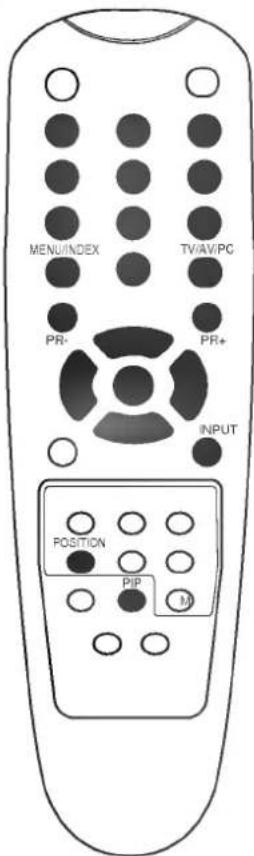
Alternatively you can select or operate the PIP function by using the PIP, POSITION, INPUT or PR +/- buttons.
Special Menu
text_image
MENU/INDEX TV/AV/PC PR- PR+ INPUT POSITION PIP MPIP operation
Special Menu

text_image
PR- PR+ INPUT POSITION PIP MOn and off
Select the PC mode. Press the PIP button to switch on the sub picture. Press this button again to switch it off.
Input mode selection for sub picture
Press the INPUT button to select the input mode for the sub picture.
Each time this button is pressed, each input mode for the sub picture is displayed as shown below.

Programme selection for sub picture
Press the PR +/- button. The selected programme number is displayed just below the programme number of main picture.
Sub picture size
Repeatedly press the PIP button to select the desired sub picture size. The sub picture appears as below.

Sub picture position change
Press the POSITION button. Repeatedly press the ▲ / ▼ or ◀ / ▶ button until desired position is achieved. The sub picture moves up/down or left/right.
a. If you turn on the TXT in PIP, some PIP keys, such as POSITION, INPUT or PR +/- etc. will work as TXT keys.
b. In PIP picture resolution will be decreased by the PIP size.
Note :
Troubleshooting check list
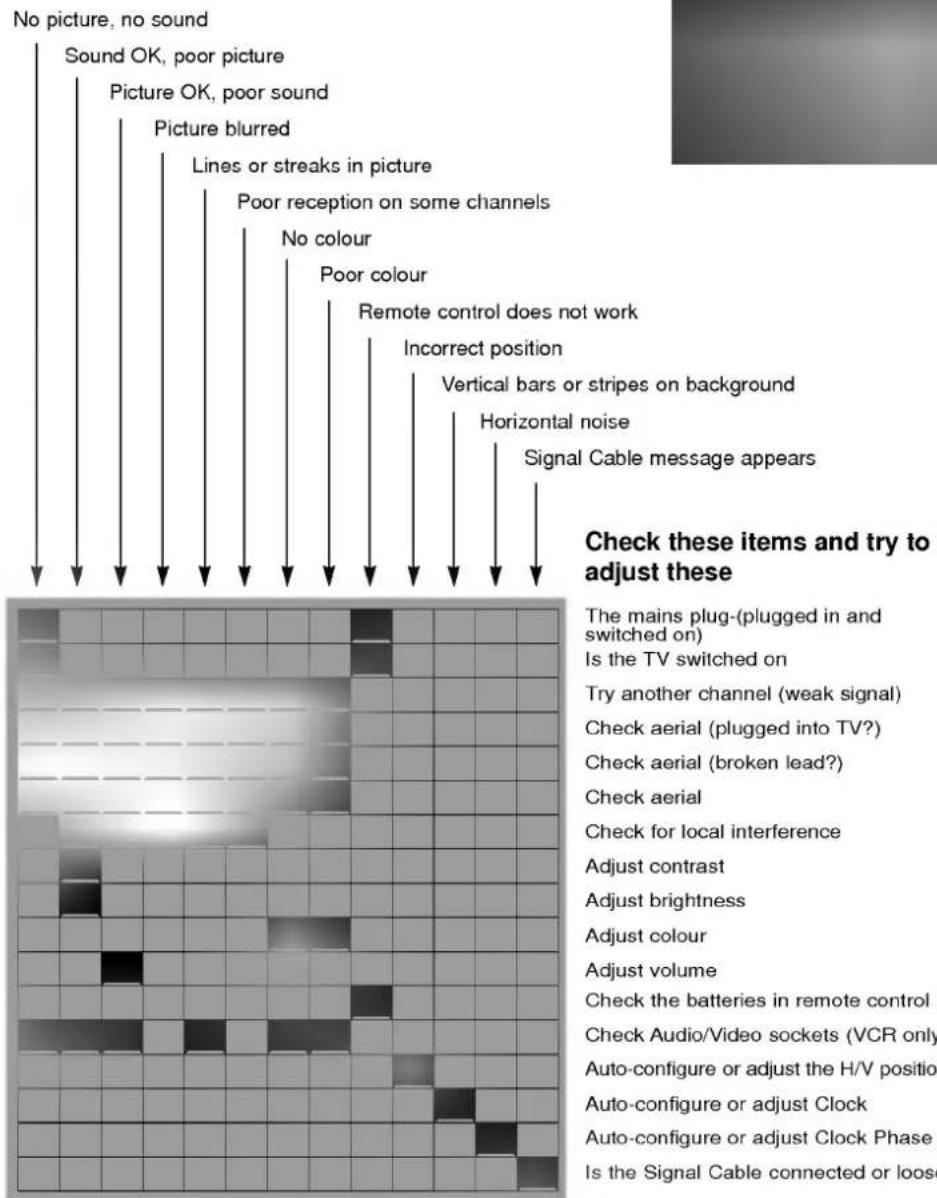
Symptoms
text_image
No picture, no sound Sound OK, poor picture Picture OK, poor sound Picture blurred Lines or streaks in picture Poor reception on some channels No colour Poor colour Remote control does not work Incorrect position Vertical bars or stripes on background Horizontal noise Signal Cable message appears Check these items and try to adjust these The mains plug-(plugged in and switched on) Is the TV switched on Try another channel (weak signal) Check aerial (plugged into TV?) Check aerial (broken lead?) Check aerial Check for local interference Adjust contrast Adjust brightness Adjust colour Adjust volume Check the batteries in remote control Check Audio/Video sockets (VCR only Auto-configure or adjust the H/V position Auto-configure or adjust Clock Auto-configure or adjust Clock Phase Is the Signal Cable connected or loose
natural_image
Solid dark gray gradient background with no visible text, symbols, or objectsCheck these items and try to adjust these
The mains plug-(plugged in and switched on)
Is the TV switched on
Try another channel (weak signal)
Check aerial (plugged into TV?)
Check aerial (broken lead?)
Check aerial
Check for local interference
Adjust contrast
Adjust brightness
Adjust colour
Adjust volume
Check the batteries in remote control
Check Audio/Video sockets (VCR only)
Auto-configure or adjust the H/V position
Auto-configure or adjust Clock
Auto-configure or adjust Clock Phase
Is the Signal Cable connected or loose
Note
Note

LG Electronics
GUARANTEE
- LG Electronics U.K. Ltd. will provide the following services in order to expedite this Guarantee.
- All faulty components which fail due to defective manufacture will be replaced free of charge for a period of 12 months from the original date of purchase.
- The dealer (or his service agent) who sold the product will be reimbursed for any labour provided in the repair of this LG equipment, for a period of 12 months from the original date of purchase. These claims must be made in accordance with the published scale of service charges and relevant claims procedure.
PLEASE NOTE:
A. The dealer may restrict the guarantee to the original purchaser.
B. The dealer is not obliged to carry out service under guarantee if unauthorized modifications are made to the apparatus, or if non standard components are used or if the serial number of the apparatus is removed, defaced, misused, or altered.
C. Any claims made under guarantee must be directed to the dealer from whom the equipment was originally purchased. The dealer may, before carrying out service under guarantee, require a receipted account as evidence of the date of purchase.
D. We respectfully point out that your dealer is not obligated to replace batteries if they become exhausted or worn in use.
E. Aerial alignment and consumer control adjustments are not covered by this guarantee.
This guarantee does not affect your statutory rights.
- REQUIREMENTS TO MAINTAIN WARRANTY COVERAGE:
RETAIN YOUR RECEIPT TO PROVE DATE OF PURCHASE. A COPY OF YOUR RECEIPT MUST BE SURRENDERED AT THE TIME GUARANTEE SERVICE IS PROVED.
• Product Registration Card:
It is helpful to complete at least your name, address, phone, model & serial numbers and return it. This will enable LG to assist you in the future should you lose your receipt, your units be stolen, or should modifications be necessary.
• To obtain information or assistance:
Call 0870 607 5544 Monday-Friday 9.00am-4.30pm.
- Service website:
http://lgelectronics.co.uk
| MODEL NO.* | SERIAL NO.* | DATE OF PURCHASE * |
* Please complete for your own record
In all cases of difficulty - consult your LG dealer from whom the product was purchased