
KX-TS700 - Telefon PANASONIC - Kostenlose Bedienungsanleitung
Finden Sie kostenlos die Bedienungsanleitung des Geräts KX-TS700 PANASONIC als PDF.


Benutzerfragen zu KX-TS700 PANASONIC
0 Frage zu diesem Gerät. Beantworten Sie die, die Sie kennen, oder stellen Sie Ihre eigene.
Eine neue Frage zu diesem Gerät stellen
Laden Sie die Anleitung für Ihr Telefon kostenlos im PDF-Format! Finden Sie Ihr Handbuch KX-TS700 - PANASONIC und nehmen Sie Ihr elektronisches Gerät wieder in die Hand. Auf dieser Seite sind alle Dokumente veröffentlicht, die für die Verwendung Ihres Geräts notwendig sind. KX-TS700 von der Marke PANASONIC.
BEDIENUNGSANLEITUNG KX-TS700 PANASONIC
Operating Instructions
text_image
Panasonic PanasonicPLEASE READ BEFORE USE AND SAVE.
APPROVED for connection to telecommunication systems specified in the instructions for use subject to the conditions set out in them.
504191
Do not connect the AC adaptor to any AC outlet other than the standard AC 220–240 V, 50 Hz.
- Outlet voltage DC 13.5 V, 400 mA
• The apparatus is approved for use with the KX-TCA6E power supply. - CAUTION: Do not remove cover. Live parts inside.
This apparatus has been approved for the use of the following facilities:
1) Storage of telephone numbers for retrieval by a predetermined code
2) Last number redial
3) Simple telephone facility
4) PBX earth register recall
PBX timed break register recall
5) MF signalling
6) LD signalling
7) Loudspeaking
8) Hold
9) Mute
Any other usage will invalidate the approval of the apparatus if as a result, it then ceases to conform to the standards against which approval was granted.
Ringer Equivalence Number (REN):
This relates to the performance of the apparatus when used in combination with other items of apparatus. It enables the calculation of the maximum number of items of apparatus that may be connected simultaneously to the line by summing the REN values of each item. A BT supplied instrument has a REN value of 1 unless otherwise marked. A maximum REN value of 4 should not be exceeded. The REN value of this apparatus is 1.
Method of connection
This is connected to the exchange line or PABX/PMBX (Private Automatic/Manual Branch Exchange) extension by the new standard British Telecom plug and socket. Arrangements for provision of this type of termination can be made through the nearest British Telecom Sales Office. The apparatus may be connected to the following types of installation. The apparatus has been approved for use under the following conditions:
a) This apparatus may be used on telecommunication systems employing LD and MF signalling. It is suitable for connection to a direct exchange line on the PSTN (Public Switched Telephone Network) or via a compatible PBX (Private Branch Exchange). (Cotact the supplier for an up to date list of compatible PBX's.)
b) This apparatus is not suitable as an extension to a payphone or for use on a party line with shared service.
999 or 112 can be dialled on the apparatus for the purposes of making outgoing calls to the BT Emergency (999 or 112) Service.
Although this equipment can use either loop disconnect or DTMF signalling, only the performance of the DTMF signalling is subject to regulatory requirements for correct operation. It is therefore strongly recommended that the equipment is set to use DTMF signalling for access to public or private emergency services. DTMF signalling also provides faster call set up.
Any cases of difficulty should be referred in the first instance to the supplier of the apparatus.
NOTE:
If you experience any problems with the normal use of your apparatus, you should unplug it from the telephone outlet and connect a known working telephone in its place. If the known working telephone still gives problems, then call British Telecom Engineers. If it operates properly, then the problem is likely to be a fault in your apparatus. In this case, contact your supplier for advice. British Telecom will charge you if they attend a service call that is not due to apparatus supplied by them.

73/23/EEC
89/336/EEC
92/31/EEC
93/68/EEC
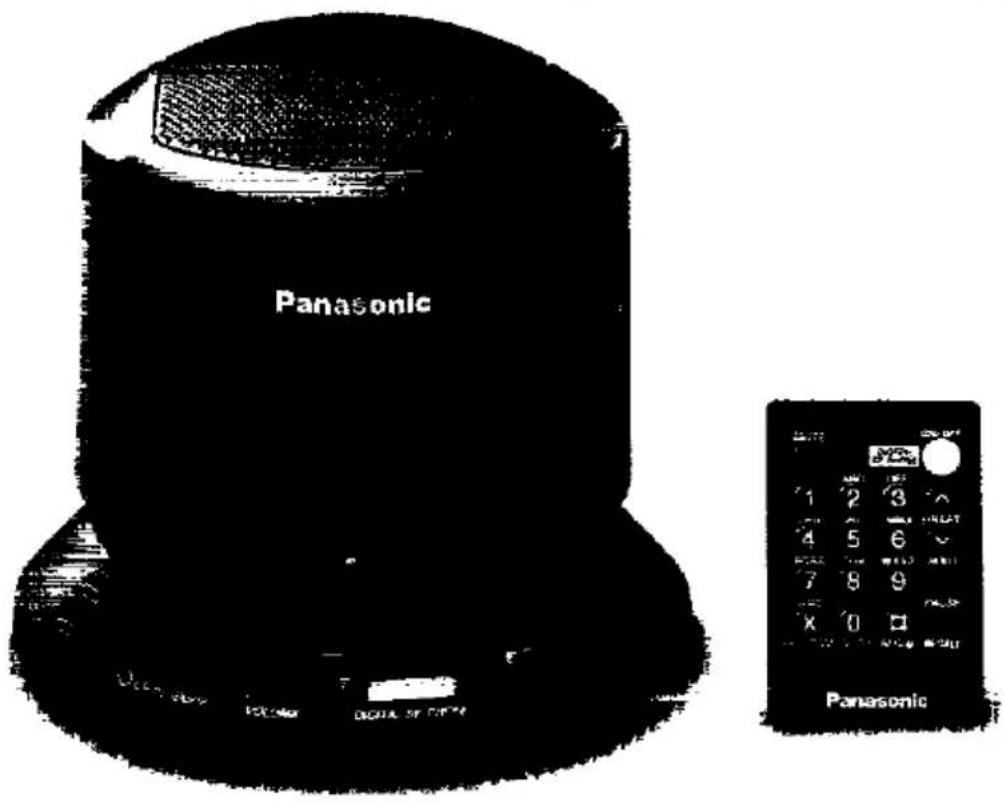
Thank you for purchasing the Panasonic telephone conference system.
For your future reference
Serial No.
Date of purchase
(found on the bottom of the unit)
Name and address of dealer
Included with this unit
| ☐ Remote Control (p. 8) | ☐ Lithium Battery (CR2025) (p. 9) |
 |  |
| one | one |
| ☐ AC Adaptor (p. 10) | ☐ Telephone Line Cord (p. 10) |
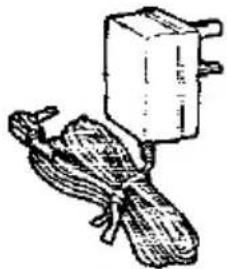 | 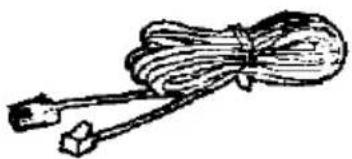 |
| one | one |
| ☐ Connection Cord (p. 12) | |
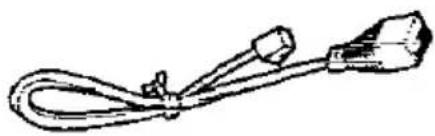 | |
| one |
Location
For best performance, the recommended unit location is:
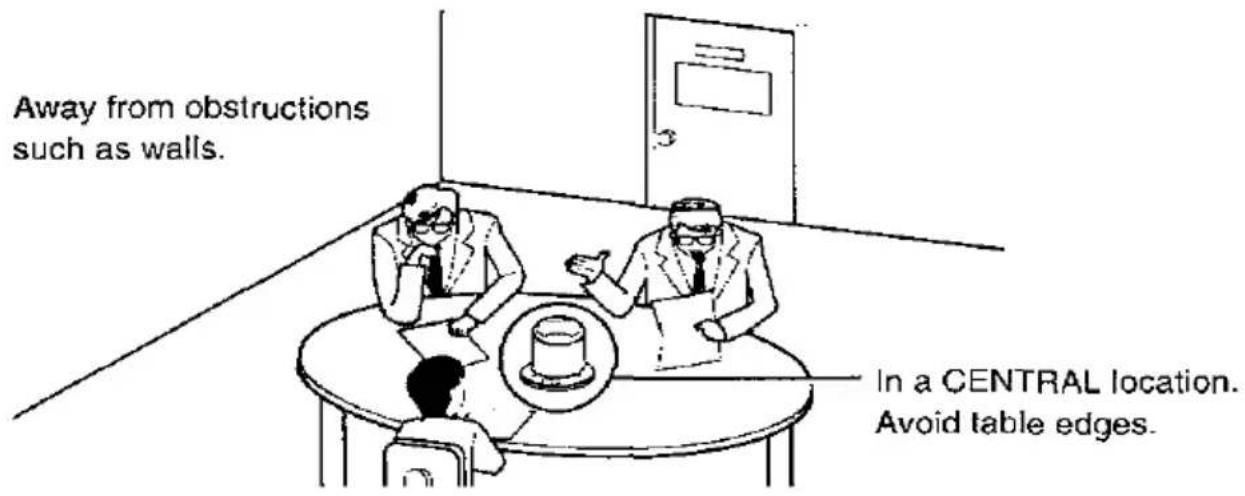
text_image
Away from obstructions such as walls. In a CENTRAL location. Avoid table edges.To avoid losing the remote control
Insert the remote control into its compartment and press until it locks into place.
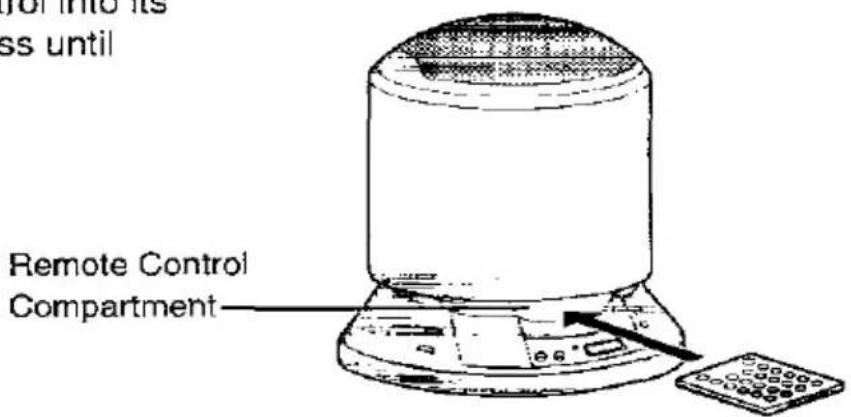
text_image
for into its ss until Remote Control CompartmentTo remove the remote control
Press the remote control to release it from the compartment.
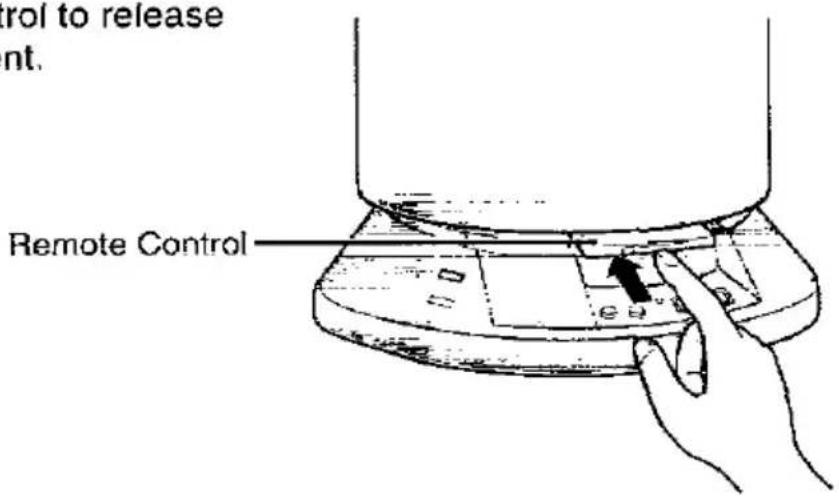
text_image
rol to release nt. Remote ControlContents
Preparation
Location of Controls 7
Setting Up 9
Installing the Battery in the Remote Control 9
Connection 10
Adding Another Phone 12
Selector Settings 13
Basic Operation
Remote Control Range 14
Making Calls 15
Answering Calls 17
Automatic Dialling 18
Storing Phone Numbers in Memory 18
Dialling a Stored Number 19
Advanced Operation
Special Features 20
Temporary Tone Dialling (For Rotary Service Users) 20
If Your Unit is Connected to a PBX 20
Muting Your Conversation 20
Using the Recall Feature 21
Useful Information
Before Requesting Help 22
Safety Instructions 24
Unit
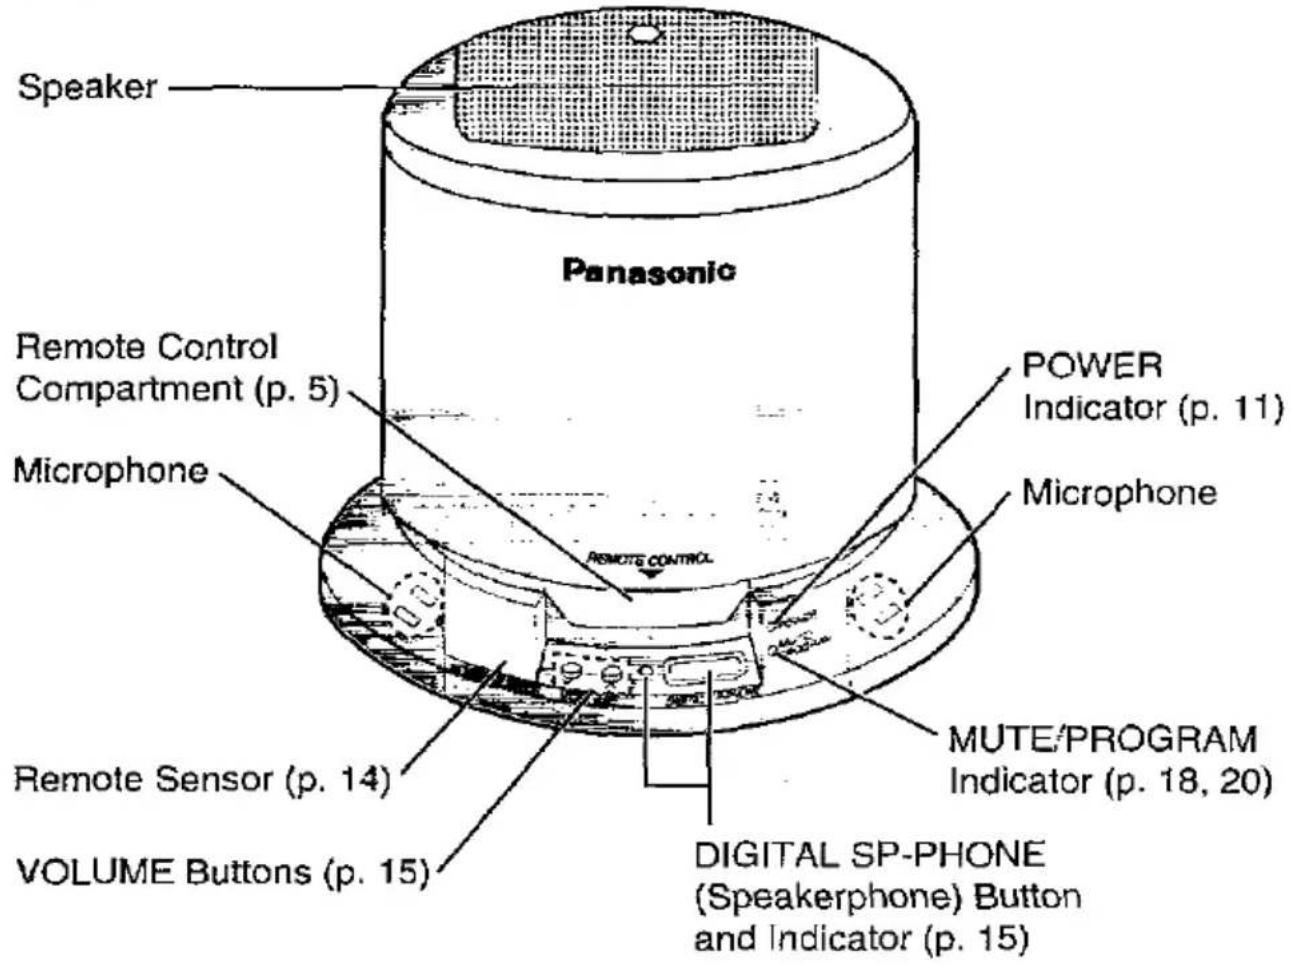
text_image
Speaker Panasonic Remote Control Compartment (p. 5) Microphone REMOTE CONTROL POWER Indicator (p. 11) Microphone MUTE/PROGRAM Indicator (p. 18, 20) Remote Sensor (p. 14) VOLUME Buttons (p. 15) DIGITAL SP-PHONE (Speakerphone) Button and Indicator (p. 15)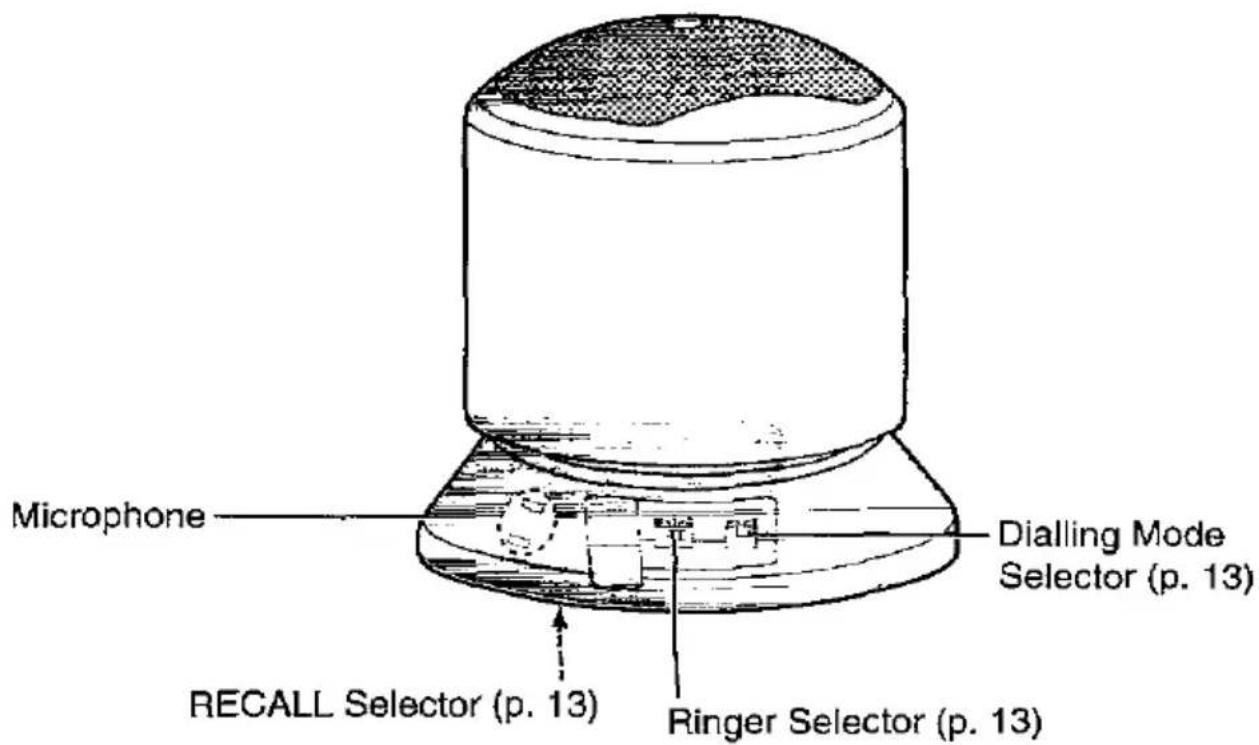
text_image
Microphone Dialling Mode Selector (p. 13) RECALL Selector (p. 13) Ringer Selector (p. 13)Remote Control
text_image
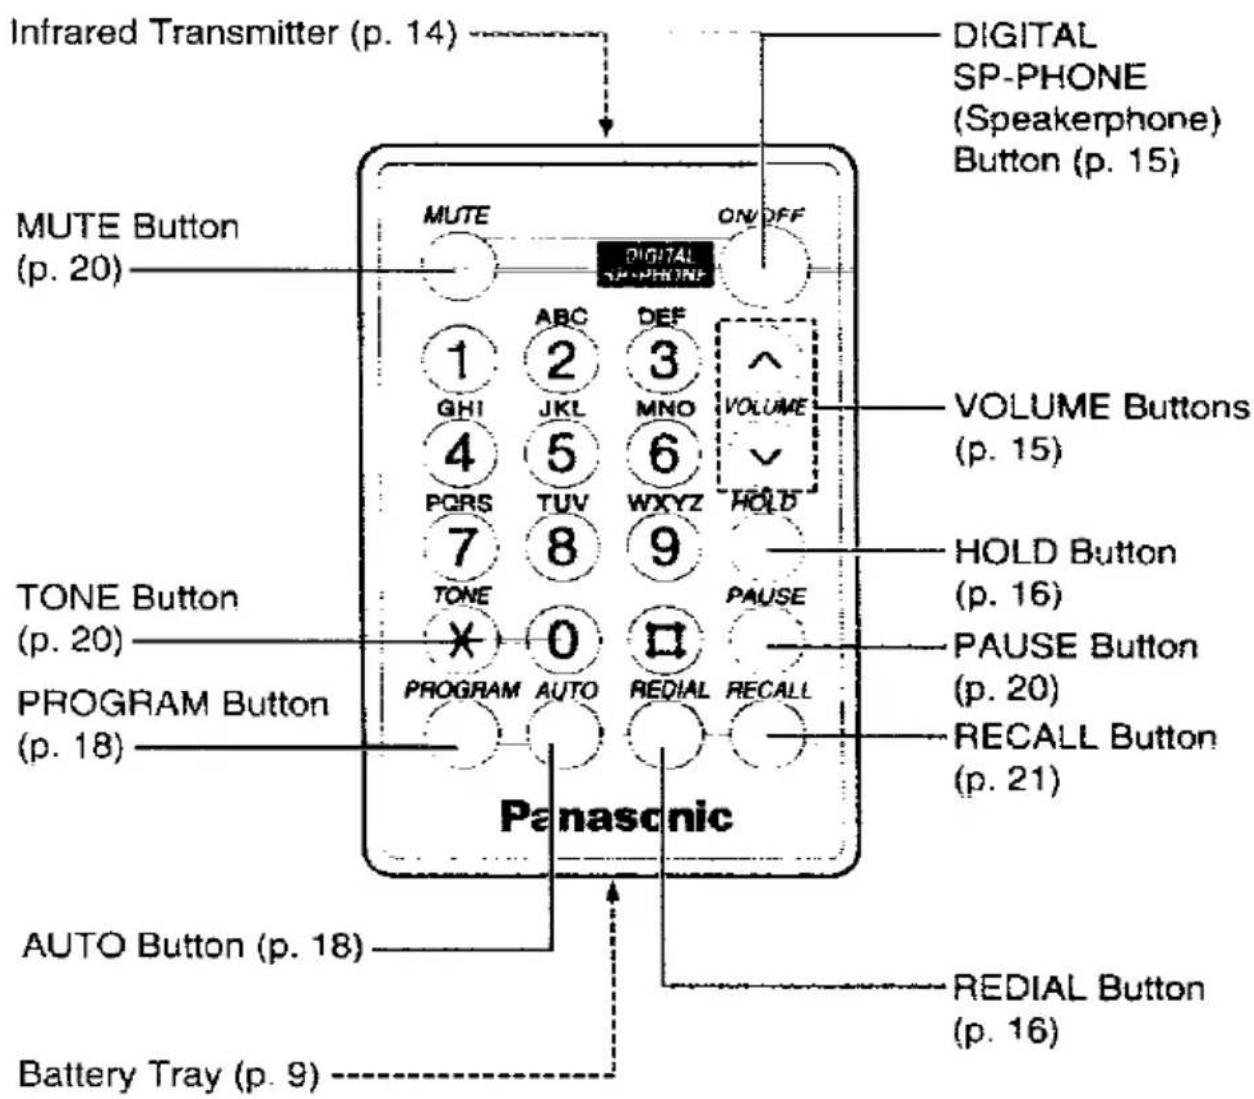
Infrared Transmitter (p. 14) DIGITAL SP-PHONE (Speakerphone) Button (p. 15) MUTE Button (p. 20) DIGITAL SP-PHONE ON OFF 1 ABC DEF GHI JKL MNO 4 5 6 VOLUME PCRS TUV WXYZ HOLD 7 8 9 TONE PAUSE × 0 PROGRAM AUTO REDIAL RECALL Panasonic TONE Button (p. 20) PROGRAM Button (p. 18) AUTO Button (p. 18) Battery Tray (p. 9) REDIAL Button (p. 16)- Do not press the remote control buttons with a pointed object, such as a pen, etc.
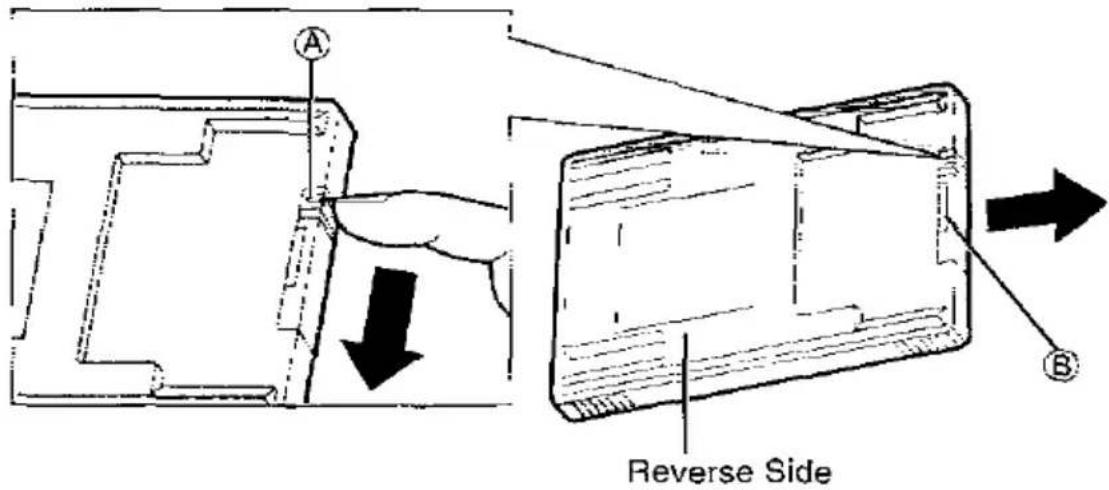
Installing the Battery in the Remote Control
1 While pressing down notch Ⓐ, pull out the battery tray by inserting your fingernail in notch Ⓑ.
text_image
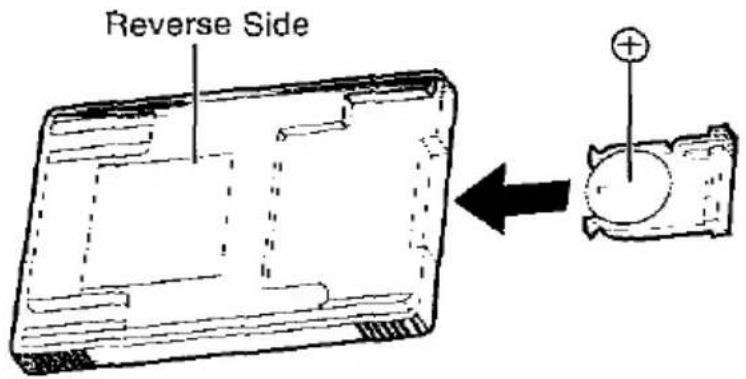
A Reverse Side B2 Install the battery with the plus side up, then insert the tray until it locks into place.
text_image
Reverse Side- Please refer to page 25 for correct battery usage.
• Install the battery properly. - Keep the battery away from children.
Battery Replacement:
- Replace the battery with a Panasonic CR2025 lithium battery only. Using another battery may raise the risk of fire or explosion.
- The battery life is about a year when a new Panasonic battery is used at room temperature. (This varies depending on usage and ambient temperature.)
- If the remote control only works when in close vicinity to the unit's remote sensor, replace the battery.
Connection
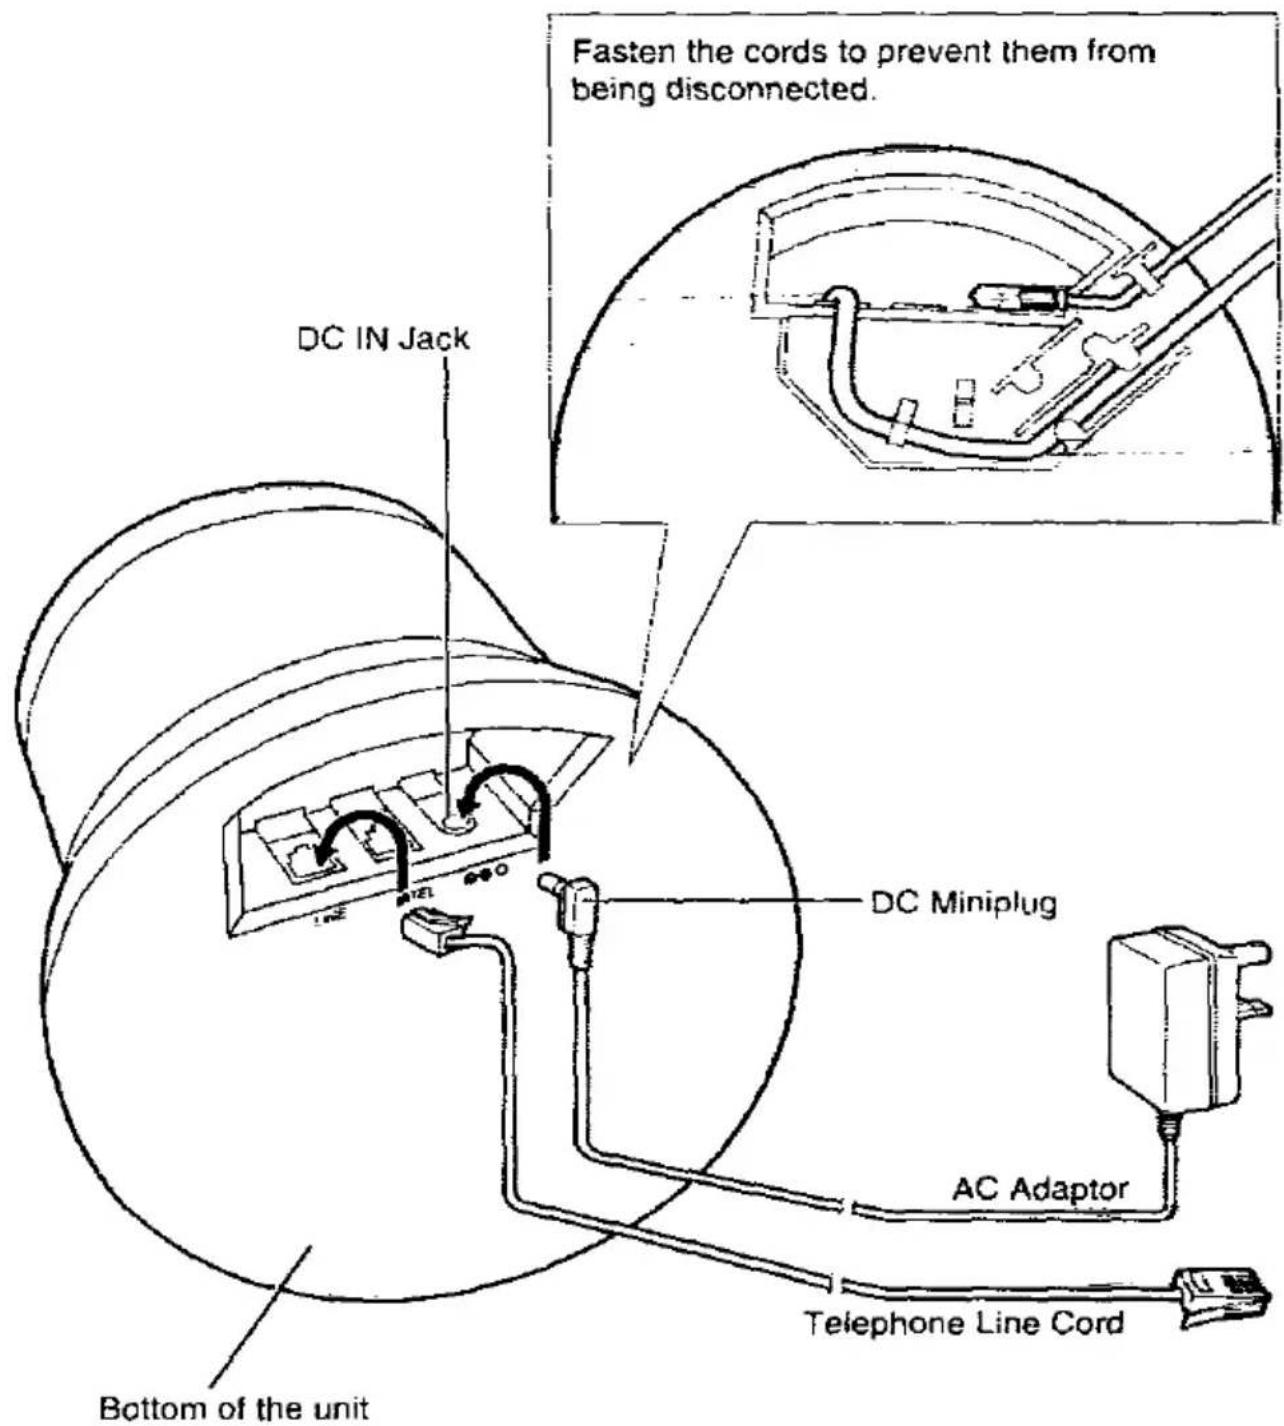
1 Plug in the AC adaptor cord and the telephone line cord to the bottom of the unit.
text_image
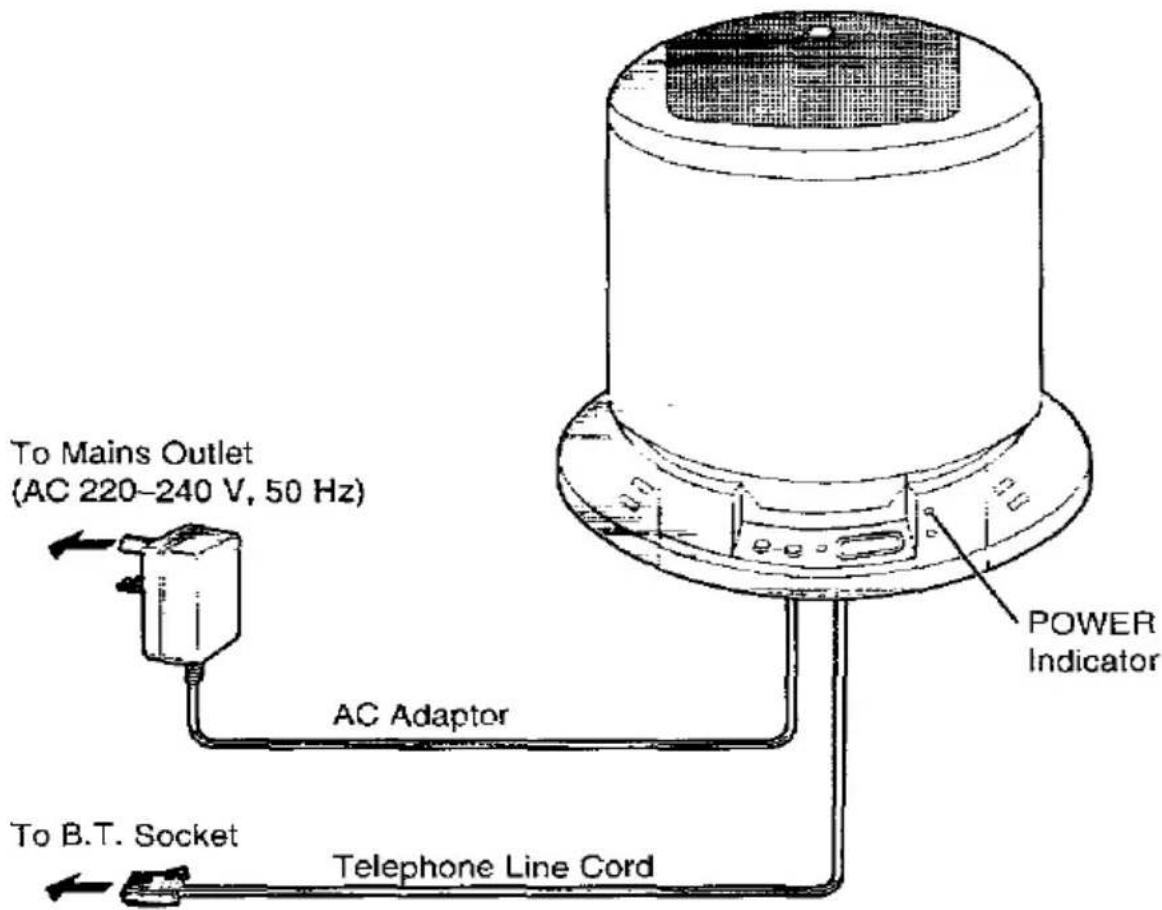
DC IN Jack Fasten the cords to prevent them from being disconnected. DC Miniplug AC Adaptor Telephone Line Cord Bottom of the unit2 Connect the cords as shown.
text_image
To Mains Outlet (AC 220-240 V, 50 Hz) AC Adaptor POWER Indicator To B.T. Socket Telephone Line Cord- USE ONLY Panasonic AC ADAPTOR KX-TCA6E.
- The AC adaptor must remain connected at all times. (It may feel warm during use. This is normal.)
- The POWER indicator lights while the AC adaptor is connected.
- If you connect a reserve telephone on the same line, see page 12.
- This product can be used with a PBX that can support an analog port. Please contact your PBX dealer for more information.
CONNECTION OF POWER SUPPLY
This apparatus is intended for use when powered by the KX-TCA6E. Using other power supplies will invalidate any approval given to this apparatus.
Adding Another Phone
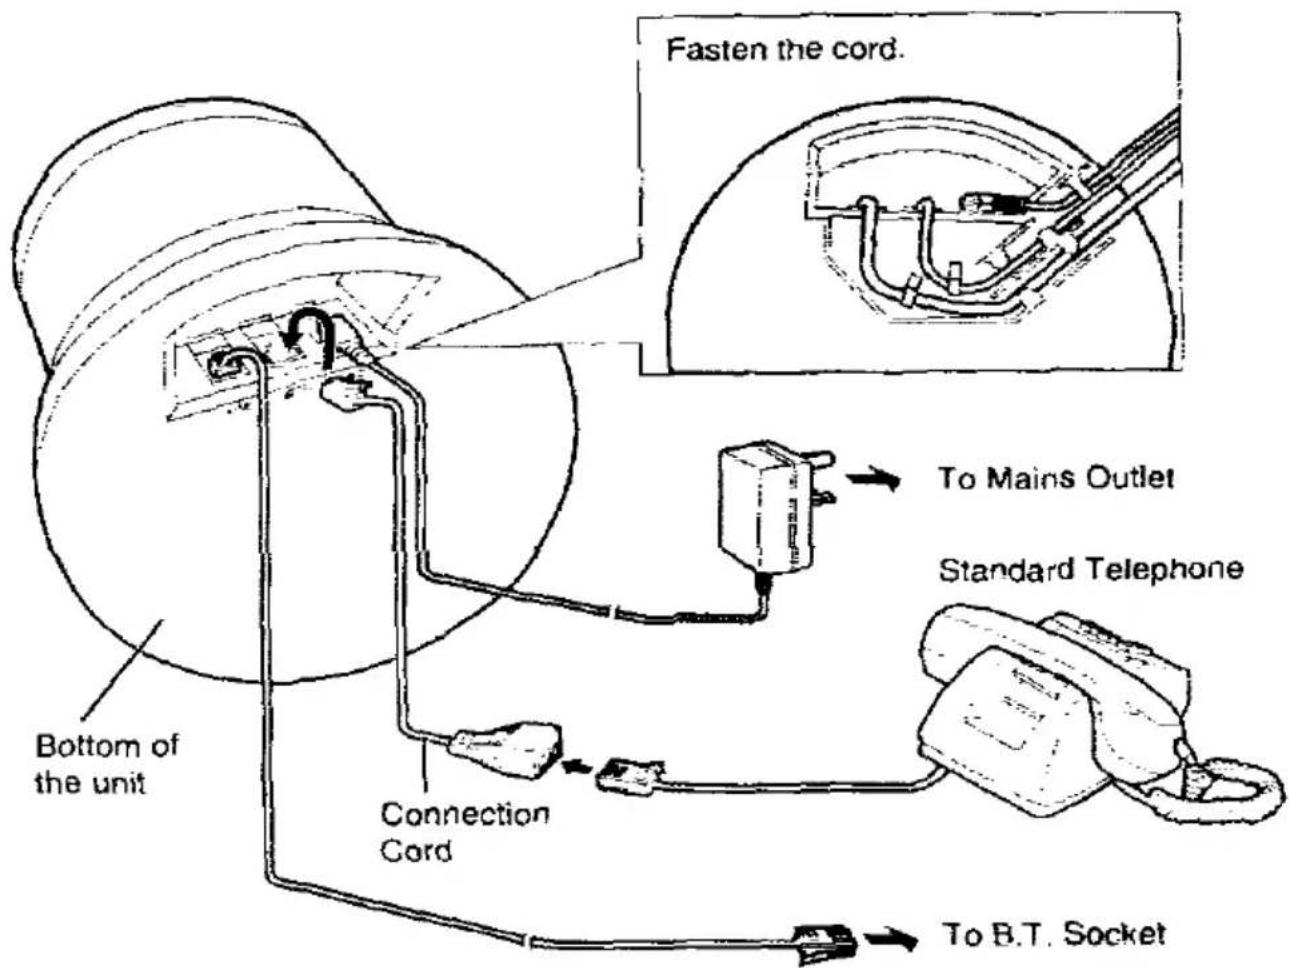
If the remote control is misplaced or cannot be used, you can connect a standard telephone, using the connection cord, to dial a number.
Once the call is connected, turn on the unit's speakerphone. Then hang up the standard telephone.
text_image
Bottom of the unit Connection Cord Fasten the cord. To Mains Outlet Standard Telephone To B.T. Socket- During a power failure, the unit will not function. Use the standard telephone.
Selector Settings
text_image
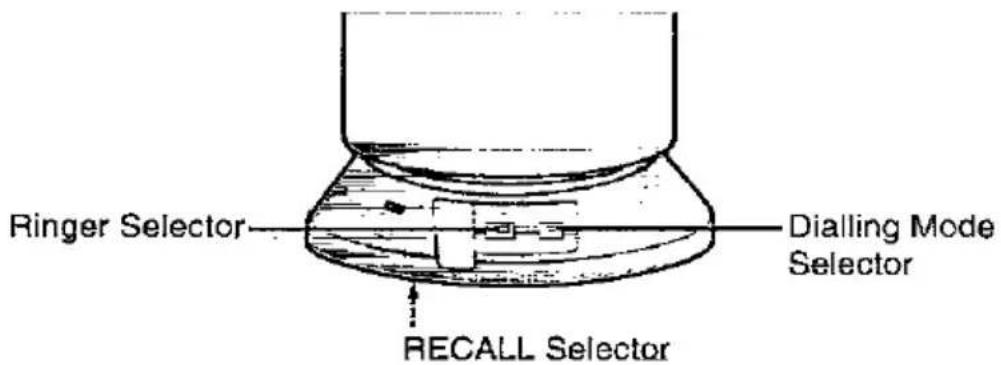
Ringer Selector Dialling Mode Selector RECALL SelectorRinger Selector
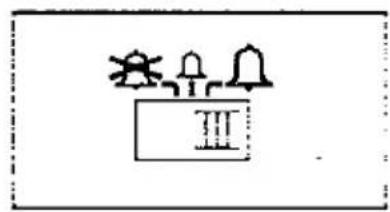
text_image
Diagram showing a bell symbol with three smaller icons above and the number III inside, enclosed in a dashed border.Select the ringer volume of the unit. Set to HIGH(Ω) or LOW (⊥). When set to OFF (⊕), the unit will not ring.
Dialling Mode Selector
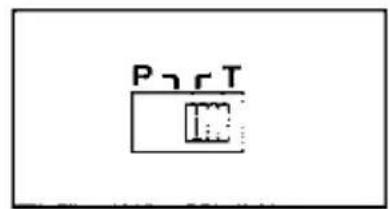
text_image
P T 100Set to TONE (T) when your telephone line has touch tone service. If rotary service is used, set to PULSE (P).
You can determine which type of local BT exchange you are connected to using the following procedure.
- Ensure that the dialling mode selector is set to TONE (T).
- Press DIGITAL SP-PHONE, then identify the dial tone.
- Dial a number you are familiar with.
- If the call is successful, you are connected to a tone exchange. Therefore, leave the dialling mode selector to TONE (T).
- If the call is not successful, you are connected to a pulse exchange. Therefore, switch the dialling mode selector back to PULSE (P).
RECALL Selector
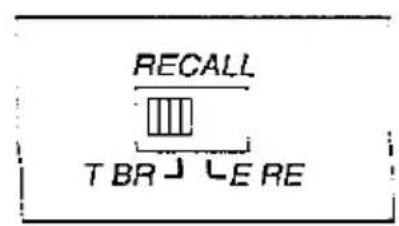
text_image
RECALL T BR J L E RESet to T BR if the unit is connected directly to an exchange line. If the unit is connected via a PBX (switchboard), then you may need to switch to E RE. Check with your switchboard manager or supplier for the proper setting.
Remote Control Range
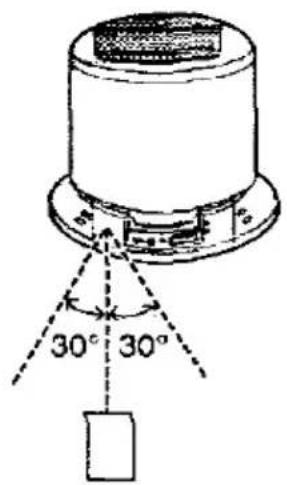
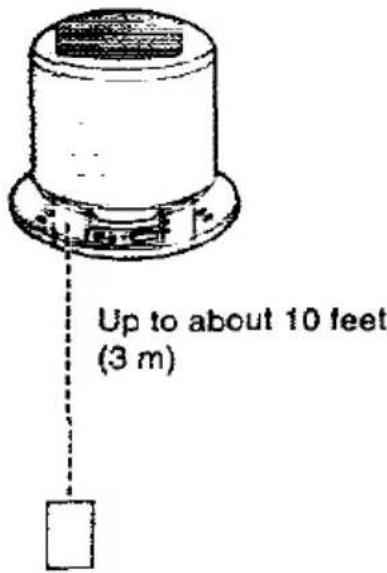
When using the remote control, point the infrared transmitter towards the remote sensor within the unit's maximum operating range.
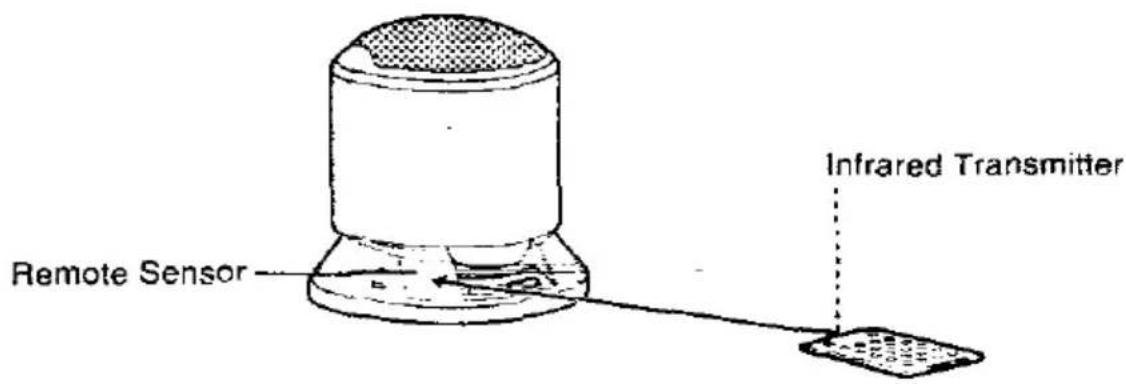
text_image
Remote Sensor Infrared TransmitterThe maximum operating area is:
Range
text_image
30° 30°Distance
text_image
Up to about 10 feet (3 m)- The operating range may vary depending on the room lighting (incandescent, fluorescent, etc.) or brightness.
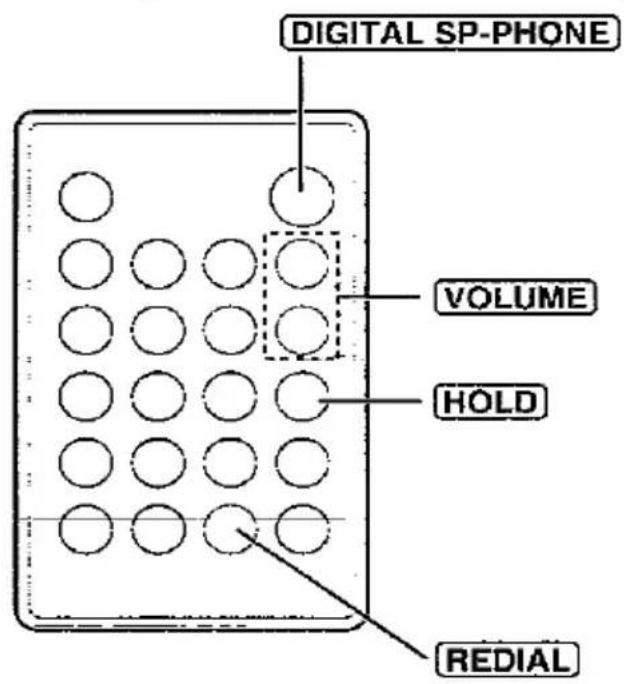
1 Press DIGITAL SP-PHONE on the remote control.
• The DIGITAL SP-PHONE indicator on the unit lights.
2 Dial a telephone number.
3 To hang up, press DIGITAL SP-PHONE.
• The indicator light goes out.
text_image
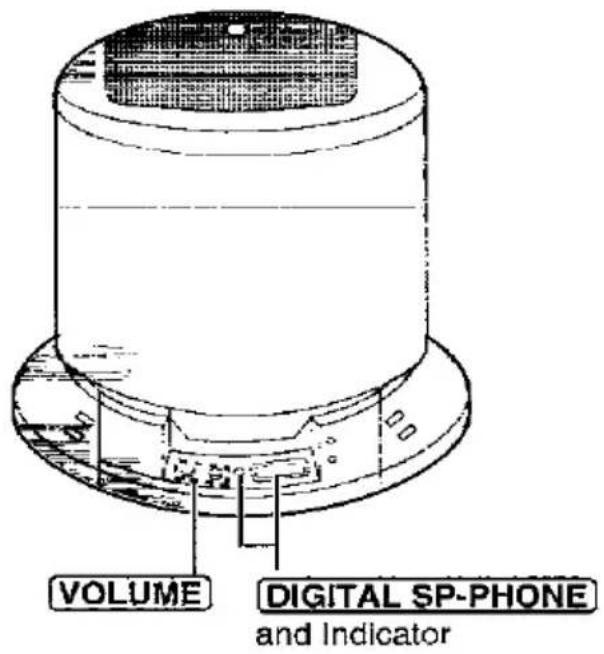
DIGITAL SP-PHONE VOLUME HOLD REDIAL- You can also use DIGITAL SP-PHONE on the unit in steps 1 and 3.
text_image
VOLUME DIGITAL SP-PHONE and IndicatorTo adjust the speaker volume (12 levels)
To increase, press ✗. To decrease, press √.
Digital Speakerphone
For best performance, please note the following:
- Speak alternately with the caller.
- If the other party's voice from the speaker cuts in/out during a conversation, press √ to decrease the speaker volume.
- Use the speakerphone in a quiet room.
To redial the last number
Press DIGITAL SP-PHONE → REDIAL.
To put a call on hold
Press HOLD.
• The DIGITAL SP-PHONE indicator on the unit flashes.
- If you put a call on hold for 6 minutes, a warning tone will sound. The call will be disconnected after a total of 10 minutes.
To release the hold
Press DIGITAL SP-PHONE.
- If another phone is connected on the same line (p. 12), you can also take the held call on that phone, by lifting its handset.
About the DIGITAL SP-PHONE button on the unit
The DIGITAL SP-PHONE button on the unit uses non-radioactive luminescent material which can absorb the light energy of sunlight or lamps (incandescent, fluorescent, halogen, etc.) and release this absorbed light for darkened room operations.
Notice:
- As the absorbed energy in the DIGITAL SP-PHONE button decreases. the button brightness will fade naturally.
- Button brightness and duration depends on the amount of room lighting and exposure time.
Answering Calls
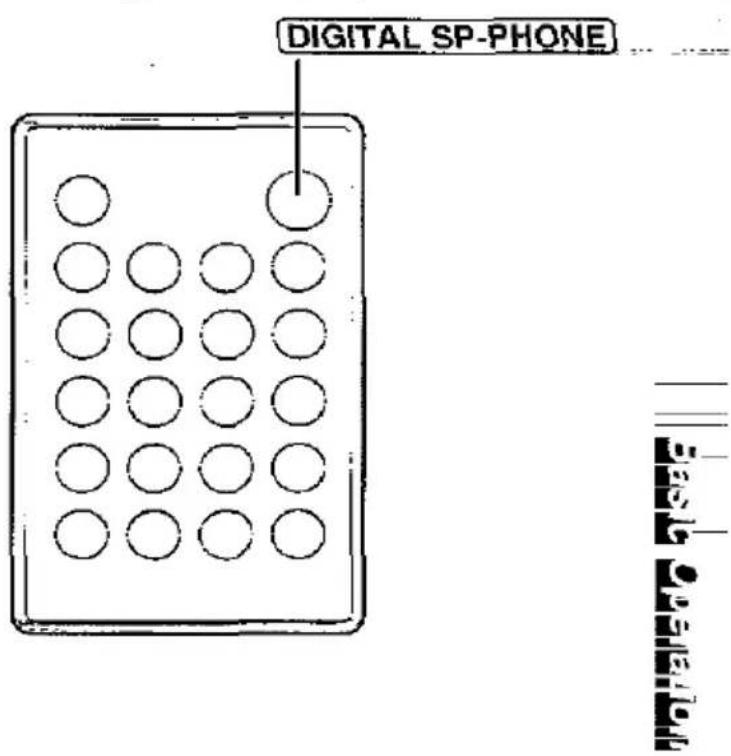
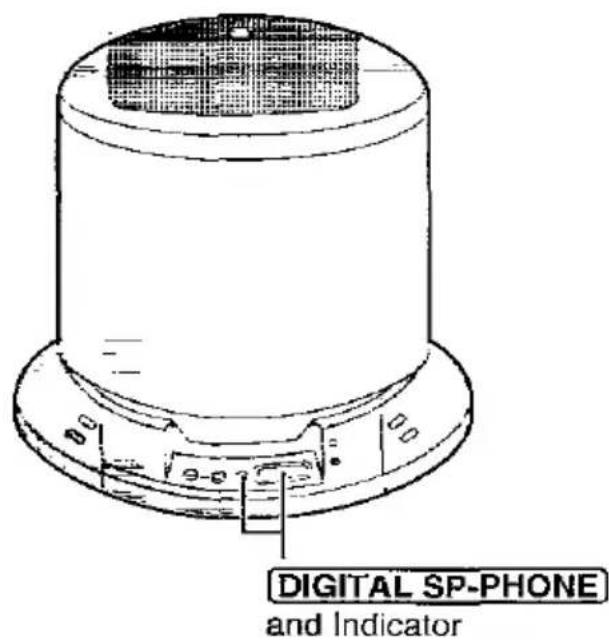
1 Press DIGITAL SP-PHONE on the remote control.
2 To hang up, press DIGITAL SP-PHONE.
text_image
DIGITAL SP-PHONE Digital SP-PHONE- You can also answer a call by pressing DIGITAL SP-PHONE on the unit.
text_image
DIGITAL SP-PHONE and IndicatorStoring Phone Numbers in Memory
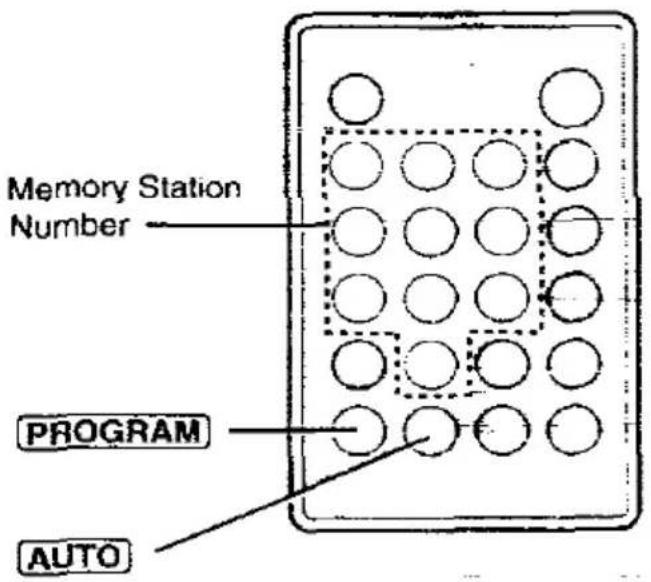
You can store up to 10 phone numbers in the unit using the remote control. The dialling buttons (0 to 9) function as memory stations.
The DIGITAL SP-PHONE indicator light must be off. Point the Infrared transmitter towards the remote sensor while storing.
1 Press PROGRAM.
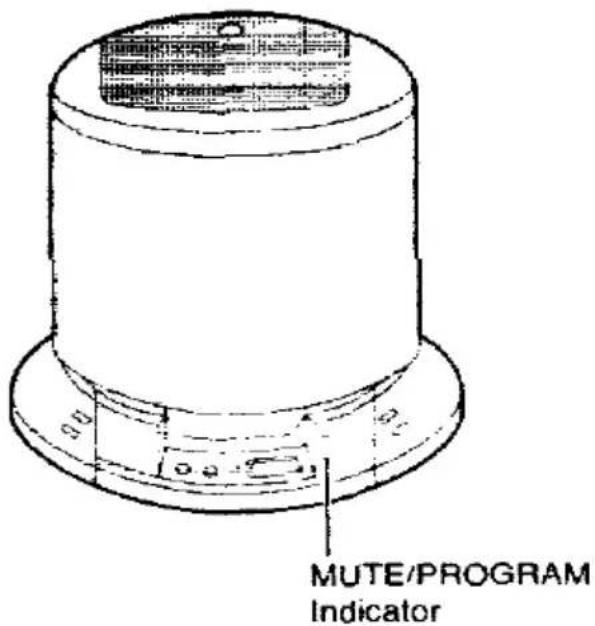
• The MUTE/PROGRAM indicator on the unit flashes.
2 Enter a phone number up to 16 digits.
- If you misdial, press PROGRAM to end storing, then restart from step 1.
3 Press AUTO.
text_image
Memory Station Number PROGRAM AUTO4 Press a memory station number (0 to 9).
• A confirmation tone sounds. (See the next page.)
• To store other numbers, repeat steps 1 through 4.
text_image
MUTE/PROGRAM Indicator- If the AC adaptor is disconnected for more than 3 days, the stored numbers should be confirmed again before dialling.
What the confirmation tone means
1 beep: A new number has been stored.
2 beeps: The number is the same as a previously stored one.
To erase a stored number
Press PROGRAM → AUTO → the memory station number (0 to 9) for the phone number to be erased.
Memory sticker
Use the included memory sticker as a name or phone number index for automatic dialling. Attach the sticker to the unit or in a convenient place.
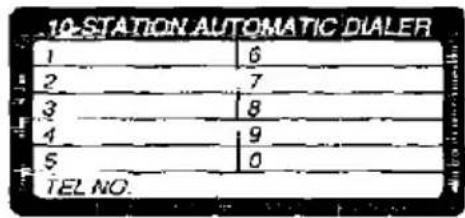
text_image
10-STATION AUTOMATIC DIALER 1 6 2 7 3 8 4 9 5 0 TEL NO.Dialling a Stored Number
1 Press DIGITAL SP-PHONE.
2 Press AUTO.
3 Press a memory station number (0 to 9).
• The stored number is dialled.

text_image
DIGITAL SP-PHONE Memory Station Number AUTO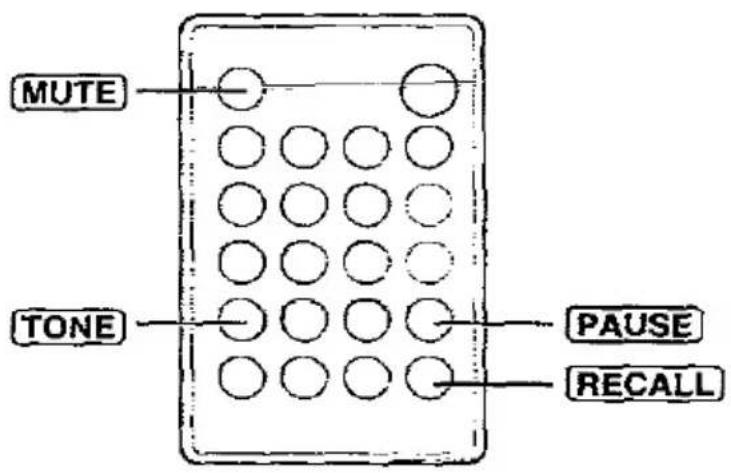
text_image
MUTE TONE PAUSE RECALL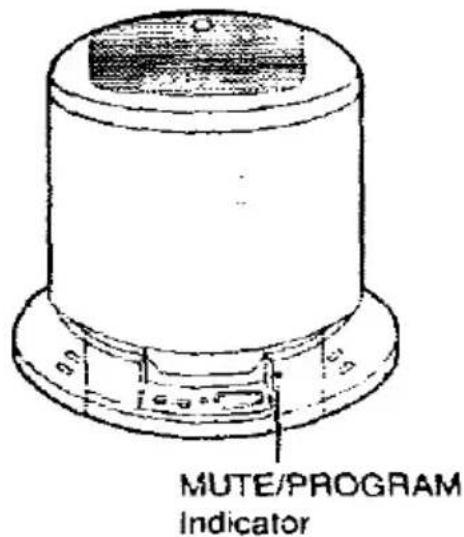
text_image
MUTE/PROGRAM IndicatorTemporary Tone Dialling
(For Rotary Service Users)
Press TONE before entering access numbers which require tone dialling.
- The dialling mode changes to tone. You can enter numbers to access answering systems, electronic banking services, etc. When you hang up, the mode returns to pulse.
If Your Unit is Connected to a PBX
We recommend you press PAUSE between the access number for an outside line and the phone number.
- Pressing PAUSE once creates a 3.5 second pause. This prevents misdialling when you redial or dial a stored number. (PAUSE) counts as one digit.)
Muting Your Conversation
Press MUTE while talking. (The MUTE/PROGRAM indicator lights.)
• The other party cannot hear your voice but you can hear theirs.
• To resume the conversation, press MUTE again.
Using the Recall Feature
The RECALL button is used to access special telephone services (optional) such as call waiting. Contact your telephone company business office for details.
Example: British Telecom call waiting
-
Ensure that you have set the RECALL selector to T BR (p. 13).
-
When a call waiting tone is heard during a conversation
a) To hold the existing call and accept the waiting call Press RECALL.
• Each time you press RECALL, you can switch between the first and second call.
b) To accept the waiting call and clear from the existing call Press DIGITAL SP-PHONE. When the unit rings, press DIGITAL SP-PHONE to answer the new call.
c) To reject the waiting call Allow the call waiting to time out. This will take about 40 seconds.
If your unit is connected to a PBX, pressing RECALL allows you to access some features of your host PBX such as transferring an extension call.
Before Requesting Help
| Problem | Remedy |
| The unit does not work. | ·Check the settings (p. 9-13). |
| The unit stops working during operation. | ·Unplug the AC adaptor to reset.Plug in, then try again.·Re-insert the remote control battery and try again. |
| The unit does not ring. | ·The RINGER selector is set to OFF (♂). Set to HIGH (Ω) or LOW (♂). |
| Short silences, echoes, or speech cuts occur during conversations. | ·Do not move the unit while it is in use.·Keep your hands away from the unit during calls.·Keep files, cups, coffee pots, etc., away from the unit.·Speak alternately with the caller. |
| While storing a phone number, the unit starts to ring. | ·To answer the call, press DIGITAL SP-PHONE. The program will be cancelled. Store the number again. |
| You cannot store a phone number in memory. | ·You cannot store a number during a conversation.·Do not pause for over 30 seconds while programming.·Point the infrared transmitter towards the remote sensor while storing. |
| The remote control does not work. | Move closer or in range of the unit (p. 14).Move the unit's remote sensor away from strong light, such as direct sunlight.The battery power is low. Replace with a new one (p. 9).Install the battery correctly (p. 9).Clean the remote sensor and the infrared transmitter with a soft, dry cloth. |
| The POWER indicator light never goes out while the AC adaptor is connected. | This is normal. |
Safety Instructions
Take special care to follow the safety suggestions listed below.
Safety
1) Power Source: The unit should be connected to a power supply only of the type described in the operating instructions or as marked on the unit.
2) Nonuse Periods: When left unused for a long period of time, the unit should be unplugged from the household AC outlet.
Installations
Environment
1) Water and Moisture: Do not use this unit near water—for example, near a bathtub, washbowl, sink, etc. Damp basements should also be avoided.
2) Heat: The unit should be kept away from heat sources such as radiators, cookers, etc. It also should not be placed in rooms where the temperature is less than 5°C (41°F) or greater than 40°C (104°F).
Placement
1) Stacking: Do not place heavy objects on top of this unit. 2) Foreign Material: Care should be taken so that objects do not fall onto and liquids are not spilled into the unit. Do not subject this unit to excessive smoke, dust, mechanical vibration, or shock.
3) Surface: Place the unit on a flat surface.
4) Magnetism: The unit should be kept away from equipment or devices that generate a strong magnetic field.
WARNING:
TO PREVENT THE RISK OF FIRE OR ELECTRICAL SHOCK, DO NOT EXPOSE THIS PRODUCT TO RAIN OR ANY TYPE OF MOISTURE.
Battery caution:
To reduce the risk of fire or injury to persons, read and follow these instructions.
- Use only the battery(ies) specified.
- Do not dispose of the battery(ies) in a fire. It (they) may explode.
- Do not open or mutilate the battery(ies). Released electrolyte is corrosive and may cause burns or injury to the eyes or skin. The electrolyte may be toxic if swallowed.
- Exercise care in handling the battery(ies) in order not to short the battery(ies) to conductive materials such as rings, bracelets, and keys. The battery(ies) and/or conductor may overheat and cause burns.
- Do not recharge the battery(ies) provided with or identified for use with this product. The battery(ies) may leak corrosive electrolyte or explode.
- Do not attempt to rejuvenate the battery(ies) provided with or identified for use with this product by heating. Sudden release of battery electrolyte may occur causing burns or irritation to the eyes or skin.
- Remove the battery(ies) from this product if the product will not be used for a long period of time (several months or more). During this time the battery(ies) could leak in the product.
- Discard the "dead" battery(ies) as soon as possible. The "dead" battery(ies) may leak in the product.
- Do not store this product, or the battery(ies) provided with or identified for use with this product, in high temperature areas. Batteries that are stored in a freezer or refrigerator for the purpose of extending shelf life should be protected from condensation during storage and defrosting. Batteries should be stabilized at room temperature prior to use after cold storage.
- Danger of explosion if battery(ies) is/are incorrectly replaced. Replace only with the same or equivalent type recommended by the manufacturer. Dispose of used battery(ies) according to the manufacturer's instructions.
GUARANTEE CONDITIONS OF GUARANTEE
This guarantee is in addition to and does not in any way affect any statutory or other rights of consumer purchasers. If within the applicable guarantee period, the appliance proves to be defective by reason of faulty design, workmanship or materials. we undertake subject to the following conditions to have the defective appliance (or any part or parts there of) repaired or replaced free of charge.
- The appliance shall have been purchased and used solely within the UK and in accordance with standard operating instructions and the technical and/or Safety Standards required in the UK.
- The appliance should be returned together with this guarantee and proof of date of purchase promptly on being found defective at the purchaser's risk and expense to the authorized dealer from whom the appliance was purchased or to the nearest authorized dealer. All enquiries must be through such dealers.
- This guarantee shall not apply to damage caused through fire, accident, lightning, misuse, wear and tear, neglect, incorrect adjustment or repair, to damage caused through installation, adaption, modification or use in an improper manner or inconsistent with the technical and/or safety standards required in the country where this appliance is used, or to damage occurred during transit to or from the purchaser.
- If at any time during the guarantee period any part or parts of the appliance are replaced with a part or parts not supplied or approved by us or of an objective quality safe and suitable for the appliance, or the appliance has been dismantled or repaired by any person not authorized by us, we shall have the right to terminate this guarantee in whole or in part immediately without further notice.
- The purchaser's sole and exclusive remedy under this guarantee against us is for the repair or replacement of the appliance or any defective part or parts and no other remedy, including, but not limited to, incidental or consequential damage or loss of whatsoever nature shall be available to the purchaser.
- This guarantee shall not apply to cassette tapes, batteries and any other items of limited natural life.
- Our decision on all matters relating to complaints shall be final. Any appliance or defective part which has been replaced shall become our property.
- The guarantee period applicable to this product shall be 12 months.
Please keep these Operating Instructions with your receipt.
Panasonic Business Systems U.K.
| Receipt No. | Date of Purchase |
| Model No. KX-TS700E-B | Serial No. |