
NN-3959 - Mikrowellen PANASONIC - Kostenlose Bedienungsanleitung
Finden Sie kostenlos die Bedienungsanleitung des Geräts NN-3959 PANASONIC als PDF.


Benutzerfragen zu NN-3959 PANASONIC
0 Frage zu diesem Gerät. Beantworten Sie die, die Sie kennen, oder stellen Sie Ihre eigene.
Eine neue Frage zu diesem Gerät stellen
Laden Sie die Anleitung für Ihr Mikrowellen kostenlos im PDF-Format! Finden Sie Ihr Handbuch NN-3959 - PANASONIC und nehmen Sie Ihr elektronisches Gerät wieder in die Hand. Auf dieser Seite sind alle Dokumente veröffentlicht, die für die Verwendung Ihres Geräts notwendig sind. NN-3959 von der Marke PANASONIC.
BEDIENUNGSANLEITUNG NN-3959 PANASONIC
OPERATING
INSTRUCTIONS
Panasonic Dimension 4 Microwave/Convection Oven with Bread Program
NN-3909/NN-3959
This appliance was produced to BS 800
Panasonic
Before operating this oven, please read these instructions carefully.
Installation
Examine Your Oven
Unpack oven, remove all packing material, and examine the oven for any damage such as dents, broken door latches or cracks in the door. Notify dealer immediately if unit is damaged. Do NOT install if unit is damaged.
Guarantee Card
Fill out and post the pre-addressed guarantee card.
Earthing Instructions
IMPORTANT FOR PERSONAL SAFETY. THIS APPLIANCE MUST BE PROPERLY EARTHED. When a wall socket is not earthed, it is the personal responsibility and obligation of the customer to have it replaced with a properly earthed wall socket.
WARNING:
THIS APPLIANCE MUST BE EARTHED. IMPORTANT:
The wires in this mains lead are coloured in accordance with the following code:
Green-and-yellow: Earth
Blue: Neutral
Brown: Live
As the colours of the wires in the mains lead of this appliance may not correspond with the coloured markings identifying the terminals in your plug, proceed as follows: The wire which is coloured GREEN-and-YELLOW must be connected to the terminal in the plug which is marked with the letter E or by the safety earth symbol or coloured GREEN or GREEN-and-YELLOW. The wire which is coloured BLUE must be connected to the terminal which is marked with the letter N or coloured BLACK. The wire which is coloured BROWN must be connected to the terminal which is marked with the letter L or coloured RED.
Voltage and Power Warning
The voltage used must be the same as specified on this microwave/convection oven. Using a higher voltage than that which is specified is dangerous, and may result in a fire or other type of accident causing damage.
N.B. 13 AMP FUSE REQUIRED IN PLUG.
Placement of Oven
- Oven must be placed on a flat, stable surface. For proper operation, the oven must have sufficient air flow.
- Do not block air vents on the rear and bottom of the cabinet. Do not place any articles on the top of the oven. If air vents are blocked during operation, the oven may overheat. If the oven overheats, a thermal safety device will turn the oven off. The oven will remain inoperable with blank display until it has cooled.
- Do not place the microwave/convection oven on a shelf directly above a gas or electric hob. Otherwise the oven may be damaged.
- Do not allow mains cable to touch cabinet surface.
- This oven was manufactured for domestic use only.
Fan Motor Operation
After using BAKING, COMBINATION and GRILLING fan motor always rotates for 10 minutes to cool the electric components. This is normal and you can take out food even though fan motor operates. You can continue using the oven during this 10 minutes on a manual program.
Built In
- In case of fitting into an oven housing please use Panasonic's Trim Kit NN-TK309 (for NN-3909), NN-TK359 (for NN-3959), referring to the Trim Kit's Instruction Manual for details
- Microwave/convection ovens should not be built into a unit directly above a top front venting conventional cooker. A gap of at least 15 cm (6 inches) should be left. It is important that the microwave draws in cool air. A microwave/convection oven which is built under a work surface must have adequate air circulation and must have a vent in the work surface.
Caution Points
- Before using CONVECTION, COMBINATION or GRILL function for the first time, operate the oven without food on GRILL 1, for 20 minutes. This will allow the oil that is used for rust protection to be burned off.
- Exterior oven surfaces, including air vents on the cabinet and the oven door will get hot during CONVECTION. COMBINATION and GRILLING. Use care when opening or closing door and when inserting or removing food and accessories.
- The oven has 2 heaters situated in the top and floor of the oven.
After using the CONVECTION, COMBINATION and GRILL functions, these surfaces will be very hot. N.B. Even after preheating and cooking by GRILL, the oven floor will be very hot.
- Do not operate this appliance if it has a damaged CORD OR PLUG, if it is not working properly, or if it has been damaged or dropped.
- This appliance including the oven lamp should be serviced only by service technician trained by the manufacturer.
- Do not use outdoors
- Do not immerse cord, plug or oven in water
- Keep cord away from heated surfaces.
- Do not let cord hang over the edge of table or work top.
- Do not attempt to tamper with or make any adjustments or repairs to door, control panel housing, safety interlock switches or any other part of the oven. Do not remove outer panel from oven.
Repairs should only be done by a qualified service person.
- The door seals and area around door opening should be kept clean at all times. Clean with a soft damp cloth.
- The appliance should be inspected for damage to the door seals and door seal areas and if these areas are damaged the appliance should not be operated until it has been repaired by service technician trained by the manufacturer.
- It is dangerous for anyone other than a service technician trained by the manufacturer to perform repair service.
- The appliance shall not be operated by MICROWAVE or COMBINATION WITHOUT FOOD IN THE OVEN, operation in this manner may damage the appliance.
General Information
1) Cooking Times
- AS MICROWAVE cooking times are much shorter than other cooking methods it is essential that recommended cooking times are not exceeded without first checking the food.
- Cooking times given in the cookbook are approximate. Factors that may affect cooking times are: preferred degree of cooking, starting temperature, altitude, volume size and shape of foods and dishes used. As you become familiar with the oven, you will be able to adjust these factors.
- It is better to undercook rather than overcook foods. If food is undercooked, it can always be returned to the oven for further cooking. If food is overcooked, nothing can be done. Always start with minimum cooking times.
Important
If the recommended cooking times are exceeded the food will be spoiled and in extreme circumstances could catch fire and possibly damage the interior of the oven.
2) Standing Times
- Standing Times are essential for foods cooked or reheated by MICROWAVE or COMBINATION. Stand times are times "after" the cooking program is complete where the food is left either in the oven or on your worktop in its cooking dish. During the STAND TIME, heat will continue to conduct to the centre to cook the food completely. The denser the food, the longer the stand time e.g. joints of meat require stand times of approx 15 mins. Reheated foods also require a standing time to allow heat to equalize through the food. See cookbook for Reheat instructions.
3) Small Quantities of Foods
- Particular attention should be paid to heating small quantities of food and items such as jacke! potatoes and Christmas puddings.
- Small quantities of food or foods with low moisture content can burn, dry out or catch on fire if cooked too long. If materials inside the oven should ignite, keep oven door closed, turn oven off, and disconnect the power cord, or shut off power at the fuse or circuit breaker panel.
4) Christmas Puddings
- It is important to correctly set the cooking time for puddings such a Christmas Pudding which has a high fat and sugar content. If the pudding is heated by MICROWAVE for too long, it can ignite. NEVER LEAVE UNATTENDED.
5) Eggs
- Do not boil eggs in their shell by MICROWAVE. Pressure may build up and the eggs will explode.
6) Piercing Skin
- Potatoes, apples, egg yolks, whole vegetables and sausages are examples of food with non porous skins. These must be pierced using a fork before cooking by MICROWAVE to prevent bursting.
7) Deep Fat Frying
- Do not attempt to deep fat fry in your oven
8) Meat Thermometer
- Use a meat thermometer to check the degree of cooking of roasts and poultry only when meat has been removed from oven. If undercooked, return to oven and cook for longer at the recommended power level or on the appropriate COMBINATION program. Do not use a conventional meat thermometer when using MICROWAVE or COMBINATION mode.
9) Liquids
- Heated liquid can erupt if not mixed with air. Do not heat liquid by MICROWAVE without first stirring.
10) Paper, Plastic
- Carefully attend the appliance if paper, plastic or other combustible materials are placed inside the oven to facilitate cooking.
- Remove wire twist-ties from roasting bags before placing bags in oven.
- Do not use re-cycled paper products, as they may contain impurities which may cause sparks and/or fires when used, unless packaging states they are specifically designed for MICROWAVE use.
Metal Tray/Turntable
- Do not operate the oven without the Metal Tray-Turntable in place when cooking by MICROWAVE or COMBINATION. Remove Metal Tray-Turntable when using GRILL or if using Solid Shelf on lower position on CONVECTION.
- Only use the Metal Tray: Turntable specifically designed for this oven. Do not substitute any other Metal Tray: Turntable.
- If Metal Tray: Turntable is hot, allow to cool before cleaning or placing in water.
- Metal Tray: Turntable can turn in either direction.
- If food or dish on Metal Tray: Turntable touches oven walls, causing the turntable to stop moving, the turntable will automatically rotate in opposite direction. This is normal. However, if food jams against wall of oven, reposition food and RESTART.
- Do NOT cook directly on Metal Tray: Turntable when cooking by MICROWAVE. Always place food in a dish, or on a rack set in a dish. One exception to this rule is Jacket Potatoes, which may be placed directly onto Turntable. For COMBINATION cooking, place meats and poultry on the Splash Guard set in Metal Tray/Turntable. Follow specific instructions in the Panasonic cookbook for proper use of oven accessories and cookware.
- While cooking by MICROWAVE or COMBINATION, Metal Tray: Turntable may vibrate. This will not affect cooking performance.
Oven Light
When it becomes necessary to replace the oven light, please consult a dealer to have it replaced.
Feature Diagram
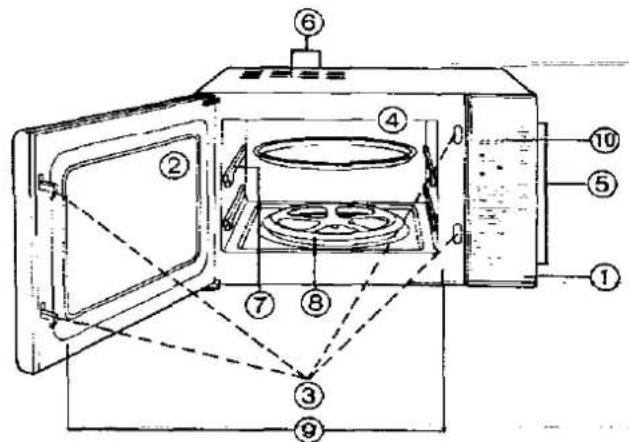
text_image
Technical diagram of a microwave oven with numbered components for identification① Door Release
② Oven Window
③ Door Safety Lock System
④ Oven Air Vents
⑤ Control Panel
⑥ External Oven Air Vents
⑦ Slide-in Shelf Guides
⑧ Metal Turn Table Support
⑨ Door Seal Area
⑩ Display Window
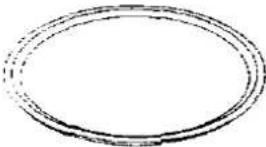
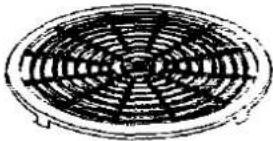
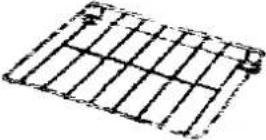
Oven Accessories
| Bread Pan(A062D5120BP) | Turntable/Metal Tray(A06015020AP) | Plastic Defrost Rack(A07064700AP) | Top Rack Shelf(A06025110BP) |
 |  |  |  |
| Kneading Blade(A062E-1520) | Solid Shelf(A060W5021AP) | Square Splash Guard(A06485110BP) | Round Splash Guard(A06485020AP) |
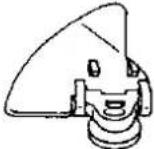 | 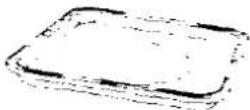 | 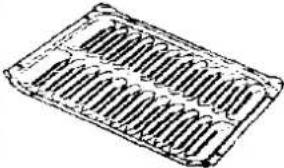 | 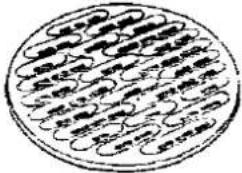 |
Cooking Modes
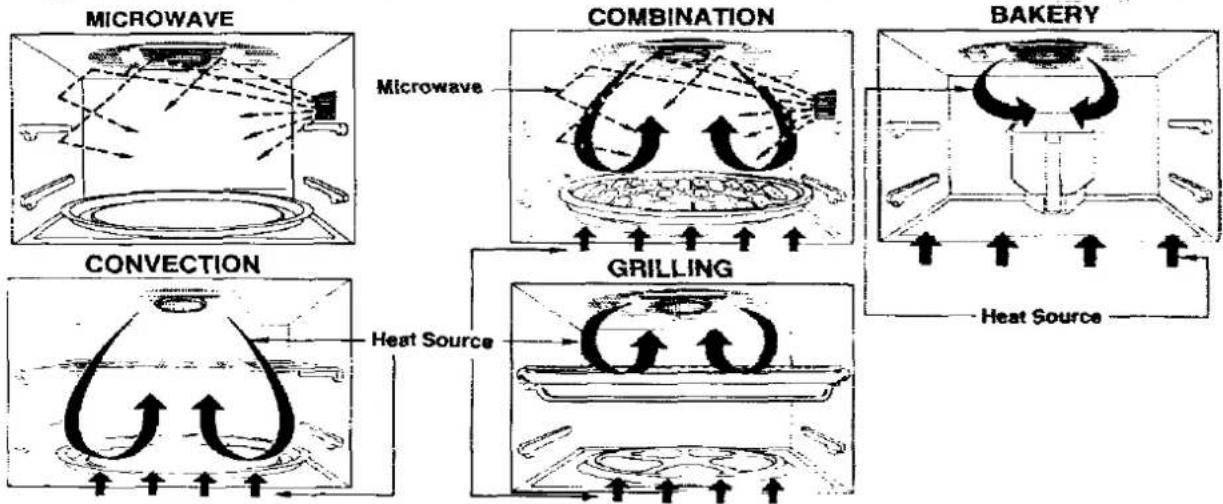
flowchart
graph TD
    A["MICROWAVE"] --> B["Combination"]
    B --> C["BAKERY"]
    C --> D["GRILLING"]
    D --> E["CONVECTION"]
    E --> F["Heat Source"]
Control Panel
Controls with Auto Count-Up Feature*
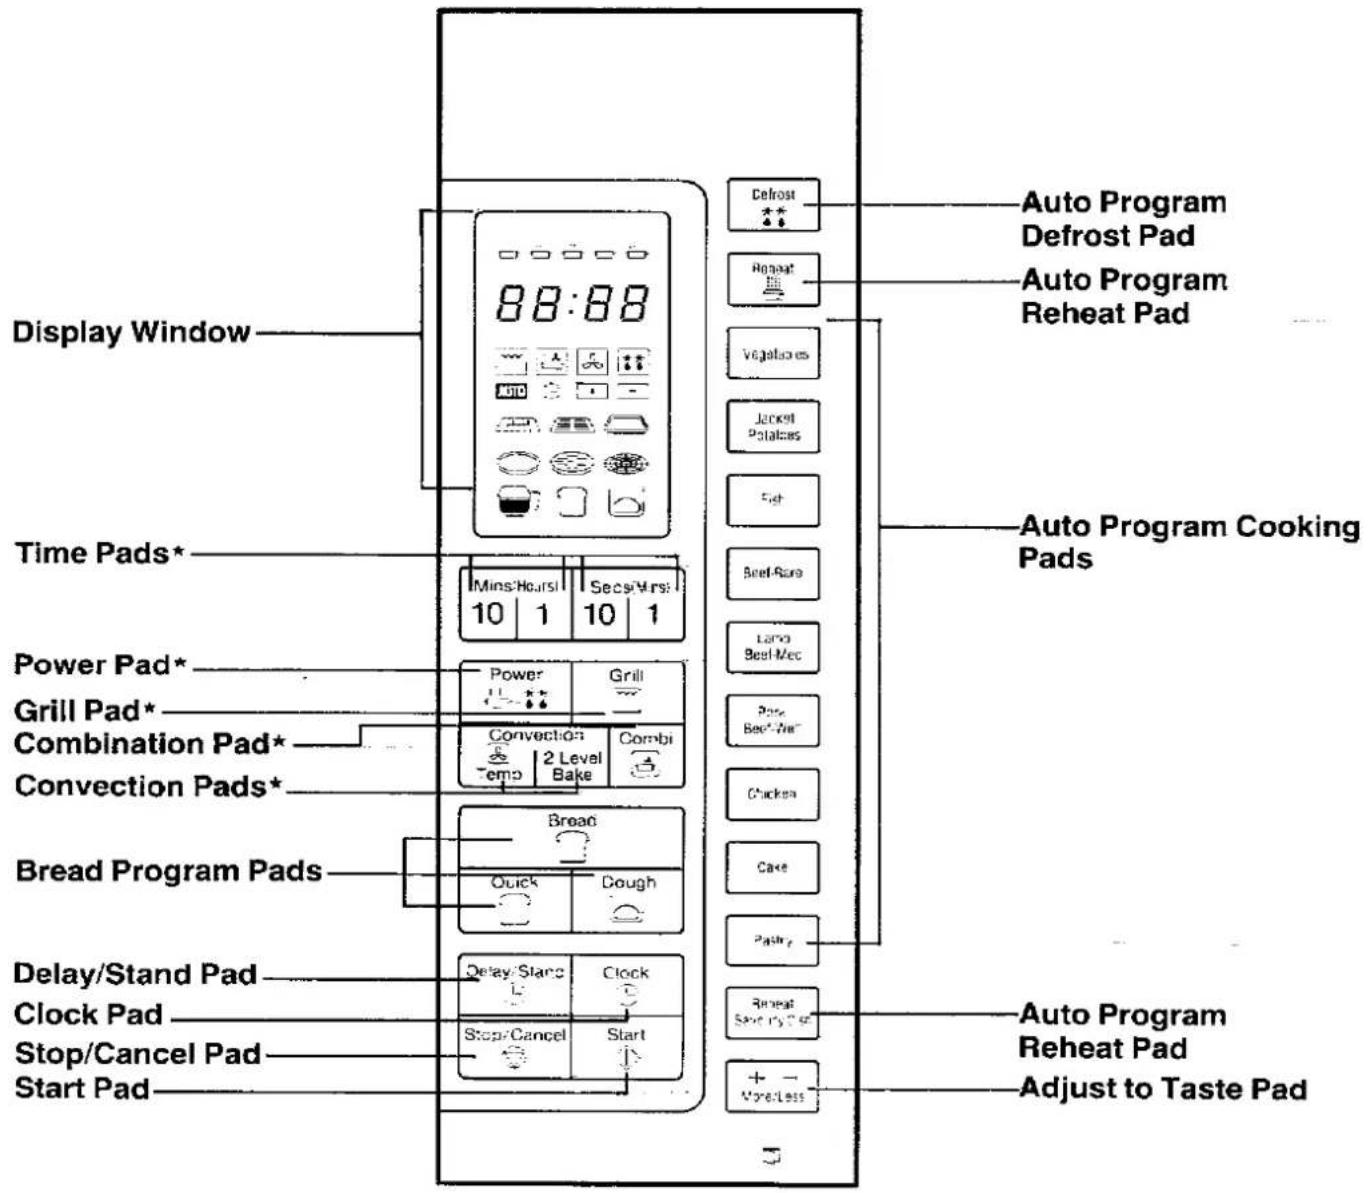
text_image
Display Window 88:88 Time Pads* Power Pad* Grill Pad* Combination Pad* Convection Pads* Bread Program Pads Delay/Stand Pad Clock Pad Stop/Cancel Pad Start Pad Defrost Auto Program Defrost Pad Auto Program Reheat Pad Vegetables Jacket Potatoes Fish Bread-Rare Largo Bed-Mec Pane Bed-War Chicken Cake Path Reset Save Only C# + - More Less Auto Program Cooking Pads Auto Program Reheat Pad Adjust to Taste PadCooking Dishes
1. 2. 3. 4. 5. 6. 7. 8. 9. 10. 11. 12. 13. 14. 15. 16. 17. 18. 19. 20. 21. 22. 23. 24. 25. 26. 27. 28. 29. 30. 31. 32. 33. 34. 35. 36. 37. 38. 39. 40. 41. 42. 43. 44. 45. 46. 47. 48. 49. 50. 51. 52. 53. 54. 55. 56. 57. 58. 59. 60. 61. 62. 63. 64. 65. 66. 67. 68. 69. 70. 71. 72. 73. 74. 75. 76. 77. 78. 79. 80. 81. 82. 83. 84. 85. 86. 87. 88. 89. 90. 91. 92. 93. 94. 95. 96. 97. 98. 99.
The Following is a summary chart in which you will find the correct use of cooking utensils in the oven.
Please see page 11 AUTO PROGRAM cooking in detail.
NOTE: FOR MORE INSTRUCTIONS ON THE CORRECT USE OF DISHES IN YOUR OVEN, PLEASE READ THE
INTRODUCTION SECTION IN THE PANASONIC COOKBOOK.
| Cookware | Microwave | Convection | Combination | Grilling | |
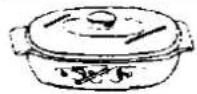 | Heat-Resistant Glass, Glass-Ceramic (Pyrex*, Fire King*, Corning Ware*, etc.) | YES(Do not use dishes with metal trim) | YES | YES(Only dishes without metal trim) | YES. if heat-safe to 280°C |
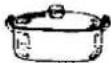 | Ceramic | YES(Do not use dishes with metal trim) | YES | YES(Only dishes without metal trim) | NO |
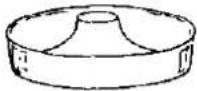 | Metal | NO | YES | YES* | YES |
 | Non Heat-Resistant Glass | NO | NO | NO | NO |
| Microwave-Safe Plastics | YES2*(Short cooking time only) | NO | NO | NO | |
| Plastic Films & Wraps | YES2* | NO | NO | NO | |
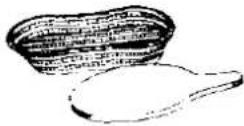 | Paper Products | YES2* | NO | NO | NO |
| Straw. Wicker | YES2* | NO | NO | NO | |
| Browning Dishes | YES | NO | NO | NO | |
1*These items must be smooth bottomed—See cookbook for further instructions.
2"If CONVECTION or COMBINATION was used prior to MICROWAVE, allow turntable to cool 15-20 min. before using these items.
N.B. For AUTO programmes, follow appropriate guide lines for MICROWAVE or COMBINATION depending on program
N.B. Paper products must only be used for short cooking times. Straw/Wicker must only be used for short reheating times
When MICROWAVING and shielding large items e.g. joints of meat, turkeys, ensure the foil used does not touch oven walls. When cooking by COMBINATION, if metal containers are used, these must not touch oven walls as they turn on turntable. Allow at least 1 inch of space between metal container and oven cavity walls. If arcing (sparking) occurs, transfer to non-metallic container or cook by CONVECTION only.
N.B. For AUTO programme "REHEAT SAVOURY DISH".
If food is contained in a FOIL container, check that the container is not dented or damaged, otherwise ARCING may occur. If foil container is dented, place on a HEATPROOF plate on turntable, or cook on convection only.
Controls and Operation Procedure
Setting The Clock:
When oven is first plugged in, "88:88" will appear in the display window.
To set clock
Step 1. Press the CLOCK Pad.
▶The coion will start to blink.
Step 2. Enter time of day by pressing appropriate TIME Pads.
▶ Time appears in display window; colon is still blinking.
Example: To set 2:30 pm,
touch TIME Pads from left to right as follows:
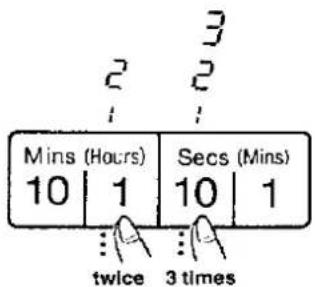
text_image
Mins (Hours) 10 | 1 ... twice Secs (Mins) 10 | 1 ... 3 times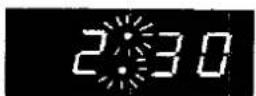
Step 3. Touch CLOCK Pad.
▶Colon stops blinking; time of day is entered and locked into display.
NOTES ON CLOCK:
- To reset time of day, repeat Step 1 through to Step 3.
- The clock will keep the time of day as long as oven is plugged in and electricity is supplied.
- This is a 12 hour clock, not a 24 hour clock. Oven will not operate whilst 24 hour clock e.g. 14:30 is set.
TIME Pads:
- Grill and all Microwave Power levels.
text_image
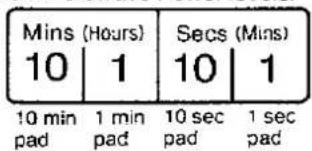
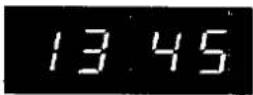
Mins (Hours) 10 | 1 Secs (Mins) 10 | 1 10 min 1 min 10 sec 1 sec pad pad pad pad padExample: After selecting GRILL/MICROWAVE Power to set 13 minutes 45 seconds
Touch;
10 MIN Pad: once
1 MIN Pad: 3 times
10 SEC Pad: 4 times
1 SEC Pad: 5 times
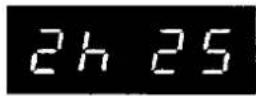
- Combination, Convection and Delay/Stand:
text_image
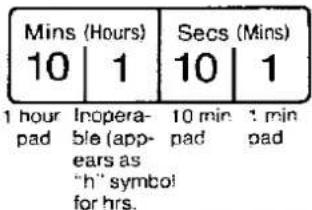
Mins (Hours) 10 | 1 Secs (Mins) 10 | 1 1 hour Inopera- pad ble (appe- ears as "h" symbol for hrs.Example: After selecting CONVECTION temp, COMBINATION program or DELAY/STAND function set 2 hours 25 minutes
Touch;
1 HOUR Pad: Twice
10 MIN Pad: Twice
1 MIN Pad: 5 times
Beep Sound:
When a pad is touched correctly, a beep will be heard. If a pad is touched and no beep is heard, the unit has not or cannot accept the instruction. The oven will beep twice between programmed stages. At the end of any complete program, the oven will beep 5 times.
At the end of preheating on CONVECTION or GRILL functions, the oven will beep 3 times.
START Pad:
One tap allows oven to begin functioning. If door is opened or STOP/CANCEL pad is tapped once during oven operation, press START pad, to resume cooking.
STOP/CANCEL Pad:
Before cooking: One tap clears your instructions.
During cooking: One tap temporarily stops the cooking process. Another tap cancels all your instructions and time of day appears in display window.
Door Release:
Opening the door during cooking will stop the cooking process without cancelling the program. Cooking resumes as soon as the door is closed and START pad is touched. The oven light will turn on and stay on whenever the door is opened.
Delayed Start Cooking
(All cooking modes except Auto Program Cooking, Grill and 2 Level Bake)
Using the Delay Stand pad you are able to program Delayed Start cooking.
text_image
1. Delay/Stand- Touch DELAY/STAND pad.
text_image
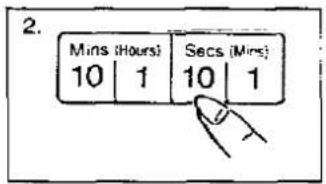
2. Mins (Hours) 10 | 1 Secs (Mins) 10 | 1- Set the Delay Time by pressing TIME pads.
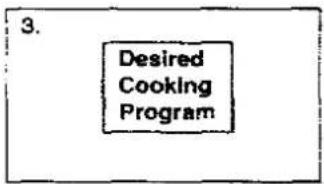
text_image
3. Desired Cooking Program- Select desired cooking program according to directions in cookbook.
text_image
4. Start- Touch START pad.
NOTES ON DELAYED START COOKING:
- With the Delay Start feature, the oven may be programmed to delay cooking for up to 9 hours 99 minutes before cooking starts
N.B.: Time pads operate as follows:
| Mins (Hours) | Secs (Mins) | ||
| 10 | 1 | 10 | 1 |
| hours | 'h' symbol | 10's mins | "1's mins |
- Three stage cooking can be programmed including Delayed Start cooking
eg. Delay:Start 1 hour. High Power 10 min Simmer Power 20 min.
Stand Time (All Cooking modes except Auto Program cooking and Grill)
Using the Delay Stand pad you can program a Stand Time after cooking is completed or use to program the oven as a minute timer.
text_image
1. Desired Cooking Program- Program desired cooking program according to directions in the cookbook.
text_image
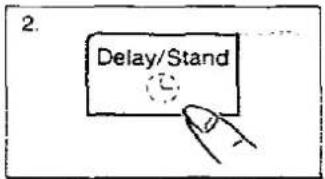
2. Delay/Stand- Touch DELAY/STAND pad.
text_image
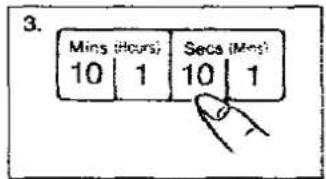
3. Mins (Hours) 10 | 1 Secs (Mns) 10 | 1- Set desired amount of time by pressing TIME pads.
text_image
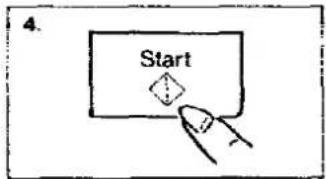
4. Start- Touch START pad.
NOTES ON STAND TIME:
- With the Stand Time feature, the oven may be programmed to stand for up to 9 hours 99 minutes after or during a cooking sequence.
N.B.: Time pads operate as follows:
| Mins (Hours) | Secs (Mins) | ||
| 10 | 1 | 10 | 1 |
| hours | 'h' symbol | "10's mins | "1's mins |
- Three stage cooking can be programmed. One of these stages can be a Stand Time
eg. Cooking Christmas Pudding (2 lb) High Power 4 min.
Stand Time 5 min
High Power 2 min.
- If oven door is opened during the Stand Time, the time in display window will continue to count down.
MICROWAVE
Selecting Power Level:
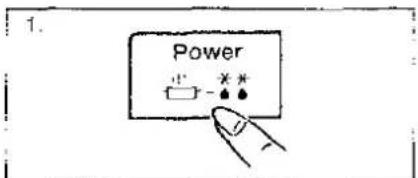
The Power pad automatically counts down from HIGH to WARM when finger is held on Power pad. The following is the approximate wattage for each power level and shows the symbol that will appear in the oven display window.
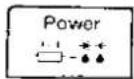
| HIGH power | 750 W | 1 press | |
| DEFROST power | 240 W | 2 presses | |
| MEDIUM power | 480 W | 3 presses | |
| LOW power | 360 W | 4 presses | |
| SIMMER power | 180 W | 5 presses | |
| WARM power | 70 W | 6 presses |
Use of accessory
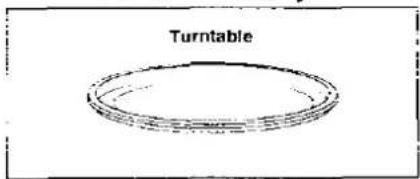
text_image
TurntableOne Stage Cooking
text_image
1. Power + - * * - -- Select cooking power by pressing POWER pad.
text_image
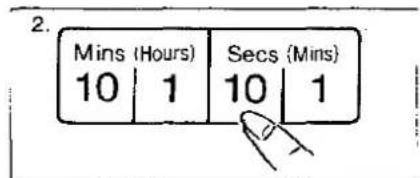
2. Mins (Hours) Secs (Mins) 10 | 1 10 | 1- Set cooking time by pressing TIME pads.
text_image
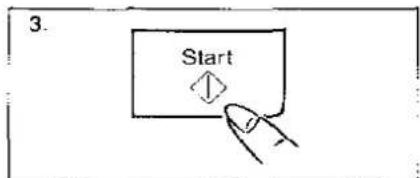
3. Start- Touch START pad.
e.g. Defrost loaf of bread for 8 mins, press POWER pad twice. Press 1 min pad 8 times. Press START pad.
Two Stage Cooking/Three Stage Cooking
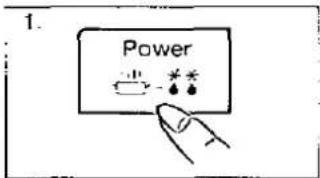
text_image
1. Power- Select 1st cooking power by pressing POWER pad, appropriate number of times.
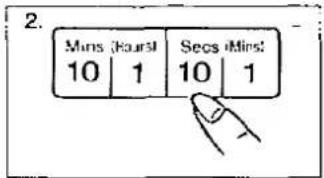
text_image
2. Mins (Kurs) 10 1 Secs (Mins) 10 1- Set 1st stage cooking time by pressing TIME pads.
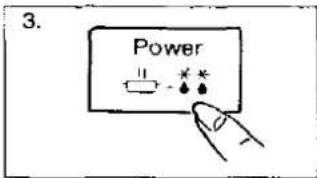
text_image
3. Power- Set 2nd power level by pressing POWER pad, appropriate number of times.
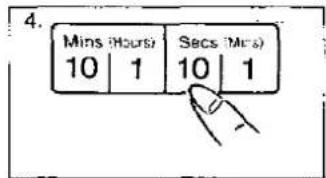
text_image
4. Mins (Hours) 10 | 1 Secs (Mrs) 10 | 1- Set 2nd cooking time by pressing TIME pads.
(If required set third power level and third cooking time) then
text_image
5. Start- Touch START pad.
NB.
Example of three stage cooking;
Casserole--High 10 mins to bring casserole to boil. Simmer 60 mins to Cook. Warm 10 mins to allow flavours to continue blending.
Example of two stage cooking:
Vegetable soup—High 10 mins to bring soup to boil. Simmer 30 mins to cook vegetable.
Auto Program Cooking
Auto Program Cooking allows you to cook most of your favourite foods without having to select cooking times. MICROWAVE powers or cooking temperatures. The oven does it all automatically. For further information, please refer to the Dimension 4 Cookbook.
Auto Reheat, Vegetables, Jacket Potatoes and Fish cook by MICROWAVE only.
Auto Meat programs, Cake, Pastry and Reheat Savoury Dish Cook by COMBINATION.
text_image
1. Beef-Rare- Select desired Category.
text_image
+ - More/Less- If desired, touch MORE or LESS pad for your desired cooking result.
text_image
2. Start- Touch START pad.
More/Less pad:
Preferences for the degree to which food is cooked varies with each individual. After having cooked with the Auto programs a few times, you may decide you would prefer your food cooked either a little more or a little less. By using the touch More/Less pad, the Auto Programs can be adjusted to cook food for a longer or shorter time. If you are satisfied with the result of cooking with the Auto Program, you do not have to use this pad. See cookbook for more details.
NOTES ON AUTO PROGRAM COOKING:
- The Auto Reheat, Vegetables, Jacket Potatoes and Fish programs work by detecting a build-up of steam on the humidity sensor. As foods cook by microwave, steam is produced. When foods are covered, the steam will build up and escape from the dish in a burst. This burst of steam is detected by the humidity sensor and then the oven automatically calculates the remaining cooking time
- The Auto Defrost program works by weighing the food. The oven then calculates the correct Defrost time i.e Microwave only.
- The Auto Meat programs, Pastry and Reheat Savoury Dish work by the oven weighing the food and calculating the correct cooking time on Combination, i.e. Microwave and Convection.
- For Auto Cake programs the oven weighs the cake and also detects the humidity level as the cake cooks, before calculating the cooking time after approx. 18 mins. The cakes cook by Combination, i.e. Microwave and Convection.
- When an Auto Program is selected, AUTO will appear in the display window. The oven door should not be opened until the remaining cooking time appears in the display window and begins to count-down. At this time, the oven door may be opened to stir or turn if necessary.
- The room air temperature surrounding the oven should not be above 35°C when using Auto Programs. Inaccurate cooking may result.
- It is essential to check the cookbook for guidelines and max/min. weights suitable for cooking by each Auto Program
- When the remaining cooking time is over 60 minutes, the time will appear as hours and minutes.
- All foods for Auto Program Cooking, are taken from their normal storage place
- Before using the Auto Programs make sure turntable in the oven is dry to assure best Auto Program Cooking results
- For best results, Auto programs should be used on a cooled oven i.e. do not attempt to use Auto Reheat, Auto vegetables, Auto Jacket Potatoes, Auto Fish when oven is hot from prior use. An "H" will appear in display window indicating if oven is too hot to accept program. If this happens, press start pad, then cooling fan will operate to cool the oven rapidly. After "H" disappears you can use Auto programs. If you are in a hurry, cook manually i.e. select power and time yourself
- For best results, wipe oven and round metal tray with a soft cloth to remove any excess moisture when repeatedly using Auto Programs.
How to use Auto Program Cooking
| ACCESSORY | NOTES | |
AUTO MICROWAVEPlastic Defrost Rack Turntable Turntable | ·Once START pad has been pressed, the oven will automatically display Defrost time after 15 secs and continue to count down.·For foods weighing more than maximum weight, the oven will beep 5 times after 15 secs and time of day appears in display window.·This program is ideal for defrosting joints of meat, chops, chicken portions, whole quiche taken directly from freezer. See cookbook for further instructions.·To measure weight of foods accurately by the sensor, place food directly on the Defrost Rack.(Do not use any other container.) | |
AUTO MICROWAVETurntable | ·Once the steam is detected, the remaining cooking time immediately appears in the display window and begins to count down.·Food's cooked/reheated on these programs are best covered with either microwave Cling Film, a lid, or an upturned plate. Covering helps keep the food moist.·See cookbook for maximum/minimum weights. | |
AUTO COMBINATIONRound Splash Guard Turntable Turntable | ·There is no need to preheat oven on these programs.·Once START pad has been pressed. the oven will automatically display Cooking time after 15 secs and continue to count down.·For foods weighing more than maximum weight, the oven will beep 5 times after 15 secs and time of day appears in display window.·See cookbook for maximum/minimum weights.·To measure weight of foods accurately by the sensor, place meat directly on the Splash Guard.(Do not use any other container.) | |
AUTO COMBINATIONTurntable | ·There is no need to preheat oven on this program.·For foods weighing more than maximum weight, the oven will beep 5 times after 15 secs and time of day appears in display window.·Once cooking starts, the remaining cooking time appears in the display window after 18 min. and begins to count down.·10 mins after pressing START, fan in oven will become quiet. This is normal. | |
AUTO COMBINATIONTurntable | ·Once START pad has been pressed, the oven will automatically display Cooking time after 15 secs and continue to count down.·For foods weighing more than maximum weight, the oven will beep 5 times after 15 secs and time of day appears in display window. | |
| ·This adjust to taste pad allows you to cook your food to your personal taste. See cookbook for further instructions. |
For more detailed use of cooking utensils, please refer to the cookbook.
CONVECTION COOKING
The Convection Temp. pad automatically counts-up from 40°C to 100°C and then in 10°C increments. Touching the Temp Pad during preheating or cooking shows the temperature you originally programmed in display window.
Auto Preheating

For your convenience, this oven is equipped with Auto Preheating. As a rule the oven should always be preheated when cooking by Convection. Do not open door during preheating.
ONE LEVEL COOKING
Use of Accessory
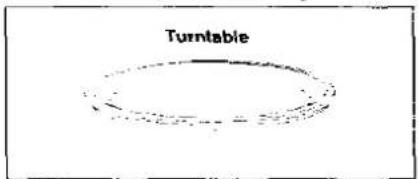
text_image
Turntable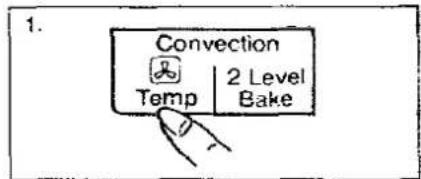
text_image
1. Convection Temp | 2 Level Bake- Press Convection Temp. pad until desired oven temperature appears in display window.
text_image
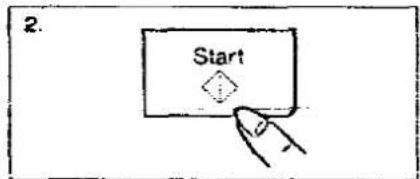
2. Start- Touch START pad.
2 LEVEL COOKING
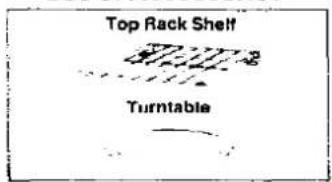
Use of Accessories
text_image
Top Rack Shelf Turntable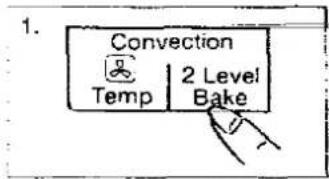
text_image
1. Convection Temp | 2 Level Bake- Press 2 LEVEL BAKE pad.
text_image
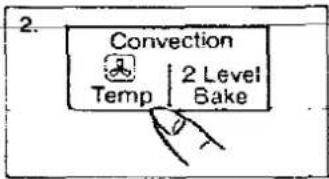
2. Convection Temp | 2 Level Bake- Press Convection Temp. pad until desired oven temperature appears in display window.
text_image
3. Start- Touch START pad.
NOTES:
- After preheating 3 beeps will be heard and the "P" will flash in display window. Open oven door and place food inside oven. If oven door is not opened after preheating, oven will maintain the selected temperature for 30 minutes. After 30 minutes, oven will shut off automatically and revert to time of day.
- For more detailed information on when to preheat, refer to your Panasonic Cookbook.
- On 2 level BAKE, oven TEMP pad operates from 100°C-250°C not 40°-250°C.
Selecting Cooking Time
natural_image
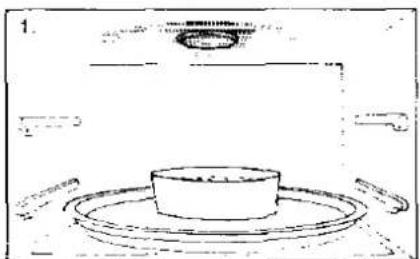
Simple line drawing of a cylindrical object on a circular base, with no text or symbols present.• After preheating, open door and insert food.
text_image
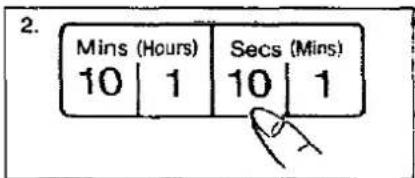
2. Mins (Hours) Secs (Mins) 10 | 1 10 | 1- Set cooking time by pressing appropriate TIME pads.
text_image
3. Start- Touch START pad.
NOTES:
- When selected cooking time is less than one hour, time counts down second by second.
- When selected cooking time is over one hour, time counts down minute by minute until only "59 00" (59 minutes) remain. Display then indicates minutes and seconds and counts down second by second.
- For recipes that do not require preheating, Convection temperature (one level cooking) must be selected before pressing TIME Pads.
- TIME pads operate as Hour pads and Minutes pads.
GRILLING
The GRILL pad provides 2 Grill settings.
Press GRILL pad once for GRILL 1—High setting. Press GRILL twice for GRILL 2 setting—Low setting.
Auto Preheating
For your convenience, the GRILL has an Auto Preheat feature so that you don't have to set a preheating time.
Use of accessory
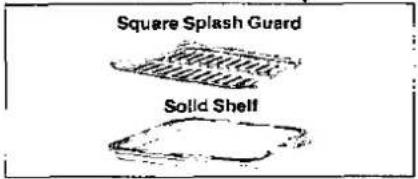
text_image
Square Splash Guard Solid Shelf
text_image
1. Grill- Press GRILL Pad for desired Grill category i.e. once or twice.
text_image
2. Start- Touch START pad.
NOTES:
- After selecting grill category and touching start pad a "P" will appear stationary in the display window. When "P" flashes Grill has preheated and is ready for use.
- Preheat with Solid Shelf in upper position and turntable removed.
- If oven door is not opened after preheating, oven will maintain the selected setting for approx. 30 minutes.
After that, oven will shut off automatically. - After preheating, open oven door and place food (on Splash Guard if required) on to Solid Shelf.
- For more detailed information refer to your Dimension 4 Cookbook.
- The Grill will only operate with the oven door closed.
Selecting Cooking Time
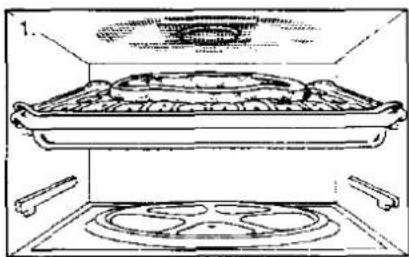
natural_image
Line drawing of a cooking appliance with a tray and stove (no text or symbols)• After Auto Preheating open door and place Splash Guard with food onto Solid Shelf. Close door.
text_image
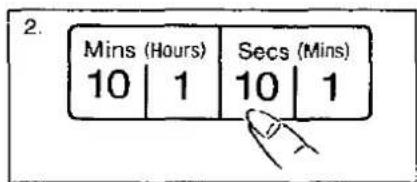
2. Mins (Hours) Secs (Mins) 10 | 1 10 | 1- Set cooking time by pressing TIME pads.
text_image
3. Start- Touch START pad.
NOTE:
- For recipes that do not require preheating, Grill category (1 or 2) must be selected before pressing TIME pads.
- When GRILLING, the TIME Pads operate as Minutes pad and Seconds pads.
- After grilling is complete, slide Solid Shelf out to remove hot food. Solid Shelf can be left to cool slightly before removing from oven. Take care to use thick oven gloves when touching Solid Shelf.
Pero Clean Filter
When using the GRILL and COMBINATION modes, your oven is equipped with a special filler system to minimise cooking smells and fumes.
COMBINATION
Combination Cooking
There are 6 combination settings. These settings are automatic, there is no need to set oven temperature or microwave power level.
Use of accessory
text_image
Turntable• Program 1, 2, 3 and 5
text_image
2. Combi- Select COMBINATION cooking program by pressing COMBI pad the appropriate number of times from 1 to 6.
Use of accessory
text_image
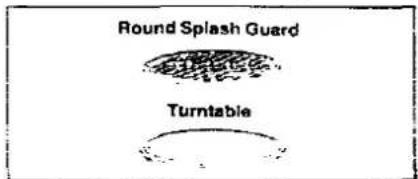
Round Splash Guard Turntable- Program 4 and 6
text_image
3. Mins (Hours) Secs (Mins) 10 1 10 1- Set Cooking time by pressing TIME pad.
natural_image
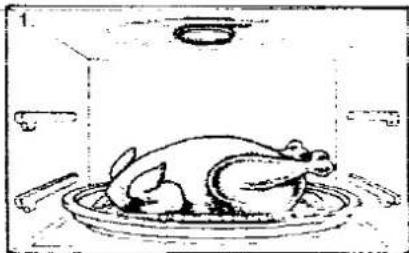
Simple line drawing of a rooster on a circular platform inside a rectangular chamber (no text or symbols)- Place food in oven using appropriate accessories.
text_image
4 Start- Touch START pad.
NOTES:
- To select correct program for particular foods, refer to cookbook.
- When selected cooking time is less than one hour, time counts down second by second.
- When selected cooking is over one hour, time counts down minute by minute until only "59 00" (59 minutes) remain. Display then indicates minutes and seconds and counts down second by second.
- Refer to the introduction in your Dimension 4 Cookbook for additional information on each setting and accessories to use.
- Do not attempt to preheat oven when cooking by Combination.
- The Combination programs are designed to cook your foods from a cold oven start. Placing foods to be cooked by combination into a hot oven will affect cooking times and results.
- When cooking joints of meat on Combination Setting 6, use Splash Guard on top of turntable. When cooking foods other than meat eg puddings etc, place container directly onto turntable.
Before Starting
1. Place the kneading blade in the bread pan
- Securely mount it so that it does not slip off during cooking. The blade should lie flat.
2. Place ingredients in the bread pan
1 yeast
2 dry ingredients
3 butter or margarine
4 liquid ingredients
- For best results, ingredients should be added to bread pan in order listed above.
- For further information as to quantity of ingredients, etc., refer to the Panasonic Bread Program cookbook.
3. Set the bread pan in the oven cavity.
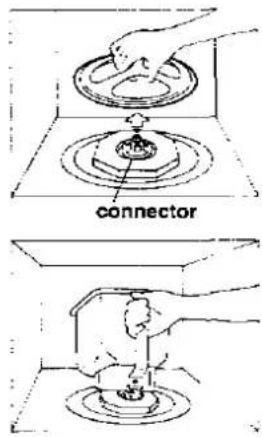
1 Remove the metal turntable support.
Lift and remove as indicated.
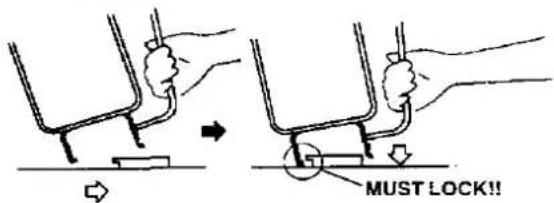
2 Set the bread pan in place.
Holding the handle of the bread pan as pictured,
insert in the base in the oven cavity bottom.
Be sure pan is securely in place.
If Bread Pan is difficult to place on platform,
slightly turn shaft under bread pan until pan can sit
securely over platform.
text_image
MUST LOCK!!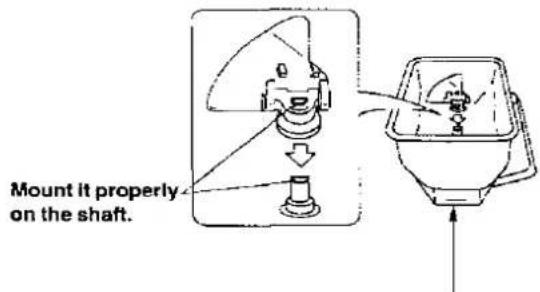
text_image
Mount it properly on the shaft.magnet The base of the Bread Pan contains a magnet. Do NOT allow other metal objects eg knives, forks to touch pan base.
text_image
connectorOperation of Bread/Quick Cycle
This feature allows you to automatically mix ingredients, knead the bread dough and bake the bread. Time required is approximately 4½ hours. For a quicker loaf use Quick pad, time required is approximately 3½ hours.
text_image
1. Bread- Press BREAD or QUICK Pad.
●Breadmaking symbol appears in display.
text_image
2. Start ↓- Press START Pad.
●Breadmaking symbol flashes, oven begins to operate.
NOTES:
- If the bread pan is not properly inserted, oven will remain inoperable.
- Do not open the door during any bread baking operation. If the door is accidentally opened before kneading period is complete, press STOP:CANCEL Pad, select correct cycle pad (ie. BREAD, QUICK or DOUGH), and press START. It is not recommended to reuse the same ingredients as the final baked result may be affected. If the door is accidentally opened after the kneading period is complete, close the door and press START. The oven will continue its cycle. (The oven will become silent after the kneading process.)
- When any bread program cycle is completed, beeper sounds and "COOL" appears in display window. Fan Motor always rotates to prevent the bread from becoming scggy. This is normal, and you can remove bread pad from the oven even though fan motor operates.
BREAD PROGRAM
After Baking
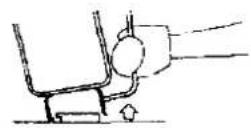
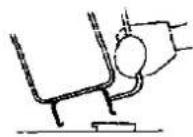
1. Remove the bread pan from the oven.
- Be sure to use oven gloves.
Lift the handle of the bread case slightly.
Pull it toward you and remove it from the base.

natural_image
Illustration of a hand gripping a small object with an arrow indicating rotation (no text or symbols)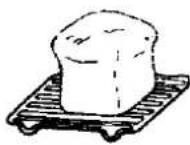
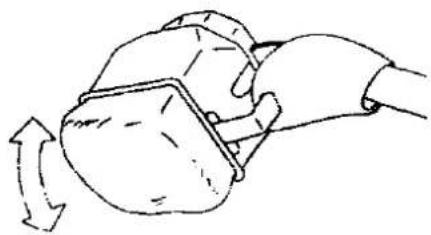
2. Remove bread from bread pan.
- Turn over the bread pan, shake it gently several times, and remove the bread.
- Place bread on a wire rack. Let cool.
*If bread is difficult to remove, turn the shaft on the bottom of the bread pan.
*If the kneading blade is stuck to the bread, carefully remove it, blade will be hot.
Operation of Delayed Bread/Dough Cycle
This features allows you to program the time of day you want the bread rising and baking process to start.
1
- Press DELAY/STAND Pad.
- Enter desired delay time in hours and minutes using appropriate TIME Pads.
- Delay time appears.
- Press BREAD Pad.
- Delay time disappears. Breadmaking symbol appears.
- Press START Pad.
- Delay time reappears.
NOTES:
- The oven may be programmed to Delay the START of the rising and baking process for up to 9 hours. 99 minutes.
- Completion of rising and Baking process is approximately 4½ hours from Delay time set. For example oven is programmed at 9:00 a.m to begin at 2:00 p.m (5 hour delay) LOAF will be ready at approximately 6:30 p.m (total time of 9½ hour).
BREAD PROGRAM
Operation of Dough Cycle

This feature allows you to prepare dough automatically. After the dough has been prepared, shape the dough to make rolls, danish, croissant, etc. and bake in your microwave/convection or conventional oven.
text_image
1. Dough- Press DOUGH Pad.
●Breadmaking and dough symbols appear in display.
text_image
2. Start- Press START Pad.
- Breadmaking symbol disappears, dough symbol flashes. Oven begins to operate.
- At end of the cycle remove pan from oven. Shape dough as desired. For further information refer to the Panasonic Cookbook.
Follow these safety precautions when using the bread bakery.
- Use only as directed in these operating instructions and the Panasonic cookbook.
- Handle the bread pan and kneading blade with care.
- Follow specific recipes/instructions in the Panasonic cookbook. Ingredients must be measured accurately to achieve satisfactory results.
- Refrain from removing the bread pan or disconnecting the power cord during cooking. If the bread case is removed or the power plug is disconnected, you have to begin the process again.
- For Delayed loaf cycle ingredients must be added to bread pan in proper sequence. To assure satisfactory results, ingredients must be added to the bread pan in the following order yeast, dry ingredients, butter, liquid ingredients.

text_image
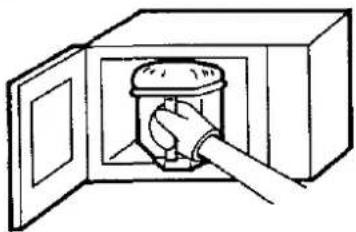
Fat Water Flour Yeast Sectional View- Carefully remove the bread pan from the oven. When baking is completed, the oven interior, bread pan, etc. are very hot. Be sure to use oven gloves to remove the bread pan.
natural_image
Simple line drawing of a hand inserting a small component into a microwave oven (no text or symbols)- After baking, remove the baked bread from bread pan as soon as possible. Place bread on a wire rack. Let cool. If the bread is kept in the bread pan, the surface of the bread may become soggy.
- Do not put hard ingredients such as ice or lump sugar or whole nuts in the bread pan. Damage may occur to the bread pan and/or kneading blade, or cause a malfunction.
- If you find the display window on the control panel showing 88:88, it means there has been a long power failure. In this instance, set the clock and/or re-set a programme for cooking. If this has happened during a Bread Programme, it is not advisable to reuse the same ingredients as the final baked result will be affected.
Care of Your Dimension 4 Oven
- Turn the oven off before cleaning.
- Keep the inside of the oven, door seals and door seal areas clean. If door seals and door seal areas become soiled and are not cleaned, door seal rubber may stick to oven front wall and it might become hard to open the door by pressing door release button. When this happens grasp the door and pull while pressing door release button. Then wipe off these areas with a damp cloth. Mild detergent may be used if they get very dirty. The use of harsh detergent of abrasives is not recommended.
- After GRILL or COMBINATION cooking, the ceiling of the oven should be cleaned with a soft cloth squeezed in soapy water.
- The outside oven surface should be cleaned with a damp cloth. To prevent damage to the operating parts inside the oven, water should not be allowed to seep into the ventilation openings.
- If the Control Panel becomes dirty, clean with a soft, dry cloth. Do not use harsh detergents or abrasives on Control Panel! When cleaning the Control Panel, leave the oven door open to prevent the oven from accidentally turning on. After cleaning touch STOP/CANCEL Pad to clear display window.
-
If steam accumulates inside or around the outside of the oven door, wipe with a soft cloth. This may occur when the microwave oven is operated under high humidity conditions and in no way indicates a malfunction of the unit.
-
It is important to keep the tumtable clean Wash the tumtable in warm soapy water or in a dishwasher. If grease accumulates or is difficult to remove, the tumtable may be cleaned with a nonabrasive nylon mesh scouring pad and a nonabrasive cleanser.
-
When GRILLING or cooking by COMBINATION, some foods may splatter grease on to the oven wails. If the oven is not cleaned occasionally to eliminate this grease, it can accumulate and cause the oven to "SMOKE" during use
-
The metal turntable support should be removed frequently for cleaning. Wash the turntable support in warm soapy water. For hard to remove soil, use a mild detergent or a nonabrasive cleanser. When metal turntable support is removed for cleaning, water or food particles should not be allowed to spill into the opening in the center of the oven bottom
-
The back and inside of oven cavity are coated with teflon. To prevent scratching, use a mild detergent. If the lining is scratched, this will not affect cooking performance.
-
Bread Pan and Kneading Blade should be washed after each use in warm sudsy water, rinsed, and dried with a soft cloth. If food particles are difficult to remove from the bread pan or blade opening, fill case with lukewarm water and let soak for 30 minutes. The inside finish of the bread pan may be easily scratched; do not use sharp objects such as metal utensils on the surface.
*See Cookbook for further advice
Technical Specifications
Power Consumption: Microwave: 1,400 W
Maximum: 2,800 W
Output: Microwave: 750 W
Heater: 2,200 W
Outside Dimensions: 390 mm (H) × 558 mm (W) ×
450 mm (D)
Oven Cavity Dimensions: 232 mm (H) × 367 mm (W) × 372 mm (D)
Operating Frequency: 2.450 MHz
Built in Trim Kit: NN-TK309 (NN-3909)
NN-TK359 (NN-3959)
Uncrated Weight: Approx 29 kg
Specifications subjects to change without notice.
Questions and Answers
Q: Why won't my oven turn on?
Q: My microwave oven causes interference with my TV. Is this normal?
Q: The oven won't accept my program. Why?
Q: Why does my oven light dim?
Q: Sometimes warm air comes from the oven vents of the oven when I am only cooking by microwave. Why?
Q: There are humming and clicking noises from my oven when I cook by Combination. What is causing these noises?
Q: Can I check the pre-set oven temperature while cooking or preheating by CONVECTION?
Q: Can I use conventional oven thermometer in the oven?
Q: Can I easily cook my favourite recipes using CONVECTION?
Q: How do I check for doneness?
Q: My oven has an odour and generates smoke when using the CONVECTION, COMBINATION and GRILL function. Why?
Q: After completion of CONVECTION, GRILL or COMBINATION cooking, there is fan noise coming from the oven even if oven door is open. Is this normal?
Q: Why doesn't the oven light come on during the beginning of a Bread Program?
Q: Can I use the oven directly after baking a loaf?
Q: What will happen if the bread is not removed from the bread pan immediately after baking?
Q: Can I wash the bread pan and blade in my dishwasher?
A: When the oven does not turn on, check the following
- Is the oven plugged in correctly? Remove plug from outlet, wait 10 seconds and reinsert.
- Check circuit breaker or fuse. Reset circuit breaker or replace fuse if it is tripped or blown.
- If the circuit breaker or fuse is all right, plug another appliance into the outlet. If the other appliance works, there probably is a problem with the oven. If the other appliance does not work, there probably is a problem with the outlet.
If it seems there is a problem with the oven, contact your retailer.
A: Some radio and TV interference might occur when you cook with the microwave oven. This interference is similar to the interference caused by small appliances such as mixers, vacuums, blow dryers, etc. It does not indicate a problem with your oven.
A: The oven is designed not to accept an incorrect program. For example, the oven will not accept a fourth stage.
A: When cooking with a power other than HIGH, the oven must cycle to obtain the lower power levels. The oven light dims and clicking noises can be heard when the oven cycles.
A: The heat given off from the cooking food warms the air in the oven cavity. This warmed air is carried out of the oven by the air flow pattern in the oven. There are no microwaves in the air. The oven vents should never be blocked during cooking.
A: The noises occur as the oven automatically switches from microwave power to convection only heat to create the combination setting. This is normal.
A: Yes. Touch the Convection Temp. pad and the oven temperature will appear in the display window until you release your finger from the pad.
A: Only when you are using Convection cooking mode. The metal in some thermometers may cause arcing in your oven and should not be used on Microwave and Combination cooking modes.
A: Yes. You can cook your favourite recipe just as you would in a conventional oven. Check instructions in the Panasonic Cookbook for suggested oven temperatures and cooking times.
A: A few tests are
●A cake should pull away from the sides of the dish.
- A toothpick or cake tester should be clean when removed from the center of a cake.
●Poultry juices are clear, and the drumstick moves freely after cooking.
A: After repeated use, it is recommended to clean oven and then run the oven without food on GRILL 1 for 20 minutes. This will burn off any food or residue or oil which may cause an odour and/or smoking.
A: This is normal. The oven is so designed that only fan motor rotates for 10 minutes after completion of Convection, Grilling and Combination cooking in order to cool electric parts.
A: The oven light does not come on until the final baking stage, you will then be able to see the loaf rising in the pan.
A: You may use the oven manually after baking, but to be sure of perfect results allow the oven to cool before using any of the AUTO PROGRAMMES.
A: The bread will become soggy. For best results carefully remove the bread from the pan and cool on a wire rack.
A: No, because this may shorten the life of the sea! around the knead blade mounting.
233
Matsushita Electric Industrial Co., Ltd.
Central P.O. Box, Osaka 530-91, Japan
A00035120BP-①
Printed in Japan