
NN-5802 - Mikrowellen PANASONIC - Kostenlose Bedienungsanleitung
Finden Sie kostenlos die Bedienungsanleitung des Geräts NN-5802 PANASONIC als PDF.


Benutzerfragen zu NN-5802 PANASONIC
0 Frage zu diesem Gerät. Beantworten Sie die, die Sie kennen, oder stellen Sie Ihre eigene.
Eine neue Frage zu diesem Gerät stellen
Laden Sie die Anleitung für Ihr Mikrowellen kostenlos im PDF-Format! Finden Sie Ihr Handbuch NN-5802 - PANASONIC und nehmen Sie Ihr elektronisches Gerät wieder in die Hand. Auf dieser Seite sind alle Dokumente veröffentlicht, die für die Verwendung Ihres Geräts notwendig sind. NN-5802 von der Marke PANASONIC.
BEDIENUNGSANLEITUNG NN-5802 PANASONIC
OPERATING
INSTRUCTIONS
Microwave Oven
This appliance was produced to BS 800
NN5802/NN5852
NN5402/NN5452
NN5202/NN5252
text_image
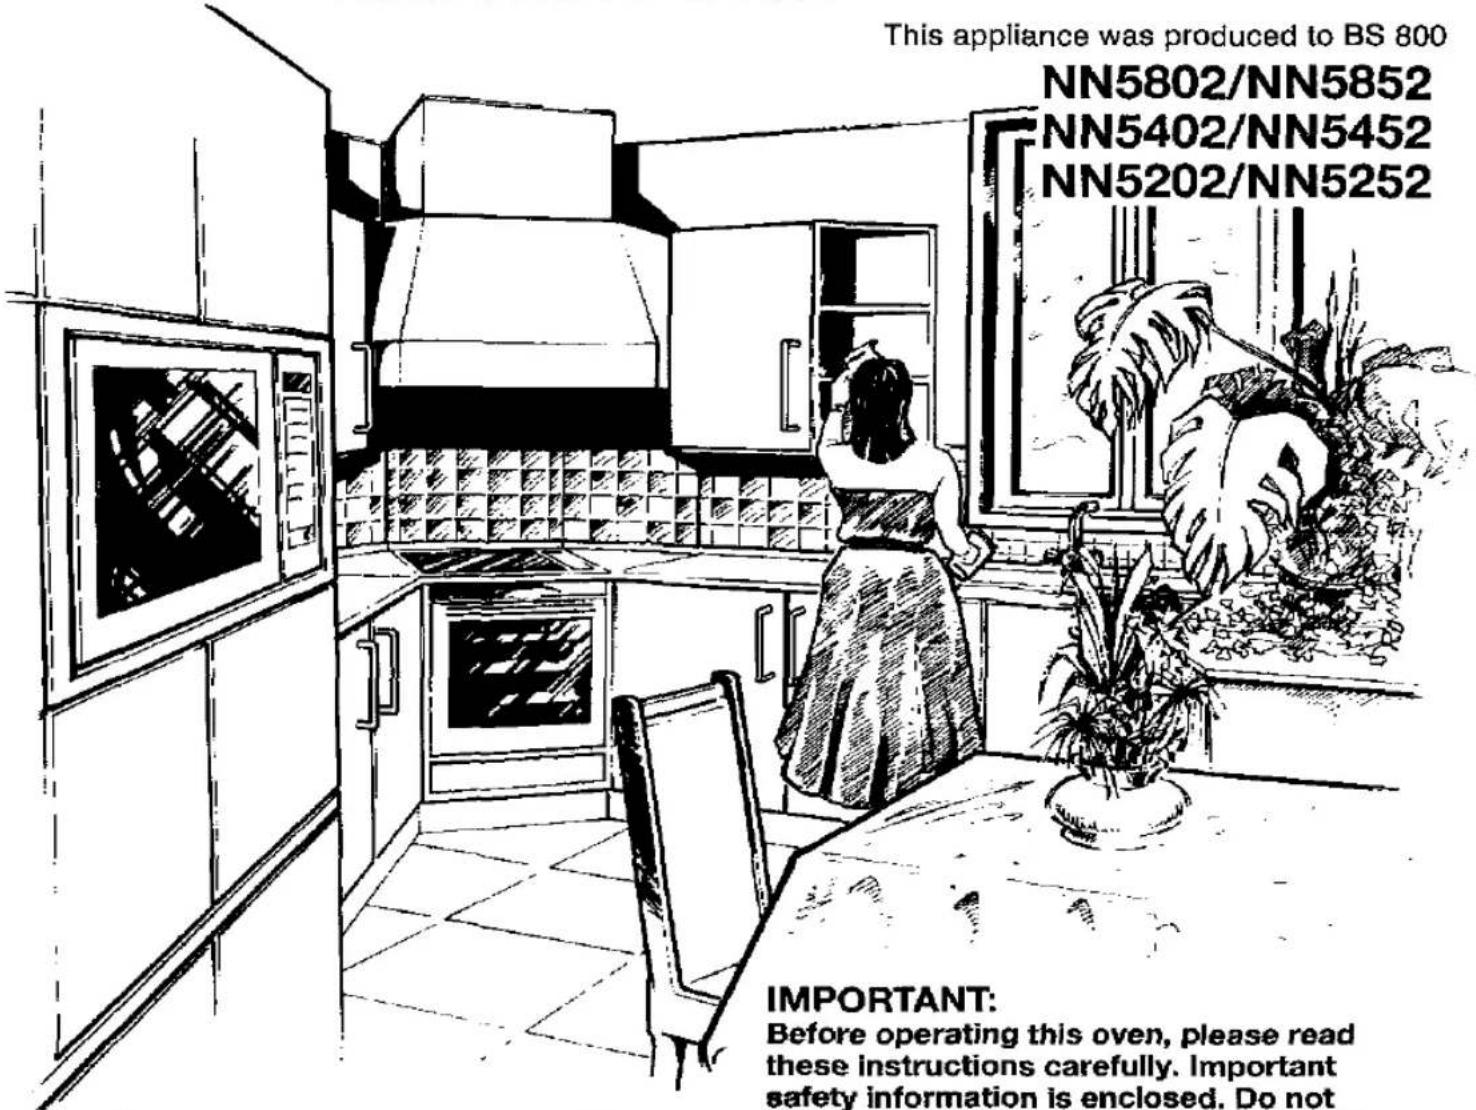
This appliance was produced to BS 800 NN5802/NN5852 NN5402/NN5452 NN5202/NN5252 IMPORTANT: Before operating this oven, please read these instructions carefully. Important safety information is enclosed. Do notPanasonic
IMPORTANT:
Before operating this oven, please read these instructions carefully. Important safety information is enclosed. Do not discard these operating instructions – they should be kept for further reference along with your cookbook.
1. Examine Your Oven
Unpack oven, remove all packing material, and examine the oven for any damage such as dents, broken door latches or cracks in the door. Notify dealer immediately if unit is damaged. Do NOT install if unit is damaged.
N.B. The appliance should be inspected for damage to the door seals and door seal areas and if these areas are damaged the appliance should not be operated until it has been repaired by service technician trained by the manufacturer.
2. Guarantee Card
Fill out and post the pre-addressed guarantee card. This oven was manufactured for DOMESTIC USE ONLY.
3. Earthing Instructions
FOR YOUR SAFETY PLEASE READ THE FOLLOWING TEXT CAREFULLY
This appliance is supplied with a moulded three pin mains plug for your safety and convenience. A 13 amp fuse is fitted in this plug. Should the fuse need to be replaced, please ensure that the replacement fuse has a rating of 13 amps and that it is approved by ASTA or BSI to BS1362. Check for the ASTA mark 📍 or the BSI mark 📍 on the body of the fuse.
If the plug contains a removable fuse cover, you must ensure that it is refitted when the fuse is replaced. If you lose the fuse cover, the plug must not be used until a replacement cover is obtained. A replacement fuse cover can be purchased from your local Panasonic Dealer. IF THE FITTED MOULDED PLUG IS UNSUITABLE FOR THE SOCKET OUTLET IN YOUR HOME THEN THE FUSE SHOULD BE REMOVED AND THE PLUG CUT OFF AND DISPOSED OF SAFELY AND AN APPROPRIATE ONE FITTED. THERE IS A DANGER OF SEVERE ELECTRICAL SHOCK IF THE CUT OFF PLUG IS INSERTED INTO ANY 13 AMP SOCKET.
If a new plug is to be fitted, please observe the wiring code as shown below. If in any doubt, please consult a qualified electrician. (For U.K. Models only)
WARNING: THIS APPLIANCE MUST BE EARTHED.
IMPORTANT: The wires in this mains lead are coloured in accordance with the following code:
Green-and-yellow: Earth Blue: Neutral Brown: Live
As the colours of the wire in the mains lead of this appliance may not correspond with the coloured markings identifying the terminals in your plug, proceed as follows:
The wire which is coloured GREEN-AND-YELLOW must be connected to the terminal in the plug which is marked with the letter E or by the Earth symbol ____ or coloured GREEN or GREEN-AND-YELLOW.
The wire which is coloured BLUE must be connected to the terminal in the plug which is marked with the letter N or coloured BLACK.
The wire which is coloured BROWN must be connected to the terminal in the plug which is marked with the letter L or coloured RED.
HOW TO REPLACE THE FUSE
Open the fuse compartment with a screwdriver and replace the fuse.
CAUTION POINTS
1. Voltage & Power
The voltage used must be the same as specified on this microwave oven. Using a higher voltage than that which is specified is dangerous and may result in a fire or other type of accident causing damage.
2. Plug Fuse (see above)
3. Service
It is dangerous for anyone other than a service technician trained by the manufacturer to perform repair service. Do not attempt to remove the outer casing of the oven.
4. Operation When Empty
The appliance must not be operated WITHOUT FOOD IN THE OVEN. Operation when empty will damage the appliance. *Models NN5202/52. Always zero the timer when food is removed from oven.
5. Cord/Plug
If the supply cord of this appliance is damaged, it must be replaced by the special cord available only from the manufacturer.
Do not immerse cord, plug or oven in water. Keep cord away from heated surfaces. Do not let cord hang over the edge of table or work top. Do not plug your oven in via an extension cable as this can be dangerous. It is important to plug the oven directly into a wall socket. The back of the appliance heats up during use. Do not allow the cord to be in contact with the back of the appliance or cabinet surface.
6. Door Seals
Do not attempt to tamper with or make any adjustments or repairs to door, control panel housing, safety interlock switches or any other part of the oven. Do not remove outer panel from oven.
The door seals and door seal areas should always be kept clean - use a damp cloth.
7. Oven Light
This appliance including the oven lamp should be serviced only by service technician trained by the manufacturer.
8. Outdoor Use
Do not use outdoors.
9. Storage of Accessories
When the oven is not being used, do not store any objects other than oven accessories inside the oven in case it is accidentally turned on. In case of electronic failure, oven can only be turned off at wall socket.
Placement of Oven
- Oven must be placed on a flat, stable surface. For proper operation, the oven must have sufficient air flow. ie 5cm/2" at the side; 15cm/6" clear over the top.
- Do not block air vents on the rear and bottom or top of the cabinet. Do not place any articles on the top of the oven on top of the top vents. If air vents are blocked during operation, the oven may overheat. If the oven overheats, a thermal safety device will turn the oven off. The oven will remain inoperable with blank display until it has cooled.
- Do not place the microwave oven on a shelf directly above a gas or electric hob. The oven may be damaged.
Building-In Your Oven
- In case of fitting into an oven housing, please use Panasonic's Trim Kit NN5802/5402/5202 - NNTK502 NN5852/5452/5252 - NNTK550
- Microwave ovens should not be built into a unit directly above a top front venting conventional cooker. This will invalidate your one year guarantee. If building in above a conventional oven a gap of at least 15cm (6 inches) should be left as it is important that the microwave draws in cool air. A microwave which is built under a work surface must have adequate air circulation and must have a vent in the work surface. Read Trim-Kit instructions carefully before installation.
Short Cooking Times
As microwave cooking times are much shorter than other cooking methods it is essential that recommended cooking times are not exceeded without first checking the food. Cooking times given in the cookbook are approximate. Factors that may affect cooking times are: preferred degree of cooking, starting temperature, altitude, volume, size and shape of foods and utensils used. As you become familiar with the oven, you will be able to adjust these factors. It is better to undercook rather than overcook foods. If food is undercooked, it can always be returned to the oven for further cooking. If food is overcooked, nothing can be done. Always start with minimum cooking times.
Important.
If the recommended cooking times are exceeded the food will be spoiled and in extreme circumstances could catch fire and possibly damage the interior of the oven.
1. Small quantities of food.
Take care when heating small quantities of food as these can easily burn, dry out or catch on fire if cooked too long. Always set short cooking times and check the food frequently. NB. If materials inside the oven should ignite, keep over door closed, turn oven off, and disconnect the power cord, or shut off power at the fuse or circuit breaker panel. NEVER OPERATE THE OVEN WITHOUT FOOD INSIDE.
2. Foods low in moisture.
Take care when heating foods low in moisture, eg bread items, chocolate, biscuits and pastries. These can easily burn, dry out or catch on fire if cooked too long.
3. Christmas Pudding.
Christmas puddings and other foods high in fats or sugar, eg. jam, mince pies, must not be over heated. These foods must never be left unattended as with over cooking these foods can ignite.
4. Boiled Eggs.
Do not boil eggs in their shell in your microwave. Raw eggs boiled in their shells can explode causing injury.
5. Foods with Skins.
Potatoes, apples, egg yolk, whole vegetables and sausages are examples of food with non porous skins. These must be pierced using a fork before cooking to prevent bursting.
6. Liquids.
When heating liquids, eg soup, sauces and beverages in your microwave oven, overheating the liquid beyond boiling point can occur without evidence of bubbling. This could result in a sudden boil over of the hot liquid. To prevent this possibility the following steps should be taken:
a) Avoid using straight-sided containers with narrow necks.
b) Do not overheat.
c) Stir the liquid before placing the container in the oven and again halfway through the heating time.
d) After heating, allow to stand in the oven for a short time, stirring again before carefully removing the container.
7. Deep Fat Frying.
Do not attempt to deep fat fry in your oven.
8. Meat Thermometer.
Use a meat thermometer to check the degree of cooking of roasts and poultry only when meat has been removed from the microwave. If undercooked, return to the oven and cook for a few more minutes at the recommended power level. Do not leave a conventional meat thermometer in the oven when microwaving.
9. Paper, Plastic.
Carefully attend the appliance if paper, plastic or other combustible materials are used as containers or for covering. Do not use wire twist-ties with roasting bags as arcing will occur. Do not use re-cycled paper products, eg Kitchen roll unless they say they are specifically designed for use in a microwave oven. These products contain impurities which may cause sparks and/or fires when used.
10. Reheating.
It is essential that reheating food is served "piping hot". Remove the food from the oven and check that it is "piping hot", ie steam is being emitted from all parts and any sauce is bubbling. (If you wish you may choose to check the food has reached 70°C with a food thermometer - but remember do not use this thermometer inside the microwave. For foods that cannot be stirred, eg lasagne, shepherds pie, the centre should be cut with a knife to test it is well heated through. Even if a manufacturer's packet instructions have been followed always check the food is piping hot before serving and if in doubt return your food to the oven for further heating.
11. Standing Time.
Standing time refers to the period at the end of cooking or reheating when food is left before being eaten, ie. it is a rest time which allows the heat in the food to continue to transfer to the centre, thus eliminating cold spots. See cookbook for details.
12. Keeping Your Oven Clean.
It is essential for the safe operation of the oven that it is wiped out regularly. Use warm soapy water, squeeze the cloth out well and use to remove any grease or food from the interior. Pay particular attention to the door seal area and also the areas around the microwave feed guide situated on the right hand side of the cavity wall. The oven should be unplugged when cleaning.
13. Care of Your Oven Cavity.
Your oven cavity is constructed of zinc coated steel, painted with an extremely durable coating. After use, the oven interior should be wiped out to remove any remaining water in order to reduce the risk of corrosion to the cavity and door. The cavity and door can be damaged by abrasive cleaners and sharp objects so care must be taken to avoid damage caused in this way. If the cavity or door becomes damaged the lining may begin to corrode. Providing the above precautions are taken regarding the cleaning and care of your oven the life of the cavity and door may be extended. However, should any corrosion of the cavity or door occur within a period of 3 years from the date of purchase and providing the above precautions are followed the cavity and door will be serviced by your supplier on a free of charge basis.
Glass Turntable
- Do not operate the oven without the Roller Ring and Glass Turntable in place.
- Only use the Glass Turntable specifically designed for this oven. Do not substitute any other Glass Turntable.
- If Glass Turntable is hot, allow to cool before cleaning or placing in water.
-
Do not cook directly on Glass Turntable. Always place food in a microwave safe dish. The only exception to this is when cooking Jacket Potatoes.
-
If food or utensil on Glass Turntable touches oven walls, causing the tray to stop moving, the tray will automatically rotate in opposite direction. This is normal. Open oven door and reposition the food.
- The Glass Turntable can rotate in either direction.
text_image
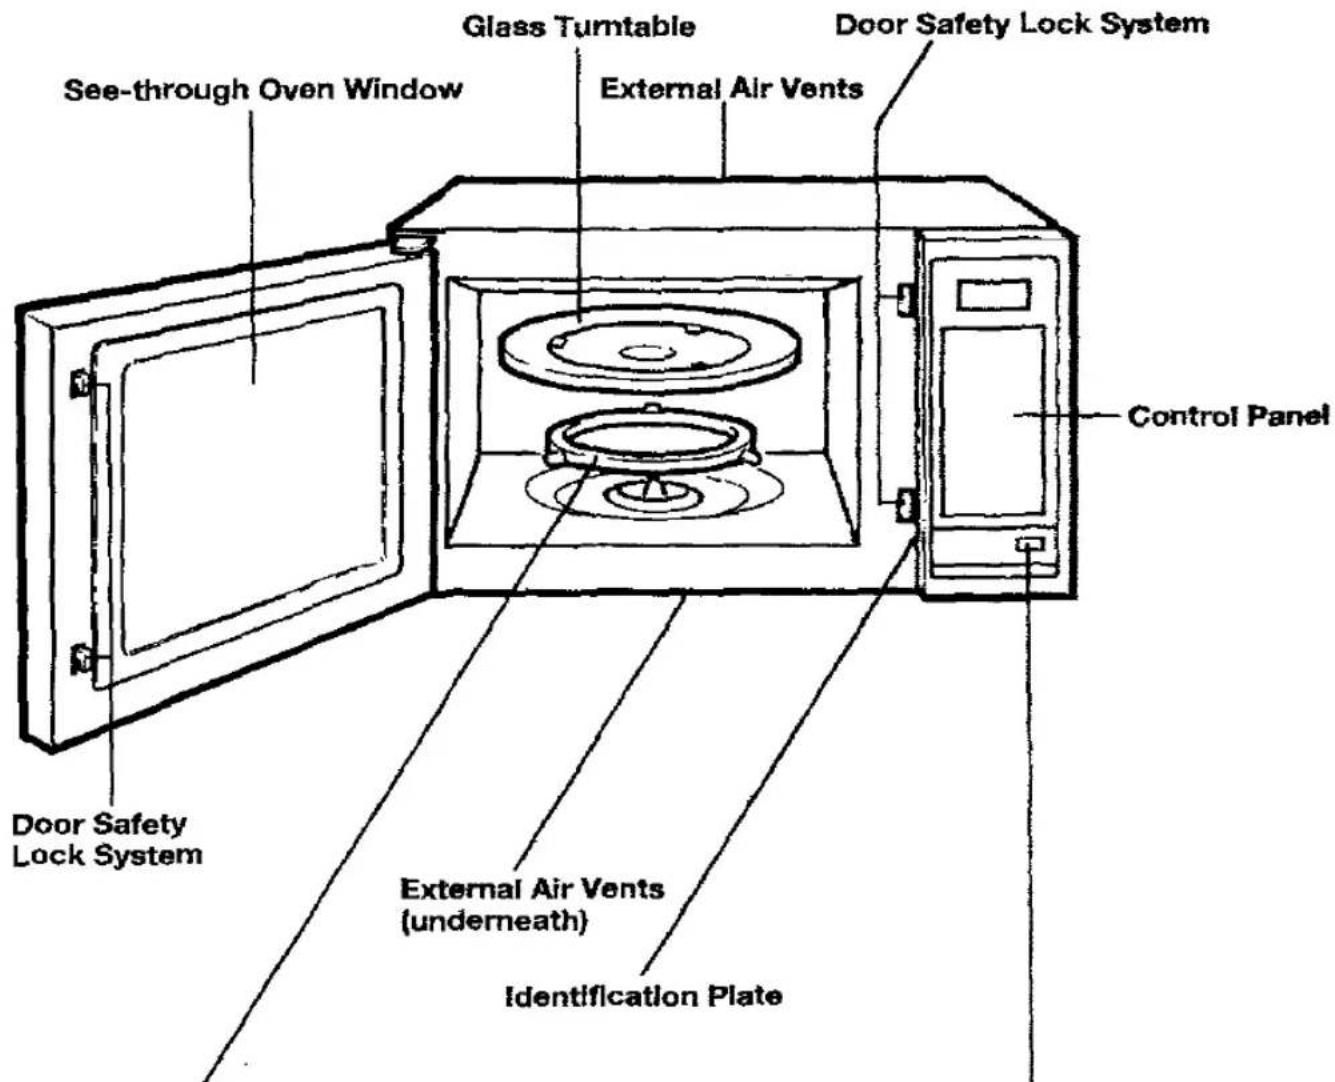
See-through Oven Window Glass Turntable External Air Vents Door Safety Lock System Control Panel Door Safety Lock System External Air Vents (underneath) Identification PlateRoller Ring
- The Roller Ring and oven floor should be cleaned frequently to prevent excessive noise.
- The Roller Ring must always be used together with the Glass Turntable for cooking.
Door Release Button
Press to open the door. Opening the door during cooking will stop the cooking process without cancelling the program. Cooking resumes as soon as the door is closed and Start Pad is pressed. The oven light will stay on or turn on whenever the door is opened.
text_image
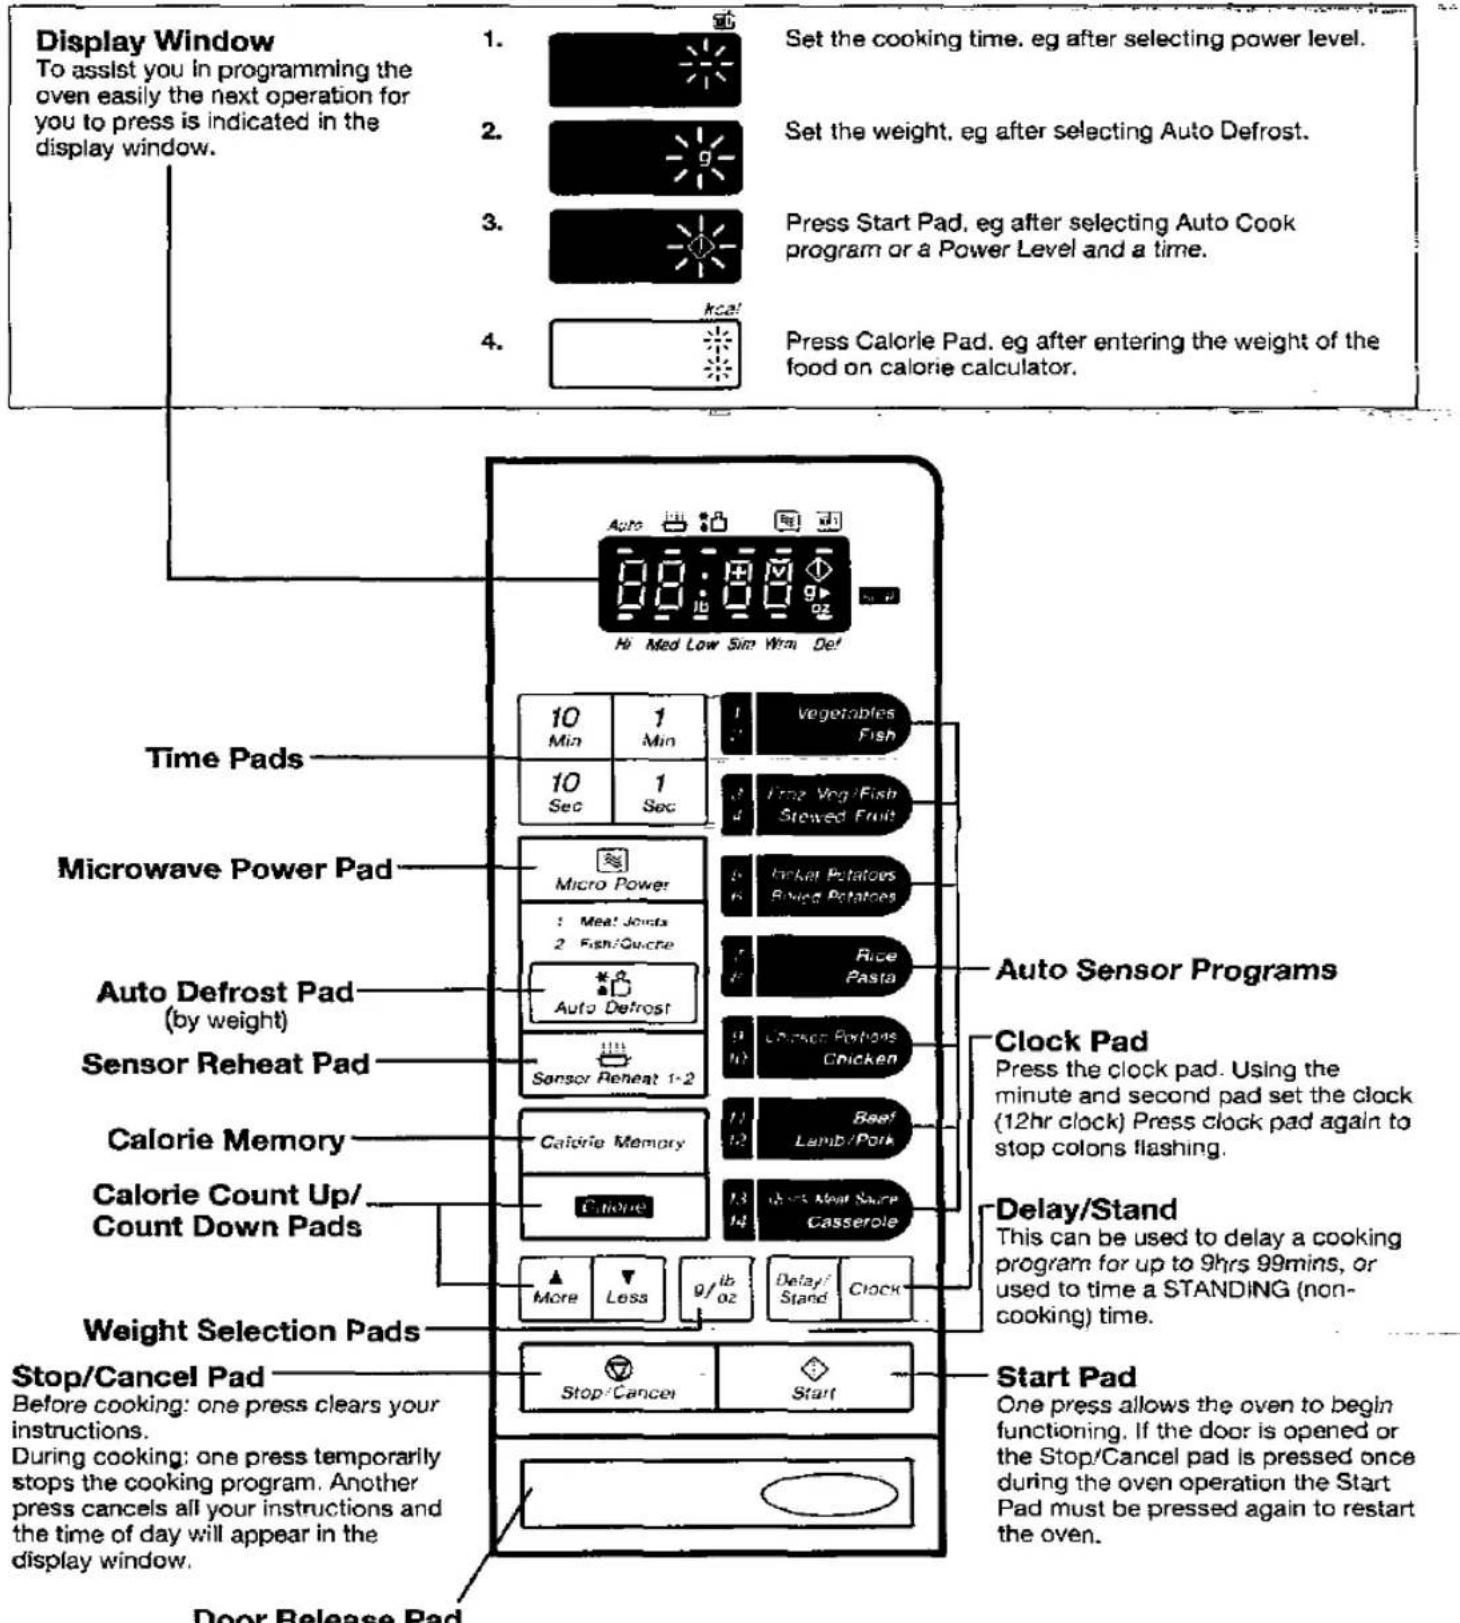
Display Window To assist you in programming the oven easily the next operation for you to press is indicated in the display window. 1. Set the cooking time, eg after selecting power level. 2. Set the weight, eg after selecting Auto Defrost. 3. Press Start Pad, eg after selecting Auto Cook program or a Power Level and a time. 4. Press Calorie Pad, eg after entering the weight of the food on calorie calculator. Hi Med Low Sim Wm Def Time Pads 10 Min 1 Min 10 Sec 1 Sec Microwave Power Pad Micro Power 1 Meat Joints 2 Fish/Quatre Auto Defrost Pad Auto Defrost Sensor Reheat Pad Sensor Reheat 1-2 Calorie Memory Calorie Memory Candle Stop/Cancel Pad Before cooking: one press clears your instructions. During cooking: one press temporarily stops the cooking program. Another press cancels all your instructions and the time of day will appear in the display window. Weight Selection Pads More Less 9/15 oz Delay/Stand Clock Stop/Cancel Start Door Release Pad Auto Sensor Programs Clock Pad Press the clock pad. Using the minute and second pad set the clock (12hr clock) Press clock pad again to stop colons flashing. Delay/Stand This can be used to delay a cooking program for up to 9hrs 99mins, or used to time a STANDING (non-cooking) time. Start Pad One press allows the oven to begin functioning. If the door is opened or the Stop/Cancel pad is pressed once during the oven operation the Start Pad must be pressed again to restart the oven.Opening the door during cooking will stop the cooking process without cancelling the program. Cooking continues as soon as the door is closed and the Start Pad pressed. The Oven Light will turn on and stay on whenever the door is open. It is quite safe to open the door during a cooking program. There is no risk of microwave exposure.
text_image
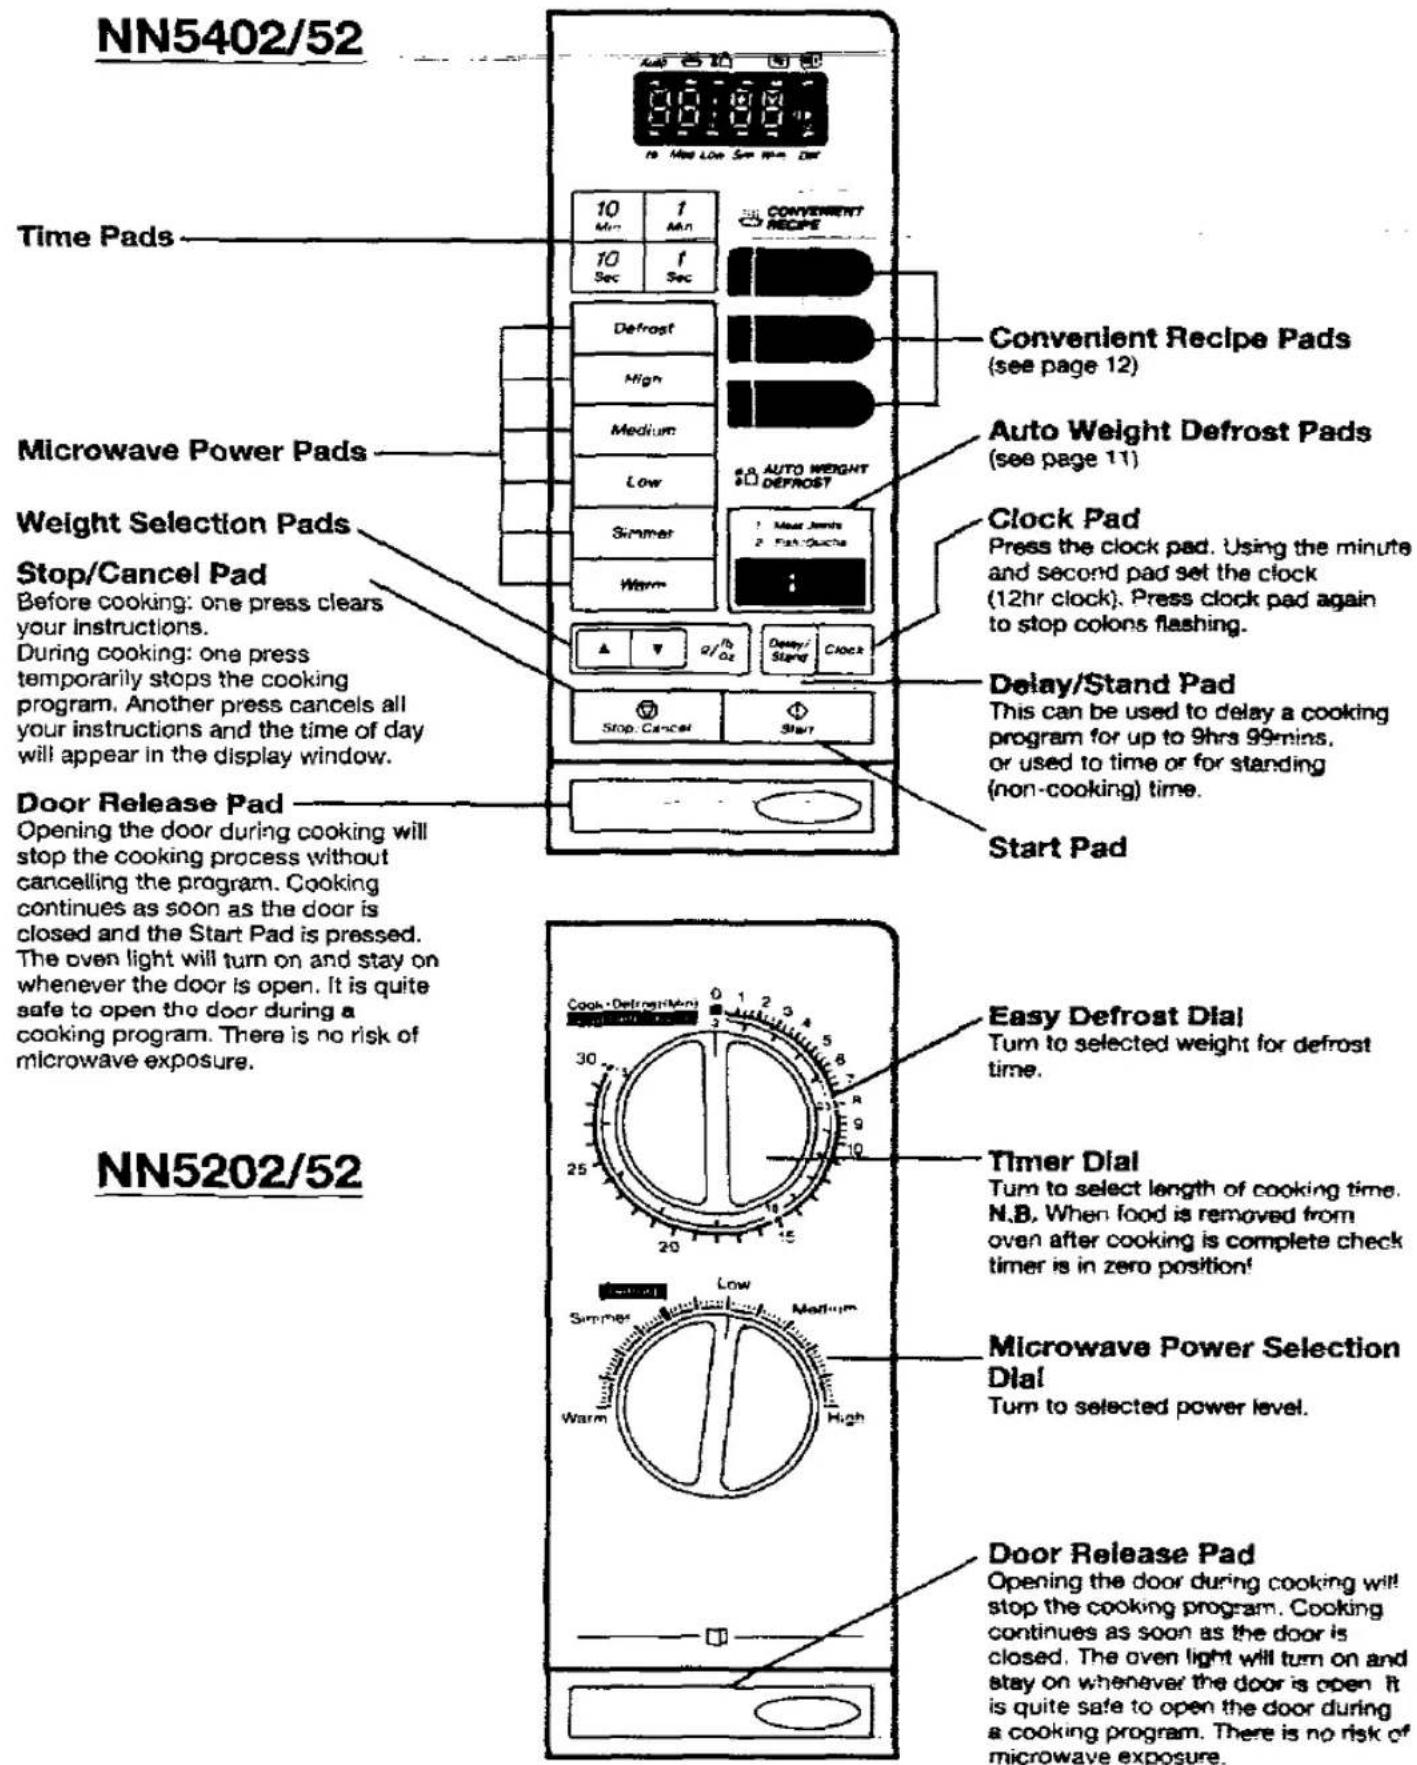
NN5402/52 Time Pads Microwave Power Pads Weight Selection Pads Stop/Cancel Pad Before cooking: one press clears your instructions. During cooking: one press temporarily stops the cooking program. Another press cancels all your instructions and the time of day will appear in the display window. Door Release Pad Opening the door during cooking will stop the cooking process without cancelling the program. Cooking continues as soon as the door is closed and the Start Pad is pressed. The oven light will turn on and stay on whenever the door is open. It is quite safe to open the door during a cooking program. There is no risk of microwave exposure. NN5202/52 Easy Defrost Dial Turn to selected weight for defrost time. Timer Dial Turn to select length of cooking time. N.B. When food is removed from oven after cooking is complete check timer is in zero position! Microwave Power Selection Dial Turn to selected power level. Door Release Pad Opening the door during cooking will stop the cooking program. Cooking continues as soon as the door is closed. The oven light will turn on and stay on whenever the door is open. It is quite safe to open the door during a cooking program. There is no risk of microwave exposure.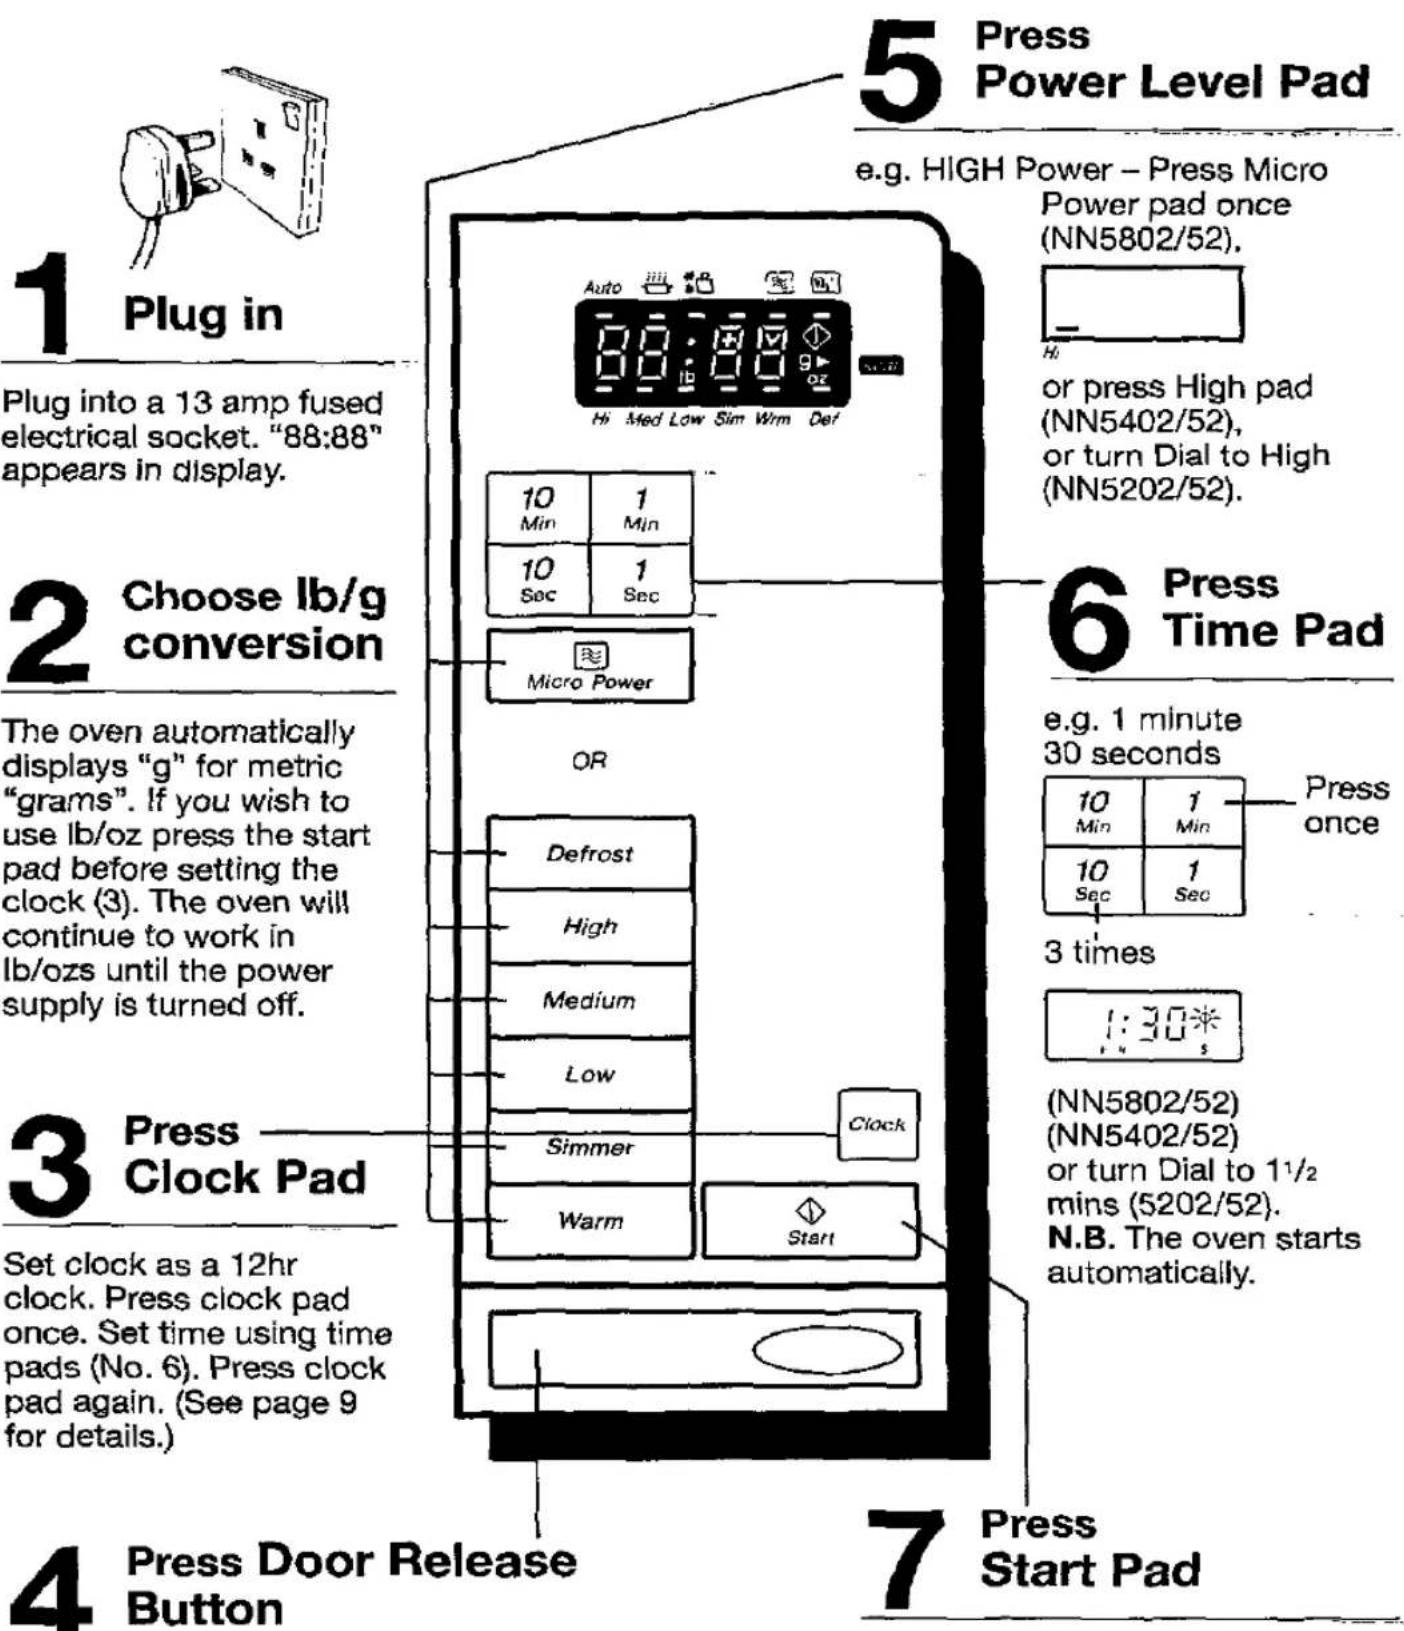
text_image
1 Plug in Plug into a 13 amp fused electrical socket. "88:88" appears in display. 2 Choose lb/g conversion The oven automatically displays "g" for metric "grams". If you wish to use lb/oz press the start pad before setting the clock (3). The oven will continue to work in lb/ozs until the power supply is turned off. 3 Press Clock Pad Set clock as a 12hr clock. Press clock pad once. Set time using time pads (No. 6). Press clock pad again. (See page 9 for details.) 4 Press Door Release Button 5 Press Power Level Pad e.g. HIGH Power – Press Micro Power pad once (NN5802/52). or press High pad (NN5402/52), or turn Dial to High (NN5202/52). 6 Press Time Pad e.g. 1 minute 30 seconds Press once 10 Min 1 Min 10 Sec 1 Sec Micro Power OR Defrost High Medium Low Simmer Clock Warm Start 7 Press Start Pad4 Press Door Release Button
Open the door and place a microwave safe bowl of water on the glass turntable in the oven. Then close the door.
NN5802/52, NN5402/52 only. The time will be displayed in the window and count down. The oven will beep at the end of the cooking program and the display window will return to time of day.
Quick Guide To Operation - NN5802/52 & NN5402/52
| Feature | How to Operate |
| To Set Clock |  Enter time of day. Enter time of day. |
| To Use Power and Time Setting |  Select power. Set the cooking time. Select power. Set the cooking time. |
| To Cook using "Sensor Cook" Pads(5802/5852 only) | Press the Desired Category Pad e.g. |
| To Reheat using "Sensor Reheat" Pad(5802/5852 only) |  |
| To Defrost using "Auto Defrost" Pad | 1. Meat Joints2. Fish/Quiche Select Defrost Program Set the Weight Select Defrost Program Set the Weight |
| To Use as a Kitchen Timer |  Set desired time. Set desired time. |
| To Set Standing Time | Set the Desired Cooking Program then select required STAND time before pressing START e.g. |
| To Set Delay/Stand | Set Delay time before selecting the Desired Cooking Programe.g. |
| To Use Calorie Counter(5802/5852 only) |  Select Food category Select Weight Check Store Value Select Food category Select Weight Check Store Value |
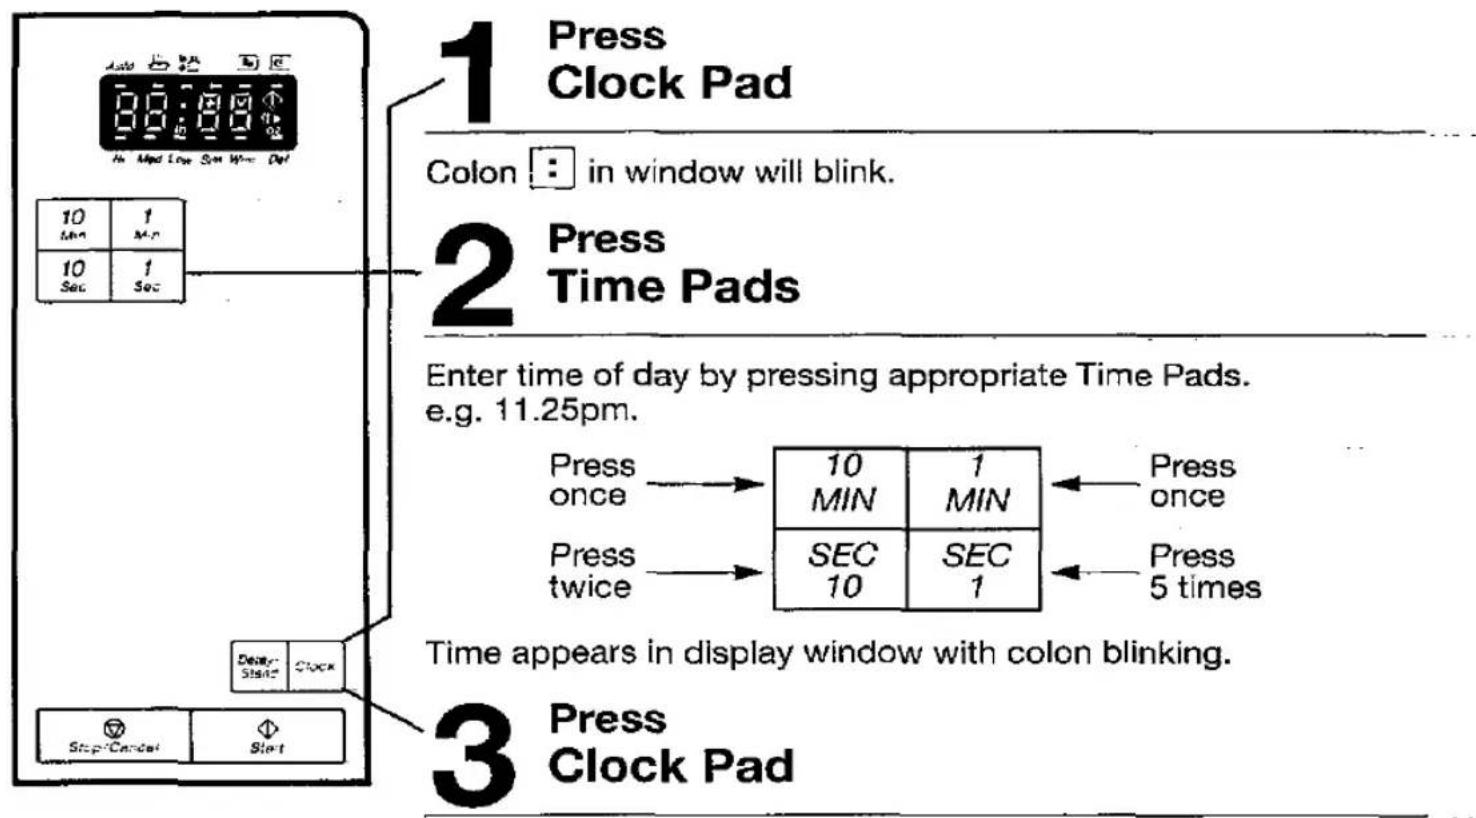
flowchart
graph TD
    A["1 Press Clock Pad"] --> B["2 Press Time Pads"]
    B --> C["3 Press Clock Pad"]
    A --> D["10 Min 1 Min"]
    A --> E["10 Sec 1 Sec"]
    D --> F["Press once"]
    E --> G["Press twice"]
    F --> H["10 MIN"]
    G --> I["SEC 10"]
    H --> J["1 MIN"]
    I --> K["SEC 1"]
    J --> L["Press once"]
    K --> M["Press 5 times"]
Colon stops blinking.
N.B.
- To reset time of day, repeat step 1 through to step 3.
- The clock will keep the time of day as long as the oven is plugged in and electricity is supplied.
- This is a 12 hour clock. ie 2pm = 2:00 not 14:00. The oven will not function if a 24 hour clock is set.
Using the Power and Time Settings
NN5802/52
1 Select Power
Press Micro Power pad to select correct power.
| Press | Power Level |
| once twice | High Defrost |
| 3 times | Medium |
| 4 times | Low |
| 5 times | Simmer |
| 6 times | Warm |
2 Set Time
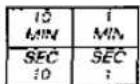
Set cooking time by pressing Time Pads.
3 Press Start
Press Start Pad.
The Cooking Program will start and the time in the display will count down.
Using Power & Time Settings
NN5402/52
1 Select Power
2 Set Time
3 Press Start
| Defrost |
| High |
| Medium |
| Low |
| Similar |
| Wayn |
| 10 Min | 1 Min |
| 10 Sec | 1 Sec |
Select correct power pad.
Set cooking time by pressing Time Pads.
Press Start Pad.
The cooking program will start and the time in the display will count down.
NN5202/52
1 Select Power
2 Set Time
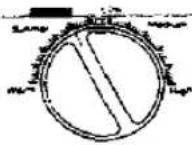
Turn dial to select power level.
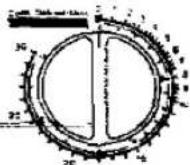
Set cooking time by turning dial. If the door is already closed cooking program will begin immediately.
Using The Delay/Stand Feature - NN5802/52 & NN5402/52 only
The Delay/Stand Pad is used as a timing pad only either before, during or after a cooking program. When the Delay/Stand Pad is selected with a time, there is no microwave power in the oven during this time.
1. To Set a Standing Time:
Set the desired Cooking Program

flowchart
graph LR
    A["Delay/Stand"] --> B["10 MIN"]
    A --> C["1 MIN"]
    B --> D["SEC 10"]
    C --> E["SEC 1"]
    D --> F["Start"]
    E --> F
Press the Stand pad
Set desired standing time (max 9hrs 99mins)
Press Start pad. Cooking program will commence after which the standing time will count down.
2. To Set a Delay Start:

flowchart
graph LR
    A["Delay/Stand"] --> B["10 MIN"]
    B --> C["1 MIN"]
    C --> D["SEC 10"]
    D --> E["SEC 1"]
    E --> F["Set the complete cooking program (Micro power then)"]
    F --> G["Start"]
    G --> H["Press Start pad. Delayed time will count down then the cooking program will start."]
    style A fill:#f9f,stroke:#333
    style G fill:#ccf,stroke:#333
N.B.
-
If the oven door is opened during the stand or delay time, the time in the display window will continue to count down.
-
Delay Start cannot be used before an Auto Program.
-
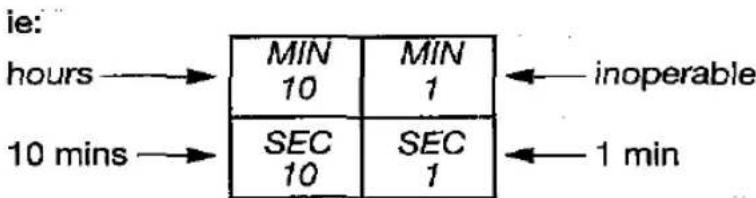
When the Delay/Stand program is used, the time pads work as hour pads and minute pads.
text_image
ie: hours → MIN 10 MIN 1 inoperable 10 mins → SEC 10 SEC 1 1 minDefrosting Using Auto Defrost
This feature allows you to defrost joints of meat, fish and quiche, all automatically. See Cookbook for Defrosting guidelines.
Models NN5802/52

flowchart
graph LR
    A["Press"] --> B["Auto Defrost"]
    B --> C["a/oz"]
    C --> D["+"]
    D --> E["More"]
    D --> F["Less"]
    E --> G["Start"]
    F --> G
to select category 1 or 2
Set the weight.
The window will display 1000g (2lb 0oz).
Adjust the weight using the MORE/LESS keys
- the weight will change in 100g (1oz) increments.
Models NN5402/52

flowchart
graph LR
    A["Input"] --> B["Processing Step"]
    B --> C["Output: Start"]
Press to select category 1 or 2.
Set the weight.
The window will display 1000g (2lb 0oz). Adjust the weight using the MORE (up)/LESS (down) keys – the weight will change in 100g (1oz) increments.
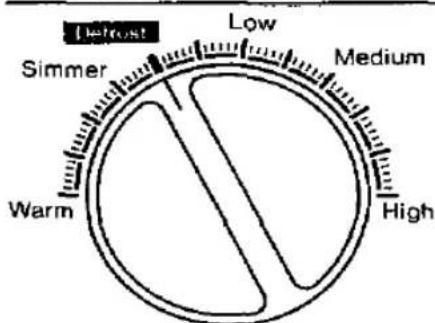
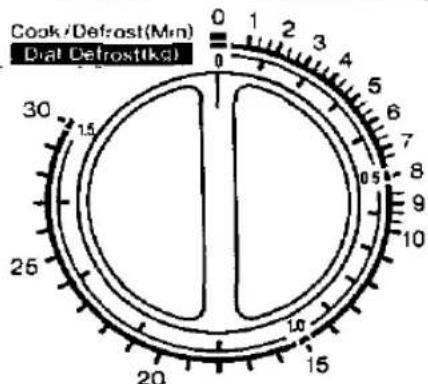
Models NN5202/52
text_image
Detroit Low Medium Simmer Warm HighSelect Defrost power by turning the dial.
text_image
Cook/Defrost(Min) Dial Defrost(Kg)Set the weight by turning the dial.
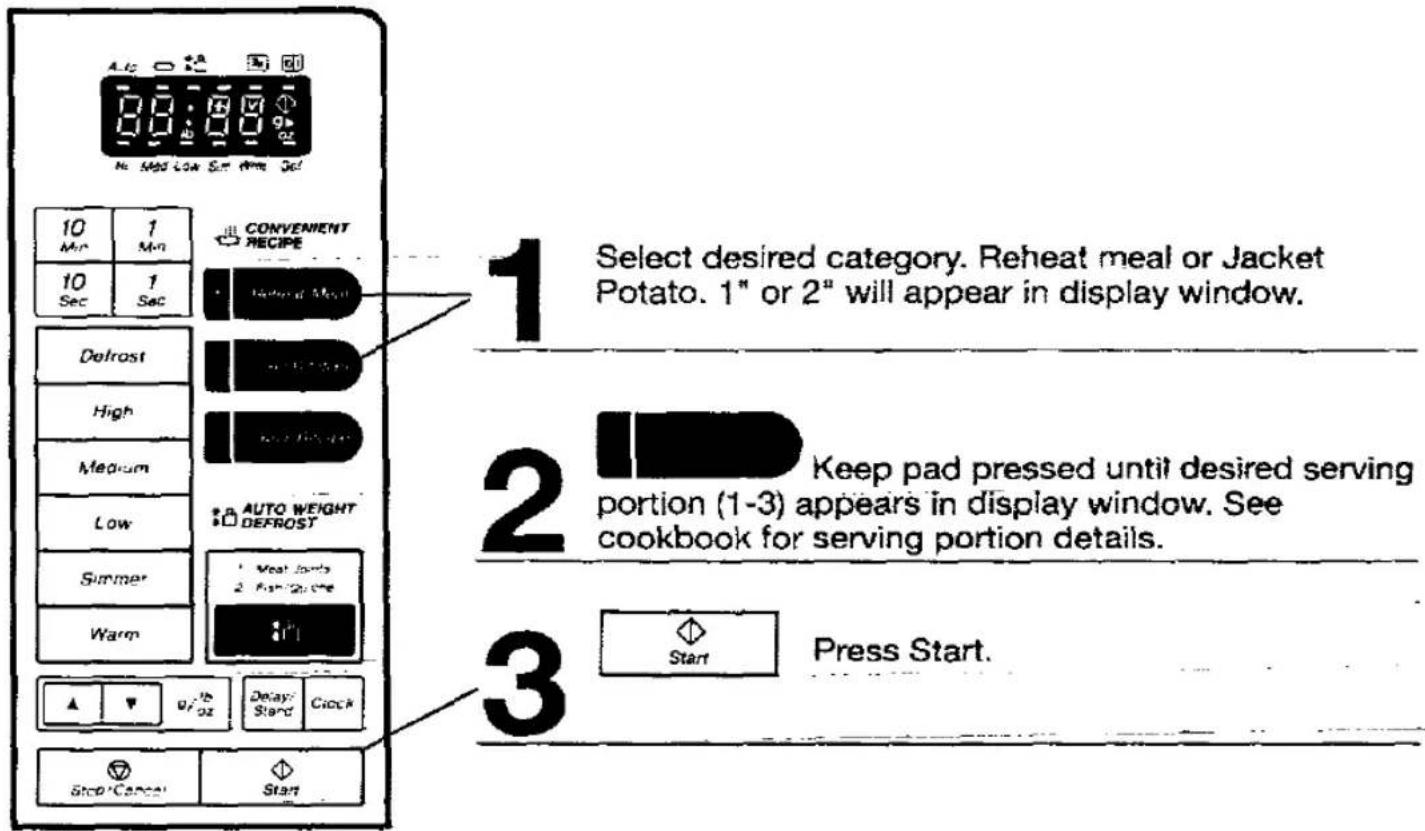
Using The Convenient Recipe Feature - NN5402/52 only
text_image
A.1c 8:00:00 No. Mid Low Set New Sel 10 Min 1 Min 10 Sec 1 Sec CONVENIENT RECIPE Delrost High Medium Low Summer Warm 1 Select desired category. Reheat meal or Jacket Potato. 1" or 2" will appear in display window. AUTO WEIGHT DEFROST 1 Meat joints 2 Spin Outer 3 Keep pad pressed until desired serving portion (1-3) appears in display window. See cookbook for serving portion details. Start Press Start. Stop Cancel StartYour Recipe
Your Recipe.

To assist you in using your oven for regular, repeated tasks, you are able to pre-program your oven for a specific power level and time that is convenient to you.
To Program:
-
Press Your Recipe
-
Select desired cooking program using a power pad and keys. 10 MIN SEC 10 1 10 MIN SEC 1
It is only possible to set one stage cooking. ie one power level and one cooking time.
The program may be used for repetitive tasks.
eg softening butter in the morning - High Power for 20 secs etc.
- Press
if using the program immediately. OR Press

To Use:
Press
Press
The pre-programmed power level and cooking time will be automatically selected by the oven. If the oven is unplugged or in the event of a power failure, the memory of "Your Recipe" will be lost. Re-program as above.
text_image
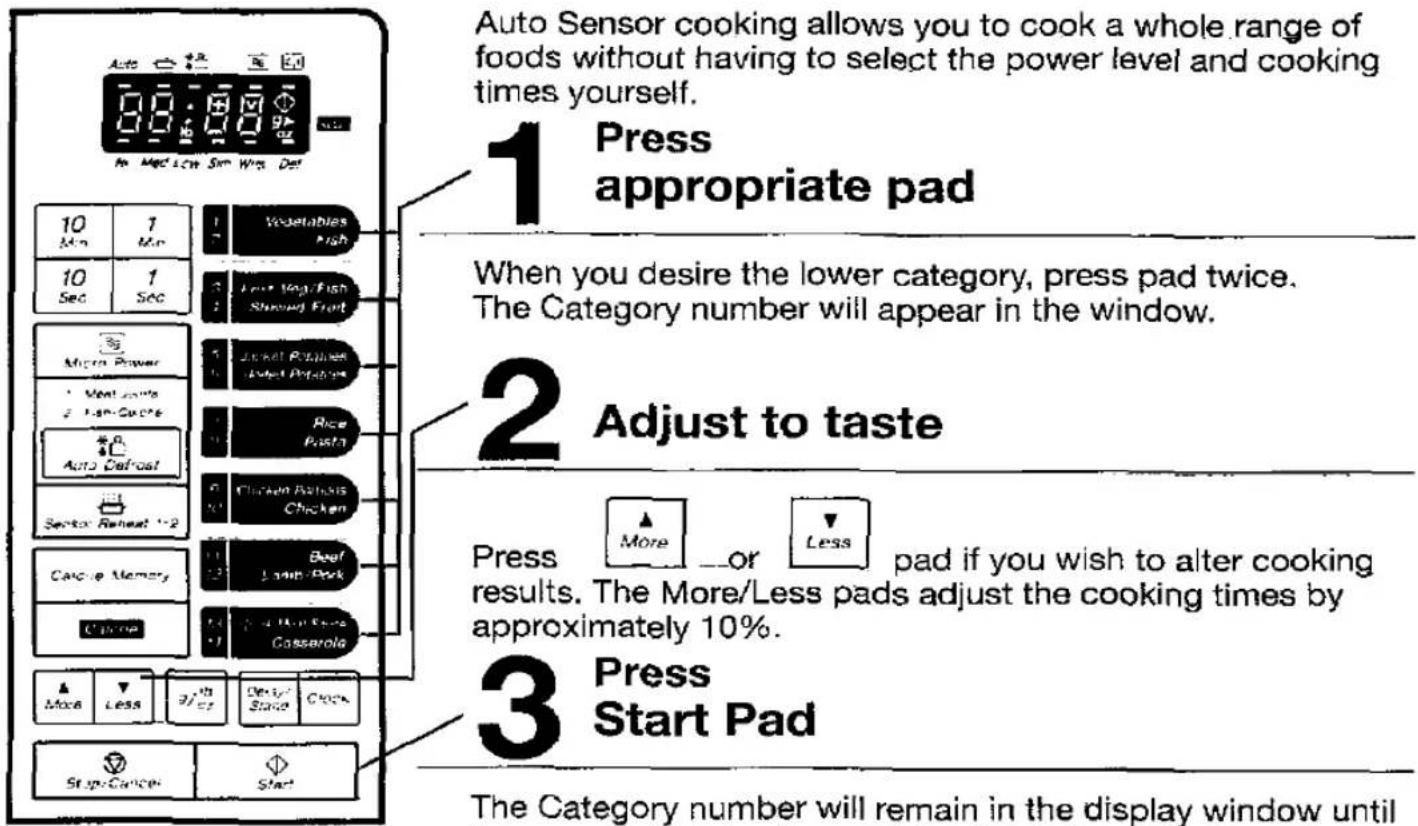
Auto Sensor cooking allows you to cook a whole range of foods without having to select the power level and cooking times yourself. 1 Press appropriate pad When you desire the lower category, press pad twice. The Category number will appear in the window. 2 Adjust to taste Press More or Less pad if you wish to alter cooking results. The More/Less pads adjust the cooking times by approximately 10%. 3 Press Start Pad The Category number will remain in the display window untilAuto Sensor cooking allows you to cook a whole range of foods without having to select the power level and cooking times yourself.
1 Press appropriate pad
When you desire the lower category, press pad twice. The Category number will appear in the window.
2 Adjust to taste
Press ▲ More ____ or ▼ Less pad if you wish to alter cooking results. The More/Less pads adjust the cooking times by approximately 10%.
3 Press Start Pad
The Category number will remain in the display window until the oven calculates the cooking time after detecting a burst of steam. See cookbook for preparing food and Minimum/Maximum weight to use.
Sensor Reheat

flowchart
graph LR
    A["Sensor Reheat 1-2"] --> B["Start"]
Select desired category 1 or 2. See cookbook for categories.
To Use The Calorie Counter - NN5802/52 only
This feature allows you to calculate the calorific value of foods and the cumulative calories consumed per day easily. The Maximum number of calories is 9999 so recommend do per person or no more than 4.
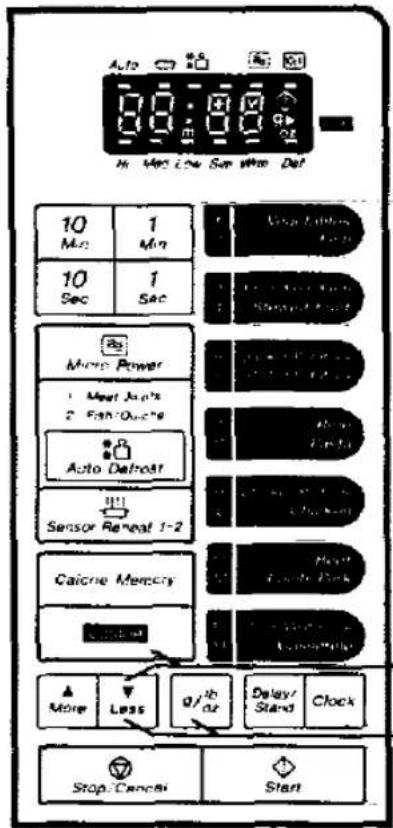
text_image
Auto 00:00 10 Min 1 Min 10 Sec 1 Sec Micro Power Meet Jan's 2 Fan'Outs' Auto Detroit Sensor Reart 1-2 Calorie Memory More Less 0/4"oz Delay/ Stand Clock Stop Cancel StartFor your convenience, calorific values of various foods may be stored according to category – (groupings of foods of similar calorific value).
Please be aware that calculations for kcals consumed based on these categories may vary from actual by up to 10% for foods with low calorific values.
WARNING: If you are calorie counting as part of a course of medical treatment, please ensure that the actual calorific values for foods provided by your Doctor/Dietician are used and DO NOT rely on the categories described below.
To calculate calories of food:
1 Press the calorie pad and use the More/Less pads to select the correct Food Code from the Calorie Chart. The oven display will show "10". Use the count up/down pads to select the required code. 2 Set the weight of the food using the weight pad and More/Less pads. The oven automatically displays 1.0kg (2.0lb) and the More/Less pads can be used to adjust up or down. 3 Press calorie pad again. The calories of that food will appear in the display.
To calculate the cumulative calories, eg for one day:
1 Calculate calorie value of each food as above steps 1, 2 and 3.
2
After each calculation press
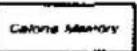
be displayed in display window
pad - this will store the calorie amount. X will k. Repeat as many times as necessary.
Entering other calorie values not on chart or values on convenience foods
- Select the correct calorie value from the information given on the food product.
- Press calorie pad.
- Use time pads 10MN ?MN to enter calorie value. eg 387 calories.
- Press Calorie Memory pad if you wish to add this value to the cumulative calories for that
To recall cumulative calories
Press Calorie Memory Pad after entering the food eaten.
To cancel cumulative calories
While total calories are shown in the display window, press pad again. While the number is blinking, press Stop/Cancel pad and the oven will revert to time of day.
Over fill
If the total number of calories cumulated comes to 9999, "FULL" will appear in display window.
- Switch the oven off before cleaning and unplug at socket if possible.
- Keep the inside of the oven, door seals and door seal areas clean. When food splatters or spilled liquids adhere to oven walls and door seals and door seal areas wipe off with a damp cloth. Mild detergent may be used if they get very dirty. The use of harsh detergent or abrasives is not recommended.
3 The outside oven surface should be cleaned with a damp cloth. To prevent damage to the operating parts inside the oven, water should not be allowed to seep into the ventilation openings. -
If the Control Panel becomes dirty, clean with a soft, dry cloth. Do not use harsh detergents or abrasives on Control Panel. When cleaning the Control Panel, leave the oven door open to prevent the oven from accidentally turning on. After cleaning touch STOP/CANCEL Pad to clear display window.
-
If steam accumulates inside or around the outside of the oven door, wipe with a soft cloth. This may occur when the microwave oven is operated in colder weather conditions and in no way indicates a malfunction of the unit.
- It is occasionally necessary to remove the glass turntable for cleaning. Wash the tray in warm soapy water or in a dishwasher.
- The roller ring and oven cavity floor should be cleaned regularly to avoid excessive noise. Simply wipe the bottom surface of the oven with mild detergent and hot water then dry with a clean cloth. The roller ring may be washed in mild soapy water. Before replacing the roller ring, careful drying of the floor of the oven will reduce the risk of corrosion.
After removing the roller ring from cavity floor for cleaning, be sure to replace it in the proper position.
Questions And Answers
Q: My microwave oven causes interference with my TV. Is this normal?
Q: Why does my oven light dim?
Q: Sometimes warm air comes from the oven vents. Why?
A: Some radio and TV interference might occur when you cook with the microwave oven. The interference is similar to the interference caused by small appliances such as mixers, vacuums, blow dryers, etc. it does not indicate a problem with our oven.
A: When cooking with a power other than HIGH, the oven must cycle to obtain the lower power levels. The oven light dims and clicking noises can be heard when the oven cycles.
A: The heat given off from the cooking food warms the air in the oven cavity. This warmed air is carried out of the oven by the air flow pattern in the oven. There are no microwaves in the air. The oven vents should never be blocked during cooking.
Technical Specifications
| Power Source: | 240V 50Hz |
| Required Power: | 1420W 6.0A |
| Output Power: | 800W (IEC-705) |
| Outer Dimensions: | 530mm (W) x 366mm (D) x 356mm (H) |
| Oven Dimensions: | 350mm (W) x 320mm (D) x 259mm (H) |
| Weight: | 16kg |
Power Source Republic of Ireland
Rated Voltage: 220V, 50HZ
Required Power: 1400W, 6.7A
All other specifications unchanged.
Weight and Dimensions shown are approximate.
text_image
Scanned image of a barcode with vertical black and white lines on both sidesE0003638