
U17M62W0GB - Ofen NEFF - Kostenlose Bedienungsanleitung
Finden Sie kostenlos die Bedienungsanleitung des Geräts U17M62W0GB NEFF als PDF.


Benutzerfragen zu U17M62W0GB NEFF
0 Frage zu diesem Gerät. Beantworten Sie die, die Sie kennen, oder stellen Sie Ihre eigene.
Eine neue Frage zu diesem Gerät stellen
Laden Sie die Anleitung für Ihr Ofen kostenlos im PDF-Format! Finden Sie Ihr Handbuch U17M62W0GB - NEFF und nehmen Sie Ihr elektronisches Gerät wieder in die Hand. Auf dieser Seite sind alle Dokumente veröffentlicht, die für die Verwendung Ihres Geräts notwendig sind. U17M62W0GB von der Marke NEFF.
BEDIENUNGSANLEITUNG U17M62W0GB NEFF
DKBO
text_image
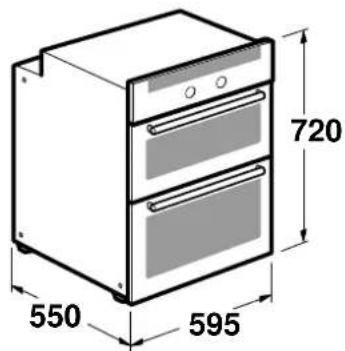
720 550 595
1
natural_image
Pure architectural diagram of a door with horizontal panels and railings, no text or symbols present
text_image
min. 550 min. 715 50 20 560+8 min. 724 A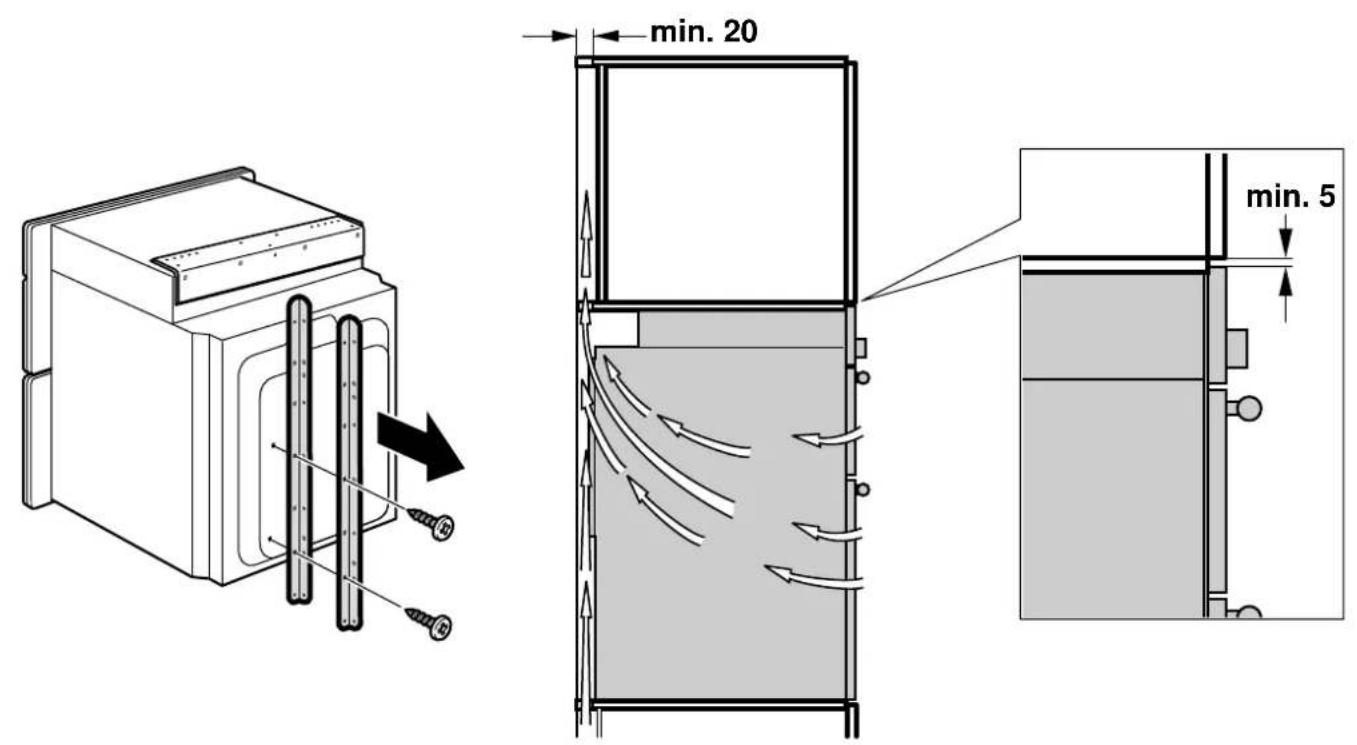
text_image
min. 20 min. 52
text_image
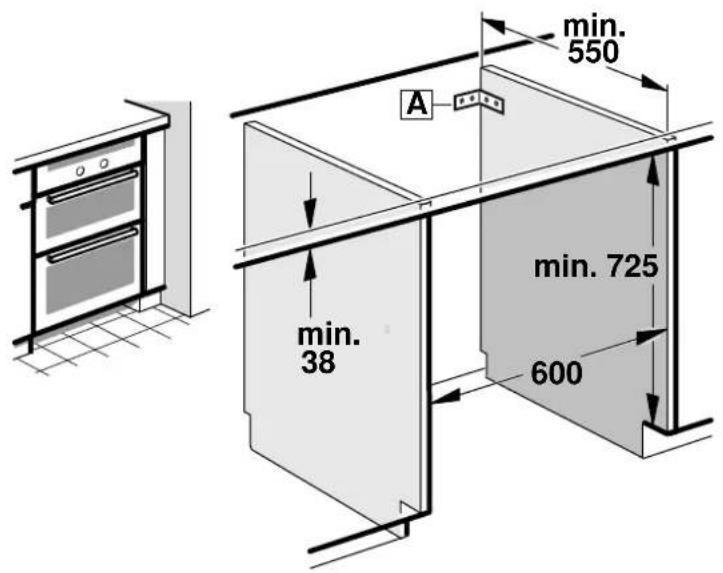
min. 550 A min. 38 min. 725 600a
natural_image
Technical diagram of a mechanical assembly with arrows indicating force or movement, no text or symbols present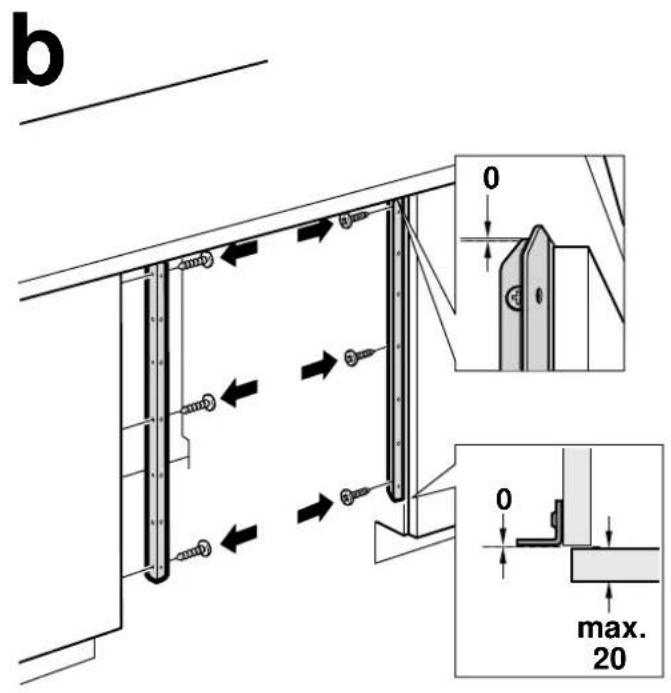
text_image
b 0 max. 20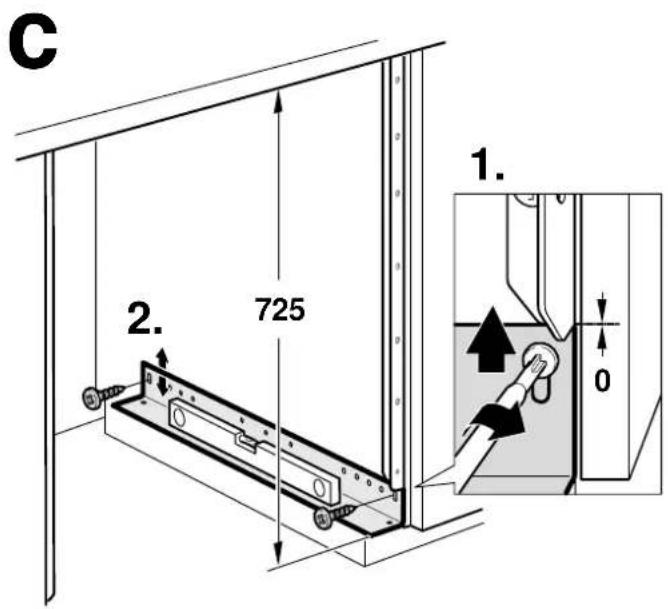
text_image
C 725 2. 1. 0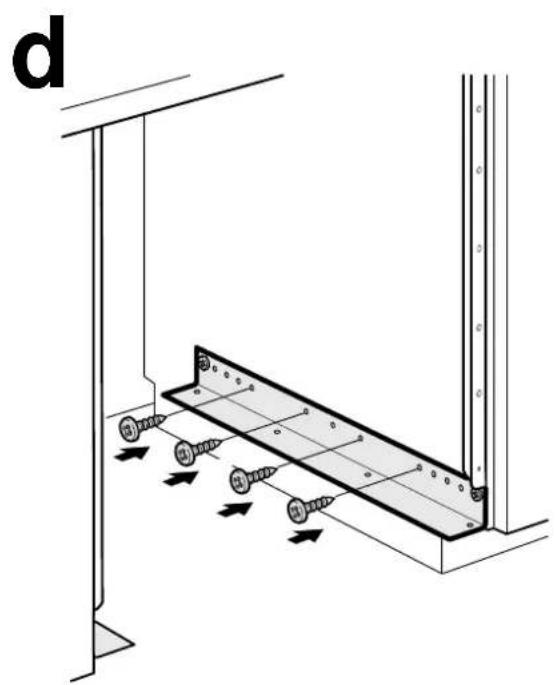
natural_image
Technical diagram of a structural panel with screw fasteners and directional arrows indicating movement (no text or symbols)
text_image
e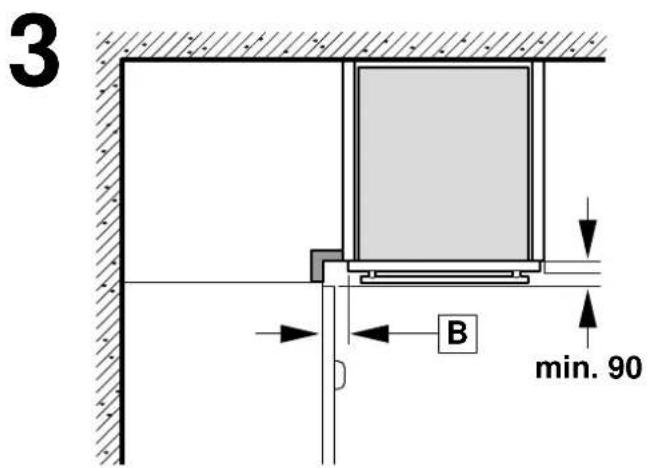
text_image
3 B min. 90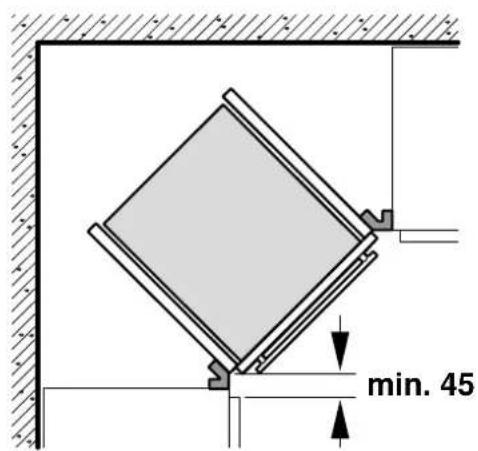
text_image
min. 455a 5b
text_image
Technical diagram showing installation steps of a door panel with screw fasteners and a close-up detail view labeled 'min. 5'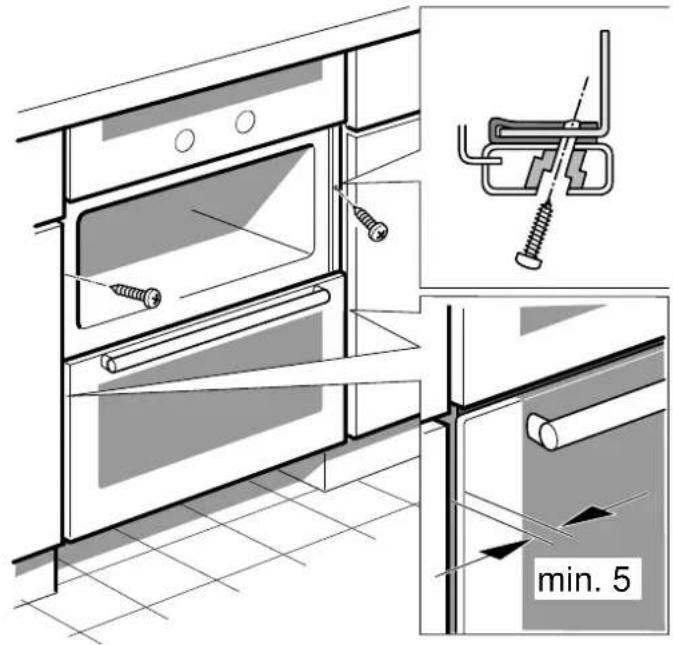
text_image
min. 5en
Important notes
This appliance is intended for use up to a maximum height of 2000 metres above sea level.
If the appliance is being installed under a hob, refer to the assembly instructions for the hob.
For installation under an induction hob, the work surface thickness must be min. 50 mm.
Do not use the door handle to carry or install the appliance.
Before installation, check the appliance for transportation damage.
Before starting up the appliance, remove any packaging material and adhesive film from the cooking compartment and the door.
The appliance must be disconnected from the power supply during all installation work.
Preparing the kitchen units
Safe use of this appliance can only be guaranteed if it has been installed professionally in accordance with these installation instructions. The installer is liable for damages incurred as a result of incorrect installation.
Do not install the appliance behind a decorative panel. There is a risk of overheating.
Units into which ovens are to be fitted must be heat-resistant up to 90 °C and adjacent cabinets up to 70 °C.
Carry out all cut-out work on the furniture unit and worktop before fitting the appliances. Remove shavings. Otherwise, the correct operation of electrical components may be adversely affected.
Caution during installation. Parts that are accessible during installation may have sharp edges. Wear protective gloves to prevent injury from cuts.
Secure freestanding units to the wall using standard, commercially available brackets A.
Permanently fix furniture units to the worktop.
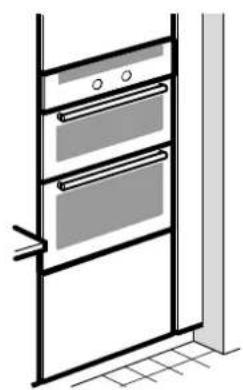
Appliance in a tall unit - Fig. 1
To ventilate the appliance, there must be a gap of 20 mm between all intermediate floors and the wall.
Only fit the appliance up to a height which allows accessories to be easily removed.
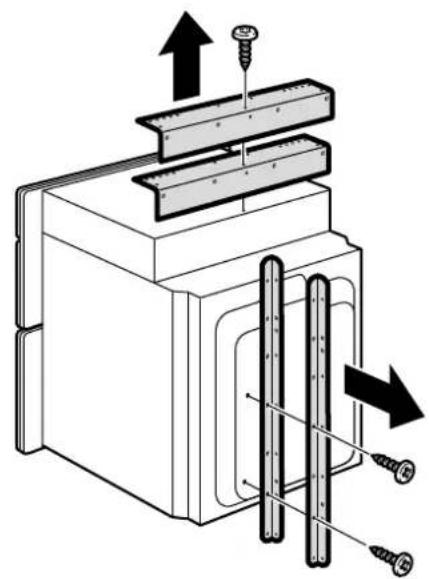
Before installation, remove the mounting angles from the rear panel of the appliance.
Appliance underneath a worktop without furniture units - Figure 2
The gap between the worktop and the appliance must not be closed using additional battens.
Screw on the mounting angles and support rails flush with the furniture unit. Align the support rails horizontally.
Corner installation - Figure 3
For corner installation, check minimum clearances. Ensure that there is sufficient clearance B for the front panel and its handles. Check that the appliance door can be opened properly.
Connecting the appliance to the power supply
Only a licensed professional may connect the appliance. The fuse protection must correspond to the power rating specified on the appliance's rating plate and to local regulations. The appliance corresponds to safety class I and may only be operated in conjunction with a safety earth terminal.
Power cord: Type H05 V V-F or a higher rating. The yellow-green wire for the safety earth terminal must be 10 mm longer on the appliance side than the other wires.
In the installation, there must be an all-pin isolating switch with at least 3 mm contact gap, or the appliance must be connected using a plug with an earthing contact. This must remain accessible after installation.
Contact protection must be ensured by the method of installation.
Identify the phase and neutral (zero) conductors in the power socket. The appliance could be damaged if incorrectly connected.
Connect the appliance only according to the connection diagram - Figure 4.
To connect the appliance, place it in front of the kitchen unit. The service cable must be long enough.
Securing the appliance
- Fully insert the appliance. Do not kink or trap the power cable, or route it over sharp edges.
- Centre the appliance.
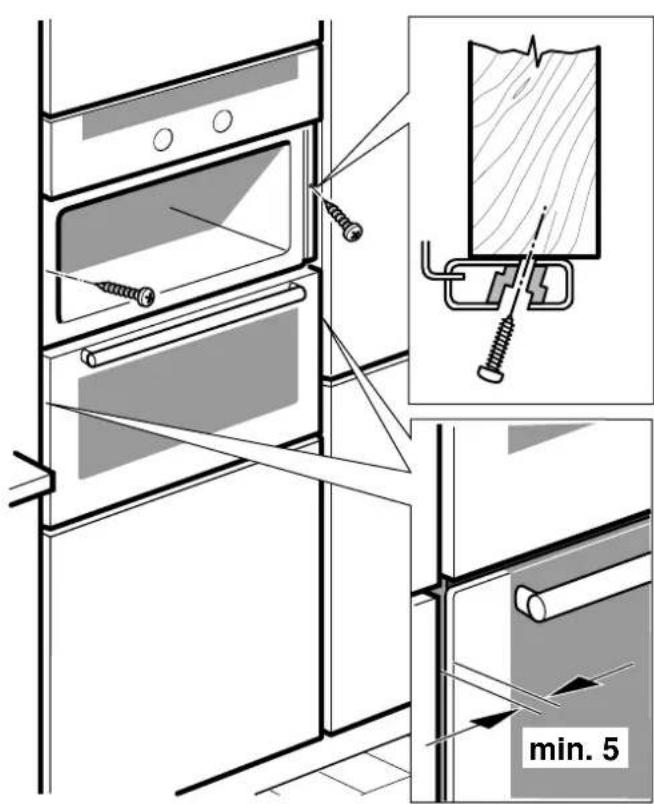
There must be an air gap of 5 mm between the appliance and adjacent cabinets.
- Using a spirit level, adjust the appliance so that it is perfectly level.
- If fitted in a tall unit, screw the appliance in place using the wood screws provided in the cooking compartment - Figure 5a.
If fitted underneath a worktop, screw the appliance in place using the metal screws provided in the bag - Figure 5b.
Removal
- Disconnect the appliance from the power supply.
- Undo the securing screws.
- Lift the appliance slightly and pull it out completely.