
KX-F2780EB - Fax PANASONIC - Kostenlose Bedienungsanleitung
Finden Sie kostenlos die Bedienungsanleitung des Geräts KX-F2780EB PANASONIC als PDF.


Benutzerfragen zu KX-F2780EB PANASONIC
0 Frage zu diesem Gerät. Beantworten Sie die, die Sie kennen, oder stellen Sie Ihre eigene.
Eine neue Frage zu diesem Gerät stellen
Laden Sie die Anleitung für Ihr Fax kostenlos im PDF-Format! Finden Sie Ihr Handbuch KX-F2780EB - PANASONIC und nehmen Sie Ihr elektronisches Gerät wieder in die Hand. Auf dieser Seite sind alle Dokumente veröffentlicht, die für die Verwendung Ihres Geräts notwendig sind. KX-F2780EB von der Marke PANASONIC.
BEDIENUNGSANLEITUNG KX-F2780EB PANASONIC
OPERATING INSTRUCTIONS
natural_image
Line drawing of a classic office telephone with keypad and cord (no text or symbols)Contents
Installation and Connection .... p. 8
Initial Preparation p. 13
Basic Operation ...... p. 19
Advanced Operation ..... p. 33
Troubleshooting and Routine Care ..... p. 70
General Information ...... p. 77
Please read these Operating Instructions before using this unit and save them for future reference.
Thank you for purchasing the Panasonic Telephone Answering System with Facsimile.
For your reference
Date of purchase
Serial No.
(found on the bottom of the unit)
Dealer's name and address
Dealer's telephone number
Model differences
| Model number | KX-F2780E | KX-F2680E |
| Automatic paper cutter | Available | Not available |
| Voice guidance | Available | Not available |
- A suffix "E" in the model number is omitted in these instructions.
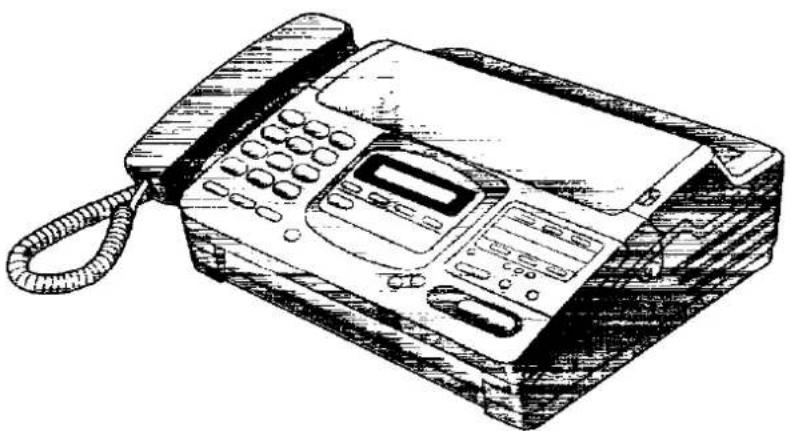
●The picture on the cover shows a KX-F2780. - Most of the pictures in these instructions show a KX-F2780, they may vary slightly from the KX-F2680.
Copyright:
This manual is copyrighted by Kyushu Matsushita Electric Co., Ltd. (KME) and its licensee. Under the copyright laws, this manual may not be reproduced in any form, in whole or part, without the prior written consent of KME and its licensee.
© Kyushu Matsushita Electric Co., Ltd. 1997
Included accessories
| Handset....1 pc.(p. 10) | Handset cord .... 1 pc.(p. 10) | Handset cradle.... 1 pc.(p. 10) | Recording paper .. 1 pc.(p. 11) |
 |  |  |  |
| Mains lead .... 1 pc.(p. 12) | Telephone line cord .... 1 pc.(p. 12) | For KX-F2780 onlyPaper stacker .... 1 pc.(p. 8) | |
 |  |  |
- If any parts are missing, contact your supplier.
- Save the original carton and packaging.
- For further accessory orders, please contact either your local Panasonic Authorised Dealer or our spare parts distributor SEME Ltd. on 01280 823523 (or fax 01280 814916).
TERMS AND CONDITIONS
-
This Warranty is in addition to and does not in any way affect any statutory or other rights of consumer purchasers. This warranty relates only to product used within Mainland Great Britain, please refer to your dealer for warranty information relating to use elsewhere within the United Kingdom.
-
This product is approved for use only on the United Kingdom's Public Switched Telephone Network and should be used only for normal purposes and in accordance with standard operating instructions.
-
You should complete the registration form overleaf and fax send it to us within 7 days of purchase; failure to do so may result in delays in providing warranty service.
-
This warranty covers breakdowns due to design or manufacturing faults; it does not apply to damage, however caused, wear and tear, neglect, incorrect adjustment or repair, or to any items of limited natural life.
-
This warranty does not cover any optional accessories which may have been purchased either at the same time as, or subsequent to, the main unit. Such accessories should be returned to the point of purchase if found to be faulty.
-
In the event of a failure, please take the following action:
a. Refer to the "Troubleshooting" section of your instruction manual in order to identify and possibly correct the problem;
b. If the fault cannot be resolved and you require a trained engineer to call, please contact the service centre on 0541 580560.
Before you telephone have the following information ready:
- Your post code, telephone number, contact name, model no. and serial no.
- A good description of the fault and any other relevant information.
- State also if the repair is to be carried out under warranty or chargeable (out of warranty).
A trained operator will discuss the nature of the perceived fault over the phone and if still unresolved will arrange for an engineer to visit.
When the operator calls please have ready proof of purchase for under warranty repair. It is your responsibility to prove that the unit is under warranty; if this is not possible the repair will be undertaken on a chargeable basis.
-
Your sole and exclusive remedy under this guarantee against us is for repair, or at our option the replacement, of the product or any defective part or parts. No other remedy, including, but not limited to, incidental or consequential damage or loss of whatsoever nature shall be available to the purchaser.
-
The warranty period applicable to this product shall be 12 months from the date of purchase.
IMPORTANT
Panasonic
WARRANTY REGISTRATION PLEASE FAX BACK TO REGISTER FOR YOUR 12 MONTHS FREE ON-SITE SERVICE
Thank you for purchasing your Panasonic combined fax and answering machine. By filling in the section below, this will ensure the following:
- We will register your machine on our warranty database. Should you ever require a service call under warranty, your call will be dealt with quickly and efficiently.
- We will send you a reply fax to confirm your registration and the correct operation of your machine.
- If you have any problems. Please call us on 0541 580560.
Simply, follow these instructions:
- Please fill in the section below in block capitals and in ink.
Your name
Company name (if applicable)
Your address
The image contains only a single, solid horizontal line. According to Rule 2 (Stylistic/Background Lines), since there is no actual text or punctuation in the source image, the OCR result must be empty.
Therefore, the corrected OCR text is:
```text [No text detected]
Your postcode
Telephone no. □□□□□□□□□□□□□□□□□□□□□□□□□□□□□□□□□□□□□□□□□□□□□□□□□□□□□□□□□□□□□□□□□□□□□□□□□□□□□□□□□□□□□□□□□□□□□□□□□□□□□
Model no.
Serial no. Date of purchase Day Month Year
- Fax this form to 0541 583250 and we will fax back to confirm receipt of your details. Please allow 14 working days for this. In addition, we will also send you information of our maintenance contracts and a "frequently asked questions" helpsheet for your machine.
Important safety instructions
When using this product basic safety precautions should always be followed to reduce the risk of fire, electric shock and injury to persons, including the following:
- Read and understand all instructions.
- Follow all warnings and instructions marked on this product.
- Unplug this product from the mains outlet and telephone line before cleaning. Do not use liquid or aerosol cleaners. Use a damp cloth for cleaning.
- Do not use this product near water, for example, near a bath, shower, basin, kitchen sink, washing machine, in a wet basement or near a swimming pool.
- Do not place this unit on an unstable surface. The product may fall, causing serious damage to the product or personal injury.
- Slots and openings in the cabinet are provided for ventilation to protect the unit from overheating. These openings must not be blocked or covered. This unit should never be placed on a bed sofa rug or similar whist powered. This product should not be placed near a radiator or other heater. This product should not be built in to any installation unless proper ventilation is provided.
- This product should only be operated on the type of power source described on the label attached to the product. If you are unsure of the type of power supplied to your premises, consult your supplier.
- This product is supplied with a moulded plug. This plug has three conductors. If the type of moulded plug does not fit your socket contact an electrician to replace your socket. Do not modify the connection this may make the product unsafe.
- Do not allow anything to rest on the power cord. Do not use this product where the cord could be damaged by people walking on it.
- Do not overload mains outlets or extension leads as this can result in the risk of fire.
- Never push objects of any kind into this product through openings in the cabinet as they may touch dangerous voltages or short out parts that could result in a risk of fire or electric shock. Never spill liquid of any kind on the product.
-
To reduce the risk of electric shock, do not disassemble this product, but take it to a qualified engineer when maintenance or repair work is required. Opening or removing covers may expose you to dangerous voltages or other risks. Incorrect re-assembly could cause an electric shock when the unit is subsequently used.
-
Unplug this unit from the mains outlet and refer servicing to qualified personnel under the following conditions:
A. When the power cord or plug is damaged or frayed.
B. If liquid has been spilled into the unit.
C. If the product has been exposed to rain or water.
D. If the product does not work normally following the operating instructions. Adjust only those controls that are covered by the operating instructions. Improper adjustment of other controls may result in damage and will often require extensive work by a qualified technician to restore the product to normal operation.
E. If the product has been dropped or the cabinet has been damaged.
F. If the product displays a distinct change in performance.
-
Avoid using a telephone (other than a cordless telephone) during a thunder storm. There may be a risk of electric shock from a lightening strike.
-
Do not use the telephone to report a gas leak anywhere near the leak.
SAVE THESE INSTRUCTIONS
INSTALLATION:
- Never install telephone wiring during a thunder storm.
- Never install telephone sockets in wet locations.
- Never touch uninsulated telephone wires unless the telephone line has been disconnected at the exchange.
- Use caution when installing or modifying telephone lines.
WARNING:
To prevent the risk of fire or electrical shock, do not expose this product to rain or any type of moisture.
OTHER INFORMATION
- Keep the unit away from electrical noise generating devices such as fluorescent lamps and electric motors.
●The unit should be kept free from dust, moisture, high temperature and vibration.
●The unit should not be exposed to direct sunlight. - Do not place objects on top of this unit.
- Do not damage the power cord.
- Do not touch the mains plug with wet hands.
- Do not use abrasive or spirit based substances to clean the cabinet with a soft cloth.
Table of Contents
Installation and Connection
Location of controls 8
Installing your unit 10
Connections 12
Initial Preparation
Setting the date, time, logo and facsimile telephone number 13
Selecting the receive mode 16
Adjusting volumes 18
Basic Operation
Making voice calls 19
Answering voice calls 19
Transmitting documents 20
Receiving documents 23
Making a copy 29
Operating the answering device 30
Advanced Operation
Automatic dialling
Storing phone numbers for automatic dialling 33
Making voice calls using automatic dialling 34
Transmitting documents using automatic dialling 34
Electronic telephone directory 35
Telephone
Voice contact (talking to the caller during or after fax reception or transmission) .. 36
TONE, RECALL and REDIAL/PAUSE buttons 37
Facsimile
Polling (retrieving fax documents) 38
Delayed transmission (sending a fax at a later time) 39
Sending documents overseas 40
Remote fax receiving (using an extension to receive a fax message) 41
Junk mail prohibitor (preventing the reception of unwanted fax documents) ..... 42
Signaling your pager that you have received a fax document 43
Answering system
Voice mailbox (how callers can leave you private messages) 44
Transferring messages 47
Operating the answering device from a remote phone 49
Recording your own greeting messages 54
Special settings
Changing the caller's recording time 56
Setting message alert 56
Setting the recording time alert 57
Changing the recording time for the ANS/FAX greeting message 57
Changing the logo print position 58
Changing the display contrast 58
Setting friendly reception 59
Setting voice guidance (KX-F2780 only) 59
Setting the recall mode.... 60
Resetting the advanced features 61
Others
The Mercury Residential Service 62
Summary of user programmable features.... 66
Printing reports and lists 67
Troubleshooting and Routine Care
Error messages on the display 70
Before requesting help 71
Clearing a recording paper jam 73
Clearing a document jam 75
Adjusting the feeder pressure 75
Cleaning the inside of the unit 76
General Information
Important information 77
Fitting a plug to the mains lead 78
CONDITIONS OF GUARANTEE 79
Specifications 80
One-touch dialler list 81
Speed dialler list 83
Index 85
Location of controls
Front view
text_image
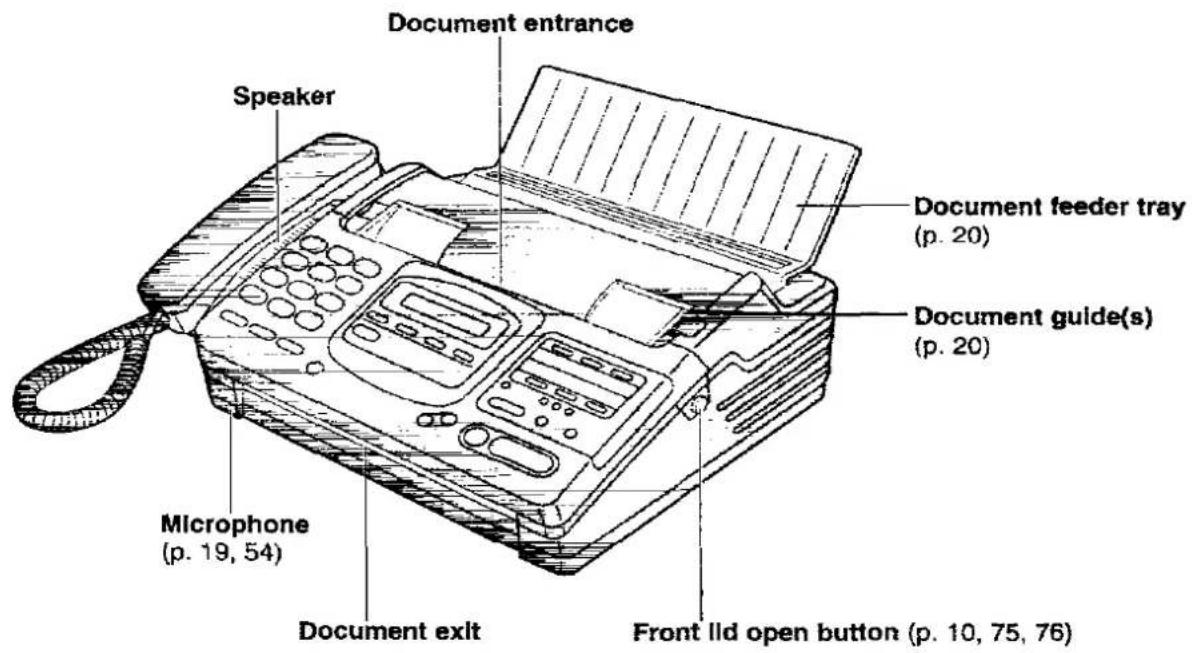
Document entrance Speaker Document feeder tray (p. 20) Document guide(s) (p. 20) Microphone (p. 19, 54) Document exit Front lid open button (p. 10, 75, 76)Installing the paper stacker (KX-F2780 only)
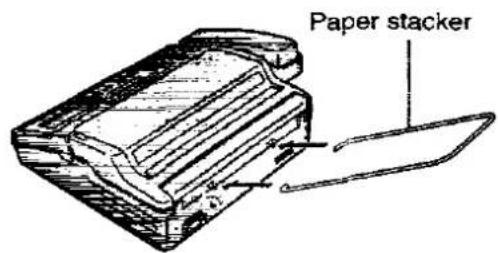
Install the paper stacker.
text_image
Paper stackerControl panel
text_image
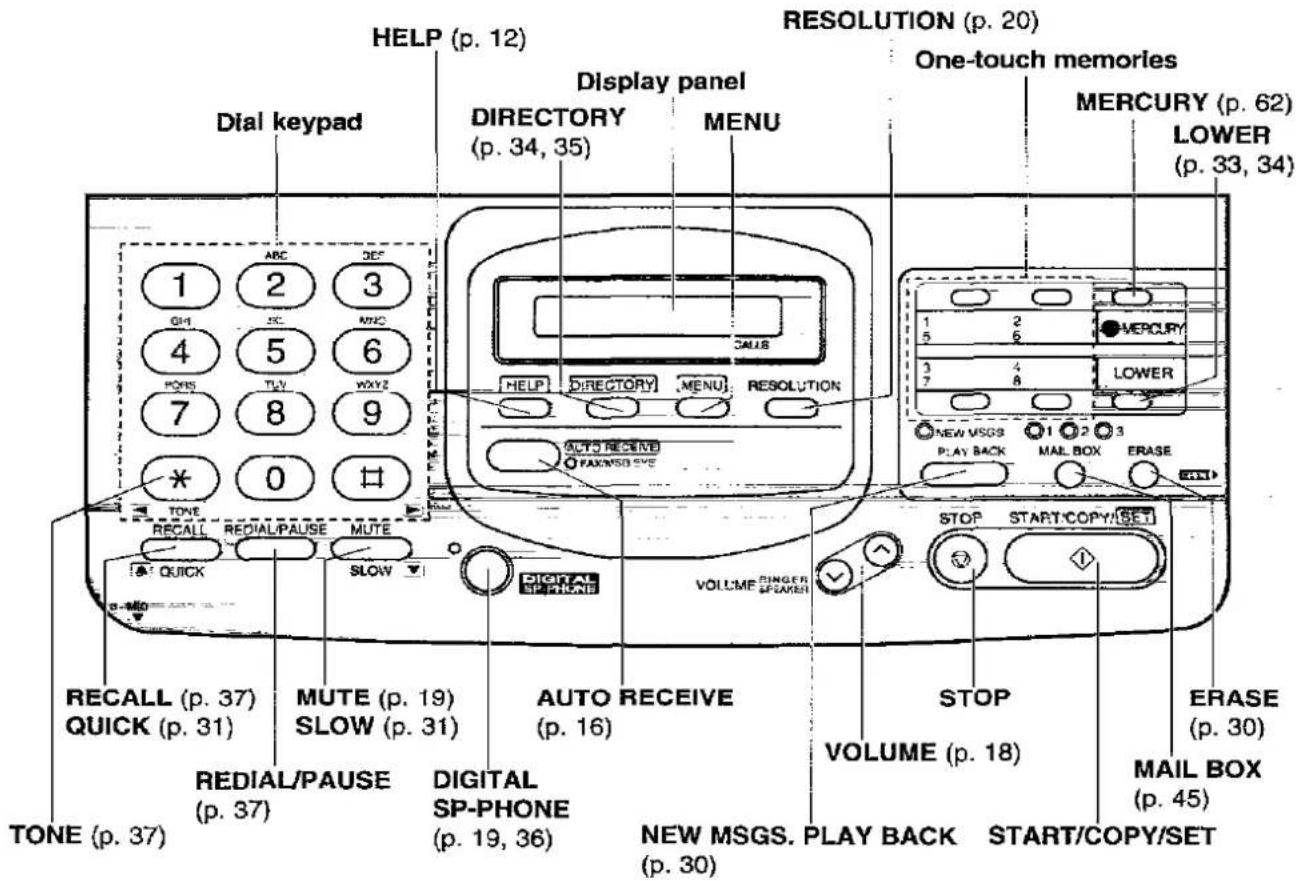
Dial keypad HELP (p. 12) DISPLAY (p. 34, 35) MENU RESOLUTION (p. 20) One-touch memories MERCURY (p. 62) LOWER (p. 33, 34) 1 ABC DEF GH 2 3 4 SC MNC 7 TV WAXZ 7 8 9 * 0 ‡ TONE RECALL RECIAL/PAUSE MUTE QUICK SLOW DIGITAL SP-PHONE TONE (p. 37) REDIAL/PAUSE (p. 37) MUTE (p. 19) SLOW (p. 31) AUTO RECEIVE (p. 16) VOLUME SINGER POWER STOP START COPY/SET VOLUME (p. 18) ERASE (p. 30) MAIL BOX (p. 45) NEW MSGS. PLAY BACK START/COPY/SET (p. 30)
Answering control buttons
text_image
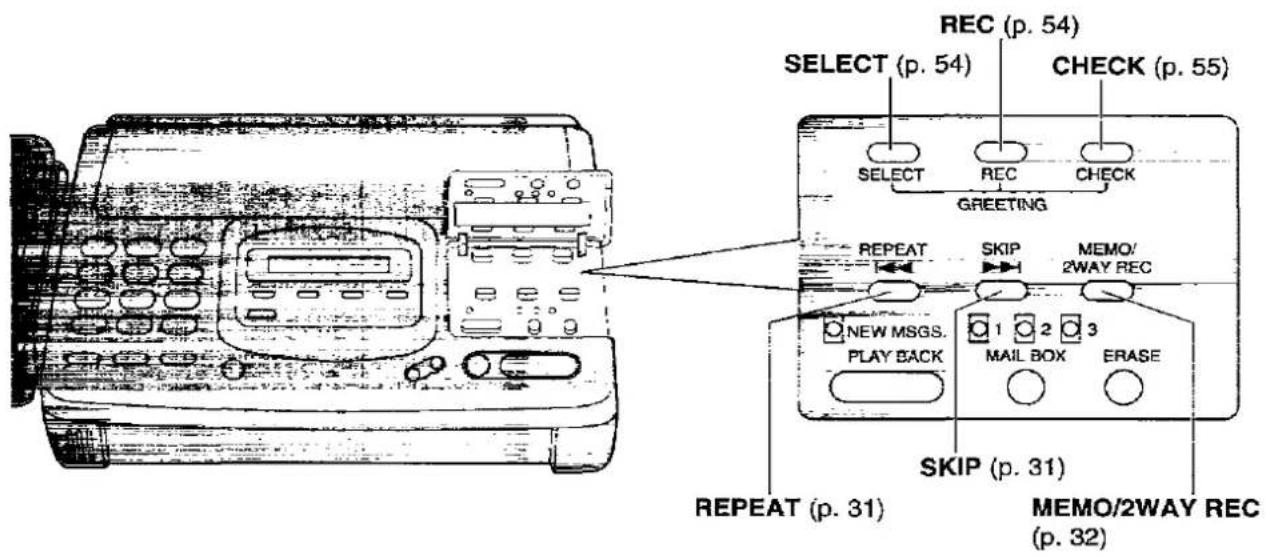
REC (p. 54) SELECT (p. 54) CHECK (p. 55) SELECT REC CHECK GREETING REPEAT SKIP MEMO/ 2WAY REC NEW MSGS. PLAY BACK MAIL BOX ERASE SKIP (p. 31) REPEAT (p. 31) MEMO/2WAY REC (p. 32)Installing your unit
Installing the handset cradle
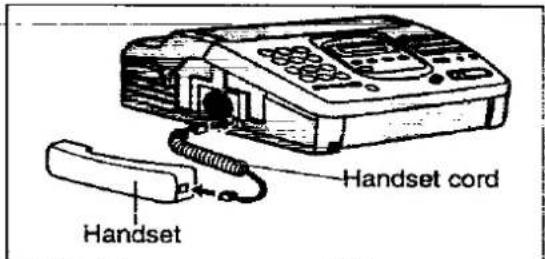
1 Connect the handset cord.
text_image
Handset cord Handset2 Ⓐ Open the front lid by pressing the front lid open button.
⑧ Open the back lid by lifting up the tabs located on both sides.
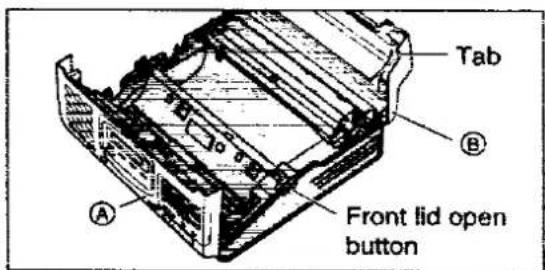
text_image
Tab Front lid open button3 Insert the handset cradle by matching the triangles.
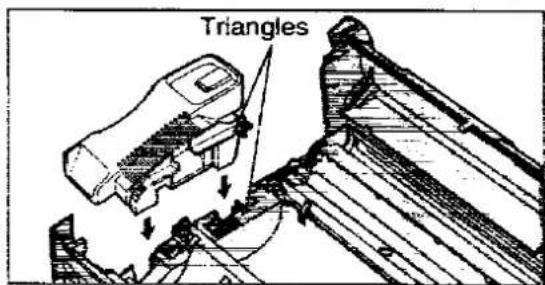
text_image
Triangles4 Press down on the ✉ marked on the handset cradle until it clicks into place. ●Make sure the two hooks lock the handset cradle firmly.
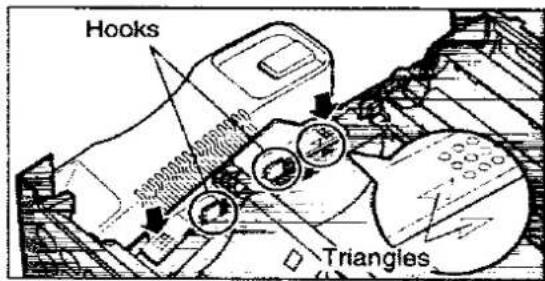
text_image
Hooks Triangles5 Place the handset on the handset cradle and close the lids securely. - If the following message is displayed when the unit is turned on, the handset cradle is not installed correctly.
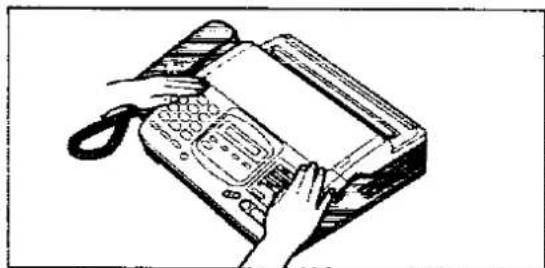
natural_image
Line drawing of a hand holding a landline telephone (no text or symbols present)CHECK CRADLE
Check step 4 again.
Installing the recording paper
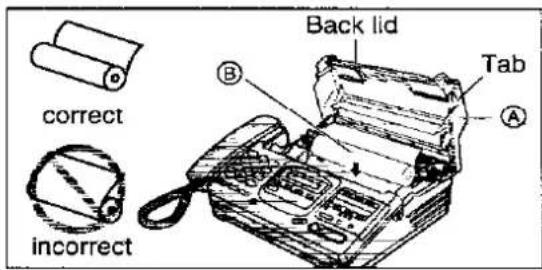
1 Ⓐ Open the back lid by lifting up the tabs located on both sides.
⑧ Install a recording paper roll in the unit.
●Make sure that the shiny side of the paper is facing down and there is no slack in the roll.
- If the beginning of roll is secured with glue or tape, cut approx. 150 mm (6 inches) from the new roll.
2-a For KX-F2780
① Insert the leading edge of the recording paper between the recording paper roller and the silver plate.
② Close the back lid by gently pressing down on both ends.
2-b For KX-F2680
① Insert the leading edge of the recording paper between the recording paper roller and the silver plate.
② Insert the paper under the back lid and pull a few centimeters of paper out of the unit.
③ Close the back lid by gently pressing down on both ends, and tear off the excess paper by pulling it toward you.
Note:
- Only use the roll of paper supplied with the unit or specified in the operating instructions, otherwise the print quality may be affected and/or thermal head wear may occur.
text_image
correct incorrect Back lid Tab A B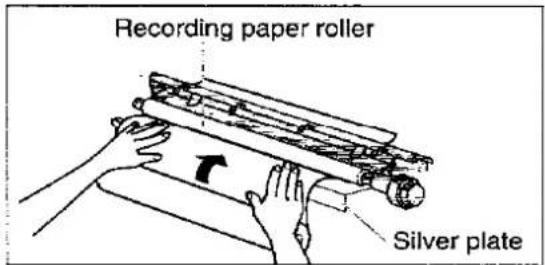
text_image
Recording paper roller Silver plate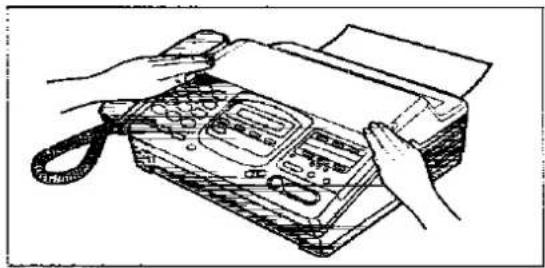
natural_image
Line drawing of hands operating a landline telephone (no text or symbols visible)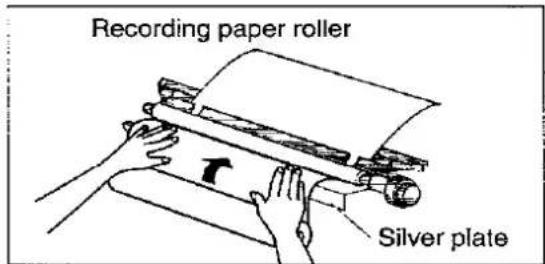
text_image
Recording paper roller Silver plate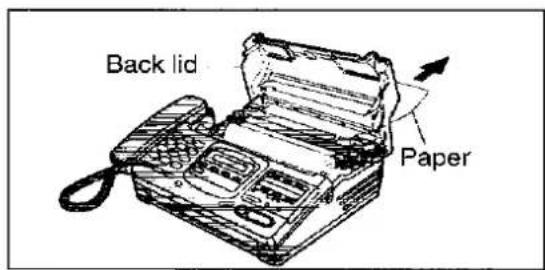
text_image
Back lid Paper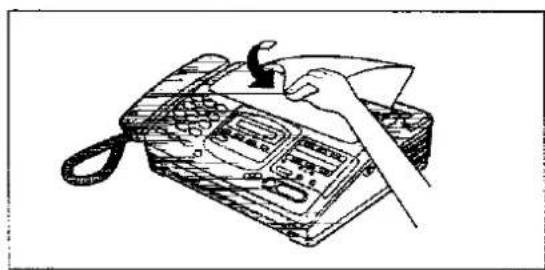
natural_image
Line drawing of a hand using a handheld device to press a telephone (no text or symbols visible)Connections
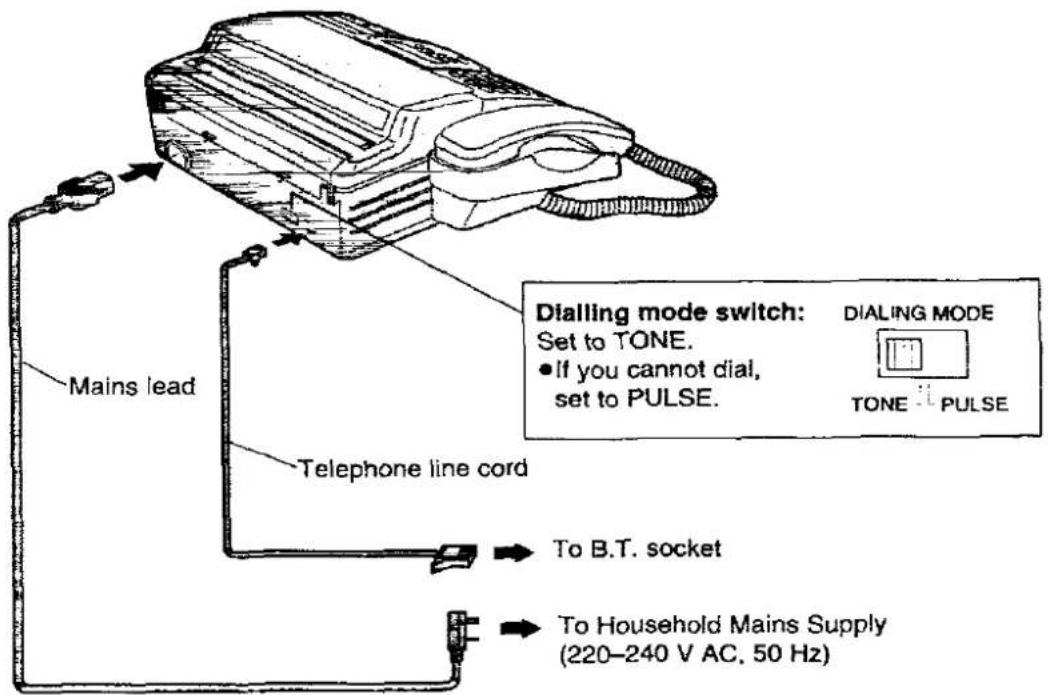
text_image
Mains lead Telephone line cord To B.T. socket To Household Mains Supply (220-240 V AC, 50 Hz) Dialling mode switch: Set to TONE. • If you cannot dial, set to PULSE. DIALING MODE TONE - PULSENote:
- When you operate this product, the mains socket outlet should be near the product and easily accessible.
- When a mains power failure takes place, you are only able to use the unit as a standard telephone.
- Telephone line connection and handset connection are at TNV (Telecommunication Network Voltage).
Helpful hint:
- If assistance is needed, press HELP. The unit will print a quick guide.
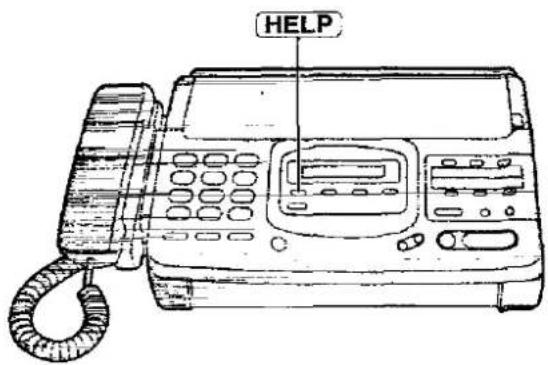
text_image
HELPSetting the date, time, logo and facsimile telephone number
Before using your unit, program the correct date and time, your logo and your facsimile telephone number.
This information will be printed on the top or bottom of each page transmitted from your unit. To change the print position, see page 58.
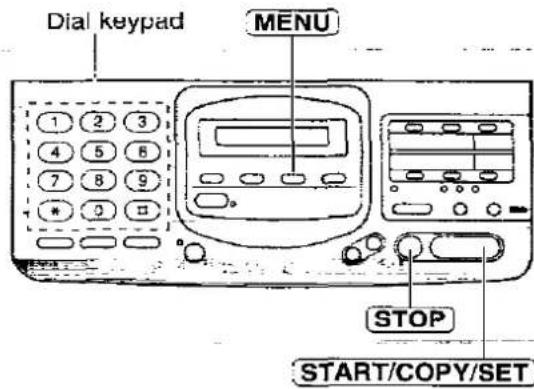
Setting the date and time
1 Press MENU.
SYSTEM SET UP
2 Press #, then 0 1.
SET DATE & TIME
3 Press START/COPY/SET.
DAY 01
4 Enter the correct day using 2 digits, then press START/COPY/SET.
MONTH 01
5 Enter the correct month using 2 digits, then press START/COPY/SET.
YEAR 97
6 Enter the last 2 digits of the year, then press START/COPY/SET:
TIME 12:00AM
7 Enter the correct hour and minute.
Example: To set 3:00PM
Press 0300. Then press # to select PM.
To select AM, press ✱.
8 Press START/COPY/SET.
9 Press MENU.
Note:
- Do not enter 24 hour clock time as this unit will only accept 12 hour clock entries.
- If you make a mistake while programming, press STOP then make corrections.
●The accuracy of the clock will be approximately ±60 seconds a month.
text_image
Dial keypad MENU STOP START/COPY/SETSetting your logo
Usually the logo is a company, division or personal name in an abbreviated form.
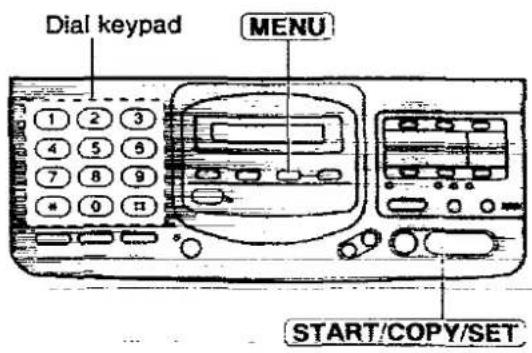
1 Press MENU.
SYSTEM SET UP
2 Press #, then 0 2.
YOUR LOGO
3 Press START/COPY/SET.
LOGO=
A Enter your logo up to 30 characters.
- Refer to the instructions on page 15.
5 Press START/COPY/SET.
6 Press MENU.
text_image
Dial keypad MENU START/COPY/SETSetting your facsimile telephone number
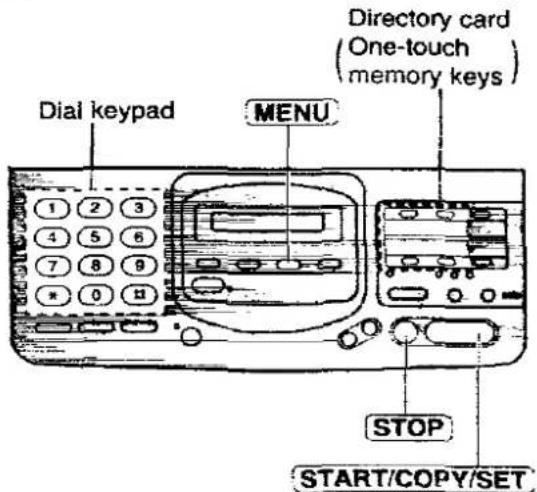
1 Press MENU.
SYSTEM SET UP
2 Press #, then 0 3.
YOUR TEL NO.
2 Press START/COPY/SET
NO.=
4 Enter your facsimile telephone number up to 20 digits.
- The # button inserts a space and the * button a "+".
- If you make a mistake, press STOP to delete the wrong number to the left of the cursor.
5 Press START/COPY/SET.
6 Press MENU.
text_image
Dial keypad MENU Directory card (One-touch memory keys) 1 2 3 4 5 6 7 8 9 * 0 H STOP START/COPY/SETNote:
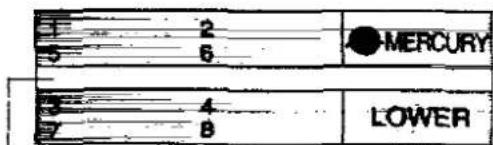
- We recommend you to write down your facsimile telephone number on the following space of the directory card.
text_image
1 2 5 6 MERCURY 3 4 LOWER 7 8Space for your facsimile telephone number
How to enter characters and symbols
The dial keypad and the one-touch memories can be used as character input keys and command keys. Pressing 0–9 and one-touch memory 1 will alternately select a character as shown below.
| Keys | Number of times | ||||||||||||
| 1 | 2 | 3 | 4 | 5 | 6 | 7 | 8 | 9 | 10 | 11 | 12 | 13 | |
| 1 | 1 | [ | ] | { | } | + | - | / | = | , | . | - | ' |
| 2 | A | B | C | a | b | c | 2 | ||||||
| 3 | D | E | F | d | e | f | 3 | ||||||
| 4 | G | H | I | g | h | i | 4 | ||||||
| 5 | J | K | L | j | k | l | 5 | ||||||
| 6 | M | N | O | m | n | o | 6 | ||||||
| 7 | P | Q | R | S | p | q | r | s | 7 | ||||
| 8 | T | U | V | t | u | v | 8 | ||||||
| 9 | W | X | Y | Z | w | x | y | z | 9 | ||||
| 0 | 0 | ( | ) | < | > | ! | " | # | $ | % | & | ¥ | |
| : | ; | ? | | | × | @ | ^ | ' | → | |||||
| INSERT key (Used to insert one character or one space.) | |||||||||||||
| SPACE key (Used to replace one character with a space.) | |||||||||||||
| DELETE key (Used to delete one character.) | |||||||||||||
| ▶ key (Used to move the cursor to the right.) | |||||||||||||
| ◀ key (Used to move the cursor to the left.) | |||||||||||||
For example, when entering "Bill" as your logo:
1 Press 2 twice.
LOGO=B
2 Press 4. six times.
LOGO=Bi
3 Press 5 six times.
LOGO=Bii
4 Press # to move the cursor and press 5 six times.
LOGO=Bill
Note:
- If you need to use the same number key to enter the next character, press # to move the cursor.
To correct a mistake while programming
Use # and * to move the cursor to the incorrect character, then make the correction.
or
Press STOP to delete the character to the left of the cursor.
To see the layout of the one-touch memory keys
Remove the directory card cover with a pencil or similar object and turn the directory card over.
Selecting the receive mode
This unit combines the functions of facsimile, telephone and answering system.
This unit has two types of receive modes; AUTO RECEIVE and MANUAL RECEIVE.
—When you are going out or unable to answer, set the AUTO RECEIVE mode.
—When you are available, set the MANUAL RECEIVE mode.
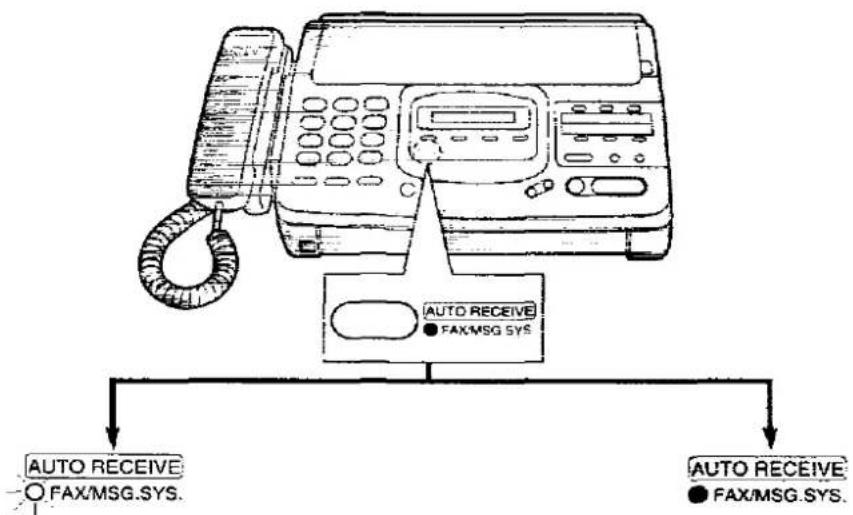
Press AUTO RECEIVE to switch to the desired mode.
flowchart
graph TD
    A["Landline Telephone"] --> B["AUTO RECEIVE"]
    A --> C["AUTO RECEIVE"]
    B --> D["FAX/MSG.SYS."]
    C --> E["FAX/MSG.SYS."]
■ AUTO RECEIVE mode
The FAX/MSG.SYS. indicator light goes on.
ANS/FAX mode (pre-selected setting): Select this mode when you want the unit to record voice messages and/or receive fax messages (see page 24).
Display: ANS/FAX MODE
- If your unit is a KX-F2680, record your ANS/FAX greeting message (see page 54).

You can select the FAX mode instead of the ANS/FAX mode as an AUTO RECEIVE mode (page 17).
FAX mode:
Select this mode when you use the unit solely as a fax machine (see page 26).
Display: FAX MODE
■ MANUAL RECEIVE mode
The FAX/MSG.SYS. indicator light goes off.
TEL mode (pre-selected setting):
Select this mode when you wish to answer all calls manually.
Display: TEL MODE
You can change to the ANS/FAX mode from a remote location. Call your unit from a touch tone phone and wait for 20 rings. The answering system will temporarily answer the line. Then enter the remote operation ID (page 50) during the greeting message. The unit will switch to the ANS/FAX mode.

You can select the TEL/FAX mode instead of the TEL mode as a MANUAL RECEIVE mode (page 17).
TEL/FAX mode:
Select this mode when you are near the unit and do not want to hear the unit ring when faxes are received but wish to answer voice calls (see page 27).
Display: TEL/FAX MODE
Note:
- Regardless of the mode you select, you can always place calls and send faxes.
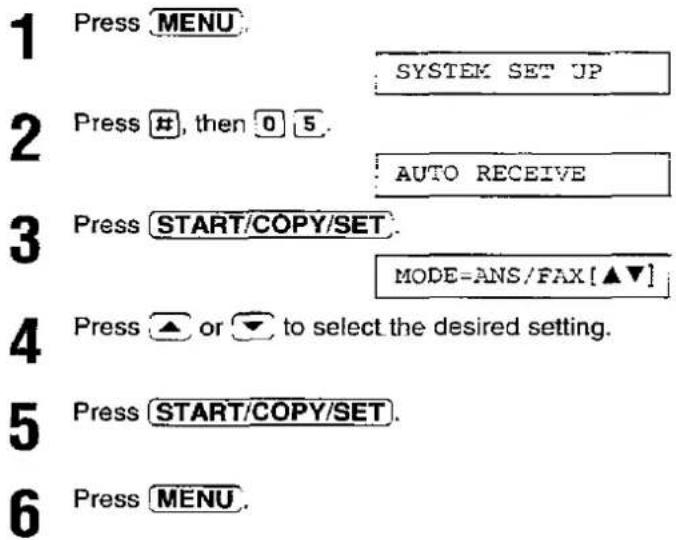
Changing the setting of the AUTO RECEIVE mode
You can select either ANS/FAX mode (pre-selected setting) or FAX mode in the AUTO RECEIVE mode.
text_image
1 Press MENU. 2 Press #, then 0 5. 3 Press START/COPY/SET. 4 Press ▲ or ▼ to select the desired setting. 5 Press START/COPY/SET. 6 Press MENU.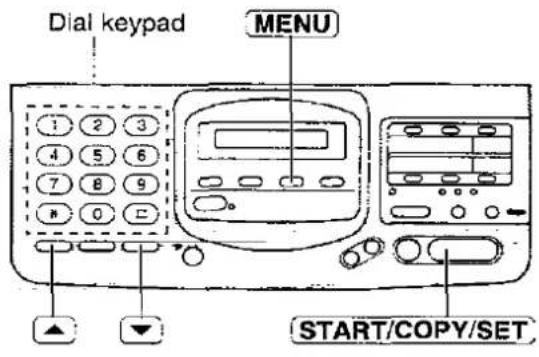
text_image
Dial keypad MENU START/COPY/SET[Barcode]
Note:
- If your unit is a KX-F2680 and you do not record an ANS/FAX greeting message, the display shows:
NO ANS GREETING
To record an ANS/FAX greeting message, see page 54.
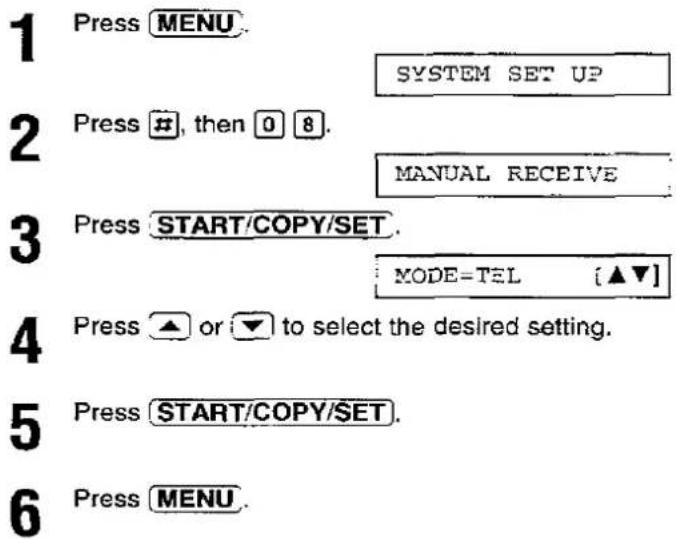
Changing the setting of the MANUAL RECEIVE mode
You can select either TEL mode (pre-selected setting) or TEL/FAX mode in the MANUAL RECEIVE mode.
text_image
1 Press MENU. 2 Press #, then 0 8. 3 Press START/COPY/SET. 4 Press ▲ or ▼ to select the desired setting. 5 Press START/COPY/SET. 6 Press MENU.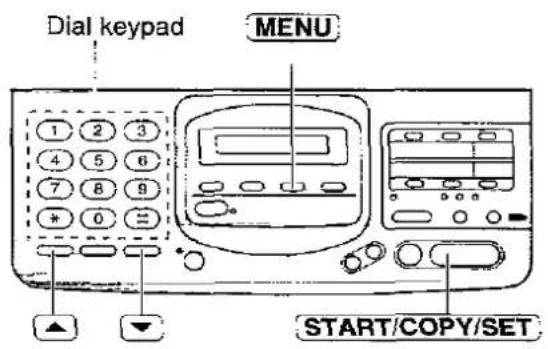
text_image
Dial keypad MENU START/COPY/SETNote:
- If you do not record a TEL/FAX greeting message, the display shows:
NO TEL-GREETING
To record a TEL/FAX greeting message, see page 54.
- When the unit is in the TEL/FAX mode, other telephones connected to the telephone line will ring 1–4 times (depending upon programming). See "Setting the TEL/FAX mode ring count" on page 28. This unit will not ring at this time. This unit will begin to ring if the call is a voice call, other telephones connected to the same line will not ring at this time.
Adjusting volumes
■ Ringer volume
Press VOLUME (v/∧) while the unit is idle.
- 3 levels (high/low/off) are available.
To turn the ringer off:
- Press VOLUME (v) repeatedly.
RINGER OFF= OK?
- Press START/COPY/SET.
While the ringer volume is set to off:
The display will show the following message and the unit will not ring when receiving a call.
RINGER OFF
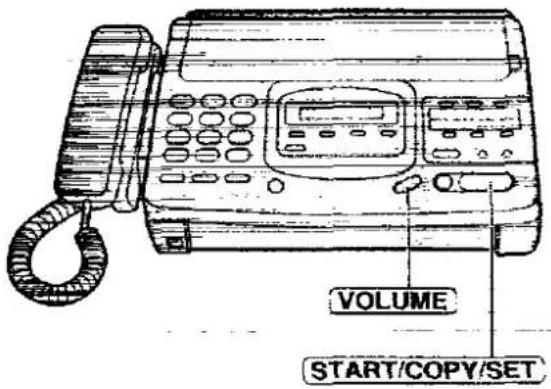
text_image
VOLUME START/COPY/SET■ Speaker volume
Press VOLUME (v/∧) while using the speakerphone.
●8 levels (high to low) are available.
■ Answering device volume
Press VOLUME (v/∧) while listening to recorded messages.
●9 levels (high to off) are available.
■ Voice guidance volume (KX-F2780 only)
Press VOLUME (v/∧) while listening to the voice guidance.
●9 levels (high to off) are available.
Making voice calls
1 Press DIGITAL SP-PHONE or lift the handset.
2 Dial a phone number.
• If you misdial, hang up and dial again.
3 When the other party answers, speak into the microphone or handset.
4 When finished, press DIGITAL SP-PHONE again or replace the handset.
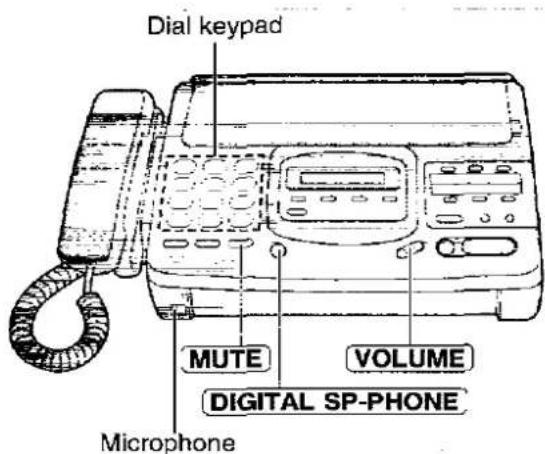
text_image
Dial keypad MUTE VOLUME DIGITAL SP-PHONE MicrophoneAnswering voice calls
1 When the unit rings, lift the handset or press DIGITAL SP-PHONE.
2 When finished, replace the handset or press DIGITAL SP-PHONE.
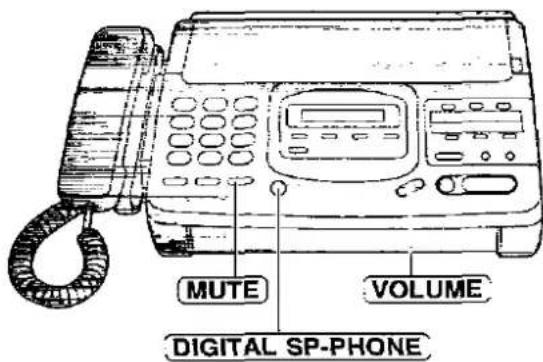
text_image
MUTE VOLUME DIGITAL SP-PHONEVoice muting
Using this feature, the other party cannot hear you but you can hear them.
- Press MUTE during a telephone conversation.
- To resume the conversation, press MUTE again.
Hints for speakerphone operation
- Use the speakerphone in a quiet room.
- If the other party has difficulty hearing you, reduce the speaker volume.
- If you and the other party speak at the same time, parts of your conversation will be lost.
- To switch to the handset, lift the handset. To switch back to the speakerphone again, press DIGITAL SP-PHONE.
Transmitting documents
Documents you can send
Minimum size
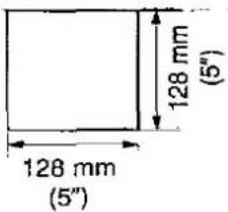
text_image
128 mm (5") 128 mm (5")Maximum size
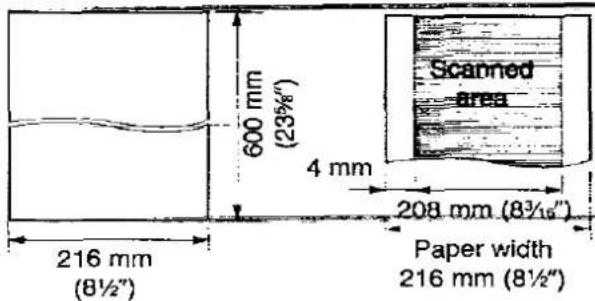
text_image
600 mm (23¾") 4 mm 208 mm (8³/₁₆") Paper width 216 mm (8½") Scanned areaEffective scanning area
Document weight
Single sheet:
45 to 90 g/m² (12 to 24 lb.)
Multiple sheets:
60 to 80 g/m² (16 to 21 lb.)
Note:
- Remove clips, staples or other similar fastening objects.
- Check that ink, paste or correction fluid has dried.
- Do not send the following types of documents. Use copies for fax transmission.
—Chemically treated paper such as carbon or carbonless duplicating paper
—Electrostatically charged paper
—Heavily curled, creased or torn paper
—Paper with a coated surface
—Paper with a faint image
—Paper with printing on the opposite side that can be seen through the front (e.g. newspaper)
Loading documents
1 Open the document feeder tray.
2 Insert the documents FACE DOWN until a beep tone is heard.
●The unit can accept up to 15 sheets of paper at a time.
3 Adjust the document guides to the width of the document.
4 Press RESOLUTION repeatedly to the desired setting.
STANDARD
For printed or typewritten originals with normal-sized characters.

For originals with small printing.

For originals with minute printing.

For originals containing photographs, shaded drawings, etc.
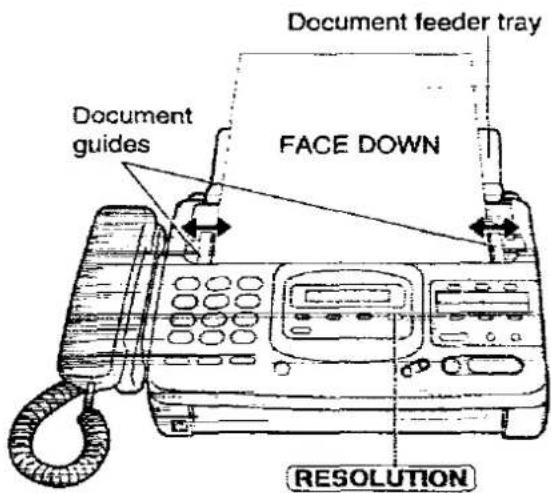
text_image
Document feeder tray FACE DOWN Document guides RESOLUTIONNote:
- Using the fine, super fine or half tone setting will increase transmission time.
- If the resolution setting is changed during feeding, it will be effective from the next sheet.
- The super fine resolution only works with other compatible machines.
Transmitting documents manually
1 Insert the documents FACE.DOWN until a beep tone is heard.
2 Press DIGITAL SP-PHONE, or lift the handset.
3 Dial a phone number.
• If you misdial, hang up and dial again.
4 When a fax tone is heard, press START/COPY/SET.
5 Replace the handset if you are using it.
Note:
- If the other party answers your call, ask them to start receiving a fax, then press (START/COPY/SET).
- The unit will automatically end the transmission after the last sheet is transmitted.
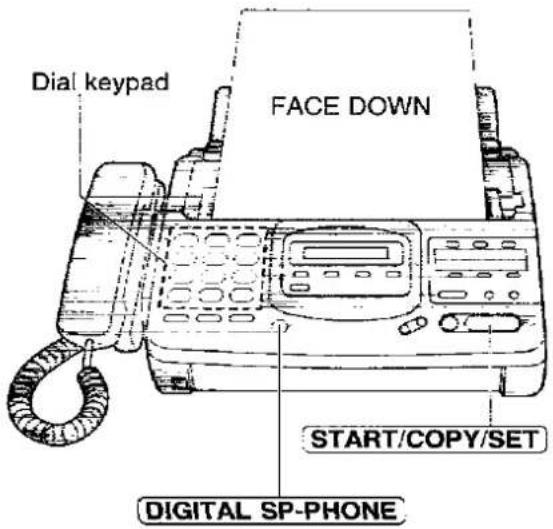
text_image
Dial keypad FACE DOWN START/COPY/SET DIGITAL SP-PHONETransmitting documents with fewer procedures
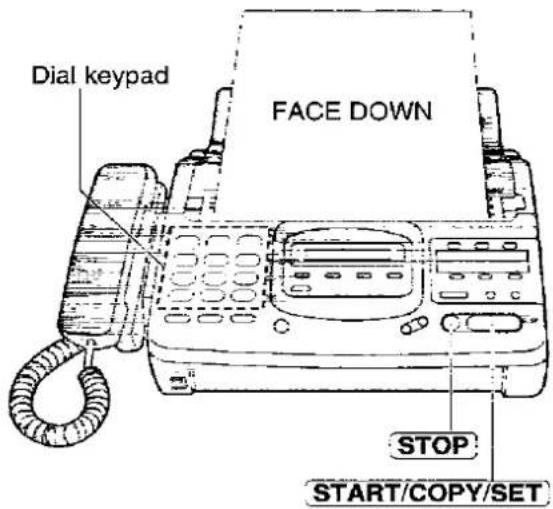
1 Insert the documents FACE DOWN until a beep tone is heard.
2 Dial a phone number.
• If you misdial, press STOP and dial again.
3 Press START/COPY/SET.
• The unit will start to dial and transmit the documents.
Fax auto redial
If there is no answer or the line is busy, the unit will automatically redial the number up to 3 times. The fax auto redial is available in the following features. —transmitting documents with fewer procedures —transmitting documents using automatic dialling (p. 34) —receive polling (p. 38) —delayed transmission (p. 39) To cancel redialling, press STOP.
text_image
Dial keypad FACE DOWN STOP START/COPY/SETTo send 16 or more sheets at a time
Insert the first 15 sheets of the document. Add the extra sheets (up to 15) before the last sheet is fed into the unit.
To stop transmission
Press STOP.
• To eject the document, press STOP again.
Voice guidance about fax transmission (KX-F2780 only)
After transmission, one of the following messages will tell you the result.
●"Transmission is complete."
●"Transmission has failed."
You can set this feature to OFF and the guidance will not be heard (see page 59).
Transmitting documents by following the voice guidance (KX-F2780 only) \_\_\_\_
Make sure that the voice guidance feature is set to ON (see page 59).
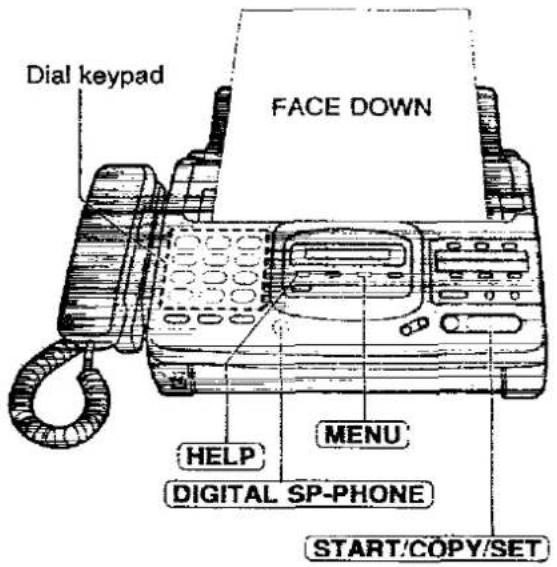
1 Press MENU until the following is displayed.
XMT VOICE GUIDE
2 Press HELP.
Voice guidance:
To transmit, insert the document face down until you hear the beep.
3 Insert the documents FACE DOWN until a beep tone is heard.
Press the speaker phone button, then dial the phone number. When the fax tone is heard, press the start button.
4 Press DIGITAL SP-PHONE.
5 Dial a phone number.
6 When a fax tone is heard, press START/COPY/SET.
Start transmission.
text_image
Dial keypad FACE DOWN HELP MENU DIGITAL SP-PHONE START/COPY/SETNote:
- You can lift the handset instead of pressing DIGITAL SP-PHONE in step 4.
Receiving documents
Receiving fax documents manually
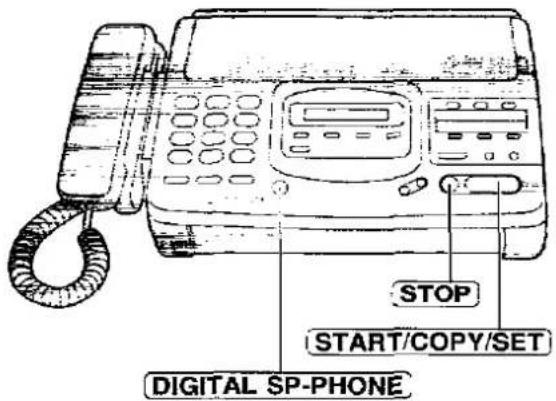
1 When the unit rings, lift the handset or press DIGITAL SP-PHONE to answer the call.
2 When:
—document reception is required,
—a slow beep is heard, or
—no sound is heard,
press START/COPY/SET.
3 Replace the handset if you are using it.
•The recording paper will be printed print side down.
text_image
STOP START/COPY/SET DIGITAL SP-PHONEFriendly reception
If you hear a slow beep when you answer a call, the unit will automatically start fax reception. You need not press START/COPY/SET. This is called "friendly reception".
- If this feature is not required, set to OFF (see page 59).
Voice guidance about friendly reception (KX-F2780 only)
When the friendly reception is activated, one of the following messages will be heard.
—“Please hang up the handset for reception.”
—"Start reception."
- If the voice guidance feature is set to OFF, these messages will not be heard (see page 59).
Automatic paper cutter
KX-F2780 provides an automatic paper cutter. The unit automatically cuts the recording paper after printing.
KX-F2680 does not provide this feature. Cut the recording paper by pulling it upwards.
To stop reception
Press STOP.
Voice guidance about fax reception (KX-F2780 only)
After reception, one of the following messages will tell you the result.
—"Reception is complete."
—"Reception has failed."
—“Reception has been interrupted.”
- You can set this feature to OFF and the guidance will not be heard (see page 59).
Memory reception (KX-F2780 only)
The unit will temporarily store received documents in memory when;
—the unit runs out of recording paper.
—the unit is overheated, or
—the recording paper is jammed.
To print a document, install a new recording paper roll, let the unit cool down or clear the jammed paper.
- If memory becomes full, the unit will stop receiving documents and the display will show the following message.
MEMORY FULL
●Concerning the memory capacity, see page 80.
Receiving fax documents and/or recording incoming voice messages automatically (ANS/FAX mode) \_\_\_\_
When you use the AUTO RECEIVE function set to ANS/FAX mode, the unit will work as a facsimile machine and/or answering device.
If a fax call is detected, the unit will automatically switch to fax mode and receive documents.
If a voice call is detected, the answering system will begin recording, then the caller can leave a voice message.
Setup of voice message and document reception
The total recording time (including the greeting messages) is about 18 minutes when no fax documents are in memory. If messages are recorded in noisy rooms, the time may be shortened by 7 minutes.
To record incoming voice messages and receive fax documents, follow these steps:
Important:
- If your unit is a KX-F2780, pre-recorded greeting messages are provided (see below).
- If your unit is a KX-F2680, no pre-recorded greeting messages are provided. Record your ANS/FAX greeting message first (see page 54).
1 Make sure that the AUTO RECEIVE mode is set to ANS/FAX (see page 17).
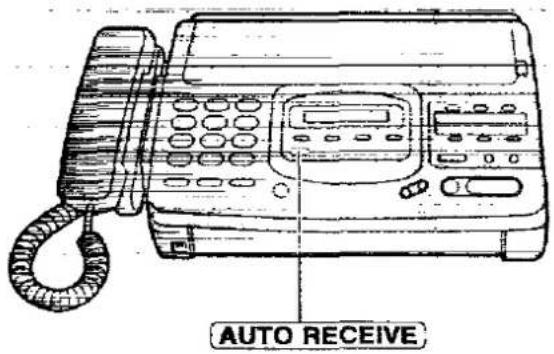
2 Turn on the AUTO RECEIVE mode by pressing AUTO RECEIVE until the FAX/MSG.SYS. indicator light goes on.
●The display shows the following message.
ANS/FAX MODE
The remaining time for recording incoming messages will be displayed on the display.
Example:
TIME LEFT=10m13s
text_image
AUTO RECEIVENote:
- The recording time available to each caller can be set to either "LONG" (2 minutes 30 seconds) or "SHORT" (1 minute). To change the setting, see page 56.
- When the remaining time is low, erase unnecessary messages from memory (see pages 30 and 46).
Pre-recorded greeting messages (KX-F2780 only)
The model KX-F2780 has three pre-recorded greeting messages in common memory. According to the unit's condition, one of the following messages will be played to the caller.
■ When your own greeting message (page 54) is not recorded, the following greeting message will be played.

Hello! We are unable to answer right now.
To send a fax, please start transmission.
To leave a voice message, please speak after the beep.
Thank you.
■ When the unit detects a problem, one of the following pre-recorded greeting messages will be played.
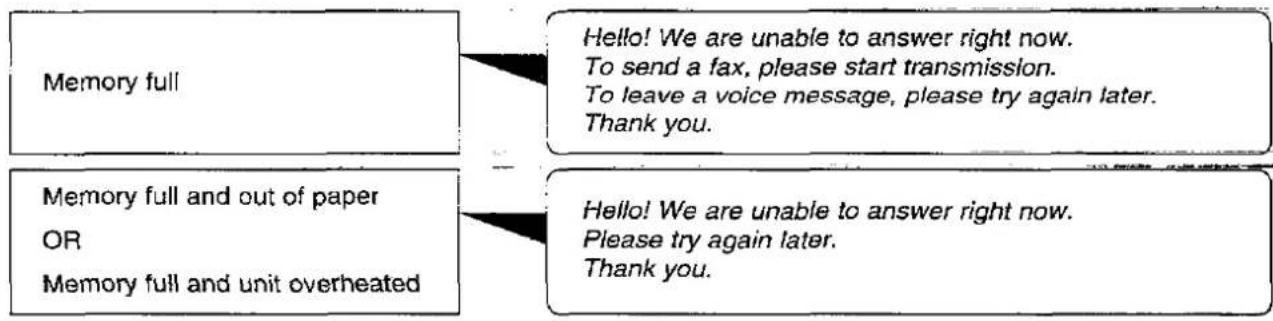
flowchart
graph TD
    A["Memory full"] --> B["Hello! We are unable to answer right now. To send a fax, please start transmission. To leave a voice message, please try again later. Thank you."]
    C["Memory full and out of paper OR Memory full and unit overheated"] --> D["Hello! We are unable to answer right now. Please try again later. Thank you."]
Setting the ANS/FAX mode ring count
This feature determines the number of rings after which the unit answers a call in the ANS/FAX mode. Choose from 1, 2, 3, 4, TOLL SAVER and RINGER OFF.
TOLL SAVER: When you call the unit from a remote location, the number of rings will tell you if there are any new voice messages or not. If the unit answers on the second ring, there is at least one new recorded message. If the unit answers on the fourth ring, there are no new recorded messages. Hang up immediately when you hear the third ring. The third ring indicates that there are no new messages. This will save you being charged for the call.
RINGER OFF: The unit will answer without ringing.
Helpful hints:
●To answer a call before the unit does, increase the number of rings.
- If you find difficulty in receiving faxes from machines that have an automatic transmission feature, decrease the number of rings.
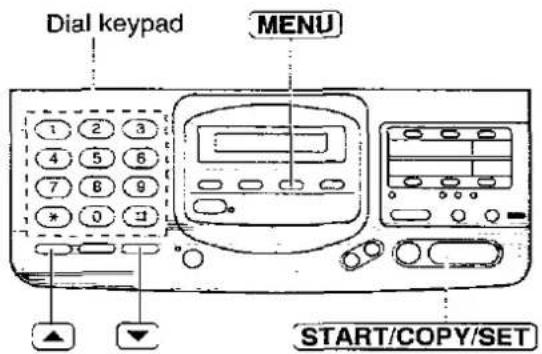
1 Press MENU.
2 Press ☐, then ☐ 6.
Press START/COPY/SET.
4 Press ▲ or ▼ to select the desired setting.
5 Press START/COPY/SET.
6 Press MENU.
SYSTEM SET UP
ANS/FAX RING
RING=2 [▲▼]
Press ▲ or ▼ to select the desired setting.
Press START/COPY/SET.
Press MENU.
text_image
Dial keypad MENU START/COPY/SETNote:
- Two rings may be referred to as "NORMAL" position as it enables the unit to answer incoming calls in a reasonably short time. This position should be selected unless you specifically wish to take advantage of the "toll saver facility".
- Callers generally expect their calls to be answered within 10 seconds and most callers would abandon a call in under 45 seconds if no reply is obtained. This unit will answer incoming calls in under 10 seconds if required.
Receiving fax documents only (FAX mode)
When you use the AUTO RECEIVE function set to FAX mode, the unit will work as a dedicated facsimile.
The unit will automatically answer all calls and generate fax tones to the callers.
Callers will hear fax tones and will only be able to transmit faxes.
Setting up the unit for fax reception
1 Set the AUTO RECEIVE mode to FAX (see page 17).
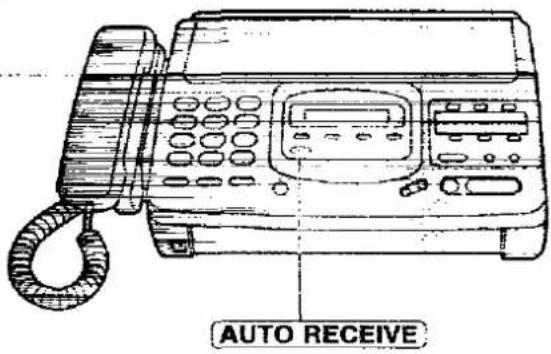
2 Turn on the AUTO RECEIVE mode by pressing AUTO RECEIVE until the FAX/MSG.SYS. indicator light goes on.
●The display shows the following message.
FAX MODE
text_image
AUTO RECEIVESetting the FAX mode ring count
This feature determines the number of rings after which the unit answers a call in the FAX mode.
Choose from 1 to 4 rings.
Helpful hints:
- To answer a call before the unit does, increase the number of rings.
- If you find difficulty in receiving faxes from machines that have an automatic transmission feature, decrease the number of rings.
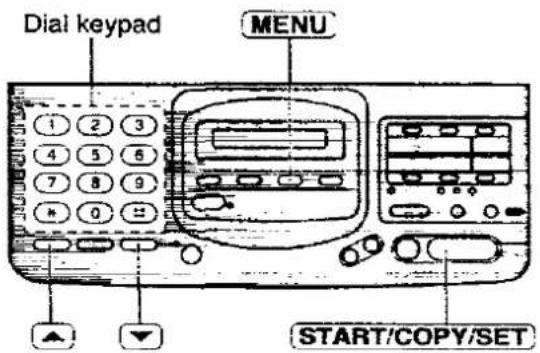
1 Press MENU.
SYSTEM SET UP
2 Press #, then 0 7.
FAX RING
3 Press START/COPY/SET.
RING=2 [▲▼]
4 Press ▲ or ▼ to select the desired number.
5 Press START/COPY/SET.
6 Press MENU.
text_image
Dial keypad MENU START/COPY/SETReceiving both voice and fax calls (TEL/FAX mode)
Use this mode when you wish to receive voice calls with ring but do not want to hear the unit ring when faxes are received.
When a call is received, the unit will work as follows.
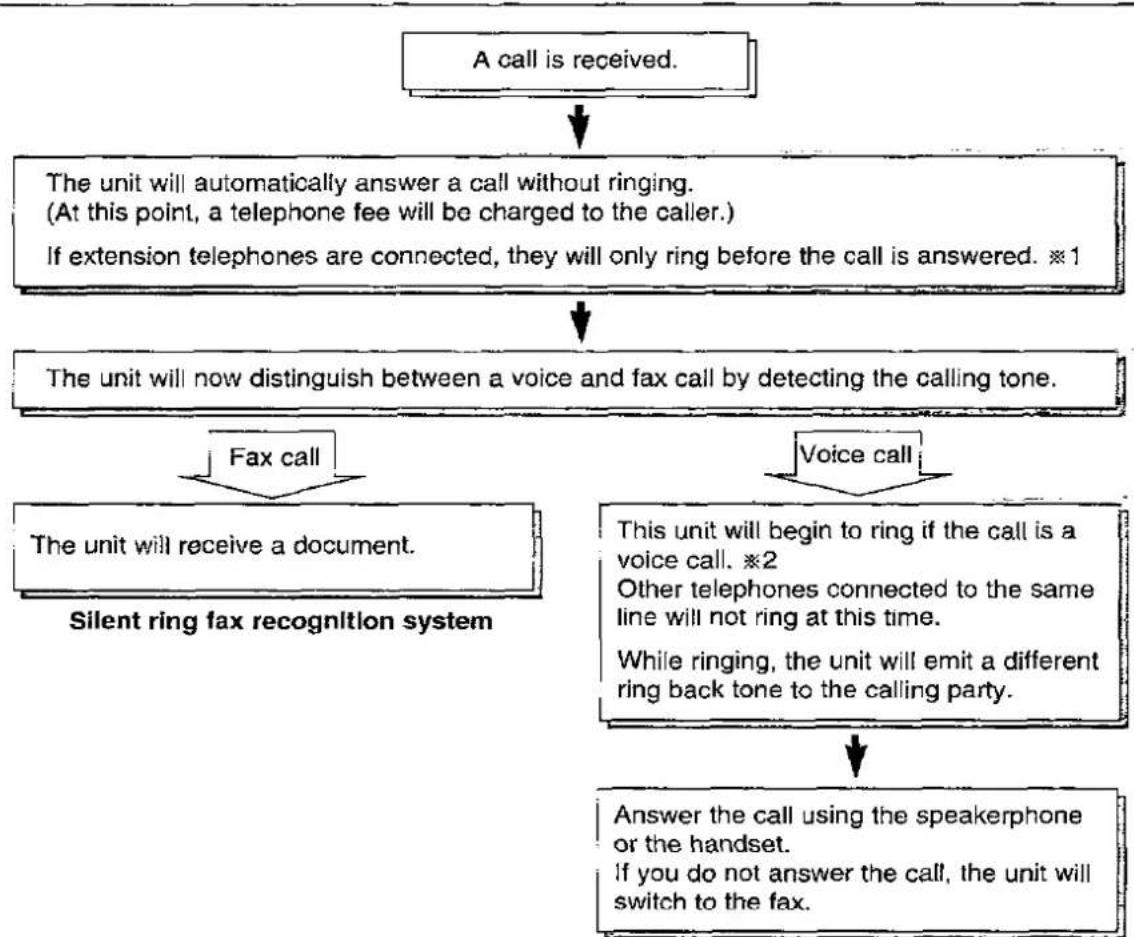
flowchart
graph TD
    A["A call is received."] --> B["The unit will automatically answer a call without ringing.<br>(At this point, a telephone fee will be charged to the caller.)"]
    B --> C["If extension telephones are connected, they will only ring before the call is answered. ※1"]
    C --> D["The unit will now distinguish between a voice and fax call by detecting the calling tone."]
    D --> E["Fax call"]
    E --> F["The unit will receive a document."]
    D --> G["Voice call"]
    G --> H["This unit will begin to ring if the call is a voice call. ※2<br>Other telephones connected to the same line will not ring at this time.<br>While ringing, the unit will emit a different ring back tone to the calling party."]
    H --> I["Answer the call using the speakerphone or the handset.<br>If you do not answer the call, the unit will switch to the fax."]
    style A fill:#f9f,stroke:#333
    style B fill:#ccf,stroke:#333
    style C fill:#cfc,stroke:#333
    style D fill:#fcc,stroke:#333
    style E fill:#cff,stroke:#333
    style F fill:#ffc,stroke:#333
    style G fill:#fcc,stroke:#333
    style H fill:#ffc,stroke:#333
    style I fill:#fcc,stroke:#333
※1 The number of rings can be changed. See "Setting the TEL/FAX mode ring count" on page 28.
*2 The number of rings can be changed. See "Setting the silent fax recognition ring count" on page 28.
Note:
- Some fax messages that are transmitted manually may not send a calling tone. These calls must be manually received.
- If the TEL/FAX greeting message is recorded (see page 54), it will be played to the caller.
Setting up the unit
1 Record the TEL/FAX mode greeting message (see page 54).
- The TEL/FAX mode greeting message will be played to the caller when the unit automatically answers the incoming call.
2 Set the MANUAL RECEIVE mode to TEL/FAX (see page 17).
3 Make sure that the AUTO RECEIVE mode is turned off.
- If the FAX/MSG. SYS. indicator light is on, press AUTO RECEIVE to turn off the AUTO RECEIVE mode.

text_image
AUTO RECEIVE ● FAX MSG SYS.Setting the TEL/FAX mode ring count
This feature determines the number of rings after which the unit automatically answers a call in the TEL/FAX mode.
Choose from 1 to 4 rings.
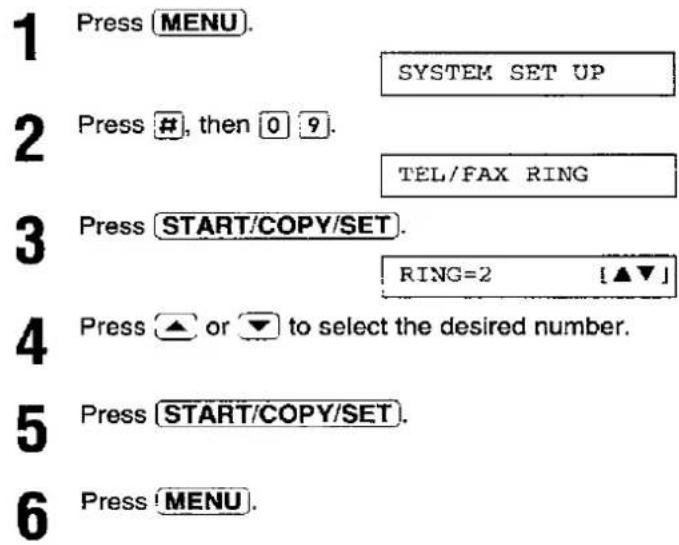
text_image
1 Press MENU. 2 Press #, then 0 9. 3 Press START/COPY/SET. 4 Press ▲ or ▼ to select the desired number. 5 Press START/COPY/SET. 6 Press MENU.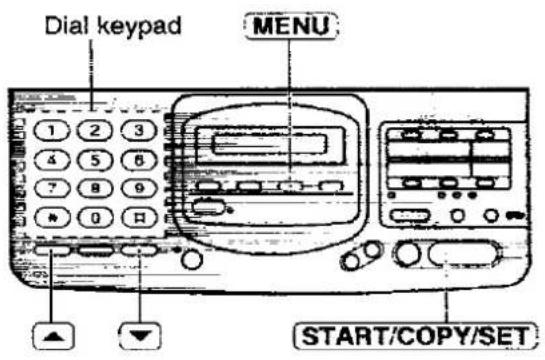
text_image
Dial keypad MENU START/COPY/SETSetting the silent fax recognition ring count
When a fax call is received in the TEL/FAX mode, the unit will automatically activate the fax function without ringing. If the unit detects a voice call, it will ring. You can choose from 3 to 6 rings.
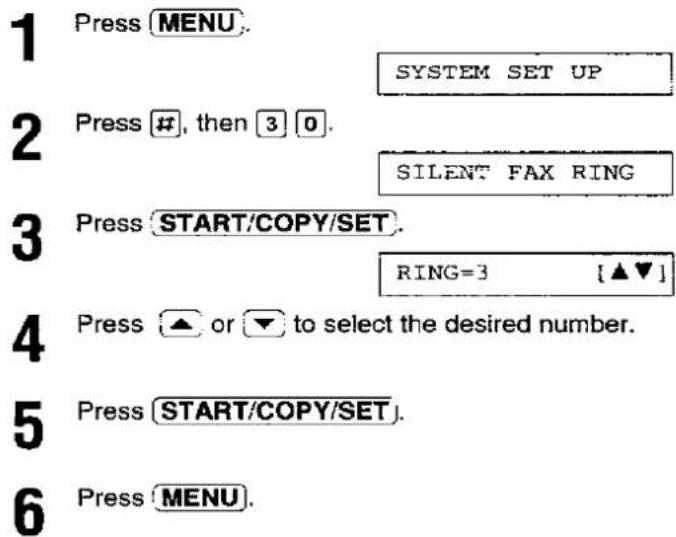
text_image
1 Press MENU. 2 Press #, then 3 0. 3 Press START/COPY/SET. 4 Press ▲ or ▼ to select the desired number. 5 Press START/COPY/SET. 6 Press MENU.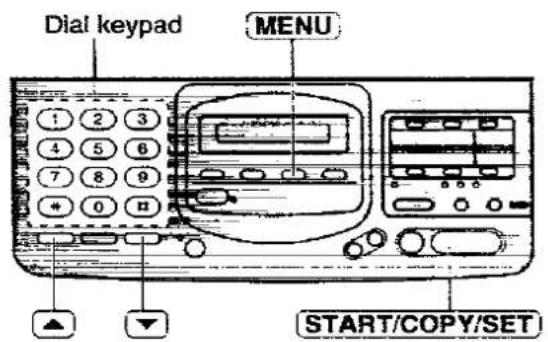
text_image
Dial keypad MENU START/COPY/SETMaking a copy
Any transmittable document can be copied (see page 20).
1 Insert the documents (up to 15 sheets) FACE DOWN until a beep tone is heard.
2 Press START/COPY/SET.
Note:
- When copying, the unit will automatically select FINE resolution. To change the resolution, press RESOLUTION.
- You can make or receive a voice call while making a copy.
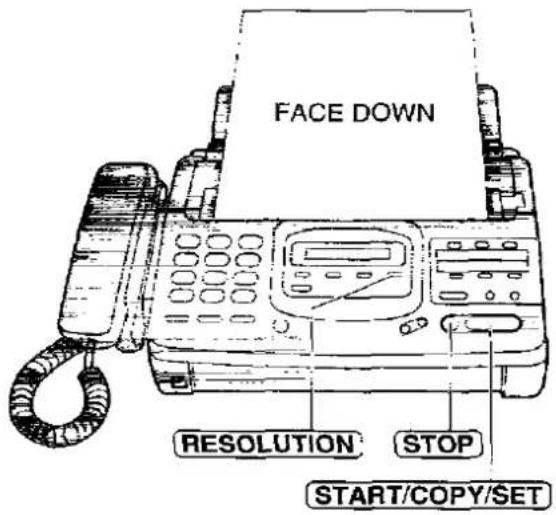
text_image
FACE DOWN RESOLUTION STOP START/COPY/SETTo stop copying
Press STOP.
Operating the answering device
Listening to messages in common memory
When the unit receives voice messages;
—the NEW MSGS. indicator will flash,
—the call counter will show the total number of recorded messages, and
—a slow beep will sound if message alert (page 56) is set to ON.
■ Listening to new recorded messages
Press NEW MSGS. PLAY BACK lightly.
■ Listening to all of the recorded messages
Press NEW MSGS. PLAY BACK until a beep is heard.
Note:
- During playback, the display shows the time and day when each message was recorded and the recorded order of the messages.
- Adjust the speaker volume using VOLUME.
Voice time/day stamp (KX-F2780 only):
During playback, a synthesized voice will announce the time and day when each message was recorded.
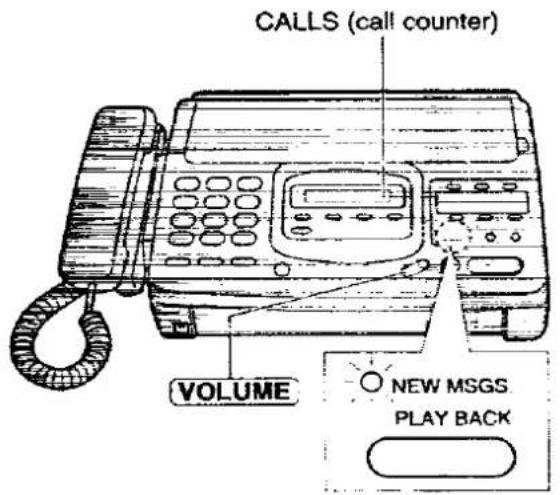
text_image
CALLS (call counter) VOLUME NEW MSGS PLAY BACKErasing recorded messages
■ Erasing specific messages from memory
Press ERASE when the message you want to erase is playing.
■ Erasing all messages in common memory
- Press ERASE after listening to all of the messages.
ICM ERASE OK?
• To cancel erasing, press STOP.
- Press START/COPY/SET.
ERASE COMPLETED
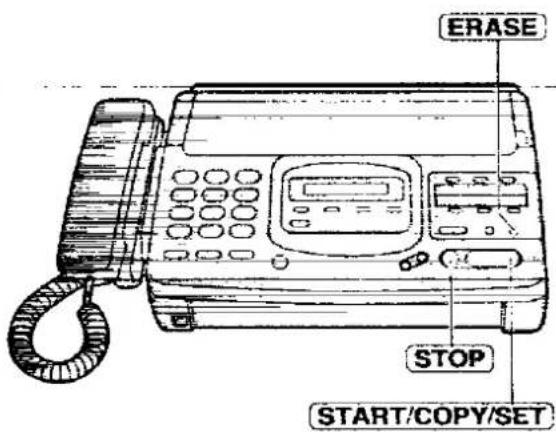
text_image
ERASE STOP START/COPY/SETFunctions during playback
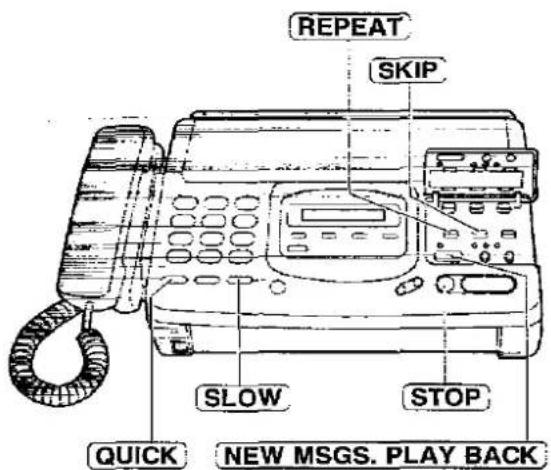
■ Repeating a message
Press REPEAT while the message you want to listen to is playing.
- If you press REPEAT within 5 seconds of the beginning of the message, the previous message will be played.
- To play back a specific message, press REPEAT repeatedly until the message you want to play back is heard.
■ Skipping a message
Press SKIP to play back the next message.
■ Stopping the operation
Press STOP to stop playing back.
• To resume playback, press NEW MSGS. PLAY BACK within 1 minute of pressing STOP.
■ Changing the playback speed
Press QUICK to play back messages at one and a half times the original speed.
Press SLOW to play back messages at a half the original speed.
To return to the original speed:
Press QUICK or SLOW again during quick or slow playback.
text_image
REPEAT SKIP SLOW STOP QUICK NEW MSGS. PLAY BACKRecording a memo message
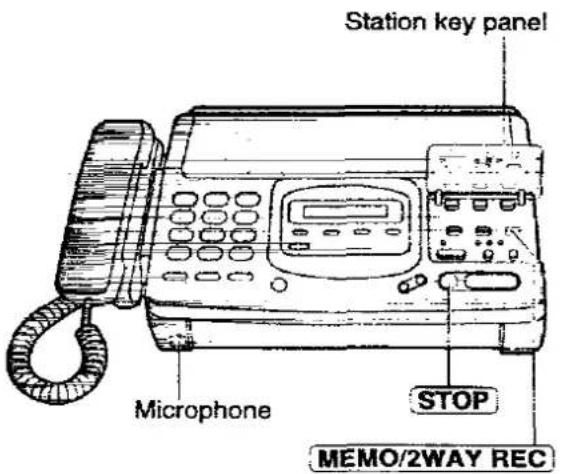
If you are going out and want to leave a private message for someone, you can record a voice memo in the unit. This can be played back later, either directly or remotely, like other messages.
1 Open the station key panel.
2 Press MEMO/2WAY REC.
●A long beep will sound.
3 Speak clearly into the microphone.
4 When finished, press STOP.
text_image
Station key panel Microphone STOP MEMO/2WAY RECRecording a telephone conversation
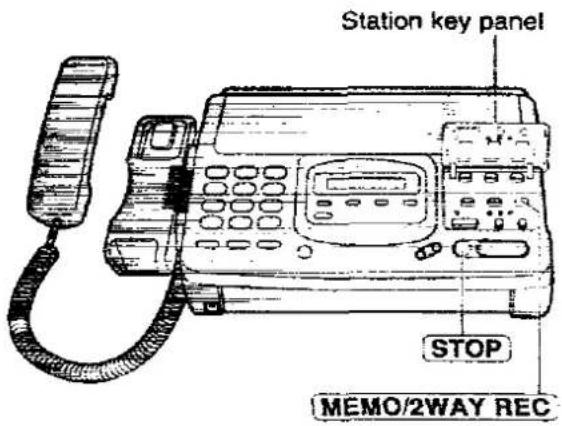
While you are talking with the handset, the telephone conversation can be recorded.
1 During a telephone conversation, open the station key panel.
2 Press MEMO/2WAY REC.
2WAY RECORDING
●A beep sounds every 15 seconds to notify the caller that the conversation is being recorded.
3 To stop recording, press STOP or hang up.
text_image
Station key panel STOP MEMO/2WAY RECStoring phone numbers for automatic dialling
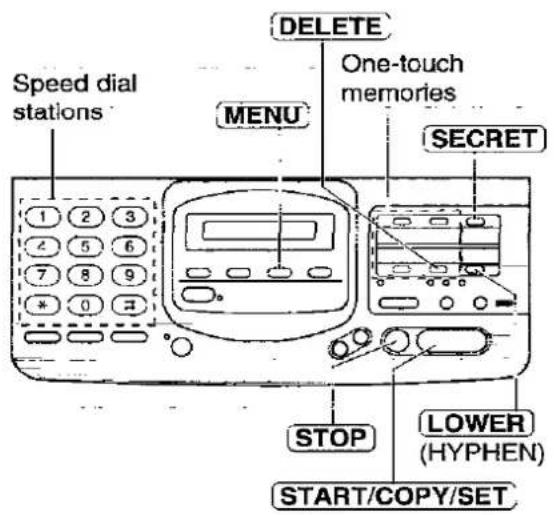
The unit's memory allows you to use both one-touch dialling and speed dialling for rapid access to your most frequently dialled numbers.
One-touch dialling: The unit is equipped with 4 one-touch memory keys, each of which is divided into an upper station and a lower station.
Speed dialling: The unit is equipped with 50 additional dialling stations. These stations are assigned to 2-digit numbers (00–49).
1 Press MENU repeatedly until the following message is displayed.
STORE TEL NO.
2 a: Programming for one-touch dialling: For upper stations (1–4)
Press one of the one-touch memory keys.
For lower stations (5–8)
Press LOWER, then press one of the one-touch memory keys.
b: Programming for speed dialling:
Press # , then press the desired 2-digit number (00-49).
2 Enter the phone number up to 30 digits in length.
• To enter a hyphen in a phone number, press LOWER.
4 Press START/COPY/SET.
NAME=
5 Enter the station name, up to 10 characters, by following the instructions on page 15.
6 Press START/COPY/SET.
●To program other stations, repeat steps 2 to 6.
7 Press STOP.
text_image
Speed dial stations MENU DELETE One-touch memories SECRET STOP LOWER (HYPHEN) START/COPY/SET
Helpful hint:
- To confirm stored phone numbers and station names, print a telephone number list (see page 67).
To keep whole or part of the phone number secret
Press SECRET (MERCURY) before and after the number you wish to keep secret.
●The phone number will not appear on the display or on the telephone number list.
- Pressing SECRET once counts as two digits.
To erase a stored number and station name
Press STOP in step 3 to clear the phone number. Press DELETE (one-touch memory 4) repeatedly in step 5 until all of the characters are erased.
Then, press START/COPY/SET.
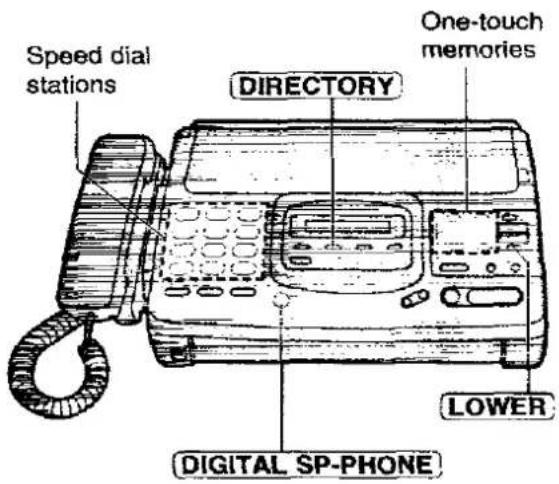
Making voice calls using automatic dialling
1 Press DIGITAL SP-PHONE or lift the handset.
2 a: Using one-touch dialling: For upper stations (1–4) Press the desired one-touch memory key.
For lower stations (5–8) Press LOWER, then press the desired one-touch memory key.
b: Using speed dialling: Press DIRECTORY, then press # and the desired 2-digit number (00–49).
text_image
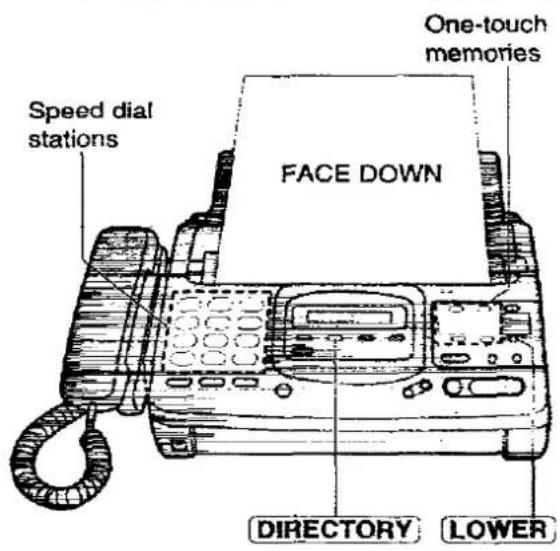
Speed dial stations DIRECTORY One-touch memories LOWER DIGITAL SP-PHONETransmitting documents using automatic dialling
1 Insert the documents FACE DOWN.
2 a: Using one-touch dialling: For upper stations (1–4) Press the desired one-touch memory key.
For lower stations (5-8) Press LOWER, then press the desired one-touch memory key.
b: Using speed dialling: Press DIRECTORY, then press # and the desired 2-digit number (00–49).
text_image
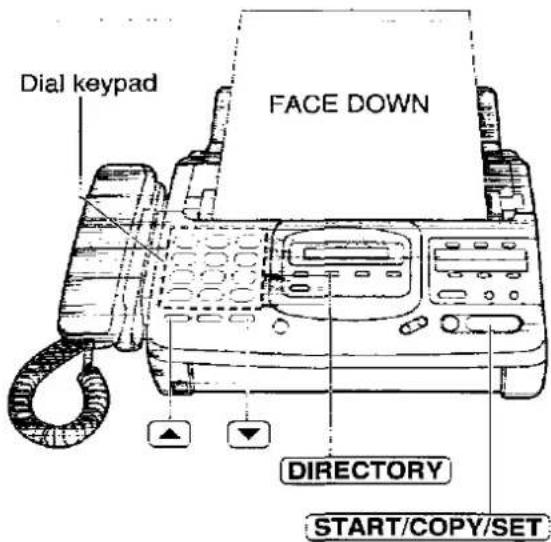
Speed dial stations FACE DOWN One-touch memories DIRECTORY LOWERElectronic telephone directory
The memory names are automatically entered into the electronic telephone directory in alphabetical order. You can make a fax or voice call by selecting the desired memory name on the display.
If you wish to send a fax, insert the documents into the document tray first.
1 Press DIRECTORY.
SELECT INDEX
2 ■ Press the dial key in which the first initial of the memory name is assigned (see index table below).
Example: To search a name with the initial "N": Press 6 repeatedly until the first station name with initial "N" is displayed. Press ▼ until the desired name is displayed.
OR
■ Press ▲ or ▼ repeatedly until the desired name is displayed.
3 Press START/COPY/SET.
●The unit will start dialling.
- If a document is fed into the unit, the unit will start transmission.
| Dial key | Index | Dial key | Index |
| 1 | 1 | 7 | P, Q, R, S, 7 |
| 2 | A, B, C, 2 | 8 | T, U, V, 8 |
| 3 | D, E, F, 3 | 9 | W, X, Y, Z, 9 |
| 4 | G, H, I, 4 | 0 | 0 |
| 5 | J, K, L, 5 | * | Other symbols |
| 6 | M, N, O, 6 | # | (Used for speed dialling) |
text_image
Dial keypad FACE DOWN DIRECTORY START/COPY/SET
Voice contact
(talking to the caller during or after fax reception or transmission)
You can have a conversation within the same call after the fax message is completed. This will save the extra time and expense of making another call.
This feature works only when the other party's unit is equipped with a voice contact feature.
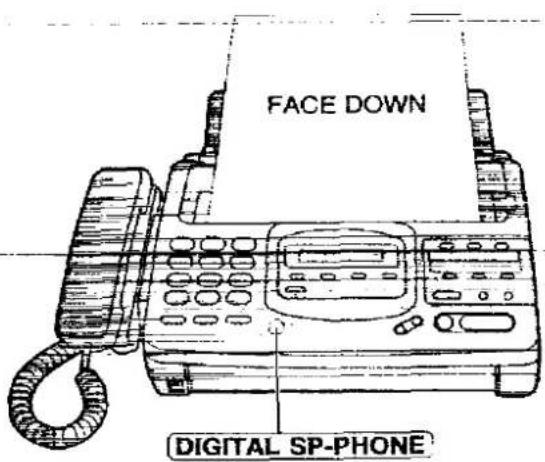
Initiating voice contact
1 Press DIGITAL SP-PHONE while transmitting or receiving documents.
VOICE STANDBY
- Your unit will call the other party with a distinctive ring.
2 When the other party answers, the unit will emit a distinctive ring.
Press DIGITAL SP-PHONE or lift the handset to start talking.
- If you initiate voice contact during transmission, you can talk after all the documents have been transmitted.
- If you initiate voice contact during reception, you can talk after the current page of the document is received.
text_image
FACE DOWN DIGITAL SP-PHONEReceiving a request for voice contact
If the other party initiates voice contact, your unit will emit a distinctive ring after transmission or reception is completed.
When the distinctive ring is heard, press DIGITAL SP-PHONE or lift the handset, then start speaking.
Note:
- If you do not answer within 10 seconds of hearing the distinctive ring;
—when your unit is in the ANS/FAX mode, your unit will play back a greeting message and record an incoming voice message.
—when your unit is in the TEL/FAX, FAX or TEL mode, the line will be disconnected.
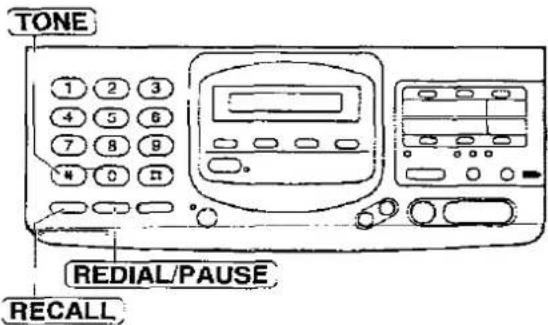
TONE, RECALL and REDIAL/PAUSE buttons
Temporary tone dialling
If your line has rotary service, pressing the TONE (*) button allows you to change the dialling mode temporarily into tone. Then you can dial the numbers or codes needed to operate the answering system or to use electronic banking services and other special services.
When you hang up, the dialling mode returns to pulse automatically.
RECALL button (To use the recall feature)
text_image
TONE 1 2 3 4 5 6 7 8 9 N 0 11 REDIAL/PAUSE RECALLNote:
- TONE, RECALL and PAUSE can be stored into a phone number for automatic dialling.
RECALL is used to access special telephone services (optional) such as call waiting. Contact your telephone company business office for details.
Example: British Telecom call waiting
- Ensure that you have set the RECALL MODE to the T-BR (Time Break Recall). See page 60.
- When the call waiting tone is heard during a conversation, press RECALL.
-
When dial tone is heard, dial 2. The first call is put on hold and you can have a conversation with the second party.
-
To keep the present call and return to the first call:
Press RECALL, then dial 2.
To hang up the first call:
Press RECALL, then dial 0.
To hang up the present call and return to the first call:
Press RECALL, then dial 1.
If your unit is connected to a PBX, pressing RECALL allows you to access some features of your host PBX such as transferring an extension call.
PAUSE button (For PBX users)
If your unit is connected to a PBX, you need to dial an access number (usually 9) to get an outside line. In this case, inserting a pause between the access number and the phone number is necessary especially when redialling or storing the number into memory. Pressing REDIAL/PAUSE makes a dialling delay in the dialling sequence.
Example-1: When your unit is connected to a host exchange, insert a pause to get an outside line.
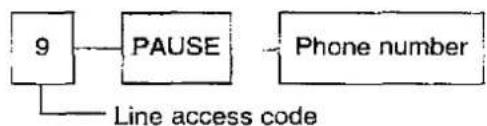
flowchart
graph TD
    A["9"] --> B["PAUSE"]
    B --> C["Phone number"]
    A --> D["Line access code"]
Example-2: If transmission errors occur when making an overseas transmission, add two pauses at the end of the phone number.

flowchart
graph LR
    A["International access code"] --> B["Country code"]
    B --> C["Phone number"]
    C --> D["PAUSE"]
    D --> E["PAUSE"]
Redialling the last number dialled
If the REDIAL/PAUSE button is pressed immediately after a dial tone is obtained, the last number dialled will be redialled.
- Lift the handset or press DIGITAL SP-PHONE.
- Press REDIAL/PAUSE
- If the line is busy when using the speakerphone, the unit will automatically redial the number up to 3 times.
Polling
(retrieving fax documents)
The polling feature allows you to receive a document from another compatible machine where you pay for the call as opposed to the document being sent to you, thereby saving the other party call charges.
Receive polling
To place a call and recover a document from another machine, follow the steps below. Make sure that no documents have been fed into your unit and that the other party's machine is ready for your call.
1 Press MENU until the following is displayed.
POLLING
2 Press START/COPY/SET.
NO.=
3 Enter the phone number using one-touch dialling, speed dialling, full number dialling or the electronic telephone directory.
4 Press START/COPY/SET.
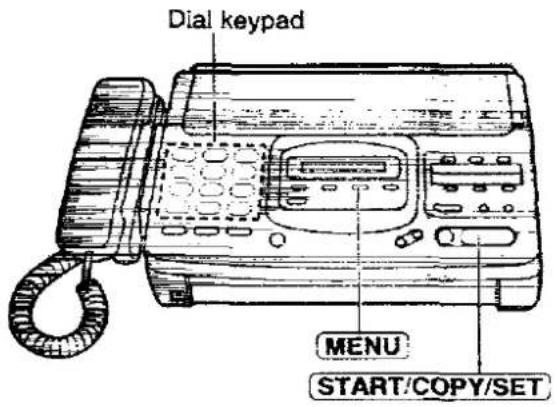
text_image
Dial keypad MENU START/COPY/SETTransmit polling
A document stored in your unit can be recovered by another party's machine. To let other machines retrieve documents loaded on your unit, proceed as follows.
1 Insert the documents FACE DOWN.
2 Press MENU until the following is displayed.
POLLED
3 Press START/COPY/SET.
MODE=OFF [▲▼]
Press ▲ or ▼ to select "ON".
MODE=ON [▲▼]
- If this feature is not required, select "OFF".
5 Press START/COPY/SET.
POLLED ON
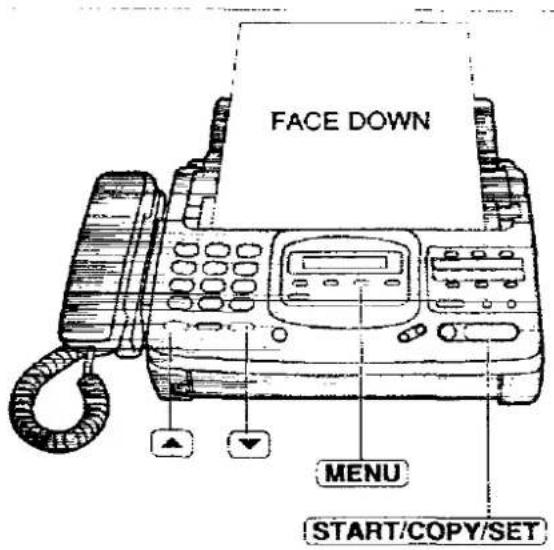
text_image
FACE DOWN MENU START/COPY/SETNote:
- When delayed transmission (page 39) is set to ON, transmit polling is not available.
Delayed transmission
(sending a fax at a later time)
Using a built-in clock, this unit can send documents automatically at a specific time. This allows you to take advantage of low-cost calling hours offered by your telephone company. The delayed transmission can be set to take place within the next 24 hours.
1 Insert the documents FACE DOWN.
2 Press MENU.
3 Press ☐, then press 2 5.
4 Press START/COPY/SET.
5 Press ▲ or ▼ to select "ON".
DELAYED XMT
MODE=OFF [▲▼]
- If this feature is not required, select "OFF".
6 Press START/COPY/SET.
7 Enter the phone number using one-touch dialling, speed dialling, full number dialling or the electronic telephone directory.
8 Press START/COPY/SET.
9 Enter the transmission start time.
Example: 11:00PM
Press 1 1 0 0, then press # to select PM.
To select AM, press ☒.
10 Press START/COPY/SET.
11 Press MENU.
- When the programmed time has come, the unit will automatically start transmission.
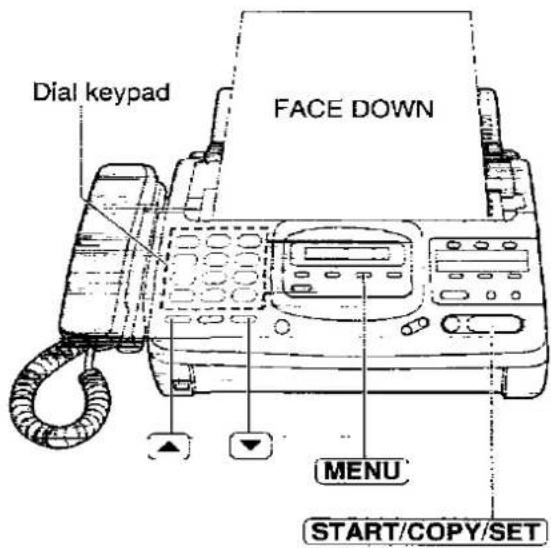
text_image
Dial keypad FACE DOWN MENU START/COPY/SET
Note:
- Do not enter 24 hour clock time as this unit will only accept 12 hour clock entries.
- You can receive, transmit and copy documents while delayed transmission is set.
- When transmit polling (see page 38) is ON, delayed transmission is not available.
Sending documents overseas
You may experience difficulty in transmitting documents overseas. This feature will make sending documents easier as the transmission speed is slowed down. Before starting the transmission procedure, follow the steps below.
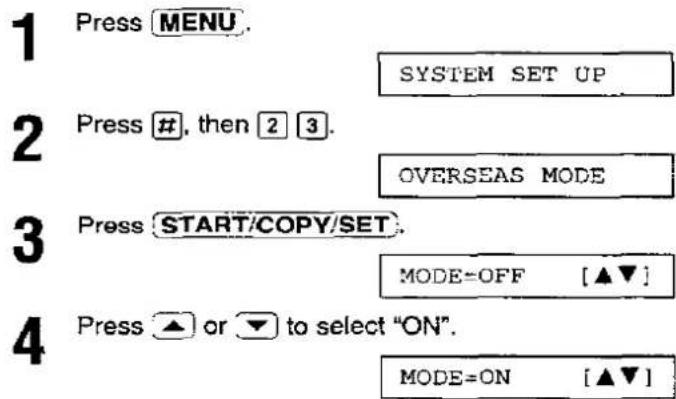
text_image
1 Press MENU. 2 Press #, then 2 3. 3 Press START/COPY/SET. 4 Press ▲ or ▼ to select "ON". SYSTEM SET UP OVERSEAS MODE MODE=OFF [▲▼] MODE=ON [▲▼]- If this feature is not required, select "OFF".
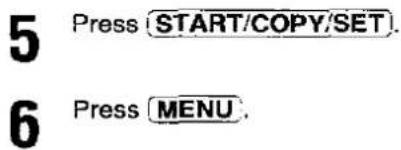
text_image
5 Press START/COPY/SET. 6 Press MENU.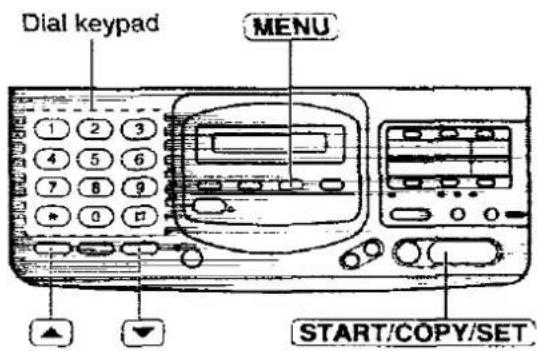
text_image
Dial keypad MENU START/COPY/SETNote:
●After transmission, this feature will be turned off automatically.
Remote fax receiving
(using an extension to receive a fax message)
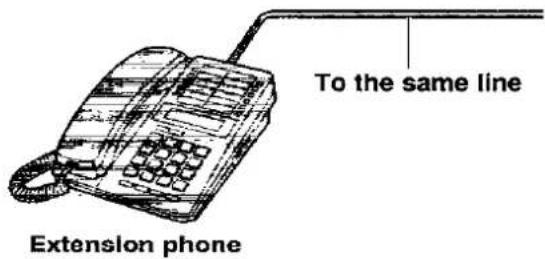
If you have an extension phone on the same line, it is possible to receive a fax message. Using the extension phone, dial the remote fax activation code.
This saves you from going to the facsimile unit and pressing START/COPY/SET.
Important:
- To activate this feature, use a touch tone telephone as the extension phone and enter the remote fax activation code DELIBERATELY.
- The remote fax activation code is set to “××” as a pre-selected setting.
Receiving using an extension
1 When a call is received, lift the handset of the extension phone.
2 When: —document reception is required, —a slow beep is heard, or —no sound is heard, enter the remote fax activation code DELIBERATELY.
3 Replace the handset. •The facsimile unit is activated for reception.
text_image
To the same line Extension phoneChanging the remote fax activation code
This code can be from 2 to 4 digits in length using numbers 0 through 9 and the character *.
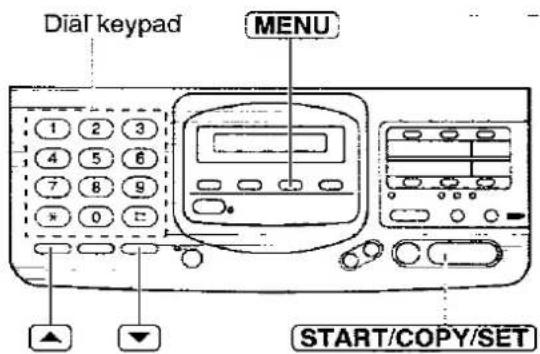
1 Press MENU.
2 Press #, then 4:1.
2 Press START/COPY/SET.
4 Press ▲ or ▼ to select the desired setting. • If this feature is not required, select "OFF".
5 Press START/COPY/SET.
6 Enter the new code number.
7 Press START/COPY/SET.
8 Press MENU.
text_image
Dial keypad MENU START/COPY/SETNote:
- Some special telephone company services will require you to press a service access code. If you subscribe to such services, whole or part of the remote fax activation code must be different from the service access code.
- If the remote fax activation code is set to "0000", the unit does not work properly.

Junk mail prohibitor
(preventing the reception of unwanted fax documents)
This feature prevents reception from facsimile machines whose phone numbers are not stored in automatic dialling.
Important:
●This feature does not work when:
—the unit is set to the TEL mode,
—manual reception is performed, or
—the other party does not program their facsimile telephone number correctly.
- The junk mail prohibitor ID must be different from the first 2 digits of the remote operation ID (page 50) and the mailbox password (page 44).
e.g. if the remote operation ID is "321", do not use "32" as a junk mail prohibitor ID.
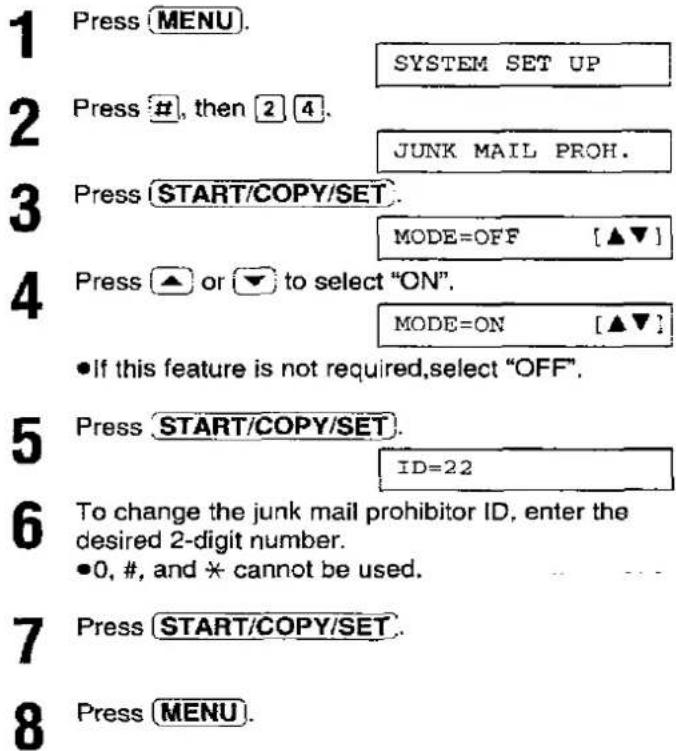
Setting the junk mail prohibitor and ID
text_image
1 Press MENU. 2 SYSTEM SET UP 3 Press #, then 2 4. 4 JUNK MAIL PROH. 5 Press START/COPY/SET. 6 MODE=OFF [▲▼] 7 Press ▲ or ▼ to select "ON". 8 MODE=ON [▲▼] 9 • If this feature is not required, select "OFF". 10 Press START/COPY/SET. 11 ID=22 12 To change the junk mail prohibitor ID, enter the desired 2-digit number. 13 •0, #, and * cannot be used. 14 Press START/COPY/SET. 15 Press MENU.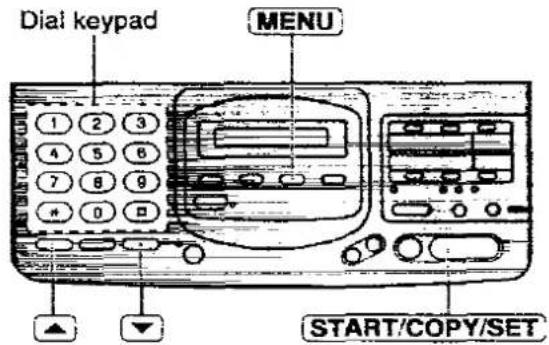
text_image
Dial keypad MENU START/COPY/SETTransmitting documents to your unit with the prohibitor ID —
Even if the junk mail prohibitor feature is activated, a designated caller will be able to transmit documents. Give your junk mail prohibitor ID to your designated callers, and advise them of the following steps. This operation is available in the AUTO RECEIVE mode (ANS/FAX only) or the MANUAL RECEIVE mode (TEL/FAX only).
- Call your unit from a touch tone telephone.
- Dial the prohibitor ID while the greeting message is playing or a different ring back tone is heard.
- Listen for a fax tone, and start transmission.
Signaling your pager that you have received a fax document
This feature allows your unit to call your pager when your unit receives a fax message. This feature is only effective with an automatic pager.
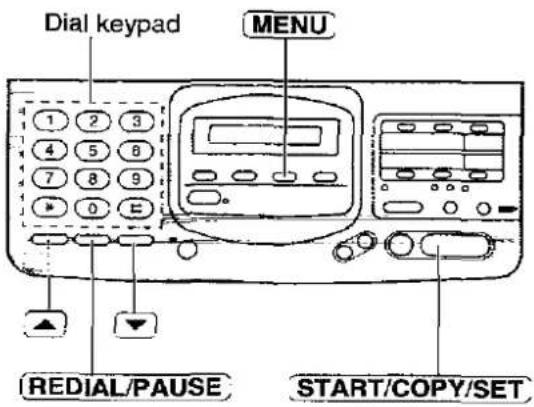
1 Press MENU.

2 Press #, then 7 0.

3 Press START/COPY/SET.

A Press ▲ or ▼ to select "ON".

- If this feature is not required, select "OFF".
5 Press START/COPY/SET.

6 Enter your pager phone number. If necessary, press REDIAL/PAUSE.
Contact your pager company regarding the proper pause time.
If your pager has the ability to display phone numbers, enter the number that you wish to appear on the display.
Press ☐ if required by your pager company.
- You can enter a total of 46 digits and/or pauses.
7 Press START/COPY/SET.
8 Press MENU.
text_image
Dial keypad MENU 1 2 3 4 5 8 7 8 9 0 E REDIAL/PAUSE START/COPY/SETVoice mailbox
(how callers can leave you private messages)
This unit has three mailbox memories. Your caller can leave a message in a specific mailbox. Only the person who knows the password can retrieve a message from a mailbox. This feature is useful when you share this unit with other people and when a caller would like to leave a message directly for a specific person.
To use a mailbox
- Program the mailbox password (see below).
- Inform the mailbox number to callers.
- Turn on the AUTO RECEIVE mode, ensure it is set to ANS/FAX (see pages 16 and 17).
Mailbox greeting messages
The model KX-F2780 has a pre-recorded greeting message in each memory. If your own greeting message is not recorded (see page 54), the pre-recorded greeting message will be played to the caller.
Sample of pre-recorded greeting message (KX-F2780 only):
This is mailbox (1-3). Please leave your name and message after the beep.
The model KX-F2680 has no pre-recorded greeting messages. Record a mailbox greeting message in each memory (see page 54).
Programming the mailbox password
Each mailbox password is pre-set to "555". If you do not program your own password, you need not enter the password to listen to the messages in a mailbox (see page 45). To prevent other users from retrieving messages, program your own mailbox password. Choose any 3-digit number except a number using digits 0 or 7.
The mailbox password must be different from the first 2 digits of the junk mail prohibitor ID (page 42) and the remote operation ID (page 50).
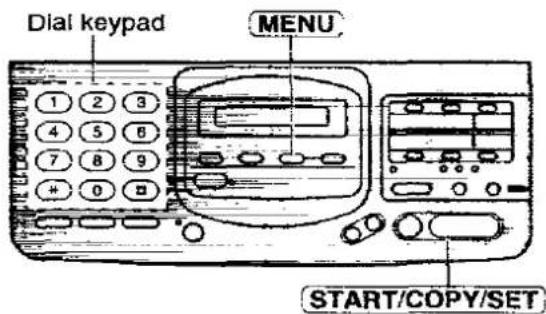
1 Press MENU.
2 For mailbox 1, press #, then 5 1.
BOX1 PASSWORD
For mailbox 2, press #, then 5 2.
BOX2 PASSWORD
For mailbox 3, press #, then 5 3.
BOX3 PASSWORD
Press START/COPY/SET.
Enter the new password.
5 Press START/COPY/SET.
●To program other passwords, repeat from step 2.
6 Press MENU.
text_image
Dial keypad MENU START/COPY/SETTo change the mailbox password:
- Proceed steps 1 through 3 as shown left.
OLD NO.=
- Enter the current password.
- If you forget your password, contact your dealer.
- Press START/COPY/SET
- If the password does not match, a series of beeps will be heard. Retry from step 2.
NEW NO.=
- Enter the new password.
- Press START/COPY/SET
- Press MENU.
How incoming messages are recorded in a mailbox \_\_\_\_
1 Call your unit from a touch tone telephone.
●The ANS/FAX greeting message will be played.
2 Press ✝ and the desired mailbox number (1, 2 or 3).
●A mailbox greeting message will be played.
3 After the beep, leave a message.
Recording a memo message and a telephone conversation
You can record a memo message and a telephone conversation into a mailbox. Press MAIL BOX until the desired mailbox number is displayed and follow the instructions on page 32.
- If you record a telephone conversation, set the desired mailbox number after lifting the handset.
Listening to messages in a mailbox
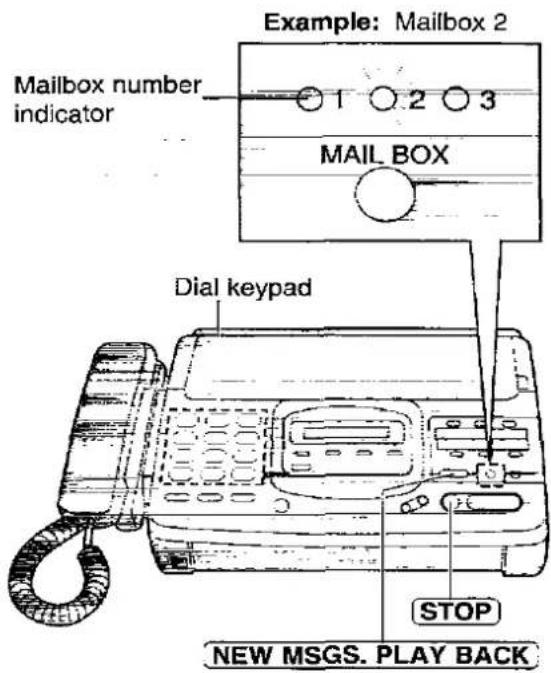
When there is a new message in a mailbox,
—the mailbox number indicator will flash, and
--a slow beep will sound if mailbox alert is set to ON (see page 46).
1 Press MAIL BOX until the desired mailbox number is displayed.
Example: Mailbox 2
BOX2 02
2 ■ If you leave the mailbox password as "555" (pre-selected setting);
Press NEW MSGS. PLAY BACK lightly.
or
■ If you program your own password;
Press NEW MSGS. PLAY BACK lightly, then enter your password.
PASSWORD=
- The unit will play back the new recorded messages.
3 To exit the mailbox, press STOP.
text_image
Example: Mailbox 2 Mailbox number indicator MAIL BOX Dial keypad STOP NEW MSGS. PLAY BACKNote:
- REPEAT, SKIP, STOP, QUICK and SLOW can be used during playback (see page 31).
•To listen to all of the recorded messages, press NEW MSGS. PLAY BACK until a beep is heard.
Erasing recorded messages in a mailbox
Erasing a specific message in a mailbox
Press ERASE while the message you want to erase is playing.
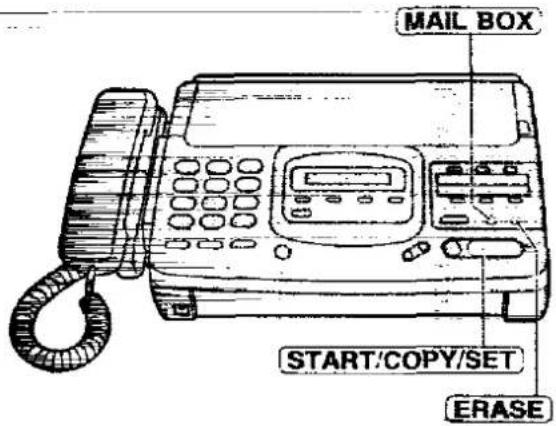
Erasing all messages in a mailbox
1 Press MAIL BOX until the desired mailbox number is displayed.
Example: Mailbox 1
BOX:
02
2 Press ERASE
PASSWORD=
2 Enter the mailbox password.
BOX1 ERASE OK?
Press START/COPY/SET.
ERASE COMPLETED
5 To exit the mailbox, press STOP.
text_image
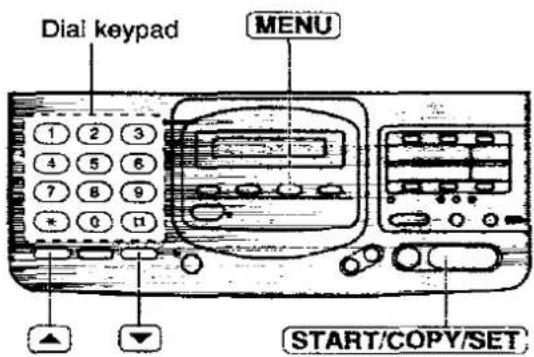
MAIL BOX START/COPY/SET ERASESetting the mailbox alert
This feature allows your unit to alert you with a slow beep that a caller's message is recorded in a mailbox.
1 Press MENU.
SYSTEM SET UP
2 Press #, then 5 0.
MAIL BOX ALERT
Press START/COPY/SET.
MODE=OFF

4 Press ▲ or ▼ to select "ON".
MODE=ON

- If this feature is not required, select "OFF".
5 Press START/COPY/SET.
6 Press MENU.
text_image
Dial keypad MENU START/COPY/SETTransferring messages
This feature allows your unit to call the desired telephone number or pager phone number, each time an incoming voice message is recorded in common or mailbox memories.
You can choose either Message Transfer or Pager Call for each memory.
Message Transfer: Program the transfer phone number first. When an incoming message is recorded in your unit, the message will be transferred. You can retrieve the message during the call by using the remote operation sequence.
Pager Call: Program the pager phone number first. When an incoming call is recorded, your pager will be called. Call your unit and retrieve the message using remote operation.
—This feature is available in the ANS/FAX mode.
—For details on the remote operation, see page 49.
—Use a touch tone telephone to access your unit.
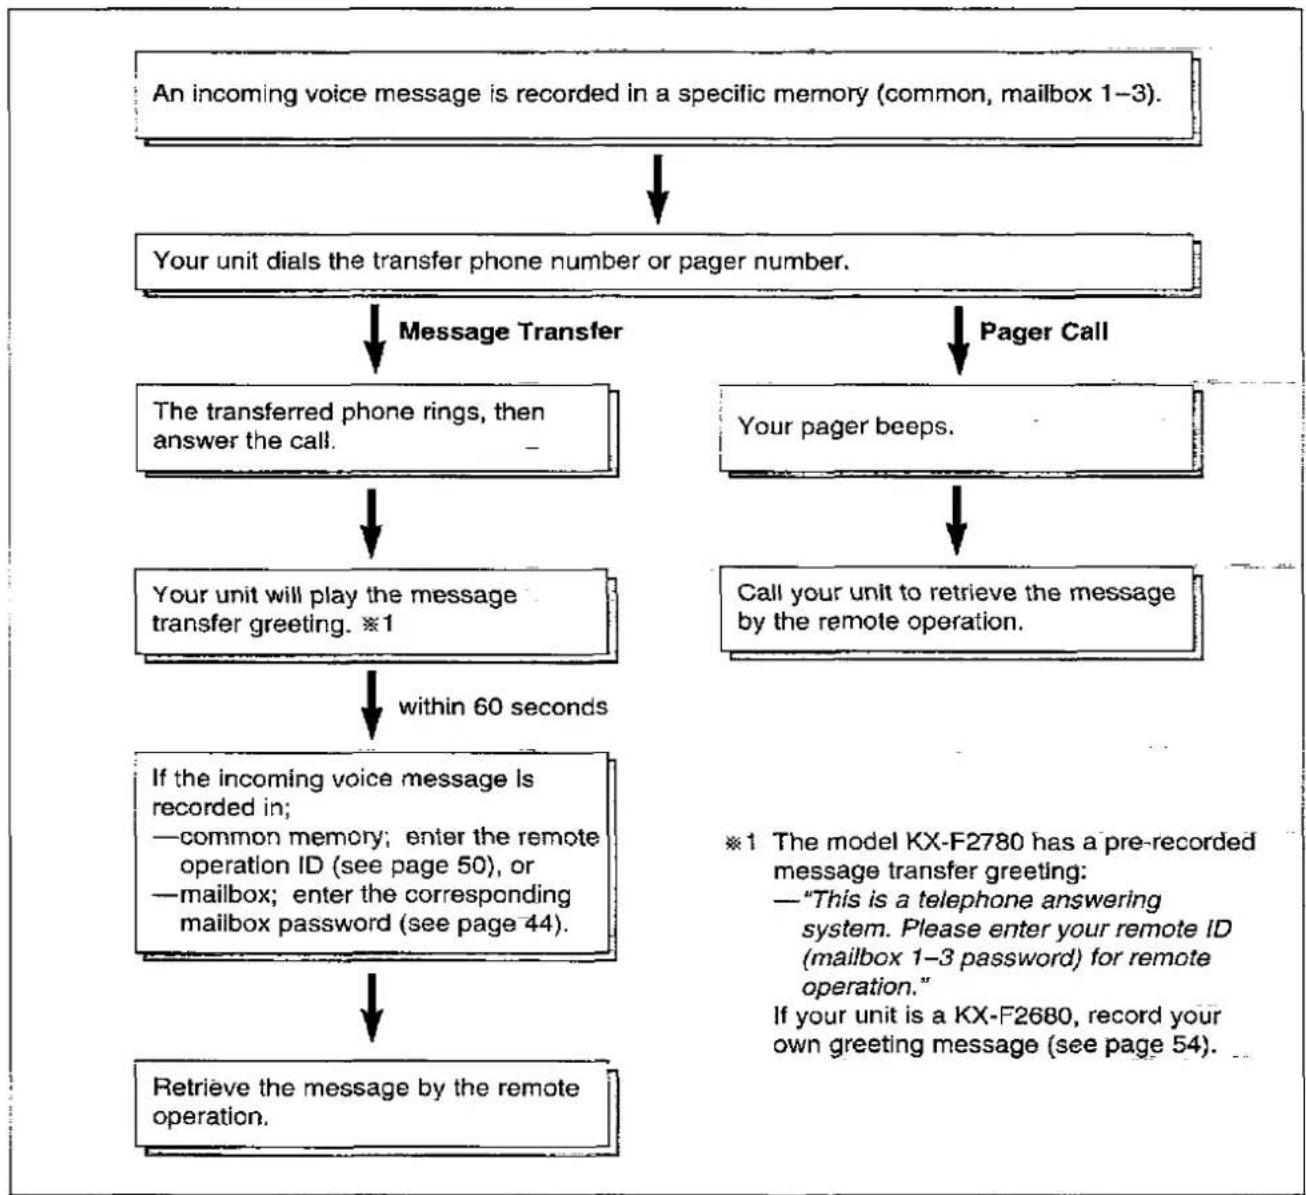
flowchart
graph TD
    A["An incoming voice message is recorded in a specific memory (common, mailbox 1–3)."] --> B["Your unit dials the transfer phone number or pager number."]
    B --> C["Message Transfer"]
    B --> D["Pager Call"]
    C --> E["The transferred phone rings, then answer the call."]
    E --> F["Your unit will play the message transfer greeting. ※1"]
    F --> G["within 60 seconds"]
    D --> H["Your pager beeps."]
    H --> I["Call your unit to retrieve the message by the remote operation."]
    G --> J["If the incoming voice message is recorded in; —common memory; enter the remote operation ID (see page 50), or —mailbox; enter the corresponding mailbox password (see page 44)."]
    J --> K["Retrieve the message by the remote operation."]
    style A fill:#f9f,stroke:#333
    style B fill:#ccf,stroke:#333
    style C fill:#cfc,stroke:#333
    style D fill:#fcc,stroke:#333
    style E fill:#ffc,stroke:#333
    style F fill:#cfc,stroke:#333
    style H fill:#fcc,stroke:#333
    style I fill:#cfc,stroke:#333
    style J fill:#fcc,stroke:#333
    style K fill:#cfc,stroke:#333
Setting the message transfer/pager call
If you choose Message Transfer, be sure of the following.
—If your unit is a KX-F2780, set the voice guidance feature to ON (see page 59) or record your message transfer greeting message (see page 54).
—If your unit is a KX-F2680, record the message transfer greeting message (see page 54).
Otherwise, 3 beeps sound and the display shows the following message.
NO TRNS-GREETING
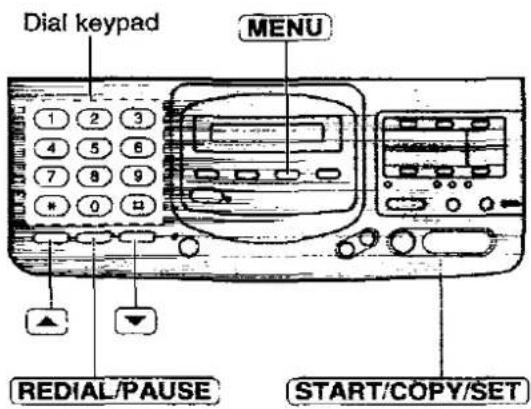
1 Press :MENU.
SYSTEM SET UP
2 For common message transfer,
press#, then 6 0.
COMMON MSG TRNSF
For mailbox 1 message transfer,
press #, then 6 1.
BOX1 MSG TRNSF
For mailbox 2 message transfer,
press #, then 6 2.
BOX2 MSG TRNSF
For mailbox 3 message transfer,
press #, then 6 3.
BOX3 MSG TRNSF
Press START/COPY/SET.
MODE=OFF [▲▼]
A Press ▲ or ▼ to select the desired setting.
4 MESSAGE: transfers incoming messages.
PAGER: calls your pager.
OFF: turns off this feature.
5 Press START/COPY/SET.
NO.=
6 a: If you selected "MESSAGE" in step 4:
Enter the number where the message is to be transferred.
b: If you selected "PAGER" In step 4:
Enter your pager phone number.
If necessary, press REDIAL/PAUSE
Contact your pager company regarding the proper pause time.
If your pager has the ability to display phone numbers, enter the number that you wish to appear on the display.
Press ☐ if required by your pager company.
- You may enter a total of 46 digits and/or pauses.
7 Press START/COPY/SET).
8 Press MENU.
text_image
Dial keypad MENU REDIAL/PAUSE START/COPY/SETNote:
●This feature can be turned on/off remotely from a touch tone phone (see page 53).
●In the following cases, the message transfer setting is cancelled.
—When the message transfer greeting is erased while the voice guidance feature is set to OFF.
(KX-F2780 only)
—When you set the voice guidance feature to OFF without recording a message transfer greeting message.
(KX-F2780 only)
—When the message transfer greeting is erased.
(KX-F2680 only)
Operating the answering device from a remote phone
The following operations are available from a remote location with a touch tone telephone.
Set the unit to the ANS/FAX mode in the AUTO RECEIVE mode before going out (see pages 16 and 17).
| Dial key | Remote command | Page | Dial key | Remote command | Page |
| 1 | Repeats a message | 52 | 4 | Erases a specific message | 52 |
| 2 | Skips a message | 52 | 5 | Erases all messages | 52 |
| 4 | New message playback | 51 | 6 1 | Turns on message transfer /pager call for incoming messages | 53 |
| 5 | All message playback | 51 | |||
| 7 | Re-records a greeting message | 53 | 6 2 | Turns off message transfer /pager call for incoming messages | 53 |
| 8 | Continues operation | See note below. | |||
| 9 | Stops re-recording of a greeting message | 53 | 0 | Skips the greeting message | 53 |
Note:
●During remote operation the unit will stop and two beeps will be heard in the following conditions:
—2 minutes 40 seconds after your unit answered.
—Every 2 minutes 40 seconds after pressing any command button.
To listen to further messages, dial 8 within 10 seconds after hearing two beeps.
Remote operation card
You may cut out this remote operation card to use.
Mailbox Remote Operation
■ Recording a message in a mailbox:
- Call your unit.
- Press ⓧ and the mailbox no. (1, 2 or 3).
- Leave a message.
■ Retrieving messages from a mailbox:
- Call your unit.
- Press ☒ and the mailbox no. (1, 2 or 3).
- Enter the mailbox password
- Press the remote command key (refer to the reverse side).
Notice of Remote Operation
- The remote operation is available only from a touch tone phone when the unit is in the ANS/FAX mode.
- When the unit is in the TEL mode, call your unit and wait for 20 rings. The answering system will temporarily answer the line. Enter the remote operation ID during the greeting message. The unit will switch to the ANS/FAX mode.
- When you press any key, press deliberately.
- To send a document, press (* *). When a fax tone is heard, start transmission.

Programming the remote operation ID
The remote operation ID is used to access the answering device common memory.
Choose any 3-digit number except a number using digits 0 or 7.
Make sure that the first 2-digits of the remote operation ID are different from the junk mail prohibitor ID (page 42) and the mailbox password (page 44).
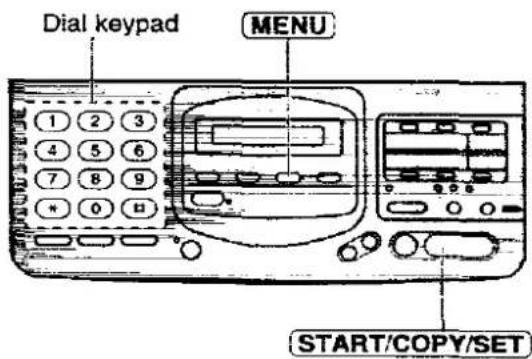
Press MENU.
SYSTEM SET UP
Press #, then 1 1.
REMOTE ANS ID
Press START/COPY/SET.
ID=111
Enter the desired number.
Press START/COPY/SET.
Press MENU.
text_image
Dial keypad MENU START/COPY/SETDuring remote operation
If your unit is a KX-F2780 and the voice guidance feature is set to ON (page 59), the voice guidance will tell you the number of new recorded messages, operating instructions and the operation results during remote operation.
If your unit is a KX-F2680, the unit will tell you the number of new recorded messages, operating instructions and the operation results during remote operation with beep tones.
Answering Device Remote Operation
| 1. Call your unit. |
| 2.Enter the remote operation IDduring the greetingmessage. |
| 3.Press the remote command key(refer to the right) within 4seconds.orWait for 4 seconds. All therecorded messages will be played back. |
| Key | Remote Command |
| 0 | Skips the greeting message |
| 1 | Repeats a message |
| 2 | Skips a message |
| 4 | New message playback |
| 5 | All message playback |
| 7 | Re-records a greeting message |
| 8 | Continues operation |
| 9 | Stops re-recording of a greeting message |
| *4 | Erases a specific message |
| *5 | Erases all messages |
| 61 | Message transfer/Pager call ON |
| 62 | Message transfer/Pager call OFF |
Listening to messages in common memory
1 Call your unit.
2 Enter the remote operation ID during the ANS/FAX greeting playback.
—A long beep and (a) short beep(s) will sound. Short beep(s) indicate(s) the number of new recorded messages. Short beeps will sound up to 8 times even if 9 or more calls are recorded.
—If your unit is a KX-F2780, the voice guidance will tell you the number of new recorded messages.
3 Press 4 to listen to the new recorded messages. OR
Press 5 or wait for 4 seconds to listen to all of the recorded messages.
—At the end of the last message, 3 beeps will sound.
—If your unit is a KX-F2780, the voice guidance will tell you the result and how to operate the unit during playback.
Example of the voice guidance:
3 new messages in common memory. No new messages in mailbox.
Playback 3 new messages.
Press 1 to repeat message.
Press 2 to skip message.
Press ✝ 4 to erase a specific message.
Listening to messages in a mailbox
1 Call your unit.
2 Press ✝ and the desired mailbox number (1, 2 or 3) during the ANS/FAX greeting playback.
3 Enter the mailbox password during the mailbox greeting message.
—A long beep and (a) short beep(s) will sound. Short beep(s) indicate(s) the number of new recorded messages. Short beeps will sound up to 8 times even if 9 or more calls are recorded.
—If your unit is a KX-F2780, the voice guidance will tell you the number of new recorded messages.
4 Press 4 to listen to the new recorded messages. OR
Press 5 or wait for 4 seconds to listen to all of the recorded messages.
—At the end of the last message, 3 beeps will sound.
—If your unit is a KX-F2780, the voice guidance will tell you the result and how to operate the unit during playback.
Example of the voice guidance:
3 new messages in mailbox (1–3).
Playback 3 new messages.
Press 1 to repeat message.
Press 2 to skip message.
Press ☑ 4 to erase a specific message.
To listen to messages in another memory after playback
- Press ☒ and ☐ (for common memory), then enter the remote operation ID.
or
Press ✝ and the desired mailbox number (1, 2 or 3), then enter the mailbox password during the mailbox greeting message.
- Press 4 or 5 to play back messages.
During playback
■ Repeating a message:
Press 1 to play the current message.
—If you press 1 within 5 seconds of playback, the previous message will be played.
■ Skipping a message:
Press 2 to play back the next message.
Note:
- If you hear 6 beep tones (or voice guidance) after playing back the messages, memory is full. Erase some or all of the messages.
Example of the voice guidance:
Not enough recording time. Please erase unnecessary messages.
Erasing incoming messages from memory
■ Erasing a specific message from memory
Press ☒ 4 when the message you want to erase is played.
—A long beep, followed by 3 short beeps (or voice guidance) will be heard. Then the unit will continue with the next message.
Example of the voice guidance:
The message has been erased.
■ Erasing all messages from a specific memory
You can erase all of the recorded messages from common and each mailbox memory. To erase all of the messages in a mailbox, you must first select a mailbox.
Press ✗ 5 when you want to erase the messages in a specific memory.
—A long beep followed by 3 short beeps (or voice guidance) will be heard.
Example of the voice guidance:
All messages have been erased.
■ Recording a marker message
After playing back the recorded messages, you can leave an additional message.
- Wait for 3 beeps (or voice guidance) indicating the end of the remote operation.
- Wait about 10 seconds.
- Hear a beep. OR Hear the voice guidance.
- Leave a message.
Example of the voice guidance:
All messages have been played.
Please leave your name and message after the beep.
■ Re-recording a greeting message
You can change the contents of the greeting messages for the ANS/FAX mode and mailbox memories. To re-record a mailbox greeting message, you must first select a mailbox.
- Press 7 to start recording during the remote operation. —A long beep will sound.
-
When finished, press ☐. —The new greeting message will be played.
-
Speak up to 16 seconds. —If you pause for over 2 seconds, 6 beeps will sound and the recording will stop. Repeat from step 1 within 10 seconds.
■ Turning message transfer/pager call on or off
You can remotely turn on or off message transfer/pager call for incoming messages. You must program a transfer phone number or a pager number in advance (see page 48).
Press 6:1 to turn ON message transfer/pager call during the remote operation.
Example of the voice guidance:
Message transfer is set. OR Pager call is set.
Press 6 2 to turn OFF message transfer/pager call.
Message transfer is off. OR Pager call is off.
—If a transfer phone number or a pager number is not programmed, 6 beeps (or voice guidance) will be heard. You cannot turn this feature on.
Transfer phone number is not set. OR Pager number is not set.
■ Skipping the greeting message
You can skip the greeting message.
Press ☐ during the greeting message playback. —The unit will skip the rest of the greeting message.
Recording your own greeting messages
You can record 6 types of greeting messages. The recording time is limited to 16 seconds for each message. Record a greeting message of under 12 seconds for optimum performance.
- As for the ANS/FAX greeting message, you can choose 16 seconds or 60 seconds of recording time (see page 57).
Suggested messages
| ANS/FAX greeting message | "This is (your name, business and/or telephone number). We are unable to answer right now. To send a fax, start transmission. To leave a message, speak for up to 2 minutes 30 seconds (or 'speak for up to 1 minute') after a long beep. If the beep sounds 6 times, your message will not be recorded. Please call back tomorrow. Thank you." |
| TEL/FAX greeting message | "This is (your name, business and/or telephone number). Please wait for someone to answer your call. To send a fax, start transmission." |
| Mailbox 1 greeting message Mailbox 2 greeting message Mailbox 3 greeting message | "This is (personal name or group name). Please leave your name and message after the long beep. Thank you." |
| Message transfer greeting message | "This is (your name). I'm going to visit you today. While I'm away, if somebody calls me, the answering machine will get their messages, so could you tell me if my machine calls you before my arrival? Thank you." |
Note:
- If your unit is a KX-F2780 and your own messages are not recorded, pre-recorded messages will be played to the caller.
Recording a greeting message
1 Open the station key panel.
2 Press SELECT until the greeting message you desire is displayed.
■ ANS/FAX greeting:
ANS-GREETING
■ TEL/FAX greeting:
TEL-GREETING
Mailbox 1-3 greeting:
BOX2-GREETING
■ Message transfer greeting:
TRNS-GREETING
3 Press REC. • A long beep
4 Speak clearly 20 cm (8 inches) away from the microphone.
●The display will show the elapsed recording time. Example: ANS/FAX greeting
ANS REC. 02s
5 When finished, press STOP.
- The unit will repeat your message. Adjust the volume using VOLUME.
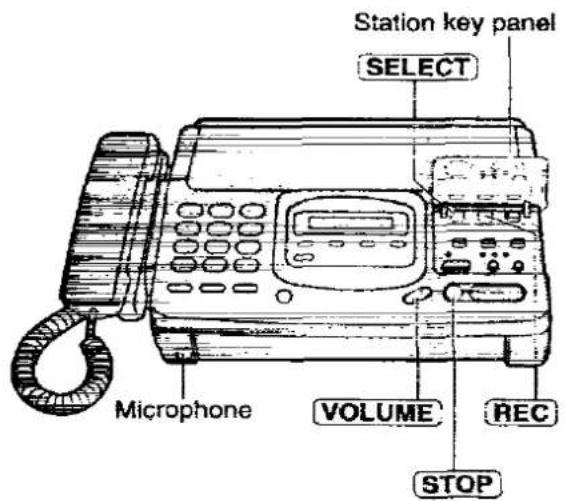
text_image
Station key panel SELECT Microphone VOLUME REC STOPNote:
- If you make a mistake while recording, repeat from step 2.
- It is helpful to include a statement of your answering telephone number with the town name or code in the greeting message. The greeting message should begin within 3 seconds of answering the call.
- If your unit is a KX-F2780 and you wish to use the pre-recorded greeting message after recording your own greeting message, erase your own message (see page 55).
Checking greeting messages
1 Open the station key panel.
2 Press SELECT until the desired greeting is displayed.
Example: Mailbox 3 greeting
BOX3-GREETING
Press CHECK.
●After the beep, the unit will play back the message. Adjust the volume using VOLUME.
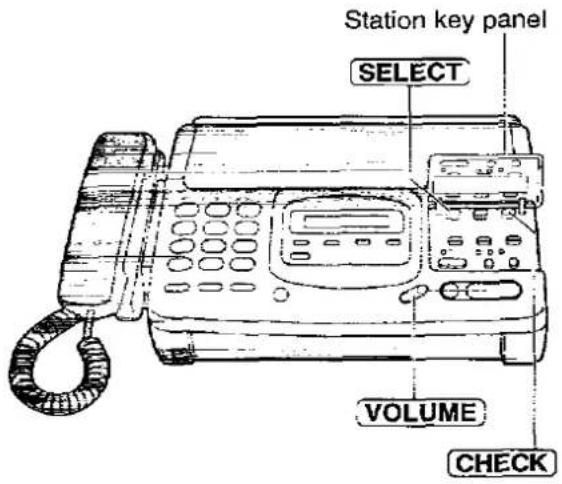
text_image
Station key panel SELECT VOLUME CHECKErasing your own recorded greeting messages
1 Open the station key panel.
2 Press SELECT until the desired greeting is displayed.
Example: Mailbox 2 greeting
BOX2-GREETING
3 Press ERASE.
ERASE OK?
4 Press START/COPY/SET.
GREETING ERASED
5 Press STOP.
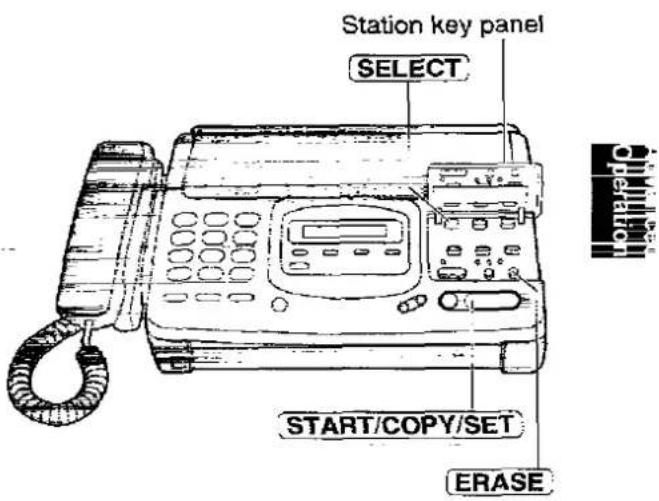
text_image
Station key panel SELECT START/COPY/SET ERASENote:
- If your unit is a KX-F2780 and you erase your own recorded greeting messages, the pre-recorded greeting messages will be used.
Changing the caller's recording time
You can choose from two lengths of recording time for incoming messages.
LONG: The unit will record an incoming message of up to 2 minutes 30 seconds (pre-selected setting).
SHORT: The unit will record an incoming message of up to 1 minute.
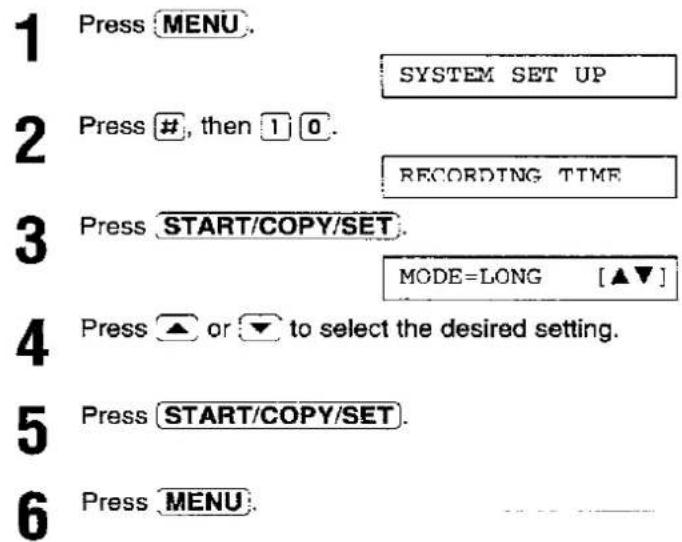
text_image
1 Press MENU. 2 Press #, then 1 0. 3 Press START/COPY/SET. 4 Press ▲ or ▼ to select the desired setting. 5 Press START/COPY/SET. 6 Press MENU.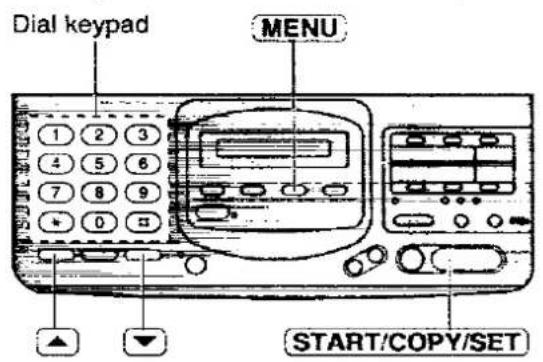
text_image
Dial keypad MENU START/COPY/SETSetting message alert
When this feature is on, the unit will let you know with a slow beep that a caller's message is recorded in the common memory.
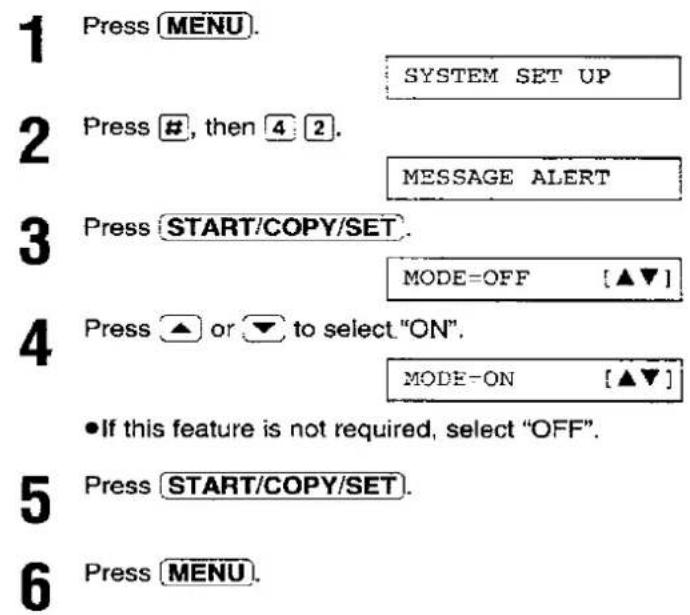
text_image
1 Press MENU. 2 Press #, then 4 2. 3 Press START/COPY/SET. 4 Press ▲ or ▼ to select "ON". 5 Press START/COPY/SET. 6 Press MENU.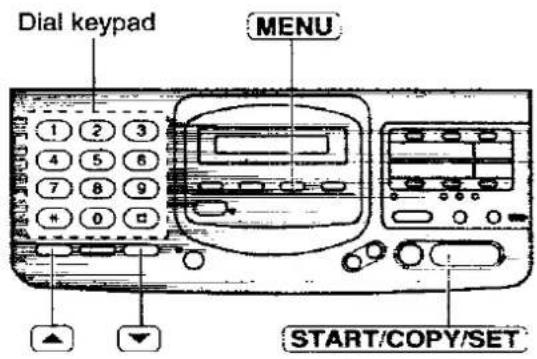
text_image
Dial keypad MENU START/COPY/SETSetting the recording time alert
With this feature, when the remaining time to record incoming messages becomes less than 60 seconds, the unit will alert the user with a slow beep.
1 Press MENU.
2 Press #, then 4 3.
Press START/COPY/SET.
Press ▲ or ▼ to select "ON".

- If this feature is not required, select "OFF".
5 Press START/COPY/SET.
6 Press MENU.
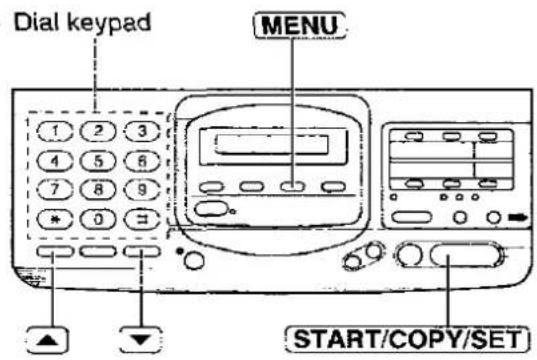
text_image
Dial keypad MENU START/COPY/SETChanging the recording time for the ANS/FAX greeting message
Choose either 16 seconds (pre-selected setting) or 60 seconds of recording time.

1 Press MENU.
2 Press #, then 5 4.
Press START/COPY/SET.
Press ▲ or ▼ to select the desired setting.
5 Press START/COPY/SET.
6 Press MENU.
SYSTEM SET UP
GREETING TIME

Note:
- If you change the greeting message time to 60 seconds, we recommend that you inform the caller in the ANS/FAX greeting message to press before starting fax transmission.
- If you change the greeting message time to 16 seconds from 60 seconds, your ANS/FAX greeting message is deleted. Re-record a greeting message (see page 54).
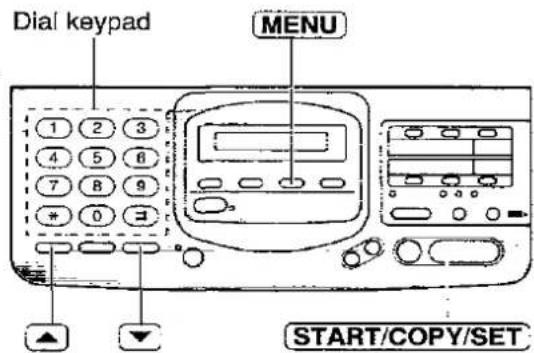
text_image
Dial keypad MENU START/COPY/SETChanging the logo print position
The logo, telephone number, date, time and page number will be printed on the transmitted document from your unit in the following manner.
OUT: Outside of the transmitted document's paper size (pre-selected setting).
IN: Inside of the transmitted document's paper size.
Press MENU.
SYSTEM SET UP
Press #, then 2 1.
LOGO POSITION
Press START/COPY/SET
MODE=OUT [▲▼]
Press ▲ or ▼ to select the desired setting.
Press START/COPY/SET
Press MENU.
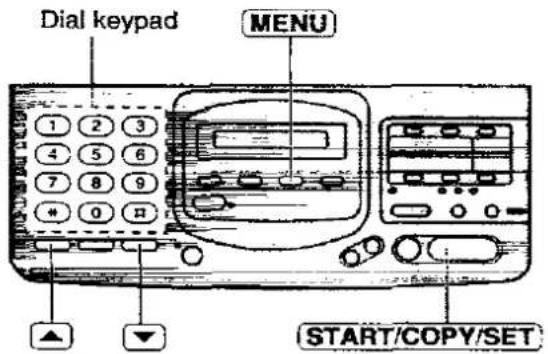
text_image
Dial keypad MENU START/COPY/SETChanging the display contrast
Use this feature to adjust the brightness of the display.
NORMAL: (Pre-selected setting)
DARKER: Used when the display contrast is too light.
Press MENU.
SYSTEM SET UP
Press #, then 3 9.
LCD CONTRAST
Press START/COPY/SET.
MODE=NORMAL [▲▼]
Press ▲ or ▼ to select the desired setting.
Press START/COPY/SET.
Press MENU.
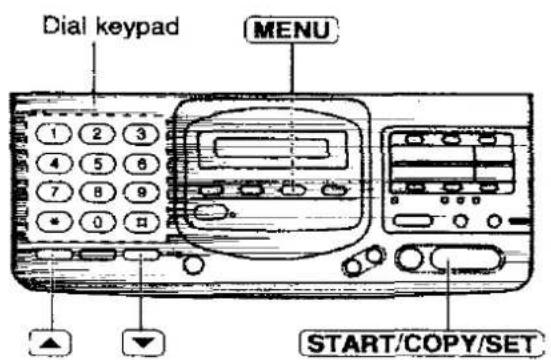
text_image
Dial keypad MENU START/COPY/SETSetting friendly reception
The friendly reception feature allows you to receive fax documents automatically without pressing START/COPY/SET. See page 23 for further details.
If you set this feature to OFF, you will have to press START/COPY/SET to receive fax documents each time you answer a call.
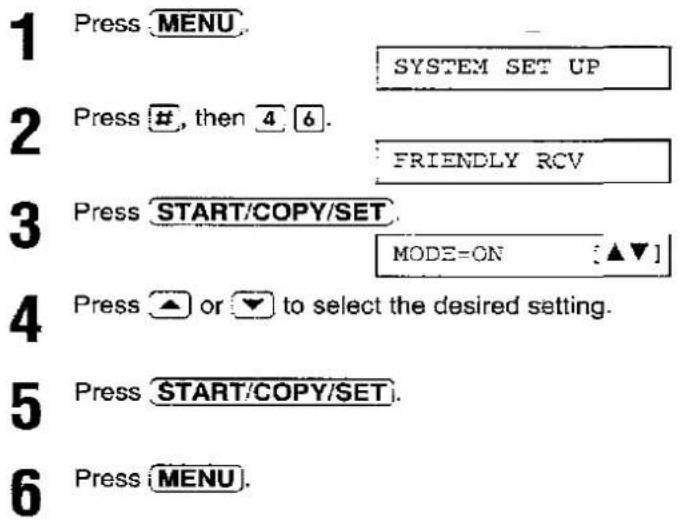
text_image
1 Press MENU. 2 Press #, then 4 6. 3 Press START/COPY/SET. 4 Press ▲ or ▼ to select the desired setting. 5 Press START/COPY/SET. 6 Press MENU.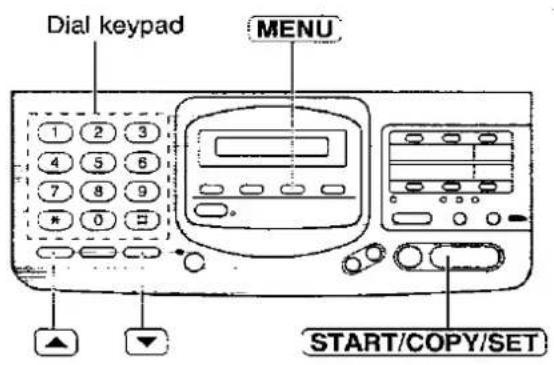
text_image
Dial keypad MENU START/COPY/SETSetting voice guidance (KX-F2780 only)
With this feature, the voice guidance, including the pre-recorded greeting messages and the voice time/day stamp, will be heard. If you do not want to hear any voice guidance, set this feature to OFF.
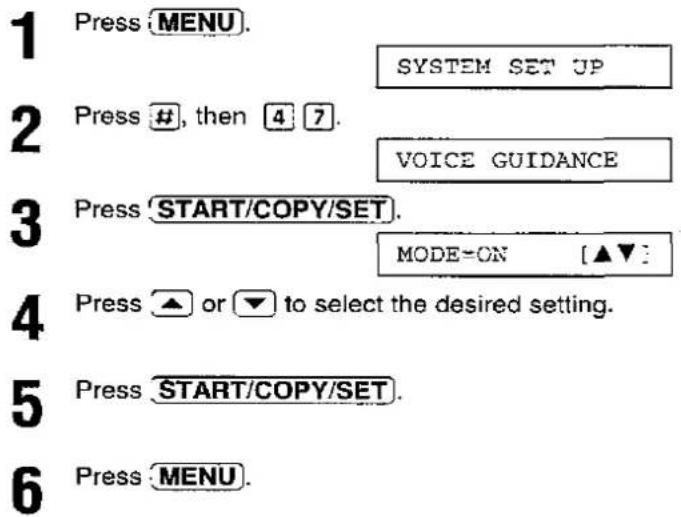
text_image
1 Press MENU. 2 Press #, then 4 7. 3 Press START/COPY/SET. 4 Press ▲ or ▼ to select the desired setting. 5 Press START/COPY/SET. 6 Press MENU.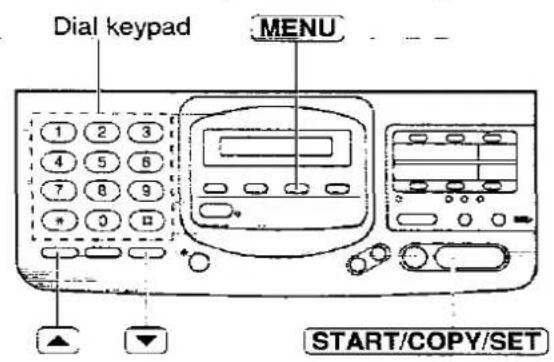
text_image
Dial keypad MENU START/COPY/SETSetting the recall mode
When this unit is used as an extension of a PABX (Private Automatic Branch Exchange), the RECALL button will allow access to PABX functions such as call transfer and hold. If you are unsure of which setting to use please consult the supplier of the PABX.
The following choices are available:
T_BR: Time Break Recall (pre-selected setting)
E_RE: Earth Recall
Note:
- For British Telecom "Star Services", set your Recall to Time Break.
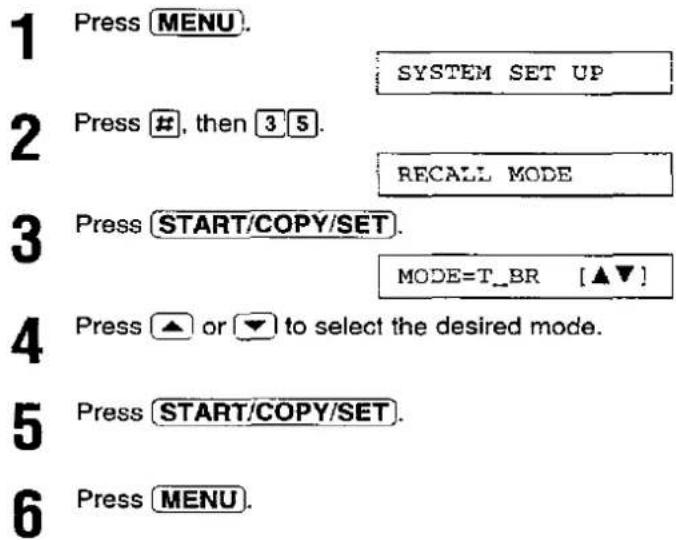
text_image
1 Press MENU. 2 Press #, then 3 5. 3 Press START/COPY/SET. 4 Press ▲ or ▼ to select the desired mode. 5 Press START/COPY/SET. 6 Press MENU.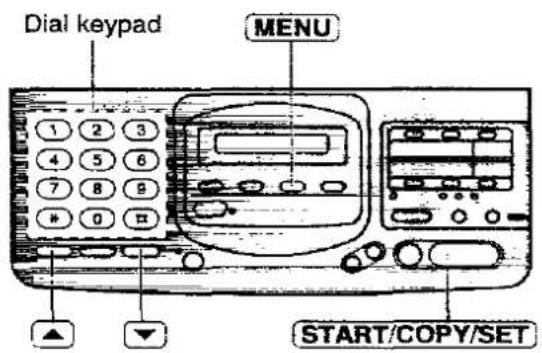
text_image
Dial keypad MENU START/COPY/SETResetting the advanced features
Use this feature to return the advanced features (see page 66) to their pre-selected settings.
1 Press MENU.
2 Press #, then 8 0.
3 Press START/COPY/SET.
Press ▲ or ▼ to select "YES".
5 Press START/COPY/SET.
- If this feature is not required, press STOP.
6 Press START/COPY/SET again for confirmation.
7 Press MENU.
RESET COMPLETED
The Ground Truth image displays a single, solid horizontal line. According to Rule 2 (UNDERSCORE & LINE RULES), this is a stylistic or background line, not a placeholder underscore. Therefore, the OCR result must ignore it and output nothing or only meaningful text. The provided OCR content is "____", which consists of four underscores. This is an incorrect interpretation of the line as a placeholder, violating the rule that stylistic lines must be ignored. The OCR has hallucinated placeholder underscores where none exist in the GT. Hence, the result is inconsistent with the Ground Truth.
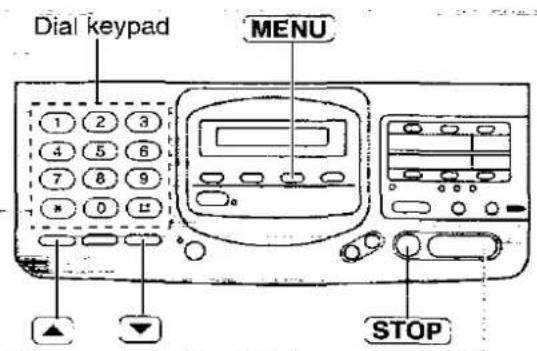
text_image
Dial keypad MENU STOPSTART/COPY/SET
SYSTEM SET JP
SET DEFAULT
RESET=NO [▲▼]
RESET=YES :▲▼:
RESET OK?

The Mercury Residential Service
Mercury's Residential Service is a highly competitive telephone service for the residential and small business user.
Most UK long distance and international calls are cheaper over Mercury, especially in the Economy period.
Mercury calls are rounded to the second, and charged to the nearest tenth of a penny. You will also receive fully itemised bills. Mercury Customer Services are available 24 hours a day to provide the highest level of customer service.
There are two ways to access Mercury, the Residential 132 Service and the Mercury PIN Codes Service. You can find out the best method for you by calling Mercury Customer Services on FreeCall 0500-500 194 (24 hours). Most homes and businesses are now able to access the Mercury network via their existing BT line. Mercury Customer Services will be able to check whether Mercury is available in your area.
All Mercury's charges and tariffs are the same for both methods of accessing Mercury—the only difference is how you connect to the Mercury network.
For Residential 132 Service customers
Once you have become a Mercury Residential 132 customer, you simply dial 132 before a long distance or international call to send it over the Mercury network.
The Mercury button on your unit comes with the digits '132' pre-stored in it.
To check that you have access to Mercury, press DIGITAL SP-PHONE, wait for the dial tone, press MERCURY, and dial 132. This call is free of charge. You should be connected to a recorded message welcoming you to the Mercury network. If you have any difficulties, please contact Mercury Customer Services (Fault Reporting) on FreeCall 0500-500 193 (24 hours).
To send your long distance and international calls over Mercury, press MERCURY before the STD code and telephone number of the person you are calling. For further details on Mercury dialling operation, see page 64.
For Mercury PIN Codes Service customers—Programming the MERCURY button with your PIN Code \_\_\_\_
After you apply for Mercury PIN Codes Service you will receive a Mercury PIN Code in two separate parts. The PIN Code, which is similar to bank PIN number, identifies you as a Mercury customer and will need to be stored in the unit's memory using the MERCURY button.
Before programming your unit with the Mercury PIN Code, you must ascertain which type of local BT exchange you are connected. See page 12.
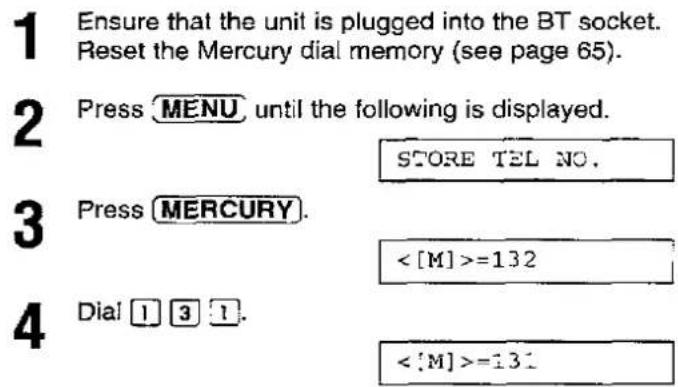
text_image
1 Ensure that the unit is plugged into the BT socket. Reset the Mercury dial memory (see page 65). 2 Press MENU until the following is displayed. STORE TEL NO. 3 Press MERCURY. <[M] >=132 4 Dial 1 3 1. <[M] >=131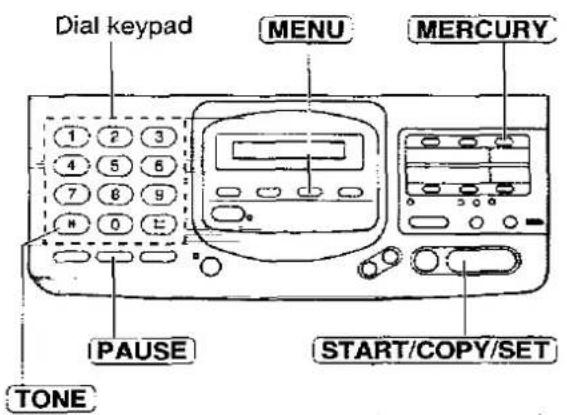
text_image
Dial keypad MENU MERCURY 1 2 3 4 5 6 7 8 9 0 E PAUSE START/COPY/SET TONE5 If you are connected to a Tone exchange: Press PAUSE once (twice if programming proves unsuccessful). or
If you are connected to a Pulse exchange: Press TONE, then press PAUSE.
6 Dial the digits of the Mercury PIN Code (part 1 then part 2).
7 Press START/COPY/SET.
8 Press STOP.
To check if the PIN Code has been programmed correctly, press DIGITAL SP-PHONE, wait for the dialling tone, and press MERCURY (followed by 2 or 3 digit Cost Centre Code* if applicable) and dial 1500. This call is free of charge. During connection you will hear a series of short beeps. This is the Mercury dial tone. After a few seconds you should be connected to a recorded message welcoming you to the Mercury network. If you have any difficulties, please contact Mercury Customer Services on FreeCall 0500-500 193 (24 hours).
*Cost centre code: See page 64.
Confirming the Mercury dial memory.
Program the Mercury code again into the MERCURY button using the procedure on previous page. When the START/COPY/SET button is pressed in step 7, you will hear 1, 2 or 6 beeps for confirmation.
1 beep: The code number is stored.
2 beeps: The code number newly entered is the same as that was previously stored.
6 beeps: The code number newly entered is different from the one that was previously stored. If you want to store the new code number, reset the Mercury dial memory, then reprogram it. For resetting the memory, see page 65.
Note:
- If you encounter a problem, see page 65.
Making a call via Mercury
1 Press DIGITAL SP-PHONE or lift the handset, then identify the dial tone.
2 Press MERCURY.
3 Dial the chosen Cost Centre Code* if applicable (see below).
4 Dial the phone number you wish to call by using one-touch dialling, speed dialling, full number dialling or the electronic telephone directory.
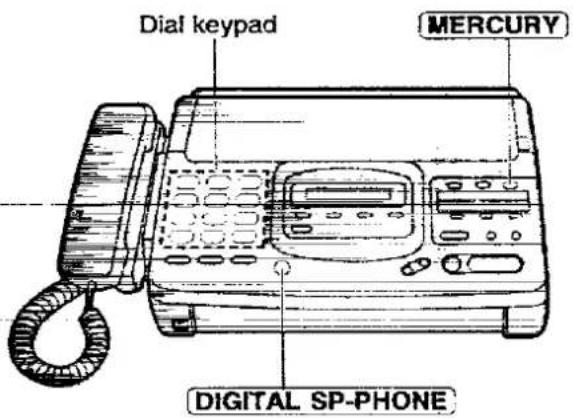
text_image
Dial keypad MERCURY DIGITAL SP-PHONE\*Cost Centre Codes
Cost Centre Codes are selectable on your Mercury order form. By keying in a code number (either 2 or 3 digits) before dialling each and every Mercury call, businesses can allocate calls to different jobs, or residential users can see who is responsible for each call. If you have requested this option, then to make a call via Mercury, you must;
- Press DIGITAL SP-PHONE.
- Press MERCURY.
- Key in your chosen Cost Centre Code (any two or three digit number except 112 or 999).
- Dial the number required.
Please note that Cost Centre Codes are not currently available with Residential 132 Service.
Resetting Mercury dial memory—Returning to Residential 132 Service
If you wish to change your Mercury code to a new one or if you need to send your unit away for repair, you must reset the Mercury dial memory using the following procedure.
1 Press MENU.
SYSTEM SET UP
2 Press ☐, then press 7 5.
RESET MERCURY
Press START/COPY/SET.
RESET=NO

Press ▲ or ▼ to select "YES".
RESET=YES

- If you wish to confirm the Mercury dial memory, select "NO".
5 Press START/COPY/SET
RESET OK?
6 Press START/COPY/SET.
RESET COMPLETED
7 Press MENU.
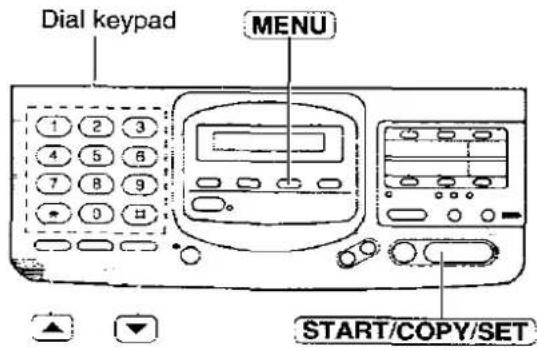
text_image
Dial keypad MENU START/COPY/SET
Summary of user programmable features
Basic features
| Code | Feature | Selection | Initial setting | Page |
| #01 | SET DATE & TIME | dd/mm/yy hh:mm | 13 | |
| #02 | YOUR LOGO | 14 | ||
| #03 | YOUR TELEPHONE NUMBER | 14 | ||
| #04 | PRINT TRANSMISSION REPORT | ERROR, ON, OFF | ERROR | 68 |
| #05 | AUTO RECEIVE MODE | ANS/FAX, FAX | ANS/FAX | 17 |
| #06 | ANS/FAX RING COUNT | 1-4 rings, TOLL SAVER, RINGER OFF | 2 rings | 25 |
| #07 | FAX RING COUNT | 1-4 rings | 2 rings | 26 |
| #08 | MANUAL RECEIVE MODE | TEL, TEL/FAX | TEL | 17 |
| #09 | TEL/FAX DELAYED RING | 1-4 rings | 2 rings | 28 |
| #10 | RECORDING TIME | LONG, SHORT | LONG | 56 |
| #11 | REMOTE ANS ID | ID=111 | 50 |
Advanced features
| Code | Feature | Selection | Initial setting | Page |
| #21 | LOGO POSITION | OUT, IN | OUT | 58 |
| #22 | JOURNAL AUTO PRINT | ON, OFF | ON | 68 |
| #23 | OVERSEAS MODE | ON, OFF | OFF | 40 |
| #24 | JUNK MAIL PROHIBITOR | ON, OFF | OFF/ID=22 | 42 |
| #25 | DELAYED TRANSMISSION | ON, OFF | OFF | 39 |
| #30 | SILENT FAX RECOGNITION RING | 3-6 rings | 3 rings | 28 |
| #35 | RECALL MODE | T_BR, E_RE | T_BR | 60 |
| #39 | LCD CONTRAST | NORMAL, DARKER | NORMAL | 58 |
| #41 | REMOTE FAX ACTIVATION CODE | ON, OFF | ON/CODE=* * | 41 |
| #42 | MESSAGE ALERT | ON, OFF | OFF | 56 |
| #43 | RECORDING TIME ALERT | ON, OFF | OFF | 57 |
| #46 | FRIENDLY RECEPTION | ON, OFF | ON | 59 |
| #47 | VOICE GUIDANCE (KX-F2780 only) | ON, OFF | ON | 59 |
| #50 | MAIL BOX ALERT | ON, OFF | OFF | 46 |
| #51 | BOX1 PASSWORD | 555 | 44 | |
| #52 | BOX2 PASSWORD | 555 | 44 | |
| #53 | BOX3 PASSWORD | 555 | 44 | |
| #54 | COMMON GREETING MESSAGE RECORDING TIME | 16s, 60s | 16s | 57 |
| #60 | COMMON MESSAGE TRANSFER | OFF, MESSAGE, PAGER | OFF | 48 |
| #61 | MAIL BOX1 MESSAGE TRANSFER | OFF, MESSAGE, PAGER | OFF | 48 |
| #62 | MAIL BOX2 MESSAGE TRANSFER | OFF, MESSAGE, PAGER | OFF | 48 |
| #63 | MAIL BOX3 MESSAGE TRANSFER | OFF, MESSAGE, PAGER | OFF | 48 |
| #70 | FAX PAGER | ON, OFF | OFF | 43 |
| #75 | RESET MERCURY DIAL MEMORY | YES, NO | NO | 65 |
| #80 | SET DEFAULT | YES, NO | NO | 61 |
Printing reports and lists
You can print out the following reports and lists from your unit.
Basic feature list—provides you with the current settings of the basic features (see page 66).
Advanced feature list—provides you with the current settings of the advanced features (see page 66).
Telephone number list—provides you with phone numbers and their station names which are stored in automatic dialling. Codes in the phone number show;
P: A pause has been entered.
F: A recall has been entered.
[ ]: A secret phone number has been entered. (The telephone number is not printed.)
Journal report—keeps records of fax transmissions and receptions. This report will be printed automatically after every 35 fax communications, but can be printed manually. You can change the setting of the journal auto print feature (see page 68).
Transmission report—provides you with a printed record of the fax transmission result (see pages 68 and 69).
How to print reports and lists
1 Press MENU until the following is displayed.
PRINT LIST
2 For the basic feature list, press #, then 1.
BASIC LIST
For the advanced list, press #, then 2.
ADVANCED LIST
For the telephone number list, press #, then 3.
TEL NO. LIST
For the journal report, press #, then 4.
JOURNAL REPORT
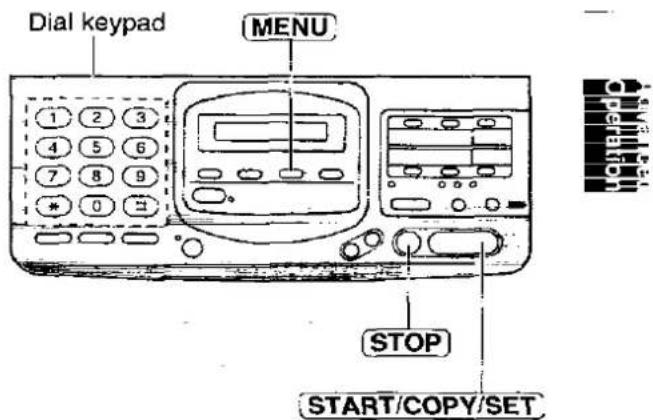
text_image
Dial keypad MENU 1 2 3 4 5 6 7 8 9 * 0 3 STOP START/COPY/SET3 Press START/COPY/SET to start printing.
• To interrupt printing, press STOP.
4 After printing, press MENU.
Setting the transmission report printing
One of the following choices is available.
ERROR: The transmission report will print out only when fax transmission falls (pre-selected setting).
ON: The report will always print out, indicating whether fax transmission is successful or not.
OFF: The report will not print.
1 Press MENU.
2 Press #, then 0 4.
2 Press START/COPY/SET.
Press ▲ or ▼ to select the desired setting.
5 Press START/COPY/SET
6 Press MENU.
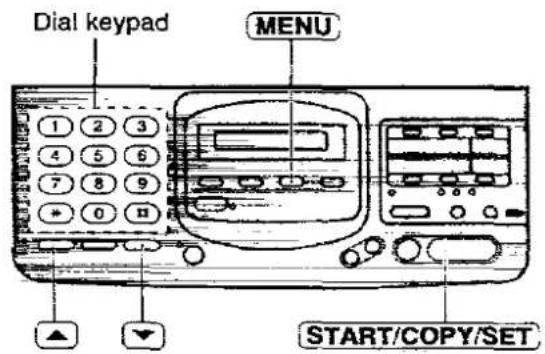
text_image
Dial keypad MENU START/COPY/SETSetting journal auto print
This unit will automatically print a journal report after every 35 fax communications. After printing, the journal memory will be erased and only subsequent activity will be recorded.
When this feature is deactivated, the unit will store the records of the last 35 fax communications, but the unit will not print the journal report automatically.
1 Press MENU.
2 Press #, then 2 2.
3 Press START/COPY/SET.
Press ▲ or ▼ to select the desired setting.
5 Press START/COPY/SET.
6 Press MENU.
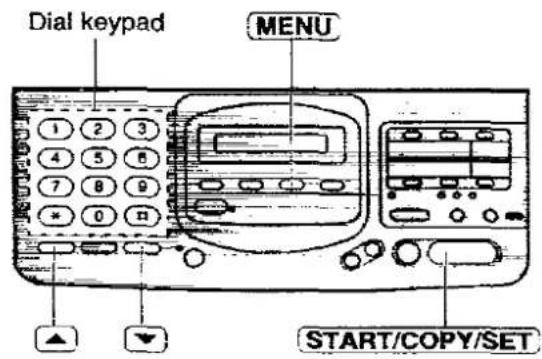
text_image
Dial keypad MENU START/COPY/SETSample of journal report
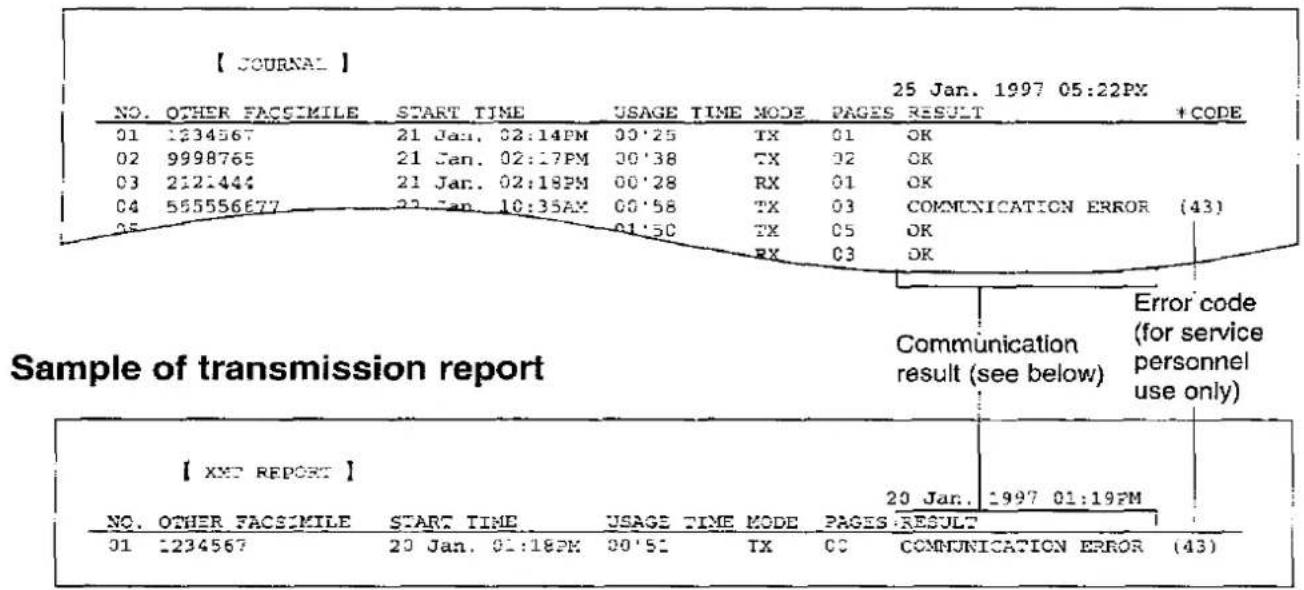
other
| NO. | OTHER FACSIMILE | START TIME | USAGE TIME MODE | PAGES RESULT | +CODE | |---|---|---|---|---|---| | 01 | 1234567 | 21 Jan. 02:14PM | 00'25 TX | 01 OK | | | 02 | 9998765 | 21 Jan. 02:17PM | 00'38 TX | 02 OK | | | 03 | 2121444 | 21 Jan. 02:18PM | 00'28 RX | 01 OK | | | 04 | 555556677 | 22 Jan. 10:35AX | 00'58 TX | 03 COMMUNICATION ERROR (43) | | | 05 | | | 01'50 TX | 05 OK | | | ... | ... | ... | RX | 03 OK | | | Sample of transmission report Error code (for service personnel use only) [XXT REPORT] 20 Jan. 1997 01:19PM NO. OTHER FACSIMILE START TIME USAGE TIME MODE PAGES RESULT 01 1234567 20 Jan. 01:18PM 00'51 TX CC COMMUNICATION ERROR (43)Communication result on the report
When a problem has occurred, one of the following messages will be printed on the transmission and journal reports.
| PRINTED MESSAGE | CODE | MEANING |
| COMMUNICATION ERROR | 41-47 FF | A transmission or reception error occurred. Try again or check with the other party. |
| DOCUMENT JAMMED | — | The document is jammed. Remove the jammed document (see page 75). |
| JUNKMAIL PROH. REJECT | — | The junk mail prohibitor of your unit rejected fax reception (see page 42). |
| NO DOCUMENT | — | The document was not fed into the unit properly. Try again. |
| NO RESPONSE | — | The receiving unit was busy or ran out of recording paper. Try again. |
| PAPER JAMMED | — | The recording paper is jammed. Clear the jammed paper (see page 73 or 74). |
| PAPER OUT | — | The unit ran out of recording paper. Install a recording paper roll (see page 11). |
| PRESSED THE STOP KEY | — | The STOP button was pressed, and fax communication was cancelled. |
| PRINTER OVERHEATED | — | Printer was overheated. Let the unit cool down. |
| THE COVER WAS OPENED | — | The back lid was open. Close it and try again. |
| OK | — | Fax communication was successful. |

Error messages on the display
If the unit detects a problem, the following messages will appear on the display.
| DISPLAY MESSAGE | CAUSE AND REMEDY |
| CALL SERVICE | ●There is something wrong with the unit. Contact your supplier. |
| CHECK COVER | ●The back lid is open. Close it. |
| CHECK CRADLE | ●The handset and handset cradle have been removed. Install the handset cradle correctly (see page 10). |
| CHECK DOCUMENT | ●The document is not fed into the unit properly. Reinsert the document. If the misfeeding occurs frequently, clean the document feeder rollers inside the unit (page 76). If the problem remains, adjust the feeder pressure (page 75). |
| CHECK MEMORY | ●Memory (phone numbers, parameters, etc.) has been erased. Re-program. |
| FAX IN MEMORY | ●The unit has documents in memory. Install a new recording paper roll (see page 11), or clear the jammed paper (see page 73 or 74). |
| MEMORY FULL | ●There is no room left in memory to record a voice message. Erase some or all of the messages (see pages 30 and 46).●The memory is full of received documents. Install a new recording paper roll (see page 11); or clear the jammed paper (see page 73 or 74). |
| NO ANS GREETING | ●Your ANS/FAX greeting message is not recorded. Record a greeting message (see page 54).●If your unit is a KX-F2780, the voice guidance feature is set to OFF. Change the setting to ON (see page 59). The pre-recorded greeting message will be used. |
| NO RESPONSE | ●The receiving unit is busy or ran out of recording paper. Try again. |
| NO TEL GREETING | ●The TEL/FAX greeting message is not recorded. Record a greeting message (see page 54). |
| NO TRNS-GREETING | ●The message transfer greeting is not recorded. Record a greeting message (see page 54).●If your unit is a KX-F2780, the voice guidance feature is set to OFF. Change the setting to ON (see page 59). The pre-recorded greeting message will be used. |
| OUT OF PAPER | ●The unit ran out of recording paper. Install a new recording paper roll (page 11). |
| PAPER JAMMED | ●A recording paper jam occurred. Clear the jammed paper (see page 73 or 74). |
| POLLING ERROR | ●The other fax machine does not provide the polling function. Check with the other party. |
| REDIAL TIME OUT | ●The receiving unit is busy or ran out of recording paper. Try again. |
| REMOVE DOCUMENT | ●The document is jammed. Remove the jammed document (page 75).●Attempted to transmit a document longer than 600 mm ( 2312 "). Press the STOP button and remove the document (page 75).Divide the document Into two or more sheets and try again. |
| TRANSMIT ERROR | ●A transmission error occurred. Try again. |
| UNIT OVERHEATED | ●The unit is too hot. Let the unit cool down. |
Before requesting help
General
| PROBLEM | CAUSE & REMEDY |
| I cannot make and receive calls. | ●The mains lead or telephone line cord is not connected. Check the connections (see page 12). |
| I cannot make calls. | ●The dialling mode setting is wrong. Check the selector (see page 12). |
| The unit does not work. | ●Disconnect the unit from the telephone line and connect a known working phone. If the working phone operates correctly, call your supplier to have the unit repaired. If the working phone does not operate properly, contact your telephone company. |
| The unit does not ring. | ●The ringer volume is set to OFF. Adjust it to a suitable level (see page 18). |
| The REDIAL/PAUSE button does not function properly. | ●If this button is pressed during dialling, a pause will be inserted. If this button is pressed immediately after obtaining a dial tone, the last number dialled will be redialled. |
| During programming, I cannot enter the activation code or the prohibitor ID. | ●Whole or part of the number is the same as another code or ID. Change the number (see pages 42, 44 and 50). |
Fax Transmission
| PROBLEM | CAUSE & REMEDY |
| The other party complains that letters on their received document are distorted. | ●If your line has special telephone services such as call waiting, the service may have been activated during fax transmission. Connect the unit to a line that does not have such services.●An extension telephone on the same line is off the hook. Hang up and try again. |
| The other party complains that dirty patterns or black lines appear on their received documents. | ●The glass or rollers are dirty. Clean them (see page 76). |
| I cannot make an international fax call. | ●Use the overseas transmission mode (see page 40).●Add two pauses at the end of the phone number (see page 37). |

Fax Reception
| PROBLEM | CAUSE & REMEDY |
| I cannot receive documents automatically. | ●The receive mode is set to the TEL mode. Set to the ANS/FAX, TEL/FAX or FAX mode.●The time to answer the call may be too long. Decrease the number of rings (see pages 25, 26 and 28).●The greeting message is too long. Shorten the message (see page 54).●The junk mail prohibitor is set to on (see page 42). |
| The recording Image is faint. | ●The sender transmitted a faint document. Request them to transmit a clearer copy of the document. |
| The received document is blank. | ●The recording paper roll is installed incorrectly. Make sure that the shiny side of the paper is facing down and re-install the paper (see page 11). |
Answering Device
| PROBLEM | CAUSE & REMEDY |
| No voice messages have been recorded in the ANS/FAX mode. | ●The memory is full. Erase some or all of the messages (see pages 30, 46 and 52). |
| I cannot retrieve recorded messages from a remote phone. | ●Make sure that you use the remote operation ID correctly (see page 50). |
| Messages in the mailbox do not play back. | ●The mailbox password is wrong. Enter the correct password (see page 44). |
Copying
| PROBLEM | CAUSE & REMEDY |
| A dirty pattern or a black line appears on the copied documents. | ●The glass or rollers are dirty. Clean them (see page 76). |
| The copied document is blank. | ●The recording paper roll is installed incorrectly. Make sure that the shiny side of the paper is facing down and re-install the paper (see page 11). |
If a power failure occurs
- You are only able to use the unit as a standard telephone. You can place and receive calls using the handset and dial keypad only.
- You cannot use the facsimile, answering system and any button and key except the dial keypad.
●The memory contents will not be erased. - If the programmed start time has passed during a power failure, delayed transmission will be attempted after power is restored.
Clearing a recording paper jam
If the unit does not eject any recording paper during reception or copying, the recording paper has jammed. Remove the jammed paper as shown below or on page 74.
For KX-F2780
1 Open the back lid by lifting up the tabs located on both sides and press the green lever to release the paper cutter.
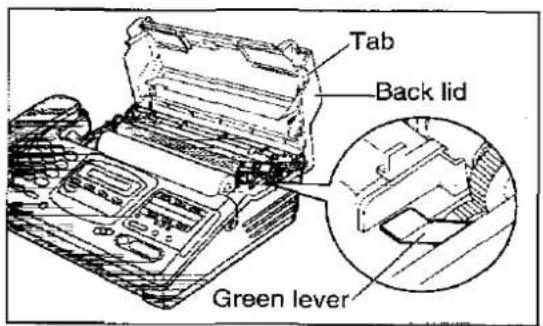
text_image
Tab Back lid Green lever2 Pull up the transparent guide and remove the piece of paper. - If the transparent guide is not pulled up, press the green lever again.
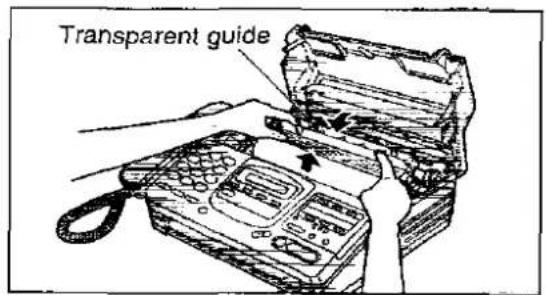
text_image
Transparent guide3 Replace the transparent guide and recording paper roll in the proper direction, and insert the leading edge of the paper between the recording paper roller and the silver plate. - Make sure that there is no slack in the paper roll.
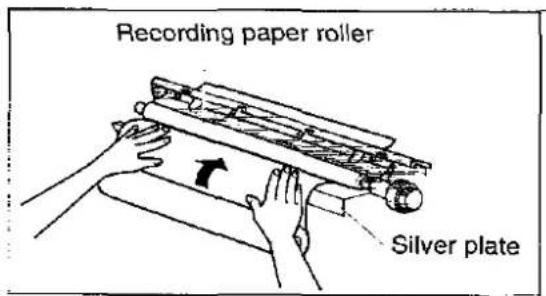
text_image
Recording paper roller Silver plate4 Close the back lid by gently pressing down on both ends.
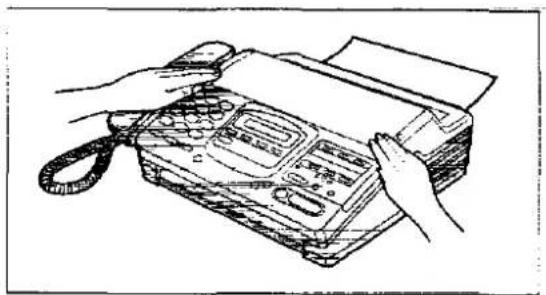
natural_image
Line drawing of hands operating a landline telephone with a paper (no text or symbols visible)For KX-F2680
1 Open the back lid by lifting up the tabs located on both sides, and remove the jammed paper.
2 Cut off the wrinkled portion.
3 Replace the recording paper roll in the proper direction, and insert the leading edge of the paper between the recording paper roller and the silver plate.
●Make sure that there is no slack in the paper roll.
4 Insert the paper under the back lid and pull a few centimeters of paper out of the unit.
5 Close the back lid by gently pressing down on both ends, and tear off the excess paper by pulling it upward.
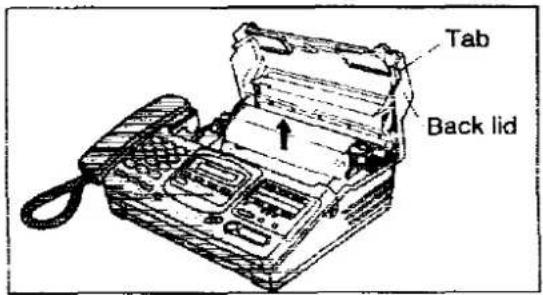
text_image
Tab Back lid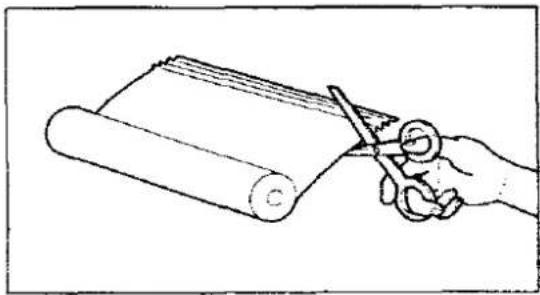
natural_image
Hand holding a rolled-up scroll with scissors cutting it, no text or symbols visible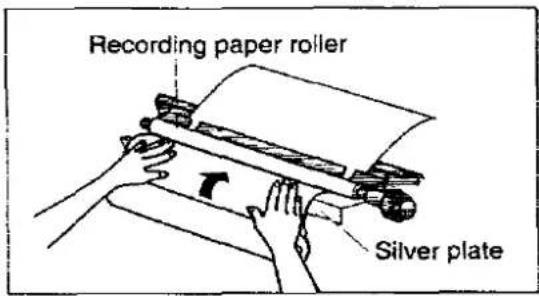
text_image
Recording paper roller Silver plate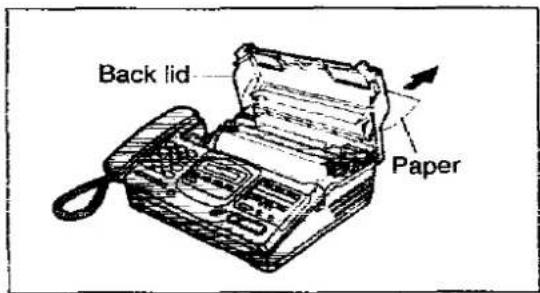
text_image
Back lid Paper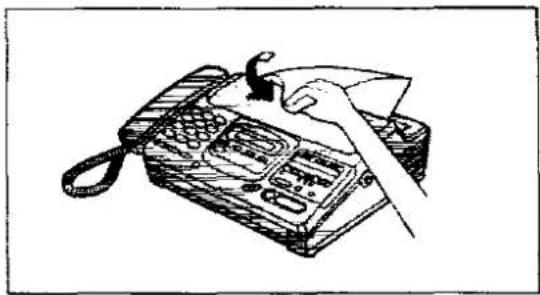
natural_image
Line drawing of a hand using a handheld device to press or install a digital telephone (no text or symbols visible)Clearing a document jam
If the unit does not release an original document during feeding, remove it as shown below.
1 Open the front lid by pressing the front lid open button.
2 Remove the jammed document.
3 Close the front lid by gently pressing down on both ends.
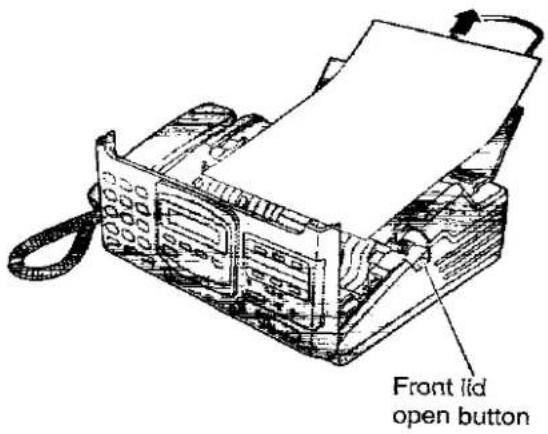
text_image
Front lid open buttonAdjusting the feeder pressure
If no feeding or multiple feeding occurs frequently, adjust the feeder pressure.
1 Open the front lid by pressing the front lid open button.
2 Shift the position of the lever by using an instrument with a pointed end, like a clip or ball-point pen.
Position A: Select this when documents do not feed.
Position B: Standard position (pre-selected)
Position C: Select this when documents multiple feed.
3 Close the front lid by gently pressing down on both ends.
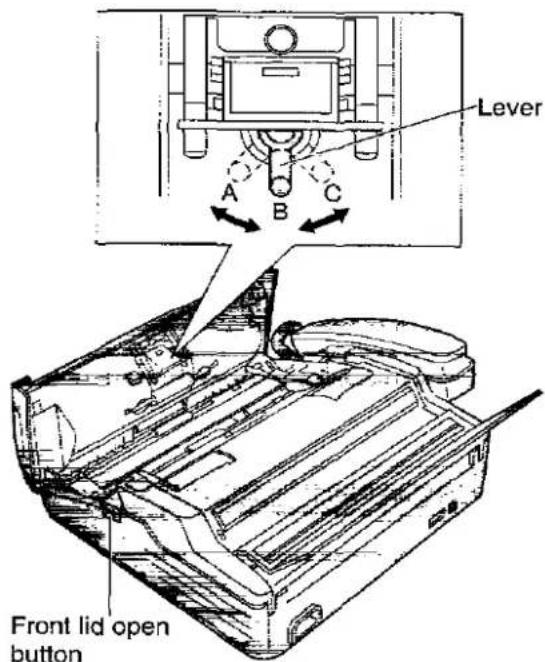
text_image
Lever A B C Front lid open button
Cleaning the inside of the unit
If misfeeding occurs frequently or dirty patterns or black bands appear on a copied or transmitted document, clean the document feeder rollers, sub roller, rubber flap, white plate and glass.
1 Disconnect the power cord and the telephone line cord.
2 Open the front lid by pressing the front lid open button.
3 Clean the document feeder rollers and sub roller with a cloth moistened with isopropyl rubbing alcohol, and let dry thoroughly.
4 Clean the rubber flap with a cotton swab moistened with isopropyl rubbing alcohol, and let dry thoroughly.
5 Clean the white plate and glass with a soft dry cloth.
6 Close the front lid by gently pressing down on both ends.
7 Connect the power cord and the telephone line cord.
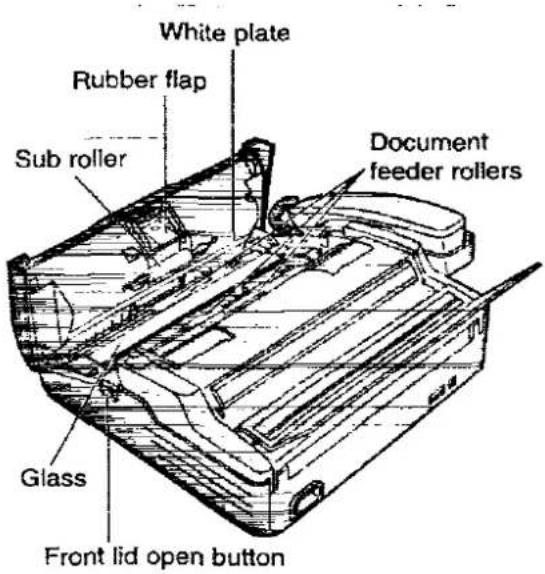
text_image
White plate Rubber flap Sub roller Document feeder rollers Glass Front lid open buttonCaution:
- Do not use paper products (such as paper towels or tissues) to clean the inside of the unit.
Important information
For KX-F2680E
text_image
APPROVED for connection to telecommunication systems specified in the instructions for use subject to the conditions set out in them. 504098For KX-F2780E
text_image
APPROVED for connection to telecommunication systems specified in the instructions for use subject to the conditions set out in them. 504099The connection to the telecommunication systems must not be hard wired and must be unplugged before the earth is disconnected.
Method of connection
This apparatus is connected to the exchange line or PABX/PMBX extension by the new standard British Telecom plug and socket. Arrangements for provision of this type of termination can be made through the nearest British Telecom Sales Office.
This apparatus may be connected to the following types of installation. This apparatus has been approved for use under the following conditions;
a) For connection to the public switched telephone network (PSTN) and compatible (Private Branch Exchange), which use loop disconnect signalling and DTMF signalling. (Please consult your supplier for an up to date list of compatible PBX's.)
b) The apparatus can be used on extension sockets connected to a direct exchange line (D.E.L.).
c) This apparatus is suitable for connection to the telecommunication system directly or via compatible private branch exchange as an extension.
The supplier of the apparatus should be consulted for an up to date list of PBX's with which the apparatus is compatible.
It cannot be guaranteed that the apparatus will operate under all possible conditions of connection to compatible PBX's.
- This apparatus is suitable for connection to a PBX with or without initial proceed indication.
- This apparatus is suitable for connection to a PBX with or without secondary proceed indication.
Any cases of difficulty should be referred in the first instance to the supplier of the apparatus.
d) The apparatus must not be connected in the following manner:
—As an extension to a pay phone
—As a party line with shared service
This apparatus has been approved for the use of the following facilities:
Integrated Telephone System
1) Simple telephone facility
2) Auto-calling
3) Last number redial
4) PBX time break: Selectable time break/earth recall for PBX
5) Loop disconnect signalling
6) DTMF signalling
7) Mercury dialling compatibility
8) Speaker-phone
Answering and Recording System
1) 2-step caller's recording time: LONG/SHORT
2) Monitoring a telephone call
3) Remote turning on the ANS/FAX mode
4) Auto disconnect
Facsimile System
1) MODEM facility
Any other usage will invalidate the approval of the apparatus if as a result, it then ceases to conform to the standards against which approval was granted.
Ringer Equivalence Number (REN)
This relates to the performance of the apparatus when used in combination with other items of apparatus. It enables the calculation of the maximum number of items of apparatus that may be connected simultaneously to the line by summing the REN values of each item. A BT supplied instrument has a REN value of 1 unless otherwise marked. A maximum REN value of 4 should not be exceeded. The REN value of this apparatus is 1.0.
The approval of this apparatus for connection to the telecommunication systems is invalidated if the apparatus is subject to any modification in any material way not authorised by BABT or it is used with or connected to internal software that has not been formally accepted by BABT.
All apparatus connected to the facsimile machine and thereby connected directly or indirectly to telecommunication systems must be approved apparatus as defined in Section 22 of the British Telecommunication Act 1984.
999 or 112 can be dialled on the apparatus for the purposes of making outgoing calls to the BT Emergency (999 or 112) Service.
NOTES:
- If you experience any problems with the normal use of your apparatus, you should unplug it from the telephone outlet and connect a known working telephone in its place. If the known working telephone still gives problems, then call British Telecom Engineers; if it operates properly, then the problems are likely to be a fault in your apparatus. In this case, consult your supplier for advice.
●British Telecom will charge you if they attend a service call that is not due to apparatus supplied by them.
CE
73/23/EEC 89/336/EEC 92/31/EEC 93/68/EEC
Fitting a plug to the mains lead
This appliance is supplied with a moulded three pin mains plug for your safety and convenience.
A 5 amp fuse is fitted in this plug.
Should the fuse need to be replaced please ensure that the replacement fuse has a rating of 5 amps and that it is approved by ASTA or BSI to BS1362.
Check for the ASTA mark A\$A or the BSI
mark 🌿 on the body of the fuse.
If the plug contains a removable fuse cover you must ensure that it is refitted when the fuse is replaced.
If you lose the fuse cover the plug must not be used until a replacement cover is obtained. A replacement fuse cover can be purchased from your local Panasonic dealer.
IF THE FITTED MOULDED PLUG IS UNSUITABLE FOR THE SOCKET OUTLET IN YOUR HOME THEN THE FUSE SHOULD BE REMOVED AND THE PLUG CUT OFF AND DISPOSED OF SAFELY. THERE IS A DANGER OF SEVERE ELECTRICAL SHOCK IF THE CUT OFF PLUG IS INSERTED INTO ANY 13 AMP SOCKET.
If a new plug is to be fitted please observe the wiring code as shown below. If in any doubt please consult a qualified electrician.
WARNING: THIS APPLIANCE MUST BE EARTHED.
IMPORTANT:
The wires in this mains lead are coloured in accordance with the following code:
Green-and-Yellow: Earth Blue: Neutral Brown: Live
As the colours of the wire in the mains lead of this appliance may not correspond with the coloured markings identifying the terminals in your plug, proceed as follows.
The wire which is coloured GREEN-AND-YELLOW must be connected to the terminal in the plug which is marked with the letter E or by the Earth symbol or coloured GREEN or GREEN-AND-YELLOW.
The wire which is coloured BLUE must be connected to the terminal in the plug which is marked with the letter N or coloured BLACK.
The wire which is coloured BROWN must be connected to the terminal in the plug which is marked with the letter L or coloured RED.
How to replace the fuse: Open the fuse compartment with a screwdriver and replace the fuse and fuse cover.
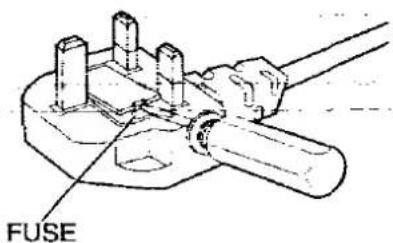
text_image
FUSECONDITIONS OF GUARANTEE
This guarantee is in addition to and does not in any way affect any statutory or other rights of consumer purchasers. If within the applicable guarantee period, the appliance proves to be defective by reason of faulty design, workmanship or materials, we undertake subject to the following conditions to have the defective appliance (or any part or parts there of) repaired or replaced free of charge.
- The appliance shall have been purchased and used solely within the UK and in accordance with standard operating instructions and the technical and/or Safety Standards required in the UK.
- The purchaser will within 7 days of purchase complete the included card and send it to us for registration. Failure to return such card could result in delay in providing the guarantee service.
- The appliance should be returned together with this guarantee and proof of date of purchase promptly on being found defective at the purchaser's risk and expense to the authorized dealer from whom the appliance was purchased or to the nearest authorized dealer. All enquiries must be through such dealers.
- This guarantee shall not apply to damage caused through fire, accident, lightning, misuse, wear and tear, neglect, incorrect adjustment or repair, to damage caused through installation, adaption, modification or use in an improper manner or inconsistent with the technical and/or safety standards required in the country where this appliance is used, or to damage occurred during transit to or from the purchaser.
- If at any time during the guarantee period any part or parts of the appliance are replaced with a part or parts not supplied or approved by us or of an objective quality safe and suitable for the appliance, or the appliance has been dismantled or repaired by any person not authorized by us, we shall have the right to terminate this guarantee in whole or in part immediately without further notice.
- The purchaser's sole and exclusive remedy under this guarantee against us is for the repair or replacement of the appliance or any defective part or parts and no other remedy, including, but not limited to, incidental or consequential damage or loss of whatsoever nature shall be available to the purchaser.
- This guarantee shall not apply to cassette tapes, batteries and any other items of limited natural life.
- Our decision on all matters relating to complaints shall be final. Any appliance or defective part which has been replaced shall become our property.
- The guarantee period applicable to this product shall be 12 months.
Please keep these Operating Instructions with your receipt.
Panasonic Business Systems U.K.
| Receipt No. ____ | Date of Purchase ____ |
| Model No. KX-F2680E/KX-F2780E | Serial No. ____ |

Specifications
- Applicable Lines:
- Document Size:
- Effective Scanning Width:
- Printing Paper Size:
- Effective Printing Width:
- Transmission Time*:
- Scanning Density:
- Halftone Level:
- Scanner Type:
- Printer Type:
- Data Compression System:
- Modem Speed:
- Operating Environment:
- Dimensions (H×W×D):
- Mass (Weight):
- Power Consumption:
- Power Supply:
- Memory capacity:
Public Switched Telephone Network
Max. 216 mm (8½") in width Max. 600 mm (23¾") in length
208 mm (8 ^3 /16")
210 mm×max. 50 m (8¼" × 164') roll
208 mm (8 ^3/16'' )
Approx. 15 s/page (Original mode) Approx. 30 s/page (G3 Normal mode)
Horizontal: 8 pels/mm (203 pels/inch)
Vertical: 3.85 lines/mm (98 lines/inch)—Standard mode
7.7 lines/mm (196 lines/inch)—Fine/Halftone mode
15.4 lines/mm (392 lines/inch)—Superfine mode
64-level
CCD image sensor
Thermal printing
Modified Huffman (MH), Modified READ (MR)
9600/7200/4800/2400 bps; Automatic Fallback
5-35 °C (41-95 °F), 45-85 % RH (Relative Humidity)
118×351×265 mm (421/32"×1313/16"×107/16")
Approx. 3.7 kg (8.2 lb.)
Standby: Approx. 3.5 W
Transmission: Approx. 16 W
Reception: Approx. 28 W
Copy: Approx. 40 W
Maximum: Approx. 120 W
220-240 V AC, 50 Hz
KX-F2680: Approx. 18 minutes of recording time including the greeting message.**
KX-F2780: Approx. 18 minutes of recording time including the greeting message when no fax documents are in memory.**
OR Approx. 13 pages of document based on CCITT No. 1 Test Chart in standard resolution when no voice messages have been recorded.
*Transmission speed depends upon the contents of the pages, resolution, telephone line conditions and capability of receiving unit. 15 second speed based upon CCITT No.1 Test Chart.
**Recording time may be reduced by caller side background noise.
CCITT No. 1 Test Chart
text_image
THE SECRETIC COMPANY LIMITED123456780000000000000000000000000000000000000000000000000000000000000000000000000000000000000000000000000000
123456789999999999999999999999999999999999999999999999999999999999999999999999999999999999999999999999999999
12345678888888888888888888888888888888888888888888888888888888888888888888888888888888888888888888888888888
Note:
- Any details given in these instructions are subject to change without notice.
●The pictures and illustrations in these instructions may vary slightly from the actual product.
One-touch dialler list
| Station No. | Name/Phone No. | Station No. | Name/Phone No. |
| 1 | 5 (LOWER 1) | ||
| 2 | 6 (LOWER 2) | ||
| 3 | 7 (LOWER 3) | ||
| 4 | 8 (LOWER 4) |
One-touch dialler list
| Station No. | Name/Phone No. | Station No. | Name/Phone No. |
| 1 | 5 (LOWER 1) | ||
| 2 | 6 (LOWER 2) | ||
| 3 | 7 (LOWER 3) | ||
| 4 | 8 (LOWER 4) |
Speed dialler list
| Station No. | Name/Phone No. | Station No. | Name/Phone No. |
| 00 | 25 | ||
| 01 | 26 | ||
| 02 | 27 | ||
| 03 | 28 | ||
| 04 | 29 | ||
| 05 | 30 | ||
| 06 | 31 | ||
| 07 | 32 | ||
| 08 | 33 | ||
| 09 | 34 | ||
| 10 | 35 | ||
| 11 | 36 | ||
| 12 | 37 | ||
| 13 | 38 | ||
| 14 | 39 | ||
| 15 | 40 | ||
| 16 | 41 | ||
| 17 | 42 | ||
| 18 | 43 | ||
| 19 | 44 | ||
| 20 | 45 | ||
| 21 | 46 | ||
| 22 | 47 | ||
| 23 | 48 | ||
| 24 | 49 |
Speed dialler list
| Station No. | Name/Phone No. | Station No. | Name/Phone No. |
| 00 | 25 | ||
| 01 | 26 | ||
| 02 | 27 | ||
| 03 | 28 | ||
| 04 | 29 | ||
| 05 | 30 | ||
| 06 | 31 | ||
| 07 | 32 | ||
| 08 | 33 | ||
| 09 | 34 | ||
| 10 | 35 | ||
| 11 | 36 | ||
| 12 | 37 | ||
| 13 | 38 | ||
| 14 | 39 | ||
| 15 | 40 | ||
| 16 | 41 | ||
| 17 | 42 | ||
| 18 | 43 | ||
| 19 | 44 | ||
| 20 | 45 | ||
| 21 | 46 | ||
| 22 | 47 | ||
| 23 | 48 | ||
| 24 | 49 |
A ANS/FAX mode.... 16,24
ANS/FAX ring count 25
AUTO RECEIVE button ....-16
AUTO RECEIVE mode 16
Automatic dialling....33
C Call counter 30
CHECK button 55
Cleaning 76
COPY button 29
D Date and time 13
Delayed transmission 39
DELETE key....15
Dialling mode 12
DIRECTORY button 34,35
Display contrast 58
E Electronic telephone directory ..... 35
ERASE button 30,55
Error message 70
F Facsimile telephone number ..... 14
Fax auto redial 21
FAX mode 16,26
Fax pager 43
FAX ring count 26
Feeder pressure 75
Friendly reception 23,59
G Greeting messages ....54
H HELP button 12
I INSERT key 15
J Journal auto print 68
Journal report.... 67, 69
Junk mail prohibitor 42
L Logo 14
Logo print position 58
LOWER key 33,34
M MAIL BOX button....45
Mailbox alert 46
Mailbox password 44
MANUAL RECEIVE mode ..... 16
MEMO/2WAY REC button 32
MERCURY button 62
Message alert 56
Message transfer 47
MUTE button. 19
N NEW MSGS. PLAY BACK button....30
O Overseas transmission mode ..... 40
P Pager call 47
PAUSE button 37
Polling 38
Q QUICK button 31
R REC button 54
RECALL button 37
Recall mode 60
Recording time 56,57
REDIAL button 37
Remote fax activation code 41
Remote operation ID 50
REPEAT button 31
RESOLUTION button 20
S SECRET key 33
SELECT button 54
Set default....61
Silent fax recognition ring 28
SKIP button 31
SLOW button 31
SPACE key 15
T TEL mode 16
TEL/FAX mode 16,27
TEL/FAX ring count 28
Telephone number list 67
Toll saver 25
TONE button....37
Transmission report 67, 68, 69
V Voice contact 36
Voice guidance....59
Voice time/day stamp 30
VOLUME button 18
169
Panasonic Business Systems U.K.
Panasonic House, Willoughby Road, Bracknell,
Berkshire RG12 4FP