
TC-15M2R - Fernseher PANASONIC - Kostenlose Bedienungsanleitung
Finden Sie kostenlos die Bedienungsanleitung des Geräts TC-15M2R PANASONIC als PDF.


Benutzerfragen zu TC-15M2R PANASONIC
0 Frage zu diesem Gerät. Beantworten Sie die, die Sie kennen, oder stellen Sie Ihre eigene.
Eine neue Frage zu diesem Gerät stellen
Laden Sie die Anleitung für Ihr Fernseher kostenlos im PDF-Format! Finden Sie Ihr Handbuch TC-15M2R - PANASONIC und nehmen Sie Ihr elektronisches Gerät wieder in die Hand. Auf dieser Seite sind alle Dokumente veröffentlicht, die für die Verwendung Ihres Geräts notwendig sind. TC-15M2R von der Marke PANASONIC.
BEDIENUNGSANLEITUNG TC-15M2R PANASONIC
Panasonic
Operating Instructions
Colour Television
TC-15M2R
(U.K. Standard)
Dear Panasonic Customer
Welcome to the Panasonic family of custpmers. We hope you have many years of enjoyment from your new colour television. The best way to understand the features is to this book thoroughly, before operating the set.
Warnings and Precautions

This TV set is designed to operate on A.C. 240V, 50Hz. It is exclusively for broadcast system PALI (U.K. Standard).
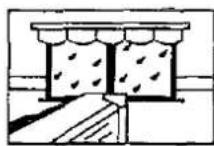
To prevent damage which might result in electric shock or fire, do not expose this TV set to rain or excessive moisture.
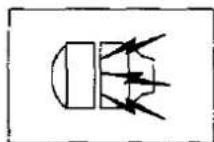
WARNING: HIGH VOLTAGE !!! Do not remove the rear cover as live parts are accessible when it is removed. There are no user serviceable parts inside.
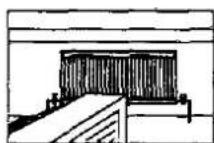
Avoid exposing the TV set to direct sunlight and other sources of heat.
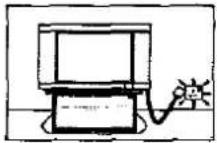
Remove the mains plug from the wall socket when the TV set is not used for a prolonged period of time.
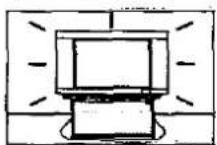
CABINET AND PICTURE TUBE CARE Remove the mains plug from the wall socket. The cabinet and picture tube can be cleaned with a soft cloth moistened with mild detergent and water. Do not use solutions containing benzol or petroleum. TV sets can produce static electricity, care must be taken whenever touching the TV screen.
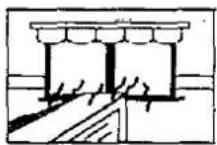
Adequate ventilation is essential to prevent failure of electrical components.
FOR YOUR SAFETY PLEASE READ THE FOLLOWING TEXT CAREFULLY
This appliance is supplied with a fitted three pin mains plug for your safety and convenience. A 5 amp fuse is fitted in this plug. If the fuse is replaced then the replacement fuse must be 5 amp rated and should be approved by ASTA or BSI to BS1362.
Check for the ASTA mark ◆ or the BSI mark 🌿 on the body of the fuse.
If the fitted plug has a removable fuse cover you must ensure that it is refitted when the fuse is replaced. If you lose the fuse cover the plug must not be used until a replacement cover is obtained.
Replacement fuse covers can be purchased through your local Panasonic dealer. If the fitted plug is unsuitable for the socket outlet in your home then the fuse should be removed and the plug cut off and disposed of safely. There is danger of severe electrical shock if the cut off plug is inserted into any 13 amp socket. If a new plug is to be fitted please observe the wiring code as shown below. If in any doubt please consult a qualified electrician.
How to replace the fuse (for plug type shown in example 1): Lift open the fuse compartment, in the mains plug, with a screwdriver, and replace the fuse, then press the fuse cover down securely. (See example 1). How to replace the fuse (for plug type shown in example 2): Lift out the removable fuse compartment with a screwdriver and replace the fuse, then refit securely into the mains plug (See example 2).
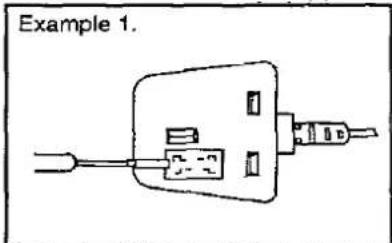
natural_image
Simple line drawing of an electrical connector with ports and wires, labeled 'Example 1.' (no text or symbols on the diagram itself)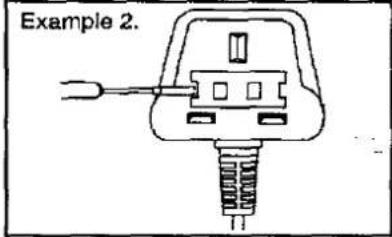
natural_image
Simple line drawing of a plug with a screw and connector (no text or symbols)IMPORTANT: - The wires in the mains lead of this appliance are coloured in accordance with the following code: - BLUE: NEUTRAL BROWN: LIVE
As the colours of the wires in the mains lead of this appliance may not correspond to the markings identifying the terminals in your plug, proceed as follows :—
- The BLUE wire must be connected to the terminal marked 'N' or coloured black.
- The BROWN wire must be connected to the terminal marked 'L' or coloured red.
IMPORTANT NOTE: Under no circumstances should either of these wires be connected to the Earth terminal of the three pin plug, marked with the letter 'E' or the earth symbol.
Contents
Installation and Tuning
Features of this T.V. 2
Battery Installation and Replacement....2
Connecting the Aerial....3
Switching the TV on / off. 3
Tuning Operation....3
Operation of Controls
Basic functions. 4
Advanced features 7
VCR functions....9
Reference Information
Audio / Video (AV) Connections....10
Audio / Video socket details. 11
General Information....12
Trouble Shooting 12
Specifications 12
Index 13
Features
New 15" Monitor Design
● TOP Dome Sound System (3 Watts audio output)
● On Screen Display
● Calculator (+ - X ÷ with 8 Digit display)
● Calendar (up to 12 / 2100)
● Mood Light (7 colours)
● Off Timer (30, 60 or 90 minutes)
● On Timer (For up to 12 hours)
● AV in / Out (Front and Rear)
● Multi-function Remote Control (TV / VCR (Panasonic))
● 51 position synthesized tuning system (1 - 50 plus VCR)
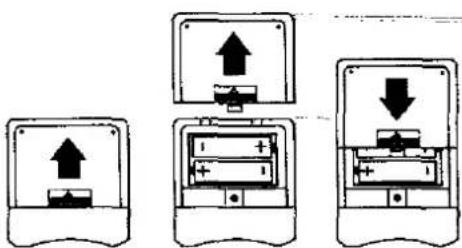
Battery Installation and Replacement
(Remote Control Transmitter)
Batteries: Use two 'R6' or 'AA' dry cells (supplied).
text_image
Diagram showing three electrical meter setups with upward and downward arrows indicating direction of movement or change.-
Remove the battery compartment lid.
-
Insert the batteries correctly as indicated by the (+) and (-) symbols.
-
Replace the cover.
BATTERY PRECAUTIONS
-
Do not use an old battery with a new one.
-
Ensure the batteries are inserted correctly.
-
Do not use rechargeable (Ni-Cad) batteries. They are partially different in shape and performance and may not ensure the desired function.
-
Do not mix battery types, i.e. Alkaline and Manganese batteries
-
Remove flat batteries and dispose of them immediately.
Installation and Tuning
text_image
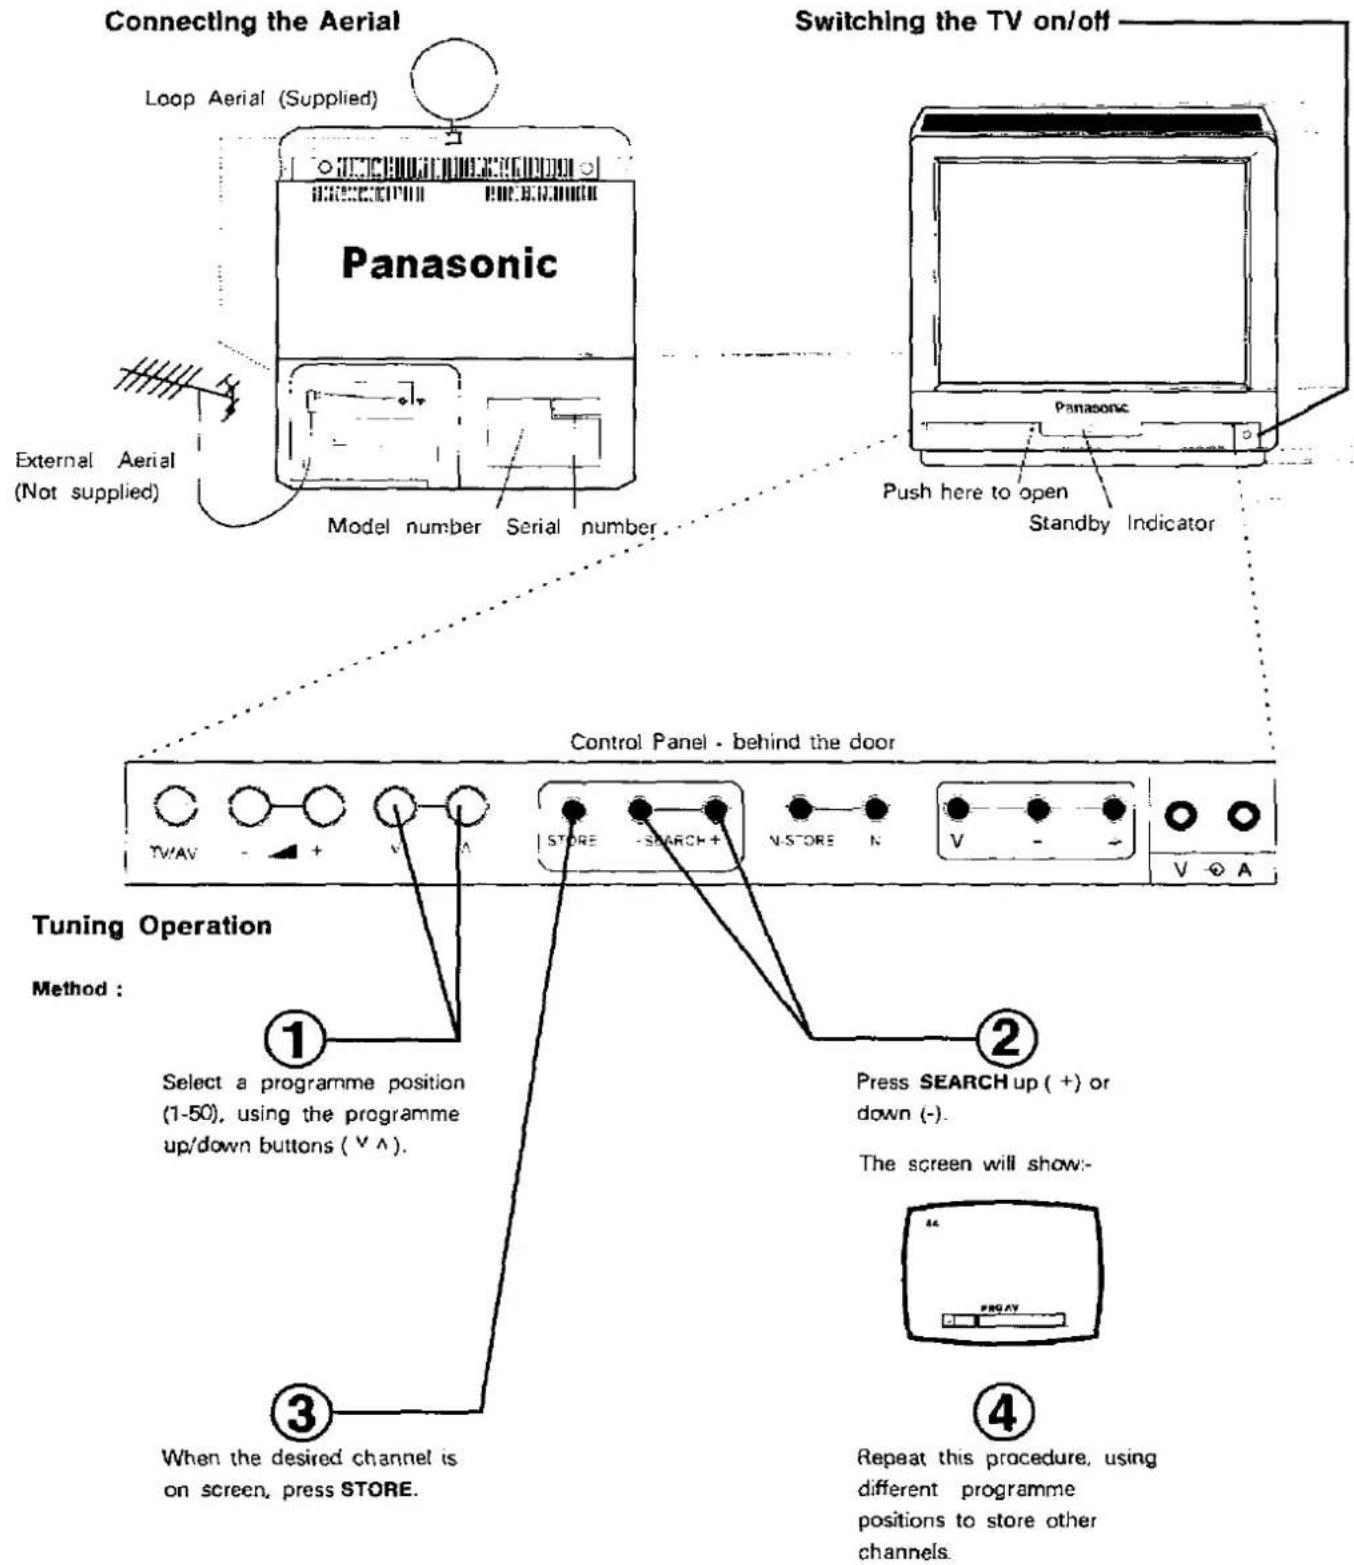
Connecting the Aerial Loop Aerial (Supplied) Panasonic External Aerial (Not supplied) Model number Serial number. Switching the TV on/off Panasonic Push here to open Standby Indicator Control Panel - behind the door Tuning Operation Method : ① Select a programme position (1-50), using the programme up/down buttons ( V ^ ). ② Press SEARCH up (+) or down (-). The screen will show: ③ When the desired channel is on screen, press STORE. ④ Repeat this procedure, using different programme positions to store other channels.Notes :
-
There are 50 programme positions available to store different channels.
-
When tuning TV into a VCR, position '0' should be selected (The TV screen will show "VCR").
Manual Operation of Controls
Note: Certain functions will display a coloured bar on screen for a short period of time
Volume Up / Down
Press to increase / decrease the volume. Displayed as a green bar.
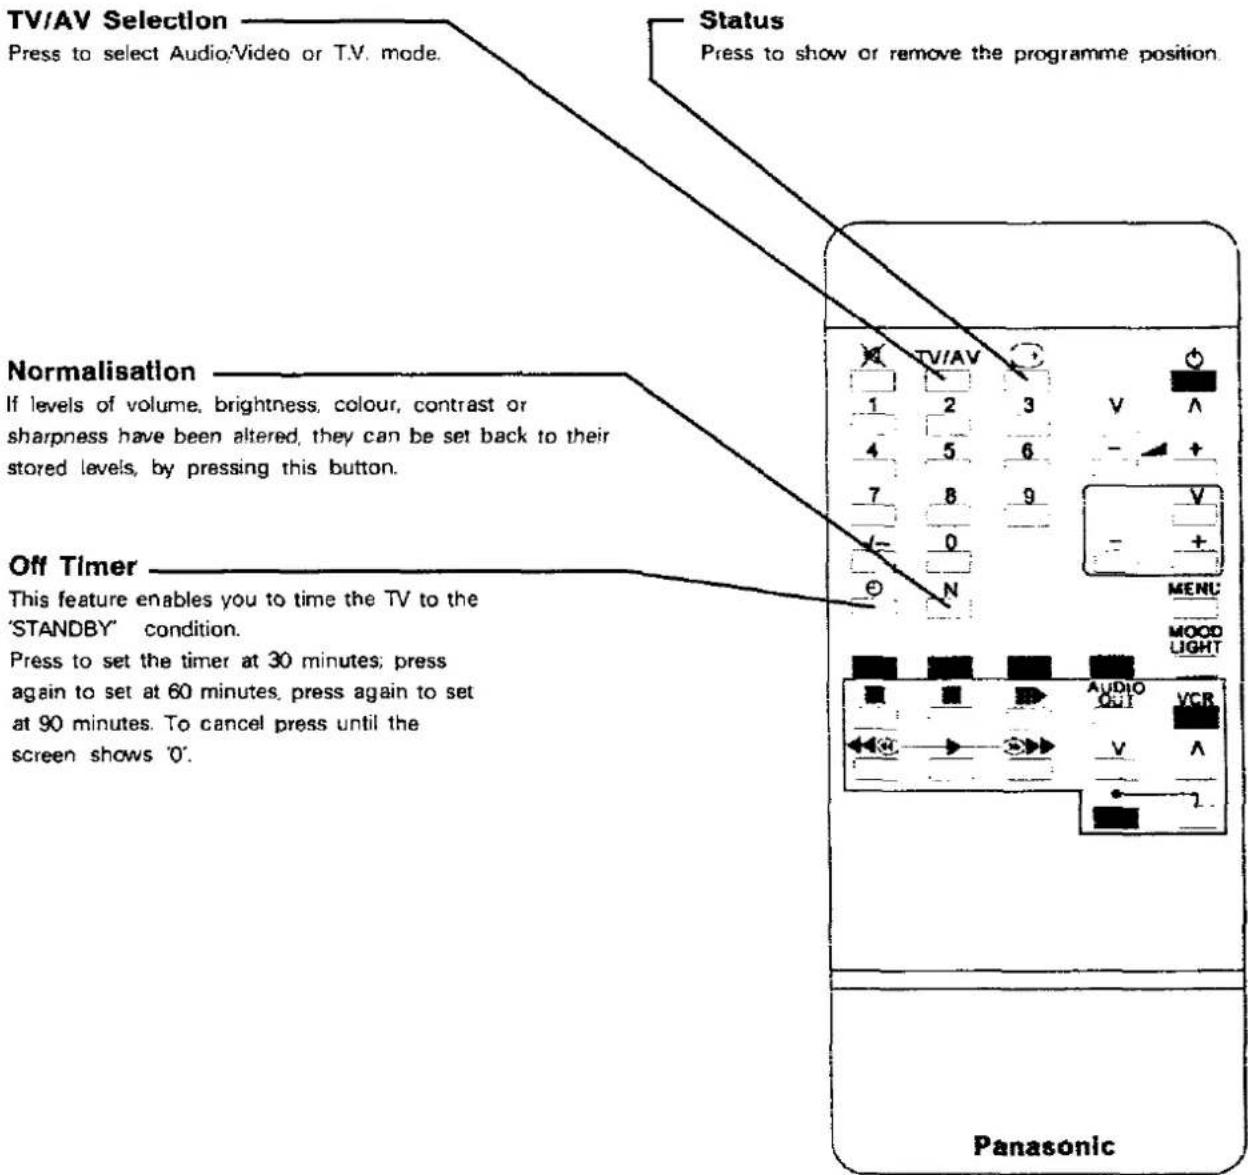
TV/AV Selection
Press to select Audio/Video or T.V. mode.
Normalisation Store
Adjust the volume, brightness, colour, contrast or sharpness to normal viewing levels. Press this button to store these levels in the TV memory.
Video Function Select
Press repeatedly to select function. then use +/- as required.
Colour Up (+) / Down (-)
Displayed as a red bar
Brightness Up (-) / Down (-)
Displayed as a white bar.
Contrast Up (+) / Down (-)
Displayed as a cyan bar
Sharpness Control
Displayed as a green bar
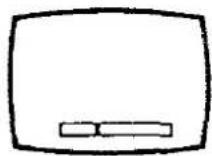
Note. In RGB operation, only the brightness and contrast functions will operate
Normalisation
If levels of volume, brightness, colour, contrast or sharpness have been altered, they can be set back to their stored levels, by pressing this button
Operation of Controls
Note: Certain functions will display a coloured bar on screen for a short period of time.
Programme Up / Down
Press to increase or decrease the programme position by one.
Volume Up / Down
Press to increase / decrease the volume. Displayed as a green bar.
Standby
Press to switch the TV. off for a period of time. To switch back on perform one of the following :
- Press Standby again.
- Select a programme position from 0-9.
- Press the programme up/down on the T.V.
Note : If the T.V. is in standby mode it is not possible to switch it back on using the Power switch (Located at the front of the T.V.).
Sound Mute
Press to mute or restore the sound.
Prog./Channel Selection
Press these to select programme positions or channel numbers.
Programme Position 10 - 50
Press to select double figure programme positions (10-50) and then enter the programme position number using buttons 0-9.
Video Function Select
Press repeatedly to select function, then use +/ - as required.
Colour Up (+) / Down (-)
Brightness Up (+) / Down (-)
Contrast Up (+) / Down (-)
Sharpness Control
Displayed as a red bar.
Displayed as a white bar.
Displayed as a cyan bar.
Displayed as a green bar.
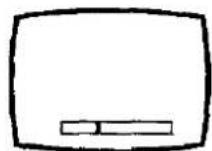
Note : In RGB operation, only the brightness and contrast functions will operate.
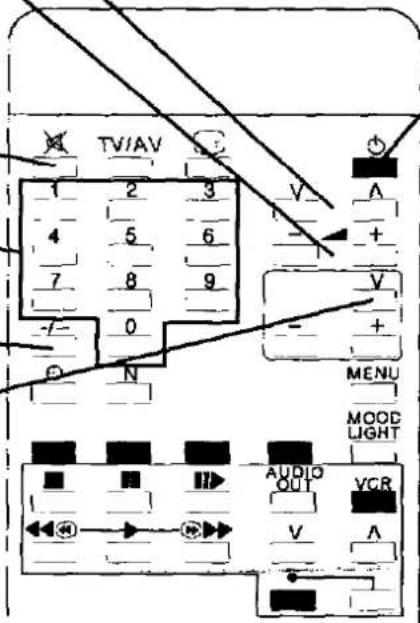
text_image
TV/AV 1 2 3 4 5 6 7 8 9 0 N V A + V + MENU MOOD LIGHT AUDIO OUT VCR V APanasonic
Operation of Controls
text_image
TV/AV Selection Press to select Audio\Video or T.V. mode. Status Press to show or remove the programme position. Normalisation If levels of volume, brightness, colour, contrast or sharpness have been altered, they can be set back to their stored levels, by pressing this button. Off Timer This feature enables you to time the TV to the 'STANDBY' condition. Press to set the timer at 30 minutes; press again to set at 60 minutes, press again to set at 90 minutes. To cancel press until the screen shows '0'. Panasonic MENIC MOOD LIGHT AUDIO VCR V A 2Note :
Certain TV functions have a last position memory, that is to say whatever level was set at the time of switch off will be the level displayed when the receiver is switched on again. See table below for list of last memory functions.
Standby
Programme
Volume
Colour
Brightness
Contrast
Sharpness
Operation of Advanced Features
Note : Loss or removal of the aerial signal while using advanced features may result in mis-operation of the feature. If this situation occurs it is recommended that the TV is returned to normal operation (TV) and then select AV mode, before returning to advanced feature use.
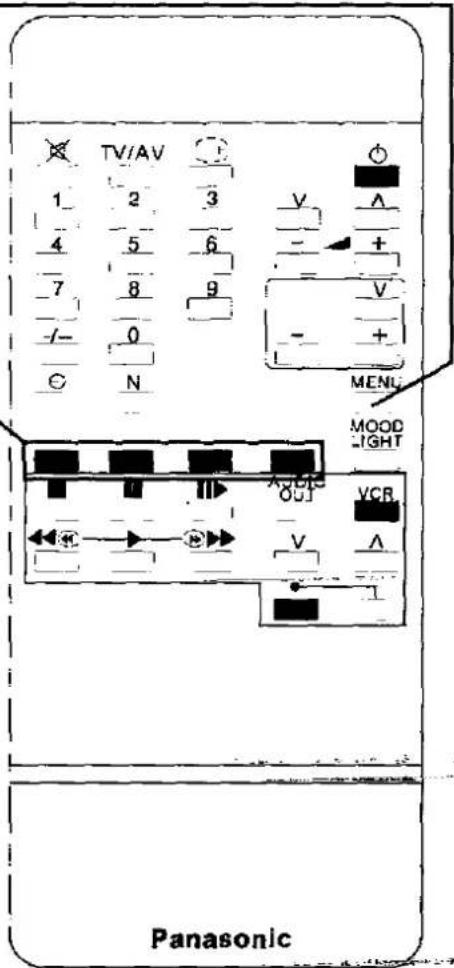
Menu selection
Press for MENU or T.V. operation.


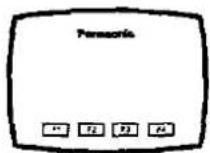
Feature selection
Press to select one of the following :
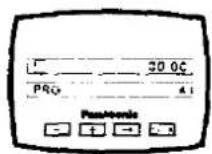
RED (F1)
Calculator,
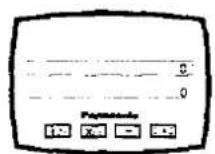
YELLOW (F3)
On Timer,
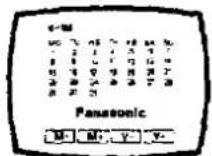
GREEN (F2)
Calendar,
BLUE (F4)
Mood Light.

text_image
TV/AV 1 2 3 4 5 6 7 8 9 - 0 C N V - + V - + MENI MODD LIGHT VCR OUT V PanasonicCalculator
Feature :
An eight digit display that will calculate to eight decimal places, with Addition / Subtraction / Multiplication and Division.
Method :
- Enter the first line using programme / channel selection.
- Press RED or GREEN to select +/-/x/÷
- Enter second line of calculation.
- Press YELLOW for answer.
- Press BLUE to clear the calculation.
NOTE: To enter a Decimal Point press -/-.
To exit press MENU or Normalisation.
Calendar
Feature :
Displays any month / year from 01 / 1901 to 12 / 2100
Method 1:
- Press programme / channel selection for direct selection of month and year.
Method 2:
- Press RED to display previous months.
- Press GREEN to display future months.
- Press YELLOW to display previous years.
- Press BLUE to display future years.
To exit press MENU or Normalisation.
Operation of Advanced Features
On Timer
Feature :
Switches the T.V. on after an elapsed time.
Method :
- Press RED or GREEN to decrease or increase the hours.
- Press YELLOW, then RED or GREEN to decrease or increase the minutes in blocks of ten minutes.
- Press YELLOW, then RED or GREEN to decrease or increase the programme position (0-50).
- Press BLUE to store (the display will be red).
- Press BLUE again to cancel or press standby to begin.
To exit press MENU or Normalisation.
Mood Light
Feature :
Displays a selection of 7 colours to enhance the atmosphere and set the mood.
Method :
- Repeatedly press MOOD LIGHT to select colour.
To exit press MENU or Normalisation.
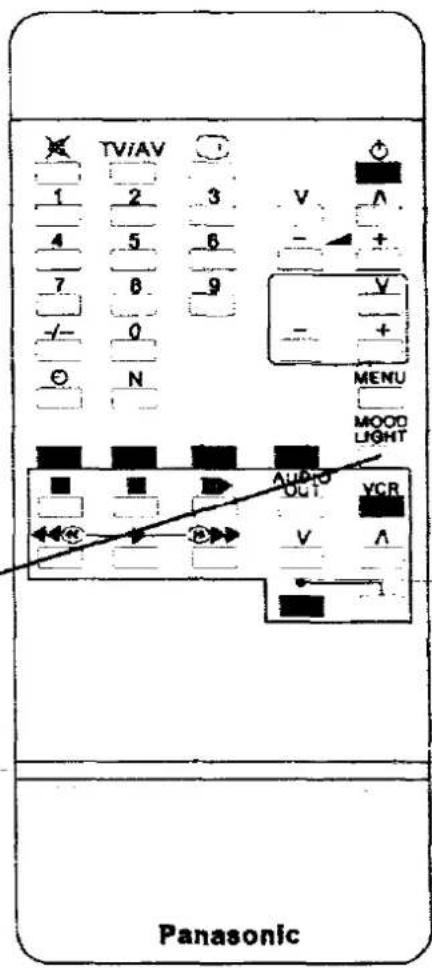
text_image
TV/AV 1 2 3 V 4 5 6 - + 7 8 9 V - 0 - + O N MENU MOOD LIGHT AUDIO UCT YCR V A PanasonicRemote Control Operation for VCR
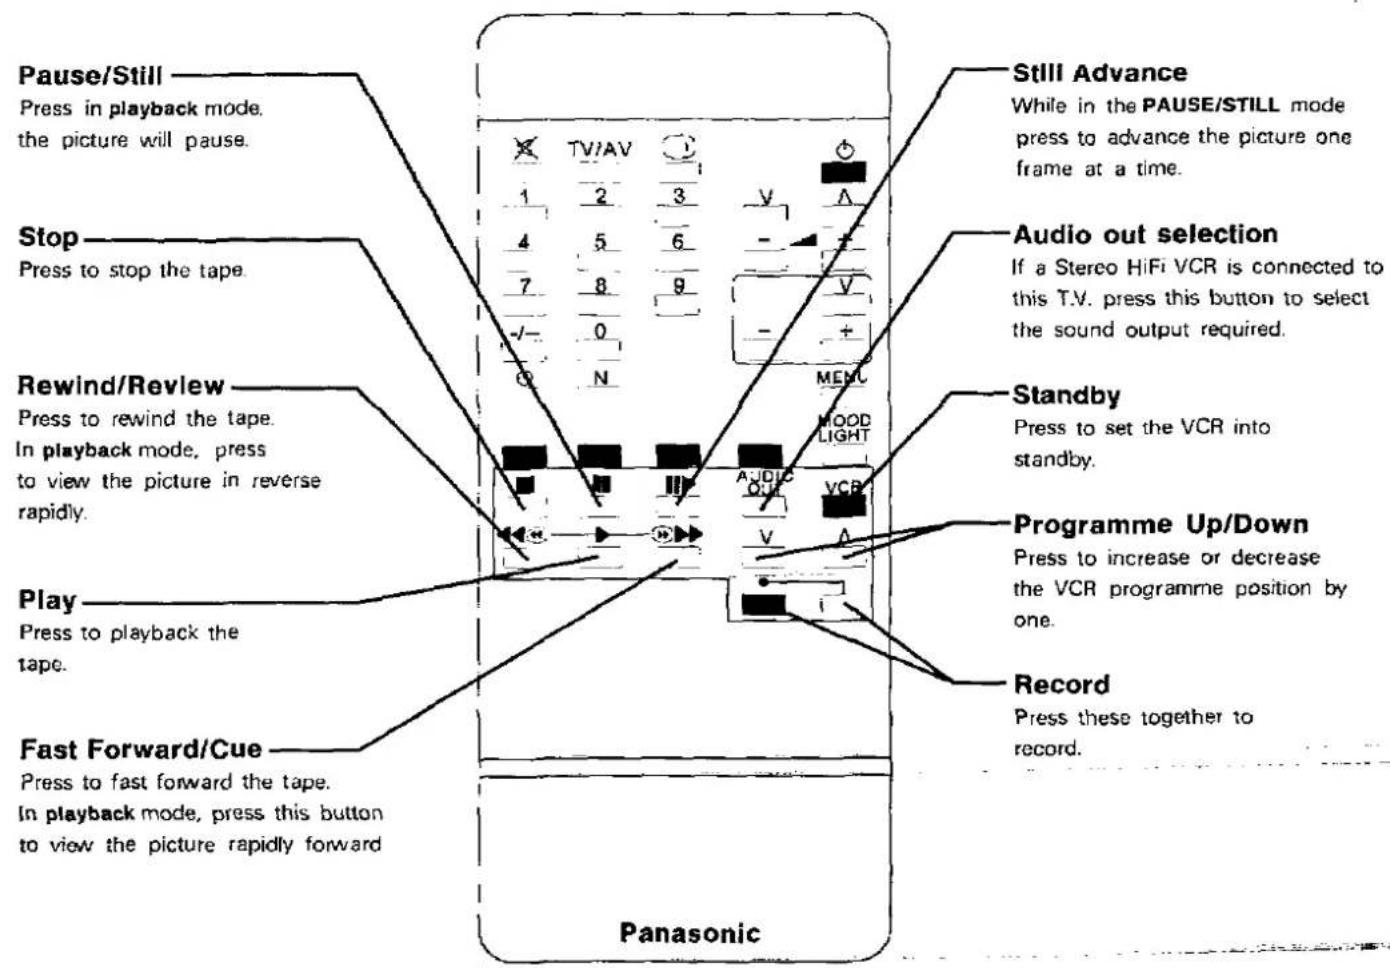
This infra-red remote control is designed specifically to be used with selected Panasonic VCR's, consult your dealer for details. Some VCR's have different functions, so to ensure compatibility, please refer to the VCR instruction book or consult VCR function.
VCR Functions Operation
text_image
Pause/Still Press in playback mode. the picture will pause. Stop Press to stop the tape. Rewind/Review Press to rewind the tape. In playback mode, press to view the picture in reverse rapidly. Play Press to playback the tape. Fast Forward/Cue Press to fast forward the tape. In playback mode, press this button to view the picture rapidly forward Panasonic Still Advance While in the PAUSE/ STILL mode press to advance the picture one frame at a time. Audio out selection If a Stereo HiFi VCR is connected to this T.V. press this button to select the sound output required. Standby Press to set the VCR into standby. Programme Up/Down Press to increase or decrease the VCR programme position by one. Record Press these together to record.Audio / Video (AV) Connections
Notes :
- Cables shown are not supplied with this T.V. set.
Audio / Video Inputs
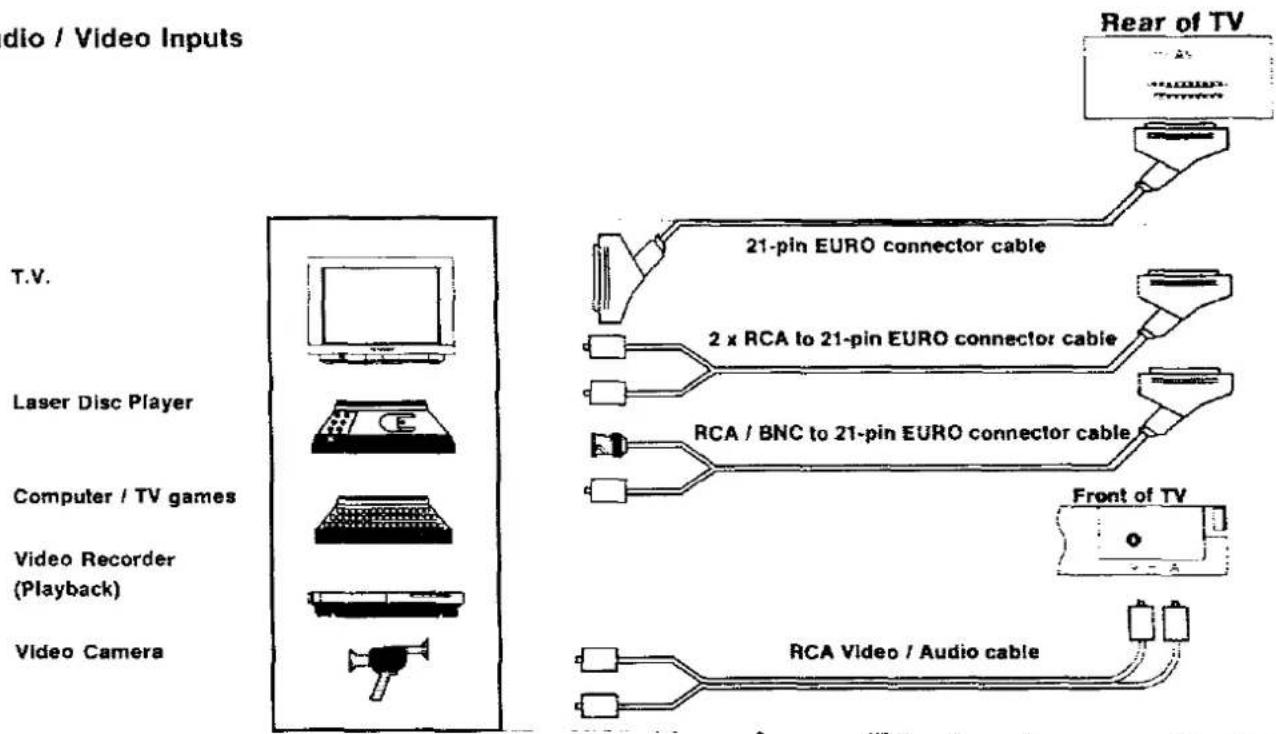
flowchart
graph LR
    A["Video Camera"] --> B["Laser Disc Player"]
    B --> C["Computer / TV games"]
    C --> D["Video Recorder (Playback)"]
    D --> E["T.V."]
    E --> F["Rear of TV"]
    F --> G["21-pin EURO connector cable"]
    G --> H["2 x RCA to 21-pin EURO connector cable"]
    H --> I["RCA / BNC to 21-pin EURO connector cable"]
    I --> J["Front of TV"]
    J --> K["RCA Video / Audio cable"]
Audio / Video Outputs

flowchart
graph TD
    A["TV / Monitor"] --> B["Video Recorder (Record)"]
    C["Rear of TV"] --> D["21-pin EURO connector cable"]
    D --> E["2 x RCA to 21-pin EURO connector cable"]
    E --> F["RCA / BNC to 21-pin EURO connector cable"]
Important note
- Do not connect a computer with TTL output (5V) to this set.
- Do not connect more than one AV Input at any time.
Additional Information
AV 21 pin terminal
| 21 | Socket earth. | 20 | CVBS in. (video) | ||
| 19 | CVBS out. (video) | 18 | RGB status earth. | ||
| 17 | CVBS earth. | 16 | Status RGB. | ||
| 15 | Red in. | 14 | -- | ||
| 13 | Red earth. | 12 | -- | ||
| 11 | Green in. | 10 | -- | ||
| 9 | Green earth. | 8 | -- | ||
| 7 | Blue in. | 6 | Audio in (L). | ||
| 5 | Blue earth. | 4 | Audio earth. | ||
| 3 | Audio out (L). | 2 | Audio in (R). | ||
| 1 | Audio out (R). |
General Information
Sleep Feature
If the set is not switched off when the TV station stops transmitting at the end of the evening, it will automatically go to standby mode after 30 minutes.
Note: This function will not operate when the TV is in AV mode.
Service
To obtain service please contact your local Panasonic dealer, and quote the model number and serial number (both are located at the rear of the TV).
T.V. Games / home Computers
Extended use of TV games or home computers with any television set can cause a permanent 'shadow' on the screen. This type of irreversible picture tube damage, can be limited by observing the following points:
(a) Reduce the brightness and contrast levels to a minimum viewing level
(b) Do not operate the television set for a continuous period of time while using TV games or home computers.
This type of picture tube damage, is not an operating defect, and as such is not covered by the Panasonic warranty
Accessories: 1 remote control (TNQ8E0447). 2 R6 (AA) size batteries. Loop Aerial.
Trouble Shooting
Specifications
Before calling for service, make a few simple checks as follows:
Symptoms Checks
No picture Not plugged into A.C. supply.
No sound Not switched on.
Check contrast,
brightness
and volume settings.
Normal picture Check volume level.
No sound Check sound mute button
on remote control.
No colour Check colour level
Normal sound
Interference on screen Electrical appliances,
Distorted sound cars, motorcycles.
fluorescent lights.
Multiple image. Direction, location and/or
Snowy picture. aerial connection.
Distorted sound.
Remote control mal- Replace batteries.
functions or reduction Clean indicator window. in operating distance.
Power source 240V AC. 50Hz
Power consumption 52 W
Receiving system PALI
Picture tube 36 cm V FST 90°
Audio output 1 x 3W
Terminals Aerial
AV
Rear of TV
21 pin terminal
(Audio.Video in/out)
(RGB in)
Front of TV
1 X RCA Video in
1 x RCA Audio in
Dimensions H 370mm
W 380mm
D 380mm.
Weight 12 Kg
Note. Specifications are subject to change without notice. Weight and dimensions shown are approximate.
Index
| Subject | Page | Subject | Page |
| A | P | ||
| Aerial | 3 | Pause/Still | 9 |
| Audio Out Selection | 9 | Play | 9 |
| Prog./Channel: Selection | 5 | ||
| B | Programme Position 10 - 50 | 5 | |
| Programme up/down(TV) | 5 | ||
| Programme up/down(VCR) | 9 | ||
| Batteries | 2,12 | ||
| Brightness Up/Down | 4,5 | ||
| R | |||
| C | Record | 9 | |
| Rewind/Review | 9 | ||
| Calculator | 7 | ||
| Calendar | 7 | ||
| Colour Up/Down | 4,5 | S | |
| Contrast Up/Down | 4,5 | ||
| Search: (Tuning) | 3 | ||
| F | Service | 12 | |
| Sharpness Control | 4,5 | ||
| Sleep Feature | 12 | ||
| Fast Forward Cue | 9 | Sound Mute | 5 |
| Feature Selection | 7 | Standby (TV) | 5 |
| Standby (VCR) | 9 | ||
| M | Status | 6 | |
| Still Advance | 9 | ||
| Menu Selection | 7 | Stop | 9 |
| Mood Light | 7,8 | Store (Tuning) | 3 |
| N | T | ||
| Normalisation | 4,6 | Tuning | 3 |
| Normalisation Store | 4 | TV/AV Selection | 4,6 |
| O | |||
| V | |||
| Off Timer | 6 | ||
| On Timer | 7,8 | Video Function Select | 4,5 |
| On/Off | 3 | Volume Up/Down | 4,5 |
602
Panasonic (U.K.) Ltd
WILLOUGHBY ROAD.
BRACKNELL,
BERKS,
RG12 4FP.