
TX-28G1 - Fernseher PANASONIC - Kostenlose Bedienungsanleitung
Finden Sie kostenlos die Bedienungsanleitung des Geräts TX-28G1 PANASONIC als PDF.


Benutzerfragen zu TX-28G1 PANASONIC
0 Frage zu diesem Gerät. Beantworten Sie die, die Sie kennen, oder stellen Sie Ihre eigene.
Eine neue Frage zu diesem Gerät stellen
Laden Sie die Anleitung für Ihr Fernseher kostenlos im PDF-Format! Finden Sie Ihr Handbuch TX-28G1 - PANASONIC und nehmen Sie Ihr elektronisches Gerät wieder in die Hand. Auf dieser Seite sind alle Dokumente veröffentlicht, die für die Verwendung Ihres Geräts notwendig sind. TX-28G1 von der Marke PANASONIC.
BEDIENUNGSANLEITUNG TX-28G1 PANASONIC
Operating Instructions
Colour Television
Fastext
NICAM Digital Stereo
Model
TX-28G1
TX-25G1
(U.K. Standard)
Panasonic
Please read these instructions completely, before operating this set
Dear Panasonic Customer
Welcome to the Panasonic family of customers We hope that you have many years of enjoyment from your new colour television This is a very sophisticated TV: the best way to understand the features is to read this book thoroughly, before operating the set.
Warnings and Precautions
natural_image
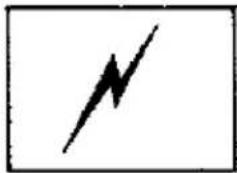
Simple black lightning bolt symbol on white background (no text or labels)This TV set is designed to operate on AC 240V, 50Hz.
natural_image
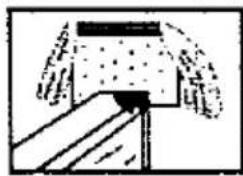
Simple line drawing of a mechanical component or device with no visible text, numbers, or symbols.To prevent damage which might result in electric shock or fire, do not expose this TV set to rain or excessive moisture.
natural_image
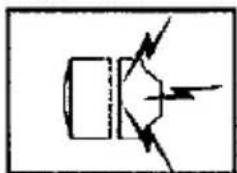
Pure electrical circuit lines without any symbolsWARNING: HIGH VOLTAGE !!!
Do not remove the rear cover as live parts are accessible when it is removed. There are no user serviceable parts inside.
natural_image
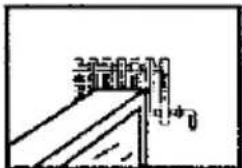
Simple line drawing of a roof structure with no text or symbolsAvoid exposing the TV set to direct sunlight and other sources of heat.
natural_image
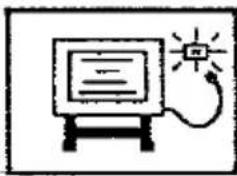
Simple line drawing of a monitor with a light bulb and cable, no text or symbols presentRemove the mains plug from the wall socket when the TV set is not used for a prolonged period of time, especially when retiring at night
natural_image
Simple line drawing of a smiling cartoon TV with radiating lines (no text or symbols)CABINET AND PICTURE TUBE CARE
Remove the mains plug from the wall socket. The cabinet and picture tube can be kept in good condition by simply wiping with a clean, soft cloth moistered with mild detergent and water. Do not use solutions containing benzol or petroleum.
natural_image
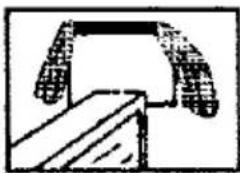
Simple line drawing of a mechanical component or bracket with no text or symbolsAdequate ventilation is essential to prevent failure of electrical components
FOR YOUR SAFETY PLEASE READ THE FOLLOWING TEXT CAREFULLY.
This appliance is supplied with a fitted three-pin mains plug for your safety and convenience. A 5 amp fuse is fitted in this plug. If the fuse is replaced then the replacement fuse must be 5 amp rated and should be approved by ASTA or BSI to BS1362. Check for the ASTA mark on the BSI mark on the body of the fuse.
If the fitted plug has a removable fuse cover you must ensure that it is refitted when the fuse is replaced if you lose the fuse cover the plug must not be used until a replacement cover is obtained. Replacement fuse covers can be purchased through your local Panasonic Dealer
If the fitted plug is unsuitable for the socket outlet in your home then the fuse should be removed and the plug cut off and disposed of safely. There is danger of severe electrical shock if the cut off plug is inserted into any 13 amp socket.
If a new plug is to be fitted please observe the wiring code as shown below If in any doubt please consult a qualified electrician.
text_image
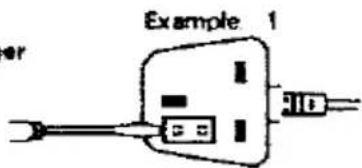
Example 1 erHow to replace the fuse. Lift open the fuse compartment, in the mains plug, with a screwdriver, and replace the fuse and fuse cover( See example. 1 )
IMPORTANT :- The wires in the mains lead of this appliance are coloured in accordance with the following code :- BLUE : NEUTRAL BROWN : LIVE
As the colours of the wires in the mains lead of this appliance may not correspond to the markings identifying the terminals in your plug, proceed as follows :-
- The BLUE wire must be connected to the terminal marked 'N' or coloured black
- The BROWN wire must be connected to the terminal marked 'L' or coloured red.
IMPORTANT NOTE: Under no circumstances should either of these wires be connected to the Earth terminal of the three pin plug, marked with the letter 'E' or the earth symbol 12
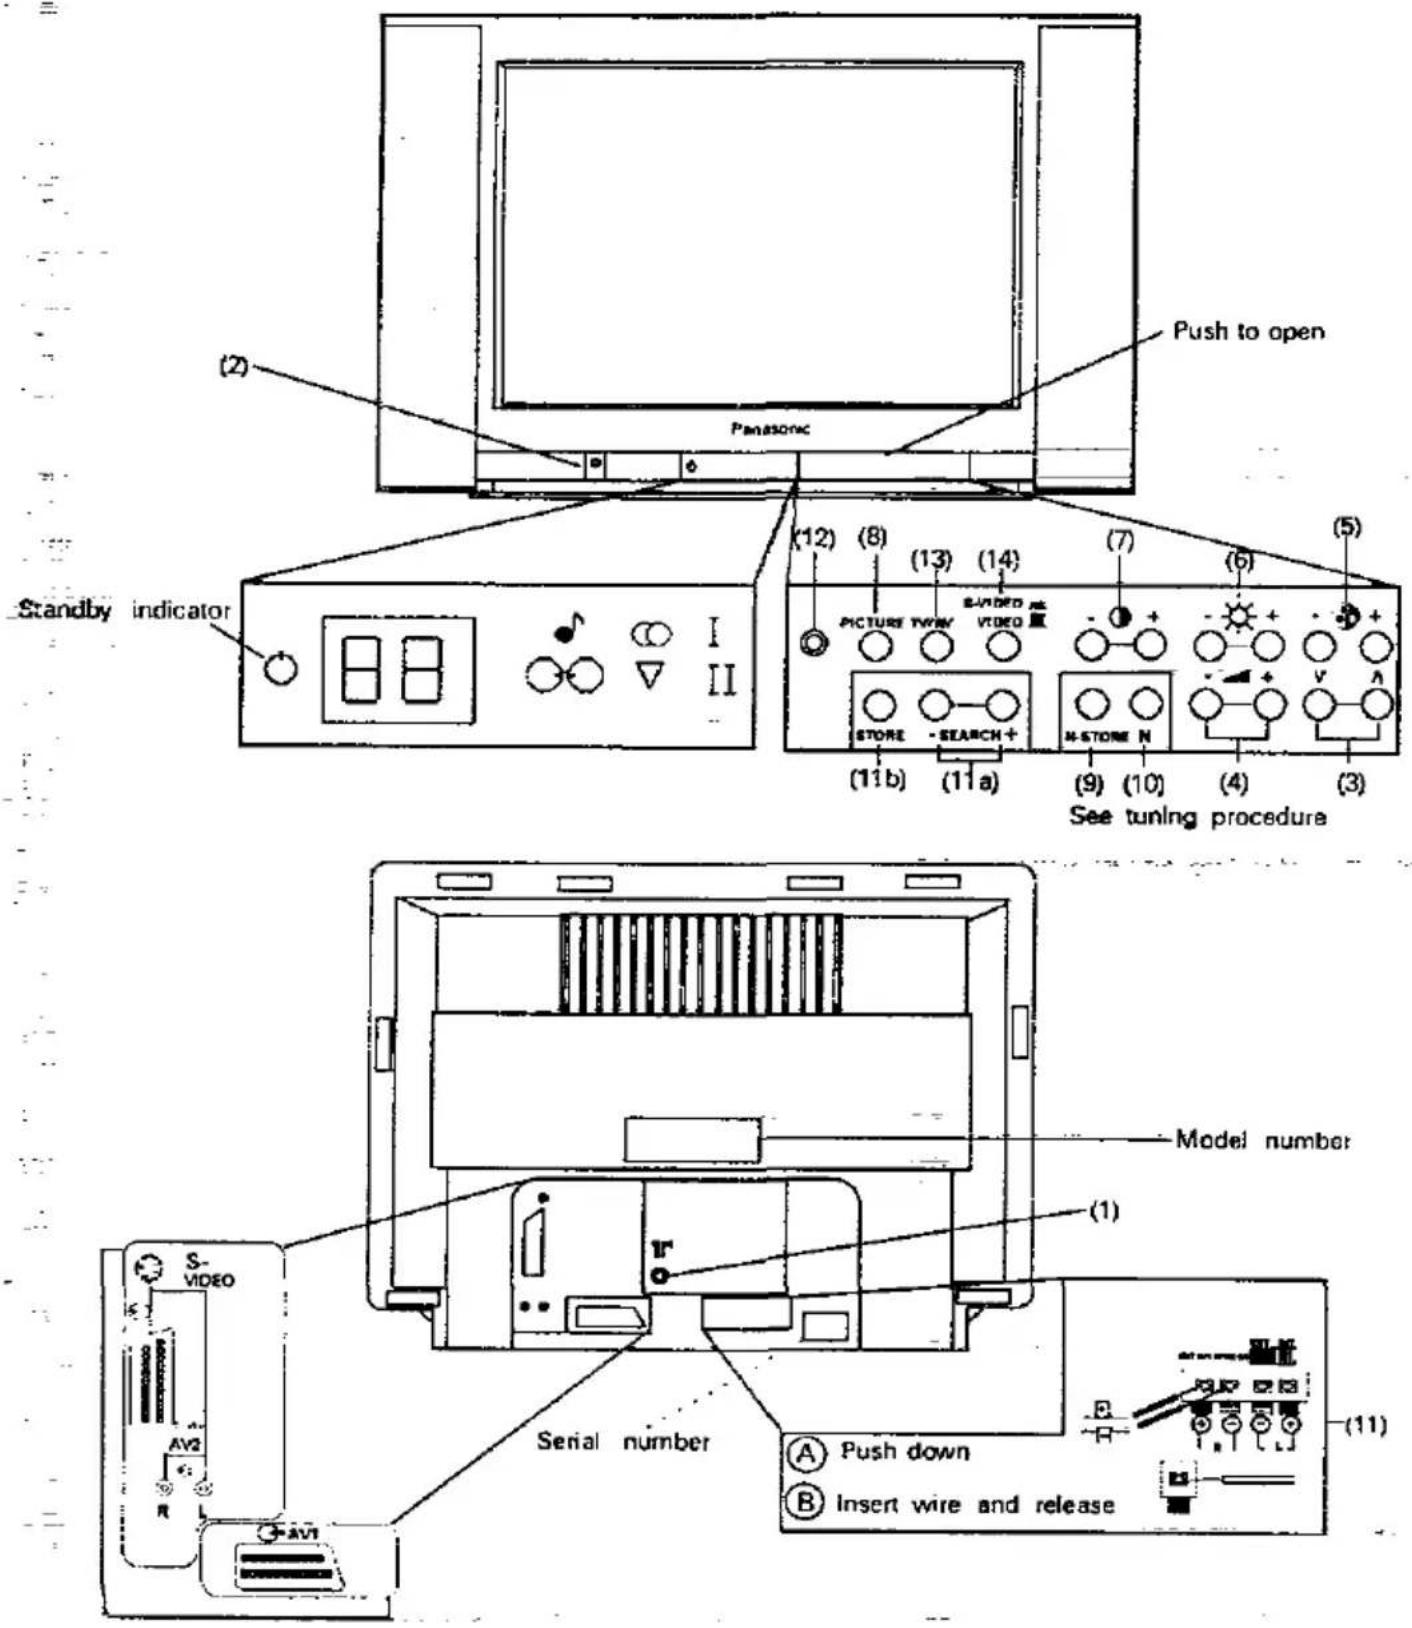
Location of Controls
Contents
Location of Controls....2
Battery Installation and Replacement 3
Audio / Video Connections....A
21 Pin Terminal and 4 pin S-VHS details....6
Tuning Procedure 7
Operation of TV Controls....8
Remote Control Operation for TV. 10
NICAM Stereo Sound System 13
Remote Control Operation for Teletext .....14
Remote Control Operation for VCR....18
Remote Control Transmitet .....19
General Information....20
Trouble Shooting 21
Specifications 21
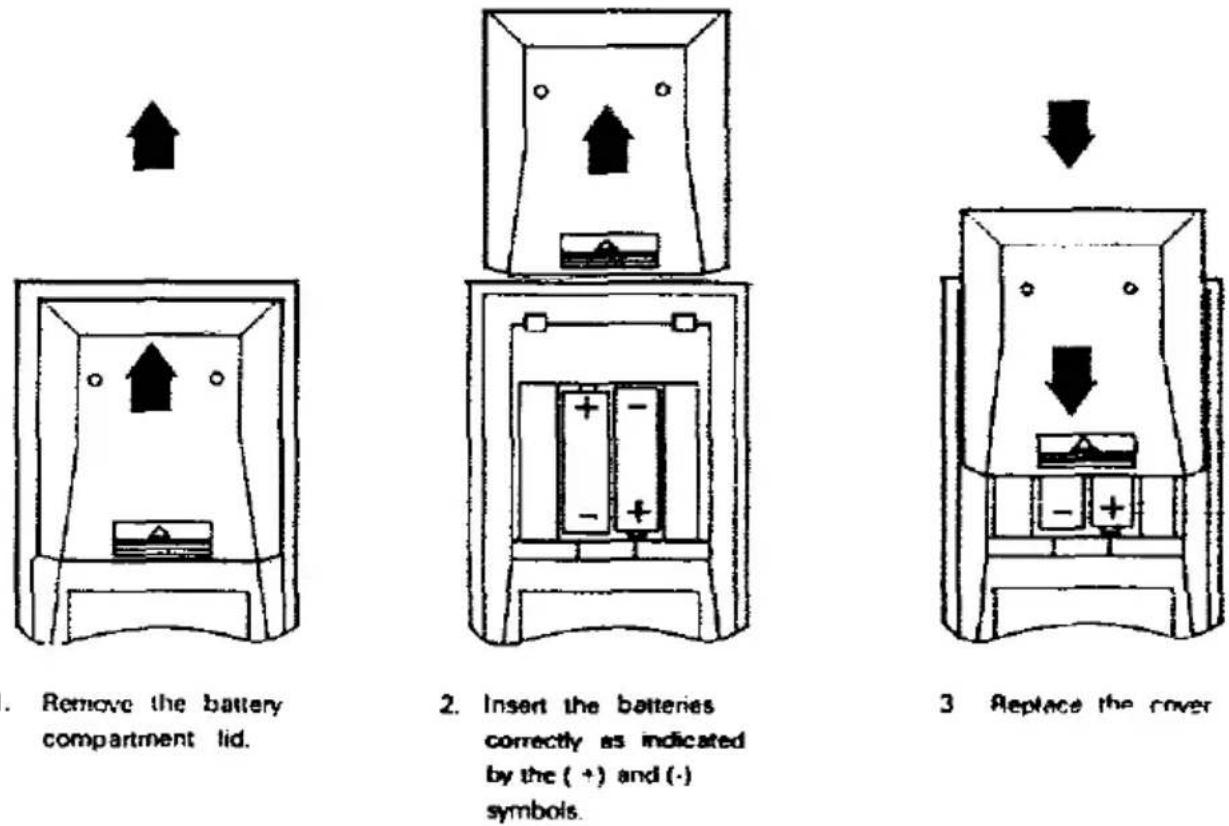
Battery Installation and Replacement
(Remote Control Transmitter)
Batteries: Use two 'R03' or 'UM-4' dry cells (supplied).
BATTERY PRECAUTIONS
- Do not use an old battery with a new one.
- Ensure the batteries are inserted correctly.
- Do not use rechargeable (Ni-Cad) batteries. They are partially different in shape and performance and may not ensure the desired function.
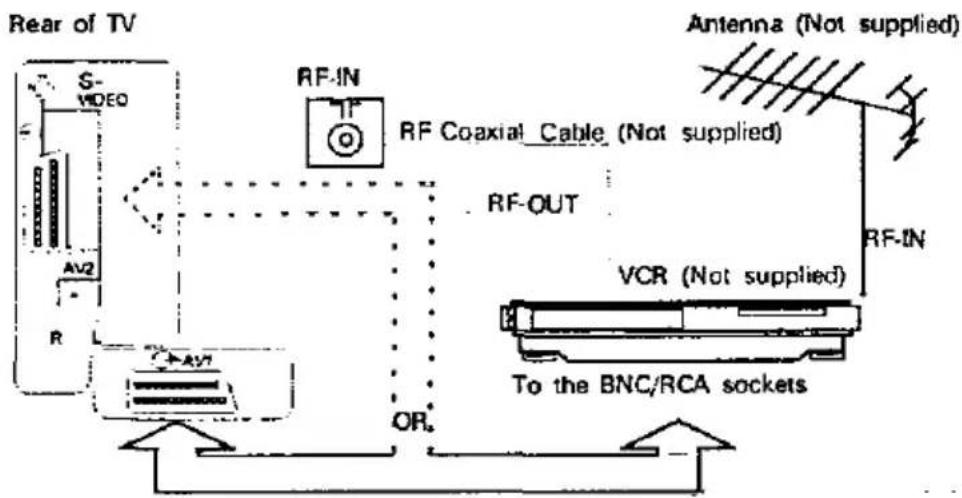
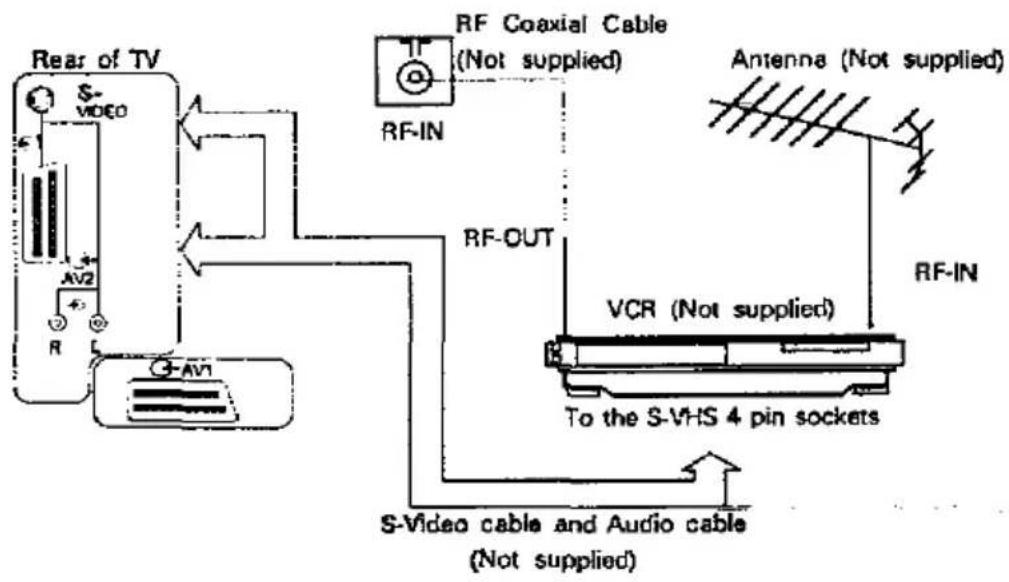
Audio / Video Connections
To a VCR not equipped with a 21 pin terminal or S-VHS 4 pin terminal
flowchart
graph TD
    A["Rear of TV"] --> B["S-VIDEO"]
    B --> C["AV2"]
    C --> D["R"]
    D --> E["AV7"]
    E --> F["OR"]
    F --> G["RF-IN"]
    G --> H["RF Coaxial Cable (Not supplied)"]
    H --> I["RF-OUT"]
    I --> J["VCR (Not supplied)"]
    J --> K["RF-IN"]
    K --> L["Antenna (Not supplied)"]
    L --> M["To the BNC/RCA sockets"]
21-pin to BNC/RCA cable (Not supplied)
To VCR equipped with S-Video (S-VHS) 4 pin terminal
flowchart
graph TD
    A["Rear of TV"] --> B["RF-IN"]
    B --> C["RF-Coaxial Cable (Not supplied)"]
    C --> D["RF-IN"]
    D --> E["VCR (Not supplied)"]
    E --> F["To the S-VHS 4 pin sockets"]
    F --> G["S-Video cable and Audio cable (Not supplied)"]
    H["Antenna (Not supplied)"] --> I["RF-IN"]
    I --> J["RF-OUT"]
    J --> K["AV1"]
    K --> L["AV2"]
    L --> M["R"]
    M --> N["S-VIDEO"]
Audio / Video Connections
To a VCR equipped with a 21 pin terminal
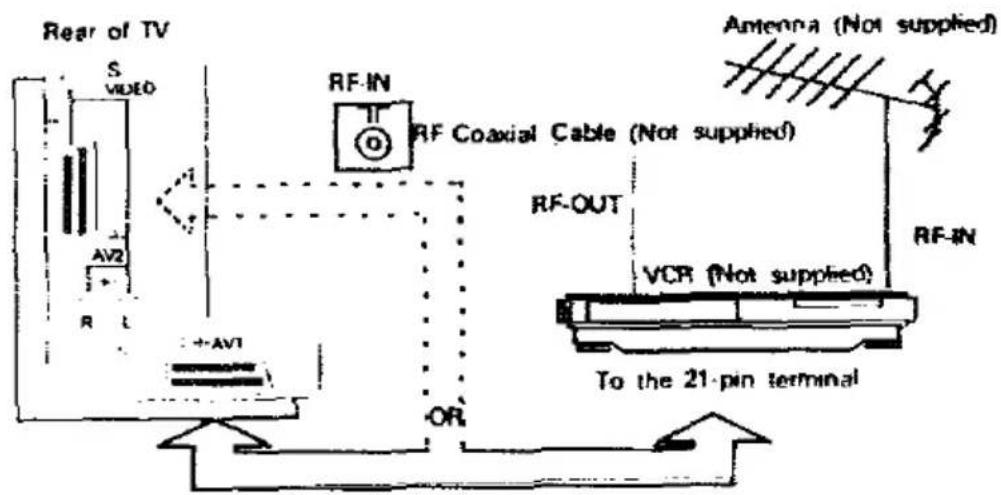
text_image
Rear of TV S VIDEO AV2 R L RF-IN RF Coaxial Cable (Not supplied) RF-OUT VCR (Not supplied) RF-IN To the 21-pin terminal OR Amena (Not supplied)21-pin cable (Not supplied)
Important note
-
Do not connect a computer with TTL output (5V) to this set
-
RGB input from a computer or TV game must be connected to the AV1 terminal. Connecting a VCR to the AV1 terminal on the TV via a 21-pin connector, will automatically switch the TV to AV mode when play is selected.
-
AV2 may be used for S-VHS video playback on either the 21 pin terminal or the 4 pin terminal. If two S-VHS inputs are connected simultaneously, the 4pin terminal will have priority over the 21pin terminal. If S-VHS Video is input on the 21pin AV2 terminal the S-VHS/VIDEO switch on the front of the TV must be in the S-VHS position, ensuring correct display of the picture.
21 Pin Terminal and 4 pin S-VHS details
| AV24 Pin S-VHS Socket | |
| 1 | Luminance earth |
| 2 | Chrominance earth |
| 3 | Luminance in |
| 4 | Chrominance in |
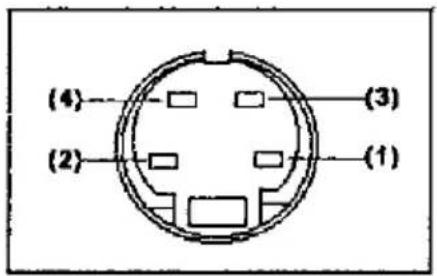
text_image
(4) (2) (3) (1)
text_image
(21) (19) (17) (15) (13) (11) (9) (7) (5) (3) (1) —(20) —(18) —(16) —(14) —(12) —(10) —(8) —(6) —(4) —(2)| AV1 | |
| 1 | Audio out (B). |
| 2 | Audio in (R). |
| 3 | Audio out (L). |
| 4 | Audio earth. |
| 5 | Blue earth. |
| 6 | Audio in (L). |
| 7 | Blue in. |
| 8 | -- |
| 9 | Green earth. |
| 10 | -- |
| 11 | Green in. |
| 12 | -- |
| 13 | Red earth. |
| 14 | -- |
| 15 | Red in. |
| 16 | Status RGB. |
| 17 | CVBS earth. |
| 18 | RGB status earth. |
| 19 | CVBS out. (video) |
| 20 | CVBS in. (video) |
| 21 | Socket earth. |
| AV2 (See note 1) | |
| 1 | Audio out (R). |
| 2 | Audio in (R). |
| 3 | Audio out (L). |
| 4 | Audio earth. |
| 5 | Blue earth. |
| 6 | Audio in (L). |
| 7 | -- |
| 8 | -- |
| 9 | Green earth. |
| 10 | -- |
| 11 | -- |
| 12 | -- |
| 13 | Red earth. |
| 14 | -- |
| 15 | S.C - In |
| 16 | -- |
| 17 | CVBS earth. |
| 18 | RGB status earth. |
| 19 | CVBS out. (video) |
| 20 | CVBS in. (S-Y In) |
| 21 | Ground |
Note:
- Pins 15 and 20 of the AV2 21 pin terminal are dependent on AV2 S-VHSMIDEO switching.
Tuning Procedure
Please refer to location of controls on page 2
Programme Positions
Note
There are 50 programme positions available i.e. 50 positions on which to store different channels When tuning TV into a VCR, position '0' should be selected Programme positions can be selected in a number of ways (see below)
Operation
Method 1.
Select a programme position (1-50), using the programme up/down buttons on the T.V. or remote control.
Method 2.
(If channel numbers are known)
Select a programme position (1-50)
Press the button marked 'C' on the remote control.
The display will now show
Press the SEARCH(11) up or down buttons until the desired channel is received.
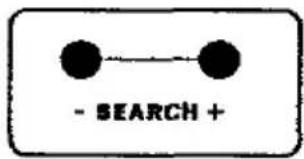
text_image
- SEARCH +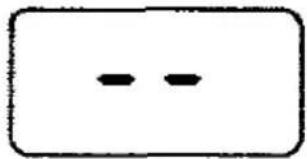
natural_image
Simple geometric shape with two horizontal dashed lines inside a rounded rectangle (no text or symbols)Enter the desired channel number e.g to receive channel 61. push buttons 5' and 1' consecutively
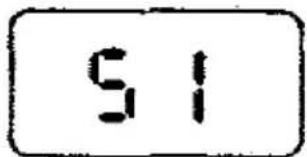
text_image
51Press the STORE(11b) button to store this channel in the T.V.'s memory.
Press the STORE(11b) button to store this channel in the TV's memory
text_image
STORE
text_image
STORERepeat this procedure, using different programme positions to store other channels.
Repeat this procedure, using different programme positions to store other channels. Consult your dealer about the channel numbers for your area
Operation of TV Controls
Please refer to the location of controls diagram on page 2.
(1) Aerial Connection
Connect the aerial lead to the socket marked "T" at the rear of the TV.
(9) Normalisation Store
Adjust the volume, brightness, colour, contrast, bass, treble and balance to normal viewing levels. Press this button to store these levels in the TV memory.
(2) Power Switch
Push to switch the TV on, push again to switch off.
(10) Normalisation
If levels of volume, brightness, colour, contrast, bass, treble and balance have been altered, they can be set back to their stored levels, by pressing this button.
(3) Programme Up/Down
Press once to increase or decrease the programme position by one.
(11) External Loudspeakers
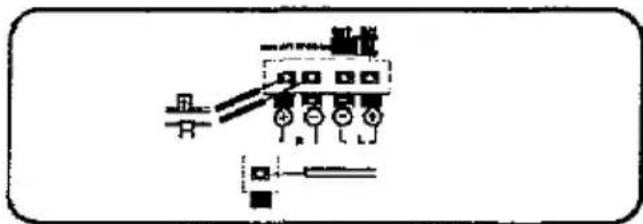
External loudspeaker terminals are provided at the rear of the TV for the connection of a pair of Hi-Fi loudspeakers of 4-8 Ohm impedance. The speakers are switchable from internal to external by means of a slide switch situated above the terminals. To select external speakers, move the switch to the EXT. position. The internal speakers will be disconnected while the external speakers are selected.
(4) Volume Up/Down
Press the '+' button to increase the sound level. Press the '-' button to decrease the sound level. Displayed on screen as a Green bar.
(5) Colour Up/Down
Press the '+' button to increase the colour level. Press the '-' button to decrease the colour level. Displayed on screen as a Red bar.
natural_image
Pure electrical circuit lines without any symbols(6) Brightness Up/Down
Press the '+' button to increase the brightness level. Press the '-' button to decrease the brightness level. Displayed on screen as a White bar.
(12) Headphones
A 3.5mm stereo headphone socket is available for the connection of a pair of 8-300 Ohm impedance headphones. The TV speakers will be automatically disconnected while the headphones are connected.
(7) Contrast Up/Down
Press the '+' button to increase the contrast level. Press the '-' button to decrease the contrast level. Displayed on screen as a Cyan bar.
(8) Picture Control
Turn left or right for a softer or sharper picture.
Operation of TV Controls
Please refer to the location of controls diagram on page 2
(13) TV/AV Selection
Terminals are available at the rear of the TV for direct audio/video inputs or outputs. To select these terminals, press the TV/AV button. This selects AV1, press again to select AV2, press again to return to IV mode
AV2 has a connection for VCR's equipped with Super VHS (S-VHS). refer to your VCR operating instructions for full details.
Examples of AV connections are shown on pages 4 and 5.
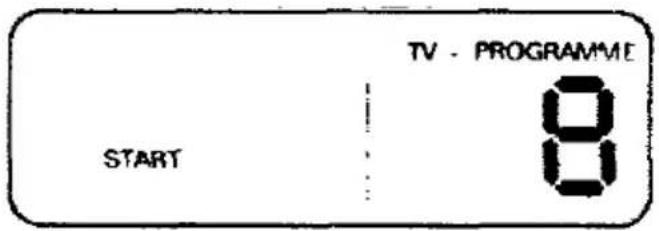
text_image
TV - PROGRAMME START 8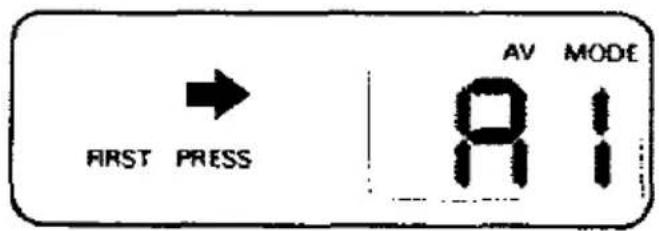
text_image
FIRST PRESS AV MODE 81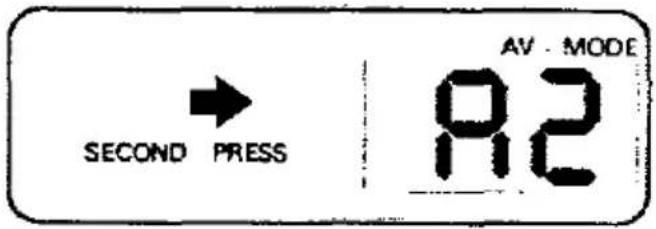
text_image
AV - MODE SECOND PRESS 92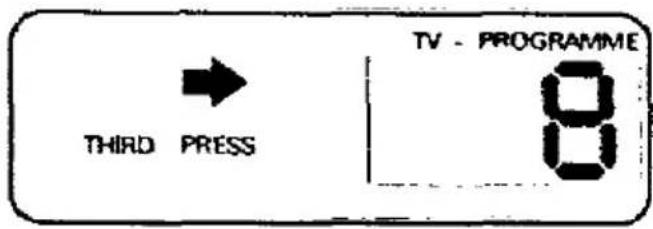
text_image
THIRD PRESS TV - PROGRAMME 8(14) AV2 S-VHS/Video switching
With this button in the 'IN' position, the AV2 setting will change the Composite video to S-VHS video, providing that the VCR is a Super-VHS (S-VHS) type and a suitable connection is made to the S-VHS input.
Remote Control Operation for TV
Please refer to the remote control diagram on page 19
(15) Standby
Press this button to switch the TV, off for short periods Press again to switch on or select a programme position from 0-9
natural_image
Simple diagram with a circle containing an internal symbol, enclosed in a rectangle (no text or labels)(16) Prog./Channel/Page Selection
Press these buttons to select programme positions, channel numbers or Teletext pages.
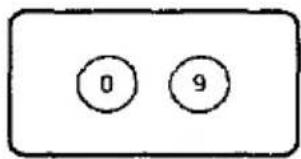
text_image
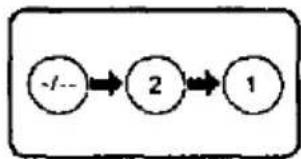
0 9(17) Programme Position 10 - 50
To select double figure programme positions (10-50), press this button and then enter the programme position number using buttons 0-9.
flowchart
graph LR
    A["-1"] --> B["2"]
    B --> C["1"]
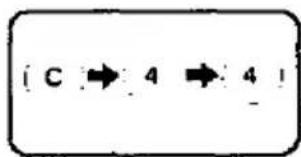
(18) Direct Channel Selection
Press this button, the display will now show '-. Now enter the channel number, using buttons 0-9 on the keyboard. To select channel number 44, press buttons '4' and '4' consecutively
NOTE. The channel number indication changes back to the previously selected programme position number.
flowchart
graph LR
    A["C"] --> B["4"]
    B --> C["4"]
(19) Programme Up/Down
Press the up/down buttons to increase/decrease the programme position by 1.
text_image
A V(20) Volume Up/Down
Press the '+' button to increase the sound level Press the '-' button to decrease the sound level Displayed on screen as a Green bar
text_image
Simple diagram with a central plus sign and a triangle inside an oval, enclosed in a rectangle.(21) Colour Up/Down
Press the '+' button to increase the colour level. Press the '-' button to decrease the colour level. Displayed on screen as a Red bar
natural_image
Simple line drawing of a rectangular frame with a central dashed circle and a plus sign (no text or symbols)(22) Brightness Up/Down
Press the '+' button to increase the brightness level. Press the '-' button to decrease the brightness level. Displayed on screen as a White bar.
natural_image
Simple line drawing of a sun with plus and minus signs inside a rounded rectangle (no text or symbols)(23) Contrast Up/Down
Press the 'r' button to increase the contrast level. Press the '-' button to decrease the contrast level. Displayed on screen as a Cyan bar.
text_image
(- ) + :Remote Control Operation for TV
Please refer to the remote control diagram on page 19
(24) Bass Up/Down
Press the '+' button to increase the bass level Press the '-' button to decrease the bass level Displayed on screen as a Blue bar
text_image
9' - +(25) Treble Up/Down
Press the '+' button to increase the treble level Press the '-' button to decrease the treble level Displayed on screen as a Yellow bar.
text_image
Simple diagram with a musical note symbol and two labeled boxes: minus sign and plus sign(26) Balance
Press the 'R' button to bias the sound to the right. Press the 'L' button to bias the sound to the left. Displayed on screen as a Magenta bar.
text_image
L R:(27) Normalisation
If levels of volume, brightness, colour, contrast, bass, treble and balance have been altered, they can be set back to their stored levels, by pressing this button

text_image
N(28) Ambience
Ambience sound is a dynamic sound system that gives a feeling of greater acoustic presence. Press this button to obtain better acoustic sound from the speakers
natural_image
Simple diagram with two circles inside a square, no text or symbols present(29) Music/Speech
Press this button to enhance the TV sound. The Music/Speech indicator on the front of the TV will light up in the Music mode, in the Speech mode there is no indication.
Music Mode
To have a wider frequency range
Speech Mode
To have a soft tone for easier listening
natural_image
Simple musical note icon inside a square frame (no text or symbols)(30) TV/AV Selection
Terminals are available at the rear of the TV for direct audio/video inputs or outputs. To select these terminals, press the TV/AV button: This selects AV1, press again to select AV2, press again to return to TV mode. NOTE : AV2 has a connection for VCR's equipped with Super VHS (S-VHS) : refer to your VCR operating instructions for full details
text_image
w/nRemote Control Operation for TV
Please refer to the remote control diagram on page 19
(31) Display Cancel
The levels of colour, contrast etc, have an on screen indicator to show which level they are set at. The level is indicated by a black box within a coloured bar. Press this button in the TV mode, the indicator 'bar' will display in RED or BLACK.
RED indicator ON. BLACK indicator OFF.

natural_image
Simple black rectangle on white background with dashed border (no text or symbols)
natural_image
Completely black image with no visible content or text.
natural_image
Empty rectangular frame with dashed border and dotted line at bottom (no text or symbols)(32) Status
Press this button, the screen will now show the programme position at the top left, the time at the top right and the name of the Teletext if transmitted. The channel number will be displayed on the programme indicator.
natural_image
Simple diagram with a plus sign inside a rounded rectangle (no text or symbols)(33) Sound Mute
Press this button to mute the sound. To restore the sound, perform any one of the following:
(a) Press the sound mute button again.
(b) Press the STANDBY button to set the TV in the standby condition, then press again.
(c) Press the VOLUME up or down buttons.
(d) Press the PROGRAMME up or down buttons
(e) Press the NORMALISATION button.
(1) Press the PROGRAMME select buttons 0 · 9.
natural_image
Simple line drawing of a speaker icon inside a circle, no text or symbols presentNICAM Stereo Sound System
Please refer to the remote control diagram on page 19.
(34) Sound Channel Selection Button
Sound output can be selected by pushing the sound channel button on the remote control transmitter
To receive NICAM broadcasts, this receiver incorporates a NICAM decoder. When a stereo, dual soundtrack or monaural NICAM programme is being received, the LED display will inform you of the type of transmission.
| STEREO | ∅ |
| NICAM MONO I | I |
| NICAM MONO II | II |
| MONO | ▽ |
NOTES :
1) When the power is switched ON, the mode is pre - set to the last memorised position.
2) If the receiving conditions deteriorate, the audio reception may vary between STEREO and MONO. In this case it is advisable to switch to MONO mode. ( ∇ ), ie Regular sound
Remote Control Operation for Teletext
Please refer to the remote control diagram on page 19.
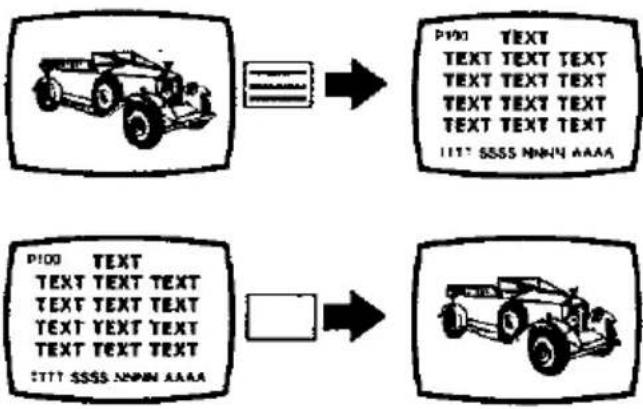
(35) Text
Press this button to change from TV to Teletext mode.
NOTE. Teletext information is only available if the channel selected is transmitting Teletext.
(36) TV
Press this button to change back to TV mode.
NOTE: Pressing the 'N' button will also change back to TV mode.
text_image
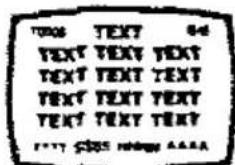
PI100 TEXT TEXT TEXT TEXT TEXT TEXT TEXT TEXT TEXT TEXT TEXT TEXT TEXT 1117 SSSS MNNY AAAA PI100 TEXT TEXT TEXT TEXT TEXT TEXT TEXT TEXT TEXT TEXT TEXT TEXT TEXT STTT SSSS NNNY AAAA(37) Page Selection
Pages can be selected in two ways.
(a) By entering the page number directly, using buttons 0-9 on the remote control.
(b) By using the programme up/down buttons to increase or decrease the page number by one.
(38) Top/Bottom/Full
Press this button to expand the TOP half of the display. Press again to expand the BOTTOM half of the display. Press again to return the display to normal (FULL) size.

text_image
PPT TEXT TEXT TEXT TEXT TEXT TEXT TEXT TEXT TEXT TEXT TEXT TEXT TEXT TCTT SSSS WITH AAAA
flowchart
graph LR
    A["100 TEXT\nTEXT TEXT TEXT\nTEXT TEXT TEXT\nTEXT TEXT TEXT\n*TTT SSSS NNNN AAAA"] --> B["100 TEXT\nTEXT TEXT TEXT\nTEXT TEXT TEXT\n*TTT SSSS NNNN AAAA"]
    B --> C["100 TEXT TEXT TEXT\nTEXT TEXT TEXT\n*TTT SSSS NNNN AAAA"]
    C --> D["100 TEXT\nTEXT TEXT TEXT\nTEXT TEXT TEXT\n*TTT SSSS NNNN AAAA"]
(39) Hold
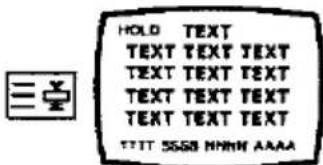
When Teletext information exceeds more than one page, the display changes automatically to the next page. To hold a particular page, press this button. HOLD will appear at the top left of the screen. This display will remain until the HOLD button is pressed again.
text_image
HOLD TEXT TEXT TEXT TEXT TEXT TEXT TEXT TEXT TEXT TEXT TEXT TEXT TEXT TTT 5558 MHH AAAA(40) Reveal
Press this button to reveal hidden words e.g. quiz pages with hidden answers. Press again to hide the word.
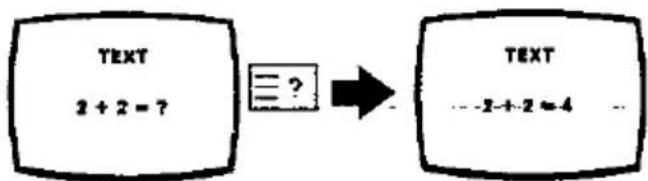
flowchart
graph LR
    A["TEXT\n2 + 2 = ?"] --> B["?"]
    B --> C["TEXT\n-2 + 2 = 4"]
Remote Control Operation for Teletext
Please refer to the remote control diagram on page 19
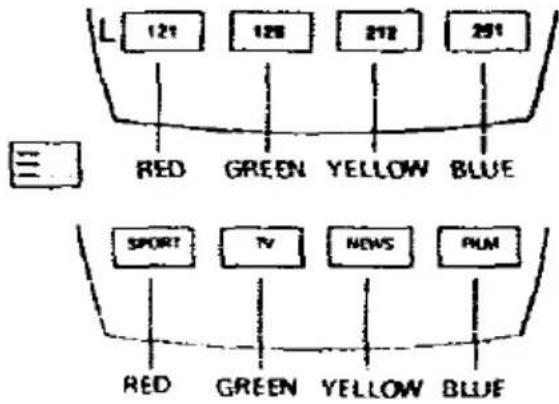
(41) List/F.text
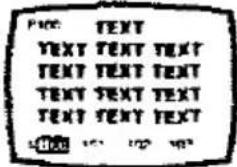
Press this button to change from LIST mode to FASTEXT mode and vice versa in FASTEXT mode, four differently coloured subjects are situated at the bottom of the display. To access more information about one of these subjects, press the appropriately coloured button. This facility enables fast access to information of the subjects shown.
NOTE. These subjects are determined by the broadcasting authorities and cannot be changed by the customer
(42) Red/Green/Yellow/Blue Buttons
These four buttons are colour-coded to correspond to the differently coloured subjects in 'FASTEXT' mode. In 'LIST STORE' mode, they correspond to the differently coloured page numbers.
(43) List Store
In this mode, four differently coloured page numbers are situated at the bottom of the screen. Each of these numbers can be altered and stored in the TV's memory. To do this, press any one of the coloured buttons on the remote control, this will select the number to be changed. Then enter the new page number to be stored, using buttons 0-9 on the remote control
NOTES.
1) When first switching to UST STORE mode, the page number coloured RED will be automatically selected. Press and hold the UST STORE button until the page numbers change to WHITE indicating that the number is now stored in the TV memory.
2) All four page numbers will be stored at the same time. This facility enables the customer to store four different page numbers on 10 programme positions. This means that up to forty Teletext page numbers can be stored in the TV memory. (PROGRAMMES 1 - 10 ONLY).
These pages will remain in the memory, even when switching off. If there is no page number matching the entered number then the number selected will keep flashing.
(44) Reset
Pressing this button in the FASTEXT mode will reset the present page back to the index page. Pressing this button in the UST STORE mode resets the present page to the RED coloured page number.
text_image
L 121 126 212 251 RED GREEN YELLOW BLUE SPORT TV NEWS PUM RED GREEN YELLOW BLUERED GREEN YELLOW BLUE

text_image
PUE TEXT TEXT TEXT TEXT TEXT TEXT TEXT TEXT TEXT TEXT TEXT TEXT TEXT 1400 15 16 17 18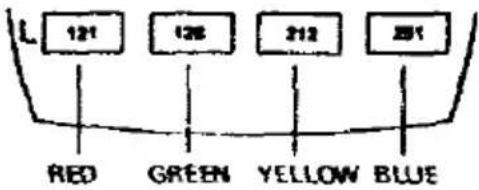
text_image
L 121 126 212 251 RED GREEN YELLOW BLUE
Remote Control Operation for Teletext
Please refer to the remote control diagram on page 19.
(45) Display Cancel
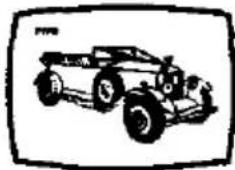
While searching for a Teletext page the TV display can be viewed by pressing this button. When the page has been found, the found symbol will be displayed at the top left of the screen.

natural_image
Black-and-white line drawing of a vintage car with large wheels and front wheel (no text or symbols)News Flash
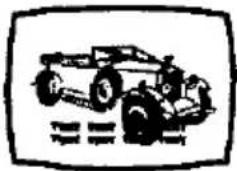
If a news flash page has been selected, see subject index, to view the TV programme press the DISPLAY CANCEL button. Every time an updated newsflash is available, the updated news item will appear over the normal TV programme. Press the DISPLAY CANCEL button to make the news information disappear.

natural_image
Simple line drawing of a car with wheels and a person, no text or symbols presentUpdated news will appear again when the news changes. Note: It is not possible to select another programme position in NEWS FLASH mode.
Update
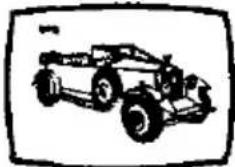
Certain Teletext pages contain information which is constantly being updated or information containing several pages. If you have selected one of these pages, press the DISPLAY CANCEL button to view normal TV. When the page information changes, the found symbol will be displayed at the top left of the screen. To view the updated page press the TEXT button, the page will disappear when the DISPLAY CANCEL button is pressed.

natural_image
Simple line drawing of a vintage car with large wheels and front wheel (no text or symbols)(46) Index
Push this button, in FASTEXT mode, to return to the main index page. Depending on the way information is transmitted by each TV channel, this INDEX button may need to be pushed more than once to return to the main index page.

Remote Control Operation for Teletext
Please refer to the remote control diagram on page 19.
(47) Time Text
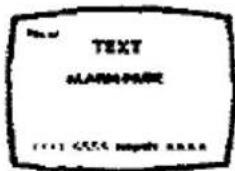
This function is used for selected pages only e.g. The Teletext alarm page. Refer to the subject index page for page location.
1) Select the TELETEXT alarm page.
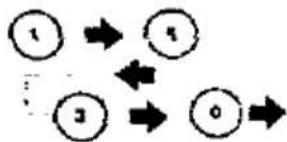
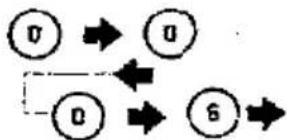
2) Press the TIME TEXT button. Txxx will be displayed at the top left of the screen now enter the time at which this alarm page should be displayed using buttons 0-9 on the remote control.
THIS FEATURE USES A 24 HOUR CLOCK
EXAMPLE: To set the alarm for 330 PM: press buttons 1.5.3.0 consecutively, the Txxx display will change to T15.30 momentarily then return to the current page number. If in UST STORE mode the letter 'T' will appear in the current coloured box at the bottom of the screen indicating that the alarm page has been set. Press the DISPLAY CANCEL button to view TV At 3.30pm the alarm page will be displayed.
To cancel this feature press the TV button to return to normal viewing, the TEXT button if you wish to select other teletext pages or press the RESET button.
Sub-coded page access ( Time Text button )
When Teletext information exceeds more than one page, it may take some time for the automatic changing of the sub-pages to reach the sub-page you require. It is possible to enter your required sub-page and continue watching the normal programme until the correct sub-page is found.
1) Select the required Teletext page using buttons 0-9 on the remote control.
2) Press the TIME TEXT button. To occur will be displayed at the top left of the screen.
3) Enter the desired sub-page number before the Txxxx disappears. If you select sub-page 6 then you must press 0,0,0 and 6 buttons.
4) If an LIST STORE mode the letter 'T' will appear in the current coloured box at the bottom of the screen indicating that the sub-coded page has been set.
5) Press DISPLAY CANCEL to view a normal TV programme. When the desired sub-page is found, the found symbol will appear at the top left of the screen. The sub page is then available until a new page is selected or until it is cleared.
6) Press the TEXT button to display the found sub-page.
7) To clear the sub-coded page, enter a new page number or press RESET.
Note: It is not possible to select another programme during sub-page operation.

flowchart
graph TD
    A["1"] --> B["5"]
    C["3"] --> D["0"]
    B --> D
    D --> B
    style A fill:#fff,stroke:#000
    style B fill:#fff,stroke:#000
    style C fill:#fff,stroke:#000
    style D fill:#fff,stroke:#000


flowchart
graph TD
    A["0"] --> B["0"]
    B --> C["6"]
    C --> D["0"]
    D --> E["0"]
    E --> F["0"]


text_image
TEXT ALABOGARIE (1) 6558 magate ARAA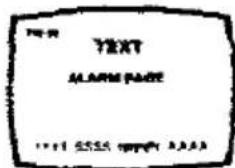
text_image
TEXT ALARM PAGE 1011 5555 (http://www.1011)
text_image
T15.50 TEXT TEXT TEXT TEXT TEXT TEXT TEXT TEXT TEXT TEXT F-11 SSOS MYLK ARAX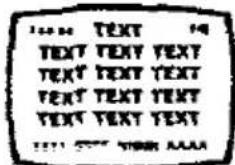
natural_image
Simple line drawing of a vintage off-road vehicle (no text or symbols)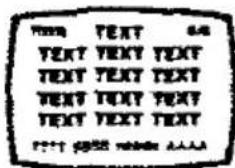
text_image
TEXT TEXT TEXT TEXT TEXT TEXT TEXT TEXT TEXT TEXT TEXT TEXT TEXT ???? 5000 10000 10000Remote Control Operation for VCR
Please refer to the remote control diagram on page 19.
This infra-ted remote control is designed specifically to be used with selected Panasonic VCR's, consult your dealer for details. Some VCR's have different functions, so to ensure compatibility, please refer to the VCR instruction book or consult VCR function. The buttons for VCR operation are numbered below.
(48) Standby
Press to switch the VCR on or off.
natural_image
Simple diagram with a circle containing a plus sign inside a rectangle (no text or symbols)(49) Stop
Press this button to stop the tape.
natural_image
Simple geometric diagram with two concentric rectangles and a central black square (no text or symbols)(50) Play
Press this button to playback the tape.
natural_image
Simple black play button icon inside a rounded rectangle (no text or symbols)(51) Record
Press these buttons together to record.
flowchart
graph TD
    A[" "] --> B[" "]
(52) Rawind/Review
Press this button to rewind the tape. In playback mode, press this button to view the picture in reverse rapidly.
natural_image
Simple diagram with two left-pointing arrows inside a rounded rectangle (no text or symbols)(53) Fast Forward/Cue
Press this button to fast forward the tape. In playback mode, press this button to view the picture rapidly forward.
natural_image
Simple diagram with two directional arrows inside rounded rectangles (no text or symbols)(54) Pause/Still
Press this button in playback mode. the picture will pause
natural_image
Simple diagram with two vertical bars inside a rounded rectangle (no text or symbols)(55) Still Advance
While in the PAUSE/STILL mode press this button to advance the picture one frame at a time.
natural_image
Simple icon of a play button with two vertical bars inside a rounded rectangle (no text or symbols)(56) Programme Up/Down
Press once to increase or decrease the programme position by one.
text_image
Simple diagram with two labeled boxes: a checkmark inside a rectangle and an inverted triangle inside a rectangle.Remote Control Transmitter
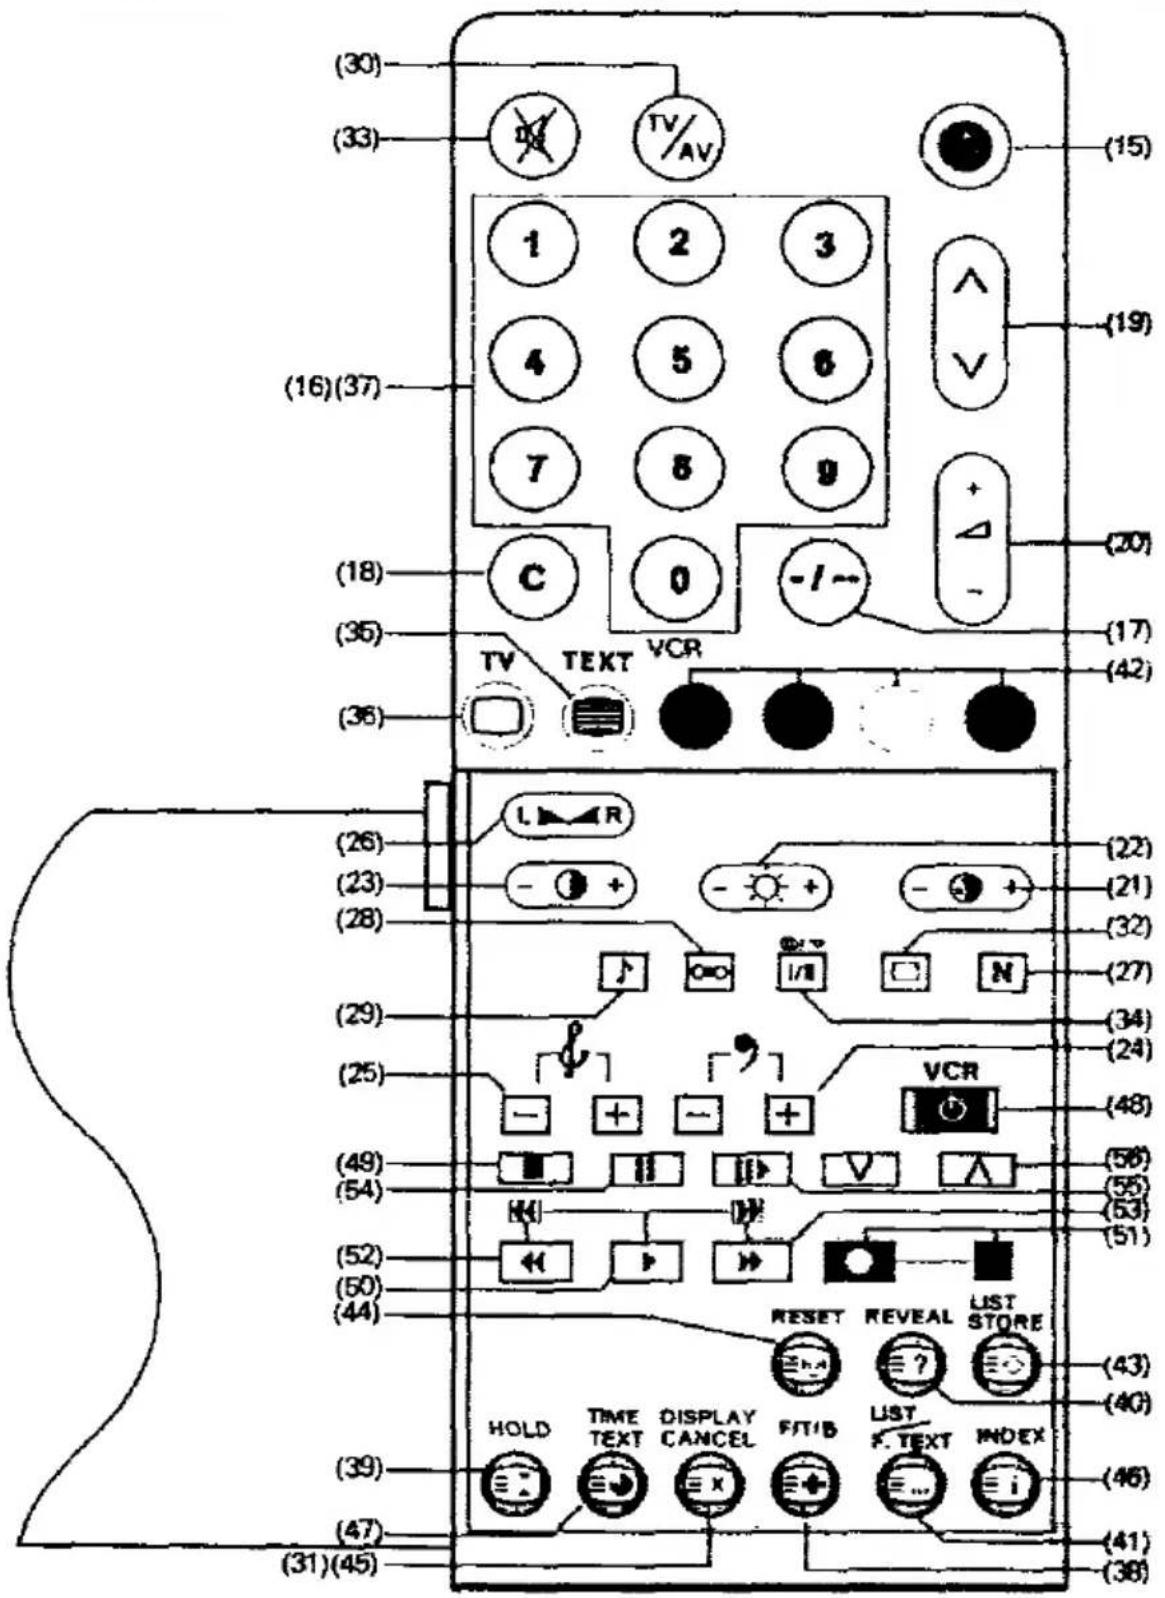
text_image
(30) (33) TV/AV (15) (16)(37) (19) (20) (18) (17) (35) C 0 -I~ (42) (36) TV TEXT VCR (26) (25) L R (22) (23) - + - + (21) (28) (32) (27) (29) (34) (24) (25) VCR (48) (49) - + - + (50) (51) (52) (53) (54) (55) (56) (57) (58) (59) (50) (44) RESET REVEAL LIST STORE (43) HOLD TIME DISPLAY LIST TIME TEXT CANCEL FUT/B F. TEXT INDEX (40) (46) (47) (31)(45)Note: An adhesive label is provided with the remote control to provide a reference to the keys functions. This label can be attached to the inside of the lid on the remote control hand unit.
General Information
Sleep Feature
If the set is not switched off when the TV station stops transmitting at the end of the evening, it will automatically go to standby mode after 30 minutes.
Note: This function will not operate when the TV is in AV mode.
Service
To obtain service please contact your local Panasonic dealer, and quote the model number and serial number (both are located at the rear of the TV).
T.V. Games / home Computers
Extended use of TV games or home computers with any television set can cause a permanent 'shadow' on the screen. This type of irreversible picture tube damage, can be limited by observing the following points:
(a) Reduce the brightness and contrast levels to a minimum viewing level
(b) Do not operate the television set for a continuous period of time while using TV games or home computers.
This type of picture tube damage, is not an operating defect, and as such is not covered by the Panasonic warranty.
Accessories: 1 remote control (TNQ660455) 2 R03 (UM-4) size batteries. 1 T.V. Stand.
Note: Certain TV functions have a last position memory, that is to say whatever level was set at the time of switch off will be the level displayed when the receiver is switched on again. See table below for list of last memory functions and no memory functions.
Last Position Memory
Programme
Volume
Brightness
Colour
Contrast
Bass
Treble
Balance
NICAM Mono / Stereo
Music / Speech
No Last Position Memory
AV1, AV2
Teletext
Sound Mute
Ambience
Trouble Shooting
Specifications
Before calling for service, make a few simple checks as follows.
| Symptoms | Checks |
| No pictureNo sound | Not plugged into A.C.supply. Not switched on.Check contrast,brightness and volumesettings. |
| Normal pictureNo sound | Check volume level.Check sound mutebutton on remortecontrolCheck INT/EXT switchon speaker terminals atrear of TV. |
| No colourNormal sound | Check colour level. |
| Interference onscreen | Electrical appliances. |
| Distorted sound | cars, motorcycles,fluorescent lights |
| Multiple image.Snowy picture.Distorted sound.Characters missingin Teletext mode | Direction, location and/or aerial connection. |
| Remote control mal-functions or reductionin operating distance. | Replace batteriesClean Indicator window |
| Power source | 240V AC. 50Hz |
| Power consumption | 95W (93W) |
| Receiving system | PAL 1 |
| Receiving Channel | UHF 21 · 69 |
| Picture tube | 66cm (59cm) V FST 110o |
| Audio output | 2 x 10W MusicInternal speakers)2 x 15W Music(External speakers) |
| Speakers | 2 x L/H |
| Terminals | Aerial.AVI21 pin terminal.Audio/Video in/outRGB inAV221 pin terminal(Video/Audio in / out)(S-VHS m)S-VHS 4 pin (C/Y m)2 x RCA Audio inExternal loudspeakersHeadphones |
| Dimensions | H 560 mm (515mm)W 780 mm (720mm).D 470 mm (450mm). |
| Weight | 38Kg (31Kg) |
| Note. Specifications are subject to change without notice. Weight and dimensions shown are approximate | |
| All figures shown in brackets refer to TX 25G1. | |