
Panafax UF-332 - Fax PANASONIC - Kostenlose Bedienungsanleitung
Finden Sie kostenlos die Bedienungsanleitung des Geräts Panafax UF-332 PANASONIC als PDF.


Benutzerfragen zu Panafax UF-332 PANASONIC
0 Frage zu diesem Gerät. Beantworten Sie die, die Sie kennen, oder stellen Sie Ihre eigene.
Eine neue Frage zu diesem Gerät stellen
Laden Sie die Anleitung für Ihr Fax kostenlos im PDF-Format! Finden Sie Ihr Handbuch Panafax UF-332 - PANASONIC und nehmen Sie Ihr elektronisches Gerät wieder in die Hand. Auf dieser Seite sind alle Dokumente veröffentlicht, die für die Verwendung Ihres Geräts notwendig sind. Panafax UF-332 von der Marke PANASONIC.
BEDIENUNGSANLEITUNG Panafax UF-332 PANASONIC
Facsimile
Panafax® UF-332
User's Guide
natural_image
Black-and-white line drawing of an office interior with a printer, potted plants, and wall art (no text or symbols)IMPORTANT INFORMATION
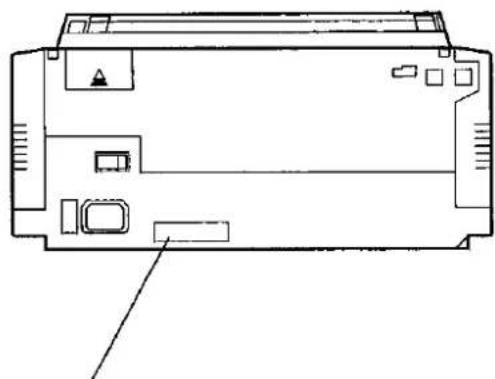
When requesting information, supplies, or service always refer to the model and serial number of your machine. The model and serial number plate (Main Name Plate) is located on the machine as shown below.
For your convenience, space is provided below to record the information you may need in the future.
Model No. Serial No.
Date of Purchase
Dealer
Address
Telephone Number ( ) -
Supplies Telephone Number ( )
Service Telephone Number ( ) -
natural_image
Technical line drawing of a device rear panel with ports and connectors (no text or symbols)Model and Serial Number
Table of Contents
1 GETTING TO KNOW YOUR MACHINE
Safety Information 5
Introduction 7
External View 9
Control Panel 10
Function Key 12
2 INSTALLING YOUR MACHINE
Main Unit and Accessories 13
Installing the Accessories 15
Installing the Print Cartridge 16
Loading the Recording Paper 18
Paper Specifications 18
How to Load the Recording Paper 18
Connecting the Telephone Line Cord and Power Cord 20
Setting the Dialling Method (Tone or Pulse) 22
Adjusting the Volume 23
Setting the Monitor Volume 23
Setting the Ringer Volume 23
User Parameters 24
Setting the Date and Time 24
Setting Your LOGO 25
Setting Your Character ID 26
Setting Your ID Number (Fax Telephone Number) 27
3 PROGRAMMING YOUR MACHINE
Entering Characters 29
One-Touch/Abbreviated Dialling Numbers 30
Entering One-Touch/Abbreviated Dialling Numbers 30
Changing or Erasing One-Touch/Abbreviated Dialling Numbers 32
Printing Out a Directory Sheet 34
Customizing Your Machine 35
Setting the Fax Parameters 35
Fax Parameter Table 36
The MERCURY Residential 132 Service and PIN Code Service ..... 39
Entering the Mercury Button 40
Checking the Connection to Mercury Network 41
Re-entering the Mercury Button 42
Entering One-Touch/Abbreviated Dialling Numbers 43
Transmission Via Mercury Network 44
4 BASIC OPERATIONS
Loading Documents 47
Documents You Can Send 47
Documents You Cannot Send 47
How to Load Documents 48
Basic Transmission Settings 49
Contrast 49
Resolution 49
Halftone 50
Communication Journal (COMM. JOURNAL) 51
Sending Documents 52
Direct Transmission 53
Manual Number Dialling (Direct Transmission) 53
One-Touch Dialling (Direct Transmission) 54
Abbreviated Dialling (Direct Transmission) 55
Directory Search Dialling (Direct Transmission) 56
Voice Mode Transmission 57
Off-Hook Dialling 57
On-Hook Dialling 58
Memory Transmission 59
Manual Number Dialling 60
One-Touch Dialling 61
Abbreviated Dialling 62
Directory Search Dialling 63
Multi-Station Transmission (Broadcasting) 64
Transmission Reservation 65
Memory Transmission Reservation (Multi-tasking) 65
Direct Transmission Reservation (Priority Transmission Reservation) 66
Redialling 67
Automatic Redialling
Manual Redialling 67
Receiving Documents 68
Reception Modes 68
Telephone Mode 69
Setting the Telephone Mode 69
Operation of Telephone Mode 69
Fax / Tel Auto Switching Mode 70
Setting the Fax / Tel Auto Switching Mode 70
Operation of Fax / Tel Auto Switching Mode 70
Fax Mode 71
Setting the Fax Mode 71
Operation of Fax Mode 71
TAM (Telephone Answering Machine) Interface Mode 72
Installing your TAM 72
Setting the TAM Interface Mode 73
Operation of TAM Interface Mode 73
Print Reduction 74
Selecting the Print Reduction Mode 74
Substitute Memory Reception 75
Making Copies 76
5 ADVANCED FEATURES
Timer Controlled Communications 77
Deferred Transmission 77
Deferred Polling 78
Polling 79
Setting Polling Password 79
To Poll Documents from Another Station 80
Edit File Mode 81
Printing a File List 81
Viewing the Contents of a File List 82
Changing the Start Time or the Station of a File 83
Deleting a File 85
Printing Out a File 86
Receive To Memory 87
Setting the RCV To Memory Password 87
Setting RCV To Memory 87
Printing Out Documents 88
Book Feeder 90
Making a Copy 90
Sending Documents 93
6 NETWORKED FEATURES
Selective Reception 95
Setting the Selective Reception 95
Confidential Mailbox 96
Compatibility with Other Machines 96
Sending a Confidential Document to a Remote Station's Mailbox 97
Polling a Confidential Document from a Remote Station's Mailbox 98
Receiving a Confidential Document to Your Machine's Mailbox 99
Storing a Confidential Document in Your Machine's Mailbox 100
Printing Out a Confidential Document from Your Machine's Mailbox 101
Deleting a Confidential Document Stored in Your Machine's Mailbox 102
Sub-addressing 103
General Description 103
To set the Sub-address into a One-Touch/ABBR. Dalling Numbers 104
To send a Document with Sub-address 105
7 PRINTOUT JOURNALS AND LISTS
Journals and Lists 107
32 Transaction Journal 107
Individual Transmission Journal (IND. XMT JOURNAL) 108
Communication Journal (COMM. JOURNAL) 111
One-Touch/Abbreviated List 112
FAX Parameter List 114
8 PROBLEM SOLVING
Troubleshooting 115
If You Have Any of These Problems 115
Information Codes 118
Clearing a Recording Paper Jam 121
Clearing a Document Jam 122
Cleaning the Print Cartridge Contact 123
Removing Dried Ink from the Nose of the Print Cartridge 124
Cleaning the Drain Pan 124
Cleaning the Document Scanning Area 125
Adjusting the Automatic Document Feeder (ADF) 126
Replacing the Print Cartridge 127
Replacing the Battery 128
Checking the Telephone Line 129
9 APPENDIX
Specifications 131
Paper Specifications 134
Supplies 135
Notice for Connection to the Telecommunication Systems ..... 136
Glossary 138
INDEX 142
This product complies with the requirements of EC Council Directives 73/23/EEC amended by 93/68/EEC, and 89/336/EEC amended by 92/31/EEC and 93/68/EEC.
WARNING
denotes a potential hazard that could result in serious injury or death.
• TO PREVENT FIRE OR SHOCK, DO NOT EXPOSE THIS PRODUCT TO RAIN OR ANY TYPE OF MOISTURE.
• TO MINIMIZE THE POSSIBILITY OF SHOCK OR DAMAGE TO THE MACHINE, IT MUST BE PROPERLY GROUNDED.
- WHEN YOU OPERATE THIS EQUIPMENT, THE SOCKET-OUTLET SHOULD BE NEAR THE EQUIPMENT AND BE EASILY ACCESSIBLE.
CAUTION
denotes hazards that could result in minor injury or damage to the machine.
- THIS PRODUCT CONTAINS A LITHIUM BATTERY. DANGER OF EXPLOSION IF BATTERY IS INCORRECTLY REPLACED. REPLACE ONLY WITH THE SAME OR EQUIVALENT TYPE. DISPOSE OF USED BATTERIES ACCORDING TO THE INSTRUCTIONS OF YOUR LOCAL SOLID WASTE OFFICIALS.
CAUTION
denotes hazards that could result in minor injury or damage to the machine.
natural_image
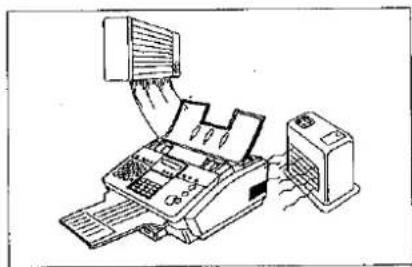
Illustration of a printer printing into a computer (no text or symbols visible)Do not install the machine near heating or air conditioning unit.
natural_image
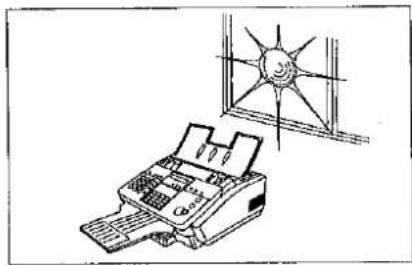
Line drawing of a printer with a sun symbol above it, no text or symbols presentAvoid exposure to direct sunlight.
natural_image
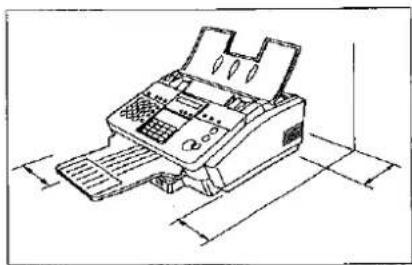
Line drawing of a printer with paper feed and paper tray (no text or symbols)Install the machine on a flat surface, leave at least 10 cm of space between the machine and other objects.
natural_image
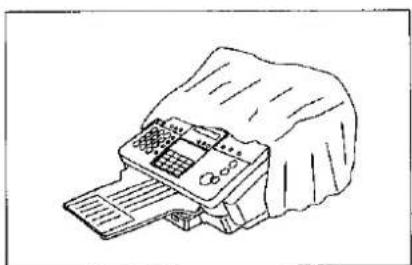
Line drawing of a printer with a paper feed and control panel (no text or symbols)Do not block the ventilation openings.
natural_image
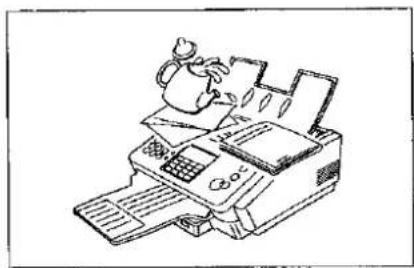
Line drawing of a hand operating a printer with paper sheets (no text or symbols)Do not place heavy objects, or spill liquids on the machine.
Thank you very much for purchasing the Panafax UF-332.
The UF-332 is one of the most advanced models in the Panafax family of G3 compatible, desktop facsimile machines.
Some of its many features are
| 1. Plain Paper Printing | Plain paper printing means you can easily write on received documents with a pen or pencil. Documents do not curl, making filing easier. In addition, plain paper does not fade, making it ideal for long term storage of important documents. |
| 2. Easy Maintenance | Maintenance requires only changing a print cartridge, making it quicker and easier than with other types of plain paper fax machines. |
| 3. Memory Function | A standard image memory feature allows you to store up to 30 standard pages into the document memory. After the UF-332 stores your documents, it can send them to selected station(s) automatically. You do not have to wait until the transmission ends before retrieving your originals. |
| 4. Fax / Telephone Auto Switch | The UF-332 differentiates between an incoming fax or voice call and automatically switches the circuit to either receive a document or to ring until you pick up the telephone connected to it. With the UF-332 you do not require a separate telephone line for your fax. |
| 5. TAM Interface | A Telephone Answering Machine (TAM) can be connected to the UF-332. The UF-332 determines whether the signal from the calling side is a fax or voice call. If it is a fax, the UF-332 will switch the telephone line to start the fax communication. If a fax signal is not detected, the UF-332 will stay in the TAM mode and the caller can leave a message. |
| 6. Book Feeder | Your machine is equipped with a unique feature called Book Feeder that allows you to make a copy and/or send a page from a book. |
| 7. View Mode | Your machine has been equipped with a View function which allows you to view the contents of the Journal and File List on the LCD display without having to print them.With a little practice, anyone can learn how to use the most popular features of the UF-332.This User's Guide will help you to use your UF-332 quickly and easily. The Table of Contents shows where to find information on each feature. Although we recommend that you review each section briefly, it will only be necessary to read the sections that contain the feature(s) you will be using. |

This page is intentionally left blank.
text_image
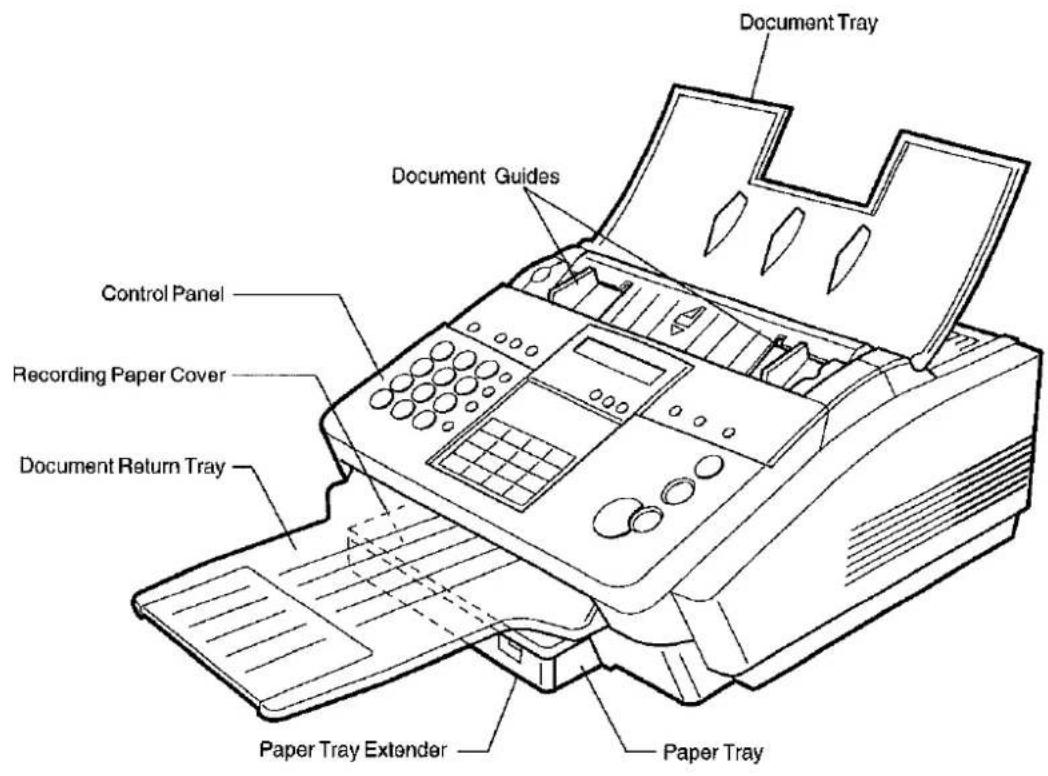
Document Tray Document Guides Control Panel Recording Paper Cover Document Return Tray Paper Tray Extender Paper Tray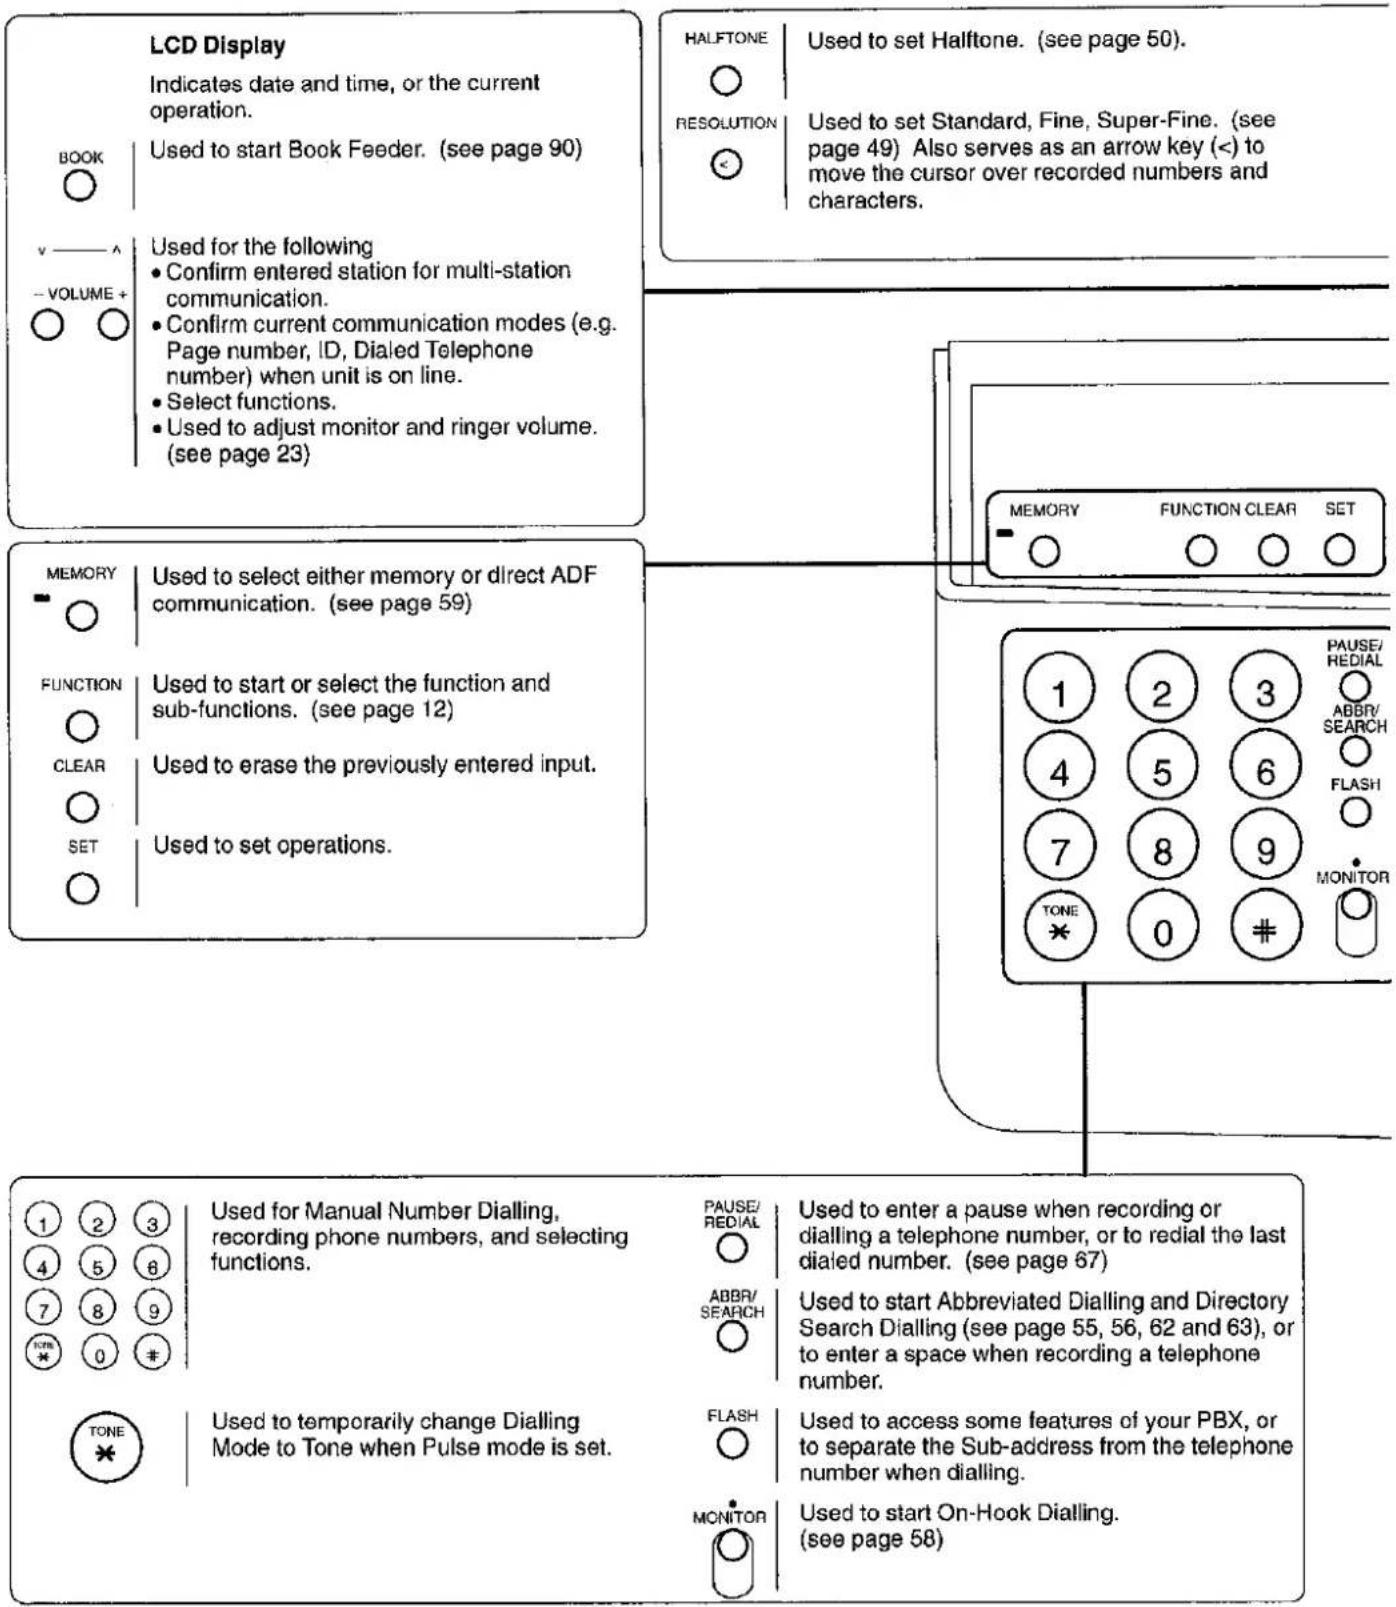
text_image
LCD Display Indicates date and time, or the current operation. BOOK | Used to start Book Feeder. (see page 90) V —— ^ | Used for the following - VOLUME + | Confirm entered station for multi-station communication. - Confirm current communication modes (e.g. Page number, ID, Dialed Telephone number) when unit is on line. - Select functions. - Used to adjust monitor and ringer volume. (see page 23) HALFTONE | Used to set Halftone. (see page 50). RESOLUTION | Used to set Standard, Fine, Super-Fine. (see page 49) Also serves as an arrow key (<) to move the cursor over recorded numbers and characters. MEMORY FUNCTION CLEAR SET MEMORY FUNCTION FUNCTION | Used to select either memory or direct ADF communication. (see page 59) USED TO START OR SELECT THE FUNCTION AND SUB-FUNCTIONS. (see page 12) CLEAR | Used to erase the previously entered input. SET | Used to set operations. TAUSE/REDIAL | PAUSE/REDIAL ABBR/SEARCH | ABBR/SEARCH TONE * 0 # MONITOR TAUSE/REDIAL | PAUSE/REDIAL ABBR/SEARCH | ABBR/SEARCH TONE * 0 # MONITOR TAUSE/REDIAL | PAUSE/REDIAL ABBR/SEARCH | ABBR/SEARCH TONE * 0 # MONITOR TAUSE/REDIAL | PAUSE/REDIAL ABBR/SEARCH | ABBR/SEARCH TONE * 0 # MONITOR TAUSE/RedIAL | PAUSE/RedIAL ABBR/SEARCH | ABBR/SEARCH TONE * 0 # MONITOR TAUSE/Redial | PAUSE/Redial | ABBR/SEARCH | ABBR/SEARCH TONE * 0 # MONITOR TAUSE/Redial | PAUSE/Redial | ABBR/SEARCH | ABBR/SEARCH TONE * 0 # MONITOR TAUSE/Redial | PAUSE/Redial | ABBR/SEARCH | ABBR/SEARCH TONE * 0 # MONITOR TAUSE/Redial | PAUSE/Redial | ABBR/ARCH | ABBR/ARCH | TONE * 0 # MONITOR TAUSE/Redial | PAUSE/Redial | ABBR/SEARCH | ABBR/SEARCH TONE * 0 # MONITOR TAUSE/Redial | PAUSE/Redial | ABBR/SEARCH | ABBR/SEARCH TONE * 0 # MONITOR TAUSE/Redial | PAUSE/Redial | ABBR/SEARCH | ABBR/SEARCH TONE * (see page 67) TAUSE/Redial | PAUSE/Redial | ABBR/SEARCH | ABBR/SEARCH TONE * (see page 63), or to enter a space when recording a telephone number. TAUSE/Redial | PAUSE/Redial | ABBR/SEARCH | ABBR/SEARCH TONE * (see page 55, 56, 62 and 63), or to enter a space when recording a telephone number. TAUSE/Redial | PAUSE/Redial | ABBR/SEARCH | ABBR/SEARCH TONE * (see page 58) TAUSE/Redial | PAUSE/Redial | ABBR/SEARCH | ABBR/SEARCH
text_image
CONTRAST Used to set Normal, Lighter, or Darker. (see page 49) Also serves as an arrow key (>) to move the cursor over recorded numbers and characters. Panasonic HALFTONE RESOLUTION CONTRAST S-FINE DARKER FINE LIGHTER BOOK V VOLUME + Panafax UF-332 OUT STOP COPY START One-Touch Keys (01-15) Used for One-Touch Dialling. (see page 54 and 61) Mercury Key Used for Mercury Dialling. (see page 39) Character Keys The One-Touch Keys also serve as character and symbol input keys which are used to record your LOGO and station name. The character key template is printed on the panel under the directory sheet cover. Directory Sheet Cover A → 01 A B C D + 13 O O B → 01 A B C D + 14 O O 01 A B C D + 13 O O 05 Q R S T 06 U V W X 07 Y Z A A 08 ð ð ð ð 09 AB / + - 10 ( ) < > 11 & ' | : SPACE 13 O O O O O O O O O O O O O O O O O O O O O O O O O O O O O O O O O O O O O O O O O O O O O O O O O O O O O O O O O O O O O O OUT Used to select either IN mode or OUT mode. (see page 68) STOP Used to cancel operations. When it is pressed, the machine will return to standby. Used to make copies. (see page 76) Used to start operations. START
Any function can be started by first pressing FUNCTION and then enter the function number, or by pressing √ or △ scroll key repeatedly until the desired function appears on the display.
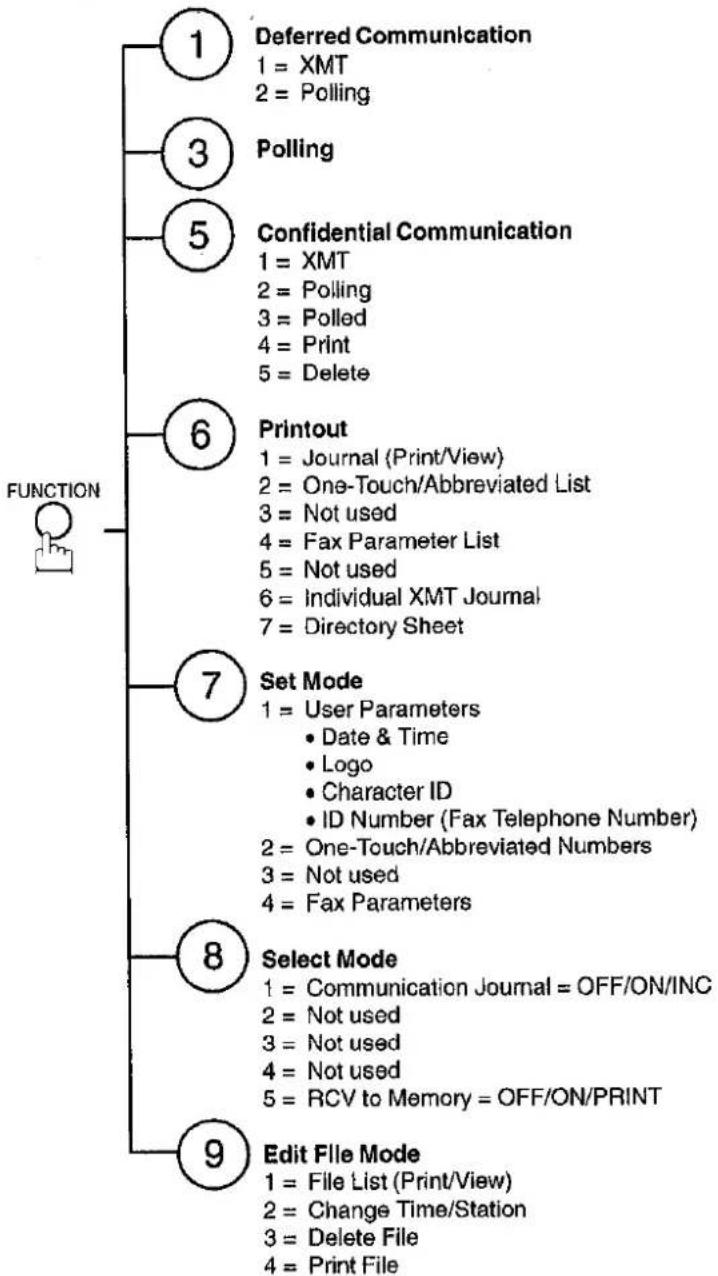
flowchart
graph TD
    A["1 Deferred Communication\n1 = XMT\n2 = Polling"] --> B["3 Polling"]
    B --> C["5 Confidential Communication\n1 = XMT\n2 = Polling\n3 = Polled\n4 = Print\n5 = Delete"]
    C --> D["6 Printout\n1 = Journal (Print/View)\n2 = One-Touch/Abbreviated List\n3 = Not used\n4 = Fax Parameter List\n5 = Not used\n6 = Individual XMT Journal\n7 = Directory Sheet"]
    D --> E["7 Set Mode\n1 = User Parameters\n• Date & Time\n• Logo\n• Character ID\n• ID Number (Fax Telephone Number)\n2 = One-Touch/Abbreviated Numbers\n3 = Not used\n4 = Fax Parameters"]
    E --> F["8 Select Mode\n1 = Communication Journal = OFF/ON/INC\n2 = Not used\n3 = Not used\n4 = Not used\n5 = RCV to Memory = OFF/ON/PRINT"]
    F --> G["9 Edit File Mode\n1 = File List (Print/View)\n2 = Change Time/Station\n3 = Delete File\n4 = Print File"]
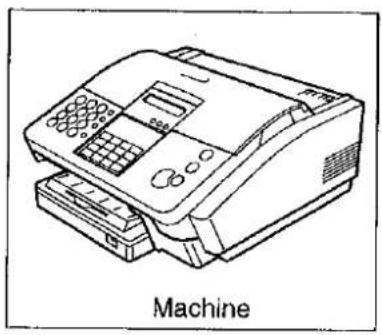
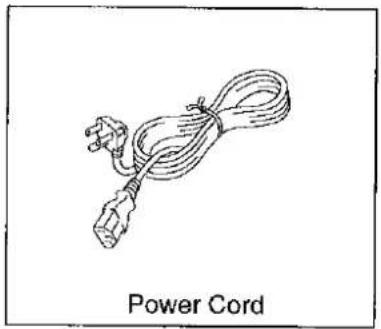
Unpack the carton and check that you have all accessories illustrated.
natural_image
Line drawing of a machine with control panel and buttons (no text or symbols on the device itself)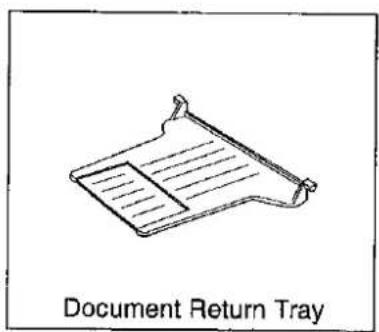
text_image
Document Return Tray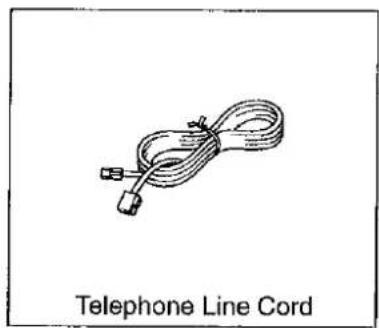
natural_image
Line drawing of a telephone line cord with coiled cable and connector (no text or symbols on the diagram itself)
natural_image
Line drawing of a power cord with plug and cable (no text or symbols on the diagram itself)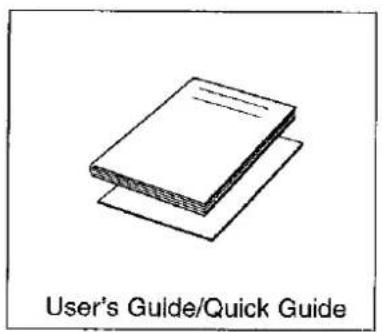
text_image
User's Guide/Quick Guide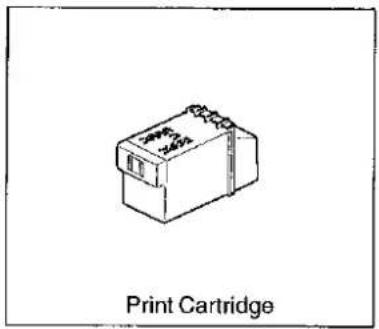
text_image
Print CartridgeThis page is intentionally left blank.
natural_image
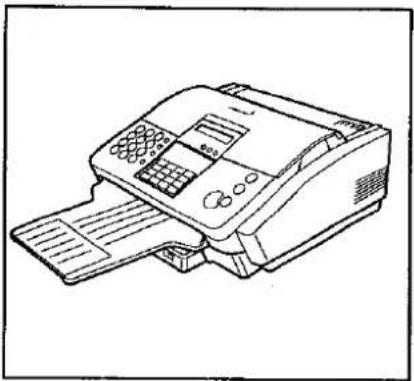
Line drawing of a printer with control panel and paper feed (no text or symbols)Final Installed View
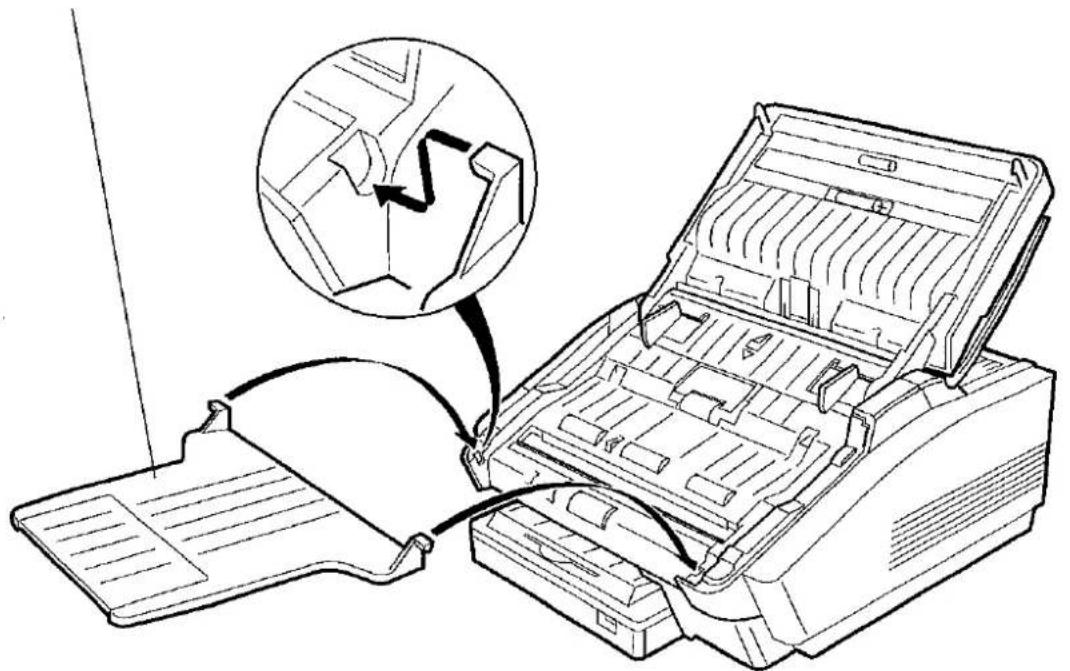
Document Return Tray
Open the ADF Door and hook the projections of the Document Return Tray into the slots on the front of the machine. Then, close the ADF Door.
text_image
Diagram showing printer operation with a magnified view of internal structure and cable connection, labeled in Chinese.Note: If you wish to use Letter / Legal size paper, change the position of paper width guide as shown below.
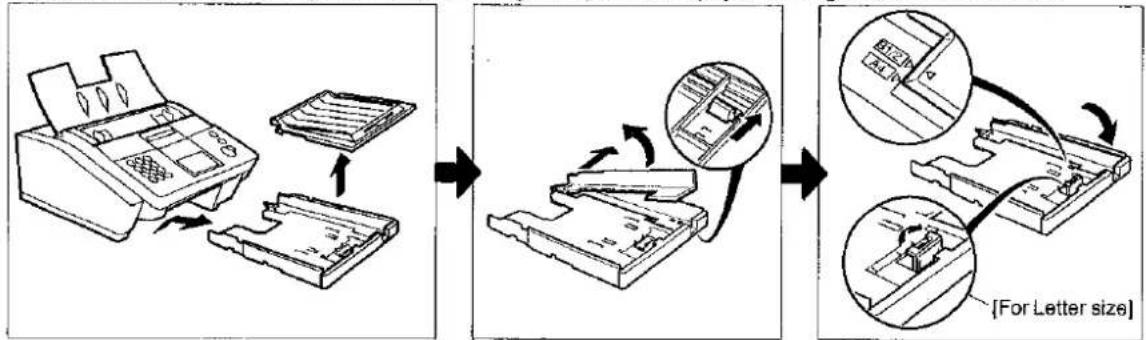
flowchart
graph LR
    A["Printer Image"] --> B["Image Collection"]
    B --> C["Final Folded Image"]
    C --> D["Insert [For Letter size"]]
    D --> E["Final Folded Image with Insert/Down Arrow"]

Installing the Print Cartridge
1
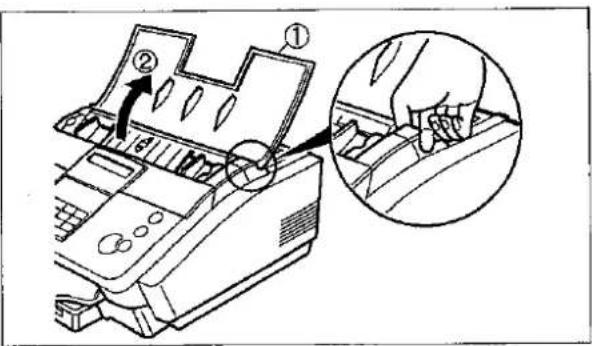
text_image
Diagram showing printer operation with labeled parts and magnified detail view① Open the Document Tray.
② Open the Printer Cover.
2
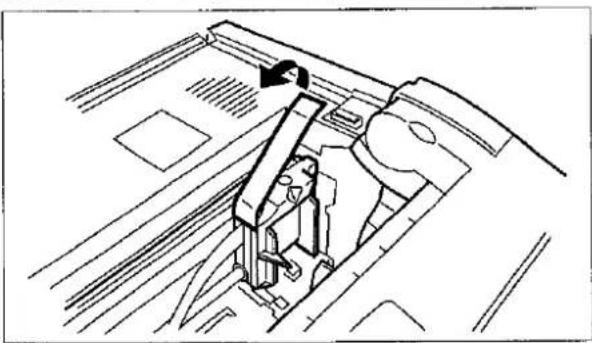
natural_image
Technical line drawing of a mechanical component with an arrow indicating direction (no text or symbols)Remove the tape on the Print Cartridge Cradle.
3
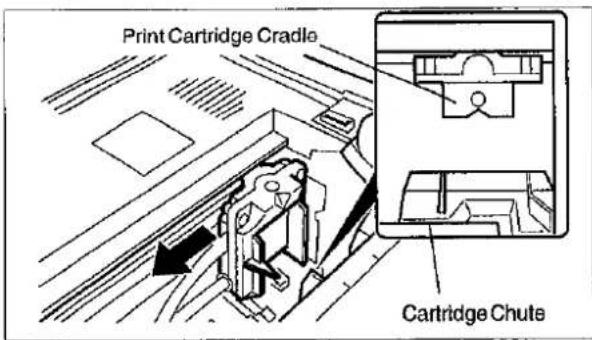
text_image
Print Cartridge Cradle Cartridge ChuteSlide the Print Cartridge Cradle about 7 mm to the left to align the Print Cartridge Cradle with the Cartridge Chute.
4
text_image
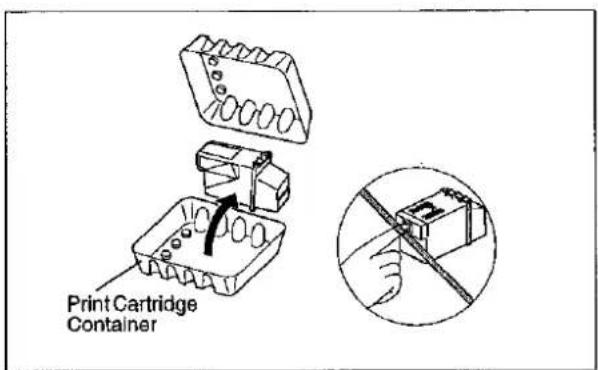
Print Cartridge ContainerOpen the Print Cartridge Container. Grasp the Print Cartridge by the green top and remove it from its container.
Take care not to touch the copper "Ribbon" located on the front edge of the Print Cartridge. Also be sure that the copper "Ribbon" does not come in contact with any surface.
Continued on the next page.

CAUTION
The Ink in the Print Cartridge may be harmful to children if swallowed. Keep new or used cartridges out of the reach of children and immediately discard used cartridge.
5
natural_image
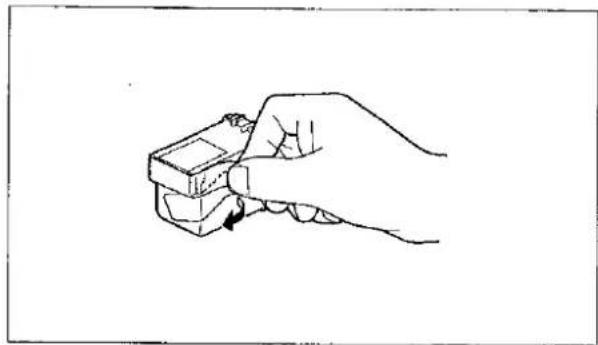
Line drawing of a hand holding a small object, possibly a tool or device, with no visible text or symbols.Gently remove the protective tapes from the front of the Print Cartridge.
6
natural_image
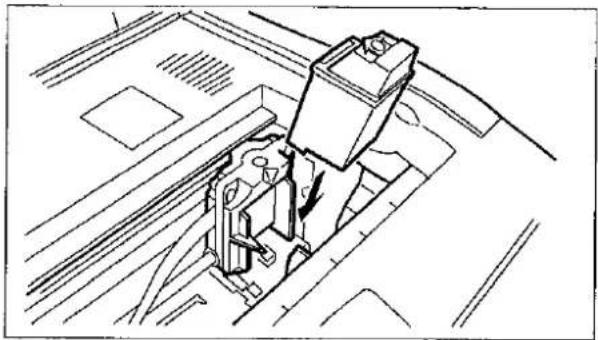
Technical line drawing of a mechanical assembly with no visible text or symbolsPlace the Print Cartridge into the Cartridge Chute with the green arrow on the cartridge top pointing to the green dot on the top of the cradle.
7
natural_image
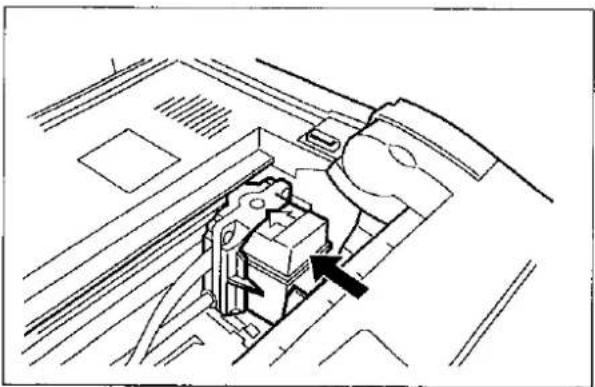
Technical line drawing of a mechanical component with an arrow indicating a specific part (no text or symbols present)Push the cartridge into the cradle, snapping the cartridge into place.
8
text_image
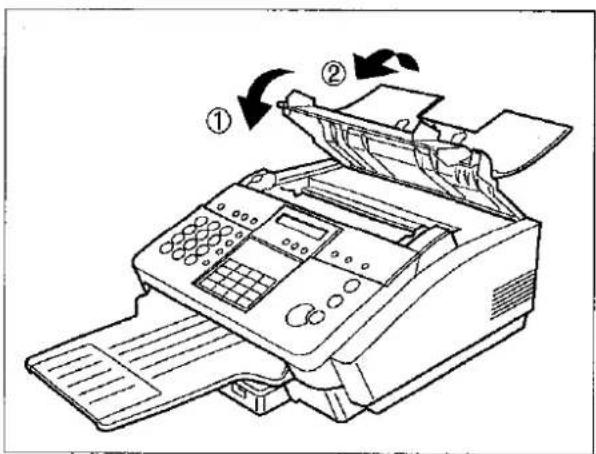
Diagram of a printer with labeled parts showing paper feeding and printing process① Close the Printer Cover.
② Close the Document Tray.
Paper Specifications
In general, most bond papers will produce excellent results. Most photocopy papers will also work very well. There are many "name" and "generic" brands of paper available. We recommend that you test various papers until you obtain the results you are looking for. For detailed recommended paper specifications, see page 134.
How to Load the Recording Paper
1
text_image
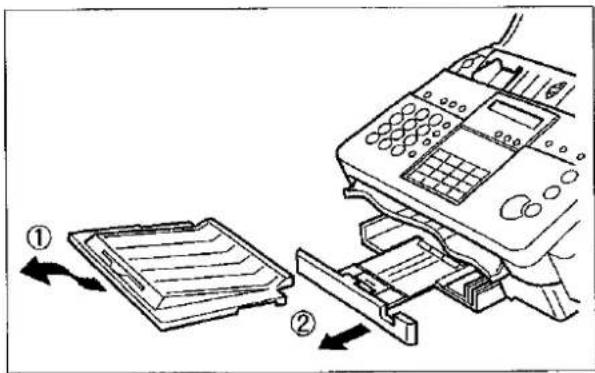
Diagram showing printer press mechanism with labeled parts and directional arrows indicating process flow① Remove the Recording Paper Cover.
② Pull out the Paper Tray Extender.
2
text_image
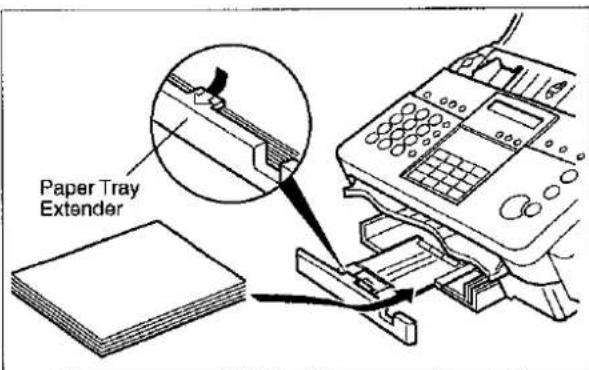
Paper Tray ExtenderInsert a stack of papers, printable side down, about 12 mm thick (approximately 100 sheets of paper) squarely into the Paper Tray.
Caution: Make sure that the paper does not exceed over the Paper Tray Extender.
text_image
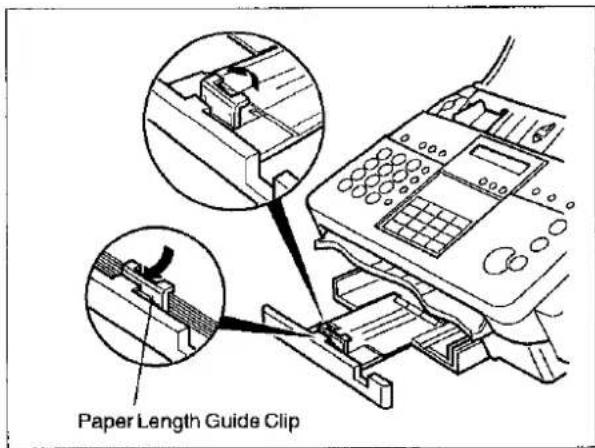
Paper Length Guide ClipIf loading Letter size paper, set the Paper Length Guide Clip upward and make sure the paper does not exceed over the Paper Length Guide Clip.
Continued on the next page.
3
natural_image
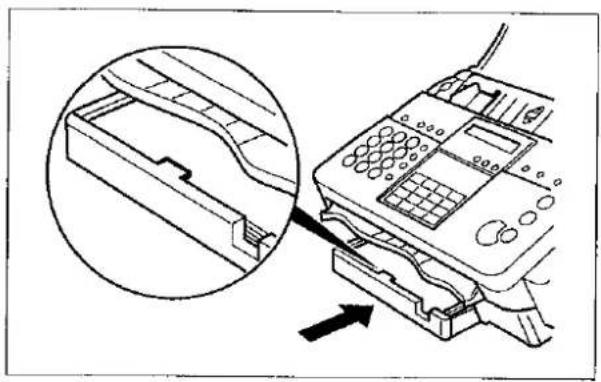
Diagram showing a printer's internal structure with an inset close-up of its cover (no text or symbols present)Slide the Paper Tray Extender in toward the paper to hold the paper against the printer.
4
natural_image
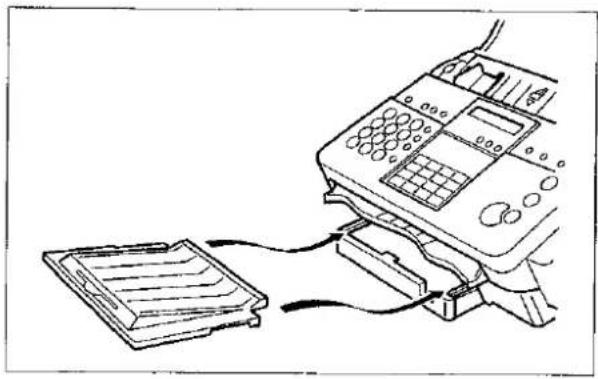
Line drawing of a printer with a receipt device and a flatbed tray, no text or symbols presentRe-install the Recording Paper Cover.

Note: 1. The setting of Fax Parameter No. 23 (Recording Paper Size) must match the paper size you have loaded. (see page 37)
- Do not add recording paper while the machine is printing a document.

Connecting the Telephone Line Cord and Power Cord
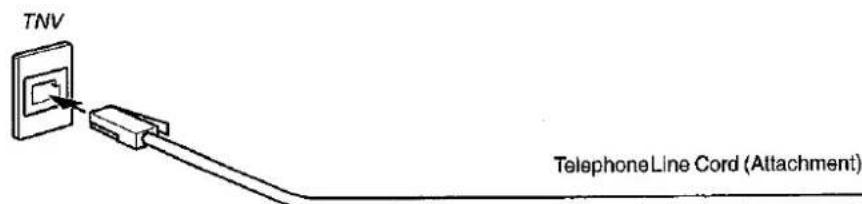
Telephone Line Cord
Plug one end of the telephone line cord into the telephone jack supplied by the telephone company and the other end into the LINE jack on the rear of the machine.
text_image
TNV TelephoneLine Cord (Attachment)Power Cord
Plug one end of the power cord into an ordinary AC outlet and the other end into the receptable on the rear of the machine.
Warning : This apparatus must be properly grounded through an ordinary AC outlet.

text_image
230V to 240V Power Cord (Attachment)
Note: Your machine uses little power and you should keep it ON at all times. If the power is turned OFF for too long, the contents of the memory may be lost.
Connecting the Telephone Line Cord and Power Cord

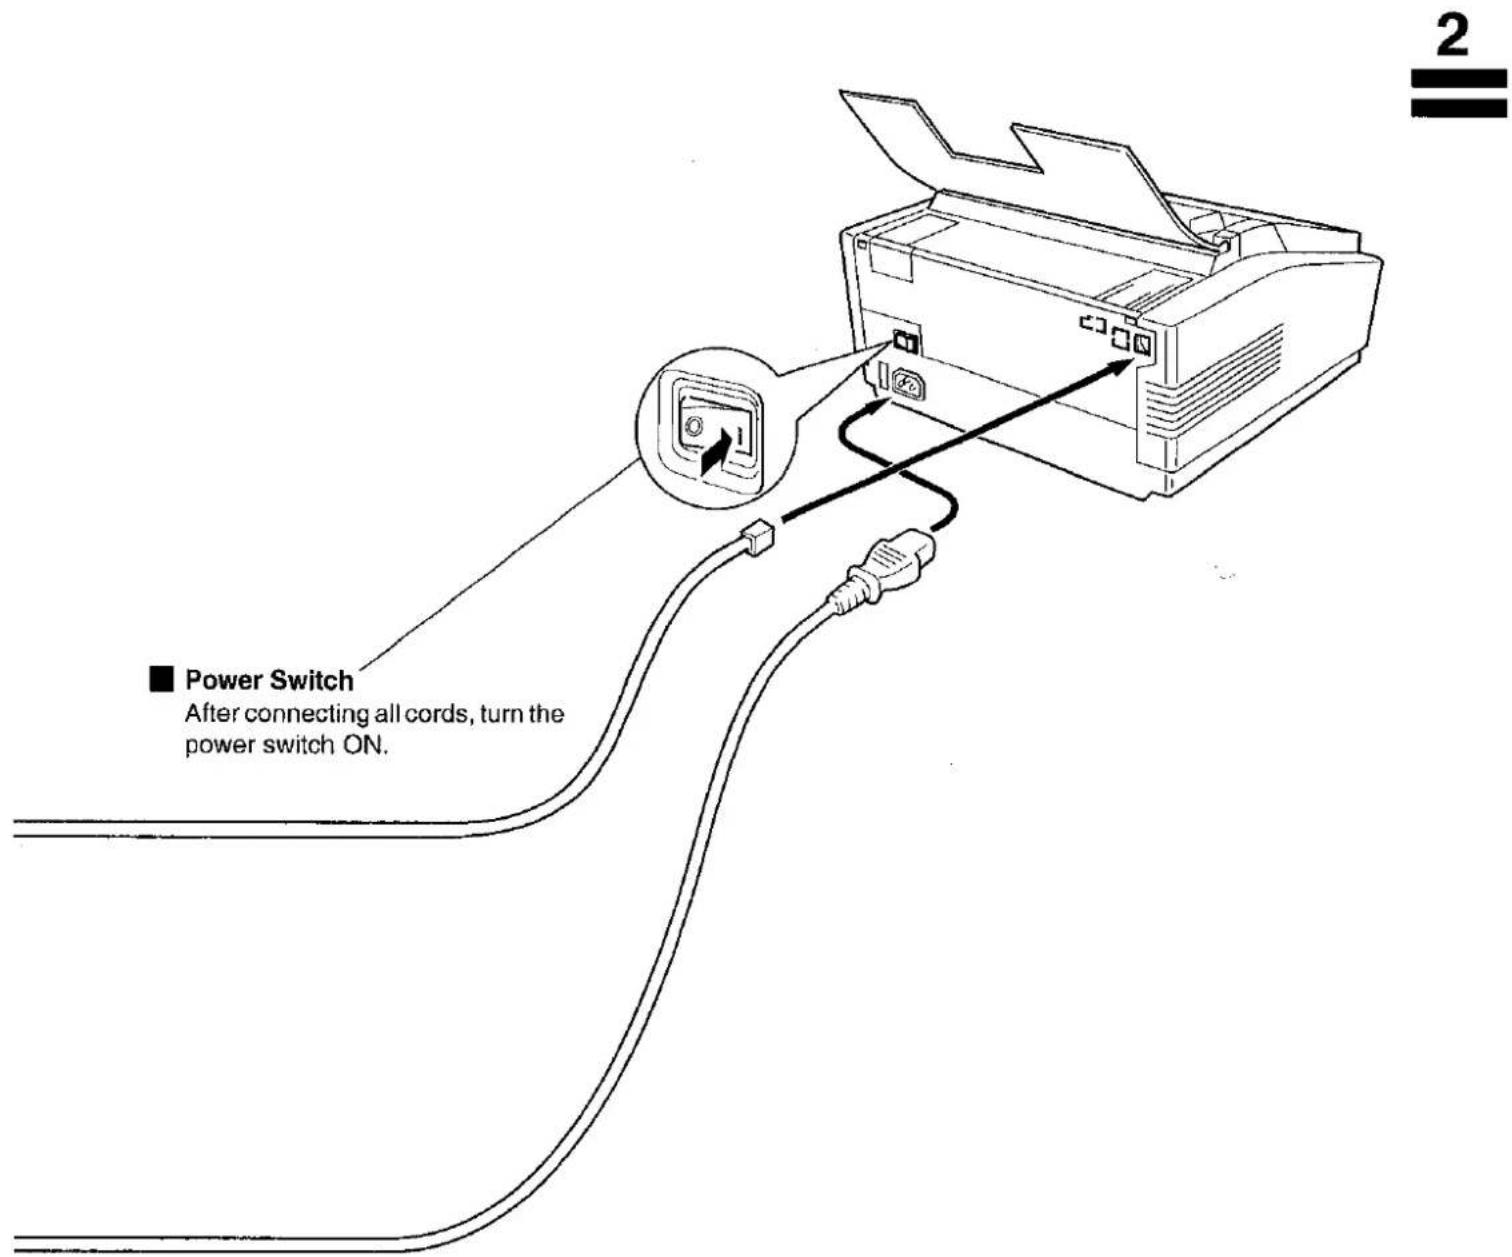
text_image
Power Switch After connecting all cords, turn the power switch ON.
Setting the Dialling Method (Tone or Pulse)
Your machine can operate with either of two dialling methods (Tone or Pulse), depending on the type of telephone line you are connected to. If you need to change the dialling method to Tone or Pulse, follow the procedure below.
1
SET MODE (1-4) ENTER NO. OR V A
2

FAX PARAMETER(01-99) NO.=
3


06 DIALLING METHOD 2: TONE
4
for Pulse.
06 DIALLING METHOD 1: PULSE
for Tone.
or
06 DIALLING METHOD 2: TONE
5
You can adjust the monitor and ringer volume on your machine. The built-in speaker enables you to hear the dial tone, dialling signals, and busy tone. The ringer sounds when your machine receives a call.
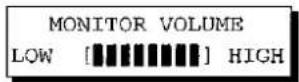
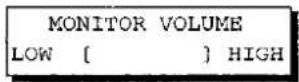
Setting the Monitor Volume
You will hear the dial tone through the speaker.
repeatedly to raise the volume.


repeatedly to lower the volume.
Setting the Ringer Volume
1 Standby

repeatedly to raise the volume.


repeatedly to lower the volume.
Note: You can also adjust the volume of the key touch tone and the volume of the buzzer in Fax Parameter No. 10 (KEY/BUZZER VOLUME). (see page 36)

User Parameters
Your facsimile machine has several basic settings (User Parameters) to help you keep records of the documents you send or receive. For example, the built-in clock keeps the current date and time, and your LOGO and ID Number help to identify you when you send or receive documents.
Setting the Date and Time
At standby the display will show the date and time. Once the standby display is set, it will automatically be updated.
1
FUNCTION

SET MODE (1-4)
ENTER NO. OR V A
2

1:USER PARAMETERS?
PRESS SET TO SELECT
3

DATE & TIME
1-01-1997 00:00
4
Enter the new date and time.
Ex: ①②
01
①⑨⑨⑦
①⑤⑦⑩
Date : 12th
Month : June
Year : 1997
Time : 3:00 PM
DATE & TIME
12-06-1997 15:00
If you make a mistake, use < or > to move the cursor to the incorrect number and enter the new number over it.
5

Setting Your LOGO
When you send a document, your LOGO appears on the top of the copy printed out at the other station.
The LOGO helps to identify you to someone who receives your document.
1
FUNCTION

SET MODE (1-4)
ENTER NO. OR V A
2

1:USER PARAMETERS?
PRESS SET TO SELECT
3

repeatedly until display shows;
LOGO
4
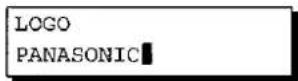
Enter your LOGO (max. 25 characters and digits) by using the Character keys (see page 11).
Ex: P A N A S O N I C
LOGO
PANASONIC
If you make a mistake, use < or > to move the cursor to the incorrect character and enter the new character over it. If more than 19 characters are entered, the left side characters will scroll off the display.
5



Setting Your Character ID
If the remote machine has a Character ID capabilities, when you are sending or receiving, your Character ID will appear on the remote machine's display and the remote machine's Character ID will appear on your display.

text_image
1 FUNCTION 7
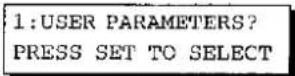

text_image
3 SET repeatedly until display shows;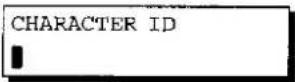
4 Enter your Character ID (max. 16 characters and digits) by using the Character keys (see page 11).
Ex: HEAD SPACE OFFICE
If you make a mistake, use < or > to move the cursor to the incorrect character and enter the new character over it.
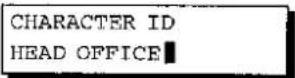
Note: The special characters of , , , , E , and cannot be used for Character ID.
Setting Your ID Number (Fax Telephone Number)
If the remote machine does not have a Character ID but it has an ID Number, when sending or receiving, your ID Number will appear on the remote machine's display and their ID Number will appear on your display.
We suggest you use your facsimile telephone number as your ID number. (max. 20 digits)
text_image
1 FUNCTION 7SET MODE (1-4) ENTER NO. OR V A
1: USER PARAMETERS? PRESS SET TO SELECT

text_image
3 repeatedly until display shows;ID NO.
4 Enter your ID (max. 20 digits) by using the key pad and SPACE.
Ex: ②①① SPACE ⑤⑤⑤ SPACE ①②①②
ID NO. 201 555 1212
If you make a mistake, press CLEAR to erase the number then re-enter the correct number.
text_image
5 SET STOPNote: You may use (*) to enter a "+" character at the beginning of the ID number to indicate the following digit(s) for your country code.
Ex : +44 344 111222 +44 for U.K. country code. +81 3 111 2345 +81 for Japan country code.
This page is intentionally left blank.
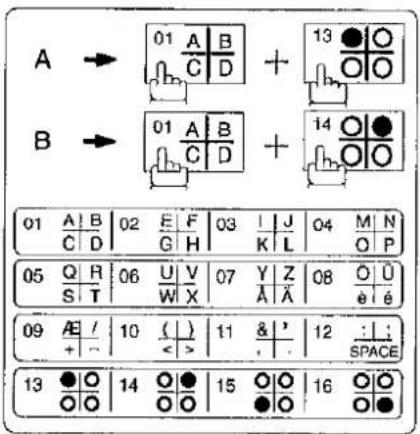
The One-Touch Keys on the Control Panel also serve as character and symbol input keys when you record your LOGO, Character ID and station names. A template is printed on the panel under the directory sheet cover.
Character Keys
text_image
A → 01 A B C D + 13 ● ○ B → 01 A B C D + 14 ○ ○ 01 A B C D 02 E F G H 03 I J K L 04 M N O P 05 Q R S T 06 U V W X 07 Y Z A A 08 ○ Ü e é 09 AE / + - 10 ( ) < > 11 & ' , 12 : ; SPACE 13 ● ○ ○ ○ 14 ○ ● ○ ○ 15 ○ ○ ● ○ 16 ○ ○ ● ○The following is an example of how to enter a LOGO using the character keys.
To enter "PANASONIC" for LOGO.
1 04 M N O P to select M, N, O or P
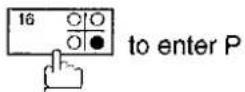
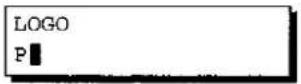
2 01 A B C D to select A, B, C or D
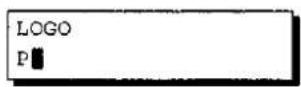
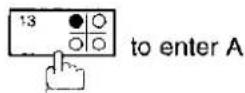
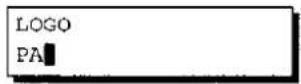
3 Enter all characters using the steps shown above.
4 SET

One-Touch/Abbreviated Dialling Numbers
Entering One-Touch/Abbreviated Dialling Numbers
One-Touch and Abbreviated Dialling are two fast ways of dialling full telephone numbers. To use these dialling methods, you must first store the telephone number using the following procedure.
To enter a One-Touch key, follow these steps below
text_image
1 FUNCTION 7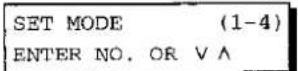
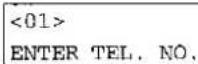
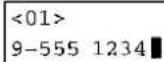
5 Enter the telephone number. (up to 36 digits including pauses and spaces)
Ex: ⑨ PAUSE ⑤ ⑤ ⑤ SPACE ① ② ③ ④
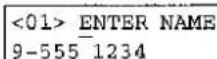
7 Enter the station name using character keys (up to 15 characters).
Ex: S A L E S SPACE D E P T
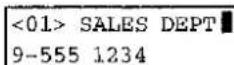
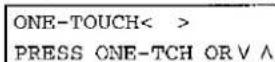
To record another number, repeat step 4 to 8. To return to standby, press STOP.
To set an Abbreviated Dialling Number, follow these steps below
1
SET MODE (1-4) ENTER NO. OR VA
2

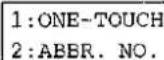
1:ONE-TOUCH 2:ABBR. NO.
3
ABBR. [■] ENTER NO. OR V A
4
Ex: ②② (01 to 34)
[22] ENTER TEL. NO.
5
Enter the telephone number. (up to 36 digits including pauses and spaces)
Ex:⑨ PAUSE ⑤ ⑤ ⑤ SPACE ② ③ ④ ⑤
[22] 9-555 2345
6

[22] ENTER NAME 9-555 2345
7
Enter the station name using character keys (up to 15 characters).
Ex: A C C O U N T I N G
[22] ACCOUNTING 9-555 2345
8

ABBR. [■] ENTER NO. OR V A
To record another number, repeat step 4 to 8.
To return to standby, press STOP.

Note: 1. If you require a special access number to get an outside line, enter it first and then press [PAUSE]. A hyphen "-" is displayed for pause.
-
Use SPACE to enter a space between the numbers to make it easier to read.
-
If you are using Pulse dialling and you wish to change to Tone dialling in the middle of dialling, press TONE (represented by a"/"). The dialling method will be changed from Pulse to Tone after dialling the digit "/".
Ex: 9 PAUSE TONE 555 1234
- You can search for an unused One-Touch key or ABBR, number by pressing √ or ∧ in step 3 or 4.
Changing or Erasing One-Touch/Abbreviated Dialling Numbers
If you have to change or erase any of the One-Touch/Abbreviated dialling numbers, follow the steps below.
To change the settings of a One-Touch/ABBR. dialling number
1


1:ONE-TOUCH 2:ABBR. NO.
2
Select 1 for One-Touch Dialling number Select 2 for ABBR. Dialling Number
Ex: ①
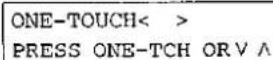
ONE-TOUCH< > PRESS ONE-TCH OR V A
3
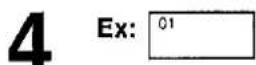
Enter the station you wish to change
<01> SALES DEPT 9-555 1234
Ex: 01
<01> SALES DEPT ENTER TEL. NO.
4

then enter a new telephone number. (see Note 1 and 2)
<01> SALES DEPT 9-555 3456
Ex: ⑨ PAUSE ⑤ ⑤ ⑤ SPACE ③ ④ ⑤ ⑥
<01> SALES DEPT 9-555 3456
5

CLEAR
<01> ENTER NAME 9-555 3456
then enter a new station name. (see Note 1 and 3)
<01> PANAFAX 9-555 3456
Ex: P A N A F A X
ONE-TOUCH< > PRESS ONE-TCH OR V ∧
7
To return to standby, press STOP.
!
Note: 1. Use < or > to move the cursor, then enter the correct number over the incorrect number.
-
Use COPY to insert a space between the numbers you have previously set. If the telephone number is 36 digits in length, COPY cannot be used to insert a space.
-
COPY cannot be used to insert a space in setting of the station name.
-
If the One-Touch/Abbreviated dialling number has been used for a communication reservation, the settings cannot be changed or erased until the communication has finished. To change or erase the settings, cancel the communication first by Edit File Mode (see page 86).
To erase the settings of One-Touch/ABBR. Dialling number
1


1:ONE-TOUCH 2:ABBR. NO.
2
Select 1 for One-Touch Dialling number Select 2 for ABBR. Dialling Number
Ex: ①
ONE-TOUCH< > PRESS ONE-TCH OR V A
3
Enter the station you wish to erase
Ex: 01
<01> SALES DEPT 9-555 1234
4

<01> SALES DEPT ENTER TEL. NO.
5

ONE-TOUCH< > PRESS ONE-TCH OR V ∧
To return to standby, press STOP.

Note: If the One-Touch/Abbreviated dialling number has been used for a communication reservation, the settings cannot be changed or erased until the communication has finished. To change or erase the settings, cancel the communication first by Edit File Mode (see page 86).


One-Touch/Abbreviated Dialling Numbers
Printing Out a Directory Sheet
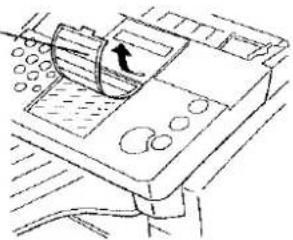
After programming a one-touch dialling number, you can print out the directory sheet which includes the first 10 characters of each station name. Cut along the dotted line and place it over the One-Touch key under the Directory Sheet Cover. To print out a directory sheet, follow these steps below.
1
PRINT OUT (1-7) ENTER NO. OR VA
2

* PRINTING * DIRECTORY SHEET
Your machine prints out the directory sheet.
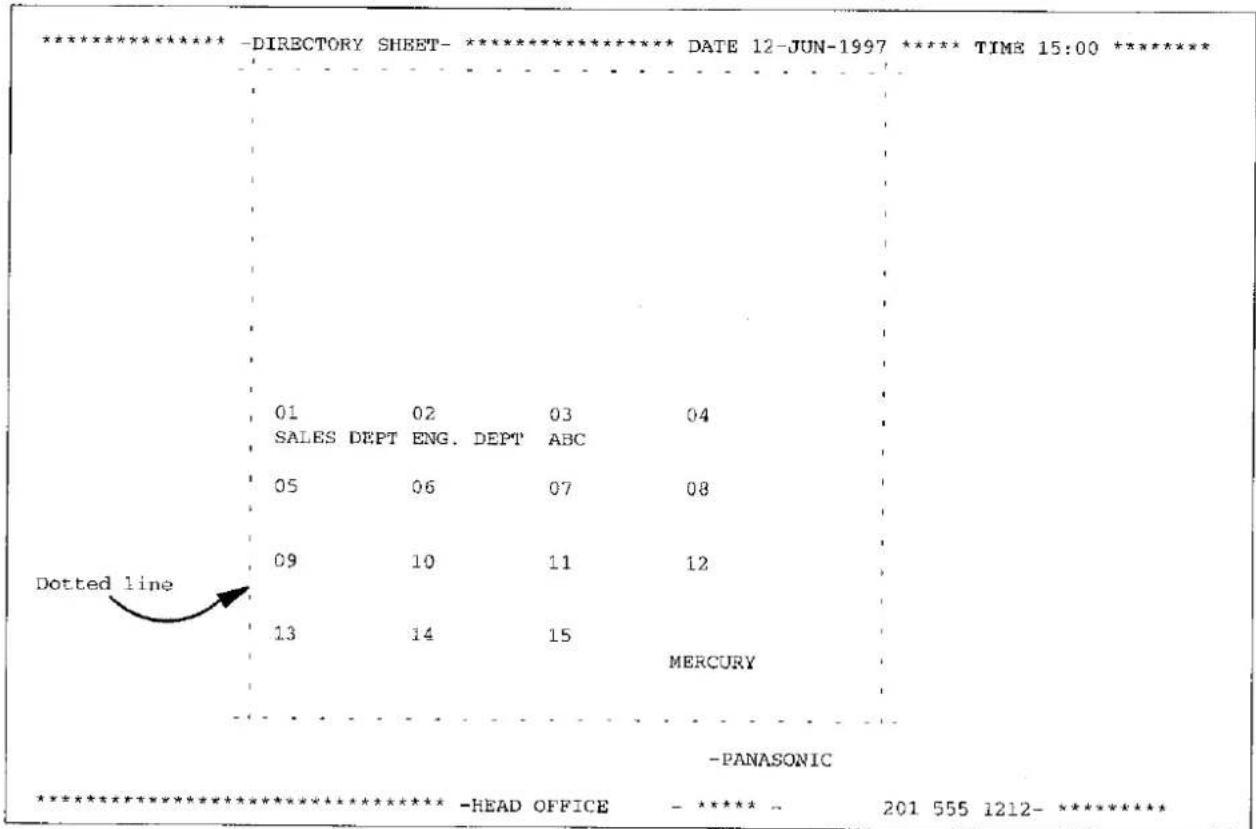
Directory Sheet Cover
natural_image
Technical line drawing of a mechanical device with no visible text or symbolsYour facsimile machine has a variety of adjustable Fax Parameters. These parameters, listed in the Parameter Table, are preset for you and do not need to be changed. If you do want to make a change, read the table carefully. Some parameters, such as the Resolution and Contrast parameters, can be temporarily changed by simple key operation just before a transmission is made. When the transmission ends, however, these parameters return to their preset values (Home position). Other parameters can only be changed by the procedure described below.
Setting the Fax Parameters
1
FUNCTION

⑦

SET MODE (1-4)
ENTER NO. OR V A
2

FAX PARAMETER(01-99)
NO.=
3
Enter Fax Parameter number from the Parameter Table (see pages 36 to 38).
Ex: ①① for CONTRAST
FAX PARAMETER(01-99)
NO.=01
4

01 CONTRAST
1: NORMAL
5
Enter the new setting value.
Ex: ② for LIGHTER
01 CONTRAST
2:LIGHTER
6

02 RESOLUTION
1: STANDARD
To set another parameter, press CLEAR to return to step 3, or, to return to standby, press STOP.

Note: 1. To scroll the Fax Parameters in Step 2 or 4, press √ or ∧.
- To print out a Fax Parameter List, see page 114.
Fax Parameter Table
| No. | Parameter | Setting Number | Setting | Comments |
| 01 | CONTRAST | 1 | Normal | Setting the home position of the CONTRAST key. |
| 2 | Lighter | |||
| 3 | Darker | |||
| 02 | RESOLUTION | 1 | Standard | Setting the home position of the RESOLUTION key. |
| 2 | Fine | |||
| 3 | S-Fine | |||
| 05 | MEMORY | 1 | Off | Settling the home position of the MEMORY key. |
| 2 | On | |||
| 06 | DIALLING METHOD | 1 | Pulse | Selecting dialling method. |
| 2 | Tone | |||
| 07 | HEADER PRINT | 1 | Inside | Selecting printing position of the header.Inside: Inside TX copy area.Outside: Outside TX copy area.No print: Header is not printed. |
| 2 | Outside | |||
| 3 | No print | |||
| 08 | HEADER FORMAT | 1 | Logo, ID No. | Selecting the header format. |
| 2 | From To | |||
| 09 | RCV'D TIME PRINT | 1 | Invalid | Selecting whether or not the machine prints the received date & time, remote ID, percentage of reduction and page number on the bottom of each received page. |
| 2 | Valid | |||
| 10 | KEY/BUZZER VOLUME | 1 | Off | Selecting the volume of the Key/Buzzer tone. |
| 2 | Soft | |||
| 3 | Loud | |||
| 12 | COMM. JOURNAL | 1 | Off | Selecting home position of printout mode for COMM. Journal Off/Always/Inc. onlyOff: No printoutAlways: Always prints outInc. only: Printout when communication has failed. |
| 2 | Always | |||
| 3 | Inc. only | |||
| 13 | AUTO JOURNAL PRINT | 1 | Invalid | Selecting whether or not the machine prints the journal automatically after every 32 transaction. |
| 2 | Valid | Selecting whether or not the machine prints the journal automatically after every 32 transaction. |
Continued on the next page.
| No. | Parameter | Setting Number | Setting | Comments |
| 15 | IN MODE | 1 | Tel | Selecting IN (attended) mode as either Telephone Mode or Fax / Tel Auto Switching Mode. |
| 2 | Fax/Tel SW | |||
| 16 | OUT MODE | 1 | Fax | Selecting OUT (unattended) mode as either Fax Mode or TAM Interface Mode. |
| 2 | TAM I/F | |||
| 18 | OP CALL TIMER | 1 | 20 sec. | Selecting the length of time that your machine signals (alarms) for an Incoming voice call in Fax/Tel Auto Switching mode (see page 70). |
| 2 | 30 sec. | |||
| 3 | 40 sec. | |||
| 4 | 50 sec. | |||
| 19 | OGM LENGTH (TAM I/F) | 1 | 1 sec. | Setting for the OGM length of your TAM from 1 to 60 seconds. The machine will not start to detect SILENCE until the time setting has lapsed. |
| --- | --- | |||
| 60 | 60 sec. | |||
| 20 | SILENT DET. (TAM I/F) | 1 | Invalid | Selecting the Silent Detection Mode. |
| 2 | Valid | |||
| 22 | SUBSTITUTE RCV | 1 | Invalid | Selecting whether or not the machine receives to memory when recording paper runs out, ink runs out or recording paper jammed. |
| 2 | Valid | |||
| 23 | RECORDING PAPER SIZE | 1 | A4 | Setting the recording paper size installed in your machine. |
| 2 | Letter | |||
| 3 | Legal | |||
| 24 | PRINT REDUCTION | 1 | Fixed | Selecting print reduction mode.Fixed: Reduce received document according to setting of Parameter No. 25.Auto: Reduce received document according to the length of received documents. |
| 2 | Auto | |||
| 25 | REDUCTION RATIO | 70 | 70% | Selecting fixed print reduction ratio from 70% to 100%. This parameter functions only when fixed print reduction is selected in fax parameter no. 24. |
| --- | --- | |||
| 100 | 100% | |||
| 26 | POLLING PASSWORD | (----) | Setting a 4-digit password for secured polling. |
Continued on the next page.
| No. | Parameter | Setting Number | Setting | Comments |
| 37 | RCV TO MEMORY | (----) | Entera 4-digit password used to print out the received document in memory by F8-5 (RCV TO MEMORY). When F8-5 is set to On, this parameter will not be shown on the LCD display. (see page 87) | |
| 42 | CONF. POLLED FILE SAVE | 1 | Invalid | Selecting whether or not the machine saves the confidential polled file even after the file is polled once. |
| 2 | Valid | |||
| 46 | SELECT RCV | 1 | Invalid | Selecting whether or not the machine performs selective reception. (see page 95) |
| 2 | Valid | |||
| 47 | REMOTE RCV | 1 | Invalid | Selecting whether or not the machine accepts remote reception command (see page 69). |
| 2 | Valid | |||
| 52 | DIAGNOSTIC PASSWORD | (----) | Setting the password for Remote Diagnostic Mode. Please ask your Panasonic Authorized Dealer for details. | |
| 53 | SUB-ADDRESS PASSWORD | (----) | Setting a 20-digit password for secured sub-address communication. | |
| 99 | MEMORY SIZE | - | - | Display the amount of base memory. |

Note: The standard settings are printed on the Fax Parameter List. To print out Fax Parameter List, see page 114.
Mercury's Residential Service is a highly competitive telephone service for the residential and small business user. Most UK long distance and international calls are cheaper over Mercury, especially in the Economy period. For customers who makes a large number of long distance and international calls during the daytime, extra saving area available by joining the Mercury Frequent Caller Programme.
Mercury calls are rounded to the second, and charged to the nearest tenth of a penny. You will also receive fully itemised bills. Mercury Customer Assistance is available 24 hours a day to provide the highest level of customer service.
There are two ways to access Mercury, the Residential 132 Service and Residential PIN Code Service. To find out the best method to suit your requirement, call Mercury Customer Assistance on Free Call 0500-500194 (24 hours). Most homes and businesses are now able to access the Mercury network via their existing British Telecom line. Mercury Customer Assistance will be able to check whether Mercury is available in your area.
All Mercury's charges and tariffs are the same for both methods of accessing Mercury. The only difference is how you connect to the Mercury network
For Residential 132 Service Customers
Once you have become a Mercury Residential 132 customer, you simply dial 132 before a long distance or international call to send it over the Mercury network. The Mercury button on your machine comes with the digits '132' pre-stored in it. To check that you have access to Mercury follow details as page 41 "Checking the Connection to Mercury Network".
For Residential PIN Code Service Customers—Programming the Mercury Button with Your PIN Code
After you apply for Mercury Residential PIN Code Service, you will receive a Mercury PIN code in two separate parts. The PIN code, which is similar to a bank PIN number, identifies you as a Mercury customer and will need to be stored in your fax memory using the Mercury button. See page 40 "To enter 131 access and PIN code".
Cost Centre Codes
Cost Centre codes are selectable on your Mercury order form. By keying in a code number (either 2 or 3 digits) before dialling each and every Mercury call businesses can allocate calls to different jobs, or residential users can see who is responsible for each call.
Please note that Cost Centre codes are not currently available with Residential 132 Service (at time of going to press).
Deleting the Mercury PIN Code
If for any reason you have to return your machine for repair, you should delete the Mercury PIN code (see Note 2 in page 42).

Note: To ensure the security of your Mercury PIN code it is essential that you do not disclose your personal 4-digit code to any unauthorised persons.
Entering the Mercury Button
To enter 132 access code into the Mercury button, you do not need to do anything as the 132 access code is already programmed in the Mercury Button (see Note 1).
To enter 131 access and PIN code (Mercury Residential PIN Code Service Customer Only)
1



1:ONE-TOUCH 2:ABBR. NO.
2
3
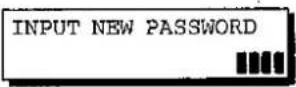
Enter a 4-digit password (Note 2).
Ex: ①②③④ and SET
4

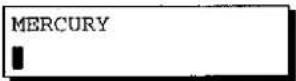
5
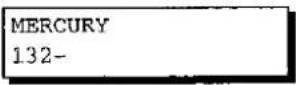
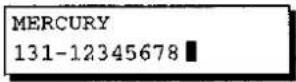
Enter 131, [PAUSE] and your PIN code (part 1 then part 2) over the number 132 (Note 3)
Ex: ①③① PAUSE ①②③④⑤⑥⑦⑧
6



Note: 1. If your machine is connected to a PBX line and needs a special code to get an outside line, follow the steps above and enter the number first then 132 access code.
-
You can enter any 4-digit number, which prevents an unauthorised person from accessing your PIN code.
-
If your machine is connected to a PBX line and needs a special code to get an outside line, enter the number first, followed by 131 access code, Pause and your PIN code.
Checking the Connection to Mercury Network
To check if you have access to Residential 132 Service make the following call. (see Note 1)
1

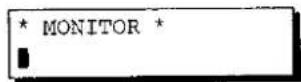
2

3
Dial 132 using your machine's keypad.
4
You will hear the recorded message welcoming you to Mercury network through your machine's monitor speaker. (see Note 2)
5
Now to make a call via Mercury. See page 44.
To check if Mercury button is programmed correctly for Residential PIN Code Service make the following call. (see Note 1)
1

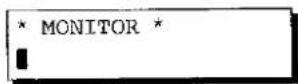
2
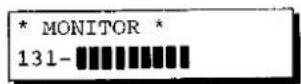
3
Enter Cost Centre Code if applicable. (see Note 3)
4
Dial 1500 using your machine's keypad.
5
You will hear a high pitched tone (Mercury dial tone) through your machine's monitor speaker, then after a few seconds the recorded message welcoming you to Mercury network. (see Note 2)
6
Now to make a call via Mercury. See page 43.

Note: 1. This call is free of charge.
-
If you cannot hear the message clearly, adjust the speaker volume. (see page 23)
-
Select any 2 or 3 digit number except 112 or 999.
-
If you have any difficulties, please contact Mercury Customer Assistance on Free Call 0500-500193 (24 hours).

The MERCURY Residential 132 Service and PIN Code Service
Re-entering the Mercury Button
1


1:ONE-TOUCH 2:ABBR. NO.
2
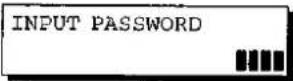
3
Enter the 4-digit password.
Ex: ①②③④ and SET
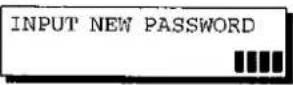
4
Enter a new 4-digit password.
Ex: ②②②② and SET
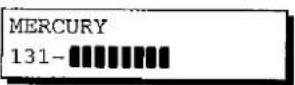
5

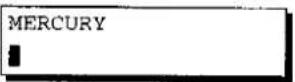
6
Enter a new access code (and, Pause, PIN code for 131 access). (see Note 1)
Ex: ①③② and PAUSE
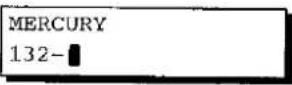
7


Note: 1. When you change Mercury button setting, One-Touch/Abbreviated dialling numbers which are programmed using Mercury button are changed automatically.
- To delete the PIN code press SET just after pressing CLEAR after step 5.
Entering One-Touch/Abbreviated Dialling Numbers
The Mercury button can be used to help you to enter One-Touch/Abbreviated dialling numbers. Instead of entering either 132 or 131, Pause and PIN code at each time of entering the One-Touch/Abbreviated dialling number, you simply press the Mercury button followed by the desired telephone number.
If you want to retain the choice between British Telecom network and Mercury network, just enter the telephone number. (see Note 1)
To enter One-Touch/Abbreviated dialling via Mercury network
1
FUNCTION


[NO TEXT]

15

P
1:ONE-TOUCH
2:ABBR. NO.
2
Press a One-Touch key or ABBR/SEARCH and a 2-digit code
(01 to 34).
3
(see Note 2)
<01>
ENTER TEL. NO.
<01>

or
<01>
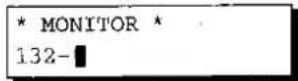
132-
<01>

or
<01>
132-5551234
<01> ENTER NAME

or
<01> ENTER NAME
132-5551234
<01> PANASONIC

or
<01> PANASONIC
132-5551234
4
Enter the telephone number. (see Note 3)
Ex:⑤⑤⑤①②③④
5

6
Enter the station name using character key (up to 15 characters).
Ex: P A N A S O N I C
7


Note: 1. Only transmission from ADF is available in this operation. If you want to use memory transmission via Mercury network, enter full number into One-Touch/Abbreviated dialling number by using Mercury button.
- If 131 access is set in Mercury button, PIN code is not shown on the display.
- You can enter a maximum of 36 digits including Mercury PIN code, telephone number and pauses.
- After entering whole One-Touch/Abbreviated dialling numbers, confirm the all numbers are entered correctly by using One-Touch/Abbreviated dialling number list (see page 112). If the PIN code is entered in a One-Touch/Abbreviated dialling, the PIN code is not printed out.

The MERCURY Residential 132 Service and PIN Code Service
Transmission Via Mercury Network
Where an access code is programmed in One-Touch/Abbreviated dialling
1

Set document(s) face down.
ENTER STATION
00%
2

Make sure that the MEMORY lamp is on.
If not, press MEMORY to set "ON".
3
Press a One-Touch key or ABBR number.
Ex: 01
<01> PANASONIC
131-5551234
or
<01> PANASONIC
132-5551234
4
The document is stored into memory with a file number.
Then start to dial the telephone number.
Where an access code is not programmed in One-Touch/Abbreviated dialling (see Note 1)
1
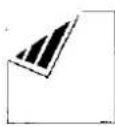
Set document(s) face down.
ENTER STATION
00%
2

3
Enter Cost Centre Code if applicable. (see Note 2)
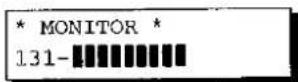
or
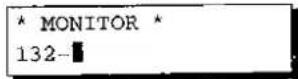
4
Dial the telephone number by pressing either:
• One-Touch Dialling
- Abbreviated Dialling
• Manual Number Dialling
• Directory Search Dialling
Then, press START when you hear a beep.
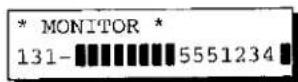
or
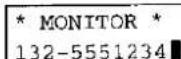

Note: 1. Only transmission from ADF is available in this operation. If you want to use memory transmission via Mercury network, enter full number into One-Touch/Abbreviated dialling number by using Mercury button.
- Select any 2 or 3 digit number except 112 or 999. (Only applicable to Mercury Residential PIN Code Service customer who have selected to use Cost Centre codes.
This page is intentionally left blank.
Documents You Can Send
In general, your machine will send any document printed on A4 size paper.
Documents You Cannot Send
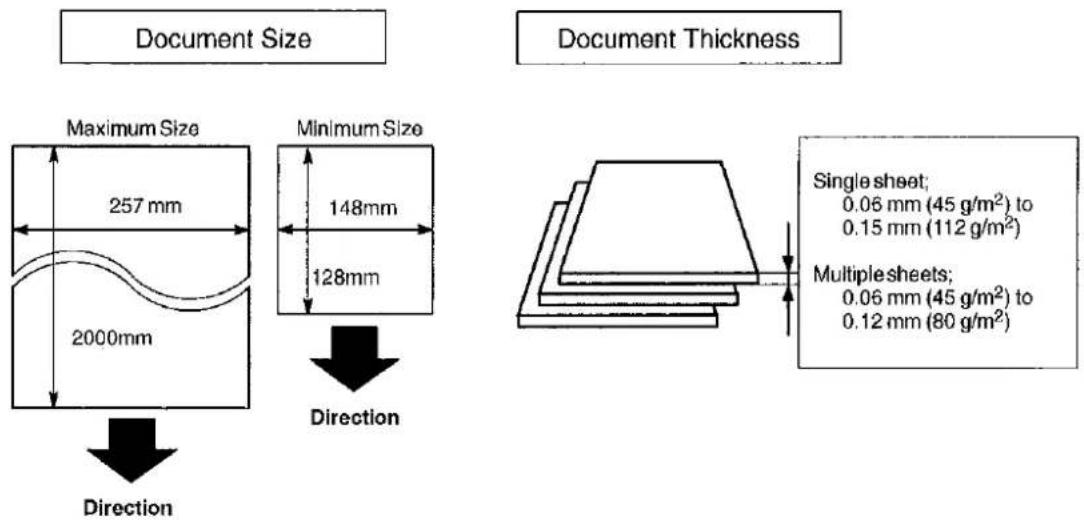
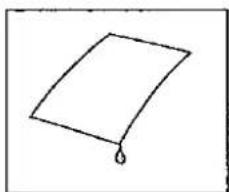
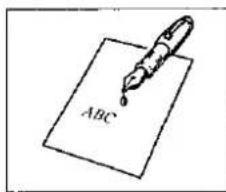
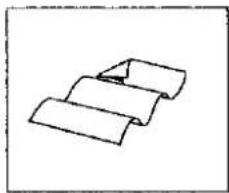
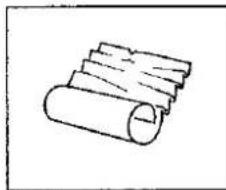
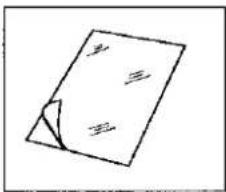
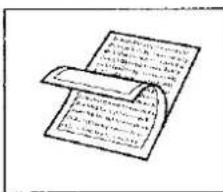
You must never try to send documents that are
natural_image
Simple line drawing of a tilted rectangular shape with a small droplet hanging from its side (no text or symbols)Wet
text_image
ABCCovered with wet ink or paste
natural_image
Simple line drawing of three overlapping rectangular sheets (no text or symbols)Too thin (e.g., onionskin, airmail paper, pages from some magazines, etc.)
natural_image
Simple line drawing of a rolled-up sheet of paper (no text or symbols)Wrinkled, curled or folded
text_image
Hand-drawn sketch of a folded paper with handwritten marks and a triangular baseCoated (e.g., glossy paper, etc.)
text_image
Hand-drawn sketch of a document with dense text, likely a formal letter or manuscriptChemically processed (e.g., pressure-sensitive paper, carbon-coated paper, etc.) or made of cloth or metal
To transmit these kinds of documents, make a photocopy first and then transmit the copy instead.

Loading Documents
How to Load Documents
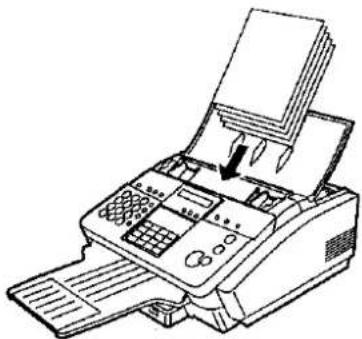
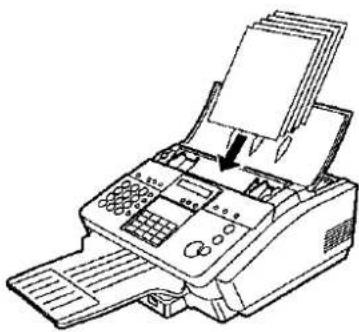
- Be sure the document(s) is free of staples, paper clips and is not torn, greasy or covered by foreign objects.
- Place the document(s) FACE DOWN on the Automatic Document Feeder (ADF) until the leading edge placed into the machine stops.
If you are sending multiple pages, make sure that the bottom sheet enters first. You can also stack up to 20 PAGES (see Note) on the ADF at one time. If you have more than 20 pages, wait until transmission or storing in memory starts as pages feed through, place any remaining pages on top of the last page in the feeder.
- Adjust the Document Guides to center the document on the ADF.
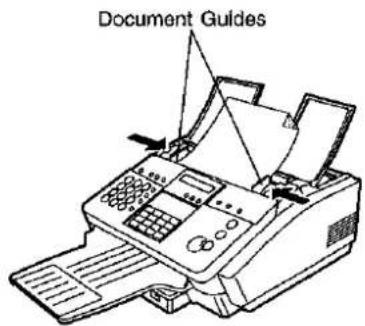
text_image
Document GuidesCORRECT
natural_image
Line drawing of a printer with paper feed and paper tray (no text or symbols)INCORRECT
natural_image
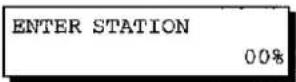
Line drawing of a printer with paper feed and control panel (no text or symbols)When you set a document on the ADF, the display message will change from date and time (standby) to the following message. You can now change basic transmission settings, or begin the dialling procedure.

Note: Transmitting documents longer than 364 mm requires user's assistance.
You can temporarily change the transmission settings either before or after you place the document on the ADF. These settings are as follows;
- Contrast
- Resolution
- Halftone
• Communication Journal
After your document has been sent, your machine will automatically return to the preset settings.
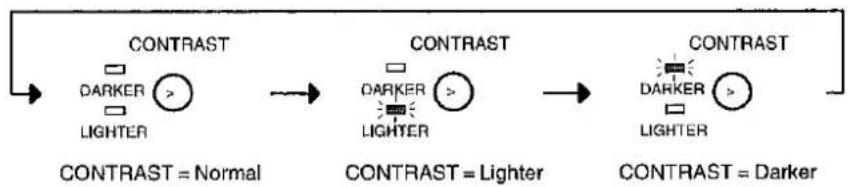
Contrast
Your machine is preset to Normal contrast. If you wish to send a document with lighter contrast, change the setting to Lighter. If you wish to send a document with darker contrast, change the setting to Darker.
Press CONTRAST to:
flowchart
graph LR
    A["CONTRAST"] --> B["DARKER >"]
    B --> C["LIGHTER"]
    C --> D["CONTRAST = Normal"]
    D --> E["DARKER >"]
    E --> F["LIGHTER"]
    F --> G["CONTRAST = Lighter"]
    G --> H["DARKER >"]
    H --> I["LIGHTER"]
    I --> J["CONTRAST = Darker"]
Note: To change the preset Contrast position, change the setting of Fax Parameter No. 01, see page 36.
Resolution
Your machine is preset to Standard resolution, which is suitable for most documents.
Use Fine or Super Fine for detailed documents.
Press RESOLUTION to:
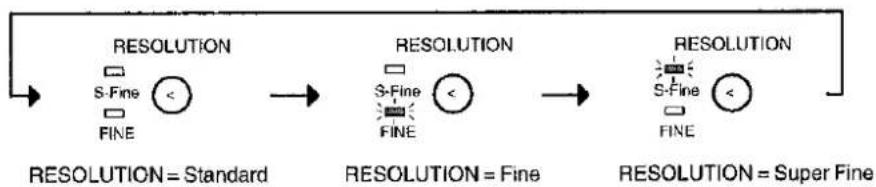
flowchart
graph LR
    A["RESOLUTION = Standard"] --> B["RESOLUTION = Fine"]
    B --> C["RESOLUTION = Super Fine"]
Note: To change the preset Resolution position, change the setting of Fax Parameter No. 02, see page 36.

Basic Transmission Settings
Halftone
The Halftone setting is useful when sending photographs or illustrations with gray tones. Your machine is preset to HALFTONE = Off.
Press HALFTONE to:
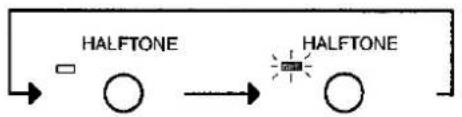
flowchart
graph LR
    A["Halftone"] --> B["Single Halftone"]
    style A fill:#fff,stroke:#000
    style B fill:#fff,stroke:#000
HALFTONE = Off HALFTONE = On
Note: When you select HALFTONE, your machine will automatically select Fine Resolution.
Communication Journal (COMM. JOURNAL)
A Communication Journal lets you verify if the transmission was successful. You can select the condition to print out the communication Journal as follows.
When you set COMM. JOURNAL = OFF,
When you set COMM. JOURNAL = ON,
When you set COMM. JOURNAL = INC.,
a Communication Journal will not be printed out.
a Communication Journal is printed out automatically after every communication.
a Communication Journal is printed out automatically only if the communication has failed.
1
FUNCTION

SELECT MODE (1-5)
ENTER NO. OR V A
2


COMM. JOURNAL=INC
1:OFF 2:ON 3:INC
3
for OFF.

for ON (Always print out).
for INCOMPLETE only.
COMM. JOURNAL=OFF 1:OFF 2:ON 3:INC
or
COMM. JOURNAL=ON 1:OFF 2:ON 3:INC
or
COMM. JOURNAL=INC 1:OFF 2:ON 3:INC
4

Note: To change the preset Comm. Journal position, change the setting of Fax Parameter No. 12, see page 36.

You can choose Direct, Voice Mode or Memory Transmission.
Use Direct Transmission if:
• The memory is full.
- You want to send the document real time.
Use Voice Mode Transmission if:
- You want to send the document after talking with the other party.
- You want to send the document after listening to a voice prompting.
Use Memory Transmission if:
- You want to send the document to multiple stations.
- You have to retrieve the document immediately.
- You want to take the advantage of Dual Operation design.
Direct Transmission
If your machine's memory is full or you wish to send the document real time, use Direct Transmission.
Manual Number Dialling (Direct Transmission)
To dial the telephone number manually, follow the steps below.
1

Set document(s) face down.
ENTER STATION
00%
2
Make sure that the lamp is off. If not, press MEMORY to set "Off".
3
Enter a telephone number from the keypad.
Ex: ⑤⑤⑤①②③④
PRESS START TO DIAL 5551234
4
Your machine starts to dial the telephone number.
* DIALLING * 5551234
!
Note: 1. If you need a special access number to get an outside line, dial it first then press PAUSE to enter a pause (represented by a "-" before dialling the full number.
Ex: 9 PAUSE 5551234
- If you are using Pulse dialling and you wish to change to Tone dialling in the middle of dialling, press
TONE (represented by a "/").
The dialling mode will be changed from Pulse to Tone after dialling the digit "/".
Ex: 9 PAUSE TONE 5551234
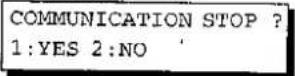
- To stop the transmission, press STOP.
The display shows:
COMMUNICATION STOP ? 1: YES 2: NO
Press ① to stop the transmission. The Communication Journal will not print out regardless of the printout mode setting of the Communication Journal.

Sending Documents
One-Touch Dialling (Direct Transmission)
One-Touch Dialling allows you to dial a full number by pressing a single key. To set up the One-Touch keys, see page 30.
1

Set document(s) face down.
ENTER STATION
00%
2
Make sure that the lamp is off. If not, press MEMORY to set "Off".
3
Press a One-Touch key.

The display will show the One-Touch number and station name. The full number (e.g. 5551234) will then be dialed.
<01>(Station name) 5551234
* DIALLING * 5551234

Note: To stop the transmission, press STOP.
The display shows:
COMMUNICATION STOP ? 1: YES 2: NO
Press① to stop the transmission. The Communication Journal will not print out regardless of the printout mode setting of the Communication Journal.
Abbreviated Dialling (Direct Transmission)
Abbreviated dialling is a speedy way to dial a frequently dialed telephone number by preprogramming the telephone number in the built-in auto-dialer with a 2-digit abbreviated code. To program an abbreviated dialling number, see page 31.
1

Set document(s) face down.
ENTER STATION
00%
4
2
Make sure that the lamp is off. If not, press MEMORY to set "Off".
3
Press ABBR/SEARCH and a 2-digit code.
Ex:


The display will show the ABBR number and station name. The full number (e.g. 5553456) will then be dialed.
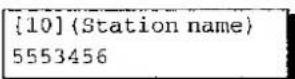
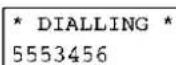

Note: To stop the transmission, press STOP.
The display shows:
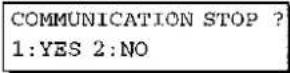
Press① to stop the transmission. The Communication Journal will not print out regardless of the printout mode setting of the Communication Journal.
Directory Search Dialling (Direct Transmission)
Directory Search dialling allows you to dial a full telephone number by searching the station name entered in the Abbreviated dialling numbers.
1

Set document(s) face down.
ENTER STATION
00%
2
Make sure that the lamp is off. If not, press MEMORY to set "Off".
3

ABBR. [■] ENTER NO. OR V A
4
repeatedly until display shows the station name you want to send to.
[10] PANASONIC 5553456
5
The full number (e.g. 5553456) will be dialed.
* DIALLING * 5553456
!
Note: To stop the transmission, press STOP.
The display shows:
Press ① to stop the transmission. The Communication Journal will not print out regardless of the printout mode setting of the Communication Journal.
Voice Mode Transmission
If you wish to send the document after talking with other party, use Voice Mode Transmission. Your machine requires an external telephone.
Off-Hook Dialling
For Off-Hook Dialling, follow these steps
1

Set document(s) face down.
2 Lift the handset or the external telephone and dial the telephone number.
Ex: ⑤⑤⑤①②③④
3 When you hear the voice of the other party, tell the other party to prepare to receive a document.
Then, when you hear a beep,
and hang up the handset.
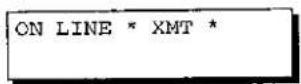
Note: To stop the transmission, press STOP.
The display shows:
COMMUNICATION STOP 1: YES 2: NO
Press① to stop the transmission. The Communication Journal will not print out regardless of the printout mode setting of the Communication Journal.

Sending Documents
On-Hook Dialling
For On-Hook Dialling, follow these steps
1
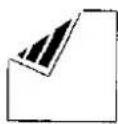
Set document(s) face down.
ENTER STATION
00%
2

You will hear dial tone through the monitor speaker.
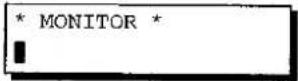
3
Dial the telephone number from the keypad.
Ex: ⑤⑤⑤①②③④
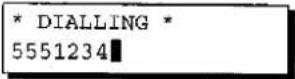
4
When you hear a beep,
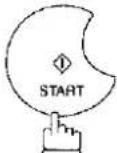
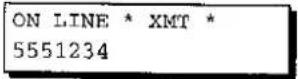

Note: 1. If you need a special access number to get an outside line, dial it first then press PAUSE to enter a pause (represented by a “-”) before dialling the full number.
Ex: 9 PAUSE 5551234
- If you are using Pulse dialling and you wish to change to Tone dialling in the middle of dialling, press TONE (represented by a "/").
The dialling mode will be changed from Pulse to Tone after dialling the digit "/".
Ex: 9 PAUSE TONE 5551234
- To stop the transmission, press STOP.
The display shows:
Press① to stop the transmission. The Communication Journal will not print out regardless of the printout mode setting of the Communication Journal.
Memory Transmission
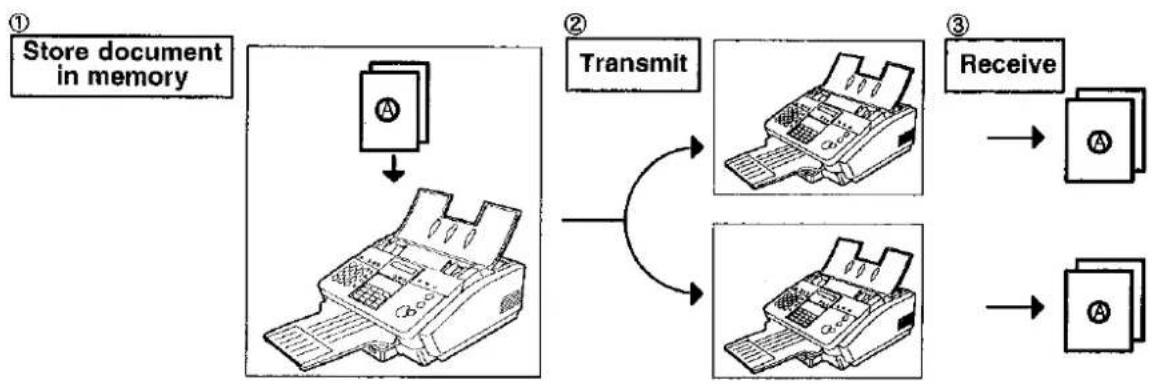
Your machine quickly stores the document into the machines memory and then starts to dial the telephone number.
If the transmission fails, your machine will re-transmit the remaining unsuccessful page(s) automatically.
flowchart
graph TD
    A["Store document in memory"] --> B["Transmit"]
    B --> C["Receive"]
    subgraph Store_Department
        D["Storage Device A"]
        E["Physical Device B"]
    end
    subgraph Transmit
        F["Physical Device 1"]
        G["Physical Device 2"]
        H["Physical Device 3"]
    end
    subgraph Receive
        I["Physical Device A"]
        J["Physical Device B"]
    end
4


Note: 1. The File Number of the document being stored is shown at the upper right corner of the display while storing the document. It is also printed on the Communication Journal (COMM. JOURNAL), 32 Transaction Journal and File List. The percentage of memory used is shown on the lower right corner of the display after each page is stored.
- If a memory overflow occurs while storing documents into memory, all the remaining documents in the ADF will be ejected. The machine will prompt on the display, whether to start transmitting those pages which are successfully stored or to cancel the transmission. Press ① to cancel; press ② to transmit. See Specifications, page 133 for the image memory capacity. If no action is taken within 10 seconds, the machine will start transmitting the stored pages.
- An Information Code will be displayed if the transmission has failed or no answer at the receiving side after the last automatic redial. The document stored for this transmission will be erased from the memory automatically and the transmission is marked with the Information Code or "BUSY" on the Communication Journal (COMM. JOURNAL).
- To stop the transmission, press STOP.
The display shows;
COMMUNICATION STOP ? 1: YES 2: NO
* STORE * NO.003 PAGES=02 10%
* STORE * COMPLETED TOTAL PAGES=05 30%
MEMORY OVERFLOW INFO. CODE=870
15 PAGES COMPLETED DELETE? 1: YES 2: NO
INCOMPLETE INFO.CODE=XXX
Press ① to stop the transmission. The document you stored will be erased automatically.
- If you would like to print a Communication Journal (COMM. JOURNAL) after stopping a transmission, press
① when the display shows:
PRINT COMM. JOURNAL? 1: YES 2: NO
Manual Number Dialling
To dial the telephone number manually, follow the steps below.
1
Set document(s) face down.
ENTER STATION
00%
2

Make sure that the MEMORY lamp is on. If not, press MEMORY to set "On".
ENTER STATION(S)
THEN PRESS START 00%
3
Enter a telephone number from the keypad.
Ex: ⑤⑤⑤①②③④
TEL. NO.
5551234
4
The document is stored into memory with a file number.
Then starts to dial the telephone number.
* STORE * NO.002
PAGES=01 05%
* STORE * COMPLETED
TOTAL PAGES=05 25%
* DIALLING * NO.002
5551234

Note: 1. If you need a special access number to get an outside line, dial it first then press PAUSE to enter a pause (represented by a "-" before dialling the full number.
Ex: 9 PAUSE 5551234
- If you are using Pulse dialling and you wish to change to Tone dialling in the middle of dialling, press TONE (represented by a "/").
The dialling mode will be changed from Pulse to Tone after dialling the digit "/".
Ex: 9 PAUSE TONE 5551234
One-Touch Dialling
One-Touch Dialling allows you to dial a full number by pressing a single key. To set up the One-Touch keys, see page 30.
1
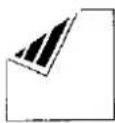
Set document(s) face down.
ENTER STATION
00%
2
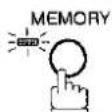
Make sure that the MEMORY lamp is on. If not, press MEMORY to set "On".
ENTER STATION(S)
THEN PRESS START 00%
3
Press a One-Touch key.
<01>(Station name)
5551234
4
The document is stored into memory with a file number. Then starts to dial the telephone number.
* STORE * NO.002
PAGES=01 05%
* STORE * COMPLETED
TOTAL PAGES=05 25%
* DIALLING * NO.002
5551234

Sending Documents
Abbreviated Dialling
Abbreviated dialling is a speedy way to dial a frequently dialed telephone number by preprogramming the telephone number in the built-in auto-dialer with a 2-digit abbreviated code. To program an abbreviated dialling number, see page 31.
1

Set document(s) face down.
ENTER STATION
00%
2

Make sure that the MEMORY lamp is on. If not, press MEMORY to set "On".
ENTER STATION(S) THEN PRESS START 00%
3
Press ABBR/SEARCH then enter a 2-digit code.
Ex:
ABBR/SEARCH
①
0
10 5553456
4
The document is stored into memory with a file number. Then starts to dial the telephone number.
* STORE * NO.002 PAGES=01 05%
* STORE * COMPLETED TOTAL PAGES=05 25%
* DIALLING * NO.002 5553456
Directory Search Dialling
Directory Search dialling allows you to dial a full telephone number by searching the station name entered in the Abbreviated dialling numbers.
1
Set document(s) face down.
ENTER STATION
00%
2

Make sure that the MEMORY lamp is on. If not, press MEMORY to set "On".
ENTER STATION(S)
THEN PRESS START 00%
3

ABBR. [ ]
ENTER NO. OR V A
4

or

repeatedly until display shows the station name you want to send to.
[10] PANASONIC 5553456
5
The document is stored into memory with a file number. Then starts to dial the telephone number.
* STORE * NO.002 PAGES=01 05%
* STORE * COMPLETED TOTAL PAGES=05 25%
* DIALLING * NO.002 5553456
Multi-Station Transmission (Broadcasting)
If you have to send the same document to multiple stations, you can save time in feeding the document by using memory transmission. That is, you can store the document into memory and then send it to the station(s) automatically.
1

Set document(s) face down.
ENTER STATION
00%
2
Make sure that the MEMORY lamp is on. If not, press MEMORY to set "On".
ENTER STATION(S) THEN PRESS START 00%
3
Dial by any combination of the following methods:
• One-Touch Dialling
- Abbreviated Dialling
- Manual Number Dialling, press SET after each station is entered (Up to 12 stations)
- Directory Search Dialling, press SET after each station is entered
(For details, see page 60 to 63.)
Ex: 01
<01>(Station name) 5551234


If you want to confirm the number of stations you have entered, press SET.
[10] (Station name) 5553456
4
The document is stored into memory with a file number. Then starts to dial the telephone number in sequence.
2 STN(S) ARE SET ADD MORE OR START
* STORE * NO.001 PAGES=01 01%
* DIALLING * NO.001 5551234

Note: You can review the stations you entered in step 3 before storing your document into memory by pressing ▼ or ▲. Press CLEAR to clear an entered station show on display if needed.
Transmission Reservation
You can do the following while sending a document from memory or receiving a document.
- Reserve the next transmission into memory for up to 10 different documents.
- Reserve a priority transmission.
Memory Transmission Reservation (Multi-tasking)
If your machine is on-line busy transmitting from memory, receiving or printing received documents, you can reserve transmission by the following procedure.
1 Your machine is on-line, the LCD is as shown to the right.
ON LINE * MEM.XMT * ID: (Identification)
ON LINE * RCV * ID: (Identification)
* PRINTING * MEMORY RCV'D DOC
2 Set document(s) face down.
ENTER STATION 00%
3 MEMORY Make sure that the MEMORY lamp is on. If not, press MEMORY to set "On".
ENTER STATION(S) THEN PRESS START 00%
4 Dial by any combination of the following methods: • One-Touch Dialling • Abbreviated Dialling • Manual Number Dialling, press SET after each station is entered (Up to 12 stations) • Directory Search Dialling, press SET after each station is entered (For details, see page 60 to 63.)
Ex: 01
<01>(Station name) 5551234
5 START Your machine will store the document into memory.
* STORE * NO.005 PAGES=01 01%
Note: To cancel the memory transmission reservation, see page 85.
* STORE * COMPLETED TOTAL PAGES=05 25%
Direct Transmission Reservation (Priority Transmission Reservation)
If you are in a rush to send an urgent document, however there are many files in the memory, use Direct Transmission Reservation to send the urgent document. The urgent document will be sent immediately after the current communication is finished.
Note that you cannot send the documents to multiple stations.
To reserve your machine for sending the urgent documents
1 Your machine is on-line, the LCD is as shown to the right.
ON LINE * MEM.XMT * ID: (Identification)
ON LINE * RCV * ID: (Identification)
* PRINTING * MEMORY RCV'D DOC
ENTER STATION 00%
Set document(s) face down.
3 MEMORY
Make sure that the lamp is off. If not, press MEMORY to set "Off".
4 Dial by using any one of the following methods:
• One-Touch Dialling
• Abbreviated Dialling
- Manual Number Dialling and press START
- Directory Search Dialling and press [START] (For details, see pages 53 to 56.)
Ex: 01
You can reserve sending an urgent document to a single station only.
A message "DIRECT XMT RESERVED" will be shown on the display.
<01>(Station name) 5551234
DIRECT XMT RESERVED <01>(Station name)
To cancel the direct transmission reservation
1 Make sure the document is on the ADF.
2
3 1 and then remove the document from ADF.
DIRECT XMT RESERVED <01>(Station name)
CANCEL XMT RESERVE ? 1: YES 2: NO
Redialling
Automatic Redialling
If the line is busy or there is no answer, your machine will redial the number up to 3 times at 3 minute intervals. During that time, a message will appear as shown to the right.
A file number is shown at the upper right corner of the display if it is a memory transmission file.
WAIT TO DIAL NO.001 (Telephone number)
Manual Redialling
You can also redial the last dialed number manually by pressing the REDIAL key.
To redial the last dialed number through memory
1

Set document(s) face down.
Make sure that the MEMORY lamp is on.
ENTER STATION(S) THEN PRESS START 00%
2
TEL. NO. 5551234
3
* STORE * NO.002 PAGES=01 01%
The document is stored into memory with a file number. Then dials the last dialed number.
* DIALLING * NO.002 5551234
To redial the last dialed number through ADF
1

Set document(s) face down.
Make sure that the MEMORY lamp is off.
2
Your machine starts to dial the last dialed number.
TEL. NO. 5551234
* DIALLING * 5551234
Note: 1. While the unit is displaying "WAIT TO DIAL", you can press REDIAL to start redialling immediately. 2. While the unit is displaying "DIALLING" and a message is heard through the monitor that the circuits are busy, you can press REDIAL to start redialling immediately.
Reception Modes
You can select one of the four modes as shown below.
| Conditions | Suggested Reception Mode | Settings |
| You normally receive only voice calls. | Telephone Mode(IN Mode)You can answer the incoming call via an External Telephone (Optional). If you receive a fax calling signal, simply press START to receive manually. (see page 69) | 1 Fax Parameter No. 15 set to 1: Tel2 Lamp: OFF Lamp: OFF |
| You receive both voice and fax calls. | Fax / Tel Auto Switching Mode(IN Mode)Unit will answer the incoming call then distinguishes whether it is voice or fax call. If it is a fax call, the unit will receive automatically. if it is a voice call, the unit will signal (rings) through the speaker for your attention. (see page 70) | 1 Fax Parameter No. 15 set to 2: Fax / Tel SW.2 Lamp: OFF Lamp: OFF |
| You normally receive fax calls only. | Fax Mode(OUT Mode)Unit will receive the document automatically. All incoming calls (including a voice call) are answered by the fax machine. (see page 71) | 1 Fax Parameter No. 16 set to 1: Fax2 Lamp: ON Lamp: ON |
| You receive both voice and fax calls. And a Telephone Answering Machine (TAM) is connected. | TAM Interface Mode(OUT Mode)The TAM answers the incoming call. During that time, the unit also monitors whether it is a voice call, the TAM continues to operate. If it is a fax call, the unit will automatically switch the line to fax and begin receiving document. (see page 73) | 1 Fax Parameter No. 16 set to 2: TAM I/F.2[5256]Lamp: ON |

Note: Depending on the model of the Telephone Answering Machine (TAM) that is connected, some of the features may not be compatible with the your machine operating in the TAM Interface mode.
Telephone Mode
When your machine is set to this mode, your machine will not receive documents automatically. If you receive a fax call, follow the procedure below to receive documents manually.
Setting the Telephone Mode
1 Change Fax Parameter No. 15 (IN MODE) to 1 : Tel. (see page 37)
2 OUT
Confirm that the lamp is OFF and the display is as shown to the right.
12-JUN-1997 15:00 RCV MODE=TEL 00%
Operation of Telephone Mode
1 When your telephone rings, lift the extension phone.
If you hear a beep from the phone, it means someone wants to send a fax. Or, if the caller answers and says he/she wants to send a fax, then...
2 Remove the document from ADF, if any.
3 START or
within 1 second on the telephone. (see Note)
Your machine will be activated remotely.
4 Hang up the phone.

Note: 1. If your machine does not have the handset, follow the step 3b.
- This procedure is called "REMOTE RCV" and will only work on a touch tone phone. If your extension phone is not a touch tone phone, press [START] on the control panel of your fax machine.
Fax / Tel Auto Switching Mode
When your machine is set to this mode, your machine will switch to document reception or voice communication automatically.
Setting the Fax / Tel Auto Switching Mode
1 Change Fax Parameter No. 15 (IN MODE) to 2: Fax / Tel SW. (see page 37)
2 OUT
Confirm that the lamp is OFF and the display is as shown to the right.
12-JUN-1997 15:00 RCV MODE=FAX/TEL 00%
Operation of Fax / Tel Auto Switching Mode
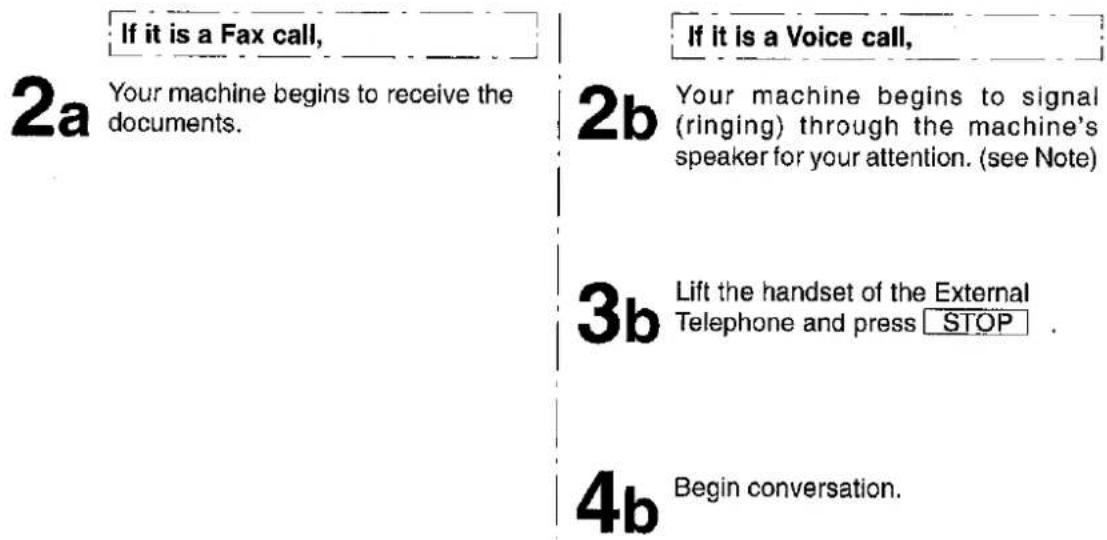
1 Your machine will answer the call when a call is received, then distinguish whether it is a voice or fax call.
text_image
If it is a Fax call, 2a Your machine begins to receive the documents. 2b Your machine begins to signal (ringing) through the machine's speaker for your attention. (see Note) 3b Lift the handset of the External Telephone and press STOP 4b Begin conversation.
Note: 1. The length of time the machine signals can be changed by Fax Parameter No. 18 (OP CALL TIMER).
- To adjust the Ringer Volume refer to page 23.
Fax Mode
When your machine is set to this mode, it will immediately begin to receive documents automatically when a call is received.
Setting the Fax Mode
1 Change Fax Parameter No. 16 (OUT MODE) to 1: Fax. (see page 37)
4

Confirm that the lamp is ON and the display is as shown to the right.
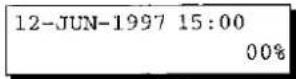
Operation of Fax Mode
Your machine will begin receiving automatically when a fax call is received.
TAM (Telephone Answering Machine) Interface Mode
Your machine is equipped with a unique feature called TAM Interface which enables it to automatically switch a single telephone line either to Fax or TAM. You can connect most TAMs in the market to your machine and use your existing telephone line very efficiently. However, some TAMs may not be compatible with this machine. For the operation of your TAM, please refer to the User's Guide of the TAM.
Installing your TAM

natural_image
Line drawing of a printer with a keypad and cable, no text or symbols present① Remove the telephone line cord of your TAM from the wall jack.
② Plug the telephone line cord of your TAM into the jack on the rear of the fax machine as shown.
Setting the TAM Interface Mode
1 Change Fax Parameter No. 16 (OUT MODE) to 2: TAM I/F. (see page 37)
Confirm that the lamp is ON and the display is as shown to the right.
12-JUN-1997 15:00 RCV MODE=FAX/TAM 00%
Operation of TAM Interface Mode
1 When your TAM and Fax receives an incoming call, the TAM always answers the call first and then the TAM plays the OGM (Outgoing Message) recorded in your TAM to the calling station. During the time the TAM is answering the call, your fax machine will be monitoring the line to distinguish whether it is a voice or fax call.
If it is Fax call, 2a Your machine will switch the line to the fax and then begin to receive the documents immediately from the calling station.
If it is a Voice call, 2b Your TAM continues to record a message (ICM) after playing the OGM.
Sample of OGM
Hello, this is Mr. Smith. Sorry I am unable to take your call. Please leave your message after the beep or if you are calling to send a fax, press the asterisk button twice on your touch tone phone now and start your machine. Thank you for calling.
Silent Detection Mode
Enables your Fax machine to switch to the Fax Mode when receiving from units that do not send fax signal (short beep) and prevents your TAM from recording a blank (long silence) incoming message.
To activate this feature,
- Change Fax Parameter No. 20 (SILENT DET.) to 2 : Valid. (see page 37)
- Set the time length of the OGM recorded in your TAM with the Fax Parameter No. 19 (OGM LENGTH). (see page 37)
[We recommend to set the time length to 5 or 6 seconds longer than the actual time length of the OGM.]
Print Reduction
This machine can use Letter, Legal or A4 size plain paper for recording. Sometimes, oversized documents sent to you by the other parties cannot be printed within a single page. When this occurs, the document will be divided into separate pages.
This machine is equipped with a Print Reduction function to solve this problem. You may select the most appropriate setting from the selections described below.
1. Automatic Reduction
Each page of a received document is first stored in memory. Based on the document length, your machine will automatically calculate the suitable reduction ratio (70% to 100%) to print the entire document on a single page. If the received document is extremely long (over 35% longer than the recording paper), the document will be divided into separate pages and printed with no reduction.
IMPORTANT!
This mode requires the entire page to be received into memory first before printing. However, this mode is disabled automatically and fixed reduction mode will be used in the cases described below:
a) Available memory is low
e.g. deferred transmission is stored in memory.
b) Receiving documents with large amount of data
e.g. photo sent by halftone mode.
2. Fixed Reduction
You can pre-determine the reduction ratio from 70% to 100% in 1% steps. The document you received will be reduced to this ratio regardless of the size.
Selecting the Print Reduction Mode
Set Fax Parameters as shown below. (see page 37)
- To set Automatic Reduction mode.
(1) No. 24 Print Reduction set to "Auto".
- To set Fixed Reduction mode.
(1) No. 24 Print Reduction set to "Fixed".
(2) No. 25 Reduction Ratio set to any number between 70% through 100%. (see Note)
Ex: A4 to A4 - 92%
A4 to Letter - 86%
Letter to Letter -- 91%
Legal to Letter - 72%

Note: If sending side is set to print the header on the outside of the copy area, more reduction ratio will be required.
Substitute Memory Reception
If the recording paper runs out, jams or if the ink runs out during reception, the machine automatically starts receiving document into its image data memory. Stored documents are printed automatically after replacing the recording paper or print cartridge.
1 When the machine finishes the memory reception and there is no recording paper or ink, an Information Code appears on the display.
NO RECORDING PAPER INFO.CODE=010
OUT OF INK INFO.CODE=015
2 Install the recording paper (see page 18) and press START or replace the print cartridge (see page 127).
The machine will automatically start printing the document stored in the memory.
* PRINTING * MEMORY RCV'D DOC

Note: 1. If the memory overflows, the machine will stop receiving and release the communication line. The document(s) stored in the memory up to that moment will be printed out.
- If you wish to turn off the substitute reception function, change the setting of Fax Parameter No. 22 to "Invalid" (see page 37).
Your machine has a copy function which can make single or multiple copies. When copying, your machine will automatically select Fine resolution.
1

Set document(s) face down.
ENTER STATION
00%
2

COPY ZOOM(∨∧)=100%
NO. OF COPY=1
3
Enter the number of copies and press √ and ∧ key to set the zoom ratio in 1% step. (70% to 141%)
Ex: ①⑩ copies with 100% ratio
COPY ZOOM(∨∧)=100%
NO. OF COPY=10
4
* STORE * NO.005
PAGES=01 01%
The machine stores the document, then prints the copies.
* STORE * COMPLETED
TOTAL PAGES=05 25%
* COPY * 100%
NO. OF COPY=01/10

Note: If the data on the original document exceeds the effective recording length of the paper loaded in the tray, the oversized data will not be copied. Adjust the zoom ratio so that it fits on one page.
You can send a document to one or multiple stations at any preset time within the next 24 hours. Up to 2 built-in timers can be set for deferred transmission and deferred polling.
Deferred Transmission
1
Set document(s) face down.
ENTER STATION
00%
2

DEFERRED COMM. NO.=1:XMT 2:POLLING
3

4
Enter the start time from the keypad.
(Use a 4-digit, 24-hour clock)
Ex: ②③③①(11:30 p.m.) and SET
DEFERRED XMT START TIME
| :
5

(See Note 2)
ENTER STATION THEN PRESS START
ENTER STATION(S) THEN PRESS START
6
Dial by any combination of the following methods:
- One-Touch Dialling
• Abbreviated Dialling - Manual Number Dialling, press SET after each station is entered (Up to 12 stations)
- Directory Search Dialling, press SET after each station is entered (For details, see page 60 to 63.)
7
to store documents into the memory.
<01>(Station name) 5551234
* STORE * NO.002 PAGES=01 05%
* STORE * COMPLETED TOTAL PAGES=05 30%

Note: 1. If you enter a wrong number in Step 4, press CLEAR then re-enter the right number.
2. When you reserve a deferred transmission without storing document into memory, the following message will be shown on the display after pressing START in the last step.
DEF DIRECT XMT RSV'D <01>(Station name)
- To change or cancel the Deferred Communication settings, see page 81.

Timer Controlled Communications
Deferred Polling
1

DEFERRED COMM. NO.=1:XMT 2:POLLING
2

DEFERRED POLLING PASSWORD=
3
Enter a 4-digit polling password.
Ex: ⑨⑧⑦⑥ and SET
DEFERRED POLLING START TIME :
4
Enter the start time from the keypad.
(Use a 4-digit, 24-hour clock)
Ex: ①③③① (3:30 a.m.) and SET
ENTER STATION(S) THEN PRESS START
5
Dial by any combination of the following methods:
• One-Touch Dialling
- Abbreviated Dialling
- Manual Number Dialling, press SET after each station is entered (Up to 12 stations)
- Directory Search Dialling, press SET after each station is entered
(For details, see page 60 to 63.)
Ex: 01
<01>(Station name) 5551234
6
* STORE * NO.001

Note: 1. If you enter a wrong number in Step 3, press CLEAR, then re-enter the right number.
- To change or cancel the Deferred Communication settings, see page 81.
Polling means calling other station(s) to retrieve a document. The other station must know in advance that you will call and must have a document set on the ADF or stored in the memory. You may need to set a polling password, shared by the other station, to ensure security.
Setting Polling Password
If the polling password does not match with the polled station, your polling request will be refused automatically.
To set the polling password, follow the steps below.
1

SET MODE (1-4) ENTER NO. OR V A

2

FAX PARAMETER(01-99) NO.=
3


26 POLLING PASSWORD

4
Enter a 4-digit polling password.
Ex: ①②③④
26 POLLING PASSWORD 1234
5


Note: 1. Polling might not function with all fax machines. We suggest you attempt a trial polling before you actually poll important documents.
- If a password is not set in the polled station, you may poll the other station even though your machine has a password.
To Poll Documents from Another Station
The following procedure lets you poll a document from one or multiple stations. Be sure to set the polling password before polling (see page 79).
1
FUNCTION

POLLING
PASSWORD=1234
2
Enter a 4-digit polling password. (see Note 2)
Ex: ①①①①
POLLING
PASSWORD=1111
3

ENTER STATION(S)
THEN PRESS START
4
Dial by any combination of the following methods:
• One-Touch Dialling
• Abbreviated Dialling
- Manual Number Dialling, press SET after each station is entered (Up to 12 stations)
- Directory Search Dialling, press SET after each station is entered
(For details, see page 60 to 63.)
Ex:
<01>(Station name)
5551234
5
* STORE *
NO.001

Note: 1. You can review the entered stations in step 4 by pressing √ or ▲ key, press CLEAR to erase the displayed station as needed.
- If you have set the polling password in Fax Parameter No. 26, the password will appear on the display. You can still change the password temporarily by overwriting it with a new one.
Your machine has a document image memory which enables you to reserve memory transmission, memory deferred transmission, memory polling and so on.
After reserving the communications in memory, you may need to change the settings of the communications while it is still in memory. This section describes how to use the file editing features.
Printing a File List
The contents of the communication settings may have to be modified or deleted. To verify the contents, follow these steps below to print out a file list.
1
EDIT FILE MODE (1-4) ENTER NO. OR V A
5
2

1: FILE LIST? PRESS SET TO SELECT
3

FILE LIST 1:PRINT 2:VIEW
4

* PRINTING * FILE LIST
Sample File List
*************************** -FILE LIST-*************************** DATE 12-JUN-1997 ***** TIME 15:00 *** P.01
(1)
(2)
FILE No.
DEFERRED XMT
002 MEM, DEF, XMT
(3)
CREATED
(4)
TIME START TIME
(5)
PAGES DESTINATION(S)
11-JUN 18:20
11-JUN 18:20
20:30
22:30
[01]
003
[12] [13] [16] [17]
-PANASONIC
-HEAD OFFICE
201 555 1212
Explanation of Contents
(1) File number
(2) Communication type
(3) Stored date/time
(4) Executing time
(5) Number of stored page(s)
(6) Destination
:If the file is now being executed, a "*" is indicated on the left of the file number.
:Date/time that these files were stored.
:If the file is Timer Controlled Communication, the start time is printed in this column.
:ABBR. No./One-Touch No./Manual Dialling No.
Viewing the Contents of a File List
You can also verify the contents of a file list by showing it on the display without printing a file list, follow the steps below.
1
FUNCTION

EDIT FILE MODE (1-4)
ENTER NO. OR V A
2

1:FILE LIST?
PRESS SET TO SELECT
3

FILE LIST
1:PRINT 2:VIEW
4
USE THE KEYS TO
SCROLL EACH FILE
5

or
repeatedly until the display shows a file you want to edit.
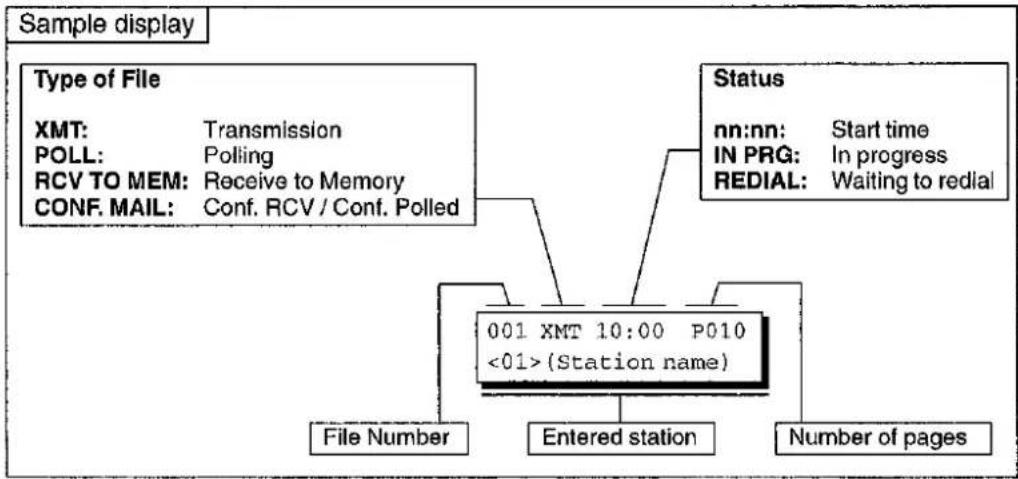
flowchart
graph TD
    A["Sample display"] --> B["Type of File"]
    B --> C["XMT: Transmission"]
    B --> D["POLL: Polling"]
    B --> E["RCV TO MEM: Receive to Memory"]
    B --> F["CONF. MAIL: Conf. RCV / Conf. Polled"]
    G["Status"] --> H["nn:nn: Start time"]
    G --> I["IN PRG: In progress"]
    G --> J["REDIAL: Waiting to redial"]
    K["001 XMT 10:00 P010 <01>(Station name)"] --> L["File Number"]
    K --> M["Entered station"]
    K --> N["Number of pages"]
6

Changing the Start Time or the Station of a File
Follow these steps to change the start time and/or stations in a communication file.
1


EDIT FILE MODE (1-4) ENTER NO. OR V^
2

ENTER FILE NO.OR V A FILE NO.=
3
Enter the file number or use √ or ∧ to select the file that you want to change.
Ex: ①①①
ENTER FILE NO.OR V A FILE NO.=001
4

(see Note 2)
DEFERRED XMT START TIME 20:30
5
Enter a new start time.
Ex: ①⑥①① (6:00 AM)
(If you do not have to change the time, skip to step 6.)
DEFERRED XMT START TIME 06:00
6

TEL. NO. 5551234
7 To delete the station(s), press √ or △ key until the station you want to delete appears. Then press CLEAR.
or
Enter the station(s) you want to add.
Ex:

ENTER STATION(S) THEN PRESS START
1 STN(S) ARE SET ADD MORE OR START
8

Note: 1. Your machine cannot change the start time and/or stations in the file while it is being sent or waiting to redial.
- If the file is not a Deferred Communication File, the following message is shown on the display.
SET DEFERRED COMM.? 1: YES 2: NO
Press① to change the type of the file for deferred communication file.
Deleting a File
Follow these steps to delete the file in memory.
1
EDIT FILE MODE (1-4) ENTER NO. OR V A
2

ENTER FILE NO.OR V A FILE NO.=
3
Enter the file number or use ▼ or ▲ to select the file that you want to delete.
Ex: ①①① (see Note 2)
ENTER FILE NO.OR V A FILE NO.=001
4
DELETE FILE NO.001? 1:YES 2:NO
5

Enter the next file number you want to delete or press STOP to return to standby.
* DELETING * FILE NO.=001
ENTER FILE NO.OR V A FILE NO.=

Note: 1. Your machine cannot delete the file while it is being sent.
- Enter (*) (*) as the file number and press SET to delete all files (except the file in progress). The following message is shown on the display.
DELETE ALL FILES ? 1: YES 2: NO
Press ① to delete all files.
Printing Out a File
Follow these steps to print the contents of the communication file.
1
EDIT FILE MODE (1-4) ENTER NO. OR VA
2

ENTER FILE NO.OR V A FILE NO.=
3
Enter the file number or use ▼ or △ to select the file that you want to print.
Ex: ①①①
ENTER FILE NO.OR V A FILE NO.=001
4

Your machine will print the file. The document will remain in memory even after printing of the file.
* PRINTING * PAGE=001/003

Note: Your machine cannot print the file while it is being sent.
This feature is used to secure all received documents by storing them into the memory. To print out the document from memory, the authorized operator must enter the correct password.
Setting the RCV To Memory Password
text_image
1 FUNCTION 7SET MODE (1-4) ENTER NO. OR V A
FAX PARAMETER (01-99) NO. =
text_image
3 3 7 SET37 RCV TO MEMORY

text_image
4 Enter a 4-digit RCV to Memory Password. Ex: ①②③④37 RCV TO MEMORY 1234
text_image
5 SET STOPSetting RCV To Memory
text_image
1 FUNCTION 8SELECT MODE (1-5) ENTER NO. OR V^
RCV TO MEMORY=OFF 1:OFF 2:ON 3:PRINT
RCV TO MEMORY=ON 1:OFF 2:ON 3:PRINT

12-JUN-1997 15:00
Note: When the memory overflows, the machine will stop receiving and release the line. The machine will not answer the next incoming call until there is space available in the memory.
Printing Out Documents
After receiving a document with Receive To Memory feature, the following message will appear on the display.
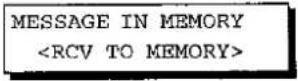
To print the document, follow these steps below.
1
FUNCTION

SELECT MODE (1-5)
ENTER NO. OR V A
2

RCV TO MEMORY=ON 1:OFF 2:ON 3:PRINT
3
RCV TO MEMORY=PRINT 1:OFF 2:ON 3:PRINT
4

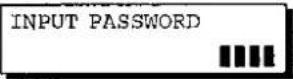
5
Enter the password to print the documents. (see Note 1)
Ex: ①②③④
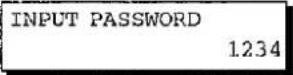
6

Machine will start to print the documents.
* PRINTING * MEMORY RCV'D DOC

Note: 1. If the password has not been set, your machine will not prompt you to enter the password.
The documents will be printed immediately after pressing SET in step 4.
- Once you set RCV TO MEMORY feature to On, the password cannot be changed (Fax Parameter No. 37 will not be shown on the LCD display). If you wish to change the password, set RCV TO MEMORY feature to Off first. Then change the password (see page 87).
This page is intentionally left blank.
Your machine is equipped with a unique feature called Book Feeder that allows you to make a copy and/or send a page from a book.
Follow the steps below to make a copy and send a page from a book.
Making a Copy
BOOK FEEDER PRESS START
BOOK FEEDER OPEN THE ADF DOOR
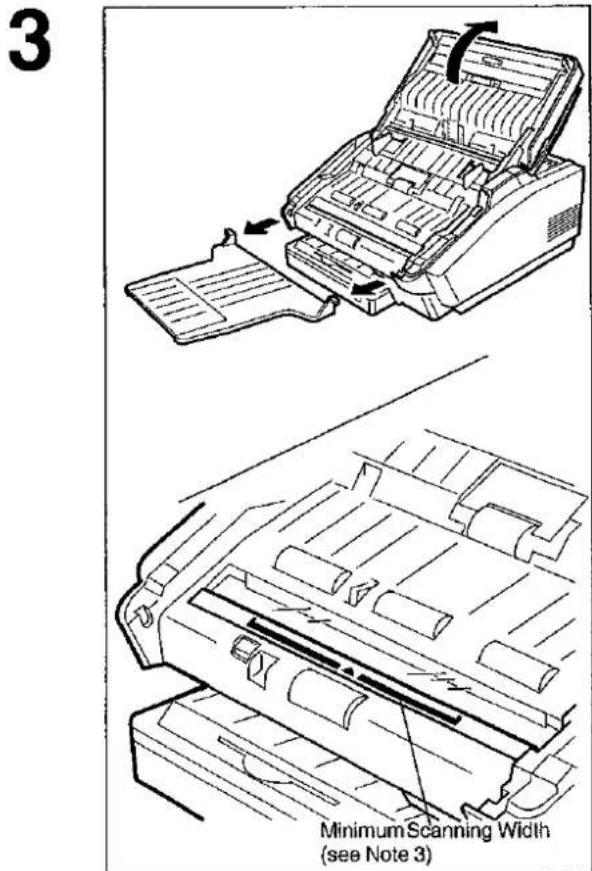
text_image
3 Minimum Scanning Width (see Note 3)Open the ADF door, and remove the Document Return Tray. The machine starts generating a tone (Pi. Pi. Pi.). (see Note 1 and 2)
4
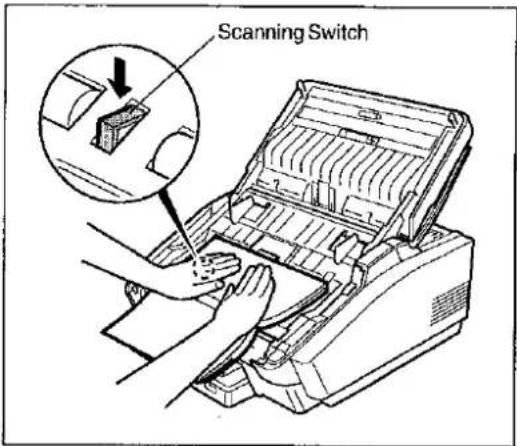
text_image
Scanning SwitchUsing two hands, position the book facing down in the center of the Scanning Glass (within the Minimum Scanning Width, see page 90). Always scan from the center to the edge of the book by applying steady even pressure on the book to flatten the spine and actuate the Scanning Switch (Black). Do not touch the Scanning Glass, if you do, please refer to page 125 on how to clean the Scanning Area.
Note: New books with rigid spine, should be flattened on a table first.
5
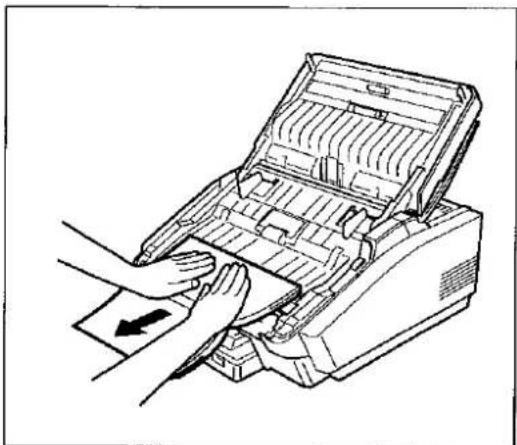
natural_image
Illustration of a printer being inserted into a paper, with hands holding the paper (no text or symbols visible)The machine generates an acceptance tone (steady 2 sec. tone) and starts to scan the page by feeding the book with the rollers. Allow the rollers to feed the book by maintaining steady pressure and guiding the book in a straight path.
Note: Copy quality may vary, we recommend that you practice a few times to familiarize yourself with this feature.
6
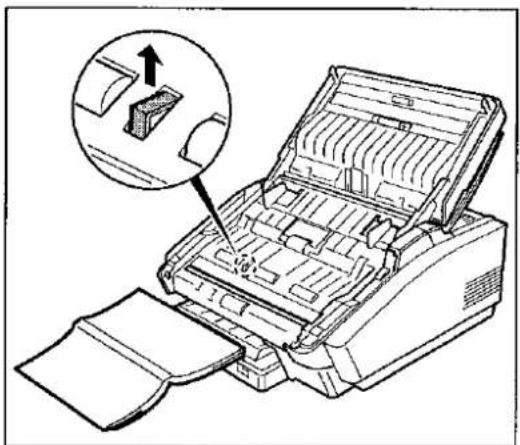
natural_image
Line drawing of a printer with an open lid and paper roll, showing internal structure and a magnified inset of the printer's internal components (no text or symbols present)The scanning halts when the Scanning Switch is released. (see Note 3)
To scan additional page(s), repeat steps 4 to 6.

Note: 1. Your machine automatically selects "Fine" resolution, however other settings (Contrast and Halftone) should be set before opening the ADF door.
- If the Scanning Switch is not actuated within 1 minute after opening the ADF door, the machine will generate a high-pitched tone and the Book Feeder mode will be disabled. Close the ADF door to stop the tone. If any document(s) have been scanned in Book Feeder mode, follow the step 8 on page 92.
- Although you can scan any book width that will fit on the Scanning Glass, the scanning quality may not be ensured with books that are less than 150 mm wide.
- If memory overflow occurs while scanning, your machine will stop and notify you with an alarm.
7
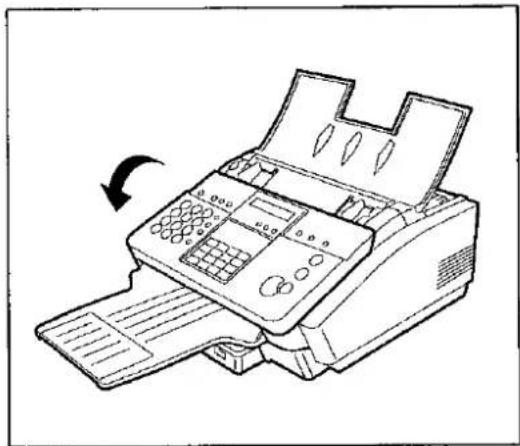
natural_image
Line drawing of a printer with a paper feed and scroll, showing no text or symbolsClose the ADF door.
8
The display shows the following message.
BOOK FEEDER NO.=1:COPY 2:XMT
9

COPY ZOOM(∨∧)=100% NO. OF COPY=1
10
Enter the number of copies and press √ and ∧ key to set the zoom ratio in 1% step. (70% to 141%) Then, press START to print the copies.
* COPY * 100% NO. OF COPY=01/10
After printing the copies the machine returns to Step 8. Press STOP to return to stanby.
BOOK FEEDER NO.=1:COPY 2:XMT
Sending Documents
1 Follow the steps 1 to 7 to scan the page(s). The display shows the following message.
BOOK FEEDER NO.=1:COPY 2:XMT
ENTER STATION(S) THEN PRESS START
Dial by any combination of the following methods:
- One-Touch Dialling
• Abbreviated Dialling - Manual Number Dialling, press SET after each station is entered (Up to 12 stations)
- Directory Search Dialling, press SET after each station is entered (For details, see page 60 to 63.)
Ex: 01
<01>(Station name) 5551234
The machine starts to dial the telephone number and after the transmission returns to standby.
This page is intentionally left blank.
Your machine has a special feature, Selective Reception, which can prevent the receiving of unnecessary documents (i.e. junk fax, direct mail, etc.).
Before receiving the document, the last 4 digits of the ID Number received from the sending machine will be compared with the last 4 digits of the telephone number programmed in each One-Touch or Abbreviated station. When a match is found, your machine will start receiving the document. If a match is not found, your machine will cancel the reception and an Information Code 406 will be recorded on the Journal.
Setting the Selective Reception
1

SET MODE (1-4) ENTER NO. OR V A
2

FAX PARAMETER(01-99) NO.=
3

46 SELECT RCV 1: INVALID
4
46 SELECT RCV 2:VALID
5


Note: 1. When the Selective Reception is set, your machine can receive from only those stations which are programmed in the built-in auto-dialer.
- If your ID number has not been set, your machine might not be able to receive from some models. To set your ID number, see page 27.
The confidential mailbox feature can be used as a mailbox to communicate with other compatible models using a 4-digit confidential code. The Confidential Mailbox feature receives document(s) with a confidential code into memory. These documents can only be printed by the person who has the correct confidential code.
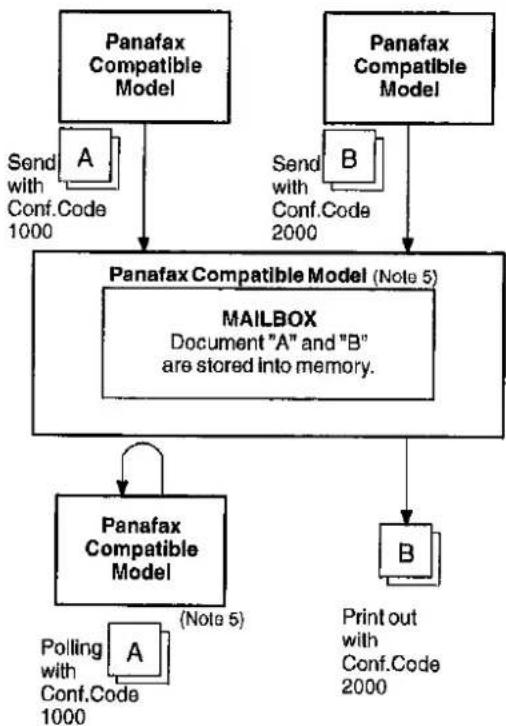
flowchart
graph TD
    A["Panafax Compatible Model"] -->|Send with Conf.Code 1000| B["Panafax Compatible Model (Note 5)"]
    C["Panafax Compatible Model"] -->|Send with Conf.Code 2000| D["MAILBOX Document "A" and "B" are stored into memory."]
    E["Panafax Compatible Model"] --> F["Panafax Compatible Model"]
    G["Panafax Compatible Model"] --> H["Polling with Conf.Code 1000"]
    I["Panafax Compatible Model"] --> J["Print out with Conf.Code 2000"]
Figure 1: Confidential Mailbox
Compatibility with Other Machines
Table 1 shows a list of compatible Panafax model which has the Confidential Mailbox feature. It also shows whether or not special settings are required.
Table 1: Confidential Mailbox Requirement
| Compatible Model | Special Settings | ||||
| UF-280M | UF-332 | UF-550 | UF-745 | UF-788 | Not Required. |
| UF-312 | UF-342 | UF-733 | UF-755 | ||
| UF-322 | UF-344 | UF-744 | UF-766 | ||

Note: 1. If your machine receives two confidential faxes with same confidential code, both documents are stored together in the same confidential mailbox.
- Up to 7 Mailbox files can be stored in memory. So, you can receive the confidential fax using 7 different confidential codes.
- If the memory overflows, the machine will stop receiving and release the line.
- If a confidential faxes was received in the mailbox of UF-733, you cannot poll those document. The UF-733 is designed to print out the received confidential document locally only.
Sending a Confidential Document to a Remote Station's Mailbox
1
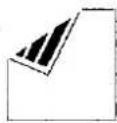
Set document(s) face down.
ENTER STATION
00%
2
FUNCTION

CONF. COMM. (1-5)
ENTER NO. OR V A
3


CONFIDENTIAL XMT
CONF.CODEE=
4
Enter a 4-digit Confidential Code.
Ex: ②②③③
CONFIDENTIAL XMT
CONF.CODE=2233
5

ENTER STATION
THEN PRESS START
6
Dial by any one of the following methods:
• One-Touch Dialling
• Abbreviated Dialling
• Manual Number Dialling
- Directory Search Dialling
Ex:

<01>(Station name)
5551234
7
If necessary, inform the receiving person and tell them the
Confidential Code.

Confidential Mailbox
Polling a Confidential Document from a Remote Station's Mailbox
After you have been informed that someone has transmitted a confidential document to a remote station's mailbox, you can poll the confidential document from the remote station in the following way.
1


CONF. COMM. (1-5) ENTER NO. OR V A
2


CONFIDENTIAL POLL CONF. CODE=
3
Enter a 4-digit Confidential Code.
Ex: ②②③③
CONFIDENTIAL POLL CONF. CODE=2233
4

ENTER STATION THEN PRESS START
5
Dial by any one of the following methods:
- One-Touch Dialling
• Abbreviated Dialling
• Manual Number Dialling - Directory Search Dialling
Ex:
<01>(Station name) 5551234
6
Receiving a Confidential Document to Your Machine's Mailbox
No special setting is required, your machine comes with this feature ready to use. Your machine receives a confidential fax the same way it receives a normal fax message. When receiving the confidential fax, the display shows following message and printing out CONF. RCV REPORT.
MESSAGE IN MAILBOX
Sample CONF. RCV Report
| ********** -CONF. RCV REPORT- ******* DATE 12-JUN-1997 ******* TIME 12:00 *******P.01 | |||
| ** NOTICE OF CONFIDENTIAL DOCUMENT HELD ** | |||
| (1) | (2) | (3) | (4) |
| FILE NO. | RECEIVED FROM | PAGES | TIME RECEIVED |
| 040 | PANA FAX | 001 | 12-JUN 12:00 |
| -PANASONIC - | |||
| ***************-HEAD OFFICE | -**** - | 201 555 1212- ******* | |
Explanation of Contents
(1) File number :001 to 255
(2) Received remote station's ID : Character ID or Numeric ID
(3) Number of pages received
(4) Received time

Note: 1. If your machine receives two confidential faxes with same confidential code, both documents are stored together in the same confidential mailbox.
- Up to 7 Mailbox files can be stored in memory. So, you can receive the confidential fax using 7 different confidential codes.
- If the memory overflows, the machine will stop receiving and release the line.
- You can verify whether the unit has received a confidential fax by printing out the File List (see page 81).
Storing a Confidential Document in Your Machine's Mailbox
Use the following procedure to store a document in a confidential mailbox in your machine. Once the confidential document is stored in your machine, it can be polled by the other machine.
1

Set document(s) face down.
ENTER STATION
00%
2

CONF. COMM. (1-5) ENTER NO. OR V A
3

CONFIDENTIAL POLLED CONF. CODE=
4
Enter a 4-digit Confidential Code.
Ex: ②②③③
CONFIDENTIAL POLLED CONF. CODE=2233
5

The document will be stored into memory. If necessary, inform the receiving party of the confidential document and tell them the confidential code needed to poll the document.
* STORE * NO.002 PAGES=01 01%

Note: The confidential file will be erased automatically after being polled.
If you wish to retain the confidential file even after being polled, change the setting of Fax Parameter No. 42 (CONF. POLLED FILE SAVE) to "Valid".
Printing Out a Confidential Document from Your Machine's Mailbox
After you have been notified that someone has transmitted a confidential document to your machine's mailbox, use the following procedure to print out the confidential document.
1

CONF. COMM. (1-5) ENTER NO. OR V A
2
PRINT CONF. FILE CONF. CODE=
3
Enter Confidential Code of the document you want to print out.
Ex: ②②③③
PRINT CONF. FILE CONF. CODE=2233
4

The machine will print out the confidential documents.
* PRINTING * PAGE=001/001

Note: The confidential file will be erased automatically after being printed out even if the setting of Fax Parameter No. 42 (CONF. POLLED FILE SAVE) is changed to "Valid".
Deleting a Confidential Document Stored in Your Machine's Mailbox
If your memory becomes full, or you just want to clean out your confidential document, you may delete one or more confidential fax stored in your machine using the following procedure.
There are two types of confidential file deletion, one is to delete file by Confidential Code, and others is to delete all confidential files in memory.
To delete file using Confidential Code
1
FUNCTION


CONF. COMM. (1-5)
ENTER NO. OR V A
2

DELETE CONF.FILE CONF.CODE=
3
Enter a 4-digit Confidential Code.
Ex: ②②③③
DELETE CONF.FILE CONF.CODE=2233
4

* DELETING * CONF. CODE=2233
To delete all confidential file in memory
1
FUNCTION

CONF. COMM. (1-5) ENTER NO. OR V A
2

DELETE CONF.FILE CONF.CODE=
3

DELETE ALL CONF. FILES? 1: YES 2: NO
4

* DELETING * ALL CONF. FILES
General Description
The Sub-addressing function allows you further routing, forwarding or relaying of document(s) to the desired recipient(s) when used in combination with the Networking version of HydraFax/LaserFAX software. This function conforms to the ITU-TS recommendation for T. Routing-Facsimile Routing utilizing the Sub-address.
Example of a Network
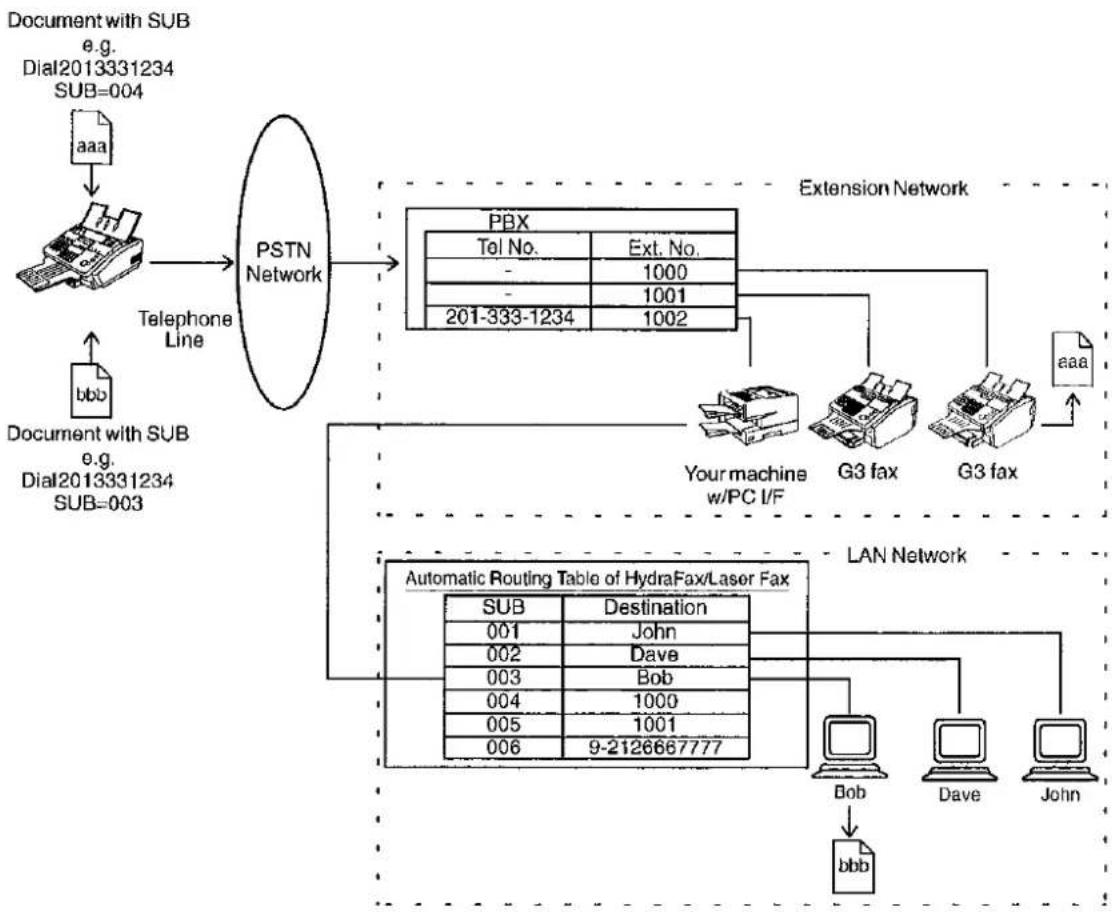
flowchart
graph TD
    A["Document with SUB e.g. Dial2013331234 SUB=004"] --> B["aaa"]
    B --> C["PTN Network"]
    C --> D["PBX"]
    D --> E["Extension Network"]
    E --> F["Your machine w/PC I/F"]
    E --> G["G3 fax"]
    E --> H["G3 fax"]
    E --> I["aaa"]
    J["Document with SUB e.g. Dial2013331234 SUB=003"] --> K["bbb"]
    K --> L["Telephone Line"]
    L --> C
    M["Automatic Routing Table of HydraFax/Laser Fax"] --> N["Destination"]
    N --> O["Sub 001"]
    N --> P["Destination 002"]
    N --> Q["Destination 003"]
    N --> R["Destination 004"]
    N --> S["Destination 005"]
    N --> T["Destination 006"]
    U["LAN Network"] --> V["Bob"]
    U --> W["Dave"]
    U --> X["John"]
    Y["Document with SUB e.g. Dial2013331234"] --> Z["bbb"]
Compatibility with Other Machines
- Sub-addressing Transmission:
UF-332/342/344/550/788 (see Note 2) - Sub-addressing Reception:
UF-342/344/550/788 with PC Interface using the Networking version of HydraFax/LaserFAX software.
Sub-addressing Transmission Methods
You can send a document with Sub-address information to the desired recipient by the following methods.
- By registering the Sub-address information into One-Touch/ABBR. Dialling Numbers.
- By specifying the Sub-address information in the Manual Number Dialling Mode.

Note: 1. HydraFax and LaserFAX are trademarks of Wordcraft International Ltd.
- UF-788 with PC Interface Option or the Option ROM installed.
To set the Sub-address into a One-Touch/ABBR. Dalling Numbers
1

1:ONE-TOUCH 2:ABBR. NO.
2
Select 1 for One-Touch Dialling number Select 2 for ABBR. Dialling Number
Ex: ①
ONE-TOUCH< > PRESS ONE-TCH OR V A
3

<01> ENTER TEL. NO.
4
Enter the telephone number, press FLASH then enter the Sub-address (up to 20 digits). (up to 36 digits including telephone number, pauses, spaces, FLASH and Sub-address)
Ex: Telephone number = 5551234, Sub-address =2762
Enter as: ⑤⑤⑤①②③④
FLASH ②⑦⑥②
<01> 5551234s2762
5

Enter the station name.
<01> SALES DEPT. 5551234s2762
6



Note: FLASH separates the Sub-address from the Telephone number and is indicated by an "s" in the display.
To send a Document with Sub-address
Using One-Touch/ABBR. Number Dialling
The operation is the same as for normal dialling
1

Set document(s) face down.
ENTER STATION
00%
2
Your machine starts to dial the number of the station and sends the document(s) with Sub-addressing information.
<01> (Station name) 5551234s2762
* DIALLING * 5551234
Using Manual Number Dialling
Use FLASH to separate the Telephone number and the Sub-address.
1

Set document(s) face down.
ENTER STATION
008
2
Enter the telephone number, press FLASH. then enter the Sub-address (up to 20 digits).
(up to 36 digits including telephone number, pauses, spaces, FLASH and Sub-address)
Ex: Telephone number = 5551234, Sub-address =2762
Enter as: ⑤⑤⑤①②③④
FLASH ②⑦⑥②
PRESS START TO DIAL 5551234s2762
3
Your machine starts to dial the number of the station and sends the document(s) with Sub-addressing information.
* DIALLING * 5551234

Note: 1. FLASH separates the Sub-address from the Telephone number and is indicated by an "s" in the display.
-
Manual Off-Hook or On-Hook Dialling cannot be used with the Sub-addressing Transmission.
-
The Sub-address is not transmitted during Manual Redial Mode.
This page is intentionally left blank.
To help you maintain records of the documents you sent and received, as well as lists of the numbers you record, your facsimile machine is equipped to print the following journals and lists: 32 Transaction Journal, Individual Transmission Journal, Communication Journal, One-Touch/ABBR. No. List, Fax Parameter List, Power Failure Report and File List.
32 Transaction Journal
The "Journal" is a record of the last 32 transactions (a transaction is recorded each time you send or receive a document). It is printed out automatically after every 32 transactions (see Note), but you can print or view it manually by using the following procedure:
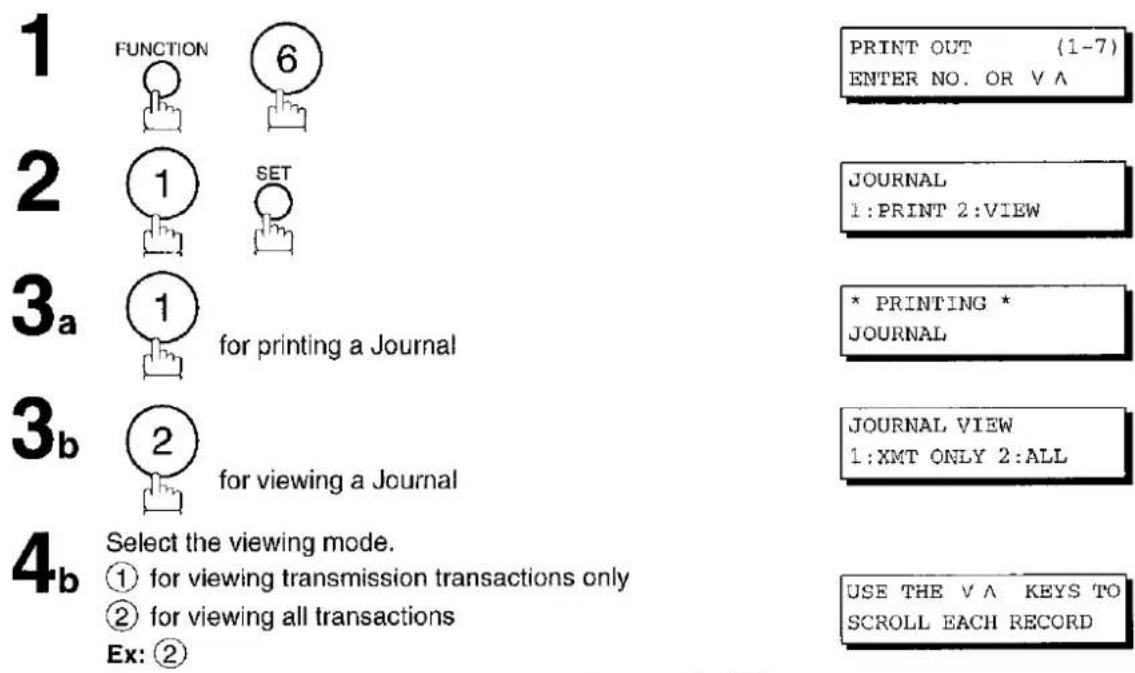
text_image
1 FUNCTION 6 2 1 SET 3a 1 for printing a Journal 3b 2 for viewing a Journal 4b Select the viewing mode. ① for viewing transmission transactions only ② for viewing all transactions Ex: ② PRINT OUT (1-7) ENTER NO. OR V A JOURNAL 1:PRINT 2:VIEW * PRINTING * JOURNAL JOURNAL VIEW 1:XMT ONLY 2:ALL USE THE V A KEYS TO SCROLL EACH RECORDYou can view the transactions in the journal by pressing ▼ or ▲. Press STOP to return to standby.
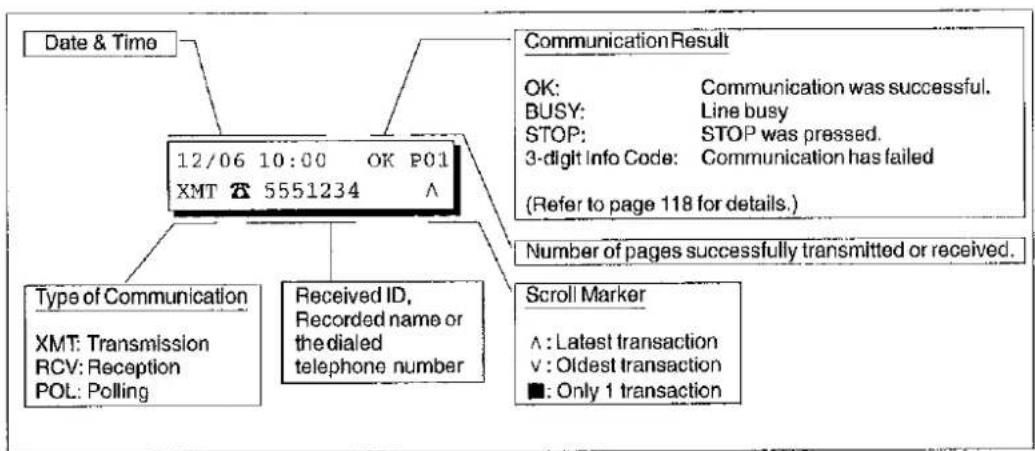
text_image
Date & Time 12/06 10:00 OK P01 XMT 5551234 ^ Type of Communication XMT: Transmission RCV: Reception POL: Polling Received ID, Recorded name or the dialed telephone number Communication Result OK: Communication was successful. BUSY: Line busy STOP: STOP was pressed. 3-digit Info Code: Communication has failed (Refer to page 118 for details.) Number of pages successfully transmitted or received. Scroll Marker ^ : Latest transaction v : Oldest transaction ■ : Only 1 transaction
Note: If you wish to disable the automatic print out of the 32 Transaction Journal, change the setting of Fax Parameter No. 13 to "Invalid". (See page 36)
Individual Transmission Journal (IND. XMT JOURNAL)
An Individual Transmission Journal contains information on the latest transmission.
1
FUNCTION

PRINT OUT (1-7)
ENTER NO. OR VA
2
6:IND. XMT JOURNAL?
PRESS SET TO PRINT
3

* PRINTING *
IND. XMT JOURNAL
Sample 32 Transaction Journal
| (1) | (2) | ||||||||
| ********** -JOURNAL-********** DATE 08-JUN-1997 *** TIME 15:00********** | |||||||||
| (3) | (4) | (5) | (6) | (7) | (8) | (9) | (10) | (11) | (12) |
| NO. | COMM | PAGES | FILE | DURATION | X/R | IDENTIFICATION | DATE | TIME | DIAGNOSTIC |
| 01 | OK | 001 | 00:00'22 | XMT | SERVICE DEPT. | 07-JUN | 17:35 | C0044903C0000 | |
| 02 | OK | 003 | 00:01'17 | RCV | 111 222 333 | 07-JUN | 17:41 | C0044903C0000 | |
| 03 | OK | 001 | 00:00'31 | XMT | ACCOUNTING DEPT. | 07-JUN | 17:50 | C0044903C0000 | |
| 04 | 630 | 000/005 | 021 | 00:00'00 | XMT | 342345676 | 07-JUN | 17:57 | 0800420000000 |
| 05 | STOP | 000 | 00:00'34 | XMT | 12324567 | 07-JUN | 18:35 | 0210260200000 | |
| 06 | OK | 001/001 | 022 | 00:00'20 | XMT | 44567345 | 07-JUN | 18:44 | C8044B03C0000 |
| 31 | OK | 002/002 | 023 | 00:00'31 | XMT | 0245674533 | 08-JUN | 08:35 | C8044B03C1000 |
| 32 | OK | 003/003 | 024 | 00:01'32 | XMT | Z0353678980 | 08-JUN | 08:57 | C8044B03C1000 |
| (13) | -PANASONIC | ||||||||
| ********** -HEAD OFFICE -**** - (15) | 201 555 1212-********** (14) | ||||||||
Sample Individual Transmission Journal (IND. XMT JOURNAL)
| ********** -IND. XMT JOURNAL- ******* DATE 12-JUN-1997 ***** TIME 15:00 ******* | ||
| (10)(11) | DATE/TIME = 12-JUN-1997 09:00 | |
| (3) | JOURNAL No. = 21 | |
| (4) | COMM. RESULT = OK | |
| (5) | PAGE(S) = 001 | |
| (7) | DURATION = 00:00'16 | |
| (6) | FILE No. = | |
| (16) | MODE = TRANSMISSION | |
| (17) | DESTINATION = [01] / 555 1234 /ABCDEFG | |
| (18) | RECEIVED ID = | |
| (19) | RESOLUTION = STD | |
| (13) -PANASONIC - | ||
| **********-HEAD OFFICE ******* - 201 555 1212- ******* | ||
| (15) | (14) | |
Explanation of Contents
| (1) Printout date | |
| (2) Printout time | |
| (3) Journal number | : 01-32 (Does not always begin with 01 when printed out manually) |
| (4) Communication result | :"OK" indicates that the communication was successful."BUSY" indicates that the communication has failed because of busy line."STOP" indicates that STOP was pressed during communication."M-OK" indicates that the substitute reception message in memory was not printed out."P-OK" indicates that memory overflow or document misfeeding occurred while storing the documents into memory for transmission but successfully stored document(s) was sent."R-OK" indicates that the Confidential Communication was successful."3-digit Info Code" (see page 118) indicates that the communication has failed. |
| (5) Number of pages transmitted or received | :The 3-digit number is the number of pages successfully transmitted or received.When the documents are stored into memory, two 3-digit numbers will appear.The first 3-digit number represents the number of pages successfully transmitted. The second 3-digit number represents the total number of pages that were attempted to be transmitted. |
| (6) File number | : 001 to 255 (If the communication is stored into memory, a file number is assigned for each communication.) |
| (7) Duration of communication | |
| (8) Type of communication | :"XMT" means Transmission"RCV" means Reception"POL" means Polling |
| (9) Remote station identification | : Name : Recorded name in One-Touch or ABBR. Numbers or remote station's Character ID.25 number : Dialed telephone numberNumber : Remote station's ID number. |
| (10) Communication date | |
| (11) Communication Start time | |
| (12) Diagnostic | : For service personnel only |
| (13) Own LOGO | : Up to 25 characters |
| (14) Own ID number | : Up to 20 digits |
| (15) Own Character ID | : Up to 16 characters |
| (16) Type of communication | : Transmission or memory transmission |
| (17) Destination | : If a One-Touch or ABBR was used for the transmission:One-Touch or ABBR. No./Telephone Number/Recorded NameIf not : Telephone number |
| (18) Received remote station's ID | : Character ID/ID number |
| (19) Resolution | :"STD" means standard resolution"FINE" means fine resolution"S-FINE" means super fine resolution |
Communication Journal (COMM. JOURNAL)
The Communication Journal (COMM. JOURNAL) lets you verify if transmission or polling was successful or not. You may select the printout condition (Off/Always/Inc. only) in Function 8-1 or Fax Parameter No.12.
Sample COMM. JOURNAL
| ********** - COMM. JOURNAL -********** DATE 08-JUN-1997 **** TIME 15:00 **** P.01 | |||||
| (1) MODE = MEMORY TRANSMISSION | (2) START=08-JUN 11:50 | (3) END=08-JUN 12:00 | |||
| FILE NO.= 050 (4) | |||||
| (5) | (6) | (7) | (8) | (9) | (10) |
| STN NO. | COMM | ABER NO. | STATION NAME/TEL NO. | PAGES | DURATION |
| 001 | OK | <01> | SERVICE DEPT. | 001/001 | 00:01'30 |
| 002 | OK | <02> | SALES DEPT. | 001/001 | 00:01'25 |
| 003 | 407 | <03> | ACCOUNTING DEPT. | 000/001 | 00:01'45 |
| 004 | BUSY | 2 | 021 111 1234 | 000/001 | 00:00'00 |
| - PANASONIC - | |||||
| ********** - HEAD OFFICE | - ***** - 201 555 1212 - ***** | ||||
Explanation of Contents
(1) Indication of communication mode
(2) Start time of communication
(3) End time of communication
(4) File number
(5) Station number
(6) Communication result
(7) Abbreviated number or ℝ mark
(8) Recorded name in One-Touch, ABBR. or direct dialling number
(9) Number of pages transmitted or received
(10) Duration of Communication
: 001 to 255 (When the communication is stored into memory, a file number is assigned for each communication.)
: Sequential number of the stations
:"OK" indicates that the communication was successful.
"BUSY" indicates that the communication has failed because of busy line.
"STOP" indicates that STOP was pressed during communication.
"M-OK" indicates that the substitute reception message in memory was not printed out.
"P-OK" indicates that memory overflow or document misfeeding occurred while storing the documents into memory for transmission but successfully stored document(s) was sent.
"R-OK" indicates that the Confidential Communication was successful.
"3-digit info code" (see page 118) indicates that the communication has failed.
: mark indicates dialed by direct number dial.
: The 3-digit number is the number of pages successfully transmitted or received. When the documents are stored into memory, two 3-digit numbers will appear. The first 3-digit number represents the number of pages successfully transmitted. The second 3-digit number represents the total number of pages that were attempted to be transmitted.

Journals and Lists
One-Touch/Abbreviated List
To print a One-Touch/Abbreviated Number List of the telephone numbers you have stored.
1
PRINT OUT (1-7) ENTER NO. OR V A
2
2:ONE-TCH/ABBR LIST? PRESS SET TO PRINT
3

* PRINTING * ONE-TOUCH/ABBR. LIST
Sample One-Touch List
********** -ONE-TOUCH LIST- ********** DATE 08-JUN-1997 ***** TIME 15:00 *** P.01
(1) (2) (3)
ONE-TOUCH STATION NAME TELEPHONE NO.
<01> SERVICE DEPT. 121 555 1234
<02> SALES DEPT. 222 666 2345
<03> ACCOUNTING DEPT 313 333 3456
NO. OF STATIONS = 03 (4)
-PANASONIC
********** -HEAD OFFICE - ***** - 201 555 1212- **********
Sample ABBR. Number List
*************************** ABBR. NO. LIST-*************************** DATE 08-JUN-1997 ***** TIME 15:00 *** P.01
ABBR NO. STATION NAME TELEPHONE NO.
[01] ENG. DEPT. 888 555 1234
[02] PURCHASE DEPT. 999 666 2345
[03] REGULATION DEPT 777 333 3456
NO. OF STATIONS = 03
-PANASONIC -
************************** -HEAD OFFICE - ***** - 201 555 1212- ************************
Explanation of contents
(1) One-Touch number or Abbreviated number :
(2) Station name recorded in the machine : Up to 15 characters
(3) Telephone number recorded in the machine : Up to 36 digits
(4) Number of recorded One-Touch and ABBR. numbers
FAX Parameter List
To print out a FAX Parameter List:
1
FUNCTION

PRINT OUT (1-7)
ENTER NO. OR V A
2
4: FAX PARA LIST?
PRESS SET TO PRINT
3

* PRINTING *
FAX PARAMETER LIST
Sample FAX Parameter List
| ********** -FAX PARAMETER LIST-********** DATE 12-JUN-1997 ***** TIME 15:00********** | |||||||
| (1)PARAMETERNUMBER | (2)DESCRIPTION | (3)SELECTION | (4)CURRENTSETTING | (5)STANDARDSETTING | |||
| 01 | CONTRAST (HOME) | (1:Normal | 2:Lighter | 3:Darker) | 1 | 1 | |
| 02 | RESOLUTION (HOME) | (1:Standard | 2:Fine | 3:S-Fine) | 2 | 1 | |
| (###) | |||||||
| 99 | MEMORY SIZE | (512KB) (6) | |||||
| -PANASONIC | |||||||
| ********** -HEAD OFFICE | -***** - | 201 555 1212-********** | |||||
Explanation of Contents
| (1) Parameter number | (4) Current setting | :"----" indicates code or password is not set. When the code or password is set, it is shown in parenthesis.When RCV To Memory Password is set, [ ][ ][ ] is shown in parenthesis. | |
| (2) Description | :"(HOME)" means home position setting. | (5) Standard setting | : Factory preset standard setting |
| (3) Selection | (6) Memory size |
If You Have Any of These Problems
| Mode | Symptom | Action | page |
| During Installation | The display is blinking | Battery is completely discharged. This may happen at first installation. Replace the battery and re-set the clock. | 24128 |
| During Transmission | Document doesn't feed/multiple feed | 1. Check that your document is free of staples and paper clips, and that it is not greasy or torn.2. Check that your document is the right type to send through a fax machine by consulting the list on "Documents You Cannot Send". If your document has the characteristics listed, make a photocopy of your document and send the copy instead.3. Check that the document is loaded properly.4. Adjust the ADF Pressure Plate. | 4748126 |
| Document jam | The information code 031 will appear on the display if the document becomes jammed. | 122 | |
| Transmission Copy Quality | Vertical lines on the transmitted document | Check own copy quality. If copy is OK, your machine has no problem, report to receiving party that they have a problem. If copy is No Good, clean the Document Scanning Area. | 125 |
| Transmitted document is blank | 1. Make sure the document is set face down.2. Check own copy quality. If copy is OK, your machine has no problem, report to receiving party that they have a problem. If copy is No Good, clean the Document Scanning Area | 125 | |
| During Reception | No recording paper | The information code 010 will appear on the display if the paper runs out. | 18 |
| Recording paper jam | The information code 001, 002 or 016 will appear on the display if the paper gets jammed. | 121 | |
| Recording paper doesn't advance into machine | Make sure that there is paper in the Paper Tray. Follow instructions for loading paper. | 18 | |
| Recording paper doesn't eject after printing | Check to see if the recording paper is jammed inside of the machine. | 121 | |
| Document auto reduction doesn't work | Check Print Reduction settings. | 74 | |
| Out of ink | The information code 015 will appear on the display if the Print Cartridge runs out of ink. | 127 | |
| Print Copy Quality | Vertical lines printing on the received document | Printout a Journal report and check quality to make sure if your machine has trouble or not.If Journal report quality is OK, your machine has no problem, report to the sending party that they have a problem.If copy is No Good, replace the Print Cartridge. | 107127 |
| Fuzzy print | 1. Make sure you are using the correct paper for the best possible print quality.2. Try reversing the recording paper to the other side. | 134 | |
| Missing dots or lines/inconsistent darkness within print | 1. Make sure you are using the correct paper for the best possible print quality.2. Replace Print Cartridge. | 134127 | |
| Fading print | The Print Cartridge may be running out of ink. Replace Print Cartridge. | 127 | |
| Faint print | You may need to choose a different paper for the best possible print quality. | 134 | |
| Communication | No dial tone | 1. Check the connection of the telephone line.2. Check the telephone line. | 129 |
| No auto answer | 1. Check the connection of the telephone line.2. Check the Reception mode setting. | 12968 | |
| Cannot transmit or receive | An information code will be shown on the display. Refer to the information code table to find out the trouble. | 118 | |
| No Unit Operation | No unit operation | To reset the machine, turn-off the Power Switch for a few seconds then turn-on again. | 21 |
| TAM Interface Trouble in Unattended TAM I/F Mode (OUT Mode) | Cannot utilize the remote turn-on feature of the telephone answering machine (TAM). The fax machine always answers after the 8th ring. | This feature is not compatible. The fax machine is designed to answer after 8 rings if the TAM does not answer. | -- |
| Fax machine will not start up when the telephone answering machine is set to give only an outgoing message (OGM). | TAM that gives outgoing announcement only is not compatible. The fax machine will work with a TAM that will record Incoming message (ICM). | -- | |
| A beep...beep sound is recorded on the telephone answering machine. | Speak a little slower between each word while recording an outgoing message (OGM). | -- | |
| Fax machine starts up in the middle of the outgoing message even though the caller wants to leave a voice message. | Make sure the outgoing message (OGM) does not have a silent pause longer than 5 seconds. | -- | |
| Cannot record any incoming message (ICM). The fax machine always starts up at the end of the OGM and before the tape advances to the end of last ICM.(Your TAM only uses a single cassette tape to give OGM and record ICM.) | Set Fax Parameter No. 20 (Silent Detection) to "Invalid". And, instruct the calling party to press (*) twice on their touch-tone phone during the OGM to start up your fax machine remotely. | 37 | |
| Cannot receive from a machine that does not send CNG signal (a short beep tone every 3 seconds) after dialling. | Set Fax Parameter No. 20 (Silent Detection) to "Valid". Or, Instruct the calling party to press (*) twice on their touch-tone phone during the OGM to start up your fax machine remotely. | 37 | |
| Cannot retrieve message from the answering machine remotely, the fax machine always starts up after the command code is entered. | Set Fax Parameter No. 20 (Silent Detection) to "Invalid". | 37 | |
| Cannot receive a fax message, but can record voice message. | Check your outgoing message, if it is too long, the calling fax machine may have timed out. Try to shorten your outgoing message to less than 15 seconds, or ask the calling party to program your telephone number in their fax machine with 3 pauses and a "#" at the end.(ex. 5551212 PAUSE PAUSE PAUSE #) | -- | |
| TAM Interface Trouble In Unattended Fax Mode (OUT Mode) | Fax machine will not start to receive with the telephone answering machine in the auto-answer mode. | Increase the ring count for detection on the telephone answering machine. | -- |

Information Codes
When something unusual occurs, the display may show one of the Information Codes below. These will help you to identify and correct the problem.
| Info. Code | Meaning | Action | Page |
| 001/002 | Recording paper jam. | Remove jammed paper. | 121 |
| 010 | No recording paper. | Load the paper. | 18 |
| 014 | Print Cartridge is not installed. | Install the Print Cartridge. | 16 |
| 015 | Out of ink. | Replace the Print Cartridge. | 127 |
| 016 | Print Cartridge Cradle can not move. | Paper jam may have occurred. Remove jammed paper. | 121 |
| 026 | The backup battery is getting weak. | Replace the battery. Otherwise, the memory contents may be lost. | 128 |
| 030 | Document misfeeding. | 1. Reload the document properly.2. Remove document jam.3. Adjust ADF. | 48122126 |
| 031 | Document paper is too long or jammed.Document length exceeds 2 meters. | 1. Reload the document properly.2. Remove document jam. | 48122 |
| 060 | Printer Cover is opened. | Close the Printer Cover. | -- |
| 061 | ADF Door (Document Return Guide) is open. | Close the ADF Door. | -- |
| 211/212 | Modem Failure. | Contact your local Panasonic Dealer for service. | -- |
| 220 | While receiving, certain signals were not detected by the Modem due to phone line noise. | If document contains errors, ask the remote side to resend the document. | -- |
| 300-316 | Printer engine failure. | Contact your local Panasonic Dealer for service. | -- |
| 400 | During initial handshake, receiving station did not respond or communication error occurred. | 1. Check with other party.2. Reload the document and send again. | -- |
| 401 | Remote station required a Receiving Password to receive the document.Remote station does not have Confidential Mailbox. | Check the remote station. | -- |
| 402 | During initial handshake, communication error occurred. | Reload the document and send again. | -- |
| 403 | No polling capability at the remote side. | Ask remote side to set "POLLED=ON". | -- |
| 404/405 | During initial handshake, communication error occurred. | Reload the document and send again. | -- |
| 406 | Received from an unauthorized station in Selective Reception mode. | Check the telephone number in One-Touch or Abbreviated station. | 95 |
| 407 | No confirmation from the receiving station for the previous page sent. | Wait a few minutes and send again. | -- |
| 408/409 | Remote side confirmation of previous page is illegible. | Wait a few minutes and send again. | -- |
| 411 | Polling password does not match. | Check polling password. | 79 |
| 412 | No data from the transmitting side. | Check with the other party. | -- |
| 414 | Polling password does not match. | Check polling password. | 79 |
| 415 | Polling transmission error. | Check polling password. | 79 |
| 416/417 418/419 | Received data has too many errors. | Check with the other party. | -- |
| 420 | Machine goes to receiving mode, but receives no command from the transmitting side. | 1. Remote side misdial.2. Check with the other party. | -- |
| 422/427 | Interface is incompatible. | Check with the other party. | -- |
| 430/434 | Communication error occurred while receiving. | Check with the other party. | -- |
| 436/490 | Received data has too many errors. | Check with the other party. | -- |
| 456 | Unit received a confidential document or was requested to be polled of a confidential document under any of following conditions.Memory does not have enough space to receive the confidential document.Confidential Mailbox file is full (7 files).While printing received document.Unit was requested to relay a document. | 1. Printout File List then check the contents.Wait a moment until finishing the printing. | 81 |
| Info. Code | Meaning | Action | Page |
| 492/493 494 | Communication error occurred while receiving. | Check with the other party. | -- |
| 495 | Telephone line disconnected. | Check with the other party. | -- |
| 540/541 542 543/544 | Communication error occurred while transmitting. | 1. Reload the document and send again.2. Check with the other party. | -- |
| 550 | Telephone line disconnected. | Check with the other party. | -- |
| 552/553 554/555 | Communication error occurred while receiving. | Check with the other party. | -- |
| 580 | Sub-address transmission to a unit that has no Sub-address function. | Check the remote station. | 103 |
| 581 | Sub-address Password transmission to a unit that has no Password Sub-address function. | Check the remote station. | 103 |
| 623 | No document was on the ADF. | Reload the document and send again. | -- |
| 630 | Redial was not successful due to a busy line or no response from the called station. | Reload the document and send again. | -- |
| 631 | During dialling, STOP was pressed. | Reload the document and send again. | -- |
| 634 | Redial was not successful due to a busy line or no response from the called station. | Reload the document and send again. | -- |
| 638 | Power failure occurred during the communication. | Check the power cord and plug. | 20 |
| 870 | Memory overflow occurred while storing documents into memory for transmission. | Transmit documents without storing into memory. | 53 135 |
| 879 | Memory overflow occurred while receiving documents into memory.Receiving documents with data that is greater than the memory size. | Check recording paper and print cartridge. | 16 18 |
| 975 | DRAM parity error. The document information in memory is lost. | Resend the lost document. | -- |
Clearing a Recording Paper Jam
If the recording paper becomes jammed in the machine, the display will show Information Code 001, 002 or 016.
To clear the jam, Info. Code 001
1
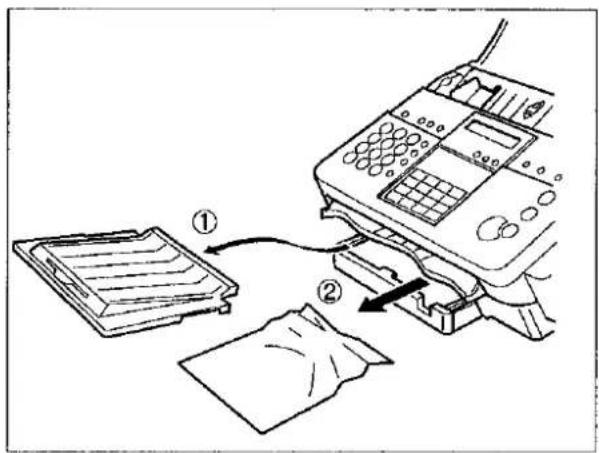
text_image
Diagram showing a printer presser printing documents, with labeled parts and directional arrows indicating process flow.① Remove the Recording Paper Cover.
② Remove the jammed paper.
③ Press STOP.
④ Re-install the Recording Paper Cover.
To clear the jam, Info. Code 002 or 016
2
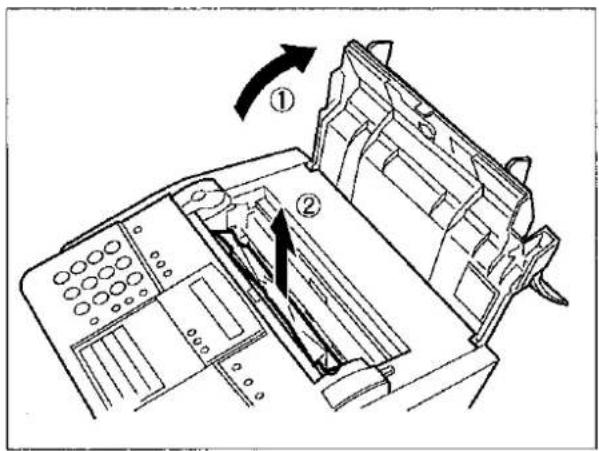
text_image
Technical diagram of a vehicle air intake system with labeled components and directional arrow indicating rotation① Open the Printer Cover.
② Remove the jammed paper.
③ Close the Printer Cover.
Clearing a Document Jam
If a document becomes jammed in the machine, the display will show the Information Code 031.
To clear the jam
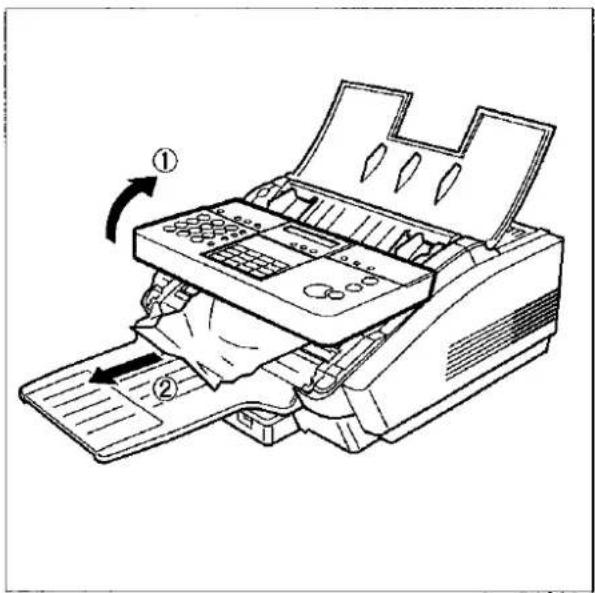
text_image
Diagram of a printer with labeled parts and directional arrow indicating process flow① Remove the documents from ADF and open the ADF Door.
② Remove the jammed paper.
③ Close the ADF Door.
Cleaning the Print Cartridge Contact
If the received document has dots or lines missing, check the Print Cartridge.
To clean the Print Cartridge
1
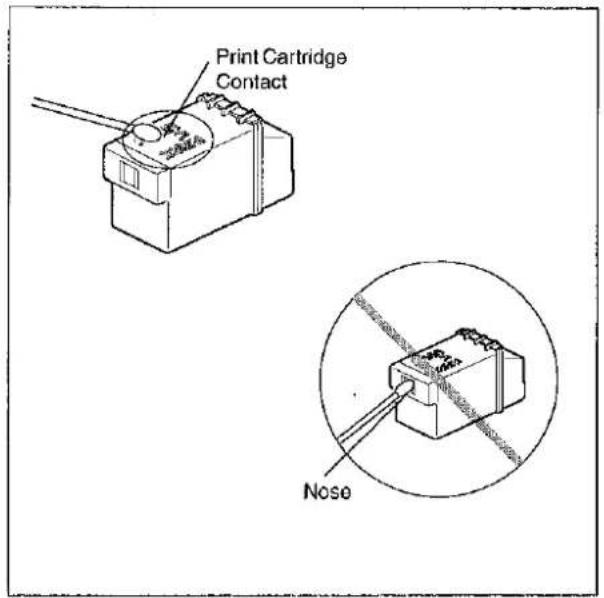
text_image
Print Cartridge Contact Nose① Turn the Power Switch to the "O" (OFF) position.
② Open the Printer Cover.
③ Remove the Print Cartridge from the Print Cartridge Cradle. Gently clean the contact on the Print Cartridge with a swab moistened only with water.
DO NOT clean the "Nose" of the Print Cartridge.
2
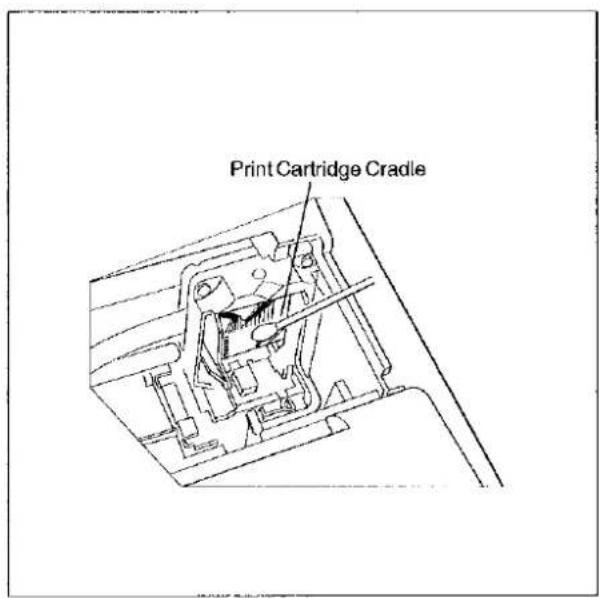
text_image
Print Cartridge Cradle① Gently clean the contact on the Print Cartridge Cradle with a swab moistened only with water.
② Re-install the Print Cartridge and reevaluate the print quality.
Removing Dried Ink from the Nose of the Print Cartridge
If the Print Cartridge is exposed to air for an extended period of time, a layer of dried ink will form as crust on the nose of the Print Cartridge. If this occurs, follow the steps below to remove the dried ink from the nose of the Print Cartridge.
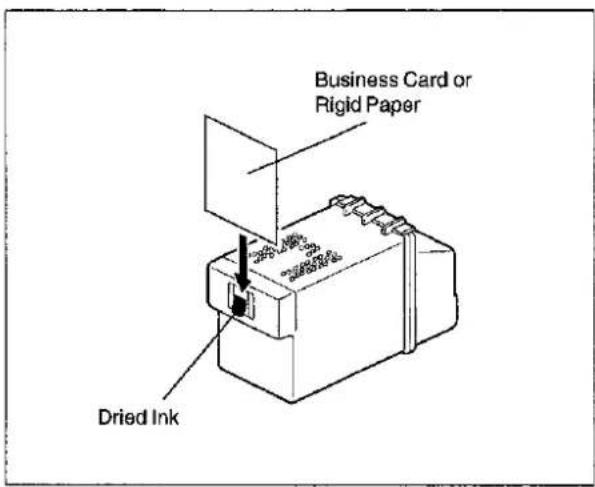
text_image
Business Card or Rigid Paper Dried Ink① Hold the Print Cartridge over a waste can so that the nose of the Print Cartridge is pointed toward the waste can.
② Gently scrape the dried ink with the edge of a Business Card or other Rigid Paper stock so that the dried ink falls into the waste can.
DO NOT use a swab to remove Dried Ink from the Print Cartridge.

Note: It is recommended to make a copy on the machine at least once a week to prevent ink from drying on the nose of the Print Cartridge.
Cleaning the Drain Pan
To prevent spillage, always clean the Drain Pan of excess ink before moving the machine.
To clean the Drain Pan
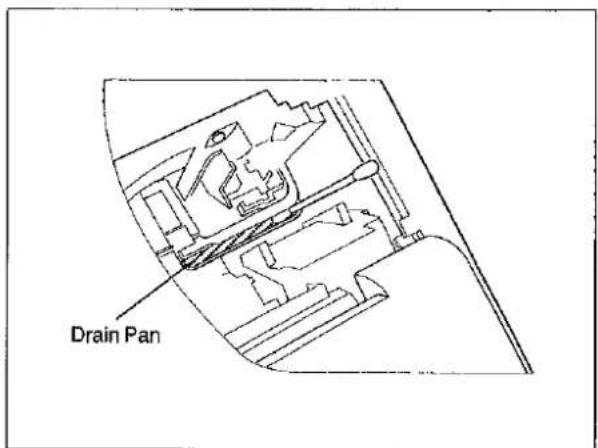
text_image
Drain Pan① Open the Printer Cover.
② Remove the Print Cartridge.
③ Inspect the Drain Pan for excess ink. If necessary, clean up the excess ink with a swab or a paper towel.
Cleaning the Document Scanning Area
If the receiving party reports that the received documents were black, or contained black lines, make a copy on your unit to verify. If the copy is black or has black lines, the document Scanning Area is probably dirty and must be cleaned.
To clean the Scanning Area
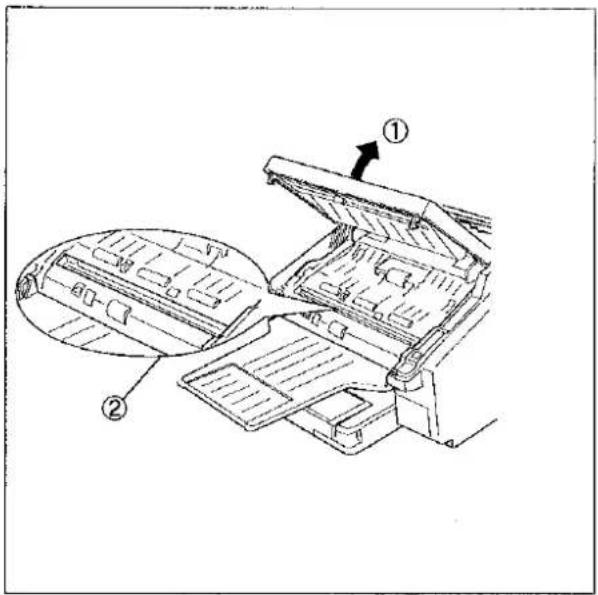
text_image
Technical diagram of a mechanical device with labeled parts and directional arrow indicating assembly or operation.① Open the ADF Door.
② Wipe the Scanning Area gently with a soft cloth or gauze wet with ethyl alcohol. Be sure to use a clean cloth, the Scanning Area can be easily scratched.
③ Close the ADF Door.
Adjusting the Automatic Document Feeder (ADF)
If document misfeeding occurs frequently, we suggest you to adjust the ADF.
To adjust the ADF
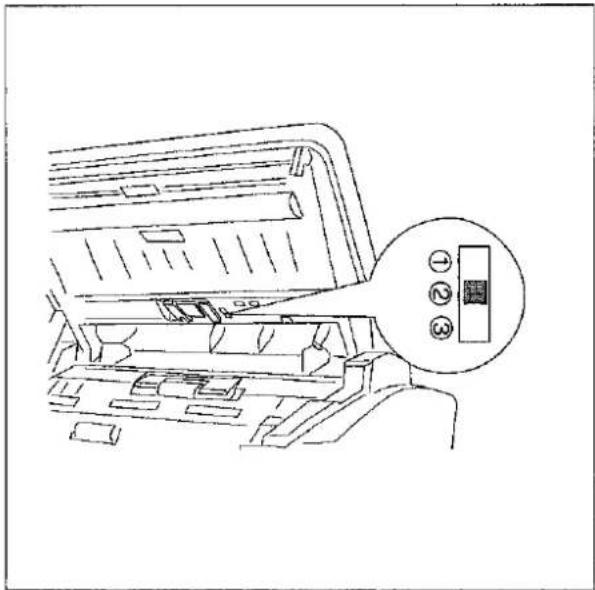
natural_image
Line drawing of a printer's internal structure with a circular inset showing a labeled panel (no text or symbols present)Open the ADF Door and slide the Pressure Adjusting Lever to the desired position depending on the condition.
| Position | Condition |
| 1 | To prevent no feed trouble |
| 2 | Standard position |
| 3 | To prevent multiple feed trouble |
Replacing the Print Cartridge
If the Print Cartridge runs out of ink, the following message is shown on the display.
OUT OF INK INFO. CODE=015
To replace the Print Cartridge.
1
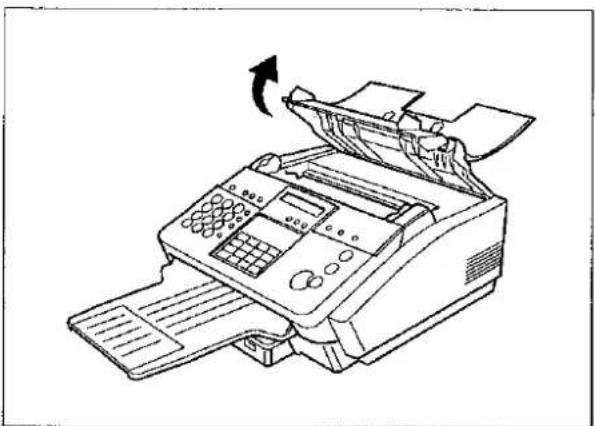
natural_image
Line drawing of a printer with an arrow indicating press operation (no text or symbols present)Open the Printer Cover.
2
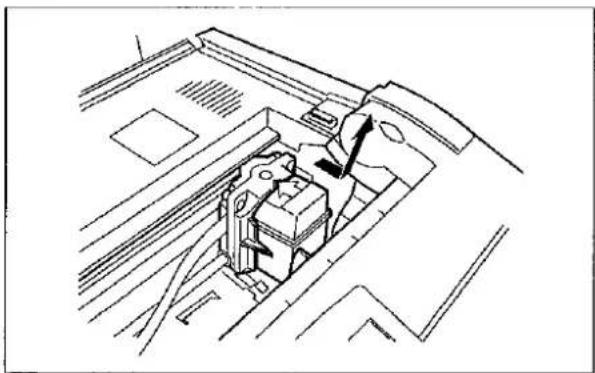
natural_image
Technical line drawing of a mechanical assembly with no visible text or symbols① Pull the Print Cartridge forward until the Print Cartridge "pops" loose. Lift the Cartridge out of the Cradle by grasping the green top and discard it.
② Install the new Print Cartridge, then close the Printer Cover. (see page 16)
3 The following message is shown on the display after closing the Printer Cover.
NEW PRINT CARTRIDGE INSTALLED? 1:Y 2:N
Press ① to return to standby.
If no action is taken within 10 seconds, the machine will default to "2 : N" and return to standby.
Maintaining Print Quality : Keep the print cartridge in the cradle at all times. Removing the cartridge will expose it to air, causing the ink to evaporate, and degrade the print quality. Keep the print cartridge in its "home" position when the UF-332 is not being used. Leaving it out of position will cause the ink to evaporate quickly.
Storing Print Cartridge : The following instructions will help you when storing unused print cartridges.
- Keep the print cartridge in its sealed container until you are ready to use it.
- Store the print cartridge container at room temperature.
- Check the expiration date on the cartridge package and use before that date.
• Install the print cartridge in the cradle immediately after opening the sealed container.

Note: If your machine detects Out-of-ink even though the Print Cartridge still has enough ink, remove the Print Cartridge, wrap it in a paper towel to prevent spillage and shake it up and down above a waste can until the ink squirts from the nose. Then, re-install the Print Cartridge and make a few copies to confirm whether the Print Cartridge has recovered.
Replacing the Battery
During the initial self test, when the power is turn "On", the machine will evaluate the condition of the back up battery. If the battery is weak or fully discharged, the following message will be shown on the display.
REPLACE BATTERY INFO. CODE=026
To replace the battery, follow the procedure below:
1 Print a File List to confirm that there is no file stored in memory. (See Note 1)
To print a File List, press FUNCTION, ⑨, ① and SET.
2
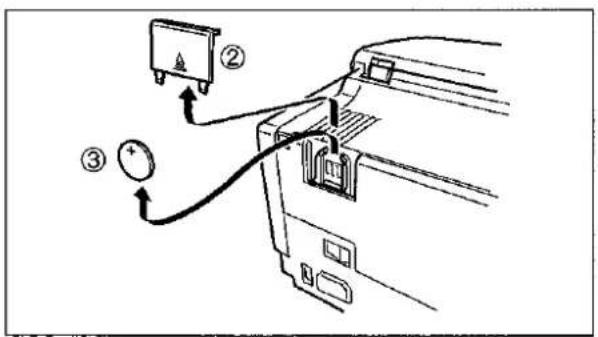
text_image
Diagram showing cable connection to a device with labeled parts and directional arrows① Turn the Power Switch to the "O" (OFF) position.
② Remove the Memory Card Cover.
③ Remove the Battery by sliding it inward and then out of the socket.
CAUTION
Dispose the battery properly and keep it away from small children.
3
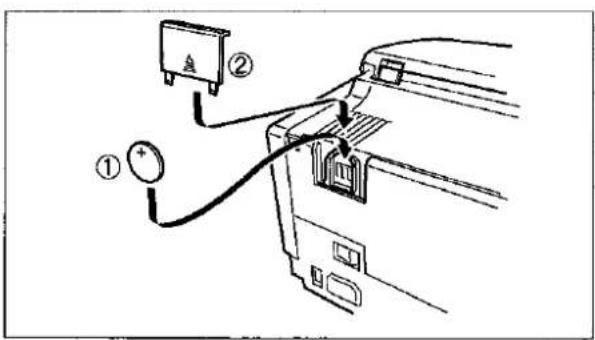
text_image
Diagram showing cable connection to a device with labeled components and polarity indicators① Install the new battery (Order No.:CR 2032) with the ⊕ side facing out.
② Re-install the Memory Card Cover.
③ Turn the Power Switch to the "I" (ON) position.
4 If the clock is flashing on the LCD Display, follow the procedure on page 24 to reset the clock.

Note: 1. If the power is turned "Off" and the battery is weak or fully discharged, the transmit and polling information of a file stored in memory may be lost. However the received document(s) in memory will be preserved and will print out automatically after the power is restored.
- The service life of the battery is approximately 1 year when the machine is turned "Off".
Checking the Telephone Line
When you do not hear a dial tone through the telephone connected to the machine or when the telephone does not ring (No automatic receive).
1
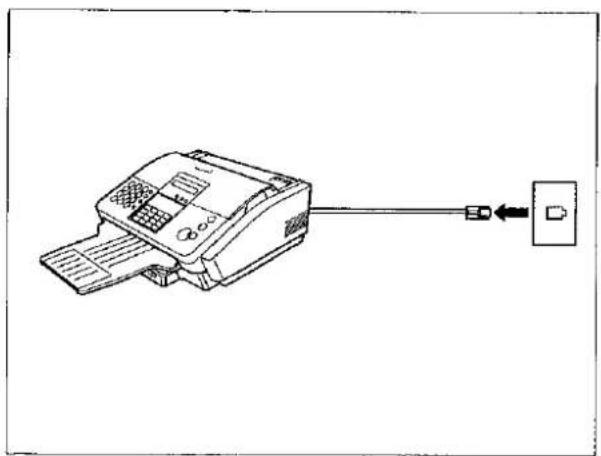
natural_image
Line drawing of a printer with an attached device (no text or symbols)Unplug the Telephone Line Cord from the telephone jack that was supplied by the telephone company.
2
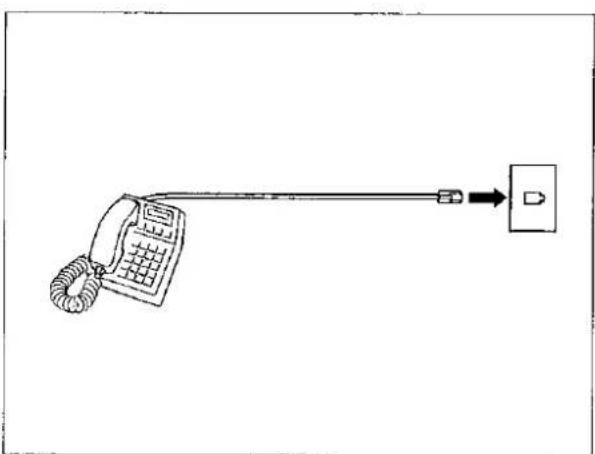
natural_image
Line drawing of a telephone handset connected to a wall-mounted device (no text or symbols)Plug a different regular telephone into the same telephone jack.
3
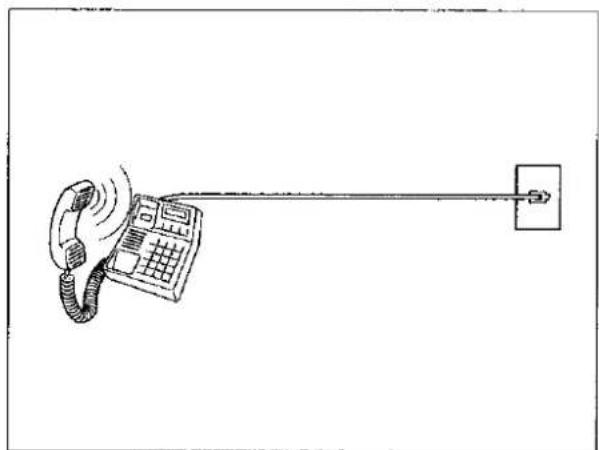
natural_image
Line drawing of a telephone handset emitting sound waves from a wall-mounted device (no text or symbols)Check for dial tone through the handset. If there is still no dial tone, report it to your local telephone company.
or
Call from another telephone to this number. If the telephone does not ring, report it to your local telephone company.
This page is intentionally left blank.
Compatibility
ITU-T/CCITT Group 3
Coding Scheme
MH, MR, MMR (Conform to ITU/CCITT Recommendations)
Modem Type
ITU-T/CCITT V.17, V.33, V.29, V.27 ter and V.21
Modem Speed
14400, 12000, 9600, 7200, 4800, 2400, and 300 bps
Document Size
Max. : 257 mm x 2000 mm
(with operator's assistance)
Min. : 148 mm x 128 mm
Document Thickness
Single sheet : 0.06 mm (45 g/m²) to 0.15 mm (112 g/m²)
Multiple sheets : 0.06 mm (45 g/m²) to 0.12 mm (80 g/m²)
ADF Capacity
(Automatic Document Feeder)
Built-in, up to 20 sheets
Scanning Method
Sheet Feeding with CCD type image sensor
Effective Scanning Width
208 mm
Scanner Resolution
| Horizontal | Vertical | ||
| Standard mode | 8 pels/mm | x | 3.85 lines/mm |
| Fine mode | 8 pels/mm | x | 7.7 lines/mm |
| Super Fine mode | 8 pels/mm | x | 15.4 lines/mm |
(All resolution modes conforms to ITU-T/CCITT Recommendations)

Specifications
Recording Method Thermal Inkjet Recording Head
Recording Paper Plain Paper
Recording Paper Size Letter / Legal / A4
Printer Resolution 360 x 360 dpi
Printing Speed Monochrome: 2 ppm (30 seconds/page) (Based on ITU-T Image No. 1)
Effective Recording Size Letter: 203 mm x 262.5 mm
A4 : 203 mm x 280.5 mm
Legal : 203 mm x 338.5 mm
Print Margin
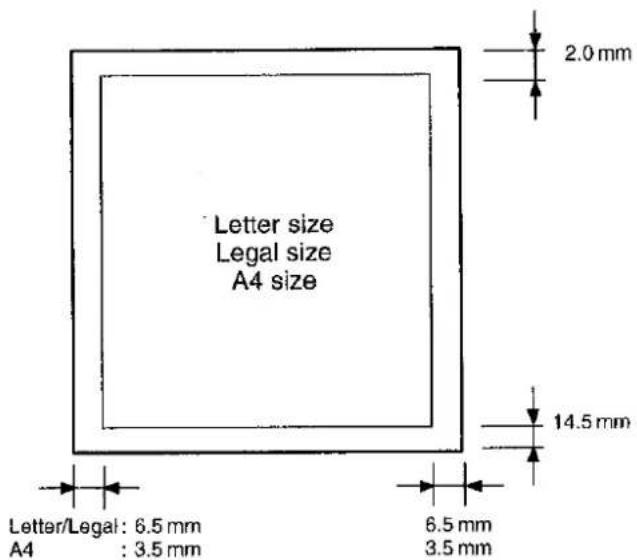
text_image
Letter size Legal size A4 size 2.0 mm 14.5 mm Letter/Legal: 6.5 mm A4 : 3.5 mm 6.5 mm 3.5 mm| Recording Paper Capacity | Approx. 100 sheets (using 80 g/m^2 paper) | |
| One-Touch/Abbreviated Dialling Memory Capacity | 49 stations (including 15 One-Touch keys) Each station can register up to 36 digits for each telephone number (including pauses and spaces) and up to 15 characters for each station name | |
| Image Memory Capacity | Approx. 30 pages (Based on ITU-T Image No.1 using Standard Resolution) | |
| Power Supply | 230 – 240 VAC, 50Hz, Single Phase | |
| Power Consumption | Standby : Approx. 8WTransmission : Approx. 19WReception : Approx. 19WCopy : Approx. 29WMax : Approx. 55W | |
| Dimensions | 380 mm (W) x 378 mm (D) x 196 mm (H) (excluding Projections) | |
| Weight | Approx. 8.5 kg (excluding consumable supplies) | |
| Operating Environment | Temperature : 5 to 35°CRelative Humidity : 15 to 70% | |
| Optimum Printing Environment | Temperature : 15 to 35°CRelative Humidity : 20 to 70% | |
In general, most plain bond papers will produce excellent results. Most photocopy papers will also work very well. There are many "name" and "generic" brands of paper available. Before purchasing large quantities, we recommend that you test various paper samples until you obtain the results you are looking for.
The following table summarizes the major specifications to consider when selecting white or colored paper.
| Basic Weight | 60 to 90 g/m2 |
| Cut Edge Conditions | Cut with sharp blades, no visible frayed edges |
| Finished Dimensions | ±0.8 mm of nominal, corners 90° ±0.2° |
| Grain | Long grain |
| Moisture Content | 4% to 6% by weight |
| Opacity | 84% minimum |
| Packing | Polylaminated moisture-proof ream wrap |
| Sizes | Letter : 216 mm x 279 mmA4 : 210 mm x 297 mmLegal : 216 mm x 356 mm |
| Type | Cut sheet |
| Wax Pick | 304.8 mm minimum (Dimension) |

Please contact your local Panasonic dealer for availability.
| Order No. | Picture | Description |
| PC-60BK |  | Print Cartridge |
- a. BABT Certificate Number/Approval Number : 607350
b. APPROVED for connection to telecommunication systems specified in the instructions for use subject to the conditions set out in them.
-
This equipment has been approved for the use of following facilities.
-
Storage of telephone numbers for retrieval by a predetermined code. (If problems occur, verify stored number.)
• Automatic Call initiation
• Operation in the presence or absence of Initial or Secondary Proceed Indication.
• Automatic Dialling Facilities
• Automatic Storage of Last Number Dialled
• Automatic Repeat Attempt Facilities
• Auto Clear from the call originating end
• Series Connection Facility - Call Progress Monitor
- Modem
Any other usage will invalidate the approval of the equipment if as a result, it then ceases to conform to the standards against which approval was granted.
-
The connection to the telecommunication systems must be unplugged before the earth is disconnected. The connection to the telecommunication systems must not be hardwired.
-
This equipment may be used on telecommunication systems employing loop disconnect or MF signalling.
-
This equipment is not suitable as an extension to a payphone or for use on shared service lines.
-
This equipment is suitable for connection only to direct exchange lines on the PSTN directly or via a compatible PABX. The supplier of the equipment should be consulted for an up to date list of PABXs with which the equipment is compatible.
It cannot be guaranteed that the equipment will operate under all possible conditions of connection to compatible PABX. Any cases of difficulty should be referred in the first instance to the supplier of the equipment.
-
Although this equipment can use either loop disconnect or DTMF signalling, only the performance of the DTMF signalling is subject to regulatory requirements for correct operation. It is therefore strongly recommended that the equipment is set to use DTMF signalling for access to public or private emergency services. DTMF signalling also provides faster call set up.
-
Ringer Equivalence Number (REN)=1
The REN is a customer guide indicating approximately the maximum number of items of equipment that should be connected simultaneously to the line.
The sum of the REN's of the individual items should not exceed 4. The REN value of a BT telephone is assumed to be 1 unless otherwise marked.
- For the definition of a RBS (Relevant Branch System) for PSTN lines, please refer to BS6789 Part 6.1 Section 2.4.
- The voltage drop introduced by the equipment between the PSTN and the associated telephone at a current of 40 mA d.c. is 2.0 Volts.
The equipment should not be used in conjunction with other series connected equipment such that the aggregate declared voltage drops of all this equipment, together with the voltage drop introduced at 40 mA d.c. by any separate wiring that is used to link equipment, exceeds 2.0 Volts.
The introduction of this voltage drop may occasionally cause difficulties in making calls from the associated telephone or problems in telephone conversation being experienced by both parties to the call.
While operation may be possible initially, changes to or modernization of the network taking place in the normal course of events may result in the equipment being connected to a network service with which it was not designed to be compatible. Failure of the equipment to work under these circumstances may not be the responsibility of the network operator.
In the unlikely event of such problems occurring, the user should contact the supplier or maintainer of the equipment.
-
Interconnection directly, or by way of other equipment, of ports marked "SAFETY WARNING. See instructions for use" with ports marked or not so marked may produce hazardous conditions on the network and that advice should be obtained from a competent engineer before such a connection is made.
-
This equipment is not intended for use in applications where callers may be considered "naive". A caller with no special knowledge of the characteristics of the auto-answering systems or with no special equipment to assist the transfer of information across the established connection is considered to be "naive".
Generally callers are unlikely to be "naive" in any of the following cases;
(1) If the equipment gives an answer tone.
(2) If the telephone number is not made public.
(3) If the telephone number is published and is accompanied by suitable instructions concerning incoming calls.
- The port voltages are telecommunication network voltages (TNV) for the PSTN line connection and the series connection.

CAUTION
Connect only equipment complying with EN41003 to this FAX.

WARNING
To prevent fire or shock hazard, do not expose this product to rain or any type of moisture.
| ABBR. No.(Abbreviated Number) | The ability to store full phone numbers into the dialer and then utilizing a short series of keystrokes to speed dial that number in the future. |
| ADF(Automatic Document Feeder) | The mechanism that delivers a stack of document pages to the scanner one page at a time. |
| Auto print reduction | The method of automatically reducing a received document so that it can be printed onto a standard size piece of plain paper. For example, your machine will reduce an incoming legal size page to 75% of its original size so it could fit on a letter size page. |
| BPS(Bits Per Second) | The amount of data that is transmitted over the phone line. Your machine can start at 14400 BPS and automatically steps down to 12000, 9600, 7200, 4800, 2400 BPS depending on the phone line condition and the receiving machines capabilities. |
| C.C.I.T.T. | Consultative Committee on International Telegraph and Telephone. This organization has presently developed four groups of industry standards that insure facsimile compatibility. |
| CCITT Test Chart No.1(ITU-T/CCITT) | An industry standard document that allows comparisons of the transmission speeds and capabilities of facsimile machines. |
| Character ID | A programmed proprietary code name that allows up to 16 alphanumeric characters identifying your facsimile machine. |
| Character keys | The keys that are used to enter letters and symbols for various programming functions. |
| Coding scheme | The data compression method used by facsimile machines. Your machine utilizes Modified Huffman (MH), Modified Read (MR), and Modified Modified Read (MMR) coding schemes. |
| COMM. JOURNAL | Refers to either the Communication Journal or the Confidential XMT Report. |
| Confidential communication | In a network of facsimile machines, a code can be entered to retrieve a document that is stored in memory of a designated relay station. |
| Confidential XMT Report | The report that gives you information about the transmission of a confidential documents to a relay station. |
| CONTRAST | Signifies the scanning sensitivity in terms of lightness and darkness of your original transmitting pages. |
| DDD(Direct Distance Dialling) | A telephone service that allows unassisted dialling, no operator assistance is required. |
| Deferred polling | The ability to retrieve documents from other stations at a later time. |
| Deferred transmission | The ability to send documents to other stations at a later time. |
| Direct Dialling | The method of dialling where you enter the entire telephone number through the keypad. |
| Directory Sheet | The list that contains the station names that are programmed into your unit. |
| DTMF(Dual Tone Multi-Frequency) | Dialling method that sends a different set of frequencies for each digit of the telephone keypad. Commonly refers to touch tone dialling. |
| ECM(Error Correction Mode) | The ability to correct transmission errors as detected during the transmitting phone call. |
| FAX Parameter List | The list that contains the home FAX parameters settings that you have programmed into your machine. |
| FAX/TEL Auto Switching | The ability to share a single telephone line for both fax and voice usage. |
| File | A task that has been stored into the memory of your unit. Examples are deferred transactions. |
| Fixed print reduction | The method that allows you to determine one reduction rate, such as 75%, for all incoming documents. |
| FUNCTION | The control panel key that will be utilized to begin an operation or configuration of a feature. |
| G3 mode (Group 3) | Refers to the standards and transmission capabilities of the current generation of facsimile machines. |
| HALFTONE | A scanning technique to distinguish levels of gray from black and white. Your machine can detect up to 64 levels of gray in halftone mode. |
| Handshaking | The exchange of a group of control signals that communicate between the transmitter and receiver. These signals determine the condition at which communication can occur. |
| Header | A row of information that is transmitted by the sending machine and printed on the top of each page by the receiving unit. This identifies the transmitting unit and information about the transmission, such as time and date. |
| ID | A programmable address of up to 20 digits identifying your machine. |
| Image memory capacity | This signifies the amount of memory available in your unit capable of storing pages of documents. All page units of measure are based using the ITU-T Test Chart No.1. |
| Individual Transmission Journal | A report that is printed by the transmitting unit stating information regarding the last document transaction. |
| Information code | A code that is internally generated by your Fax stating a specific operational error or machine failure. |
| IN/OUT Mode | IN(Attended reception) and OUT(Unattended reception) mode can be easily changed by just pressing OUT button. When IN or OUT mode is selected, the reception mode will be set according to the setting in the Fax Parameter 15 and 16.IN Mode : TEL (Fax manual reception): FAX/TEL Auto SwitchOUT Mode : FAX (Fax automatic reception): TAM I/F |
| ITU-T | International Telecommunication Union-Telecommunication, formerly known as C.C.I.T.T. |
| Journal | A report that is printed by your unit listing the last 32 transmitting and receiving transactions. |
| Keypad | A group of numeric keys located on your control panel. |
| LCD | Liquid Crystal Display. The display area of your machine. |
| LOGO | Your programmed company name or identification up to 25 alphanumeric characters. |
| Memory transmission | The documents are scanned into memory before actual connection to the phone line for transmission. |
| Modem | A device that converts signals from your fax machine into signals that can be transmitted over telephone lines. |
| Multi-file transmission | The ability to store many files into your machines memory before actual telephone connection occurs. |
| Multi-station transmission | The ability to broadcast the same set of documents to a programmed number of locations. |
| Off-hook dialling | The direct dialling of a telephone number with the handset out of the cradle or "off the hook." |
| On-hook dialling | The direct dialling of a telephone number with the handset in the cradle or "on the hook." |
| One-Touch dialling | The ability to dial an entire telephone number by pressing one key. |
| Panasonic Super Smoothing | An electronic image enhancement (Panasonic Super Smoothing) that will create a particular pattern for the improvement of copy quality. |
| Polling | The ability to retrieve a document from another facsimile machine. |
| Polling password | A 4-digit programmed code that enables the security of a document being polled. |
| Print reduction modes | The methods used to determine how an incoming document will be reduced to print onto the paper loaded in your machine. |
| PSTN | Public Switched Telephone Network. Network of interconnected switching equipment and transmission facilities. |
| Remote Reception | A function that allows you to activate your fax machine to receive from an extension phone. You may transfer an incoming call to your fax machine from an extension phone by pressing the " * " key twice on a touch tone phone. |
| RESOLUTION | Relates to the number of dots scanned or printed per certain square. The quality of the image increases as the number of dots per certain square increases. |
| Selective reception | A function that can be set so that your unit will receive from only those machines programmed into your dialer. |
| Station name | Alphanumeric ID which can be programmed for each One-Touch dialling and Abbreviated dialling number. |
| Stored documents | Documents that have been scanned and now are stored in your machine's memory. |
| Sub-address | ITU-T recommendation for further routing, forwarding or relaying of incoming faxes. |
| Substitute memory reception | Your machine's ability to store an incoming document into its memory, when it runs out of recording paper or ink in the Print Cartridge. |
| TAM Interface | A capability of your unit to be connected and operate with a Telephone Answering Machine (TAM). |
| Transmission reservation | The ability to preset a telephone number so that you may reserve a transmission while your unit is performing another function. |
| User parameter | Programmed parameters that provide information to other stations. Examples are logo, character ID, date and time. |
| View Mode - File List | Allows you to view the brief contents of the memory files through the LCD display without having to print the Memory File List. |
| View Mode - Journal | Allows you to view the brief contents of the journal through the LCD display without having to print the journal. |
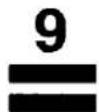
INDEX
A
ABBR. Number List 113
Abbreviated Dialling Numbers 30
ADF Capacity 131
Automatic Document Feeder 48
Automatic Reduction 74
B
Battery 128
C
Character ID 26
Character Keys 11
Communication Journal (COMM. JOURNAL) ..... 51, 111
Confidential Code 96
Confidential Mailbox 96
Contrast 49
Copy 76
D
Date and Time 24
Deferred Polling 78
Deferred Transmission 77
Diagnostic Password 38
Dialling Method (Tone or Pulse) 22
Dimensions 133
Direct Transmission 53
Direct Transmission Reservation 66
Directory Search Dialling 63
Directory Sheet 34
Document Jam 122
Document Misfeeding 126
Document Size 131
Document Thickness 131
E
Edit File Mode 81
F
Fax / Tel Auto Switching Mode 70
Fax Parameter List 114
Fax Parameter Table 36
File List 81
Fixed Reduction 74
Flash Key 10
Function Key List 12
H
Halftone 50
Header Format 36
Header Print 36
1
ID Number 27
Image Memory Capacity 133
IND. XMT JOURNAL 108
Information Codes 118
J
Journal 107
K
Key/Buzzer Volume 36
L
Loading Document 47
LOGO 25
M
Memory Transmission 59
Monitor Volume 23
Multi-Station Transmission 64
0
Off-Hook Dialling 57
On-Hook Dialling 58
One-Touch Dialling Numbers 30
One-Touch Keys 30
One-Touch List 113
Operating Environment 133
P
Paper Specification 18
Pause Key 10
Polling 79
Polling Password 79
Power Consumption 133
Print Margin 132
Print Reduction 74
Print Reduction Ratio 74
Priority Transmission Reservation 66
R
Receive To Memory 88
Received Time Print 36
Recording Paper Jam 121
Recording Paper Size 132
Redial 67
Reduction Ratio 37
Remote Reception 69
Resolution 49
Ringer Volume 23
S
Selective Reception 95
Sub-address Password 38
Sub-addressing 103
Substitute Memory Reception 75
T
TAM Interface Mode 72
Timer Controlled Communications 77
Transmission Reservation 65
U
User Parameters 24
V
View Mode - File List 82
View Mode – Journal 107
W
Weight 133
This page is intentionally left blank.
TO THE USER
Before connecting this equipment to a British Telecom line, the lower portion of this form should be sent to your local BT District Office. This form is to:
a) Advise them of your connection.
b) Where necessary, request the installation of a suitable BT connection socket for telephone network or PBX connection. In the latter case, the form may be used only where the extension wiring is owned by BT.
To: THE DISTRICT BUSINESS SYSTEMS MANAGER
At:
I/We
a
and intend to use the equipment in your area.
I/We do/do not require the installation of a BT wall socket for this equipment.
(signed)
Name:
Address:
Tel No.:
Facsimile Number Directory
Name
Number
Panafax®
Facsimile
UF-332