H13-HLV4 - Beleuchtung SuperBrightLEDs - Kostenlose Bedienungsanleitung
Finden Sie kostenlos die Bedienungsanleitung des Geräts H13-HLV4 SuperBrightLEDs als PDF.


Benutzerfragen zu H13-HLV4 SuperBrightLEDs
0 Frage zu diesem Gerät. Beantworten Sie die, die Sie kennen, oder stellen Sie Ihre eigene.
Eine neue Frage zu diesem Gerät stellen
Laden Sie die Anleitung für Ihr Beleuchtung kostenlos im PDF-Format! Finden Sie Ihr Handbuch H13-HLV4 - SuperBrightLEDs und nehmen Sie Ihr elektronisches Gerät wieder in die Hand. Auf dieser Seite sind alle Dokumente veröffentlicht, die für die Verwendung Ihres Geräts notwendig sind. H13-HLV4 von der Marke SuperBrightLEDs.
BEDIENUNGSANLEITUNG H13-HLV4 SuperBrightLEDs
superbrightleds.com
User Manual
Part Number:
x-HLV4
Important: Read all instructions prior to installation.
LED Headlight Kit
Installation Instructions (continued)
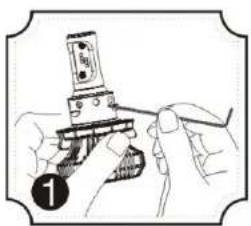
Beam Pattern adjustment for H13/9004/9007
In some applications, these may require bulb body to be rotated in relation to locking ring to achieve desired pattern. Follow steps below to adjust.
natural_image
Illustration of hands using a handheld device to adjust or install a component (no text or symbols visible)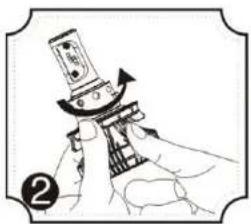
natural_image
Illustration of hands holding a mechanical device with a knob (no text or symbols visible)To adjust, remove allen screw on locking ring. Rotate bulb body in ring to desired position. Reinstall allen.
Warranty Agreement
- A Lifetime Warranty is given from the date of purchase to the original purchaser. The warranty is for free repair or replacement and covers manufacturing faults only. Labor costs are not covered by warranty.
-
Warranty exclusions:
-
Any damages caused from improper operation or connecting voltages other than 9\~32 VDC.
• The product appears to have excessive physical damage. - Repair or replacement as provided under this warranty is the exclusive remedy to the customer. We shall not be liable for any incidental or consequential damages for breach of any stipulation in this warranty.
superbrightleds.com
LED Headlight Kit Installation Manual
H4-HLV4
9004-HLV4
PSX24W-HLV4
H7-HLV4
9005-HLV4
PSX26W-HLV4
H8-HLV4
9006-HLV4
H10-HLV4
9007-HLV4
H11-HLV4
9012-HLV4
H13-HLV4
H16-HLV4
natural_image
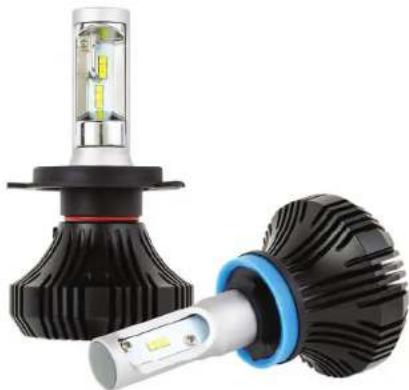
Two compact electric vehicle headsets with LED lights, one black and one white, shown against a white background (no text or symbols visible)CE



superbrightleds.com
User Manual
Part Number:
x-HLV4
important: Read all Instructions prior to installation.
LED Headlight Kit
Safety and Notes
- Product shall be installed and serviced by a qualified technician.
- LED headlight replacements are weatherproof when used in an approved headlight housing assembly.
- Good heat dissipation will prolong the working life of the driver, ensure good ventilation.
- Check voltage of the vehicle to be sure it complies with working voltage of the product. (9\~32 VDC)
- Ensure all wire connections and polarities are correct before applying power to avoid any damages to the LED lights.
- If a fault occurs, return product to Super Bright LEDs. Do not attempt to fix this product by yourself.
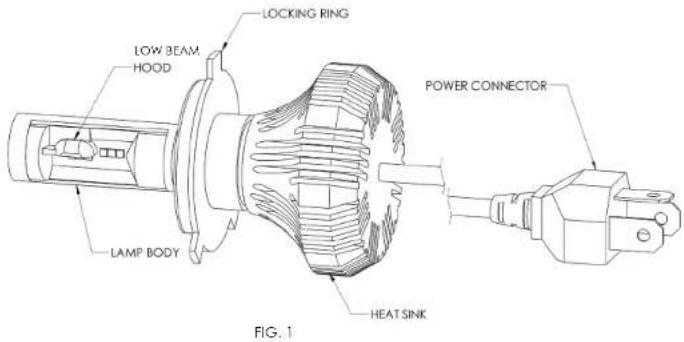
MAKE SURE HOOD IS POSITIONED AS SHOWN ONCE INSTALLED
text_image
LOW BEAM HOOD LAMP BODY LOCKING RING POWER CONNECTOR HEAT SINK FIG. 1Installation Instructions
Remove bulb retaining ring if so equipped and remove stock bulb.
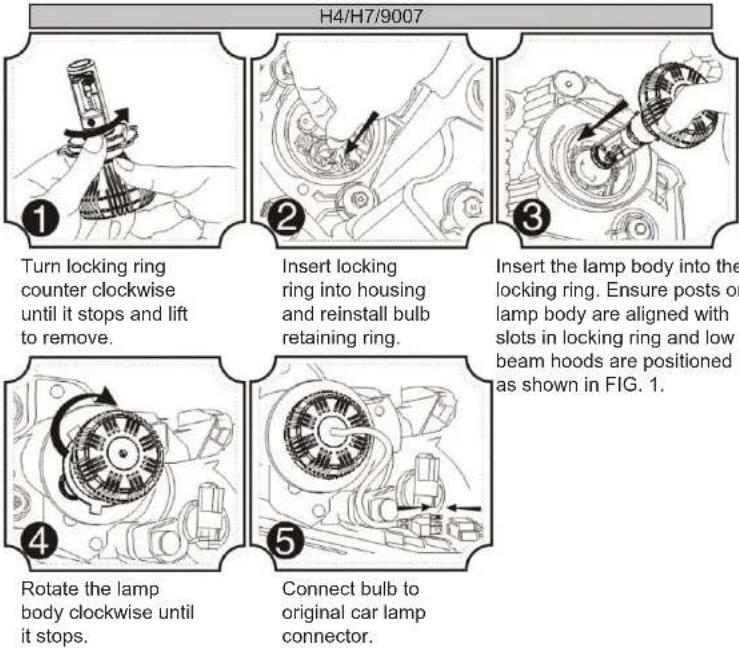
flowchart
graph TD
    A["Turn locking ring counter clockwise until it stops and lift to remove."] --> B["Insert locking ring into housing and reinstall bulb retaining ring."]
    B --> C["Insert the lamp body into the locking ring. Ensure posts on lamp body are aligned with slots in locking ring and low beam hoods are positioned as shown in FIG. 1."]
    C --> D["Rotate the lamp body clockwise until it stops."]
    D --> E["Connect bulb to original car lamp connector."]
H8/H11/H13/H16JP/P13/9004/9005/9006/PSX24/PSX26
text_image
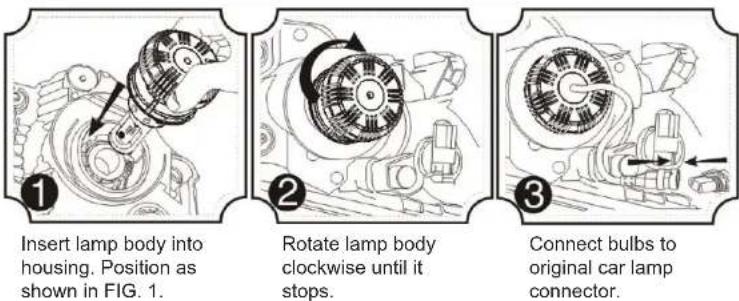
Insert lamp body into housing. Position as shown in FIG. 1. Rotate lamp body clockwise until it stops. Connect bulbs to original car lamp connector.
Rev Date: V1 11/08/2016
4400 Earth City Expy, St. Louis, MO 63045 • 866-590-3533 • superbrightleds.com