001-727 - Rollladen Hard Head - Kostenlose Bedienungsanleitung
Finden Sie kostenlos die Bedienungsanleitung des Geräts 001-727 Hard Head als PDF.


Benutzerfragen zu 001-727 Hard Head
0 Frage zu diesem Gerät. Beantworten Sie die, die Sie kennen, oder stellen Sie Ihre eigene.
Eine neue Frage zu diesem Gerät stellen
Laden Sie die Anleitung für Ihr Rollladen kostenlos im PDF-Format! Finden Sie Ihr Handbuch 001-727 - Hard Head und nehmen Sie Ihr elektronisches Gerät wieder in die Hand. Auf dieser Seite sind alle Dokumente veröffentlicht, die für die Verwendung Ihres Geräts notwendig sind. 001-727 von der Marke Hard Head.
BEDIENUNGSANLEITUNG 001-727 Hard Head
Hard Head
001-721 — 001-730
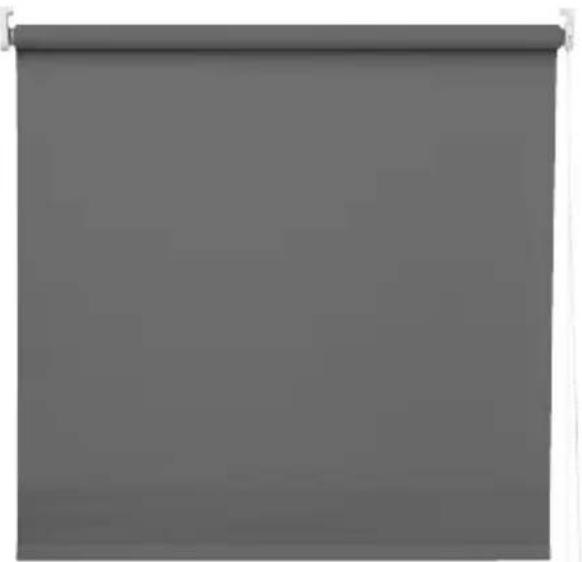
natural_image
Plain gray scroll or banner with no visible text, symbols, or markings
SE RULLGARDIN
Bruksanvisning i original Viktigt! Läs bruksanvisningen noggrant innan användning! Spara den för framtida behov.
NO RULLEGARDIN
Bruksanvisning (Oversettelse av original bruksanvisning) Viktig! Les bruksanvisningen nøye før bruk. Ta vare på den for fremtidig bruk.
PL ROLETY OKIENNEJ
Instrukcja obsługi (Tłumaczenie oryginalnej instrukcji) Ważny! Przed użyciem uważnie przeczytaj instrukcję obsługi! Zachowaj ją na przyszłość.
EN ROLLER BLIND
Operating instructions (Translation of the original instructions) Important! Read the user instructions carefully before use. Save them for future reference.
Rätten till ändringar förbehålles.
Vid eventuella problem, kontakta vår serviceavdelning på telefon 0200-88 55 88.
www.jula.se
Med forbehold om endringer.
Ved eventuelle problemer kan du kontakte vår serviceavdeling på telefon 67 90 01 34.
www.jula.no
Z zastrzeżeniem prawa do zmian.
W razie ewentualnych problemów skontaktuj się telefonicznie z naszym działem obsługi klienta pod numerem: 22 338 88 88.
www.jula.pl
Jula reserves the right to make changes. In the event of problems, please contact our service department. www.jula.com
Tillverkare/ Produsent/ Producenci/ Manufacturer
Jula AB, Box 363, 532 24 SKARA
Distributör/ Distributør/ Dystrybutor/ Distributor
Jula Poland Sp. z o.o., ul.
Malborska 49, 03-286 Warszawa, Polska
Jula Norge AS, Solheimsveien 6–8, 1471 L∅RENSKOG
2017-02-09
© Jula AB
1
text_image
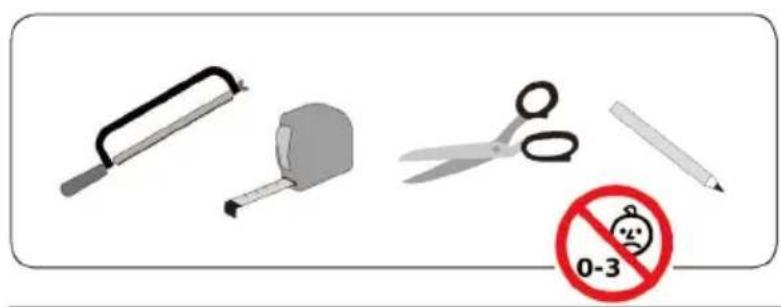
0-3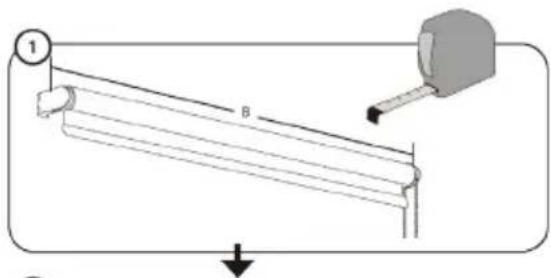
text_image
1 B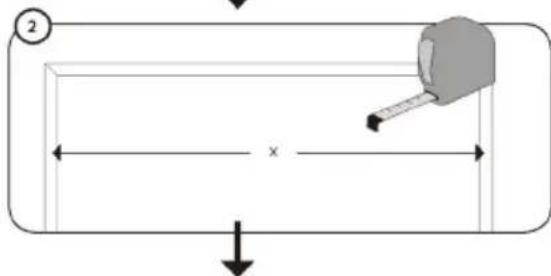
text_image
2 x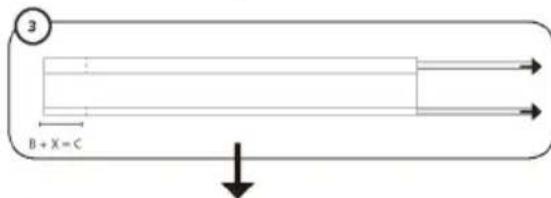
text_image
3 B + X = C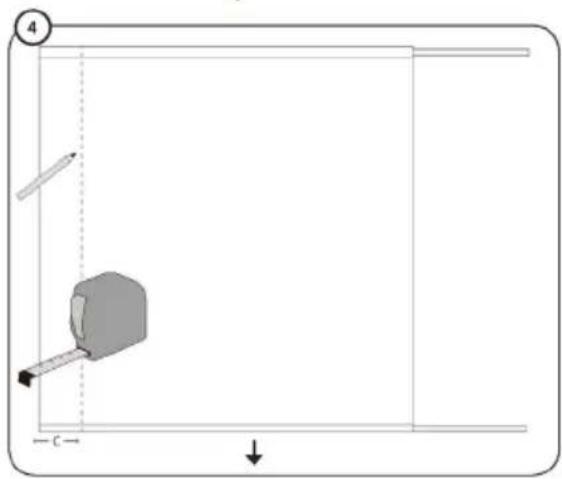
natural_image
Pure technical diagram showing a mechanical component with no text, numbers, or symbols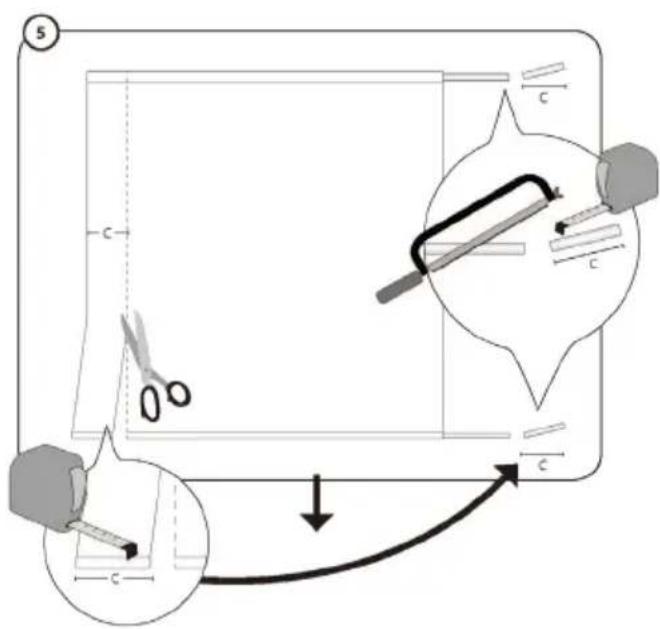
text_image
Diagram illustrating a sewing or cutting process with labeled parts and directional arrows indicating steps.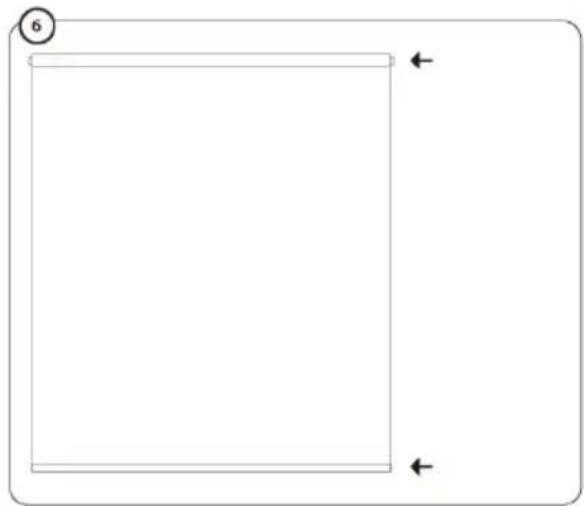
natural_image
Simple line drawing of a rectangular frame with an arrow and number 6, no text or symbols present.2
text_image
A x 1 B C D x 5 E x 5 F x 1 G x 1 H x 1 8 0-3 I x 1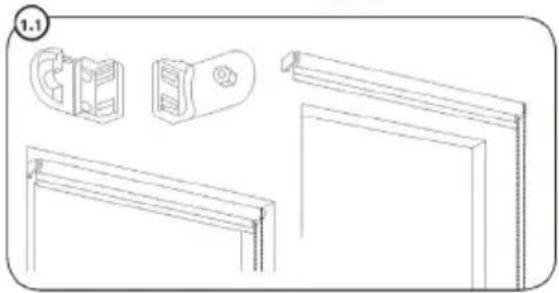
natural_image
Technical line drawing of a mechanical assembly with two views and a separate inset showing a component (no text or symbols)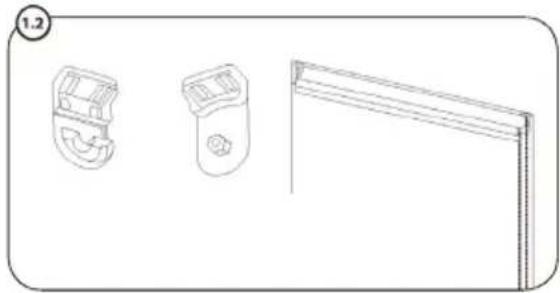
natural_image
Line drawing of three electronic devices: a front panel, a side panel with a button, and a rear panel (no text or symbols)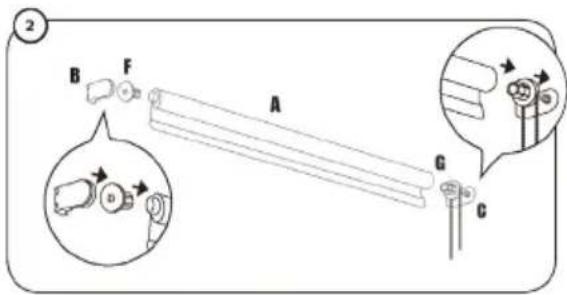
text_image
2 B F A G C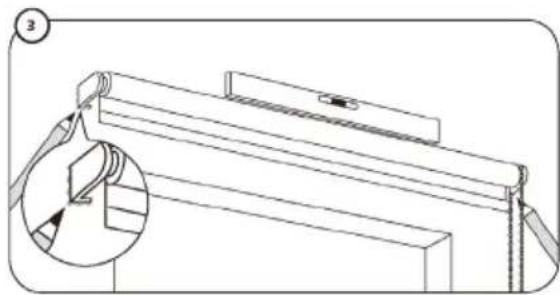
natural_image
Technical line drawing of a mechanical assembly with a magnified inset showing internal components (no text or symbols)
text_image
A B D C D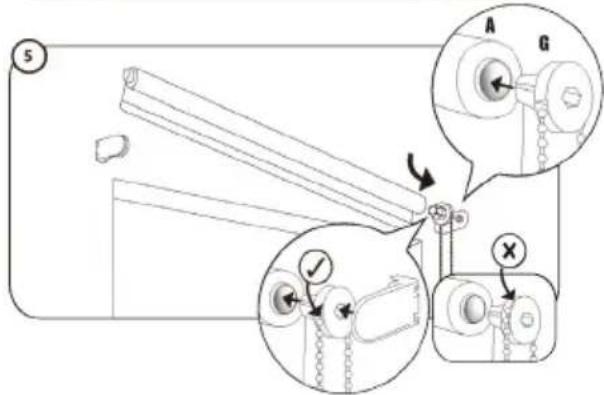
text_image
5 A G X2
text_image
Technical diagram showing mechanical assembly with labeled parts and a magnified inset view of a cylindrical component.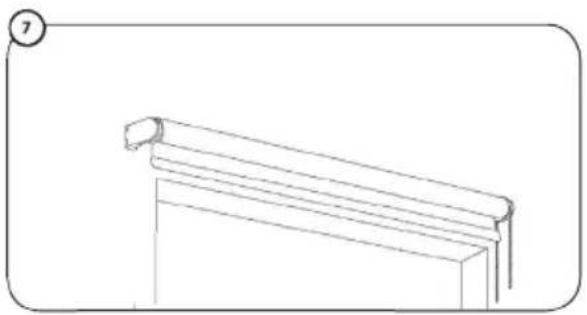
natural_image
Simple line drawing of a three-tiered cylindrical object mounted on a base, no text or symbols present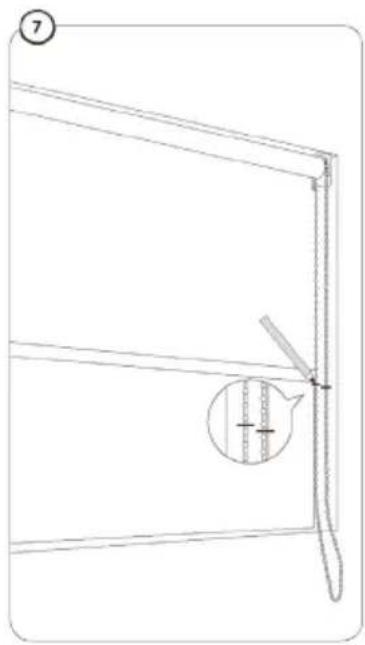
natural_image
Technical line drawing of a door frame with a handle and a circular inset showing measurement markings (no text or symbols)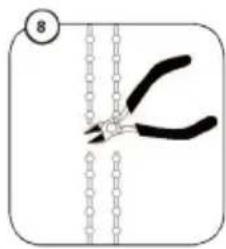
natural_image
Illustration of a pair of pliers cutting through chains, no text or symbols present
chemical
Diagram of a molecular interaction or reaction with labeled components H and numbered point 9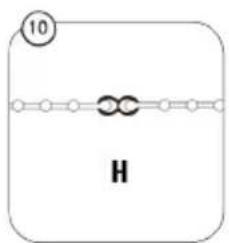
chemical
Simple molecular structure diagram with labeled atom number 10 and label H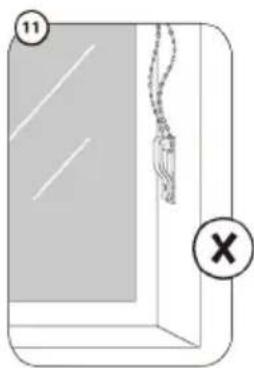
natural_image
Simple line drawing of a window with a hanging tag and a cross mark, no text or symbols present.
text_image
12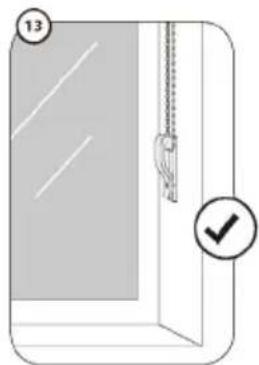
text_image
13 ✓3
natural_image
Pure technical diagram of a mechanical component with no text or symbols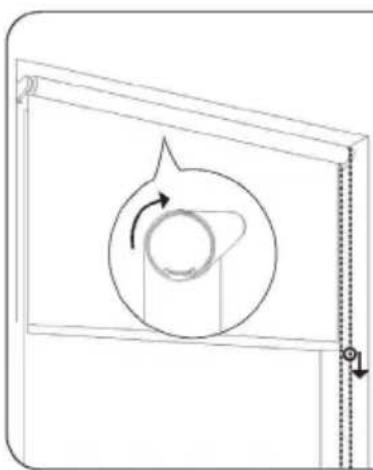
natural_image
Technical line drawing of a mechanical component with a circular feature and directional arrows (no text or symbols)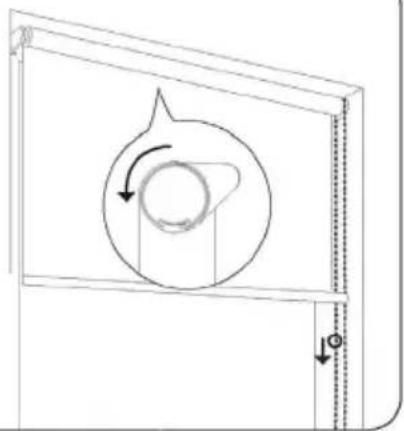
natural_image
Diagram of a mechanical component with a rotating arrow and base, no text or symbols presentSÄKERHETSANVISNINGAR
text_image
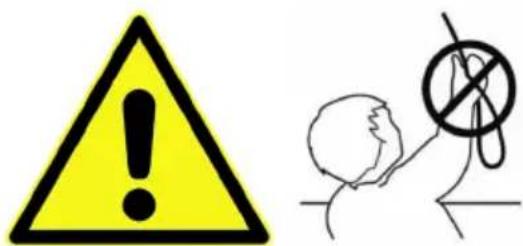
Warning symbol and pictogram showing a yellow triangular warning sign with an exclamation mark and a hand holding a circle with a diagonal line.WARNING
- Det har hänt att småbarn har strypts i snaror som uppstått på linor, kedjor och band samt på manöverlinor.
- Se till att linorna är utom räckhåll för barn, för att undvika stryp- och insnärjningsolyckor. Linor kan sno sig runt halsen på ett barn.
- Flytta bort sängar och andra möbler från linor till solskydd och andra gardiner.
- Knyt inte ihop linor. Se till att linor inte tvinnas ihop eller bildar en snara.
-
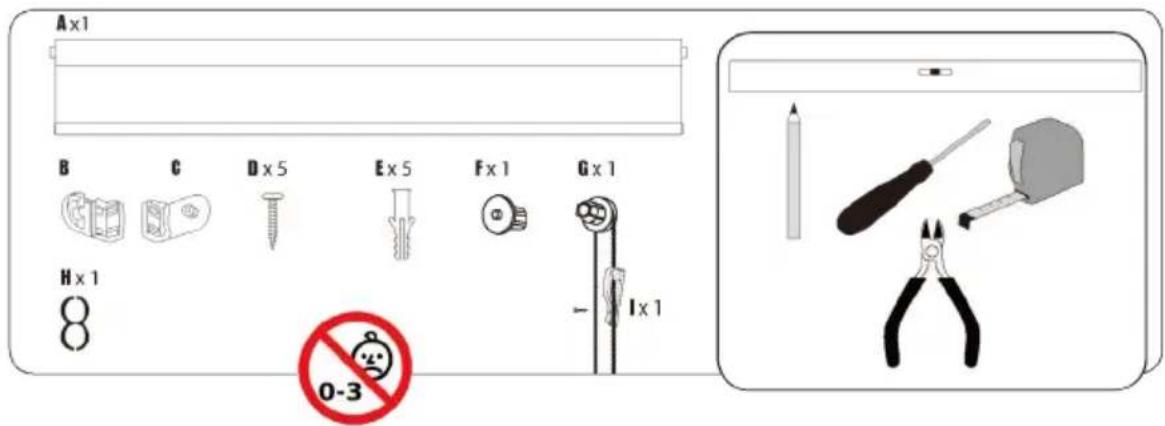
Säkerhetsanordningen, linsträckaren (I), ska placeras tillräckligt högt för att vara utom räckhåll för barn, men ändå åtkomliga för vuxna.
-
Säkerhetsanordningen, linsträckaren, måste fästas på en stabil yta med skruvar som passar för väggen eller ytmaterialet. Den får inte limmas eller tryckas på plats.
- Den övre skenan ska placeras minst 1,5 m ovanför golvet.
- Säkerhetsanordningen, linsträckaren, ska monteras minst 1,5 m ovanför golvet.
- Barn kan strypas om säkerhetsanordningen, linsträckaren, inte installeras och juseras. Denna anordning ska alltid användas för att hålla linor och kejor utom räckhåll för barn.
- Barn kan strypas om denna säkerhetsanordning inte installeras och justeras. Läs noggrant anvisningarna och installera därefter.
- Montering ska utföras av personer med tillräcklig erfarenhet.
- Säkerhetsanordningen för kulkedjan (H) eliminerar den farliga öglan och måste
installeras enligt anvisningarna. Om säkerhetsanordningen för kulkedjan löst ut ska delarna sättas samman igen före fortsatt användning.
- Säkerställ att linornas placering är enligt monteringsanvisningarna.
MONTERING
MINSKA BREDDEN
BILD 1
MONTERING
BILD 2
HANDHAVANDE
BILD 3
UNDERHÅLL
Rengör med dammsugare eller trasa.
SIKKERHETSANVISNINGER
text_image
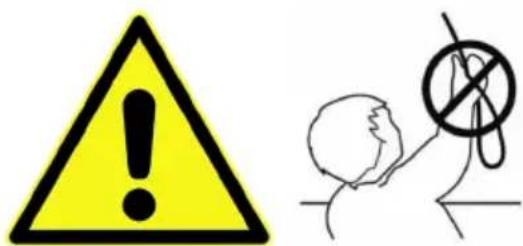
Warning symbol and pictogram showing a yellow triangular warning sign with an exclamation mark and a hand holding a circle with a diagonal line.ADVARSEL
- Det har hendt at små barn har blitt kvalt i løkker på snorer, kjeder og bänd.
- Sørg for at snorene er utenfor barns rekkevidde for å unngå at de kveles eller setter seg fast. Snorer kan vikle seg rundt halsen på et barn.
- Flytt senger og andre møbler vekk fra snorene til persienner og andre gardiner.
- Knyt ikke sammen snorer. Pass på at snorer ikke tvinnes sammen eller danner en løkke.
-
Sikkerhetsinnretningen, snorfestet (I), skal plasseres så høyt at den er utenfor barns rekkevidde, men likevel kan nås av voksne.
-
Sikkerhetsinnretningen, snorfestet, må festes på en stabil flate med skruer som er egnet til veggen eller overflatematerialet. Den skal ikke limes eller trykkes på plass.
- Den øvre skinnen skal monteres minst 1,5 m over gulvet.
- Sikkerhetsinnretningen, snorfestet, skal monteres minst 1,5 m over gulvet.
- Hvis sikkerhetsfestet, snorfestet, ikke blir installert og justert, kan det føres til at barn blir kvalt. Denne sikkerhetsanordningen skal alltid brukes for å holde snorer og kjeder utenfor barns rekkevidde.
- Hvis denne sikkerhetsinnretningen ikke blir installert og justert, kan det føres til at barn blir kvalt. Les anvisningene nøye og installer deretter.
-
Monteringen skal utføres av en person med tilstrekkelig erfaring.
-
Sikkerhetsinnretningen for kulekjedet (H) eliminerer den farlige løkken og må installeres i henhold til anvisningene. Hvis sikkerhetsinnretningen for kulekjedet har løsnet, skal delene settes sammen igjen før videre bruk.
- Sørg for at snorenes plassering er som vist på monteringsanvisningene.
MONTERING
REDUSERE BREDDEN
BILDE 1
MONTERING
BILDE 2
BRUK
BILDE 3
VEDLIKEHOLD
Rengjør med støvsuger eller klut.
ZASADY BEZPIECZEŃSTWA
text_image
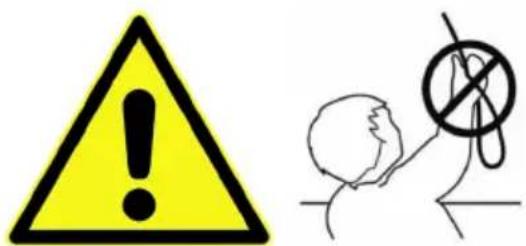
Warning symbol and pictogram showing a yellow triangular warning sign with an exclamation mark and a person holding a crossed-out circle.OSTRZEŻENIE
- Zdarzały się sytuacje, w których małe dzieci udusify się linkami, tańcuszkami, taśmami i linkami prowadzącymi.
- Aby wyeliminować ryzyko uduszenia lub zaplątania, upewnij się, że dzieci nie mają dostępu do linek. Linki mogą owinąć się dookoła szyi dziecka.
- Odsuń łóżka i inne meble od linek rolet przeciwsłonecznych lub innych oston.
- Nie związanuj linek. Dopilnuj, aby linki się nie skręcały ani nie splątywały.
-
Zabezpieczenie, element naciągający linkę (I), należy umieścić na wysokości niedostępnej dla dzieci, a jednocześnie w zasięgu osób dorosłych.
-
Zabezpieczenie, element naciągający linkę, należy przymocować do stabilnej powierzchni wkrętami pasującymi do ściany lub do materiału rolety. Nie można go przyklejać ani dociskać do wybranego miejsca.
- Rynnę górną należy umieścić co najmniej 1,5 m nad podłogą.
- Zabezpieczenie, element naciągający linkę, należy zamontować co najmniej 1,5 m nad podłogą.
- Jeśli zabezpieczenie i element naciągający linkę nie zostaną zamontowane i wyregulowane, występuje ryzyko, że dziecko się udusi. Zawsze stosuj zabezpieczenie, aby linki i łańcuszki pozosta-wały niedostępne dla dzieci.
- Jeśli zabezpieczenie nie zostanie zamontowane i wyregulowane, występuje ryzyko, że dziecko się udusi. Podczas montażu dokładnie czytaj instrukcje.
- Montaż powinny wykonywać osoby z odpowiednim do- świadczeniem.
- Zabezpieczenie łańcuszka kulkowego (H) eliminuje powstanie niebezpiecznej pętli i należy je zamontować zgodnie ze wskazówkami. Jeśli zabezpieczenie łańcuszka kulkowego się rozpadnie, przed dalszym użytkowaniem należy go złożyć z powrotem.
- Upewnij się, że położenie linek jest zgodne ze wskazów-kami montażowymi.
MONTAŻ
ZMNIEJSZ SZEROKOŚĆ
RYS. 1
MONTAŻ
RYS. 2
OBSŁUGA
RYS. 3
KONSERWACJA
Czyść odkurzaczem lub ściereczką.
SAFETY INSTRUCTIONS
text_image
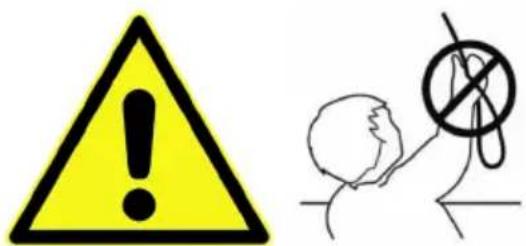
Warning symbol and pictogram showing a yellow triangular warning sign with an exclamation mark and a person holding a crossed-out circle.WARNING
- Small children have been choked in loops formed on lines, chains, straps and handling lines.
- Keep lines out of the reach of children to avoid accidents as a result of choking or getting trapped. Lines can fasten round the necks of children.
- Move beds and other furniture away from lines to sunshades and other curtains.
- Do not tie lines together. Make sure that lines do not twist together, or form loops.
- The safety device, the line tensioner (I), must be placed sufficiently high up to be out of the reach of children, but still accessible for adults.
- The safety device, the line tensioner, must be fastened on a stable surface with screws that suit the wall or surface material. It must not be glued or pressed in place.
- The top rail must be placed at least 1.5 m above the floor.
- The safety device, the line tensioner, must be mounted at least 1.5 m above the floor.
- Children can be choked if the safety device, line tensioner, is not installed and adjusted. This device must always be used to keep lines and chains out of the reach of children.
- Children can be choked if this safety device is not installed and adjusted. Read the instructions carefully and install accordingly.
- The installation must be carried out by persons with the requisite experience.
- The safety device for the ball chain (H) eliminates the dangerous loop and must be installed according to the instructions. If the safety
device for the ball chain has tripped the parts must be put together again before using it again.
• Make sure the lines are positioned as shown in the installation instructions.
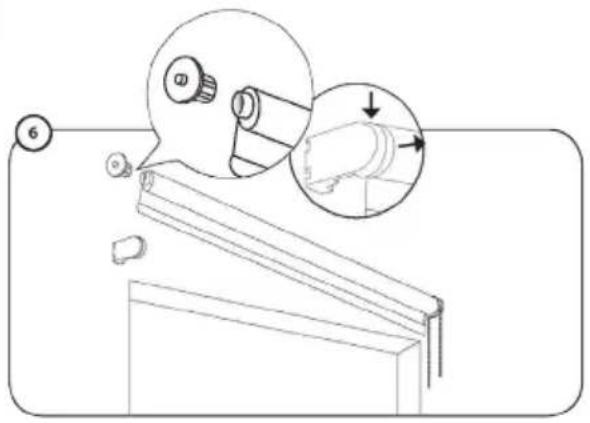
INSTALLATION
REDUCING THE WIDTH
FIG. 1
INSTALLATION
FIG. 2
USE
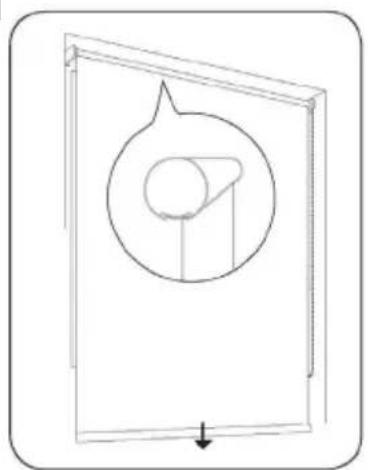
FIG. 3
MAINTENANCE
Clean with a vacuum cleaner or cloth.