
MRC 36 - Staubsauger FAKIR - Kostenlose Bedienungsanleitung
Finden Sie kostenlos die Bedienungsanleitung des Geräts MRC 36 FAKIR als PDF.


Benutzerfragen zu MRC 36 FAKIR
0 Frage zu diesem Gerät. Beantworten Sie die, die Sie kennen, oder stellen Sie Ihre eigene.
Eine neue Frage zu diesem Gerät stellen
Laden Sie die Anleitung für Ihr Staubsauger kostenlos im PDF-Format! Finden Sie Ihr Handbuch MRC 36 - FAKIR und nehmen Sie Ihr elektronisches Gerät wieder in die Hand. Auf dieser Seite sind alle Dokumente veröffentlicht, die für die Verwendung Ihres Geräts notwendig sind. MRC 36 von der Marke FAKIR.
BEDIENUNGSANLEITUNG MRC 36 FAKIR
natural_image
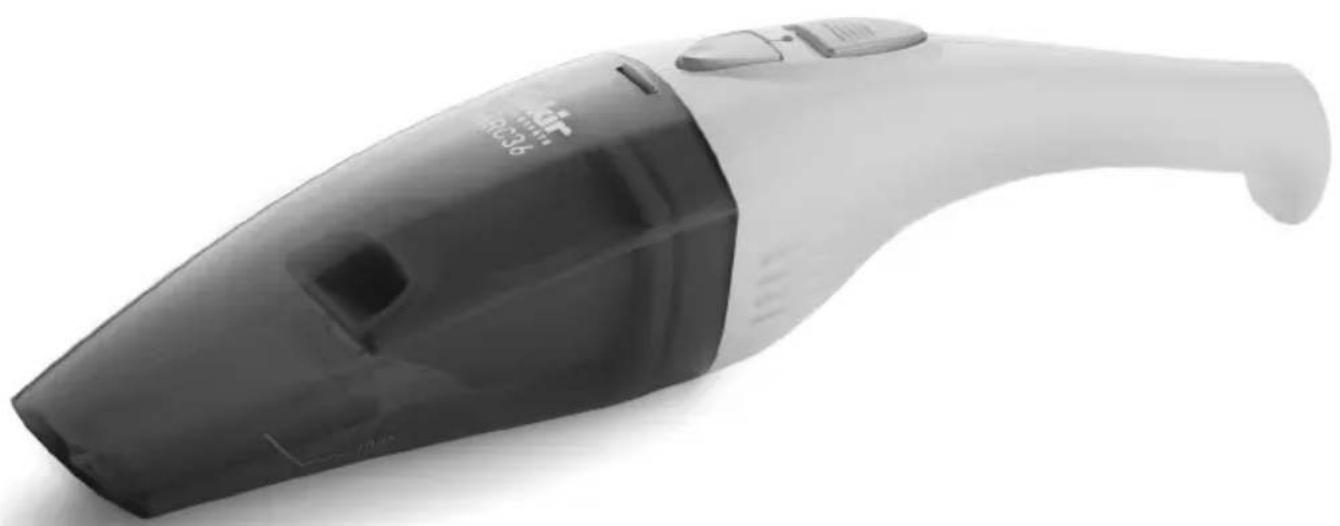
Exterior view of a white handheld vacuum cleaner (no visible text or symbols)MRC 36
Şarjlı El Süpürgesi - Kullanma Kılavuzu Rechargeable Cleaner - Instruction Manual
Uzun yıllar sorunsuz çalışması için tasarlanan ve üretilen bu ürünü satın aldığınız için teşekkür ederiz.
Benzer ürünleri kullanmaya alışık olabilirsiniz, ancak kullanma kılavuzunu okumak için lütfen zaman ayırınız, bu kılavuz satın almış olduğunuz üründen en iyi performansı almanız için hazırlanmıştır.
Güvenlik Önemlidir
- Kendi güvenliğiniz ve diğerlerinin güvenliği için ürünü çalıştırmadan önce kullanma kılavuzunu okuyunuz.
- Bu kılavuzu ilerideki kullanımlar için güvenli bir yerde saklayınız.
- Bu cihaz akli dengesi yerinde olmayan kişilerin ya da bu tip cihazları kullanmak için yeterli bilgisi olmayan kişilerin kullanması için uygun değildir. Bu tip kişilerin cihazı kullanmasına kesinlikle izin vermeyiniz.
GÜVENLİK BİLGİLERİ
Süpürgenin kullanılması
- Kullanmadan önce, süpürgeyi ve şarj aletini varsa hatalı parçaları kontrol ediniz.
Parçaların kırıklarını, düğmelerin hasarları vs. cihazın çalışmasını engelleyici herhangi bir durum olup olmadığını kontrol ediniz. - Eğer süpürgenin herhangi bir parçası hasarlı ya da hatalı ise cihazı kullanmayınız.
- Hasarlı ya da hatalı parçalar Fakır Yetkili Servis'i tarafından tamir edilir ya da değiştirilir.
- Şarjlı süpürgeyi suya daldırmayınız.
- Motoru yüzünüzden ve gözlerinizden uzak bir seviyede tutunuz.
- Şarjlı süpürgeyi yanıcı veya tehlikeli sıvılar için kullanmayınız.
-
Şarjlı süpürgeyi yanan sigara, kibrit veya sıcak kül gibi sıcak veya yanan cisimleri almak için kullanmayınız.
-
Şarjlı süpürgeyi haznesi ve filtresi takılmadan kullanmayınız.
- Şarjlı süpürgeyi kullanırken çocukları ve evcil hayvanları güvenli bir mesafede tutunuz.
- Şarjlı Süpürge sadece hafif, ıslak/kuru, kapalı alan kullanımı için tasarlanmıştır. Herhangi bir aksesuar veya ek parça ile tavsiye edilenin dışındaki kullanım şekli kişisel yaralanma riski içerir.
- Şarjlı süpürgeyi kullanmadığınız zamanlarda kuru, çocukların ulaşamayacağı, uygun bir yerde saklayınız.
Şarj Adaptörü
- Şarj adaptörünü başka cihazlarda kullanmayınız.
- Süpürgeyi başka hiçbir şarj aleti ya da adaptörü ile şarj etmeyiniz.
- Sadece cihaz ile birlikte verilen şarj adaptörünü kullanınız.
- Cihazın temizlenmesi veya bakımı işlemlerine başlamadan önce şarj adaptörünü fişten çekiniz.
- Şarj adaptörünü açmayınız, açmaya çalışmayınız.
- Şarj adaptörünü fişten çekmek için adaptörün kablosunu kullanmayınız.
- Şarj adaptörünü ısı, yağ ve keskin yüzeylerden uzak tutunuz.
Hava alma
- Eğer cihazın hava alma veya soğutma delikleri tıkalı ise cihazı kullanmayınız.
- Soğutma ve hava alma deliklerini saç, tüy, iplik, toz vb. hava akışını engelleyebilecek maddelerden koruyunuz.
Batarya
- Bataryayı ya da batarya yuvasını açmaya çalışmayınız.
- Bataryayı suya daldırmayınız.
- Bataryayı ateşe atmayınız.
- Bataryanın yok edilmesi için, mutlaka yakınınızdaki pil atık toplama merkezlerini kullanınız.
ELEKTRİK GÜVENLİĞI
UYARI!
Şarj adaptörünü fişe takmadan önce mutlaka elektrik güvenliğini dikkatlice okuyunuz. Kullanmadığınızda şarj adaptörünü fişe takılı bırakmayınız.
- Bu şarjlı süpürge sadece kapalı alanlarda kullanılan bir şarj adaptörü ile kullanılır.
- Adaptörü fişe takmadan önce, şebeke voltajının cihazınız ile uyumlu olup olmadığını kontrol ediniz.
- Şarj adaptörü kapalı bir ünitedir. Adaptörde kullanıcı tarafından ayarlanacak herhangi bir kısım olmadığı gibi adaptöre ayar yapılması da gerekli değildir.
UYARI! :
Şarj adaptörünü açmaya çalışmayınız.
- Eğer şarj adaptörü fişiniz ile uyumlu değil, hatalı, hasarlı ya da bataryayı şarj edemez durumda ise değiştirilmeli ve uygun bir yol ile imha edilmelidir. Bu işlem için Fakır Yetkili Servisi'ne başvurunuz.
-
Şarj adaptörü 220V-230V 50Hz şebeke voltajı ile çalışacak şekilde tasarlanmıştır. Adaptörün başka özellikleri şebekeye bağlanması adaptöre zarar verebilir.
-
Süpürgenin veya adaptörün yağmur ya da neme maruz kalmasını engelleyiniz.
- Düzenli olarak şarj adaptörünün ve kablosunu hasarlara karşı kontrol ediniz. Eğer bir hasar ya da hata oluşursa adaptörü kullanmayınız. Fakir Yetkili Servisi'ne başvurunuz.
Ürün Özellikleri
Model Numarası MRC 36
Şarj voltajı 220V-230V AC 50Hz
Batarya voltajı 3.6 volt
Şarj süresi 16 saat
Kullanım ömrü 10 yıl
Kutu İçindekiler
MRC 36 Şarjlı süpürge
Duvara monte şarj ünitesi
Şarj adaptörü
Kenar-köşe aparatı (uzun)
Kenar-köşe aparatı (kısa)
Sivi vakum aparatı
Kenar-Köşe Aparatları
Kenar- Köşe aparatları ulaşması zor yerlerde kullanılır. Aparatları direkt olarak cihazın ucuna takabilirsiniz
Sivi vakum aparatı
Sıvı vakuma aparatını, sıvıların vakumlanmasında kullanmak için direkt olarak cihazın ucuna takabilirsiniz
Parça Bilgileri
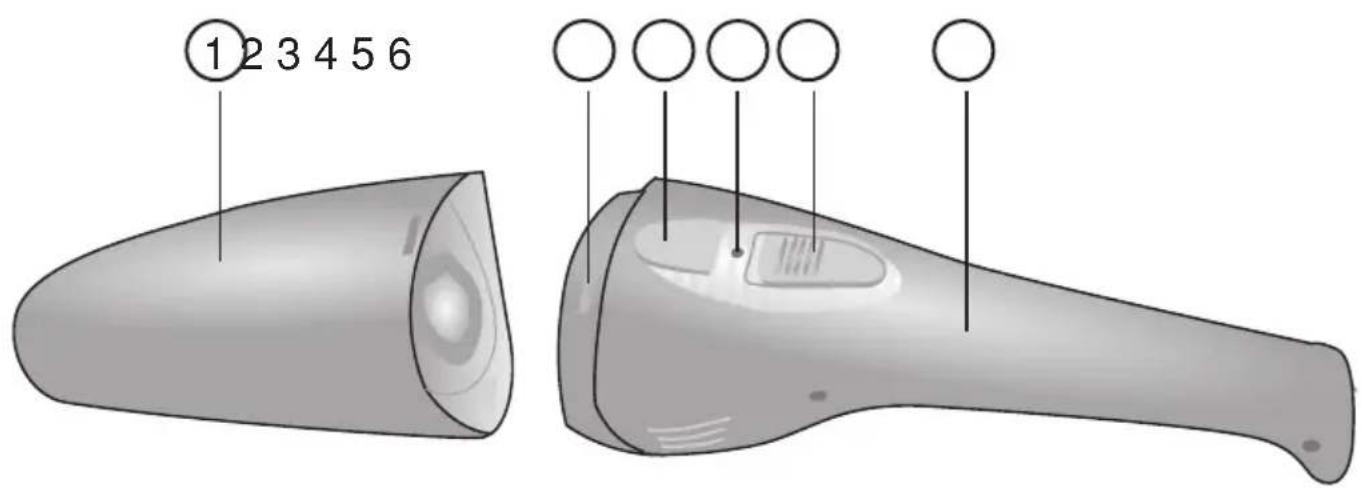
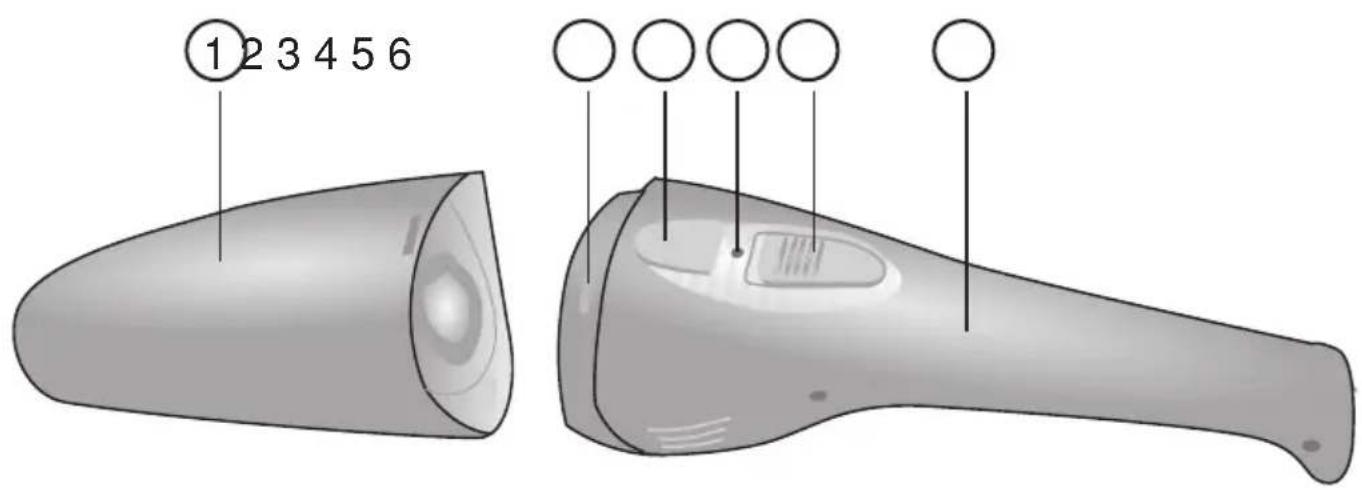
1- Toz haznesi
2- Toz haznesi klipsi
3- Toz haznesi açma düğmesi
4- Şarj lambası
5- Açma/Kapama düğmesi
6- Tutma sapi
7- Toz filtre haznesi
8- Filtre (Toz haznesinin içinde)
9- Sivi vakum aparati
10- Kenar köşe aparatı kısa
11- Kenar köşe aparatı uzun
12- Şarj adaptörü
13- Duvara monte aparati
text_image
①23456 ○○○○○ ○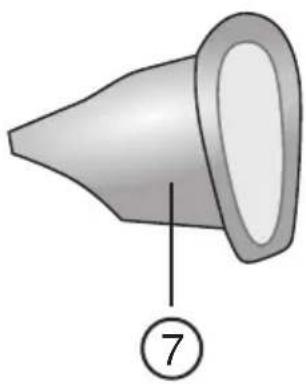
natural_image
3D diagram of a funnel-shaped object with a numbered label (7) pointing to its side, no text or symbols present.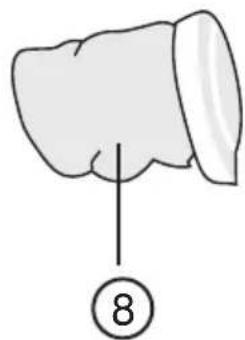
natural_image
Simple line drawing of a biological structure with a numbered label (8) pointing to a specific region, no text or symbols present.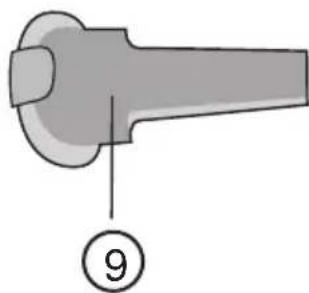
natural_image
Mechanical component diagram with labeled part (9), no text or symbols present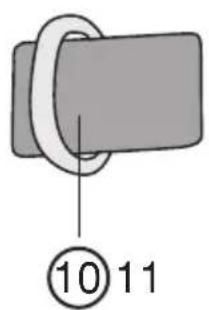
text_image
⑩ 11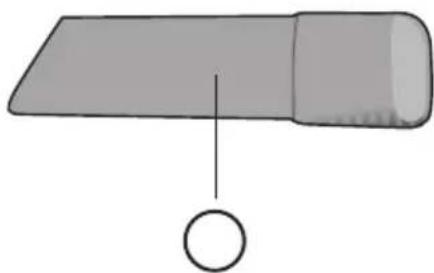
natural_image
Simple diagram of a rectangular object with a vertical line and a circle below it (no text or symbols)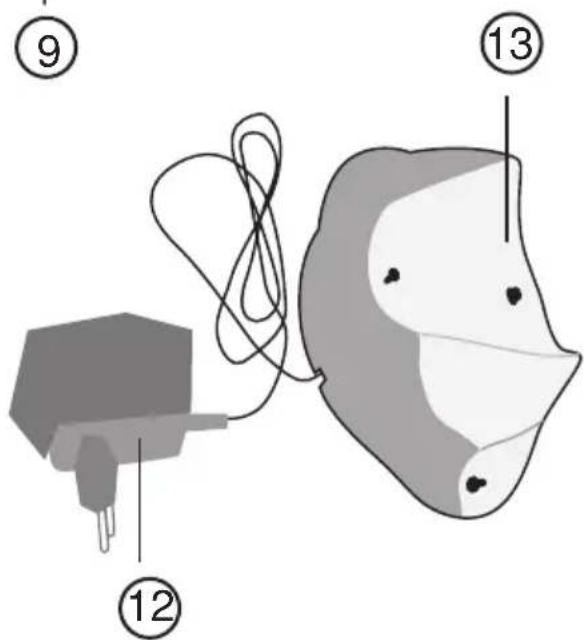
text_image
Diagram of a medical or surgical device with numbered parts labeled ⑨, ⑩, ⑫, and ⑬.Duvara Monte Şarj Ünitesinin Kurulması
Süpürgenin düzgün şekilde şarj olabilmesi için şarj ünitesinin duvara monte edilmesi tavsiye edilir.
- Elektrik prizine yakın, kapalı bir alanda, çocukların ulaşamayacağı bir yer belirleyiniz.
- Şarj ünitesini doğrudan güneş altında kalacak bir yerde ya da sıcak bir kaynağın yakınına (ocak, fırın vb.) kurmayınız.
- Seçtiğiniz yerde duvar içinde başka kablo ya da boru olmadığından emin olunuz.
- Adaptörün ucunu şarj cihazının arka tarafına getirin ve uygun pozisyondayken çevirerek takın.
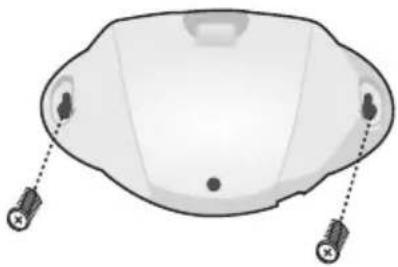
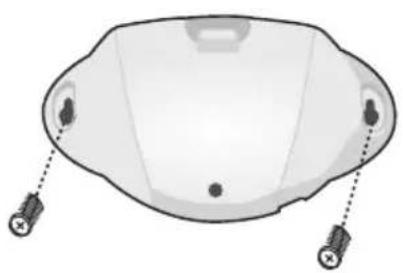
- Monte vidalarının yerini duvarda belirleyiniz ve uygun 2 tane delik açınız.
natural_image
Top-down view of a white ergonomic device with two sensors attached (no text or symbols visible)-
Şarj ünitesinin vidalarını sıkınız.
-
Şarjlı süpürge kullanılmadığında şarj ünitesine yerleştirilmelidir, bu sayede her zaman kullanıma hazır olur.
ŞARJLI SÜPÜRGENİN KULLANIMI Pilin Şarj Edilmesi
Not: Kullanmadan önce maksimum performans için batarya 16 saat şarj edilmelidir.
natural_image
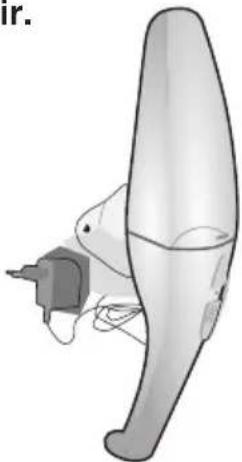
Illustration of a bird's wing with a small attached device (no text or symbols)- Şarjin fişini prize takın (220 - 230V 50Hz)
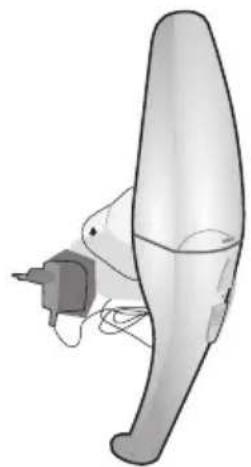
- Süpürgeyi şarj ünitesine uygun bir şekilde koyunuz. Süpürgenin şarj soketinin şarj ünitesi üzerindeki pimler ile temas ettiğinizden emin olunuz.Şarj lambası (LED) yanarak şarj işleminin başladığıını gösterecektir.
NOT: Şarj esnasında ürün kapalı olmalıdır.
- Eğer iki haftadan fazla kullanılmaya- caksa adaptör prizden çıkartılmalıdır.
ISLAK YÜZEYLERİN TEMİZLENMESİ
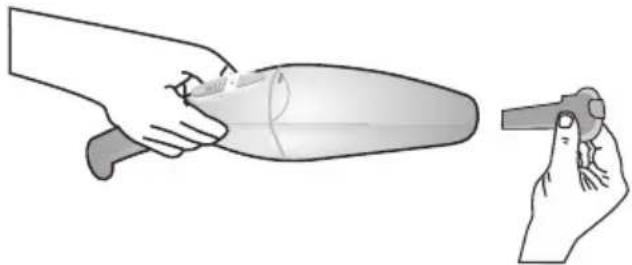
Islak yüzeyleri temizlerken sıvı vakum aparatını kullanınız.
natural_image
Illustration of a hand holding a pen-like object with a small inset showing the tip (no text or symbols)KENAR KÖŞE APARATLARI

natural_image
3D illustration of a mechanical component with a cylindrical shaft and two connected parts (no text or symbols)AÇMA - KAPAMA
Şarjlı süpürgeyi açmak için tutma sapındaki açma - kapama düğmesini kullanınız.
NOT:
Eğer şarjlı süpürgenin vakum gücü zayıfsa veya azalmışsa şarjlı süpürgenizi yeniden şarj edilmeye ihtiyacı vardır.
Toz Haznesinin Temizlenmesi ve Filtre
Süpürgenin çalışma performansı toz haznesinin ve filtrenin durumuna bağlıdır. Toz haznesi düzenli olarak boşaltılmalı ve temizlenmelidir. Filtre düzenli olarak sıcak ve sabunlu su ile yıkanmalı ve iyice durulanmalıdır.
- Ünitenin kapalı olduğundan emin olun.
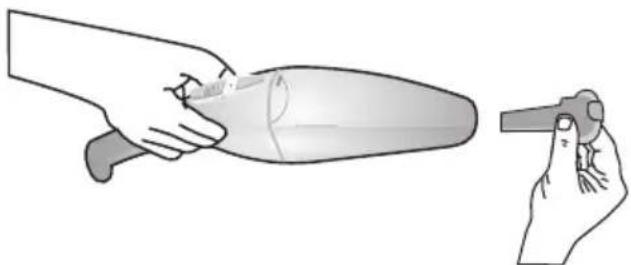
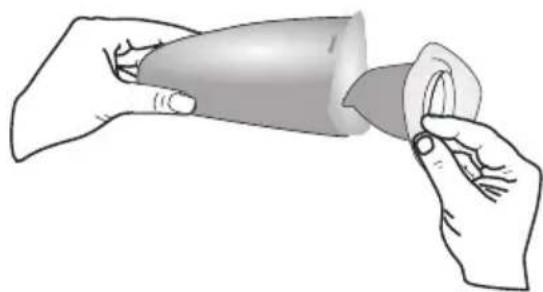
- Toz haznesini boşaltmak ve filtreyi çıkarmak için, toz haznesi açma düğmesine basınız.
- Toz haznesini resimde gösterildiği şekilde motorun olduğu kısımdan çekiniz.
natural_image
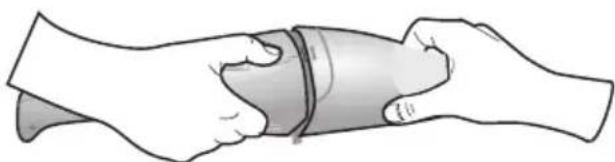
Illustration of a hand holding a wrist with a curved bandage and a small mark on the wrist (no text or symbols)- Filtreyi toz haznesinden çıkarınız.
- Hazneyi boşaltıp temizleyiniz.
natural_image
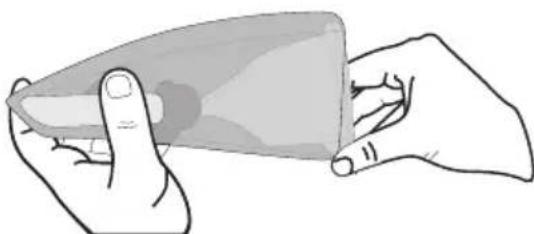
Illustration of two hands holding a cylindrical object with a circular opening (no text or symbols)- Filtreyi sıcak ve sabunlu suda yıkayınız. Tekrar takmadan önce kurumaya birakınız. Kurutma makinesi gibi sıcak kaynaklarda kurutmayınız.
- Her zaman filtreyi takıp toz haznesine doğru şekilde oturttuktan sonra süpürgeyi çalıştırınız.
natural_image
Illustration of a hand holding a small object, possibly a tool or device, with no visible text or symbols.Cihazda kullanıcıının yapabileceği herhangi bir tamir bulunmamaktadır. Cihaz üzerinde herhangi bir arıza, hasar ya da problem var ise Fakir Yetkili Servisi'ne başvurunuz.
Sevk
Cihazın, orijinal ambalajında veya zarar görmesini önlemek için, iyi ve yumuşak pakette taşınması gerekmektedir.
Thank you for purchasing this product which has been designed and manufactured to give you many years of trouble free service.
You may already be familiar with using a similar product, but do please take time to read these instructions - they have been written to ensure you get the very best from your purchase.
Safety is Important
Keep this information in a safe place for future reference.
To ensure your safety and the safety of others, please ensure you read the Safety Instructions before you operate this vacuum cleaner.
This appliance is not designed to be used by persons (including children) with limited physical, sensory or mental capacities or by persons lacking in experience and/or knowledge, unless they are supervised by someone who is responsible for their safety or have received instructions on how to use the appliance.
SAFETY INSTRUCTIONS
Using the Vacuum Cleaner
- Before use, inspect the cleaner and the charger for damage or defective parts. Check for breakage of parts, damage to switches and any other condition that may affect its operation.
- Do not use the cleaner if any part is damaged or defective.
- Have any damaged or defective parts repaired or replaced by an authorized repair agent.
- Do not put your vacuum cleaner directly into water.
-
Do not place the nozzle or unit near the eyes or ears whilst operating.
-
Do not use to vacuum flammable or corrosive liquids.
- Do not use the vacuum cleaner to pick-up burning objects as this is a fire risk!
- Do not pick up hot objects such as coal and ash.
- Do not operate the cleaner without the container and filters installed.
- This cleaner has been designed for light, wet/dry, indoor use only.
- The use of any accessory or attachment or the performance of any operation with this appliance other than those recommended in this User Guide may present a risk of personal injury.
- When not in use the cleaner should be stored in a dry, secure location out of the reach of children.
The Charging Adaptor
- Do not use the charging adaptor on any other appliance.
- Do not charge this vacuum cleaner with any other charger or charging adaptor.
- Use only the charging adaptor supplied with this appliance.
- Unplug the charging adaptor from the mains supply before starting any cleaning or maintenance procedures.
- Do not attempt to open the charging adaptor.
- Do not pull the charging adaptor lead to disconnect the charging adaptor from the mains supply.
- Keep the charging adaptor lead away from heat, oil and sharp edges.
Air Intake
- Do not use the cleaner if the air intake or the cooling vents are blocked.
- Keep the cooling vents and air intake free of hair, lint, dust and any other items that may block or restrict the air flow.
The Battery
- Do not attempt to open the battery or battery compartment.
- Do not expose the battery to water.
- Do not incinerate the battery.
- When disposing of the battery, use battery waste collecting centers.
ELECTRICAL SAFETY
Warning READ THESE ELECTRICAL SAFETY INSTRUCTIONS CAREFULLY BEFORE CONNECTING THE CHARGING ADAPTOR TO THE MAINS SUPPLY. DO NOT LEAVE YOUR CHARGING ADAPTOR CONNECTED TO THE MAINS SUPPLY WHEN NOT IN USE.
- This vacuum cleaner is supplied with a charging adaptor which has been designed for indoor use only.
- Before plugging the charging adaptor into the mains supply, make sure that the voltage of your electricity supply is the same as that indicated on the rating plate on the charging adaptor.
- The charging adaptor is a sealed unit. There are no user serviceable parts inside and it does not require any electrical adjustments.
Warning DO NOT ATTEMPT TO OPEN THE CHARGING ADAPTOR.
- If the charging adaptor is not suitable for your socket, becomes damaged, or fails to charge your battery, it must be replaced and disposed of in a safe and environmentally protective way. Always
refer to qualified personnel.
- This charging adaptor is designed to operate on 220-230VAC 50Hz supply only. Connecting it to any other power sources may damage the unit.
- Do not allow the cleaner, or the charging adaptor to be exposed to rain or moisture.
- Regularly inspect the charging adaptor and the lead for damage. Do not use it if faults or damage are found. Refer to qualified service personnel.
Product Specifications
Model No: MRC 36
220V - 230V AC 50 Hz
Battery Voltage: 3,6 Volt
Charging Time: 16 Hours
Usage life: 10 years
Inside the box
MRC 36 Rechargeable Vacuum Cleaner Charging Stand
Chargin Adaptor
Crevice Tool (Long)
Crevice Tool (Short)
Liquid vacuum tool
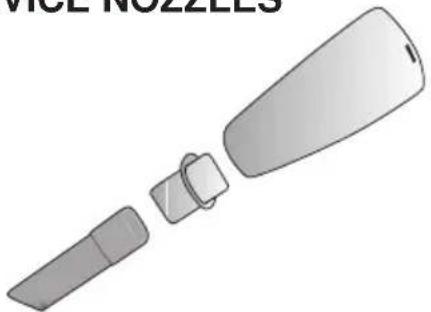
Crevice Tools
The Crevice tools can be used to clean hard to reach places. Fit the crevice tools directly into the nozzle.
Liquid vacuum tool
Fit the Liquid vacuum tool directly into the nozzle and use it to vacuum liquids.
Product Information
- Dust Container
- Dust Container Lock Pin
- Dust Container Release Button
- Charging Light
- On/Off Switch
- Carrying Handle
-
Dust Filter Container
-
Filter (Inside the container)
- Liquid Vacuum Tool
- Crevice Tool (Long)
- Crevice Tool (Short)
- Charging Adaptor
- Charging Stand
text_image
①23456 ○○○○○ ○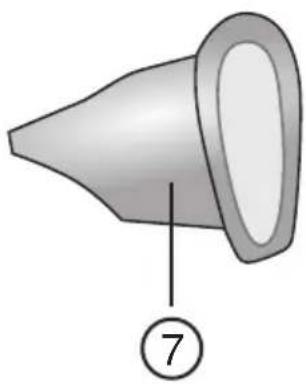
natural_image
3D diagram of a funnel-shaped object with a numbered label (7) pointing to its base, no text or symbols present.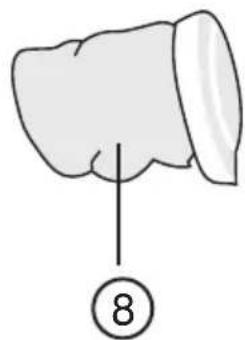
natural_image
Simple line drawing of a biological structure with a numbered label (8) pointing to a specific region, no text or symbols present.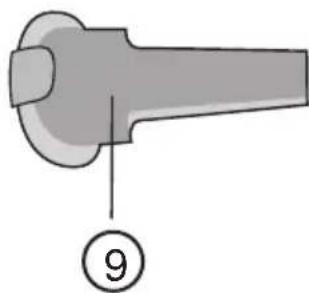
natural_image
Diagram of a mechanical component with a numbered label (9) pointing to a feature, no readable text or symbols present.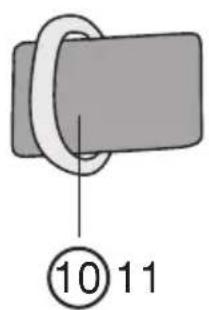
text_image
⑩ 11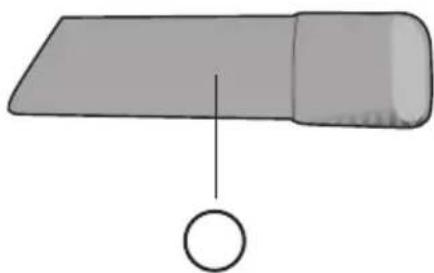
natural_image
Simple diagram of a cylindrical object with a vertical line and a circle below it (no text or symbols)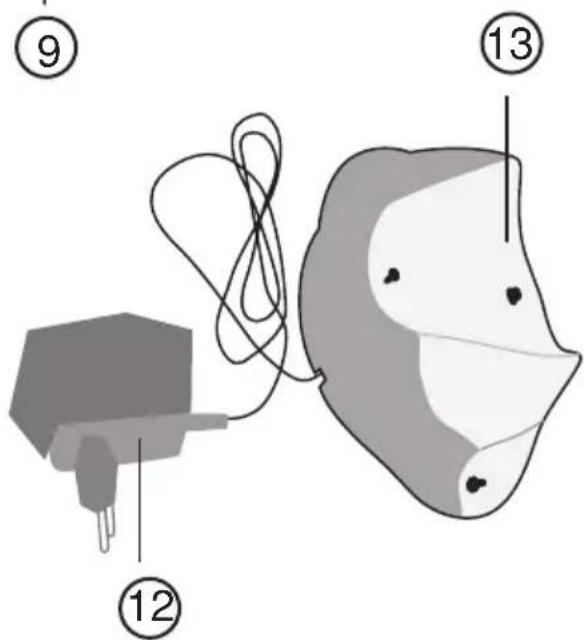
text_image
Diagram of a medical or surgical device with numbered parts, likely for anatomical or procedural reference.INSTALLING THE WALL MOUNTED CHARGING BASE
It is recommended that the charging base should be mounted on a wall to provide a convenient storage and charging point for the cleaner.
-
Find a suitable indoor wall location near a mains power socket but out of the reach of children.
-
Do not mount the charging base in direct sunlight or close to a heating source.
-
Make sure that there are no hidden electrical wires or pipes in the chosen location.
-
Insert the adaptor plug through the rear of the charging base and twist to lock into position.
-
Mark the location of the mounting holes and drill two suitable holes, insert the rawl plugs supplied into the holes.
natural_image
Top-down view of a white ergonomic device with two black buttons attached to the side (no text or symbols visible)-
Make sure that the charging plug is correctly located and that the adaptor lead is threaded through the slot in the charging base. Excess lead can be stored at the rear of the charging base.
-
Screw the charging base to the wall, using the screws provided.
-
The cleaner should be stored in the charging base. This will ensure that the battery remains fully charged and the cleaner always ready for use.
STORAGE
We recommend that the accessories are stored as shown to prevent them getting lost or damaged. The turbo brush attached to the vacuum cleaner and the accessories place onto the charger as shown.
USING RECHARGEABLE VACUUM CLEANER
NOTE:
Before using the vacuum cleaner it is recommended that you charge for a full 16 hours to ensure maximum performance.
natural_image
3D rendered diagram of a mechanical component with curved and straight surfaces, no visible text or symbols- Plug the charging stand into a mains outlet socket (220-230V \~50HZ).
- To charge the unit, slide the vacuum cleaner into the charging stand. The charging LED indicator will light up to indicate charging is in progress.
NOTE:
The On/Off switch must be in the off position for charging.
- You may leave this unit on charge permanently thereby ensuring that the unit is always ready to use. If the unit is not to be used for at least two weeks, disconnect the charger from the mains outlet.
CLEANING WET SURFACES
natural_image
Illustration of a hand holding a pen-like object next to a pair of fingers, no text or symbols presentCREVICE NOZZLES
natural_image
Illustration of a nozzle assembly with a cylindrical component and a separate internal component (no text or symbols)Switching On/Off
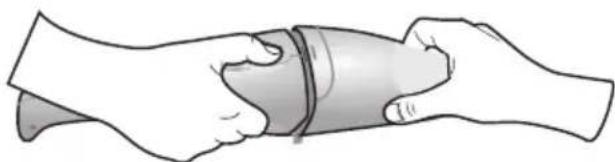
To switch the vacuum cleaner on, push the ON/OFF switch located above the handle forwards.
NOTE:
If you find that the suction power of the vacuum cleaner becomes weak or stops, you may need to charge the vacuum cleaner again.
natural_image
Illustration of a hand holding a curved object with a circular mark, no text or symbols presentEmptying the Dust Container
To empty and clean the unit, carry out the following procedure.
-
Ensure the unit is switched off.
-
Press and hold the release button.
-
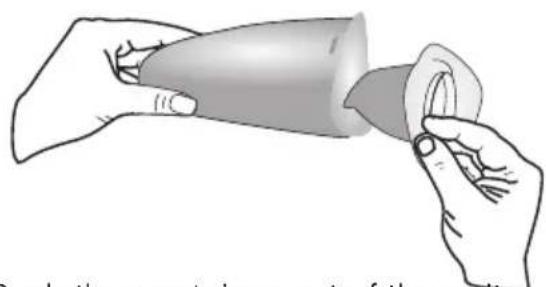
Remove the dust container by pressing the release button and tilting the container holder away from the motor housing.
natural_image
Illustration of two hands holding a cylindrical object with a ring, no text or symbols present-
Push the container out of the unit as shown.
-
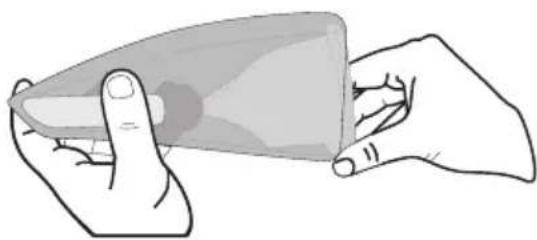
Pull out the filter from the unit and empty the container into a rubbish bin.
natural_image
Illustration of two hands holding a flat object, no text or symbols present-
Wash and dry the inside of the dust container.
-
Take the filter apart by twisting the front section slightly anticlockwise. Tap the two halves gently to remove any dust which has accumulated. If it is very dirty, carefully brush the filters with a small brush.
Dispatch
Carry the appliance in the original package or a similar, well-padded package to prevent damage to the appliance.