JD375 - Nicht kategorisiert TranzX - Kostenlose Bedienungsanleitung
Finden Sie kostenlos die Bedienungsanleitung des Geräts JD375 TranzX als PDF.


Waehlen Sie Ihre Sprache und Ihre E-Mail-Adresse: wir senden Ihnen eine speziell uebersetzte Version.
Benutzerfragen zu JD375 TranzX
0 Frage zu diesem Gerät. Beantworten Sie die, die Sie kennen, oder stellen Sie Ihre eigene.
Eine neue Frage zu diesem Gerät stellen
Noch keine Fragen. Stellen Sie die erste.
Laden Sie die Anleitung für Ihr Nicht kategorisiert kostenlos im PDF-Format! Finden Sie Ihr Handbuch JD375 - TranzX und nehmen Sie Ihr elektronisches Gerät wieder in die Hand. Auf dieser Seite sind alle Dokumente veröffentlicht, die für die Verwendung Ihres Geräts notwendig sind. JD375 von der Marke TranzX.
BEDIENUNGSANLEITUNG JD375 TranzX
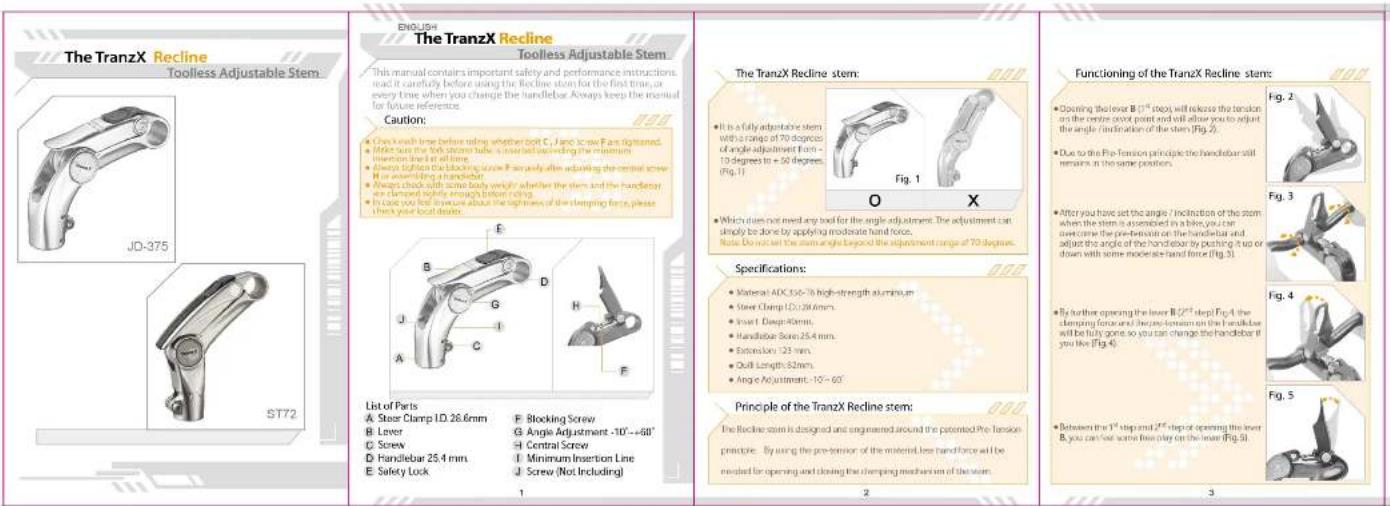
text_image
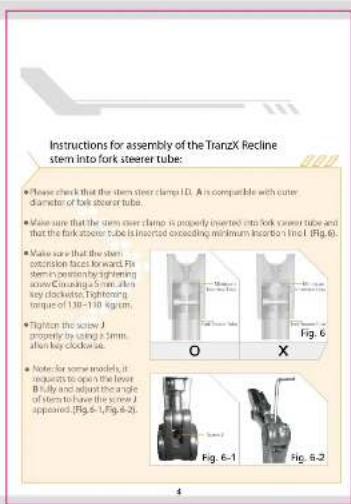
Instructions for assembly of the TranzX Recline stem into fork steerer tube: • Please check that the stem steer clamp 1.0. A is comparable with outer diameter of fork steerer tube. • Make sure that the stem over clamp is properly inserted into fork steerer tube and that the fork steerer tube is inserted exceeding minimum insertion line I (Fig. 6). • Make sure that the stem extension faces forward. Fix stem in potentially tightening zone. Conducing 5 mm after key clockwise. Tightening torque of 130-130 kg/cm. • Tightening the screw J properly by using a 1mm. after key clockwise. • Note for some models, it requires to open the lower B fully and adjust the angle of stem to have the screw J appeared. (Fig. 6-1, Fig. 6-2).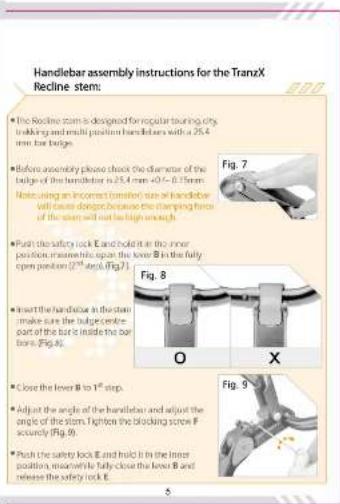
text_image
Handlebar assembly instructions for the TranzX Recline stem The Recline stem is designed for regular touring city, walking and multi-position handled cars with a 25.4 mm bar bridge. Before assembly please check the diameter of the lodge of the handlebar is 25.4 mm 40~0.15mm. Note: using an incorrect transition size of handlebar will cause damage because the clamping force of the stem will not be high enough. Push the safety lock E and hold it in the inner position measure to open the lower B in the fully open position (2nd step, Fig.2). Insert the handlebar in the start make sure the shoulder center part of the bar is inside the bar bone, Fig.4. Close the lever B to 1st step. Adjust the angle of the handlebar and adjust the angle of the stem. Tighten the blocking screw F acutely (Fig.8). Push the safety lock E and hold it in the inner position measure while fully close the lever B and release the safety lock E.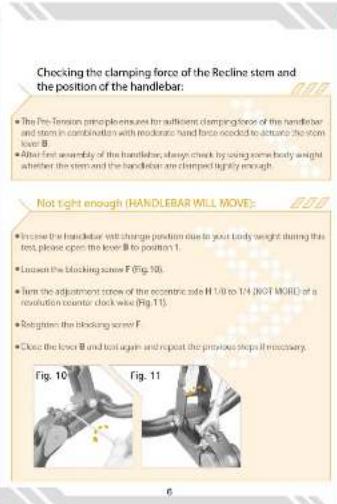
text_image
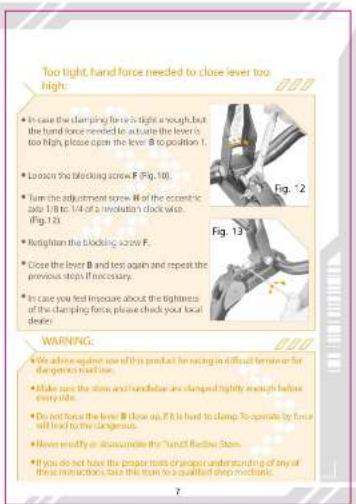
Checking the clamping force of the Recline stem and the position of the handlebar. • The Pre-Tension principle ensures for sufficient clamping force of the handlebar and stem in combination with moderate hand force needed to arrange the stem lower B • Allow test assembly of the handlebar, always check by using some body weight whether the stem and the handlebar are clamped slightly enough. Not tight enough (HANDLEBAR WILL MOVE): • Increase the handlebar will change position due to your body weight during this test, please open the lower B to position 1. • Remove the blocking screw F (Fig. 10). • Turn the adjustment screw of the eccentric side H 1/0 to 1/4 (NOT MORE) of a resolution counter clock wire (Fig. 11). • Relighten the blocking screw F. • Close the lower B and test again and repeat the preplates step if necessary. Fig. 10 Fig. 11 6