Pro Serie 85825 - Gartenschlauch Flair - Kostenlose Bedienungsanleitung
Finden Sie kostenlos die Bedienungsanleitung des Geräts Pro Serie 85825 Flair als PDF.


Benutzerfragen zu Pro Serie 85825 Flair
0 Frage zu diesem Gerät. Beantworten Sie die, die Sie kennen, oder stellen Sie Ihre eigene.
Eine neue Frage zu diesem Gerät stellen
Laden Sie die Anleitung für Ihr Gartenschlauch kostenlos im PDF-Format! Finden Sie Ihr Handbuch Pro Serie 85825 - Flair und nehmen Sie Ihr elektronisches Gerät wieder in die Hand. Auf dieser Seite sind alle Dokumente veröffentlicht, die für die Verwendung Ihres Geräts notwendig sind. Pro Serie 85825 von der Marke Flair.
BEDIENUNGSANLEITUNG Pro Serie 85825 Flair
FLAIR
PRO SERIE
natural_image
Exterior view of a Pro Series 20 air潍ster with attached cable (no visible text or symbols beyond branding)BRUGERVEJLEDNING
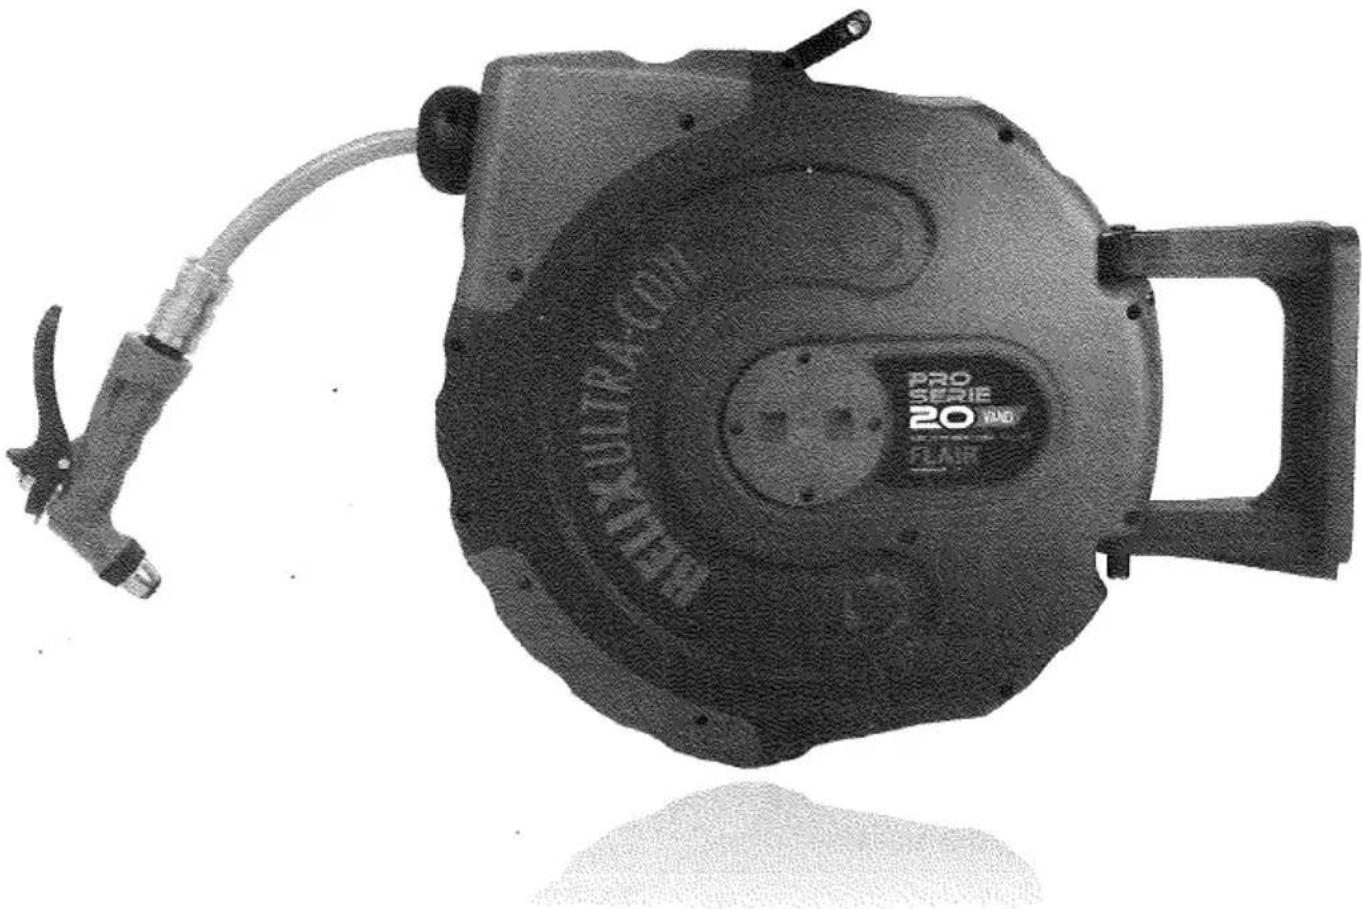
Best. nr. 85805 20 mtr. automatisk slangeopruller til vand
Best. nr. 85825 20 mtr. automatisk slangeopruller til luft
text_image
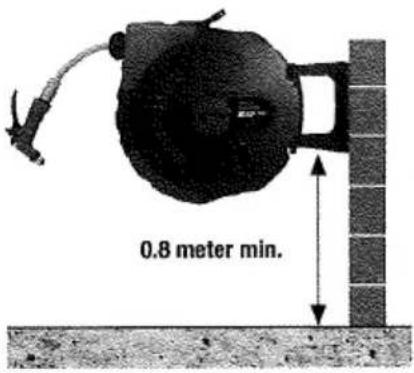
0.8 meter min.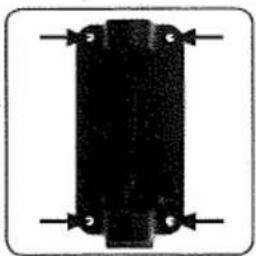
natural_image
Pure electrical circuit lines without any symbolsFig. 1 Monteringsbeslag Bor 4 x 8 mm svarende til hullerne l vægbeslaget. (Fig. 1)
natural_image
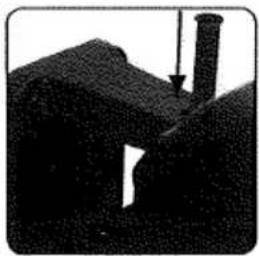
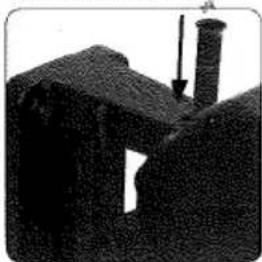
Silhouette of a building with a chimney and arrow pointing downward (no text or symbols)Fig. 2 Pivot pind Monter slangeoprulleren som vist på billedet. (Fig. 2)
natural_image
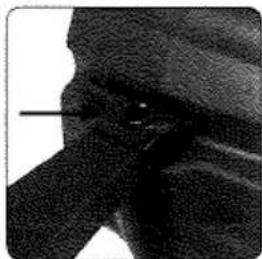
Close-up of a person's face in profile, showing detailed shading and facial features (no text or symbols visible)Fig. 3 Låsebeslag Monter låsebeslag som anvist hvis oprulleren ønskes fastmonteret (Fig. 3)
INTRODUKTION
Denne slangeopruller er fremstillet af kvalitetsmaterialer og har en indbygget fjeder, der er i stand til, automatisk at oprulle den. Slangeoprulleren kan monteres enten på væggen eller loftet ved hjælp af medfølgende monteringsbeslag, som tillader den at svinge 180°. Længden på slangen er 20 mtr.
INSTALLATION
Monter slangeoprulleren på væggen eller loftet, afhængig af anvendelsen. Den mest anvendte montering er på væggen ca. 0,80 mtr. over jorden. Fastgør slangeoprulleren med skruer af passende størrelse. Det er en fordel af bruge fjederskiver til skruerne.
Monter slangeoprullerens tilslutningsslange nær nærmeste vandudtag.
SLANGEN
Slangen er en kvalitetsslange. Efter endt brug skal der lukkes for vandet/luften. Ved meget høj temperatur kan det være vanskeligt at rulle slangen ind igen, hvorfor man skal lukke for vandet/luften inden indspoling. Lad heller ikke slangen ligge ude under meget lave temperaturer. Det kan ligeledes gøre det vanskeligt at rulle slangen ind.
Anvend ikke kemiske væsker ud- eller indvendig i slangen.
ANVENDELSE
- Slangeoprulleren har en indbygget skralde.
- Under udtrækning høres skraldens "klikken". Når slangen er udtrukket til den ønskede længde, fortsættes indtil man hører skralden "klikke". Slip så slangen, der nu er fastlåst.
- ∅nskes yderligere længde gentages pos. 2.
- Når man ønsker slangen oprullet, trækkes der yderligere i den, indtil den holder op med at "klikke". Slangen opruller nu automatisk.
NB! For at undgå skader på tromlen skal slangen fastholdes mens den ruller tilbage.
VEDLIGEHOLDELSE
Slangeoprulleren må ikke vaskes ren under vand. Er slangen meget snavset, aftørres den inden/under oprulningen.
Monter slangeoprulleren et beskyttet sted, så den ikke står i direkte sollys eller er udsat for regn og slud.
Når den ikke anvendes bør den opbevares oprullet i et tørt og frostfrit rum.
GARANTI
Der ydes garanti efter de gældende regler ved evt. fabrikationsfejl (kundefaktura skal vedlægges). Defekter som følge af forkert brug, stød og slag er ikke dækket af garanti. Slangen, o-ringe og slangestop betegnes som sliddele og dækkes derfor ikke under garanti.
TEKNISKE SPECIFIKATIONER:
| Model: | Slange-str.: | Slange-længde: | Slange-materiale: | Max. tryk: | Temperatur: | Tilslutning: |
| Flair, 85805 | 1/2" (13 mm) | 20 mtr. | PVC | 10 BAR | -5 til +45 grader | 3/4"-1/2" BSPT |
| Flair, 85825 | 3/8" (10 mm) | 20 mtr. | PVC | 20 BAR | -5 til +45 grader | 1/4" BSPT |
FLAIR
PRO SERIES
natural_image
Close-up of a black industrial fuel pump with attached hose and valve (no visible text or symbols)Hose Reel Operating Instructions
85805 - 20 metre x 11.5 mm (1/2") Reinforced PVC Braided Water Hose
85825 - 20 metre x 10 mm (3/8") Reinforced PVC Braided Air Hose
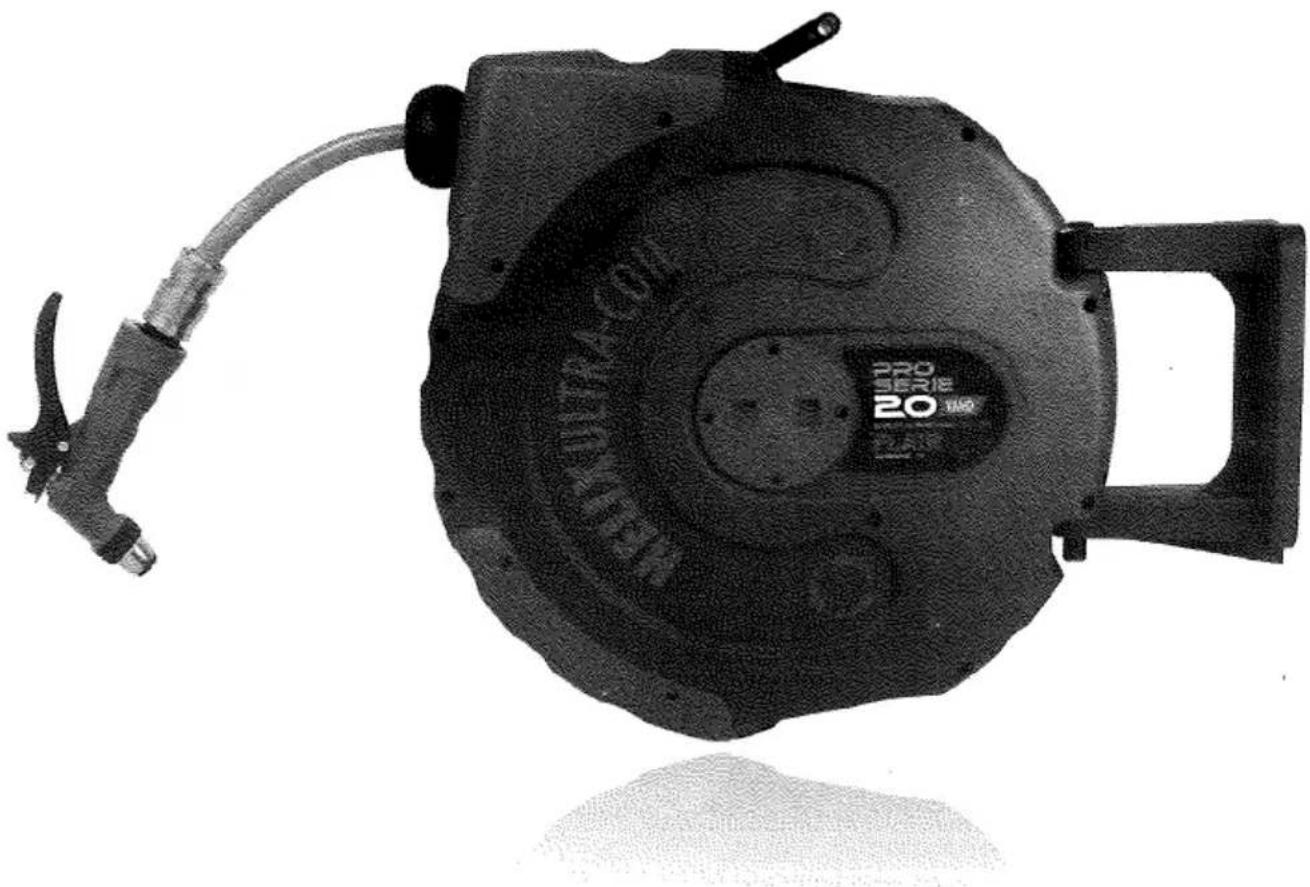
The Flair PRO SERIES Hose Reel with a precision machined solid brass internal spindle for strength and reliability, combined with the unique HELIX Ultra-Coil self layering system, sets a high standard of hose reel performance.
Proudly designed in Australia, the Flair PRO SERIES Hose Reel has been manufactured using the highest quality materials. This multi-purpose hose reel is suitable for standard water applications and is ideal for use around the home, automotive workshop or industrial site.
FEATURES
- Precision machined solid brass internal spindle for strength and reliability.
- Unique HELIX Ultra-Coil self layering hose system provides tangle free operation.
- Fully enclosed outer case protects hose and inner drum against dirt and other contaminants.
• High impact and weather resistant UV stabilised polypropylene case.
• Auto lock and auto rewind mechanism provides positive hose latching every full revolution of the hose inner drum. - Reinforced PVC braided hose with an additional 2 metre leader hose.
• Quality brass hose connectors, tap fittings and water spray gun included. - Heavy duty mounting bracket, locking plate and pivot pin for fixed in-line or optional 180° swivel mount.
- Suitable for both wall or overhead mounting.
- Convenient carry handle located on top of the case allows easy removal and refitting of the hose reel to the mounting bracket.
- Every Flair PRO SERIES Hose Reel is supported with a 1 YEAR WARRANTY.
text_image
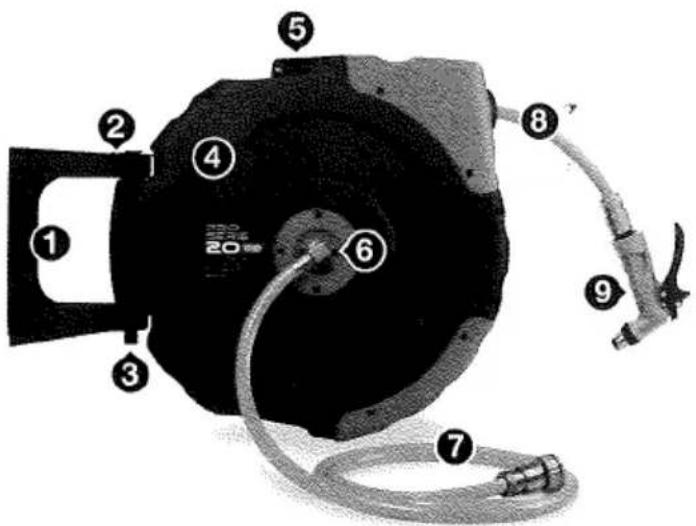
Labeled diagram of a mechanical device with numbered components and a cable, showing parts 1 through 9.PRODUCT IDENTIFICATION
① Mounting Bracket
② Optional Fixed In-line Locking Plate
③ Pivot Pin
④ Fully Enclosed Case
⑤ Carry Handle
6 Solid Brass Internal Spindle
⑦ 2 metre Leader Hose
⑧ Hose with Adjustable Stopper
9 Water Gun (for 85825 only)
INSTALLATION
The Flair PRO SERIES Hose Reel can be mounted in a horizontal or vertical position.
- Chose a location that is near to the water source.
- For large areas, place the hose reel at the centre of the work area.
- When mounting the hose reel vertically, ensure there is adequate clearance under the reel to prevent injury or damage.
- Mounting bracket must be installed on a flat surface.
Note: It is recommended to install the mounting bracket 0.8 metre (minimum) above the floor level.

text_image
0.8 metre min.-
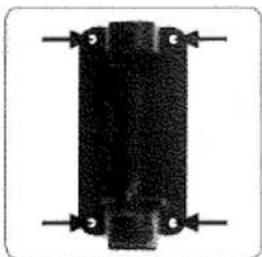
Drill 4 x M8 holes to match the holes located in the Mounting Bracket. (Fig. 1)
-
Connect the hose reel to the Mounting Bracket with the Pivot Pin. (Fig. 2)
Note: For fixed in-line position, fit the locking plate onto the Mounting Bracket prior to inserting the pivot pin. (Fig. 3)
- Connect the inlet leader hose to the water source using the tap fittings supplied.
natural_image
Pure electrical circuit lines without any symbolsFig. 1 Mounting Bracket
natural_image
Close-up of a textured, dark object with a vertical arrow and a cylindrical object inserted (no visible text or symbols)Fig. 2 Pivot Pin
natural_image
Close-up of a textured surface with a dark linear mark and a small arrow pointing to a feature (no text or symbols visible)Fig. 3 Locking Plate
OPERATION
- Slowly pull out the hose to the required length. A 'clicking' noise will be heard every revolution of the inner drum. To lock the reel, allow the hose to retract slowly after hearing the second or third 'click'.
- To release the hose, pull out the hose until the 'clicking' noise stops, and then allow the hose to slowly retract while guiding the hose back into the hose reel. The self layering mechanism will coil the hose back onto the inner drum.
- To avoid injury and damage, always hold the hose while it is retracting.
IMPORTANT:
If the hose becomes tangled and will not retract - slowly pull out the hose past the tangled section and then allow the hose to slowly retract while guiding the hose back into the hose reel.
Always ensure the hose is clean and not twisted.
SPECIFICATIONS
| Part No. | Hose Length | Hose Material | Working Pressure | Hose I.D. | Hose O.D. | Leader Hose | Inlet Size |
| 85805 | 20 m | PVC | Max. 150 p.s.i. (10 BAR) | 11.5 mm (1/2") | 16 mm (5/8") | 2 m | 3/4" and 1/2" tap fittings |
| 85825 | 20 m | PVC | Max. 300 p.s.i. (20 BAR) | 10 mm (3/8") | 16 mm (5/8") | 2 m | 1/4" |
MAINTENANCE
• Always keep the hose clean.
- If the hose becomes dirty, clean it with a damp cloth while retracting.
• DO NOT twist the hose while in use.
- Mount the hose reel in a sheltered area to assist and protect the performance of the hose and hose reel.
- DO NOT allow the hose to contact any corrosive chemicals or fluids.
• Always retract the hose when not in use. - The Flair PRO SERIES Hose Reel contains a pre-tensioned spring inside the inner drum assembly.
Do not attempt to open the inner drum assembly.
WARRANTY
& CLAIM PROCEDURE
The Flair PRO SERIES Hose Reel is covered against defects in material and workmanship for a period of 1 years from the purchase date recorded on the owner's invoice or receipt.
In the instance of a warranty claim, the owner will be entitled to a replacement unit or a sufficient repair of the defective part/s and or component/s to ensure normal operating condition of the hose reel.
WARRANTY EXCLUSIONS
The hose, rubber o-rings and hose stopper are deemed normal wear items and are not covered under warranty.
The warranty does not extend to parts or components affected or damaged by accident, normal wear, misuse, neglect or faulty installation.
EC Overensstemmelseserklæring
| HELIX |
| 13/03 |
| 0001 |
Vi; Primus Australia Pty Ltd handel som Jamec Pem
Af; Level 3/20 Enterprise Drive, Bundoora, Victoria 3083, Australia
Erklærer, at
Helix slangeoprullere, som er leveret under Jamec Pem brand
er i overensstemmelse med følgende direktiv
2006 /42/EC Maskindirektivet (og dens ændringsdirektiver)
er blevet designet og fremstillet til følgende specifikationer:
EN ISO 12100:2010 Maskinsikkerhed
Jeg erklærer herved, at udstyret nævnt ovenfor, er blevet konstrueret til at opfylde de relevante afsnit af de ovenfor nævnte specifikationer. Produktet opfylder alle væsentlige krav i direktiverne.
Denne erklæring er ikke længere gyldig, hvis enheden er modificeret fra sin oprindelige specifikation eller anvendes til andet end sit formål uden vores skriftlige samtykke.
Navn: Gerard Bates
Position: Category Manager Industrielle, Primus Australia Pty Ltd handel som Jamec Pem
Udfærdiget: Primus Australia Pty Ltd handel som Jamec Pem, Level 3/20 Enterprise Drive, Bundoora, Victoria 3083, Australia
Dato: 14/03/2013
Dokument nr. 13/03-0001
Kontakt i EC
Navn: Peter Littlewood
Position: International Sales
Adresse: 17 Abingdon View, Gateford, Worksop S81 7RT, UK
Tel: +44 (0)1909 509700 eller +44 (0)7583 313905