Volta - Sicherheitskamera Atlantis Land - Kostenlose Bedienungsanleitung
Finden Sie kostenlos die Bedienungsanleitung des Geräts Volta Atlantis Land als PDF.


Benutzerfragen zu Volta Atlantis Land
0 Frage zu diesem Gerät. Beantworten Sie die, die Sie kennen, oder stellen Sie Ihre eigene.
Eine neue Frage zu diesem Gerät stellen
Laden Sie die Anleitung für Ihr Sicherheitskamera kostenlos im PDF-Format! Finden Sie Ihr Handbuch Volta - Atlantis Land und nehmen Sie Ihr elektronisches Gerät wieder in die Hand. Auf dieser Seite sind alle Dokumente veröffentlicht, die für die Verwendung Ihres Geräts notwendig sind. Volta von der Marke Atlantis Land.
BEDIENUNGSANLEITUNG Volta Atlantis Land

text_image
V LTAla Telecamera a Pile
GUIDA RAPIDA
QUICK START GUIDE
ITALIANO - GUIDA RAPIDA

text_image
VOLTAla Telecamera a Pile

Atlantis
www.atlantis-land.com
Vista d'insieme
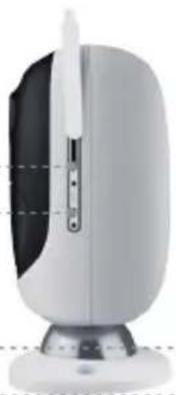
Slot Micro SD
Bottone per il Reset
premere per qualche secondo sino a ché Volta riprodurrà un messaggio vocale: "Il Reset è stato effettuato...."
Sensore di luminosità
Lente
LED di Stato
Microfono
PIR integrato
Altoparlante
Base magnetica
natural_image
Exterior view of a modern office building (no signage)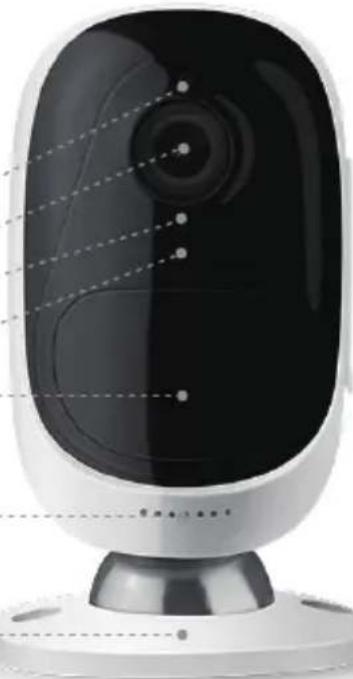
natural_image
Front view of a modern digital camera with black screen and white base (no visible text or symbols)Led Stato ROSSO
Acceso fisso: Connessione Wi-Fi non riuscita
Led Stato BLU
Acceso fisso: Connessione Wi-Fi attiva
Inserimento batterie nella camera
natural_image
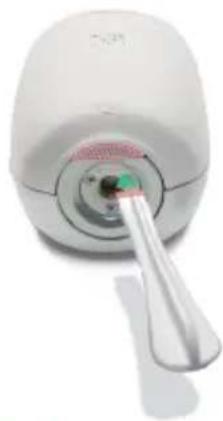
Close-up of a white appliance with a green and red button, being brushed by a metal tool (no visible text or symbols)Step 1
Utilizzare l'apposito perno plastico per rimuovere la copertura posteriore. Premere delicatamente nella zona indicata e poi ruotare.
natural_image
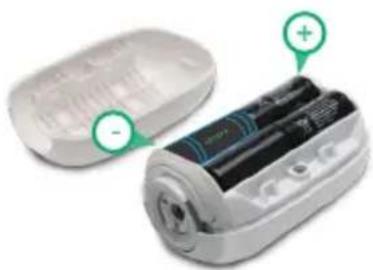
Two white batteries with one open and one closed, showing internal components and polarity indicators (no text or symbols)Step 2
Inserire le 4 batterie fornite, rispettando come da figura, la polarità.
natural_image
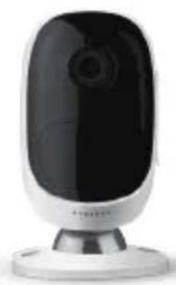
White and black digital camera with a circular lens, mounted on a stand (no visible text or symbols)Step 3
Posizionare la copertura posteriore e verificare che sia saldamente richiusa.

ATTENZIONE
• Verificare la polarità delle batterie
• Non usare mai batterie di brand/tipologie diversi/e
- Non riutilizzare batterie già usate (scariche o parzialmente scariche)
- Ne caso in cui Volta non sia utilizzata per un lungo periodo, si consiglia di rimuovere le batterie.
Batterie Supportate
• 3V CR123A non ricaricabili
3.6V\~4.2V CR123A ricaricabili
Note Importanti
Volta non è stata progettata per offrire uno streaming continuativo, quanto piuttosto per registrare su SD e per consentire, a richiesta, la visione remota diretta o dei file registrati. Un kit di 4 batterie (CR123A non ricaricabili) può far funzionare Volta sino a 6 mesi in modalità stand by oppure 800 minuti (LED IR spenti durante il giorno) di registrazione o visualizzazione.
Condizioni di scarsa copertura wireless e/o temperture basse possono portare ad una durata inferiore.
Installazione e sostituzione delle batterie
Il prodotto contiene una batteria che potrebbe essere sostituita nel corso della vita utile del prodotto medesimo. A fine vita della batteria (cioè quando non è più possibile effettuare la ricarica) contenuta nel prodotto, questa deve essere smaltita separatamente dai rifiuti generici indifferenziati, gettandola negli appositi contenitori per lo smaltimento delle batterie. La raccolta e il riciclaggio delle batterie contribuiscono alla tutela dell'ambiente e alla conservazione delle risorse naturali, e permettono il recupero di materiali preziosi.
Installazione App VOLTA
Digitare Atlantis Volta in App Store (per IOS)
o in Google Play.
Scaricare ed installare la App.
Configurazione di Volta
Inserite le batterie, Volta riprodurrà il seguente messaggio vocale:
"Volta è pronta per essere configurata.
Si prega di lanciare l'App Volta,
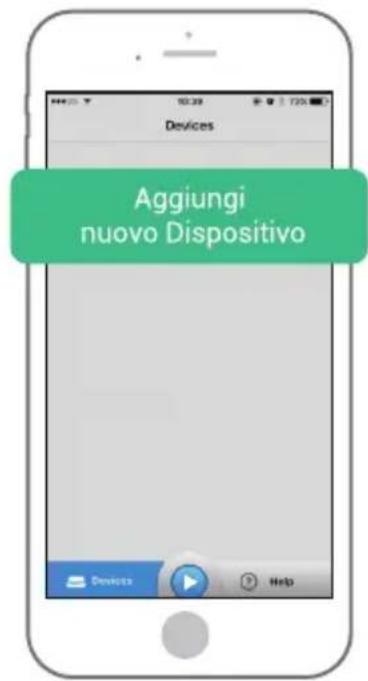
toccare su "Aggiungi nuovo Dispositivo"
e seguire le indicazioni per la configurazione di Volta."
Prima di iniziare collegare lo SmartPhone alla rete WiFi cui Volta dovrà essere collegata.
- Lanciare l'APP Volta.
Cliccare su "Aggiungi nuovo Dispositivo"
text_image
Aggiungi nuovo Dispositivo-
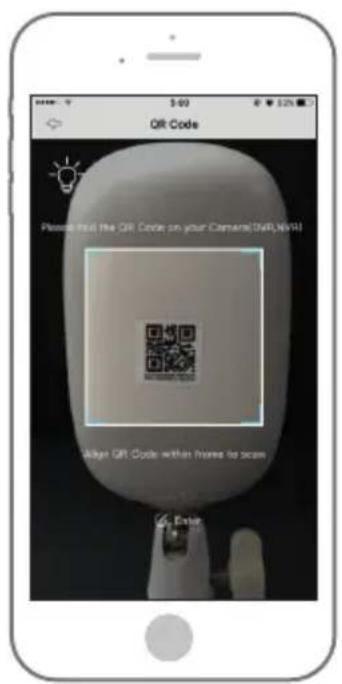
Scansionare il QR code posto sul retro di Volta.
-
Toccare su "Conf. Telecamera". Nota: Quando la configurazione è terminata, Volta può essere aggiunta in altri smartphone semplicemente scansionandone il Qr Code e cliccando su "Accesso Telec".
text_image
QR Code Please find the QR Code on your Camera (NVR, NVIDIA) Align QR Code within frames to scan Enter
text_image
Set Use Camera Conf. Telecamera Accesso Camera Accesso Telec.- Toccare sul bottone:
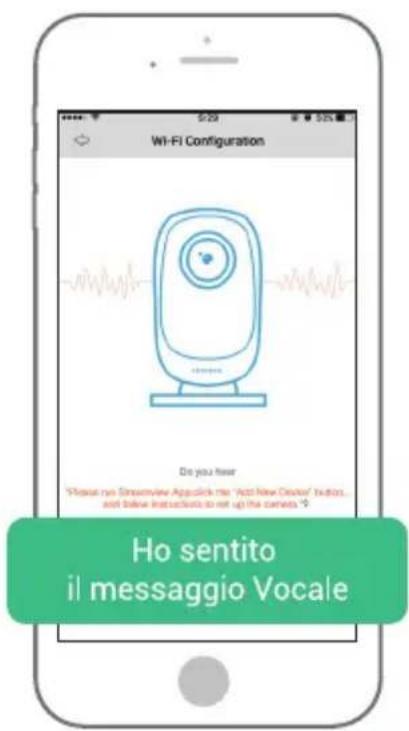
"Ho sentito il messaggio Vocale" per passare alla pagina seguente. Nel caso in cui Volta non riproduca nessun messaggio vocale, toccare sul bottone: "Non ho sentito il messaggio Vocale".
text_image
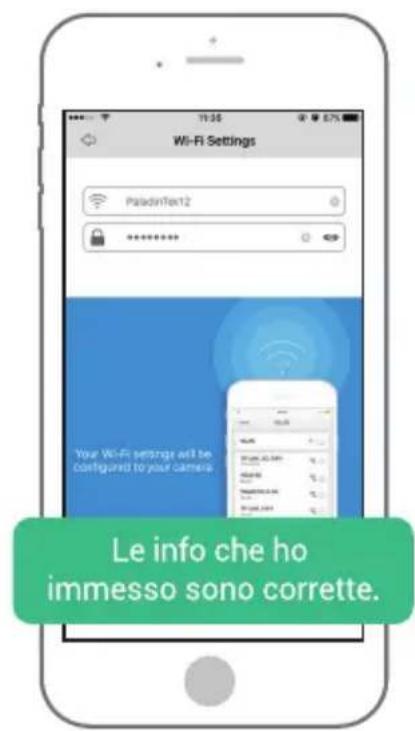
Wi-Fi Configuration Do you hear "Please run Streamview Apps click me "Add New Deuter" button... and below instructions to ret up the camera." Ho sentito il messaggio Vocale- Digitare la password della rete Wi-Fi evidenziata (la stessa cui Volta cercherà di collegarsi). Toccare sul bottone "Le info che ho immesso sono corrette."
text_image
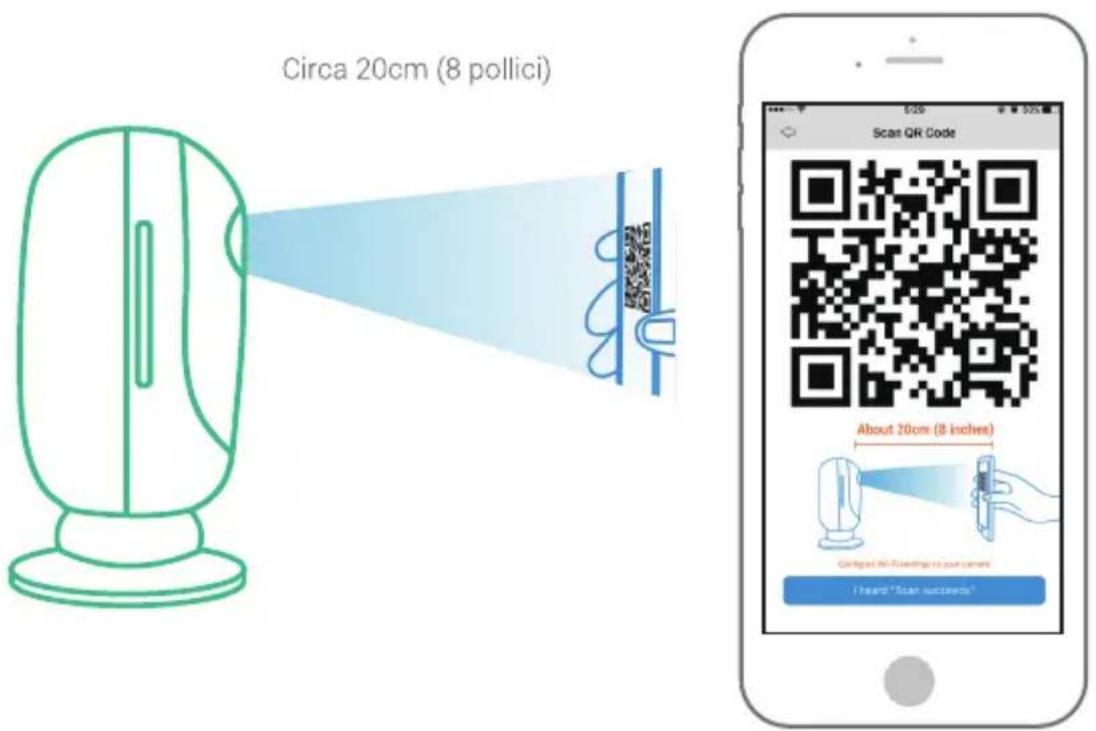
Wi-Fi Settings PaladinTex12 Your Wi-Fi settings all be configured to your camera. Le info che ho immesso sono corrette.- Lo SmartPhone genererà un QR Code, posizionare questo QR code in modo che possa essere scansionato da Volta (a circa 20 cm dalla lente). Volta riprodurrà il seguente messaggio vocale:
"Scansione completata. Volta cercherà di collegarsi al router. Attendere."
Toccare sul bottone:" Ho sentito scansione completata..."
text_image
Circa 20cm (8 pollici) Scan QR Code About 20cm (8 inches) Getgust Hi-Foening in purcens I heard "Scan accents"-
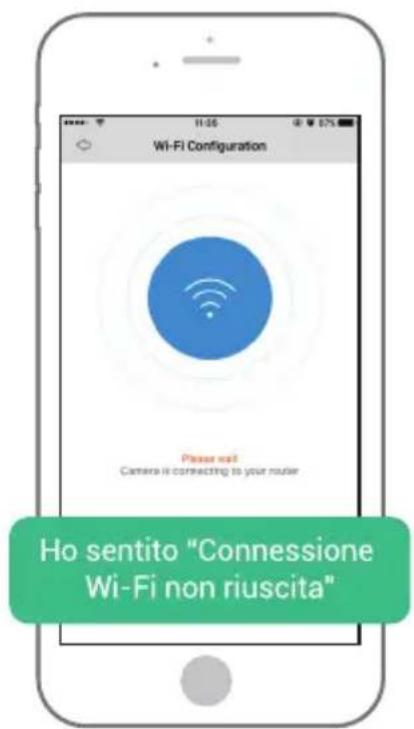
In caso di problemi Volta riprodurrà il seguente messaggio vocale: "Connessione Wi-Fi non riuscita. Si prega di controllare le impostazioni del Wi-Fi e provare nuovamente". Toccare sul bottone: "Ho sentito "Connessione Wi-Fi non riuscita".
-
Volta riprodurrà il seguente messaggio vocale: "Connessione Wi-Fi riuscita" ad indicare il corretto accesso alla rete WiFi del router. Toccare sul bottone: "Ho sentito "Connessione Wi-Fi riuscita".
text_image
Wi-Fi Configuration Please wait Camera is connecting to your router Ho sentito "Connessione Wi-Fi non riuscita"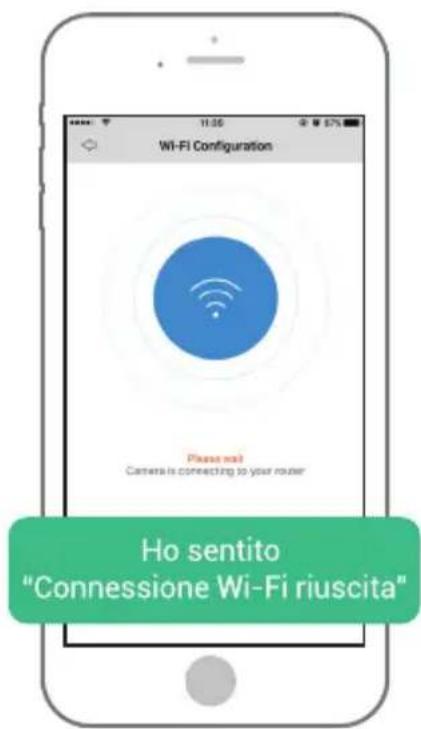
text_image
Wi-FI Configuration Please wait Camera is connecting to your router Ho sentito "Connessione Wi-Fi riuscita"- Una volta effettuato il login (utilizzando le credenziali di default admin e password vuota), verrà visualizzata una finestra, simile a quella sotto raffigurata, in cui è possibile assegnare un nome a Volta e cambiarne la password di accesso. Digitare 2 volte la nuova password e toccare su OK.
Nota: Per aumentare la sicurezza è opportuno creare una password di almeno 6 caratteri alfanumerici.

text_image
Crea Password Creare una nuova password utilizzando almeno 6 caratteri alfanumerici. Nuova password Conferma password Cancella OKLive Video

Stato Batteria

Elimina dispositivo

Abilita/Disabilita Notifiche Push

Abilita/Disabilita sensore PIR (default attivo)

Configurazione WiFi

Impostazioni Dispositivo
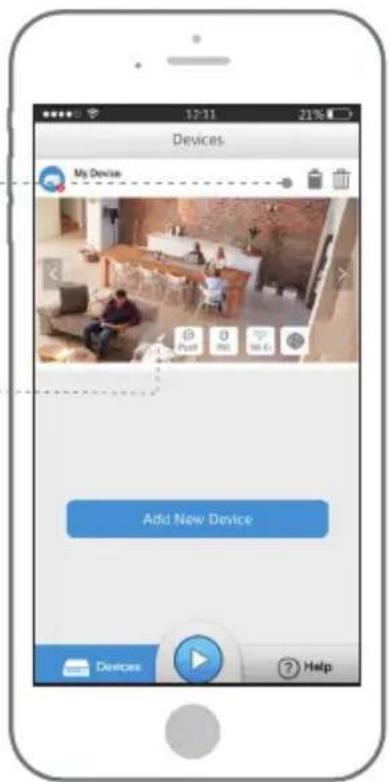
text_image
Devices My Device Add New Device Devices HelpConfigurazione distanza PIR
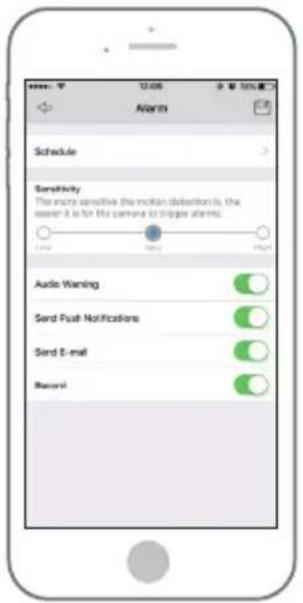
La sensibilità predefinita del sensore PIR è "Medio" e la distanza di rilevamento è 6m. Per regolare la sensibilità, lanciare l'app VOLTA e fare clic su "Device Settings (Impost. disp.)" -> "PIR Settings (Impost PIR)" e poi toccare su Salva per utilizzare le nuove impostazioni.
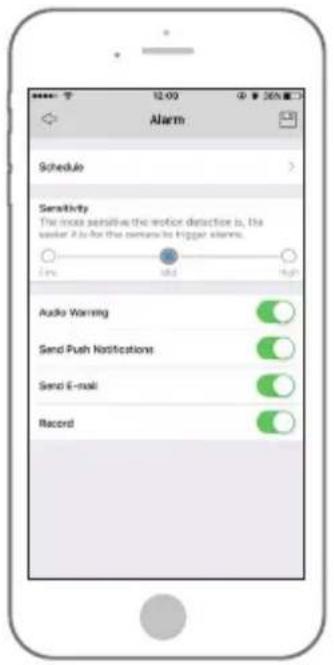
text_image
Schedule Sensitivity The noise-sensitive the motion detection is, the sender is to be the sentarles trigger alarms. Audio Warning Send Push Notifications Send E-mail Record| Sensibilità | Distanza di rilevazione (ambiente abitato) | Distanza di rilevazione (veicoli in movimento) |
| LOW (basso) | Sino a 4 metri | Sino a 10 metri |
| MID (medio) | Sino a 6 metri | Sino a 12 metri |
| HIGH (alto) | Sino a 9 metri | Sino a 15 metri |
Nota:
Si noti che una maggiore sensibilità consente distanze superiori, ma talvolta provoca un elevato numero di falsi allarmi. Quando si installa Volta all'esterno, impostare la sensibilità su "Basso" o "Medio".

IMPORTANTE
Accorgimenti per la riduzione dei falsi allarmi
• Non installare il sensore PIR di fronte a oggetti luminosi, comprese lampade ecc.
• Non installare il sensore PIR a meno di 15m di distanza da veicoli in movimento.
- Mantenere la distanza dalle feritoie di uscita di condizionatori, umidificatori, dissipatori di calore di proiettori ecc.
• Non installare il sensore PIR di fronte a specchi.
- Non posizionare Volta in luoghi con forte interferenze wireless (router e telefoni Wi-Fi e altri dispositivi wireless).
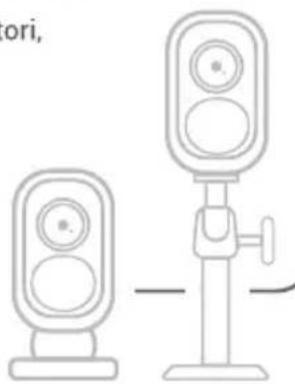
natural_image
Line drawing of two speakers with different speaker positions, one standing and one seated (no text or symbols)Area di Rilevazione
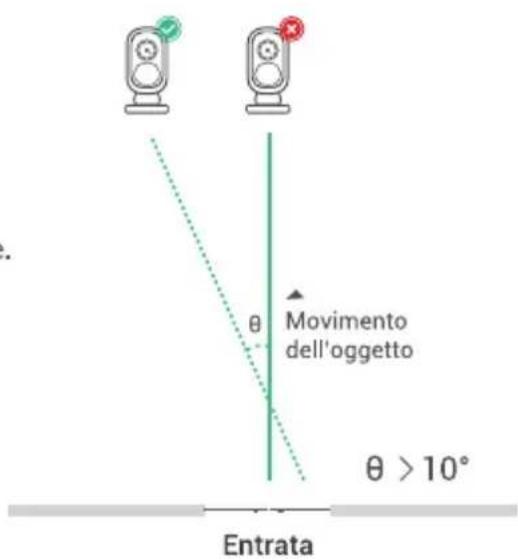
Volta non riesce a rilevare con esattezza oggetti che si muovono in verticale o che si avvicinino in linea retta. Si suggerisce di posizionare Volta in modo da avere un angolo di almeno 10°, come da figura, per una corretta ed immediata rilevazione.
Nota:
• L'angolo di rilevazione del PIR è di 120° orizzontali
- La distanza di rilevazione, di default, è di 6mt
text_image
Movimento dell'oggetto θ > 10° EntrataReset
Premere delicatamente il tasto al centro, usando l'apposita clip metallica, sino a ché il dispositivo non riproduce il messaggio: "Il Reset è stato effettuato. Rilasciare il pulsante".
Volta riprodurrà poi il messaggio:
"Volta è pronta per essere configurata. Si prega di lanciare l'App Volta, toccare su "Aggiungi nuovo Dispositivo" e seguire le indicazioni per la configurazione di Volta."
A questo punto collegare lo SmartPhone alla rete cui si desidera connettere Volta e lanciare l'APP.
ENGLISH - QUICK START GUIDE

text_image
VOLTABattery-powered Camera

Atlantis
www.atlantis-land.com
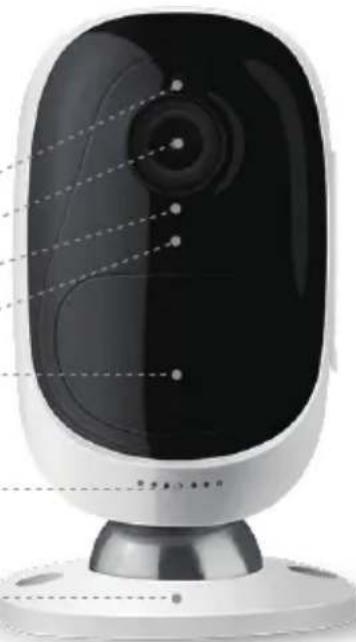
General Introduction
Daylight Sensor
Lens
Status LED
Built-in Mic
Built-in PIR Motion Sensor
Speaker
Magnetic Base
natural_image
Illustration of a modern digital camera with black screen and white base (no text or symbols)Micro SD Card Slot
natural_image
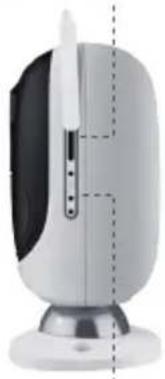
Illustration of a white and black electronic device with a vertical dashed line indicating a reference point (no text or symbols present)Reset Button
Red LED
Wi-Fi connection failed
Blue LED
Wi-Fi connection succeeded
Insert the Batteries into the Camera
natural_image
Close-up of a white cylindrical battery with two partially open casing, one showing internal components (no visible text or symbols)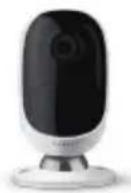
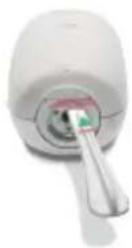
Step 1
Please use the stick to press the white button, and then rotate to separate the backing casing from the camera.
Step 2
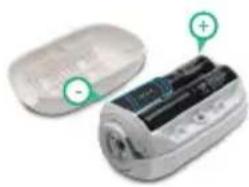
Insert four batteries into the battery slot.
Step 3
Close the back casing. Please press both end of the casing to make it close firmly for good weatherproof performance.

Important Safeguards on Battery Use
• The batteries must be placed in the right direction of polarity;
• Do not use batteries of different brands and different models together;
• Do not use new and old batteries together;
- If you don't use the product for long periods, please remove the batteries in avoidance of erosion resulting from battery leakage.
Batteries Supports
3V CR123A non-rechargeable batteries
3.6V\~4.2V CR123A rechargeable batteries
Important Note
Volta is not designed for 24/7 full capacity running or around-the-clock live streaming. It's designed to record motion events and remotely view live streaming only when you need it. Please note that a new set of 4 batteries (the standard batteries we provide) will support up to 180 days in standby mode, or 800 minutes (IR LEDs off in daytime) of motion triggered recording and live view.
Installing and replacing batteries
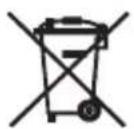
The product contains a battery that could be replaced during the lifetime of the product itself. Dispose of the battery contained in the product correctly at the end of their useful lifespan (thus when it can no longer be charged) by placing it in appropriate battery disposal container separate from generic unsorted waste. Collection and recycling of batteries helps protect the environment and preserve natural resources, allowing recovery of valuable materials.
Install VOLTA App
Search Atlantis Volta in App Store (for iOS) or in Google Play (for Android). Download and install the app.
Set up the Camera
Please follow the prompt tone to configure the camera:
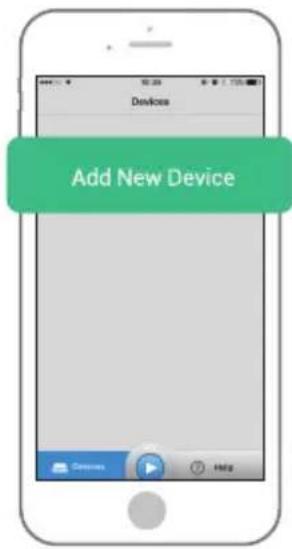
"Camera has been started up. Please run VOLTA App. Click the "Add New Device" button, and follow the instructions to set up the camera."
- Click on "Add New Device".
- Scan QR code on the camera.
- Click "Set Up Camera" to continue. When the setup for this camera is completed, your family can access the camera simply by clicking "Access Cameras" without reconfiguring it
text_image
Devices Add New Device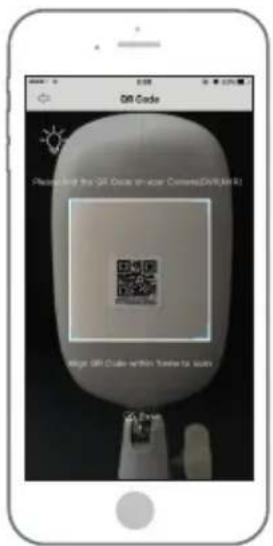
text_image
On Code Please click the QR code to scan CameraScanScan On Code within Time to scan On Drive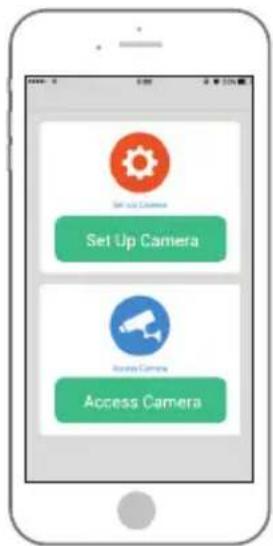
text_image
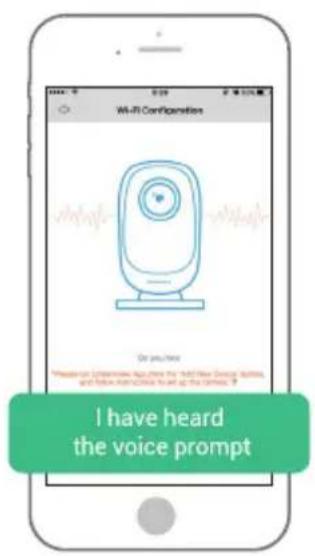
Set Up Camera Set Up Camera Security Camera Access Camera- Click the button "I have heard the voice prompt" to enter the next page. If you did not hear the voice prompt, please press "I did not hear the voice prompt" for help.
- Enter the Wi-Fi password of the selected Wi-Fi network and press "I have entered the correct information" to enter the next page.
- A QR code will be generated on the phone. Please place the QR code on your phone towards Volta camera lens at a distance of about 20cm (8 inches) to let the camera scan the QR code. Please make sure that you've ripped the protection film of the camera's lens
text_image
Wi-Fi Configuration Or you nice I have heard the voice prompt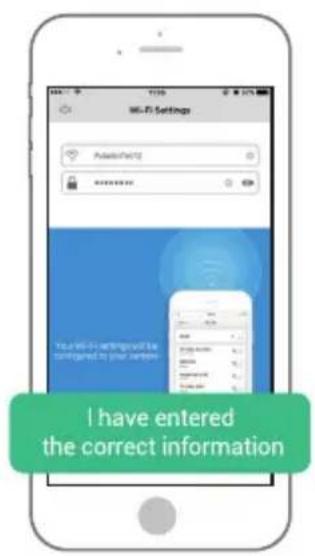
text_image
Hi-Fi Settings PulseNet12 800000000 Your Wi-Fi settings will be configured to your samples. I have entered the correct information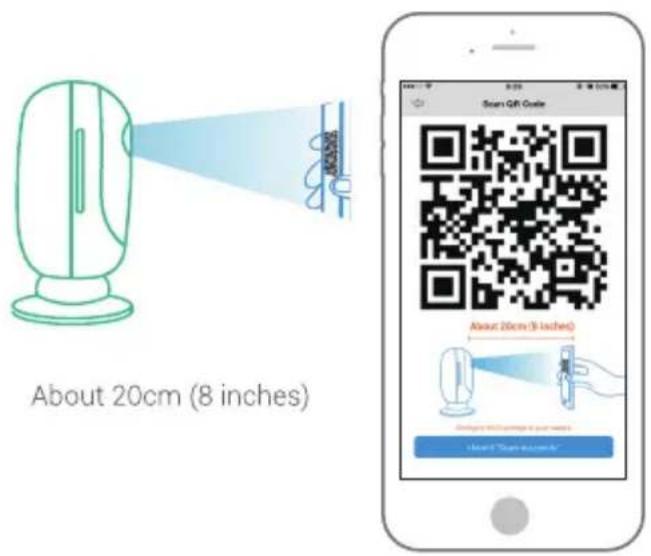
text_image
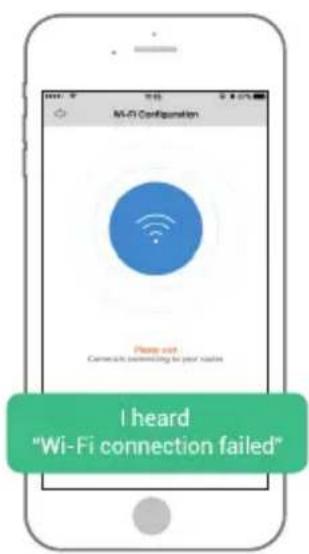
About 20cm (8 inches) Scan Gift Guide About 20cm (8 inches) Use the "Scan" option- "Wi-Fi connection failed! Please check the Wi-Fi settings and try again." If you hear the above voice prompt, please press "I heard 'Wi-Fi connection failed' " for help.
- "Wi-Fi connection succeeds! Welcome to VOLTA!" If you hear the above voice prompt, please press "I heard 'Wi-Fi connection succeeds' to finish the quick setup.
- Please create a password for your camera. Press the camera icon 📋 on the Device list. A pop-up window will show as below. Create a new password for your camera, and click OK.
text_image
Hi-Fi Configuration Hi End Comments referring to your names I heard "Wi-Fi connection failed"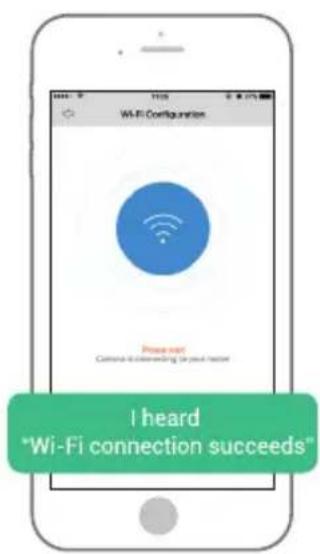
text_image
Wi-Fi Configuration Press out Common to connecting the user's home! I heard "Wi-Fi connection succeeds"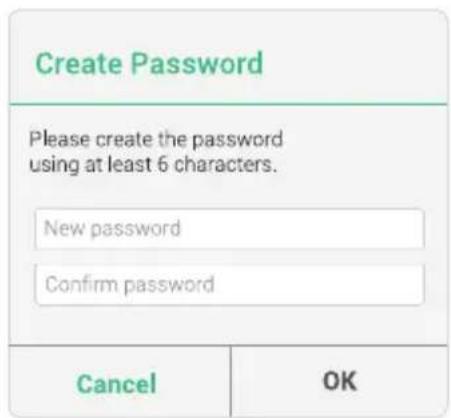
text_image
Create Password Please create the password using at least 6 characters. New password Confirm password Cancel OKNote: For your account's security, please create a strong password (at least 6 characters) that contains letters and numbers.
Live Video

Battery Status

Delete Device

Enable/Disable Push Notification

Enable/Disable PIR Sensor (In default, the PIR sensor is enabled.)

Wi-Fi Configuration

Device Settings
Cover the Monitoring Area
When installing the camera, it's not suggested to make the PIR sensor vertically face the moving object. Please note that if the moving object approaches the PIR sensor vertically, the PIR sensor may not detect the motion events. You are advised to install the camera angularly (the angle between the PIR sensor and the detected object is larger than 10°) for effective motion detection.
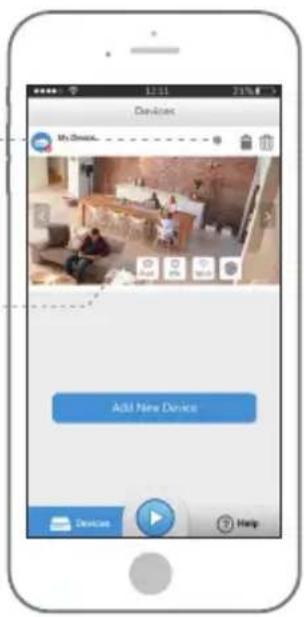
text_image
Devices My Devices Add New Device Devices Help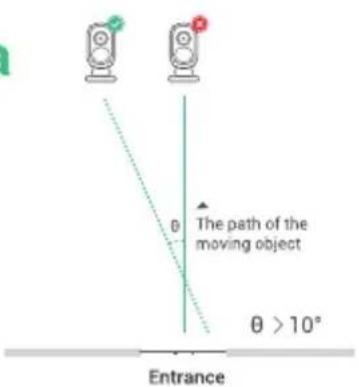
text_image
θ The path of the moving object θ > 10° EntranceFYI:
- The PIR sensor's detecting angle: 120^ (H)
• The PIR sensor's detecting distance: 6mt (in default)
Adjust the Detecting Distance of the PIR Sensor
text_image
Schedule Sensitivity The more sensitive the motion deflection is, the user it is for the camera to trigger alarms. Audio Warning Send Push Notifications Send E-mail CancelThe default sensitivity of the PIR sensor is at "Mid" and the detecting distance is 6 meters (20ft). If you want to adjust the sensitivity, please launch your App, and then click "Device Settings" ->"PIR Settings" and click the "save" button to save the settings.
| Sensitivity | Detecting Distance(For moving and living things) | Detecting Distance(For moving vehicles) |
| LOW | Up to 4 meters | Up to 10 meters |
| MID | Up to 6 meters | Up to 12 meters |
| HIGH | Up to 9 meters | Up to 15 meters |
Note: Higher sensitivity offers longer detecting distance, but it would lead to more false alarms. You are advised to set up the sensitivity level to "Low" or "Mid" when you install the camera outdoors.
For reducing false alarms, please note that:

- Do not install the camera facing any objects with bright lights, including sunshine, bright lamplights, etc.
- Do not install the camera in a place within 15 meters (50ft) where there are frequently moving vehicles.
- Stay away from the outlets, including the air conditioner vents, humidifier outlets, the heat transfer vent of projectors, etc.
- Do not install the camera facing the mirror.
- Stay away from wireless interference, including Wi-Fi routers, phones and other wireless devices.
SCOPRI DI PIÚ
text_image
QR code image with green border, containing machine-readable data for scanningwww.atlantis-land.com/file/Volta

Atlantis
www.atlantis-land.com
Hellatron SpA
Via Enrico Mattei,10 - 20010 Pogliano Milanese (MI) - Italy
Tel. +39 02 99 76 011 - info@atlantis-land.com